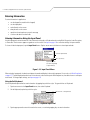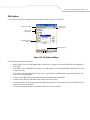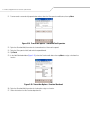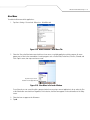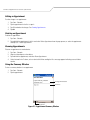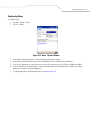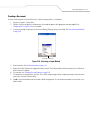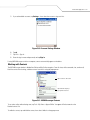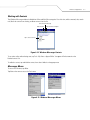
1
User Guide
Microsoft Applications for Symbol Devices
Microsoft® Applications User Guide
for Symbol Devices
72-68197-01
Revision A
February 2005
© 2005 by Symbol Technologies, Inc. All rights reserved.
No part of this publication may be reproduced or used in any form, or by any electrical or mechanical means, without permission in writing from
Symbol. This includes electronic or mechanical means, such as photocopying, recording, or information storage and retrieval systems. The
material in this manual is subject to change without notice.
The software is provided strictly on an “as is” basis. All software, including firmware, furnished to the user is on a licensed basis. Symbol grants
to the user a non-transferable and non-exclusive license to use each software or firmware program delivered hereunder (licensed program). Except
as noted below, such license may not be assigned, sublicensed, or otherwise transferred by the user without prior written consent of Symbol. No
right to copy a licensed program in whole or in part is granted, except as permitted under copyright law. The user shall not modify, merge, or
incorporate any form or portion of a licensed program with other program material, create a derivative work from a licensed program, or use a
licensed program in a network without written permission from Symbol. The user agrees to maintain Symbol’s copyright notice on the licensed
programs delivered hereunder, and to include the same on any authorized copies it makes, in whole or in part. The user agrees not to decompile,
disassemble, decode, or reverse engineer any licensed program delivered to the user or any portion thereof.
Symbol reserves the right to make changes to any software or product to improve reliability, function, or design.
Symbol does not assume any product liability arising out of, or in connection with, the application or use of any product, circuit, or application
described herein.
No license is granted, either expressly or by implication, estoppel, or otherwise under any Symbol Technologies, Inc., intellectual property rights.
An implied license only exists for equipment, circuits, and subsystems contained in Symbol products.
Symbol, Spectrum One, and Spectrum24 are registered trademarks of Symbol Technologies, Inc. Other product names mentioned in this manual
may be trademarks or registered trademarks of their respective companies and are hereby acknowledged.
Symbol Technologies, Inc.
One Symbol Plaza
Holtsville, New York 11742-1300
http://www.symbol.com
Contents
About This Guide
Introduction . . . . . . . . . . . . . . . . . . . . . . . . . . . . . . . . . . . . . . . . . . . . . . . . . . . . . . . . . . . . . . . . . . . . . . . . . . . . xiii
Documentation Set . . . . . . . . . . . . . . . . . . . . . . . . . . . . . . . . . . . . . . . . . . . . . . . . . . . . . . . . . . . . . . . . . . . xiii
Chapter Descriptions . . . . . . . . . . . . . . . . . . . . . . . . . . . . . . . . . . . . . . . . . . . . . . . . . . . . . . . . . . . . . . . . . . . . . . xiv
Notational Conventions . . . . . . . . . . . . . . . . . . . . . . . . . . . . . . . . . . . . . . . . . . . . . . . . . . . . . . . . . . . . . . . . . . . . .xv
Mobile 2003 Devices
Chapter 1. Getting Started with Mobile 2003 Devices
Today Screen . . . . . . . . . . . . . . . . . . . . . . . . . . . . . . . . . . . . . . . . . . . . . . . . . . . . . . . . . . . . . . . . . . . . . . . . . . . 1-3
Using the Status Bar . . . . . . . . . . . . . . . . . . . . . . . . . . . . . . . . . . . . . . . . . . . . . . . . . . . . . . . . . . . . . . . . . . . . . . 1-4
Status Icons . . . . . . . . . . . . . . . . . . . . . . . . . . . . . . . . . . . . . . . . . . . . . . . . . . . . . . . . . . . . . . . . . . . . . . . . . 1-4
Speaker Icon. . . . . . . . . . . . . . . . . . . . . . . . . . . . . . . . . . . . . . . . . . . . . . . . . . . . . . . . . . . . . . . . . . . . . . . . .1-5
Battery Icon . . . . . . . . . . . . . . . . . . . . . . . . . . . . . . . . . . . . . . . . . . . . . . . . . . . . . . . . . . . . . . . . . . . . . . . . . 1-6
Time and Next Appointment Icon . . . . . . . . . . . . . . . . . . . . . . . . . . . . . . . . . . . . . . . . . . . . . . . . . . . . . . . . 1-7
Connectivity Icon . . . . . . . . . . . . . . . . . . . . . . . . . . . . . . . . . . . . . . . . . . . . . . . . . . . . . . . . . . . . . . . . . . . . . 1-8
Instant Message Icon. . . . . . . . . . . . . . . . . . . . . . . . . . . . . . . . . . . . . . . . . . . . . . . . . . . . . . . . . . . . . . . . . . 1-8
E-Mail Icon . . . . . . . . . . . . . . . . . . . . . . . . . . . . . . . . . . . . . . . . . . . . . . . . . . . . . . . . . . . . . . . . . . . . . . . . . . 1-9
Multiple Notification Icon . . . . . . . . . . . . . . . . . . . . . . . . . . . . . . . . . . . . . . . . . . . . . . . . . . . . . . . . . . . . . . 1-9
Using the Command Bar . . . . . . . . . . . . . . . . . . . . . . . . . . . . . . . . . . . . . . . . . . . . . . . . . . . . . . . . . . . . . . . . . . 1-10
Selecting Programs . . . . . . . . . . . . . . . . . . . . . . . . . . . . . . . . . . . . . . . . . . . . . . . . . . . . . . . . . . . . . . . . . . . . . . 1-11
Using Pop-up Menus . . . . . . . . . . . . . . . . . . . . . . . . . . . . . . . . . . . . . . . . . . . . . . . . . . . . . . . . . . . . . . . . . . . . . 1-12
Notifications. . . . . . . . . . . . . . . . . . . . . . . . . . . . . . . . . . . . . . . . . . . . . . . . . . . . . . . . . . . . . . . . . . . . . . . . . . . . 1-13
Entering Information. . . . . . . . . . . . . . . . . . . . . . . . . . . . . . . . . . . . . . . . . . . . . . . . . . . . . . . . . . . . . . . . . . . . . . 1-14
iv Microsoft Applications User Guide for Symbol Devices
Entering Information Using the Input Panel . . . . . . . . . . . . . . . . . . . . . . . . . . . . . . . . . . . . . . . . . . . . . . . .1-14
Writing on the Screen . . . . . . . . . . . . . . . . . . . . . . . . . . . . . . . . . . . . . . . . . . . . . . . . . . . . . . . . . . . . . . . .1-19
Selecting Text. . . . . . . . . . . . . . . . . . . . . . . . . . . . . . . . . . . . . . . . . . . . . . . . . . . . . . . . . . . . . . . . . . . . . . .1-21
Drawing on the Screen. . . . . . . . . . . . . . . . . . . . . . . . . . . . . . . . . . . . . . . . . . . . . . . . . . . . . . . . . . . . . . . .1-22
Recording a Message. . . . . . . . . . . . . . . . . . . . . . . . . . . . . . . . . . . . . . . . . . . . . . . . . . . . . . . . . . . . . . . . .1-22
Using My Text. . . . . . . . . . . . . . . . . . . . . . . . . . . . . . . . . . . . . . . . . . . . . . . . . . . . . . . . . . . . . . . . . . . . . . .1-23
Finding Information. . . . . . . . . . . . . . . . . . . . . . . . . . . . . . . . . . . . . . . . . . . . . . . . . . . . . . . . . . . . . . . . . . . . . . .1-24
Find . . . . . . . . . . . . . . . . . . . . . . . . . . . . . . . . . . . . . . . . . . . . . . . . . . . . . . . . . . . . . . . . . . . . . . . . . . . . . . .1-24
File Explorer . . . . . . . . . . . . . . . . . . . . . . . . . . . . . . . . . . . . . . . . . . . . . . . . . . . . . . . . . . . . . . . . . . . . . . . .1-25
Chapter 2. Windows Mobile 2003 Settings
Introduction. . . . . . . . . . . . . . . . . . . . . . . . . . . . . . . . . . . . . . . . . . . . . . . . . . . . . . . . . . . . . . . . . . . . . . . . . . . . . 2-3
Adjusting Settings . . . . . . . . . . . . . . . . . . . . . . . . . . . . . . . . . . . . . . . . . . . . . . . . . . . . . . . . . . . . . . . . . . . . . . . .2-3
Personal Tab . . . . . . . . . . . . . . . . . . . . . . . . . . . . . . . . . . . . . . . . . . . . . . . . . . . . . . . . . . . . . . . . . . . . . . . . .2-3
System Tab . . . . . . . . . . . . . . . . . . . . . . . . . . . . . . . . . . . . . . . . . . . . . . . . . . . . . . . . . . . . . . . . . . . . . . . . . .2-4
Connections Tab . . . . . . . . . . . . . . . . . . . . . . . . . . . . . . . . . . . . . . . . . . . . . . . . . . . . . . . . . . . . . . . . . . . . . .2-6
Buttons . . . . . . . . . . . . . . . . . . . . . . . . . . . . . . . . . . . . . . . . . . . . . . . . . . . . . . . . . . . . . . . . . . . . . . . . . . . . . . . . .2-7
Program Buttons . . . . . . . . . . . . . . . . . . . . . . . . . . . . . . . . . . . . . . . . . . . . . . . . . . . . . . . . . . . . . . . . . . . . . .2-7
Up/Down Control . . . . . . . . . . . . . . . . . . . . . . . . . . . . . . . . . . . . . . . . . . . . . . . . . . . . . . . . . . . . . . . . . . . . .2-7
Input . . . . . . . . . . . . . . . . . . . . . . . . . . . . . . . . . . . . . . . . . . . . . . . . . . . . . . . . . . . . . . . . . . . . . . . . . . . . . . . . . . .2-8
Keyboard Input Method . . . . . . . . . . . . . . . . . . . . . . . . . . . . . . . . . . . . . . . . . . . . . . . . . . . . . . . . . . . . . . . .2-8
Block Recognizer Input Method . . . . . . . . . . . . . . . . . . . . . . . . . . . . . . . . . . . . . . . . . . . . . . . . . . . . . . . . . .2-8
Letter Recognizer Input Method. . . . . . . . . . . . . . . . . . . . . . . . . . . . . . . . . . . . . . . . . . . . . . . . . . . . . . . . . .2-9
Transcriber Input Method. . . . . . . . . . . . . . . . . . . . . . . . . . . . . . . . . . . . . . . . . . . . . . . . . . . . . . . . . . . . . .2-10
Star Key Input Method . . . . . . . . . . . . . . . . . . . . . . . . . . . . . . . . . . . . . . . . . . . . . . . . . . . . . . . . . . . . . . . .2-16
Word Completion . . . . . . . . . . . . . . . . . . . . . . . . . . . . . . . . . . . . . . . . . . . . . . . . . . . . . . . . . . . . . . . . . . . .2-17
Options . . . . . . . . . . . . . . . . . . . . . . . . . . . . . . . . . . . . . . . . . . . . . . . . . . . . . . . . . . . . . . . . . . . . . . . . . . . .2-17
Menus . . . . . . . . . . . . . . . . . . . . . . . . . . . . . . . . . . . . . . . . . . . . . . . . . . . . . . . . . . . . . . . . . . . . . . . . . . . . . . . . .2-18
Start Menu . . . . . . . . . . . . . . . . . . . . . . . . . . . . . . . . . . . . . . . . . . . . . . . . . . . . . . . . . . . . . . . . . . . . . . . . .2-18
New Menu . . . . . . . . . . . . . . . . . . . . . . . . . . . . . . . . . . . . . . . . . . . . . . . . . . . . . . . . . . . . . . . . . . . . . . . . .2-19
Owner Information . . . . . . . . . . . . . . . . . . . . . . . . . . . . . . . . . . . . . . . . . . . . . . . . . . . . . . . . . . . . . . . . . . . . . . .2-20
Identification. . . . . . . . . . . . . . . . . . . . . . . . . . . . . . . . . . . . . . . . . . . . . . . . . . . . . . . . . . . . . . . . . . . . . . . .2-20
Notes . . . . . . . . . . . . . . . . . . . . . . . . . . . . . . . . . . . . . . . . . . . . . . . . . . . . . . . . . . . . . . . . . . . . . . . . . . . . .2-20
Options . . . . . . . . . . . . . . . . . . . . . . . . . . . . . . . . . . . . . . . . . . . . . . . . . . . . . . . . . . . . . . . . . . . . . . . . . . . .2-21
Passwords. . . . . . . . . . . . . . . . . . . . . . . . . . . . . . . . . . . . . . . . . . . . . . . . . . . . . . . . . . . . . . . . . . . . . . . . . . . . . .2-22
Password . . . . . . . . . . . . . . . . . . . . . . . . . . . . . . . . . . . . . . . . . . . . . . . . . . . . . . . . . . . . . . . . . . . . . . . . . .2-22
Hint . . . . . . . . . . . . . . . . . . . . . . . . . . . . . . . . . . . . . . . . . . . . . . . . . . . . . . . . . . . . . . . . . . . . . . . . . . . . . . .2-23
Sounds & Notifications. . . . . . . . . . . . . . . . . . . . . . . . . . . . . . . . . . . . . . . . . . . . . . . . . . . . . . . . . . . . . . . . . . . .2-24
Sounds . . . . . . . . . . . . . . . . . . . . . . . . . . . . . . . . . . . . . . . . . . . . . . . . . . . . . . . . . . . . . . . . . . . . . . . . . . . .2-24
Notifications . . . . . . . . . . . . . . . . . . . . . . . . . . . . . . . . . . . . . . . . . . . . . . . . . . . . . . . . . . . . . . . . . . . . . . . .2-24
Today. . . . . . . . . . . . . . . . . . . . . . . . . . . . . . . . . . . . . . . . . . . . . . . . . . . . . . . . . . . . . . . . . . . . . . . . . . . . . . . . . .2-26
Appearance. . . . . . . . . . . . . . . . . . . . . . . . . . . . . . . . . . . . . . . . . . . . . . . . . . . . . . . . . . . . . . . . . . . . . . . . .2-26
Items . . . . . . . . . . . . . . . . . . . . . . . . . . . . . . . . . . . . . . . . . . . . . . . . . . . . . . . . . . . . . . . . . . . . . . . . . . . . . .2-26
About. . . . . . . . . . . . . . . . . . . . . . . . . . . . . . . . . . . . . . . . . . . . . . . . . . . . . . . . . . . . . . . . . . . . . . . . . . . . . . . . . .2-28
Version . . . . . . . . . . . . . . . . . . . . . . . . . . . . . . . . . . . . . . . . . . . . . . . . . . . . . . . . . . . . . . . . . . . . . . . . . . . .2-28
Device ID. . . . . . . . . . . . . . . . . . . . . . . . . . . . . . . . . . . . . . . . . . . . . . . . . . . . . . . . . . . . . . . . . . . . . . . . . . .2-28
Copyrights. . . . . . . . . . . . . . . . . . . . . . . . . . . . . . . . . . . . . . . . . . . . . . . . . . . . . . . . . . . . . . . . . . . . . . . . . .2-29
Brightness . . . . . . . . . . . . . . . . . . . . . . . . . . . . . . . . . . . . . . . . . . . . . . . . . . . . . . . . . . . . . . . . . . . . . . . . . . . . . .2-30
Contents v
Brightness. . . . . . . . . . . . . . . . . . . . . . . . . . . . . . . . . . . . . . . . . . . . . . . . . . . . . . . . . . . . . . . . . . . . . . . . . .2-30
Battery Power . . . . . . . . . . . . . . . . . . . . . . . . . . . . . . . . . . . . . . . . . . . . . . . . . . . . . . . . . . . . . . . . . . . . . . .2-30
External Power . . . . . . . . . . . . . . . . . . . . . . . . . . . . . . . . . . . . . . . . . . . . . . . . . . . . . . . . . . . . . . . . . . . . . .2-31
Certificates . . . . . . . . . . . . . . . . . . . . . . . . . . . . . . . . . . . . . . . . . . . . . . . . . . . . . . . . . . . . . . . . . . . . . . . . . . . . .2-32
Personal . . . . . . . . . . . . . . . . . . . . . . . . . . . . . . . . . . . . . . . . . . . . . . . . . . . . . . . . . . . . . . . . . . . . . . . . . . .2-32
Root. . . . . . . . . . . . . . . . . . . . . . . . . . . . . . . . . . . . . . . . . . . . . . . . . . . . . . . . . . . . . . . . . . . . . . . . . . . . . . .2-32
Clock and Alarms . . . . . . . . . . . . . . . . . . . . . . . . . . . . . . . . . . . . . . . . . . . . . . . . . . . . . . . . . . . . . . . . . . . . . . . .2-34
Time . . . . . . . . . . . . . . . . . . . . . . . . . . . . . . . . . . . . . . . . . . . . . . . . . . . . . . . . . . . . . . . . . . . . . . . . . . . . . .2-34
Alarms. . . . . . . . . . . . . . . . . . . . . . . . . . . . . . . . . . . . . . . . . . . . . . . . . . . . . . . . . . . . . . . . . . . . . . . . . . . . .2-35
Memory. . . . . . . . . . . . . . . . . . . . . . . . . . . . . . . . . . . . . . . . . . . . . . . . . . . . . . . . . . . . . . . . . . . . . . . . . . . . . . . .2-37
Main . . . . . . . . . . . . . . . . . . . . . . . . . . . . . . . . . . . . . . . . . . . . . . . . . . . . . . . . . . . . . . . . . . . . . . . . . . . . . .2-37
Storage Card. . . . . . . . . . . . . . . . . . . . . . . . . . . . . . . . . . . . . . . . . . . . . . . . . . . . . . . . . . . . . . . . . . . . . . . .2-37
Running Programs. . . . . . . . . . . . . . . . . . . . . . . . . . . . . . . . . . . . . . . . . . . . . . . . . . . . . . . . . . . . . . . . . . . .2-38
Power . . . . . . . . . . . . . . . . . . . . . . . . . . . . . . . . . . . . . . . . . . . . . . . . . . . . . . . . . . . . . . . . . . . . . . . . . . . . . . . . .2-39
Battery . . . . . . . . . . . . . . . . . . . . . . . . . . . . . . . . . . . . . . . . . . . . . . . . . . . . . . . . . . . . . . . . . . . . . . . . . . . .2-39
Advanced . . . . . . . . . . . . . . . . . . . . . . . . . . . . . . . . . . . . . . . . . . . . . . . . . . . . . . . . . . . . . . . . . . . . . . . . . .2-39
Optimizing Battery Life . . . . . . . . . . . . . . . . . . . . . . . . . . . . . . . . . . . . . . . . . . . . . . . . . . . . . . . . . . . . . . . .2-40
Regional Settings . . . . . . . . . . . . . . . . . . . . . . . . . . . . . . . . . . . . . . . . . . . . . . . . . . . . . . . . . . . . . . . . . . . . . . . .2-41
Remove Programs. . . . . . . . . . . . . . . . . . . . . . . . . . . . . . . . . . . . . . . . . . . . . . . . . . . . . . . . . . . . . . . . . . . . . . . .2-44
Screen. . . . . . . . . . . . . . . . . . . . . . . . . . . . . . . . . . . . . . . . . . . . . . . . . . . . . . . . . . . . . . . . . . . . . . . . . . . . . . . . .2-45
General . . . . . . . . . . . . . . . . . . . . . . . . . . . . . . . . . . . . . . . . . . . . . . . . . . . . . . . . . . . . . . . . . . . . . . . . . . . .2-45
Clear Type. . . . . . . . . . . . . . . . . . . . . . . . . . . . . . . . . . . . . . . . . . . . . . . . . . . . . . . . . . . . . . . . . . . . . . . . . .2-46
Text Size . . . . . . . . . . . . . . . . . . . . . . . . . . . . . . . . . . . . . . . . . . . . . . . . . . . . . . . . . . . . . . . . . . . . . . . . . . .2-46
Receiving Incoming Beams. . . . . . . . . . . . . . . . . . . . . . . . . . . . . . . . . . . . . . . . . . . . . . . . . . . . . . . . . . . . . . . . .2-47
Bluetooth . . . . . . . . . . . . . . . . . . . . . . . . . . . . . . . . . . . . . . . . . . . . . . . . . . . . . . . . . . . . . . . . . . . . . . . . . . . . . .2-48
Bonding with Discovered Device(s) . . . . . . . . . . . . . . . . . . . . . . . . . . . . . . . . . . . . . . . . . . . . . . . . . . . . . .2-48
Renaming a Bonded Device . . . . . . . . . . . . . . . . . . . . . . . . . . . . . . . . . . . . . . . . . . . . . . . . . . . . . . . . . . . .2-50
Deleting a Bonded Device . . . . . . . . . . . . . . . . . . . . . . . . . . . . . . . . . . . . . . . . . . . . . . . . . . . . . . . . . . . . .2-51
Connections . . . . . . . . . . . . . . . . . . . . . . . . . . . . . . . . . . . . . . . . . . . . . . . . . . . . . . . . . . . . . . . . . . . . . . . . . . . .2-53
Wireless Ethernet. . . . . . . . . . . . . . . . . . . . . . . . . . . . . . . . . . . . . . . . . . . . . . . . . . . . . . . . . . . . . . . . . . . . . . . .2-54
Chapter 3. Mobile 2003 Applications
Calendar . . . . . . . . . . . . . . . . . . . . . . . . . . . . . . . . . . . . . . . . . . . . . . . . . . . . . . . . . . . . . . . . . . . . . . . . . . . . . . . 3-5
Creating Appointments. . . . . . . . . . . . . . . . . . . . . . . . . . . . . . . . . . . . . . . . . . . . . . . . . . . . . . . . . . . . . . . . .3-6
Editing an Appointment . . . . . . . . . . . . . . . . . . . . . . . . . . . . . . . . . . . . . . . . . . . . . . . . . . . . . . . . . . . . . . . .3-8
Deleting an Appointment . . . . . . . . . . . . . . . . . . . . . . . . . . . . . . . . . . . . . . . . . . . . . . . . . . . . . . . . . . . . . . .3-8
Beaming Appointments . . . . . . . . . . . . . . . . . . . . . . . . . . . . . . . . . . . . . . . . . . . . . . . . . . . . . . . . . . . . . . . .3-8
Using the Summary Window . . . . . . . . . . . . . . . . . . . . . . . . . . . . . . . . . . . . . . . . . . . . . . . . . . . . . . . . . . . .3-8
Creating Meeting Requests . . . . . . . . . . . . . . . . . . . . . . . . . . . . . . . . . . . . . . . . . . . . . . . . . . . . . . . . . . . . .3-9
Configuring Calendar Views. . . . . . . . . . . . . . . . . . . . . . . . . . . . . . . . . . . . . . . . . . . . . . . . . . . . . . . . . . . . .3-9
Contacts . . . . . . . . . . . . . . . . . . . . . . . . . . . . . . . . . . . . . . . . . . . . . . . . . . . . . . . . . . . . . . . . . . . . . . . . . . . . . . .3-10
Changing Contact Options . . . . . . . . . . . . . . . . . . . . . . . . . . . . . . . . . . . . . . . . . . . . . . . . . . . . . . . . . . . . .3-10
Creating a Contact . . . . . . . . . . . . . . . . . . . . . . . . . . . . . . . . . . . . . . . . . . . . . . . . . . . . . . . . . . . . . . . . . . .3-11
Editing a Contact . . . . . . . . . . . . . . . . . . . . . . . . . . . . . . . . . . . . . . . . . . . . . . . . . . . . . . . . . . . . . . . . . . . .3-12
Deleting a Contact . . . . . . . . . . . . . . . . . . . . . . . . . . . . . . . . . . . . . . . . . . . . . . . . . . . . . . . . . . . . . . . . . . .3-12
Finding a Contact . . . . . . . . . . . . . . . . . . . . . . . . . . . . . . . . . . . . . . . . . . . . . . . . . . . . . . . . . . . . . . . . . . . .3-13
Beaming Contacts. . . . . . . . . . . . . . . . . . . . . . . . . . . . . . . . . . . . . . . . . . . . . . . . . . . . . . . . . . . . . . . . . . . .3-13
Using the Summary Window . . . . . . . . . . . . . . . . . . . . . . . . . . . . . . . . . . . . . . . . . . . . . . . . . . . . . . . . . . .3-13
vi Microsoft Applications User Guide for Symbol Devices
Tasks . . . . . . . . . . . . . . . . . . . . . . . . . . . . . . . . . . . . . . . . . . . . . . . . . . . . . . . . . . . . . . . . . . . . . . . . . . . . . . . . . .3-14
Creating a Task. . . . . . . . . . . . . . . . . . . . . . . . . . . . . . . . . . . . . . . . . . . . . . . . . . . . . . . . . . . . . . . . . . . . . .3-14
Editing a Task . . . . . . . . . . . . . . . . . . . . . . . . . . . . . . . . . . . . . . . . . . . . . . . . . . . . . . . . . . . . . . . . . . . . . . .3-16
Deleting a Task. . . . . . . . . . . . . . . . . . . . . . . . . . . . . . . . . . . . . . . . . . . . . . . . . . . . . . . . . . . . . . . . . . . . . .3-16
Beaming Tasks . . . . . . . . . . . . . . . . . . . . . . . . . . . . . . . . . . . . . . . . . . . . . . . . . . . . . . . . . . . . . . . . . . . . . .3-16
Using the Summary Window . . . . . . . . . . . . . . . . . . . . . . . . . . . . . . . . . . . . . . . . . . . . . . . . . . . . . . . . . . .3-17
Configuring Tasks . . . . . . . . . . . . . . . . . . . . . . . . . . . . . . . . . . . . . . . . . . . . . . . . . . . . . . . . . . . . . . . . . . . .3-17
Notes. . . . . . . . . . . . . . . . . . . . . . . . . . . . . . . . . . . . . . . . . . . . . . . . . . . . . . . . . . . . . . . . . . . . . . . . . . . . . . . . . .3-19
Creating a Note . . . . . . . . . . . . . . . . . . . . . . . . . . . . . . . . . . . . . . . . . . . . . . . . . . . . . . . . . . . . . . . . . . . . .3-20
Creating a Template . . . . . . . . . . . . . . . . . . . . . . . . . . . . . . . . . . . . . . . . . . . . . . . . . . . . . . . . . . . . . . . . . .3-21
Editing a Note. . . . . . . . . . . . . . . . . . . . . . . . . . . . . . . . . . . . . . . . . . . . . . . . . . . . . . . . . . . . . . . . . . . . . . .3-22
Deleting a Note . . . . . . . . . . . . . . . . . . . . . . . . . . . . . . . . . . . . . . . . . . . . . . . . . . . . . . . . . . . . . . . . . . . . .3-22
Beaming Notes . . . . . . . . . . . . . . . . . . . . . . . . . . . . . . . . . . . . . . . . . . . . . . . . . . . . . . . . . . . . . . . . . . . . . .3-22
Configuring Notes. . . . . . . . . . . . . . . . . . . . . . . . . . . . . . . . . . . . . . . . . . . . . . . . . . . . . . . . . . . . . . . . . . . .3-23
Inbox . . . . . . . . . . . . . . . . . . . . . . . . . . . . . . . . . . . . . . . . . . . . . . . . . . . . . . . . . . . . . . . . . . . . . . . . . . . . . . . . . .3-24
Synchronizing E-mail Messages. . . . . . . . . . . . . . . . . . . . . . . . . . . . . . . . . . . . . . . . . . . . . . . . . . . . . . . . .3-24
Connecting Directly to an E-mail Server . . . . . . . . . . . . . . . . . . . . . . . . . . . . . . . . . . . . . . . . . . . . . . . . . .3-24
Setting Up an E-mail Service . . . . . . . . . . . . . . . . . . . . . . . . . . . . . . . . . . . . . . . . . . . . . . . . . . . . . . . . . . .3-25
Deleting Accounts . . . . . . . . . . . . . . . . . . . . . . . . . . . . . . . . . . . . . . . . . . . . . . . . . . . . . . . . . . . . . . . . . . .3-26
Downloading Messages. . . . . . . . . . . . . . . . . . . . . . . . . . . . . . . . . . . . . . . . . . . . . . . . . . . . . . . . . . . . . . .3-26
Creating E-mail Messages . . . . . . . . . . . . . . . . . . . . . . . . . . . . . . . . . . . . . . . . . . . . . . . . . . . . . . . . . . . . .3-28
Disconnecting . . . . . . . . . . . . . . . . . . . . . . . . . . . . . . . . . . . . . . . . . . . . . . . . . . . . . . . . . . . . . . . . . . . . . . .3-29
Managing E-mail Messages and Folders. . . . . . . . . . . . . . . . . . . . . . . . . . . . . . . . . . . . . . . . . . . . . . . . . .3-30
Configuring Global Accounts . . . . . . . . . . . . . . . . . . . . . . . . . . . . . . . . . . . . . . . . . . . . . . . . . . . . . . . . . . .3-31
Pocket Word . . . . . . . . . . . . . . . . . . . . . . . . . . . . . . . . . . . . . . . . . . . . . . . . . . . . . . . . . . . . . . . . . . . . . . . . . . . .3-34
Creating a Document . . . . . . . . . . . . . . . . . . . . . . . . . . . . . . . . . . . . . . . . . . . . . . . . . . . . . . . . . . . . . . . . .3-35
Editing a Document . . . . . . . . . . . . . . . . . . . . . . . . . . . . . . . . . . . . . . . . . . . . . . . . . . . . . . . . . . . . . . . . . .3-37
Deleting a Document . . . . . . . . . . . . . . . . . . . . . . . . . . . . . . . . . . . . . . . . . . . . . . . . . . . . . . . . . . . . . . . . .3-37
Beaming Documents. . . . . . . . . . . . . . . . . . . . . . . . . . . . . . . . . . . . . . . . . . . . . . . . . . . . . . . . . . . . . . . . . .3-37
Pocket Word Input Methods. . . . . . . . . . . . . . . . . . . . . . . . . . . . . . . . . . . . . . . . . . . . . . . . . . . . . . . . . . . .3-38
Formatting Text and Drawings . . . . . . . . . . . . . . . . . . . . . . . . . . . . . . . . . . . . . . . . . . . . . . . . . . . . . . . . . .3-39
Formatting Paragraphs . . . . . . . . . . . . . . . . . . . . . . . . . . . . . . . . . . . . . . . . . . . . . . . . . . . . . . . . . . . . . . . .3-40
Finding and Replacing Text . . . . . . . . . . . . . . . . . . . . . . . . . . . . . . . . . . . . . . . . . . . . . . . . . . . . . . . . . . . .3-41
Configuring Files. . . . . . . . . . . . . . . . . . . . . . . . . . . . . . . . . . . . . . . . . . . . . . . . . . . . . . . . . . . . . . . . . . . . .3-42
Pocket Excel . . . . . . . . . . . . . . . . . . . . . . . . . . . . . . . . . . . . . . . . . . . . . . . . . . . . . . . . . . . . . . . . . . . . . . . . . . . .3-43
Tips for Working in Pocket Excel . . . . . . . . . . . . . . . . . . . . . . . . . . . . . . . . . . . . . . . . . . . . . . . . . . . . . . . .3-43
Creating a Workbook . . . . . . . . . . . . . . . . . . . . . . . . . . . . . . . . . . . . . . . . . . . . . . . . . . . . . . . . . . . . . . . . .3-44
Editing a Workbook . . . . . . . . . . . . . . . . . . . . . . . . . . . . . . . . . . . . . . . . . . . . . . . . . . . . . . . . . . . . . . . . . .3-45
Deleting a Workbook . . . . . . . . . . . . . . . . . . . . . . . . . . . . . . . . . . . . . . . . . . . . . . . . . . . . . . . . . . . . . . . . .3-45
Beaming Workbooks. . . . . . . . . . . . . . . . . . . . . . . . . . . . . . . . . . . . . . . . . . . . . . . . . . . . . . . . . . . . . . . . . .3-46
Formatting Workbooks . . . . . . . . . . . . . . . . . . . . . . . . . . . . . . . . . . . . . . . . . . . . . . . . . . . . . . . . . . . . . . . .3-46
Finding and Replacing Text . . . . . . . . . . . . . . . . . . . . . . . . . . . . . . . . . . . . . . . . . . . . . . . . . . . . . . . . . . . .3-48
Configuring Files. . . . . . . . . . . . . . . . . . . . . . . . . . . . . . . . . . . . . . . . . . . . . . . . . . . . . . . . . . . . . . . . . . . . .3-49
MSN Messenger. . . . . . . . . . . . . . . . . . . . . . . . . . . . . . . . . . . . . . . . . . . . . . . . . . . . . . . . . . . . . . . . . . . . . . . . .3-50
Setting Up an Account . . . . . . . . . . . . . . . . . . . . . . . . . . . . . . . . . . . . . . . . . . . . . . . . . . . . . . . . . . . . . . . .3-50
Working with Contacts. . . . . . . . . . . . . . . . . . . . . . . . . . . . . . . . . . . . . . . . . . . . . . . . . . . . . . . . . . . . . . . .3-51
Adding a Contact . . . . . . . . . . . . . . . . . . . . . . . . . . . . . . . . . . . . . . . . . . . . . . . . . . . . . . . . . . . . . . . . . . . .3-52
Deleting a Contact . . . . . . . . . . . . . . . . . . . . . . . . . . . . . . . . . . . . . . . . . . . . . . . . . . . . . . . . . . . . . . . . . . .3-52
Contents vii
Chatting with Contacts. . . . . . . . . . . . . . . . . . . . . . . . . . . . . . . . . . . . . . . . . . . . . . . . . . . . . . . . . . . . . . . .3-52
Managing Contacts . . . . . . . . . . . . . . . . . . . . . . . . . . . . . . . . . . . . . . . . . . . . . . . . . . . . . . . . . . . . . . . . . .3-53
Media Player. . . . . . . . . . . . . . . . . . . . . . . . . . . . . . . . . . . . . . . . . . . . . . . . . . . . . . . . . . . . . . . . . . . . . . . . . . . .3-55
Pictures . . . . . . . . . . . . . . . . . . . . . . . . . . . . . . . . . . . . . . . . . . . . . . . . . . . . . . . . . . . . . . . . . . . . . . . . . . . . . . . .3-56
Viewing Pictures. . . . . . . . . . . . . . . . . . . . . . . . . . . . . . . . . . . . . . . . . . . . . . . . . . . . . . . . . . . . . . . . . . . . .3-56
Viewing a Slideshow of Pictures . . . . . . . . . . . . . . . . . . . . . . . . . . . . . . . . . . . . . . . . . . . . . . . . . . . . . . . .3-56
Copying Pictures to the Device. . . . . . . . . . . . . . . . . . . . . . . . . . . . . . . . . . . . . . . . . . . . . . . . . . . . . . . . . .3-56
Editing Pictures. . . . . . . . . . . . . . . . . . . . . . . . . . . . . . . . . . . . . . . . . . . . . . . . . . . . . . . . . . . . . . . . . . . . . .3-56
Sending Pictures. . . . . . . . . . . . . . . . . . . . . . . . . . . . . . . . . . . . . . . . . . . . . . . . . . . . . . . . . . . . . . . . . . . . .3-57
Setting a Picture as Background . . . . . . . . . . . . . . . . . . . . . . . . . . . . . . . . . . . . . . . . . . . . . . . . . . . . . . . .3-57
Pocket Internet Explorer . . . . . . . . . . . . . . . . . . . . . . . . . . . . . . . . . . . . . . . . . . . . . . . . . . . . . . . . . . . . . . . . . . .3-58
Mobile Favorites. . . . . . . . . . . . . . . . . . . . . . . . . . . . . . . . . . . . . . . . . . . . . . . . . . . . . . . . . . . . . . . . . . . . .3-58
Using Pocket Internet Explorer . . . . . . . . . . . . . . . . . . . . . . . . . . . . . . . . . . . . . . . . . . . . . . . . . . . . . . . . . .3-59
Windows CE Devices
Chapter 4. Getting Started with Windows CE Devices
Windows CE Desktop . . . . . . . . . . . . . . . . . . . . . . . . . . . . . . . . . . . . . . . . . . . . . . . . . . . . . . . . . . . . . . . . . . . . . 4-3
Status Icons . . . . . . . . . . . . . . . . . . . . . . . . . . . . . . . . . . . . . . . . . . . . . . . . . . . . . . . . . . . . . . . . . . . . . . . . . . . . .4-4
Selecting Programs. . . . . . . . . . . . . . . . . . . . . . . . . . . . . . . . . . . . . . . . . . . . . . . . . . . . . . . . . . . . . . . . . . . . . . . .4-5
Using the Input Panel . . . . . . . . . . . . . . . . . . . . . . . . . . . . . . . . . . . . . . . . . . . . . . . . . . . . . . . . . . . . . . . . . . . . . .4-6
Windows Explorer . . . . . . . . . . . . . . . . . . . . . . . . . . . . . . . . . . . . . . . . . . . . . . . . . . . . . . . . . . . . . . . . . . . . . . . .4-7
Working with Files and Folders . . . . . . . . . . . . . . . . . . . . . . . . . . . . . . . . . . . . . . . . . . . . . . . . . . . . . . . . . .4-8
Chapter 5. Windows CE Device Settings
Introduction. . . . . . . . . . . . . . . . . . . . . . . . . . . . . . . . . . . . . . . . . . . . . . . . . . . . . . . . . . . . . . . . . . . . . . . . . . . . . .5-3
Windows Control Panel . . . . . . . . . . . . . . . . . . . . . . . . . . . . . . . . . . . . . . . . . . . . . . . . . . . . . . . . . . . . . . . . . . . .5-3
Backlight . . . . . . . . . . . . . . . . . . . . . . . . . . . . . . . . . . . . . . . . . . . . . . . . . . . . . . . . . . . . . . . . . . . . . . . . . . . . . . . .5-6
Battery Power . . . . . . . . . . . . . . . . . . . . . . . . . . . . . . . . . . . . . . . . . . . . . . . . . . . . . . . . . . . . . . . . . . . . . . . .5-6
External Power . . . . . . . . . . . . . . . . . . . . . . . . . . . . . . . . . . . . . . . . . . . . . . . . . . . . . . . . . . . . . . . . . . . . . . .5-6
Brightness. . . . . . . . . . . . . . . . . . . . . . . . . . . . . . . . . . . . . . . . . . . . . . . . . . . . . . . . . . . . . . . . . . . . . . . . . . .5-7
Certificates . . . . . . . . . . . . . . . . . . . . . . . . . . . . . . . . . . . . . . . . . . . . . . . . . . . . . . . . . . . . . . . . . . . . . . . . . . . . . .5-8
Date/Time. . . . . . . . . . . . . . . . . . . . . . . . . . . . . . . . . . . . . . . . . . . . . . . . . . . . . . . . . . . . . . . . . . . . . . . . . . . . . . .5-9
Device Management . . . . . . . . . . . . . . . . . . . . . . . . . . . . . . . . . . . . . . . . . . . . . . . . . . . . . . . . . . . . . . . . . . . . .5-10
Dialing. . . . . . . . . . . . . . . . . . . . . . . . . . . . . . . . . . . . . . . . . . . . . . . . . . . . . . . . . . . . . . . . . . . . . . . . . . . . . . . . .5-11
Display . . . . . . . . . . . . . . . . . . . . . . . . . . . . . . . . . . . . . . . . . . . . . . . . . . . . . . . . . . . . . . . . . . . . . . . . . . . . . . . .5-13
Background Tab . . . . . . . . . . . . . . . . . . . . . . . . . . . . . . . . . . . . . . . . . . . . . . . . . . . . . . . . . . . . . . . . . . . . .5-13
Appearance Tab . . . . . . . . . . . . . . . . . . . . . . . . . . . . . . . . . . . . . . . . . . . . . . . . . . . . . . . . . . . . . . . . . . . . .5-13
Input Panel . . . . . . . . . . . . . . . . . . . . . . . . . . . . . . . . . . . . . . . . . . . . . . . . . . . . . . . . . . . . . . . . . . . . . . . . . . . . .5-15
Internet Options . . . . . . . . . . . . . . . . . . . . . . . . . . . . . . . . . . . . . . . . . . . . . . . . . . . . . . . . . . . . . . . . . . . . . . . . .5-16
General Tab . . . . . . . . . . . . . . . . . . . . . . . . . . . . . . . . . . . . . . . . . . . . . . . . . . . . . . . . . . . . . . . . . . . . . . . .5-16
Connection Tab. . . . . . . . . . . . . . . . . . . . . . . . . . . . . . . . . . . . . . . . . . . . . . . . . . . . . . . . . . . . . . . . . . . . . .5-16
Security Tab . . . . . . . . . . . . . . . . . . . . . . . . . . . . . . . . . . . . . . . . . . . . . . . . . . . . . . . . . . . . . . . . . . . . . . . .5-17
Advanced Tab . . . . . . . . . . . . . . . . . . . . . . . . . . . . . . . . . . . . . . . . . . . . . . . . . . . . . . . . . . . . . . . . . . . . . . .5-17
Keyboard. . . . . . . . . . . . . . . . . . . . . . . . . . . . . . . . . . . . . . . . . . . . . . . . . . . . . . . . . . . . . . . . . . . . . . . . . . . . . . .5-18
Mouse. . . . . . . . . . . . . . . . . . . . . . . . . . . . . . . . . . . . . . . . . . . . . . . . . . . . . . . . . . . . . . . . . . . . . . . . . . . . . . . . .5-19
Network and Dial-up Connections . . . . . . . . . . . . . . . . . . . . . . . . . . . . . . . . . . . . . . . . . . . . . . . . . . . . . . . . . . .5-20
viii Microsoft Applications User Guide for Symbol Devices
Owner . . . . . . . . . . . . . . . . . . . . . . . . . . . . . . . . . . . . . . . . . . . . . . . . . . . . . . . . . . . . . . . . . . . . . . . . . . . . . . . . .5-21
Identification Tab . . . . . . . . . . . . . . . . . . . . . . . . . . . . . . . . . . . . . . . . . . . . . . . . . . . . . . . . . . . . . . . . . . . .5-21
Notes Tab . . . . . . . . . . . . . . . . . . . . . . . . . . . . . . . . . . . . . . . . . . . . . . . . . . . . . . . . . . . . . . . . . . . . . . . . . .5-21
Network ID Tab. . . . . . . . . . . . . . . . . . . . . . . . . . . . . . . . . . . . . . . . . . . . . . . . . . . . . . . . . . . . . . . . . . . . . .5-22
Password. . . . . . . . . . . . . . . . . . . . . . . . . . . . . . . . . . . . . . . . . . . . . . . . . . . . . . . . . . . . . . . . . . . . . . . . . . . . . . .5-23
PC Connection. . . . . . . . . . . . . . . . . . . . . . . . . . . . . . . . . . . . . . . . . . . . . . . . . . . . . . . . . . . . . . . . . . . . . . . . . . .5-24
Power . . . . . . . . . . . . . . . . . . . . . . . . . . . . . . . . . . . . . . . . . . . . . . . . . . . . . . . . . . . . . . . . . . . . . . . . . . . . . . . . .5-25
Power Off Tab. . . . . . . . . . . . . . . . . . . . . . . . . . . . . . . . . . . . . . . . . . . . . . . . . . . . . . . . . . . . . . . . . . . . . . .5-25
Misc Tab . . . . . . . . . . . . . . . . . . . . . . . . . . . . . . . . . . . . . . . . . . . . . . . . . . . . . . . . . . . . . . . . . . . . . . . . . . .5-26
PwrDevices Tab . . . . . . . . . . . . . . . . . . . . . . . . . . . . . . . . . . . . . . . . . . . . . . . . . . . . . . . . . . . . . . . . . . . . .5-26
Wakeup Tab . . . . . . . . . . . . . . . . . . . . . . . . . . . . . . . . . . . . . . . . . . . . . . . . . . . . . . . . . . . . . . . . . . . . . . . .5-27
Regional Settings . . . . . . . . . . . . . . . . . . . . . . . . . . . . . . . . . . . . . . . . . . . . . . . . . . . . . . . . . . . . . . . . . . . . . . . .5-28
Region Tab . . . . . . . . . . . . . . . . . . . . . . . . . . . . . . . . . . . . . . . . . . . . . . . . . . . . . . . . . . . . . . . . . . . . . . . . .5-28
Number Tab . . . . . . . . . . . . . . . . . . . . . . . . . . . . . . . . . . . . . . . . . . . . . . . . . . . . . . . . . . . . . . . . . . . . . . . .5-28
Currency Tab. . . . . . . . . . . . . . . . . . . . . . . . . . . . . . . . . . . . . . . . . . . . . . . . . . . . . . . . . . . . . . . . . . . . . . . .5-29
Time Tab . . . . . . . . . . . . . . . . . . . . . . . . . . . . . . . . . . . . . . . . . . . . . . . . . . . . . . . . . . . . . . . . . . . . . . . . . . .5-29
Date Tab . . . . . . . . . . . . . . . . . . . . . . . . . . . . . . . . . . . . . . . . . . . . . . . . . . . . . . . . . . . . . . . . . . . . . . . . . . .5-30
Remove Programs . . . . . . . . . . . . . . . . . . . . . . . . . . . . . . . . . . . . . . . . . . . . . . . . . . . . . . . . . . . . . . . . . . . . . . . .5-31
Storage Manager . . . . . . . . . . . . . . . . . . . . . . . . . . . . . . . . . . . . . . . . . . . . . . . . . . . . . . . . . . . . . . . . . . . . . . . .5-32
Managing Disk Partitions . . . . . . . . . . . . . . . . . . . . . . . . . . . . . . . . . . . . . . . . . . . . . . . . . . . . . . . . . . . . . .5-32
Stylus . . . . . . . . . . . . . . . . . . . . . . . . . . . . . . . . . . . . . . . . . . . . . . . . . . . . . . . . . . . . . . . . . . . . . . . . . . . . . . . . .5-34
Double-Tap Tab . . . . . . . . . . . . . . . . . . . . . . . . . . . . . . . . . . . . . . . . . . . . . . . . . . . . . . . . . . . . . . . . . . . . .5-34
Calibrate Tab . . . . . . . . . . . . . . . . . . . . . . . . . . . . . . . . . . . . . . . . . . . . . . . . . . . . . . . . . . . . . . . . . . . . . . .5-34
System . . . . . . . . . . . . . . . . . . . . . . . . . . . . . . . . . . . . . . . . . . . . . . . . . . . . . . . . . . . . . . . . . . . . . . . . . . . . . . . .5-35
General Tab . . . . . . . . . . . . . . . . . . . . . . . . . . . . . . . . . . . . . . . . . . . . . . . . . . . . . . . . . . . . . . . . . . . . . . . .5-35
Memory Tab . . . . . . . . . . . . . . . . . . . . . . . . . . . . . . . . . . . . . . . . . . . . . . . . . . . . . . . . . . . . . . . . . . . . . . . .5-35
Device Name Tab . . . . . . . . . . . . . . . . . . . . . . . . . . . . . . . . . . . . . . . . . . . . . . . . . . . . . . . . . . . . . . . . . . . .5-36
Copyrights Tab . . . . . . . . . . . . . . . . . . . . . . . . . . . . . . . . . . . . . . . . . . . . . . . . . . . . . . . . . . . . . . . . . . . . . .5-36
Volume & Sounds . . . . . . . . . . . . . . . . . . . . . . . . . . . . . . . . . . . . . . . . . . . . . . . . . . . . . . . . . . . . . . . . . . . . . . . .5-37
Sounds Tab . . . . . . . . . . . . . . . . . . . . . . . . . . . . . . . . . . . . . . . . . . . . . . . . . . . . . . . . . . . . . . . . . . . . . . . . .5-37
Microphone Tab . . . . . . . . . . . . . . . . . . . . . . . . . . . . . . . . . . . . . . . . . . . . . . . . . . . . . . . . . . . . . . . . . . . . .5-38
Chapter 6. Windows CE Applications
Introduction. . . . . . . . . . . . . . . . . . . . . . . . . . . . . . . . . . . . . . . . . . . . . . . . . . . . . . . . . . . . . . . . . . . . . . . . . . . . . 6-3
ActiveSync . . . . . . . . . . . . . . . . . . . . . . . . . . . . . . . . . . . . . . . . . . . . . . . . . . . . . . . . . . . . . . . . . . . . . . . . . . . . . .6-3
Copying Files. . . . . . . . . . . . . . . . . . . . . . . . . . . . . . . . . . . . . . . . . . . . . . . . . . . . . . . . . . . . . . . . . . . . . . . . .6-3
Internet Explorer . . . . . . . . . . . . . . . . . . . . . . . . . . . . . . . . . . . . . . . . . . . . . . . . . . . . . . . . . . . . . . . . . . . . . . . . . .6-4
Browsing the Web . . . . . . . . . . . . . . . . . . . . . . . . . . . . . . . . . . . . . . . . . . . . . . . . . . . . . . . . . . . . . . . . . . . .6-4
Favorites . . . . . . . . . . . . . . . . . . . . . . . . . . . . . . . . . . . . . . . . . . . . . . . . . . . . . . . . . . . . . . . . . . . . . . . . . . . .6-5
Saving a Copy of a Page. . . . . . . . . . . . . . . . . . . . . . . . . . . . . . . . . . . . . . . . . . . . . . . . . . . . . . . . . . . . . . . .6-6
Copying a Page to a Document . . . . . . . . . . . . . . . . . . . . . . . . . . . . . . . . . . . . . . . . . . . . . . . . . . . . . . . . . .6-7
Remote Desktop . . . . . . . . . . . . . . . . . . . . . . . . . . . . . . . . . . . . . . . . . . . . . . . . . . . . . . . . . . . . . . . . . . . . . . . . . .6-8
Connecting to a Terminal Server . . . . . . . . . . . . . . . . . . . . . . . . . . . . . . . . . . . . . . . . . . . . . . . . . . . . . . . . .6-8
Disconnecting Without Ending a Session . . . . . . . . . . . . . . . . . . . . . . . . . . . . . . . . . . . . . . . . . . . . . . . . . .6-8
Disconnecting and Ending a Session . . . . . . . . . . . . . . . . . . . . . . . . . . . . . . . . . . . . . . . . . . . . . . . . . . . . . .6-8
Windows CE Messenger . . . . . . . . . . . . . . . . . . . . . . . . . . . . . . . . . . . . . . . . . . . . . . . . . . . . . . . . . . . . . . . . . . .6-9
Setting Up an Account . . . . . . . . . . . . . . . . . . . . . . . . . . . . . . . . . . . . . . . . . . . . . . . . . . . . . . . . . . . . . . . . .6-9
Signing In . . . . . . . . . . . . . . . . . . . . . . . . . . . . . . . . . . . . . . . . . . . . . . . . . . . . . . . . . . . . . . . . . . . . . . . . . .6-10
Contents ix
Working with Contacts. . . . . . . . . . . . . . . . . . . . . . . . . . . . . . . . . . . . . . . . . . . . . . . . . . . . . . . . . . . . . . . .6-11
Messenger Menus . . . . . . . . . . . . . . . . . . . . . . . . . . . . . . . . . . . . . . . . . . . . . . . . . . . . . . . . . . . . . . . . . . .6-11
Adding a Contact . . . . . . . . . . . . . . . . . . . . . . . . . . . . . . . . . . . . . . . . . . . . . . . . . . . . . . . . . . . . . . . . . . . .6-12
Deleting a Contact . . . . . . . . . . . . . . . . . . . . . . . . . . . . . . . . . . . . . . . . . . . . . . . . . . . . . . . . . . . . . . . . . . .6-12
Chatting with Contacts. . . . . . . . . . . . . . . . . . . . . . . . . . . . . . . . . . . . . . . . . . . . . . . . . . . . . . . . . . . . . . . .6-13
Managing Contacts . . . . . . . . . . . . . . . . . . . . . . . . . . . . . . . . . . . . . . . . . . . . . . . . . . . . . . . . . . . . . . . . . .6-15
Microsoft WordPad . . . . . . . . . . . . . . . . . . . . . . . . . . . . . . . . . . . . . . . . . . . . . . . . . . . . . . . . . . . . . . . . . . . . . .6-19
Creating a Document . . . . . . . . . . . . . . . . . . . . . . . . . . . . . . . . . . . . . . . . . . . . . . . . . . . . . . . . . . . . . . . . .6-19
Editing a Document . . . . . . . . . . . . . . . . . . . . . . . . . . . . . . . . . . . . . . . . . . . . . . . . . . . . . . . . . . . . . . . . . .6-20
Formatting Text. . . . . . . . . . . . . . . . . . . . . . . . . . . . . . . . . . . . . . . . . . . . . . . . . . . . . . . . . . . . . . . . . . . . . .6-21
Formatting Paragraphs . . . . . . . . . . . . . . . . . . . . . . . . . . . . . . . . . . . . . . . . . . . . . . . . . . . . . . . . . . . . . . . .6-22
Finding Text . . . . . . . . . . . . . . . . . . . . . . . . . . . . . . . . . . . . . . . . . . . . . . . . . . . . . . . . . . . . . . . . . . . . . . . .6-22
Replacing Text . . . . . . . . . . . . . . . . . . . . . . . . . . . . . . . . . . . . . . . . . . . . . . . . . . . . . . . . . . . . . . . . . . . . . .6-23
Index
Tell Us What You Think...
x Microsoft Applications User Guide for Symbol Devices
About This Guide
Introduction . . . . . . . . . . . . . . . . . . . . . . . . . . . . . . . . . . . . . . . . . . . . . . . . . . . . . . . . . . . . . . . . . . . . . . . . . . . . xiii
Documentation Set . . . . . . . . . . . . . . . . . . . . . . . . . . . . . . . . . . . . . . . . . . . . . . . . . . . . . . . . . . . . . . . . . . . xiii
Chapter Descriptions . . . . . . . . . . . . . . . . . . . . . . . . . . . . . . . . . . . . . . . . . . . . . . . . . . . . . . . . . . . . . . . . . . . . . . xiv
Notational Conventions . . . . . . . . . . . . . . . . . . . . . . . . . . . . . . . . . . . . . . . . . . . . . . . . . . . . . . . . . . . . . . . . . . . . .xv
xii Microsoft Applications User Guide for Symbol Devices
xiii
Introduction
This guide provides instructions for using Microsoft applications on Symbol devices, and is divided into two main sections:
•
•
Section 1 discusses the set up and applications for devices running the Mobile 2003 operating system.
Section 2 discusses the set up and applications for devices running the Windows CE operating system.
Screens and windows pictured in this guide are samples and can differ from actual screens.
Note
Not all features described in this guide pertain to all devices. Refer to the device’s User Guide for
supported features.
Documentation Set
The documentation set for Symbol devices is divided into guides that provide information for specific user needs. The guides are:
•
•
•
•
•
Microsoft Applications User Guide for Symbol Devices - describes how to use Microsoft developed applications.
Symbol Application Guide - describes how to use Symbol developed applications.
User Guide - describes how to use the Symbol device.
Integrator Guide - describes how to set up the device and accessories.
SMDK Help File - provides API information for writing applications.
xiv Microsoft Applications User Guide for Symbol Devices
Chapter Descriptions
Topics covered in this guide are as follows:
•
•
•
•
•
•
Chapter 1, Getting Started with Mobile 2003 Devices, explains how to use the Today screen, select programs, and enter
information on the device.
Chapter 2, Windows Mobile 2003 Settings, explains how to adjust settings on a Windows Mobile 2003 device, including
screen brightness, time and regional settings, memory, power, and owner information.
Chapter 3, Mobile 2003 Applications, explains how to use Windows Mobile 2003-specific applications such as Calendar,
Notes, and Inbox.
Chapter 4, Getting Started with Windows CE Devices, explains how to use the desktop, select programs, and enter
information on the device.
Chapter 5, Windows CE Device Settings, explains how to adjust settings on a Windows CE device, including time, display
brightness, memory, power, and owner information.
Chapter 6, Windows CE Applications, explains how to use Windows CE-specific applications such as Internet Explorer and
Remote Desktop.
xv
Notational Conventions
The following conventions are used in this document:
•
•
•
•
“Device” refers to any Symbol computer that runs Windows Mobile 2003 Second Edition for Pocket PC.
Italics are used to highlight specific items in the general text, and to identify chapters and sections in this and related
documents.
Bullets (•) indicate:
• action items
• lists of alternatives
• lists of required steps that are not necessarily sequential
Sequential lists (e.g., those that describe step-by-step procedures) appear as numbered lists.
For the latest version of this guide go to:http://www.symbol.com/manuals.
xvi Microsoft Applications User Guide for Symbol Devices
Mobile 2003 Devices
Microsoft Applications User Guide for Symbol Devices
Getting Started with Mobile 2003 Devices
Today Screen . . . . . . . . . . . . . . . . . . . . . . . . . . . . . . . . . . . . . . . . . . . . . . . . . . . . . . . . . . . . . . . . . . . . . . . . . . . 1-3
Using the Status Bar . . . . . . . . . . . . . . . . . . . . . . . . . . . . . . . . . . . . . . . . . . . . . . . . . . . . . . . . . . . . . . . . . . . . . . 1-4
Status Icons . . . . . . . . . . . . . . . . . . . . . . . . . . . . . . . . . . . . . . . . . . . . . . . . . . . . . . . . . . . . . . . . . . . . . . . . . 1-4
Speaker Icon. . . . . . . . . . . . . . . . . . . . . . . . . . . . . . . . . . . . . . . . . . . . . . . . . . . . . . . . . . . . . . . . . . . . . . . . .1-5
Battery Icon . . . . . . . . . . . . . . . . . . . . . . . . . . . . . . . . . . . . . . . . . . . . . . . . . . . . . . . . . . . . . . . . . . . . . . . . . 1-6
Time and Next Appointment Icon . . . . . . . . . . . . . . . . . . . . . . . . . . . . . . . . . . . . . . . . . . . . . . . . . . . . . . . . 1-7
Connectivity Icon . . . . . . . . . . . . . . . . . . . . . . . . . . . . . . . . . . . . . . . . . . . . . . . . . . . . . . . . . . . . . . . . . . . . . 1-8
Instant Message Icon. . . . . . . . . . . . . . . . . . . . . . . . . . . . . . . . . . . . . . . . . . . . . . . . . . . . . . . . . . . . . . . . . . 1-8
E-Mail Icon . . . . . . . . . . . . . . . . . . . . . . . . . . . . . . . . . . . . . . . . . . . . . . . . . . . . . . . . . . . . . . . . . . . . . . . . . . 1-9
Multiple Notification Icon . . . . . . . . . . . . . . . . . . . . . . . . . . . . . . . . . . . . . . . . . . . . . . . . . . . . . . . . . . . . . . 1-9
Using the Command Bar . . . . . . . . . . . . . . . . . . . . . . . . . . . . . . . . . . . . . . . . . . . . . . . . . . . . . . . . . . . . . . . . . . 1-10
Selecting Programs . . . . . . . . . . . . . . . . . . . . . . . . . . . . . . . . . . . . . . . . . . . . . . . . . . . . . . . . . . . . . . . . . . . . . . 1-11
Using Pop-up Menus . . . . . . . . . . . . . . . . . . . . . . . . . . . . . . . . . . . . . . . . . . . . . . . . . . . . . . . . . . . . . . . . . . . . . 1-12
Notifications. . . . . . . . . . . . . . . . . . . . . . . . . . . . . . . . . . . . . . . . . . . . . . . . . . . . . . . . . . . . . . . . . . . . . . . . . . . . 1-13
Entering Information. . . . . . . . . . . . . . . . . . . . . . . . . . . . . . . . . . . . . . . . . . . . . . . . . . . . . . . . . . . . . . . . . . . . . . 1-14
Entering Information Using the Input Panel. . . . . . . . . . . . . . . . . . . . . . . . . . . . . . . . . . . . . . . . . . . . . . . . 1-14
Writing on the Screen . . . . . . . . . . . . . . . . . . . . . . . . . . . . . . . . . . . . . . . . . . . . . . . . . . . . . . . . . . . . . . . . 1-19
Selecting Text. . . . . . . . . . . . . . . . . . . . . . . . . . . . . . . . . . . . . . . . . . . . . . . . . . . . . . . . . . . . . . . . . . . . . . .1-21
Drawing on the Screen . . . . . . . . . . . . . . . . . . . . . . . . . . . . . . . . . . . . . . . . . . . . . . . . . . . . . . . . . . . . . . . 1-22
Recording a Message. . . . . . . . . . . . . . . . . . . . . . . . . . . . . . . . . . . . . . . . . . . . . . . . . . . . . . . . . . . . . . . . . 1-22
Using My Text . . . . . . . . . . . . . . . . . . . . . . . . . . . . . . . . . . . . . . . . . . . . . . . . . . . . . . . . . . . . . . . . . . . . . . 1-23
Finding Information . . . . . . . . . . . . . . . . . . . . . . . . . . . . . . . . . . . . . . . . . . . . . . . . . . . . . . . . . . . . . . . . . . . . . . 1-24
Find . . . . . . . . . . . . . . . . . . . . . . . . . . . . . . . . . . . . . . . . . . . . . . . . . . . . . . . . . . . . . . . . . . . . . . . . . . . . . . . 1-24
File Explorer . . . . . . . . . . . . . . . . . . . . . . . . . . . . . . . . . . . . . . . . . . . . . . . . . . . . . . . . . . . . . . . . . . . . . . . . 1-25
1-2 Microsoft Applications User Guide for Symbol Devices
Getting Started with Mobile 2003 Devices 1-3
Today Screen
When turning on a Windows Mobile 2003 device for the first time each day (or after a period of inactivity), the Today screen appears.
Alternatively, tap Start - Today to display the Today screen.
Tap to view connection status
Tap to switch to a
program
Tap to change volume or mute all sounds
Status Bar
Tap to change the date and time
Tap to open an item
Day at a glance
Command Bar
Tap to create a new item
Tap to view connection status
Figure 1-1. Today Screen
The Today screen displays important information for the day, and varies depending on the device configuration.
To customize the Today screen, tap Start - Settings - Today icon. Use the Appearance tab to customize the background and the Items
tab to change the list and order of items that appear on the screen. See Today on page 2-26.
1-4 Microsoft Applications User Guide for Symbol Devices
Using the Status Bar
The status bar at the top of the screen displays the active program, various status icons (Table 1-1), and current time.
Tap to view connection status
Tap to change volume or mute all sounds
Status Bar
Tap to close program
Tap to select a program
Tap to see additional programs
Tap to customize the device
Figure 1-2. Screen Navigation
Status Icons
The status icons listed in Table 1-1 may appear on the status bar.
Table 1-1. Status Icons
Icon
Function
Description
Speaker On
Indicates sound is on.
Vibrate
Indicates vibrate is on.
Speaker Off
Indicates sound is off.
Battery
Backup battery is very low.
Main battery is charging.*
Main battery is low.
Main battery is very low.
Main battery is full.*
Time and Next
Appointment
Displays current time in analog or digital format.
Connectivity
Connection is active.
Synchronization is occurring.
IrDA connection is occurring.
* Only appears in the Time and Next Appointment dialog box.
Getting Started with Mobile 2003 Devices 1-5
Table 1-1. Status Icons (Continued)
Icon
Function
Description
Instant Message
Notification that one or more instant messages were received.
E-Mail
Notification that one or more e-mail messages were received.
Multiple Notifications
There are more notification icons than can be displayed. Tap to display remaining icons.
* Only appears in the Time and Next Appointment dialog box.
Speaker Icon
Use the Speaker icon in the status bar to turn the speaker on or off, set the device to vibrate, and adjust the system volume.
1. Tap the Speaker icon. The Volume dialog box appears.
Figure 1-3. Volume Dialog Box
2. Tap and move the slide bar to adjust the volume.
3. Select the On or Off radio button to turn the volume on or off, or select the Vibrate radio button.
Alternatively, use the Sounds & Notifications window to adjust the system volume. See Sounds & Notifications on page
2-24.
1-6 Microsoft Applications User Guide for Symbol Devices
Battery Icon
Battery icons appear on the status bar when the main battery or backup battery power falls below a predetermined level. A Battery
dialog box also appears indicating the status of the main or backup battery.
Figure 1-4. Battery Status Dialog Box
Alternatively, use the Power window to view battery status. See Power on page 2-39 to change power settings.
Getting Started with Mobile 2003 Devices 1-7
Time and Next Appointment Icon
The Time icon displays the current time in a digital or analog format. To change the time format, tap and hold the Time icon until a
menu appears. Select the format.
Digital Clock
Analog Clock
Figure 1-5. Time Icon Format Menu
To display current date, time, and appointments:
1. Tap the Time icon to display the Time and Next Appointment dialog box.
Battery Status icon
Upcoming appointments
Current date and time
Figure 1-6. Time and Next Appointment Dialog Box
2. The dialog box displays the current date and time, the battery status, and any upcoming appointments in the Calendar. See
Calendar on page 3-5.
1-8 Microsoft Applications User Guide for Symbol Devices
Connectivity Icon
The Connectivity icon indicates the communication status of the device when it’s connecting to the Internet or host computer.
Figure 1-7. Connectivity Dialog Box
Instant Message Icon
The Instant Message icon indicates when MSN Messenger receives a new incoming message. See MSN Messenger on page 3-50.
Figure 1-8. MSN Messenger Dialog Box
Getting Started with Mobile 2003 Devices 1-9
E-Mail Icon
The E-Mail icon indicates incoming e-mails. See Inbox on page 3-24.
Figure 1-9. New E-Mail Messages Dialog Box
Multiple Notification Icon
The Multiple Notification icon appears when two or more message notifications occur. Tap the icon to display the multiple notification
icons.
Multiple Notification icon
Figure 1-10. Multiple Notifications Icon
1-10 Microsoft Applications User Guide for Symbol Devices
Using the Command Bar
Use the command bar at the bottom of the screen to perform program tasks. The command bar includes menu names, buttons, and
the Input Panel button. To create a new item in the current program, tap New. To see the name of a button, hold the stylus on the
button. Drag the stylus off the button to decline the command.
Menu names
Buttons
Input panel
button
Figure 1-11. Command Bar
Getting Started with Mobile 2003 Devices 1-11
Selecting Programs
To select a program, tap Start - Programs, then select the program name. See Chapter 2, Windows Mobile 2003 Settings to select
which programs appear in the Start menu.
Figure 1-12. Programs Window
1-12 Microsoft Applications User Guide for Symbol Devices
Using Pop-up Menus
Use pop-up menus to quickly choose an action for an item. For example, use the pop-up menu in the contact list to delete a contact,
make a copy of a contact, or send an e-mail message to a contact. The actions in the pop-up menus vary from program to program.
To access a pop-up menu, hold the stylus on the item on which to perform the action. When the menu appears, lift the stylus and
select the action to perform, or tap outside the menu to close it without performing an action.
Tap and hold to display
the pop-up menu
Lift the stylus and
tap the action
Tap outside the menu to close it
without performing an action
Figure 1-13. Pop-up Menu
Getting Started with Mobile 2003 Devices 1-13
Notifications
The device provides notifications for appointments and tasks. For example, after setting up an appointment in Calendar, a task with
a due date in Tasks, or an alarm in Clock, the device provides a notification in any of the following ways:
•
•
•
a message box appears on the screen
a pre-set sound plays
the device vibrates.
To choose reminder types and sounds for the device, tap Start - Settings - Personal tab - Sounds & Notifications icon. Select the
desired options. See Sounds & Notifications on page 2-24.
1-14 Microsoft Applications User Guide for Symbol Devices
Entering Information
To enter information in applications:
•
•
•
•
•
•
use the keypad (on models with a keypad)
use the input panel
write directly on the screen
draw pictures on the screen
speak into the microphone to record a message
scan bar code data into data fields.
Entering Information Using the Input Panel
Use the input panel to enter information. Enter information using the soft Keyboard or write using Block Recognizer, Letter Recognizer,
or Transcriber. The characters appear as typed text on the screen. See Input on page 2-8 to customize settings for input methods.
To show or hide the input panel, tap the Input Panel button. Tap the arrow next to this button to view input methods.
Select an input method
Tap to see choices
Input Panel Button
(icon varies depending
on input method)
Figure 1-14. Input Panel Menu
When using the input panel, the device anticipates the word and displays it above the input panel, if set to do so in Word Completion
on page 2-17. Tap the displayed word to insert it into the text at the insertion point. With frequent use, the device learns to anticipate
more words. To change input settings, see Input on page 2-8.
Using the Soft Keyboard
Use the Keyboard input method to enter information by tapping keys with the stylus. To type with the soft Keyboard:
1. Tap the arrow next to the Input Panel button, then select Keyboard.
2. On the Keyboard, tap the keys with the stylus.
Tap here if this is the right word
Figure 1-15. Keyboard Input Panel
3. Tap the pop-up word to enter this word on the screen, or continuing tapping keys to enter information.
Getting Started with Mobile 2003 Devices 1-15
Using Letter Recognizer
Use the Letter Recognizer input method to enter information by writing letters and numbers in a special writing area. To enter
information using Letter Recognizer:
1. Tap the arrow next to the Input Panel button, then select Letter Recognizer.
2. Write letters or numbers in the writing area. Write capital letters in the left side of the writing area, numbers in the right
side, and lower case letters in the center.
Writing area
Figure 1-16. Letter Recognizer Input Panel
3. Tap the
button to open a panel of symbols and special characters to enter, including foreign characters.
Figure 1-17. Letter Recognizer Symbols
4. Tap the ... button to return to Letter Recognizer.
When writing a letter, it appears as typed text on the screen. For specific instructions on using Letter Recognizer, with Letter
Recognizer open, tap the
next to the writing area.
See Letter Recognizer Input Method on page 2-9 to configure Letter Recognizer.
Using Block Recognizer
Use the Block Recognizer input method to enter information by writing letters and numbers in a writing area using special stylus
strokes. This requires learning how to write characters in a specific way, but speeds recognition.
To enter information using Block Recognizer:
1. Tap the arrow next to the Input Panel button, then select Block Recognizer.
2. Write letters in the left side of the writing area (labeled abc), or numbers, symbols, special characters, or punctuation in the
right side (labeled 123), using special character strokes. Each written character appears as typed text in the window. Figure
1-19 provides examples of how to write characters in lowercase.
1-16 Microsoft Applications User Guide for Symbol Devices
Writing area
Figure 1-18. Block Recognizer
Following are tips for using Block Recognizer:
•
•
•
To enter an upper case letter, enter an upstroke in the left side of the writing area, and when a cursor appears on the screen
write the letter. To enter more than one uppercase letters (to achieve a caps lock), first enter two upstrokes. Enter another
upstroke to return to lower case.
When entering special characters or punctuation, first tap in the right side of the writing area, then enter the character.
Tap the
button to open a panel of symbols and special characters to enter, including foreign characters.
Getting Started with Mobile 2003 Devices 1-17
The following chart illustrates some of the characters to write (the dot on each character is the starting point for writing).
Figure 1-19. Character Chart
For specific instructions on using Block Recognizer, with Block Recognizer open, tap
next to the writing area.
See Block Recognizer Input Method on page 2-8 to configure Block Recognizer.
Using the Star Key
Use the Star Key input option to input special characters. To enter information using the Star Key input panel:
1. Tap the arrow next to the Input Panel button, then select Star Key.
Figure 1-20. Star Key Input Panel
2. On the Star Key keyboard, tap the character’s key with the stylus to enter that character.
See Star Key Input Method on page 2-16 to configure the Star Key keyboard.
1-18 Microsoft Applications User Guide for Symbol Devices
Using Transcriber
Use the Transcriber input option to enter information by writing letters and numbers customized to an individual’s handwriting style.
To enter information using Transcriber:
1. Tap the arrow next to the Input Panel button, then select Transcriber.
Figure 1-21. Transcriber Icons
Table 1-2. Transcriber Icons
Icon
Description
Set options such as writing direction and inking. See Transcriber Input Method on page 2-10.
Adapt a writing style to optimize recognition. See Transcriber Input Method on page 2-10.
Quickly input numbers, punctuation, and other symbols.
Select a recognition mode:
Alpha mode (a): Default mode for handwriting recognition.
Numeric mode (123): Allows numbers and some letters, and activates the Calculator.
Uppercase mode (A): Capitalizes all letters.
Inserts a space at the cursor.
Inserts a return at the cursor.
Moves the cursor one space to the left.
Moves the cursor one space to the right.
Erases the character to the left of the cursor.
Opens the help file.
2. To open a customized letter shapes file to speed recognition, tap
a letter shapes file.
. See Transcriber Input Method on page 2-10 to create
Getting Started with Mobile 2003 Devices 1-19
3. Tap File - Open... and tap the file to open it.
Figure 1-22. Opening Letter Shapes File
4. Tap ok.
5. Write anywhere on the screen. Transcriber changes the written characters to typed characters. For specific instructions on
using Transcriber, with Transcriber open, tap
.
See Transcriber Input Method on page 2-10 to configure Transcriber.
Writing on the Screen
In programs that accept writing, such as Notes and the Notes tab in Calendar, Contacts, and Tasks, use the stylus to write directly on
the screen.
To write on the screen, tap the Pen button to switch to writing mode. Lines appear on the screen for guidance.
Tap the Pen button and
use the stylus like a pen
Figure 1-23. Writing on the Screen
Some programs that accept writing do not have the Pen button. See the documentation for that program to find out how
to switch to writing mode.
1-20 Microsoft Applications User Guide for Symbol Devices
Converting Writing to Text
To convert the writing to text, within a program, tap Tools - Recognize.
To convert words:
1. Tap the Pen button to deselect it, then select the word(s). See Selecting Writing on page 1-21.
2. Tap Tools - Recognize, or tap and hold the selected word, then select Recognize on the pop-up menu. If a word is not
recognized, it is left as writing.
Select the text to convert and tap
Recognize on the pop-up menu
The writing is
converted to text
Figure 1-24. Converting Writing to Text
If the conversion is incorrect:
1. Tap and hold the incorrect word.
2. On the pop-up menu, select Alternates. A list of alternate words appears.
3. Tap the word to use, or tap the writing at the top of the menu to return to the original writing.
Tap to return to the
original writing
Or, tap the
word to use
Figure 1-25. Alternate List
Getting Started with Mobile 2003 Devices 1-21
If adding to a word to change it (such as changing a “3” to an “8”) after recognizing the word, the added
writing is not included on the next recognition attempt.
Note
Writing Tips
•
•
•
•
•
Write neatly.
Write on the lines and draw descenders below the line. Cross off the “t” and write apostrophes below the top line so they
are not confused with the word above. Write periods and commas above the line.
For better recognition, increase the zoom level to 300% using the Tools menu.
Leave large gaps between words so the device can easily tell where words begin and end.
Hyphenated words, foreign words that use special characters such as accents, and some punctuation cannot be converted.
Selecting Text
To edit or format typed text, select it by dragging the stylus across the text. Cut, copy, and/or paste text by holding the selected words
then selecting an editing command on the pop-up menu, or by selecting the command on the Edit menu.
Selecting Writing
To select writing to edit or format:
1. Tap and hold the stylus next to the text to select until the insertion point appears.
2. Drag the stylus across the text.
Tap Edit - Undo Ink to erase accidental writing, and try again. Also select text by tapping the Pen button to deselect it, then dragging
the stylus across the screen.
Cut, copy, and paste written text in the same way as with typed text: tap and hold the selected words, then select the command from
the pop-up menu, or select the command from the Edit menu.
1-22 Microsoft Applications User Guide for Symbol Devices
Drawing on the Screen
Drawing on the screen is similar to writing on the screen. To create a drawing:
1. Within a program, cross three ruled lines on the first stroke. A drawing box appears.
2. Draw strokes in or touching the drawing box to include the strokes in the drawing. Drawings that do not cross three ruled
lines are treated as writing.
The drawing box indicates the
boundaries of the drawing
Pen button
Figure 1-26. Drawing on the Screen
To change the zoom level, select a zoom level from the Tools menu.
Manipulating a Drawing
To manipulate a drawing:
•
•
•
•
To select a drawing to edit or format, tap and hold the stylus on the drawing until the selection handle appears.
To select multiple drawings, deselect the Pen button, then drag to select the drawings.
To cut, copy, and paste drawings, tap and hold the selected drawing, then select an editing command on the pop-up menu,
or select the command from the Edit menu.
To resize a drawing, deselect the Pen button and drag a selection handle.
Recording a Message
Record a message to capture thoughts, reminders, and phone numbers. In Calendar, Tasks, and Contacts, include the recording in the
Notes tab. In the Notes program, either create a stand-alone recording or include a recording in a written note.
To create a recording:
1. Tap Start - Programs - Notes to open the Notes application.
2. Tap the Voice Bar button.
3. Tap the Record button (the circle) to begin recording.
Getting Started with Mobile 2003 Devices 1-23
4. Speak into the device’s microphone, or hold the microphone near another source of sound.
Embedded recording icon
Rewind
Play/Pause
Fast-forward
Volume
Record
Stop
Voice Bar icon
Figure 1-27. Recording Window
5. Tap the Stop button when finished. The new recording appears in the note list or as an embedded icon.
6. To play a recording, tap it in the list or tap the embedded icon in the note.
Using My Text
When using Messaging or MSN Messenger, use My Text to quickly insert preset or frequently used messages into the text entry area.
To insert a message:
1. Tap Start - Messaging to open Inbox, or tap Start - Programs - MSN Messenger icon to open MSN Messenger.
2. Open a new message or chat.
3. Tap My Text and select a message.
Tap to select a prewritten message
Figure 1-28. Using My Text
4. If desired, add text after the My Text message by tapping at the end of the message and inserting text using the input panel.
To edit a My Text message, tap Tools - Edit My Text... . Select the message to edit and make the changes.
1-24 Microsoft Applications User Guide for Symbol Devices
Finding Information
To locate information on the device, use the Find application or File Explorer.
Find
The Find application locates information. To use Find:
1. Tap Start - Programs - Find icon.
Figure 1-29. Find Window
2. Enter the text to find in the Find: field.
3. Select a data type from the Type: drop-down list. To find information taking up storage space on the device, select Larger
than 64 KB.
4. Tap Go. All information containing the text entered in the Find: field appears in the Results area.
Getting Started with Mobile 2003 Devices 1-25
File Explorer
Use File Explorer to find files and organize them into folders. Tap Start - Programs - File Explorer.
Select the sort
order for the list
Tap to change folders
Tap the folder
name to open it
Tap and hold to create
a new folder
Network Share icon
My Device icon Storage Card icon
Figure 1-30. File Explorer Window
Use File Explorer to perform the following:
•
•
•
•
•
•
•
Browse folders to locate a file by tapping folders to open them, or using the Show menu (labeled My Device by default) to
close folders.
To list folders and files alphabetically or by date, size, or type, tap the Sort By menu (labeled Name by default), then select
an option to sort by.
To move a file, tap and hold the file, then select Cut or Copy. Navigate to a different folder, tap and hold the screen, then
select Paste on the pop-up menu.
To create a new folder, tap Edit - New Folder, then name the folder using the input panel.
To delete a file or folder, tap and hold the item to delete, then select Delete.
To view the contents of an inserted storage card, tap the Storage Card icon in the command bar. Tap the My Device icon to
return to the contents of the device.
To enter a network path, tap Open or the Network Share icon in the command bar.
1-26 Microsoft Applications User Guide for Symbol Devices
Windows Mobile 2003 Settings
Introduction . . . . . . . . . . . . . . . . . . . . . . . . . . . . . . . . . . . . . . . . . . . . . . . . . . . . . . . . . . . . . . . . . . . . . . . . . . . . 2-3
Adjusting Settings . . . . . . . . . . . . . . . . . . . . . . . . . . . . . . . . . . . . . . . . . . . . . . . . . . . . . . . . . . . . . . . . . . . . . . . .2-3
Personal Tab. . . . . . . . . . . . . . . . . . . . . . . . . . . . . . . . . . . . . . . . . . . . . . . . . . . . . . . . . . . . . . . . . . . . . . . . .2-3
System Tab. . . . . . . . . . . . . . . . . . . . . . . . . . . . . . . . . . . . . . . . . . . . . . . . . . . . . . . . . . . . . . . . . . . . . . . . . . 2-4
Connections Tab. . . . . . . . . . . . . . . . . . . . . . . . . . . . . . . . . . . . . . . . . . . . . . . . . . . . . . . . . . . . . . . . . . . . . . 2-6
Buttons . . . . . . . . . . . . . . . . . . . . . . . . . . . . . . . . . . . . . . . . . . . . . . . . . . . . . . . . . . . . . . . . . . . . . . . . . . . . . . . . . 2-7
Program Buttons. . . . . . . . . . . . . . . . . . . . . . . . . . . . . . . . . . . . . . . . . . . . . . . . . . . . . . . . . . . . . . . . . . . . . . 2-7
Up/Down Control . . . . . . . . . . . . . . . . . . . . . . . . . . . . . . . . . . . . . . . . . . . . . . . . . . . . . . . . . . . . . . . . . . . . . 2-7
Input . . . . . . . . . . . . . . . . . . . . . . . . . . . . . . . . . . . . . . . . . . . . . . . . . . . . . . . . . . . . . . . . . . . . . . . . . . . . . . . . . . . 2-8
Keyboard Input Method . . . . . . . . . . . . . . . . . . . . . . . . . . . . . . . . . . . . . . . . . . . . . . . . . . . . . . . . . . . . . . . . 2-8
Block Recognizer Input Method . . . . . . . . . . . . . . . . . . . . . . . . . . . . . . . . . . . . . . . . . . . . . . . . . . . . . . . . . . 2-8
Letter Recognizer Input Method . . . . . . . . . . . . . . . . . . . . . . . . . . . . . . . . . . . . . . . . . . . . . . . . . . . . . . . . . 2-9
Transcriber Input Method . . . . . . . . . . . . . . . . . . . . . . . . . . . . . . . . . . . . . . . . . . . . . . . . . . . . . . . . . . . . . 2-10
Star Key Input Method . . . . . . . . . . . . . . . . . . . . . . . . . . . . . . . . . . . . . . . . . . . . . . . . . . . . . . . . . . . . . . . . 2-16
Word Completion . . . . . . . . . . . . . . . . . . . . . . . . . . . . . . . . . . . . . . . . . . . . . . . . . . . . . . . . . . . . . . . . . . . . 2-17
Options . . . . . . . . . . . . . . . . . . . . . . . . . . . . . . . . . . . . . . . . . . . . . . . . . . . . . . . . . . . . . . . . . . . . . . . . . . . . 2-17
Menus. . . . . . . . . . . . . . . . . . . . . . . . . . . . . . . . . . . . . . . . . . . . . . . . . . . . . . . . . . . . . . . . . . . . . . . . . . . . . . . . . 2-18
Start Menu . . . . . . . . . . . . . . . . . . . . . . . . . . . . . . . . . . . . . . . . . . . . . . . . . . . . . . . . . . . . . . . . . . . . . . . . . 2-18
New Menu . . . . . . . . . . . . . . . . . . . . . . . . . . . . . . . . . . . . . . . . . . . . . . . . . . . . . . . . . . . . . . . . . . . . . . . . . 2-19
Owner Information . . . . . . . . . . . . . . . . . . . . . . . . . . . . . . . . . . . . . . . . . . . . . . . . . . . . . . . . . . . . . . . . . . . . . . .2-20
Identification . . . . . . . . . . . . . . . . . . . . . . . . . . . . . . . . . . . . . . . . . . . . . . . . . . . . . . . . . . . . . . . . . . . . . . .2-20
Notes . . . . . . . . . . . . . . . . . . . . . . . . . . . . . . . . . . . . . . . . . . . . . . . . . . . . . . . . . . . . . . . . . . . . . . . . . . . . . 2-20
Options . . . . . . . . . . . . . . . . . . . . . . . . . . . . . . . . . . . . . . . . . . . . . . . . . . . . . . . . . . . . . . . . . . . . . . . . . . . . 2-21
Passwords . . . . . . . . . . . . . . . . . . . . . . . . . . . . . . . . . . . . . . . . . . . . . . . . . . . . . . . . . . . . . . . . . . . . . . . . . . . . . 2-22
Password . . . . . . . . . . . . . . . . . . . . . . . . . . . . . . . . . . . . . . . . . . . . . . . . . . . . . . . . . . . . . . . . . . . . . . . . . . 2-22
Hint . . . . . . . . . . . . . . . . . . . . . . . . . . . . . . . . . . . . . . . . . . . . . . . . . . . . . . . . . . . . . . . . . . . . . . . . . . . . . . . 2-23
2-2 Microsoft Applications User Guide for Symbol Devices
Sounds & Notifications. . . . . . . . . . . . . . . . . . . . . . . . . . . . . . . . . . . . . . . . . . . . . . . . . . . . . . . . . . . . . . . . . . . .2-24
Sounds . . . . . . . . . . . . . . . . . . . . . . . . . . . . . . . . . . . . . . . . . . . . . . . . . . . . . . . . . . . . . . . . . . . . . . . . . . . .2-24
Notifications . . . . . . . . . . . . . . . . . . . . . . . . . . . . . . . . . . . . . . . . . . . . . . . . . . . . . . . . . . . . . . . . . . . . . . . .2-24
Today. . . . . . . . . . . . . . . . . . . . . . . . . . . . . . . . . . . . . . . . . . . . . . . . . . . . . . . . . . . . . . . . . . . . . . . . . . . . . . . . . .2-26
Appearance. . . . . . . . . . . . . . . . . . . . . . . . . . . . . . . . . . . . . . . . . . . . . . . . . . . . . . . . . . . . . . . . . . . . . . . . .2-26
Items . . . . . . . . . . . . . . . . . . . . . . . . . . . . . . . . . . . . . . . . . . . . . . . . . . . . . . . . . . . . . . . . . . . . . . . . . . . . . .2-26
About. . . . . . . . . . . . . . . . . . . . . . . . . . . . . . . . . . . . . . . . . . . . . . . . . . . . . . . . . . . . . . . . . . . . . . . . . . . . . . . . . .2-28
Version . . . . . . . . . . . . . . . . . . . . . . . . . . . . . . . . . . . . . . . . . . . . . . . . . . . . . . . . . . . . . . . . . . . . . . . . . . . .2-28
Device ID. . . . . . . . . . . . . . . . . . . . . . . . . . . . . . . . . . . . . . . . . . . . . . . . . . . . . . . . . . . . . . . . . . . . . . . . . . .2-28
Copyrights. . . . . . . . . . . . . . . . . . . . . . . . . . . . . . . . . . . . . . . . . . . . . . . . . . . . . . . . . . . . . . . . . . . . . . . . . .2-29
Brightness . . . . . . . . . . . . . . . . . . . . . . . . . . . . . . . . . . . . . . . . . . . . . . . . . . . . . . . . . . . . . . . . . . . . . . . . . . . . . .2-30
Brightness. . . . . . . . . . . . . . . . . . . . . . . . . . . . . . . . . . . . . . . . . . . . . . . . . . . . . . . . . . . . . . . . . . . . . . . . . .2-30
Battery Power . . . . . . . . . . . . . . . . . . . . . . . . . . . . . . . . . . . . . . . . . . . . . . . . . . . . . . . . . . . . . . . . . . . . . . .2-30
External Power . . . . . . . . . . . . . . . . . . . . . . . . . . . . . . . . . . . . . . . . . . . . . . . . . . . . . . . . . . . . . . . . . . . . . .2-31
Certificates . . . . . . . . . . . . . . . . . . . . . . . . . . . . . . . . . . . . . . . . . . . . . . . . . . . . . . . . . . . . . . . . . . . . . . . . . . . . .2-32
Personal . . . . . . . . . . . . . . . . . . . . . . . . . . . . . . . . . . . . . . . . . . . . . . . . . . . . . . . . . . . . . . . . . . . . . . . . . . .2-32
Root. . . . . . . . . . . . . . . . . . . . . . . . . . . . . . . . . . . . . . . . . . . . . . . . . . . . . . . . . . . . . . . . . . . . . . . . . . . . . . .2-32
Clock and Alarms . . . . . . . . . . . . . . . . . . . . . . . . . . . . . . . . . . . . . . . . . . . . . . . . . . . . . . . . . . . . . . . . . . . . . . . .2-34
Time . . . . . . . . . . . . . . . . . . . . . . . . . . . . . . . . . . . . . . . . . . . . . . . . . . . . . . . . . . . . . . . . . . . . . . . . . . . . . .2-34
Alarms. . . . . . . . . . . . . . . . . . . . . . . . . . . . . . . . . . . . . . . . . . . . . . . . . . . . . . . . . . . . . . . . . . . . . . . . . . . . .2-35
Memory. . . . . . . . . . . . . . . . . . . . . . . . . . . . . . . . . . . . . . . . . . . . . . . . . . . . . . . . . . . . . . . . . . . . . . . . . . . . . . . .2-37
Main . . . . . . . . . . . . . . . . . . . . . . . . . . . . . . . . . . . . . . . . . . . . . . . . . . . . . . . . . . . . . . . . . . . . . . . . . . . . . .2-37
Storage Card. . . . . . . . . . . . . . . . . . . . . . . . . . . . . . . . . . . . . . . . . . . . . . . . . . . . . . . . . . . . . . . . . . . . . . . .2-37
Running Programs. . . . . . . . . . . . . . . . . . . . . . . . . . . . . . . . . . . . . . . . . . . . . . . . . . . . . . . . . . . . . . . . . . . .2-38
Power . . . . . . . . . . . . . . . . . . . . . . . . . . . . . . . . . . . . . . . . . . . . . . . . . . . . . . . . . . . . . . . . . . . . . . . . . . . . . . . . .2-39
Battery . . . . . . . . . . . . . . . . . . . . . . . . . . . . . . . . . . . . . . . . . . . . . . . . . . . . . . . . . . . . . . . . . . . . . . . . . . . .2-39
Advanced . . . . . . . . . . . . . . . . . . . . . . . . . . . . . . . . . . . . . . . . . . . . . . . . . . . . . . . . . . . . . . . . . . . . . . . . . .2-39
Optimizing Battery Life . . . . . . . . . . . . . . . . . . . . . . . . . . . . . . . . . . . . . . . . . . . . . . . . . . . . . . . . . . . . . . . .2-40
Regional Settings . . . . . . . . . . . . . . . . . . . . . . . . . . . . . . . . . . . . . . . . . . . . . . . . . . . . . . . . . . . . . . . . . . . . . . . .2-41
Remove Programs . . . . . . . . . . . . . . . . . . . . . . . . . . . . . . . . . . . . . . . . . . . . . . . . . . . . . . . . . . . . . . . . . . . . . . . .2-44
Screen . . . . . . . . . . . . . . . . . . . . . . . . . . . . . . . . . . . . . . . . . . . . . . . . . . . . . . . . . . . . . . . . . . . . . . . . . . . . . . . . .2-45
General . . . . . . . . . . . . . . . . . . . . . . . . . . . . . . . . . . . . . . . . . . . . . . . . . . . . . . . . . . . . . . . . . . . . . . . . . . . .2-45
Clear Type. . . . . . . . . . . . . . . . . . . . . . . . . . . . . . . . . . . . . . . . . . . . . . . . . . . . . . . . . . . . . . . . . . . . . . . . . .2-46
Text Size . . . . . . . . . . . . . . . . . . . . . . . . . . . . . . . . . . . . . . . . . . . . . . . . . . . . . . . . . . . . . . . . . . . . . . . . . . .2-46
Receiving Incoming Beams. . . . . . . . . . . . . . . . . . . . . . . . . . . . . . . . . . . . . . . . . . . . . . . . . . . . . . . . . . . . . . . . .2-47
Bluetooth. . . . . . . . . . . . . . . . . . . . . . . . . . . . . . . . . . . . . . . . . . . . . . . . . . . . . . . . . . . . . . . . . . . . . . . . . . . . . . .2-48
Bonding with Discovered Device(s) . . . . . . . . . . . . . . . . . . . . . . . . . . . . . . . . . . . . . . . . . . . . . . . . . . . . . .2-48
Renaming a Bonded Device . . . . . . . . . . . . . . . . . . . . . . . . . . . . . . . . . . . . . . . . . . . . . . . . . . . . . . . . . . . .2-50
Deleting a Bonded Device . . . . . . . . . . . . . . . . . . . . . . . . . . . . . . . . . . . . . . . . . . . . . . . . . . . . . . . . . . . . .2-51
Connections . . . . . . . . . . . . . . . . . . . . . . . . . . . . . . . . . . . . . . . . . . . . . . . . . . . . . . . . . . . . . . . . . . . . . . . . . . . .2-53
Wireless Ethernet . . . . . . . . . . . . . . . . . . . . . . . . . . . . . . . . . . . . . . . . . . . . . . . . . . . . . . . . . . . . . . . . . . . . . . . .2-54
Windows Mobile 2003 Settings 2-3
Introduction
For Windows Mobile 2003 devices, this chapter provides device setting adjustments and customization instructions for setting
options such as selecting programs to appear in the Start menu, setting input method options, and customizing device sounds.
Adjusting Settings
To view available options for device settings, tap Start - Settings. Adjust settings in either the Personal tab or the System tab.
Available settings vary depending on the device.
Note
Personal Tab
Figure 2-1. Settings - Personal Tab
Table 2-1 lists the applications available in the Personal tab.
Table 2-1. Personal Tab Applications
Icon
Description
Assign programs to the application hardware buttons. See Buttons on page 2-7.
Switch input methods and set input options. See Input on page 2-8.
Configure the items that appear in the Start menu. See Menus on page 2-18.
Change owner's personal profiles. See Owner Information on page 2-20.
2-4 Microsoft Applications User Guide for Symbol Devices
Table 2-1. Personal Tab Applications (Continued)
Icon
Description
Change owner's password and set security options. See Passwords on page 2-22.
Select the type of actions for which to hear sounds and customize notification about different
events. See Sounds & Notifications on page 2-24.
Customize the information displayed on the Today screen. See Today on page 2-26.
System Tab
Figure 2-2. Settings - System Tab
Table 2-2 lists the applications available in the System tab.
Table 2-2. System Tab Applications
Icon
Description
View device information and name. See About on page 2-28.
Customize screen brightness settings. See Brightness on page 2-30.
View and modify digital certificates used by some applications for establishing trust for secure
communications. See Certificates on page 2-32.
Windows Mobile 2003 Settings 2-5
Table 2-2. System Tab Applications (Continued)
Icon
Description
Change date, time, and time zone information and set alarms. See Clock and Alarms on page 2-34.
Adjust the allocation of storage and program memory. See Memory on page 2-37.
View battery status and change power management options. See Power on page 2-39.
Change how numbers, currencies, dates, and times are displayed. See Regional Settings on page
2-41.
Remove loaded programs from RAM. See Remove Programs on page 2-44.
Align the touch screen and enable ClearType fonts. See Screen on page 2-45.
2-6 Microsoft Applications User Guide for Symbol Devices
Connections Tab
Figure 2-3. Settings - Connections Tab
Table 2-3 lists the applications available in the Connections tab.
Table 2-3. Connections Tab Applications
Icon
Description
Detects incoming InfraRed (IR) and Bluetooth beams. See Receiving Incoming Beams on page 2-47.
Set up the Bluetooth radio to send and receive beams. See Bluetooth on page 2-48.
Change connection information. See Connections on page 2-53.
Modify wireless Ethernet settings. See Wireless Ethernet on page 2-54.
Windows Mobile 2003 Settings 2-7
Buttons
Use the Buttons windows to assign an application to a key to open a frequently used application by pressing one key.
Program Buttons
To assign an application to a key on the keypad:
1. Tap Start - Settings - Personal tab - Buttons icon - Program Buttons tab.
Figure 2-4. Buttons Window - Program Buttons Tab
2. Select a button from the Select a button: list.
3. Select a key or application from the Assign a program: drop-down list.
4. Tap ok.
Up/Down Control
To set the key repeat rate:
1. Tap Start - Settings - Personal tab - Buttons icon - Up/Down Control tab.
Figure 2-5. Buttons Window - Up/Down Control Tab
2. Adjust the Delay before first repeat: slide bar to change the time elapsed before scrolling begins.
3. Adjust the Repeat rate: slide bar to change the time it takes to scroll from one item to the next.
4. Tap ok.
2-8 Microsoft Applications User Guide for Symbol Devices
Input
Use the Input window to set input method options.
Keyboard Input Method
Use the Keyboard input method to enter information by tapping keys with the stylus. See Using the Soft Keyboard on page 1-14.
To set options for the Keyboard input method:
1. Tap Start - Settings - Personal tab - Input icon - Input Method tab.
2. Select Keyboard from the Input method: drop-down list.
Figure 2-6. Input Window - Input Method Tab, Keyboard
3. Select the Large keys or Small keys radio button to set the size of the Keyboard’s keys.
4. If selecting the Large keys radio button, tap the Use gestures for the following keys: check box to use stylus strokes to enter
the keys specified in the Input window.
Block Recognizer Input Method
Use the Block Recognizer to convert writing to typed text on the screen. See Using Block Recognizer on page 1-15.
To set options for the Block Recognizer input method:
1. Tap Start - Settings - Personal tab - Input icon - Input Method tab.
2. Select Block Recognizer from the Input method: drop-down list.
Figure 2-7. Input Window - Input Method Tab, Block Recognizer
Windows Mobile 2003 Settings 2-9
3. There are currently no Block Recognizer customization settings available in Options... .
Letter Recognizer Input Method
Use the Letter Recognizer to convert writing to typed text on the screen. See Using Letter Recognizer on page 1-15.
To set options for the Letter Recognizer input method:
1. Tap Start - Settings - Personal tab - Input icon - Input Method tab.
2. Select Letter Recognizer from the Input method: drop-down list.
Figure 2-8. Input Window - Input Method Tab, Letter Recognizer
3. Tap Options... .
Figure 2-9. Letter Recognizer Options
4. Select the Quick stroke check box to write letters using one stroke. This requires learning a new way to write letters.
5. Select the Right to left crossbar check box if you cross “t”, “f”, and “+” from right to left.
6. Select the Allow accented characters check box to enable the recognizer to predict whether entered characters use accent
marks.
2-10 Microsoft Applications User Guide for Symbol Devices
Transcriber Input Method
Use the Transcriber input method to convert handwriting to typed text on the screen. See Using Transcriber on page 1-18.
To set options for the Transcriber input method:
1. Tap Start - Settings - Personal tab - Input icon - Input Method tab.
2. Select Transcriber from the Input method: drop-down list.
Figure 2-10. Input Window - Input Method Tab, Transcriber
3. Select Options... to customize the Transcriber for your handwriting.
Figure 2-11. Transcriber Options - Quick Settings Tab
4. On the Quick Settings tab, select the alphabet used for writing from the Recognition: drop-down list.
5. Next to Writing Direction: select the direction closely representing the writing angle when forming letters. Select the last
option to change the screen orientation for recognition when writing in landscape mode.
6. Select the Intro Screen check box to view an informative introduction dialog box when using Transcriber.
7. Select the Sound check box to use sound to indicate recognition.
Windows Mobile 2003 Settings 2-11
8. Tap the Inking tab.
Figure 2-12. Transcriber Options - Inking Tab
9. Use the slide bar to select how long the Transcriber takes to recognize writing after completion. Shorten the delay to speed
recognition as you become more comfortable with Transcriber.
10. Select whether Transcriber adds a space after each recognized word.
11. Select the width and color of pen strokes using the drop-down lists.
12. Tap Match Letter Shapes to your writing to familiarize Transcriber with the different ways you write letters, numbers, and
special characters, enabling Transcriber to work faster and more accurately.
Figure 2-13. Transcriber Options - Letter Shapes
Creating a letter file is optional, as Transcriber can use a default file, but recommended to optimize
recognition of an individual’s handwriting.
Note
2-12 Microsoft Applications User Guide for Symbol Devices
To update an existing letter shape file (rather than create a new file), tap File - Open... and tap the file to open it.
Figure 2-14. Transcriber Options - Open Letter Shapes File
13. Tap each character in the list on the Letter Shapes window (Figure 2-13), using the double arrows to scroll through character
selections. Select an option representing how to write that character, then select whether you use that method of writing
the letter often, rarely, or never.
14. Tap File - Save ... to save the set of letter shapes, recommended if more than one person uses the device.
Figure 2-15. Transcriber Options - Save Letter Shapes File
15. Enter a name for the file, then select the folder, type of file, and location (main memory, application, or platform) using the
drop-down lists.
16. Tap OK.
17. Tap ok to return to the Inking tab.
Windows Mobile 2003 Settings 2-13
18. Tap the Advanced tab.
Figure 2-16. Transcriber Options - Advanced Tab
19. Tap Shorthand Settings to automatically expand a short word into a longer word, insert data such as a date, or run a
program.
Figure 2-17. Transcriber Options - Shorthand
20. In the Shorthand window, tap Add to add shorthand settings.
Figure 2-18. Transcriber Options - Add Shorthand
2-14 Microsoft Applications User Guide for Symbol Devices
21. To enter words to automatically expand when written, select the Text expansion radio button, then tap Next.
Figure 2-19. Transcriber Options - Shorthand Text Expansion
22.
23.
24.
25.
Tap in the Shorthand field, then write the shortened version of the word to expand.
Tap in the Text expansion field, and write the expanded word.
Tap Finish.
In the Add Shorthand window (Figure 2-18), select the Function radio button then tap Next to assign a shorthand to a
function.
Figure 2-20. Transcriber Options - Function Shorthand
26. Tap in the Shorthand field, then write the shorthand to assign to a function.
27. Select the function from the Function drop-down list.
Windows Mobile 2003 Settings 2-15
28. In the Add Shorthand window (Figure 2-18), select the Run program radio button then tap Next to assign a shorthand to a
program to run.
Figure 2-21. Transcriber Options - Run Program Shorthand
29.
30.
31.
32.
33.
Tap in the Shorthand field, then write the shorthand to assign to a program.
Select the program from the Run program drop-down list.
Tap Finish.
Tap ok.
Tap Dictionaries Settings on the Advanced tab (Figure 2-16) to select the default dictionary or personal dictionaries to
optimize word recognition. See Creating Dictionaries for information on creating a personal dictionary.
Figure 2-22. Transcriber Options - Dictionaries
34. Check the dictionaries to use in recognition.
35. Tap ok.
Creating Dictionaries
To create a personalized dictionary:
1.
2.
3.
4.
On a host computer, open a text program such as Notepad.
Enter each dictionary word on a separate line.
Select File - Save as.
In the Save as type box, select All Files, then name the file using a .dct extension.
2-16 Microsoft Applications User Guide for Symbol Devices
5. Using an ActiveSync connection, copy the file to the My Device\My Documents\Dictionaries folder on the device. The file
appears in the Transcriber: Dictionaries window (Figure 2-22) for selection.
Star Key Input Method
Use the Star Key to input special characters. See Using the Star Key on page 1-17.
To set options for the Star Key input method:
1. Tap Start - Settings - Personal tab - Input icon - Input Method tab.
2. Select Star Key from the Input method: drop-down list.
Figure 2-23. Input Window - Input Method Tab, Star Key
3. Tap Options... to customize the Star Key keyboard.
Figure 2-24. Star Key Options
4. Tap a key to reassign from the lower keyboard, then select the character to assign to this key from the Key Assignments
options.
5. Repeat this for each key to reassign.
6. Tap ok.
Windows Mobile 2003 Settings 2-17
Word Completion
Use the Word Completion tab to adjust how suggested words pop up in a window above the input panel.
1. Tap Start - Settings - Personal tab - Input icon - Word Completion tab.
Figure 2-25. Input Window - Word Completion Tab
2. Make the desired changes to the settings.
3. Tap ok.
Options
Use the Options tab to adjust preferences for writing and recording.
1. Tap Start - Settings - Personal tab - Input icon - Options tab.
Figure 2-26. Input Window - Options Tab
2. Make the desired changes to the settings.
3. Tap ok.
2-18 Microsoft Applications User Guide for Symbol Devices
Menus
Use the Menus window to change the items that appear in the Start menu.
Start Menu
To change the items that appear in the Start menu:
1. Tap Start - Settings - Personal tab - Menus icon - Start Menu tab.
Figure 2-27. Menus Window - Start Menu Tab
2. Select up to seven programs to appear in the Start menu.
3. Tap ok.
To create subfolders and shortcuts to appear under the Start menu:
1.
2.
3.
4.
5.
In ActiveSync on the host computer, click Explore.
Double-click My Pocket PC.
Double-click Windows.
Double-click Start Menu.
Create the folders and shortcuts.
Windows Mobile 2003 Settings 2-19
New Menu
To enable the New menu within applications:
1. Tap Start - Settings - Personal tab - Menus icon - New Menu tab.
Figure 2-28. Menus Window - New Menu Tab
2. Select the Turn on the New button menu check box to have access to multiple applications within a program. An arrow
appears next to New in the command bar of certain programs such as Pocket Word, Pocket Excel, Contacts, Calendar, and
Tasks. Tap this arrow, then tap a new item to create.
Tap arrow to open a new
document in other applications
Figure 2-29. New Menu in Calendar Window
To use New only to start a new file within a program (rather than accessing a menu of applications), do not select the Turn
on the New button menu check box. Regardless of the selection, the New menu appears in the command bar of the Today
screen.
3. Select the items to appear on the New menu.
4. Tap ok.
2-20 Microsoft Applications User Guide for Symbol Devices
Owner Information
Use the Owner Information window to enter information about the device owner. The information can appear when the device is
turned on.
Identification
To enter personal information:
1. Tap Start - Settings - Personal tab - Owner Information icon - Identification tab.
Figure 2-30. Owner Information Window - Identification Tab
2. Fill in or edit the data as desired.
3. Tap ok.
Notes
To add more information about the owner:
1. Tap Start - Settings - Personal tab - Owner Information icon - Notes tab.
Figure 2-31. Owner Information Window - Notes Tab
2. Enter information in the Notes: text box.
Windows Mobile 2003 Settings 2-21
Options
To display information when starting the device:
1. Tap Start - Settings - Personal tab - Owner Information icon - Options tab.
Figure 2-32. Owner Information Window - Options Tab
2. To have owner information display when starting the device, select the Identification information and/or Notes check
box(es).
3. Tap ok.
After entering the information and selecting the Identification information and/or Notes check box(es), the Welcome
window appears whenever the device powers on.
Figure 2-33. Welcome Window
2-22 Microsoft Applications User Guide for Symbol Devices
Passwords
Use the Password window to set a password to disable unauthorized access to the device.
Password
If the device is configured to connect to a network, use a strong (difficult to figure out) password to help protect network security.
Password cracking tools continue to improve and the computers used to crack passwords are more powerful than ever.
If you forget the password, or if the device is corrupt and soft resetting doesn't work, perform a hard reset.
Performing a hard reset erases all created files and data, and user-installed programs.
1. Tap Start - Settings - Personal tab - Password icon - Password tab.
Figure 2-34. Password Window - Password Tab
2.
3.
4.
5.
6.
Select Prompt if device unused for check box to enable password protection.
From the drop-down list, select a time value for the protection to take affect after non-use.
From the Password type: drop-down list, select either Simple 4 digit or Strong alphanumeric.
For a simple password, enter a four-digit password in the Password field.
For a stronger password:
a. Enter a seven character password in the Password: field. A strong password must contain at least seven characters that
are a combination of uppercase and lowercase letters, numerals, and punctuation.
Figure 2-35. Alphanumeric Password
Windows Mobile 2003 Settings 2-23
b. Re-enter the password in the Confirm: field.
7. Tap ok.
Hint
To set a hint to remember the password:
1. Tap Start - Settings - Personal tab - Password icon - Hint tab.
Figure 2-36. Password Window - Hint Tab
2. In the text box, enter a password hint for a password reminder.
3. Tap ok.
2-24 Microsoft Applications User Guide for Symbol Devices
Sounds & Notifications
Use the Sounds & Notifications window to set event sounds and notification options.
Sounds
To enable event sounds:
1. Tap Start - Settings - Personal tab - Sounds & Notifications icon - Sounds tab.
Figure 2-37. Sounds & Notifications Window - Sounds Tab
2. Select the desired Enable Sounds for options.
Turning off sounds saves power and prolongs battery life.
Note
3. Tap ok.
Notifications
Use the Notifications tab to customize notification about different events.
1. Tap Start - Settings - Personal tab - Sounds & Notifications icon - Notifications tab.
Figure 2-38. Sounds & Notifications Window - Notifications Tab
Windows Mobile 2003 Settings 2-25
2.
3.
4.
5.
6.
Select the event name from the Event: drop-down list.
Select the Play sound check box to enable sound notification for the event.
Select a sound from the drop-down list.
Select the Vibrate check box to enable vibration notification of the event.
Tap ok.
2-26 Microsoft Applications User Guide for Symbol Devices
Today
Use the Today window to customize the Today screen.
Appearance
To change the appearance of the Today screen:
1. Tap Start - Settings - Personal tab - Today icon - Appearance tab.
Figure 2-39. Today Window - Appearance Tab
2. Select the desired theme for the Today screen background. To use a customized background, select the Use this picture as
the background check box and tap Browse to locate the desired file on the device.
3. To beam a theme to another device, select the desired theme and tap Beam.
4. To delete a theme, select the desired theme and tap Delete.
5. Tap ok.
Items
To select items that appear on the Today screen:
1. Tap Start - Settings Personal tab - Today icon - Items tab.
Figure 2-40. Today Window - Items Tab
2. Select the items to appear on the Today screen. To customize the information further, select an information type, then tap
Options... (not available for all information types).
Windows Mobile 2003 Settings 2-27
3. To set an inactivity timeout after which the device returns to the Today screen, select the Today timeout: check box, then
select the time period from the drop-down list.
4. Tap ok.
2-28 Microsoft Applications User Guide for Symbol Devices
About
Use the About window to view general system properties, change memory settings, input device name, and view copyright
information.
Version
The Version tab displays general system settings.
1. Tap Start - Settings - System tab - About icon - Version tab.
Figure 2-41. About Window - Version Tab
2. Tap ok.
Device ID
Use the Device ID tab to customize the name and description of the device.
1. Tap Start - Settings - System tab - About icon - Device ID tab.
Figure 2-42. About Window - Device ID Tab
2. In the Device name: text box, enter a name for the device. Do not use spaces.
3. In the Description: text box, enter a description for the device.
4. Tap ok.
Windows Mobile 2003 Settings 2-29
Copyrights
The Copyrights tab displays copyright information.
1. Tap Start - Settings - System tab - About icon - Copyrights tab.
Figure 2-43. About Window - Copyrights Tab
2. Tap ok.
2-30 Microsoft Applications User Guide for Symbol Devices
Brightness
Use the Brightness window to conserve battery power or to turn off the backlight when the device is idle.
Brightness
To set a brightness level for the backlight:
1. Tap Start - Settings - System tab - Brightness icon - Brightness tab.
Figure 2-44. Brightness Window - Brightness Tab
2. Use the slider to adjust screen brightness.
3. Tap ok.
Battery Power
To set the backlight settings when using battery power:
1. Tap Start - Settings - System tab - Brightness icon - Battery Power tab.
Figure 2-45. Brightness Window - Battery Power Tab
2. Select the Dim if device is idle for more than check box to dim the backlight when the device is not used for a certain period
of time. Select this period of time from the drop-down list. Available times are 15 seconds, 30 seconds, 1 minute, 3 minutes,
5 minutes, and 15 minutes.
3. Tap ok.
Windows Mobile 2003 Settings 2-31
External Power
To set the backlight settings when using external AC power:
1. Tap Start - Settings - System tab - Brightness icon - External Power tab.
Figure 2-46. Brightness Window - External Power Tab
2. Select the Dim if device is idle for more than check box to dim the backlight when the device is not used for a certain period
of time. Select this period of time from the drop-down list. Available times are 30 seconds, 1 minute, 3 minutes, 5 minutes,
15 minutes, and 30 minutes.
3. Tap ok.
A soft reset retains the new settings. A hard reset restores the default settings.
Note
2-32 Microsoft Applications User Guide for Symbol Devices
Certificates
Add and delete public key certificates on the device to help establish identity when logging onto a secured network, such as a
corporate network. Certificates also help establish the identity of other computers, such as servers, with which the device connects.
This helps prevent unauthorized users from accessing the device and information.
There are two types of certificates: personal certificates that establish identity, and root certificates that establish the identity of
servers with which the device connects. The device may include a set of preinstalled certificates.
Personal
1. Tap Start - Settings - System tab - Certificates icon - Personal tab.
Figure 2-47. Certificates Window - Personal Tab
The list box displays the name of the certificate issuer and the expiration date.
2. To view more information about a certificate, select it from the list box.
3. To delete a certificate, tap and hold it in the list box, and then tap Delete.
4. Tap ok.
Root
1. Tap Start - Settings - System tab - Certificates icon - Root tab.
Figure 2-48. Certificates Window - Root Tab
The list box displays the name of the certificate issuer and the expiration date.
Windows Mobile 2003 Settings 2-33
2. To view more information about a certificate, select it from the list box.
3. To delete a certificate, tap and hold it in the list box, and then tap Delete.
4. Tap ok.
2-34 Microsoft Applications User Guide for Symbol Devices
Clock and Alarms
Use the Clock & Alarms windows to change the date, time, and time zone, and set alarms.
Time
To set the date, time, and time zone:
1. Tap Start - Settings - System tab - Clock & Alarms icon - Time tab.
Figure 2-49. Clock Window - Time Tab
2.
3.
4.
5.
6.
7.
Select the Home radio button.
Select the current time zone from the time zone drop-down list.
To set the hour, tap on the hour field and use the up and down arrows to the right of the time to adjust the hour.
To set the minutes, tap on the minute field and use the up and down arrows to the right of the time to adjust the minutes.
To set the date, tap in the date field.
Tap the down arrow to the right of the date field. The Calendar window appears.
Figure 2-50. Calendar
8.
9.
10.
11.
To select the month and year, tap the arrows to the right or left of the month until the current month and year appear.
Tap the day of the month. The calendar disappears.
Tap ok.
Set the Visiting time zone to quickly see the correct date and time in a frequently visited time zone.
Windows Mobile 2003 Settings 2-35
Alarms
To use the device as a travel alarm clock, set a wake-up alarm.
1. Tap Start - Settings - System tab - Clock & Alarms icon - Alarms tab.
Figure 2-51. Clock Window - Alarms Tab
2. Highlight a Description field, then enter a name for the alarm.
3. Tap the letter(s) representing the day(s) of the week to enable the alarm.
4. Tap the Bell icon to set alarm features. The Alarm Settings window appears.
Figure 2-52. Alarm Settings Window
5.
6.
7.
8.
9.
10.
Select the Play sound check box to enable a sound when the alarm starts.
From the drop-down list, select the sound that plays when the alarm starts.
Select the Repeat sound check box to repeat the sound notification.
Select the Display message checkbox to enable a message to appear on the screen when the alarm goes off.
Select the Flash light and/or Vibrate checkbox to flash a light and/or vibrate when the alarm starts.
Tap ok.
2-36 Microsoft Applications User Guide for Symbol Devices
11. Tap the time field to set the alarm time. The clock window appears.
Figure 2-53. Alarm Clock Setting Window
12.
13.
14.
15.
16.
Use the time field and up and down arrows to set the time, or tap, hold, and drag the clock hands.
Tap ok.
Set up to two more alarms in the available fields.
Tap ok.
To change the way the date or time is displayed on the device, see Regional Settings on page 2-41.
Windows Mobile 2003 Settings 2-37
Memory
Use the Memory window to adjust RAM allocation, view storage card memory usage, and stop active programs.
Main
To temporarily adjust the allocation of storage and program memory:
1. Tap Start - Settings - System tab - Memory icon - Main tab.
Figure 2-54. Memory Window - Main Tab
2. To adjust RAM allocation move the slider to allocate more memory for programs or storage. If there is not enough space for
a file, increase the amount of storage memory. If the device is running slowly, try increasing the amount of program memory.
3. Tap ok.
If memory problems still occur, reset the device, which can make additional storage or program memory available.
Programs supplied with the device are located in ROM and remain after a hard reset. Installed programs are located in RAM and must
be reinstalled after a hard reset. If there are problems reinstalling programs, adjust RAM allocation.
Storage Card
The Storage Card tab displays how much memory is available in the device’s partitions.
1. Tap Start - Settings - System tab - Memory icon - Storage Card tab.
Figure 2-55. Memory Window - Storage Card Tab
2-38 Microsoft Applications User Guide for Symbol Devices
2. Tap the drop-down list, then the name of the partition to view information.
3. Tap ok.
Running Programs
The Running Programs tab displays a list of active programs.
1. Tap Start - Settings - System tab - Memory icon - Running Programs tab.
Figure 2-56. Memory Window - Running Programs Tab
2.
3.
4.
5.
To display an active program, select the program from the Running Program List: list box and tap Activate.
To stop an active program, select the program from the Running Program List: list and tap Stop.
To stop all active programs tap Stop All.
Tap ok.
Windows Mobile 2003 Settings 2-39
Power
Use the Power window to view the status of the main and backup batteries and set power management options.
Battery
The Battery tab provides general information about battery conditions. The amount of useful operating time remaining varies
depending on battery type and device use.
To check the main battery and backup battery status:
1. Tap Start - Settings - System tab - Power icon - Battery tab.
Figure 2-57. Power Window - Battery Tab
2. Tap ok.
Advanced
Select options for turning off the device to conserve battery power. To conserve the most power, select the option to turn off the device
after 3 minutes or less.
1. Tap Start - Settings - System tab - Power icon - Advanced tab.
Figure 2-58. Power Window - Advanced Tab
2. Select On battery power: Turn off device if not used for check box.
3. Select a time value from the drop-down list.
2-40 Microsoft Applications User Guide for Symbol Devices
4. Select On external power: Turn off device if not used for check box.
5. Select time value from the drop-down list.
6. Tap ok.
Optimizing Battery Life
Under normal conditions, the device offers many hours of use from a single charge. To extend battery life as much as possible,
especially when on the road, observe these tips:
•
•
•
Use external power whenever possible, especially when:
• using the backlight
• connecting to a host computer
• using accessories.
Set the device to turn off when idle. While on battery power, the device automatically turns off, or suspends operation, if
not used for three minutes. Maximize battery life by shortening this time.
By default, the device produces sounds in response to a number of events, such as warnings, appointments, and key presses.
To optimize battery life, turn off unnecessary sounds. See Sounds & Notifications on page 2-24.
When batteries are low, a battery icon appears in the status bar. See Status Icons on page 1-4.
Windows Mobile 2003 Settings 2-41
Regional Settings
Use regional settings to change the way the device displays dates, times, currency amounts, large numbers, and numbers with
decimal fractions. Also choose the metric or U.S. system of measurement.
Choose from a large number of input locales. When switching to another input locale, some programs offer special features, such as
font characters or spell checkers designed for different languages.
1. Tap Start - Settings - System tab - Regional Settings icon - Region tab.
Figure 2-59. Regional Settings Window - Region Tab
2. From the drop-down list, select the country.
3. Tap the Number tab.
Figure 2-60. Regional Settings Window - Number Tab
4. Select the desired options. The characteristics available depend on the region selected on the Region tab.
2-42 Microsoft Applications User Guide for Symbol Devices
5. Tap the Currency tab.
Figure 2-61. Regional Settings Window - Currency Tab
6. Select the desired options. The characteristics available depend on the region selected on the Region tab.
7. Tap the Time tab.
Figure 2-62. Regional Settings Window - Time Tab
8. Select the desired options. The characteristics available depend on the region selected on the Region tab.
9. Tap the Date tab.
Figure 2-63. Regional Settings Window - Date Tab
Windows Mobile 2003 Settings 2-43
10. Select the desired options. The characteristics available depend on the region selected on the Region tab.
11. Tap ok.
2-44 Microsoft Applications User Guide for Symbol Devices
Remove Programs
Use the Remove Programs window to remove programs that were loaded onto the device and are installed in RAM:
1. Tap Start - Settings - System tab - Remove Programs icon.
Figure 2-64. Remove Programs Window
2.
3.
4.
5.
From the Programs in storage memory: list box, select the program to remove.
Tap Remove.
Tap Adjust memory allocation. to adjust the allocation of storage and program memory. See Memory on page 2-37.
Tap ok.
Windows Mobile 2003 Settings 2-45
Screen
Use the Screen window to align the screen and to enable ClearType fonts.
General
1. Tap Start - Settings - System tab - Screen icon - General tab.
Figure 2-65. Screen Window - General Tab
2. Select a screen orientation. Figure 2-66 provides an example of screen appearance for portrait and landscape orientations.
Landscape Orientation
Portrait Orientation
Figure 2-66. Portrait and Landscape Screen Orientation
3. Tap Align Screen.
4. The align screen appears. Tap each target with the stylus and follow the on-screen messages.
5. Tap ok.
2-46 Microsoft Applications User Guide for Symbol Devices
Clear Type
1. Tap Start - Settings - System tab - Screen icon - ClearType tab.
Figure 2-67. Screen Window - ClearType Tab
2. Select the Enable ClearType check box to enable easier reading of text in programs that support ClearType.
3. Tap ok.
Text Size
1. Tap Start - Settings - System tab - Screen icon - Text Size tab.
Figure 2-68. Screen Window - Text Size Tab
2. Use the slider to set the size of displayed text.
3. Tap ok.
Windows Mobile 2003 Settings 2-47
Receiving Incoming Beams
By default, devices receive all incoming InfraRed (IR) and Bluetooth beams, and prompt for acceptance. Clear the Receive all incoming
beams check box to prevent the device from detecting or receiving beams.
To reject incoming beams:
1. Tap Start - Settings - Connections tab - Beam icon.
Figure 2-69. Beam Window
2. Tap the Receive all incoming beams check box to clear the box.
3. Tap ok.
Ensure the Receive all incoming beams check box is checked to receive all incoming beams.
To receive beams from devices with older operating systems (e.g., Pocket PC 2000 or H/PC), tap Receive an
infrared beam.
2-48 Microsoft Applications User Guide for Symbol Devices
Bluetooth
This section describes how to discover and create bonds with other Bluetooth devices. The device can receive information from
discovered devices without creating a bond. Once bonded, the device exchanges information with the bonded device when the
Bluetooth radio is turned on.
Bonding with Discovered Device(s)
A bond is a relationship created between two Bluetooth devices to securely exchange information. To create a bond, enter the same
PIN on both devices. Once a bond is created, entering the PIN is not necessary for information exchange.
To bond with a discovered Bluetooth device:
1. Ensure the target device is in discoverable mode.
2. Ensure the two devices are within 30 feet (10 meters) of one another.
3. Tap Start - Settings - Connections tab - Bluetooth icon - Bonded Devices tab.
Figure 2-70. Bluetooth Window - Bonded Devices Tab
4. Tap New... . The device searches for other Bluetooth devices and displays them in the list.
Figure 2-71. Select a Bluetooth Device Window
Windows Mobile 2003 Settings 2-49
5. Tap the device with which to create a bond, then tap Next.
Figure 2-72. Enter Device Bluetooth PIN Window
If the target device does not appear in the list, ensure it is turned on, in discoverable mode, and within range
(30 feet/10 meters) of the searching device.
6. In the Device PIN: text box, enter a PIN (between 1 and 16 characters) and tap Next. The device sends the PIN request to
the target device.
7. When prompted, enter the same PIN on the target device. The Name the Bluetooth Device window appears.
Figure 2-73. Name the Bluetooth Device Window
8. In the Name: text box, edit the name of the other device, if desired.
2-50 Microsoft Applications User Guide for Symbol Devices
9. Tap Finish. The bonded device appears in the list.
Figure 2-74. Bluetooth Bonded Devices Window
Renaming a Bonded Device
To rename a bonded device, use the Bluetooth Bonded Devices window.
1. Tap Start - Settings - Connections tab - Bluetooth icon - Bonded Devices tab.
2. Tap and hold the device to rename. In the pop-up menu, select Rename.
Figure 2-75. Renaming a Bonded Device
Windows Mobile 2003 Settings 2-51
The Rename bonded device window appears.
Figure 2-76. Rename Bonded Device Window
3. Enter a new name for the bonded device in the Name: text box.
4. Tap ok.
Tap Delete in this window to delete a bonded device.
Deleting a Bonded Device
If it is no longer necessary to connect with a device, delete it from the Bluetooth Bonded Devices window.
1. Tap Start - Settings - Connections tab - Bluetooth icon - Bonded Devices tab.
2. Tap and hold the device to delete. In the pop-up menu, select Delete.
Figure 2-77. Deleting a Bonded Device
2-52 Microsoft Applications User Guide for Symbol Devices
3. A confirmation dialog appears. Tap Yes.
Figure 2-78. Delete Device Confirmation Dialog Box
Windows Mobile 2003 Settings 2-53
Connections
Use the Connections window to create a modem connection to an Internet Service Provider (ISP) or network, or a VPN connection.
Tap Start - Settings - Connections tab - Connections icon.
Figure 2-79. Connections Window
Refer to the Symbol device’s Integration Guide or the modem manufacturer’s documentation for availability of connection options and
connection instructions.
2-54 Microsoft Applications User Guide for Symbol Devices
Wireless Ethernet
To configure the device for a wireless Ethernet connection.
1. Tap Start - Settings - Connections tab - Wireless Ethernet icon. The Configure Network Adapters window appears.
Figure 2-80. Configure Network Adapters Window
2. In the My network card connects to: drop-down list, select the appropriate connection.
3. In the Tap an adapter to modify settings: list, select the adapter to modify. The IP address window displays.
Figure 2-81. Wireless Ethernet - IP Address Window
4. In the IP address window, select the appropriate radio button:
• to Use a server-assigned IP address
or
• to Use a specific IP address. Enter the IP address, Subnet mask, and Default gateway, as needed.
Windows Mobile 2003 Settings 2-55
5. Tap the Name Servers tab.
Figure 2-82. Wireless Ethernet - Name Servers Window
6. Enter the appropriate DNS, Alt DNS, WINS, and Alt WINS server addresses.
7. Tap ok.
Figure 2-83. Adapters
8. Tap ok to confirm the setup.
9. Tap ok to exit.
2-56 Microsoft Applications User Guide for Symbol Devices
Mobile 2003 Applications
Calendar . . . . . . . . . . . . . . . . . . . . . . . . . . . . . . . . . . . . . . . . . . . . . . . . . . . . . . . . . . . . . . . . . . . . . . . . . . . . . . . 3-5
Creating Appointments . . . . . . . . . . . . . . . . . . . . . . . . . . . . . . . . . . . . . . . . . . . . . . . . . . . . . . . . . . . . . . . . 3-6
Editing an Appointment . . . . . . . . . . . . . . . . . . . . . . . . . . . . . . . . . . . . . . . . . . . . . . . . . . . . . . . . . . . . . . . . 3-8
Deleting an Appointment . . . . . . . . . . . . . . . . . . . . . . . . . . . . . . . . . . . . . . . . . . . . . . . . . . . . . . . . . . . . . . . 3-8
Beaming Appointments . . . . . . . . . . . . . . . . . . . . . . . . . . . . . . . . . . . . . . . . . . . . . . . . . . . . . . . . . . . . . . . . 3-8
Using the Summary Window . . . . . . . . . . . . . . . . . . . . . . . . . . . . . . . . . . . . . . . . . . . . . . . . . . . . . . . . . . . . 3-8
Creating Meeting Requests . . . . . . . . . . . . . . . . . . . . . . . . . . . . . . . . . . . . . . . . . . . . . . . . . . . . . . . . . . . . . 3-9
Configuring Calendar Views . . . . . . . . . . . . . . . . . . . . . . . . . . . . . . . . . . . . . . . . . . . . . . . . . . . . . . . . . . . . 3-9
Contacts . . . . . . . . . . . . . . . . . . . . . . . . . . . . . . . . . . . . . . . . . . . . . . . . . . . . . . . . . . . . . . . . . . . . . . . . . . . . . . . 3-10
Changing Contact Options . . . . . . . . . . . . . . . . . . . . . . . . . . . . . . . . . . . . . . . . . . . . . . . . . . . . . . . . . . . . .3-10
Creating a Contact . . . . . . . . . . . . . . . . . . . . . . . . . . . . . . . . . . . . . . . . . . . . . . . . . . . . . . . . . . . . . . . . . . . 3-11
Editing a Contact . . . . . . . . . . . . . . . . . . . . . . . . . . . . . . . . . . . . . . . . . . . . . . . . . . . . . . . . . . . . . . . . . . . . 3-12
Deleting a Contact . . . . . . . . . . . . . . . . . . . . . . . . . . . . . . . . . . . . . . . . . . . . . . . . . . . . . . . . . . . . . . . . . . . 3-12
Finding a Contact . . . . . . . . . . . . . . . . . . . . . . . . . . . . . . . . . . . . . . . . . . . . . . . . . . . . . . . . . . . . . . . . . . . . 3-13
Beaming Contacts . . . . . . . . . . . . . . . . . . . . . . . . . . . . . . . . . . . . . . . . . . . . . . . . . . . . . . . . . . . . . . . . . . . 3-13
Using the Summary Window . . . . . . . . . . . . . . . . . . . . . . . . . . . . . . . . . . . . . . . . . . . . . . . . . . . . . . . . . . . 3-13
Tasks. . . . . . . . . . . . . . . . . . . . . . . . . . . . . . . . . . . . . . . . . . . . . . . . . . . . . . . . . . . . . . . . . . . . . . . . . . . . . . . . . . 3-14
Creating a Task. . . . . . . . . . . . . . . . . . . . . . . . . . . . . . . . . . . . . . . . . . . . . . . . . . . . . . . . . . . . . . . . . . . . . . 3-14
Editing a Task . . . . . . . . . . . . . . . . . . . . . . . . . . . . . . . . . . . . . . . . . . . . . . . . . . . . . . . . . . . . . . . . . . . . . . .3-16
Deleting a Task. . . . . . . . . . . . . . . . . . . . . . . . . . . . . . . . . . . . . . . . . . . . . . . . . . . . . . . . . . . . . . . . . . . . . . 3-16
Beaming Tasks . . . . . . . . . . . . . . . . . . . . . . . . . . . . . . . . . . . . . . . . . . . . . . . . . . . . . . . . . . . . . . . . . . . . . . 3-16
Using the Summary Window . . . . . . . . . . . . . . . . . . . . . . . . . . . . . . . . . . . . . . . . . . . . . . . . . . . . . . . . . . . 3-17
Configuring Tasks. . . . . . . . . . . . . . . . . . . . . . . . . . . . . . . . . . . . . . . . . . . . . . . . . . . . . . . . . . . . . . . . . . . . 3-17
Notes . . . . . . . . . . . . . . . . . . . . . . . . . . . . . . . . . . . . . . . . . . . . . . . . . . . . . . . . . . . . . . . . . . . . . . . . . . . . . . . . . 3-19
Creating a Note . . . . . . . . . . . . . . . . . . . . . . . . . . . . . . . . . . . . . . . . . . . . . . . . . . . . . . . . . . . . . . . . . . . . . 3-20
Creating a Template. . . . . . . . . . . . . . . . . . . . . . . . . . . . . . . . . . . . . . . . . . . . . . . . . . . . . . . . . . . . . . . . . . 3-21
3-2 Microsoft Applications User Guide for Symbol Devices
Editing a Note. . . . . . . . . . . . . . . . . . . . . . . . . . . . . . . . . . . . . . . . . . . . . . . . . . . . . . . . . . . . . . . . . . . . . . .3-22
Deleting a Note . . . . . . . . . . . . . . . . . . . . . . . . . . . . . . . . . . . . . . . . . . . . . . . . . . . . . . . . . . . . . . . . . . . . .3-22
Beaming Notes . . . . . . . . . . . . . . . . . . . . . . . . . . . . . . . . . . . . . . . . . . . . . . . . . . . . . . . . . . . . . . . . . . . . . .3-22
Configuring Notes. . . . . . . . . . . . . . . . . . . . . . . . . . . . . . . . . . . . . . . . . . . . . . . . . . . . . . . . . . . . . . . . . . . .3-23
Inbox . . . . . . . . . . . . . . . . . . . . . . . . . . . . . . . . . . . . . . . . . . . . . . . . . . . . . . . . . . . . . . . . . . . . . . . . . . . . . . . . . .3-24
Synchronizing E-mail Messages. . . . . . . . . . . . . . . . . . . . . . . . . . . . . . . . . . . . . . . . . . . . . . . . . . . . . . . . .3-24
Connecting Directly to an E-mail Server . . . . . . . . . . . . . . . . . . . . . . . . . . . . . . . . . . . . . . . . . . . . . . . . . .3-24
Setting Up an E-mail Service . . . . . . . . . . . . . . . . . . . . . . . . . . . . . . . . . . . . . . . . . . . . . . . . . . . . . . . . . . .3-25
Deleting Accounts . . . . . . . . . . . . . . . . . . . . . . . . . . . . . . . . . . . . . . . . . . . . . . . . . . . . . . . . . . . . . . . . . . .3-26
Downloading Messages. . . . . . . . . . . . . . . . . . . . . . . . . . . . . . . . . . . . . . . . . . . . . . . . . . . . . . . . . . . . . . .3-26
Creating E-mail Messages . . . . . . . . . . . . . . . . . . . . . . . . . . . . . . . . . . . . . . . . . . . . . . . . . . . . . . . . . . . . .3-28
Disconnecting . . . . . . . . . . . . . . . . . . . . . . . . . . . . . . . . . . . . . . . . . . . . . . . . . . . . . . . . . . . . . . . . . . . . . . .3-29
Managing E-mail Messages and Folders. . . . . . . . . . . . . . . . . . . . . . . . . . . . . . . . . . . . . . . . . . . . . . . . . .3-30
Configuring Global Accounts . . . . . . . . . . . . . . . . . . . . . . . . . . . . . . . . . . . . . . . . . . . . . . . . . . . . . . . . . . .3-31
Pocket Word . . . . . . . . . . . . . . . . . . . . . . . . . . . . . . . . . . . . . . . . . . . . . . . . . . . . . . . . . . . . . . . . . . . . . . . . . . . .3-34
Creating a Document . . . . . . . . . . . . . . . . . . . . . . . . . . . . . . . . . . . . . . . . . . . . . . . . . . . . . . . . . . . . . . . . .3-35
Editing a Document . . . . . . . . . . . . . . . . . . . . . . . . . . . . . . . . . . . . . . . . . . . . . . . . . . . . . . . . . . . . . . . . . .3-37
Deleting a Document . . . . . . . . . . . . . . . . . . . . . . . . . . . . . . . . . . . . . . . . . . . . . . . . . . . . . . . . . . . . . . . . .3-37
Beaming Documents. . . . . . . . . . . . . . . . . . . . . . . . . . . . . . . . . . . . . . . . . . . . . . . . . . . . . . . . . . . . . . . . . .3-37
Pocket Word Input Methods. . . . . . . . . . . . . . . . . . . . . . . . . . . . . . . . . . . . . . . . . . . . . . . . . . . . . . . . . . . .3-38
Formatting Text and Drawings . . . . . . . . . . . . . . . . . . . . . . . . . . . . . . . . . . . . . . . . . . . . . . . . . . . . . . . . . .3-39
Formatting Paragraphs . . . . . . . . . . . . . . . . . . . . . . . . . . . . . . . . . . . . . . . . . . . . . . . . . . . . . . . . . . . . . . . .3-40
Finding and Replacing Text . . . . . . . . . . . . . . . . . . . . . . . . . . . . . . . . . . . . . . . . . . . . . . . . . . . . . . . . . . . .3-41
Configuring Files. . . . . . . . . . . . . . . . . . . . . . . . . . . . . . . . . . . . . . . . . . . . . . . . . . . . . . . . . . . . . . . . . . . . .3-42
Pocket Excel . . . . . . . . . . . . . . . . . . . . . . . . . . . . . . . . . . . . . . . . . . . . . . . . . . . . . . . . . . . . . . . . . . . . . . . . . . . .3-43
Tips for Working in Pocket Excel . . . . . . . . . . . . . . . . . . . . . . . . . . . . . . . . . . . . . . . . . . . . . . . . . . . . . . . .3-43
Creating a Workbook . . . . . . . . . . . . . . . . . . . . . . . . . . . . . . . . . . . . . . . . . . . . . . . . . . . . . . . . . . . . . . . . .3-44
Editing a Workbook . . . . . . . . . . . . . . . . . . . . . . . . . . . . . . . . . . . . . . . . . . . . . . . . . . . . . . . . . . . . . . . . . .3-45
Deleting a Workbook . . . . . . . . . . . . . . . . . . . . . . . . . . . . . . . . . . . . . . . . . . . . . . . . . . . . . . . . . . . . . . . . .3-45
Beaming Workbooks. . . . . . . . . . . . . . . . . . . . . . . . . . . . . . . . . . . . . . . . . . . . . . . . . . . . . . . . . . . . . . . . . .3-46
Formatting Workbooks . . . . . . . . . . . . . . . . . . . . . . . . . . . . . . . . . . . . . . . . . . . . . . . . . . . . . . . . . . . . . . . .3-46
Finding and Replacing Text . . . . . . . . . . . . . . . . . . . . . . . . . . . . . . . . . . . . . . . . . . . . . . . . . . . . . . . . . . . .3-48
Configuring Files. . . . . . . . . . . . . . . . . . . . . . . . . . . . . . . . . . . . . . . . . . . . . . . . . . . . . . . . . . . . . . . . . . . . .3-49
MSN Messenger. . . . . . . . . . . . . . . . . . . . . . . . . . . . . . . . . . . . . . . . . . . . . . . . . . . . . . . . . . . . . . . . . . . . . . . . .3-50
Setting Up an Account . . . . . . . . . . . . . . . . . . . . . . . . . . . . . . . . . . . . . . . . . . . . . . . . . . . . . . . . . . . . . . . .3-50
Working with Contacts. . . . . . . . . . . . . . . . . . . . . . . . . . . . . . . . . . . . . . . . . . . . . . . . . . . . . . . . . . . . . . . .3-51
Adding a Contact . . . . . . . . . . . . . . . . . . . . . . . . . . . . . . . . . . . . . . . . . . . . . . . . . . . . . . . . . . . . . . . . . . . .3-52
Deleting a Contact . . . . . . . . . . . . . . . . . . . . . . . . . . . . . . . . . . . . . . . . . . . . . . . . . . . . . . . . . . . . . . . . . . .3-52
Chatting with Contacts. . . . . . . . . . . . . . . . . . . . . . . . . . . . . . . . . . . . . . . . . . . . . . . . . . . . . . . . . . . . . . . .3-52
Managing Contacts . . . . . . . . . . . . . . . . . . . . . . . . . . . . . . . . . . . . . . . . . . . . . . . . . . . . . . . . . . . . . . . . . .3-53
Media Player. . . . . . . . . . . . . . . . . . . . . . . . . . . . . . . . . . . . . . . . . . . . . . . . . . . . . . . . . . . . . . . . . . . . . . . . . . . .3-55
Pictures . . . . . . . . . . . . . . . . . . . . . . . . . . . . . . . . . . . . . . . . . . . . . . . . . . . . . . . . . . . . . . . . . . . . . . . . . . . . . . . .3-56
Viewing Pictures. . . . . . . . . . . . . . . . . . . . . . . . . . . . . . . . . . . . . . . . . . . . . . . . . . . . . . . . . . . . . . . . . . . . .3-56
Viewing a Slideshow of Pictures . . . . . . . . . . . . . . . . . . . . . . . . . . . . . . . . . . . . . . . . . . . . . . . . . . . . . . . .3-56
Copying Pictures to the Device. . . . . . . . . . . . . . . . . . . . . . . . . . . . . . . . . . . . . . . . . . . . . . . . . . . . . . . . . .3-56
Editing Pictures. . . . . . . . . . . . . . . . . . . . . . . . . . . . . . . . . . . . . . . . . . . . . . . . . . . . . . . . . . . . . . . . . . . . . .3-56
Sending Pictures. . . . . . . . . . . . . . . . . . . . . . . . . . . . . . . . . . . . . . . . . . . . . . . . . . . . . . . . . . . . . . . . . . . . .3-57
Setting a Picture as Background . . . . . . . . . . . . . . . . . . . . . . . . . . . . . . . . . . . . . . . . . . . . . . . . . . . . . . . .3-57
Mobile 2003 Applications 3-3
Pocket Internet Explorer . . . . . . . . . . . . . . . . . . . . . . . . . . . . . . . . . . . . . . . . . . . . . . . . . . . . . . . . . . . . . . . . . . .3-58
Mobile Favorites. . . . . . . . . . . . . . . . . . . . . . . . . . . . . . . . . . . . . . . . . . . . . . . . . . . . . . . . . . . . . . . . . . . . .3-58
Using Pocket Internet Explorer . . . . . . . . . . . . . . . . . . . . . . . . . . . . . . . . . . . . . . . . . . . . . . . . . . . . . . . . . .3-59
3-4 Microsoft Applications User Guide for Symbol Devices
Mobile 2003 Applications 3-5
Calendar
For Windows Mobile 2003 devices, use Calendar to schedule appointments such as meetings. View appointments in different ways
(Agenda, Day, Week, Month, and Year) and easily change views using the View icons.
Tap to go to today
Tap to display or edit the
appointment details
Tap to create a new appointment
Figure 3-1. Calendar Window
Check appointments in different views by tapping the icons described in Table 3-1 within an appointment.
Table 3-1. Appointment Views
Icon
View
Description
Agenda
Upcoming appointments appear in bold, past appointments do not.
Day
View the day’s schedule in 30-minute blocks.
Week
View the week’s schedule in one-hour blocks.
Month
View the month’s schedule in 12-hour blocks.
Year
View a year calendar.
3-6 Microsoft Applications User Guide for Symbol Devices
Creating Appointments
To create an appointment:
1. Tap Start - Calendar.
2. Tap New. When necessary, hide the input panel or use the scroll bar to see all available fields.
Figure 3-2. Entering an Appointment
3. Tap in the Subject: text box and use the input panel to enter a subject, or tap the arrow next to the Subject: text box to select
pre-defined text.
4. Tap in the Location: text box and use the input panel to enter a location, or tap the arrow next to the Location: text box to
select a pre-defined location.
5. Tap the date in the Starts: and Ends: fields to select new dates from a pop-up calendar. Tap the time in these fields to enter
a time, or tap the arrow next to the time to select a time.
6. Tap the All Day: drop-down list to select whether the appointment lasts all day.
7. If the appointment occurs more than once, tap the Occurs: field and select an option from the drop-down list, or select Edit
pattern... in the drop-down list to create a new pattern option.
8. In the Reminder: field, select Remind me to receive a reminder notification for the appointment according to the options set
in Start - Settings - Personal tab -Sounds & Notifications. Tap the number field below Remind me to select the length of time
before the appointment to be reminded. Tap the time unit field next to the number field to select minutes, hours, days, or
weeks.
Mobile 2003 Applications 3-7
9. To assign the appointment to a category, tap Categories.
Figure 3-3. Calendar Categories - Select Tab
10. To select one or more categories for the appointment, select their check boxes. This allows displaying appointments by
category in the appointment list.
11. Select the Add/Delete tab to add and delete categories.
Figure 3-4. Calendar Categories - Add/Delete Tab
12. To add a category, enter the name for the category in the text box, and tap Add. This category is automatically selected on
the Select tab.
13. To delete a category, select the category from the list and tap Delete.
14. Tap ok.
15. Tap in the Attendees: field to select attendees from the contacts list.
16. Tap the Status: drop-down list to select how the appointment appears to others.
17. Tap the Sensitivity: drop-down list and select Private to mark the appointment as private.
18. To add notes, such as maps and directions, tap the Notes tab. Enter text, draw, or create a recording. For more information
on creating notes, see Notes on page 3-19.
19. When finished, tap ok to save the appointment and return to the Calendar.
3-8 Microsoft Applications User Guide for Symbol Devices
Editing an Appointment
To make changes to an appointment:
1.
2.
3.
4.
Tap Start - Calendar.
Tap the appointment in the list to open it.
Tap Edit and make the changes. See Creating Appointments.
Tap ok.
Deleting an Appointment
To delete an appointment:
1. Tap Start - Calendar.
2. Tap and hold the appointment in the list and select Delete Appointment from the pop-up menu, or select the appointment
and tap Tools - Delete Appointment.
Beaming Appointments
To beam an appointment to another device:
1.
2.
3.
4.
Tap Start - Calendar.
Align the infrared ports on the devices.
Tap and hold the appointment, and select Beam Appointment.
Select Infrared in the To beam, select a device field. After sending the file a message appears indicating successful data
transfer.
Using the Summary Window
To view a summary window for an appointment:
1. Tap Start - Calendar.
2. Tap the appointment.
View appointment details
View notes
Tap to change
appointment
Figure 3-5. Appointment Summary Window
Mobile 2003 Applications 3-9
Creating Meeting Requests
Use Calendar to set up meetings with users of Outlook or Pocket Outlook. The meeting notice is created automatically and sent upon
message synchronization or connecting to the e-mail server. Indicate how to send meeting requests by tapping Start - Calendar - Tools
- Options - Appointments tab. See Configuring Calendar Views. If sending and receiving e-mail messages through ActiveSync, select
ActiveSync.
To schedule a meeting:
1.
2.
3.
4.
5.
6.
Tap Start - Calendar.
Create an appointment. See Creating Appointments on page 3-6.
In the appointment details, hide the input panel or scroll down, then tap Attendees.
From the list of e-mail addresses entered in Contacts, select the meeting attendees.
Tap ok.
Tap ok to place the meeting request in the Outbox folder. For more information on sending and receiving meeting requests,
see Calendar Help and Inbox Help on the device.
Configuring Calendar Views
To configure calendar views:
1. Tap Start - Calendar - Tools - Options.
Figure 3-6. Calendar Options
2.
3.
4.
5.
6.
7.
8.
9.
10.
On the General tab, select the first day of the week to display from the drop-down list.
Select the number of days to appear in the Week view: drop-down list.
Select the Show half-hour slots check box to appear in Agenda, Day, and Week views
Select the Show week numbers check box to appear in Week and Month views.
Tap the Appointments tab.
Select the Set reminders for new items check box to set default reminder times.
Select the amount of time before an appointment to issue reminders using the number and time unit drop-down lists.
Next to Show icons: select appointment icons to appear.
Select an item from the Send meeting requests via: drop-down list to indicate how to send appointment requests.
3-10 Microsoft Applications User Guide for Symbol Devices
Contacts
For Windows Mobile 2003 devices, Contacts maintains a list of associates and friends so information is easily accessible at home or
on the road. Use the infrared (IR) port to share Contacts information with other users.
Select the category of contacts
to display in the list
Tap and enter part of a name to
quickly find it in the list
Tap to see information of
contacts whose last names
begin with that letter
Tap to display or edit the
contact details
Tap and hold to display a
pop-up menu of actions
Tap to create a new contact
Figure 3-7. Contacts Window
Changing Contact Options
1. To view the contact list by company name rather than by the contacts’ names, tap Start - Programs - Contacts - View - By
Company.
2. To change the way information is listed, tap Tools - Options.
Figure 3-8. Contacts - Options Window
3. Clear the Show ABC tabs check box to increase the space available for listing contacts.
4. Select the Show contact names only check box to hide information other than the contacts’ names in the list.
5. Enter an Area code: and select a Country/Region: to use when creating new contacts.
Mobile 2003 Applications 3-11
Creating a Contact
To create a contact:
1. Tap Start - Programs - Contacts.
2. Tap New.
Tap to return to the contact list (the
contact is saved automatically)
Scroll to see more fields
Notes is a good place for
maps and directions
Figure 3-9. Creating a Contact
3. Using the input panel, tap in each field and enter contact information as needed. Scroll down to see all fields.
Tap the arrow next to the Name: or Home addr: field to open a window for adding more details.
4. To assign the contact to a category, tap Categories.
Figure 3-10. Contact Categories - Select Tab
5. To select one or more categories for the contact, select their check boxes. This allows displaying contacts by category in the
contact list.
3-12 Microsoft Applications User Guide for Symbol Devices
6. Tap the Add/Delete tab to add and delete categories.
Figure 3-11. Contact Categories - Add/Delete Tab
7. To add a category, enter the name for the category in the text box, and tap Add. This category is automatically selected on
the Select tab.
8. To delete a category, select the category and tap Delete.
9. Tap ok.
10. To add notes, tap the Notes tab and enter text, draw, or create a recording. For more information on creating notes, see Notes
on page 3-19.
11. When finished, tap ok to return to the contact list.
Editing a Contact
To make changes to a contact:
1.
2.
3.
4.
Tap Start - Programs - Contacts.
Tap the contact in the contact list to open it.
Tap Edit and make the changes. See Creating a Contact on page 3-11.
Tap ok.
Deleting a Contact
To delete a contact:
1. Tap Start - Programs - Contacts.
2. Tap and hold the contact in the contact list and select Delete Contact from the pop-up menu, or select the contact and tap
Tools - Delete Contact.
Mobile 2003 Applications 3-13
Finding a Contact
Find a contact in one of the following ways:
•
•
•
•
In the contact list, enter a contact name in the Find a name text box under the status bar. To show all contacts again, tap the
left arrow button to the right of the box to clear the text.
In the drop-down list, tap the category list (labeled All Contacts by default) and select the type of contact to display. To show
all contacts again, select All Contacts. To view a contact not assigned to a category, select No Categories.
To view the names of associated companies, in the contact list, tap View - By Company. The number of contacts that work
for that company appears to the right of the company name.
Tap Start - Programs - Find, enter the contact name, select Contacts for the type, then tap Go.
Beaming Contacts
To beam a contact to another device:
1. Tap Start - Programs - Contacts.
2. Align the infrared ports on the devices.
3. Tap and hold the contact, and select Beam Contact.
To beam several contacts, tap and drag to select the contacts, then tap Tools - Beam Contacts.
4. Select Infrared in the To beam, select a device field. After sending the file a message appears indicating successful data
transfer.
Using the Summary Window
To view a summary window for a contact:
1. Tap Start - Programs - Contacts.
2. Tap a contact in the contact list.
View contact details
Tap to view notes
Tap to change contact information
Figure 3-12. Contacts Summary Window
3-14 Microsoft Applications User Guide for Symbol Devices
Tasks
For Windows Mobile 2003 devices, use Tasks to keep a “to do” list.
Select the category of tasks to
display in the list
Select the sort
order of the list
Tap to display or edit the
task details
Tap and hold to display a
pop-up menu of actions
Tap to create a new task
Figure 3-13. Task Window
Creating a Task
To create a task:
1. Tap Start - Programs - Tasks.
2. Tap New. When necessary, hide the input panel or use the scroll bar to see all available fields.
Tap to return to the task list (the task
is saved automatically)
Tap to choose from
predefined subjects
Notes is a good place for
task details
Figure 3-14. Creating a Task
3. Tap in the Subject: text box and use the input panel to enter a subject, or tap the arrow next to the Subject: text box to select
pre-defined text.
4. Tap in the Priority: field and select a priority level.
5. Tap in the Status: field and select whether the task is completed or not.
Mobile 2003 Applications 3-15
6. Tap the date in the Starts: and Due: fields to select these dates from a pop-up calendar.
7. If the task occurs more than once, tap the Occurs: field and select an option from the drop-down list, or select Edit pattern...
in the drop-down list to create a new pattern option.
8. In the Reminder: field, select Remind me to receive a reminder notification for the task according to the options set in Start
- Settings - Personal tab -Sounds & Notifications. Tap the date field below Remind me to select the date to issue the
reminder.
9. To assign the task to a category, tap Categories.
Figure 3-15. Task Categories - Select Tab
10. To select one or more categories for the task, select their check boxes. This allows displaying tasks by category in the task
list.
11. Tap the Add/Delete tab to add and delete categories.
Figure 3-16. Task Categories - Add/Delete Tab
12. To add a category, enter the name for the category in the text box, and tap Add. This category is automatically selected on
the Select tab.
13. To delete a category, select the category and tap Delete.
14. Tap ok.
3-16 Microsoft Applications User Guide for Symbol Devices
15. Tap the Sensitivity: drop-down list and select Private to mark the appointment as private.
16. To add notes, tap the Notes tab and enter text, draw, or create a recording. For more information on creating notes, see Notes
on page 3-19.
17. Tap ok to save the task and return to the task list.
To create a task with only a subject, tap Tools - Entry Bar. Then tap in the Tap here to add a new task field
and enter task information.
Note
Editing a Task
To make changes to a task:
1.
2.
3.
4.
Tap Start - Programs - Tasks.
Tap the task in the task list to open it.
Tap Edit and make the changes. See Creating a Task on page 3-14.
Tap ok.
Deleting a Task
To delete an task:
1. Tap Start - Programs - Tasks.
2. Tap and hold the task in the task list and select Delete Task from the pop-up menu, or select the task and tap Tools - Delete
Task.
Beaming Tasks
To beam a task to another device:
1. Tap Start - Programs - Tasks.
2. Align the infrared ports on the devices.
3. Tap and hold the task and select Beam Task, or select the task and tap Tools - Beam Task... .
To beam several tasks, tap and drag to select the tasks, then tap Tools - Beam Task... .
4. Select Infrared in the To beam, select a device field. After sending the file a message appears indicating successful data
transfer.
Mobile 2003 Applications 3-17
Using the Summary Window
To view a summary window for an appointment:
1. Tap Start - Programs - Tasks.
2. Tap a task in the task list.
View task details
Tap to show and hide additional
summary information
View notes
Tap to change task
Figure 3-17. Task Summary Window
Configuring Tasks
To change how tasks appear:
1. Tap the Show drop-down list under the status bar (labeled All Tasks by default), then select an option to show all tasks or
tasks within a category.
2. Tap the Sort By drop-down list under the status bar (labeled Priority by default), then select an option to sort the tasks by
status, priority, subject, start date, or due date.
Figure 3-18. Tasks - Show and Sort By Lists
3-18 Microsoft Applications User Guide for Symbol Devices
3. Tap Tools - Options.
Figure 3-19. Tasks - Tools - Options Window
4. Select the Set reminders for new items check box to select whether to enable reminders for new items.
5. Select the Show start and due dates check box to display start and due dates for tasks.
Mobile 2003 Applications 3-19
Notes
For Windows Mobile 2003 devices, use Notes to capture thoughts, reminders, ideas, drawings, and phone numbers. Create a written
note or a recording, or include a recording in a note. If a note is open when creating the recording, it is included in the note as an icon.
If the note list is displayed, it is created as a stand-alone recording.
Tap to change the
sort order of the list
Tap to open a note or play
a recording
Tap and hold to display a
pop-up menu of actions
Tap to create a new contact
Tap to show or hide the
Recording toolbar
Figure 3-20. Notes Window
To limit the notes displayed, tap the Folder drop-down list under the status bar (labeled All Folders by default), then select an option
to show notes within all folders or within a specified folder. Select Add/Delete... from the Folder drop-down list to add or delete a
folder.
3-20 Microsoft Applications User Guide for Symbol Devices
Creating a Note
To create a note:
1. Tap Start - Programs - Notes.
2. Tap New.
3. Create a note by writing, drawing, typing, and recording. For more information about using the input panel, writing and
drawing on the screen, and creating recordings, see Entering Information on page 1-14.
Tap to return to the note list (the note
is saved automatically)
Tap to show or hide
the input panel
Tap to write on the screen
Tap to add a recording to
the note
Figure 3-21. Creating a Note
4. Tap ok to save the note and return to the Notes list.
Mobile 2003 Applications 3-21
Creating a Template
To create a template for notes:
1. Tap Start - Programs - Notes.
2. Create a note. See Creating a Note on page 3-20.
3. In the Notes list, tap and hold the note, then select Rename/Move... .
Figure 3-22. Saving a Note in the Templates Folder
4. In the Folder: drop-down list, select Templates to store the note in the Templates folder.
5. Tap ok.
Creating a Note Using a Template
To create a note based on a template:
1.
2.
3.
4.
5.
6.
7.
Tap Start - Programs - Notes.
Tap the Show list (labeled All Folders by default), then select Templates.
Tap the template to use, and make the changes.
Tap ok to close the note.
In the Notes list, tap and hold the note, then select Rename/Move... .
Enter a new name, folder, and location for the note.
Tap ok.
3-22 Microsoft Applications User Guide for Symbol Devices
Editing a Note
To make changes to a note:
1.
2.
3.
4.
5.
6.
7.
8.
Tap Start - Programs - Notes.
Tap the note in the Notes list to open it.
Make the changes.
To rename the note, tap Tools - Rename/Move... .
Enter the new name in the Name: field. See Figure 3-22 on page 3-21.
To move the note to a different folder, in the Folder: drop-down list, select the new folder.
Tap ok.
Tap ok.
Deleting a Note
To delete a note:
1. Tap Start - Programs - Notes.
2. Tap and hold the note in the Notes list and select Delete from the pop-up menu, or select the note and tap Tools - Delete
Note... .
Beaming Notes
To beam a note to another device:
1. Tap Start - Programs - Notes.
2. Align the infrared ports on the devices.
3. Tap and hold the note and select Beam File..., or select the note and tap Tools - Beam File... .
To beam several notes, tap, drag, and hold to select the notes, then select Beam File... .
4. Select Infrared in the To beam, select a device field. After sending the file a message appears indicating successful data
transfer.
Mobile 2003 Applications 3-23
Configuring Notes
To configure Notes:
1. Tap Start - Programs - Notes.
2. Tap Tools - Options.
Figure 3-23. Notes - Options Window
3.
4.
5.
6.
In the Default mode: drop-down list, set the note taking mode (writing or typing).
In the Default template: drop-down list, select which template to use as a default when creating notes.
In the Save to: drop-down list, select where to save the note (in main memory or in the Platform or Application folder).
In the Record button action: drop-down list, select whether pressing the record hardware button switches to the Notes
application or remains in the current application.
7. To change input options, tap Global Input Options. See Input on page 2-8.
3-24 Microsoft Applications User Guide for Symbol Devices
Inbox
For Windows Mobile 2003 devices, use Inbox to send and receive e-mail messages in the following ways:
•
•
Synchronize e-mail messages with Microsoft Exchange or Outlook on the host computer.
Send and receive e-mail messages by connecting directly to an e-mail server through an Internet service provider (ISP) or a
network.
Synchronizing E-mail Messages
To synchronize e-mail messages, first enable Inbox synchronization in ActiveSync options. For information on enabling Inbox
synchronization, see ActiveSync Help on the host computer.
During synchronization:
•
•
•
•
E-mail messages are copied from the Inbox folder of Exchange or Outlook on the host computer to the Inbox folder of the
Outlook e-mail account on the device. By default, you receive messages from the last three days only, the first 100 lines of
each message, and file attachments of less than 100 KB in size. The original messages remain on the host computer.
E-mail messages in the Outbox folder on the device are transferred to Exchange or Outlook, then sent from those programs.
Messages deleted on the device are deleted from the host computer.
E-mail messages in subfolders selected for synchronization in ActiveSync on the host computer are transferred.
Connecting Directly to an E-mail Server
Set up a connection to an e-mail server to send and receive e-mail messages using a network connection and Inbox on the device.
The ISP or network must use a POP3 or IMAP4 e-mail server and an SMTP gateway.
•
•
•
•
•
Connecting to the e-mail server downloads new messages to the device Inbox folder, sends messages in the device Outbox
folder, and removes messages deleted on the e-mail server from the device Inbox.
Messages received directly from an e-mail server are linked to the e-mail server rather than the host computer. Deleting a
message on the device also deletes it from the e-mail server on the next connection.
When working online, read and respond to messages while connected to the e-mail server. Messages are sent upon tapping
Send, which saves space on the device.
When working offline, after downloading new message headers or partial messages, disconnect from the e-mail server, then
decide which messages to download completely. On the next connection, Inbox downloads the complete messages marked
for retrieval and sends new messages.
If desired, use multiple e-mail services to receive messages. For each e-mail service, first set up and name the e-mail service.
If using the same service to connect to different mailboxes, set up and name each mailbox connection.
Mobile 2003 Applications 3-25
Setting Up an E-mail Service
To set up a POP3 or IMAP4 e-mail account:
1. Tap Start - Messaging.
2. Tap Accounts - New Account.
Figure 3-24. Inbox - Accounts Menu
3. Follow the instructions in the wizard. For an explanation of a window, tap Start - Help.
Changing Account Options
To change options for an e-mail account:
1. Tap Start - Messaging.
2. Tap Accounts - Accounts or Tools - Options.
Figure 3-25. Accounts Options
3. On the Accounts tab, tap the name of the account and follow the instructions in the window.
3-26 Microsoft Applications User Guide for Symbol Devices
Deleting Accounts
To delete an account:
1.
2.
3.
4.
Tap Start - Messaging.
Tap Accounts - Accounts.
Tap and hold the name of the account.
Select Delete.
Downloading Messages
To download copies of messages to the device:
1. Tap Start - Messaging.
2. If using ActiveSync for downloading, begin synchronization.
If connecting to an e-mail server, tap Accounts and select the correct account (selection is indicated by a bullet). Tap
Accounts - Connect.
This downloads new messages to the device Inbox folder, sends messages in the device Outbox folder, and removes
messages that were deleted on the e-mail server or host computer from the device Inbox.
Show menu
Sort by menu
Tap and hold to display a
pop-up menu of actions
Tap to connect and to send
and receive e-mail
Tap to connect to the
selected service
Figure 3-26. Inbox Window
3. The most recently received messages appear at the top of the list. To change the sort order, tap the Sort by menu (labeled
From by default), and select to sort by Received Date or alphabetically by Subject.
4. To view items within a specific folder, tap the Show menu (labeled Inbox by default), and select the folder.
Mobile 2003 Applications 3-27
5. Tap a message in the list to open it. Unread messages appear in bold.
Close icon
Delete icon
Tap to view the previous or
next message
Reply icon
Figure 3-27. Viewing a Message
6.
7.
8.
9.
To reply to the message, tap the Reply icon and create the message. See Creating E-mail Messages on page 3-28.
To delete the message, tap the Delete icon.
To see the previous or next message, tap the left or right arrow icon in the command bar.
Tap the Close icon to close the message and return to the message list.
Retrieving Complete Messages
When connecting to the e-mail server or synchronizing with the host computer, Inbox downloads by default only messages from the
last three days, the first 100 lines of each new message, and file attachments of less than 100 KB in size.
To mark the messages to retrieve completely (including attachments if set up to do so in the e-mail account) on the next
synchronization or connection to the e-mail server:
•
•
In the message list, tap and hold the message to retrieve. On the pop-up menu, select Mark for Download. The icons in the
Inbox message list indicate message status, or
In an open message, tap Edit - Mark for Download.
Downloading Attachments
An attachment to an e-mail appears as an icon at the bottom of the message if it was fully downloaded. Tap the icon to open the
attachment. If the attachment was not downloaded, mark it for downloading on the next connection.
If using ActiveSync to download messages:
1. In ActiveSync on the host computer, select File - Mobile Device, then select the device.
2. Click Tools - Options.
3. Select the message account, click Settings, then select Include File Attachments.
3-28 Microsoft Applications User Guide for Symbol Devices
If using an IMAP4 account:
1.
2.
3.
4.
5.
6.
7.
Tap Start - Messaging on the device.
Tap Accounts - Accounts... .
Select IMAP4.
Tap Next until Server Information appears.
Tap Options.
Tap Next twice.
Select Get full copy of messages and When getting full copy, get attachments.
Creating E-mail Messages
To create an e-mail message:
1. Tap Start - Messaging.
2. Tap New.
3. In the To: field, enter an e-mail address of one or more recipients, separating each with a semicolon, or select a name from
the contact list by tapping the Address Book icon. All e-mail addresses entered in the e-mail fields in Contacts appear in the
Address Book.
Tap to show or hide the
complete header
Voice Bar icon
Address Book icon
Figure 3-28. Creating a Message
4. Enter the message. To enter preset or frequently used messages, tap My Text and select a message. To include a recording,
tap the Voice Bar icon. See Recording a Message on page 1-22.
Mobile 2003 Applications 3-29
5. Tap Edit to cut, copy, paste, clear, select all text, save a copy of the message in the drafts folder for later, or cancel the
message.
Figure 3-29. Inbox - Edit and Tools Menus
6. Tap Tools to spell check a message, check recipients names against the contacts list, or change the language of the message.
7. To add an attachment, tap Tools - Add Attachment... .
Figure 3-30. Adding an Attachment
8. In the Folder: drop-down list, select the folder that contains the file to attach.
9. Tap the file to attach it to the message.
10. Tap Send when finished. If working offline, the message is transferred to the Outbox folder and sent on the next
synchronization.
Disconnecting
If using a POP3 or IMAP4 e-mail account, to disconnect (required before adding a new account):
1. Tap Start - Messaging.
2. Tap Accounts - Disconnect to end a connection.
3-30 Microsoft Applications User Guide for Symbol Devices
Managing E-mail Messages and Folders
By default, messages are displayed in one of five folders for each account created: Inbox, Deleted Items, Drafts, Outbox, and Sent
Items. The Deleted Items folder contains messages that have been deleted on the device. The behavior of the Deleted and Sent Items
folders depends on the options selected. See Configuring Global Accounts on page 3-31 to select the options.
Folder Behavior with ActiveSync and Direct Connection to Server
The behavior of the folders created depends on whether you are using Outlook e-mail with ActiveSync, POP3, or IMAP4.
•
•
•
If using ActiveSync, e-mail messages in the Inbox folder in Outlook are automatically synchronized with the device. Select
to synchronize additional folders by designating them for ActiveSync. The folders created and the messages moved are
mirrored on the server. For example, if you move two messages from the Inbox folder to a folder named Family, and you have
designated Family for synchronization, the server creates a copy of the Family folder and copies the messages into that
folder. Then read the messages while away from the host computer.
If using POP3 and you move e-mail messages to another folder, the link is broken between the messages on the device and
their copies on the mail server. Upon the next connection, the mail server notes the messages missing from the device Inbox
and deletes them from the server. This prevents having duplicate copies of a message, but it also means that there is no
longer access to messages moved to folders created from anywhere except the device.
If using IMAP4, the folders created and the e-mail messages moved are mirrored on the server. Therefore, messages are
available upon connection to the mail server, whether it is from the device or host computer. This synchronization of folders
occurs when connecting to the mail server, creating new folders, or renaming/deleting folders when connected.
Managing Folders
If using POP3 or IMAP4, to change folder options:
1. Tap Start - Messaging.
2. Tap Tools - Manage Folders.
Figure 3-31. Inbox Manage Folders Window
3. As needed, manage folders as follows:
• Tap New to create a new folder under the selected folder.
• To change a folder name, tap the folder, then tap Rename. Note that default folder names cannot be changed.
• To move a message to another folder, in the message list, tap and hold the message, then select Move to on the pop-up
menu.
Mobile 2003 Applications 3-31
• To delete a folder and its contents, tap the Delete icon
.
• Tap Tools - Options to set folder synchronization settings for specific folders.
Configuring Global Accounts
To configure accounts:
1. Tap Start - Messaging.
2. Tap Tools - Options to modify how messages appear on-screen.
3. To change a signature, tap the Accounts tab.
Figure 3-32. Inbox Options Window - Accounts Tab
4. Tap Signatures... .
Figure 3-33. Inbox Options Window - Accounts Tab, Signatures Window
5.
6.
7.
8.
Select the account to use a signature with from the drop-down list.
Select the Use signature with this account check box and enter the signature in the text box.
Select the Use when replying and forwarding check box to append the signature to replied and forwarded messages.
Tap ok.
3-32 Microsoft Applications User Guide for Symbol Devices
9. Tap the Message tab to customize reply formatting options.
Figure 3-34. Inbox Options Window - Message Tab
10. Select the When replying, include body check box, then the Indent and/or Add a leading character: check box(es) to choose
whether to include the original message in the reply, and how this appears.
11. Select the Keep copy of sent mail in Sent folder check box to track sent messages. Note that this occupies memory on the
device.
12. From the drop-down list, select whether, after deleting a message, to see the next message, show the previous message,
or return to the message list.
13. On the Address tab, use the drop-down list to select which e-mail address book to check in Contacts.
Figure 3-35. Inbox Options Window - Address Tab
14. Many e-mail servers can verify names with an online address book (a directory service) using Lightweight Directory Access
Protocol (LDAP). To have Messaging check a directory service as well as a contact list to verify names entered in the To, Cc,
and Bcc fields, select the mail service in the Verify names using these address books: field (if listed) and tap ok.
Mobile 2003 Applications 3-33
If the mail service is not listed, tap Add... .
Figure 3-36. Inbox Options Window - Address Tab, Add Address Book
15. In the Directory name: and Server: text boxes, enter the LDAP directory and server names.
16. If authentication is needed for the server, select the Authentication is necessary on this server check box, then enter the user
name and password in their respective fields.
17. To check this service when using Messaging, select the Check name against this server check box.
When using synchronization to send and receive messages, disable installed directory services to avoid error
messages that occur when Messaging attempts to verify names against an unconnected service.
Note
18. Tap OK.
19. On the Storage tab, select the Store attachments on storage card check box to save message attachments to a storage card
rather than internal RAM.
Figure 3-37. Inbox Options Window - Storage Tab
20. Select an option from the Empty deleted items: drop-down list to select when items are permanently removed.
3-34 Microsoft Applications User Guide for Symbol Devices
Pocket Word
For Windows Mobile 2003 devices, Pocket Word works with Microsoft Word on the host computer to provide access to copies of
documents. Create new documents on the device, or copy documents from the host computer to the device. Synchronize documents
between the host computer and the device so the most up-to-date information is available in both locations.
Pocket Word contains a list of the files stored on the device. Tap a file in the list to open it. To delete, make copies of, or send a file,
tap and hold a file in the list. Then, select the appropriate action on the pop-up menu.
Select the folder to display its contents
Tap to change the sort
order of the list
Tap to open a document
Tap and hold an item to see a
pop-up menu of actions
Tap to create a new item
Figure 3-38. Pocket Word Window
Mobile 2003 Applications 3-35
Creating a Document
To create a new document in Pocket Word, such as a letter, meeting minutes, or a trip report:
1. Tap Start - Programs - Pocket Word
2. Tap New. If using a template for new documents, that template appears with appropriate formatting applied. See
Configuring Files on page 3-42 to use a template.
3. To select the method of input, tap View, then select Writing, Drawing, Typing, or Recording. See Pocket Word Input Methods
on page 3-38.
Show/Hide Toolbar icon
Figure 3-39. Selecting an Input Method
4. Enter information. See Entering Information on page 1-14.
5. Tap the Show/Hide Toolbar icon to toggle the toolbar on and off. The toolbar provides similar formatting tools as in Microsoft
Word on the host computer.
6. To format text, see Formatting Text and Drawings on page 3-39.
7. To change the zoom magnification, tap View - Zoom. Select the percentage. Select a higher percentage to enter text and a
lower one to see more of the document.
8. Tap ok to close the document and save it under a Word-assigned name. To save the document under a custom name or in a
specific folder:
3-36 Microsoft Applications User Guide for Symbol Devices
9. Tap Tools - File - Save Document As... .
Figure 3-40. Save As Window
10. Enter the new name in the Name: text box.
11. To move the file to a different folder, in the Folder: drop-down list, select the new folder.
12. In the Type: drop-down list, select the file type. A variety of file formats is available, including Word (.doc), Pocket Word
(.psw), Rich Text Format (.rtf), and Plain Text (.txt).
13. In the Location: drop-down list, select where to save the document (in main memory or in the Platform or Application folder).
14. Tap OK.
15. Tap ok.
Mobile 2003 Applications 3-37
Editing a Document
To make changes to a document:
1. Tap Start - Programs - Pocket Word
2. Tap the document in the list to open it.
3. Make the changes. If opening a Word document created on a host computer, tap View - Wrap to Window to see the entire
document.
4. To rename and/or move a file, tap Tools - File - Rename/Move... .
Figure 3-41. Rename/Move Window
5.
6.
7.
8.
9.
Enter the new name in the Name: text box.
To move the file to a different folder, in the Folder: drop-down list, select the new folder.
In the Location: drop-down list, select where to save the file (in main memory or in the Platform or Application folder).
Tap ok.
Tap ok to close the file.
Deleting a Document
To delete a document:
1. Tap Start - Programs - Pocket Word
2. Tap and hold the document in the list and select Delete from the pop-up menu.
Beaming Documents
To beam a document to another device:
1. Tap Start - Programs - Pocket Word
2. Align the infrared ports on the devices.
3. Tap and hold the document and select Beam File..., or select the document and tap Tools - File - Beam Document... .
To beam several documents, tap, drag, and hold to select the documents, then select Beam File... .
4. Select Infrared in the To beam, select a device field. After sending the file a message appears indicating successful data
transfer.
3-38 Microsoft Applications User Guide for Symbol Devices
Pocket Word Input Methods
Following are the input methods used in Pocket Word.
Typing Mode
In typing mode, use the input panel to enter typed text in a document. See Entering Information on page 1-14.
Figure 3-42. Typing Mode
Writing Mode
In writing mode, use the stylus to write directly on the screen. Ruled lines appear as a guide, and the zoom magnification increases
to ease writing. See Writing on the Screen on page 1-19.
With Space button selected,
drag to insert space. An arrow
appears showing the space
direction and size.
Tap to highlight selected text
Pen
button
Space
button
Tap to select formatting options, such
as pen weight and line color
Figure 3-43. Writing Mode
Crossing three ruled lines in a single stylus stroke converts the writing to a drawing, which can be edited and manipulated as
described in the following section.
Written words are converted to graphics (metafiles) when a Pocket Word document is converted to a Word document on the host
computer.
Mobile 2003 Applications 3-39
Drawing Mode
In Drawing mode, use the stylus to draw on the screen. Gridlines appear as a guide. Lift the stylus after the first stroke to display a
drawing box indicating the boundaries of the drawing. Every subsequent stroke within or touching the drawing box becomes part of
the drawing. See Drawing on the Screen on page 1-22.
Resize an object by dragging the
selection handles
Select Shape on the pop-up menu to
convert objects to proper shapes
Figure 3-44. Drawing Mode
Recording Mode
In Recording mode, embed a recording into the document. Recordings are saved as .wav files. See Recording a Message on page 1-22.
Formatting Text and Drawings
To format text or a drawing:
1. Tap Start - Programs - Pocket Word
2. Tap a document in the list to open it.
3. Select the text or drawing. To select text, drag the stylus across the text. To format a drawing, de-select the Pen button,
then tap on the drawing.
4. Tap Edit - Format... .
Figure 3-45. Formatting Text and Drawings
3-40 Microsoft Applications User Guide for Symbol Devices
5.
6.
7.
8.
9.
If formatting text, select the Font: and font Size: from the drop-down lists.
Use the Pen weight: drop-down list to select the pen weight.
To change the color of the font or line, select a color from the Line/Font: drop-down list.
If formatting a drawing, select a fill color from the Fill color: drop-down list.
If formatting text, select the appropriate check boxes to bold, italicize, underline, highlight, or strike through the selected
text.
Formatting Paragraphs
To format a paragraph:
1.
2.
3.
4.
Tap Start - Programs - Pocket Word
Tap a document in the list to open it.
Select the text or paragraph.
Tap Edit - Paragraph... .
Figure 3-46. Formatting Paragraphs
5. Select whether to left-align, right-align, or center the paragraph using the Alignment: drop-down list.
6. Select the Bulleted check box to bullet the selected text.
7. Under Indentation, use the up and down arrows to add indentation to text as needed.
Mobile 2003 Applications 3-41
Finding and Replacing Text
To search a document for text:
1. Tap Start - Programs - Pocket Word
2. Tap a document in the list to open it.
3. Tap Edit - Find/Replace.
Figure 3-47. Finding Text
4.
5.
6.
7.
8.
Enter the text to find in the Find what: text box.
To replace this text with new text in the document, tap Replace... and enter the new text in the Replace with: text box.
Select the Match case check box to find text using the same case specified.
Select the Match whole words only check box to find whole words.
Tap Find. Upon locating the text, select whether to replace the text with the new text, or to search for the next instance.
3-42 Microsoft Applications User Guide for Symbol Devices
Configuring Files
To configure how files are created and saved in Pocket Word:
1. Tap Start - Programs - Pocket Word
2. Tap Tools - Options.
Figure 3-48. Pocket Word Options Window
3.
4.
5.
6.
In the Default template: drop-down list, select which template to use as a default when creating a document.
In the Save to: drop-down list, select where to save the document (in main memory or in the Platform or Application folder).
In the Display in list view: drop-down list, select the types of files to appear in the file list.
Tap ok.
For more information on using Pocket Word, tap Start - Help.
Mobile 2003 Applications 3-43
Pocket Excel
For Windows Mobile 2003 devices, Pocket Excel works with Microsoft Excel on a host computer to provide easy access to copies of
workbooks. Create new workbooks on the device, or copy workbooks from the host computer to the device. Synchronize workbooks
between the host computer and the device to have up-to-date content in both locations.
Pocket Excel lists the files stored on the device. Tap a file in the list to open it. To delete, make copies of, or send a file, tap and hold
a file in the list, then select the appropriate action from the pop-up menu.
Cell contents appear
here as entered
AutoSum icon
Format icon
Zoom icon
Show/Hide Toolbar icon
Figure 3-49. Pocket Excel Window
Tips for Working in Pocket Excel
When working in large worksheets in Pocket Excel:
•
•
•
•
•
•
•
To toggle the toolbar on and off, tap the Show/Hide Toolbar icon or tap View - Toolbar. The toolbar provides fundamental
spreadsheet tools, such as formulas, functions, sorting, and filtering.
Within a workbook, use the Tools menu to insert and format data using similar tools as in Microsoft Excel on the desktop
computer.
To view in full-screen mode to see as much of the worksheet as possible, tap View - Full Screen. To exit full-screen mode,
tap Restore.
To change the zoom magnification, tap View - Zoom. Select the percentage. Select a higher percentage to enter data and a
lower one to see more of the workbook.
Show and hide window elements. Tap View, then select the elements to show or hide.
Freeze panes on a worksheet. First select the cell to freeze panes. Tap View - Freeze Panes. Freeze the top and leftmost panes
in a worksheet to keep row and column labels visible when scrolling through a sheet.
Split panes to view different areas of a large worksheet. Tap View - Split. Drag the split bar to the desired location. To remove
the split, tap View - Remove Split.
3-44 Microsoft Applications User Guide for Symbol Devices
Creating a Workbook
To create a new workbook in Pocket Excel, such as an expense report or mileage log:
1. Tap Start - Programs - Pocket Excel.
2. Tap New. If using a template for new workbooks, that template appears with appropriate formatting applied. See
Configuring Files on page 3-42 to use a template.
3. Enter information in the desired cells using the input panel. See Entering Information on page 1-14.
4. To format the workbook, see Formatting Workbooks on page 3-46.
5. If the workbook contains sensitive information, protect it with a password. Tap Tools - Password, then enter and verify the
password in the text boxes. Opening the workbook requires entering the password, so choose one easy to remember but
hard for others to guess.
Figure 3-50. Creating a Password for a Workbook
6. Tap ok to close the workbook and save it under an Excel-assigned name. To save the workbook under a custom name or in
a specific folder, tap Tools - File - Save Workbook As... .
Figure 3-51. Saving a Workbook
7. Enter the new name in the Name: text box.
8. To move the file to a different folder, in the Folder: drop-down list, select the new folder.
Mobile 2003 Applications 3-45
9. In the Type: drop-down list, select the file type. Pocket Excel supports a variety of formats, including Pocket Excel (.pxl) and
Excel (.xls).
10. In the Location: drop-down list, select where to save the workbook (in main memory or in the Platform or Application folder).
11. Tap OK.
12. Tap ok.
Editing a Workbook
To make changes to a workbook:
1.
2.
3.
4.
Tap Start - Programs - Pocket Excel.
Tap the workbook in the list to open it.
Make the changes.
To rename and/or move a file, tap Tools - File - Rename/Move... .
Figure 3-52. Renaming and Moving a File
5.
6.
7.
8.
9.
Enter the new name in the Name: text box.
To move the file to a different folder, in the Folder: drop-down list, select the new folder.
In the Location: drop-down list, select where to save the file (in main memory or in the Platform or Application folder).
Tap ok.
Tap ok to close the file.
Deleting a Workbook
To delete a workbook:
1. Tap Start - Programs - Pocket Excel.
2. Tap and hold the workbook in the list and select Delete from the pop-up menu, or tap the workbook to open it and tap
Tools - File - Delete Workbook.
3-46 Microsoft Applications User Guide for Symbol Devices
Beaming Workbooks
To beam a workbook to another device:
1. Tap Start - Programs - Pocket Excel.
2. Align the infrared ports on the devices.
3. Tap and hold the workbook and select Beam File..., or select the workbook and tap Tools - File - Beam Workbook... .
To beam several workbooks, tap, drag, and hold to select the workbooks, then select Beam File... .
4. Select Infrared in the To beam, select a device field. After sending the file a message appears indicating successful data
transfer.
Formatting Workbooks
To format a workbook:
1.
2.
3.
4.
Tap Start - Programs - Pocket Excel.
Tap a workbook in the list to open it.
Select a cell.
Tap Format - Cells... .
Figure 3-53. Pocket Excel Format Menu
5. Use the five Format Cells tabs to format cells in a similar manner as in Microsoft Excel on the desktop computer.
6. To hide a row or column, select a cell in that row or column. Tap Format - Row or Column - Hide.
To show a hidden row or column, tap Tools - Go To, then type a reference that is in the hidden row or column. Tap Format Row or Column - Unhide.
Mobile 2003 Applications 3-47
7. To arrange sheets within a workbook, tap Format - Modify Sheets... .
Figure 3-54. Deleting Cells
8.
9.
10.
11.
12.
To rename a sheet, tap the sheet, then tap Rename... . Enter a new name for the sheet.
To insert a new sheet, tap Insert... , and enter a new name for the sheet.
To delete a sheet, tap the sheet, then tap Delete.
To reorder sheets, tap each sheet, then tap Move Up or Move Down as needed.
To insert rows or columns, tap Format - Insert Cells... .
Figure 3-55. Inserting Cells
13. Select a radio button to indicate whether to shift the selected cell up or down, or insert an entire row or column.
3-48 Microsoft Applications User Guide for Symbol Devices
14. To delete rows or columns, tap Format - Delete Cells... .
Figure 3-56. Deleting Cells
15. Select a radio button to indicate whether to delete the selected cell only and shift remaining cells up or to the left, or delete
an entire row or column.
Finding and Replacing Text
To search a workbook for text:
1. Tap Start - Programs - Pocket Excel.
2. Tap a workbook in the list to open it.
3. Tap Edit - Find/Replace.
Figure 3-57. Finding and Replacing Text
4.
5.
6.
7.
8.
9.
Enter the data to find in the Find what: text box.
To replace this data with new data in the workbook, tap Replace... and enter the new data in the Replace with: text box.
Select the Match case check box to find data using the same case specified.
Select the Match entire cells check box to search for entire cell content.
Select Values or Formulas from the Look in: drop-down list to indicate the type of information desired.
Tap Find. Upon locating the data, select whether to replace the data with the new data, or to search for the next instance.
Mobile 2003 Applications 3-49
Configuring Files
To configure how files are created and saved in Pocket Excel:
1. Tap Start - Programs - Pocket Excel.
2. Tap Tools - Options.
Figure 3-58. Configuring Files
3. In the Template for new workbook: drop-down list, select which template to use as a default when creating a workbook.
4. In the Save new workbooks to: drop-down list, select where to save the workbook (in main memory or in the Platform or
Application folder).
5. In the Files to display in list view: drop-down list, select the types of files to appear in the file list.
6. Tap ok.
For more information on using Pocket Excel, tap Start - Help.
3-50 Microsoft Applications User Guide for Symbol Devices
MSN Messenger
For Windows Mobile 2003 devices, use the MSN® Messenger instant messaging program on the device to:
•
•
•
see who is online
send and receive instant messages
have instant message conversations with groups of contacts.
MSN Messenger requires a Microsoft Passport™ account or a Microsoft Exchange e-mail account. A Passport is required to use MSN
Messenger Service. (A Passport is included with a Hotmail® or MSN account.) After obtaining a Microsoft Passport or a Microsoft
Exchange account, set up the account.
Setting Up an Account
Before connecting, set up the Passport or Exchange account and sign in:
1. Tap Start - Programs - MSN Messenger icon.
2. Tap Tools - Options.
Figure 3-59. MSN Messenger Options Window - Accounts Tab
3. On the Accounts tab, select the Enable MSN Messenger Service and/or Enable Exchange Instant Messaging check box(es).
4. Enter the sign-in name (typically an e-mail address) and password.
Mobile 2003 Applications 3-51
5. If you selected both accounts, tap Settings..., then select the account to sign onto first.
Figure 3-60. Account Settings Window
6. Tap ok.
7. Tap Tools - Sign In... .
8. Enter the sign in name and password, and tap Sign in.
If using MSN Messenger on the host computer, contacts automatically appear on the device.
Working with Contacts
The MSN Messenger window is divided into Online and Not Online categories. From this view, while connected, chat, send e-mail,
block the contact from chatting, or delete contacts from the list using the pop-up menu.
Tap a contact to start a chat
Tap and hold to display a
pop-up menu of actions
Figure 3-61. MSN Messenger Contacts
To see others online without being seen, tap Tools - My Status - Appear Offline. You appear offline but remain on the
blocked contact's list.
To unblock a contact, tap and hold the contact, then select Unblock on the pop-up menu.
3-52 Microsoft Applications User Guide for Symbol Devices
Adding a Contact
To add a contact:
1.
2.
3.
4.
5.
Tap Start - Programs - MSN Messenger icon.
Tap Tools - Add a Contact.
Type in the user’s account name.
Tap Next.
Follow the directions on the screen.
Deleting a Contact
To delete a contact:
1. Tap Start - Programs - MSN Messenger icon.
2. Tap and hold the contact name.
3. Select Delete Contact.
Chatting with Contacts
To chat with a contact:
1.
2.
3.
4.
5.
6.
Tap Start - Programs - MSN Messenger icon.
Tap Tools - Sign In... .
Enter the sign in name and password, and tap Sign in.
Tap a contact name to open a chat window.
Enter the message in the text entry area at the bottom of the screen, or tap My Text to enter a preset message.
Tap Send.
Enter a message
Tap to send a message
Figure 3-62. Sending a Message
7. To invite another contact to a multi-user chat, tap Tools - Invite and tap the contact to invite.
8. To switch back to the main window without closing a chat, tap Contacts. To revert back to the chat window, tap Chats and
select that person.
Mobile 2003 Applications 3-53
9. To know if the contact is responding, look for the message under the text entry area.
View full chat
View the status of the chat
Figure 3-63. Receiving a Message
10. To indicate status to other contacts, tap Tools - My Status, then select a status description such as Away.
11. To disconnect a session at any time, tap Tools - Sign Out.
Managing Contacts
To change contact options:
1. Tap Start - Programs - MSN Messenger icon.
2. Tap Tools - Options - General tab.
Figure 3-64. Contact Options - General Tab
3. In the text box, enter the name that others see when sending instant messages.
4. Select the Run this program upon connection check box to run MSN Messenger when connecting.
3-54 Microsoft Applications User Guide for Symbol Devices
5. Tap the Privacy tab.
Figure 3-65. Contact Options - Privacy Tab
6. Scroll through the list to see who has you listed as a contact.
7. Select the Alert me when I am added to a Passport contact list check box to receive an alert when someone adds you to their
list.
8. To block a contact from sending you messages, tap Blocked Users... , tap the contact, then tap the right arrow to move
this contact to My Block List.
9. To unblock a contact, tap the contact, then tap the left arrow to move the contact to My Allow List.
For more information on using MSN Messenger, tap Start - Help.
Mobile 2003 Applications 3-55
Media Player
For Windows Mobile 2003 devices, use Windows Media Player to play digital audio and video files stored on the device. To switch
to Windows Media Player, tap Start - Windows Media.
Indicates the progress of the current track
Slide to adjust volume
Tap to play or pause
Tap to turn volume on/off
Tap to skip to the next song
Tap to stop
Tap to play a previous song
Figure 3-66. Media Player Window
Use the host computer to copy digital audio and video files to the device. The device can play Windows Media and MP3 files.
For more information on using Windows Media Player, tap Start - Help.
3-56 Microsoft Applications User Guide for Symbol Devices
Pictures
For Windows Mobile 2003 devices, use Pictures to view .jpg format pictures stored on the device, send pictures to others, view a
slideshow of pictures, or set a picture as the background on the Today screen.
Viewing Pictures
To view a picture in full-screen view.
1. Tap Start - Programs - Pictures icon.
2. Tap the thumbnail of the picture to view. To locate the thumbnail:
• Browse folders to locate a file by tapping folders to open them, or using the Show menu (labeled My Pictures by default)
to close folders.
• To list folders and files alphabetically or by date, size, or type, tap the Sort By menu (labeled Name by default), then select
an option to sort by.
• Tap the Storage Card icon
to view pictures stored on a storage card.
• Tap the My Device icon
to view pictures stored in the My Pictures folder.
Viewing a Slideshow of Pictures
Pictures can display slides of the pictures shown in thumbnail view with 5-second intervals between slides. To view .jpg pictures as
a slideshow:
1.
2.
3.
4.
5.
In Pictures, tap the View as a slide show icon
to view pictures as a slideshow.
Tap anywhere on the screen to display the Slideshow toolbar, used to pause the slideshow, rotate the view, and more.
To change the time period that each slide displays, tap Tools - Options - Slide Show tab.
Tap the up and down arrows next to the Delay between slides: field to set this time.
Press the left/right controls to move forward or backward through the slides.
Copying Pictures to the Device
Copy .jpg picture files from the host computer to the My Pictures folder, within the My Documents folder on the device. View the
pictures in Pictures.
For more information on copying files from the host computer to the device, see ActiveSync Help on the PC.
Editing Pictures
Rotate, crop, zoom, and adjust the brightness and color contrast of the .jpg pictures.
1.
2.
3.
4.
5.
6.
Tap Start - Programs - Pictures icon.
Tap the thumbnail of the picture to view.
Tap
to rotate a picture 90 degrees counter-clockwise.
Tap
to crop a picture by dragging and selecting the crop area. Tap outside of the box to stop cropping.
Tap
to display the Zoom panel, used to zoom in or out of a picture, or return a picture to full-screen size.
Tap Edit - Brightness and Contrast to adjust the brightness and contrast levels of a picture.
Mobile 2003 Applications 3-57
Sending Pictures
When sending a .jpg picture to others as an e-mail attachment, the picture is resized to approximately 30 KB, making it easier to send
over wireless connections. To send a picture:
1. Tap Start - Programs - Pictures icon.
2. Tap the picture to send as an e-mail attachment.
3. Tap Tools - Send via E-mail to create an e-mail message with the picture attached.
Setting a Picture as Background
Use a personalized .jpg picture as the background on the Today screen, and specify how to display it on the screen, such as adjusting
the transparency level.
1. Tap Start - Programs - Pictures icon.
2. Tap the picture to set as the background.
3. Tap Tools - Set as Today Wallpaper.
3-58 Microsoft Applications User Guide for Symbol Devices
Pocket Internet Explorer
For Windows Mobile 2003 devices, use Microsoft Pocket Internet Explorer to view Web or Wireless Application Protocol (WAP) pages
in the following ways:
•
•
During synchronization with the host computer, download favorite links and mobile favorites stored in the Mobile Favorites
subfolder in Internet Explorer on the host computer.
Connect to an Internet service provider (ISP) or network and browse the Web.
To select Pocket Internet Explorer, tap Start - Internet Explorer.
Mobile Favorites
Items stored in the Mobile Favorites subfolder in the Favorites folder in Internet Explorer on the host computer are synchronized with
the device. This folder was created when installing ActiveSync.
Favorite Links
Synchronization updates the list of favorite links both in the Mobile Favorites folder on the host computer and in Pocket Internet
Explorer on the device. Unless you mark the favorite link as a mobile favorite, only the link is downloaded to the device; connect to
the ISP or network to view the content. For more information on synchronization, see ActiveSync Help on the host computer.
Creating Mobile Favorites
If using Microsoft Internet Explorer 5 or later on the host computer, download mobile favorites. Synchronizing mobile favorites
downloads Web content to the device so Web pages are available for viewing when disconnected from the ISP and host computer.
Use the Internet Explorer plug-in installed with ActiveSync to create mobile favorites:
1.
2.
3.
4.
5.
In Internet Explorer on the host computer, click Tools - Create Mobile Favorite.
To change the link name, enter a new name in the Name field.
If desired, select an update schedule in Update.
Click OK. Internet Explorer downloads the latest version of the Web page to the host computer.
To download the pages linked to the mobile favorite just created, in Internet Explorer on the host computer, right-click the
mobile favorite, then click Properties. On the Download tab, specify the number of links deep to download. To conserve
device memory, only go one level deep.
6. Synchronize the device and host computer. Mobile favorites stored in the Mobile Favorites folder in Internet Explorer are
downloaded to the device.
If you did not specify an update schedule in step 3, manually download content to keep the information updated on the host
computer and device. Before synchronizing, in Internet Explorer on the host computer, click Tools - Synchronize. Note the last
time content was downloaded to the host computer; if necessary, manually download content.
7. To add a button to the Internet Explorer toolbar for creating mobile favorites, in Internet Explorer on the host computer, click
View - Toolbars - Customize.
Saving Memory on the Device
Mobile Favorites take up storage memory on the device. To minimize the amount of memory used:
•
•
In the settings for the Favorites information type in ActiveSync options, turn off pictures and sounds or stop some mobile
favorites from downloading. For more information, see ActiveSync Help.
Limit the number of downloaded linked pages. In Internet Explorer on the host computer, right-click the mobile favorite to
change, then select Properties. On the Download tab, specify 0 or 1 for the number of linked pages to download.
Mobile 2003 Applications 3-59
Using Pocket Internet Explorer
With Pocket Internet Explorer, browse mobile favorites and channels downloaded to the device without connecting to the Internet.
Also connect to the Internet through an ISP or a network connection and browse the Web.
Go icon
Favorites icon
Home icon
Refresh icon
Back icon
Figure 3-67. Pocket Internet Explorer Window
To view mobile favorites and channels:
1. Tap Start - Internet Explorer.
2. Enter the address in the address bar at the top of the screen and tap the Go icon, or tap the arrow to choose from previously
entered addresses. If the address bar isn’t available, tap View - Address Bar, or
Tap the Favorites icon, then tap the page to view.
Tap the favorite
to view
Tap to add or delete a
folder or favorite link
Figure 3-68. Mobile Favorites
3-60 Microsoft Applications User Guide for Symbol Devices
The page downloaded on the last synchronization with the host computer appears. If the page is not on the device, the favorite is
dimmed. Synchronize with the host computer again to download the page to the device, or connect to the Internet to view the page.
Browsing the Web
1. Tap Start - Internet Explorer.
2. Connect to the ISP or network wirelessly.
3. Go to a specific Web page in one of the following ways:
• Tap Favorites, then tap the favorite to view.
• In the address bar at the top of the screen, enter the Web address and tap the Go icon or tap the arrow to choose from
previously entered addresses.
4. To add a favorite link, go to the Web page to add, tap and hold on the page, and select Add to Favorites.
If you select Pocket Internet Explorer before setting up the network connections, a window may appear allowing you to proceed to
the connection settings window. Select the settings to return to Pocket Internet Explorer.
Using AvantGo Channels
AvantGo is a free interactive service that provides access to personalized content and thousands of popular Web sites. Subscribe to
AvantGo channels directly from the device, then synchronize with the host computer, or connect to the Internet to download the
content. For more information, visit the AvantGo Web site.
To sign up for AvantGo:
1.
2.
3.
4.
5.
6.
In ActiveSync options on the host computer, turn on synchronization for the AvantGo information type.
On the device, tap Start - Internet Explorer.
Tap the Favorites icon to display the list of favorites.
Tap AvantGo Channels.
Tap Activate.
Follow the directions on the screen. Synchronize the device with the host computer, then tap My Channels to complete
setup.
When synchronization is complete, tap AvantGo Channels in the list of favorites to see a few of the most popular channels. To add
or remove channels, tap Add or Remove.
View Menu
To use the View menu to configure web page appearance:
1. Tap Start - Internet Explorer.
2. Tap View - Layout to choose how to lay out web pages on the screen.
Figure 3-69. View Menu
Mobile 2003 Applications 3-61
3. Select One Column to arrange nearly all page content into one column as wide as the screen, to avoid horizontal scrolling.
The page looks different than when viewed on a desktop computer.
Select Default to keep a similar layout as on the desktop computer, but arrange content and decrease the size of page items
so most of the page is included.
Select Desktop to maintain the same layout and size as on the desktop computer. Horizontal and vertical scrolling are
necessary.
4. To prevent pictures from downloading, tap View - Show Images to deselect it. To download one picture, connect to the
Internet, tap and hold the picture’s placeholder, then select Show Picture.
5. To change the size of the screen text, tap View - Text Size, then select the size.
6. Tap View - Address Bar to toggle the address bar at the top of the screen on or off.
Changing Internet Explorer Options
To change Pocket Internet Explorer settings:
1. Tap Start - Internet Explorer.
2. Tap Tools - Options.
3. Select the General tab.
Figure 3-70. Internet Explorer Options - General Tab
4. Tap Use Current to change the default home page to the current page.
5. Select a different character set from the Default character set drop-down list to easily view text in another language.
3-62 Microsoft Applications User Guide for Symbol Devices
6. Select the Memory tab to free storage space on the device.
Figure 3-71. Internet Explorer Options - Memory Tab
7.
8.
9.
10.
Use the up and down arrows to select how many days to saved visited links.
Tap Clear History to delete all cached links.
Tap Delete Files to delete all pages stored on the device, including offline favorites content.
Select the Security tab to change security settings.
Figure 3-72. Internet Explorer Options - Security Tab
11. Deselect the Allow cookies check box to prevent Internet pages from sending and storing cookies on the device. Cookies
contain information about user preferences so a page can customize information for the user.
12. Tap Clear Cookies to delete all cookies stored on the device.
Windows CE Devices
Microsoft Applications User Guide for Symbol Devices
Getting Started with Windows CE Devices
Windows CE Desktop. . . . . . . . . . . . . . . . . . . . . . . . . . . . . . . . . . . . . . . . . . . . . . . . . . . . . . . . . . . . . . . . . . . . . 4-3
Status Icons . . . . . . . . . . . . . . . . . . . . . . . . . . . . . . . . . . . . . . . . . . . . . . . . . . . . . . . . . . . . . . . . . . . . . . . . . . . . . 4-4
Selecting Programs . . . . . . . . . . . . . . . . . . . . . . . . . . . . . . . . . . . . . . . . . . . . . . . . . . . . . . . . . . . . . . . . . . . . . . . 4-5
Using the Input Panel . . . . . . . . . . . . . . . . . . . . . . . . . . . . . . . . . . . . . . . . . . . . . . . . . . . . . . . . . . . . . . . . . . . . . . 4-6
Windows Explorer . . . . . . . . . . . . . . . . . . . . . . . . . . . . . . . . . . . . . . . . . . . . . . . . . . . . . . . . . . . . . . . . . . . . . . . .4-7
Working with Files and Folders . . . . . . . . . . . . . . . . . . . . . . . . . . . . . . . . . . . . . . . . . . . . . . . . . . . . . . . . . . 4-8
4-2 Microsoft Applications User Guide for Symbol Devices
Getting Started with Windows CE Devices 4-3
Windows CE Desktop
When turning on a Windows CE device, use the desktop to navigate the device.
Procedures in this chapter assume the device has a touch-enabled screen. For devices that do not have touch
screens, refer to the device’s User Guide for instructions on navigating the Windows CE desktop and
applications.
Double-tap an icon
to open a program
Select to open a program
Select to change device settings
Start Menu
Status Bar
Battery charge status
Show/hide input panel
Figure 4-1. Windows CE Desktop
Tap to return to desktop
4-4 Microsoft Applications User Guide for Symbol Devices
Status Icons
The status icons listed in Table 4-1 may appear on the status bar at the top of the screen.
Table 4-1. Status Icons
Icon
Function
Battery
Description
Backup battery is low.
Backup battery is very low.
Main battery is charging.
Main battery is low.
Main battery is very low.
Main battery is at 80% capacity. (100 indicates a full battery.)
External (AC) power source is connected.
Connectivity
Dial-up connection is active.
Direct connection is active.
Getting Started with Windows CE Devices 4-5
Selecting Programs
To select a program, double-tap the program icon on the desktop.
If the program is not on the desktop, tap Start - Programs, then select the program name.
Figure 4-2. Programs Menu
4-6 Microsoft Applications User Guide for Symbol Devices
Using the Input Panel
Use the input panel to enter information in any program. Either type using the soft Keyboard or write using Block Recognizer, Letter
Recognizer, or Transcriber. The characters appear as typed text on the screen. See Input on page 2-8 to customize settings for input
methods.
To show or hide the input panel, tap the Input Panel button, then select Keyboard.
Input Panel Button
Figure 4-3. Input Panel Button
Use the Keyboard input method to enter information by tapping keys with the stylus. To type with the soft Keyboard:
1. Tap the Input Panel button, then select Keyboard.
2. On the Keyboard, tap the keys with the stylus. Text appears on the screen.
Figure 4-4. Input Panel Keyboard
Getting Started with Windows CE Devices 4-7
Windows Explorer
Use Windows Explorer to find files and organize them into folders. To open Windows Explorer, double-tap the My Computer icon on
the desktop, or tap Start - Programs - Windows Explorer.
Figure 4-5. Windows Explorer
Use Windows Explorer to perform the following:
•
•
•
•
•
Browse folders to locate a file by double-tapping folders to open them, or using the back arrow button to close folders.
To move a file, tap and hold the file, then select Cut or Copy. Navigate to a different folder, tap and hold the screen, then
select Paste on the pop-up menu.
To create a new folder, tap File - New Folder, then name the folder using the input panel.
To delete a file or folder, tap and hold the item to delete, then select Delete.
To view the contents of an inserted storage card, double-tap the Storage Card folder.
4-8 Microsoft Applications User Guide for Symbol Devices
Working with Files and Folders
Browsing Folders
Figure 4-6. Windows Explorer - Go Menu
•
•
•
•
•
To open a folder, double-tap the folder.
To close the folder and return to the previous folder, tap the back arrow button, or select Go - Back.
To go to the next folder (that was previously opened), select Go - Back.
To quickly access the My Documents folder, select Go - My Documents.
To see all folders previously accessed, select Go - History.
Viewing Files as Icons or Lists
Figure 4-7. Windows Explorer - View Menu
•
•
To view files and folders as icons, select View - Large Icons or Small Icons.
To view files and folders as a list, select View - Details.
Getting Started with Windows CE Devices 4-9
Managing Files and Folders
Figure 4-8. Windows Explorer - File and Favorites Menus
•
•
•
•
•
•
•
To create a new folder, if necessary open the folder in which the new folder is to reside, then select File - New Folder.
To transfer a file using infrared, select it, line up the infrared ports of the two devices, then select File - Send To - Infrared
Recipient.
To receive a file, line up the infrared ports of the devices, then select File - Receive.
To create a Desktop Shortcut, display the file or Web page for which you want to create a shortcut, then select File - Send
To - Desktop as Shortcut.
To add a folder to the Favorites list, open the folder, then select Favorites - Add to Favorites. In the Name box, type the
shortcut name.
To open a favorite file or folder, select Favorites, then select the folder.
To organize favorites, select Favorites - Organize Favorites.
Switching to the Internet
To open a web page, type the URL in the Address bar.
4-10 Microsoft Applications User Guide for Symbol Devices
Windows CE Device Settings
Introduction . . . . . . . . . . . . . . . . . . . . . . . . . . . . . . . . . . . . . . . . . . . . . . . . . . . . . . . . . . . . . . . . . . . . . . . . . . . . . 5-3
Windows Control Panel . . . . . . . . . . . . . . . . . . . . . . . . . . . . . . . . . . . . . . . . . . . . . . . . . . . . . . . . . . . . . . . . . . . . 5-3
Backlight. . . . . . . . . . . . . . . . . . . . . . . . . . . . . . . . . . . . . . . . . . . . . . . . . . . . . . . . . . . . . . . . . . . . . . . . . . . . . . . . 5-6
Battery Power. . . . . . . . . . . . . . . . . . . . . . . . . . . . . . . . . . . . . . . . . . . . . . . . . . . . . . . . . . . . . . . . . . . . . . . .5-6
External Power . . . . . . . . . . . . . . . . . . . . . . . . . . . . . . . . . . . . . . . . . . . . . . . . . . . . . . . . . . . . . . . . . . . . . . . 5-6
Brightness. . . . . . . . . . . . . . . . . . . . . . . . . . . . . . . . . . . . . . . . . . . . . . . . . . . . . . . . . . . . . . . . . . . . . . . . . . . 5-7
Certificates . . . . . . . . . . . . . . . . . . . . . . . . . . . . . . . . . . . . . . . . . . . . . . . . . . . . . . . . . . . . . . . . . . . . . . . . . . . . . . 5-8
Date/Time. . . . . . . . . . . . . . . . . . . . . . . . . . . . . . . . . . . . . . . . . . . . . . . . . . . . . . . . . . . . . . . . . . . . . . . . . . . . . . . 5-9
Device Management . . . . . . . . . . . . . . . . . . . . . . . . . . . . . . . . . . . . . . . . . . . . . . . . . . . . . . . . . . . . . . . . . . . . . 5-10
Dialing . . . . . . . . . . . . . . . . . . . . . . . . . . . . . . . . . . . . . . . . . . . . . . . . . . . . . . . . . . . . . . . . . . . . . . . . . . . . . . . . 5-11
Display . . . . . . . . . . . . . . . . . . . . . . . . . . . . . . . . . . . . . . . . . . . . . . . . . . . . . . . . . . . . . . . . . . . . . . . . . . . . . . . . 5-13
Background Tab . . . . . . . . . . . . . . . . . . . . . . . . . . . . . . . . . . . . . . . . . . . . . . . . . . . . . . . . . . . . . . . . . . . . . 5-13
Appearance Tab . . . . . . . . . . . . . . . . . . . . . . . . . . . . . . . . . . . . . . . . . . . . . . . . . . . . . . . . . . . . . . . . . . . . . 5-13
Input Panel . . . . . . . . . . . . . . . . . . . . . . . . . . . . . . . . . . . . . . . . . . . . . . . . . . . . . . . . . . . . . . . . . . . . . . . . . . . . . 5-15
Internet Options . . . . . . . . . . . . . . . . . . . . . . . . . . . . . . . . . . . . . . . . . . . . . . . . . . . . . . . . . . . . . . . . . . . . . . . . . 5-16
General Tab . . . . . . . . . . . . . . . . . . . . . . . . . . . . . . . . . . . . . . . . . . . . . . . . . . . . . . . . . . . . . . . . . . . . . . . . 5-16
Connection Tab. . . . . . . . . . . . . . . . . . . . . . . . . . . . . . . . . . . . . . . . . . . . . . . . . . . . . . . . . . . . . . . . . . . . . . 5-16
Security Tab . . . . . . . . . . . . . . . . . . . . . . . . . . . . . . . . . . . . . . . . . . . . . . . . . . . . . . . . . . . . . . . . . . . . . . . . 5-17
Advanced Tab. . . . . . . . . . . . . . . . . . . . . . . . . . . . . . . . . . . . . . . . . . . . . . . . . . . . . . . . . . . . . . . . . . . . . . .5-17
Keyboard. . . . . . . . . . . . . . . . . . . . . . . . . . . . . . . . . . . . . . . . . . . . . . . . . . . . . . . . . . . . . . . . . . . . . . . . . . . . . . . 5-18
Mouse. . . . . . . . . . . . . . . . . . . . . . . . . . . . . . . . . . . . . . . . . . . . . . . . . . . . . . . . . . . . . . . . . . . . . . . . . . . . . . . . . 5-19
Network and Dial-up Connections . . . . . . . . . . . . . . . . . . . . . . . . . . . . . . . . . . . . . . . . . . . . . . . . . . . . . . . . . . . 5-20
Owner . . . . . . . . . . . . . . . . . . . . . . . . . . . . . . . . . . . . . . . . . . . . . . . . . . . . . . . . . . . . . . . . . . . . . . . . . . . . . . . . . 5-21
Identification Tab . . . . . . . . . . . . . . . . . . . . . . . . . . . . . . . . . . . . . . . . . . . . . . . . . . . . . . . . . . . . . . . . . . . . 5-21
Notes Tab . . . . . . . . . . . . . . . . . . . . . . . . . . . . . . . . . . . . . . . . . . . . . . . . . . . . . . . . . . . . . . . . . . . . . . . . . . 5-21
5-2
Microsoft Applications User Guide for Symbol Devices
Network ID Tab. . . . . . . . . . . . . . . . . . . . . . . . . . . . . . . . . . . . . . . . . . . . . . . . . . . . . . . . . . . . . . . . . . . . . .5-22
Password. . . . . . . . . . . . . . . . . . . . . . . . . . . . . . . . . . . . . . . . . . . . . . . . . . . . . . . . . . . . . . . . . . . . . . . . . . . . . . .5-23
PC Connection. . . . . . . . . . . . . . . . . . . . . . . . . . . . . . . . . . . . . . . . . . . . . . . . . . . . . . . . . . . . . . . . . . . . . . . . . . .5-24
Power . . . . . . . . . . . . . . . . . . . . . . . . . . . . . . . . . . . . . . . . . . . . . . . . . . . . . . . . . . . . . . . . . . . . . . . . . . . . . . . . .5-25
Power Off Tab. . . . . . . . . . . . . . . . . . . . . . . . . . . . . . . . . . . . . . . . . . . . . . . . . . . . . . . . . . . . . . . . . . . . . . .5-25
Misc Tab . . . . . . . . . . . . . . . . . . . . . . . . . . . . . . . . . . . . . . . . . . . . . . . . . . . . . . . . . . . . . . . . . . . . . . . . . . .5-26
PwrDevices Tab . . . . . . . . . . . . . . . . . . . . . . . . . . . . . . . . . . . . . . . . . . . . . . . . . . . . . . . . . . . . . . . . . . . . .5-26
Wakeup Tab . . . . . . . . . . . . . . . . . . . . . . . . . . . . . . . . . . . . . . . . . . . . . . . . . . . . . . . . . . . . . . . . . . . . . . . .5-27
Regional Settings . . . . . . . . . . . . . . . . . . . . . . . . . . . . . . . . . . . . . . . . . . . . . . . . . . . . . . . . . . . . . . . . . . . . . . . .5-28
Region Tab . . . . . . . . . . . . . . . . . . . . . . . . . . . . . . . . . . . . . . . . . . . . . . . . . . . . . . . . . . . . . . . . . . . . . . . . .5-28
Number Tab . . . . . . . . . . . . . . . . . . . . . . . . . . . . . . . . . . . . . . . . . . . . . . . . . . . . . . . . . . . . . . . . . . . . . . . .5-28
Currency Tab. . . . . . . . . . . . . . . . . . . . . . . . . . . . . . . . . . . . . . . . . . . . . . . . . . . . . . . . . . . . . . . . . . . . . . . .5-29
Time Tab . . . . . . . . . . . . . . . . . . . . . . . . . . . . . . . . . . . . . . . . . . . . . . . . . . . . . . . . . . . . . . . . . . . . . . . . . . .5-29
Date Tab . . . . . . . . . . . . . . . . . . . . . . . . . . . . . . . . . . . . . . . . . . . . . . . . . . . . . . . . . . . . . . . . . . . . . . . . . . .5-30
Remove Programs . . . . . . . . . . . . . . . . . . . . . . . . . . . . . . . . . . . . . . . . . . . . . . . . . . . . . . . . . . . . . . . . . . . . . . . .5-31
Storage Manager . . . . . . . . . . . . . . . . . . . . . . . . . . . . . . . . . . . . . . . . . . . . . . . . . . . . . . . . . . . . . . . . . . . . . . . .5-32
Managing Disk Partitions . . . . . . . . . . . . . . . . . . . . . . . . . . . . . . . . . . . . . . . . . . . . . . . . . . . . . . . . . . . . . .5-32
Stylus . . . . . . . . . . . . . . . . . . . . . . . . . . . . . . . . . . . . . . . . . . . . . . . . . . . . . . . . . . . . . . . . . . . . . . . . . . . . . . . . .5-34
Double-Tap Tab . . . . . . . . . . . . . . . . . . . . . . . . . . . . . . . . . . . . . . . . . . . . . . . . . . . . . . . . . . . . . . . . . . . . .5-34
Calibrate Tab . . . . . . . . . . . . . . . . . . . . . . . . . . . . . . . . . . . . . . . . . . . . . . . . . . . . . . . . . . . . . . . . . . . . . . .5-34
System . . . . . . . . . . . . . . . . . . . . . . . . . . . . . . . . . . . . . . . . . . . . . . . . . . . . . . . . . . . . . . . . . . . . . . . . . . . . . . . .5-35
General Tab . . . . . . . . . . . . . . . . . . . . . . . . . . . . . . . . . . . . . . . . . . . . . . . . . . . . . . . . . . . . . . . . . . . . . . . .5-35
Memory Tab . . . . . . . . . . . . . . . . . . . . . . . . . . . . . . . . . . . . . . . . . . . . . . . . . . . . . . . . . . . . . . . . . . . . . . . .5-35
Device Name Tab . . . . . . . . . . . . . . . . . . . . . . . . . . . . . . . . . . . . . . . . . . . . . . . . . . . . . . . . . . . . . . . . . . . .5-36
Copyrights Tab . . . . . . . . . . . . . . . . . . . . . . . . . . . . . . . . . . . . . . . . . . . . . . . . . . . . . . . . . . . . . . . . . . . . . .5-36
Volume & Sounds . . . . . . . . . . . . . . . . . . . . . . . . . . . . . . . . . . . . . . . . . . . . . . . . . . . . . . . . . . . . . . . . . . . . . . . .5-37
Sounds Tab . . . . . . . . . . . . . . . . . . . . . . . . . . . . . . . . . . . . . . . . . . . . . . . . . . . . . . . . . . . . . . . . . . . . . . . . .5-37
Microphone Tab . . . . . . . . . . . . . . . . . . . . . . . . . . . . . . . . . . . . . . . . . . . . . . . . . . . . . . . . . . . . . . . . . . . . .5-38
Windows CE Device Settings 5-3
Introduction
This chapter provides basic instructions for customizing a Windows CE Symbol device. Use the Windows CE Control Panel to access
customization settings.
The list of available Windows Control Panel options may differ depending on the Symbol device configuration.
Procedures in this chapter assume the device has a touch-enabled screen. For devices that do not have touch screens,
refer to the device’s User Guide for instructions on navigating the Windows CE desktop and applications.
Windows Control Panel
To view available options for Symbol device settings, tap Start - Settings - Control Panel.
Figure 5-1. Windows Control Panel
Table 5-1 lists the applications available in the Windows Control Panel menu.
Table 5-1. Windows Control Panel Menu Icons
Icon
Description
Adjust backlight brightness and power settings. See Backlight on page 5-6.
View and modify digital certificates some applications use to establish trust for secure
communications. See Certificates on page 5-8.
Change date, time, and time zone information. See Date/Time on page 5-9.
Configure device management and install and view available software. See Device Management
on page 5-10.
5-4
Microsoft Applications User Guide for Symbol Devices
Table 5-1. Windows Control Panel Menu Icons (Continued)
Icon
Description
Set dialing properties for modem communication and change telephony settings. See Dialing on
page 5-11.
Change desktop background, appearance, backlight, and brightness. See Display on page 5-13.
Switch input methods and set input options. See Input Panel on page 5-15.
Control how the device connects to the Internet. See Internet Options on page 5-16.
Change keyboard repeat delay and rate. See Keyboard on page 5-18.
Adjust double-click sensitivity for both the speed and timing. See Mouse on page 5-19.
Connect to other computers, networks, and the Internet through a modem. See Network and Dialup Connections on page 5-20.
Change owner's personal profiles. See Owner on page 5-21.
Set a password for the device. See Password on page 5-23.
Change settings for connectivity of a host computer. See PC Connection on page 5-24.
View and control device power settings. See Power on page 5-25.
Windows CE Device Settings 5-5
Table 5-1. Windows Control Panel Menu Icons (Continued)
Icon
Description
Change how numbers, currencies, dates, and times appear. See Regional Settings on page 5-28.
Remove programs installed in RAM. See Remove Programs on page 5-31.
Manage storage media and disk partitions. See Storage Manager on page 5-32.
Calibrate the touch screen and adjust double-tap timing. See Stylus on page 5-34.
View system information and change memory settings. See System on page 5-35.
Set event sounds and volume options. See Volume & Sounds on page 5-37.
5-6
Microsoft Applications User Guide for Symbol Devices
Backlight
Use the Backlight tabs to adjust backlight brightness and power settings.
Battery Power
To set the backlight settings when using battery power:
1. Select Start - Settings - Control Panel, and double-tap the Backlight icon.
Figure 5-2. Backlight Settings Window - Battery Power Tab
2. Select the Disable backlight if device is not used for check box to turn off the backlight when the device is not used for a
certain period of time. Select this period of time from the drop-down list. Available times are 10 seconds, 30 seconds, 1
minute, 2 minutes, 3 minutes, 4 minutes, and 5 minutes.
3. Select the Enable backlight when a button is pressed or the screen is tapped check box to turn on the backlight when one
of these events occur.
4. Tap ok.
External Power
To set the backlight settings when using external AC power:
1. Select Start - Settings - Control Panel, double-tap the Backlight icon.
2. Tap the External Power tab.
Figure 5-3. Backlight Settings Window - External Power Tab
Windows CE Device Settings 5-7
3. Select the Disable backlight if device is not used for check box to turn off the backlight when the device is not used for a
certain period of time. Select this period of time from the drop-down list. Available times are 1 through 10 minutes in
1-minute intervals.
4. Select the Enable backlight when a button is pressed or the screen is tapped check box to turn on the backlight when one
of these events occur.
5. Tap ok.
Brightness
To set a brightness level for the backlight:
1. Select Start - Settings - Control Panel, double-tap the Backlight icon.
2. Tap the Brightness tab.
Figure 5-4. Backlight Settings Window - Brightness Tab
3. Select the Disable backlight check box to turn off the backlight completely.
4. If the Disable backlight check box is unchecked, use the slider to adjust screen brightness.
5. Tap ok.
5-8
Microsoft Applications User Guide for Symbol Devices
Certificates
Some applications use certificates to establish trust and for secure communications. Certificate authorities sign and issue certificates
which are valid for a prescribed period of time. Windows CE manages multiple certificate stores.
1. Select Start - Settings - Control Panel, and double-tap the Certificates icon.
Figure 5-5. Certificates Window
2. Select the certificate group from the drop-down list to view or modify.
• The Trusted Authorities store lists the top-level certificates for trusted authorities.
• The My Certificates store contains the personal certificates, which are used for identification.
• The Other Authorities store lists intermediate certificate authorities that help establish a chain of trust.
3. To add a certificate or associated private key to the selected store, tap Import.
4. To view more details of the selected certificate, such as the expanded name or expiration date, tap View.
5. To delete a certificate, select it in the drop-down list and tap Remove.
6. Tap OK to apply the settings.
Windows CE Device Settings 5-9
Date/Time
Use the Date/Time Properties window to change the date, time, and time zone information.
1. Select Start - Settings - Control Panel, and double-tap the Date/Time icon.
Figure 5-6. Date/Time Properties Window
2.
3.
4.
5.
6.
Use the arrows to select the month.
Tap the date to select it.
Tap to highlight the hours, minutes, or seconds entry. Tap the up or down arrows to change the highlighted value.
Select the time zone from the Time Zone drop-down list.
Tap Apply or OK to save the new settings.
5-10
Microsoft Applications User Guide for Symbol Devices
Device Management
Use Device Management to keep track of software and hardware, inventory, and configure devices remotely.
The device management client contains a download/install engine that enables downloading software and notifications when there
are new applications or operating system (OS) updates available. The device management system also allows downloading and
running scripts to enable configuration and customized management. The Windows CE Device Management Client works with the
Microsoft Systems Management Server (SMS) to provide the required capabilities.
1. Select Start - Settings - Control Panel, and double-tap the Device Management icon.
Figure 5-7. Device Management Window
2. Enter the host system server name or IP address (see the System Administrator) in the Server name or IP address: field.
3. Select the Use Secure connection check box to require use of a secure connection.
4. Tap OK to close the window and set up the next poll to contact the new server.
Windows CE Device Settings 5-11
Dialing
Use the Dialing Properties window to set dialing properties for modem communication and change telephony settings.
1. Select Start - Settings - Control Panel, and double-tap the Dialing icon.
Figure 5-8. Dialing Properties Window
2.
3.
4.
5.
To remove a location from the Location: drop-down list, select the location and tap Remove.
Enter or edit the area code and country code as needed.
Select Tone dialing or Pulse dialing (most phone lines are tone).
Select the Disable call waiting check box to disable call waiting. Then select the appropriate number sequence from the dial:
drop-down list, or enter a new sequence.
6. To create a new location, tap New... and enter a name for the new location in the Location name: field.
Figure 5-9. Create New Location Window
7. To edit dialing properties, select the location from the Location: drop-down list, and tap Edit... . The Edit Dialing Patterns
window appears.
8. Using the codes listed in Table 5-2, edit the dialing patterns in the Edit Dialing Patterns window. Tap OK to save the new
entries or tap X to exit without saving the new entries.
Figure 5-10. Edit Dialing Patterns Window
5-12
Microsoft Applications User Guide for Symbol Devices
To use characters other than the ones listed in Table 5-2, use manual dialing.
Hyphens and spaces in dialing strings are ignored.
Some modems may not respond to the characters listed, even though the device allows them in the dial string.
Table 5-2. Dialing Characters
To
Enter
Dial country code (specified by the dialing program)
E
Dial area code (specified by the dialing program)
F
Dial local number (specified by the dialing program)
G
Insert a pause (typically 2 seconds)
, (comma)
Wait for credit card tone (specified by the dialing program)
$ (dollar sign)
Wait for second tone (typically used after $)
W
Tone-dial the following numbers
T
Pulse-dial the following numbers
P
Transfer to another extension (0.5 sec on hook, 0.5 sec off hook)
! (hookflash)
Wait for “quiet answer” (typically indicated by 6.5 seconds of
silence followed by a ringing tone)
@
Use special controls on some systems (tone only)
ABCD or * or #
Windows CE Device Settings 5-13
Display
Use the Display Properties window to change desktop background image and the display appearance.
Background Tab
To select the background image:
1. Select Start - Settings - Control Panel, and double-tap the Display icon.
2. Tap the Background tab.
Figure 5-11. Display Properties - Background Tab
3. From the Image: drop-down list, select the desktop background image. To locate an image in another folder, tap Browse.
4. To have the image cover the entire background, select Tile image on background.
5. Tap OK to save settings.
Appearance Tab
To change the color scheme:
1. Select Start - Settings - Control Panel, and double-tap the Display icon.
2. Tap the Appearance tab.
Figure 5-12. Display Properties - Appearance Tab
3. From the Scheme: drop-down list, select a scheme.
4. Select the color scheme item from the Item: drop-down list.
5. View the choice in the preview box and tap Apply to apply the scheme.
5-14
Microsoft Applications User Guide for Symbol Devices
To create a custom scheme:
1.
2.
3.
4.
5.
6.
7.
8.
9.
Select Start - Settings - Control Panel, and double-tap the Display icon.
Tap the Appearance tab.
From the Item: drop-down list, select a display item.
Tap the square next to the Item: drop-down list.
From the Basic colors: list, select a color, and tap OK.
View the color selection(s) in the preview box.
Tap Save to save the scheme.
In the Save scheme As box, enter a name for the scheme, and tap OK.
Tap Apply.
Windows CE Device Settings 5-15
Input Panel
Use the Input Panel Properties window to switch input methods and to set the input options.
1. Select Start - Settings - Control Panel, and double-tap the Input Panel icon.
Figure 5-13. Input Panel Properties
2. From the Current input method: drop-down list, select the input method.
3. Tap Options to open the Soft Keyboard Options window.
Figure 5-14. Soft Keyboard Options Window
4. Make the setting changes.
5. Tap OK to save the changes and exit the Soft Keyboard Options window.
6. Tap OK to apply the changes.
5-16
Microsoft Applications User Guide for Symbol Devices
Internet Options
Use the Internet Settings window to control how the device connects to the Internet.
General Tab
To select a home page and search engine:
1. Select Start - Settings - Control Panel, and double-tap the Internet Options icon.
Figure 5-15. Internet Settings Window - General Tab
2. In the Start Page: text box, enter the URL for the page to appear upon accessing the Internet.
3. In the Search Page: text box, enter the URL for the page to use to perform searches.
4. Tap Clear Cache and/or Clear History to free up space on the device by deleting Internet files. The Cache Size (in KB):
field indicates the amount of space being used for these files.
Connection Tab
To set Internet connection options:
1. Select Start - Settings - Control Panel, and double-tap the Internet Options icon.
2. Tap the Connections tab.
Figure 5-16. Internet Settings Window - Connection Tab
3. Select the Use LAN (no autodial) check box to prevent the device from automatically dialing the remote connection when
accessing the Internet or corporate network.
4. If the Use LAN (no autodial) check box was not selected, select the remote connection to use from the Autodial name: dropdown list.
Windows CE Device Settings 5-17
5. Select the Access the Internet using a proxy server check box to use a proxy server for Internet connection. This provides
additional security when connecting to the Internet through a local network. Enter the address and port in the corresponding
text boxes.
6. Select the Bypass proxy server for local addresses check box to disable using the proxy server when connecting to local
addresses, such as corporate intranet pages.
Security Tab
To set Internet security options:
1. Select Start - Settings - Control Panel, and double-tap the Internet Options icon.
2. Tap the Security tab.
Figure 5-17. Internet Settings Window - Security Tab
3. Select the check boxes corresponding to the features to enable.
Advanced Tab
To set Internet advanced options:
1. Select Start - Settings - Control Panel, and double-tap the Internet Options icon.
2. Tap the Advanced tab.
Figure 5-18. Internet Settings Window - Advanced Tab
3. Select the check boxes corresponding to the features to enable.
4. In the Underline links section, select a radio button to determine whether or not to underline links that appear on Internet
pages.
5-18
Microsoft Applications User Guide for Symbol Devices
Keyboard
Use the Keyboard Properties window to change the keyboard repeat rate and repeat delay.
1. Select Start - Settings - Control Panel, and double-tap the Keyboard icon.
Figure 5-19. Keyboard Properties - Repeat Tab
2.
3.
4.
5.
6.
Tap the Enable character repeat check box.
Drag the Repeat delay: slider to change the repeat delay time.
Drag the Repeat rate: slider to change the repeat rate.
Test the new settings in the text box provided.
Tap OK to apply the changes.
Windows CE Device Settings 5-19
Mouse
Use the Mouse Properties window to adjust stylus double-tap timing.
1. Select Start - Settings - Control Panel, and double-tap the Mouse icon.
Figure 5-20. Mouse Properties Window
2. Double-tap the checkerboard grid at a comfortable speed.
3. Double-tap the clapboard to test the settings.
4. Tap OK to apply changes.
5-20
Microsoft Applications User Guide for Symbol Devices
Network and Dial-up Connections
Use the Connection window to set connections to other computers, networks, and the Internet.
1. Select Start - Settings - Control Panel, and double-tap the Network and Dial-up Connections icon.
Figure 5-21. Connection Window
2. Double an icon to select a connection type.
3. Follow the connection type instructions.
4. Tap OK to apply changes.
Windows CE Device Settings 5-21
Owner
Use the Owner Properties window to enter owner information. This information can appear when the device turns on.
Identification Tab
1. Select Start - Settings - Control Panel, and double-tap the Owner icon.
2. Tap the Identification tab.
Figure 5-22. Owner Properties Window - Identification Tab
3. Fill in or edit the owner information.
4. Select the Display owner identification check box to display this information when the device starts.
Notes Tab
1. Tap the Notes tab and enter additional information in the Notes box.
2. Select the Display owner notes box to include this information on the startup display.
Figure 5-23. Owner Properties Window - Notes Tab
5-22
Microsoft Applications User Guide for Symbol Devices
Network ID Tab
To set up identification for remote networks, select the Network ID tab and enter the user name, password, and domain name used
to log on to the remote network.
Figure 5-24. Owner Properties Window - Network ID Tab
Windows CE Device Settings 5-23
Password
Use the Password Properties window to set a password for the device.
1. Select Start - Settings - Control Panel, and double-tap the Password icon.
Figure 5-25. Password Properties Window
2.
3.
4.
5.
6.
Enter the password for the device in the Password: text box.
Enter the password again in the Confirm password: text box.
Select the Enable password protection at power-on check box to require the password on startup.
Select the Enable password protection screen saver check box to require the password to unlock the screen saver.
Tap OK to apply changes.
5-24
Microsoft Applications User Guide for Symbol Devices
PC Connection
Use the PC Connection Properties window to set the device communication baud rate (with the host computer).
1. Select Start - Settings - Control Panel, and double-tap the PC Connection icon.
Figure 5-26. PC Connection Properties Window
2. Select the Enable direct connections to the desktop computer checkbox to allow direct connections.
3. Tap Change Connection... to change the selection.
Figure 5-27. Change Connection Window
4. Select the connection type from the drop-down list.
5. Tap OK.
6. In the PC Connection Properties window, tap OK to apply the changes.
Windows CE Device Settings 5-25
Power
Use the Power Properties window to view and control device power settings.
1. Select Start - Settings - Control Panel, and double-tap the Power icon.
Figure 5-28. Power Settings Window - Battery Tab
2. On the Battery tab, view the power remaining on the battery and backup battery to determine if charging is required.
Power Off Tab
1. Select Start - Settings - Control Panel, and double-tap the Power icon.
2. Tap the Power Off tab.
Figure 5-29. Power Settings Window - Power Off Tab
3. Under On Battery power:, select the Turn off device if not used for check box to suspend the device when not used for a
certain period of time when operating on battery power. Select this period of time from the drop-down list. Available times
are 30 seconds, 1 minute, 2 minutes, 3 minutes, 4 minutes, 5 minutes, 6 minutes, and never.
4. Under On External power:, select the Turn off device if not used for check box to suspend the device when not used for a
certain period of time when operating on external power. Select this period of time from the drop-down list. Available times
are 1 minute, 2 minutes, 3 minutes, 5 minutes, 10 minutes, 15 minutes, 30 minutes, and never.
5-26
Microsoft Applications User Guide for Symbol Devices
Misc Tab
1. Select Start - Settings - Control Panel, and double-tap the Power icon.
2. Tap the Misc tab.
Figure 5-30. Power Settings Window - Misc Tab
3. Select the Disable Power Switch check box to prevent the power switch (button???) from suspending the system.
PwrDevices Tab
1. Select Start - Settings - Control Panel, and double-tap the Power icon.
2. Tap the PwrDevices tab.
Figure 5-31. Power Settings Window - PwrDevices Tab
3. All components with active power management enabled appear in the left column with their current power level in the right
column. To set a power level, tap the device in the list, then select the level from the drop-down list. Selections range from
D0 (high) which means the device is at the highest power level to D4 (off) which means the device is at the lowest power
level.
4. Tap Set to apply the selections.
Windows CE Device Settings 5-27
Wakeup Tab
1. Select Start - Settings - Control Panel, and double-tap the Power icon.
2. Tap the Wakeup tab.
Figure 5-32. Power Settings Window - Wakeup Tab
3. For each device in the list, tap a source field to select whether or not to wake up the device based on a certain event????
4. Tap Apply to apply the changes, or Restore to reapply the default settings.
5-28
Microsoft Applications User Guide for Symbol Devices
Regional Settings
Use Regional Settings to set how the device displays dates, times, currency amounts, large numbers, and numbers with decimal
fractions. Also set the system of measurement to either metric or U.S.
Region Tab
1. Select Start - Settings - Control Panel, and double-tap the Regional Settings icon.
Figure 5-33. Regional Settings Properties - Region Tab
2. From the Your locale: drop-down list, select the appropriate location.
3. If applicable, select the appropriate language from the User Interface Language drop-down list.
Some location selections also provide special features, such as font characters or spell checkers designed for different
languages.
Number Tab
1. Tap the Number tab.
Figure 5-34. Regional Settings Properties - Number Tab
2. Select desired options. Available options vary depending on the Your locale: and User Interface Language selections on the
Region tab.
Windows CE Device Settings 5-29
Currency Tab
1. Tap the Currency tab.
Figure 5-35. Regional Settings Properties - Currency Tab
2. Select desired options. Available options vary depending on the Your locale: and User Interface Language selections on the
Region tab.
Time Tab
1. Tap the Time tab.
Figure 5-36. Regional Settings Properties - Time Tab
2. Select desired options. Available options vary depending on the Your locale: and User Interface Language selections on the
Region tab.
5-30
Microsoft Applications User Guide for Symbol Devices
Date Tab
1. Tap the Date tab.
Figure 5-37. Regional Settings Properties Window - Date Tab
2. Select desired options. Available options vary depending on the Your locale: and User Interface Language selections on the
Region tab.
Windows CE Device Settings 5-31
Remove Programs
Use the Remove Programs window to remove user-installed programs from the device:
1. Select Start - Settings - Control Panel, and double-tap the Remove Programs icon.
2. Select the program to be removed.
Figure 5-38. Remove Programs Window
3. Tap Remove.
4. Tap OK or X.
5-32
Microsoft Applications User Guide for Symbol Devices
Storage Manager
Use the Storage Properties window to manage storage media and disk partitions.
Figure 5-39. Storage Properties Window
The Store Info: drop-down list shows available storage devices. To view information about the disk or perform store operations, select
a device from the list.
•
•
To unmount all partitions on the selected storage device, tap Dismount.
To format the partition table, tap Format. The partition table cannot be formatted if any partitions on the storage device are
mounted.
Managing Disk Partitions
The Partitions: list box shows available partitions on the selected storage device.
•
•
•
To create a new partition on the storage device, tap New.
To delete a partition from the storage device, select the partition to delete and tap Delete. Mounted partitions cannot be
deleted.
To view partition information or perform advanced partition functions, such as formatting, select the partition from the list
and tap Properties. See Advanced Partition Options.
Creating A New Partition
To create a new partition:
1.
2.
3.
4.
Select a storage device from the Store info: list and tap New.
Type the name of the new partition.
Type the size (in sectors) for the new partition, or check the Use All Available Disk Space box.
Tap OK to create the partition, or tap X to cancel.
Windows CE Device Settings 5-33
Advanced Partition Options
To view advanced partition options, select a partition from the list and tap Properties.
Figure 5-40. Partition Properties Window
•
•
•
•
•
To mount an unmounted partition, tap Mount.
To dismount a mounted partition, tap Dismount.
To format a partition, tap Format.
To scan and repair a partition, tap Scan.
To defragment a partition, tap Defrag.
Depending on a partition's file system, the Format, Scan, and Defrag options may not be available. The
behavior of these features vary depending on the implementation of the file system's utility library.
5-34
Microsoft Applications User Guide for Symbol Devices
Stylus
Use the Stylus Properties windows to adjust double-tap timing and to recalibrate the touch screen.
Double-Tap Tab
1. Select Start - Settings - Control Panel, and double-tap the Stylus icon.
2. Tap the Double-Tap tab.
Figure 5-41. Stylus Properties - Double-Tap Tab
3. Double-tap the checkerboard grid at a comfortable speed.
4. Double-tap the clapboard to test the setting.
5. Tap OK.
Calibrate Tab
1. Select Start - Settings - Control Panel, and double-tap the Stylus icon.
2. Tap the Calibration tab.
Figure 5-42. Stylus Properties - Calibration Tab
3. Tap Recalibrate.
4. Tap the targets and follow the on-screen messages.
5. Tap OK.
Windows CE Device Settings 5-35
System
Use the System Properties windows to view general system properties, change memory settings, enter a device name, and view
copyright information.
General Tab
The General tab displays general system settings.
1. Select Start - Settings - Control Panel, and double-tap the System icon.
2. Tap the General tab to view basic system and computer properties.
Figure 5-43. System Properties - General Tab
Memory Tab
Use the Memory tab to adjust the RAM allocation.
1. Select Start - Settings - Control Panel, and double-tap the System icon.
2. Tap the Memory tab.
Figure 5-44. System - Memory Tab
3. Move the slider to allocate more memory for programs or storage. If there is not enough space for a file, increase the amount
of storage memory. If the device is running slowly, increase the amount of program memory.
Programs supplied with the device are located in ROM and remain after a cold boot. User-installed programs
are located in RAM and must be reinstalled after a cold boot. Adjust the RAM allocation as required for
reinstalling user programs.
5-36
Microsoft Applications User Guide for Symbol Devices
Device Name Tab
Use the Device Name tab to customize the device name and description.
1. Select Start - Settings - Control Panel, and double-tap the System icon.
2. Tap the Device Name tab.
Figure 5-45. System Properties - Device Name Tab
3. Enter the device name in the Device name (without spaces): field.
4. Enter a device description in the Device description: field.
Copyrights Tab
The Copyrights tab displays copyright information.
1. Select Start - Settings - Control Panel, and double-tap the System icon.
2. Tap the Copyrights tab to view the copyrights statement.
Figure 5-46. System Properties - Copyrights Tab
Windows CE Device Settings 5-37
Volume & Sounds
Use the Volume & Sounds Properties window to set event sounds and volume options.
1. Select Start - Settings - Control Panel - double-tap the Volume & Sounds icon.
Figure 5-47. Volume & Sounds Properties Window - Volume Tab
2. On the Volume tab, use the slide bar to change the volume.
3. Select the desired enable sound options.
Turning off sounds saves power and prolongs battery life.
Sounds Tab
1. Select Start - Settings - Control Panel - double-tap the Volume & Sounds icon.
2. Tap the Sounds tab.
Figure 5-48. Volume & Sounds Properties - Sounds Tab
3. From the Event: list, select an event.
4. From the Sound: drop-down list, select a sound to apply to the event.
To remove a sound from the selected event, select (None).
5. To save the changes to a different scheme, tap Save As, and then enter the name the sound scheme.
6. To delete a sound scheme, select the scheme in the Scheme: drop-down list and tap Delete.
5-38
Microsoft Applications User Guide for Symbol Devices
To quickly turn off all event sounds, select No sounds from the Scheme: list.
Microphone Tab
1. Select Start - Settings - Control Panel - double-tap the Volume & Sounds icon.
2. Tap the Microphone tab.
Figure 5-49. Volume & Sounds Properties - Microphone Tab
3. Move the slider to adjust the microphone gain. Table 5-3 list the sensitivity settings for a microphone.
Table 5-3. Microphone Sensitivity Settings
Sensitivity
Comment
Very low (furthest left)
Sensitivity is low.
Low
Sensitivity is slightly low.
Med
Sensitivity is medium. Default after hard reset.
High
Sensitivity is slightly high.
Very high (furthest right)
Sensitivity is high.
Windows CE Applications
ntroduction . . . . . . . . . . . . . . . . . . . . . . . . . . . . . . . . . . . . . . . . . . . . . . . . . . . . . . . . . . . . . . . . . . . . . . . . . . . . . 6-3
ActiveSync . . . . . . . . . . . . . . . . . . . . . . . . . . . . . . . . . . . . . . . . . . . . . . . . . . . . . . . . . . . . . . . . . . . . . . . . . . . . . . 6-3
Copying Files . . . . . . . . . . . . . . . . . . . . . . . . . . . . . . . . . . . . . . . . . . . . . . . . . . . . . . . . . . . . . . . . . . . . . . . .6-3
Internet Explorer. . . . . . . . . . . . . . . . . . . . . . . . . . . . . . . . . . . . . . . . . . . . . . . . . . . . . . . . . . . . . . . . . . . . . . . . . . 6-4
Browsing the Web . . . . . . . . . . . . . . . . . . . . . . . . . . . . . . . . . . . . . . . . . . . . . . . . . . . . . . . . . . . . . . . . . . . . 6-4
Favorites . . . . . . . . . . . . . . . . . . . . . . . . . . . . . . . . . . . . . . . . . . . . . . . . . . . . . . . . . . . . . . . . . . . . . . . . . . . . 6-5
Saving a Copy of a Page. . . . . . . . . . . . . . . . . . . . . . . . . . . . . . . . . . . . . . . . . . . . . . . . . . . . . . . . . . . . . . . . 6-6
Copying a Page to a Document . . . . . . . . . . . . . . . . . . . . . . . . . . . . . . . . . . . . . . . . . . . . . . . . . . . . . . . . . . 6-7
Remote Desktop . . . . . . . . . . . . . . . . . . . . . . . . . . . . . . . . . . . . . . . . . . . . . . . . . . . . . . . . . . . . . . . . . . . . . . . . . . 6-8
Connecting to a Terminal Server . . . . . . . . . . . . . . . . . . . . . . . . . . . . . . . . . . . . . . . . . . . . . . . . . . . . . . . . . 6-8
Disconnecting Without Ending a Session . . . . . . . . . . . . . . . . . . . . . . . . . . . . . . . . . . . . . . . . . . . . . . . . . . 6-8
Disconnecting and Ending a Session . . . . . . . . . . . . . . . . . . . . . . . . . . . . . . . . . . . . . . . . . . . . . . . . . . . . . . 6-8
Windows CE Messenger . . . . . . . . . . . . . . . . . . . . . . . . . . . . . . . . . . . . . . . . . . . . . . . . . . . . . . . . . . . . . . . . . . . 6-9
Setting Up an Account . . . . . . . . . . . . . . . . . . . . . . . . . . . . . . . . . . . . . . . . . . . . . . . . . . . . . . . . . . . . . . . . . 6-9
Signing In . . . . . . . . . . . . . . . . . . . . . . . . . . . . . . . . . . . . . . . . . . . . . . . . . . . . . . . . . . . . . . . . . . . . . . . . . . 6-10
Working with Contacts . . . . . . . . . . . . . . . . . . . . . . . . . . . . . . . . . . . . . . . . . . . . . . . . . . . . . . . . . . . . . . . 6-11
Messenger Menus . . . . . . . . . . . . . . . . . . . . . . . . . . . . . . . . . . . . . . . . . . . . . . . . . . . . . . . . . . . . . . . . . . . 6-11
Adding a Contact . . . . . . . . . . . . . . . . . . . . . . . . . . . . . . . . . . . . . . . . . . . . . . . . . . . . . . . . . . . . . . . . . . . . 6-12
Deleting a Contact . . . . . . . . . . . . . . . . . . . . . . . . . . . . . . . . . . . . . . . . . . . . . . . . . . . . . . . . . . . . . . . . . . . 6-12
Chatting with Contacts . . . . . . . . . . . . . . . . . . . . . . . . . . . . . . . . . . . . . . . . . . . . . . . . . . . . . . . . . . . . . . . 6-13
Managing Contacts . . . . . . . . . . . . . . . . . . . . . . . . . . . . . . . . . . . . . . . . . . . . . . . . . . . . . . . . . . . . . . . . . . 6-15
Microsoft WordPad . . . . . . . . . . . . . . . . . . . . . . . . . . . . . . . . . . . . . . . . . . . . . . . . . . . . . . . . . . . . . . . . . . . . . . 6-19
Creating a Document . . . . . . . . . . . . . . . . . . . . . . . . . . . . . . . . . . . . . . . . . . . . . . . . . . . . . . . . . . . . . . . . . 6-19
Editing a Document . . . . . . . . . . . . . . . . . . . . . . . . . . . . . . . . . . . . . . . . . . . . . . . . . . . . . . . . . . . . . . . . . . 6-20
Formatting Text . . . . . . . . . . . . . . . . . . . . . . . . . . . . . . . . . . . . . . . . . . . . . . . . . . . . . . . . . . . . . . . . . . . . . 6-21
Formatting Paragraphs . . . . . . . . . . . . . . . . . . . . . . . . . . . . . . . . . . . . . . . . . . . . . . . . . . . . . . . . . . . . . . . . 6-22
6-2
Microsoft Applications User Guide for Symbol Devices
Finding Text . . . . . . . . . . . . . . . . . . . . . . . . . . . . . . . . . . . . . . . . . . . . . . . . . . . . . . . . . . . . . . . . . . . . . . . .6-22
Replacing Text . . . . . . . . . . . . . . . . . . . . . . . . . . . . . . . . . . . . . . . . . . . . . . . . . . . . . . . . . . . . . . . . . . . . . .6-23
Windows CE Applications 6-3
Introduction
Applications provided on Symbol Windows CE devices include Internet Explorer, Remote Desktop, Windows CE Messenger, and
Microsoft WordPad.
Screens and windows pictured in this guide are samples and can differ from actual screens.
Procedures in this chapter assume the device has a touch-enabled screen. For devices that do not have touch screens,
refer to the device’s User Guide for instructions on navigating the Windows CE desktop and applications.
ActiveSync
Use the Symbol supplied PC Link icon (from the device’s demo window) as a shortcut to the device-side ActiveSync component
repllog.exe. Microsoft ActiveSync synchronizes information on the desktop computer with information on the device and updates both
computers with the most recent information.
From the demo window, double-tap the PC Link icon to start ActiveSync.
ActiveSync automatically connects when the device is connected to the host computer.
Figure 6-1. Connecting to Host Computer
Copying Files
Copying a file results in separate versions of a file on the device and desktop computer. Since the files are not synchronized, changes
made to one file do not affect the other.
1.
2.
3.
4.
Connect the device to the host computer.
In ActiveSync on the host computer, click Explore. Windows Explorer opens the Mobile Device window for the device.
Open a new Windows Explorer and browse to the file to be copied on the device or host computer.
To copy the file to the device, right-click the file and select Copy. Right-click in the desired folder on the device and select
Paste.
To copy the file to the host computer, right-click the file and select Copy. Open a new Windows Explorer, right-click in the
desired folder on the host computer, and select Paste.
6-4
Microsoft Applications User Guide for Symbol Devices
Internet Explorer
Use Internet Explorer to view Internet or intranet Web pages on the device. Connecting to an Internet service provider (ISP) or network
requires a modem, an Ethernet connection, or a Spectrum24 connection. To customize Internet Explorer options, such as setting home
and search pages, see Internet Options on page 5-16.
To open Internet Explorer, double-tap the Internet Explorer icon, or select Start - Programs - Internet Explorer.
Figure 6-2. Internet Explorer Window
Browsing the Web
To browse the Web:
1. Connect to a network using a wireless connection. See the Integrator Guide.
2. Go to a specific Web page in one of the following ways:
• Use the keypad to enter the web address in the address bar, then press the ENT key.
• Tap the address bar drop-down arrow to select a previously entered address.
3. To end the connection, select File - Close.
If Internet Explorer is selected before setting up the network connection, a window may appear to proceed to
the connection settings window.
Windows CE Applications 6-5
Browsing Tips
Figure 6-3. Internet Explorer - View Menu
•
•
•
•
•
To return to the last page viewed, tap the back arrow, or select View - Back.
To go to the next page that was previously viewed, tap the forward arrow, or select View - Forward.
To refresh the page, select View - Refresh.
To stop loading a page, select View - Stop.
To change the screen text size, select View - Text Size, then the preferred size.
Favorites
Adding a Favorite
To add a page to Favorites:
1. Go to the page to add.
Figure 6-4. Internet Explorer - Favorites Menu
2. Select Favorites - Add to Favorites... .
Figure 6-5. Internet Explorer - Adding Favorites
6-6
Microsoft Applications User Guide for Symbol Devices
3. If necessary, enter the name of the page to appear in the Favorites menu.
4. If necessary, enter the URL in the URL: field.
5. Tap OK.
To view a Favorite site, select Favorites, then the name of the site.
Saving a Copy of a Page
To save a Web page to view later when disconnected from the Internet or intranet without using cached memory:
1. Go to the page to save.
Figure 6-6. Internet Explorer - File Menu
2. Select File - Save As... .
Figure 6-7. Internet Explorer - Saving a Page
3.
4.
5.
6.
Select a folder from the browser in which to save the file.
Enter a name for the file in the Name: field.
Select a file type from the Type: drop-down list.
Tap OK.
Windows CE Applications 6-7
When viewing saved Web pages:
•
•
•
Images are not displayed and links are disabled.
Web pages with frames either do not display, or display the frame structure only.
To save an individual frame, press ALT and tap the frame, then select Save As or Save from the pop-up menu. Frames that
cannot be saved do not display when opened in Windows Explorer as saved files.
Copying a Page to a Document
To copy a Web page to a document:
1. Select all or part of the Web page to copy.
Figure 6-8. Internet Explorer - Edit Menu
2. Select Edit - Copy.
3. Go to the document and select the location in which to place the information.
4. Select Edit - Paste.
6-8
Microsoft Applications User Guide for Symbol Devices
Remote Desktop
Use Remote Desktop to log onto a Windows Terminal Server and to use the programs installed on the server, such as the desktop
version of Microsoft Word.
Connecting to a Terminal Server
To connect to a terminal server:
1. Double-tap the Remote Desktop Connection icon, or select Start - Programs - Remote Desktop Connection. The initial
Remote Desktop Connection window appears.
Figure 6-9. Remote Desktop Connection Window
2. In the Computer: drop-down list, type a Terminal Server name or TCP/IP address, or select a server from the drop-down list.
3. Tap Connect.
4. In the next window, type the user name, password, and domain (if required), then tap OK.
Disconnecting Without Ending a Session
To disconnect a session:
1. In the Remote Desktop Connection window, select Start - Shutdown.
2. Tap Disconnect.
3. Tap OK.
If disconnecting from Terminal Server without ending the session, the Terminal Server continues to execute
any running processes. Remote Desktop Connection can later reconnect to this session (if the administrator
configured Remote Desktop Connection to reconnect to disconnected sessions).
Disconnecting and Ending a Session
To end a session:
1. In the Remote Desktop Connection window, select Start - Shutdown.
2. Tap Log Off.
3. Tap OK.
Windows CE Applications 6-9
Windows CE Messenger
Use the Windows CE Messenger application to communicate using text-based messaging and Voice-over-IP (VoIP), for example:
•
•
•
See who is online.
Talk with a colleague anywhere in the world using the device’s microphone and speakers.
Communicate using Session Initiation Protocol (SIP), or Hotmail accounts using the .NET Messenger.
Windows CE Messenger requires a Microsoft Passport™ account or a Microsoft Exchange e-mail account. A Passport is required to
use MSN Messenger Service. (A Passport is included with a Hotmail® or MSN account.) Obtain a Microsoft Passport or a Microsoft
Exchange account and set up the account.
Setting Up an Account
Before connecting, set up the Passport or Exchange account and sign in:
1. Double-tap the Messenger icon, or select Start - Programs - Messenger.
Figure 6-10. Windows Messenger Welcome Window
2. Tap Next.
Figure 6-11. Service Information Window
3. Enter the e-mail address and tap Next.
6-10
Microsoft Applications User Guide for Symbol Devices
Figure 6-12. Get a Passport Window
4. To set up a Passport account, tap Get a Passport.
5. Enter a sign-in name (typically an e-mail address) and password.
6. Tap Next.
7. Tap Finish to sign in.
Signing In
To sign in after setting up an account:
1. Double-tap the Messenger icon, or select Start - Programs - Messenger.
Figure 6-13. Windows Messenger Sign In Window
2. Enter the sign-in name.
3. Tap ok.
If using MSN Messenger on the host computer, contacts automatically appear on the device.
Windows CE Applications 6-11
Working with Contacts
The Windows Messenger window is divided into Online and Not Online categories. From this view, while connected, chat, send email, block the contact from chatting, or delete contacts from the list.
Send an Instant Message
Add a Contact
Call a Contact’s Computer
Tap to select a contact
Figure 6-14. Windows Messenger Contacts
To see others online without being seen, tap Tools - My Status - Appear Offline. You appear offline but remain on the
blocked contact's list.
To unblock a contact, tap and hold the contact, then select Unblock on the pop-up menu.
Messenger Menus
To access the File menu, tap Menu.
Tap Next on the menu to access the Tools menu.
Figure 6-15. Windows Messenger Menus
6-12
Microsoft Applications User Guide for Symbol Devices
Adding a Contact
To add a contact:
1. Double-tap the Messenger icon, or select Start - Programs - Messenger.
2. Enter the sign-in name and tap ok.
3. Tap the Add a Contact icon, or tap Menu - Add a Contact... .
Figure 6-16. Adding a Contact
4. Select the By e-mail address or sign-in radio button, then tap Next.
5. Type in the user’s account name.
Figure 6-17. Entering Contact E-mail Address
6. Tap Next.
7. Tap Finish.
Deleting a Contact
To delete a contact:
1.
2.
3.
4.
Double-tap the Messenger icon, or select Start - Programs - Messenger.
Enter the sign-in name and tap ok.
Select the contact name.
Tap Menu - Delete Contact.
Windows CE Applications 6-13
Chatting with Contacts
To chat with a contact:
1.
2.
3.
4.
5.
Double-tap the Messenger icon, or select Start - Programs - Messenger.
Enter the sign-in name and tap ok.
Tap a contact name.
Tap the Send an Instant Message icon, or tap Menu - Next - Send an Instant Message.
Enter the message in the text entry area at the bottom of the screen.
Join this Conversation
Block this contact
Tap to talk to the contact
Tap to sent an attachment
Enter a message
Tap to send a message
Figure 6-18. Sending a Message
6. To invite another contact to a multi-user chat, tap the Join this Conversation icon.
Figure 6-19. Inviting a Contact
7. Enter the e-mail address of the contact to invite, then tap OK.
8. To prevent the contact from seeing or contacting you, tap the Block this contact icon.
6-14
Microsoft Applications User Guide for Symbol Devices
9. To send an attached file with the message, select Menu - Send a File To.
Figure 6-20. Sending a File
10. Enter the file name in the Name: text box, or use the explorer to browse to the file and select it.
11. Tap OK.
12. Tap Send.
Windows CE Applications 6-15
Managing Contacts
To change contact options:
1. Double-tap the Messenger icon, or select Start - Programs - Messenger.
2. Enter the sign-in name and tap ok.
3. Tap Menu - Next - Options... .
Figure 6-21. Messenger Options - Personal Tab
4. In the text box, enter the name that others see when sending instant messages.
5. Select the check box to always require a password when checking e-mail or opening .NET Passport-enabled web pages.
6. To change the message font, tap Change Font... .
Figure 6-22. Change My Message Font Window
7.
8.
9.
10.
To select a font, font style, and font size, use the drop-down lists for the corresponding option.
Select the Strikeout check box to strike out text, or the Underline check box to underline text.
Select a text color from the Color: drop-down list.
Tap OK.
6-16
Microsoft Applications User Guide for Symbol Devices
11. Tap the Phone tab.
Figure 6-23. Messenger Options: Phone Tab
12. Select the country and region from the My Country/region code: drop-down list.
13. In the Home:, Work:, and Mobile: fields, enter the appropriate phone number. These appear with your name in others’ contact
lists.
14. Tap the Preferences tab.
Figure 6-24. Messenger Options: Preferences Tab
15. Select the check boxes that correspond to the desired features.
16. After selecting the Play sound when contacts sign in or send a message check box, tap Sounds... to specify the sound.
17. In the Files received from other users: text box, enter the path for the folder in which to store received files, or tap Browse...
and browse to the folder.
Windows CE Applications 6-17
18. Tap the Privacy tab.
Figure 6-25. Messenger Options - Privacy Tab
19. To block a contact from sending you messages, tap the contact in My Allow List, then tap the right arrow to move this contact
to My Block List.
20. To unblock a contact, tap the contact in My Block List, then tap the left arrow to move the contact to My Allow List.
21. Select the Alert me when other users add me to their contact lists check box to receive an alert when someone adds you to
their list.
22. To view users who have added you to their contact lists, tap View... .
Figure 6-26. Messenger Options - View Contacts Window
23. Tap Close to return to the Options window.
6-18
Microsoft Applications User Guide for Symbol Devices
24. Tap the Accounts tab.
Figure 6-27. Messenger Options - Accounts Tab
25. Select the My contacts include users of a communications service and/or My contacts include users of .NET Messenger
service check box(es).
26. Enter the sign-in name (typically an e-mail address) and password, if required, in the appropriate fields.
27. Select either the Communications Service account or the .NET Passport account radio button to determine which account to
sign onto first.
28. Tap the Connection tab.
Figure 6-28. Messenger Options - Connection Tab
29.
30.
31.
32.
Select the I use a proxy server check box if using a proxy server.
Select the type of proxy server from the Type: drop-down list.
Enter the requested proxy information in the text boxes.
Tap OK.
For more information on using Windows CE Messenger, tap Start - Help.
Windows CE Applications 6-19
Microsoft WordPad
Use Microsoft WordPad to create documents on the device.
Creating a Document
To create a new document in Pocket Word, such as a letter, meeting minutes, or a trip report:
1. Tap Start - Programs - Microsoft WordPad.
Figure 6-29. Microsoft WordPad Window
2. Tap File - New Document.
3. Enter information. To enter symbols, select Tools - Insert Symbol... .
Figure 6-30. Symbol Window
4.
5.
6.
7.
Tap the symbol to insert, then tap Insert.
Repeat this for each symbol to insert, then tap Close to return to the document.
To format text, see Formatting Text on page 6-21.
To change the zoom magnification, tap View - Zoom. Select the percentage. Select a higher percentage to enter text and a
lower one to see more of the document.
8. To require a password to open the file, tap File - Password... .
Figure 6-31. Password Window
6-20
Microsoft Applications User Guide for Symbol Devices
9. Enter the password in the Password: field.
10. Re-enter the password in the Verify Password: field.
11. To save the file, tap File - Save As... .
Figure 6-32. Save As Window
12. Enter the file name in the Name: text box.
13. To move the file to a different folder, select the new folder in the list box, or use the folder icons to navigate to the folder.
14. In the Type: drop-down list, select the file type. A variety of file formats is available, including WordPad (.pwd), Word (.doc),
Rich Text Format (.rtf), and Plain Text (.txt).
15. Tap OK.
Editing a Document
To make changes to a document:
1. Tap Start - Programs - Microsoft WordPad.
2. Tap File - Open... .
Figure 6-33. Open Window
3. Enter the file name in the Name: text box, or use the explorer to navigate to and select the file.
Windows CE Applications 6-21
4. Tap OK to open the file.
5. Make the changes. If opening a document created on a host computer, tap View - Wrap to Window to see the entire
document.
To cut, copy, or paste text, select the text, then select the appropriate item from the Edit menu to perform the function.
Figure 6-34. Edit Menu
6. Tap File - Save to save the changes.
7. Tap X to close the file.
Formatting Text
To format text or a drawing:
1.
2.
3.
4.
5.
6.
Tap Start - Programs - Microsoft WordPad.
Tap File - Open... .
Enter the file name in the Name: text box, or use the explorer to navigate to and select the file.
Tap OK to open the file.
Select the text to format. To select text, drag the stylus across the text.
Tap Format - Font... .
Figure 6-35. Formatting Text
7.
8.
9.
10.
11.
Select the Font: and font Size: from the drop-down lists.
To change the color of the font, select a color from the Color: drop-down list.
Select the appropriate check boxes to bold, italicize, or underline the selected text.
To return the selected text to the default settings, tap Apply Default.
To use the font modifications as default settings, tap Set as Default... .
6-22
Microsoft Applications User Guide for Symbol Devices
12. Tap OK.
Formatting Paragraphs
To format a paragraph:
1.
2.
3.
4.
5.
6.
Tap Start - Programs - Microsoft WordPad.
Tap File - Open... .
Enter the file name in the Name: text box, or use the explorer to navigate to an select the file.
Tap OK to open the file.
Select the text or paragraph.
Tap Format - Paragraph... .
Figure 6-36. Formatting Paragraphs
7.
8.
9.
10.
Select whether to left-align, right-align, or center the paragraph using the Alignment: drop-down list.
Select the Bulleted or Numbered radio button to bullet or number selected text.
Under Indentation, use the up and down arrows to add indentation to text as needed.
To set tabs, tap Tabs... .
Figure 6-37. Setting Tabs
11.
12.
13.
14.
Enter a tab stop position in the text box, and tap Set.
Repeat this for each tab needed.
Tap OK to return to the Paragraph window.
Tap OK to finish.
Finding Text
To search a document for text:
1.
2.
3.
4.
Tap Start - Programs - Microsoft WordPad.
Tap File - Open... .
Enter the file name in the Name: text box, or use the explorer to navigate to and select the file.
Tap OK to open the file.
Windows CE Applications 6-23
5. Tap Edit - Find... .
Figure 6-38. Finding Text
6.
7.
8.
9.
Enter the text to find in the Find what: text box.
Select the Match whole words only check box to find whole words.
Select the Match case check box to find text using the same case specified.
Tap Find Next. Upon locating the text, select whether to update the text, or to search for the next instance.
Replacing Text
To replace text in a document:
1.
2.
3.
4.
5.
Tap Start - Programs - Microsoft WordPad.
Tap File - Open... .
Enter the file name in the Name: text box, or use the explorer to navigate to and select the file.
Tap OK to open the file.
Tap Edit - Replace... .
Figure 6-39. Replacing Text
6.
7.
8.
9.
10.
Enter the text to find in the Find what: text box.
Enter the text that is to replace the found text in the Replace with: text box.
Select the Match whole words only check box to find whole words.
Select the Match case check box to find text using the same case specified.
Tap Find Next. Upon locating the text, select whether to replace the text, or to search for the next instance.
For more information on using Microsoft WordPad, tap Start - Help.
6-24
Microsoft Applications User Guide for Symbol Devices
Index
A
about . . . . . . . . . . . . . . . . . . . . . . . . . . . . . . . . . . . .2-28
ActiveSync . . . . . . . . . . . . . . . . . . . . . . . . . . . . . . . . .6-3
adjusting memory . . . . . . . . . . . . . . . . . . . . . 2-37, 5-35
adjusting settings . . . . . . . . . . . . . . . . . . . . . . . . . . .2-3
alarms . . . . . . . . . . . . . . . . . . . . . . . . . . . . . . . . . . .2-35
align screen . . . . . . . . . . . . . . . . . . . . . . . . . . . . . . .2-45
appearance . . . . . . . . . . . . . . . . . . . . . . . . . . . . . . .5-13
applications
calendar . . . . . . . . . . . . . . . . . . . . . . . . . . . . . .3-5
contacts . . . . . . . . . . . . . . . . . . . . . . . . . . . . .3-10
inbox . . . . . . . . . . . . . . . . . . . . . . . . . . . . . . . .3-24
notes . . . . . . . . . . . . . . . . . . . . . . . . . . . . . . . .3-19
pictures . . . . . . . . . . . . . . . . . . . . . . . . . . . . . .3-56
tasks . . . . . . . . . . . . . . . . . . . . . . . . . . . . . . . .3-14
appointment icon . . . . . . . . . . . . . . . . . . . . . . . . . . . .1-7
appointments . . . . . . . . . . . . . . . . . . . . . . . . . . . . . . .3-6
beaming . . . . . . . . . . . . . . . . . . . . . . . . . . . . . .3-8
deleting . . . . . . . . . . . . . . . . . . . . . . . . . . . . . . .3-8
editing . . . . . . . . . . . . . . . . . . . . . . . . . . . . . . . .3-8
meeting requests . . . . . . . . . . . . . . . . . . . . . . .3-9
summary window . . . . . . . . . . . . . . . . . . . . . . .3-8
AvantGo channels . . . . . . . . . . . . . . . . . . . . . . . . . .3-60
B
background . . . . . . . . . . . . . . . . . . . . . . . . . . . . . . .5-13
backlight . . . . . . . . . . . . . . . . . . . . . . . . . . . . . . . . . .5-3
battery power . . . . . . . . . . . . . . . . . . . . . 2-30, 5-6
brightness . . . . . . . . . . . . . . . . . . . . . . . . . . . . .5-7
external power . . . . . . . . . . . . . . . . . . . . 2-31, 5-6
backup battery . . . . . . . . . . . . . . . . . . . . . . . . . . . . 2-39
battery
optimizing life . . . . . . . . . . . . . . . . . . . . . . . . 2-40
power management . . . . . . . . . . . . . . . . . . . 2-39
settings . . . . . . . . . . . . . . . . . . . . . . . . . . 2-30, 5-6
battery icon . . . . . . . . . . . . . . . . . . . . . . . . . . . . . . . 1-6
beams
receiving . . . . . . . . . . . . . . . . . . . . . . . . . . . . 2-47
block recognizer
entering characters . . . . . . . . . . . . . . . . . . . . 1-15
setting options . . . . . . . . . . . . . . . . . . . . . . . . 2-8
bluetooth
bonding . . . . . . . . . . . . . . . . . . . . . . . . . . . . . 2-48
deleting bonded device . . . . . . . . . . . . . . . . . 2-51
discovering devices . . . . . . . . . . . . . . . . . . . . 2-48
receiving beams . . . . . . . . . . . . . . . . . . . . . . 2-47
renaming bonded device . . . . . . . . . . . . . . . . 2-50
bonding, bluetooth . . . . . . . . . . . . . . . . . . . . . . . . . 2-48
brightness . . . . . . . . . . . . . . . . . . . . . . . . . . . . . . . . 2-30
settings . . . . . . . . . . . . . . . . . . . . . . . . . . . . . . 2-4
browsing web . . . . . . . . . . . . . . . . . . . . . . . . . . . . . 3-60
bullets . . . . . . . . . . . . . . . . . . . . . . . . . . . . . . . . . . . . . xv
buttons
settings . . . . . . . . . . . . . . . . . . . . . . . . . . . . . . 2-3
Index-2 Microsoft Applications User Guide for Symbol Devices
C
calendar . . . . . . . . . . . . . . . . . . . . . . . . . . . . . . . . . . .3-5
beaming appointments . . . . . . . . . . . . . . . . . . .3-8
configuring views . . . . . . . . . . . . . . . . . . . . . . .3-9
creating appointments . . . . . . . . . . . . . . . . . . .3-6
deleting an appointment . . . . . . . . . . . . . . . . . .3-8
editing an appointment . . . . . . . . . . . . . . . . . . .3-8
meeting requests . . . . . . . . . . . . . . . . . . . . . . .3-9
summary window . . . . . . . . . . . . . . . . . . . . . . .3-8
views . . . . . . . . . . . . . . . . . . . . . . . . . . . . . . . . .3-5
calibrating the screen . . . . . . . . . . . . . . . . . . . . . . . .5-5
certificates . . . . . . . . . . . . . . . . . . . . . . . . 2-32, 5-3, 5-8
changing the date . . . . . . . . . . . . . . . . . . . . . . 2-34, 5-9
changing the time . . . . . . . . . . . . . . . . . . . . . . 2-34, 5-9
channels . . . . . . . . . . . . . . . . . . . . . . . . . . . . . . . . . .3-60
characters . . . . . . . . . . . . . . . . . . . . . . . . . . . . . . . .1-17
special . . . . . . . . . . . . . . . . . . . . . . . . . . . . . . .1-17
clear type fonts . . . . . . . . . . . . . . . . . . . . . . . . . . . .2-45
clock and alarms
settings . . . . . . . . . . . . . . . . . . . . . . . . . . . . . . .2-5
command bar . . . . . . . . . . . . . . . . . . . . . . . . . . . . . .1-10
icons . . . . . . . . . . . . . . . . . . . . . . . . . . . . . 1-4, 4-4
companion programs
Media Player . . . . . . . . . . . . . . . . . . . . . . . . . .3-55
MSN Messenger . . . . . . . . . . . . . . . . . . . . . . .3-50
Pocket Excel . . . . . . . . . . . . . . . . . . . . . . . . . .3-43
Pocket Word . . . . . . . . . . . . . . . . . . . . . . . . . .3-34
WordPad . . . . . . . . . . . . . . . . . . . . . . . . . . . . .6-19
configuring email accounts . . . . . . . . . . . . . . . . . . .3-31
connection properties . . . . . . . . . . . . . . . . . . . . . . .5-24
connections
Bluetooth . . . . . . . . . . . . . . . . . . . . . . . . . . . . .2-48
infrared . . . . . . . . . . . . . . . . . . . . . . . . . . . . . .2-47
setting up . . . . . . . . . . . . . . . . . . . . . . . . . . . .2-53
wireless Ethernet . . . . . . . . . . . . . . . . . . . . . .2-54
connectivity icon . . . . . . . . . . . . . . . . . . . . . . . . . . . .1-8
contacts . . . . . . . . . . . . . . . . . . . . . . . . . . . . . . . . . .3-10
beaming contacts . . . . . . . . . . . . . . . . . . . . . .3-13
changing options . . . . . . . . . . . . . . . . . . . . . . .3-10
creating a contact . . . . . . . . . . . . . . . . . . . . . .3-11
deleting a contact . . . . . . . . . . . . . . . . . . . . . .3-12
editing a contact . . . . . . . . . . . . . . . . . . . . . . .3-12
finding . . . . . . . . . . . . . . . . . . . . . . . . . . . . . . .3-13
summary screen . . . . . . . . . . . . . . . . . . . . . . .3-13
control panel . . . . . . . . . . . . . . . . . . . . . . . . . . . . . . .5-3
conventions
notational . . . . . . . . . . . . . . . . . . . . . . . . . . . . . xv
currency settings . . . . . . . . . . . . . . . . . . . . . . . . . . . .5-5
custom scheme . . . . . . . . . . . . . . . . . . . . . . . . . . . .5-14
customizing . . . . . . . . . . . . . . . . . . . . . . . . . . . . 2-3, 5-3
D
date . . . . . . . . . . . . . . . . . . . . . . . . . . . . . 2-34, 5-3, 5-9
date settings . . . . . . . . . . . . . . . . . . . . . . . . . . . . . . .5-5
deleting bluetooth bond . . . . . . . . . . . . . . . . . . . . . .2-51
desktop . . . . . . . . . . . . . . . . . . . . . . . . . . . . . . . . . . . .4-3
device management . . . . . . . . . . . . . . . . . . . . . 5-3, 5-10
device name . . . . . . . . . . . . . . . . . . . . . . . . . . . . . . .2-28
dialing . . . . . . . . . . . . . . . . . . . . . . . . . . . . . . . .5-4, 5-11
display
appearance . . . . . . . . . . . . . . . . . . . . . . . . . . 5-13
display settings . . . . . . . . . . . . . . . . . . . . . . . . . . . . . 5-4
drawing on screen . . . . . . . . . . . . . . . . . . . . . . . . . 1-22
E
email
account options . . . . . . . . . . . . . . . . . . . . . . . 3-25
adding an account . . . . . . . . . . . . . . . . . . . . . 3-25
attachments . . . . . . . . . . . . . . . . . . . . . .3-27, 3-29
configuring accounts . . . . . . . . . . . . . . . . . . . 3-31
connecting . . . . . . . . . . . . . . . . . . . . . . . . . . . 3-24
connecting to server . . . . . . . . . . . . . . . . . . . 3-24
creating messages . . . . . . . . . . . . . . . . . . . . . 3-28
deleting accounts . . . . . . . . . . . . . . . . . . . . . 3-26
disconnecting . . . . . . . . . . . . . . . . . . . . . . . . . 3-29
downloading messages . . . . . . . . . . . . . . . . . 3-26
folders . . . . . . . . . . . . . . . . . . . . . . . . . . . . . . 3-30
managing . . . . . . . . . . . . . . . . . . . . . . . . . . . . 3-30
message list . . . . . . . . . . . . . . . . . . . . . . . . . . 3-26
synchronizing . . . . . . . . . . . . . . . . . . . . . . . . . 3-24
email icon . . . . . . . . . . . . . . . . . . . . . . . . . . . . . . . . . 1-9
entering information . . . . . . . . . . . . . . . . . . . . . . . . 1-14
converting to text . . . . . . . . . . . . . . . . . . . . . . 1-20
drawing on screen . . . . . . . . . . . . . . . . . . . . . 1-22
My Text . . . . . . . . . . . . . . . . . . . . . . . . . . . . . 1-23
recording message . . . . . . . . . . . . . . . . . . . . 1-22
writing on screen . . . . . . . . . . . . . . . . . . . . . . 1-19
entering text . . . . . . . . . . . . . . . . . . . . . . . . . . .1-14, 4-6
Ethernet settings . . . . . . . . . . . . . . . . . . . . . . . . . . 2-54
Excel
pocket . . . . . . . . . . . . . . . . . . . . . . . . . . . . . . 3-43
explorer . . . . . . . . . . . . . . . . . . . . . . . . . . . . . . . . . . . 4-7
external power . . . . . . . . . . . . . . . . . . . . . . . . .2-31, 5-6
F
favorite links . . . . . . . . . . . . . . . . . . . . . . . . . . . . . . 3-58
file explorer . . . . . . . . . . . . . . . . . . . . . . . . . . . . . . . 1-24
finding files . . . . . . . . . . . . . . . . . . . . . . . . . . . . . . . . 4-7
finding information . . . . . . . . . . . . . . . . . . . . . . . . . 1-24
I
icons
appointment . . . . . . . . . . . . . . . . . . . . . . . . . . . 1-7
battery . . . . . . . . . . . . . . . . . . . . . . . . . . . . . . . 1-6
connectivity . . . . . . . . . . . . . . . . . . . . . . . . . . . 1-8
email . . . . . . . . . . . . . . . . . . . . . . . . . . . . . . . . 1-9
instant message . . . . . . . . . . . . . . . . . . . . . . . 1-8
speaker . . . . . . . . . . . . . . . . . . . . . . . . . . . . . . 1-5
status . . . . . . . . . . . . . . . . . . . . . . . . . . . . .1-4, 4-4
time . . . . . . . . . . . . . . . . . . . . . . . . . . . . . . . . . 1-7
Index Index-3
inbox . . . . . . . . . . . . . . . . . . . . . . . . . . . . . . . . . . . . 3-24
account options . . . . . . . . . . . . . . . . . . . . . . . 3-25
adding an account . . . . . . . . . . . . . . . . . . . . . 3-25
attachments . . . . . . . . . . . . . . . . . . . . . 3-27, 3-29
configuring accounts . . . . . . . . . . . . . . . . . . . 3-31
connecting to email server . . . . . . . . . . . . . . 3-24
creating messages . . . . . . . . . . . . . . . . . . . . . 3-28
deleting accounts . . . . . . . . . . . . . . . . . . . . . . 3-26
disconnecting . . . . . . . . . . . . . . . . . . . . . . . . . 3-29
downloading messages . . . . . . . . . . . . . . . . . 3-26
folders . . . . . . . . . . . . . . . . . . . . . . . . . . . . . . 3-30
managing . . . . . . . . . . . . . . . . . . . . . . . . . . . . 3-30
message list . . . . . . . . . . . . . . . . . . . . . . . . . . 3-26
synchronizing email . . . . . . . . . . . . . . . . . . . . 3-24
infrared
receiving . . . . . . . . . . . . . . . . . . . . . . . . . . . . . 2-47
input method
block recognizer . . . . . . . . . . . . . . . . . . . . . . . . 2-8
keyboard . . . . . . . . . . . . . . . . . . . . . . . . . . . . . . 2-8
letter recognizer . . . . . . . . . . . . . . . . . . . . . . . . 2-9
setting block recognizer options . . . . . . . . . . . 2-8
setting keyboard options . . . . . . . . . . . . . . . . . 2-8
setting star key options . . . . . . . . . . . . . . . . . 2-16
transcriber . . . . . . . . . . . . . . . . . . . . . . 2-10, 2-16
input panel . . . . . . . . . . . . . . . . . . . . . . . . 1-14, 4-6, 5-4
block recognizer . . . . . . . . . . . . . . . . . . . . . . . 1-15
keyboard . . . . . . . . . . . . . . . . . . . . . . . . . . . . . 1-14
letter recognizer . . . . . . . . . . . . . . . . . . . . . . . 1-15
settings . . . . . . . . . . . . . . . . . . . . . . . . . . . . . 5-15
star key . . . . . . . . . . . . . . . . . . . . . . . . . . . . . . 1-17
transcriber . . . . . . . . . . . . . . . . . . . . . . . . . . . 1-18
instant message icon . . . . . . . . . . . . . . . . . . . . . . . . 1-8
internet explorer . . . . . . . . . . . . . . . . . . . . . . . . . . . . 6-4
browsing web . . . . . . . . . . . . . . . . . . . . . . . . . 6-4
internet options . . . . . . . . . . . . . . . . . . . . . . . . . . . . 5-16
IR
receiving . . . . . . . . . . . . . . . . . . . . . . . . . . . . . 2-47
K
keyboard . . . . . . . . . . . . . . . . . . . . . . . . . . 4-6, 5-4, 5-18
L
letter recognizer
entering characters . . . . . . . . . . . . . . . . . . . . 1-15
setting options . . . . . . . . . . . . . . . . . . . . . . . . . 2-9
messaging . . . . . . . . . . . . . . . . . . . . . . . . . . . . . . . .3-24
account options . . . . . . . . . . . . . . . . . . . . . . .3-25
adding an account . . . . . . . . . . . . . . . . . . . . .3-25
attachments . . . . . . . . . . . . . . . . . . . . . 3-27, 3-29
configuring accounts . . . . . . . . . . . . . . . . . . .3-31
connecting to email server . . . . . . . . . . . . . . .3-24
creating messages . . . . . . . . . . . . . . . . . . . . .3-28
deleting accounts . . . . . . . . . . . . . . . . . . . . . .3-26
disconnecting . . . . . . . . . . . . . . . . . . . . . . . . .3-29
downloading messages . . . . . . . . . . . . . . . . .3-26
folders . . . . . . . . . . . . . . . . . . . . . . . . . . . . . . .3-30
managing . . . . . . . . . . . . . . . . . . . . . . . . . . . .3-30
message list . . . . . . . . . . . . . . . . . . . . . . . . . .3-26
My Text . . . . . . . . . . . . . . . . . . . . . . . . . . . . . .1-23
synchronizing . . . . . . . . . . . . . . . . . . . . . . . . .3-24
microphone
adjusting . . . . . . . . . . . . . . . . . . . . . . . . . . . . .5-38
mobile channels . . . . . . . . . . . . . . . . . . . . . . . . . . . .3-60
mobile favorites . . . . . . . . . . . . . . . . . . . . . . . 3-58, 3-59
creating . . . . . . . . . . . . . . . . . . . . . . . . . . . . . .3-58
modem . . . . . . . . . . . . . . . . . . . . . . . . . . . . . . . . . . .5-11
modem communications . . . . . . . . . . . . . . . . . . . . .5-11
mouse . . . . . . . . . . . . . . . . . . . . . . . . . . . . . . . . . . . .5-4
MSN Messenger . . . . . . . . . . . . . . . . . . . . . . . . . . .3-50
adding contacts . . . . . . . . . . . . . . . . . . . . . . .3-52
chatting . . . . . . . . . . . . . . . . . . . . . . . . . . . . . .3-52
deleting contacts . . . . . . . . . . . . . . . . . . . . . .3-52
managing contacts . . . . . . . . . . . . . . . . . . . . .3-53
My Text . . . . . . . . . . . . . . . . . . . . . . . . . . . . . .1-23
privacy options . . . . . . . . . . . . . . . . . . . . . . . .3-54
setting up an account . . . . . . . . . . . . . . . . . . .3-50
working with contacts . . . . . . . . . . . . . . . . . .3-51
my info . . . . . . . . . . . . . . . . . . . . . . . . . . . . . . . . . . .2-21
My Text . . . . . . . . . . . . . . . . . . . . . . . . . . . . . . . . . .1-23
N
network settings . . . . . . . . . . . . . . . . . . . . . . . . . . . .5-4
notational conventions . . . . . . . . . . . . . . . . . . . . . . . .xv
notes . . . . . . . . . . . . . . . . . . . . . . . . . . . . . . . . . . . .3-19
beaming notes . . . . . . . . . . . . . . . . . . . 3-22, 3-46
configuring . . . . . . . . . . . . . . . . . . . . . . . . . . .3-23
creating a note . . . . . . . . . . . . . . . . . . . . . . . .3-20
creating a template . . . . . . . . . . . . . . . . . . . .3-21
deleting a note . . . . . . . . . . . . . . . . . . . 3-22, 3-45
editing a note . . . . . . . . . . . . . . . . . . . . 3-22, 3-45
notifications . . . . . . . . . . . . . . . . . . . . . . . . . . . 2-4, 2-24
numbers settings . . . . . . . . . . . . . . . . . . . . . . . . . . . .5-5
M
main battery . . . . . . . . . . . . . . . . . . . . . . . . . . . . . . 2-39
Media Player . . . . . . . . . . . . . . . . . . . . . . . . . . . . . . 3-55
memory . . . . . . . . . . . . . . . . . . . . . . . . . . . . . 2-37, 5-35
program . . . . . . . . . . . . . . . . . . . . . . . . 2-37, 5-35
settings . . . . . . . . . . . . . . . . . . . . . . . . . 2-5, 2-37
storage . . . . . . . . . . . . . . . . . . . . . . . . . 2-37, 5-35
storage card . . . . . . . . . . . . . . . . . . . . . . . . . . 2-37
menus . . . . . . . . . . . . . . . . . . . . . . . . . . . . . . . . . . . 2-18
O
onfiguring . . . . . . . . . . . . . . . . . . . . . . . . . . . . . . . . .3-31
optimizing battery life . . . . . . . . . . . . . . . . . . . . . . .2-40
owner information . . . . . . . . . . . . . . . . . . . . . 2-20, 5-21
owner notes . . . . . . . . . . . . . . . . . . . . . . . . . . . . . . .2-20
owner profile . . . . . . . . . . . . . . . . . . . . . . . . . . . . . . .5-4
P
password . . . . . . . . . . . . . . . . . . . . . . . . . . . . . . . . .5-23
Index-4 Microsoft Applications User Guide for Symbol Devices
password hint . . . . . . . . . . . . . . . . . . . . . . . . . . . . .2-23
passwords . . . . . . . . . . . . . . . . . . . . . . . . . . . . 2-4, 2-22
pictures . . . . . . . . . . . . . . . . . . . . . . . . . . . . . . . . . .3-56
copying to device . . . . . . . . . . . . . . . . . . . . . .3-56
editing . . . . . . . . . . . . . . . . . . . . . . . . . . . . . . .3-56
setting as background . . . . . . . . . . . . . . . . . . .3-57
slideshow . . . . . . . . . . . . . . . . . . . . . . . . . . . .3-56
Pocket Excel . . . . . . . . . . . . . . . . . . . . . . . . . . . . . . .3-43
Pocket Internet Explorer
browsing web . . . . . . . . . . . . . . . . . . . . . . . . .3-60
channels . . . . . . . . . . . . . . . . . . . . . . . . . . . . .3-60
cookies . . . . . . . . . . . . . . . . . . . . . . . . . . . . . .3-62
default home page . . . . . . . . . . . . . . . . . . . . .3-61
favorite links . . . . . . . . . . . . . . . . . . . . . . . . . .3-58
memory . . . . . . . . . . . . . . . . . . . . . . . . . . . . . .3-62
mobile favorites . . . . . . . . . . . . . . . . . . 3-58, 3-59
options . . . . . . . . . . . . . . . . . . . . . . . . . . . . . .3-61
security settings . . . . . . . . . . . . . . . . . . . . . . .3-62
using . . . . . . . . . . . . . . . . . . . . . . . . . . . . . . . .3-59
view menu . . . . . . . . . . . . . . . . . . . . . . . . . . . .3-60
Pocket Word . . . . . . . . . . . . . . . . . . . . . . . . . . . . . . .3-34
beaming notes . . . . . . . . . . . . . . . . . . . . . . . .3-37
configuring . . . . . . . . . . . . . . . . . . . . . . . . . . .3-42
creating a document . . . . . . . . . . . . . . . 3-35, 3-44
deleting a note . . . . . . . . . . . . . . . . . . . . . . . .3-37
editing a note . . . . . . . . . . . . . . . . . . . . . . . . .3-37
finding text . . . . . . . . . . . . . . . . . . . . . . . . . . .3-41
formatting drawings . . . . . . . . . . . . . . . . . . . .3-39
formatting paragraphs . . . . . . . . . . . . . . . . . .3-40
formatting text . . . . . . . . . . . . . . . . . . . . . . . .3-39
input methods . . . . . . . . . . . . . . . . . . . . . . . . .3-38
replacing text . . . . . . . . . . . . . . . . . . . . . . . . .3-41
pop-up menus . . . . . . . . . . . . . . . . . . . . . . . . . . . . .1-12
power
backlight settings . . . . . . . . . . . . . . . . . . . . . . .5-6
settings . . . . . . . . . . . . . . . . . . . . . . . . . . . . . . .2-5
power management . . . . . . . . . . . . . . . . . . . . . . . . .2-39
power settings . . . . . . . . . . . . . . . . . . . . . . . . . 5-4, 5-25
programs
removing . . . . . . . . . . . . . . . . . . . . 2-44, 5-5, 5-31
running . . . . . . . . . . . . . . . . . . . . . . . . . . . . . .2-38
selecting . . . . . . . . . . . . . . . . . . . . . . . . . 1-11, 4-5
stop running programs . . . . . . . . . . . . . . . . . .2-38
R
recording . . . . . . . . . . . . . . . . . . . . . . . . . . . . . . . . .1-22
settings . . . . . . . . . . . . . . . . . . . . . . . . . . . . . .2-17
regional settings . . . . . . . . . . . . . . .2-5, 2-41, 5-5, 5-28
currency . . . . . . . . . . . . . . . . . . . . . . . . . 2-42, 5-29
date . . . . . . . . . . . . . . . . . . . . . . . . . . . . 2-42, 5-30
numbers . . . . . . . . . . . . . . . . . . . . . . . . 2-41, 5-28
time . . . . . . . . . . . . . . . . . . . . . . . . . . . . 2-42, 5-29
remote desktop . . . . . . . . . . . . . . . . . . . . . . . . . . . . .6-8
removing programs . . . . . . . . . . . . . . . . . 2-5, 2-44, 5-5
renaming bluetooth bond . . . . . . . . . . . . . . . . . . . . .2-50
S
screen . . . . . . . . . . . . . . . . . . . . . . . . . . . . . . . . . . . . 5-5
aligning . . . . . . . . . . . . . . . . . . . . . . . . . . . . . 2-45
clear type fonts . . . . . . . . . . . . . . . . . . . . . . . 2-45
text size . . . . . . . . . . . . . . . . . . . . . . . . . . . . . 2-46
selecting a drawing . . . . . . . . . . . . . . . . . . . . . . . . 1-22
selecting programs . . . . . . . . . . . . . . . . . . . . . .1-11, 4-5
selecting text . . . . . . . . . . . . . . . . . . . . . . . . . . . . . 1-21
selecting writing . . . . . . . . . . . . . . . . . . . . . . . . . . . 1-21
setting the device name . . . . . . . . . . . . . . . . . . . . . 2-28
settings . . . . . . . . . . . . . . . . . . . . . . . . . . . . . . . . . . . 2-3
about . . . . . . . . . . . . . . . . . . . . . . . . . . . .2-4, 2-28
adjusting . . . . . . . . . . . . . . . . . . . . . . . . . . . . . 2-3
battery . . . . . . . . . . . . . . . . . . . . . . . . . . .2-30, 5-6
beam . . . . . . . . . . . . . . . . . . . . . . . . . . . . . . . . 2-6
block recognizer input method . . . . . . . . . . . . 2-8
bluetooth . . . . . . . . . . . . . . . . . . . . . . . . . . . . . 2-6
brightness . . . . . . . . . . . . . . . . . . . . 2-4, 2-30, 5-7
buttons . . . . . . . . . . . . . . . . . . . . . . . . . . . . . . . 2-3
certificates . . . . . . . . . . . . . . . . . . . . . . . .2-4, 2-32
clock and alarms . . . . . . . . . . . . . . . . . . . . . . . 2-5
connections . . . . . . . . . . . . . . . . . . . . . . . . . . . 2-6
input . . . . . . . . . . . . . . . . . . . . . . . . . . . . . . . . . 2-3
keyboard input method . . . . . . . . . . . . . . . . . . 2-8
letter recognizer input method . . . . . . . . . . . . 2-9
memory . . . . . . . . . . . . . . . . . . . . . . . . . .2-5, 2-37
menus . . . . . . . . . . . . . . . . . . . . . . . . . . . . . . . 2-3
owner information . . . . . . . . . . . . . . . . . . . . . . 2-3
password . . . . . . . . . . . . . . . . . . . . . . . . . . . . . 2-4
power . . . . . . . . . . . . . . . . . . . . . . . . . . . .2-5, 2-39
regional . . . . . . . . . . . . . . . . . . . . . . . . . .2-5, 2-41
remove programs . . . . . . . . . . . . . . . . . . . . . . . 2-5
screens . . . . . . . . . . . . . . . . . . . . . . . . . . . . . . . 2-5
sound and notifications . . . . . . . . . . . . . . . . . . 2-4
Today . . . . . . . . . . . . . . . . . . . . . . . . . . . . . . . . 2-4
transcriber input method . . . . . . . . . . . .2-10, 2-16
wireless Ethernet . . . . . . . . . . . . . . . . . . . . . . . 2-6
slideshow of pictures . . . . . . . . . . . . . . . . . . . . . . . 3-56
soft keyboard . . . . . . . . . . . . . . . . . . . . . . . . . . . . . . 4-6
entering characters . . . . . . . . . . . . . . . . . . . . 1-14
software version . . . . . . . . . . . . . . . . . . . . . . . . . . . 2-28
sound
adjusting . . . . . . . . . . . . . . . . . . . . . . . . . . . . 2-24
setting . . . . . . . . . . . . . . . . . . . . . . . . . . .5-5, 5-37
sounds . . . . . . . . . . . . . . . . . . . . . . . . . . . . . . . . . . . . 2-4
speaker icon . . . . . . . . . . . . . . . . . . . . . . . . . . . . . . . 1-5
special characters . . . . . . . . . . . . . . . . . . . . . . . . . . 1-17
star key . . . . . . . . . . . . . . . . . . . . . . . . . . . . . . . . . . 1-17
setting options . . . . . . . . . . . . . . . . . . . . . . . . 2-16
start menu
selecting programs . . . . . . . . . . . . . . . . .1-11, 4-5
settings . . . . . . . . . . . . . . . . . . . . . . . . . . . . . 2-18
status bar . . . . . . . . . . . . . . . . . . . . . . . . . . . . . . . . . 1-4
Index Index-5
status icons . . . . . . . . . . . . . . . . . . . . . . . . . . . . 1-4, 4-4
battery . . . . . . . . . . . . . . . . . . . . . . . . . . . . . . . 1-6
connectivity . . . . . . . . . . . . . . . . . . . . . . . . . . . 1-8
email . . . . . . . . . . . . . . . . . . . . . . . . . . . . . . . . 1-9
instant message . . . . . . . . . . . . . . . . . . . . . . . . 1-8
speaker . . . . . . . . . . . . . . . . . . . . . . . . . . . . . . . 1-5
time . . . . . . . . . . . . . . . . . . . . . . . . . . . . . . . . . 1-7
storage card
memory . . . . . . . . . . . . . . . . . . . . . . . . . . . . . 2-37
storage manager . . . . . . . . . . . . . . . . . . . . . . . 5-5, 5-32
stylus . . . . . . . . . . . . . . . . . . . . . . . . . . . . . . . 5-19, 5-34
system information . . . . . . . . . . . . . . . . . . . . . . . . . . 5-5
T
tasks . . . . . . . . . . . . . . . . . . . . . . . . . . . . . . . . . . . . 3-14
beaming tasks . . . . . . . . . . . . . . . . . . . . . . . . 3-16
configuring . . . . . . . . . . . . . . . . . . . . . . . . . . . 3-17
creating a task . . . . . . . . . . . . . . . . . . . . . . . . 3-14
deleting a task . . . . . . . . . . . . . . . . . . . . . . . . 3-16
editing a task . . . . . . . . . . . . . . . . . . . . . . . . . 3-16
summary screen . . . . . . . . . . . . . . . . . . . . . . . 3-17
text size . . . . . . . . . . . . . . . . . . . . . . . . . . . . . . . . . . 2-46
time . . . . . . . . . . . . . . . . . . . . . . . . . . . . . . 2-34, 5-3, 5-9
time icon . . . . . . . . . . . . . . . . . . . . . . . . . . . . . . . . . . 1-7
time zone . . . . . . . . . . . . . . . . . . . . . . . . . . 2-34, 5-3, 5-9
Today screen . . . . . . . . . . . . . . . . . . . . . . . . . . 1-3, 2-26
setting personalized background . . . . . . . . . . 3-57
settings . . . . . . . . . . . . . . . . . . . . . . . . . . . . . . 2-4
transcriber
icons . . . . . . . . . . . . . . . . . . . . . . . . . . . . . . . . 1-18
setting options . . . . . . . . . . . . . . . . . . . . . . . . 2-10
writing on screen . . . . . . . . . . . . . . . . . . . . . . 1-18
V
volume
adjusting . . . . . . . . . . . . . . . . . . . . . . . . . . . . 2-24
setting . . . . . . . . . . . . . . . . . . . . . . . . . . 5-5, 5-37
W
web browser . . . . . . . . . . . . . . . . . . . . . . . . . . 3-60, 6-4
Windows CE Messenger . . . . . . . . . . . . . . . . . . . . . 6-9
accounts options . . . . . . . . . . . . . . . . . . . . . . 6-18
adding contacts . . . . . . . . . . . . . . . . . . . . . . . 6-12
chatting . . . . . . . . . . . . . . . . . . . . . . . . . . . . . 6-13
connection options . . . . . . . . . . . . . . . . . . . . . 6-18
deleting contacts . . . . . . . . . . . . . . . . . . . . . . 6-12
fonts . . . . . . . . . . . . . . . . . . . . . . . . . . . . . . . . 6-15
managing contacts . . . . . . . . . . . . . . . . . . . . . 6-15
personal options . . . . . . . . . . . . . . . . . . . . . . 6-15
phone options . . . . . . . . . . . . . . . . . . . . . . . . 6-16
preferences . . . . . . . . . . . . . . . . . . . . . . . . . . 6-16
privacy options . . . . . . . . . . . . . . . . . . . . . . . . 6-17
setting up an account . . . . . . . . . . . . . . . . . . . 6-9
signing in . . . . . . . . . . . . . . . . . . . . . . . . . . . . 6-10
working with contacts . . . . . . . . . . . . . . . . . . 6-11
windows explorer . . . . . . . . . . . . . . . . . . . . . . . . . . . 4-7
Word
pocket . . . . . . . . . . . . . . . . . . . . . . . . . . . . . . .3-34
word completion settings . . . . . . . . . . . . . . . . . . . .2-17
WordPad . . . . . . . . . . . . . . . . . . . . . . . . . . . . . . . . .6-19
creating a document . . . . . . . . . . . . . . . . . . . .6-19
editing a document . . . . . . . . . . . . . . . . . . . . .6-20
finding text . . . . . . . . . . . . . . . . . . . . . . . . . . .6-22
formatting paragraphs . . . . . . . . . . . . . . . . . .6-22
formatting text . . . . . . . . . . . . . . . . . . . . . . . .6-21
replacing text . . . . . . . . . . . . . . . . . . . . . . . . .6-23
writing on screen . . . . . . . . . . . . . . . . . . . . . . . . . . .1-19
converting to text . . . . . . . . . . . . . . . . . . . . . .1-20
writing settings . . . . . . . . . . . . . . . . . . . . . . . . . . . .2-17
Index-6 Microsoft Applications User Guide for Symbol Devices
Tell Us What You Think...
We’d like to know what you think about this Manual. Please take a moment to fill out this questionnaire and fax this form
to: (631) 738-3318, or mail to:
Symbol Technologies, Inc.
One Symbol Plaza M/S B-4
Holtsville, NY 11742-1300
Attention: Technical Publications Manager
IMPORTANT: If you need product support, please call the appropriate customer support number provided. Unfortunately,
we cannot provide customer support at the fax number above.
Manual Title:___________________________________________
(please include revision level)
How familiar were you with this product before using this manual?
Very familiar
Slightly familiar
Not at all familiar
Did this manual meet your needs? If not, please explain.
______________________________________________________________________________________
______________________________________________________________________________________
______________________________________________________________________________________
______________________________________________________________________________________
What topics need to be added to the index, if applicable?
______________________________________________________________________________________
______________________________________________________________________________________
______________________________________________________________________________________
______________________________________________________________________________________
What topics do you feel need to be better discussed? Please be specific.
______________________________________________________________________________________
______________________________________________________________________________________
______________________________________________________________________________________
______________________________________________________________________________________
What can we do to further improve our manuals?
______________________________________________________________________________________
______________________________________________________________________________________
______________________________________________________________________________________
______________________________________________________________________________________
Thank you for your input—We value your comments.
Symbol Technologies, Inc.
One Symbol Plaza
Holtsville, New York 11742-1300
http://www.symbol.com
72-68197-01 Revision A
February 2005