1
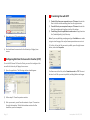
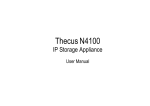
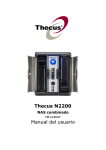
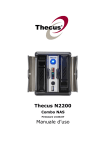
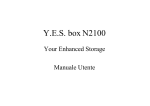
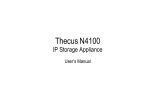
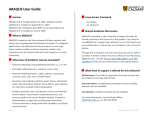
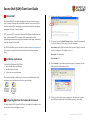
Secure Shell (SSH) Client User Guide What is SSH? 1) To begin configuring, open the SSH Client SSH Secure Shell Client is a free application that can be used to access your IT account through the command line as well as to transfer files. It is secure and useful for managing your account and also for developing webpages with your IT account space. SFTP, or secure FTP, is a protocol that uses SSH (Secure Shell) to transfer files. Unlike standard FTP, it encrypts both commands and data, preventing passwords and sensitive information from being transmitted over the network in clear text. An SFTP client allows you to connect to a server (such as ftp.ucalgary.ca) from your local computer and transfer files back and forth between them. Installation Instructions To install the SSH Secure Shell Client: Save the file onto your desktop Double-click on the icon Follow the set up instructions. 2) To connect, press the Quick Connect button. You will be prompted for a Host name and User name. Enter the following: Host name: name of the host with which you are trying to connect to (ie: c1.ucalgary.ca, c2.ucalgary.ca, etc..) Username: IT username Port number: 22 3) Press Connect. If you have not yet set up your IT account, you can find more information about it here. The client should be installed shortly. Once your installation has been completed, you should see two icons on your desktop: Configuring SSH Client for Command Line Access 4) If this is your first time ever connecting to the university’s server, you will be prompted with the following message. Select Yes. To begin using the SSH Secure Shell Client, you must first configure it for use on the University of Calgary servers. Page | 1 Last updated: Feb 10, 2015 Transferring Files with SFTP 5) Next, enter your IT Account password 6) You should now be connected to the University of Calgary Linux servers. 1) Transfer files from your computer to your IT Account: Locate the files in the left window and drag them into the right window. 2) Transfer files to your computer from your IT Account: Locate the files right window and drag them into the left window. 3) Transferring files to be published as web content: Copy them into the ~/webdisk/public_html/ directory. Note: If you are publishing a webpage and get a Forbidden error when trying to view the page, this may be because permissions are not set. To fix this, click on the file you want to publish, press the right mouse button, and select Properties. Configuring SSH Client for Secure File Transfer (SFTP) To use the SSH Secure File Transfer Client, you must first configure it for use with the University of Calgary Linux servers. 1) Open the application. The following window should appear: To allow access to the file, set the Permission mode to 755. This must be done for all files you want to publish, including folders and images. 2) Follow steps 2-5 from the previous section. 3) After you connect, you will see the contents of your IT account on the right side window. The left side window contains the files located on your local computer. Page | 2 Last updated: Feb 13, 2015