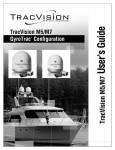
1
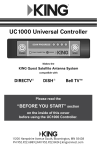
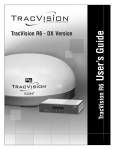
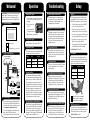
Welcome!
Operation
Congratulations! You have purchased the most reliable
mobile satellite TV antenna system. Use this guide
for basic setup, operation, and troubleshooting. For
installation information, refer to the Installation Guide.
Product Serial Number
Can the antenna see the satellite?
DIRECTV
1. Park your vehicle in an area with a clear view
of the southern sky, away from any trees or tall
buildings.
The antenna requires an unobstructed view of
the southern sky to receive satellite TV signals.
Common causes of blockage include trees,
buildings, bridges, and mountains.
The TracVision system ships from the factory set
up for DIRECTV. However, if you need to change to
DIRECTV from another service, follow these steps:
3. Set the switchplate’s
Power switch to ON (l).
ON
OFF
MAINTENANCE
R5SL, In-motion
Set the switchplate’s Power switch to OFF (o).
R4SL, Stationary (use only when parked)
Compatible Receivers
Did you paint the dome?
The following receivers have been validated by KVH
to work well with your TracVision system.*
Any paint that contains metal will block satellite
signals and impair reception. If you wish to paint
the dome, use only non-metallic automotive paint
without a primer coat.
4. Wait 2 minutes for system startup.
Turning Off the System
TracVision Antenna
Switchplate
Data/Power
RF2
(Optional)
Excessive dirt or moisture on dome?
Dirt buildup or moisture on the dome can reduce
satellite reception. Clean the exterior of the dome
periodically with fresh water and mild detergent.
Avoid harsh cleansers and volatile solvents (such
as acetone), and do not spray the dome with
high-pressure water.
TracVision System Diagram
RF1
MAINTENANCE
Vehicle
AC Power
Vehicle
AC Ground
Grounding
Block
TV 1
Receiver 1
PUSH
SELECT
N E T W O R K
SYSTEM
INFO
15 VDC
Power
Supply
POWER
HDTV
VIP211
TV 2
Receiver 2
PUSH
SELECT
N E T W O R K
SYSTEM
INFO
POWER
HDTV
VIP211
Technical Support
If you are experiencing any operational problems,
call or visit your local authorized TracVision dealer
or distributor. You can find a technician near you by
visiting www.kvh.com/wheretogetservice.
If you need help finding an authorized technician,
please contact KVH Technical Support:
E-mail: [email protected]; Phone: +1 401 847-3327
Setup
Turning On the System
2. Turn on your receiver
and TV.
TracVision Serial Number
Troubleshooting
Service
HD
Non-HD
DIRECTV
Not supported
D12, D11, D10
DISH Network 211, 211k
311
Bell TV
3100, 4100
6100, 6131
*Newer models might also be compatible; contact KVH.
Switching Satellites
The antenna automatically switches satellites as
you change channels using the primary receiver’s
remote (the receiver connected to the RF1 cable).
Since the antenna tracks one satellite at a time,
switching satellites with the primary receiver might
cause TVs connected to other receivers to display
different programming, no programming, or an
error message. Simply select a channel carried
by the new satellite, or switch back to the original
satellite. Also, the receiver might briefly display an
error message when you change channels.
Is it raining heavily?
Heavy rain or snow can weaken satellite TV signals.
Reception should improve once the inclement
weather subsides.
2. Remove any service keys connected to the
switchplate (see the reverse side of this guide).
3. Turn on the receiver then press its Reset button
(usually located behind the card access door).
4. Using the receiver’s remote, go to the “Signal
Meter” screen and select satellite 101.
5. Turn on the antenna. The antenna should find
the DIRECTV satellites within 15 minutes.
Satellites Tracked: 101 and 119.
DISH Network
If you add a new or home-configured receiver, or
you need to change to DISH Network from another
service, follow the steps on the reverse side of this
guide for your desired mode and region.
Mode
Satellites Tracked
DISH 1000/129
110, 119, and 129
Is everything turned on and connected?
DISH 1000/61
110, 119, and 61
Make sure the antenna is turned on at the
switchplate. Also, make sure your TV and receiver
are turned on and set up for the satellite input.
Finally, check the cables connecting all of these
components to ensure none have come loose.
DISH 500
110 and 119
Have you reset the receiver?
Receivers can sometimes lock up, preventing the
programming from being displayed on the TV. Turn
off and unplug your receiver. Wait 1 minute, then
plug it back in and turn it on.
Special Instructions for DISH 1000/129
If you don’t have the optional KVH Master Receiver
Selector installed, DISH 1000/129 mode is limited
to stationary use only. Also, before you turn on
the antenna, you must first select satellite 119 and
transponder 17 at the receiver’s “Point Dish/Signal
Strength” screen (press MENU, 6, 1, 1).
1. Turn off the antenna and connect the DIRECTV
receiver to the antenna’s RF1 cable.
= DISH 129 satellite recommended
= DISH 61 satellite recommended
= Southwest procedure required
Is the receiver set up for the antenna mode?
Bell TV (formerly ExpressVu)
All DISH Network or Bell TV (ExpressVu) receivers
that you connect to the TracVision system must
be set up for the antenna’s operating mode. To
configure a receiver, you need to run its Check
Switch test. Refer to the next section for details.
If you add a new or home-configured receiver, or
you need to change to Bell TV from another service,
follow the steps on the reverse side of this guide.
Satellites Tracked: 91 and 82.
Setup
Setup
Setup
DISH Network/Bell TV Only
DISH Network/Bell TV Only
DISH Network/Bell TV Only
Table A
If your chosen mode requires a service key(s),
connect it to the switchplate before going to Step 2.
1. Select Check Switch.
Mode
Key A
Key B
DISH 1000/129
-
-
DISH 1000/61
Connect
-
DISH 500
Connect
Connect
-
Connect
Bell TV (ExpressVu)
Service Key “A” (Front of Switchplate)
MAINTENANCE
Table D
2. Select Test (DISH) or Check (Bell TV).
1. If the receiver was preconfigured by KVH*,
go to Table E. (*KVH part #s 02-1712-61 and -0129)
3. Wait for the test to complete.
D500, D1000/61
4. If a warning message appears, select Cancel.
2. Go to Table C.
D1000/129
5. Select Done.
6. Select satellite 119 and transponder 17.
7. Wait for the signal meter to go green and
lock on the 119 satellite.
A
Service Key “B” (Back of Switchplate)
B
B
3. Go to Table C.
D500S, D1000/61S, D1000/129S
2. Turn off the antenna then wait 10
seconds.
9. Go to Table D.
3. Turn on the antenna then wait 2 minutes.
Table B
4. Go to Table B.
2. Select Test (DISH) or Check (Bell TV).
A
2. Select Check Switch.
8. Wait 5 minutes and ensure the signal meter
stays locked on the 119 satellite.
1. Select Check Switch.
MAINTENANCE
3. Wait a full 15 minutes and ignore any
messages displayed on the TV.
Bell, D500S, D1000/61S, D1000/129S
4. Go to Table C.
D500, D1000/61, D1000/129
4. Go to Table D.
Table E - Preconfigured Receiver Only
1. Select each satellite in your chosen mode
from the “Point Dish/Signal Strength” screen.
All satellites
2. Press View Live TV and
wait for the guide to load.
lock OK
Green signal meter
The process is complete!
All satellites
2. Turn off the antenna then
wait 10 seconds.
do not lock OK
3. Turn on the antenna then
wait 2 minutes.
Table C
D500, D1000/61
1. Select Test (DISH) or Retest (Bell TV).
Step 2 - Run Check Switch Tests
Follow the steps as directed for your chosen mode.
(“D” = DISH; “S” = Southwest procedure)
1. Park your vehicle in a blockage-free area.
2. Turn off the TracVision antenna.
3. Ensure the receiver you need to configure is
connected to the antenna’s RF1 cable.
4. Turn on the TV and the receiver.
5. Turn on the TracVision antenna and wait 2
minutes for system startup.
6. Using the receiver’s remote, go to the “Point
Dish/Signal Strength” screen (press MENU,
6, 1, 1 on most models).
D500S, D1000/61S, D1000/129, D1000/129S
4. Go to Table B.
D500S, D1000/61S,
D1000/129, D1000/129S
2. Wait for the test to complete. It will take
several minutes.
3. Verify the values shown in the “Installation
Summary” match those shown in Table F.
Check
4. Press View Live TV and wait
for the program guide to load.
Switch OK
The process is complete!
Check
D500S, D1000/61S, D1000/129S
Switch
4. Repeat Table C.
not OK
Bell, D500, D1000/61, D1000/129
4. Turn off the antenna then
wait 10 seconds.
5. Turn on the antenna then
wait 2 minutes.
Bell, D500, D1000/61
7. Go to Table A.
Bell, D500, D1000/61
6. Go to Table B.
D1000/129
7. Go to Table B.
6. Go to Table A.
TracVision R5SL/R4SL
User’s Guide
Step 1 - Connect the Service Key(s)
4. Go to Table A.
Table F - Expected Check Switch Results
D1000/129
D1000/129S
Satellites
119, 110, and 129
Switch type
SW64
D1000/61
D1000/61S
Satellites
119, 110, and 61.5
Switch type
SW64
D500
D500S
Satellites
119 and 110
Switch type
SW42
Bell
Satellites
91, 82
Switch type
SW21
KVH Industries, Inc.
50 Enterprise Center
Middletown, RI 02842-5279
Phone: 1-401-847-3327
E-mail: [email protected]
Tech Support E-mail: [email protected]
Configuring Additional Receivers
Set up each additional receiver (if not preconfigured
by KVH) by connecting it to the antenna’s RF1 cable
and running a single Check Switch test.
©2008-2010, KVH Industries, Inc. KVH and TracVision are registered trademarks of KVH Industries, Inc.
The unique light-colored dome with dark contrasting base is a registered trademark of KVH Industries, Inc.
DIRECTV, DISH Network, and Bell TV are official trademarks of their respective companies.
All other trademarks are property of their respective companies. (54-0560 Rev. B)