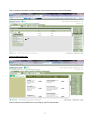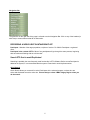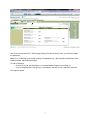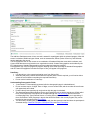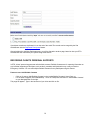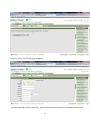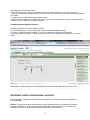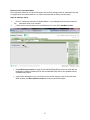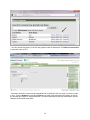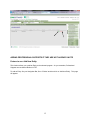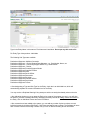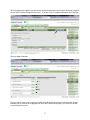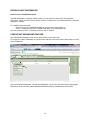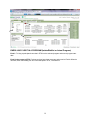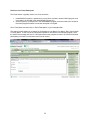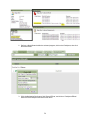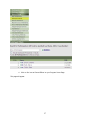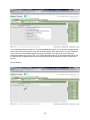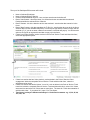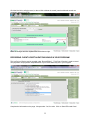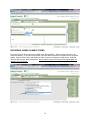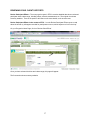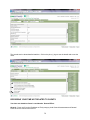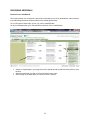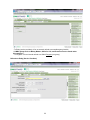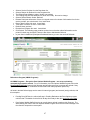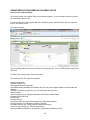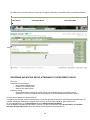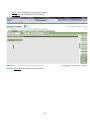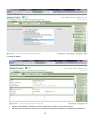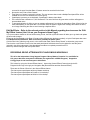
1
Efforts To Outcomes (ETO) USER MANUAL Independent Living Support, All Supportive Living, and Street Outreach Stabilization Programs Created in September 2012 TABLE OF CONTENTS Page Introduction Navigating ETO Recording a new client in Intake/Waitlist Recording client’s personal supports Recording client’s professional supports Adding professional supports if they are not already in ETO Editing client information Participant Dashboard feature Enrolling client in a Program (Intake/Waitlist or Actual) Printing a Facesheet of your client Dismissing a client from your Program Recording your time with and on behalf of clients To do List Editing your records (efforts) Recording client hospitalizations while in your Program Recording signed consent forms Reviewing your client’s efforts Recording your time not related to clients Reviewing your total time and work for a particular date range Printing the notes for a particular client for a particular date range Recording referrals Adding service providers not already in ETO Recording assessments linked to a client (Participant Assessments) Recording surveys/assessments not linked to a client Adding New Groups and Registering clients in your Program’s groups Recording and editing group attendance of registered clients Recording group attendance of anonymous individuals Un-registering clients in groups Housing Check-In / Check-Out - Supportive Living and SOS only Logging off from ETO 2 3 4 6 10 12 15 18 18 19 21 22 24 31 33 35 36 37 38 40 44 45 48 50 54 55 58 61 62 63 65 INTRODUCTION Welcome to ETO! ETO is a case management software for social services developed and maintained by the company Social Solutions based in Baltimore, United States. ETO helps nonprofit organizations quickly and easily track efforts (Staff and Client activities), outcomes (questionnaires and surveys), and the progress of clients in their efforts. To access the ETO database, type in the following address: http://cmhacalgary.etosoftware.ca Your Username is your CMHA e-mail address (or if you don’t have one, use your personal e-mail address that you provided to CMHA). Once you are given an initial password, the new password that you will set up will be of your own choosing, but it has to have a minimum of 6 characters and include at least one numeric character. You have access to: the Programs you are working in, the Intake/Waitlist Program of your Program, as well as the Peer Options and Leisure Recreation Programs as you will benefit from viewing your clients’ attendance in Peer Options and Leisure Recreation groups. All your Programs have an Intake Program or a Waitlist Program. Clients are first ‘added’ (if new) or ‘enrolled’ (if already in another CMHA Program or previously in your Program) in the Intake/Waitlist Program, then they are discharged (‘dismissed’) from the Intake Program, and then enrolled in your actual Program. This is the process for Independent Living Support, Street Outreach and Stabilization, and all Supportive Living. The main reason for having an Intake/Waitlist program is that we would like to keep track of the number of referrals (referral forms) received for each Program as well as the number of individuals eligible and not eligible (per reason for ineligibility) and the length of time individuals waited to start receiving services. While in the Intake/Waitlist Program, clients receive minimal services such as Staff contacts with professionals, writing letters, signing release of information etc. While in the Actual Program, clients receive the full range of services provided by the Program (visits, groups, etc.) There are a lot of common elements among your Programs, that is why only one Manual has been developed for all your Programs. However, the differences between your Programs are taken into consideration and are highlighted. Please contact your ETO Administrator (CMHA Outcomes Measurement Coordinator or Director of Client Services in the absence of the Outcomes Measurement Coordinator) if you have any questions regarding ETO. You can also access the Help section in the database, or you can contact ETO customer support at [email protected] or at 1- 866.732.3560 extension 2 Best wishes for your successful use of ETO! 3 NAVIGATING ETO There are a variety of ways to move through ETO Software. 1 My Dashboard 2 Quick Tab Navigation 3 Custom Home Page Links 4 Navigation Bar It's up to you to decide which navigation method is the most comfortable based on your use of ETO. The ETO Administrator may prefer a method or combination of methods and train you accordingly. Follow the links below to learn more about each. My Dashboard My Dashboard includes details of the work you have recently entered into ETO (Efforts, Assessments, Referrals). It may also include My Caseload, a search feature, reports, etc. Quick Tab Navigation The green tabs across the top of the screen are referred to as Quick Tabs. Quick Search is the most frequently used tab. Enter in a Participant's First or Last Name into the "Enter Search Term(s)" box and click the Search button. 4 Click on a name in the search results to access a list of features to work on with that Participant. Custom Home Page Links Links to features can be added to the Home Page by the ETO Administrator. 5 Navigation Bar The green bar on the right side of the page is referred to as the Navigation Bar. Click on any of the headers (in white font) to access features that fall in that section. RECORDING A NEW CLIENT IN INTAKE/WAITLIST Participant – Member of the target population, recipient of service. For CMHA: Participant = registered client. Participant in the context of ETO: “Most of our participants will go through the same process, beginning with an intake and finishing with an exit interview.” Search ETO first to avoid Duplicates! Searching is probably the most frequently used functionality in ETO Software. Before a new Participant is added to the system, it is recommended that the system is searched to avoid duplicate entries Quick Search Quick Search allows you to search for active Participants in the selected program, or those who are active and dismissed across the entire site. Ensure that you select ‘CMHA Calgary Region’ when you do the search. 6 After you have searched ETO – CMHA-Calgary Region and did not find the client, you will have to Add the participant. Add = Entry of data that is not already existing in the database (e.g.: Add Participant, Add Referral, Add Reliable Contact, Add Participant Match) To add a Participant: - Click on Go next to ‘Add Participant’ on the Intake/Waitlist Program’s Home Page, or - On your Navigation Bar to the right, go to ‘Participants’ and then click on ‘Add New Participant’. This page will appear. 7 The Add New Participant screen is how a record is started for a participant within the selected program. After this screen is submitted, additional types of data, such as Assessments, Efforts (Points of Service), and Referrals, can be attached to the record. The Demographics seen on this screen are a combination of Standard fields that come with the software, and Custom fields that were set up based on our organization's needs. Custom Demographics can be edited by the ETO Administrator; Standard Demographics are hard coded and cannot be modified. Demographics may vary from program to program, although some fields (including all Standard Demographics and all Custom Demographics built with the Scope of Site), will appear in all programs. Data Entry: Use the tab key or the mouse/track pad to move from field to field Asterisks (and yellow) indicate which fields are required (when a field is required, you will not be able to submit the record without completing the required information). Do not use the back button or enter keys Understanding Demographic Fields: “Case Number” is automatically generated after the demographic page is submitted/saved. Phone numbers require 10 digits. Enter 10 digits, move to another field, and the number will auto-format with parenthesis and a dash. Postal Code will auto-populate city and province after the page is submitted. The Standard Demographics Referral Source and Funding Source are both a special type of field called Entity Cross Reference. New options can be added through the Add New Entity feature. Select the corresponding Entity Type (Referral Source or Funding Source) based on the field you're populating. If there are Entities in other programs in the site that should be listed in the current program, they can be brought into the program through Enroll Entity. The Alert field (if enabled) will generate a pop-up with the data entered in that field when the participant is accessed through View/Edit Participant, Participant Efforts and Enroll Participant. 8 Submitting the Add New Participant Page: Once you’ve completed all relevant demographic information on the first page, select the Participant’s Program Start Date at the bottom of the page. This date should be the date when the Participant started receiving services or completed an intake/referral form. The Program Start Date can be backdated as necessary. Only the ETO Administrator can edit this date, please enter it carefully. This date default to blank. The Enroll in Program check box must be checked to enroll the participant in the program. The box will be automatically selected. If this box is not checked, the Participant will exist in ETO with no program affiliation. You will then have to use the Enroll Participant feature to pull the participant into the selected program. We would like to avoid this. Click Submit at the bottom of the page to save the record. A confirmation will appear to let you know that the Participant has been successfully added to the Program. Click OK to move to the next screen, which is defined by the ETO Administrator on a program by program basis. Duplicate Alert If you submit the new Participant’s name and it matches another Participant in the Software, you will get a Resolve Potential Duplicates alert. It is very common for staff to be confused by this message, as it is not expected! A list of possible matches of existing records will appear. The Duplicate Alert includes the following options: 1. If not a duplicate: Click on Not a duplicate, please add which will add the participant as a new record 2. If a duplicate: Click on Go Back to the demographics and edit the record you are trying to add so that it will no longer match an existing record. If a duplicate is already Enrolled in the program, the record will say Currently Enrolled in green. If a duplicate is not Currently Enrolled in your program (but exists in the CMHA-Calgary Region site), click on the enroll option: this will redirect you to the Enroll Participant feature, where you will need to search for the Participant. 9 If participant records are duplicated, it's not the end of the world! The records can be merged by the Site Administrator with the Duplicated Participants feature. After submitting the Add New Participant page, you will be directed to another page, based on how your ETO Administrator has customized your system using either feature. RECORDING CLIENT’S PERSONAL SUPPORTS In ETO, clients’ personal supports are called reliable contacts. Reliable Contacts are for capturing information on any individual supporting a Participant, such as family members and friends who may or may not also be Emergency Contacts. You can add multiple Reliable Contacts for any Participant using this feature. Feature to use: Add Reliable Contacts - Click on Go next to ‘Add Reliable Contacts’ on the Intake/Waitlist Program’s Home Page, or For the other Programs (not Intake/Waitlist): - Click on ‘Participants’ and then on ‘Add Reliable Contacts’ on your Navigation Bar to the right. This page will appear. Type in the last name of your client and click on Go. 10 Select your client. And then this page will appear: - Only the name field (in yellow) is required. Type in the first name and last name of the Reliable Contact in this 11 order (first name and then last name). - Check the Emergency Contact box to identify that this is a person to contact in event of an emergency. - Enter 10 digits for phone number and move to another field. The number will be auto-populated with parenthesis and a dash. - It is optional to enter the address of the reliable contact. - Multiple reliable contacts can be added, one at a time, for the selected participant. However, the same reliable contact may not be attached to multiple participants. View/Editing/Deleting Reliable Contacts Reliable Contacts can be viewed, edited or deleted. On your Navigation Bar, Click on ‘Participants’ and then ‘View/Edit Reliable Contacts’. Or: Click on ‘View/Edit Reliable Contacts’ on your client’s Dashboard. (Participant Dashboard). If a participant has more than one reliable contact, the order can be changed on this page (click on ‘Change Order’). TIP: Reliable contacts appear on the Standard Reports Participant Profile and Participant Face Sheet. RECORDING CLIENT’S PROFESSIONAL SUPPORTS In ETO Professional Supports are called: Participant Matches. Professional Supports are installed in ETO as Entities. Entities – Typically a third party that somehow impacts Participants, such as Professionals, Employers, Education Institutions, or other community based organizations where Participants are referred. Like Participants, Entities can be tracked with assessments, efforts, and processes. 12 Feature to use: Participant Match. This functionality allows you to match a Participant with an Entity Contact (either an Individual Entity that is categorized as a contact by default, or a contact associated with an Entity of another type). Steps to making a match: Click on ‘Participants’ and then ‘Participant Match” on your Navigation Bar and then search for the participant (client) to be matched. If there are no current matches for the participant, this is noted. Click Add New Contact. Click Add Existing Contact to search for the Individual Entity/Entity Contact to match with the participant. Contacts are added to ETO with the Add New Entity feature, and updated with the View/Edit Entity feature. A pop-up box will appear so you can search for the contact using all or part of their last name. When located, click Work with this contact to link them with the Participant. 13 • You will note that the person you chose now appears under the Participant. Click Add Current Contact to make the match in ETO. • More than one Entity Contact may be associated with a Participant, and vice versa. If a match is made in error, it can be deleted from this page. Edits can be made to the start date of the contact, as well as the end date and reason for match termination. This field is populated by the Site Administrator from the Reasons for Dismissal feeder table. 14 ADDING PROFESSIONAL SUPPORTS IF THEY ARE NOT ALREADY IN ETO Feature to use: Add New Entity. This function allows you to add an Entity to the selected program. As you remember, Professional Supports are considered Entities in ETO. To add an Entity: On your Navigation Bar, Go to ‘Entities’ and then click on ‘Add New Entity’. This page will appear: 15 Type in the Entity Name in this manner: First Name and Last Name. Do not put any title such as Dr. For Entity Type: Always select: Individuals The following Sub-Types are available: Professional Supports- Addiction Counselor Professional Supports – Clinical Support/Case Manager: e.g,: Psychologist, Nurse, etc. Professional Supports – Community Support Worker. E.g. Social worker Professional Supports – Dentist Professional Supports-Financial Support Worker Professional Supports-Guardian/Trustee Professional Supports-Other Professional Supports-Parole Officer Professional Supports-Pharmacist Professional Supports-Physician Professional Supports-Probation Officer Professional Supports-Psychiatrist Professional Supports-Trustee • After designating a Type and Sub-Type for the Entity, check the Is an Individual box, which will automatically populate the contact information box for the Entity. You may receive a Duplicate Warning if they attempt to add a new entity that already exists on the site • After indicating whether or not you want the Entity to be a part of the program you are in, you will then be asked in you wish to Manage the Entity. Managing the Entity consists of adding contact information to the Entity. Click on Add New Contact and enter information. • After contacts have been added to the system, you can add any number of phone numbers to each individual contact by clicking on Edit Entity. Click Phone and add all new numbers. The Software will store each of these numbers as Pending numbers until you click on Record Pending Phone Information 16 When the page below appears, you will need to add the Professional to all Programs so that all Programs can use this Professional Support in the future. To do this, click on ‘Program Information’ at the top right: Then this page will appear: Click on ‘Add’ for each of the Programs you believe would benefit from having this Professional Support available (one of the client in the program may have this Professional Support). You will have to do this for each Program at a time. 17 EDITING CLIENT INFORMATION Feature to use: View/Edit Participant View/Edit Participant is a program specific search; you can search for both active and dismissed participants. When you have done the search, click on a Participant to view his demographics, and make changes if necessary. To View/Edit Client Information: - Click on Go next to View/Edit Participant on your Program’s Home Page, or - Click on ‘Participants’ and then ‘View/Edit Participant’ on your Navigation Bar. View the information, Edit it if necessary, and then click on ‘Submit’ PARTICIPANT DASHBOARD FEATURE The Participant Dashboard is a link to have quick access to your client’s file. To access your client’s Dashboard, do a quick search and then click on the client’s name and then on the client’s Dashboard: This is a Participant Dashboard. Through this Dashboard, you can view your client’s basic demographic information, as well as his/her recent activities/attendances (efforts), assessments, and referrals. 18 ENROLLING CLIENT IN A PROGRAM (Intake/Waitlist or Actual Program) Enroll – To bring a participant that exists in ETO into the selected program and enter a program start date. Enroll in the context of ETO: Fred got services here three years ago and moved to Florida. When he returned, rather than adding him as a new Participant in ETO, I enrolled him. 19 Feature to use: Enroll Participant The Enroll feature is typically used in one of two scenarios: 1. Intake/Waitlist Programs: A participant is (or has) been enrolled in another CMHA program, and now needs to be enrolled in the Intake/Waitlist Program too. 2. Actual Programs: A participant is in the Intake/Waitlist program, and now needs to be enrolled in the Actual program because he has been accepted or is eligible. Go to ‘Participants’ and then click on ‘Enroll Participants’ on your Navigation Bar. The search function allows you to search for Participants by Last Name, First Name, SSN, Case Number or Family Name. To see a list of all Participants available for enrollment in the selected program, leave the search boxes empty and click Go. Participant Results are grouped into sets of 50. Select the desired participants (click Next 50 to advance to the next 50 results). 20 This page will appear. Put a checkmark in front of the participant’s name. Input the Program Start Date when this page appears, and then click on ‘Submit’. To view/edit the client’s information, use the View/Edit Participant feature described in another section in this Manual (page 18). PRINTING A FACESHEET OF YOUR CLIENT Click on ‘Go’ next to ‘View/Edit Participant’ on your Program’s Home Page 21 Search for the client you are interested in. At the bottom of the demographic page click on ‘Participant Face Sheet’ and print the Face Sheet. DISMISSING A CLIENT FROM YOUR PROGRAM Dismiss = Discharge, file closing. Feature to use: Dismiss Participant When a Participant is no longer being served by a selected program, it may be Dismissed from that program using this feature. Dismissed participant records are not deleted; a dismissed Participant may be re-enrolled with the Enroll Participant feature at any time. Enrollment and dismissal details are stored on the Program History accessed via the button in the upper left of the View Edit or Find Participant pages. Note: Every time the decision has been made as to whether a client is accepted/eligible, not accepted/not eligible for a Program, you will need to dismiss them from the Intake/Waitlist Program. Click on Go next to ‘Dismiss Participants’ on your Program’s Home Page. This page will appear: 22 Search by the (single or combined) full or partial last name and/or full or partial first name. This page will appear: Put a checkmark next to the client’s name and click on Dismiss (Different Dates + Reasons). This page will appear: 23 Input the End Date, select the dismissal reason, and put a checkmark in ‘Successfully completed’ if the client successfully completed your Program. Then click on ‘Dismiss’. These are the dismissal reasons: - Completed Service, no follow-up: To be used when the client has successfully completed the Program. - Completed Service, client went to other Program: To be used when the client has successfully completed your Program and is transferring to another CMHA Program or to another Program in the community - Client withdrew from Service: To be used when the client decides not to receive services anymore or drop out from the Program. - Transfer into the Program: ***This is only to be used by the Intake Program when an individual is dismissed from the Intake Program, is eligible, and is moving into the Actual Program*** - Client Moved: When client left the program because is moving to another city. - Client Deceased - Other After dismissing a client, you will have to complete: 1) The Goal Attainment Scale – Discharge Report. This is a Participant Assessment – Refer to the appropriate section in this Manual. 2) The Discharge Information Assessment (with housing item). This is a Participant Assessment – Refer to the appropriate section in this Manual. RECORDING YOUR TIME WITH AND ON BEHALF OF CLIENTS Point of Service – This is where time and energy spent is tracked within ETO. We tried to set up Points of Service so that time spent can be related to client progress (such as going from lack of engagement to full engagement). Points of Service are entered by Recording Efforts. 24 Point of Service in the context of ETO: “We used to enter case notes in Word documents and attendance information in Excel. Now staff enter that information into Point of Service using the Record Efforts features and the reporting options are great!” Effort – Entry of Point of Service data, which is also known as recording efforts. There are several record efforts features in ETO: Efforts can be recorded for Participants, Entities, or General. Efforts can be recorded for one Participant (Entity) at a time, or Multiple Participants (Participants). Most Point of Service elements are built with a field to capture time spent on contact. Time spent on contact and number of contacts both track effort on behalf of staff entering their work. ETO has the capacity for many efforts to be recorded for a given participant on the same day; effort data is typically entered with more frequency than any other type. Value – The data field that appears on Record Efforts pages where you provide a response to the Point of Service name. Values may be presented as a drop box of choices (which can be edited by the ETO Administrator), a Yes/No selection, or a blank box, which indicates that Numeric data be entered. Value in the context of ETO: "When I went to record an effort in ETO I was on the fence as to whether to select the value of Contemplation or Planning, but after speaking with my program manager about how the values are defined, it was clear the Participant is in Planning, so that's the value I chose!" These are the Points of Service for your Programs: - Track Activities with client: Visits with clients, phone calls with clients - Track Activities on behalf of client: Writing letters, faxing, reading client’s file, updating client’s file in database, etc. - No show without notice: Client did not come and did not notify you - Track Professional Consultation with client: Meeting between client, professional, and you - Track Professional consultation without client: Meeting or phone call with a professional without the client present. - Track contact with Collateral with client: Meeting between client, family member or significant other, and you - Track contact with Collateral without client: Meeting or phone with client’s family member or significant other. - Track No contact with Client: *** To be used only by Supportive Living Relief and Overnight Staff when there is no contact with the client during the shift **** Most of the Points of Service for your Programs are Composite Points of Service. A Composite Point of Service allows you to enter data on more than one related Point of Service on the same screen. Feature to use: Record Efforts Efforts are used to enter Point of Service data. Points of Service allow for time spent with Participants to be captured. Efforts are entered with more frequency than any other feature in ETO. There are several ways to access the Participant Efforts feature: 1. Go to the Participant's Dashboard (through the Quick Search link, the link at the top of the View/Edit Participant page, or from My Dashboard). Once on the Participant's Dashboard, click the Participant Efforts link inside the Action Links ETO Part, or utilize the appropriate link (Edit, Add Similar, New) within the Recent Efforts ETO Part. 25 2. Perform a Quick Search within the selected program, click on the Participant, then click Record an Effort: 3. Click the Navigation Bar feature, find ‘Record Efforts’, and click on ‘Participant Efforts’. Search for the Participant and click on his name. 26 4. Click on ‘Go’ next to ‘Record Efforts’ on your Program’ Home Page. This page will appear: 27 You will be presented with a drop box. To access the data entry screen, you must select the appropriate Point of Service from the drop box, and click the Submit button. Note that if there is only one Participant Point of Service in the selected program, this screen will flash by very quickly and you will be auto directed to the data entry screen. Also, if you clicked the Add Similar link on the Recent Efforts ETO Part, the drop box will not appear and the user will be auto directed to the data entry screen for that Point of Service. Click on Submit: 28 The top of the Participant Effort screen will include: Name of selected Participant Name of selected Point of Service Contact Location/Method drop box - how or where was the service delivered? Date of Last Contact - this will be None if no efforts have been recorded with the selected Participant within the selected Point of Service Date of Contact - this is the date the service was rendered - note that the date cannot be in the future Date of Next Contact - this date populates the To Do List - note that the day must be in the future. Select a date from the calendar date picker, or enter a plus sign and the number of days until the reminder (+7). If you do not enter a date of next contact, a reminder will pop up. You will have the option to click a link to request this reminder not pop up in the future. If there is an ‘Effort Qualifier’ section such as in the Point of Service ‘Track Activities with client’, select the appropriate options. If there is a section that has ‘Value choices’, such as below in the Point of Service ‘Client engagement’ within the composite Point of Service ‘Track activities with client’, select the appropriate value choice. If there is a section that has the Values ‘Yes or No’, such as below in the Point of Service ‘Track travel time’ within the composite Point of Service ‘Track activities with client’, select ‘Yes’ if there was travel time and select ‘No’ if there was no travel time. The same for ‘Track documentation of activities with client’. If you select ‘No’, input ‘0’ for Time Spent. Time Spent: Is always in Minutes and always in 15 minutes increments: e.g. 15, 30, 45, 90, 120, 180, etc. 29 Type in your case note in the Notes box that holds up to 7,250 characters. The box will expand with a scroll bar on the right to accommodate text beyond what's visible. ETO doesn’t have an integrated spell checker so some people prefer to write their notes in Word and then paste them. Try to avoid using double quotation marks, because they can affect the appearance of certain standard reports and query results. Three save options: o Save Effort & Close o Save Effort & Record Similar Effort: This is to record data for the same Point of Service for the same participant. o Save Effort & View/Edit Participant: This is if you want to update demographic data of the 30 participant after you have entered a Point of Service. If you have entered a Next Contact Date because you know when the next appointment with your client is, then you can use the To Do List feature. You can use the To Do List feature to directly record the effort that you had on that ‘Next Contact Date’. To Do List When recording a Point of Service/Effort, the Date of Next Contact can be entered with a plus sign followed by the number of days (+14), typing a date directly into the box (using m/d/yyyy format) or by using the date picker calendar. The To Do List is accessed by clicking the To Do List tab at the top of the screen, or on Programs’ Home Page. 31 Click the toggle (plus sign) on the left side of the Point of Service Element to expand the details. The Take Action drop box includes: Record Effort, View Efforts History, View/Edit Participant, Change Due Date, and for Program Managers and higher, Assign Effort to Staff. Open the Show drop box to switch the To Do List view. 32 The most popular view is the Calendar. You can determine which days should appear (5 work days versus the full week), and can move through the calendar by using the arrows pointing to the left (past) and right (future). If you have entered efforts in more than one program, all reminders can be combined in one list by switching the Scope. Editing your records (efforts) If you have made a mistake or did not finish entering a note, the Edit my Efforts feature will allow you to go back and update the effort with changes. On your Program’s Home Page, go to ‘Edit My Efforts’: 33 Efforts can be found based on the Date of Contact (often different than the date recorded), or by the Participant’s last name. 34 Click the blue link to edit the record, or the red link to delete the record (note that deleted records are completely erased from ETO). Make the changes and click Update Effort at the bottom right. RECORDING CLIENT HOSPITALIZATIONS WHILE IN YOUR PROGRAM This is a Point of Service and is recorded under ‘Record Efforts”. This Point of Service is used to record non-psychiatric and psychiatric hospitalizations of your clients while they are in your Program. Complete the information on the page. Always select ‘Yes’ for value. Click on ‘Save Effort and Close’. 35 RECORDING SIGNED CONSENT FORMS These are Points of Service and are recorded under ‘Record Efforts’. Each Consent Form has to be entered separately. In the ‘Next Contact Date’, input the date the consent form expires and in the Notes section, input the names of the individuals you have consent to exchange information with. Note that since you will input the ‘Next Contact Date’, the reminders to have the consent forms signed again will appear in your To Do List. 36 REVIEWING YOUR CLIENT’S EFFORTS Review Participant Efforts – The most popular report in ETO! It contains detailed data about a selected participant within a date range, including efforts, referrals, assessments, etc. The original view shows summary statistics. There is the option to drill down to see more details, such as case notes. Review Participant Efforts in the context of ETO: “I run the Review Participant Efforts report to read about the efforts my colleagues recorded for participants we serve, which helps me to feel in the loop.” On your Program’s Home Page, click on ‘Review Client Efforts’. Once you have selected the client and a date range, this page will appear: The first section shows summary statistics 37 The second section shows detailed statistics. Click on the plus (+) sign to see the details and to see the notes. RECORDING YOUR TIME NOT RELATED TO CLIENTS Your time not related to clients is considered a ‘General Effort’. General – Does not fit into the Participant or Entity category; both General Assessments and General Points of Service can be built into ETO. 38 General in the context of ETO: “I track my work as an ETO Administrator in a General effort so that I can generate a report detailing how much time I spend working with the software.” Feature to use: General Efforts. Go to ‘Record Efforts’ on your Navigation Bar, and then click on ‘General Efforts’: The General Efforts for your Programs are: - Track Administrative Tasks: To be used to record non-client related work such as filling out your timesheet, expenses, preparing your weekly schedule etc. Input your time for administrative tasks on a daily, weekly, or monthly basis. To calculate your monthly time in administrative tasks (which is the total time you worked – total time in client-related work), use the ‘Review My Efforts’ feature described below in this Manual. Always in minutes, so multiply your hours by 60. - Staff Meeting: To be used to track your time in Team meetings or Agency Staff meeting. - Track contacts with non-participants: To be used for tracking contacts with non-registered individuals/clients (not registered in a CMHA Program e.g. individuals at the Clinics, individuals living in your Apartment building). - Program Presentations: To be used when you deliver a presentation about your Program to a community agency. - Track Outreach Activities: ***For the SOS Program only*** - Track Professional Development: To be used for tracking your attendance in workshops, training courses, conferences, agency tours etc. for your professional development. - Track travel time: To be used to track your travel time not related to client work. - Group Preparation: To be used to capture the time you spend on preparing for your Program’s groups, workshops. (Including preparation for house meetings and community meetings). 39 Select the appropriate Contact Location/Method, Date of Contact, Date of Next Contact if desired (this will populate your To Do List for future contacts). Always click on “Yes’ if the activity (e.g.: administrative tasks, program presentation) happened and click on ‘No’ if an activity (e.g. and in particular, travel time) did not happen. If you select ‘No’, input 0 for ‘Time spent on Contact’. The notes box has a limit of 7,250 characters. Click Save Effort & Close to submit or Save & Record Similar Effort to submit and record an additional effort with the same program. REVIEWING YOUR TOTAL TIME AND WORK FOR A PARTICULAR DATE RANGE The Review My Efforts functionality provides a viewable and printable record of all efforts that you have recorded in ETO. On your Program’s Home Page, click on ‘Review My Efforts’. 40 To access ‘Review My Efforts’, simply type in a date range and Submit. The first section is composed of summary statistics. Program Summary: For the Program you mostly work in. Site Summary: If you work in more than one Program. If you decide to enter your time in administrative tasks at the end of the month, at the end of the month, you can add your ‘total time spent’ under ‘Participant point of service elements’ (which is your total time for client-related work) and under ‘General Points of service elements’ (which is your time in group 41 preparation for example), and then substract this amount from the total time your worked in the month to find out your time in administrative tasks. Then enter a ‘General Effort’ : ‘Track administrative tasks’ and select the last date of the month. The second section provides details of your work. To view all your work during the period selected, click on ‘Select All details’ and then submit. This page will appear: Each of these sections allow you to Toggle Details for more information in any particular area, including 42 ”drilling down” to show the Participants with whom you worked, where the contact occurred, and full case notes. Please note that you can also view the referrals and the assessments that you completed during that period. If you would like to see your work in other Programs (not the main programs you work in), click on ‘View Other Programs” at the top and select the Program. 43 PRINTING THE NOTES FOR A PARTICULAR CLIENT FOR A PARTICULAR DATE RANGE On your Navigation Bar, go to Reports and then click on ‘Standard Reports’. This page will appear. Under the Section ‘Individual Participant History Reports’, click on the report ‘Participant Notes by Date and Outcome’ and then search for your client and input a date range and click ‘Run report’. The report will appear and you will be able to print it. 44 RECORDING REFERRALS Feature to use: Add Referral This function allows you to capture the referral of a Participant to one of two destinations: Internal referral to a CMHA Program and an external referral to an outside agency/entity. On your Program’s Home Page, click on ‘Go’ next to ‘Add Referrals’. Or on your Navigation Bar, go to ‘Record Efforts’ and then click on ‘Add Referral’. Search for a participant in your program by full or partial last name (and first name), SSN or Case Number. Select the participant you wish to refer by clicking on their name. After clicking on the participant, you will see a list of 2 options: 45 - To Entity (service providers): is for an external referral to an outside agency/outside. ***CMHA groups such as Money Matters, Skills for Life, and Proactive You are found under this category*** - To Program: is for an internal referral to a CMHA Program (not group). Referrals to Entity (Service Providers) 46 Select a Service Provider from the Drop-down list. Select a Reason for Referral from the Drop-down list The Referral Date defaults to today. Modify it as needed. The Pending Drop Off Date defaults to a month from today. No need to change. Select a Referral Status: Select ‘Referred’ Release Participant Information: If there is a signed consent for release of information form for the service provider, put a checkmark, if not, leave blank. Date of Next Contact: No need. Leave blank. Time spent of contact: No need. Leave blank. Referral Notes: optional Dismiss from Program: No need. Leave blank Click Submit. The following page contains a printer icon so that the referral information can be printed if a hard copy is needed. There are also links to Add Another Referral. In your client’s dashboard (Participant Dashboard feature) you can view and edit Referrals: Referrals to Program (CMHA Programs) All CMHA Programs – Except the Peer Options Waitlist Program – are set up so that they automatically accept the referral. For your information, the Peer Options Waitlist Program will use the View Pending Referrals feature in their program and will either accept or not accept the referral. If they opt not to accept the referral, the Reason for Dismissal feeder table populates options why. All fields in the Add Referral page are the same for internal (program) and external (entity) referrals, with this exception: Pending Drop Off Date: the referral will stay in Pending Referrals at the Peer Options program until this date. The default for this field is 30 days from today’s date, but can be set to any date. Peer Options Waitlist Staff will receive an e-mail when a referral is made to their Program. The Staff referring the client to the Peer Options Waitlist Program will receive an email message once the referral is accepted or not accepted. 47 ADDING SERVICE PROVIDERS NOT ALREADY IN ETO Feature to use: Add New Entity. This function allows you to add an Entity to the selected program. As you remember, Service Providers are considered Entities in ETO. To add an Entity: On your Navigation Bar, Go to Entities and then ‘Add New Entity’. But first make sure that it is not already in ETO. This page will appear: Type in the Entity Name which is the full name of the agency/entity. If it is an AHS Program, always start with ‘AHS’. For Entity Type: Always select: Service Providers. The following Entity Sub-Types are available: Access Mental Health Addiction Program: e.g. AHS Inpatient Services (hospitals) AHS Mental Health and Addiction Outpatient Services (any AHS Program related to mental health and addiction Child and Youth Serving Agencies (e.g.: Hull Child and Family Services) CMHA Program Community Agency (e.g. Calgary Association of Self Help, Potential Place) Emergency/Crisis Services Family/Friend Forensic Services Government Services (provincial/municipal) (e.g. AISH, Alberta Works) Housing Program (e.g. Pathways to Housing, The Alex) Immigrant Services (e.g. Calgary Catholic Immigration Society) Long-Term Care Facility (e.g. Fanning Care Centre) Non-AHS Health Professional (e.g. Physician, psychiatrist not affiliated to AHS) 48 Other AHS Professional (Any AHS Program not related to Mental Health and Addiction, e.g. Living well with a chronic illness) Other Shelter, Homeless (e.g. The Mustard Seed) Shelter, Other (e.g. Calgary Women’s Emergency Shelter, YWCA Sherriff King Home, etc.) • After designating a Type and Sub-Type for the Entity, input the phone number and the address in the first section. There is no need to enter the second section. • After indicating whether or not you want the Entity (service provider) to be a part of the program you are in, you will then be asked in you wish to Manage the Entity. No need. Continue until the page below appears. You may receive a Duplicate Warning if you attempt to add a new entity that already exists on the site • Add the service provider to all Programs so that all Programs can use this Service Provider in the future. To do this, click on Program Information at the top right. Click on ‘Add’ for each of the Programs you believe will benefit from having this Service Provider (they may refer to them in the future). You will have to do this for each Program at a time. 49 RECORDING ASSESSMENTS LINKED TO A CLIENT (Participant Assessments) Assessment - A data collection tool in ETO. It can be used as a continuation of demographic data, like in an extensive intake form, or it can be used as a questionnaire that track knowledge, belief, attitude, and/or behavior that is completed more than one time and allow for comparative analysis to determine the impact of services. For your Programs, the Participant Assessments are: - Goal Attainment Scale - Critical Incident Report - Discharge Assessment with housing item form - Exit questions for the SOS Program (SOS Program only). - Independent Living Skills Survey (Roberts House only) - HoNos (Hamilton House and Roberts House only) - Brief Psychiatric Rating Scale (Roberts House only) - Global Assessment of Functioning (Roberts House only) Feature to use: Participant Assessment This feature allows for Participant Assessments to be taken, updated, and reviewed. Additionally, individual participant reporting options are available on this page. There are three ways to access participant assessment: - In the Program’s Home Page (Record Participant Assessment link) - In the client’s file (using Participant Dashboard feature) - On your Navigation Bar (‘Participant History’ and then ’Participant Assessment’) Search for a Participant by Last Name, SSN or Case Number and click on Go. Note that dismissed Participants can be included in the search if the check box is clicked. Select the name of the Participant. 50 To enter new assessment information, click the “Take New Assessment” button. Select from the drop box of available Assessments and click Continue 51 Enter the assessment date at top of screen. Complete assessment elements as desired. 52 If helpful, “Schedule Assessment Follow-up Alert”, which allows you to create an alert on your To Do List. Check the box and complete the Alert Date, Alert Type and Alert Notes (optional). You can create a reminder to take a new assessment or complete the current assessment. You can also create a reminder for another staff person to complete the assessment. This is especially useful for the Goal Attainment Scale when you want to schedule to take a Progress Report (which is a new assessment) Click on “Submit” to save your information. We do not recommend you to ‘Save Draft’ because if you do not go back to complete the assessment and submit it, the assessment data will not show up in aggregate reports. After submitting, the response review screen will generate, along with a confirmation that the assessment has been submitted in the system. The next screen will allow for review of answers and a link to go back to make edits if necessary. If a response needs to be modified, click “Edit” and you will be able to make those edits. Click Continue to return to the Participant Assessment screen, where a list of options appears in the Take Action list. 53 1. Review – shows a read only version of your assessment data. This is helpful if you are unable to run Crystal Reports on your computer. 2. Response Report – a Crystal Report containing a print out of all assessment questions that were answered and the answers to those questions. 3. Full Report – a Crystal Report containing all questions, choices, and selected answers in the assessment, including those that were not answered. 4. Aggregate Report – a Crystal Report for assessments that have been completed multiple times for the selected participant. The report aggregates the data entered into those assessments. 5. Condensed Report – a Crystal Report that is abbreviated because the large header only appears on page 1. 6. Update – allows edits to an existing assessment. 7. Delete – this option is only available to Site Administrators and deletes the entire selected individual assessment. RECORDING SURVEYS / ASSESSMENTS NOT LINKED TO A CLIENT For your Programs the Surveys/General Assessments are: Independent Living Support: - ILS exit questionnaire – ‘Take a Survey’ - ILS Follow-up phone questionnaire – ‘Take a Survey’ - Skills for Life survey - ‘Take a Survey’ Supportive Living Program: - Supportive Living Client questionnaire - ‘Take a Survey’ Street Outreach and Stabilization Program: SOS Outreach Tracking Survey – General Assessment There are two ways to access ‘Take a Survey’ or ‘General Assessments’ - On your Program’s Home Page: Click on Go next to ‘Take a Survey’ or next to “General Assessments’ 54 - On your Navigation Bar: Go to ‘Record Efforts’ and then click on ‘Take a Survey’ or “General Assessments’. For Surveys: Select the survey and then click on ‘Continue’ For General Assessments: Click on Take New Assessment (this is because SOS Program has only one General Assessment, thus there is no need to select one, it goes directly to the assessment) Input the survey/assessment date at top of screen Complete survey/assessment elements as desired. Schedule Assessment Follow-up Alert: N/A. This allows you to create an alert on your To Do List. Check the box and complete the Alert Date, Alert Type and Alert Notes (optional). You can create a reminder to take a new assessment or complete the current assessment. You can also create a reminder for another staff person to complete the survey/assessment. But in the case of Surveys and General Assessments this feature will not be used. Submit to save your information. We do not recommend you to ‘Save Draft’ because if you do not go back to complete the survey/assessment and submit it, the survey/assessment data will not show up in aggregate reports. After submitting, you will come to the response review screen. You will receive a confirmation that your survey/assessment has been submitted in the system. The next screen will allow you to review your answers and go back to make edits if necessary. If you need to edit a response, click Edit and you will be able to make those edits. Click Continue to move on to the next screen where you will have the following options: 1. Review - shows a read-only version of your assessment data. This is helpful if you are unable to run Crystal Reports on your computer. 2. Update - allows you to go back and edit the assessment data. This option will not be available if the Site Administrator has set up the assessment to prevent updates. 3. Report - a Crystal Report containing a print out of all assessment questions that were answered and the answers to those questions. 4. Print - a Crystal Report containing all questions and answers in the assessment, including those that were not answered. 5. Delete - this option is only available to Site Administrator and allows you to delete one individual assessment response at a time. ADDING NEW GROUPS AND REGISTERING CLIENTS IN YOUR PROGRAM’S GROUPS Feature to use: Manage Groups A group is a defined subset of participants active in the selected program. A subset of participants who receive services simultaneously. Basically, a roster. Groups can be set up to start and end on specific dates (such as seasonally occurring activities/classes), or to be continually active (such as support groups), with participants rotating in and out of the group. The Manage Groups feature allows for the creation of rosters of individual participants that meet together regularly over time. This is especially true if there is an expectation for each participant to show up to an activity, versus a dropin event. Creating groups makes tracking attendance and other point of service elements tracked for a group much easier. FOR MANAGER ONLY: To add a new group, follow these steps: On your Program’s Home Page, Click on ‘Manage group’ or on your Navigation Bar, go to ‘Participants’ and then Manage groups 55 Click the Add button on the bottom of the Manage Groups page This page will appear: Group Name: Enter a name for the group. Disabled: Select if this group is not yet active. This option is rarely used at the time of a group's creation. Groups can easily be disabled and re-enabled once created. 56 Start Date: Note that ETO will prevent attendance data for the group from being entered prior to the group start date. For this reason, it is important if the group started in the past, the start date is backdated. Set All Individual Members' Group Start Date Equal to Date Above: If this box is not checked, member start dates will default to the date they are added to the group (today). Member group start date can be edited individually if this box is checked. NOTE: If this box is checked for an existing group, the start date for the current members will not change. Checking this box will only impact new members added to the group. End Date: The group will not be available for recording efforts after its end date (including for back data entry). Group Description: Text will show up under the title of the group on the Manage Groups screen. Uses Scheduling: Not Applicable. Adding Participant Members to a Group: Once you’ve added a new group, click on 0 Members where you can add active participants in the selected Program. Use the search bar to search for specific participants’ names or click Go to view a list of all available participants in your program. Click Add next to the desired participant(s). (If a participant is already a member of another group, you will see their Existing Groups below their name) Each participant's start date in the group appears next to his name. This start date may or may not match the group start date, depending on the setting on the Add New Group page, and whether the date has been edited. 57 Click Edit next to the client’s name in the group to change the Start Date, Termination Date, or Termination Reason. Participants in Fake Money Matters group: Take Action Edit Remove Participant Name Fake, Robert Group Start Date 06/06/2012 RECORDING AND EDITING GROUP ATTENDANCE OF REGISTERED CLIENTS This is for: Independent Living Support: - Money Matters CMHA clients - Proactive You CMHA clients - Skills for Life CMHA clients Supportive Living: - Group homes house meetings and other groups such a skill development and leisure groups - Apartments community meetings and other groups such as skill development and leisure groups Feature to use: Multiple Participant Efforts This feature is most often used to track attendance, or services provided to more than one Participant simultaneously. For example, workshops, meetings for residents of the house or of the apartment building, group activities, etc. On your Navigation Bar, go to Record Efforts and then Multiple Participant Efforts Once the Multiple Participant Efforts feature is selected, you will be prompted to select Group/Family or Participant: Select the Group/Family option, then click Submit to be prompted to enter data for one: 58 Group – for the Independent Living Support Program Housing Unit – for all Supportive Living Programs. Select the appropriate Point of Service and click ‘Submit’. 59 This page will appear: Contact Location/Method. This field is meant to capture how or where a service was provided Date of Contact should be the date when you actually worked with the participants, including those contacts that 60 occurred in the past. Note that Date of Contact cannot be recorded for the future. No need to enter ‘Date of Next Contact’. Time Spent on Contact is entered in minutes. The user account that records a Multiple Participant Effort will be credited once for the time entered for the entire group. If participant is present: put a checkmark, if participant is absent: leave blank. The notes field has a limitation of 7,250 characters. The notes field box will grow and a scroll bar will appear to accommodate notes. To prevent duplication of efforts, a pop-up message will appear if you submit an Attendance Point of Service for the same Participant(s) on the same date. You will then have the option to bypass the message and submit the effort, or to forego submitting the effort to avoid entering a duplicate effort. Edit My Efforts – Refer to the relevant section in this Manual regarding how to access the ‘Edit My Efforts’ feature (hint: It is on your Program’s Home Page!) If you have made a mistake or did not finish entering a note, the Edit my Efforts feature will allow you to go back and update the effort with changes. Efforts can be found based on the Date of Contact (often different than the date recorded), or by the Participants last name. For Multiple Participant Efforts, Date of Contact is probably the better option. Click the blue link to edit the group record, or the red link that reads "Delete Group Record" to delete the group record. There is also a red "Delete record" link so that each participant's individual record can be deleted in case they were included in the effort inadvertently. Note that deleted records are completely erased from ETO. Make any needed changes and click Update Effort. RECORDING GROUP ATTENDANCE OF ANONYMOUS INDIVIDUALS This is for the Independent Living Support Program: Money Matters, Proactive You, and Skills for Life groups that have anonymous individuals (not registered in a CMHA Program). Supportive Living groups do not have anonymous individuals. This is done by using the ‘General Efforts feature’. Access the General Efforts Feature through the ILS Program Home Page or though your Navigation Bar (Record Efforts and then General Efforts). These are the Points of Service in the General Efforts feature: -Track anonymous participants at Money Matters workshop -Track anonymous participants at Proactive You workshop -Track anonymous participants at Skills for Life workshop 61 UN-REGISTERING CLIENTS IN GROUPS This is for when one or multiple participants leave the group. Go to Manage Groups on your Home Page or on your Navigation Bar (‘Participants’ and then ‘Manage groups’). Click on “x Members’ under ‘Active Members’. 62 Click on ‘Remove’ next to each participant’s name: Participants in Fake Money Matters group: Take Action Participant Name Edit Remove Fake, Robert Group Start Date 06/06/2012 This page will appear: - Input the ‘Termination Date’ - For Termination Reason: *** Only use the options ‘Completed Group’, ‘Dropped out from Group’ and ‘Other’ because all the other options do not apply to Groups (Indeed, the other options are for discharge from a Program or not accepted into Peer Options Program)*** - Click on ‘Save’ HOUSING CHECK-IN The rooms have been configured in ETO in your program, meaning that there is a room number for each room in your house and an apartment number for each apartment in your apartment building. If you can not find the apartment number or if an apartment number is no longer available in your building (since apartment numbers change), please notify the ETO Administrator as soon as possible so that they can modify this. On your Navigation Bar, go to ‘Record Efforts’ and then ‘Housing Check-In’. This page will appear: 63 Click on the Plus (+) sign to expand. This page will appear. Click Add Participant to Room x to utilize the quick and easy housing check in. Search for a participant using “last name, first name” format. A list of matches will generate. Select the participant, and determine the occupancy start date and click on ‘Save’. 64 HOUSING CHECK-OUT On your Navigation Bar, go to ‘Record Efforts’ and then ‘Housing Check-Out’. This page will appear: Check the participant(s) who needs to be checked out of a room/Apt., determine the check out date(s), and click save. LOGGING OFF To log off, click on the link in the upper right corner of the software. You should click on this link before closing your browser to ensure the data remains as secure as possible. 65