Transcript
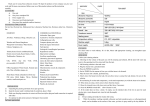
Operating Instructions and Illustrations for Abrasive Belt Grinder
u
Inspect if the voltage is conforming and if abrasive belt and screws are loose before doing the
operations as follow。
1.
Connect with main supply, turn on the power to see if abrasive belt
runs in parallel; if abrasive belt deviates in running, regulate the abrasive
ring belt to the position as adequate with regulatory screw under running
status before starting operation.
2.
To place the grinding base flatly, unfasten the
fixing screw on the motor rings before pulling down the
grinding base to flat (or to the desired grinding angle),
then fasten the fixing screw adequately (over-fastening
may result breaking of screw or crack of rings).
3.
To replace abrasive ring belt, pull up the fastening
wrench to unfasten the abrasive ring belt, pull down the
wrench again when the abrasive ring is belt replaced.
4.
To replace rubber wheel, grab the wheel manually
before removing the 5/8¨fixing nut (left-threaded nut,
unfasten it clockwise with a jerk) of rubber wheel with
26m/m socket, fasten the nut again after the rubber
wheel is replaced (fasten it counter clockwise with a
jerk).
★ Clear the dust on the grinder on a regular basis to assure the normal operations of driving and belt tension
mechanism.
★ Do not use porous socket, extension wire or operate several machines in the same socket to avoid damage
of motor due to the low voltage.
★ Do not overload the grinder to prevent damage to the motor due to speed down of motor and rise of voltage.
