1
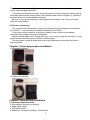
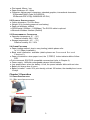
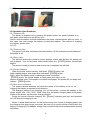
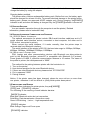
Portable Bluetooth 2” Thermal Printer User’s Manual V1.0
(Model: BT-TP2)
Chaper 0 Operating Precautions
This section presents important information intended to ensure safe and effective use
of the printer. Please read the following carefully.
0.1 NOTES ON SAFETY
Be sure to use the specified battery and power source provided by our company.
Connection to an improper power source may cause fire, explosion or damage to the
printer.
Don’t put the battery into the fire or water, don’t disassemble or modify the battery,
don’t be short circuit, otherwise may result in injury or fire even explosion.
If the printer would not be used for a long time, be sure to take off the battery, otherwise
the battery may leak liquid which is corrosive, if improper operation causes battery leak,
and the liquid is spattered
on the skin or clothes, please wash it with water, if spattered in the eyes, please rinse
them with water thoroughly and see a doctor.
Please do not open the paper case cover when it is printing or just when printing is
over, do not touch the print head with hand or body, overheat may cause scald.
0.2 NOTES ON USING
Be sure not to print continuously over 1 meter, otherwise may cause damage to the
print head.
Water or other liquid should not spill into the printer, also the printer should not be
appeared in the rain, or else may cause printer
damage.
Please do not open the paper case cover when it is printing, otherwise the printer may
work improperly.
If print with serial interface, should not unplug the interface cable in the course of
printing, or else some printing data may be lost.
When print with Bluetooth interface, the communication distance should be within 10
meters, otherwise the printer doesn’t print or
prints rubbish codes.
Too high(50℃)
or too low(0℃)temperature and too high (85%)or too low (20%)
relative humidity both effect the print quality.
1 The print paper in poor quality or stored for too long time also may reduce the print
quality even damage the printer.
In the black mark detecting mode, the printer requires that the ready-print black mark is
accordant with the black mark printing rules (details please refer to Chapter 5), otherwise
the black mark can not be detected correctly.
Be sure to use up the electricity of the battery before charge it, as it can ensure the
using life of the battery.
0.3 NOTES ON HANDLING
The printer should be placed in such an environment that the temperature is between 20℃and 60℃, and the relative humidity is between 5% and 95%.
If the printer will be stored for a long time, pleas be sure to take out the battery,
otherwise may damage the battery and printer.
Normal thermal paper can’t be kept too long, if you need to keep the receipt for a long
period, please choose long term effective thermal paper.
The print paper should be keep away from high temperature environment and pointblank sunshine.
Chapter 1 Outer Appearance and Model
1.1 Standard Package:
1.2 Option Accessories:
Chapter 2 General Specifications
2.1 PRINTING SPECIFICATIONS
● Print method: thermal line printing
● Paper width: 58mm
● Print width: 48mm
● Resolution: 8 dots/mm (203dpi), 384 dots/line
2 ● Print speed: 60mm/sec.
● Paper thickness: 60~80µm
● Character: Alphanumeric characters, extended graphics, international characters,
1D Barcode:EAN13,Code 39,CODE128
2D Barcode:PDF417(By WINDOWS-XP DLL)
2.2 PHYSICAL SPECIFICATIONS
● Outline dimension: 75×105×46mm
● Weight: 261g (including paper roll and battery)
● Paper roll diameter: ≤40mm
● RS232 serial (1200bps~115200bps), The RS-232 cable is optional.
● Bluetooth Wireless Interface (Default)
2.3 ENVIRONMENTAL CONDITIONS
● Operation temperature: 0℃~50℃
Relative humidity: 20%~85%
● Storage temperature: -10℃~70℃
Relative humidity: 5%~95%
2.4 OTHER FEATURES
● Paper loading method: drop-in easy loading (details please refer
to 3.1.2 Paper Installation).
● Black mark localization: available (details please see C o m m a n d S e t a n d
C h a p t e r 5 ).
● Paper out detection: when paper is out, the 【FEED】 button indicator blinks Yellow
LED.
● Print commands: ESC/POS compatible command set (refer to Chapter 4).
● Power supply: 1400mAh rechargeable polymer lithium battery.
● Low power alarm: when the battery is low, the power indicator blinks with red color
● Battery full charge time: 4 hours.
● Battery duration: under 25% print density, at least 100 meters, the standby time is over
15 days.
Chapter 3 Operation
3.1 USING PREPARATION
3.1.1 BATTERY INSTALLATION
3.1.2 PAPER INSTALLATION
3 3.1.3 BUCKLE INSTALLATION(WITH SNAP RING & HOLSTER)
3.2 Operation Specifications
3.2.1 PRINTER ON
The printer is powered on by pressing the power button; the power indicator is on
with green color whenever the printer is on.
Notice: when the batter is almost exhausted, the power indicator blinks with red color, in
this case, you must charge the battery by using the adaptor. The method of charging
the battery, please refer
to 3.2.5.
3.2.2 PRINTER OFF
The printer is off after hold down the power button. All the indicators are off whenever
the printer is off.
3.2.3 SELF-TEST
The self-test checks the printer’s current settings, status and whether the printer has
any problems. Turn on the power while holding down the 【FEED】button, the self-test
begins.
The printer is ready to receive data as soon as it completes the self-test.
3.2.4 PAPER FEEDING
When the printer works normally, hold down【FEED】button, the
paper feeding begins, and stops when hold down【FEED】button
again. When the printer works in black mark mode, hold down
【FEED】button, the printer begins to feed paper and stops at the
position of black mark. If the paper is not black mark paper, the printer will not stops until
release 【FEED】button.
3.2.5 BATTERY CHARGING
The power indicator becomes red when the power of the battery is run out, so
charging the battery is required in this situation.
The charging method is as following: turn off the printer, connect the adapter to the
power socket with 1 1 0 V - 220V, 50HZ, then plug the power charging cable to the power
socket of the printer, so the power charging begins.
During the course of power charging, the 【Power】indicator goes red, and becomes
turn off when the charging is over.
Notice: it would better not turn on the printer during the course of charging power, lest
the charging time goes longer, moreover, be sure not to use the printer to print when the
battery is charging.(The adapter voltage may not afford the power exhaust while printing
activation)
4 When the battery is low, the power indicator blinks with red color;In this case, you must
charge the battery by using the adaptor.
Charging battery method:
The printer uses a Lithium rechargeable battery pack. Before first use, the battery pack
should be charged for at least 4 hours. To prevent electrical damage to the printer and/or
battery pack, please use approved AC/DC adapter only. During charging, the
【POWER】
indicator is red, and when the battery is charged fully, the【POWER】indicator is turned off.
3.3 PRINTER SETTING
You can transfer instruction through the computer to set the printer.( Related
information, please refer to instruction that).
3.4 PRINTER INTERFACE CONNECTION AND PRINTING
3.4.1 RS-232 SERIAL INTERFACE
The optional accessories for printer include: DB-9 serial interface cable(one end is D
model standard serial interface socket, connected to host computer, the other end is
PS/2 socket, connected to printer).
When connect the serial interface, if it works normally, then the printer stops to
received data from Bluetooth interface.
The serial interface of the printer is RS-232, the baud rate range is:1200bps, 2400bps,
4800bps, 9600bps, 19200bps,57600bps,115200bps.
3.4.3 BLUETOOTH CONNECTION
PDA, Laptop and other communication devices with Bluetooth can drive printer to
print by the Bluetooth interface. printer-BT is compatible with Bluetooth 2.0 protocol.
Power grade is CLASS 2; effective communication distance is 10 meters. The name of
the printer is printer ,the initial password is “0000”.
The method for the pairing between printer with the host device is:
1. Turn on the printer;
2. Host device searches for the outer Bluetooth device;
3. If there are other Bluetooth devices, please select “BT-PRINTER”
4. Put in password “0000”
5. Pairing finished.
Notice: If the printer name has been changed, please be sure not turn on more than
one printer, otherwise it will be difficult to justify which printer been paired.
3.5 INDICATORS AND BUZZER
There are three indicators for printer printer, they are【MODE】
,
【
and
【POWER】indicator
FEED】
The following is the meaning of each indicator denotes:
【MODE】indicator:
Blink Blue: Bluetooth active but yet connection
Solid Blue: Data transmission /connection ready
Green LED blinking (twice): high temperature error
【FEED】indicator:
Blink Orange: Paper out/Cover open
【POWER】indicator:
5 Solid GREEN: power on
Solid RED: low battery
Solid RED: while charging
Light off: Full charging begins from power off status
Chapter 4 Printing Control Commands
The printer adopts ESC/POS compatible commands; the command table is the
printing commands. They are classified according to their functions.(Please Refer to
Command Set)
CHAPTER 5 BLACK MARK DETECTION
If user uses ready printing black mark to localize the receipt, please be sure to
abide by the following black mark ready printing regulation when print the black mark,
otherwise the black mark can’t be recognized by the printer. The black mark ready
printing regulation:
z Print position: as the following figure shows, the black mark should be printed on
the right of the word side.
z Width range: ≥7mm
z
z
Height range: 4mm≤height≤6mm
Reflectivity to infrared ray: <10% (the reflectivity of the other parts of the paper black
mark width to infrared ray >65%)
z
HPS: 4.5mm≤Hps≤6.5mm
6