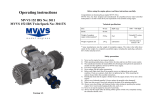
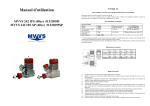
1
Desert Aircraft Australia
Owners Manual
www.desertaircraft.com.au
Desert Aircraft Australia
Thank you for buying your DA150. Please read this manual
carefully, before you operate your engine. Please be careful when
operating your new engine, make yours and the safety of others a
priority. Your new DA150 is a purpose designed model aircraft
engine, and proper care should be taken when in operation.
Desert Aircraft Australia is proud to stand by our products and
happy to aid and assist you where ever we can. If you have any
questions regarding your engine and its operation, please do not
hesitate to call us! We are here to help!
Please be aware that this is a petrol engine and silicone fuel tubing
is not suitable. Tygon or neoprene fuel tube is required, not only to
the carburetor but also in the fuel tank. Standard unleaded fuel
mixed at the required ratio (see page 10) is all that is need for
running your DA150. Your DA150 is well suited to many kinds of
model aircraft, from aerobatic, scale, war birds, glider tugs and the
likes. Propeller selection will depend on the airframe and its
intended use (see page 11). So recommending the correct
propeller is not a straightforward issue. Obviously, choosing a
quality, balanced propeller is a must, and we will be happy to help
with your selection.
Desert Aircraft Australia
Unit 5/74 Secam Street
Mansfield. Qld. 4122
PH –07 3422 0772
Fax –07 3420 6678
[email protected]
www.desertaircraft.com.au
2
Introduction
The DA150 was designed to provide the highest quality and
performance in Giant Scale modeling. Unlike most other large gas
engines on the market, the
DA150 is not a combination of various industrial motor parts.
Desert Aircraft computer designed the DA150 from the ground up
as a high performance aircraft engine. We did not cut any corners.
Existing cylinders, pistons and crankshafts were plentiful and
cheap, but did not offer the performance and other features that we
needed. The DA 150 pistons, cylinders and crankshaft were
designed by, and manufactured exclusively for, Desert Aircraft.
The design features long connecting rods and high piston pin
location for better rod angularity and piston tracking with less
cylinder and piston wear. Three large crankshaft bearings are
used to offer maximum stability and longevity. The pistons and
crankshaft are very well balanced, providing the smoothest
vibration levels for your airframe and radio system in its class.
Rather than use a shaft extension to gain clearance between the
prop and the cylinders and carburetor, the front section of the case
is long, with a bearing right behind the prop hub. Not only does
this provide a very stable crankshaft, it also makes fitting the
engine and mufflers in the cowl, much easier.
The crankcases are CNC milled from 7075 T6 aluminum alloy.
Along with excellent fit and finish, precise bearing alignment is
insured, which is critical to engine performance.
The reliable Desert Aircraft auto advance, electronic ignition
system insures easy starting and high performance. This ignition
provides a powerful spark, yet is fully shielded to insure protection
from R/F noise.
3
The DA150 has proven to be the ultimate aerobatic engine by
dominating and winning the 1999 World Aerobatic Masters, the
2000 Tournament of Champions, 2001/2003 IMAC Nats,
2001/2003 Tucson Shootouts, 2002 and 2003 JR Challenge.
Congratulations and thank you from all of us at Desert Aircraft for
choosing to own the best in Giant Scale engines!
Safety Instructions
WARNING! This motor can cause severe harm to you,
and or others, if misused or if these safety precautions
and instructions are not observed. Desert Aircraft is not
responsible for any loss, injury or damage resulting from
the miss-use of its products. You alone are responsible
for the safe operation of your motor.
If you do not agree with the above, do not operate the
engine.
Read all instructions before operating your motor.
If you have any questions about any aspect of operating this
motor, do not attempt to start or operate it.
§ Never operate the motor or fly alone.
§ Keep away from the prop while operating the motor. Do not
wear loose clothing near the motor or prop. Do not run the
motor near loose material such as dirt, gravel, power cords,
ropes, sand, etc. Loose material can be drawn into the turning
prop causing injury or damage.
§ Always operate the motor in an open area. Do not operate
indoors.
§ This motor can develop tremendous thrust. Make sure the
aircraft is properly secured when starting or operating the
motor.
§
§
4
§
§
§
§
§
§
§
§
§
§
§
§
§
§
§
Inspect motor mount bolts and firewall integrity before operating
the motor.
Anyone in the immediate area of the motor should use eye
protection during operation of the motor.
When operating the motor, never stand, or allow anyone else to
stand, in front of, or to the side of the propeller. Always stand
behind the propeller.
Keep spectators at least 30 feet away when operating the
motor.
Turn off the motor before making any adjustments.
Always use the proper size propeller. Never use a damaged,
modified or repaired propeller.
Always use the correct length propeller bolts. Do not use
spacers behind the propeller.
Spinner cones must not touch the propeller.
Check that the propeller bolts are tight before every flight.
Always install an ignition kill switch to stop the motor.
Adjust the carburetor linkage so that the motor will stop when
the carburetor is completely closed.
Petrol is extremely flammable. Be careful of any sparks from
electrical contacts such as fuel pumps, battery chargers, etc.
Do not allow smoking in the area of your fuel supply or motor.
Store fuel in approved containers and in well ventilated areas.
Allow the motor to cool before touching or fueling.
Always turn the prop a few revolutions after running the motor
to discharge the ignition system.
The ignition system develops extremely high voltage. Do not
touch it during operation.
5
Motor Installation
Mount the motor using high grade 1/4" or 6mm bolts with
washers and locking nuts on the rear of the firewall. Make
sure your firewall is structurally sound. The crankshaft
centerline is in the exact center of the rear mounting plate bolt
pattern.
§ The carburetor is equipped with a 4-40 ball link. Make sure
the carburetor's idle set screw is removed or set so that the
carb can be fully closed by the servo at low trim. Use a high
quality servo for the throttle. A poor quality servo or linkage
will not provide accurate and repeatable throttle settings.
Don't use metal to metal linkages.
§ Do not remove the butterfly/throttle shaft return spring.
One end of the spring can be cut or un-hooked to relieve
tension. Removing the spring allows damage to the brass
plate from vibration.
§ Do not try to rotate the carburetor 180 deg. on the mounting
block or remove the butterfly shaft assembly. Do not remove
the composite carburetor mounting block from the reed valve
assembly. It is sealed with a special sealant and may not reseal correctly if removed.
§ When not using case pressure for a smoke pump, make sure
the hole for crankcase pressure (on the case, near the carb
mount) is sealed.
§ The carburetor needs at least 1 1/2" (38mm) of clearance
between the intake and the bottom of the cowl. If there is less
than 1 1/2", make an opening in the cowl below the carb at
least as large as the carb intake diameter.
§ Since the carburetor must often be adjusted differently with the
cowl on as compared to off, we recommend small access
holes be made in the cowl for adjusting the needle valves.
Sometimes the needles can be reached through the cowl's
openings for the exhaust system.
§ A 50 oz. (or larger) fuel tank is recommended. The tank must
be vented. The carb has a strong pump, so the tank can be
mounted almost anywhere. The fuel line must be petrol
§
6
compatible and have an inner diameter the same or larger
than the carburetor's fuel inlet fitting's inner diameter. Make
sure all fuel line connections are secure. Small nylon zip ties
work well to keep the fuel line on the metal fittings. Make sure
the fuel line is secure and not touching the exhaust or cylinder
fins. An inline fuel filter is recommended.
§ Cooling is critical to motor performance and longevity. Allow
as much cooling air as possible in from the front of the cowl.
Allow an opening at least 2 1/2 times larger at the rear or
bottom of the cowl for the hot air to escape. Air must flow
through the cylinder fins to properly cool the motor. Air ducts
can be made from thin plywood, fiberglass, or aluminum sheet
to guide and force air from the front inlets to and through the
cylinder fins. Don't let the air take the easy way out! Make it
go through the fins.
§ Depending on the location of the exhaust system, and cowl
airflow, the carburetor may need some air cooling also. A hot
carb can be erratic in flight or make the motor hard to restart.
Sometimes placing heat shielding material between the
exhaust and carburetor can help.
Ignition System
·
·
·
·
When making electrical connections to the ignition system, use
the same gauge wire (or larger) as used on the red and black
power leads on the ignition module, all the way to the battery
pack. Keeps wire length to a minimum. Heavy-duty plugs, as
supplied on the ignition or as used on electric cars and planes,
are recommended.
Use a high quality switch such as JR’s heavy-duty switch.
Standard size R/C receiver switches are not recommended.
Isolate the charge circuit from the ignition while charging the
batteries. In other words don’t “charge” the ignition module.
Use 4.8 or 6 volt batteries only. Higher voltage will damage the
ignition system and will void the warranty. We recommend a
1200 mAh or larger capacity pack. With this size, the ignition
7
should last longer than your receiver pack will. If the meter
shows 5.0 volts or less, don’t fly, re-charge.
· Unlike some ignitions, the Desert Aircraft ignition is designed to
spark only when the prop is flipped at a high speed. If the prop
is not turned over at "starting" speed, the ignition will not fire.
This helps to prevent the motor from firing accidentally. Unless
you are having problems starting the motor, don’t bother
“testing” the ignition with the plug removed from the cylinder.
· When removing the spark plug caps, PULL STRAIGHT out on
the caps. Do not pull on the shielded ignition wires! If caps
seem loose and are not making a solid metal to metal contact
with the spark plug base, use a small hose clamp around the
base of the cap to keep them firmly attached to the base of the
plug. To prevent radio interference, the spark plug caps must
have the split retainer ring around the base to insure a tight fit.
– DON’T FLY WITHOUT THEM!
· Protect the shielded plug wires from rubbing against fiberglass
or sharp edges of wood or metal. Rubber grommets and
plastic “spiral wrap” insulation from automotive or electronic
supply stores work well. Holes in the braided shielding can
emit R/F noise (i.e.: RADIO INTERFERENCE!)
· Keep ignition components and wiring separated, as much as
possible, from your receiver, receiver battery, servos, wiring
and switches.
· Don’t use metal-to-metal linkages to operate the throttle.
· Always perform a radio range check before flying. Range with
one section of the antenna extended should be at least 80 to
100 Ft. with the plane on the ground and the motor running. If
there are “glitches”, DON’T FLY! Check for holes in the braided
shielding or loose connections (spark plug caps, connectors
and switches). If that doesn’t solve the problem, re-locate your
ignition and receiver components farther apart. If the problem
persists, return the ignition to Desert Aircraft for inspection.
· Timing is set at the factory and should not need adjustment.
Contact Desert Aircraft if you have any questions regarding
timing.
8
Only use NGK CM-6 spark plugs. Other plugs may not fit the
plug caps firmly.
· Plug gap is .015” to .020" (.38 to .50 mm)
·
Fuel and Oil Mix
Mid to High octane petrol is recommended.
We recommend filtering your fuel, between your fuel container
and your plane’s fuel tank. Also, a high flow inline filter, or
clunk/ filter between the tank and motor is a good idea.
· For break-in, we recommend a petroleum-based oil such as
Castrol Active 2T. Mixed at 32 to 1. This oil allows the rings to
seat correctly. Switch to synthetic oil after 4 to 5 gallons of fuel
have been used.
· After the break-in process, we recommend a high quality
synthetic oil. As for brand of oil, there are many good ones on
the market. Some oils, and their mix ratios, that Desert Aircraft
recommends are: Red-line 2 Cycle Racing Oil (40 to 1), Castrol
TTS 40:1. These oils can be found at most motorcycle/Auto
shops. (Redline can be sourced from DA Australia)
· Make sure the plane’s tank is well vented and the fuel clunk
moves freely.
· Use of any other fuel or additives such as methanol, nitro
methane, etc., can harm the motor and will void the warranty.
· Do not use Aviation Gas!
· Do not use any silicon sealers on the fuel system. Petrol can
break it down and carry it into the carb.
·
·
Mix Ratio
1 Litre
5 Litres
10 Litres
15 Litres
20 Litres
33:1
Mls
30.3
151.5
303
454.5
606
40:1
Mls
25
125
250
375
500
9
50:1
Mls
20
100
200
300
400
100:1
Mls
10
50
100
150
200
Recommended Props
Always inspect your prop and spinner and tighten prop bolts
before each flight!
· While special break-in props are not required, they can help
speed up the break-in process and reduce the risk of over
loading the motor.
· The following props are recommended:
For break-in:
Menz 30x10, 32x10
Mejzlik 30x10, 30x12
For normal use: Menz 30x10, 30x12, 32x10, 32x12
Mejzlik 30x10, 30x12, 32x10
AirModels 31x12, 32x11
Vess 32A, 32B, 32C, 32D
3 blades
Mejzlik 28x12, 28.5x12, 29x12
AirModels 28x12, 29x12
·
·
·
·
·
·
·
·
Smaller diameter props with more pitch will help reduce noise.
Some props are thinner, and may require shorter bolts. Ensure
that the prop bolts do not bottom out. (Shorter bolts are
available from Desert Aircraft Australia)
The DA150 has a very wide power band. The "normal" peak
operating rpm for aerobatics is 5,500 to 6,500 rpm, depending
on prop selection, sound requirements and pilot preference.
While with fine-tuning it is possible to have an idle as low as
800 rpm, normal “reliable” idle rpm is 1,200 to 1,400.
Always use a drill guide to drill your props.
Always check the balance of your prop.
For safety, we recommend painting the tips of your props (front
and back) with bright color, especially black props.
Never use a damaged or repaired prop, or a prop that has
struck the ground or any other object. Damage that can be
hard to see could turn into disaster when turning at thousands
of RPM.
10
Starting
1. Check that prop bolts are tight and spinner is secure.
2. Make sure the starting area is free of dirt, sand, gravel, or other
loose debris
3. Turn on the radio system and check the throttle operation and
position.
4. Have someone (with eye protection) firmly hold the plane.
5. Close the choke completely.
6. Open the throttle to approximately 1/4 position.
7. Turn on the ignition. ALWAYS BE PREPARED FOR THE
MOTOR TO START
ON ANY FLIP OF THE PROP!
8. Always wear a heavy leather glove when starting the motor.
9. Give the prop a quick, firm, flip counter clockwise. Follow
through quickly as you
flip the prop so your hand is out of the propeller's path. Repeat
until the motor fires or “pops”.
10. Open the choke.
11. Set throttle to idle position. (carb butterfly plate slightly open)
12. Flip the prop again until the motor runs.
13. Let the motor warm up for 15 or 20 seconds before advancing
the throttle.
11
Needle Adjustments
The needle farthest from the motor is the “High End” needle.
The needle closest to motor is the “Low End” needle. Turning
the needles clockwise “leans” the fuel mixture. Turning the
needles counter-clockwise “richens” the fuel mixture.
· Settings will vary with altitude, temperature, humidity, fuel, carb
variances, etc. A consistently good starting point is: 5/8 of a
turn open on the Low needle, 2 turns open on the High
needle. The Low needle is very sensitive and should not vary
much, if at all, from the 5/8's setting.
· Adjusting either needle can have a slight effect on the other.
Example: leaning the low needle can "slightly" lean the high
range.
· Adjust the High End needle to peak rpm. A tachometer is a
great help, but remember that the RPM may drop a little after
every start due to heat build up. Don’t lean the mixture any
more than necessary. If the rpm steadily drops at full throttle or
fades on long vertical maneuvers, the motor is too lean and is
over heating.
· Adjust the Low End needle until you achieve a smooth idle and
a reliable transition to high throttle. Generally if the motor
“stutters” or “coughs” in the mid range or when the throttle is
advanced, the low end needle is too rich and possibly even the
high end needle. If the motor dies quickly, the low end is
probably lean.
· Operating the motor overly rich not only reduces power, it
creates other problems such as poor transition, pre-mature
carbon build up, fouled plugs, excessive exhaust residue,
sticking rings, and rough running.
·
12
Trouble Shooting
Motor won't start
Check battery voltage ( should be 5.0+ volts) and all ignition
connections, wiring and switches. Wires can break from
vibration near connectors.
· Check tank venting, clunk position, and fuel flow.
· Is the case pressure tap sealed? ( 1/4" 28 threaded hole in the
rear case, near carb)
· Does fuel move towards the carb when the prop is flipped?
· If carb isn’t priming, is choke plate closing completely? Is the
carb or carb mount loose causing an air leak? Look for fuel
seepage.
· Is throttle set at idle or slightly higher after motor “pops” and
choke is opened?
· Make sure prop is flipped over with authority. The ignition won’t
fire at low speed.
· If a lot of fuel drips from carb, the motor might be flooded. If so,
remove and dry, or replace, the spark plugs. Try starting again
without using the choke.
·
Motor runs poorly in knife edge and/or inverted flight
·
·
·
The motor might be too rich. Make sure both needles are
adjusted to peak performance.
Check that the fuel clunk is not stuck in the wrong position.
The most common cause of this problem on gas aircraft motors
is the variation of airflow around the carb inlet and the carb
pump metering hole (located on the “shiny” carb diaphragm
cover). The carb has a hard time adjusting to positive and
negative pressures in and around the cowl. If the meter hole
senses the prop blast or some other pressure variance, it will
usually cause the carb to pump more fuel, which in turn makes
the motor run rich. One symptom is that the motor becomes
rich on take off. Sometimes the metering hole is in side the
cowl and the carb intake is out side in a very different
13
environment. Even with both inside the cowl, there can be
enough of a variance to affect the performance. The optimum
is to have both operating in the same environment. These
problems, and the cures for them, vary from plane to plane.
Since the problem usually only occurs in flight, bench testing
won’t help much. It may take several test flights to sort it out.
Here are some things to try:
1) Fasten a small shield over the diaphragm hole. Thin
aluminum works well (drink can!). This protects the hole
from direct blasts of air.
2) Horizontal cooling shroud plates in front of the
cylinders, not only help lower engine temperatures, but
also help protect the carb area from turbulent airflow in
the cowl.
3) If the carb is exposed, try to create positive pressure
over the carb inlet.
This can be done with a small aluminum plate protruding
out from the rear side of the intake or a beveled velocity
stack. This lets the carb “see” a positive airflow
regardless of the planes attitude.
4) Caution! If the diaphragm plate is removed for any
reason, be sure the diaphragm pin on the center of the
diaphragm is inserted in the metering lever “fork”.
If any problem persists, please contact:
Desert Aircraft Australia
Unit 5/74 Secam Street
Mansfield. Qld. 4122
Ph 07 3422 0772
Fax 07 3420 6678
[email protected]
www.desertaircraft.com.au
14
DA150 WARRANTY
Your DA150 motor and ignition system are covered with a 3 year
warranty by Desert Aircraft, starting from the date of purchase.
·
·
·
This warranty covers defects in workmanship and materials
only.
Do not disassemble the motor or ignition system. Disassembly
of the motor or ignition system will void the warranty on that
item.
Any modifications to the motor, or the ignition system, other
than those authorized by Desert Aircraft, will void this warranty.
This warranty does not cover the following:
Shipping expenses to and from Desert Aircraft for warranty
service.
· Damage caused by improper handling, operation, or
maintenance.
· Damage caused by a crash.
· Damage caused by using improper fuel or additives.
· Damage incurred during transit to Desert Aircraft.
·
WRAP ENGINE CAREFULLY!!
NOTE: Warranty replacement items will not be
shipped until suspect items are received, and
deemed faulty by, Desert Aircraft.
15
Repair/Return Form
Customer Details:
Name___________________________________
Address
__________________________________
__________________________________
City
__________________ State___________
Postcode _________ Phone Number ____________
REASON FOR RETURN?
_____________________________________________
___________________________________________
_____________________________________________
_____________________________________________
_____________________________________________
_____________________________________________
_____________________________________________
_____________________________________________
__________________________________________________________________________________
____________________________________________
DESERT AIRCRAFT AUSTRALIA
Unit 5/74 Secam Street
Mansfield. Queensland. 4122
P.O. Box 2240. Mansfield. Qld. 4122
Ph 07 3422 0772 Fax 07 3420 3250
16