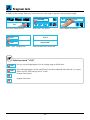
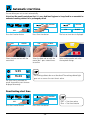
1
2-year RATIONAL warranty Secure your 2-year guarantee and your free membership of Club RATIONAL www.rational-online.com/warranty Operating instructions SelfCooking Center® Dear Customer Congratulations on your new SelfCooking Center®. Thanks to a readily understandable visual control concept, you and your SelfCooking Center® will achieve excellent results in no time at all – with hardly any time or expense spent on training. In SelfCooking Control® mode you simply select the relevant food and the desired cooking result at the push of a button – that’s it! There is no longer any need for traditional inputs such as temperature, time and humidity or complicated programming and constant monitoring. Of course the SelfCooking Center® also provides the versatile facilities of a perfect Combi-Steamer. It takes no time at all to create your own cooking programs in Programming Mode. We give a 24 month warranty from the date of initial installation provided that the warranty registration was completed and submitted correctly. The warranty excludes glass damage, light bulbs and sealing material as well as damage caused by improper installation, use, maintenance, repair or descaling. And now enjoy your new SelfCooking Center®. Your RATIONAL AG You can reach our Technical Customer Support Service 7 days a week on: +44 1582 480388 For any queries relating to use please ring the RATIONAL Chef✆Line: +44 7743 389863 Dealer: Installer: Installed on: Unit number: We reserve the right to make technical changes in the interest of progress! -3- Original Contents Explanation of the pictograms Starting for the first time Safety Instructions Care, inspection, maintenance and repair Features Notes on using your unit Max. load sizes for each unit size Working with the core temperature probe Working with the hand shower Overview of the cooking modes General instructions for use SelfCooking Control® mode Combi-Steamer mode Moist Heat Dry Heat Combination of Moist Heat + Dry Heat ClimaPlus Control® Time settings Air speed Humidification Cool down Programming mode – Controls Programming – SelfCooking Control® mode Programming - Combi-Steamer mode Start the program, check program steps Change program Delete all programs Delete program Copy program Create LevelControl® program Program lock Change password CareControl – care status Cleaning prompt Soiling display CleanJet®+care cleaning CleanJet®+care aborted CleanJet®+care – request 6 6 7 10 11 12 12 14 15 16 17 18 25 27 28 29 30 31 32 32 33 34 35 36 38 39 40 40 41 42 46 47 48 49 49 50 53 53 -4- Contents Delta-T cooking 1/2 Power Automatic start time CalcDiagnosis system® (CDS) Descaling the steam generator Abort descaling process Descaling the humidifying nozzle USB data memory (USB stick) HACCP logging Importing and exporting programs Software update Download service data Settings Real time Date Language Real time format Cooking time format Temperature format Contrast setting Reset to factory default Buzzer settings Modify the IP address/subnet mask/ gateway address Maintenance Service✆Info Chef✆Line “Mod” unit and software identification Help function Fault messages Before you call customer service EU Declaration of Conformity for electrical appliances EU Declaration of Conformity for gas appliances CLUB RATIONAL -5- 54 55 56 57 58 60 61 62 63 64 65 65 66 66 66 66 66 66 66 67 67 67 68 69 70 70 71 71 72 75 77 78 79 Explanation of the pictograms Danger! Warning: Directly hazardous situation that could result in very severe injury or death. Potentially hazardous situation that could result in severe injury or death. Corrosive substances Risk of fire! Attention: Damage may be caused if this is ignored. Caution! Potentially hazardous situation that could result in minor injury. Risk of burns! Handy tips for everyday use Starting for the first time When you start your new, intelligent SelfCooking Center® for the first time, you are prompted once only to run an automatic self test. This self test lasts around 15 minutes. It is designed to match the SelfCooking Center® to its specific ambient conditions. Risk of fire! Remove packaging materials, the starter kit, grids and containers. 7:00 6:59 m s start m s start Leave hanging racks or mobile oven racks in the unit. Close the door. Press the Start button. The self test runs and the remaining time is displayed. Do not open the cooking cabinet door during the self test. Opening the cooking cabinet door will cancel the self test. You will then be prompted the next day to start the self test again. -6- Safety Instructions Warning: Incorrect installation, servicing, maintenance, cleaning or modifications to the unit may result in damage, injury or death. Read these operating instructions carefully before you start to use the unit. This unit must only be used to cook food in catering establishments. Any other use is not intended and is therefore considered dangerous. It must not be used to cook food containing flammable materials (such as food with alcohol). Substances with a low flash point can ignite spontaneously - Risk of fire. Cleaning and descaling products and the associated accessories must only be used for the purposes described in this manual. Any other use is not intended and is therefore considered dangerous. In case of damage to the glass plate, please replace the entire plate immediately. Warning: Gas units only - If your unit is installed under an extractor hood, this must be switched on when the unit is in use - Combustion gases. - If your unit is connected to a chimney, the flue duct must be cleaned in compliance with specific regional regulations - Risk of fire. (Contact your installer.) -D o not put objects on your unit's exhaust pipes - Risk of fire. - Do not let objects block or obstruct the area below the unit's base. - Risk of fire! - The unit must only be used in still conditions. - Risk of fire! What to do if you smell gas: - Shut off the gas supply immediately - Do not touch any electrical controls - Make sure the area is well ventilated - Avoid naked flames or sparking - Use an external telephone to notify the appropriate gas supplier (if the gas supplier is unobtainable call the nearest fire station). -7- Safety Instructions Keep this manual handy so that it can always be consulted by anyone using the unit. This unit must not be used by children or people with limited physical, sensor or mental capacity or those without the necessary experience and/or knowledge, unless such people are supervised by a person who is responsible for their safety. Operate using hands only. Damage caused by the use of pointed, sharp or other objects will invalidate the warranty. We recommend regular training of your staff to avoid the risk of accident or damage to the unit. Operators must also receive regular safety instruction. Warning: Daily checks before switching on and use - L ock the air baffle at the top and bottom as per the instructions - risk of injury from the rotating fan wheel. -M ake sure that the hanging racks or mobile oven rack are correctly locked in place in the cooking cabinet - Containers with hot liquids can fall through or slip out of the cooking cabinet - Risk of combustion. -M ake sure that there are no detergent tab residues in the cooking cabinet before you start cooking with the unit. Remove any detergent tab residues and rinse thoroughly with the hand shower - Risk of chemical burns. -8- Safety Instructions Warning: Safety instructions during use - If containers are filled with liquid or contents which liquefy during cooking, do not use rack levels higher than those that allow the user to see into the slide-in containers - Risk of burns! Warning sticker is enclosed with appliance. - Always open the cooking cabinet door very slowly (hot vapours) - Risk of burns. - Always wear thermal protective clothing to hold accessories and other objects in the hot cooking cabinet - Risk of burns. - The external temperatures of the unit may exceed 60 °C. Only touch the unit at the controls - Risk of burns. - The hand shower and water from the hand shower may be hot – Risk of burns. - Cool-down mode - Do not use the Cool-down function unless the air baffle has been locked correctly - Risk of injury. - Do not touch the fan wheel - Risk of injury. - Cleaning - Aggressive chemical fluid - Risk of chemical burns. Always wear the correct protective clothing, safety goggles, gloves and facemasks during cleaning. Follow the safety instructions in the “CleanJet®+care cleaning” section. - Do not store highly flammable or combustible materials near the unit - Risk of fire - If mobile units and mobile oven racks are not moved, you must apply the parking brakes to the wheels. Racks could roll away on uneven floors - Risk of injury. - If mobile oven racks are used, you must always apply the container lock. Cover any containers with liquids to prevent the hot liquid spilling out - Risk of burns. - The transport trolley must be correctly fixed to the unit when you load and remove the mobile plate rack or mobile oven rack - Risk of injury. -M obile oven racks, mobile plate racks, transport trolleys and units on casters can tip over when being moved over an inclined plane or threshold - Risk of injury. -9- Care, inspection, maintenance and repair Your unit must be cleaned every day or when the cleaning prompt appears to maintain the high quality of the stainless steel, for hygiene reasons and to avoid operating faults. To do this, follow the instructions in the “CareControl – CleanJet®+care cleaning” section. Warning: If the unit is not cleaned or is not cleaned well enough, deposits of grease or food residues in the cooking cabinet may catch fire - Risk of fire. - To avoid corrosion in the cooking cabinet, your unit must be cleaned every day, even if it is only operated in “Moist Heat” (steaming) mode. - Apply vegetable oil or grease to the inside of the cooking cabinet at regular intervals (every 2 weeks or so) to prevent corrosion. - Do not use a high pressure cleaner to clean the unit. -D o not treat the unit with acids or expose to acid fumes – this will damage the passivated coating of the nickel-chromium steel and the units might discolour. -O nly use cleaning agents made by the unit’s manufacturer. Cleaning agents from other manufacturers may cause damage and invalidate the warranty. -D o not use scouring products or scratchy cleaning agents. -D aily cleaning of the cooking cabinet seal with a non-abrasive cleaning agent will extend the service life. - R emove and clean the incoming air filter once per month (see Maintenance). Inspection, maintenance and repair Danger - High Voltage - Inspection, maintenance and repair work must only be carried out by trained technicians. - The unit must be switched off at the mains for cleaning (apart from CleanJet®+care cleaning) and for inspection, maintenance or repair work. - If the unit is installed on casters (mobile), freedom of movement must be restricted so that power, water and drainage pipes cannot be damaged when the unit is moved. If the unit is moved, make sure that power, water and drainage lines are correctly disconnected. If the unit is returned to its original position, make sure that the retention device, energy, water and drainage pipes are correctly attached. - Your unit should be serviced by an authorised service partner at least once a year to ensure that it remains in perfect working order. - 10 - Features Unit number (can only be seen when the door is open) Draft diverter (optional) (gas units only) Interior lighting Unit door with double glass panel Door handle Table-top units: One-handed operation with slam function Floor units: One-handed operation Unlocking device to open double glass door panel (inside) q gIntegral and self-draining door drip pan (inside) hDrip collector connected directly to unit drain i Unit foot (height adjustable) Rating plate (with all the important data such as power input, gas type, voltage, number of phases and frequency, as well as the unit model and number (see the "Model" section - unit and software identification), option number) Control panel Protective cover for the electrical installation area Central dial q Hand shower (with automatic rewind) Run-in guide (floor units) Air filter (installation area ventilation) qDrawer / flap for care tabs - 11 - Notes on using your unit - Avoid having heat sources (e.g. grill plates, deep-fat fryers etc.) near the unit. - You can only use the unit in areas with a room temperature > 5 °C. For ambient temperatures of less than + 5 °C, you must heat the cooking cabinet to room temperature (> + 5 °C) before starting. - As soon as you open the cooking cabinet door, the heating and fan wheel shut down automatically. The integral fan wheel brake is activated. The fan wheel keeps running for a brief period only. - If your unit is switched on for longer than 20 minutes, but you do not select a cooking mode or CleanJet®+care, the energy-saving circuit is automatically activated, and only the current time appears on the display. - If there is no further operator input during operation, the intensity of the displays is automatically reduced in 2 stages. The intensity of the displays is reduced for the first time after 10 minutes. The intensity of the displays is reduced a second time after another 10 minutes. When you touch the display or open the cooking cabinet door, the normal display intensity is automatically restored. - A drip tray should always be inserted when grilling and roasting (e.g. chicken) in order to catch the fat. - Only use genuine heatproof accessories made by the unit manufacturer. - Always clean accessories before use. - Leave the unit door slightly open if it is going to be idle for a prolonged period (e.g. overnight). - The cooking cabinet door has a slam function; the door of the floor unit is not closed tight unless the door handle is vertical. - For long stoppages (e.g. non-work day), shut off the water, power and gas supplies to the unit. - At the end of its service life, the unit must not be disposed of with the general waste and must not be placed in the recycling containers at local authority collection points. We will be happy to help you with the disposal of your unit. Max. load sizes for each unit size 6 x 1/1 GN 10 x 1/1 GN 20 x 1/1 GN 6 x 2/1 GN 10 x 2/1 GN 20 x 2/1 GN 30 kg 45 kg 90 kg 60 kg 90 kg 180 kg (max. 15 kg per rack) (max. 15 kg per rack) (max. 15 kg per rack) (max. 30 kg per rack) (max. 30 kg per rack) (max. 30 kg per rack) If the maximum load sizes are exceeded, this can damage the unit. Please note the maximum load sizes for food in the application manual. - 12 - Notes on using your unit Table-top units with hanging racks (6 x 1/1 GN, 6 x 2/1 GN, 10 x 1/1 GN, 10 x 2/1 GN) - To remove, raise the hanging rack slightly in the middle and pull it out of the front locking mechanism. - S wivel the hanging rack to the middle of the cooking cabinet. - L ift the hanging rack out of its fixing by lifting it up. Reverse the above sequence to reset. Working with mobile oven racks, mobile plate racks and transport trolleys for table-top units (option) - R emove the hanging rack as described above. - P lace the run-in rail on the fixing provided on the unit's base. Make sure it is fixed accurately in place (4 pins). - R emember that the unit must be matched to the exact height of the transport trolley and must be levelled. -M ove the transport trolley as far as it will go on the run-in rail and make sure that the transport trolley is correctly locked on the unit. - P ush the mobile oven rack or mobile plate rack into the unit as far as it will go, and check that the locking mechanism in the unit is working correctly. - To remove the mobile oven rack or mobile plate rack, release the locking mechanism and pull the rack out of the cooking cabinet. First insert the core temperature probe with the run-in rail in the park position. -M ake sure that the mobile oven rack or mobile plate rack is securely locked on the transport trolley during transportation. - 13 - Working with the core temperature probe Caution! The core temperature probe and its positioning aid may both be hot - Risk of burns. Wear oven gloves. Insert the needle of the core temperature probe into the thickest point at an angle of 30-45 degrees. You must insert the needle through the middle of the food (see application manual). Use the positioning aid if there is any possibility that the core temperature probe will fall out of the food by itself (e.g. soft or thin food). For Finishing® "Plated Banquet", insert the core temperature probe into the ceramic tube on the mobile plate rack. - Always correctly position the core temperature probe and the positioning aid in the park position provided - Risk of damage. - Do not let core temperature probe hang out of cooking cabinet - Risk of damage. - Remove the core temperature probe from the food before you take the food from the cooking cabinet - Risk of damage. Caution! Protect your arms and hands - Risk of injury. Use the starting bit provided to make a hole in frozen foods. Drill a hole in the thickest part of the food to be cooked. To do this, place the food on a firm surface. Cool the needle of the core temperature probe with the hand shower before use. - 14 - Working with the hand shower - If you use the hand shower, pull the hose at least 20 cm out of the park position. - You can select 2 jet strengths by pressing the control button. - Always let the hand shower slide slowly back into the park position. Caution! The hand shower and water from the hand shower may be hot – Risk of burns. The hand shower has no latch position. If you pull hard on the hand shower and it exceeds the maximum available hose length, it will damage the hose. Make sure that the hand shower hose is fully rewound after use. You must not use the hand shower to cool the cooking cabinet. Units with the AeroCat® - AeroCat® is subject to natural wear. If used 8 hours per day, on average, it will last around 2 years. -C ooking times are around 10 % to 20 % longer with AeroCat®. - The change in air flow can lead to irregularities in sensitive bakery products. - 15 - Overview of the cooking modes SelfCooking Control® mode Combi-Steamer mode Programming mode CleanJet+care 70% 160°C 0:15 Level Control copy change delete 11:34 When you switch on or press the SelfCooking Control® button, SelfCooking Control® mode is started. See the SelfCooking Control® mode section for a description. new Press the Moist Heat, Dry Heat or Combination Moist Heat and Dry Heat button to switch to CombiSteamer mode. See the Combi-Steamer mode section for a description. - 16 - Pressing the “Prog” button switches to Programming mode. See the Programming mode section for a description. General instructions for use Your unit has a touch screen. You can make settings on your unit by just touching it lightly with your finger. rare 65° The cooking process (e.g. Joints) is activated as soon as you press the button. welldone rare 70° welldone You can change the settings using the central dial. Your settings are automatically accepted within 4 seconds. Otherwise you can press (Push function) the central dial. The end of a cooking process is indicated by the flashing SelfCooking Control® button. If the cooking cabinet is hotter than the temperature set, the button for the mode selected will flash (e.g. Dry Heat). (See the "Cool Down" section for cooking cabinet cooling). General notes Preheat The status of the preheating temperature is displayed in red and blue. RESET GAS Low water level is displayed when the steam generator is no longer full (open the water valve). The display goes out automatically after filling. Press "RESET GAS" to re-start the automatic ignition process. Please notify Customer Support if the display is still lit after repeated pressing. - 17 - SelfCooking Control® mode On/Off switch SelfCooking Control® 9 cooking modes: Joints Pan-fried Poultry Fish Side dishes Potato products Egg dishes/desserts 11:34 Baking Finishing® - 18 - Function button Programming mode button Central dial with Push function SelfCooking Control® mode The 9 SelfCooking Control® modes (Joints, Pan-fried, Poultry, Fish, Bakery Products, Side Dishes, Potato Products, Egg Dishes/Dessert, Finishing®) automatically detect product-specific requirements, the size of the food to be cooked and the load size. The cooking time, temperature and the ideal cooking cabinet climate are continuously adjusted to achieve the result you want. The remaining cooking time is displayed. Food thickness Gratineed Colouration Proofing volume Smooth baking Time settings Delta-T setting Help function Key to the pictograms Back/Interrupt Searing temperature Core temperature/cooking level Core temperature/cooking level Core temperature/cooking level Core temperature/cooking level How well done Browning Select size The application manual section gives examples and useful tips on how to make cooking your products child’s play. - 19 - Next function SelfCooking Control® mode We will now explain how to use the unit with reference to 5 examples. Your application manual will give you plenty of other helpful tips on how to make preparing meals child’s play. Alternatively you can simply follow the prompts on the display. Example 1: Roast veal Press the "Joints" button rare welldone Preheat 0:58 braise light dark roast with crackling soft roasting rare welldone Select type of preparation (e.g. Roast) – that’s it! rare welldone The browning and how well done can be changed individually. rare welldone Load The preheating status is displayed in red and blue. rare roast "Load" is displayed when the preheating temperature is reached Insert core temperature probe welldone 33°C The unit works with preset settings. The remaining cooking time and core temperature are displayed Y ou can save your settings under the name of your choosing (see the Programming section). If the core temperature probe is not set or is set incorrectly, the buzzer sounds and a prompt to set the core temperature probe correctly appears on the display. You can cook different-sized roasts at the same time. First insert the core temperature probe into the smallest joint. Remove the finished joint and insert the core temperature probe into the next largest joint. Press the arrow button – the cooking process resumes automatically. - 20 - SelfCooking Control® mode Example 2: Muffins Press the "Baking" button preheat The preheating status is displayed in red and blue. baking savory baking biscuits pastries with moisture Select type of preparation (e.g. Baking) – that’s it! baking light dark The browning can be changed individually. load As soon as the preheating temperature is reached, the display reads "Load" Insert core temperature probe 0:18 Use the positioning aid for the core temperature probe The unit works with preset settings. The remaining cooking time is displayed You can save your settings under the name of your choosing (see the Programming section). If the core temperature probe is not set or is set incorrectly, the buzzer sounds and a prompt to set the core temperature probe correctly appears on the display. - 21 - SelfCooking Control® mode Example 3: Finishing® – à la carte/LevelControl® With Level Control® you can enter and display an individual time for each rack in your unit. That way you can always see exactly when each rack is ready. The buzzer sounds and the indicated level flashes as soon as the preset time for the relevant rack is up. Once the cabinet door has been opened and closed, the level is free once more and can be reloaded. Press the Finishing® button plated banquet plates à la carte Container colouration dry Select Finishing® "Plates à la carte" - that's it! humid short long The cooking cabinet climate and cooking time can be changed individually. short long short preheat long load The preheating status is displayed in red and blue. "Load" is displayed when the preheating temperature is reached 1 2 3 4 5 6 7 8 10:00 9 10 Select level - the cooking time appears on the display Changing the cooking time 1 2 3 4 5 6 7 8 10:00 9 10 Select level (e.g. Level 8) 6 7 8 9:00 9 10 Change cooking time Y ou can save your settings under the name of your choosing (see the Programming section). The cooking time is paused if you open the cooking cabinet door. Depending on the duration and the energy lost, LevelControl® automatically adds additional time to all displays. - 22 - SelfCooking Control® mode Example 4: Finishing® - Plated Banquet Press the Finishing® button plated banquet plates à la carte container colouration Select Finishing® – Plated Banquet - that's it dry short humid long The cooking cabinet climate and cooking time can be changed individually. short long preheat The preheating status is displayed in red and blue. short long short long load "Load" is displayed when the preheating temperature is reached short long Insert core temperature probe short long 0:08 Insert the core temperature probe into the ceramic tube on the mobile plate rack. The unit works with preset settings. The remaining cooking time is displayed Once the cooking time has elapsed, the arrow button is displayed. Press the arrow button to add another load You can save your settings under the name of your choosing (see the Programming section). - 23 - SelfCooking Control® mode Example 5: Pasta with sauce Press the "Side Dishes" button preheat fried rice pasta with sauce convenience roasted Select type of preparation (e.g. pasta with sauce) – that’s it! pasta with sauce short long The cooking time can be changed individually. load The preheating status is displayed in red and blue. short steamed rice "Load" is displayed when the preheating temperature is reached Insert the core temperature probe into the container long 0:08 The unit works with preset settings. The remaining cooking time is displayed You can save your settings under the name of your choosing (see the Programming section). If the core temperature probe is not set or is set incorrectly, the buzzer sounds and a prompt to set the core temperature probe correctly appears on the display. - 24 - Combi-Steamer mode All the Combi-Steamer functions are available in Combi-Steamer mode. You switch to Combi-Steamer mode by pressing the Moist Heat or Dry Heat button or a combination of Moist Heat and Dry Heat. 70% 160°C 0:15 - 25 - Combi-Steamer mode Request current cooking data On/Off switch 3 cooking modes: Moist Heat Dry Heat Combination of Moist Heat and Dry Heat Hold down Temperature button (2 seconds) The following values are displayed: • Current cooking cabinet humidity • Current cooking cabinet temperature • Elapsed cooking time • Current core temperature Clima window Cooking cabinet temperature Cooking time Core temperature Humidification Air speed Cool down Function button Programming mode Central dial with Push function - 26 - Moist Heat In Moist Heat cooking mode, the steam generator generates hygienic fresh steam. You can set the cooking cabinet temperature from 30 °C to 130 °C. Cooking methods: Steaming, stewing, blanching, simmering, soaking, vacuum cooking, thawing, preserving 100°C 0:00 0:00 Press the “Moist Heat“ button Press the Temperature button and set the cooking cabinet temperature 20° Press the Cooking Time button and set the cooking time 31° Or work with the core temperature Press the Core Temperature button and set the core temperature Optional functions, e.g. fan wheel speed (apart from CleanJet®+care, Descale and Cool Down), may be incorporated. - 27 - Dry Heat In "Dry Heat" cooking mode, powerful heating elements heat up the dry air. You can set the cooking cabinet temperature from 30 °C to 300 °C. You can limit the cooking cabinet humidity if necessary. Cooking methods: Baking, roasting, grilling, deep-frying, gratinating, glazing 70% Press the “Dry Heat“ button 160°C 160°C 0:00 Press the Clima button and set the maximum cooking cabinet humidity (see the ClimaPlus Control® section) Press the Temperature button and set the cooking cabinet temperature 0:00 20° 31° Or work with the core temperature Press the Cooking Time button and set the cooking time Press the Core Temperature button and set the core temperature Optional functions, e.g. fan wheel speed (apart from CleanJet®+care, Descale and Cool Down), may be incorporated. In continuous operation, the cabinet temperature automatically reduces from 300 °C to 270 °C after 60 minutes. - 28 - Combination of Moist Heat + Dry Heat Moist Heat and Dry Heat cooking modes are combined. This combination creates a hot humid cabinet climate for especially intensive cooking. You can set the cooking cabinet temperature from 30 °C to 300 °C. You can set the cooking cabinet climate if necessary. Cooking methods: Roasting, baking, Finishing®. 70% Press the Moist Heat and Dry Heat buttons at the same time 160°C 160°C 0:00 Press the Clima button and set the cooking cabinet climate (see the ClimaPlus Control® section) Press the Temperature button and set the cooking cabinet temperature 0:00 20° 31° Or work with the core temperature Press the Cooking Time button and set the cooking time Press the Core Temperature button and set the core temperature Optional functions, e.g. fan wheel speed (apart from CleanJet®+care, Descale and Cool Down), may be incorporated. In continuous operation, the cabinet temperature automatically reduces from 300 °C to 270 °C after 60 minutes. - 29 - ClimaPlus Control® ClimaPlus Control® measures and regulates the humidity in the cooking cabinet to within one percent. You can set the exact product-specific climate for each food in the clima window. Moist Heat Dry Heat Moist Heat + Dry Heat The factory setting for ClimaPlus Control® is 100 %. ClimaPlus Control allows you to regulate the humidity in the cooking cabinet to within one percent. Red bars and associated percentages show the maximum permitted moisture level in the cooking cabinet. The more red visible on the display, the drier the cabinet atmosphere and the lower the humidity level. ® You can set a mixture of Moist Heat and Dry Heat. The more blue visible in the clima window, the moister the cabinet atmosphere and the higher the humidity level. While cooking is taking place you can see what ClimaPlus Control® is doing as follows: Up arrow lit – moisture entering cooking cabinet. Down arrow lit – moisture leaving cooking cabinet. - 30 - Time settings You can set the cooking time individually to suit your needs. Time settings 0:24 Press the “Cooking Time” button and set the cooking time Continuous operation CONT. Press the cooking time button and turn the central dial anti-clockwise until "CONT." is displayed Manual Preheat 100°C Preheat 0:00 Press the Cooking Time button Turn the central dial anticlockwise until “Preheat” appears. Real-time setting (to set the unit clock, see the "Settings" section) Start time setting (see the "Settings" section) Changing the time format (see the "Settings" section) - 31 - Humidification A powerful jet atomises bursts of water and distributes it throughout the cooking cabinet. Humidification creates ideal rising conditions and gives bakery products an attractive glossy finish. Can be selected with Dry Heat or a combination of Moist Heat and Dry Heat. Humidification period: Humidification is limited to 2 seconds. Press the button again to humidify for a further 2 seconds. Temperature range: 30 °C to 260 °C cooking cabinet temperature. 0:24 Press the Humidification button Air speed There are 5 air speed settings so that you can generate the ideal climate for all cooking processes. 0:24 Turbo air speed Standard air speed 1/2 air speed Press the Air Speed button and set the air speed - 32 - 1/4 air speed Fan wheel cycles at 1/4 air speed Cool down You have been operating your appliance at high cooking cabinet temperature and now want to continue working at low cabinet temperature. The "Cool Down" function allows you to cool the cabinet quickly and gently. Warning: - Do not use the Cool-down function unless the air baffle has been locked correctly - Risk of injury. - During "Cool Down", the fan wheel does not switch off when the door is opened. -D o not touch the fan wheel - Risk of injury. - During "Cool Down", hot vapours emerge from the cooking cabinet - Risk of burns. Close door Select cooking mode Press the “Cool Down” button and close the cooking cabinet door. 124°C COOL DOWN Cool Down and the current cooking cabinet temperature are displayed The air speed can be set individually. The “Cool Down“ function is not programmable. - 33 - Open door Open the cooking cabinet door Programming mode – Controls It takes no time at all to create your own cooking programs in Programming mode. Select program CleanJet+car Program name new New program Level Control New LevelControl® program CleanJet+care copy New Level Control change Change program Copy Change delete Delete program Copy program Delete Display cooking programs: - 34 - Roast 1 Roast Roast SelfCooking cooking process LevelControl® cooking program Manual cooking program Programming – SelfCooking Control® mode You can copy or adapt the 9 operating modes (Joints, Pan-fried, Poultry, Fish, Side Dishes, Bakery Products, Potato Products, Egg Dishes/Dessert, Finishing®) to meet your individual requirements and store them under a new name. Example: You could rename “Roast” and save the cooking process under the new name of “Roast veal” with your individual settings, e.g. “Light browning” and “Well done”. CleanJet+care 9:24 Press the Prog button new Level Control copy change Press "New" to create a new cooking process DEFGHIJ K LMNOPQ Enter a program name (e.g. Roast veal) Roast veal hijklm n opqrst delete Press the letter or the central dial to confirm. Select cooking mode (the "Joints" button for roast veal) store Save program name roast braise light dark roast with crackling soft roasting rare welldone Select the type of preparation Roast veal light Press the SelfCooking Control® button dark Save your settings - 35 - The browning and how well done can be changed individually. Programming - Combi-Steamer mode You can create a manual cooking program to suit your exact requirements. CleanJet+care 9:24 Press the Prog button new Level Control copy change Press "New" to create a cooking program DEFGHIJ K LMNOPQ Enter a program name (e.g. Roast veal) Roast veal hijklm n opqrst Press the letter or the central dial to confirm. delete store Save program name 100°C Select cooking mode 20° 31° 0:00 Set cooking parameters (e.g. cooking cabinet temperature, preheat, cooking time or core temperature, etc) 20° 31° Save your settings or add another program step Select a cooking mode for another program step 20° 31° End the programming - 36 - Set cooking parameters (e.g. cooking cabinet temperature, core temperature, etc) Programming - Combi-Steamer mode You can have an audible signal to indicate when each program step has ended. 00:24 Press the Function button in the program step english settings Select "settings" 100°C 0:24 Press the Back button Continue programming - 37 - english Press the audible signal button Start the program CleanJet+care 9:24 Press the Prog button new Level Control copy change Press the Program selection button Lamb Select cooking process or a cooking program Lamb Level Control new Start the cooking process or cooking program Check program steps CleanJet+care 9:24 Press the Prog button Level Control copy change Press the Program selection button Lamb new new Level Control Start the cooking process or cooking program Lamb Select cooking process or a cooking program 0:08 0:12 Lamb 1 Lamb 2 Program step 1 is displayed (Lamb 1) - 38 - Press the Program step button. Program step 2 is displayed. Change program CleanJet+care 9:24 Press the Prog button copy new Level Control copy change Press the Program selection button change Press "Change" Select cooking process or a cooking program Lamb_ DEFGHIJK delete Lamb L MNOPQRS Delete and modify program name as required delete store Save program name 100°C 0:12 0:12 0:08 Lamb 2 Lamb 2 Set cooking parameters (e.g. cooking cabinet temperature, preheat, cooking time or core temperature, etc) Save your settings - 39 - Press the Program step button several times to exit Change mode Delete program CleanJet+care 9:24 Press the Prog button copy new Level Control copy change Press the Program selection button Lamb Select cooking process or a cooking program change delete delete Press "Delete" Confirm "Delete" Delete all programs Prog settings h:m 9:24 Press the Function button Select the Chef's hat button Prog h:m Prog Select the "delete" confirmation button and hold down. The deletion process is indicated by a moving arrow. The unit starts automatically after the program is deleted. - 40 - Prog Select Delete all programs (press briefly) Copy program CleanJet+care 9:24 Press the Prog button copy delete Press "copy" new Level Control copy change Press the Program selection button change Lamb Select cooking process or a cooking program Lamb cdefghijkl m nopqrstuv Delete and modify program name as required delete Save program name If you do not change the program name, it is automatically assigned a consecutive index. - 41 - store Create LevelControl® program You can cook different products at the same time with LevelControl®. Only the cooking time of the individual products will differ. All the other cooking parameters must be the same. You can enter and display a separate cooking time for each rack in your unit. The buzzer sounds and the displayed level flashes as soon as the preset cooking time for a given rack has elapsed. Once you have opened and closed the cooking cabinet door, the level is free once more and can be reloaded. new Level Control copy change /()<>_@A B CDEFGHIJ delete Press the Prog button 1 Broccoli Enter program name (e.g. Broccoli) 1 Broccoli i cdefgh jklmno Press the letter or the central dial to confirm. 100 °C Press "LevelControl®" 0:00 delete store Save program name 0:15 1 Broccoli Select cooking mode ms ms Set cooking parameters (e.g. cooking cabinet temperature, cooking time, etc) Save and exit programming The "Level Control®" function cannot be used for SelfCooking modes. With LevelControl®, you can only ever enter one program step. An adhesive label for identifying the rack levels is supplied as standard with the unit. The label must be attached to the outside of the unit. - 42 - Start LevelControl® program 1 Broccoli CleanJet+care 9:24 Press the Prog button Level Control copy change Press the Program selection button 1 Broccoli new new Level Control Start LevelControl® program 100 °C Preheat Unit preheats automatically - 43 - Select LevelControl® program 1 Broccoli 1 2 ... 3 15:00 ... 4 5 Load food and select the associated level Working with up to 3 LevelControl® programs If there is already a LevelControl® program active, you can press an empty button field to select another LevelControl® program (only possible if the cooking mode, cooking cabinet temperature, climate, etc, are the same). 1 Broccoli 1 2 15:00 ... 3 1 Spinach ... 4 5 Select empty button field 1 Broccol 1 Spinach 1 2 15:00 3 8:00 new Select LevelControl® program ... 4 1 Spinach 5 2:00 Load food and select the associated level - 44 - Level Control Activate LevelControl® program Change LevelControl® cooking time 1 Broccoli 1 2 ... 3 8:00 1 ... 4 2 3 5:00 4 5 5 Press Level Set cooking time The display format is set at the factory to Minutes:Seconds. Reset LevelControl® cooking time 1 Broccoli 1 2 ... 3 8:00 1 Broccoli ... 4 5 Press Level and hold until "0:00" is displayed 1 ... 2 3 ... 4 5 Level may be reassigned Reset LevelControl® program 1 Broccoli 1 2 1 Spinach 1 Tomato 3 4 Press program name and hold until "...." is displayed 5 1 Broccoli 1 2 ... 3 1 Tomato 4 5 A new program can be selected - 45 - Program lock A flexible safety concept allows you to lock the unit in two stages to prevent settings being changed. settings h:m m:s Prog 9:24 Press the Function button Level 1 _XXXX Level 2 enter password Select "Level" program lock Select Chef's hat button Press Program lock button Enter password with central dial Default password “12345” Level 1 You can use existing programs, but not change, copy or delete them. Only cooking programs can be used. The unit cannot be operated manually and it is not possible to work in SelfCooking Control® mode. Program lock inactive Program lock active Level 2 - 46 - Change password You can change the existing 5-digit password "12345" to suit your requirements. settings h:m m:s Prog 9:24 Press the Function button Select Chef's hat button ABCDEF Level 1 G HIJKLM change password Level 2 Press Level button 1 or 2 Press Change password _XXXX _XXXX enter new password repeat new password Enter new password (5 digits) Repeat new password - 47 - Press Program lock button _XXXX enter old password Enter old password using the central dial CareControl – care status The intelligent CareControl automatically detects the unit usage, the general care status and – just in time – optimises the cleaning process to minimise the use of chemicals, water and power. Combined with the special care tabs, this prevents limescale building up in the first place. The unit’s care status is indicated by the red and blue bars on the display: CareControl 9:24 Press the Function button care start time Display care status Blue bar: The unit has the ideal care status CareControl The unit has an average care status. CareControl Red bar: The care status is poor and the unit must be cleaned more often using CleanJet®+care. CareControl - 48 - CareControl – Cleaning prompt CareControl detects the time at which CleanJet®+care cleaning is required. CareControl takes account of working patterns, such as longer breaks or the end of work. Bitte reinigen + care Please clean + care As soon as CleanJet®+care cleaning is required, it automatically appears on the display. care later Start CleanJet®+care cleaning or select “later”. interim cleaning light medium strong The cleaning stages for optimum care are displayed in red. The CleanJet®+care cleaning prompt is repeated at regular intervals until CleanJet®+care cleaning is carried out. CareControl – Soiling display The level of soiling is indicated by red bars. The more red bars are displayed, the greater the soiling in the unit. medium CareControl care 9:24 Press the Function button medium start time Select the CleanJet®+care button strong Soiling level display after CleanJet®+care cleaning - 49 - Soiling level display strong CareControl – CleanJet®+care cleaning CleanJet®+care is the automatic cleaning system for cleaning the cooking cabinet. With 6 cleaning steps, it can be adjusted to suit the individual degree of soiling. Attention: - F or hygiene reasons and to prevent malfunctions it is essential to clean the unit every day - Risk of fire - P lease note that your unit must be cleaned every day, even if it is only operated using moist heat. -U se only the unit manufacturer’s detergent and care tabs. The use of other chemical cleaners may damage the appliance. We shall not be liable for any damage that might result. - You may experience foaming if too much chemical cleaner is used. -N ever put tablets in the hot cooking cabinet (>60 °C). care cooking cabinet too hot settings 9:24 Press the Function button rinse without tabs rinse interim cleaning light medium strong Select cleaning stage CleanJet+care start time Select CleanJet®+care 1x 2x 1:45 "Unit too hot" appears when the cooking cabinet temperature exceeds 75 °C. Select "Cool down" (see the "Cool down" section) 1x 2x remove grids/ containers open door Open cooking cabinet door, remove containers and grids - 50 - Stainless steel grids, CombiFry® and poultry SuperSpikes may remain in the cooking cabinet CareControl – CleanJet®+care cleaning Warning: Always wear gloves when handling detergent and care tabs – risk of chemical burns. Detergent tab: Remove protective foil 1x 2x 1:45 start Press the Start button, the cleaning time is displayed Floor units: Insert the number of care tab packages on the display into the flap. Table-top units: Place the number of care tab packages on the display in the drawer. Place detergent tabs into the recess in the air baffle D o not place tabs in the cooking cabinet - risk of damage. Warning: Do not open the cooking cabinet door while cleaning is in progress – chemical cleaner and hot vapour may escape – risk of chemical burns and scalding. When the CleanJet®+care cleaning is complete, check the entire cooking cabinet (including behind the air baffle) for detergent residues. Remove these residues and thoroughly rinse the entire cooking cabinet (including behind the air baffle) using the hand shower Risk of chemical burns. Before you start the CleanJet®+care cleaning, make sure that the hanging racks or mobile oven rack are inserted correctly in the cooking cabinet. If you are using softened water, you can reduce the recommended number of cleaner tabs by up to 50 %. If foaming does occur, even though the amount is correct, then the number of cleaner tablets should be reduced. - 51 - CareControl – CleanJet®+care cleaning Cleaning stage Description/application Tabs Rinse without tabs Rinse cooking cabinet with warm water. No Rinse For non-greasy limescale deposits, e.g. after baking or working with moist heat. Care Interim cleaning "Short cleaning time" - for all soiling, but without drying and rinsing. Cleaner Light For lighter soiling, e.g. after mixed loads, applications up to 200 °C Cleaner/Care Medium For roasting and grilling deposits, e.g. after cooking chicken, steaks, grilled fish. Cleaner/Care Strong For heavy roasting and grilling deposits, e.g. multiple loads of chicken, steaks, etc. Cleaner/Care - Leave the unit door slightly open if it is going to be idle for a prolonged period (e.g. overnight). -C leaning the cooking cabinet seal every day will extend the service life. Use a soft cloth and cleaning agent to clean the cooking cabinet seal. Do not use scouring products. -C lean the glass windows on the inside and out and the outer panels of the unit, ideally using a soft, damp cloth. Do not use a scouring product. - 52 - CareControl – CleanJet®+care aborted After a power failure lasting longer than 10 minutes or after the unit is switched off, the display reads "Interrupt CleanJet". If Interrupt CleanJet®+care is not confirmed within 20 seconds by pressing the display, the activated CleanJet®+care program runs through to the end without interruption. Interrupt CleanJet®+care CleanJet light interrupt CleanJet? Press button CleanJet Warning: Always wear gloves when handling detergent tabs – risk of chemical burns. ABORTED open door Remove detergent tabs (if still present) do not open door 0:09 remove Close the cooking cabinet door; the cooking cabinet is rinsed 1:20 The rinsing time is displayed CleanJet®+care – request This function allows you to extend the intervals between each cleaning prompt. It is intended for applications in which the cooking cabinet is subject to minimal soiling over long periods (e.g. baking applications). settings english 9:24 Press the Function button Select settings Press CleanJet®+care symbol „red“ CleanJet®+care – Prompt extended „blue“ CleanJet®+care – Standard prompt - 53 - Delta-T cooking Delta T = difference between core temperature and cooking cabinet temperature. By gradually raising the temperature in the cabinet until the cooking process ends and maintaining a constant differential to the current core temperature, the meat is cooked more slowly (can only be selected in Combi-Steamer mode). 62° Select cooking mode h:m m:s Delta-T 11° Press the Function button Prog Press Delta T button 0:24 20 °C Set Delta temperature settings Select Chef’s hat button 62° 11° Set required core temperature Alternatively, you can set a time window for the Delta T cooking time. - 54 - 1/2 Power The power consumption of the heating elements is reduced by 50% (e.g. model 10 x 1/1 GN from 18 kW to 9 kW). Cannot be selected in SelfCooking Control® mode 11° 62° settings CleanJet start time Press the Function button Select settings Press 1/2 Power button 100 °C 0:15 "E/2" (half power) is displayed Cooking times are longer when cooking with half power. Food quality may be reduced. Power optimisation connection (electric appliances only) If the power supply is interrupted by an energy optimisation system this will be indicated on the display (Combi-Steamer mode only). 100 °C 0:15 - 55 - Automatic start time You can allow your unit to start automatically. Attention: We would remind you that it is very bad food hygiene to keep food in an uncooled or unheated cooking cabinet for a prolonged period. care settings 9:24 Press the Function button 6:30 28.06.07 Select the time and set with the central dial 6:30 16:24 6:30 Press Start time button 6:30 care start time start time 28.06.07 The last set start time is displayed 28.06.07 Select the date and set with the central dial - press several times to confirm Select cooking mode and make the required settings The cooking cabinet door must be closed. The cooking cabinet light goes out as soon as the start time is active. The start time is activated. He actual time and the start time are displayed alternately. Deactivating start time care 9:24 Press the Function button start time settings Press Start time button - 56 - Red = Start time active Blue = Start time inactive CalcDiagnosis system® (CDS) The CalcDiagnosis System® rinses and drains the steam generator. The CalcDiagnosis system® also monitors the limescale level in the steam generator. The display shows the limescale level in the steam generator as a red bar. settings Mod 9:24 Press the Function button Press the Technik button Limescale level is displayed CalcCheck Indication 8 red bars – display shows: Press the display to cancel the message. Please descale the steam generator within the next 3-4 weeks. CalcCheck Indication 9 red bars – the display shows: The message disappears automatically after 30 seconds. The steam generator must be descaled within the next 2 weeks at the latest. If you have any questions about descaling, please contact an authorised service partner. Drain steam generator You can drain the steam generator before moving it or to stop it freezing. settings descaling 9:24 Deselect the cooking mode, press function button and open cooking cabinet door Service✆Info Press the Technik button - 57 - Press the Drain button - the steam generator is drained Descaling the steam generator To avoid damaging the unit, the steam generator must be descaled when the "CalcCheck" display appears. Always use the appliance manufacturer's descaling agent and accessories. - Electric descaler pump - Article no.: 60.70.409 - Descaler, 10 litre canister - Article no.: 6006.0110 Follow the instructions and safety notes on the canister and on the descaler pump. Press the Function button settings descaling Press the Technik button Select "descaling" descaling do not open door cooking cabinet too hot wait steam generator cooling "Unit too hot" appears when the cooking cabinet temperature exceeds 75 °C. Select "Cool down" (see the "Cool down" section) Warning: Aggressive chemical fluid - risk of chemical burns. It is vital that you use protective clothing, safety goggles, gloves, face mask and the unit manufacturer's descaler pump. Steam generator is drained Guide hose into steam inlet opening as far as the mark - 58 - Remove left hanging rack and air baffle The meaning of the marks is described in the instructions for the descaler pump. Descaling the steam generator Descaling fluid reacts with lime and can foam over. Insert hanging rack and fix hose with wire hooks Descaling 5.0 l Descaler Fill slowly with the indicated volume of descaler, e.g. 5.0 l Place canister of descaling fluid in the cooking cabinet and run the hose into the canister Warning: Aggressive chemical fluid - risk of chemical burns. There may be residues of the descaling fluid in the hoses. Rinse descaling accessories thoroughly with water. Wear: protective clothing, safety goggles, gloves and face mask. 5.0 l descaler finish filling Remove descaler accessories, insert air baffle and left hanging rack, and lock in place Press the "Finish filling" - the operation starts steam generator descale complete 0:00 Press the Back button - the operation ends If there is still scale in the steam generator, it will be displayed by a red bar on the CDS display. You can repeat the descaling if necessary. - 59 - Abort descaling process Not yet filled with descaling fluid. wait cool steam generator 2:01 Press Back button - that's it Already filled with descaling fluid. Switch the unit off and on again. Warning: Aggressive chemical fluid - risk of chemical burns. There may be residues of the descaling fluid in the hoses. Rinse descaling accessories thoroughly with water. Wear protective clothing, safety goggles, gloves and face mask. ABORTED 1:06 Remove descaler accessories, insert air baffle and left hanging rack, and lock in place Press "Abort" - The abort program takes at least 1 hour and 6 minutes - 60 - steam generator descale complete 1:06 Press Back button - the operation ends Descaling the humidifying nozzle Please check the humidifying nozzle for limescale deposits once a month. Switch unit off. Loosen union nut of the humidifying nozzle (turn anticlockwise – size 15 spanner size). Place the humidifying nozzle in the descaling fluid and leave to take effect (the humidifying nozzle must be scale-free) Remove left hanging rack Open air baffle Warning: Aggressive chemical fluid - risk of chemical burns. Wear protective clothing, safety goggles, gloves and face mask. Thoroughly rinse descaler hand pump with water. Reverse the above sequence to reassemble - Note the installation position - 61 - USB data memory (USB stick) You can use the USB stick to download cooking programs and HACCP data from the unit. You will need the USB memory stick from the unit manufacturer, article no.: 42.00.035 The status of the USB data memory appears on the display. settings 9:24 Insert the USB stick into the port under the control panel Press the Function button Press the Stick button USB data memory display (USB stick) H USB stick connected, no file was found H USB stick connected, HACCP file was found, stick is write-protected P USB stick connected, program file was found, stick is write-protected USB stick connected, no file was found, stick is write-protected USB stick connected, HACCP file was found P H USB stick connected, HACCP file was copied to stick P USB stick connected, program file was found ? USB stick connected, program file was copied to stick USB stick connected, writing in progress, do not remove. - 62 - USB stick connected, write error HACCP logging HACCP process data is output continuously via the unit's interface. HACCP process data is also stored for a period of 10 days and can be output via the unit interface as required. You will need a PC/laptop. You will find more detailed explanations in the CombiLink® manual. settings 9:24 Insert the USB stick into the port under the control panel Press the Function button Press Stick button Prog HACCP 26.06.07 8:24 06.07.07 Update Info 06.07.07 8:24 start Press HACCP button The following data is logged: – Batch no. – Cooking cabinet temperature – Change of cooking mode - Connection of energy optimisation system Select the period and set with the central dial – Time – Core temperature – CleanJet®+care cleaning - 63 - 8:24 Press "start" – Cooking program name – Door open /door closed – 1/2 power Importing and exporting programs You can copy your cooking programs to a genuine USB memory stick from the unit manufacturer. The cooking programs can then be transferred to a computer. settings 9:24 Insert the USB stick into the port under the control panel Press the Function button Prog Prog Prog Prog Prog HACCP Prog HACCP Exporting a program: Cooking programs are saved to the USB stick Press Stick button Importing a program: Cooking programs are copied to the unit's memory - the unit starts automatically Saving is complete when the USB symbol turns blue. Existing programs are retained if the program names are different. If the program name is the same, then the program is replaced. - 64 - Software update You can update the unit software using the USB stick. settings 9:24 Insert USB stick with new software into the port Prog HACCP Update Info Press the Function button Press the Stick button Press the Update button, the software is updated - the unit starts automatically Download service data For easier troubleshooting, you can copy service data to a USB stick. settings 9:24 Insert USB stick into the port Prog HACCP Update Info Press the Function button Press Info button; the data is copied to the USB stick - 65 - Press Stick button Settings settings 9:24 Press the Function button Select "settings" Real time Date 8:55 am/pm 24h h:m m:s 10.07.07 Language °C °F IP english Press Real time and set with the central dial Press Date and set with the central dial Press Language and set with the central dial Real time format Cooking time format Temperature format 8:55 10.07.07 am/pm 24h °C °F h:m m:s 8:55 IP 10.07.07 Press Real time format. The set real time format lights up red (the date format changes automatically). am/pm 24h °C °F h:m m:s 8:55 IP 10.07.07 Press Cooking time format. The set cooking time format lights up red. h:m hours : minutes m:s minutes : seconds Programming: The time format can be changed for every step of the program. Example: Program step 1 (h:m), Program step 2 (m:s) - 66 - am/pm 24h °C °F h:m m:s IP Press Temperature format. The set temperature format (Celsius or Fahrenheit) lights up red. Settings settings 9:24 Press the Function button Select "settings" Contrast setting Reset to factory default english Press the Contrast button and set using the central dial english english Press the Factory defaults button briefly Confirmation, select and hold down "Reset factory default" button. All settings are reset to their factory defaults. Duration of Combi-steamer mode LevelControl® Buzzer settings english Press the Buzzer button Volume CONT. CONT. Press the Volume button and set using the central dial CONT. Press the button and set the length of the buzzer using the central dial - 67 - 20 sec Press the button and set the duration for LevelControl® programs using the central dial Modify the IP address/subnet mask/ gateway address If your unit is equipped with an (optional) Ethernet interface card, you can incorporate the unit into your local computer network (LAN/Ethernet). You must enter an "IP address" and, if necessary, the "Subnet mask" and "Gateway address" to identify the unit. The "IP address", "Subnet mask" and "Gateway address" are assigned by your local computer administrator. settings 8:55 10.07.07 9:24 Press the Function button Select "settings" am/pm 24h °C °F h:m m:s IP Press the IP button Modify "IP address" IP address 168.65.11.239 168.65.11.241 cdefghijkl m nopqrstuv Edit Press "Edit" Delete and modify the "IP address" as required delete store Save the "IP address" Modify the subnet mask/gateway address IP address Subnet mask Edit Select "Subnet mask" or "Gateway address" with the central dial Press "Edit" cdefghijkl m nopqrstuv Delete or modify the subnet mask or gateway address as required 255.255.1.1 delete 255.255.0.0 store Save the subnet mask or gateway address - 68 - Maintenance The following inspections can be carried out by experienced employees. Only use genuine spare parts from the unit manufacturer. Cleaning the air filter Replacing the door seal Replacing the halogen lamp Push the lever to the left in order to release the lug. Then push the filter to the left and pull down to remove. -C lean the air filter in the dishwasher at least once a month and replace in unit after drying. - Air filters should be replaced at least twice a year. -D o not run the unit without an air filter. The door seal is fitted in a groove on the cooking cabinet. - Pull the old seal out of the groove - Clean the guide rail - Insert new seal into the groove (moisten the retaining lips with soapy water) - The rectangular part of the seal must be seated fully in the holding frame. First switch off the unit at the mains. - Cover the unit drain in the cooking cabinet - Remove the frame with glass and seal - Replace halogen bulb (article no.: 3024.0201), do not touch the bulb with your hands) - Replace sealing frame as well (article no.: 40.00.094) - Screw the frame in place with glass and seal Cooking cabinet seals: Article no.: 6 x 1/1 GN 20.00.394 6 x 2/1 GN 20.00.395 10 x 1/1 GN 20.00.396 10 x 2/1 GN 20.00.397 20 x 1/1 GN 20.00.398 20 x 2/1 GN 20.00.399 - 69 - Chef✆Line You can display the Chef✆Line telephone number as required. settings Chef✆Line 9:24 Press the Function button Select Chef's hat button Select "Chef✆Line" ChefLine Tel: The ChefLine telephone number is displayed Service✆Info The following service notices can be displayed in the Service Info area. settings descaling 9:24 Press the Function button Service✆Info Press Technik button Select "Service✆Info" Service 23 Tel: The Service hotline telephone number is displayed If no service message is displayed, the relevant Customer Service telephone number is shown under ServiceInfo. Service messages are automatically displayed at 10 second intervals. See also the "Fault messages" section. - 70 - “Mod” unit and software identification The unit and software identification can be displayed using the “Mod” function. settings Mod 9:24 Press the Function button Press the Technik button Select "Mod" No. SW.: Mod: ENGLISH The unit and software identification are displayed Help function Your unit has a number of help texts to enable you to use its extensive potential as fully and as simply as possible. The Help function is available if the display shows “?”. soufflé pizza Batch Finishing Use SCC mobile oven rack 9:24 Press the Function button Plated banquet Press the Help button The help text appears in the display The required cooking process can also be selected directly from the Help function. Press the selection button and scroll down using the central dial - 71 - Fault messages Service 23 Tel: Tel: If faults occur on your unit, they are indicated on the display: Faults on your unit which allow you to carry on cooking can be suppressed by pressing the Back button. Fault message When and how Remedial action Service 10 When it has been switched on for 30 seconds, It can be cleared with the "Arrow" button. The unit can be used for cooking. Please notify Customer Service. Service 11 When it has been switched on for 30 seconds, It can be cleared with the "Arrow" button. The unit can be used for cooking. Please notify Customer Service. Service 12 When it has been switched on for 30 seconds, It can be cleared with the "Arrow" button. The unit can be used for cooking. Please notify Customer Service. Service 14 When it has been switched on for 30 seconds, It can be cleared with the "Arrow" button. The unit can only be used in Dry Heat cooking mode. Please notify Customer Service. Service 20 Displayed for 30 seconds when the cooking mode is changed, on switching on and when the SelfCooking Control® modes are selected. Working with SelfCooking Control® cooking modes and programs is not possible. It is possible to work in Combi-Steamer mode with some restrictions. Please notify Customer Service. Service 21 When it has been switched on for 30 seconds, Working with SelfCooking Control® cooking modes and programs is not possible. It is possible to work in Combi-Steamer mode with some restrictions. Please notify Customer Service. Service 23 Displayed continuously. Switch the unit off and notify Customer Service. - 72 - Fault messages Fault message When and how Remedial action Service 24 Displayed continuously. Switch the unit off and notify Customer Service. Service 25 Displayed for 30 seconds during CleanJet®+care cleaning. CleanJet®+care is not working. - Open the water tap fully - Check the incoming screen - Remove the container from the cooking cabinet - If no faults are found, please notify Customer Service. - If Service 25 occurs during CleanJet®+care cleaning, please remove the tabs from the cooking cabinet and rinse the cooking cabinet thoroughly with the hand shower (also behind the air baffle) - The unit can be used for cooking temporarily. Please notify Customer Service. Service 26 Displayed continuously. If the fault message occurs during CleanJet®+care cleaning, please run "Interrupt CleanJet®”. If the fault message continues to be displayed after running "Interrupt CleanJet®", remove the tabs from the cooking cabinet and rinse the cooking cabinet thoroughly with the hand shower (also behind the air baffle). Please notify Customer Service. Service 27 When it has been switched on for 30 seconds, CleanJet®+care is not possible. Switch off the power at the mains for 5 seconds, then switch on again. Service 28 When it has been switched on for 30 seconds, Please notify Customer Service. Service 29 Displayed continuously. Check the air filter under the control panel, and clean or replace if necessary. Check whether the unit is being affected by an external heat source. If the service message persists, notify Customer Service. Service 30 When it has been switched on for 30 seconds, Moisture control not working. The unit can be used for cooking with limitations. Please notify Customer Service. Service 31 When it has been switched on for 30 seconds, Core temperature probe is defective. The unit can be used for cooking without the core temperature probe. Please notify Customer Service. Service 32 Gas Displayed continuously. units Close the gas valve. Please notify Customer Service. - 73 - Fault messages Fault message When and how Remedial action Service 33 Gas This is displayed continuously after units being reset 4 times. Close the gas valve. Please notify Customer Service. Service 34 Displayed continuously. Please notify Customer Service. Service 40 Displayed for 30 seconds during CleanJet®+care cleaning. Run CleanJet®+care and if fault message occures again, please notify Customer Service. Service 41 Displayed for 30 seconds during CleanJet®+care cleaning. Run CleanJet®+care and if fault message occures again, please notify Customer Service. Service 42 Displayed for 30 seconds during CleanJet®+care cleaning. Run CleanJet®+care and if fault message occures again, please notify Customer Service. Service 43 Displayed for 30 seconds during CleanJet®+care cleaning. Run CleanJet®+care and if fault message occures again, please notify Customer Service. Service 44 Displayed for 30 seconds during CleanJet®+care cleaning. Run CleanJet®+care and if fault message occures again, please notify Customer Service. Service 100 Displayed continuously. Please notify Customer Service. Service 110 Displayed continuously. Please notify Customer Service. Service 120 Displayed continuously. Please notify Customer Service. - 74 - Before you call customer service Error: Possible cause To eliminate Water dripping out of the unit’s door Door is not closed correctly. If the door is closed correctly, the door handle will point down on floor units. Door seal is worn or damaged. Replace the door seal (see the "Maintenance” section of the manual). Care instructions for a maximum service life: - At the end of production, clean the door seal thoroughly with a damp cloth. - If lots of grilled products are cooked (considerable build-up of grease), then the door seal must also be cleaned with a damp cloth between cycles. - If the unit is to be operated for a long time without products, we recommend that the cooking cabinet temperature should not exceed 180 °C. Noise is heard in the cooking cabinet while the unit is in use. Air baffles, hanging racks, etc, are not fixed correctly. Fix the air baffles and hanging racks correctly in the cooking cabinet. Cooking cabinet light not working. Halogen lamp is defective. Replace the lamp (see the "Maintenance” section of the manual). Low water level: “Flashing water valve symbol”. Water valve closed. Open the water valve. Water running out of the bottom of the unit. The unit is not level. Level the unit using a spirit level (see Installation Manual). Drain is blocked. Remove and clean the outlet (HT pipe) on the back of the unit. Blockages can occur if products with a high proportion of fat are cooked frequently or if the drop on the outlet pipe is too shallow. To remedy: Run the outlet pipe as described in the installation instructions.Clean the unit regularly with CleanJet®+care Water intake filter on the unit Check and clean the filter. To do this: Close the is clogged. water valve, unscrew the water intake on the unit, then remove and clean the filter in the water intake. Insert the filter, connect the water intake and check for leaks. - 75 - Before you call customer service Error: Possible cause To eliminate The unit does not indicate a External main switch is function after it is switched switched off. on. Fuse on the premises’ distribution board has tripped. Switch on at the main switch. Check the fuses on the premises’ distribution board. Heat the cooking cabinet to above 20 °C (68 °F). The ambient temperature The appliance must only be used in frost-free after switching the unit off conditions (see installation instructions). remained below 5 °C (41 °F) for a long time. Foam forms on the unit at the top of the outlet pipe during CleanJet®+care cleaning. Water too soft. Please notify Customer Service. The outlet is not installed correctly. Install the outlet as described in the installation manual. The run time is suddenly incremented once more during a CleanJet®+care process. The CleanJet®+care process is interrupted. Make sure that the air baffle and the grid shelves are fixed correctly in the cooking cabinet. There must be no containers or sheets in the cooking cabinet during the CleanJet®+care process. The gas unit indicates "Change polarity”. The power supply is not connected with the correct polarity. If the gas unit is connected to a socket, remove the connector and turn through 180°. Have an electrician permanently connect the unit with the correct polarity (without a connector). Gas unit constantly displays The gas supply to the unit is Reset. interrupted. The gas pressure is too low. Open the gas valve. Switch on the ventilation cover. Have the gas supply to the unit checked. Cooking mode button flashing Use Cool Down to cool the cooking cabinet (see the “Cool Down” section of the “General User Instructions” manual). The cooking cabinet is too hot - 76 - EU Declaration of Conformity for electrical appliances RATIONAL AG Iglinger Straße 62 D-86899 Landsberg/Germany www.rational-ag.com Product: Commercial CombiSteam Ovens Electric Appliances Types: CombiMaster CM61, CM62, CM101, CM102, CM201, CM202 SelfCooking Center SCC61, SCC62, SCC101, SCC102, SCC 201, SCC 202 BG CZ D DK E EE F FIN GB GR H HR I LT LV NL P PL RO RU S SER SI SK TR Фирма Ратионал потвърждава, че тези продукти съответстват на следващите директиви на ЕС: Firma RATIONAL prohlašuje, že výrobky jsou v souladu s následujicimi směrnicemi EU: Konformitätserklärung. RATIONAL erklärt, dass diese Produkte mit den folgenden EU-Richtlinien übereinstimmen: RATIONAL erklaerer at disse produkter er i overensstemmelse med følgende EU-direktiver: RATIONAL declara que estos productos son conformes con las siguientes Directivas Europeas: RATIONAL kinnitab, et antud tooted vastavad järgmistele EU normidele: RATIONAL déclare que ces produits sont en conformité avec les directives de l’Union Européenne suivantes: RATIONAL vakuuttaa, että nämä tuotteet täyttävät seuraavien EU direktiivien vaalimukset: RATIONAL declares that these products are in conformity with the following EU directives: RATIONAL δηλώνει ότι τα προϊόντα αυτά συμμορφώνονται προς τις οδηγίες της Ε.Ε. Mi, a RATIONAL kijelentjük, hogy ezen termékek megfelelnek az Europal Unio kövelkezö irányelveinek: RATIONAL izjavljuje da su ovi proizvodi sukladni slijedeĉim smjernicama EU: RATIONAL dichiara che questi prodotti sono conformi alle seguenti Direttive della Comunità Europea: RATIONAL patvirtina, kad šie produktai atitinka žemiau išvardintas ES normas: Firma RATIONAL pazino, ka izstrãdãjumi atbilst sekojoŝām ES normām: RATIONAL verklaart, dat deze producten in overeenstemming zijn met de volgende richtlijnen: A RATIONAL declara que estes produtos estāo em conformidade com as seguintes directivas EU: Firma RATIONAL oświadcza, że dane wyroby są zgodne z niniejszymi wytycznymi UE: Societatea RATIONAL declară că aceste produse sunt in conformitate cu următoarele directive ale Uniunii Europene: Фирма Ратионал заявляет, что данные изделия отвечают следующим нормам ЕС: RATIONAL försäkrar att dessa produkter är i överensstämmelse med följande EU-direktiv: RATIONAL izjavljuje da su ovi proizvodi u saglasnosti sa sledeċim smernicama EU: RATIONAL izlavlja, da so ti izdelki v skladu z naslednjimi smernicami EU: Firma RATIONAL prehlasuje, že výrobky sú v súlade s nasledovnými smernicami EU: RATIONAL bu ürünlerin Avrupa Birliği’ nin aşşağidaki Direktiflerine uygunluğunu onaylar: Machinery Directive MD 2006/42/EC Including Low Voltage Directive LVD 2006/95/EC (EN 60335-1:2002+A11+A1+A12+Corr.+A2.2006; EN 60335-2-42:2003; EN 50366:2003+A12006) Electro Magnetic Compatibility EMC 2004/108/EC (EN 55014-1:2006; EN 61000-3-2:2006; EN 61000-3-11:2000; EN 55014-2:1997+A1:2001) oppure LVD and EMC: Product Certification and CE Surveillance by VDE (0366). Restriction of Hazardous Substances RoHS 2002/95/EC EN 1717: 2001-05 Protection against pollution of potable water in water installations and general requirements of devices to prevent pollution by backflow – certified by DVGW Landsberg, 01.12.2009 i.V. Bruno Maas Manager R & D i.V. Roland Hegmann Product Architect Electric Appliances - 77 - oppure EU Declaration of Conformity for gas appliances RATIONAL AG Iglinger Straße 62 D-86899 Landsberg/Germany www.rational-ag.com Product: Commercial CombiSteam Ovens Gas Heated Appliances Types: CombiMaster CM61G, CM62G, CM101G, CM102G, CM201G, CM202G SelfCooking Center SCC61G, SCC62G, SCC101G, SCC102G, SCC 201G, SCC 202G BG CZ D DK E EE F FIN GB GR H HR I LT LV NL P PL RO RU S SER SI SK TR Фирма Ратионал потвърждава, че тези продукти съответстват на следващите директиви на ЕС: Firma RATIONAL prohlašuje, že výrobky jsou v souladu s následujicimi směrnicemi EU: Konformitätserklärung. RATIONAL erklärt, dass diese Produkte mit den folgenden EU-Richtlinien übereinstimmen: RATIONAL erklaerer at disse produkter er i overensstemmelse med følgende EU-direktiver: RATIONAL declara que estos productos son conformes con las siguientes Directivas Europeas: RATIONAL kinnitab, et antud tooted vastavad järgmistele EU normidele: RATIONAL déclare que ces produits sont en conformité avec les directives de l’Union Européenne suivantes: RATIONAL vakuuttaa, että nämä tuotteet täyttävät seuraavien EU direktiivien vaalimukset: RATIONAL declares that these products are in conformity with the following EU directives: RATIONAL δηλώνει ότι τα προϊόντα αυτά συμμορφώνονται προς τις οδηγίες της Ε.Ε. Mi, a RATIONAL kijelentjük, hogy ezen termékek megfelelnek az Europal Unio kövelkezö irányelveinek: RATIONAL izjavljuje da su ovi proizvodi sukladni slijedeĉim smjernicama EU: RATIONAL dichiara che questi prodotti sono conformi alle seguenti Direttive della Comunità Europea: RATIONAL patvirtina, kad šie produktai atitinka žemiau išvardintas ES normas: Firma RATIONAL pazino, ka izstrãdãjumi atbilst sekojoŝām ES normām: RATIONAL verklaart, dat deze producten in overeenstemming zijn met de volgende richtlijnen: A RATIONAL declara que estes produtos estāo em conformidade com as seguintes directivas EU: Firma RATIONAL oświadcza, że dane wyroby są zgodne z niniejszymi wytycznymi UE: Societatea RATIONAL declară că aceste produse sunt in conformitate cu următoarele directive ale Uniunii Europene: Фирма Ратионал заявляет, что данные изделия отвечают следующим нормам ЕС: RATIONAL försäkrar att dessa produkter är i överensstämmelse med följande EU-direktiv: RATIONAL izjavljuje da su ovi proizvodi u saglasnosti sa sledeċim smernicama EU: RATIONAL izlavlja, da so ti izdelki v skladu z naslednjimi smernicami EU: Firma RATIONAL prehlasuje, že výrobky sú v súlade s nasledovnými smernicami EU: RATIONAL bu ürünlerin Avrupa Birliği’ nin aşşağidaki Direktiflerine uygunluğunu onaylar: Directive on Appliances Burning Gaseous Fuels 90/396/EEC (EN 203-1:1992; EN 203-1/A2:1995; EN 203-1/A2:1999; EN 203-2:1995,prEN 203-3:1996; essential parts of EN 483:1999) Including Low Voltage Directive LVD 2006/95/EC (EN 60335-1:2002 + A1:2004 + A2:2006 + A11:2004 + A12:2006; EN 60335-2-42:2003; EN 50366:2003 + A1:2006; EN 50165:1997+C1:1998+A1:2001) Including Electro Magnetic Compatibility EMC 2004/108/EC (EN 50165; EN 55014-1:2000+A1:2001+A2:2002; EN 55014-2:1997+A1:2001; EN 61000-3-2:2000; EN 61000-3-3:1995+A1:2001; EN 55014-2:1997+A1:2001) EC Type-Examination and CE Surveillance E 4470 by KIWA Gastec. Machinery Directive MD 2006/42/EC Restriction of Hazardous Substances RoHS 2002/95/EC EN 1717: 2001-05 - Protection against pollution of potable water in water installations and general requirements of devices to prevent pollution by backflow – certified by DVGW. Landsberg, 01.12.2009 i.V. Bruno Maas Manager R & D i.V. Rainer Otminghaus Product Architect Gas Appliances - 78 - CLUB RATIONAL Register now and become a member. As a member you have access to an Internet-based platform that is unique within the industry and offers many services and benefits. CLUB benefits to you at a glance: Free upgrades You always have the latest SelfCooking Center® software Recipes – simply at the push of a button The best recipes for your SelfCooking Center® Download area Documentation for all unit series Chef✆Line now available by e-mail Expert help from one chef to another Service✆Info now available by e-mail RATIONAL Service – always there for you Quarterly newsletter So you are always well-informed. Free SelfCooking Center® seminars Academy RATIONAL– Your route to becoming a SelfCooking Center® professional. Frequently-Asked Questions What you've always wanted to know. Membership of the CLUB is free for you. Register right away! www.club-rational.com - 79 - RATIONAL Großküchentechnik Iglinger Straße 62 86899 Landsberg a. Lech/Germany Tel.: +49 8191 327387 Fax: +49 8191 327231 E-mail: [email protected] www.rational-online.de RATIONAL Belgium nv Zandvoortstraat 10 Bus 5 2800 Mechelen/Belgium Tel: +32 15 285500 Fax: +32 15 285505 E-mail: [email protected] www.rational.be RATIONAL France S.A.S. 6 Rue de la Mare Blanche 77186 Noisiel/France Tel: +33 (0) 1 60 53 56 53 Fax: +33 (0) 1 60 53 56 50 E-mail: [email protected] www.rational-france.fr RATIONAL International AG HELLAS 19ο χλμ.Θεσ/νίκης-Περαίας Τ.Θ. 4317 57019 Θεσσαλονίκη Τηλ: +30 23920 39410 Φαξ +30 23920 39418 [email protected] www.rational-online.gr RATIONAL Ibérica Cooking Systems S.L. Ctra. de Hospitalet, 147-149 Cityparc / Edif. Paris D 08940 Cornellá (Barcelona)/ SPAIN Tel: +34 93 4751750 Fax: +34 93 4751757 E-mail: [email protected] www.rational-iberica.com RATIONAL Italia S.r.l. via Venier 21 30020 Marcon (VE)/ITALY Tel: +39 041 5951909 Fax: +39 041 5951845 E-mail: [email protected] www.rational-italia.it RATIONAL Nederland Grootkeukentechniek BV Twentepoort West 7 7609 RD Almelo/THE NETHERLANDS Tel: +31 546 546000 Fax: +31 546 546099 E-mail: [email protected] www.rational.nl RATIONAL Sp. z o.o. ul. Trylogii 2/16 01-982 Warszawa/POLAND Tel: +48 22 8649326 Fax: +48 22 8649328 E-mail: [email protected] www.rational-polska.pl RATIONAL Scandinavia AB Kabingatan 11 212 39 Malmö/SWEDEN Tel: +46 40 680 85 00 Fax: +46 40 680 85 09 E-mail: [email protected] www.rational-scandinavia.se RATIONAL Schweiz AG Heinrich-Wild-Strasse 202 9435 Heerbrugg/SWITZERLAND Tel: +41 71 727 9092 Fax: +41 71 727 9091 E-mail: [email protected] www.rational-schweiz.ch RATIONAL Slovenija SLORATIONAL d.o.o. Ronkova ulica 4 2380 Slovenj Gradec / Slovenija Tel: +386 (0)2 8821900 Fax: +386 (0)2 8821901 E-mail: [email protected] www.slorational.si RATIONAL UK Unit 4 Titan Court, Laporte Way Portenway Business Park Luton, Bedfordshire, LU 4 8EF GREAT BRITAIN Tel: 00 44 (0) 1582 480388 Fax: 00 44 (0) 1582 485001 E-mail: [email protected] www.rational-uk.com RATIONAL AUSTRIA GmbH Innsbrucker Bundesstrasse 67 5020 Salzburg/AUSTRIA Tel.: 0043 (0)662-832799 Fax: 0043 (0)662-83279910 E-Mail: [email protected] www.rational-austria.at ООО "РАЦИОНАЛЬ РУС" 117105, г. Москва, Варшавское шоссе, д.25а, стр. 6 Тел: +7 495 663 24 56 Факс: +7 495 663 24 57 Эл. почта: [email protected] www.rational-russia.ru RATIONAL International AG İstanbul İrtibat Bürosu Acıbadem Cad., İbrahimağa Konutları, C1-C Blok, No.: 39, Kadıköy, 34718 İstanbul Tel./Faks: +90 (0) 212 339 98 18 E-mail: [email protected] www.rational-international.com RATIONAL AUSTRALIA PTY LTD 156 Swann Drive Derrimut, VIC 3030 Tel: +61 (0) 3 8369 4600 Fax: +61 (0) 3 8369 4699 E-mail: [email protected] www.rationalaustralia.com.au RATIONAL NZ Ltd 208-210 Neilson Street Onehunga, 1061 Auckland, 1643 Tel.: +64 (9) 633 0900 Fax.: +64 (9) 636-4434 E-Mail: [email protected] www.rationalnz.co.nz RATIONAL International Middle East Montana Building, Floor 303 Zaabeel Road, Dubai, UAE Phone+971 4 337 5455 Fax: +971 4 337 5445 eMail: [email protected] www.rational-middleeast.com RATIONAL Canada Inc. 2410 Meadowpine Blvd., Unit 107 Mississauga, Ontario L5N 6S2/CANADA Toll Free: 1-877-RATIONAL (728-4662) Fax: 905 567 2977 E-mail: [email protected] www.rational-canada.com RATIONAL USA Inc. 895 American Lane Schaumburg, IL 60173 Toll Free: 888-320-7274 Fax: 847-755-9583 E-mail: [email protected] www.rational-usa.com RATIONAL International AG Office Mexico Innoparc 01 Heinrich-Wild-Strasse 202 CH-9435 Heerbrugg Switzerland Tel. en México: +52 (55) 5292-7538 Fax en México: +52 (55) 85039847 eMail [email protected] www.rational-mexico.com.mx RATIONAL BRASIL Rua Prof. Carlos de Carvalho, 113 - Itaim Bibi São Paulo, SP CEP: 04531-080 Tel.: +55 (11) 3071-0018 Fax: +55 (11) 3071-0600 Internet: www.rational-online.com.br E-mail: [email protected] 㪹㆞↩䯍ኔዄኧወವንዀኮዐ ᇽ 㨀℻掌㠖℻◉㈛㰌ₐ䥽䟹⚆ ⇞♚ₜ╤䞲歾䞿㳚ኰወ⚆殷ኃኀዐኍ Tel: (03) 3812 -6222 Fax: (03) 3812 -6288 ኾዙወቿኦዉኖ [email protected] ኸዙኽዙን www.rational-japan.com RATIONAL ₙ䀆 ₙ䀆ゑ化⢘㿫恾⚆ ⧳棂⦌棔⟕┰ㄎ⧉%⸳ 挽㟎冥䪐₼⦌ 䟄幬᧶+86 21 64737473 ↯䦮᧶+86 21 64730197 䟄挽᧶[email protected] www.rational-china.cn RATIONAL Korea ꄱ렍꿙驕뤉ꍡ껹ᎎ 끭闊驝霡ꩱꫦ鶎ꩱ꾽ꠁ點 鲵뼑ꖱ霢 놹쀉+82-2-545-4599 볞걙+82-2-3443-5131 E-mail:[email protected] www.rationalkorea.co.kr RATIONAL International AG Heinrich-Wild-Straße 202 CH-9435 Heerbrugg Tel: +41 71 727 9090 Fax: +41 71 727 9080 E-mail: [email protected] www.rational-international.com RATIONAL AG Iglinger Straße 62 86899 Landsberg a. Lech Tel: +49 8191 3270 Fax: +49 8191 21735 E-mail: [email protected] www.rational-ag.com 80.01.001 · V-19 · MDS/Ad · 02/10 · englisch