1
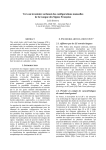
The Auslan System
Sign Editor User Manual
Preface:
This manual explains how to construct, edit, or design their own sign language signs.
The software referred to in this manual, the “Auslan Sign Editor”, is designed to work
in conjunction with the tutorial software, “Auslan Tuition System”. The sign editor
software concentrates on building the signs whereas the tuition system is the front end
and displays the constructed signs in a tutorial manner. The “Auslan System” will be
used to describe both editor and tutorial program collectively.
Note that with the sign editor, the signs that are constructed for the tuition system are
not restricted to those from Auslan (Australian Sign Language). The sign editor is
capable of creating any upper body pose, making the editor a useful and flexible tool
suitable for most sign languages.
Written By:
Jason C. Wong.
Developers involved:
Jason C. Wong, Sam Yeates, Nick Lowe, James Strauss, Eun-Jung Holden, and
Robyn Owens.
Acknowledgements:
The Deaf Society of Western Australia.
1
Table of Contents
Chapter 0: Installing the Auslan Sign Editor
Chapter 1: Getting Started with the Auslan Sign Editor
Chapter 2: The Camera Controls
Chapter 3: Making Poses and Handshapes
Chapter 4: Making Sign Animations
Chapter 5: The Sign Editor Menu Commands
Chapter 6: A Step-by-Step Tutorial
Chapter 7: The File Types Used in the Auslan System
2
Chapter 0: Installing the Auslan Sign Editor
To install the Auslan Sign Editor, simply unzip the “AuslanSystem.zip” file to an
appropriate location. To do this, simply double click on the icon of the file. You will
need to have Winzip or some other un-compression software installed on your system.
Once unzipped, there should be two directories. One contains the Auslan Tuition
System and the other contains the Auslan Sign Editor. Within the sign editor
directory, there should be several other folders. These contains the necessary files for
the sign editor to run:
•
•
•
•
•
FingerSpelling: This folder contains a copy of the files used for finger spelling
in the Auslan Tuition System.
HandShapes: This folder contains some previously created handshapes. These
handshapes are derived from Auslan basic handshapes. These handshapes can
be used to aid in the creation of sign animations.
Model: This folder contains the information needed for the avatar. Do not
modify any of the files in this directory as it may break the program.
Numbers: This folder contains a copy of the files needed for signing numbers
used in the Auslan Tuition System.
Signs: This folder contains sign files that were created from the Sign Editor.
These sign files are used in the Auslan Tuition System.
3
Chapter 1: Getting Started with Auslan Sign Editor
Once you have successfully installed the Auslan System, double click or open the
“SignEditor.exe” file.
1.1 Start-up window
When the sign editor is initially started, a start-up window will appear as shown in
Figure 1.1.1. The user can then choose the starting point of the program through this
start-up window.
a. Static Pose: This option will start the editor on a default pose. The user is then
free to construct a pose (see Chapter 3) in this mode.
b. Right/Left Handshape: This option will bring up a pose window with a
right/left handshape in the default position. The user is then free to construct
an appropriate handshape (see Chapter 3).
c. Sign Animation: This option will create a default animation window. The
initial animation will consist of two keyframes (see Section 4.1) with default
poses. This option allows for the user to create signs from scratch (see
Chapter 4).
d. Open Existing File: This option is for opening previously created sign
animations, poses, or handshapes. The user may select a file from the recent
file history list, or may opt for selecting another file elsewhere by highlighting
“More files…” and clicking on OK.
Figure 1.1.1: The editor start-up window.
4
1.2 Static Pose Window
If the Static Pose option is chosen at the start up of the editor, the interface will
change slightly. Firstly, a new pose window (Figure 1.2.1) will pop up with an avatar.
The avatar will become the model for the user created poses. Secondly, the pose
control panel (Figure 1.2.2) will appear on the right hand side of the sign editor. This
panel contains the controls for making a pose (see Chapter 2 for camera control and
see Chapter 3 for pose manipulation).
Figure 1.2.1: The pose window showing the posing avatar.
Figure 1.2.2: The pose control panel used in controlling the avatar to make poses.
5
1.3 Handshape Window
When a new right/left handshape is created, a window similar to the static pose
window (see Section 1.2) will pop up. Figure 1.3.1 shows the handshape window that
will pop up so that the user may create a suitable handshape. A control panel will
appear on the right side of the editor similar to that shown in Figure 1.2.2.
Figure 1.3.1: The right and left handshape window that is used for viewing the constructed handshapes.
1.4 Sign Animation Window
In creating a sign animation, an animation window similar to the static pose window
will pop up. The animation window (Figure 1.4.1) however, has a blue background to
distinguish it from the pose window (with a white background). Also there are some
major differences on the animation control panel (Figure 1.4.2) compared to that of
the pose control panel used for poses and handshapes.
Figure 1.4.1: The animation window that displays the sign animation being created.
6
Figure 1.4.2: The animation control panel.
The animation control panel contains three major components. The first component is
the keyframe panel (Figure 1.4.3) that controls the sequence of keyframes (see Section
4.1). The second component is the tool panel (Figure 1.4.4). The tool panel is used to
control how poses and handshapes are integrated into the sign animation. The third
component is the playing panel (Figure 1.4.5) where the playing of the animation is
controlled.
Figure 1.4.3: The keyframe panel where the keyframe sequence is controlled.
7
Figure 1.4.4: The tool panel where the pose and handshapes are integrated into the sign animation
Figure 1.4.5: The playing panel where the playing of the animation is controlled.
The animation control panel also has a component that controls the camera (see next
chapter), which is accessed through the “Camera” tab shown in Figure 1.4.3.
8
Chapter 2: The Camera Controls
When creating poses, handshapes, or sign animations, the camera can be rotated
around the avatar. The camera can be manipulated to give a more meaningful view of
the avatar as some angles may cause the pose/handshape to be difficult to see. The
camera can also be zoomed to give a more appropriate distance in viewing the model.
In all the cases of pose, handshape, and animation windows, the camera control panel
are identical, as shown in Figure 2.0.1. Hence, the view in these windows can be
manipulated in the same way.
Figure 2.0.1: The camera control panel.
2.1 Rotating the Avatar
The three dials on the camera control panel (Figure 2.0.1) are used to determine the
amount of rotation to be performed in the x, y, and z axes respectively. Figure 2.1.1,
Figure 2.1.2, and Figure 2.1.3 show the rotation of the avatar caused by the rotation of
the x, y, and z axis dials respectively. Note that this camera system is used for the
pose, handshape, and animation windows.
Figure 2.1.1: The effects of rotating the x axis rotation dial.
9
Figure 2.1.2: The effects of rotating the y axis rotation dial.
Figure 2.1.3: The effects of rotating the z axis rotation dial.
10
2.2 The Camera Zoom
The zoom of the camera can also be controlled via the camera control panel.
Increasing the zoom factor will pull the camera away from the avatar, making it seem
smaller. Decreasing the zoom factor will bring the avatar closer. Figure 2.2.1 and
Figure 2.2.2 show the effects of the zoom factor.
Figure 2.2.1: The effect of decreasing the zoom factor from the default of 60.
Figure 2.2.2: The effect of increasing the zoom factor from the default of 60.
11
Chapter 3: Making Poses and Handshapes
This chapter will go through the processes involved in creating poses and handshapes
of the avatar. Once created, poses and handshapes can then be applied to a keyframe
in a sign animation. Applying these to a sign animation is discussed in more detail in
Chapter 4.
Since the creation of poses and handshapes are practically identical, the creation of
poses and handshapes will be explained concurrently.
3.1 Starting a New Pose/Handshape
The creation of a pose/handshape can be chosen from the editor start-up window (see
Section 1.1). Otherwise, a new pose/handshape window can be created through the
editor menu commands (see Chapter 5) or keyboard shortcuts. Pressing “Ctrl – p” will
create a new pose window whereas “Ctrl – l” or “Ctrl – r” will create a new left and
right handshape window respectively.
Note that there are many existing handshapes that have already been created. Using
these basic Auslan handshapes can save a lot of time.
3.2 Selecting the Right Model Segment
Each of the poses/handshapes is created through positioning each of the segments of
the model. For example, the left shoulder, left elbow, and left wrist of the avatar were
arranged to create the pose shown in Figure 3.2.1.
Handshapes are created in a similar manner. However, since handshapes are rather
intricate, the creation of handshapes is separated from the pose creation to give more
control and better views when creating handshapes.
Figure 3.2.1: A pose created through the manipulation of the left shoulder, elbow, and wrist segments.
12
Therefore, in order to create a pose/handshape, each of the segments of the model will
need to be able to be selected. There are two ways to do this:
1. Each segment can be selected from a drop down list on the control panel (as
shown in Figure 3.2.2).
2. A segment can also be selected by directly clicking on it in the
pose/handshape window.
Figure 3.2.2: The drop down list on the control panel showing the segments
that can be selected during creation of poses.
Each of the segments is connected in a hierarchy. This hierarchy is shown in Figure
3.2.3 and Figure 3.2.4. When a segment is selected and moved, all the other segments
further down the hierarchy from that segment will also be moved.
Figure 3.2.3: The hierarchy of the joints in the avatar.
13
Figure 3.2.4: The hierarchy of the joints in the avatar’s hand.
Once a segment is selected, the avatar model will go semi-transparent except the
selected segment and segments below it. Some examples of highlighted segments are
shown in Figure 3.2.5 and Figure 3.2.6.
Figure 3.2.5: The left shoulder segment is selected. Note that the segments that are lower in the
hierarchy are also highlighted as well to give an easy sense of manipulation.
Figure 3.2.6: The right index finger is highlighted.
14
3.3 Manipulation of Segments
The essence of creating poses and handshapes is in the manipulation and arrangement
of the model segments. Once a segment is selected, the user is given control of
rotating the segment to a desired position. With a segment selected, the control panel
will change to include three new rotation dials as shown in Figure 3.3.1.
Figure 3.3.1: The rotation dials that appear when a segment is selected.
Rotating the x, y, or z dials will rotate the segment in the respective directions. Figure
3.3.2 shows the head being rotated by the control panel dials.
Figure 3.3.2: The effect of the control panel rotation dials on the selected segment.
Care should be taken to make sure the angles the segment is rotated in are not
unrealistic. Situations can occur where segments are rotated to angles that are simply
not humanly possible. In creating handshapes however, the rotations of the segments
have been automatically limited in the appropriate directions and angles.
3.4 Saving Your Pose/Handshape
Once the user is satisfied with the pose/handshape, the user can either apply it to a
sign animation (see Section 4.3) or save it to a file for later use.
Both the menu commands (see Section 5.1) and the keyboard shortcut “Ctrl – s” can
be used to save a pose, handshape, or animation. When saving, simply choose the
suitable location and filename for the pose/handshape to save it.
15
Chapter 4: Making Sign Animations
This chapter will concentrate on the basics of creating sign animations in the Auslan
Sign Editor.
4.1 Keyframes
A sign animation in the Auslan System is composed of several keyframes. These
keyframes specify a certain pose that the avatar should have at a particular time.
These keyframes can then determine the movement and timings of the avatar, hence
creating a sign animation. It is important that the keyframes capture the defining
positions and poses of the avatar at the appropriate timing. An example of a sequence
of keyframes is shown in Figure 4.1.1. This sequence is used for creating the sign
animation for “goodbye”.
Figure 4.1.1: A sequence of keyframes at time 0.2, 0.4, and 0.6 seconds respectively.
This sequence leads the animation of the meaning “goodbye”.
The “key” to creating a good sign animation is in the way the keyframes are
constructed. The sequence of keyframes can be thought of as a series of target poses
the avatar is to aim for by a certain time.
For a high quality and accurate sign animation, many keyframes are needed at close
time steps to ensure that the avatar movement is accurate. However, for many sign
animations, this level of “assistance” for the avatar is not necessary. As shown in
Figure 4.1.1, the keyframe poses can be quite different from one keyframe to the next.
This is possible because the sign editor employs a technique that seamlessly
interpolates the avatar from one pose to another.
The user should experiment with how the number of keyframes affect the quality of
the animation to determine a satisfactory level of quality. It is generally the case that
more complex animations require more keyframes to produce a good and
understandable sign animation.
16
4.2 Editing the Keyframe Sequence
Keyframe sequences can be manipulated through the command buttons on the
keyframe panel as shown in Figure 4.2.1. With these command buttons, keyframes
can be inserted and deleted from the keyframe sequence.
Figure 4.2.1: The keyframe panel with the controls to manipulate the keyframe sequence.
1. Inserting Keyframes
When the Insert function is called, a new window will appear. This window (shown
in Figure 4.2.2) determines the parameters of the keyframe that will be introduced
into the keyframe sequence.
Figure 4.2.2: The insert keyframe options.
There are basically two parameters that need to be initialised for the new keyframe:
one being the initial keyframe pose, and the other being the time of the keyframe.
17
Keyframe Pose
The initial keyframe pose is selected from one of three options. Note that the
keyframe pose can be changed later, once the keyframe has been inserted.
a. Default Frame: This will create a keyframe pose of the avatar in a default
position.
b. Copy of Current Frame: This will create a keyframe pose that is the same
as the currently highlighted keyframe pose in the keyframe panel.
c. Frame from Window: This will create a keyframe pose copied from
another currently opened pose window. The drop down list will display all
the pose windows currently available.
Keyframe Time
The timing of the new keyframe is also selected from three options. Again, the initial
timing of the keyframe is not permanent and can be changed later.
a. Before Current Frame: The keyframe will be placed at a time evenly
between the previous keyframe and the currently highlighted keyframe.
b. After Current Frame: The keyframe will be placed at a time evenly
between the currently highlighted keyframe and the next keyframe.
c. At Time: The keyframe will be placed at the time specified. Note that
keyframes cannot have the same time.
2. Deleting Keyframes
Deleting keyframes will erase them from the keyframe sequence. Since they cannot
be revived, make sure important work is saved before deleting. Keyframes are deleted
through the Delete button as shown in Figure 4.2.1.
3. Properties of Keyframes
The properties of each keyframe can be examined by calling the Properties function.
The Properties function will bring up a window similar to that in Figure 4.2.3 that
displays the avatar joint angles of the highlight keyframe. Each of the joints of the
avatar can be changed via this Properties function.
Figure 4.2.3: The properties window of a keyframe.
18
4. Cleaning Keyframe Sequences
The Clean button causes the keyframe sequence to be “cleaned” up of redundant
information. This function is useful for reducing the amount of storage space of the
sign animation.
It is not usual that all the avatar joints move from keyframe to keyframe. Hence, the
information for these avatar joints does not have to be stored. This function will not
store unchanged joints and will not affect the animation.
5. Changing Keyframe Times
The keyframes can be shuffled within the keyframe sequence through changing the
keyframe time. This is done by altering the Time parameter on the keyframe control
panel as shown in Figure 4.2.1. Changing the Time will shift the currently highlighted
keyframe to the new set time.
4.3 Making and Editing Signs
Once a sign animation has been created it is possible to alter the keyframe poses of
the animation. Changing the keyframe poses will also change the sign animation.
Keyframes can be selected from the keyframe panel (as shown in Figure 4.3.1). A
selected keyframe can then be changed by directly editing the keyframe pose, or by a
new pose applied to it.
Figure 4.3.1: The keyframe panel with the 4th keyframe selected.
1. Editing Keyframe Poses & Handshapes
A selected keyframe can be edited in any of the sign animations. Editing a keyframe
involves creating a new pose or handshape window. This new window with the avatar
model can be manipulated in the same way as a normal pose/handshape (see Chapter
3). Note that for the ease of creating signs, the new pose window will contain a copy
of the pose/handshape of the keyframe.
19
The command for editing a keyframe pose or handshape can be selected from the tool
panel (Figure 4.3.2) via the Pose, R.Hand, and L.Hand buttons in the “Edit” category.
Figure 4.3.2: The tool panel with command buttons for editing and applying poses/handshapes.
Once the pose/handshape is appropriately altered, it has to be applied to the keyframe
(see Section 4.3.2).
2. Applying Keyframe Poses & Handshapes
The incorporate a new pose or handshape into the sign animation, it must first be
applied to a certain keyframe, regardless of where the pose/handshape came from
(either from editing the keyframe pose, or a completely new pose).
When applying a pose, the target keyframe has to be selected in the keyframe panel.
The apply command can then be invoked by the buttons on the tool panel shown in
Figure 4.3.2. The user should select the appropriate button to apply a pose, left or
right handshape. Once the button has been pressed, a dialog similar to the one shown
in Figure 4.3.3 will appear. This box is for selecting the source pose/handshape
window to copy the pose/handshape from.
Figure 4.3.3: The pose/handshape source selection window. This window determines
from where to copy a pose/handshape.
4.4 Saving the Sign Animation
Saving the animation is done in a similar fashion to saving a pose. To save an
animation, the user can either use menu commands (see Section 5) or use the
keyboard shortcut “Ctrl – s”. The user should then choose a suitable filename and
location.
Note that in order to use this new animation in the Auslan Tuition System, the
animation must be saved to the “Signs” folder in the “AuslanTuitionSystem”
directory as opposed to the “Signs” folder in the “AuslanSignEditor”.
20
Chapter 5: The Sign Editor Menu Commands
This chapter goes through the file menu commands available in the sign editor. Many
of the commands are similar to other windows based menu systems.
5.1 The File Menu Commands
The menu commands under the File menu are used for the manipulation of files in the
sign editor. Figure 5.1.1 shows the commands that are available. Note that some of the
file menu commands can also be accessed through the specified keyboard shortcuts.
Figure 5.1.1: The file menu commands available in the sign editor.
1. New
The New command creates a new file. Note that the New menu command opens up
more options when highlighted. The user can create a new right handshape, left
handshape, pose, or sign animation. All of these New commands can also be accessed
through the corresponding keyboard shortcuts listed on the side of the menu
command.
2. Open
The Open command opens a previously created and stored file. In order to select an
existing file, the Open command will bring up a file selection dialog box, similar to
that shown in Figure 5.1.2.
21
Figure 5.1.2: The dialog box used to select the file to open.
Please refer to Chapter 7 for the supported file types in the Auslan Sign Editor.
3. Save
The Save command is used to save a pose, handshape or sign animation to a file. Once
called, the Save command will bring up a dialog box similar to the file open window.
The save window is shown in Figure 5.1.3.
Figure 5.1.3: The dialog box used to save a file.
The sign editor will automatically select the appropriate file type to save the pose,
handshape, or animation so only the filename is required (see Chapter 7 for more
details).
22
4. Export
The Export command is used to export the information from within a pose or
handshape. The resulting file is of the XML format and contains the angles of each of
the avatar joints. The export dialog box is shown in Figure 5.1.4.
Figure 5.1.4: The dialog box used to export a pose or handshape to a XML file.
A snippet of an example XML file that was exported is shown in Figure 5.1.5.
Figure 5.1.5: Snippet of a XML file that was exported from the editor.
Exported files can be useful in determining the exact angles of each of the joints.
Also, the type of information (i.e. a pose, keyframe, or handshape) is stored within the
file itself. This allows exported XML files to store all the types of files.
23
5. Close
The Close command simply closes the currently highlighted window, be it a pose,
handshape, or animation window. Make sure important windows have been saved
before closing them.
6. Recent File List
The recent file list under the File menu (Figure 5.1.1) shows the most recent
previously opened files. This list provides quick access to recent files that may be
needed. This list can be cleared by the Clear Recent Files command in the File menu.
7. Quit
The Quit command will exit the whole sign editor program. Make sure all important
files have been saved before quiting.
5.2 The Tools Menu Commands
The Tools menu contains useful functions that may be useful during the creation of
poses, handshapes, and sign animations. The content of the Tools menu is shown in
Figure 5.2.1.
Figure 5.2.1: The Tools menu available in the editor.
1. Mirror Handshape
The Mirror Handshape function is available when the Tools menu is accessed whilst
a handshape window is selected. The Mirror Handshape function will create a new
handshape window that will have a mirrored handshape.
2. Output Frames
This useful function will output a sequence of images of a sign animation. Effectively,
these image files (stored as TIF images) can be compiled to create a video sequence
of the sign animation. When the Output Frames function is called, a dialog box
appears with the option for the number of frames to output per second (Figure 5.2.2).
This will determine how smooth the video sequence will be. The more frames, the
smoother the video sequence. However, more frames recorded means more images
will be saved. This can require a lot of storage space.
24
Figure 5.2.2: The options for when outputting frames.
3. Apply Global R. Arm/L. Arm Default
The Apply Global Default function will apply the right/left arm default position to the
whole sign animation. This function can be useful to reset one of the avatar arms
throughout an animation to the default position.
5.3 The Windows Menu Commands
The commands under the Windows menu are used to control and organise the
currently opened windows. These commands are generally used to maximise the use
of the sign editor workspace. Figure 5.3.1 shows the contents of the Windows menu.
Figure 5.3.1: The menu commands available in the Windows menu.
1. Tiling Windows
The menu commands Tile Horizontally and Tile Vertically are commands that
rearrange the currently opened windows for an easier and cleaner workspace. If
several different windows are opened simultaneously, the sign editor workspace can
get cluttered and difficult to manipulate.
When the Tile Horizontally command is called, the opened windows are arranged in a
tile like fashion, going across the workspace horizontally. The results of tiling several
windows can be seen in Figure 5.3.2.
25
Figure 5.3.2: The results of tiling the windows horizontally.
When the Tile Vertically command is called, the windows will be arranged similarly
to the Tile Horizontally command. However, the Tile Vertically command will tile
windows going down the workspace as shown in Figure 5.3.3.
Figure 5.3.3: The results of tiling the windows vertically.
26
2. Cascading Windows
The Cascade command will arrange the currently opened windows one after the
other, creating a cascading affect. The result of using the Cascade command is shown
in Figure 5.3.4.
Figure 5.3.4: The results of cascading the windows.
3. Window Selection
When several windows are opened, a list of these windows will be available in the
Windows menu. An example of this list can be seen in Figure 5.3.1.
Notice that there is a tick next to one of the windows. This indicates which window is
currently selected and has the focus. This focus can be shifted to another window by
either clicking directly on the window, or choosing the name of the window in the
Windows menu.
5.4 The Help Menu Commands
The Help menu contains useful utilities for explaining the use of the sign editor. The
content of the Help menu is shown in Figure 5.4.1.
Figure 5.4.1: The contents of the Help menu.
27
1. The Tutorial
The Tutorial command will start a simple tutorial that will run through the steps
involved in creating sign animations, poses, and handshapes. An example of one of
the tutorial steps is shown in Figure 5.4.2.
Figure 5.4.2: An example of the tutorial window used to guide a user in using the sign editor.
2. Hints
The Hints command provides the option to turn on/off hints shown on the interface.
These hints are intended to help a new user to get familiar with the sign editor
interface. The hints are designed to provide reminders for the user as to the use and
purpose of each of the control panels.
Some examples of the hints that are shown on the interface with the Hints option
turned on are shown in Figure 5.4.3.
28
Figure 5.4.3: Some hints that are shown when the Hints option is engaged.
29
Chapter 6: A Step-by-Step Tutorial
This chapter is a simple step-by-step tutorial to give you a good understanding of the
workings of the sign editor. The whole process of creating a sign animation from the
beginning will be shown in a series of simple steps.
Step 1: Starting up
The first step involves creating a new sign animation to work on. Once the sign editor
is started, the start-up window will be shown (see Figure 6.0.1). Select the option of
Sign Animation and click on the OK button.
Figure 6.0.1: The start-up window of the sign editor, with the Sign Animation option selected.
Alternate Commands:
Note that there are other ways to start a new sign animation:
1. Using the menu commands, File New New Sign Animation, or
2. Using the keyboard short cut “Ctrl – a”.
Step 2: Insert a New Keyframe
On the Keyframe Control Panel (see Section 4.2), click on the Insert button to add a
new keyframe into the keyframe sequence. A dialog box will pop up for setting the
parameters for the new keyframe. Select a default frame (i.e. default pose) and give
the keyframe a time of 0.5 seconds. The dialog box should look like that which is
shown in Figure 6.0.2.
30
Figure 6.0.2: The insert keyframe dialog box should look like this before proceeding.
Step 3: Select the New Keyframe
Once the keyframe has been inserted, select it in the Keyframe list. Notice that the
slider at the bottom of the animation control panel (see Section 1.4) now moves to the
centre (shown in Figure 6.0.3). The selected keyframe should be the middle point of
the sign animation.
Figure 6.0.3: The control panel look likes this when the new inserted keyframe is highlighted.
31
Step 4: Edit the Keyframe Pose
To edit the keyframe pose, click on the Pose button in the “Edit” category on the
animation control panel. This will create a new pose window and the control panel
will now look like that which is shown in Figure 6.0.4.
Figure 6.0.4: The control panel will look like this when a new pose window is created.
Alternate Commands:
Since the keyframe that was inserted is of a default pose, it makes no difference to
create a new pose window from 1. Menu commands, File New New Sign Animation, or
2. Keyboard short cuts, “Ctrl – p”.
Step 5: Creating a New Pose
Maximise the pose window to give you a clearer view of the avatar. This is done by
clicking on the Maximise icon in the top right corner of the pose window (see Figure
6.0.5).
Figure 6.0.5: The title bar of the pose window with the Minimise, Maximise, and the Close icons.
32
Now click on the avatar’s right forearm (or elbow). The avatar and the control panel
should change to look like those shown in Figure 6.0.6.
Figure 6.0.6: The avatar and the control panel when the right forearm is selected.
With the forearm segment selected, it is now possible to move this segment. Do this
by rotating the dials on the bottom of the control panel. You can also change the
camera views by rotating the upper dials (see Chapter 2).
Rotate the right forearm until you create a pose similar to that shown in Figure 6.0.7.
33
Figure 6.0.7: The result of rotating the dials on the control panel when the forearm is selected.
More Complex Poses:
Poses that are more complex can be made by changing and rotating more of the avatar
segments.
Step 6: Apply the Pose to the Keyframe
Once you have created a suitable pose, Restore the pose window to its original size.
To do this, click on the Restore icon in the top right corner above the control panel as
shown in Figure 6.0.8.
Figure 6.0.8: The Minimise, Restore, and the Close icons of a maximised window.
Now select the original sign animation window by clicking on the title bar. The
control panel should change back to the previous state as in Figure 6.0.3.
With the middle keyframe highlighted, click on the Pose button in the “Apply”
category on the control panel. This will bring up a dialog box similar to that shown in
Figure 6.0.9. Select the name of the pose window with the new pose and click on OK.
34
Figure 6.0.9: The dialog box when apply a pose to a keyframe.
The middle keyframe in the sign animation should now show the avatar with the same
pose as the one in the pose window.
Step 7: Playing the Animation
Once everything is set up, the resulting animation can be play and examined.
Maximise the sign animation window first to get a better view. Then, simply click on
the Play button on the control panel.
Step 8: Saving the Animation
Any of the sign animations that are created can be saved. Firstly, call the Save menu
command from File
Save. A dialog box will appear querying the filename and
location the animation should be saved to (see Figure 6.0.10).
Figure 6.0.10: The dialog box when saving a sign animation.
Choose a suitable filename and location then click on OK. The animation should then
be saved.
Alternate Commands:
35
The Save command can also be called via a keyboard short cut, namely “Ctrl – s”.
Chapter 7: The File Types Used in the Auslan System
This chapter will focus mainly on the file types used in the sign editor. Having a clear
understanding of the file types can help in recognising previously saved files.
7.1 Sign Files - .sgn
Filenames ending with “.sgn” are sign files. These files contain a sign animation that
was previously saved. When opened, the sign editor automatically recognises the file
type and sets up a sign animation window containing the animation.
7.2 Body Pose Files - .pbd
Filenames ending with “.pbd” are body pose files. These files contain the information
of a body pose that was previously saved. When opened, the Sign Editor will set up a
new pose window that contains the body pose.
36
7.3 Right Handshape Files - .prh
Filenames ending with “.prh” are right handshape files. These files contain the
information of a right handshape that was previously saved. When opened, the Sign
Editor will set up a new window that contains the right handshape.
7.4 Left Handshape Files - .plh
Filenames ending with “.plh” are left handshape files. These files contain the
information of a left handshape that was previously saved. When opened, the Sign
Editor will set up a new window that contains the left handshape.
7.5 Exported Files - .xml
Filenames ending with “.xml” are exported files. These files contain the information
of exported poses, keyframes or handshapes that was previously exported. When
opened, the Sign Editor will open a pose window will the exported information,
whether it be a pose, keyframe, or handshape.
37