1
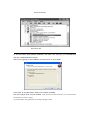
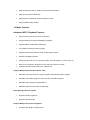
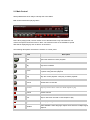
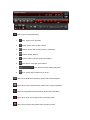
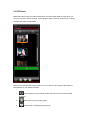
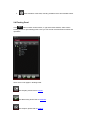
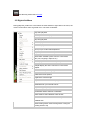
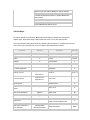
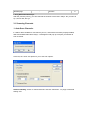
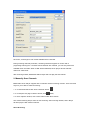
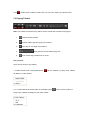
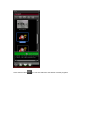
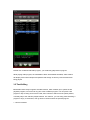
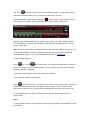
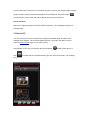
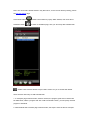
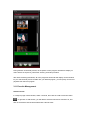
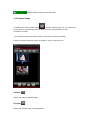
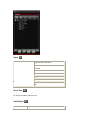
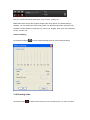
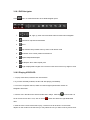
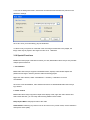
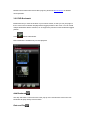
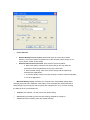
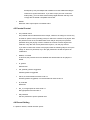
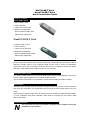
MinTV-DVB-T Stick
WandTV-DVB-T Stick
Quick Installation Guide
Installation Overview
MinTV-DVB-T Stick
1* MinTV-DVB-T Stick
1* DVB-T Antenna
1* HDTV Play for Windows
Installations CD-ROM with:
. Driver for MinTV-DVB-T Stick
. HDTV Player Application
WandTV-DVB-T Stick
1* WandTV-DVB-T Stick
1* DVB-T Antenna
1* HDTV Play for Windows
Installations CD-ROM with:
. Driver for WandTV-DVB-T Stick
. HDTV Player Application
Connecting the MtinTV (WandTV) -DVB-T Stick
Please ensure that windows XP is cerredtly installed and started before connecting the MinTV
(WandTV) –DVB-T Stick to your computers USB 2.0 port. Due to power and bandwidth
requirement, we do not recommend connecting the unit into a USB Hub. Connect the MinTV
(WandTV) –DVB-T Stick to the USB connection of your computer.
Connecting the Aerial
It is recommended to connect to a roof top aerial during the first time installation as this may
provide a better signal quality then the provided portable antenna.
You will need to ensure that you are located in a area that has Digital Terrestrial coverage.
IMPORTANT!
The base of the orovided antenna generates a magnetic field. If you have a heart pacemaker
and notice any anomalies, you should keep away from this device and seek advice from your
doctor.
Always keep the antenna away from all equipment that is sensitive to electromagnetic fields,
e.g. PCs, notebooks, hard drives, diskettes, credit cards etc. Improper use may result in data
loss or other faults.
Driver-Installation
N
ote: If you have any anti-virus software enabled, please disable it during the
installation of the software.
When you first connect the MinTV (WandTV) -DVB-T Stick to your computer a Hardware
Assistant will appear, the “USB Device ”will be recognized.
Insert the “HDTV Player for Windows Installations CD-ROM”into your CD drive.
Select the option “Install Driver”and click “Next”.
If prompted select “No, not this time”and select “Next”. Select the option “Install the software
automatically”and click “Next”.
A window may appear about the “USB Device”not passing the windows logo testing, select
“Continue Anyway”.
When “Completing the Found New Hardware wizard”window appears click the “Finish”button
to complete the driver installation.
N
ote ”If any further components are found please repeat the above process until you
receive the message “Found new hardware: Your hardware is installed and configured
use”
You will now need to check that The drivers are installed correctly.
Right Click on My Computer and Left Click on Properties. Click on Hardware tab and then
Device Manager.
In the Device Manager click on the +symbol on the Sound Video and Game controllers secTion. If the deiver is installed corRectly you should see the “DiBcom DIB7700 DVB-T device with Infrared receiver” (it is for Min-TV-DVB-T Stick), ( “AF9015 BDA Device” is for
WandTV-DVB-T Stick). If it has a Yellow mark next to it then this means that the driver is not
installed correctly. You will need to remove the driver and disconnect the MinTV (Wand-TV)
-DVB-T Stick from the computer and re-connect is to install the driver again.
WandTV-DVB-T Stick
MinTV-DVB-T Stick
HDTV Player Software Installation
To start the DVB-T Stick software installation, click Start / Run then type your CD-ROM drive
and click “Install Blaze HDTV Player”.
Select your language for the installation and Click “Next”or / and “Install”.
Click “finish”to complete setup, restart your computer if needed.
Run HDTV player which you just installed, enter user name and serial number ( you can find out the
serial number on driver CD bag)
To start the HDTV Play application, A message will appear askin
you to scan for tuner channel now, click “YES”.
Select your country location, and then, select “scan”.
Start to enjoy your digital life by use our products.
About BlazeVideo HDTV Player v2.1
1. Overview
1.1 BlazeVideo HDTV Player Introduction
Welcome to use all-in-one BlazeVideo HDTV Player!
BlazeVideo HDTV Player is a full-featured and easy to use BlazeVideo HDTV Player software,
combining HDTV playback, FM receiving, video record and DVD playback functions. You can
make advantage of PC monitor's high resolution, watch, record, playback high definition HDTV
program or teletext broadcast program.
BlazeVideo HDTV Player also acts as your multi-media center, with superior video and audio
quality, it supports DVD, VCD, SVCD, MP3, MPEG, RM, MOV, SWF, WMV, DIVX and
Pictures playback. The more advanced features, such as video/audio record, video capture,
bookmark previ ew, picture slideshow, screen control, special audio effect, optional skin, bring
you an infinite wonderful multi-media world.
BlazeVideo HDTV Player has wide compatibility, supporting most popular TV Card with BDA
interface on market, runs stably and smoothly on Windows 2000/XP operating system.
Let’
s see what can BlazeVideo HDTV Player do for you?
•
Playing HDTV program
•
Realtime record favorite HDTV program
•
Schedule record favorite HDTV program
•
Live update program list and program guide
•
Schedule watch HDTV program at specified time
•
TimeShifting, pause watching HDTV program
•
Playing teletext broadcasting
•
Playing FM radio with Visualization effect
•
Capture HDTV program video as still image
•
Manage favorites program
•
Multi-channel preview to quickly access favorite programs
•
Playing DVD/SVCD/VCD/CD disc
•
DVD bookmark preview to quickly access favorite title/chapter
•
Playing most popular media files
•
Playing picture as slide show with background music
•
Playing external video devices
1.2 Major Features
Advanced HDTV Playback Features:
•
Auto scanning channels and save all channels
•
Support Electronic Program Guide(EPG) navigation
•
Support teletext & FM radio broadcasting
•
Live update and forecast HDTV Program
•
Support multi-channel preview, easily access target channel
•
Support TimeShifting function
•
Check programs info, such as service provider, channel frequency, service type, etc
•
Notify current program's duration time, the start time and the end time
•
Advanced Power Saving Scheme for notebook PC
Support Multiple Real-time & Schedule Task:
•
Real-time record and save your favorite program while watching HDTV program
•
Schedule record HDTV program, never miss any wonderful programs
•
Schedule watch program at specified time
•
Real-time capture favorite video as still image
Easily Manage HDTV Programs:
•
Support favorite program list
•
Support Parental Control
Support Multiple Source Files Playback:
•
Compliant with DVB-T based protocol
•
Support playback HDTV, DVD/VCD/CD disc, media file, video device, etc
•
Playback picture as slideshow
•
Support Teletext broadcasting
•
Support MPEG-2 decoder
Outstanding Video & Audio Quality:
•
High video quality, support multiple aspect ratio and video hardware accelerating
•
Video desktop lets you view video in true background mode, just like wallpaper
•
Smart stretch lets video smart fit on all monitor with different aspect ratio, avoid video
loss or distortion
•
Enhanced audio effect and equalizer, supports 5.1, 6.1, 7.1 channel output
1.3 Other Features
•
Record DVD segment into MPEG2 video or MP3 audio file
•
Capture your favorite DVD Movies scenes, preview the images and save the favored
ones.
•
Bookmark preview, quickly access desired DVD title/chapter
•
2X, 4X, 8X, 16X Fast Forward/Fast Backward
•
Step forward for precise title/chapter watching
•
Freely select Menus: Title, Root, Chapter, Subtitles, Language, camera Angles
•
Repeat title/chapter
•
Number of subtitles: 32
•
Close captioning
•
Multiple angles: 9
•
Automatically resuming from the last scene
•
Parental control level
•
Configurable user Interface
•
Zoom in Video Images, maximize eight times.
•
Language learning function
•
Support files : MPG, VOB, AC3, ASF, M1V, M2V, MOV, QT, AVI, WMV, DAT, VRO,
WAV, MID, WM, WMA, MP2, MP3, RMI, RM, RMVB, MOV, QT, SWF, OGG, OGM
and other popular media formats.
1.4 Supported Media Types
•
Supports all of the following disc formats:
o
DVD-Video, DVD-ROM, DVD-RAM, DVD-RW, DVD+RW,
o
•
•
VCD1.1, VCD2.0, SVCD
Video file formats
o
Audio-Video Interleaved (AVI)
o
Motion Picture Experts Group (MPEG, MPG, M1V, DATMPA, MPE, MPV2)
o
Windows Media Video (WMV)
o
Advanced Streaming Format (ASF, ASX)
o
Digital Video (DV, DV1)
o
video Object File (VOB)
o
MPEG 2 VIDEO (M2V)
o
Intel Video Technology (IVF)
o
QuickTime Content (MOV, QT)
o
Real Networks Content (RM, RMVB)
o
DivX (AVI)
o
Ogg Video(OGM)
o
Flash(SWF)
o
Picture(BMP,JPG,GIF)
o
DC&DV
Audio file formats:
o
Microsoft Waveform audio files (.WAV)
o
AIFF (.AIF)
o
AU (.AU)
o
SND (.SND)
o
MIDI (.MID)
o
Windows Media Audio (.WMA)
o
MPEG Audio Layer-3 (.MP3, .MP2, .MP1, .MPA, .M2P, .M2A)
o
CD(CDA)
o
Ogg Audio(OGG)
1.5 System Requirements
Basic
CPU
Intel Celeron 600MHz or higher
System Memory
128MB RAM or higher
Operating System
Windows 2000, Windows XP
Display card
Sound card
Have 24 Bits resolution and support DirectX, 8MB
Video-ROM or more
PCI sound cards, Integration chipset on Mother Board,
USB audio devices etc. compatible with Windows and
stereo speakers
Device
Hard-disk available
capacity
All DVD drives
At least 512 MB temporary disc space for Time Shifting
function;
Large enough space for HDTV program or DVD record
DirectX
DirectX 9.0 or later
Hardware
HDTV device and its driver should be properly installed
2. BlazeVideo HDTV Player Appearance
BlazeVideo HDTV Player is designed with user-friendly interface, the default video window
and main control are as below:
2.1 Main Control
Startup BlazeVideo HDTV Player and keep the active status.
Main Control Panel when playing HDTV:
Note: When playing DVD, not each section is fit to all DVD's titles. Only manufacturers can
confirm the specific functions burned on discs. The functions which are unavailable to special
titles will be displayed gray and not able to be accessed.
The following descriptions are about the sections on control panel:
Button/Icon
Name
Description
EPG
Open EPG window for HDTV playback
Play
Play HDTV or Media
Pause
TimeShift during the HDTV playback
or pause during the DVD playback
Stop
Stop the current playback. Click play to restart playback.
Record
Record HDTV or DVD file
Previous
Skip to previous HDTV channel or DVD chapter to play
Browse
Browse channel
Next
Skip to next HDTV channel or DVD chapter to play
Open
Select playback type
Subtitles
Select Subtitles. Select language caption when there are multiple language
captions.
Audio
Select Audios: Click to select audio if there are various audio options
Capture
Capture video as .bmp still image
Volume Control
Drag slider right/left to increase/decrease volume.
Mute
Click it, the audio is muted, click once again, get back the previous
conditions.
Media Type
Display current media type, vary with different media type
Playback status
Display current playback status, vary with different playback status
Signal Quality
Display HDTV signal quality (Available when playback HDTV)
Signal Strength
Display HDTV signal strength (Available when playback HDTV)
Channel/chapter
Display current HDTV channel or DVD chapter info
time
Display hours, minutes, seconds of the current HDTV time or DVD chapter
time
Fast backward
Fast backward, switch between 1X, 2X, 4X, 8X, 16X at each press
Slider bar
Drag the slider to new position for playback.
Fast Forward
Fast forward, switch between 1X, 2X, 4X, 8X, 16X at each press
Open Floating
Panel
Show Advanced
Panel
Minimize
Exit
Show Floating Panel
Show/Hide Advanced Panel
It is a standard windows icon. Click it, the control panel and the view window
will be minimized and displayed as icons on system toolbar.
Exit BlazeVideo HDTV Player.
2.2 Advanced Panel
Click
on Main Control Panel to show "Advanced Panel" or click
which has six sub panels:
Default open with TV advanced panel:
to hide it,
Click to show TV advanced panel.
1.
Scan: Click to scan channels.
2.
Recall: Click to return to last channel
3.
Favorite: Click to add current channel in favorite list.
4.
Teletext: Display teletext
5.
Previous: Skip to previous page of the teletext
6.
Next: Skip to next page of the teletext
7.
8.
display total and current teletext page info
Save current page of teletext as a .txt file.
Click to show DVD advanced panel, please refer to DVD Navigator.
Click to show color advanced panel, please refer to Color Adjustment.
Click to show equalizer advanced panel, please refer to Equalizer.
Click to show zoom panel, please refer to Zooming Video.
Click to show screen panel, please refer to Screen Control.
2.3 EPG Panel
BlazeVideo HDTV Player provides with Electronic Program Guide (EPG), through which you
can scan channels, preview channel, access program guide, check all programs info, manage
favorites and create schedule task.
There are four sub windows in EPG window, you can click the four buttons at the bottom of
EPG window for your desired operation:
1.
Show Transport: scan channels, refresh channels and access all channels
properties.
2.
Show Guide: access program guide.
3.
Show Favorite: manage favorite programs.
4.
Show Schedule: create task, including schedule record and schedule watch.
2.4 Floating Panel
Click
button on Main Control Panel, or right click Video Window, select "Show
Floating Panel" to open Floating Panel. Here you can access more advanced functions and
operations.
There are four sub pages in Floating Panel:
Show Playlist, please refer to Playlist.
Show Bookmark, please refer to Bookmark.
Show Capture, please refer to Capture.
Show Record, please refer to Record.
2.5 Right-click Menu
During playback, position the cursor above the video window to right click for the menu, the
menu's commands is same of general menu. The menu is followed:
Play:start playback
Pause:pause/continue playback
Stop:stop playback
Forward:playback DVD under the fast forward mode
Backward:playback DVD under the fast backward mode
Go to:jump to certain title/chapter/time
Repeat:repeat the current chapter/title
Menu:select available options from the current DVD
disc (root, language, captions etc.)
Title:display the current HDTV frequency or DVD title
Chapter:display the HDTV channels or current DVD
chapter
Subtitle:select caption language
Audio:select audio options
Angle:select camera angle
Play from:choose the source for playback
Bookmark:mark your favorite scenes
Capture Image:capture your favorite scenes
Visualization:Switch different visualization
Video Window: Select different video window
Full Screen:zoom in the video window to your monitor's
available area
Show Floating Panel: show Floating Panel or bring the
Floating Panel to top
Options: open the Options dialog for change settings
Purchase & Register:purchase or register BlazeVideo
HDTV Player
Help:access online help
Exit:exit BlazeVideo HDTV Player
2.6 Hot Keys
For user’
s operating convenience, BlazeVideo HDTV Player provides a lot of keyboard
express keys, the express keys is active when the cursor is over the video window.
Two keys indicate holding the first key and pressing the second key or pressing the two keys
at the same time. Non-letter key is put in bracket. The Express keys include:
Functions
hot-keys
Functions
hot-keys
Angle
G
Stop
Audio
A
Pause
Chapter
C
Fast forward
F
Reduce brightness
-
Fast backward
B
Increase brightness
-
Bookmark
K
Reduce volume
Increase volume
Ejecting disc
Exit BlazeVideo HDTV
Player
Next channel/chapter
Previous channel/chapter
Adjustment
DVD menu selection in
four directions
alphanumeric
keyboard "-"
alphanumeric
Capture
End
Space
[Ctrl] + C
Title menu
T
-
Subtitle menu
S
-
Main menu
R
PgDown
Mute on/off
M
Step forward
N
keyboard "+"
PgUp
Corresponding
Directional Arrows
Switch between the full screen
mode and the window mode
Enter DVD Menu
Z
Enter
Attribute page
-
Resume
U
3. Using BlazeVideo HDTV Player
After the previous journey, you have learned the features of the HDTV Player. Do you want to
try it, feel it? OK, let's go.
3.1 Scanning Channels
1. Auto Scan Channels
If a HDTV device installed or connected to your PC, and its driver has been properly installed,
after launch BlazeVideo HDTV Player, a message box will pop up to enquire you whether to
scan channels.
Click Yes, the "Scan" box ejects for you to set scan options.
Advanced Setting: Check on "Advanced Scan" and click "Advanced..." to popup "Advanced
Setting" box:
Click "OK", it will begin to scan all the available HDTV channels.
During scanning channels procedure, "Scanning Channels" appears on screen with a
progressing scanning bar. If "Preview found channels" box checked, you can also preview all
available HDTV channels. When a valid channel detected, HDTV player will auto add this
channel in channel list.
After scanning finishes, BlazeVideo HDTV Player will auto play the first channel.
2. Manually Scan Channels
BlazeVideo HDTV Player supplies with convenient channel scanning function. There are three
ways for you to launch channel scanning:
1. In TV Advanced Panel click "Scan Channels" button
2. In "Transport" sub page of "EPG" window, click
;
button;
3. In "DTV Options" window, click "Scan" button under "DTV Source".
The manual scanning step is same as auto scanning. After scanning finishes, HDTV Player
will auto play the last scanned channel.
Abort Scanning:
If you want to abort scanning, just press the "Abort" button. (It is recommended you finish
scanning one time at least).
3.2 Playing HDTV Program
When yout run BlazeVideo HDTV Player for the first time, and if your PC have a HDTV device
installed, after auto scanning all available channels, the program will auto play the first
scanned channels.
In the future every time when you startup HDTV Player, HDTV Player will auto play the last
channel you have viewed.
There are also below operations available for you to quickly and easily access your desired
channels.
Directly Play
In EPG window, double click a desired channel, you will directly play this channel's program.
Switch Channel
You can click
channel.
or
button in Main Control Panel to freely switch to previous or next
Browse Channel
Click
"Browse Channel" button, you will open a channel list dialogue box, all of the
channels and your favorite channels will be displayed. Here you can freely select your desired
channel to watch.
Return to Last Channel
In TV Advanced Panel, click "Recall" button
, you can quickly access and play the last
viewed channel's program.
Select Subtitle
Click
"Subtitle" button in Main Control Panel, you can freely select your desired subtitle.
Select Audio
Click
"Audio" button in Main Control Panel, you can freely select your desired audio.
3.3 Playing Teletext
Note: The Teletext is activated only if HDTV service provider has provided such program.
1.
Teletext: Display teletext
2.
Previous: Skip to previous page of the teletext
3.
Next: Skip to next page of the teletext
4.
5.
display total and current teletext page info
Save current page of teletext as a .txt file.
Play Teletext:
There are two ways to play teletext:
1. In Main Control Panel, click Subtitle button
and tick "Teletext" in popup menu, teletext
will display on video window.
2. In TV Advaned Panel Teletext area, click Teletext button
popup menu, teletext will display on the video window.
and tick "Show Teletext" in
Go To:
click to popup a menu allowing you to go to specified teletext page. You can also click the
or
button to go to previous or next page.
Hold: Always hold and keep playing the current teletext program during other operations.
Transparent: Display Teletext over the current video by transparent mode, if not checked,
there will be only teletext, no video displaying.
3.4 Playing FM Radio
BlazeVideo HDTV Players supports FM Radio receiving and playing. In "Transport" sub
window of "EPG" window, click "Refresh" button, all the available HDTV program and FM radio
will be scanned.
After scanning finishes, the HDTV program will be listed with the thumbnail of the current video,
while the FM radio program will be listed with the default thumbnails
will easily and quickly distinguish DHTV or radio program.
, thus you
Click "Views" button
, you can also switch the view status of all the programs.
Double click a selected FM radio program, you will directly playback this program.
While playing radio program, the Visualization effect will be default activated, Video window
will display multi-colored shapes and patterns that change in harmony with the audio track
being played.
3.5 TimeShifting
BlazeVideo HDTV Player supports TimeShift function, which enables you to pause the live
playback program, but never miss any part of the wonderful program. You can pause a live
program or skip a boring Ad.to have a break, then continue to watch from the pause position;
or directly skip to the real-time playback status. For instance, you can freely pause watching a
program to enjoy a cool drinker, then go back to continue watch the paused program.
1. Launch TimeShift
Just press
Pause button during HDTV program playback status, you will pause watching
and launch TimeShift function, then you will do any other thing if you want.
In TimeShift status, playback status displays as
, the time stops at the TimeShift stat time,
and a green bar will display and keep changing at the center of Main Control Panel.
Depending the TimeShift buffer size you preset in DTV Options, the whole TimeShift duration
time will be different, which can be estimated by contrasting the TimeShift start time and the
current System time.
Note: Due to the certain size of TimeShift buffer file, upon green bar reaching at the end, if you
do not cancel TimeSift, the previous TimeShift program will be removed, what you reserved
will be the latest program. You can also enlarge the Buffer Size in DTV Optons.
2. Play TimeShift Program: Press
Play or press
Pause button again, you will play timeshift program, continue to
watch HDTV program from the paused position, thus you will never miss any of the wonderful
instance of the HDTV programs.
In TimeShift playback status, there is still a green bar displaying.
3. Exit TimeShift, Resume Live Playback:
Press
Play button two times, you will skip some content (such as boring Ad.), resume live
playback and keep along with the actual playback status offered by HDTV service provider.
This function is useful for you to skip the boring Advertisement and enjoy a short time break.
In Live Playback status, the green bar disappears and the Main Control Panel returns to
normal status.
Notes:
1. The TimeShift function is only activated for HDTV program playback, not available for media
file playback.
2. The paused duration time depends on your TimeShift Buffer Size, which can be set in DTV
Setting.
3.6 Program Guide
Click "EPG" button in Main Control Panel to pop up EPG window, then click the "Show Guide"
button
, you will switch to Guide sub window.
All the available programs and start time will be listed.
Click a selected program, you can access more details of this program, such as program title,
start time, end time and program description.
Search
Type the start time or keyword of your desired programs in Search box, all the relative program
guide info will be quickly searched and displayed in EPG Guide list. click Clear button
,
you will clear the search result and resume display all the program guide info.
Add to Schedule:
Right click a selected program and select "Add to Schedule", you will add this program in a
schedule task.
3.7 Record TV
You can real-time record your favorite HDTV program into MPEG2 video file while you are
watching HDTV program. The record file will be saved as ".mpg" file in the folder you have
preset in Record Setting page for your future viewing.
The operation is very easy, just directly click Record button
click
on Main Control Panel, or
in Floating Panel to activate Record page, then click record button, you will begin
to record file.
Record
Click to start to record, during recording procedure, the file size will keep dynamically changed
Stop Record
Click to stop record, then the record file will be auto saved as ".mpg" file named by record time
in the specified folder you have set in Record Option page.
Play Record
Click to playback the selected record file
Delete
Remove the selected record file in Record List
Remove all record files in Record List
Remove the record file from the record file's folder
Right-click Menu:
Begin to record
Playback the selected record file
Remove the selected record file from Record List
Remove all record files from Record List
Quickly access and open the record file's folder
Delete the selected record file from record file's folder
3.8 Schedule Record TV
BlazeVideo HDTV Player allows you to schedule record HDTV program, if you have to be
away from PC at the time of your favorite program playback; or you can not bear sitting in front
of PC to wait your desired program to begin; or you have multiple favorite programs to watch at
the same time. Don't worry, the Schedule Record feature will assure you never miss any of
your favorite programs. Your favorite program will be automatically recorded and saved on
your hard disk as MPEG2 video file for your future viewing.
Note: The record file is default saved in "My Document", for the record directory setting, please
see Record Setting page.
Click "EPG" button
on Main Control Panel to popup "EPG" window, then click "Show
Schedule" button
to switch to Schedule page, here you can freely add schedule task.
Create Task: Click this button to eject "Task" window for you to set the task details.
There are also ohter ways to add schedule task:
1. In Transport page of EPG window, select a channel, the program guide of this channel will
be listed below, select a program and click "Add to Schedule" button, you will quickly add this
program to Schedule.
2. Add schedule task in Favoite page of EPG window, the steps is same as above Transport.
3. In Guide page of EPG window, right click a program and select "Add to Schedule".
The schedule record steps are as below:
1. Set Task Name: Input the task name in "Task Name" option
2. Set Task Channel: drop down click to select your desired channel
3. Set Task Type: Select "Recording File" as task type, and set the record duration time
Note: If select "Viewing Reminder" as task type, you will create schedule watch task. Please
refer to Schedule Watch HDTV Program.
4. Set Start Time. The start time will directly display
After click "OK", you will finish setting schedule record task, HDTV Player will automatically
begin to record your desired program at the task time.
: Modify Task: select a created task and click this button, you will modify the task details.
: Delete the selected task.
3.9 Schedule Watch TV
BlazeVideo HDTV Player allows you to schedule watch HDTV program, it will remind you to
watch your favorite program at the specified time, so that you will never miss any of your
favorite program.
The operation is similar with schedule record HDTV program, the only difference is you should
set Task Type as "Viewing Reminder", instead of "Recording File", then specify the task start
time, HDTV Player will automatically switch to playback your scheduled channel's program.
Please see Schedule Record HDTV Program page for detailed schedule task operation. 3.10 Multi-channel Preview
BlazeVideo HDTV Player supports multi-channel preview function. You can preview multiple
channels either in scanning channel progress or in EPG window.
1. Preview channel while scanning channels
During scanning channels procedure, tick on "Preview found channels" box, each found
channel will sequentially display on video window, thus you can preview each channel's
program.
2. Multi-channel preview in EPG window
In "Transport" page of "EPG" window, click "Refresh" button
available channels' thumbnails.
, the player will refresh all
During Refresh Thumbnails process, the snapshot of each program will real-time display on
Video window in sequence, just like the scanning channels procedure.
After finish refreshing thumbnails, all of the programs' thumbnails will display on EPG window
for you multi-channel preview. Double click your desired program, you will quickly access and
playback this channel's program. 3.11 Favorite Management
Add to Favorite:
In Transport page of EPG window, select a channel, then click the "Add to Favorite" button
, or right click to add favorite, you will add the selected channel into Favorite List, and
each of the favorite channel will be added with a favorite mark.
Click
to switch to Favorite page, here you will see all the favorite channels. Double click
a favorite channel, you will quickly access and play this channel's program.
You can also freely manage your favorite channels in Favorite page of EPG window.
Create Folder: click to create a favorite folder, you can customize the folder name.
Move to Folder: Move the selected channel to another favorite folder.
Rename: Change name of the selected channel
Delete: Remove the selected channel from the favorite list.
: Add the selected program to schedule task.
3.12 Capture Image
In Floating Panel, click the third button
to switch to Capture page. You can capture your
favorite video as .bmp still image with one click of a button, and preview them for the
convenience of saving.
1.The captured bitmap image will be stored in "My Pictures" directory as default.
2.They are saved in sequence number by default as 1.bmp, 2.bmp and so on.
Capture
Capture the video as BMP still image.
Preview
Preview the selected image in Paint application.
Delete
Delete: Delete the selected images.
Delete All: Delete all the images in list.
Copy to Clipboard
Copy the selected images to clipboard.
Save
Save: Save the selected image
Save All: Save all images in the list
Save As: Rename the selected image
3.13 Playlist Management
In Floating Panel, click the first button
to switch to Capture page. Playlist lets you select
and save a list of files, then played in the order you specified.
Open
Play DVD from DVD drive
Play USB PC camera (if USB PC camera
installed)
Play DVD from hard disk
Play media files
Play photos as slideshow
Open playlist
Delete the current playlist and create a new
one
Go to Play
Go to play the select channel or file
Add Playlist
Add file(s) to playlist
Add file(s) to playlist
Add folder to playlist
Add URL to playlist
Remove Playlist
Delete the selected item in the playlist
Delete all the items in the playlist
Delete all dead items
Delete item physically from the hard disk
Save Playlist
Save playlist
Save as playlist in other place
3.14 Color Adjustment
Open Advanced Panel, click Color button
to open Color Panel:
Lightness, Contrast, Saturation, Hue adjustment bar separately displays.
Drag mouse along the slide bar, to freely adjust your desired color.
Drop down click you also can select different display modes: CRT, LCD, TV, Custom
Click "Default", to resume default color setting.
3.15 Equalizer
Click equalizer button
to open Equalizer Panel:
Here you can launch special audio effect, such as Echo, Amplify, etc.
BlazeVideo HDTV Player also supports multiple other audio effects, the default setting is
"Disable", you can drop-down click to freely select your desired audio effect: Classical, Club,
Full Bass, Laptop speakers, Large hall, Live, Party, Pop, Reggae, Rock, Ska, Soft, Soft Rock,
Techno, Custom, etc.
Advanced Setting:
Click Advanced button
to open Advanced dialogue box for more advanced setting.
3.16 Zooming Video
Click Zoom button
to open Zoom Panel, here you can freely zoom in or zoom out video
Zoom In
Zoom in one time per click , maximize to eight times.
Zoom Out
Zoom out one time per click, minimize to the original size
Actual Size
Return to actual or normal size.
Center
Display the central part while zooming in
Drag the slide bar, you can also zoom in or zoom out video.
3.17 Screen Control
Click Screen Panel button
to open Screen Panel:
Letter Box
Compute the largest 4x3 area of the output window
Pan&Scan
Display the 16x9 video to the largest 4x3 area of the output window, or the source 4x3 video
stretched into the windscreen.
Keep Aspect Ratio
Keep aspect ratio of the video. Adjust the aspect ratio by dragging the slider.
Smart Stretch to 16:9
Display video at 16:9 ratio on any screen mode, remove distortion and improve video quality
3.18 Playing DVD
It is quite simple to watch DVD film. In most cases, you just need to insert a disc. HDTV Player
will automatically start and determine disc type. But sometimes you may need to watch only
some DVD subtitle and not want to watch from beginning. HDTV Player will help you to watch
DVD in a controlled way. After you are familiar with the control panel of HDTV Player, you will
find that the control panel contains all basic operation buttons (play, pause and stop, etc.),
options for volume and mute, play speed, chapter and menu navigation, and repeat. Now let’
s
watch a film by follow the following steps:
Get Start to Play DVD
1. If you want to watch a DVD movie, please insert a DVD disc into a default DVD drive. (You
can see the default DVD drive in the Standard Setup of Attribute Setup dialog box). Click on
the most right Play
Button icon, or press Enter shortcut key of Play. If auto play is set,
HDTV Player will automatically start to play. IF you want to play the movie manually, ensure
that the right DVD drive has been selected on the OPTIONS. You may also click on the bottom
Select source
Button to select the DVD drive for playing.
Note: Some DVD disc may supplement with other DVD play software and may prompt you if
you want to install the software. It is recommended not to install such software as the attached
software may be simple in function and may lead to conflict with HDTV Player.
2. Depend on the type of the DVD disc, there will be alarm message or copyright information
on the screen. This cannot be skipped.
3. Normally DVD main menu will be on the screen after the preview advertising. You can use
mouse or arrow key or direction / arrow on the DVD Navigator Sub Panel
navigate thought playing. Then you can select using Intermediate Button or shortcut key
CTRL+Enter to select.
4. DVD movie will now begin to play.
to
Control Play
5.Clicking on Pause
on the main control panel or pressing Space Bar on the keyboard
may pause video window image. If you want to resume play, click on Play
or press Space
Bar again or Pause Key.
6.If you want to watch movie with full screen, double click on the video window or use shortcut
key Z. If the current play is in windows mode, it will switch to full screen mode. If it is in full
screen mode, it will switch to windows mode.
7.Increase / decrease volume or turn on / off sound·
If you want to increase volume, you can move the volume slider upward to the required level or
press alphanumeric keyboard [+] keys on the keyboard.·If you want to decrease volume, you
can move the volume slider downward to the required level or press alphanumeric keyboard [-]
keys on the keyboard.·If you want to turn on / off the sound, you can click on the Mute button
or press M key on the keyboard.
8.Color adjustment, please open Advanced Panel, activate Color panel, for detailed operation,
please see Color Adjustment page, you can drag slider bar to set Brightness, Contrast,
Saturation and Hue.
9. Change chapter. If you want to change to other chapter, click on Previous
Next
button or
button. Or press C on the keyboard to open chapter menu directly.
10. During playback or under pause mode, click on the Next Chapter button or Previous
Chapter will move to next chapter or return to previous chapter.
11.Fast Forward
and Fast Backward
You don’
t need to search for a movie or a chapter one by one. You can use Fast Forward or
Fast Backward button. Switch between 1x, 2x, 4x, 8x, 16x speed at each click.
12.Step Forward
During the playing, click on the Advancing a Frame on the bottom of the control panel will
move to next frame. Click on random stepping button will stop playing. The button will enable
you to capture image with more accuracy.
13.To eject the disc from the player, click on the Stop
press [End] key on the keyboard.
button and then Quit button or
3.18.1 DVD Navigator
Click
button on Advanced Panel to show DVD Navigator panel.
1.
Left, right, up, down arrow and enter button for DVD menu Navigation.
2.
Eject/Close: eject/close DVD-ROM
3.
Menu:
4.
Step Forward: step forward frame by frame under Pause mode
5.
Bookmark: save current position as bookmark
6.
Repeat: Repeat title/chapter
7.
AB Repeat: Set A and B repeat point
8.
Angle: Display/select angles menu for the movies which have many angles of vi ew
3.18.2 Playing VCD/SVCD
1. To play VCD/ SVCD, insert the disc into the drive.
2. If you have Auto-Play enabled, the disc will start playing immediately.
3. To move to a specific channel, select from the left-right-up-down-enter section on
Navigation Sub-Panel .
4. Insert a VCD / SVCD into the drive and start HDTV Player. Click Play
set to correct source drive. If not, click on source
. Ensure that it is
button and select the right DVD ROM
drive.
5. After the VCD / SVCD movie start to play, a movie menu will be shown on the screen
depend on the content of the disc and you may select the one you want to see by mouse click.
6. Since all VCD / SVCD have navigator functions, you can use navigating cursor of the
Sub-Panel to brows the contents.
7. If the disc support, click on Next
chapter. or Previous
will skip to the next or previous
3.18.3 Playing Media Files
1.
Click "Open" button on Main Control Panel, select "Play Media Files";
Or right click video window, select "Play From" ->" "Play Media Files",
then select one or more media files, you will begin to play media files.
2.
If playback multiple files, you can click "Previous" or "Next" button to skip playback.
3.
When playing a file, you can drag the progress bar to control the playback status.
3.18.4 Playing Video Devices
Video Capture Devices include PC Camera ,Digital Camera (DC), Digital Video(DV),Video
Card and so on.
Click "Open" button in the Main Control Panel, select then 2nd item in the following message
box to play Video Capture Device directly.
If you haven't installed Video Capture Device or the relevant driver , the second item could not
be seen in the Open Menu.
3.18.5 Playing Photos as Slide Show
BlazeVideo HDTV Player supports playing pictures as slide show.
1.Click "Open" button, select "Play Photos as Slideshow" from the appearing Open Menu.
Select the picture images from the open file message box, click "Ok".
2.Or right click video window, select "Play From"-> "Play photos As Slideshow" .
3.You can set background music, effect times and interval times between two pictures in the
Slideshow Settings.
Click "Ok" when you finish setting, play the slideshow.
4.If there is only one picture or mixed with other non-image formats files in the playlist, the
file(s) could only be played in the single form but not in slideshow.
3.19 Special Functions
Besides the DVD player’
s standard functions you wish, BlazeVideo HDTV Player also provides
multiple special functions.
1. Visualization
BlazeVideo HDTV Player supports Visualization effect, displays multi-colored shapes and
patterns that change in harmony with the audio track being played.
Right click video window, select "Visualization"->"Alchemy"->"Random" to launch
Visualization.
Click "Off" to exit Visualization, video window will resume to default BlazeVideo HDTV Player
logo window.
2. Video Control
BlazeVideo HDTV Player supports multiple video display mode, right click video window and
select Video Window, you can freely switch among different video modes:
Keep Aspect Ratio: Keep aspect ratio of the video
Smart Stretch: Watching any DVD movie at 16:9 ratio on any screen mode, remove distortion
and improve video quality
Video Desktop: DVD video full screen display at desktop, enables you to work and watch
DVD simultaneously
Always on Top: Always on top display video
3. Repeat
You can repeat watching a chapter or a title by selecting the Repeat option from right-clicking
menu or click the Repeat
button on DVD advanced panel.
4. AB Repeat
BlazeVideo HDTV Player supports AB Repeat function, which allows you to freely repeat your
favorite segment.
1. Set A Point
Click AB Repeat button
on Navigator Panel, or go to right click menu, select "Repeat"->
"Set A Point" to set A point;
2. Set B Point
Click
again, or go to right click menu, select "Repeat"-> "Set B Point" to set B point,
BlazeVideo HDTV Player will repeat playback from A point to B point.
3. Repeat Off
Click
once again, or go to right click menu, select "Repeat"-> "Repeat Off", you will turn off
AB repeat, resume to normal playback status.
5. Learning Mode:
BlazeVideo HDTV Player supports learning mode, which is helpful for you to learn foreign
language.
Go to right click menu, click "Repeat"-> "Learning Mode" to popup below learning mode setting
dialog:
Duration: Set repeat duration time.
Repeat Times: Set repeat times.
Click OK, BlazeVideo HDTV Player will begin to repeat playback as per you have set in
Learning Mode Setting.
6. Auto Resume Play
During playback status, click Stop
DVD movie, click Play
, BlazeVideo HDTV Player will stop playing the current
again, BlazeVideo HDTV Player will auto resume play DVD to
eject below dialog:
Play from last posiiton: Auto resume play DVD from last position
Play from beginning: Not resume play, play from the beginning.
7. Play at Specified Time
Go to right click Menu, click "Go to" -> "Specified Time" to pop up below box:
You can input the accurate time to jump to play the specified position.
8. BlazeVideo HDTV Player Audio options
BlazeVideo HDTV Player offers many audio output modes for your choice. You may select the
right audio output mode according to your computer configurations. Choices for output mode
include:
For audio output changing, please refer to Audio Setting page.
For special audio effect or preset Equalizer value, please refer to Equalizer Panel.
3.20 Record DVD Video/Audio
BlazeVideo HDTV player allows you to record DVD movie, you can record the whole DVD or
just your favorite title/chapter into MPEG2 video file for video editting, you can also just rip the
DVD audio into MP3 audio file for foreign language learning.
You can set record file type and record file saving directory in Record Setting page.
Please see below for DVD record steps:
1. Select Record Type
Please go to "Option"-> 'Record", drop down click to select Record Type as MPEG2 or MP3
file
MPEG2-- Record DVD into MPEG2 video file
MP3-- Rip DVD audio into MP3 audio file
2. Begin to Record
Click "Record" button
while playing DVD, you will begin to record DVD.
Record DVD is similar with record HDTV program, please see Record HDTV for detailed
record operation.
3.21 DVD Bookmark
Bookmarks lets you save the location of your favorite scenes, so that you can jump right to
them. Click on the bookmark will playback the tagged position of the movie. You can create
multiple bookmarks without confusion, for we support the preview of each bookmark's tagged
position.
Click
, switch to Bookmark.
Note: Bookmark is available only for DVD playback.
Add Bookmark
This step will create a new menu item in the pop-up menu of bookmark. Click on the new
bookmark will jump directly to that location.
Goto and Play
Play from the position you have selected.
Remove a Bookmark
Delete the bookmark you have selected.
Remove All Bookmarks
Clear all the bookmarks you have saved in the list.
3.22 Using Media Detector
If you have loaded disc in the default drive, Media Detector will auto launch BlazeVideo HDTV
Player to play the disc, thus simplify the operation.
•
After launching Media Detector, there is an icon
popup below menu:
•
Start BlazeDTV: Run BlazeVideo HDTV Player
•
Search Disc and Play: Search and auto play files in disc
•
AutoPlay DVD: If DVD disc loaded, auto play the disc
•
AutoPlay VCD: If VCD disc loaded, auto play the disc
•
AutoPlay AVI Disc: If AVI disc loaded, auto play the disc
•
AutoPlay RM Disc: If RM disc loaded, auto play the disc
•
AutoPlay MP3 Disc: If MP3 disc loaded, auto play the disc
•
AutoPlay CD: If CD disc loaded, auto play the disc
•
Start with Windows: Auto launch Media Detector when Windows start
•
Exit: Exit Media Detector, do not auto play the loaded disc
in Taskbar, right click the icon to
•
Click "Option" to popup below menu
•
AutoPlay: Auto play the checked disc type
•
Directory Depth: Set the sub folder depth for searching disc
•
File Amount: Set the maximum file number for searching disc
•
Start with Windows: Click on to launch Media Detector with Windows
4. Setup BlazeVideo HDTV Player
BlazeVideo HDTV Player is a configurable DVD player. You can personalize BlazeVideo
HDTV Player as you want.
Right click on the video window for the menu to select the "Options..." selection or click the
"Options..." button on the control panel to show the configuration dialog box.
4.1 General Setting
•
DVD drive
o
Default drive
If there are many drives in the computer, set the default CD/DVD Drive Option
to assign a drive for playing. BlazeVideo HDTV Player will play DVD/VCD
movies from this drive by default.
o
Properties
Press this button you will see a dialog box, you can modify the properties of
the default DVD/VCD drive.
You can change the region code of your DVD drive here.
•
Auto play
o
Enable autoplay
Check this option to enable the autoplay function of BlazeVideo HDTV Player.
If BlazeVideo HDTV Player is running, a disc will be played automatically
shortly after insert it into the default drive.
o
Enable autorun
Check this option to enable the autorun function of BlazeVideo HDTV Player.
If BlazeVideo HDTV Player is not running, it will be launched automatically
shortly after you insert a DVD disc into your DVD drive.
If both ‘
Enable autoplay’and ‘
Enable autorun’are checked, when you insert a
DVD disc into the DVD ROM, BlazeVideo HDTV Player will be run if it is not
running, then play the disc automatically.
•
Auto resume play
From this option, you can choose one of the following auto resume mode when you
play a disc you have played before.
o
Not Setting
It will start play from the beginning of the newly inserted disc.
o
User Choice
It will prompt a dialogue box ask the user if it shall be play from beginning or
play from the last memorized point.
o
Play From Beginning
It will start play from the beginning of the newly inserted disc.
o
Play From Last Position
It will start play from the ending point of the last play when a disc is re-inserted,
it will start to play from the memorized point. If it is inserted the first time, it will
start to play from beginning.
•
Default language
Select default language type for audio, subtitle and menu. If the disc supports the
selected language, it will be used as priority.
•
Default
Restore all options above to their initial/default values.
4.1.1 Power Setting
Click "Options..." button in the control panel to eject "Options" box, then activate "General" and
click "Power Setting" button, you will enter "Power Setting" box as below:
?
Power Scheme:
•
Enable Windows Power Scheme: Select this option and click "Show Power
Scheme", the "Power Options Properties" box of the windows system will pop up for
you to perform system power setting.
•
Enable Additional Power Scheme: there are three options as below:
o
a. High Power Saving: offers the best power savings, but may affect the
performance of other applications running at the same time.
o
b. Normal Power Saving: offers some power savings without significantly
affecting other applications.
o
c. Low Power Saving: offers less power savings but allows maximum flexibility
to run other applications.
?
Minimum Battery to play- Prevents your computer from unexpectedly shutting down
while playing movie due to depletion of the battery. Once the battery life reaches the level, a
dialog will pop up to prompt you with low power info. Default level is 15%, you also can drag
the slide bar to set your desired level.
?
?
?
Default- click "Default", you will resume the default setting.
Ok-Submitting the setting, power-saving technology adopted for Laptop PC.
Cancel-Cancel the resetting, keep the original selecting
4.1.2 File Associate Setting
1.
Click the "Option" button in the control panel, select the "General" when the message
box shows, then choose the "Files Association" button, the following message box
appeared
Select All-Choose BlazeVideo HDTV Player as the default autoplay for all the files
formats listed above.
2.
Select None-Release the files you have selected, cancel the BlazeVideo HDTV
Player's association of these files formats.
3.
Default- BlazeVideo HDTV Player has selected several files formats as the default
options.
4.
Okay-Submitting the selecting files formats, BlazeVideo HDTV Player will play the files
by default.
5.
Cancel-Cancel the resetting, keep the original selecting
4.2 DTV Setting
Open "Options"->"DTV", to popup DTV setting window.
•
Device: If a HDTV device installed or connected to your PC, the device name will
display. Click "Properties", you can see the relative info of this device.
•
Scan: click to launch scanning channel, for the detailed info, please see Scanning
Channels
•
TimeShift: set the parameters of TimeShifting:
o
Buffer Folder: display the directory of buffer file, please select a directory with
large enough space.
o
Buffer Size: Hard disk size for buffer and saving missed programs, the bigger
size, the longer time of saving program.
•
Days to keep EPG history: Set the days to keep the EPG history, maximum 7 days to
keep EPG history.
•
Clear History: Delete the EPG history.
4.3 Video Setting
•
Video Mode
For this option, recommend to select “Auto”
o
Auto
According the movies source BlazeVideo HDTV Player will automatically
select the deinterlace mode (Bob or Weave) to obtain better video quality.
o
Force Bob
The movies is coded from interleaved signal (i.e. 30fps/NTSC or 25fps/PAL) is
played under the mode.
o
Force Weave
It is suited for the “movies content”coded from the original film (i.e. 24fps).
•
Others
o
Enable hardware accelerating.
Set this function to enable, BlazeVideo HDTV Player can utilize the hardware
accelerating to obtain better performance.
o
Enable OSD.
Select hiding or display OSD. OSD is short for on screen display. Check this
option to display prompt necessary message on the video window when you
operate BlazeVideo HDTV Player.
o
Switch to full-screen mode when play.
Set the function to enable, when you play movies, the window will
automatically switch to full screen mode.
o
Show time on video window.
Select hiding or display time on video window.
o
Show left media time.
Select hiding or display left time on video window.
o
Default
Reset all options above to their initial values.
4.4 Audio Setting
•
Audio output settings
This option is used to configure the audio output mode for BlazeVideo HDTV Player.
Please select the correct one from the following according to the actual configuration
of your PC.
o
1 speaker – MONO
Mono channel output which combine multi channels into a single channel for
output.
o
2 speakers – STEREO
Twin channels stereo which combine multi channels into twin channels output.
o
4 speakers – L, R, LS, RS
The 4 channels output option is suitable for computer with sound card
supporting 4 channels output. They are left, right, left surround and right
surround. If your computer system use 4 speakers, you may use this option. In
this case, BlazeVideo HDTV Player will automatically assign 4 independent
channels for these speakers and enable you to enjoy the true surround sound
effect.
o
5 speakers – L, C, R, LS, RS
The 5channels output mode is suitable for computer with sound card
supporting 5 channels output. They are left, center, right, left surround and
right surround.
o
6 speakers – 5.1 channels, L, C, R, LS, RS, LFE
If your computer is provided with the sound cards which support 6-channel
(left, center, right, left surround, right surround, and LEE ) output and six
speakers, we advise using the function to obtain the surround sound
experience. The mode is suited for the DVD discs that have multi-channel
encoding function, such as Dolby Digital 5.1.
o
7 Speakers – 6.1 channels
7 channels output mode (6.1 channel mode): If your computer is installed with
sound card with 7 channels output and is using 7 speakers, it will
automatically export produce a more true and super surround effect when
playing DVD with 8 channels.
o
8 Speakers – 7.1 channels
8 Channel output mode (7.1 channels): If your computer uses 8 speakers, you
can use this option. BlazeVideo HDTV Player will automatically assign 8
channels for those speakers which will produce the feel of being at the live
show.
o
S/PDIF – to external audio decoder
Stereo signals shall be output to the external receivers through S/PDIF
compatible sound card. S/PDIF is an advanced digital interface technology
developed by Sony and Philips that is different from the traditional analogue
interface for signal transmission. If you want to enjoy the true 6 channels
audio quality, you must have external Dolby Digital decoder and they must
comply with the S/PDIF compatible sound card.
•
Default
Reset the audio output option to its default value.
4.5 Parental Control
•
The parental control
The parental control in BlazeVideo HDTV Player, similar to the ratings of movies may
be used for specific users (normally parent) to restrict the contents to be played. After
the parental control is set, the BlazeVideo HDTV Player will prompt for parental
password during the playing of DVD if it detect the contents contains higher level
restriction. Only after the correct password is keyed in, can the play resume.
If you want to restrict the movies to be played, follow the following steps to set up the
ratings. IF there is a password, key in the right password to enable all options for
modification.
•
Disable, no limited
In this level, the parental control are disabled and all DVD titles can be played no
limited.
•
G, general
General level
•
PG, parental guidance suggested
Parental guidance suggested
•
PG-13,not recommended for those under 13
Parental guidance suggested, not recommended for those under 13
•
R, restricted
Restricted
•
NC_17,not appropriate for those under 17
Not appropriate for those under 17
•
Set password
Set new password to protect parental level
4.6 Record Setting
In "Options" window, activate "Record" option:
Record Type:
Drop down to select MP3 or MPEG2
Select MP3, rip DVD audio into MP3 audio file
Select MPEG2, record DVD movie into MPEG2 video file
Save Record File to:
Specify the path to save the record file
Locate on Disk:
To quickly open the record file's folder
4.7 Appearance Setting
BlazeVideo HDTV Player supports many user-defined skins and you may choose the one you
like. You may also visit our website for more skins.
If you want to change skin during playing, just follow the following operations to change to the
one you like.
1.
Select and preview the skin you like in the drop-down list box.
2.
Confirm after selection Remarks: Click on Default button will be restore to the default
skin.
Remarks: Click on Default button will be restore to the default skin.
4.8 System Information
The information property page shows the current information of current system environment
and current playing DVD disc. They are not changeable.
•
Audio Attributes
Display the parameters about the current audio stream, such as format, sample rate
etc.
•
Video Attributes
Display the parameters about the current video stream, such as format, sample rate
etc.
•
Subpicture Attributes
Display the parameters about the current DVD menu/subtitle.
•
CPU Attributes
Display the information about the CPU.
•
Misc. Attributes
Display other information including BlazeVideo HDTV Player internal version, build
time and the version number of directX.
5. Support
5.1 Technical Support
Before asking for our technical support you should have browsed this online help carefully. We
have collected a list of Frequently Asked Questions here.
If your questions cannot be solved yet, please collect the following information and E-mail us.
We will respond you as soon as possible:
•
Product Order ID
•
BlazeVideo HDTV Player’
s version number
•
Windows Operating System’
s version
•
Hardware configuration (sound card, VGA card, Image Capturing card) and their
specifications
•
The warning message
•
The time and process descriptions about your troubles.
5.2 Frequently Asked Questions(FAQs)
Q: What is the minimum requirement for HDTV Player?
A: Before installing HDTV Player, you should confirm your system comply with the following
minimum requirement:
OS: Windows 2000 or XP;
CPU: Intel Celeron 600MHz or higher;
Device: All DVD drives;
Sound card: PCI sound cards, Integration chipset on Mother Board, USB audio devices etc.
compatible with Windows and stereo speakers;
RAM: 128MB RAM or higher;
Display card: Have 24 Bits resolution and support DirectX, 8MB Video-ROM or more
Direct X: DirectX 9.0 or later
Hardware: HDTV device and its driver should be properly installed
Q: What platform can HDTV Player support?
A: HDTV Player is a simple to use DVD play software using pure software method. It supports
Windows 2000 and XP.
Q: How to install HDTV Player?
A: It depends on the way you buy the software.
1. Register number by email
You can download and install most updated HDTV Player trial version from our website and
register with the registered number you obtain from us by email.
2. CD setup disc
Run setup program supplied with CD and follow the steps to carry out installation.
3. Online download
After you have completed an order, you will receive an order confirmation email which will
provide you a designated website to download HDTV Player setup files.
Q: Why can’t I install HDTV Player in Windows 2000?
A: If your operating system is Windows 2000, when you install HDTV Player, you should logon
as Administrator in order to install the program.
Q: HDTV Player prompts me to upgrade DirectX to version 9.0 or newer versions. Do I
need to upgrade DirectX?
A: HDTV Player need to have DirectX 9.0 or newer versions to run the program. You can
download free latest version from Microsoft website. If you purchased HDTV Player is in CD
version, the disc should have contained DirectX setup disc. Find it and install it in your
computer.
Q: What kind of audio processing functions can HDTV Player offer?
A: 1.Dolby Digital 2/4/6- channels decoding and (floating point) Pro-Logic decoding functions?
2 . Support SPDIF to output Dolby Digital (AC-3) for most real audio quality.
3 . Support MPEG-2 audio effect and LPCM decoding function.
4 . Support two channels DS3D, A3D and QXPander analogue surround sound effect.
5 . Support Windows 2000 multi-channels and SPDIF.
6 . Support DVD sound effect of Microsoft DirectSound standard interface.
7 . Support 2 channels output and mixer arithmetic.
8 . Support multi-channels output of the main stream sound cards
9. Support karaoke and MP3 functions.
Q: What video playing functions can HDTV Player provide?
A: 1.Support NTSC (resolution at 720 x 480) and PAL (resolution at 720 x 576) system.
2.Support different display modes for different screen resolutions. For example, it supports
display modes of 4:3 or 16:9 under the screen resolution of 4:3, or supports display modes of
16:9 under the screen resolution of 16:9.
3.Display correct aspect ratio of the movie.
4. support DVD (MPEG-2) and VCD (MPEG-1) specifications.
5.Strengthened smooth playing and eliminate picture twittering.
Q: What types of multi media formats does HDTV Player support?
A: HDTV Player support most of the multi media formats, including various audio and video
specifications. It support all functions provided by Microsoft. Details of specifications are as
follows:
1. Audio-Video Interleaved (AVI)
2. Motion Picture Experts Group (MPEG, MPG, M2V, DAT)
3. Windows Media? Video (WMV)
6. Digital Video (DV, DV1)
7. Video Object File (VOB)
8. MPEG 2 VIDEO (M2V)
9. WAV (WAV)
10. AIFF (AIF)
11. AU (AU)
12. SND (SND)
13. MIDI (MID)
14. Windows Media Audio* (WMA)
15. MPEG Audio Layer-3 (MP3, MP2, MP1, MPA, M2P, M2A)
16. CDA(.cda) file
Q: Does HDTV Player have functions for change skins?
A: HDTV Player v2.0 provides functions for changing skins that is suitable for you. You can
also visit our website http://www.blazevideo.com to download the most new skins or design
specific skins by yourselves!
Q: Where can I get or buy a HDTV Player?
A: If you want an trial version, you can download it in the “free download area”of our website.
Q: I have already bought the software and I don’t know how to register HDTV Player.
A: 1. You must first install HDTV Player evaluations copy. If you don’
t have it, please download
it from our website.
2. Find a serial number contained in the order confirmation email. It is suggested to print out
the email and keep it properly for future reference.
3. Run HDTV Player, select purchase / register of the right click menu at video window.
4. Carefully input your name and serial number and then click on register.
Q: Why I fail to create Overlay surface on the video card? How to solve the problem?
A: Such alarm will be prompted by HDTV Player if your VGA card cannot provide enough
memory space or don’
t have Overlay mode to display video images.
In this case, it is suggested to reduce the resolution, refreshing rate or color pallet to leave
enough memory space for video images.
Another reason is due to drivers for the VGA card is quite old or don’
t support Overlay mode
which lead to failure of Overlay initiation. Please contact your VGA supplier for most updated
drivers or do as we recommend above.
Q: How to play DVD,VCD,SVCD,MP3?
A: You only need to insert the a disc into DVD-ROM not matter it is DVD, VCD or SVCD,
HDTV Player will launch automatically and play the contents for you as long as your
DVD-ROM support standard read and write formats. It is just insert and play. You don’
t need to
bother which type of format to choose for the disc to play.
If you find that the inserted disc cannot play correctly, it may be due to the non-standard format
of the disc being playing. In this case, please try to use “file”mode to play, like MP3 or some
multi media files made you yourselves.
Q: What are the special features and functions of HDTV Player?
A: HDTV Player ™ is a simple and easy to use multi media play program by pure software
method. It is simple, reliable and suitable for users worldwide. HDTV Player is the best choice
for DVD playing! Dispense of the use of the expensive hardware MPEG-2 decompression card,
it can play DVD with high graphic quality and let you enjoy the best music environment. It
render your multi media computer to be home theater and audio and video center!
Features of the Products:
·Support DVD/VCD/SVCD/MP3 playback;
·Record DVD Video/Audio;
·Personalized user interface;
·Changing of control panel skin;
·Bookmark
·Capture Image
- Parental Control
·Hardware acceleration and motion compensation
·Pan&scan, Letter Box, Smart Strectch to 16:9
·Video Desktop;
·Playback Pictures as Slide Show;
- Special Audio Effect & Equalizer Preset Value
- Visualization
- Smart Media Detector
Q: What kind of video play function can HDTV Player provide?
A: 1. Support NTSC (resolution 720 x 480) and PAL (resolution 720 x 576) specifications.
2. Support different display modes under different aspect ratio and resolution. For example, it
supports display modes of 4:3 or 16:9 under the screen resolution of 4:3, or supports display
modes of 16:9 under the screen resolution of 16:9.
3. Display correct aspect ratio of the movie.
4. Support hardware motion compensation function.
5. Support different DVD (MPEG-2) and VCD (MPEG-1) specifications.
6. Strengthened smooth playing and eliminate picture twittering.
Q: What kind of sound processing can HDTV Player provide?
A: 1. By means of MMX Dolby Digital 2/4/6- channels and Pro-Logic
2. Support SPDIF to output Dolby Digital (AC-3) and obtain most real audio quality
3. Support MPEG-2 sound effect and LPCM software decoding function
4. Support 2 channels analogue surround audio effect
5. Support Windows 2000 multi channels (Creative!) and SPDIF (Crystal 654630/4624)
6. Support DVD sound effect of Microsoft DirectSound standard interface
7. Support 2 channels output and mixer arithmetic
8. Support multi-channels output of main stream sound cards
9. Support Karaoke and MP3 play functions.
Q: Why there is no subtitle when I am playing HDTV Player?
A: This is because that the Overlay driver of your VGA card has not been started normally and
you cannot see subtitles. You can try the following method to correct the problem:
A. Install DirectX 8 or higher version;
B. Update your VGA card driver;
C. Reduce the resolution, color pallet and adjusting refreshing rate.
Q: Does Windows 2000 support S/PDIF?
A: HDTV Player can use S/PDIF. But it depends on whether your sound card supports S/PDIF.
It only works after Windows 2000 have installed Microsoft Service Pack 2 or later versions.
Q: Why Can’t I use S/PDIF 5.1 channels output provided by HDTV Player?
A: First confirm if your sound card support S/PDIF. IF your sound card could not support, you
cannot play using S/PDIF.IF you want to set this option, press audio setting button on the
HDTV Player setting attribute and select DVD play setting option.
Q: Why there is region code protection?
A: The major movie producers in the world have set the standard to divide the world into 6
regions and require the DVD released within in these 6 regions to be set with region code to
protect their interest. Hence, theaters and families in each region will not be able to obtain
cheaper discs from those cheaper regions and has to purchase from the normal channels so
as to safeguard their interest. HDTV Player allows for the user to set a different region code for
5 times. After setting of 5 times, the player will only watch the DVD set for the region or discs
locked for all regions.
Q: How many types of region code protection in DVD-ROM hardware itself?
A: The region code protection in DVD-ROM hardware may be classed into 2 types: A. Phase I
(with no region code protection): The hardware itself will not protect the region and the region
code is protected by the software. In the case of HDTV Player, you may confirm if you have
change the region code for 5 times. If yes, HDTV Player will use the last set region code as the
final setting and lock the region code.B. Phase II (with region code protection): Use the set
region code protect on the hardware as the one for watching movies. As this is the protection
by the hardware itself, you should consult DVD-RMO manufacturer for detail information.
HDTV Player will base on the region code set in the DVD-ROM.
Q: How many times is allowed for me to change the region code after setup the HDTV
Player for the first time?
A: The region code protection is to comply with the major 8 movie producers in the world. You
will have 5 opportunities to change the region code (depend on the DVD ROM) and the region
code will be locked after the 5th setting. From then on, you could only play DVD movies set for
the region or locked for all regions.
Q: My computer has already MPEG1or MPEG2 hardware decoding and compression
card. Can I still use HDTV Player?
A: HDTV Player is a play program for decoding MPEG1 and MPEG2 using pure software
method. HDTV Player may be compatible with hardware compression card, but cannot be run
simultaneously with the hardware compression card.This means that when you are using
HDTV Player, remember don’
t to use hardware compression card at the same time. Because if
hardware compression card and HDTV Player are used simultaneously, it may cause the
playback to stop or even the system will be suspended. If such thing happen, it is suggested to
remove the hardware compression card or close it.
Q: Can all functions of HDTV Player be used in VCD?
A: There are many types and sizes of VCD. For some disc types like music CD, they have
musics / chapters and can be skipped forward and backward. For other VCD, they don’
t allow
for such actions. However, you can fully utilize searching slider to search for the sections you
want to play.Some of the allowable functions that may be used on some VCD depend on the
individual case are listed below:
Skip to next chapter or last chapter, those listed below are for VCD.
Normal setup
OSD setup
Begin to use
Audio setup
Panel setup
Q: Can I use frame capture function during playing VCD movie?
A: HDTV Player v1.0 provides frame capture function and you can use this function during
DVD or VCD playing.
Q: I encounter an error "This DVD-Video content is protected by Macrovision. The
system does not satisfy Macrovision requirement. Can't continue playing this disc",
why ?
A: Macrovision errors usually indicate a failure to authenticate the Macrovision-protected video
content on a DVD disc. Macrovision is the analog copy protection applied to most DVD's, in
order to prevent them from being copied to video tape. Your system, particularly your video
card and drivers, must be configured properly or Macrovision errors can result. There can be
several possible causes of this problem:
Improperly Configured Video Drivers: Make sure you install video drivers according to the
manufacturer specifications. Detailed instructions for properly installing or upgrading video
drivers are usually included in a readme file that accompanies the driver files.
Incompatible Software or Drivers: Please make sure that your DVD decoder is fully compatible
with your current system configuration. This includes video card, version of Windows, version
of DirectX, etc. Be sure to visit the decoder's website for information about system
requirements if you are not completely sure of compatibility. If your decoder is not fully
compatible, then an upgrade for it may be available that will make it compatible.
TV Out Feature May Be Activated: On most notebook PC's, as well as some desktop
computers, the display adapter has a TV Out feature. If you are viewing DVD video on a
computer, you should make sure that only the display that is currently in use is active. For
instance, if you have a laptop and you do not have an external monitor or TV connected to it,
make absolutely sure that this feature is not currently activated. If it is, then the video hardware
will be trying to send a signal to both places, and an error is likely to occur.
No Support For Macrovision In Video Drivers: This is becoming a rare issue, but it can still
happen. Older video cards (mainly, models released before 1997) probably will not support
Macrovision. In addition, some video card makers can sometimes release driver updates even
for current models that are incorrectly configured for Macrovision support. In these cases, the
solution would be to either replace the video card with a newer model, or install a set of drivers
that include Macrovision support in them; depending on what the situation may be.
Insufficient Video Resources: Sometimes a lack of hardware resources can trigger a
Macrovision error. You may want to change your display to 800x600 pixels and High Color
(16-Bit), and see if this makes any difference. Also, if you have recently replaced your monitor
or have your system connected to a different monitor than it usually uses, make sure that
Windows is not still configured to use the previous monitor model. This too can trigger a
Macrovision error.