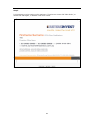
1
RI Advice
Online User Manual for Staff & Practices
2013
Table of Contents
1.
2.
3.
Introduction....................................................................................................................................1
How to Sign In ...............................................................................................................................2
Home Page .....................................................................................................................................3
Explorer Bar Overview ......................................................................................................................3
Navigation Bar Overview ..................................................................................................................3
4. How to Create and Submit an Order ..........................................................................................4
Minimum and Maximum Limits........................................................................................................6
5. Creating a Template Order ........................................................................................................11
6. Search Order History...................................................................................................................14
7. Search Order History - Reordering ...........................................................................................15
8. Adding an Address ......................................................................................................................18
Add Customer Address ...................................................................................................................19
Add New Address ............................................................................................................................20
9. Ordering On Demand Stationery...............................................................................................21
10.
Search & Sort Fields ...............................................................................................................25
Wildcard Searches ...........................................................................................................................25
Syntax Searches ..............................................................................................................................25
11.
Helpful Contacts ......................................................................................................................26
12.
Frequently Asked Questions ..................................................................................................27
Can I use the ‘back’ button on the browser? ..............................................................................27
How do I search for a product using a stock code?...................................................................27
If I don't have a code, can I search another way? ....................................................................27
Why won't my order submit?.........................................................................................................27
What is a Back Order? ....................................................................................................................27
What quantities do I order?...........................................................................................................27
How long will it take for my order to be delivered? ...................................................................27
Can I view these products from the website?.............................................................................28
How do I edit my cart or delete an item?....................................................................................28
How do I view the status of my order?........................................................................................28
1. Introduction
Welcome to RI Advice’s online ordering site. This site is provided by GEON Group, RI Advice’s
print management provider.
The system is entirely web-based and requires no loading of special programmes on your
computer. The system will allow you to:
–
–
–
–
–
Place orders online easily
See a thumbnail of your documents
Print and download PDFs of the document
Track your orders
Create favourite order templates
Like anything new, there is an initial familiarisation period as you get to know the software
and explore its features. We appreciate this and have provided a range of support functions
outside this manual.
Accompanying this User Manual is a comprehensive Frequently Asked Questions (FAQs).
If you have questions about using the system, please check the FAQs first to see whether
your question is answered here.
If you have further enquiries please call the Helpdesk on 1300 556 770 where a GEON Group
consultant will assist you.
The system also has a help facility on each page accessed by clicking on the ‘Help’ icon.
Minimum requirements
GEONline can be used with most W3C compliant browsers, however for commercial reasons;
PCs and laptops with the following specifications only are supported:
Hardware
• Configuration (including network connectivity), which will support internet access,
and speeds commensurate with acceptable organisational levels. A minimum
connection speed of 1mbps per user is recommended.
• Minimum Screen resolution - 1024x768
Software
• Internet Explorer 7 / 8
• Firefox 3.6.x
*Cookies must be enabled
*Java-script must be enabled
About this manual
This manual is as much a tutorial as a reference guide. While GEONline functions are built to
be intuitive, this guide has been designed as a step-by-step guide on how to login and place
orders.
1
2. How to Sign In
Step 1
Start your internet browser and go to https://riadvice.geononline.com
Step 2
Enter your User Code and Password in the fields provided and click Login. Please remember
that your Password is case-sensitive. If you have forgotten your password or would like to
change it, please contact the Help Desk:
Ph:
1300 556 770
Email: [email protected]
2
3. Home Page
Once logged in, you will be presented with a Welcome HOME page similar to the following:
Explorer Bar Overview
•
•
•
Explorer tab – Enables you to set up Hot Links ’for your most frequently used screens
Catalogue tab has the following work areas:
1. Cart - Shows items waiting for checkout in your shopping cart
2. Search - Simple and Advanced search facility for all catalogued items
3. Favourites - Set up and manage favourites for items that are frequently ordered
4. Browse – Enables browsing through product groups within the catalogue
Work tab – Snapshot of orders in cart pending request
Navigation Bar Overview
•
•
•
•
Home tab – Takes you back to the Home page
Ordering tab – A drop-down menu enabling you to manage product orders
Maintenance tab – Enables you to administer personal functions
Security tab - User administration
3
4. How to Create and Submit an Order
Step 1
Click the Staff catalogue on the left hand side of the screen under the Browse section. This will
open the catalogue listing as illustrated in the screen preview below
1. Click on product
catalogue and subcatalogues here
Any catalogues that have a plus (+) sign beside them, can be expanded further to view the
contents within this category as illustrated.
4
Step 2
1. When you click on the product sub-group that you wish to browse, the products in this group
will appear in the main body of the screen. This will include:
• RI Advice product code
• Image of the product that can be downloaded as a low resolution PDF
• Unit of measure
• Stock availability
• Order button
2. Once you have located the item you wish to select, enter the quantity in the box provided.
3. You then click on the Order link at the far right side of the product you wish to order. This will
add the item to your Shopping Cart.
To add more products to your Shopping Cart, you simply follow the above steps again.
4. When your Shopping Cart is complete, click on the Check Out button. The ‘Check Out’ option
navigates you to the checkout area of the online solution where you can preview your cart
before completing the necessary delivery details.
a. To empty the contents of the cart if you have added incorrect products/quantities
to your shopping cart click on the rubbish bin icon.
4. Click on ‘Check
Out’ to complete
order
2. Enter
quantity of
the product
you need
4a. Click on bin
to clear cart
1. Select product group
you wish to browse
3. Click on
‘Order’ button
5
Step 3
If you have access to more than one (1) Cost Centre, ‘Select’ the appropriate cost centre the
product/s will be charged against; otherwise go to next step.
Click on ‘Select’
Minimum and Maximum Limits
When ordering a product that is over/under the minimum and maximum quantities, the online
solution will automatically round up/down your order quantity to fall within the defined thresholds;
a message will notify you when clicking the ‘Check Out’ button.
6
You can quickly identify the minimum and maximum quantities assigned to a stock item by clicking
on the ‘Product Description’ of any product and then clicking on the ‘Stock’ tab which will bring up
the stock metrics as identified below.
Click on ‘Product
Description’
7
Step 4
•
‘After selecting the ‘Check Out’ button you will be taken to the Order Details screen. Add a
‘Reference’ if required. The Reference is a free text field that can be used to type in
purchase order numbers, contact names, reference numbers etc., as a way of
differentiating orders.
Step 5
•
•
•
The delivery address provided on the registration page will automatically populate the
required fields.
If you wish to modify the pre-populated address, simply write over the existing address.
You can also save this as your default address by selecting the ‘Save as Default Address’
option below the address fields.
To complete the order, click on the Submit Order button and your order will be processed.
1. Enter Reference
number if desired
4. Click on
‘Submit Order’
2. Delivery address
populated, change if
required
3. Select ‘Save as
‘Default Address’ to
keep new address
as default
8
Step 6
Order Submission screen – This screen is the final step in the ordering process and displays your
‘Order Number’ that can be used to follow-up your products with the GEON Helpdesk. It is
important to note this number for any future referencing.
To complete your session click ‘Exit’.
9
Step 7
When your order is successfully processed by the system, you will receive an email notification
which will outline all the details of your order.
The order number located in the email is the reference used should you need to validate any
information regarding your order with the help desk.
10
5.
Creating a Template Order
The following functionality allows you to create a ‘Template Order’ which you can re-use as
required removing the need to create new orders on every occasion. This feature is particularly
beneficial for users who order the same products consistently with a higher than normal frequency
pattern.
Step 1
•
•
Click on the ‘Ordering’ tab
‘Select ‘Template Orders’ from the drop-down list which will navigate you to the
appropriate screen for creating a template order. Template orders can be used as a short
cut should you order the same products repeatedly.’ Click on ‘Add’ to begin configuring
your ‘Template Order’
1. Click on
‘Ordering’
2. Click on
‘Template Orders’
3. Click
on ‘Add’
Step 2
•
Select the appropriate ‘Cost Centre’ by clicking on ‘Select’
Click on
‘Select’
11
Step 3
•
•
Enter a name against your template so that you can easily access at a later date.
Click on ‘Add’ to begin assigning products to your template order.
1. Enter a
‘Template Name’
2. Click ‘Add’ to
assign stock to the
template
Step 4
•
Click on the ‘Search’ link.
1. Click on the
Search link
Step 5
•
•
If you do not know the item code you can search by key words i.e.: Increases. Your search
will then return a list of closest matches to your search criteria.
Once you have located the item you require click the ‘Order’ link as highlighted to add an
item into your template.
1. Enter the
product code
or key words
2. Click on ‘Order’
to add product into
your template
12
Step 6
•
•
Click ‘Add’ to continue adding products to the template order.
When you have added all the appropriate products into your template click on ‘Save and
Exit’ which will then save the template into your template list for future use.
2. Click ‘Save
and Exit’ to save
your template
1. Click ‘Add’ to
continue adding
products
Step 7
•
•
•
To locate your pre-defined templates choose the ordering tab, then select template orders
from the drop-down list. Click the clear icon ‘ ’ to remove the date from the ‘Date Raised
(From)’ field.
Click on the ‘Refresh’ button which will return a list of all your template orders.
To use the template, simply click on the ‘Use’ link and then complete the delivery details
and complete your order. Please refer to Step 3 under section Submitting an Order.
2. Click on
Refresh button.
1. Click on ‘the
clear icon
3. Click on ‘Use’
template
13
6.
Search Order History
The following functionality allows you to search your order history pipeline to follow up on an order
or re-use the order details instead of creating a new order from scratch. The status of orders are
updated automatically as they are fulfilled by the GEON Warehouse.
Step 1
•
•
Go to the navigational menu on the left of the screen and lick on ‘Ordering’
Click on ‘Order History’ from the drop-down menu
1. Click on
‘Ordering’
2. Click
on ‘Order
History’
Step 2
•
•
Click the clear icon
to remove the date from the ‘Date Raised (From)’ field. Click on
‘Refresh’ to display all previous orders under your user profile.
Click on the ‘Reorder’ link if you would like to recycle/re-use your existing order.
This page provides you with a complete history of all orders except draft orders. Note: Draft Orders
can be found by clicking on Ordering > Draft Orders.
The Order Number, Cost Centre Name, Reference (if populated), Date Created and Status are all
visible on this page so that you can quickly get a view of your order history.
For users with a large order history, you have the option of filtering your history by date, reference,
Cost Centre name and number. The search will bring back all closest matches to your search
criteria.
1. Click on the
‘Refresh’ button
2. Click on
‘Reorder’ to
recycle the order
14
7.
Search Order History - Reordering
The Order History – Reordering functionality is similar to that of the ‘Template Orders’. It allows
you to re-use an existing order that you have previously placed without having to re-enter all the
product and delivery address details.
By utilising this option you can reduce the processing time of an order. Please refer to Step 2 under
section Search Order History.
Step 1
•
After you have clicked on the ‘Reorder’ link, you will be directed to Order Details.
Step 2
•
•
If you wish to modify the pre-populated address, simply write over the existing address.
You can also save this as your default address by selecting the ‘Save as Default Address’
option below the address fields
To complete the order, click on the Submit Order button and your order will be processed
3. Click on
Submit Order
to process
your order
1. You will be directed to the
Order Details screen
2. If you have edited the address
fields and want to save the
address, click the this option
15
Step 3
Order Submission Screen – This screen is the final step in the ordering process and displays your
‘Order Number’ that can be used to follow-up your products with the GEON Helpdesk. It is
important to note this number for any future referencing.
Once you have noted your ‘Order Number’, click on the ‘Exit’ button highlighted below to navigate
out of the ‘Order Submission’ screen.
16
Step 4
When your order is successfully processed by the system, you will receive an email notification
which will outline all the details of your order including delivery address, contact name, business
unit and products ordered.
You can use these emails to build a history of your ordering pattern.
17
8.
Adding an Address
The following section outlines how a user can ‘Add’ new addresses to their delivery options within
the online solution.
Step 1
Click on the Maintenance tab; click on User Address Maintenance from the drop-down menu.
Click on the Maintenance tab;
click on User Address
Maintenance from the dropdown menu.
Step 2
If you have access to more than one (1) Cost Centre, ‘Select’ the appropriate cost centre the
product/s will be charged against; otherwise go to next step.
Click on ‘Select’
18
The screen will show two Add buttons, “Add Customer Address” and “Add New Address” (fig1)
(fig 1)
Select:
Add Customer Address
or
Add New Address
Add Customer Address – allows the user to set a customer address as a default address.
1. Click Add Customer Address button (fig 1)
2. Select the required delivery address (fig 2)
3. Confirm that the address details are correct, alter if necessary (fig 3)
4. Click Save and Exit button (fig 3)
(fig 2)
Select the required
delivery address
(fig 3)
Click ‘Save and Exit
19
Add New Address – Allows the user to create a new address
1. Click Add New Address button (fig 5)
2. Fill out the address fields (fig 6)
3. Click Save and Exit button (fig 6)
(fig 5)
Select Add New
Address
(fig 6)
Click ‘Save and Exit
20
9.
Ordering On Demand Stationery
Step 1
Click on the Staff catalogue on the left hand side of the screen under the Browse section. This will
open the catalogue listing as illustrated in the screen preview below
1. Click on product
catalogue and subcatalogues here
Step 2
When you click on the product sub-group that you wish to browse, the products in this group will
appear in the main body of the screen.
Enter
quantity of
the product
you need
•
•
•
Click ‘Order’
Once you have located the item you wish to select, enter the quantity in the box provided.
You then click on the Order link at the far right side of the product you wish to order. This
will add the item to your Shopping Cart.
Click on the Order action, located at the far right side of the product you wish to order.
Note If you have access to more than one (1) Cost Centre Select the relevant Cost Centre
(see Step 3), otherwise go to step 4.
21
Step 3
Click on ‘Select’
Click on ‘Select’
22
Step 4
1. Complete all fields
2. Click Preview to review what the finished product will look like
Complete all the
fields
Click on ‘Preview’
to see what the
finished product
will look like when
printed
23
Step 5
It is important to review entries on the stationery. If entries are correct click ‘Place Order’, to
amend click ‘Edit Again’, to abandon order click ‘Cancel’
24
10.
Search & Sort Fields
The search function offers simple or advanced search features. Simple will match all fields whereas
Advanced will match specific fields. Results are displayed within the Browse Catalogue screen.
Wildcard Searches
Function Example Expected Return
*
123*
Find all matches starting with 123. Example returns ‘123’, 12315, 123000005,
1231115 etc.
?
123?5
Find any matches that are five characters long starting with ‘123‘ ending with
‘5‘. Example returns 12315, 12325, 12335, 12345 etc.
*
123*5
Finds any matches starting with ‘123‘ ending with ‘5‘. Example returns
123000005, 12305, 1231115 etc.
?*
123?5* Finds any matches starting with 123 with any character in the 4th position,
followed
by
a
5
and
any
characters
following
the
5.
Example returns 12315, 12325, 123A5, 123B5, 123A5000, 123B500 etc.
Syntax Searches
When using syntax searches, each field is scanned for the content of the search.
Function Search
Expected Return
Function/Example
Envelopes
Would return all products with Envelopes in any of the description
fields.
Envelopes ENV
Would return all products containing either Envelopes or ENV in the
same description fields.
OR
Envelopes
OR Would return the same results as the search above.
ENV
AND
Envelopes AND Would return all products containing both Envelopes and SS in the
SS
same description field.
Quotes " " are used when combining separate words e.g. "Head Office" to treat as single search
criteria. A sample search example would be Envelopes AND "Head Office" which would return all
products containing both Envelopes and Head Office in the description line of the same field.
25
11.
Helpful Contacts
GEONline and Progress of Orders.
GEON staff are available to support you with catalogue and delivery enquiries.
–
–
Email [email protected]
Phone 1300 556 770 – Business Hours (EST)
26
12.
Frequently Asked Questions
ORDERING YOUR STATIONERY AND SALES MATERIALS
Can I use the ‘back’ button on the browser?
No. To control navigation use the options made available on the resident web page. Pressing
the ‘back’ button will log you out of the website
How do I search for a product using a stock code?
Stock codes are unique identifiers that differentiate customer products from one another.
Each code consists of 10-20 characters, and can be made of letters or numbers. eg: RI280B.
When searching using a code, you can enter any part of the code in the GEONline search
field with the wildcard symbols which will return all closest matches. ie. %280%
Note, the wildcard symbols are the percentage signs (%).
If I don't have a code, can I search another way?
There are other criteria that you can also use when searching for a stock item:
Description – search using key words (Some words may be abbreviated or shortened to fit
the entire name of the stock item into the system.)
Your Reference – search by using a portion of the reference code. This narrows down your
search to a particular group of items. Eg: Full code: RI208B – Partial code: RI208 (Using
RI208 will locate all the correct product in the system. Using RetireInvest will locate all the
RetireInvest products)
icon to guide you on other advanced search
Wildcard and Syntax Searches – Click on the
features.
Why won't my order submit?
If you do not have adequate delivery address details in the system, your order will not be
processed (an error message will confirm this).
Your delivery address can be located with the ‘Delivery’ tab which is contained in the ‘Order
Details’ screen. There, you can allocate an existing address, or add the company name if it is
missing. Delivery addresses which are not contained in the pre-defined drop-down list can be
added by choosing the ‘One-Off Delivery Address’ in the drop-down list.
What is a Back Order?
When a stock item shows unavailable, there is no stock of that item in the warehouse.
Orders may still be placed against the item, and when the replenishment of stock arrives in
the warehouse, the back-orders will then be despatched.
What quantities do I order?
When ordering stock items, the UNIT quantity may vary.
Each – means that you can order in single units
Box 250 – some items (eg: envelopes) come grouped, so ordering 1 = 1 x box of 250
How long will it take for my order to be delivered?
All orders placed before 12 noon will be despatched by road freight the same business day,
unless otherwise agreed.
27
The below table highlights the standard delivery timeframes across Australia.
Destination
Delivery if order received
prior to 12 pm
Delivery if order received
after 12 pm & before 4 pm
NSW Country
Next Working Day
Within 2 Working Days
Melbourne Metro
Next Working Day
Within 2 Working Days
Victoria Country
2 Working Days
2 Working Days
Brisbane Metro
Next Working Day
Within 2 Working Days
Qld Country
2 Working Days
Within 3 Working Days
Adelaide Metro
2 Working Days
2 Working Days
SA Country
3 Working Days
Within 4 Working Days
Perth Metro
5 Working Days
5 Working Days (Deliveries only
(Deliveries only on Tuesday &
on Tuesday & Friday)
Friday)
WA Country
5 Working Days
(Deliveries only on Tuesday &
Friday)
6 Working Days (Deliveries only
on Tuesday & Friday)
Sydney Metro
Next Working Day
Next Working Day
Nthn Territory
5 Working Days
5 Working Days
Tasmania
4 Working Days
Within 4 Working Days
ACT
Next Working Day
Within 2 Working Days
Please note: the above delivery times are a guide only.
Can I view these products from the website?
Most of the products can be viewed online by clicking on the thumbnail preview.
How do I edit my cart or delete an item?
Items can be removed or added to your cart by simply clicking the ‘Edit’ button which can be
found in the ‘Order Details’ screen. If for an example an item has the incorrect quantity
allocated, you can click on ‘Edit’ and adjust the quantity to suit.
Adding items to the cart is as simple as clicking on the ‘Add’ button, then clicking on the
‘Search’ link which will navigate you to the Catalogue where you can add items. Note, once
you have added the items you will need to click on ‘Check Out’ to update the cart.
How do I view the status of my order?
You can view the status of your order by navigating to the option menu on the left hand-side
and clicking on ‘Order History’. This link, will take you to a new view where you will need to
click on ‘Refresh’. Once you have done this a list of all your orders and their status will
appear.
Status Descriptors:
•
•
•
•
New = this refers to any new orders that you have made that are yet to be
processed by GEON’s warehouse.
Confirmed = Orders that have been processed by GEON’s warehouse.
Closed = Orders that have been processed and dispatched.
Back order = Orders that do not have sufficient stock on hand for successful
completion of the order.
28