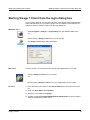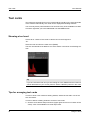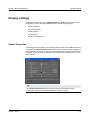
1
Visage 7 Client
User Manual
This software is CE-compliant and is defined as a class IIa medical device in accordance with Medical Devices Directive 93/42/EEC.
All product and company names are trademarks or registered trademarks of the respective companies.
Some of the specifications described herein may not be currently available in all
countries. Please contact your local sales representative for the most current information.
Caution:
US federal law restricts this device to sale by or on the order of a physician
(or properly licensed practitioner).
Visage 7 is the successor of the Visage PACS/CS product family.
Information in this manual may be subject to changes without prior announcement.
Manufacturer
Visage Imaging GmbH
Lepsiusstraße 70
12163 Berlin, Germany
Phone: +49 (0) 30 700968-0
www.visageimaging.com
US Distributor
Visage Imaging, Inc.
12250 El Camino Real,
Suite 230
San Diego, CA 92130, USA
www.visageimaging.com
Support and Safety Contact
Phone: +49 (0) 30 700968-30
Email: [email protected]
Copyright © Visage Imaging GmbH. All rights reserved.
Document Version 29.00
Table of Contents
System Overview
7
Intended use ............................................................................................................ 7
License management ............................................................................................... 8
System requirements ............................................................................................... 9
Data protection and data security........................................................................... 10
Access control and authentication ....................................................................... 10
Audit trails ............................................................................................................ 11
Overview of the product documentation................................................................. 12
User and administrator documentation................................................................ 13
Information on using the Visage manuals............................................................ 14
Information on using the online help systems...................................................... 15
Starting and Ending the Program
17
Installing the Visage 7 Client ................................................................................. 17
Starting Visage 7 Client.......................................................................................... 18
Starting Visage 7 Client from the login dialog box.................................................. 19
Changing your password........................................................................................ 20
Exiting Visage 7 Client ........................................................................................... 20
Getting Started
23
The Visage 7 Client workflow ................................................................................. 23
The general Visage 7 Client window layout ........................................................... 24
Visage 7 Client windows...................................................................................... 25
Menu bar.............................................................................................................. 26
Visage 7 Client
1
Table of Contents
Study Browser
27
Query section ......................................................................................................... 28
Filter and search criteria ...................................................................................... 29
Starting and resetting a search............................................................................ 30
Query presets......................................................................................................... 30
Context menu of the preset buttons..................................................................... 31
Study/series list ...................................................................................................... 31
Information in the study/series list ....................................................................... 31
Context menu of the study/series list................................................................... 32
Loading, retrieving or removing data ................................................................... 34
Session management ............................................................................................ 34
Preview images ...................................................................................................... 36
View Window
37
Protocols ................................................................................................................ 38
Viewer segments.................................................................................................... 39
3D viewer segment .............................................................................................. 41
3D rendering techniques in the 3D viewer ........................................................ 42
Projection modes in the 3D viewer.................................................................... 43
3D viewer context menu.................................................................................... 43
MPR viewer segment........................................................................................... 46
Navigation crosshair.......................................................................................... 47
Compositing modes for thick slices................................................................... 48
MPR viewer context menu ................................................................................ 48
2D viewer............................................................................................................. 51
Interactive arrangement of viewer segments and image data ............................. 52
Layout toolbar ................................................................................................... 52
Image Series tool card ...................................................................................... 52
Mouse operation .................................................................................................... 54
Toolbars ................................................................................................................. 56
Working with toolbar icons................................................................................... 56
Showing or hiding toolbars .................................................................................. 57
Standard tools...................................................................................................... 57
Navigation tools................................................................................................. 58
Orientation tools ................................................................................................ 59
Image size tools ................................................................................................ 59
2
Visage 7 Client
Table of Contents
Rotate/Flip Images tools ................................................................................... 60
Dataset Navigation tools ................................................................................... 60
Annotation and Measurement tools .................................................................. 60
Snapshot and Cine tools ................................................................................... 66
Cropping tools ................................................................................................... 66
Remove tools .................................................................................................... 67
Fusion Registration tools................................................................................... 68
Viewer Linking tools .......................................................................................... 69
CPR/Vessel tools .............................................................................................. 70
Brain Perfusion tools ......................................................................................... 71
Multiphase tools ................................................................................................ 72
Lesion tools ....................................................................................................... 73
Labels tools ....................................................................................................... 74
Miscellaneous tools........................................................................................... 74
Tool cards .............................................................................................................. 76
Showing a tool card ............................................................................................. 76
Tips for arranging tool cards ................................................................................ 76
Visage 7 Client tool cards .................................................................................... 78
Templates tool card (3D viewer) ....................................................................... 78
Display tool card................................................................................................ 79
3D Color Map tool card (3D viewer).................................................................. 81
Cine tool card .................................................................................................... 85
Line Profile tool card ......................................................................................... 88
SUV tool card .................................................................................................... 89
Vessels and Centerlines tool card..................................................................... 90
Bone tool card ................................................................................................... 92
Edit tool card ..................................................................................................... 94
Structures tool card ........................................................................................... 96
Statistics tool card ............................................................................................. 98
LV Analysis and LV Results tool cards ............................................................. 99
Calcium tool card ............................................................................................ 103
Batching tools....................................................................................................... 104
Batching tool card .............................................................................................. 104
Stacked Batching ............................................................................................ 104
Horizontal Rotational Batching........................................................................ 105
Vertical Rotational Batching ............................................................................ 106
Batching toolbar................................................................................................. 107
Additional tools for time series analysis ............................................................... 109
Time-density analysis for ROIs.......................................................................... 109
Subtraction for time series ................................................................................. 109
View window main menu...................................................................................... 110
Visage 7 Client
3
Table of Contents
Export Window
113
Snapshots ............................................................................................................ 115
Report editor toolbar ............................................................................................ 116
Report text............................................................................................................ 117
Quality Assurance
119
Query section ....................................................................................................... 120
Filter and search criteria .................................................................................... 121
Starting and resetting a search.......................................................................... 122
Presets bar ........................................................................................................... 122
Context menu of the preset buttons................................................................... 123
Performed Procedures list.................................................................................... 123
Information in the Performed Procedures list .................................................... 123
Menu and Icons of the Performed Procedures list............................................. 124
Scheduled Procedures list.................................................................................... 126
Information in the Scheduled Procedures list .................................................... 126
Menu of the Scheduled Procedures list ............................................................. 126
Visage 7 Client configuration
127
General preferences ............................................................................................ 127
Monitor Configuration ........................................................................................ 128
Window/Level Presets ....................................................................................... 128
Keyboard Shortcuts ........................................................................................... 129
Tool Palette........................................................................................................ 129
Properties .......................................................................................................... 130
Display settings .................................................................................................... 131
Viewer Properties .............................................................................................. 131
Reset All Warnings ............................................................................................ 132
Render Settings ................................................................................................. 132
UI Appearance................................................................................................... 132
Streaming Compression .................................................................................... 133
4
Visage 7 Client
Table of Contents
Protocol configuration .......................................................................................... 133
Prioritizing and disabling protocols .................................................................... 133
Save Protocol wizard ......................................................................................... 134
Reloading protocols ........................................................................................... 136
Index
Visage 7 Client
137
5
Table of Contents
6
Visage 7 Client
System Overview
In this section you will find an overview of the Visage® 7 product and its data security concept, as well as a brief introduction to the Visage user documentation.
Intended use
Visage is a system for distributing, viewing, processing, and archiving medical images within and outside health care environments.
The Visage server receives image data in DICOM format via the hospital network.
This provides universal connections to archives, modalities, and workstations. The
supported modalities are listed in the DICOM Conformance Statement.
Besides general image interpretation and processing tools, Visage provides specific
tool sets for several clinical applications, including:
•
CT/MR angiography, e.g. for vascular analysis and stent planning
•
Cardiac analysis, including calcium scoring and functional assessment of cardiac CT data
•
Neuroradiology, including CT and MR brain perfusion analysis
•
Oncology, including SUV analysis and lesion marking and analysis
Visage is to be used only by trained and instructed health care professionals. It can
support physicians and/or their medical staff in providing their own diagnosis for
medical cases. The final decision regarding diagnoses, however, resides with the
doctors and/or their medical staff in their own area of responsibility.
Although the web and thin client technologies allow the software to be run on a variety of hardware platforms, for diagnostic purposes the user must make sure that the
display hardware used for reading the images complies with state-of-the-art diagnostic requirements and currently valid laws.
Only DICOM for presentation images can be used on an FDA approved monitor for
mammography for primary image diagnosis.
Only uncompressed or non-lossy compressed images must be used for primary image diagnosis in mammography.
Visage 7 Client
7
License management
System Overview
License management
Every Visage installation comes with a license code. Without it the software will not
run on the server.
Licenses
The license code serves as copy protection and controls which product options are
enabled. This includes:
•
The maximum number of DICOM connections for calling/importing data from the
network onto the Visage system, and for sending data from the Visage system.
•
How many users may access data on the server simultaneously via Visage Web
Client, or via Visage 7 Client (also referred to as thin client). Different viewer
types require different licenses.
•
The maximum data volume on the server.
•
Activation/deactivation of audit trails.
•
The availability of the archive option.
•
The availability of the cardiac analysis option for Visage 7 Client.
•
The availability of the oncology option for Visage 7 Client.
•
The availability of the neuro option for Visage 7 Client.
Visage uses the so-called “floating licenses” concept. This means that a license is
not bound to a particular user name or a dedicated workstation or computer. A license for 10 users means that 10 users can work with Visage 7 Client simultaneously. If an 11th user tries to log on, he or she is told to try again later. Once one
of the original 10 users logs off, logon of the 11th user will be permitted. Of course,
licenses can be upgraded.
Upgrade
When upgrading an installation, the old license becomes invalid. The new Visage license, which comes with the upgrade, must be installed.
If a larger data volume was licensed in a previous version, this may lead to the oldest data being deleted from the system after the new license has been installed, depending on the “auto-delete” settings defined by the system administrator.
8
Visage 7 Client
System Overview
System requirements
System requirements
When describing system requirements we make a distinction between server and
clients.
Server
Visage runs on standard server platforms. Server hardware must be qualified by
Visage Imaging. For a detailed server hardware and software specification please
contact your sales representative.
Clients
These are the minimum hardware and software requirements for Visage 7 Client
PCs or Macs.
•
Operating system and software
Microsoft Windows XP (32 bit and 64 bit editions),
Microsoft Windows Vista (32 bit and 64 bit editions),
Microsoft Windows 7 (32 bit and 64 bit editions),
Mac OS X 10.5, or
Mac OS X 10.6.
•
Computer/processor
Intel Pentium IV or equivalent
•
Main memory
1 GB RAM
•
Graphics card
Any graphics card that supports a screen resolution of at least 1024x768 pixels
and true color.
For optimum performance on very high resolution monitors, we recommend
graphics cards supporting OpenGL acceleration. For details on qualified cards
please contact your Visage Imaging representative.
•
Monitor
Single monitor or up to four monitors for viewing and one or more additional
monitors for study browser, reporting, or quality assurance. All monitors used for
viewing image data must have the same pixel resolution and orientation (portrait
or landscape).
•
Other
For latency free operation in local area networks (LAN) we recommend the use
of Gigabit Ethernet.
In order to be able to use the client in wide area networks or through the Internet,
the Visage streaming technology has been optimized to support even very slow
networks, down to a bandwidth of 512 Kbit/s. However, for smooth operation we
recommend a bandwidth of more than 6 MBit/s and a latency of less than 60ms.
Visage 7 Client
9
Data protection and data security
System Overview
Temporary harddisk space: If you intend to create movies on the Cine tool card
of the Visage 7 Client the system will temporarily occupy local harddisk space
during movie creation (min. 1 GB or more for large movie files).
Data protection and data security
Data relating to individuals is subject to data protection. In this regard, please ensure compliance with all applicable laws and regulations in your country.
Visage provides extensive security mechanisms that help you assure data protection and data security.
On the administration platform the system administrator can also activate the audit
trail option. This supports the strict regulations concerning patient data protection
and data security according to US law.
Note
For security reasons, it is not permitted to make changes to the Visage product
and its database. Contravention of this will lead to all guarantees being revoked
and under some circumstances may even be violating applicable laws.
Access control and authentication
Each user must log into the Visage system with a user name and password. The
Visage server checks these entries. Only if they match is access to the system
granted. Access authorization ensures that users can only view data for which they
have access rights.
Login and password
To ensure that user accounts and their passwords are effectively protected from unauthorized access:
•
passwords are encrypted
and, if this has been configured
•
passwords will expire
•
failed login attempts are recorded, and multiple failed login attempts will cause a
user account to be locked.
Note
Recording logins and other actions only makes sense if all users on the system
have their own user names and passwords.
10
Visage 7 Client
System Overview
Multi-session
operation
Data protection and data security
A user may log on to Visage more than once from a single or multiple client machines. This allows users to work from more than one clinical workplace simultaneously and view the same data there.
Each session makes use of (and thereby blocks) one license.
Auto logoff
Visage can be configured so that a logged in user is logged off from the system after
a configurable period of time with no user interactions. This prevents licenses from
being unnecessarily blocked and stops any unauthorized persons accessing data if
a user has logged on but has forgotten to log off again.
Service access
permissions
Remote access for service purposes must be granted explicitly. It is therefore up to
you if and to what extent you wish to grant access rights to service.
•
Full Access
Service has read and write permissions. This means that service personnel can
analyze problems and can solve these problems or change settings. Service access is logged.
•
Limited Access
Service has read permission only.
•
No Access
Service has no access.
Note
Please note that with full access, service is granted unlimited access. Under certain circumstances this may include patient data which has not been anonymized.
Audit trails
Logging of user actions in Visage 7 Client occurs in so-called audit trails. Audit trails
are recordings of access-controlled actions. They are the proof that access to patient data is monitored.
A message informs users that their actions may be monitored.
The following activities are recorded if the audit trail option has been activated by
the system administrator:
Visage 7 Client
•
Changes to access rights with accessing user, date and time
•
Viewing, exporting, printing, or deleting patient data
•
Changes to archived images with time, date and user
•
Login and logout, and failed attempts to log in
•
Every query/retrieval
•
Service sessions (local or remote)
11
Overview of the product documentation
•
System Overview
Software updates, as well as backup and restore
In addition the highest original number of images is recorded, to compare with the
current number of images.
If audit trails must be kept for a number of years, it is the responsibility of the system
administrator to ensure that the relevant log files are archived according to the requirements that apply to your institution and country.
The system administrator is the only user who has access to the audit trails via a
dedicated viewer.
For larger systems, a separate database server can be made available for audit
trails.
Overview of the product documentation
The Visage product documentation distinguishes between three user groups and
the tasks that these groups typically perform.
•
Clinical users
These users access the Visage server from a Visage Web Client or Visage 7 Client in order to review 2D, 3D, or report data.
The Visage Web Client and Visage 7 Client user documentation addresses this
user group.
•
System administrator
The system administrator of the hospital will perform system maintenance and
adapt server configuration and database settings to changes in the system and
network environment. This user group works on the administration platform.
The Visage administrator documentation addresses this user group.
•
Service personnel
This user group will install the system and subsequently perform initial system
configuration. This group will need the installation manual for system installation and the administration documentation for initial system configuration.
In this section you will find an overview of the available product documentation as
well as information on how to work with the Visage manuals and online help systems.
12
Visage 7 Client
System Overview
Overview of the product documentation
User and administrator documentation
The Visage product documentation addresses the information needs of each of
these user groups.
User documentation
The Visage Web Client and Visage 7 Client user documentation addresses clinical
users.
It comprises:
•
The Visage Web Client user documentation
In these documents clinical users will find a complete description of the Visage
Web Client user interface and program functionality.
In the printed user manual you will find a complete description of all Visage Web
Client functions.
The online guide offers additional information and task-oriented descriptions
presented in a step-by-step style. Online guides are available in English and
German.
Visage Web Client also features a context-sensitive online help system which
you can call up right from the user interface. The context-sensitive help topics
explain all the user interface elements and features of the currently displayed
window in your native language. For the English and German user interface the
online help system also contains task-oriented step-by-step instructions.
•
The Visage 7 Client user documentation
The user manual (this document) provides a complete description of all Visage
7 Client functions.
Visage 7 Client also features an online help system, which you can call up from
the Help menu. The various help topics explain the user interface of the client
software.
Administrator
documentation
The Visage administrator documentation supports system administrators in a hospital. It helps them with user management and adapting the system to changes in the
overall network environment, if this becomes necessary.
The Visage administrator documentation also helps service personnel with initial
system configuration tasks immediately after system installation or update.
•
The Administration Manual
This document is available as a pdf file on your program CD/DVD. You can print
out this document if you prefer reading on paper.
•
The administration platform Online Help System
The Visage administration platform features a context-sensitive online help system. The context-sensitive help topics explain the parameters you will find and
the settings you can make on the various configuration windows. Whenever relevant, background information on selected topics is also given in the online help
system.
Visage 7 Client
13
Overview of the product documentation
System Overview
Service
documentation
Installation instructions are available for Visage Imaging service personnel only.
Release notes
Release notes contain additional useful information about the software. They focus
on technical details.
Information on using the Visage manuals
Document structure
In order to help you locate relevant information in the Visage manuals quickly, they
are subdivided into chapters.
In the Visage 7 Client user manual each chapter addresses a specific window or
tab card of the Visage 7 Client application program. The chapter on starting and
ending the program and the Getting Started chapter address new users of the system specifically.
The Table of Contents and Index sections help you locate a topic quickly.
Layout conventions
To help you find and interpret the appropriate information, the following visual orientation aids are used here:
•
Operating steps
Single-step actions are presented as plain text.
1. Operating steps in sequences of actions are numbered.
•
Bold text
Names of windows, menus, and functions are shown in bold typeface. Sections of
text given particular emphasis are also highlighted in bold type.
Tips, notes,
warnings
Tips, notes, and warnings are specifically highlighted in the text.
Tip
Tips provide additional useful information about a topic. Tips, for example, help
you organize your work more efficiently.
Note
Notes mark text that you should pay special attention to. A note may, for example,
emphasize a piece of information relating to the safety of functions, but where no
danger is involved.
Caution
Caution is used to indicate the presence of a hazard which can cause personal injury to a patient or damage to the equipment.
14
Visage 7 Client
System Overview
Overview of the product documentation
Information on using the online help systems
The Visage Web Client and Visage 7 Client user interfaces, and the Visage administration platform feature an online help system each.
Calling up online
help
Call up the Visage 7 Client online help window from the Help menu.
The first topic of the Visage 7 Client online help system is displayed.
Mac users
The Visage Client will launch the PDF viewer of your system in order to view the online documentation. Search and navigation functions depend on the PDF reader
that you are using on your system. The remainder of this section does not apply.
Windows users
Use the various navigational features of the online help system to search for the information you need.
Tab cards
The left half of the Visage 7 Client online help window shows four tab cards for quick
access to the help contents.
This tab card contains a table of contents similar to that of a printed book.
1. Double-click the book icon to display a topic and show subheadings.
2. Click the page with question mark icon to display the text of a help page in the
right half of the help window.
You can search for index entries here.
1. Enter a word to search for.
-OrScroll through the alphabetical index.
2. Double-click an index entry to display the information about it.
This tab card permits a full-text search.
1. Enter a word to search for.
2. Press the RETURN key.
All help topics containing this word will be listed.
Visage 7 Client
15
Overview of the product documentation
System Overview
On this tab card you can set bookmarks for help topics that are of particular interest
to you.
1. Display the topic you want to add to the Favorites list.
2. Click Add.
Links to other topics
In various help topics you will find links that will take you to more detailed information about a subject.
Text links are highlighted by blue text color and underline.
Browse sequence
Use the next and previous icons in the footer of each help topic to scroll through
the online help system topic by topic.
Help window toolbar
The upper part of the help window shows a number of icon buttons. Use these buttons to adapt the help window, scroll through topics, and print topics.
Shows the online help tab cards if they are hidden and then changes to the Hide button.
Hides the online help tab cards if they are shown and then changes to the Show button.
Returns to the previous topic.
Returns to the next topic (after you have clicked Back).
Prints the current topic on the default printer.
Shows a menu with more help functions.
16
Visage 7 Client
Starting and Ending the Program
This section tells you how to start Visage 7 Client, how to log onto the server, and
how to close Visage 7 Client properly.
Installing the Visage 7 Client
Before you can start Visage 7 Client for the first time you must connect your client
PC or Mac to the Visage server and install the Visage 7 Client software on your
computer.
1. Open your Internet browser.
2. Enter the Visage server address and "/download" in the Address Bar.
The Visage 7 Client download screen opens.
Visage 7 Client
17
Starting Visage 7 Client
Windows users
Starting and Ending the Program
Click the download link for the Visage Client .exe (Windows) under Download Thin
Client Software.
This will start the Visage 7 Client setup procedure, which will install the client software on your PC. Follow the instructions in the setup windows.
After program installation, Visage 7 Client will be available in the Windows Start
menu, and an icon will have been created on your Windows Desktop.
Mac users
Click the download link for the Visage Client .dmg (Mac) under Download Thin Client Software.
The .dmg file is automatically unpacked and becomes an application file (.app). You
can now double-click the file to open the Visage client.
1. Copy or move the file into your Applications folder to install it permanently.
2. Drag&Drop the application file into the dock to create a shortcut.
Tip
From the Visage 7 Client download screen, you can also download the user manuals for the Visage 7 Client and Visage Web Client as pdf files.
Starting Visage 7 Client
If your system and user account have been configured for so-called IWA (Integrated
Windows Authentication) starting the Visage 7 Client software is very straightforward.
Double-click the Visage 7 Client icon on your desktop.
-Or-
Select Programs > Visage 7 > Visage 7 Client from the Windows Start menu.
The Visage 7 Client application program opens and the Study Browser is shown in
the foreground.
18
Visage 7 Client
Starting and Ending the Program
Starting Visage 7 Client from the login dialog box
Starting Visage 7 Client from the login dialog box
If your system and user account have not been configured for IWA (Integrated Windows Authentication) or if you want to switch over to a different user interface language you start the Visage 7 Client from the login dialog box.
Windows users
Select Programs > Visage 7 > Login Dialog from the Windows Start menu.
-Or-
Double-click the Visage 7 Client icon on your desktop.
The Visage 7 Client login dialog box opens.
Mac users
For easy access, you should move the Visage client application to your dock
Click the Visage 7 Client icon in your dock.
-Or-
Double-click the Visage 7 Client icon in your Applications via the Finder.
All users
1. Enter the name of the server in the Server Name field or choose one from the
list.
2. Enter your User Name and Password.
3. Select the user interface Language.
4. Activate or deactivate Integrated Windows Authentication for future program
starts (not applicable for Mac users).
Visage 7 Client
19
Changing your password
Starting and Ending the Program
Note
Integrated Windows Authentication is only possible for users whose accounts
were imported in the Visage system from Windows and for whom the integrated
Windows authentication privilege has been set by the system administrator.
5. Click Login to start the program.
The Visage 7 Client application program opens and the Study Browser is
shown in the foreground.
You can now define and start a query for case data in your database, browse
through a history of recent queries and start one of those queries, or load a recent session from the session management box.
Changing your password
You should change your password from time to time for data security reasons.
1. Open the Visage 7 Client.
2. Select File > Preferences > Change Password from the main menu.
3. Enter your Old Password, the New Password, and repeat the new password in
the Retype New box.
4. Press RETURN.
Use the new password from now on when logging in.
Exiting Visage 7 Client
Logging off from the
server
In order to close Visage 7 Client:
Select File > Exit from the Visage 7 Client menu bar.
-OrClick Close window in the upper right-hand corner of the window.
Mac users
In order to close Visage 7 Client:
Select VisageCS > Quit VisageCS from the Visage 7 Client menu bar.
20
Visage 7 Client
Starting and Ending the Program
Exiting Visage 7 Client
-OrClick the red close button in the upper left corner of the application window.
Automatic logoff
If Visage observes no activity for a certain time (default setting: 15 minutes) a message box appears. You are prompted to confirm that you wish to continue working. If
you do not answer you will be logged off automatically after a few seconds. The license you were using is now available for another user.
Only the system administrator can change the automatic logout time.
Note
If you do not continue working, your current work is saved in a auto-logoff session
when you are logged off automatically.
Visage 7 Client
21
Exiting Visage 7 Client
22
Starting and Ending the Program
Visage 7 Client
Getting Started
This section describes typical features of the Visage 7 Client:
•
The Visage 7 Client workflow
•
The general Visage 7 Client window layout
Note
In this user manual we assume that you have worked with Windows or Mac application programs before.
You should be familiar with typical operating elements such as drop-down and
context menus and various data input and selection options. You should also have
experience with overall keyboard and mouse operation.
The Visage 7 Client workflow
The basic workflow with Visage 7 Client is very straightforward and indicated by the
arrangement of windows on the user interface. You open these windows by selecting the respective entries in the Window menu or by clicking the following buttons in
the upper right-hand section of the application window (Windows only).
•
Study Browser
In the Study Browser you query the Visage database or connected network
nodes for patient and study data. Once you have found the data you are looking
for you load this data onto the View window. The View window is shown as soon
as you have loaded data.
If your Visage is integrated in another clinical software application, you may skip
this step and window. In this case you select the data you wish to review in that
program and then advance directly to the View window.
•
View
On the View window you review and analyze 3D volume datasets. You can manipulate image display and create new slice images from any position and in any
orientation in the process. Moreover, you can evaluate areas of particular interest and perform various measurements and calculations. In order to document
your findings you create snapshots of relevant images.
Visage 7 Client
23
The general Visage 7 Client window layout
•
Getting Started
Export
You use the Export window to create reports, which include selected snapshots
and report text. Or you use the Export window to save snapshot images in the
Visage database, to send them over the network, or to export them onto your local computer.
•
Quality Assurance
You use the Quality Assurance window to correct or re-assign patient, study
and series data manually and to match studies with orders sent by a RIS system.
The general Visage 7 Client window layout
Visage 7 Client features an intuitive user interface, which is easy to learn and allows
you to perform image manipulations with a minimum of clicks. The Visage 7 Client
window comprises the following basic window areas.
Menu bar
Visage 7 Client windows
Workspace of the Visage 7 Client windows
24
Visage 7 Client
Getting Started
The general Visage 7 Client window layout
Visage 7 Client windows
The Visage 7 Client comprises four windows. You move from one window to the
next by selecting the respective entries in the Window menu or by clicking the corresponding button (Windows only).
Note
Switching between windows does not load data. The new window shows the data
that you queried for or loaded the last time you worked on this window.
Workspace of the
Visage 7 Client
windows
For a detailed description of the operating elements of the four program windows
please refer to these sections:
•
Study Browser
•
View Window
•
Export Window
•
Quality Assurance
Note
If Visage 7 Client was called from another application, the Study Browser may
not be available.
Visage 7 Client
25
The general Visage 7 Client window layout
Getting Started
Menu bar
The Visage 7 Client main menu bar contains a number of drop-down menus for selection of program options or functions.
Context sensitivity
The Visage 7 Client program features a context-sensitive main menu. Context-sensitivity means that the contents of the menu bar depend on the Visage 7 Client window that is currently shown in the foreground. For example the Protocol, and Tools
menus are available on the View window but not on the Study Browser and Export window.
Common commands
for Windows users
These menus and commands are available on all Visage 7 Client windows.
File
Exit: Closes the Visage 7 Client.
Help
Online Help: Shows the Visage 7 Client online help system.
Audit Warning: Displays a dialog box which informs users that their activities may be monitored. This command is shown only if the audit trail license has been installed on the server.
Keyboard shortcuts: Shows the list of keyboard shortcuts for Visage 7 Client.
About: Opens a message box with information about the currently installed program version, the accessed servers, and information about the current program session.
Common commands
for Mac OS users
These menus and commands are available on all Visage 7 Client windows.
VisageCS
About VisageCS: Opens a message box with information about the currently installed program version, the accessed servers, and information about the current program session.
Quit VisageCS: Closes the Visage 7 Client.
Help
Online Help: Shows the Visage 7 Client online help system.
Audit Warning: Displays a dialog box which informs users that their activities may be monitored. This command is shown only if the audit trail license has been installed on the server.
Keyboard shortcuts: Shows the list of keyboard shortcuts for Visage 7 Client.
26
Visage 7 Client
Study Browser
The Study Browser is used to search for data on the local Visage server selected
when logging in or partner systems (bold tabs), on a connected DICOM network
node (tabs in regular typeface), or on external drives.
Basic workflow
Local backend server
or partner system
When searching and loading data, you proceed in this order:
1. Query the local backend server or partner system.
2. Select one or more study or series.
3. Load this data onto the View window.
-OrClick Add to View to add the data to an ongoing Visage 7 Client session.
-Or-
Remote DICOM node
1. Query a remote DICOM node.
2. Select and transfer the data to the Visage database (Retrieve button).
3. Query the local database, for example, by insertion date today (local database
tab).
4. Select the retrieved data from the local database tab card and load it onto the
View window.
-Or-
External drive
1. Select the tab card of an external drive or directory.
2. Select the data on this tab card and load it onto the View window.
-OrClick Add to View to add the data to an ongoing Visage 7 Client session.
If this tab card is not shown in your Study Browser, or if it does not show the data
you are looking for:
1. Select File > Import DICOM Directory or File > Import DICOM Files from the
main menu.
2. Select the drive and directory where the data is stored in the Import DICOM dialog box and click Choose or Open.
3. Select the data on the tab card of the external drive or directory and load it onto
the View window or select Add to View to add the data to an ongoing session.
Visage 7 Client
27
Query section
Overview of the user
interface
Study Browser
Study Browser menu
Toolbar: Loading, retrieving or removing data
Query presets
Query
section
Study/series list
Preview images
Session management
Query section
Before you start defining filter or search criteria for a database query, select the database, drive or directory you wish to search by clicking the corresponding tab
above the study/series list. Any query will only apply to the database whose tab card
is currently shown in the foreground.
Modality search
The query section allows you to search a database for studies performed on one or
several modalities. E.g. check CT, MR, and DX modalities in the query section to
show all studies and series that were performed either at the CT, or the MR, or the
DX modality.
Filter criteria
All other entry boxes in the query section are filter criteria. This means, the more criteria you define, the shorter the hit list will be. E.g. enter A for patient name to show
all patients whose name starts with an A. Or enter A for patient name and select today for study date to show only those patients whose name starts with an A and
who were examined today.
Wildcard search
If you do not remember a name or number you are looking for, you can use wildcards in your search. E.g. type Mil in the patient name box to find Miller, Milford,
Miltner, or *mil to find all the above and also Hamilton, or AB??34 in the patient ID
box to find AB1234, AB0034, and AB11345678.
28
Visage 7 Client
Study Browser
Query section
Even if you use wildcards, you should always specify your search criteria as precisely as possible. Rather general queries may yield a very long hit list, which would
require extensive scrolling.
Filter and search criteria
Patient
Date
Allows you to search for a patient’s name and ID.
Allows you to search for patient and study data based on a date or date range. You can toggle the date search on and off by means of the checkbox.
If toggled on, you can select or enter:
Type - select whether you want to search by Study Date, Date of Birth or Insertion Date
(i.e. the date when the data was transferred to the server).
From date To date - specifies the search period. Click in a date box with the cursor and enter a date in the format YYYY-MMM-DD (e.g. 2006-MAY-23). Or click the icon button to the
right of the date entry box to open a calendar and select a start and end date from here.
3. Click one of these buttons to select a default search period:
Today - selects the current day as search period.
Yesterday - selects the previous day as search period.
1 Week - selects the last seven days as search period.
2 Weeks - selects the last 14 days as search period.
Modality
Allows you to search for patient and study data by modality. You can toggle the modality
search on and off by means of the checkbox.
If toggled on, you can choose one of the following options:
1. Check the boxes of all those modalities whose studies you are looking for (CT - computed tomography, MR - magnetic resonance tomography, PT - positron emission tomography
(PET), US - ultrasound, CR - computed radiography, DX - digital radiography, MG - mammography, XA - X-ray angiography)
2. Enter any modality abbreviations in the Others box (e.g. "CT"). Multiple modalities are
separated by a space (e.g. “CT PT MR”).
Fields
Here you can specify further filter criteria.
Drop down a list of available criteria with the arrow icon to the right of a field box. Then
specify your search string in the input box below the selected criterion.
For queries of your local database you can combine up to three additional filter criteria this
way. For queries on DICOM nodes only two additional filter criteria can be defined: Accession Number and Study Description.
In addition, you can click Study States... and then select one or several study states in the
dialog to be included in your search. Clicking the Clear button resets this selection to include all study states.
Entering a text in the Label box will search for labels assigned to a study by means of the
Context menu of the study/series list. You can search for more than one label and fine-tune
your search by a preceding + sign (label must exist) or - sign (this label excluded)
Visage 7 Client
29
Query presets
Study Browser
Starting and resetting a search
Click this button to start your query of the local database or the DICOM node whose tab
card is currently shown in the study/series list area.
Click this button to remove all search criteria from the query boxes, then start defining a new
search.
Query presets
The Presets bar contains the button New Preset, which opens a dialog to define the
current settings, for example a specific query, as a preset for the currently active user. This preset will then be shown as a button on the Presets bar.
You can
30
•
enter a name for the preset.
•
check Auto Query to automatically start a query when the preset button is clicked.
•
check Default to make this preset the user's default when initially opening the Study
Browser window.
Visage 7 Client
Study Browser
Study/series list
Context menu of the preset buttons
Clicking a preset button with the right mouse button opens this context menu.
Properties
Default
Update Preset
with Current Settings
Delete Preset
Allows you to change the preset’s name and to have the preset perform an Auto Query or
set it as Default.
Checking this menu option defines this preset as default, loading its parameters when the
Quality Assurance view is opened.
Updates the preset with the settings currently active in Quality Assurance.
Deletes the preset button after a query is confirmed.
Study/series list
The study/series list has tab cards for the local backend server of the Visage system
and for each connected DICOM network node or external medium.
Click a tab to show the study/series list of the corresponding database or medium.
After switching over to another tab card, the study/series list of the last database
query you performed on this tab card is shown.
Information in the study/series list
The study/series list is arranged in a hierarchical tree view. Use the +/- icons in front
of the entries to expand or collapse this list.
For a better overview, you can sort the list by clicking on a column header. Clicking
a second time reverses the search order.
Hovering with the mouse above a list entry without clicking shows information about
this study in a tooltip. For example, hovering above the first column shows the assigned labels.
Patient
Patient ID
Accession Number
Modality
Visage 7 Client
Name of the patient.
Patient’s identification number.
Job number of the patient in the HIS/RIS (hospital or radiology information system).
Modality or modalities used to examine the patient.
31
Study/series list
Study Browser
Images
3D
Number of images in a series (on study level, no image number is shown).
Shows a graphical icon when a series is a 3D series (i.e. contains at least one continuous
3D volume).
A green bullet indicates that a 3D volume dataset is available on the Visage server (local database).
A yellow bullet indicates that the system is currently creating a 3D volume dataset from
the original slice images.
Study/Series Description
Study/Series
Date
Insertion Date
Study or series description.
Date and time when the study or series was performed in the format YYYY-MMM-DD and
HH:MM:SS (24 hour clock).
Date and time when the study or series was sent to the local database in the format YYYYMMM-DD and HH:MM:SS (24 hour clock).
Context menu of the study/series list
View
Add to View
View All Series
Side By Side
View All Phases
Side By Side
Loads one or more selected studies or series to the View window.
Adds one or more selected studies or series to the View window. If this would result in data
from different patients being shown on the View window, a safety query will be displayed.
Loads the selected series with a dynamic protocol and shows all series side by side.
See also Viewer segments in section View window main menu.
Loads the selected series with a dynamic protocol and shows all phases of time series side
by side.
See also Viewer segments in section View window main menu.
32
Find all Studies
for this Patient
Shows all studies of the patient of the selected study.
Assign study to
groups
Assigns the selected study to one or more user groups, thus granting only them access to
the study. The assignment can be revoked by the same means.
Assign study to
users
Assigns the selected study to one or more users, thus granting only them access to the
study. The assignment can be revoked by the same means.
Visage 7 Client
Study Browser
Study Labels...
Study/series list
Opens a dialog to show labels of a study and create new or assign existing labels to studies
so they can be quickly located, for example for conferences or a second opinion.
1. Select a patient or study and right-click it.
2. Select Study Labels...
3. In the dialog now opened, check one or more existing labels in the list box (you can filter
this list by means of show public and/or show private)
- ORCreate a new label by entering a name activating Create Private or Create Public to
assign it to your own account or all users.
The selected label(s) or new label will be shown in a list. You can select an entry in this list
and use the context menu to perform the following actions:
•
make a private label public or vice versa
•
delete a label
•
assign it to a button on the View window. See also Labels tools.
Delete protection
Protects studies from being deleted from the local database after a certain amount of time
or when the database runs full and old studies would automatically be moved to remote. Also protects studies from being deleted manually during Quality Assurance activities. You
can remove the delete protection later.
DICOM Send...
Sends one or more selected studies to network nodes. A dialog to select these nodes is
opened.
On the DICOM Send tab, you can perform the following actions:
•
define these nodes as default addresses for DICOM Send via Make Default
•
apply you selection to DICOM Quick Send via Copy to Quick Send
On the DICOM Quick Send tab, you can perform the following actions:
DICOM Quick
Send
Media Export...
•
copy the presets to DICOM Send
•
define these nodes as default addresses for DICOM Quick Send via Make Default
(Quick Send).
Sends one or more selected studies to one or more preselected network nodes. No confirmation is shown.
Sends one or more selected studies to a destination to be selected.
You can perform the following actions:
•
check whether you have selected the correct Patient
•
view the Actual data size of the export file(s)
•
select a Destination in the list box
•
browse for an Export Folder
•
enter a name to the Media Folder or accept the the one suggested by the system
•
specify the Media Size, selecting either CD or other medium
•
specify whether to Include Media Viewer to view the data on the CD without additional
software, Autorun MediaViewer when the medium is inserted and Uncompressed
only to save in that way
Click on Make Default to save your settings for subsequent media exports, if required, and
click on Export to start the export process.
Visage 7 Client
33
Session management
Study Browser
Loading, retrieving or removing data
This icon is active on the local database tab and on remote DICOM nodes or external drive
and for data that has already been transferred to the database.
Select one or several studies or series in the study/series list and click the View button.
-OrIf you want to load only one study or series, simply double-click it in the study/series list to
load the data onto the View window.
When session management has been enabled for your user account, double-clicking a
study loads the most recent session associated with this study. Double-clicking a series
loads image data only but no session information.
If you have already loaded data onto the View window and want to add more datasets rather than replace the currently loaded data:
Select the dataset you want to add to your current session on the local database tab card or
the tab card of an external medium or folder.
Click the Add to View button to add this data to an ongoing session.
This way you can, for example, load a previous study from a patient medium (CD or DVD)
to compare it with a current study, which you have already loaded from your database.
Only active on a DICOM node tab and only for users with permission to query and retrieve
data from a remote DICOM node.
Select data on a DICOM node and click the Retrieve button to copy this data to the database. You can subsequently load the data onto the View window from there.
Only active on the Database tab and only for users with delete permission.
Select one or several studies or series in the study/series list of the local database and click
Delete to remove this data from the database.
If a patient, study or series is displayed dimmed (grayed out) in the local study/series list,
this means that the data cannot be loaded onto the View window. The data can still be deleted.
You cannot delete data on remote servers.
Session management
Visage 7 Client supports session management. This means that you can save processing and evaluation results before you end a session (for example when you
load new data or close the program). When you return at a later time, you can load
the session again and resume your work or present your results to colleagues.
34
Visage 7 Client
Study Browser
Session management
Tip
A session stores the following information:
- How many and which datasets were loaded at the time the session was saved.
- Protocol and display settings
- Key views (incl. annotations and measurements)
- Segmentation results (such as 3D ROIs or vessel segmentation results)
- Structures and contours
- Cardiac analysis results
Note
Session information is temporary data. Sessions are stored on the Visage server
as long as the studies they refer to are stored on the server. Once a patient or
study is deleted from the database, session information is lost.
Deletion of patient and study data may be triggered manually or automatically,
when the hard disk is full. Automatic deletion of study data affects the oldest studies on the server.
If session management has been enabled for your user account, the lower righthand corner of the Study Browser displays a session list.
Recent or study
sessions
Use the Show My Recent Sessions button to show a list of your most recent sessions (for all studies) in the session management section of the Import window.
-OrClick a study in the study/series list to show only sessions of this study in the session management section.
Loading a session
Double-click a session in the session list to load its dataset(s) and session settings
onto the View window.
Auto logoff session
If the system logs you off automatically (after an extended period of no user interaction) the currently loaded dataset(s) and all your preliminary processing and evaluation results are automatically saved in an auto logoff session.
An auto logoff session is shown in red and in the topmost position in the session
management section of the Study Browser after you have logged on again.
Tip
Open the auto logoff session immediately after you have logged on again and decide whether to save it in a user-created session. When you are logged off automatically a second time, a new auto logoff session is created and the previous
session is overwritten.
Session sharing
You can use session management to share your work with colleagues.
When saving a session, the system prompts you to indicate if you want to save this
session under your own user name or if you want to share it with other users. Ses-
Visage 7 Client
35
Preview images
Study Browser
sions that you made available for all users are marked with (shared) in the session
management box of the Study Browser.
Shared sessions can also be sent as session links to colleagues via email. When
your colleagues receive such emails, all they need to do is to double-click the attached link to open the Visage 7 Client and display this session.
Note
Sharing sessions via email requires that the Visage 7 Client has been installed on
recipients’ computers before they click the email link.
Tip
Remember to save recent changes (File > Save Session) before sending a session link (File > Email Session Link).
Preview images
When a dataset is selected in the local database, a preview is displayed automatically in the preview area. In case of 3D datasets, this preview displays the central
slice. If multiple series are selected, a preview image is shown for each of these series.
On remote DICOM nodes, previews are available only if the selected series has already been sent to the Visage server.
If a session is selected in the session management section, a screenshot of the
View window is shown in the preview section. The screenshot shows the View window with the session data at the time when the session was saved.
Windowing preview
images
For a better overview, you can window preview images:
Resizing the preview
area
You can change the size of the preview window area and the study/series list by
dragging the "split bar" that separates these window areas up or down.
Click a preview image, hold the mouse button down, and drag the mouse up/down
to change the window center or brightness, or right/left to change the window width
or contrast.
You cannot resize individual preview images.
36
Visage 7 Client
View Window
You use the View window to display images and evaluate image information.
Window layout
Depending on your selection of data, the View window will be shown with a different
window layout. This window layout is defined in a so-called “protocol”.
The system will preselect a different protocol for data of different modalities and anatomical regions and depending on the monitor configuration and how many series
you load onto the View window at a time. If you prefer another protocol you can select a different one from the Protocol menu.
Overview of the user
interface
View window main menu
Toolbars
H
A
MPR viewer segment
MPR viewer segment
L
R
A
L
P
C: 0
W: 400
MPR
P
Viewer
controls
5.0mm
95%
CT PET >>
C: 0
W: 400
MPR
MPR viewer segment
R
Visage 7 Client
MPR
5.0mm
R
L
A
F
W: 400
CT PET >>
3D viewer segment
L
A
95%
H
H
C: 0
F
5.0mm
Tool cards
95%
CT PET >>
C: 0
F
W: 400
SVRT
Ortho
29%
>>
37
Protocols
View Window
Protocols
Protocols define the layout of the View window and the display parameters for the
loaded images.
Protocol assignment
When a user loads one or several studies, series, or volume datasets onto the View
window the system automatically selects a suitable protocol to display the data. Depending on the system and protocol configuration the system uses a combination of
several matching criteria to select the protocol best-suited for the loaded data.
•
Monitor configuration
Different protocols can be defined for different combinations of monitors and
screen resolutions.
•
Study and series criteria
Protocol matching criteria usually include the modality or combination of modalities that acquired the data. For example, a CT series may be shown with a different window layout than an MR series or a combination of a CT and a PET series.
Other study or series criteria may include the study description or part of the
body that was examined or whether current and prior studies are being loaded
onto the View window.
•
Protocol access and protocol ranking
Protocols may have been defined in such a way that they are available for individual users or user levels only. Moreover, protocols can be assigned priority ratings by users. A protocol with a high priority rating is more likely to be
automatically selected than a protocol with a low priority rating.
Protocol definition
A number of protocols have been predefined for your system. Users with advanced
user privileges can adapt these protocols and their matching criteria or create protocols of their own.
See Visage 7 Client configuration (Protocol configuration).
A protocol typically defines the following layout aspects:
Changing the View
window content
•
The number of image segments (viewers)
•
The initial rendering parameters for each viewer
•
The linking of viewer segments for synchronized navigation in multiple viewers
•
The availability and location of toolbars
•
The availability and location of tool cards
Each protocol defines one or more so-called layouts, so you can switch between different representations of the currently loaded data (see also Layouts toolbar). If the
desired representation does not exist in the current protocol, you can select and apply a different protocol from the Protocol menu.
There are additional ways to change the images and display parameters in the View
window:
38
Visage 7 Client
View Window
Viewer segments
Change the arrangement of viewer segments and load image data into these viewer
segments manually.
See also Interactive arrangement of viewer segments and image data.
-OrSelect different rendering parameters for MPR viewer segments or the 3D segment
from the context menu or from the viewer controls.
See also Viewer controls, 3D viewer context menu, and MPR viewer context
menu
-OrSelect additional tool cards from the Tools menu.
See also View window main menu and Tool cards
-OrAdd toolbars to the toolbar section.
See also View window main menu and Toolbars.
Viewer segments
The Visage 7 Client View window is subdivided into several viewer segments. For
example, if you have loaded a single thin slice CT dataset, it may be presented using three MPR viewer segments and one additional 3D viewer segment. The active
viewer segment is indicated by a highlighted viewer frame.
Tip
Show crosshairs in all viewer segments. This will help you identify the position and
orientation of the displayed slices in one MPR viewer with respect to the slices in
the other MPR viewers and the 3D viewer segment.
See 3D viewer context menu and MPR viewer context menu for how to enable
crosshair display.
Linked viewers
Viewer segments can be linked, which means that image manipulation steps are automatically applied to all linked viewer segments and not only to the one that was
active when you made the changes. As a rule, all MPR viewer segments that show
images from the same dataset are linked. Linking of viewers is defined in the currently active protocol.
Linking affects one or several image manipulation steps, depending on how linking
has been defined in the protocol. For example, slice browsing is synchronized in all
viewers that have been linked in a translation group, and zooming is synchronized
in all viewer segments that belong to the same zoom group. Users can edit the ways
in which viewers are linked, either for the duration of an entire session or only temporarily for the next image manipulation step. Use Attach/Detach Viewer or Edit
Visage 7 Client
39
Viewer segments
View Window
Viewer Linking from the viewer segment context menu or the Viewer Linking tools to
change the way viewers are linked.
Image text and
warning symbols
Aside from image information, the viewer segments contain information about the
loaded data in the form of image text and icons.
The following symbols in images alert you to the fact that an image is shown with reduced image quality or that warnings exist concerning the displayed images.
Low resolution warning
A red bullet in the lower right-hand corner of a viewer segment indicates reduced image
quality. The low resolution warning may appear while the dataset is still being loaded and
the system generates full image quality, or if a low streaming compression level has been
selected.
Image processing in progress
A yellow bullet in the lower right-hand corner of a viewer segment indicates that the image
shown in this viewer has not yet been updated with your latest image processing step. The
previous image is still displayed while image processing is performed in the background. As
soon as image processing is complete and the image display has been updated the yellow
bullet disappears.
Note
Do not use images that show a red or yellow bullet in the lower right-hand corner
of the viewer segment for primary diagnosis. Wait until the bullet has disappeared
(see also View window main menu).
Miscellaneous warnings
A yellow warning triangle in the upper left-hand corner of the images indicates that warnings
exist for this dataset.
Caution
Find out more about these warnings by clicking the yellow warning triangle if it is
shown in your viewers.
Scale
For calibrated image types (e.g. CT images) a scale can be shown on the right edge
of the viewer segments. The scale looks like a small ruler and indicates centimeters
or millimeters when you zoom in on an image.
Showing/hiding
image text
If the image text is in your way during image processing, you can either hide it altogether or hide selected blocks of text information.
Use View > Show in Viewer > ... in the main menu to hide or redisplay specific
blocks of image text in all viewer segments.
-OrUse View > Show in Viewer > Toggle All or the keyboard shortcut Spacebar to
hide or redisplay all image texts in all viewer segments.
40
Visage 7 Client
View Window
Viewer segments
Tip
When working with a small window size and low window resolution it may not
always be possible to show all image texts and image icons correctly. Texts are
truncated, and icons, the scale or a color bar may be shown on top of each other.
Maximize the program window and switch to fullscreen mode for display of all
image information.
Viewer controls
Each viewer segment has a number of controls within easy reach along its lower
border. You can use these controls to toggle or select display options relevant for
this viewer segment.
Click the arrow icon to the right of a viewer control to drop down a selection list.
-OrClick a value and overwrite it to change the window center/width, slice thickness or
zoom percentage of images, for example.
Tip
If the viewer controls are temporarily in your way you can hide them. Right-click in
a viewer segment and deselect Viewer Controls in the context menu.
3D viewer segment
The 3D viewer segment displays a 2D projection of a 3D volume.
You can choose between several volume rendering techniques and display modes
in the 3D viewer segment.
In the 3D viewer segment you can rotate this image in order to generate arbitrary 3D
views, and you can zoom or pan the image and adjust window/level. Use the viewer
controls, the mouse, the 3D viewer context menu, or toolbar icons to do so.
Tip
3D Rotate is the preselected standard navigation tool in the 3D viewer segment.
Visage 7 Client
41
Viewer segments
View Window
3D rendering techniques in the 3D viewer
Choose one of these 3D rendering techniques from the 3D viewer controls or the 3D
viewer context menu:
•
3D MIP
Maximum intensity projection: Visage 7 Client calculates the maximum of all the
voxel values lying on the virtual viewing ray behind this pixel. 3D MIP requires a
grayscale color map.
•
3D MIP (inverse)
Similar to MIP, but displayed inversely (black on white instead of white on black).
•
VRT
Volume rendering technique, also called emission-absorption model: This technique maps data values to colors and transparencies defined in a 3D color map.
The voxels are interpreted as small diffuse light sources emitting and absorbing
light in the direction of the viewer. Each voxel is interpreted as a local diffuse light
source, without additional shading.
See also 3D Color Map tool card (3D viewer) and Templates tool card (3D viewer).
•
VRT (diffuse)
Similar to VRT, however, an additional virtual light source and a diffuse lighting
model is used to add shades to the visual surfaces of the volume. For example,
curved surfaces become darker towards the edges, which results in a more natural appearance.
•
VRT (specular)
An addition to diffuse shading, specular shading uses a lighting model that reflects light dependent on the angle between the incoming and reflected light.
42
Visage 7 Client
View Window
Viewer segments
This means that on smooth surfaces the user will see highlights, and that the
shading becomes even more expressive than with diffuse shading. Specular
shading is especially good for large surfaces with fine detail.
Projection modes in the 3D viewer
Choose one of these projection modes for the 3D image from the viewer controls:
•
Orthographic
Orthographic viewing is like viewing an object through a lens with a very long focal distance (telelens), where the viewing rays are almost parallel to each other,
and no perspective distortion occurs.
•
Perspective
This display mode gives a more natural impression. It corresponds with the everyday experience of perspective distortion. Objects that are far away appear
smaller than objects close by.
Tip
In orthographic mode you can perform 2D measurements in the image plane (e.g.
distance and angle measurements). In perspective mode this is not possible.
3D viewer context menu
The 3D viewer context menu provides quick access to functions. Some of these
functions are also available from toolbars or tool cards while others can be selected
in this context menu only.
Tip
Refer to the Toolbars section for an explanation of all context menu entries with a
small icon or image in front of them.
Right-click in a viewer segment to show the context menu.
-OrUse this control in the viewer control bar to call the context menu.
Visage 7 Client
43
Viewer segments
44
View Window
Visage 7 Client
View Window
Viewer segments
3D viewer context
menu options
Fullscreen
Select this menu option or double-click in the 3D viewer segment to display the 3D viewer in
full screen mode.
Select the command or double-click again to return to the previous screen layout.
Viewer Control
Check or uncheck this commands to show or hide the viewer controls bar below the 3D
viewer segment.
View Study Reports
If a study report has been sent to the Visage from the RIS, you can show this report in a
separate window with this command.
Store Key View
Stores what is currently shown in the 3D viewer segment as a key view. During your session
you can return to this view using the Recall Key View menu entry or by pressing F11/F12
(Previous/Next Key View).
Note that key views are lost when you close Visage 7 Client or load new data. To preserve
key views save your session (File > Save Session or File > Save Session As).
Recall Key View
Allows you to select and redisplay one of the stored key views.
Delete Key View
Allows you to delete a key view you created earlier during your session.
Crosshair
Bounding Box
Centerline
View Orientation
Properties
Shows or hides a 3D crosshair showing the orientation and position of the slices currently
shown in the MPR viewer segments in the 3D viewer.
Shows or hides a box delineating the volume borders in the 3D viewer.
Turns on display of the centerline for vessel segmentation for this viewer segment.
Opens a submenu with commands for rotating, flipping and centering the displayed volume.
Opens a submenu with alternative display options for the selected viewer segment.
Use this submenu to change the rendering technique in the 3D viewer segment, for example (see also 3D rendering techniques in the 3D viewer).
Or use this submenu to select Smart Sampling, which reduces artifacts in the volume display, or to toggle between orthographic and perspective display (see also Projection modes
in the 3D viewer).
Attach/Detach
Viewer
Opens a submenu in which you can detach, which means temporarily remove, a viewer
from a linked viewers group.
-OrSelect Edit Viewer Linking in this submenu to enter viewer group editing more. In this
mode icons that represent groups of image manipulation tools are shown in the various
viewer segments. You add a segment to a group by selecting the corresponding tool icon in
a viewer segment. End this more by confirming your selection (checkmark icon in the lower
right-hand corner of the last viewer segment in which you have clicked a tool group icon).
Visage 7 Client
45
Viewer segments
View Window
MPR viewer segment
An MPR viewer displays slice images.
•
Original scan images belonging to a 3D volume created by a postprocessing application (single MPR viewers only, but not for viewers of an MPR crosshair
group).
-Or•
Reconstructed arbitrary slices through a volume dataset.
Immediately after loading a dataset and depending on the currently active protocol, the MPR viewer segments show slices of the standard anatomical views.
In the MPR viewer segments you can perform various image manipulation and evaluation procedures, such as changing image display parameters and using measurement and annotation functions. Use the viewer controls, the mouse, the MPR
viewer context menu, or toolbar icons to do so.
Tip
MPR viewers showing the same image series are implicitly linked. When you
change display parameters in one MPR viewer segment, all MPR viewers showing
images from the same series will be updated as well.
When you have loaded a volume dataset, you can use the MPR viewer segments to
create new slice images by moving and rotating the navigation crosshair.
You can change the slice thickness and choose a different compositing technique
for your images.
If you have loaded suitable volume data (i.e. two series of volume datasets from the
same study) you can toggle between the primary and overlay dataset, activate fusion mode, and fade between the primary and the overlay dataset.
46
Visage 7 Client
View Window
Viewer segments
Navigation crosshair
For volume datasets the navigation crosshair in an MPR viewer segment indicates
the orientation and position of the slices that are currently shown in the two other
MPR viewers for this dataset.
•
A blue line represents the image currently shown in the MPR segment with the
blue viewer frame.
•
A green line represents the image currently shown in the MPR segment with the
green viewer frame.
•
A red line represents the image currently shown in the MPR segment with the
red viewer frame.
Small arrows pointing to the crosshair indicate the viewing direction in the other two MPR
viewer segments.
When you move the cursor over the center of the crosshair, the cursor changes shape.
Click and drag the entire crosshair. This moves two view planes simultaneously in the volume dataset and shows new slice images in both of the other MPR viewer segments.
Note that the move cursor is not available for Partial Crosshair display.
When you move the cursor over a crosshair line, the cursor changes shape.
Click and drag this line up or down. That will take you through the volume dataset along the
two other standard axes and update the view in one of the other MPR viewer segments.
When you move the cursor over the rotation handles (small dots), the cursor changes
shape.
Click and drag the cursor up or down to rotate the navigation crosshair. This updates the
views in the two other slice segments, and generates slice images with non-standard views.
When you click one of the small triangles on the crosshair lines along the edges of the image the crosshair lines are shown dotted.
You can now change the slice thickness in the MPR viewers by dragging the slice thickness
handles up or down. As soon as you release the mouse button the slice thickness indicator
and the selected thick slice compositing mode are updated in the viewer controls.
Tip
Also show the crosshair in the 3D viewer segment while you navigate through your
volume with the navigation crosshair in the MPR viewers. See 3D viewer context
menu for how to enable crosshair display in the 3D viewer segment.
Visage 7 Client
47
Viewer segments
View Window
Compositing modes for thick slices
The default slice thickness for reconstructed images in MPR viewer segments is
specified in the active protocol. It is usually the slice thickness of the original scans.
You can change the slice thickness for your loaded images and subsequently
choose a different compositing technique for thick slices.
•
Thin MPR
In this mode slices are shown in their original ("native") thickness.
•
Maximum intensity (MIP)
Data values are computed as the maximum of the values of the original slices.
•
Minimum intensity (MinIP)
Data values are computed as the minimum of the values of the original slices.
•
Average intensity (AvIP)
When displaying a thick slice, data values are computed as the average of the
values of the original slices.
You work with the Viewer controls or the Display tool card when changing the slice
thickness and selecting a different compositing technique.
-OrUse the keyboard shortcut T to turn thick slice display on and off.
MPR viewer context menu
The MPR viewer context menu provides quick access to functions. Some of these
functions are also available from toolbars or tool cards while others can be selected
in this context menu only.
Right-click in a viewer segment to show the context menu.
-OrUse this control in the viewer control bar to call the context menu.
48
Visage 7 Client
View Window
Viewer segments
MPR viewer context
menu options
Fullscreen
Select this menu option or double-click in the MPR viewer segment to display the MPR
viewer in full screen mode.
Select the command or double-click again to return to the previous screen layout.
Viewer Controls
View Study Reports
Select As Baseline Phase
Store Key View
Check or uncheck this commands to show or hide the viewer controls bar below MPR viewer segments.
If a study report has been sent to the Visage from the RIS, you can show this report in a
separate window with this command.
Only for time series.
Defines the current phase image as baseline phase. In a time-series analysis, this defines
which image will be subtracted from all the other images in the time series.
Stores what is currently shown in the currently active (highlighted) segment as a key view.
During your session you can return to this view using the Recall Key View menu entry or by
pressing F11/F12 (Previous/Next Key View).
Note that key views are lost when you close Visage 7 Client or load new data. To preserve
key views save your session (File > Save Session or File > Save Session As).
Recall Key View
Allows you to select and redisplay one of the stored key views.
Delete Key View
Allows you to delete a key view you created earlier during your session.
Crosshair
Visage 7 Client
Shows or hides the navigation crosshair in MPR viewer segments.
49
Viewer segments
Partial Crosshair
View Window
Shows or hides a section in the middle of the navigation crosshair, which might be in the
way when reviewing images.
Note that when this option is selected, you cannot move the entire crosshair (the cursor will
not change shape when you point to the crosshair intersection; see also Navigation
crosshair). You can, however, move single crosshair lines.
Advanced users can toggle display of the partial crosshair via keyboard shortcut (key X).
Bounding Box
Shows or hides a box delineating the volume borders in the MPR viewer segments.
DICOM Overlays
If a dataset contains DICOM overlays use this context command to show or hide them.
DICOM Shutters
If a dataset contains DICOM shutter information use this context command to show or hide
the shutter.
DICOM Annotations
If a dataset contains DICOM annotations use this context command to show or hide them.
DICOM annotations are more comprehensive graphic and text annotations than DICOM
overlays and they are stored in DICOM presentation states.
Centerline
DICOM Print
View Orientation
Properties
Turns on display of the centerline for vessel segmentation for this viewer segment.
Starts a DICOM print action either for the current image or image set. You can select the
DICOM printer you want to use as well as layout and media properties.
Opens a submenu with commands for rotating, flipping and centering images.
Opens a submenu with alternative display options for the selected viewer segment.
Use this submenu to toggle between thin or thick slice display and to switch between compositing modes for thick slices (see also Compositing modes for thick slices).
Also use this submenu to select Bilinear Filtering, which interpolates MPR rendered slices
for a smoother appearance or to show or hide Slice Boundaries.
Attach/Detach
Viewer
Opens a submenu in which you can detach, which means temporarily remove, a viewer
from a linked viewers group.
-OrSelect Edit Viewer Linking in this submenu to enter viewer group editing more. In this
mode icons that represent groups of image manipulation tools are shown in the various
viewer segments. You add a segment to a group by selecting the corresponding tool icon in
a viewer segment. End this more by confirming your selection (checkmark icon in the lower
right-hand corner of the last viewer segment in which you have clicked a tool group icon).
Scoutlines
50
If several series are loaded which show the same anatomical region (same frame of reference) but from a different orientation you can show the location of images of one series in
the images of the other series as scoutlines.
Visage 7 Client
View Window
Viewer segments
2D viewer
The 2D viewer displays original slice images such as the scan images of a series or
a topogram.
Depending on the active protocol, the 2D viewer may be shown in a viewer segment, which replaces one of the other segments or the 2D viewer is shown
fullscreen.
Tip
The 2D viewer allows you to scroll though a large number of images quickly.
Advanced image processing and analysis functions are not available in the 2D
viewer (these functions are only available in MPR viewer segments). Image
manipulation tools that do not make sense for original scan images are dimmed in
the toolbar section of the 2D viewer.
Any image manipulation and evaluation options available in the 2D viewer can be
accessed via mouse keys, toolbar icons, or the 2D viewer context menu.
Layouts toolbar
Visage 7 Client
Use the Layouts toolbar, which is usually shown above the 2D viewer segment, to
select how many images you want to show in the 2D viewer segments.
51
Viewer segments
View Window
If the Layouts toolbar is not currently shown, select it from the context menu of the
toolbar section or from the View > Show Toolbars submenu.
Interactive arrangement of viewer segments and image data
When you load image data onto the View window a protocol is automatically selected. This protocol defines the arrangement of viewer segments and which images or
volume data are shown in these segments.
In order to adapt the arrangement of image data interactively you use the Layout
toolbar and the Image Series tool card.
Layout toolbar
If the Layouts toolbar is not currently shown, select it from the context menu of the
toolbar section or from the View > Show Toolbars submenu.
The Layouts toolbar offers you alternative arrangements of viewer segments which
have been defined for the currently active protocol.
Click on of the buttons in this toolbar to show a new arrangement of viewer segments on the View window.
Image Series tool card
The Image Series tool card is usually shown along the bottom of the window. It contains thumbnails of all the currently loaded studies, series, images and volume
datasets. It can be opened using the arrow button if it is not opened automatically.
52
Visage 7 Client
View Window
Loading image data
Viewer segments
Use the thumbnails to load volume datasets, 2D images, or image stacks into the
various viewer segments.
Click a thumbnail and drag it onto a viewer segment to replace the images in this
and any other viewer segments that shows orthogonal slices or the 3D display of
this dataset.
-OrRight-drag the image into a viewer segment in fusion mode in order to define this
dataset as the overlay dataset. (Use the viewer context menu to undo this setting.)
Folder icon
If a thumbnail represents several volume datasets, images in a series, or phase images this is indicated by a small folder icon in the lower right-hand corner of the
thumbnail.
Double-click the thumbnail with the folder icon to show the volume datasets or images it contains.
Use the Go back icon (green arrow) to return to the dataset overview display.
Protocol or series
mode
Use these two buttons to toggle the display mode of the Image Series tool card:
Visage 7 Client
•
PROT - shows all image series in the current protocol.
•
SERIES - shows all loaded series of all loaded studies according to their DICOM
hierarchy.
53
Mouse operation
View Window
Mouse operation
Advanced Visage 7 Client users can perform many of the most frequent image manipulation tasks directly in the viewer segments with the left, middle, or right mouse
button. This way you do not have to move the mouse to activate or switch tools.
To operate Visage 7 Client primarily with the mouse you need to distinguish between clicking and dragging.
Visage 7 Client has functions assigned to clicks with the left, middle, or right mouse
button.
Dragging implies clicking the left, middle, or right mouse button, and moving the
mouse while you hold the mouse button down.
If your computer is equipped with a wheel mouse you can use it for scrolling by turning the wheel, or you can click the wheel, this way it functions as the middle mouse
button.
+
Some functions require that you keep the Shift, Ctrl, or Alt keys on your keyboard
pressed while you click or drag the left, middle, or right mouse button.
The following tables list all functions assigned to mouse buttons, combinations of
mouse buttons, and combinations of keys plus mouse buttons.
Single mouse button
Left-click
Selects a viewer segment or performs a function (i.e. the function selected by the currently
active tool).
Left-drag
Performs the default navigation function of the currently active viewer segment, or the function of the currently active tool.
Middle-drag
Zooms the images in all linked viewers:
Move the mouse up to zoom in, or move the mouse down to zoom out
Mouse wheel
Browses through the image stack in the MPR viewer, CPR viewer, lumen viewer, or 2D
viewer segments.
Right-click
Selects a viewer segment and calls up the viewer context menu, or calls up the context
menu of any other window section or control for which a context menu exists.
-OrSelects or activates a control for which no context menu exists.
Right-drag
54
Pans the image, i.e. moves the image in the viewer segment.
Visage 7 Client
View Window
Mouse operation
Two mouse buttons
Left + right-drag
Changes window levels in all viewers linked for joint windowing:
Move the mouse up or down to change the window center (brightness)
Move the mouse left or right to change the window width (contrast)
Middle + rightdrag
Browses through the image stack in the MPR viewer, CPR viewer, lumen viewer, or 2D
viewer segments.
This mouse button combination is not active in the 3D viewer segment.
Shift key + mouse
button
Shift + left-drag
Changes the segmentation threshold in lesion segmentation mode.
Shift + middledrag
Zooms only the image in the selected viewer segment in or out.
(Leaves images in linked viewers unchanged).
Control key + mouse
button
Ctrl + left-drag
Always performs the default navigation function of the currently active viewer segment regardless of the currently active tool.
Alt key + mouse
button
Alt + left-click
Position Crosshair (F7): moves the crosshair center in all viewer segments to this point.
This updates all MPR viewer segments that show this dataset.
Alt + left-drag
Position Crosshair (F7) (see above).
Alt + middle-drag
Changes the slice thickness when you perform this action in an MPR viewer segment.
-OrSelects the Crop Slab tool and changes the slab thickness if you perform this action in the
3D viewer segment.
Mac users
Generally, mouse operation for Mac users is the same as described above, with the
Ctrl key replaced by the Cmd key. However, in order to use these functions, you
should apapt the mouse settings to distinguish left and right mouse button via System Preferences > Mouse.
Note
Some types of mice, such as the Mighty Mouse and Magic Mouse from Apple, do
not support pressing the left and right mouse button together. In this case, window
levels have to be changed by activating the W/L Tool.
Visage 7 Client
55
Toolbars
View Window
Toolbars
A number of icons are shown along the edges of your window after you have loaded
data. With these icons you can start functions or select options with a single mouse
click. The icons are grouped in toolbars. Which toolbars are shown when you first
load data as well as the toolbar position depends on the currently active protocol.
If you wish, you can change the arrangement of toolbars for the duration of your current session. You can show more toolbars or hide toolbars currently shown, or you
can change the location of a toolbar by dragging it across the window and dropping
it wherever you prefer it to be shown. When you drag a toolbar to the left, right or
bottom edge of the window a new toolbar section appears there. When you drag
and drop a toolbar anywhere else on the window it is shown in a floating window.
Some of the functions and options that are represented by toolbar icons can also be
called up with keyboard shortcuts. These keyboard shortcuts are active even if a
toolbar or icon is currently not displayed in any of the toolbar sections on the window.
Tip
A number of keyboard shortcuts have been predefined for the Visage 7 Client.
These keyboard shortcuts are indicated in brackets after the function name in the
tool description tables in this user manual. Or select Help > Keyboard shortcuts
in the main menu to show a list of these keyboard shortcuts.
Note, however, that users with appropriate user rights can change the assignment
of keyboard shortcuts for their own user account or on a system-wide basis (see
also Visage 7 Client configuration (Keyboard Shortcuts). This means that the keyboard shortcuts list in the main menu as well as the keyboard shortcuts indicated
in this user manual may no longer be correct for your system.
Working with toolbar icons
Tool tips
All icons are assigned tool tips. A tool tip explains the function of an icon.
Position the mouse cursor on an icon and let it rest there for a short time.
A brief explanation of this icon appears.
Active function
56
Some icons start functions immediately, others allow you to activate a processing
mode.
Visage 7 Client
View Window
Toolbars
When a processing option is selected and therefore active the corresponding icon is
displayed with a gray background.
Drop-down icon
bars
Some icons represent a drop-down icon bar. This is indicated by a small triangle
pointing downwards.
1. Click exactly on the small triangle in the lower right-hand corner of a drop-down
icon.
-OrClick a drop-down icon and hold the mouse button pressed for a little while.
2. Move the mouse cursor along the icon bar until it points to the function or image
processing tool you wish to select.
3. Click an icon on the drop-down icon bar to select this function or option.
For frequently used functions the program now replaces the drop-down icon in
the toolbar with the icon you last selected. This makes it the preferred icon in this
drop-down icon bar. The next time you wish to activate this function all you have
to do is click this icon, you no longer have to drop down the icon bar.
Icons that represent rarely used functions will stay in the drop-down icon bar and
not move up to the top level.
Showing or hiding toolbars
If the currently displayed selection of toolbars does not contain the icon or icons you
are looking for, you can show more toolbars.
Use View > Show Toolbars in the main menu to show or hide toolbars.
-OrRight-click in the toolbar section of the window to open a menu with all available
toolbars. Check additional toolbars here.
Standard tools
Toolbars group icons by function, frequency of use, and suitability for specific
datasets and diagnostic problems. Which toolbars are available after you have loaded your data depends on your active protocol and on your general configuration.
The active protocol defines which toolbars are shown directly after you have loaded
data and also which toolbars are available in the first place.
Visage 7 Client
57
Toolbars
View Window
This user manual describes the standard toolbars of the Visage 7 Client and the
tools these toolbars contain. In addition to these standard toolbars you may find additional toolbars with icon groups that were defined for a specific protocol.
Navigation tools
Default Navigation (F1)
The default navigation tool is set to browse slices when the active viewer segment is an
MPR, CPR, lumen or 2D viewer, and to 3D rotate when the active viewer segment is a 3D
viewer.
Tip
With the Ctrl key you can return to the default navigation tool temporarily. Default
navigation will be active for as long as the Ctrl key is pressed. When you release
the key you return to the currently selected program function.
3D Rotate (F2)
3D viewer segment: Click anywhere in the viewer segment, hold the mouse button
pressed, and drag the mouse to rotate the 3D volume in the direction of the mouse movement.
Use any of the standard orientation icons or keyboard shortcuts (Anterior (A), Posterior (P),
Left (L), Right (R), Head (H), Foot View (F)) to reset rotation.
MPR viewer segments: Click the point in the image that is to be the center of rotation. Hold
the mouse button pressed, and drag the mouse to rotate the image plane. New slice images
in non-standard orientations are created in the process. If the orientation labels and orientation cube are currently shown in a segment, they indicate the new image orientation.
Use Reset Slice Orientation (F9) to return to the original image orientation.
Pan (F3)
Select this icon and click and drag the mouse across an MPR viewer or 3D viewer segment
to move the image within the segment.
Zoom (F4)
Select this icon, click in a viewer segment, hold the mouse button pressed, and drag the
mouse cursor up to zoom in, or down to zoom out. Or use the percentage box in the viewer
controls to change the image display size.
58
Visage 7 Client
View Window
Toolbars
Window Level (F5)
Select this icon, click a viewer segment, hold the mouse button pressed, and drag the
mouse cursor left/right to change the window width (contrast), or up/down to change the
window center (brightness).
While the Window Level tool is active in a viewer segment, a histogram of grayscale values
is also shown in the lower left-hand corner of the segment. A small white bar that moves as
you shift the window center and expands or shrinks when you change the window width indicates the current window settings graphically.
Note that when you window an image segment in fusion mode this will affect the window
values of the primary dataset. In order to window the image of the overlay dataset, hold the
Shift key pressed while you window the image.
Browse Slices (F6)
The browsing tool allows the use of the mouse to navigate through an image stack in an
MPR viewer. Select this icon, click a viewer segment, hold the mouse button pressed, and
drag the mouse cursor up/down to scroll forward or backward through the image stack.
Position Crosshair (F7)
Select this icon and click a visible (opaque) structure in the 3D viewer or any point in one of
the images in the MPR viewer segments. This sets the crosshair cursor of the MPR viewers
to this 3D position and updates all MPR viewer segments that show this dataset.
Orientation tools
Anterior (A), Posterior (P), Left (L), Right (R), Head (H), Foot View (F)
Displays the volume in the 3D overview segment or a slice image in one of the MPR viewer
segments in the standard anatomical views anterior, posterior, left, right, head, or feet.
Image size tools
Zoom 100%
Clicking this icon represents every pixel in the image as a pixel on the window, thus representing the image “as is”.
Visage 7 Client
59
Toolbars
View Window
Fit Width/Height, Fit Width, Fit Height
Select one of these icons while a 3D viewer segment is active to resize the displayed 3D
volume so that it fits optimally in the segment (Fit Width/Height), or so that it makes optimum use of the segment width (Fit Width) or segment height (Fit Height).
-OrSelect one of these icons while an MPR viewer segment is active to resize the images in
this and all other linked MPR segments in one go.
Rotate/Flip Images tools
Rotate Clockwise, Rotate Counterclockwise
Select one of these icons while an MPR viewer is active to rotate the image in the active
viewer segment by 90° clockwise or counterclockwise. Rotation is applied only to the segment in which you clicked (3D viewer or MPR viewer).
Flip Horizontally, Flip Vertically
Select one of these icons while an MPR viewer is active to rotate the currently displayed image around its vertical or horizontal axis.
Note that you cannot flip the 3D volume in the 3D viewer.
Dataset Navigation tools
Previous Study, Next Study
If you have loaded more than one 3D study, use these icons to scroll through the loaded
studies.
Previous Volume or Muliframe Image (Ctrl +
(Ctrl +
)
), Next Volume or Muliframe Image
If more than one 3D volume is assigned to an MPR or 3D viewer, or more than one multiframe image is assigned to a 2D viewer, use these tools to switch between the different objects assigned to the viewer.
Previous Phase of Time Series (
), Next Phase of Time Series (
)
If you have loaded a time series, use these icons to scroll through the phases.
Annotation and Measurement tools
With these tools you can annotate and evaluate image information in slice images
(MPR viewers) as well as in the 3D viewer. Note, however, that measurements in
the 3D volume of the 3D viewer segment are only possible in orthographic but not in
perspective display mode.
60
Visage 7 Client
View Window
Saving annotations
Toolbars
For information about how to save annotations and measurements refer to Saving
annotations and measurements.
Arrow/Text Annotation
Select this tool and click in an image segment to create a text annotation.
-OrClick in an image segment, hold the mouse button pressed, and drag the mouse across the
image to create an arrow plus text annotation (straight line with arrow).
The Edit Annotation dialog box is automatically opened.
Subsequently, you can also right-click the arrow or annotation text and select Properties to
open the Edit Annotation dialog box.
Refer to Editing annotations and Edit Annotation dialog box for information on how to move,
edit, or format annotation texts.
Refer to Showing annotation text at a fixed viewer position if you want to freeze annotation
text in a viewer segment.
Circle Annotation
Select this tool and click in an image segment to create a circle with a predefined radius.
-OrClick in an image segment, hold the mouse button pressed, and drag the mouse across the
image to create a circle with your own radius. You can right-click the circle and select Set
Size as Default to define this radius as your own default.
The Edit Annotation dialog box is automatically opened when a new circle is created.
Subsequently, you can also right-click the circle or annotation text and select Properties to
open the Edit Annotation dialog box.
Refer to Editing annotations and Edit Annotation dialog box for information on how to move,
edit, or format annotation texts.
Refer to Showing annotation text at a fixed viewer position if you want to freeze annotation
text in a viewer segment.
Distance (D)
Select this tool, click where you want to start your distance measurement, hold the mouse
button down, drag the mouse across the image, and release the mouse button at the end
point of your distance line.
-OrCreate a line that consists of several segments: start the first segment, press the Shift key
before you release the mouse button at the end of the first segment. Hold the Shift key
pressed while you draw the other segments. Release the Shift key before the last click.
The distance is indicated in mm (millimeters).
Display the Line Profile tool card tool for an intensity profile (or HU value profile for CT) of
your distance line.
Refer to Editing annotations for information on how to move or edit measurement graphics.
Visage 7 Client
61
Toolbars
View Window
Caution
The accuracy of distance measurements is ± 2 pixels. Larger errors can occur if
the image is displayed with reduced matrix size, that is if not every original pixel is
shown on the screen due to zoom-out. For optimum accuracy we recommend
zooming into the structure of interest as much as possible. The accuracy is further
limited by the physical resolution of the acquisition itself. If the monitor used for
display does not permit exact pixel selection, the inaccuracy can be greater still.
Angle
Select this icon, click in an image segment, hold the mouse button down, and drag the
mouse to draw the first leg of an angle. Click when you have reached the vertex and draw
the second leg.
Refer to Editing annotations for information on how to move or edit measurement graphics.
Angle (Two Lines)
Select this icon, click and draw two separate lines in your image. If the lines intersect the
program calculates both the acute and the obtuse angle. If the lines do not intersect in the
viewer segment the program calculates only the acute angle.
Refer to Editing annotations for information on how to move or edit measurement graphics.
Caution
The accuracy of angle measurements depends on the length of the shorter of the
two angle legs. The longer the angle legs are, the better the accuracy.
For example:
Length of shorter angle leg (measurement error):
10 pixels (± 12°), 20 pixels (± 6°), 50 pixels (± 2.5°), 100 pixels (± 1.1°)
Larger errors can occur if the image is displayed with reduced matrix size, that is if
not every original pixel is shown on the window due to zoom-out. For optimum accuracy we recommend zooming into the structure of interest as much as possible.
The accuracy is further limited by the physical resolution of the acquisition itself. If
the monitor used for display does not permit exact pixel selection, the inaccuracy
can be greater still.
Distance Ratio
Click this icon and perform distance measurements. The system will display the length of
the two distance lines and the ratio between the two measurements.
Vertical Distance
Click this icon and two points in the image. Visage 7 Client will draw two horizontal lines and
measure the vertical distance between these lines.
62
Visage 7 Client
View Window
Toolbars
Calibrate Image (only in 2D images)
Some image types have no aspect ratio information in their DICOM image header. For
these images distances cannot automatically be expressed in millimeters. You can, however, calibrate the distance tool using known distances in images (e.g. image markers or the
length of a ruler).
Click this icon and measure a known distance. Enter that distance (in millimeters) in the
Calibrate dialog box.
Elliptic ROI
Click this icon and draw an elliptical ROI. The ROI area is indicated in mm² (square millimeters).
Refer to Editing annotations for information on how to move or edit measurement graphics.
Caution
The relative error of the elliptical ROI measurement is ± 2 pixels/(shorter radius).
For example:
Shorter radius (measurement error):
10 pixels (± 20%), 20 pixels (± 10%), 50 pixels (± 4%), 100 pixels (± 2%)
Larger errors can occur if the image is displayed with reduced matrix size, that is if
not every original pixel is shown on the screen due to zoom-out. For optimum accuracy we recommend zooming into the structure of interest as much as possible.
The accuracy is further limited by the physical resolution of the acquisition itself. If
the monitor used for display does not permit exact pixel selection, the inaccuracy
can be greater still.
Circular ROI
Click this icon and draw a circular ROI. The ROI area is indicated in mm² (square millimeters).
Refer to Editing annotations for information on how to move or edit measurement graphics.
Spherical ROI
Click this icon to draw a spherical ROI in a 3D dataset. When you release the mouse button
statistics for both the diameter and the volume of the sphere are shown.
Refer to Editing annotations for information on how to move or edit measurement graphics.
Point-Sized ROI
Select this icon and click a point in an image to show the density value as a measurement
graphic, which you can save in a key view or snapshot.
Refer to Editing annotations for information on how to move or edit measurement graphics.
Visage 7 Client
63
Toolbars
View Window
Pixel Value
Select this icon and move the mouse over an image in an MPR viewer segment. The pixel
value of the cursor position is shown as image text in the lower left-hand corner of the viewer segment. The value changes as you move the mouse.
In CT images the pixel value is given in HU (Hounsfield Units). In other image types the
units depend on the information stored in the DICOM data.
Cobb’s Angle
With this tool you can measure Cobb’s angles in spine datasets. Or use this tool to measure
the angle between lines that intersect outside the visible image area.
Editing annotations
You can modify an annotation or measurement even after you have finished drawing it.
Click the annotation graphic to reselect it, and move the entire graphic.
-OrMove an end point of a line by clicking and dragging it to a new position.
-OrRight-click an annotation or measurement graphic and select Properties from the
context menu to edit display properties.
-OrDelete the annotation graphic with the Del. key on your keyboard.
-OrClick a distance line that is in your way during image review. Hold the mouse button
down, and drag the line to where it is no longer in your way. The end points of the
original measurement are indicated as dots.
Note that a line profile cannot be shown for distance lines that you have moved as
described here.
Edit Annotation
dialog box
Double-click an annotation text to open the Edit Annotation dialog box.
Here you can overwrite the Annotation text, change the Font Settings for the annotation text, and select a color (Set Color) and Line Width for your annotation.
Selecting Move Text Freely allows you to move an annotation text independently of
the annotation or measurement graphics.
With appropriate user privileges you can save your settings for future measurements and annotations in your user profile or on a system-wide basis. Click the Default button in the Edit Annotation dialog box to do so.
Showing annotation
text at a fixed viewer
position
1. Click the annotation text you want to freeze into this viewer segment for the current dataset.
2. Right-click and select Fixed Position in Viewer from the context menu.
When you now start scrolling slices or change the orientation the annotation text
will be shown in each slice image and at the same window position.
64
Visage 7 Client
View Window
Toolbars
Note
Only text annotations can be frozen into a viewer segment this way. Arrow
annotations and measurement graphics cannot be converted this way.
Saving annotations
and measurements
Annotations and measurement graphics can be saved temporarily or permanently.
•
Key view
Annotations and measurement graphics are automatically saved as key views.
This means that when you scroll back to a slice during the same session your
annotations and measurements will be shown again.
As soon as you close Visage 7 Client key views are lost unless you save them.
Tip
Use the Recall Key View item in the context menu of each viewer to return to a
view in which you performed measurements or added annotations.
•
Session management
You can save key views and other display settings in a session. Use Save Session or Save Session As from the main menu to do so.
•
Snapshots
Use the Snapshot Active Viewer (S) icon to save your measurements and annotations in a snapshot. You can then insert a snapshot in your report or save it onto your hard disk.
Visage 7 Client
65
Toolbars
View Window
Snapshot and Cine tools
Snapshot Active Viewer (S)
Creates a snapshot of the active viewer segment and places it on the Export tab card,
where it will be available for reporting.
Snapshot All Viewers (Shift + S)
Creates several snapshot images, one for each image segment currently shown on the window.
-OrCombined Snapshot All Viewers - creates one snapshot which contains all image segments currently shown on the window.
Cropping tools
Use the cropping tools to cut away portions of the volume which hide more important information that lies underneath.
When you click a crop tool, orange lines appear in the MPR viewer segments.
These lines define the area to be cut away. You can resize the crop region by clicking these orange lines in any of the image segments and drag them in or out, or you
can rotate the crop region by dragging a corner.
When you have clicked a crop tool the Lock Crop Region icon appears in the lower
right-hand corner of the active viewer segment. (The icons may look slightly different from this icon here, depending on which crop tool is currently active.)
Clicking this icon locks the crop region and allows you to move or rotate within the
crop box or slab.
Tip
Show the bounding box in the 3D viewer segment before you select a cropping
tool (see 3D viewer context menu options). This will help you to identify the portions of the volume to be cut away.
Crop Box
Select this tool to cut away the outer parts of the volume. A smaller volume box in the center
of the volume dataset remains. You can move, resize, or rotate this box by dragging or rotating it in any of the viewer segments.
Crop Corner
Select this tool to cut away a box from the corner of the volume.
66
Visage 7 Client
View Window
Toolbars
Crop Slab
Select this tool to cut away portions of the volume so that only a slab remains (i.e. a section
of the volume between any two parallel planes with oblique orientation.
Use the Viewer controls or the keyboard shortcut T in the 3D viewer segment to change the
slab thickness or to toggle slab display on and off.
Crop Plane
Select this tool to cut away a corner of the volume along an oblique cutting plane.
Remove tools
These tools provide options for the automatic segmentation and removal of specific
structures from 3D datasets. They also offer a subtoolbar for segmentation and
cropping of freely definable volume sections. Freehand cropping can be performed
in all datasets.
Caution
The automatic segmentation tools (remove table, remove leg bones, remove chest
wall) support the physician by hiding structures that occlude important information
in the images. However, the software cannot guarantee that the detected pixels
correspond to the actual anatomical structures for each individual patient and
scan. It is the responsibility of the user to check whether any relevant structure
has been accidentally removed. In that case, simply click the respective tool icon
to bring the removed structures back.
Freehand Crop
Click this icon to start freehand cropping. A context toolbar appears in the lower right-hand
corner of the active viewer segment. Proceed as follows:
1. Select the viewer segment which shows the structure you want to crop particularly clearly.
2. Click and drag the mouse around the structure. When you release the mouse button the
system closes the shape.
3. Select if you want to remove what lies inside your shape (Remove Inside) or what lies
outside (Remove Outside) on the context toolbar.
The system now determines what to remove from the volume by extruding the drawn shape
through all slices of the volume in the direction orthogonal to the current image plane. This
portion is removed from the volume in the 3D viewer segment. Freehand cropping mode is
also ended.
In order to work with the full volume dataset again:
1. Click the Freehand Crop tool a second time.
2. Click Remove Reset on the context toolbar in the lower right-hand corner of the active
viewer segment.
3. Click OK.
Visage 7 Client
67
Toolbars
View Window
Remove Table
If the table is shown in your images this tool offers a quick and easy way to remove this artifact in CT datasets.
Remove Leg Bones
Applies a lower extremities bone removal segmentation to a CT-Angio dataset, provided
you have performed an automatic bone segmentation run during this or a previous session
with this dataset. Bone segmentation with the Bone tool card is automatically stored by the
system.
If no segmentation information exists for this dataset a message box informs you about this
fact. Call the Bone tool card from this message box and perform bone segmentation now.
Remove Chest Wall
Click this icon to remove the chest wall/ribcage from a CT thorax dataset.
Fusion Registration tools
Visage 7 Client allows display of suitable datasets in so-called fusion display. Fusion
display overlays datasets, for example, a CT and a PET series of the same study.
Fusion display requires that datasets are registered, which means that they are
aligned spatially.
When you load two datasets suitable for fusion display, Visage 7 Client displays a
message that reminds you to check the correct alignment of the two datasets and
confirm it manually. Unless you do so a warning triangle will be shown in the images
throughout your entire session.
Close the message box and use the icons of the Fusion Registration toolbar to
check, adjust, and confirm correct spatial alignment of your dataset pair.
Tip
Prior to aligning datasets manually you should window the two datasets in such a
way that prominent structures are clearly visible (e.g. a bone). This will help you
overlay the two corresponding images correctly.
Manual Registration
Click this icon to enter manual alignment mode. In this mode the two datasets are displayed
overlaid. The primary dataset is shown in magenta, and the overlay dataset is shown in
green in the active viewer. An outlined cross also appears in the MPR viewer segment.
Click the center of the cross, hold the mouse button down, and drag the green layer so that
corresponding structures in the green and magenta layer are exactly overlaid. Release the
mouse button when they are.
-OrClick one of the ends of the cross. The cursor changes shape and indicates rotation. Click
and hold the mouse button down to rotate the green overlay layer.
68
Visage 7 Client
View Window
Toolbars
Accept Registration
Click this icon after you have finished aligning your datasets manually.
Once you have clicked this icon, the warning triangle disappears from the image segments.
Align Centers
Click this icon to have Visage 7 Client align the centers of the bounding boxes of the two
datasets.
Reset Registration
Click this icon to undo any manual or center alignment. The two datasets are now registered
in the same way as they were right after loading.
Viewer Linking tools
Toggle Linking
Some protocols allow linked navigation in multiple viewers. When such a protocol is active
you can use this icon to turn viewer linking on and off. When you navigate in a linked viewer
the slice images in all linked viewer segments are updated accordingly.
Link Current Position I
When a side-by-side protocol is active you can link viewers on a certain landmark in the two
datasets (e.g. a lesion, bone, or calcium segmentation).
Position the crosshairs on the landmark in both viewers and then click the Toggle Linking
icon.
Reset Viewer Linking
Shows linked datasets in the same way as when you first loaded them.
Link Display Properties
Synchronizes window/level adaptation and display of thin or thick slices in all linked viewer
segments.
Automatically Link Viewers
Click this icon to link viewers and the datasets displayed in these viewer segments automatically.
Edit Viewer Linking
Click this icon to link viewers and the datasets displayed in these viewer segments automatically.
Visage 7 Client
69
Toolbars
View Window
CPR/Vessel tools
You use these tools to perform one of the following tasks:
•
Definition and display of curved slices
This implies that you define a curve through your volume and have Visage 7 Client apply curved reformatting, which shows a projection image of a curved extrusion plane defined by the vertices of your curve. This view helps tracking curved
structures such as the spine.
For curve definition you can either use the 3D viewer segment or MPR viewers
or a combination of both. In MPR viewers you can scroll slices while adding
points (vertices).
•
Segmentation of vessels
Semi-automatic vessel segmentation implies that you identify a vessel in the 3D
viewer or any of the MPR viewer segments and define at least the start and end
point for the vessel segmentation. Next you have the system segment the vessel
automatically. Finally you can evaluate the vessel in your MPR viewers or in the
lumen viewer.
For a more detailed description of the procedures involved in vessel tracing and
vessel analysis see also Vessels and Centerlines tool card.
Curved planar
reconstruction
Curved View
Click this icon to show the curved slice viewer. The curved slice viewer is shown in a new
viewer segment. As soon as you begin to click points along your curve a projection image is
shown here.
Define/Edit Curve
Select this tool to begin curve definition. A context toolbar appears in the lower right-hand
corner of your active viewer segment.
Now click the vertices of your curved slice in any of the viewer segments. The vertices and
the curve will be shown in all viewer segments that display this data.
Use the Show All Vertices icon in the context toolbar to toggle display of all vertices that
you have created so far, or only those in slices that are close to the currently displayed slice.
Use the Undo icon in the context toolbar of the active viewer segment to remove the last
vertex. Or use the OK icon to finish curved slice definition.
Clear Points
Use this tool to delete a curve definition.
Toggle Centerline
Use this icon to show or hide your curve in the images in the MPR viewers and in the volume in the 3D viewer segment.
70
Visage 7 Client
View Window
Toolbars
Vessel segmentation
Define/Edit Curve
Select this tool to begin curve definition. A context toolbar appears in the lower right-hand
corner of your active viewer segment.
Click at least two points along your vessel to define the vessel segment you wish to review.
Curved View
Click this icon to turn display of the curved slice viewer on or off.
Lumen View
Click this icon to turn display of the lumen slice viewer on or off.
Cross-Section View
Click this icon to show a cross-section of your vessel in one of your MPR viewer segments.
Use the context menu in this MPR viewer segment to show the shutter as well.
Toggle Centerline
Use this icon to show or hide your curve in the images in the MPR viewers and in the volume in the 3D viewer segment.
Brain Perfusion tools
For brain perfusion studies, Visage 7 Client provides tools for performing perfusion
analysis. The icons are sorted according to the workflow from left to right.
Display tMIP
Click this icon to show or hide the temporal MIP.
In a temporal MIP of a CT dataset, the brightness of each pixel in the image indicates the
maximum pixel value in any of the time steps for this pixel. In MR datasets, tMIP shows the
minimum pixel value. This helps to show contrast-filled vessels particularly clearly.
Define Artery
Next select Define Artery on the toolbar and click on the main artery of the brain in the temporal MIP image.
The point where you clicked is marked as a ROI and an uptake curve for this ROI is shown
in the viewer. The update curve for the artery is displayed in red.
Define Vein
Next select Define Vein on the toolbar and click the main vein of the brain in the image.
The uptake curve of the vein has been added to the graph. The uptake curve for the vein is
displayed in blue. If the graph is in your way, click it and drag it to where it does not hide important image information.
Visage 7 Client
71
Toolbars
View Window
Calculate Perfusion
Click the Calculate Perfusion icon on the toolbar to show the following functional images in
the result images viewer segments: mean transit time (MTT), time to Peak (TTP), cerebral
blood flow (CBF), cerebral blood volume (CBV)
Define ROI
Select the original scan image, tMIP image, or any of the functional images (e.g. MTT) and
click Define ROI on the toolbar to activate mirror mode and to define and evaluate regions
of interest in this image.
A vertical line has appeared in the image segment. Click and drag the end points so that the
line separates the left and right half of the brain.
Use the tools in the context toolbar in the lower right-hand corner of the image segment to
define an elliptical ROI or a freehand ROI. As soon as you release the mouse button a mirror image of your ROI is shown in the other half of the brain. ROI statistics are shown in all
four functional images.
The Refine Contour tool is active now. Correct the contour of the ROI you have drawn, do
not correct the mirror ROI. Click anywhere in the image to show the “nudge” tool. This tool
has the shape of a circle. The further away you click from the contour the larger the circle
will be. The closer to the contour line you click the smaller will be. When you have clicked
outside the contour you can use the nudge tool to push the contour line in and reduce the
area defined by the contour. When you click inside the contour you can push the contour
line out and increase its area.
Use the Undo icon on the context toolbar to undo contour editing step by step.
Click OK when you have finished refining contours and adding ROIs.
Mirror Mode
Use this icon to toggle mirror mode on an off.
Multiphase tools
Subtract baseline
Subtracts the baseline image from a time series.
See also Additional tools for time series analysis
72
Visage 7 Client
View Window
Toolbars
Lesion tools
Lesion tool
With these tools and context toolbar you can mark lesions, segment lesions, and evaluate
and compare lesions in a current and earlier study, for example.
To evaluate and compare lesions in a current and prior study proceed as follows:
1. Load the two studies onto the View window and show corresponding images side by
side.
Tip: Linking the two viewers will help when you scroll while reviewing the datasets.
2. Click the lesion tool on the toolbar. A context toolbar is shown in the lower right-hand corner of the active viewer segment.
3. Use the Segment Lesion tool to segment and evaluate a lesion.
4. In the corresponding image of the other study either segment the lesion as well, or use
the Mark Lesion tool to mark a spot if no lesion is visible in this dataset.
If you have segmented lesions in both images lesion statistics are shown, which include lesion growth information.
In order to grow or shrink a lesion segmentation:
Hold the Shift key down, click in the image and drag the mouse across the window. The lesion segmentation grows or shrinks and the lower threshold level for the segmentation is
shown.
If a lesion cannot be segmented automatically (because of poor image quality, for example):
Use the Measure Lesion tool from the Lesion context toolbar to measure the diameter of a
lesion in the images of one or both studies.
-OrSelect Measure Lesion (2 Diameters) to measure both the horizontal and the vertical diameter of a lesion. (Note that your measurements must be perpendicular.)
In order to classify a lesion according to the RECIST standard:
Click a lesion to select it.
Drop down the list of standardized lesion labels next to the Classify Lesion icon to select
one.
If you have marked several lesions in one or two corresponding datasets:
Use the Next Lesion/Previous Lesion tools in the context toolbar to scroll through all lesions marked in your dataset. (You can create snapshots for your report now, for example)
Visage 7 Client
73
Toolbars
View Window
Labels tools
Labels... button
Opens a dialog to show labels of a study and create new or assign existing labels to the currently open so it can be quickly located, for example for conferences or a second opinion.
3. Click the Labels... button
4. In the dialog now opened, check one or more existing labels in the list box (you can filter
this list by means of show public and/or show private)
- ORCreate a new label by entering a name activating Create Private or Create Public to
assign it to your own account or all users.
The selected label(s) or new label will be shown in a list. You can select an entry in this list
and use the context menu to perform the following actions:
•
make a private label public or vice versa
•
delete a label
•
assign it to a button on the labels toolbar.
Label buttons
If a label was assigned to a button, it is shown on the Labels toolbar.
Miscellaneous tools
In this section you will find a description for additional tools and toolbars that are not
contained in any of the standard toolbars by default. Most likely these tools will be
available as separate toolbars which have been defined by the active protocol.
Magnifier
Use this tool to be able look at details in the displayed images more closely without having
to zoom the entire image.
Select the tool and click in an image to enlarge a portion of that image just as if you were
applying a magnifying glass.
Request original lossless data from server
If a red dot can be seen in the lower right corner of an image, this image has been loadedfrom the server in compressed form.
Press the HD button to force updating the image with lossless original data from the server.
74
Visage 7 Client
View Window
Toolbars
Scroll Page by Page
Click this icon to use the wheel mouse for browsing images. In a 2D viewer segment that
shows one image turning the mouse wheel will scroll one image at a time.
If the active viewer segment is a 2D viewer and several images are shown in the 2D viewer
(tiled display mode) turning the mouse wheel will scroll one page up or down (i.e. replace all
displayed images).
Study Navigator
Click this icon to open the Prior Studies dialog box with a list of any previous studies stored
on the Visage server for this patient.
Study Information
Click this icon to open a dialog box with patient and study information.
You can edit the study comment text here but no other study information.
Visage 7 Client
75
Tool cards
View Window
Tool cards
Tool cards may be arranged in one or several stacks, usually on the right-hand side
of the window. Alternatively, tool cards can be displayed as floating windows.
Your currently active protocol defines how and how many of the available tool cards
are shown right after you have loaded data onto the View window.
Showing a tool card
Click a tab in a stack of tool cards to call this card to the foreground.
-OrSelect the tool card from the main menu (Tools).
The tool card will either be added to one of the stacks or be shown as a floating window.
Tip
If you do not find the tool card you are looking for in the Tools menu then this tool
card is deactivated in your current protocol. Select a different protocol in this case.
Tips for arranging tool cards
In order to show a tool card as a floating window, double-click its tab in one of the
tool card stacks.
In order to attach a floating window to a stack of tool cards:
1. Click the arrow button that points down (upper right-hand corner of a stack of tool
cards). A list of all available tool cards drops down.
76
Visage 7 Client
View Window
Tool cards
2. Check more tools here to add their cards to your current stack.
A tool card can only be shown in one stack at a time.
Some tool cards require more window space than others. You can therefore resize
tool card stacks or the width of the entire tool card area.
1. Click the line that divides two stacks of tool cards, for example.
The mouse cursor changes shape.
2. Drag the line up or down to resize the tool card above and below.
If the tool card area is temporarily in your way you can hide it:
Click the arrow button between the image viewer and tool card section.
-OrUncheck View > Show Tool Cards in the main menu to do so.
Depending on the protocol, the tool card area may initially be hidden. In that case
click the arrow icon at the border of the window.
-OrSelect View > Show Tool Cards in the main menu to show the tool card area.
Visage 7 Client
77
Tool cards
View Window
When tool cards are shown as floating windows they are usually displayed in a size
that ensures they are not in your way while you are reviewing images. You can enlarge these windows, if you like.
Click the lower left or right-hand corner of the window and drag it out to show the
tool card larger.
Visage 7 Client tool cards
Tool cards offer controls for changing image display settings and supporting the user with advanced image review and evaluation tasks. Some of these functions apply
to all viewers, while others provide different tools depending on the currently active
viewer type.
When the 2D viewer is your active viewer segment, most of the evaluation options
on the tool cards are not available as they apply to volume datasets only.
Tip
If you cannot find one of the following tool cards in the drop-down list of tool cards
or in the main menu, select a different protocol.
Templates tool card (3D viewer)
Templates offer a quick and easy way to optimize the 3D volume display in the 3D
viewer segment for specific tasks.
A template defines volume rendering and display parameters for volume datasets of
a particular modality or combination of modalities.
A template stores the following information:
•
The modality of the primary and overlay dataset.
•
A color map for the primary and overlay dataset
See 3D Color Map tool card (3D viewer).
•
User-defined 3D
templates
78
Rendering and display settings for the volume display in the 3D viewer segment.
A number of predefined templates came with your system. Advanced users may
choose to adjust these to their own requirements or define their own set of 3D templates. When saving a new or adapted template you decide whether to make it
available for all users or save it under your own user account only.
Visage 7 Client
View Window
Tool cards
Note
If you edit and save one of the All users templates on the Visage server you
change this template permanently and for all Visage 7 Client users in your network. The factory-defined template version will be lost this way.
Template
selection
Simply click a template thumbnail on the tool card.
-OrDrop down the list of suitable templates.
The tool card lists only templates that were defined for the modality (or modalities) of the data currently loaded on the View window.
After loading a template the volume display in the active 3D viewer is updated. You can
work with this volume display now or change individual display parameters, if you wish.
Click Reset to return to the original 3D volume and revoke your changes.
Use these icons to maintain the list of templates available in your system.
Click the Save icon to save the 3D rendering and display settings currently applied to the
3D volume in your active 3D viewer segment.
A dialog box opens. Enter a template name here and decide whether the new template will
be available for all users or for your user account only.
To remove this template from the list select a template thumbnail and click the Delete icon.
Display tool card
On the Display tool card you can adapt display settings for the images in the MPR
viewers and the 3D volume in the 3D viewer. The Display tool card offers slightly
different controls depending on the currently selected viewer segment (MPR viewer,
3D viewer, or 2D viewer), and whether fusion mode is currently active or not.
Turning fusion
display on and off
Visage 7 Client
If you have loaded multiple series or studies you can display the images of these
series overlaid.
79
Tool cards
View Window
Click the Primary Dataset checkbox and the Overlay Dataset checkbox on the
Display tool card and select datasets from the corresponding dropdown lists.
Fusion display is particularly suitable for studies from combined multi-modality
scanners such as CT-PET and CT-SPECT, but you can also use this feature to
overlay two CT series, for example.
Uncheck either the Primary Dataset checkbox or the Overlay Dataset checkbox to
turn fusion display off again.
Display card in
fusion mode (all
viewers)
Primary Dataset
With this checkbox you turn display of the primary dataset on and off.
Select the primary dataset from the drop-down menu (arrow button to the right).
Histogram and
color map
Shows the histogram of the primary dataset.
Use the slider right below the histogram to adjust the window settings for this dataset.
-OrDrop down a list of available color maps with the arrow button to the right of the histogram
and select a suitable color map.
Overlay Dataset
With this checkbox you turn display of the second dataset on and off. This dataset will be
overlaid over the primary dataset.
Select the overlay dataset from the drop-down menu (arrow button to the right).
Histogram and
color map
Fusion slider
80
Shows the histogram of the overlay dataset.
Use the slider to adjust the window settings for this dataset, or select a color map from the
drop-down menu.
This slider allows you to fade between the primary and the overlay datasets. If you move the
slider all the way to the left, only the primary dataset will be visible. If you move it all the way
to the right, only the overlay dataset will be visible.
Visage 7 Client
View Window
Tool cards
Display card in nonfusion mode (MPR
and 3D viewers)
Dataset selection
Allows to select the dataset to be displayed.
Histogram and
color map
Shows the histogram of the primary dataset.
Use the slider right below the histogram to adjust the window settings for this dataset.
-OrDrop down a list of available color maps with the arrow button to the right of the histogram
and select a suitable color map.
MPR/CPR/Lumen viewers
Always Highest Resolution: check this box to show full resolution images even during image manipulation (this may slow down program performance). Or uncheck this box to show
a downsampled slice image during program interaction (e.g. for thick slices or during rotation).
Use the Quality slider to decrease or increase image quality during program interaction:
moving the slider to the right will increase image quality but may slow down system performance.
3D Color Map tool card (3D viewer)
The 3D Color Map tool card allows you to select and edit the color map that is used
for VRT rendering in the 3D viewer segment.
A color map assigns colors and transparencies to different tissue types as defined
by their window values.
By selecting and adjusting a color map, you focus on structures and tissue types
that are of particular interest to you. With a suitable color map, you can display
these structures particularly clearly and hide structures and tissue types which
would only distract you from the question at hand.
User-defined color
maps
Visage 7 Client
A number of predefined color maps came with your system. Advanced users may
choose to adjust these to their own requirements or define their own set of 3D color
81
Tool cards
View Window
maps. When saving a new or adapted color map back to the Visage server you can
decide whether to make it available for all users or save it under your own user account only.
Note
Some of the available color maps (e.g. gray ramp and temperature) can only be
edited to a limited extent. Only the data windows of the tissue types of these color
maps can be adjusted but not the color and transparency settings. Changes to
these color maps cannot be saved either.
Primary Dataset/
Overlay Dataset
Fusion mode only.
Select which of the two color maps you want to edit: the one that is used to display the primary dataset or the one that is assigned to the overlay dataset.
Color map
selection
Click the arrow button next to the currently selected color map label to drop down a list of all
color maps available in your system.
Color map editor
The color map editor shows the histogram (grayscale or HU values) of the selected dataset
as a background image.
The graphs that overlay the grayscale histogram represent the tissue types and their display definition with respect to color and transparency for VRT rendering.
You can edit these graphs in order to change the color map:
- You can change the data window for a tissue type.
- You can select different colors for each graph.
- You can change the transparency settings for a tissue type.
- You can change the tissue type description.
- You can add or delete tissue type graphs.
Click Reset to return to the original 3D color map and revoke your changes.
82
Visage 7 Client
View Window
Tool cards
Use these icons to maintain the repertoire of color maps available in your system:
Click the Save icon to save your changes to a color map or create a new color map.
A dialog box opens. Enter a color map name here and decide whether the new color map
will be available for all users or for your user account only.
To remove this template from the list select a color map and click the Delete icon.
Editing a color map
In order to move or resize the histogram:
1. Click in the black area above or below the grayscale histogram and hold the
mouse button down.
The mouse cursor changes shape (it turns into a double-arrow).
2. Drag the mouse to the right or left to move the histogram (and show areas to the
right or left that were previously hidden).
-OrDrag the mouse cursor up or down to condense or expand the histogram.
In order to add or delete a graph:
1. Right-click next to the graph to open a menu.
2. Select New Tissue to add a new graph.
-OrSelect Delete Tissue to delete the selected graph.
-OrSelect one of the listed tissue types for editing.
In order to edit a graph:
1. Click a graph to select it.
2. Drag the boxes to the left or right along the bottom line of the histogram to
change the window center and width of this tissue type.
Visage 7 Client
83
Tool cards
View Window
-OrDouble-click the boxes along the bottom line or the apex (or apices) to change
the color definition of the graph.
-OrDrag the boxes up or down to change transparency settings.
-OrClick in the tissue description text above the histogram and edit this text.
In order to rename a tissue type:
1. Click a tissue graph (control point or line) to select it.
The name of the selected tissue type is shown above the graph section.
2. Select this text in order to overwrite it.
84
Visage 7 Client
View Window
Tool cards
Cine tool card
With the controls on the Cine tool card you can animate the display of the MPR and
3D viewers. Depending on the type of data that has been loaded and the selected
viewer segment you can scroll through slice images in an image stack, play back a
time series over time, rotate the volume in the 3D viewer segment, or move the crop
plane through the volume (if the Crop Plane tool is currently turned on).
You can record these animations for presentation purposes, for example. You can
save the resulting captured images as a new DICOM series (.dcm) in the local database or send them to another DICOM server in order to distribute the results of your
work. Or you may save the images to the hard disk on your computer as MPEG
movie (.mpg), JPEG (.jpg), PNG (.png), or DICOM (.dcm).
Cine tool card for
MPR viewers (image
stack or time series)
Batching
Position
Increment
Best 3D Quality
Update All Viewers
Select whether you want to scroll through the slice images (Stack) or whether you want to
show a time series over the acquired time (Time).
Select a Start position and End position slice for your movie.
Select an Increment for scrolling. This can either be the Same as Slice Thickness or any
other value (Custom).
Check this box for slow playback or recording in best 3D quality.
Only active for time series.
With this checkbox you decide whether you want to apply cine mode to all viewers or whether you want to play the film in the selected viewer only.
Click Play (or use the keyboard shortcut C) to play your film back once.
Click Pause (or use the keyboard shortcut C) to halt the playback.
Select Loop to play the film in an endless loop.
Visage 7 Client
85
Tool cards
View Window
Click the Record icon to open the Cine Options dialog box.
Here you can choose whether you want to save your film as an MPEG movie (on your local
computer), or as separate snapshot images (like in a slide show) or as a new DICOM series
(on your local computer or on a connected DICOM server).
Cine tool card for
the 3D viewer (image
stack or time series)
Batching
Select an animation mode here:
Rotate - this rotates the entire volume.
Crop - this has a crop plane move through the volume (only shown if the Crop Plane tool is
currently turned on).
Time - this plays the volume back over the time axis (only shown if the loaded dataset is a
time series).
Parameters
Axis
Position
Best 3D Quality
Update All Viewers
Select the rotation Angle (360° is full rotation) and Increment.
Select a rotation axis and decide whether this axis refers to the patient coordinate system
(Object Coordinates) or to Window Coordinates.
Select a Start position and End position slice for your movie.
Check this box for slow playback or recording in best 3D quality.
Only active for time series.
With this checkbox you decide whether you want to apply cine mode to all viewers or whether you want to play the film in the selected viewer only.
Click Play (or use the keyboard shortcut C) to play your film back once.
Click Pause (or use the keyboard shortcut C) to halt the playback.
86
Visage 7 Client
View Window
Tool cards
Select Loop to play the film in an endless loop.
Click the Record icon to open the Cine Options dialog box and save your film as an mpg
file. Select recording settings here and choose whether to save the movie to your local computer or to a connected DICOM server.
Cine tool card for
lumen viewer or CPR
Batching
Position and
Increment
Select whether you want to scroll slice by slice (Stack) or whether you want to rotate around
the segmented structure or vessel (Rotation).
If you have selected Stack mode:
Select a Start position and End position slice for your movie.
Select an Increment for scrolling. This can either be the Same as Slice Thickness or any
other value (Custom).
Parameters and
Axis
If you have selected Rotation:
Select the rotation Angle (360° is full rotation) and Increment.
Select a rotation axis and decide whether this axis refers to the patient coordinate system or
to window coordinates.
Best 3D Quality
Update All Viewers
Check this box for slow playback or recording in best 3D quality.
Only active for time series.
With this checkbox you decide whether you want to apply cine mode to all viewers or whether you want to play the film in the selected viewer only.
Click Play (or use the keyboard shortcut C) to play your film back once.
Click Pause (or use the keyboard shortcut C) to halt the playback.
Visage 7 Client
87
Tool cards
View Window
Select Loop to play the film in an endless loop.
Click the Record icon to open the Cine Options dialog box.
Here you can choose whether you want to save your film as an MPEG movie (on your local
computer), or as separate snapshot images (like in a slide show) or as a new DICOM series
(on your local computer or on a connected DICOM server).
Line Profile tool card
The Line Profile tool card shows the grayscale (or HU value) profile of the currently
selected distance line in the image currently shown in the active viewer. If there is
only one line in the image, that line is shown automatically.
If you have moved a distance line that was in your way no line profile can be shown.
Move the distance line back to its original position to redisplay the line profile.
linear/log
x/y- axis
Select linear or logarithmic scale.
The x-axis shows the length of the line(s), the y-axis represents grayscale or HU values.
In fusion mode (when a primary and an overlay image are active in the same viewer), two
profiles are shown, one for each image. The colors of the lines correspond to the colors of
the units shown on the two X axes.
Click this icon to create a snapshot of your line profile(s). The snapshot will be added to any
snapshots of image data on the Export window, from where you can save it to hard disk.
Click this icon to save the data of your line profile onto your hard disk as a comma-separated list (*.csv file).
88
Visage 7 Client
View Window
Tool cards
SUV tool card
PET images contain data that represent radionuclide activity in the patient's body.
This data is usually indicated in units of Bq/ml. Visage 7 Client can convert these
values in Standardized Uptake Values (SUV) based on the radionuclide activity and
the patient's anatomy. Visage 7 Client algorithms for the following SUV standards:
•
SUV based on body weight
•
SUV based on lean body mass
•
SUV based on body surface areas
On the SUV tool card you can select which value to use and check or correct the patient and study data required for SUV calculation.
Note
The values displayed on the tool card refer to the volume dataset currently shown
in the active viewer. If you activate a viewer showing a different dataset, the values
in the SUV tool card are updated.
Patient weight,
height, sex
Check if this data has been entered correctly and add missing information if you want to calculate SUV for lean body mass or SUV for body surface area.
Radionuclide
data
Check and, if necessary, add missing information on half-life, dose, injection and scan time
start.
Reset to DICOM
values
Use this button if you have changed data and want to reset it to the information stored in the
source files.
Data Window
Unit radio buttons
Visage 7 Client
Adjust the SUV data window used for initial display in SUV-based protocols.
Select the unit you want your system to use for displaying radionuclide activity in the patient's body. Choose between becquerel or Standardized Uptake Values, or select Counts
for data acquired with Phillips scanners.
89
Tool cards
View Window
Stores the default values for the initial data window as well as for the preferred SUV type in
the global settings for this user.
Vessels and Centerlines tool card
This tool card helps you with vessel analysis as it allows you to trace one or several
vessels in your dataset and name them, which will help you with reporting.
Vessel segmentation and analysis are performed in two steps:
•
Vessel tracing
Visage 7 Client offers two alternatives or modes for vessel tracing: a semi-automatic
mode and a manual mode.
In most cases you will use semi-automatic vessel tracing and click to select two
(or more) points along a vessel and then have the system trace the vessel. If the
system cannot trace and segment the vessel correctly you can reset tracing, return
to curve definition, select more points and repeat automatic tracing. You will use the
curve editing tools on the Vessel tool card or on the CPR/Vessel tools to do so. In
semi-automatic mode the system will slightly readjust the points you clicked (for example, move a clicked point to the vessel center) and trace the path of the vessel
automatically. Vertices you selected for semi-automatic vessel tracing are shown as
green dots.
If semi-automatic vessel tracing fails to produce adequate results (for example, because of poor image quality) you can revert to manual tracing mode. Hold the
Shift key down while you click vertices. Manually selected points are shown as blue
dots and are placed exactly where you clicked. When you start vessel tracing the
system connects all blue dots with straight lines and does not attempt to readjust
points or trace vessel paths automatically.
Tip
Before you start vessel tracing rotate the volume in the 3D viewer and remove any
obstructing structures so that you have a particularly clear view of the vessel or
vessels in question.
•
Vessel analysis
As a result of vessel tracing the system has identified your vessel in the dataset.
The vessel is highlighted in the 3D viewer segment (surface shading).
You can now switch on lumen view, which helps you to locate areas of interest along
your vessel. You can also show a cross-section of your vessel in one of the MPR
viewer segments and use a shutter for easy navigation.
90
Visage 7 Client
View Window
Tool cards
Vessel tracing
Caution
The vessel tools support the physician in finding vessel-like structures in the image data and in navigating quickly along these structures for efficient review.
However, the software cannot guarantee that the detected and displayed structures correspond to an actual vessel fragment. It is the responsibility of the user to
check the plausibility and accuracy of the presented data.
Click the vessel you are going to define.
Double-click the default text Vessel1, for example, and overwrite it with the name of the
vessel, if you want.
-OrSelect Insert New Vessel from the context menu of the vessels list.
Click Edit to start curve definition. A context toolbar appears in the lower right-hand corner
of the active viewer segment.
For semi-automatic vessel tracing (green dots):
Click two points along your vessel to define the vessel segment you wish to review.
-OrFor manual tracing mode (blue dots):
Hold the Shift key down while you click points along your vessel.
Click Clear if you have made a mistake and want to start again.
Click Trace large for large vessels (e.g. carotids or aortic vessels) or click Trace small for
small vessels (e.g. coronary arteries).
Visage 7 Client traces the vessel between the end points of your curve automatically now.
If automatic vessel tracing is unable to trace the vessel correctly, return to Edit mode to refine your curve definition. Click to add more points, click an existing point to show images of
this point in MPR viewer segments, or Shift + click existing points to select them without updating image display in the MPR viewer segments. Drag a selected point to move it
Visage 7 Client
91
Tool cards
View Window
Vessel analysis
After you have had the system segment your vessel you can analyze it using the
shutter view and the lumen view.
Click Curved View in the lower left-hand corner of the Vessel tool card to show a new viewer segment with a projection image of a curved plane defined by the vertices of your curve
definition. Curved view allows you to rotate around a vessel, for example.
Click Lumen View to show a new viewer segment.
Lumen view helps you locate areas of interest along your vessel and navigate to these slices quickly. Simply drag one of the sliders to the slice you would like to review. This slice is
now shown in the MPR viewers.
Use the lumen viewer context menu to show the distance between the sliders (Segment
Length).
Dragging a slider also turns Cross Section view on, which replaces one MPR viewer segment. Use cross-section view to measure the vessel cross-section with the Distance (D)
tool. Measurement results are shown in the lumen viewer next to the slider of the active
cross-section.
Use the keyboard shortcut E to toggle cross-section display of the two sliders in lumen view.
Once you have measured the vessel cross-section in the images of the two slider positions,
use the context menu in the lumen viewer to turn display of the percentage of the Stenosis
on and off.
Shutter
If the shutter is not already shown in the cross-section viewer, select it from the context
menu. With shutter mode active:
You will navigate along the selected vessel when you browse slices in the segment with the
shutter. (One of the sliders in lumen view will follow your movement).
You can rotate the vessel in Lumen View with the viewing angle handles in shutter view.
Click and drag these handles to look at the vessel from a different angle.
You can resize the shutter. Hold the Shift key down, click one of the handles, and drag it in
or out to shrink or enlarge the shutter.
Bone tool card
The Bone tool card helps you remove bones from CT datasets of the entire body or
of the legs.
Visage 7 Client can automatically delete and remove the pelvis and spine and the
bones in the legs. Other bones cannot be segmented automatically.
Segmentation of bones with the tools of the Bone tool card is saved on the server
automatically. No user interaction is required in this. The next time you load a
dataset in which you performed bone removal in an earlier session you can also reload your segmentation results. You can now apply them to the data again with the
Remove Leg Bones icon of the Remove toolbar, or the option Load Pre-Computed
Segmentation on the Bone tool card.
92
Visage 7 Client
View Window
Tool cards
Caution
The bone tool card supports the physician in finding bone structures in the image
data.
However, the software cannot guarantee that the detected and displayed structures actually correspond to the bones of the pelvis, spine, and the bones of the
legs. It is the responsibility of the user to check the plausibility and accuracy of the
presented data.
Segmentation algorithm
Select which bones you want the system to segment and remove: pelvis and spine, or the
bones of the legs, or both.
If you have selected pelvis and spine segmentation, the system expects you to locate the
aorta. Either scroll to a slice that shows the aorta clearly and place the navigation cross-hair
over the aorta. Or click this button to have the system find the aorta.
Click Compute to start the segmentation run.
Use these buttons to toggle between hiding the bones in the 3D viewer, showing only
bones, and showing the complete volume again.
Click the Reset button if you are not satisfied with the results of bone removal.
Select Load Pre-Computed Segmentation and click Load to redisplay the results of a
segmentation run you performed earlier or during a previous session.
Selecting Load Pre-Computed Segmentation and clicking Load has the same effect as
clicking the Bone Removal icon on the Remove tools.
Visage 7 Client
93
Tool cards
View Window
Edit tool card
The Edit tool card allows you to segment structures, or to refine segmentation results created by semi-automatic Visage 7 Client segmentation tools, such as the
bone removal tool.
Basic workflow
In order to segment a structure in your volume dataset, proceed as follows:
1. Select Create New Object in the context menu of the objects list in the lower
half of the Edit tool card.
2. Point the mouse to the generic object name, select Rename Object from the
context menu, and enter a descriptive object name.
3. Select the value range of the structure you are about to segment either by using
the value range slider or by entering grayscale values or HU values (for CT data)
in the min./max. boxes.
4. Click one of the selection tools above the value range slider (e.g. the Connected
Voxels in Value Range (3D) tool).
The system switches into a mode in which only voxels with grayscale values defined by the value range are shown in the 3D viewer segment. In MPR viewers
tissue of this value range is highlighted blue.
5. Select voxels in the 3D viewer or one of the MPR viewer segments.
Your selection is shown red.
6. Use the Grow or Shrink buttons to enlarge or reduce your selection, if necessary.
7. Click the plus sign (+) to the right of your object label in the objects list to add the
selected structure to this object.
8. Use the context menu in the objects list section of the Edit tool card to control
the display of segmented structures in MPR viewers (Outlined in MPR, Filled in
MPR, or Opaque in MPR).
If your selection included more voxels than appropriate you can subtract them from
an object.
1. Point the mouse to the object you have just created and select Select this object from the context menu.
2. Select the Lasso tool, hold the Shift key down and circle the section you want to
remove from the selection.
-Or1. Click one of the selection tools above the value range slider.
Only voxels with grayscale values defined by the value range are shown in the
3D viewer segment. In MPR viewers tissue of this value range is highlighted
blue.
2. Identify the structure you want to remove.
94
Visage 7 Client
View Window
Tool cards
3. Click the minus sign (-) to the left of your object label in the objects list to subtract
the selected structure from this object.
Tip
Use the Objects control in the viewer controls of the 3D viewer and MPR viewers
to adjust display options for any objects listed on the Edit tool card.
value range
Defines the value range for any voxels to be shown in the 3D viewer or highlighted in one of
the MPR viewers after you have clicked one of the following selection tools.
With the Connected Voxels in Value Range (3D) tool you can click any point in the 3D
viewer or an MPR viewer and the system will select all adjacent voxels of the same value
range.
With the Encircle Voxels in Value Range (3D) tool you can draw a freehand shape around
a structure either in the 3D viewer or any of the MPR viewers.
When you release the mouse button the system selects all adjacent voxels of the predefined value range within the freehand shape.
With the Encircle Voxels in Value Range (2D) tool you can select voxels in a single slice
image only.
You use this tool if you need to work with extreme precision and proceed slice by slice.
With the Define Contour in 3D tool you proceed in the same way as when defining 3D
structures with the Structures tool card: As soon as you click this tool a context toolbar is
shown in the active MPR viewer segment. Select Elliptical Contour or Freehand Contour
in this toolbar and draw a shape around the structure in this slice image. Scroll on to the
next slice image that shows the structure in question particularly clearly and also define a
contour. Click OK to finish contour definition.
Note that with the tool Define Contour in 3D you are expected to draw a shape as closely
as possible around the boundary of your structure as it is shown in your slice images. This
is because the Contour tool considers any voxels within your shape and not only those of
the value range defined on the Edit tool card.
Visage 7 Client
95
Tool cards
View Window
Click this button to increase your selection by one step.
Use the Grow 2x button to increase your selection by two steps.
Click this button to shrink your selection by one step.
Use the Shrink 2x button to shrink your selection by two steps.
Click this icon to clear a selection.
Use the plus (+) sign in the objects list to add a selection (voxels highlighted red) to a object.
-OrUse the minus (-) sign in the objects list to remove a selection (voxels highlighted red) from
a object.
Click these icons to lock or unlock objects. Locked objects are not affected when you add
objects to a selection or remove objects from a selection (with the plus/+ or minus/- buttons).
Structures tool card
The Structures tool card provides tools for easy segmentation and analysis of
structures such as tumors in CT or MR datasets.
Basic workflow
In order to segment a structure in your dataset you proceed as follows:
1. Decide whether you want to evaluate a 2D structure or a 3D structure and click
the corresponding button on the Structures tool card.
2. Define its contour.
3. Refine this contour, if necessary.
4. For 3D structures scroll through your slice images and repeat contour definition
in slices that show the structure in question.
Visage 7 Client interpolates the contours and calculates the volume of the structure.
5. Click Calculate Volume on the structures tool card to have the system calculate
the volume of your 3D structure.
6. Move on to the Statistics tool card to save the calculated volume and contour areas of your structures. You can send the data to the Export window from there,
or export them to your hard disk as a comma-separated list file.
96
Visage 7 Client
View Window
Tool cards
Structure Name
Lists all structures you have defined in your dataset and (for 3D structures) the contours that
define them in a tree view.
Structures and contours are numbered. Use Rename Structure and Rename Contour
from the context menu in the structures list to give your structures and contours descriptive
names.
Vol/Area
Color box
Shows the calculated volume for 3D ROIs and the area for 2D ROIs.
Visage 7 Client assigns each structure a color.
Double-click the color box in the structures list to open the color selection dialog box. Select
a different color, if required.
MPR
3D
Check or uncheck these boxes for a structure to show or hide its contours in the MPR viewer segments.
Check or uncheck these boxes for a structure to show or hide it in the 3D viewer segment.
Click the New 2D button to create a new 2D structure. This requires drawing a contour in
one slice image only.
As soon as you have clicked this button a context toolbar is shown in the lower right-hand
corner of the active viewer segment. This toolbar offers two alternatives to start contour definition: definition of an elliptical contour or definition of a freehand contour.
Click in the image and draw your contour. When you have finished, the system switches into
refine mode automatically. When you now click in the image a “nudge” tool is shown. This
tool has the shape of a circle. The further away you click from the contour the larger the circle will be. The closer to the contour line you click the smaller it will be.
When you have clicked outside the contour you can use the nudge tool to push the contour
line in and reduce the area defined by the contour. When you click inside the contour you
can push the contour line out and increase its area.
Use the Undo icon on the context toolbar if necessary to undo contour editing step by step.
Click OK when you have finished refining the contour.
Visage 7 Client
97
Tool cards
View Window
Click the New 3D button to create a new 3D structure. This requires that you draw contours
in more than one slice image and that you scroll through your image stack between contour
definitions.
Use the tools in the contour toolbar in the lower right-hand corner of the active viewer segment as described above to refine your contours.
Click the Delete button to remove selected structures or contours from the list.
Click the Calculate Volume button to calculate the volume (mm³) of the selected 3D structure as well.
Click this button again each time you refine one of the contours that define a 3D structure.
Click this button to open the Statistics tool card.
Statistics tool card
The Statistics tool card performs statistical analysis of all ROIs and structures that
you defined in your primary dataset.
These are:
98
•
A volume that you cropped using the Freehand Crop tools.
•
The table, if you cropped it using the Remove Table tool.
•
Bones that you segmented using the Bone tool card.
•
Chest wall/ribcage, which you removed with the Remove Chest Wall tool.
•
Vessels that you selected with the Vessels and Centerlines tool card.
•
Structures that you defined on the Structures tool card.
•
Objects which you defined on the Edit tool card.
•
Lesions segmented volumetrically with Segment Lesion tool from the Lesion
tools.
Visage 7 Client
View Window
Tool cards
Click Compute to have the system evaluate your ROIs and structures.
In the columns 2D/3D you can tell whether the evaluated ROIs are 2D (area) or 3D (volume)
ROIs.
If you want to continue evaluating the results of your ROI evaluation with another program
(e.g. Excel), you can export them as a comma-separated list.
Use the Export CSV button to export all your results or select Export CSV Selected to export the statistics of selected rows (i.e. selected ROIs or structures) only.
LV Analysis and LV Results tool cards
The LV Analysis tool card helps you with the analysis of the left ventricle in cardiac
CT time series, which show the heart in various phases of one heart beat. This tool
card guides you through an LV analysis step by step.
After you have completed the last step the LV Results tool card is displayed as a
floating window. You can review your results now and export them to your report.
After you have just performed LV analysis the system cannot calculate the myocardial mass automatically. You need to identify the myocardium in your images manually first.
Caution
The LV tools support the physician in finding the left ventricle in the image data.
However, the software cannot guarantee that the detected and displayed structures correspond to the left ventricle. It is the responsibility of the user to check the
plausibility and accuracy of the presented data.
Visage 7 Client
99
Tool cards
View Window
LV Analysis
With the Next Phase/Previous Phase buttons you can page through the phase images
one at a time
If you have moved or rotated your slice images, use the Short Axis View button to return to
this view quickly. The button becomes active after you have finished the first step.
Step 1
In this step you are expected to move the crosshair to the left ventricle in one of the MPR
viewers. Click the Find Axis button when you are done. The system will now find the long
and short axes of the left ventricle.
As a result the system will show the short axis view in one MPR viewer and long axis views
in the other MPR viewers. In the long axis views the valve level is indicated as a pink line.
You are now expected to check the correct indication of the long axis and valve level in all
phase images. Page through the phase images to do so.
If the axis or valve level are not indicated correctly in an image, you can adjust them: click
the pink line in one of the slice images and drag it up or down.
Use the navigation crosshair in one of the slice images to move or rotate the axes: click
close to the center to move the axis, or click far from the center to rotate it.
Decide whether to apply these adjustments to the currently displayed phase image alone or
to all phase images (Apply to all Phases button in the context toolbar).
Click Apply in the context toolbar in the lower right-hand corner of the active viewer segment when you have finished your adjustments.
100
Visage 7 Client
View Window
Tool cards
Step 2
Click one of the Find LV buttons to have the system segment the left ventricle either in All
Phases or in the Current Phase your phase images. The segmentation results are indicated as shaded areas in the slice images. Page through the phase images once again to verify that segmentation yielded correct results in all phases if you chose this option.
If you do not agree with segmentation results in one or several images:
Click Clear LV and readjust the valve level and axes as described above.
Click the Find LV button again when you have finished your adjustments.
-OrUse the Edit tool card to edit the object LV manually. You can add or remove voxels in single
or multiple time steps. Do not forget to unlock the LV object before you start editing.
Step 3
Click the Calculate Perfusion button when you are satisfied with the segmentation results
in all images. The LV Results tool card is now shown.
LV Results
When displayed as a floating window the LV Results tool card consists of three segments:
a summary section, a curve display section, and a section showing results in the AHA
(American Heart Association) bull’s eye view. When you display the LV Results card in one
of the tool card stacks only one of these segments can be shown at a time.
Use the drop-down selection box in the lower left-hand corner of the tool card to select a different view of your LV analysis results.
Click the Report button to send your LV Results views to the Export window, where you
can include them in your report.
Visage 7 Client
101
Tool cards
View Window
Summary
Enter the heart rate of your patient here.
The cardiac output value is updated automatically.
Also adjust the system’s selection of the end-diastolic (ED) and end-systolic (ES) phase
with the sliders, if necessary.
Global Volume
Bull’s Eye View
Here you find a graph of the total LV volume over one heart cycle.
View the results of the calculation of regional ejection fractions (%) in a bull’s eye view.
The segments in this bull’s eye display correspond to the AHA classification.
Move the mouse cursor over a segment to show the segment designation as a tool tip. Or
right-click anywhere in the bull’s eye view for a context menu that allows you to toggle between results view and segment ID view.
Regional Volume / Endocardial Distance
In this segment or tool card view you will find the stroke volume curves of the various LV regions.
Initially the curves of all regions are shown. If you find this view hard to read, right-click anywhere in this section for a context menu that allows you to select and deselect region curves
individually.
Note that when you create a report only those curves that are currently shown will be included.
Wall Motion /
Bull’s Eye Motion
Myocardial mass
calculation
This segment or tool card view shows the accumulated wall motion in the bull’s eye view.
Move the cursor across this display to see region names as tool tips or right-click and toggle
value and segment ID display.
In order to calculate myocardial mass proceed as follows:
1. Open the Edit tool card.
2. Lock the object Left Ventricle.
3. Show a suitable phase image in one of the MPR viewers.
4. Select the Define Contour in 3D tool on the Edit tool card.
5. Draw a contour around the heart in the MPR viewer (prefereably in the short axis
view). Adjust the contour, if necessary.
6. Scroll up or down a few images and repeat the last step for several images.
7. Add your selection to the object Myocardium by clicking the plus sign next to
the object label on the Edit tool card.
8. Return to the LV Analysis tool card.
102
Visage 7 Client
View Window
Tool cards
9. Click the Calculate Perfusion button again.
The system recalculates the LV analysis and adds the myocardial mass to the
LV Results.
Calcium tool card
Visage 7 Client provides a tool card for identifying the extent of calcified plaque in
coronary arteries for CT series.
Basic workflow
In order to perform calcium scoring you proceed as follows:
1. Select an MPR viewer that shows an axial slice (native thin-slice image).
2. Click the Calcium Scoring button on the Calcium tool card.
In your MPR viewers all areas with an intensity of more than 130 HU are highlighted (blue).
3. You are now expected to scroll through the slices of your series and assign highlighted (blue) areas to arteries.
Click the label button for an artery on the Calcium tool card. Then click on a blue
highlighted area in your image or draw a lasso (click and drag). Scroll on to the
next slice and repeat these steps.
The calcium score is updated every time you assign a new highlighted area to an
artery.
Calcium Scoring
Click this button to have the system identify areas with a HU value of 130 or more in your
dataset.
The button is active only if the active MPR viewer shows an axial native thin-slice image.
Multi-Slice Mode
Visage 7 Client
Check this box if you want artery assignment to be applied to adjacent slices as well.
103
Batching tools
LM, LAD, CX, ...
Results table
View Window
Artery label buttons. Click a label button first and then assign it to a highlighted area in an
image.
The results table lists the coronary arteries, the number of lesions found (according to Agatston Score) and the calcium Score, which is equivalent to the Agatston Score.
Click the Report button to copy your results table onto the Export tab card, from where you
can insert in into your report.
If you want to continue evaluating your results with another program (e.g. Excel) you can
export them as a comma-separated list with the Export CSV button.
With Reset you can delete any assignments you have so far made and start again.
Batching tools
Batching is a process in which special reformatting creates new image series.
The Batching tool is used to review/change the parameters of reformatting in a slice
viewer or VRT before reformatting is started.
In addition, the properties associated with the batching workflow can be viewed and
adapted if required.
Batching tool card
You can start batching on this tool card. In this process, regular linear or rotational
stacks of images within a given dataset are defined. Three different methods of
batching with different parameters are available:
•
Stacked Batching
•
Horizontal Rotational Batching
•
Vertical Rotational Batching
Stacked Batching
Allows to review/change the parameters of stacked batching. The parameters Number of
Images, Image Thickness, Overlap and Distance are available.
Clicking on the lock symbol before either Number of Images, Image Thickness or Overlap allows you to change this parameter by means of dragging the mouse within the viewer.
Other parameters may be adapted automatically to keep the data consistent.
104
Visage 7 Client
View Window
Batching tools
Properties...
Clicking this button opens the Properties dialog for stacked batching.
The Value column will show possible changes you have already performed on the tool card.
In the Modified column, a checked box shows that a value was changed, and in the Defined in column, the value will be set from factory default to user profile.
You can click Save in user profile to save the changed parameters or reset to the factory
defaults by clicking Reset user profile...
Save/Send
Initiates batching and a DICOM Send action. A dialog is opened where several properties
(as in the Properties dialog) can be reviewed and changed.
Select the receiving DICOM node under Destination.
Under Scout Images, select the scout images you want to include, as well as Show Measurements and Annotations and Show Orientation Cube, if required.
You can change the Series Number and Series Description or accept the defaults.
Click Make Default to save your settings and click Send to send the stack to the selected
DICOM nodes.
Export
Opens the Export dialog. Depending on your selection in the Properties dialog, the title bar
of the dialog shows whether the stack will be exported as Grayscale (reformatting) or RGB
(secondary capture).
Select the file format under Export as. For a Grayscale export, only DICOM Files (dcm)
can be selected. For an RGB export, Image File (JPG or PNG) or Movie (MPG) can be selected as well.
You can enter the path for the export file under Destination and a file name or accept the
given one. You can also Browse for a destination. The file type is automatically appended.
The following Options are additionally available:
•
You can change the Series Number and Series Description for DICOM files.
•
You can select Burn in Patient Information and/or Burn in Orientation Letters for image files.
•
You can select Burn in Patient Information and/or Burn in Orientation Letters and
additionally change the Frame Rate for movie files.
Click Export to start batching and the export. A message is shown once it is finished.
Horizontal Rotational Batching
Allows to review/change the parameters of horizontal rotational batching. The parameters
Number of Images, Increment, Image Thickness, Overlap and Direction (buttons for
clockwise and anti-clockwise rotation) are available.
Clicking on the lock symbol before either Number of Images, Increment allows to change
this parameter by means of dragging the mouse within the viewer. Other parameters may
be adapted automatically to keep the data consistent.
Visage 7 Client
105
Batching tools
View Window
Properties...
Clicking this button opens the Properties dialog for horizontal rotational batching.
The Value column will show possible changes you have already performed on the tool card.
In the Modified column, a checked box shows that a value was changed, and in the Defined in column, the value will be set from factory default to user profile.
You can click Save in user profile to save the changed parameters or reset to the factory
defaults by clicking Reset user profile...
Save/Send
Initiates batching and a DICOM Send action. A dialog is opened where several properties
(as in the Properties dialog) can be reviewed and changed.
Select the receiving DICOM node under Destination.
Under Scout Images, select the scout images you want to include, as well as Show Measurements and Annotations and Show Orientation Cube, if required.
You can change the Series Number and Series Description or accept the defaults.
Click Make Default to save your settings and click Send to send the stack to the selected
DICOM nodes.
Export
Opens the Export dialog. Depending on your selection in the Properties dialog, the title bar
of the dialog shows whether the stack will be exported as Grayscale (reformatting) or RGB
(secondary capture).
Select the file format under Export as. For a Grayscale export, only DICOM Files (dcm)
can be selected. For an RGB export, Image File (JPG or PNG) or Movie (MPG) can be selected as well.
You can enter the path for the export file under Destination and a file name or accept the
given one. You can also Browse for a destination. The file type is automatically appended.
The following Options are additionally available:
•
You can change the Series Number and Series Description for DICOM files.
•
You can select Burn in Patient Information and/or Burn in Orientation Letters for image files.
•
You can select Burn in Patient Information and/or Burn in Orientation Letters and
additionally change the Frame Rate for movie files.
Click Export to start batching and the export. A message is shown once it is finished.
Vertical Rotational Batching
Allows you to review/change the parameters of vertical rotational batching. The parameters
Number of Images, Increment, Image Thickness, Overlap and Direction (buttons for
forwards and backwards rotation) are available.
Clicking on the lock symbol before either Number of Images, Increment allows to change
this parameter by means of dragging the mouse within the viewer. Other parameters may
be adapted automatically to keep the data consistent.
106
Visage 7 Client
View Window
Batching tools
Properties...
Clicking this button opens the Properties dialog for horizontal rotational batching.
The Value column will show possible changes you have already performed on the tool card.
In the Modified column, a checked box shows that a value was changed, and in the Defined in column, the value will be set from factory default to user profile.
You can click Save in user profile to save the changed parameters or reset to the factory
defaults by clicking Reset user profile...
Save/Send
Initiates batching and a DICOM Send action. A dialog is opened where several properties
(as in the Properties dialog) can be reviewed and changed.
Select the receiving DICOM node under Destination.
Under Scout Images, select the scout images you want to include, as well as Show Measurements and Annotations and Show Orientation Cube, if required.
You can change the Series Number and Series Description or accept the defaults.
Click Make Default to save your settings and click Send to send the stack to the selected
DICOM nodes.
Export
Opens the Export dialog. Depending on your selection in the Properties dialog, the title bar
of the dialog shows whether the stack will be exported as Grayscale or RGB.
Select the file format under Export as. For a Grayscale export, only DICOM Files (dcm)
can be selected. For an RGB export, Image File (JPG or PNG) or Movie (MPG) can be selected as well.
You can enter the path for the export file under Destination and a file name or accept the
given one. You can also Browse for a destination. The file type is automatically appended.
The following Options are additionally available:
•
You can change Series Number and Series Description for DICOM files.
•
You can select Burn in Patient Information and/or Burn in Orientation Letters for image files.
•
You can select Burn in Patient Information and/or Burn in Orientation Letters and
additionally change the Frame Rate for movie files.
Click Export to start batching and the export. A message is shown once it is finished.
Batching toolbar
The batching toolbar is identical for the three different methods of batching:
•
Stacked Batching
•
Horizontal Rotational Batching
•
Vertical Rotational Batching
Toggle RGB/Grayscale: Click this icon to switch the image generation mode between
Grayscale (reformatting) or RGB (secondary capture).
Visage 7 Client
107
Batching tools
View Window
Batch Send: Clicking this toolbar icon initiates batching and a DICOM Send action. A dialog
is opened where several properties (as in the Properties dialog) can be reviewed and
changed.
Select the receiving DICOM node under Destination.
Under Scout Images, select the scout images you want to include, as well as Show Measurements and Annotations and Show Orientation Cube, if required.
You can change the Series Number and Series Description or accept the defaults.
Click Make Default to save your settings and click Send to send the stack to the selected
DICOM nodes.
Export: Opens the Export dialog. Depending on your selection in the Properties dialog, the
title bar of the dialog shows whether the stack will be exported as Grayscale (reformatting)
or RGB (secondary capture).
Select the file format under Export as. For a Grayscale export, only DICOM Files (dcm)
can be selected. For an RGB export, Image File (JPG or PNG) or Movie (MPG) can be selected as well.
You can enter the path for the export file under Destination and a file name or accept the
given one. You can also Browse for a destination. The file type is automatically appended.
The following Options are additionally available:
•
You can change Series Number and Series Description for DICOM files.
•
You can select Burn in Patient Information and/or Burn in Orientation Letters for image files.
•
You can select Burn in Patient Information and/or Burn in Orientation Letters and
additionally change the Frame Rate for movie files.
Click Export to start batching and the export. A message is shown once it is finished.
Open Tool Card: Opens the Batching tool card, where you can select one of the three
methods of batching and other options, as described under Batching tool card.
Cancel: Click this icon to cancel batching.
108
Visage 7 Client
View Window
Additional tools for time series analysis
Additional tools for time series analysis
Visage 7 Client provides two additional functions specifically for time series analysis.
Time-density analysis for ROIs
Time-density analysis allows the observation of the density progression in a ROI
over time in time-resolved 3D datasets.
The density progression is shown in a plot which displays the density graphs of one
or several ROIs.
Basic workflow
1. Load a time-series.
2. Show an image from the baseline phase in an MPR viewer.
3. Draw a ROI.
See Annotation and Measurement tools.
4. Select Time-Density Analysis in the context menu.
In order to add the time-analysis graph of a second ROI to an existing time-analysis
plot:
5. Draw a second ROI.
6. Select Add to Time-Density Analysis in the context menu.
Subtraction for time series
Subtraction mode allows you to subtract the baseline phase from the other images
of a time series. The resulting image shows only those structures where changes
occurred over time now (e.g. the flow of contrast medium).
Basic workflow
1. Load a time-series.
By default the first image in a time series is the baseline phase (i.e. the image
that will be subtracted from other images).
If you want to subtract another image:
2. Use the Previous/Next Phase icons on the Dataset Navigation tools to navigate
to a different phase in the time series.
Visage 7 Client
109
View window main menu
View Window
3. Select Select as Baseline Phase from the context menu to define this phase as
the baseline phase.
4. Click the Subtract zero phase icon.
View window main menu
This section describes menus and commands that are available only if the View
window is shown in the foreground.
Refer to Getting Started for a description of menu and commands available on all
Visage 7 Client windows.
File
Import DICOM
Directory
Import DICOM
Files
Allows you to load a DICOM directory from hard disk, CD, or from an external drive.
Return to the Study Browser after DICOM Directory import and load the data onto the
View window from there.
Allows you to load individual DICOM files from hard disk, CD, or from an external drive.
Return to the Study Browser after DICOM file import and load the data onto the View window from there.
Save Protocol
See Visage 7 Client configuration (Protocol configuration).
Reload Protocol
See Visage 7 Client configuration (Protocol configuration).
New Session
Starts a new session.
Load Session
Loads a session that you have saved for this dataset.
Save Session
Saves changes to your current session.
Save Session As
Email Session
Link
Allows you to save your session under a new name.
Allows you to send a session to a colleague as an attachment to an email.
Do not forget to save recent changes to your session data before sending the link.
DICOM Job List
Shows a list of data retrieval and send jobs that are currently being processed. In the
DICOM Job List dialog box you can cancel individual jobs or all jobs.
View DICOM Parameters
Allows you to show the DICOM information for the first image of each of the loaded datasets
or slice images.
Preferences
Opens a submenu with configuration options.
See Visage 7 Client configuration (General preferences).
View
110
Visage 7 Client
View Window
Viewer Properties
Show Tool Cards
View window main menu
See Visage 7 Client configuration (Viewer Properties).
Shows or hides the tool cards section of the window.
Show Toolbars
Allows you to select which toolbars to show or hide.
Show in Viewer
Allows you to select which information will be shown as image text in the viewer segments.
Reset all Warnings
See Visage 7 Client configuration (Reset All Warnings).
Render Settings
Open Reports
Viewer
Find Prior Studies
UI Appearance
Streaming Compression
Protocol
See Visage 7 Client configuration (Render Settings).
Opens a window showing the latest report for the selected study.
Opens a window showing the currently loaded study as well as prior studies of this patient.
Selecting one of more of these by means of the checkbox and clicking Load opens them on
the View window.
See Visage 7 Client configuration (UI Appearance).
See Visage 7 Client configuration (Streaming Compression).
Allows you to select a protocol from the list.
Default is the protocol that the system considers best-suited for the currently loaded volume data.
Under Protocol > All > ... you find a complete list of all protocols defined in your system
sorted by monitor configuration.
Restored Session Protocol
Returns to the preset session protocol in case another protocol was used in the meantime.
Protocols list
The protocols that the system considers best-suited for the currently loaded data are listed
first.
Configure Protocols
See Visage 7 Client configuration (Prioritizing and disabling protocols).
Tools
Allows you to select and show tool cards.
Visage 7 Client
111
View window main menu
112
View Window
Visage 7 Client
Export Window
You use the Export window to create reports for the study you have analyzed on
the View window, or to save, send, or export snapshot images from here.
Basic workflow
When creating reports or saving or sending images you proceed in this order:
1. Load your study, series, or volume dataset onto the View window.
2. Show or create the relevant slice images.
3. Create snapshots of every image you wish to preserve.
-Or4. Send results of an LV analysis or a calcium score analysis to the Export window.
In order to create a report:
1. Select a template on the Export window (optional).
2. Drag snapshots onto your report page(s).
3. Add text.
4. Save and print your report.
In order to save or send snapshot images:
1. Select the snapshot images you wish to save or send on the Export window.
2. Click this button to save the images on your local computer or in your network.
-OrClick this button to save the images in your database or on another server in
your DICOM network.
Visage 7 Client
113
Export Window
Overview of the user
interface
Report editor toolbar
Snapshots
Report text
0%
114
Visage 7 Client
Export Window
Snapshots
Snapshots
While analyzing images on the View window you create new slice images and add
measurements and annotations. In order to document your results you can create
snapshots of such images with the Snapshot Active Viewer (S) or Snapshot All
Viewers (Shift + S) tools on the View window. Snapshots also include the results of
LV or calcium scoring analyses sent to the Export window with the Results button
on the corresponding tool card.
All snapshots you create during a Visage 7 Client session are collected in the Snapshot section of the Export window. From here you can save them, send them over
the network or include them in your report.
1. Click a snapshot to select it.
-OrHold the Ctrl key pressed while you click snapshots to select more than one image.
2. Click Delete to remove the selected snapshots from this window section.
-OrClick Save to export images onto your local computer or a network drive and
folder in your network. Select DICOM, JPG, or PNG as a file format.
Use the Send button to save selected snapshot images in your local database or
DICOM network.
A dialog box opens when you click this button. Select Local here to save the selected snapshot images in the database. The images will be added to a study as
a new series.
-OrSelect one of the configured remote DICOM nodes to send the selected images
in your DICOM network.
Note
If you select multiple images and save them as DICOM or send them to a DICOM
server, a new DICOM series will be created assigned to the original study.
If you select images from multiple different studies, one new DICOM series will be
created for each of the studies, containing only the images belonging to that study.
-OrSelect Web Client to show the selected images in a Visage Web Client image viewer. The button only becomes active once snapshots have been sent to the local database
Visage 7 Client
115
Report editor toolbar
Export Window
Report editor toolbar
The toolbar section comprises several toolbar sections:
File
With the icons of the File toolbar (or the commands of the File menu) you can:
Templates
•
Create a new report.
•
Print your report or show a print preview.
•
Create snapshots of your report pages (one per page). The generated report
snapshots will be shown on the thumbnails section on the left side, so that you
can export the report pages as images, save them in the Visage image database, or send them to any DICOM partner.
•
Create a PDF version of your report.
•
Create a Word document.
•
Send the report to the RIS (depending on configuration/RIS integration).
•
Close the report you are currently working on.
When you create a new report you can select one of the report templates stored in
your system.
If you have made changes to your template that you would like to reuse in future reports, click the Save icon next to the template drop-down list. You can either overwrite an existing template or create a new one now.
Format Actions
Use these two toolbars (or the commands of the Format menu) to perform one of
the following text formatting operations:
116
•
Format selected characters or words as bold text or in italics, or underline them.
•
Change the color of selected text.
•
Re-align text (left, center, right, or justified).
•
Apply predefined paragraph styles.
Visage 7 Client
Export Window
Report text
•
Select a different type font or font size for selected text.
Edit Actions
With the icons of the Edit Actions toolbar (or the commands of the Edit menu) you
can:
•
Undo the last editing action (or redo the last action you undid).
•
Cut or copy selected text to the clipboard, or paste text from the clipboard.
•
Search for text or search and replace text.
Report text
In the report text section of your report editor you can type text, insert snapshot images, or insert placeholders for patient and study information.
Inserting snapshots
Select one or several snapshots in the Snapshot section of the Export window and
drag them into the report text section to include these images in your report.
Placeholders
Use the Edit > Insert Placeholder > ... menu to select and insert a placeholder into
your report text. Placeholders are populated with patient and study information as
soon as you insert snapshots into your report.
Placeholders are particularly useful when you create report templates.
Tip
If you try to combine snapshots from several studies in one report, a message will
prompt you to confirm this. The message will also remind you to check study-specific information and ensure that placeholders have been populated correctly.
Visage 7 Client
117
Report text
Export Window
118
Visage 7 Client
Quality Assurance
You can use Quality Assurance (QA) to manually fix incorrect patient, study and
series data, to re-assign images to the correct patient, study or series, to merge patients or delete patient entries, and to match studies with orders sent by a RIS system.
By default, all studies will be shown Performed Procedures list. Filter for studies
with QA status "SCHEDULED", indicating that automatic data consolidation did not
produce satisfactory results, to view studies which need to be QA processed.
Orders from the RIS can be displayed in the Scheduled Procedures list.
Dedicated QA user rights are required to perform QA activities.
Overview of the user
interface
Quality Assurance window menu
Presets bar
Query
section
Performed Procedures list (studies)
Scheduled Procedures list (orders)
Visage 7 Client
119
Query section
Quality Assurance
Query section
Study/Order
Queries can be applied either to the studies list (performed procedures) or to the orders list (scheduled procedures), with slightly different filter criteria.
Modality search
The query section allows you to search a database for studies performed on one or
several modalities. E.g. check CT, MR, and DX modalities in the query section to
show all items relating to any of these modalities. You can toggle the modality
search on and off by means of the checkbox.
Filter criteria
All other entry boxes in the query section are filter criteria. This means, the more criteria you define, the shorter the hit list will be. E.g. enter A for patient name to show
all patients whose name starts with an A. Or enter A for patient name and select today for study date to show only those patients whose name starts with an A and
who were examined today.
Wildcard search
If you do not remember a name or number you are looking for, you can use wildcards in your search. E.g. type Mil in the patient name box to find Miller, Milford,
Miltner, or *mil to find all the above and also Hamilton, or AB??34 in the patient ID
box to find AB1234, AB0034, and AB11345678.
Even if you use wildcards, you should always specify your search criteria as precisely as possible. Rather general queries may yield a very long hit list, which would
require extensive scrolling.
120
Visage 7 Client
Quality Assurance
Query section
Filter and search criteria
First toggle between the Study and Order tabs, depending on the search you want
to perform. The Query section will appear slightly different for each of them.
Searching on the Study tab produces results in the Performed Procedures list,
whereas the Order tab produces results in the Scheduled Procedures list.
Patient
Date
Allows you to search for a patient’s name and ID.
Allows you to search for patient and study data based on a date or date range. You can toggle the date search on and off by means of the checkbox.
Type - select whether you want to search by
•
Study Date, Date of Birth or Insertion Date (i.e. the date when the data was
transferred to the server) on the Study tab
- OR -
•
Date of Birth or Modification Date (i.e. the date when the order was modified)
on the Order tab
From date To date - specifies the search period. Click in a date box with the cursor and enter a date in the format YYYY-MMM-DD (e.g. 2006-MAY-23). Or click the icon button to the
right of the date entry box to open a calendar and select a start and end date from here.
Click one of these buttons to select a default search period:
Today - selects the current day as search period.
Yesterday - selects the previous day as search period.
1 Week - selects the last seven days as search period.
2 Weeks - selects the last 14 days as search period.
Modality
Allows you to search for patient and study data by modality. You can toggle the modality
search on and off by means of the checkbox.
Choose one of the following options:
1. Check the boxes of all those modalities whose studies you are looking for (CT - computed tomography, DS - digital subtraction angiography, DX - digital radiography, MR - magnetic resonance tomography, NM - nuclear medicine, PT - positron emission tomography
(PET), US - ultrasound, SC - "secondary capture" images)
2. Enter any modality abbreviations in the Others box (e.g. "CT"). Multiple modalities are
separated by a space (e.g. “CT PT MR”).
Visage 7 Client
121
Presets bar
Quality Assurance
Fields
Here you can specify further filter criteria. These are specific either for a Study or Order
search.
Drop down a list of available criteria with the arrow icon to the right of a field box. Then
specify your search string in the input box below the selected criterion.
In addition, you can
•
click Study States and then select one or several study states in the dialog to
be included in your search on the Study tab. Clicking the Clear button resets this
selection to include all study states.
- OR •
select an order status from the Status drop down list on the Order tab.
Starting and resetting a search
Click this button to start your query of the local database or the DICOM node whose tab
card is currently shown in the study/series list area.
Click this button to remove all search criteria from the query boxes, then start defining a new
search.
Presets bar
The Presets bar contains the button New Preset, which opens a dialog to define the
current settings, for example a specific query, as a preset for the currently active user. This preset will then be shown as a button on the Presets bar.
You can
•
enter a name for the preset.
•
check auto query to automatically start a query when the preset button is
clicked.
•
check Default to define this preset as default for your user account, loading its parameters when the Quality Assurance view is opened.
122
Visage 7 Client
Quality Assurance
Performed Procedures list
Context menu of the preset buttons
Clicking a preset button with the right mouse button opens this context menu.
Properties
Allows you to change the preset’s name and to have the preset perform an auto query or
set it as Default.
Default
Checking this menu option defines this preset as default, loading its parameters when the
Quality Assurance view is opened.
Update preset
with current
settings
Delete preset
Updates the preset with the settings currently active in Quality Assurance.
Deletes the preset button after a query is confirmed.
Performed Procedures list
The initial contents of the Performed Procedures List depend on your default query
preset. Typically, the studies with QA status “SCHEDULED” will be shown, since
these are most likely to be in need of manual correction.
Information in the Performed Procedures list
The Performed Procedures list is arranged in a hierarchical tree view. Use the +/icons in front of the entries to expand or collapse the list.
Patient Name
Name of the patient.
Patient ID
Patient’s identification number.
Birth Date
Patient’s date of birth.
Sex
Patient’s sex (M/F/O)
QA Status
QA status of the study. Possible values are NOT SCHEDULED, SCHEDULED, COMPLETED and DISCONTINUED.
Accession
Number
Job number of the patient in the HIS/RIS (hospital or radiology information system).
Study ID
ID of the study.
Modality
Modality or modalities used to examine the patient.
Body part
Visage 7 Client
Body part examined in this series.
123
Performed Procedures list
Images
Description
Comments
Date/Time
Performing
Physician
Quality Assurance
Number of images in a series or volume dataset (on the study level no image number is
shown).
Study or series description.
Study comment from the DICOM images.
Date and time when the study or series was performed in the format YYYY-MMM-DD and
HH:MM:SS (24 hour clock).
Performing Physician entered for this study or series.
Menu and Icons of the Performed Procedures list
These commands can be found in the Edit menu of the menu bar as well as in the
context menu. The items of the Edit menu can also be displayed as an own menu
bar.
The functions can also be called up via icons in the toolbar.
Move
Moves one or more images, series or studies to other existing series, studies or patients. At
least two items must be selected. Items can only be moved to items on a higher hierarchical
level, like this:
•
Images can be moved to series, studies or patients. If they are moved to a patient, a
new study and series are created, if they are moved to a study, a new series is created.
•
Series can be moved to studies or patients. If they are moved to a patient, a new study
is created.
•
Studies can only be moved to patients.
After selecting two items and clicking on Move, a safety query is displayed, so that you can
check your selection before confirming it.
124
Split
Splits the selected study/studies or series and creates a new data record to receive your selection. You will be prompted to enter data on patient or study level for the new data record.
Move to New
Patient
Move one or more selected series to a new patient. You will be prompted to enter patient information for the new patient that will automatically be created to receive the selected series. Click Force Update if you want to update the DICOM files even if no changes to the
database are made.
Merge Patients
Merges two selected patient data records into one. You will be prompted to select the target
data record to which the other one should be assigned, which is deleted after merging.
Visage 7 Client
Quality Assurance
Performed Procedures list
Edit
Delete
Assign Order to
Study
Visage 7 Client
Lets you change a data record on patient, study or series level, depending on your selection. Click Force Update if you want to update the DICOM files even if no changes to the
database are made.
Deletes one or more selected images, series, studies or patient entries after you confirm a
safety query. Check Delete from Archive in the safety query if required.
Assigns a study selected in the Performed Procedures list to an order selected in the
Scheduled Procedures list. You are prompted to confirm the assignment.
125
Scheduled Procedures list
Quality Assurance
Scheduled Procedures list
The Scheduled Procedures list contains the scheduled procedure steps sent by the
RIS. Some of them may have to be manually matched to studies.
Information in the Scheduled Procedures list
The individual columns contain information on patient, visit and order level provided
by the RIS, with the exception of the Assigned column, where you can see whether
an order has been assigned to a study or not.
Menu of the Scheduled Procedures list
The only command available for the Scheduled Procedures list can be found on the
menu bar as well as in the context menu.
Assign Order to
Study
126
Assigns a study selected in the Performed Procedures list to an order selected in the
Scheduled Procedures list. You are only prompted to confirm the assignment.
Visage 7 Client
Visage 7 Client configuration
Users can adapt program functions and the appearance of the Visage 7 Client user
interface to a certain degree. Some of these configuration options are available to
all users while others can only be accessed by users with appropriate user rights.
Users with the right to access these preferences can also save their settings. Again
depending on their user privilege settings these changes will be effective for their
own user account only or on a system-wide basis.
Tip
If you cannot access some of the commands and dialog boxes described in this
section, this indicates that your user account has not been assigned the appropriate user rights.
Talk to your system administrator about the organization of user privileges in your
institution.
All configuration options are accessible from the main menu, some configuration
options are available on all windows, while others can be acessed from the View or
Study Browser window only.
General preferences
Select File > Preferences from the Study Browser or View window to drop down a
submenu with the folllowing configuration options.
•
Window/Level Presets
•
Properties
•
Tool Palette
•
Properties
•
Monitor Configuration
In order to be able to access these configuration dialogs you need to be assigned to
a user level with the right to manage properties on a user or system level. Monitor
configuration is available to all users irrespectively of their user level.
Visage 7 Client
127
General preferences
Visage 7 Client configuration
Monitor Configuration
If you are working with more than one monitor, this configuration dialog box allows
you to define which Visage 7 Client window will be shown on which monitor.
Window/Level Presets
In this dialog box you can define Window/Level Presets for image types. Either enter the relevant parameters or copy settings from the currently active viewer.
Window/Level Presets can be called from a drop-down menu in the viewer controls below each viewer segment and via the available shortcuts (1, 2, 3, 4,...).
128
Visage 7 Client
Visage 7 Client configuration
General preferences
Keyboard Shortcuts
Visage 7 Client comes with a set of predefined keyboard shortcuts for frequently
used functions and tasks. You can display this list by selecting keyboard shortcuts
from the Help menu.
In the Configure keyboard shortcuts dialog box you can adapt the assignment of
keyboard shortcuts to your own preferences.
Select a tool in the Available Tools list to the left and drag it onto a key or key combination to the right to assign or reassign a tool to a keyboard shortcut or key combination.
Click with the right mouse button on an assigned tool and select Remove from the
context menu to remove this tool from the keyboard shortcut or key combination.
Tool Palette
In the Configure Tool Palette dialog box you can assemble a toolbar with frequently used tools. By saving this collection of tools for your own user account you create
a personal toolbar or palette.
Click with the right mouse button on an assigned tool and select Remove from the
context menu to remove this tool from the tool palette.
Visage 7 Client
129
General preferences
Visage 7 Client configuration
You can choose whether a right-click into the viewer will show only the tool palette,
only the context menu entries, or both.
Properties
This dialog box shows the default settings for the majority of program functions and
features. The Properties dialog box also indicates whether a setting is a factory default or a system or user level configuration setting. You can adapt configuration details here. Moreover, with the appropriate user privileges, you can change the
assignment of settings to the user or system level.
130
Visage 7 Client
Visage 7 Client configuration
Display settings
Display settings
Drop down the View menu of the Study Browser or View window for a number of
configuration options that affect View window or image display aspects.
•
Viewer Properties
•
Reset All Warnings
•
Render Settings
•
UI Appearance
•
Streaming Compression
Viewer Properties
This dialog box shows allows you to define display settings for the View window user interface. The Viewer Properties dialog box also indicates whether a setting is a
factory default or a system or user level configuration setting. With appropriate user
privileges you can change the assignment of configuration settings to user or system level here.
Tip
The Viewer Properties dialog box shows a subset of the user interface
configuration options of Properties dialog for a better overview.
Visage 7 Client
131
Display settings
Visage 7 Client configuration
Reset All Warnings
If you had selected Do not show again ... for any warning that appeared since you
called up Visage 7 Client, selecting View > Reset All Warnings will make sure that
a warnings are shown again from now on.
Render Settings
This dialog box allows you to define render settings for the server and the local rendering subsystem.
Check the Auto checkbox for Local Rendering and Rendering Subsystem to
have the system identify and select the option best suited for your system configuration.
Caution
Only use Local Rendering set to ON and Rendering Subsystem set to Open
GL manually if you are certain that this mode is supported properly by the graphics card in your client computer.
Validate correct image display by loading and displaying test images.
UI Appearance
View > UI Appearance opens a submenu which allows you to choose between different color schemes for the user interface: bright, medium, and dark. This allows
you to adapt the user interface to the ambient light conditions of your workplace.
132
Visage 7 Client
Visage 7 Client configuration
Protocol configuration
Streaming Compression
Selecting View > Streaming Compression allows you to select a compression level for image transfer from the server to the client computer.
Select a compression level depending on the network you are working in and on the
image quality you require (the system will remember your selection):
•
Auto - selects a compression level that has been optimized for the current network bandwidth and latency characteristics.
•
Lossless Only - transfers only losslessly compressed data with full image quality. Select this option for fast networks, for example, in local area networks
(LANs). Your server needs to be configured to support this function.
•
Medium - applies a medium compression level. Select this option, for example
in a slow LAN or a wide area network (WAN).
•
Strong - applies a high compression level for fast data transfer at the expense of
image quality. Select this option, for example, if you are working in a slow or very
busy network.
Note
If images are displayed with reduced image quality as a result of your streaming
compression this is indicated by a red bullet in the lower right-hand corner of the
window.
Wait until the red bullet has disappeared to assure sufficient image quality for
primary diagnosis (see also Low resolution warning).
Protocol configuration
The full scope of protocol configuration options requires a combination of various
user level settings. Therefore, even though you may be able to access some of the
configuration options described in this section but you may not be able to access all
of these options.
•
Prioritizing and disabling protocols
•
Save Protocol wizard
Prioritizing and disabling protocols
Use the File menu of the Study Browser of View window (File > Preferences >
Protocols) or the View window Protocol menu (Protocol > Configure Protocols)
to open this dialog box.
Visage 7 Client
133
Protocol configuration
Visage 7 Client configuration
Only protocols with a checkmark in the Active columns will be considered when a
user loads data and the system selects the protocol best suited for the selected data. Moreover only active protocols are listed in the Protocols menu and presented to
users for manual protocol selection.
The Protocols dialog box also allows you to prioritize protocols and to enable or
disable protocols. Protocols with a high priority ranking are more likely to be selected by the system when a user loads data onto the View window. Protocols with a
high priority ranking also show up at the top the list when users drop down the Protocols menu.
Scroll through the list of all protocols defined for your system in the lower part of the
Protocols dialog box or use the Filters in the upper third of the dialog for a better
overview.
Save Protocol wizard
With appropriate user privileges you can modify protocols or create protocols of
your own.
Protocol definition
workflow
Visage 7 Client expects you to base any protocol definitions on an exisiting protocol.
The workflow for protocol modification therefore comprises the following steps:
•
Loading appropriate image data onto the View window.
•
Selecting the protocol you want to modify from the Protocol menu.
•
Adapting display settings including toolbar and tool card selection.
•
Calling up the Save Protocol wizard.
•
Entering or modifying the protocol name.
Now you can decide to save your modifications right away, or to further review and
modify the affected settings. By going through the individual pages of the Save Protocol dialog box, you can control the following protocol related settings:
•
134
Defining protocol access and matching criteria.
Visage 7 Client
Visage 7 Client configuration
Protocol configuration
•
Defining toolbar and tool card settings (or accepting interactively made modifications).
•
Defining layout and viewer properties (or accepting interactively made modifications).
•
Defining image assignment to viewer segments (or accepting interactively made
modifications).
•
Accepting any global properties you made in the Preferences dialog boxes.
See also General preferences.
•
Saving your new protocol or protocol modifications.
•
Assigning a priority ranking to the new or modified protocol.
See also Prioritizing and disabling protocols.
Save Protocol
wizard
Select File > Save Protocol to call up the Save Protocol wizard.
Note
Because Visage 7 Client expects you to base any protocol definitions on a predefined protocol the Save Protocol command is dimmed if no image data are currently shown on the View window.
The overview page of the Save Protocol wizard indicates which display settings
you have already changed interactively on the View window. These categories are
shown in bold type and are marked with an asterisk.
Visage 7 Client
135
Protocol configuration
Visage 7 Client configuration
Procede through the various pages of the Save Protocol wizard and click the Save
Protocol button when you are done.
Reloading protocols
Each time a user starts a Visage 7 Client session protocols are read into the main
memory of the client computer.
If protocols are modified on the server while a client session is still ongoing this client needs to reload protocols in order to be up to date.
Use the File > Reload Protocol command to synchronize your protocols with those
on the Visage server.
136
Visage 7 Client
Index
2D ROIs , 63
2D viewer , 51
layout , 51
3D Color Map (tool card) , 81
3D MinIP (inverse) , 42
3D MIP , 42
3D projection modes , 43
3D rendering techniques , 42
3D Rotate (icon) , 58
3D templates , 78
user-defined , 78
3D viewer
context menu , 45
3D viewer segment , 41
A
Accept Registration (icon) , 69
Access control , 10
Align Centers (icon) , 69
Alignment (datasets) , 68
American Heart Association (AHA) , 101
Angle (icon) , 62
Angle BetweenDisconnected Lines
(icon) , 62
Annotation
arrow , 61
circle , 61
text , 61
Annotation and Measurement (tools) ,
60
Anterior (icon) , 59
Arrow/Text Annotation (icon) , 61
Audit trails , 11
Authentication , 10
Auto logoff , 11
Auto logoff session , 35
Automatically Link Viewers (icon) , 69
Visage 7 Client
Average intensity (AvIP) , 48
AvIP (average intensity) , 48
B
Batching tool , 104
Batching tool card , 104
Horizontal Rotational Batching , 105
Stacked Batching , 104
Vertical Rotational Batching , 106
Batching toolbar , 107
Bilinear Filtering , 50
Bone (tool card) , 92
Bones
loading segmentation , 92
performing segmentation , 92
Bounding box , 45 , 50
Brain Perfusion (tools) , 71
Browse Slices (icon) , 59
C
Calcium (tool card) , 103
Calculate Perfusion (icon) , 72
Calibrate Image (icon) , 63
Centerline , 45 , 50
Chest wall (removing) , 68
Cine (tool card) , 85
Circle Annotation (icon) , 61
Circular ROI (icon) , 63
Clear Points (icon) , 70
Client installation , 17
Cobb’s Angle (icon) , 64
Color map
delete tissue , 83
editing , 83
new tissue , 83
user-defined , 81
137
Index
Comma-separated list , 88 , 99 , 104
Compositing modes (thick slices) , 48
Connected Voxels in Value Range (3D)
(icon) , 95
Context menu
3D viewer , 45
MPR viewer , 49
CPR viewer
display settings , 81
CPR/Vessel (tools) , 70
CR (computer radiography) , 29
Crop Box (icon) , 66
Crop Corner (icon) , 66
Crop Plane (icon) , 67
Crop Slab (icon) , 67
Cropping
removing parts of the volume , 67
Cropping (tools) , 66
Cross Section view , 92
Crosshair , 45 , 47 , 49
moving , 47 , 59
moving line , 47
positioning , 59
rotating , 47
slice thickness , 47
viewing direction , 47
Cross-Section View (icon) , 71
CT (computed tomography) , 29
Curved planar reconstruction (CPR) , 70
Curved view , 92
Curved View (icon) , 70 , 71
D
Data protection , 10
Data security , 10
Database , 28
deleting data , 34
loading data , 34
Database query , 28
Dataset alignment , 68
Dataset Navigation (tools) , 60
Date of Birth (database filter) , 29
Default Navigation (Ctrl key) , 58
Default Navigation (icon) , 58
Define Artery (icon) , 71
Define Contour in 3D (icon) , 95
Define ROI (icon) , 72
Define Vein (icon) , 71
138
Define/Edit Curve , 70
Define/Edit Curve (icon) , 70 , 71
Delete (button) , 34
Delete Key View , 45 , 49
Deleting data (Database) , 34
Density profile , 88
DICOM (.dcm) , 85
DICOM Annotations , 50
DICOM Job List , 110
DICOM node , 28
retrieving data , 34
DICOM Overlays , 50
DICOM Print , 50
DICOM Shutters , 50
Display (tool card) , 79
Display protocol , 38
Display tMIP (icon) , 71
Distance (icon) , 61
Distance Ratio (icon) , 62
Drop-down icon bars , 57
DX (digital radiography) , 29
Dynamic protocols , 39
E
Edit (tool card) , 94
Edit Annotation (dialog box) , 64
Edit Curve (tools) , 70
Edit Viewer Linking (icon) , 69
Editing annotations , 64
Elliptic ROI (icon) , 63
Email Session Link , 110
Encircle Voxels in Value Range (2D)
(icon) , 95
Encircle Voxels in Value Range (3D)
(icon) , 95
Export (window) , 113
Export CSV (button) , 99 , 104
F
Feet (icon) , 59
Fields (database filter) , 29
Filter criteria (QA) , 121
Filter criteria (Study Browser) , 29
Fit Height (icon) , 60
Visage 7 Client
Index
Fit View (tools) , 59
Fit Width (icon) , 60
Fit Width/Height (icon) , 60
Fixed Position in Viewer , 64
Flip Horizontally (icon) , 60
Flip Vertically (icon) , 60
Freehand Crop (icon) , 67
Fullscreen , 45 , 49
Fusion display , 79
aligning datasets , 68
overlay dataset , 80
primary dataset , 80
Fusion Registration (tools) , 68
IWA (Integrated Windows Authentication) , 18
J
JPEG images , 85
K
Keyboard shortcut , 56
H
Head (icon) , 59
Horizontal Rotational Batching , 105
I
Image preview (Study Browser) , 36
Image Series (tool card) , 52
Image text , 40
show/hide , 40
Images
browsing , 59
calibrating distances , 63
flipping , 60
measuring 2D ROIs , 63
measuring angles , 62
measuring Cobb’s Angle , 64
measuring distance ratio , 62
measuring distances , 61
measuring pixel density , 64
measuring spherical ROIs , 63
measuring vertical distances , 62
orientation , 59
panning , 58
resizing , 60
rotating , 58 , 60
windowing , 59
zooming , 58
Insertion Date (database filter) , 29
Installation , 17
Intended use , 7
Visage 7 Client
L
Layout (2D viewer) , 51
Left (icon) , 59
Leg Bones (removing) , 68
Lesion (tools) , 73
Lesion tool (icon) , 73
Licenses , 8
Line Profile (tool card) , 88
Link Current Position I (icon) , 69
Link Display Properties across Viewers
(icon) , 69
Linked viewers , 39
Linking
automatically , 69
edit , 69
toggle navigation , 69
viewer navigation , 69
windowing , 69
Load Session , 110
Loading
bone segmentation , 92
session , 110
Loading data , 27 , 34
Lock Crop Region (icon) , 66
Login , 18
Login dialog box , 19
Logoff , 20
Lumen view , 71 , 92
Lumen View (icon) , 71
Lumen viewer
display settings , 81
139
Index
140
LV Analysis
(tool card) , 99
Report (button) , 101
LV Results
(tool card) , 99
Bull’s Eye View , 102
Endocardial Distance , 102
Global Volume , 102
Regional Volume , 102
Summary , 102
Wall Motion , 102
context menu , 49
MPR viewer segment , 46
MPR viewers
display settings , 81
MR (magnetic resonance tomography) ,
29
Multiphase (tools) , 72
Multi-planar reconstruction (MPR) , 46
Multi-session operation , 11
My recent sessions , 35
Myocardial mass (calculation) , 102
M
N
Mac users
change windows , 24
Cmd key , 55
mouse operation , 55
mouse settings , 55
quit VisageCS , 20
Visage client download , 18
Visage client installation , 18
Main menu , 26
Manual Registration (icon) , 68
Maximum intensity (MIP) , 48
Measurement
angles , 62
calibration , 63
circular ROI , 63
Cobb’s Angle , 64
density , 64
distance ratio , 62
distances , 61
elliptic ROI , 63
point-sized ROI , 63
vertical distances , 62
MG (mammography) , 29
Minimum intensity (MinIP) , 48
MinIP (minimum intensity projection) ,
48
MIP (maximum intensity projection) , 48
Mirror Mode (icon) , 72
Modality (database search) , 29
Modality search (QA) , 121
Modality search (Study Browser) , 29
Mouse operation , 54
Movie , 85
MPEG movie , 85
MPR viewer
Navigation (tools) , 58
Navigation crosshair , 47
New Session , 110
Next Phase of Time Series (icon) , 60
Next Study (icon) , 60
Next Volume or Muliframe Image (icon)
, 60
O
Online help , 15
Orientation (tools) , 59
Orthographic (3D projection) , 43
Overlay dataset , 80
P
Pan (icon) , 58
Partial Crosshair , 50
Password
change password , 20
Patient ID (database filter) , 29
Patient name (database filter) , 29
Perspective (3D projection) , 43
Pixel density , 64
Pixel Value (icon) , 64
PNG images , 85
Point-Sized ROI (icon) , 63
Position Crosshair (icon) , 59
Visage 7 Client
Index
Posterior (icon) , 59
Previous Phase of Time Series (icon) ,
60
Previous Study (icon) , 60
Previous Volume or Muliframe Image
(icon) , 60
Primary dataset , 80
Protocol , 38 , 111
dynamic protocols , 39
PT (positron emission tomography,
PET) , 29
Q
QA , 119
Database query , 120
Date of Birth (database filter) , 121
Fields (database filter) , 122
Insertion Date (database filter) , 121
Modality (database search) , 121
Modification Date (database filter) ,
121
Patient ID (database filter) , 121
Patient name (database filter) , 121
Study Date (database filter) , 121
Wildcard search , 120
Quality Assurance , 119
Query presets (Study Browser) , 30
Querying a database , 28
R
Recall Key View , 45 , 49
Registration , 68
Remove (tools) , 67
Remove Chest Wall (icon) , 68
Remove Leg Bones (icon) , 68
Remove Table (icon) , 68
Report
creating a report , 113
LV analysis , 101
Report editor
(toolbar) , 116
entering text , 117
placeholders , 117
templates , 116
Visage 7 Client
Reset Registration (icon) , 69
Reset Viewer Linkage (icon) , 69
Resizing (images) , 60
Retrieve (button) , 34
Retrieving data from a DICOM node , 34
Right (icon) , 59
Rotate Clockwise (icon) , 60
Rotate Counterclockwise (icon) , 60
Rotate/Flip Images (tools) , 60
Rotating
slices , 58
volume , 58
S
Save Session , 110
Save Session As , 110
Saving snapshots , 113
Scale , 40
Scoutlines
MPR viewers , 50
Segmentation
3D ROI statistics , 98
bones , 92
Edit tool card , 94
object definition , 94
removing parts of the volume , 67
structures , 96
vessels , 91
Select As Baseline Phase , 49
Sending snapshots , 113
Session
Auto logoff , 35
email link , 110
loading , 110
most recent , 35
new , 110
save as , 110
saving , 110
study , 35
Session management , 34
loading session , 110
new session , 110
save session , 110
Session sharing , 35
Shortcuts
keyboard , 56
mouse operation , 54
Show in Viewer , 40
141
Index
Show Toolbars , 57
Showing/hiding
bounding box , 45 , 50
centerline , 45 , 50
crosshair , 45 , 49
fullscreen mode , 45 , 49
image text , 40 , 111
partial crosshair , 50
reports from the RIS , 45 , 49
scale , 40
tool cards , 76 , 111
toolbars , 57 , 111
viewer controls , 45 , 49
Shutter , 92
Slice thickness , 47
Snapshot Active Viewer (icon) , 66
Snapshot All Viewers (icon) , 66
Snapshot and Cine (tools) , 66
Spherical ROI (icon) , 63
Stacked Batching , 104
Standard anatomical view , 59
Standardized Uptake Values (SUV) , 89
Statistics (tool card) , 98
Store Key View , 45 , 49
Structures
analyzing , 96
defining , 96
Structures (tool card) , 96
Study Browser (window) , 27
Study Date (database filter) , 29
Study sessions , 35
Study/series list (Study Browser) , 31
Subtract baseline (icon) , 72
Subtraction (time series) , 109
SUV
based on body surface areas , 89
based on body weight , 89
based on lean body mass , 89
SUV (tool card) , 89
System requirements , 9
T
Table (removing) , 68
Templates (tool card) , 78
Thick slices , 47 , 48
Thin MPR , 48
Time series analysis , 109
Time-density analysis , 109
142
Toggle All , 40
Toggle Centerline (icon) , 70 , 71
Toggle Linking (icon) , 69
Tool cards , 76
floating window , 76
resizing stack , 76
resizing window , 78
showing/hiding , 76
stack , 76
Toolbars , 56
show/hide , 57
Tools , 76
U
Upgrade , 8
US (ultrasound) , 29
User-defined
3D templates , 78
color maps , 81
V
Vertical Distance (icon) , 62
Vertical Rotational Batching , 106
Vessel (tool card) , 90
Vessel segmentation , 71
Vessels
analysis , 92
cross-section view , 92
curved view , 92
lumen view , 71 , 92
show/hide centerline , 45 , 50
shutter , 92
tracing , 91
View
(button) , 34
View DICOM Parameters , 110
View Orientation , 45 , 50
View Study Reports , 45 , 49
View window menu , 110
Viewer Control , 45 , 49
Viewer controls , 41
Viewer linking , 39 , 69
Viewer linking (tools) , 69
Viewer segments , 39
Visage 7 Client
Index
Volume
cropping , 66
removing parts , 67
removing the chest wall , 68
removing the leg bones , 68
removing the table , 68
rotating , 58
VRT , 42
VRT (diffuse) , 42
VRT (specular) , 42
W
Warning symbols , 40
Wildcard search , 28
Window layout , 24 , 38
Window Level
linking , 69
Window Level (icon) , 59
Workflow , 23
X
XA (X-ray angiography) , 29
Z
Zoom (icon) , 58
Visage 7 Client
143
Index
144
Visage 7 Client
REF: 750-70063-0700-02
Copyright © Visage Imaging GmbH
European Headquarters
US Headquarters
Pro Medicus Headquarters
Visage Imaging GmbH
Lepsiusstraße 70
12163 Berlin, Germany
phone: +49 (0) 30-700968-0
Visage Imaging Inc.
12250 El Camino Real, Suite 230
San Diego, CA 92130, USA
phone :+1-888-338-4724
+1-978-319-4641
Pro Medicus Ltd.
450 Swan Street, Richmond
3121 Victoria, Australia
phone: +61 3 9429 8800
For contact information and a list of our world-wide office locations visit www.visageimaging.com.
Visage Imaging is a wholly owned subsidiary of Pro Medicus Ltd. -www.promedicus.com.