1
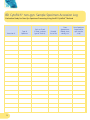
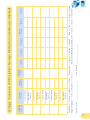
BD CytoRich™ non-gyn
Non-Gynecological Applications
Procedures & Protocols
For Use Outside the US Only
TABLE OF CONTENTS
Specimen Handling and Collection Procedures
3
Washings
4
Brushings
4
Body Cavity Fluids
4
Sputum
5
Urine/Bladder Washing
5
Fine Needle Aspirates
5
General Non-Gyn Procedure
6
BD PrepStain ™ Processing for Non-Gynecologic Specimens
9
Validation Guidelines
14
BD CytoRich ™ non-gyn: Sample Specimen Accession Log
16
Cytologic Comparison of BD CytoRich ™ non-gyn
Method to Current non-gyn Methods
17
Bibliography
18
Warnings and Precautions
19
Frequently Asked Questions
20
NOTES
2
Specimen Handling & Collection Procedures
The BD CytoRich™ non-gyn method can be applied to all non-gynecological sample types such as
Brushes, Washings, Fine Needle Aspirates, Body Cavity Fluids, etc. However, due to the variations
in sample collection techniques, some guidelines are provided on specimen handling.
Required Materials
Optional Materials
a 50 mL centrifuge tubes – conical, sterile or non-sterile
a Urine-type container – leakproof, sterile or non-sterile
a Disposable transfer pipettes
a Buffered de-ionized water, pH 7.8 – 8.2
a Squirt bottle – 100 mL or 500 mL
a BD CytoRich™ Red preservative
a BD CytoRich™ Blue preservative
a BD PrepStain™ settling chambers
a 12 mL disposable centrifuge tubes
a BD SurePath™ PreCoat slides
a 30 mL pump dispenser for gallon container
General Instructions
a When BD CytoRich™ Red & BD CytoRich™ Blue are available, directly use these for fixation of the
specimen in the lab
a When there is no fixative available, try to collect the specimen as fresh as possible and store them in
refrigerated conditions (4º C)
Non-Gynecologic Preservative Summary
BD CytoRich™ Blue*
BD CytoRich™ Red
- Urine
- Bladder Washing
- Sputum
-
Bronchial Aspirates/Washings
Body Cavity Fluids
Brushings
Fine Needle Aspirations
*For sputum, urine and bladder washing’s, only use BD CytoRich™ Blue when the red blood cells need to be
preserved for diagnostic reasons, if their presence is not required use the BD CytoRich™ Red as a fixative.
3
Washings (for Bladder washings see Urine protocol)
a Submit fresh (unfixed) specimens to the laboratory immediately after collection, or
a Fix specimen with an equal volume of BD CytoRich™ Red preservative, when transport to the
laboratory or processing is delayed.
BD CytoRich™ non-gyn processing procedure:
a If fresh (unfixed): Follow General Procedure Steps I – IV (Concentrate, Fix, Wash, Process).
a If received fixed: Follow General Procedure Steps I – IV. If sample is received fixed in BD CytoRich™ Red,
skip Step II.
Brushings
a Make direct smear(s) if desired, then immediately place brush into approximately 10 mL of
BD CytoRich™ Red preservative or
a Immediately place brush into approximately 10 mL of BD CytoRich™ Red preservative
BD CytoRich™ non-gyn processing procedure:
a Remove brush after vortexing but before centrifugation steps.
a If received fresh (unfixed): Follow General Procedure Steps I – IV (Concentrate, Fix, Wash, Process).
a If received fixed: Follow General Procedure Steps I – IV. If sample is received fixed in BD CytoRich™ Red,
skip Step II.
Body Cavity Fluids
a Large volume specimens (≥ 100 mL): Submit fresh specimen to laboratory immediately after collection.
If transport to laboratory or processing is delayed, refrigeration is recommended.
a Small volume specimens (< 100 mL): Submit fresh specimen to the laboratory immediately after
collection. If transport to laboratory or processing will be delayed, fix specimen with an equal volume
of BD CytoRich™ Red preservative.
BD CytoRich™ non-gyn processing procedure:
a If fresh (unfixed): Follow General Procedure Steps I – IV (Concentrate, Fix, Wash, Process).
a If received fixed: Follow General Procedure Steps I – IV. If sample is received fixed in BD CytoRich™
Red, skip Step II.
4
Sputum
a If received fresh, promptly fix in equal volumes of BD CytoRich™ Blue preservative.
a If transportation to laboratory is delayed, collect directly into 30 mL BD CytoRich™ Blue preservative and
send to lab.
BD CytoRich™ non-gyn processing procedure:
a If fresh (unfixed): Follow General Procedure Steps I – IV (Concentrate, Fix, Wash, Process).
a If received fixed: Follow General Procedure Steps I – IV. If sample is received fixed in BD CytoRich™
Blue, skip Step II.
Urine/Bladder Washing
a If received fresh, fix specimen with an equal volume of BD CytoRich™ Blue preservative.
a Collect specimen directly into 30 mL of BD CytoRich™ Blue preservative.
BD CytoRich™ non-gyn processing procedure:
a Follow General Procedure Steps I – IV. If sample is received fixed in BD CytoRich™ Blue,
skip Step II.
Fine Needle Aspirates
a Make direct smear(s) if desired, then immediately rinse the needle in approximately 10 mL of
BD CytoRich™ Red preservative.
a Expel entire contents of the needle aspirate directly into 10 mL of BD CytoRich™ Red preservative.
BD CytoRich™ non-gyn processing procedure:
a If fresh (unfixed): Follow General Procedure Step I – IV (Concentrate, Fix, Wash, Process).
a If received fixed: Follow General Procedure Steps I – IV. If sample is received fixed in BD CytoRich™ Red,
skip Step II.
5
General Non-Gyn Procedure
Including Urines, Body Cavity Fluids, Fine Needle Aspirations and Respiratory Specimens
Processing Steps
I. CONCENTRATION
1. Mix to homogenize the unfixed sample. This can be accomplished by simple inversion
or alternatively vortexing when a collection device is submitted (i.e. brush sample).
2. Assess for and remove clots,* particles* and mucus.**
3. Transfer a 50 mL aliquot or for small volume samples, the entire amount to a
centrifuge tube.
4. Centrifuge for 10 minutes @ 600 g (Program #3).
5. Pour off supernatant fluid.
* It is important to remove any visible clots or particulate matter. Failure to do so may
cause clogs in the BD PrepStain™ vacuum bundles. Filtering may be accomplished by
pouring the specimen through any coarse medium such as gauze. Any captured
material may be used for cell block procedures.
**Follow standard laboratory procedures to homogenize and/or emulsify mucous.
II. FIXATION (This step may be omitted for prefixed samples. Vortex sample for 15 ± 5 seconds and proceed to step 10.)
6. Depending on cell pellet volume, add 5 – 10 mL of BD CytoRich™ Red or Blue
preservative. (Refer to collection procedures on page 3 for preservative choices.)
7. Vortex for 15 ± 5 seconds and allow to sit for a minimum of 30 minutes.
8. Centrifuge for 10 minutes @ 600 g (Program #3).
9. Pour off supernatant fluid and vortex to homogenize sample. (See Step 13 for
decanting instructions)
6
III. WASH
10. If no visible or small pellet is identified, add 6 mL of buffered DI H2O directly to 50 mL
centrifuge tube, vortex for 15 ± 5 seconds and transfer entire contents to 12 ml tube.
11. If a moderate to large pellet is identified, transfer a representative sample (1–5
drops) to 12 mL tube and add 10 mL buffered DI H2O.
12. Transfer 12 mL tubes to centrifuge tube holder(s) and centrifuge for 5 minutes
@ 600 g (Program #4).
13. Decant and vortex for 15 ± 5 seconds to homogenize sample. (Decanting should be
done in a single, rapid motion by inverting each tube rack 180 degrees so as to not
disturb the cell pellet. While inverted, carefully blot the mouth of all tubes in the
rack with absorbent paper. Turn the rack upright after 3 to 5 seconds.)
IV. PROCESS
14. Load the labeled 12 mL centrifuge tube holders onto the BD PrepStain™ Slide Processor
for processing.
15. Place BD SurePath™ PreCoat slides on the slide racks in the same position as the tubes
in the centrifuge tube holder. If more than one slide is to be prepared from each
sample tube, follow the “Non-Gyn Slide Processing” instructions in the BD PrepStain™
Operator’s Manual for proper slide positioning.
16. Check levels of all reagent bottles. For non-gyn samples processing, the use of
BD PrepStain™ 0.5 Hematoxylin stain is recommended.
17. Place each labeled intake tubing into its corresponding reagent bottle.
18. Start slide preparation run. Refer to the BD PrepStain™ Operator’s Manual for
software operation.
19. Remove each slide rack from BD PrepStain™ Slide Processor as it is completed.
20. Invert the slide rack and blot to remove any excess alcohol from the settling
chambers. Turn the rack right side up.
21. Taking one slide at a time, remove and discard the settling chamber.
22. Rinse each slide one at a time first by using a squirt bottle. Spray a stream of alcohol
just above the cell circle, then rinse the slide through a bath with 100% alcohol.
Clear with xylene or xylene substitute and coverslip according to laboratory protocol.
CAUTION
• Do not allow the slides to air dry prior to coverslipping. For optimal results, each settling chamber should be removed one at a time.
• Leaving stained samples in alcohol for an extended period of time can cause the cells to destain.
7
Slide Results and Cytologic Interpretation
The BD PrepStain™ slide processor produces a uniform thin-layer of cells in a 13 mm diameter circle. The
non-gyn application of the BD PrepStain™ software allows for stained or unstained slides. The preparations
may contain single cells and cell clusters. Interpretations should be made by applying fundamental
cytological guidelines practiced by Cytotechnologists and Pathologists.
Optimizing Sample Adequacy
a Instruct health care provider on how to collect samples in the proper fixative and how to transport to
the laboratory.
a Follow manufacturer’s recommended protocols for specimen collection and processing and use
specified reagents and equipment.
a Use only BD CytoRich™ Red or BD CytoRich™ Blue as the primary fixative for sample collection. Other
fixatives may impair sample adequacy.
a Use only BD SurePath™ Precoat slides.
8
BD PrepStain™ Processing for Non-Gynecologic Specimens
The following procedure is to be used when using the BD PrepStain™ Slide Processor for
preparing thin-layer slides for non-gynecologic specimens.
1 The GYN application automatically loads when you start the BD PrepStainTM instrument workstation.
Exit this application to access a DOS prompt to display the Non-GYN Version Check menu. This screen
provides access to all functions of the program.
a If the workstation is running the GYN application, select Quit to display the DOS prompt, type in
NONGYN, and then press Enter. The Non-GYN Version Check menu is displayed.
a If the workstation is already displaying the DOS prompt, type in NONGYN and then press Enter. The
Non-GYN Version Check menu is displayed.
2 Select Run Version 2.80 from the menu, and then press Enter. This brings up the Non-GYN Version
2.80 Main Menu. The main menu provides access to all functions of the program.
3 Select Sample Preparation, and then press Enter. The Number of Samples screen is displayed.
Note: On this and all other BD PrepStain™ system screens, you can use either the Tab or Enter keys to move the
cursor (navigate) from one field to the next.
4 In the first field, type in the number of samples to be processed, and then press Enter. The number of
samples must be a multiple of four.
Note: If the number of slides to be processed is not divisible by four, type in the next higher multiple of four, and
then add blank slides, settling chambers and tubes to the slide tray to make up for the difference. For e.g., if
processing 6 specimens, enter 8 in the first field and ensure 2 blank slides, settling chambers and tubes are inserted
into the blank positions.
5 Go to the next field and type in the number of slides you want created for each sample. For example,
you might want to create three slides from each sample centrifuge tube. (Details on processing
multiple slides are illustrated in the BD PrepStain™ Operator’s Manual – Appendix C.)
6 Navigate to the next field and type in the number of slides that you want stained for each sample.
For example, if you were creating 3 slides for each sample, you might only want one of them stained
using the current sample and stain settings.
7. Navigate to the next field, and either press Enter to confirm that the Next Tip Position is correct; or
type in the correct tip number, and then press Enter.
9
8
The Reenter Run Information prompt is displayed.
a To change any of your entries: select Yes, press Enter, and then repeat the last three steps.
a To confirm your entries and proceed: select No and then press Enter.
9
The Change Sample/Stain Parameters prompt is displayed.
The default volume setting of “Resuspension” is always 600 and “Sample” always 200. Adapt
these settings depending on the amount of cell pellet and number of slides that will be processed
from each sample.
a To change the sample or stain settings, select Yes and then press Enter. Refer to Change sample/stain
parameters on page 5 –13 of the BD PrepStain™ Operator’s Manual for details on how to make
these adjustments.
a To use the existing settings and proceed, select No and then press Enter.
10 The Tube & Slide positions confirmed? screen is displayed.
a Confirm that the positions of the sample tubes and their corresponding slides match.
a Select Yes and then press Enter.
11 The vacuum prompt is displayed, and the alarm will sound. Press any key to silence the alarm.
12 Turn on the vacuum pump, wait a few minutes for it to warm up, adjust pressure to 8 –10 in/Hg,
then press any key to continue.
13 The Prime ALL Tubing? prompt will appear.
a If this is the first run of the day, select Yes and then press Enter to prime the system tubing. The
system initializes, and the pumps dispense reagents through the quad arm tubing and into the
waste station.
a For subsequent runs during the next eight hours, select No, then press Enter to skip the full
priming function.
a Before each run, a single syringe volume is automatically pumped through the tubing to ensure
that the system is filled.
14 When the priming cycle is complete, the Is the PSSP tubing primed? prompt is displayed.
a To repeat the priming sequence, select No and then press Enter.
a To proceed with slide preparation and staining, select Yes and then press Enter.
15 The DiTi dispenses buffered water into each centrifuge tube to re-suspend the cell pellet. Next, the
DiTi picks up a disposable tip, and then a sample of the cell suspension is aspirated, carried to its
corresponding slide, and deposited into the settling chamber.
10
16 After a sample is transferred, the BD PrepStain™ instrument dispenses an additional amount of
buffered water. When samples have been transferred to all racks, the instrument pauses for ten
minutes to allow the cells to sediment onto the slide.
17 When the sedimentation pause is complete, an alarm alerts the operator that the arm is about
to move.
Staining is performed one slide rack at a time. During each staining cycle, each slide is pre-washed in the appropriate
reagent (buffered water for Hematoxylin, alcohol for EA/OG) then stained. After the staining is complete, the slide
is washed with alcohol. Each settling chamber is completely emptied between stains and washes.
18 When all the slides on a rack have been stained, the BD PrepStain™ system sounds an alarm, then
continues to stain the next slide rack.
19 As each slide rack is completed, remove it within 10 minutes from the BD PrepStain™ instrument and
decant the alcohol from the settling chambers into an appropriate receptacle and blot. Rinse the
slides one at a time.
Rinsing steps:
1.
Take off the settling chamber from the first slide, keep the slide in upright position above
a waste bin
2.
Use a squirt bottle to flush loose cells and excessive liquids from the slide by “spraying” for
2 – 3 sec a stream of 100% alcohol just above the cell circle
3.
Rinse the slide in 100% alcohol, and rinse twice in xylene or xylene substitute to clear.
4.
Go through step 1 – 3 for all following slides
5.
Coverslip the slides according lab protocol
Caution
Leaving stained samples in alcohol for an extended length of time can cause the cells to de-stain.
20 When the BD PrepStain™ instrument finishes processing, the Sample Preparation Complete prompt is
displayed, and an alarm sounds. Press any key to silence alarm and continue.
21 When you complete a Sample preparation, you can either run another batch, clean up the instrument,
or exit to DOS so you can start one of the other BD PrepStain™ applications.
For details on processing multiple slides for each specimen, refer to Appendix C of the BD PrepStain™
Operator’s Manual.
11
Troubleshooting
Less than optimal preparations may be encountered using standard laboratory techniques. This
can be attributed to multiple factors including variability in biological samples and collection
methods. A few situations and solutions are outlined below. For a more detailed troubleshooting
guide, refer to Chapter 7 of the BD PrepStain™ Operator’s Manual.
Observation
Scant Cellularity
Possible Explanations / Solutions
1. The sample itself may be low in cellularity. Concentrate multiple volumes by centrifugation, combine
the pellets and re-process sample.
2. The supernatant of the concentrated specimen was not properly decanted. Decant by inverting the
tube or tube rack 180 degrees and blot to remove residual supernatant before returning the tube rack
to an upright position.
3. Specimen was not vortexed prior to loading on BD PrepStain™ Slide Processor. Vortex specimen prior
to loading on the BD PrepStain™ Slide Processor to disperse and mix cell pellet.
4. Specimens fixed in BD CytoRich™ Red were not washed with DI water prior to processing.
Observation
There is a halo or circle of stained cells on the prepared slide. This may appear visually as a ‘donut effect.’
Possible Explanations / Solutions
1. The wrong glass microscope slides were used. Use the BD SurePath™ PreCoat slides. The thickness of a
BD SurePath™ PreCoat slide is optimized for the BD PrepStain™ Slide Processor and ensures a tight seal
of the settling chamber to the slide. Use of other slides may result in leakage around the O ring of the
settling chamber, resulting in a ‘halo effect.’
2. The vacuum pressure of the BD PrepStain™ Slide Processor may be too high. Adjust the pressure to
8 – 10 psi.
3. Proteins in the sample are competing for sites on the coated slides. Fix the sample in BD CytoRich™ Red
and wash the fixed pellet with DI water prior to processing.
4. The Z max of the Quad may be too low. Call Technical Support for guidance on troubleshooting.
12
Observation
Staining is too dark.
Possible Explanations / Solutions
1. DI water was not used for BD PrepStain™ processing. Do not use tap water.
2. pH of DI water was not appropriate. Adjust the pH to 7.0 – 8.4.
3. Staining intensity may be affected by ambient temperature. Add extra water and/or alcohol
rinses to adjust stain to user preference. See Operator’s Manual for instructions on how to
change stain parameters.
4. An inappropriate Hematoxylin stain was used. Use Hematoxylin 0.5 provided by BD Diagnostics –
TriPath for non-gynecologic specimens.
5. An inappropriate alcohol blend was used during processing. Use BD PrepStain™ Alcohol Blend Rinse
or prepare according to the following formula using reagent grade alcohol and isopropanol.
ALCOHOL BLEND RINSE
Mix equal parts of:
100% Reagent Alcohol (denatured ethanol) or 100% Ethanol
AND
100% 2-propanol (isopropyl alcohol)
It is important that all glassware is clean and reagents are mixed in the correct proportions. Additional
troubleshooting guidance is provided in Chapter 7 of the BD PrepStain™ Operator’s Manual.
If problem persists, please contact Technical Support.
13
Validation Guidelines
The following suggested protocol can be used to assist the laboratory with the introduction
and evaluation of BD CytoRich™ non-gyn.
Please note: BD Diagnostics – TriPath can provide consultation; however, the laboratory is
ultimately responsible for the validation study design & results interpretation.
Test Method to Be Evaluated
Non-Gynecologic Specimen preparation using the BD CytoRich™ non-gyn method
(BD Diagnostics – TriPath, Zaventem, Belgium)
Objective
To demonstrate equivalency between non-gyn specimens processed using the BD CytoRich™ non-gyn
method compared to current methods used by the laboratory to include the Cytospin® process, direct
preparations, filter technique, pick and smear, etc.
Scope of Study
1. Determine time frame and approximate number of samples to be included prior to initiating the
evaluation study. The laboratory determines the total number of samples included in the study.
2. Include representative samples from each general specimen category. General categories might include
respiratory tract, urinary tract, body cavity fluids, deep-seated vs. superficial fine needle aspiration, etc.
3. Include when possible bloody, mucoid, serous and proteinaceous specimens.
4. Include when possible normal and malignant specimens.
Split-Sample Study Design Recommendations
1. Moderate to large volume fluid samples:
Mix sample well to homogenize. Divide into two equal volumes. Use current laboratory protocol to
process the first aliquot and the BD CytoRich™ non-gyn protocol to process the second aliquot.
2. Small volume samples (e.g., csf):
a. Process fluid sample using current laboratory protocol. Rinse residual material in BD CytoRich™
preservative and process using the BD CytoRich™ non-gyn method. (Refer to Specimen Collection &
Handling section for type of preservative).
b. Mix well to homogenize, and divide into two equal volumes.
14
3. Fine needle aspirates:
a. Perform fine needle aspirate using current laboratory protocol. Rinse needle tract in BD CytoRich™
Red preservative.
b. Dedicate at least one fine needle aspirate pass for collection directly into BD CytoRich™ Red
preservative.
4. Brush samples:
Rinse or deposit brush head into BD CytoRich™ Red preservative after the smear is made. If laboratory
protocol requires the brush to be collected directly into fixative (no smears made), then mix the sample
well to homogenize and divide into two equal volumes.
5. Mucoid samples:
a. For sputum processed using the ‘pick and smear’ technique, first prepare sample in the usual
manner. Fix remaining sputum sample in 30 mL of BD CytoRich™ Blue or BD CytoRich™ Red
preservative if red blood cells may be removed from the specimen.
b. For respiratory specimens processed using a homogenization process (blending), homogenize
according to routine laboratory procedures. Divide into two equal volumes.
6. Fixed samples:
For best results, the use of other alcohol-based preservatives (e.g., Saccomanno) is not recommended.
Data Collection and Comparing Results
1. Determine the characteristics for each method to be compared such as cellularity, preservation,
number of abnormal cells, morphology, etc.
2. Compare using tools provided in this document.
3. Derive conclusions based on comparative data analysis.
Frequently asked questions that may arise during implementation process are addressed on pages 22–25.
15
BD CytoRich™ non-gyn: Sample Specimen Accession Log
Evaluation Study for Non-Gyn Specimen Processing Using the BD CytoRich™ Method
Accession #
16
Type of
Specimen
Fresh or Fixed
(If fixed, indicate
type of fixative)
Mucoid
Yes or No
Gross
Appearance:
Bloody, clear,
cloudy, etc.
Data Specimen
Processed for
split-sample
study
17
BD CytoRich™
Non-Gyn
Current Method
BD CytoRich™
Non-Gyn
Current Method
BD CytoRich™
Non-Gyn
Current Method
BD CytoRich™
Non-Gyn
Current Method
BD CytoRich™
Non-Gyn
Current Method
Preparation
Method
Cytologic
Interpretation
Reviewer’s Initials ___________________________
Cellularity
Preservation
Stain Quality
Obscuration
Comments
Stain = +(1)poor, ++(2) average, +++(3)good
Diagnostic
Groups
Date Reviewed ____________________________
Obscuration (blood, polys, protein, etc) = +(1)clean, ++(2)partial, +++(3)abundant
Preservation = + (1)poor, ++ (2)average, +++(3)good
Diagnostic
Correlation
Y or N
Diagnostic groups = +(1)few, ++(2)moderate, +++(3)many
Cellularity = + (1)low, ++ (2)moderate, +++ (3)high
Accession
Number and
Specimen Type
Cytologic Comparison of BD CytoRich™ Non-Gyn Method to Current Non-Gyn Methods
Bibliography
• Arain S, Walts AE, Thomas P, Bose S. The anal Pap smear: cytomorphology of squamous intraepithelial lesions. CytoJournal. 2005;2(1):4.
• Bishop J, MacFarlane K, Cheuvront D, et al. Cell recovery and appearance in thin-layer preparations in nongynecologic cytology. Analyt Quant
Cytol Histol. 1998;20:229-237.
• Bishop J, Sims K. Cellular morphometry in nongynecologic thin-layer and filter cytologic specimens. Analyt Quant Cytol Histol.
1998;20(4):257-267.
• Davis-Devine S, Day SJ, Freund GG. New red blood cell lysing fixative for use in fine needle aspiration and fluid cytology. Acta Cytol.
2003;47(4):630-636.
• Gabriel C, Achten R, Drijoningen M. Use of liquid-based cytology in serous fluids: a comparison with conventional cytopreparatory
techniques. Acta Cytol. 2004;48(6):825-835.
• Hayama FH, Motta AC, Silva AP, Migliari DA. Liquid-based preparations versus conventional cytology: specimen adequacy and diagnostic
agreement in oral lesions. Med Oral Patol Oral Cir Bucal. 2005;10(2):115-122.
• Johnson T, Maksem JA, Beisheim BI, Roose EB, Klock LA, Eatwell I. Liquid-based cervical-cell collection with brushes and wooden spatulas,
demonstrating a cost-effective, alternative monolayer slide preparation method. Diagn Cytopathol. 2000;22(2):86-91.
• Kujan O, Desai M, Sargent A, Bailey A, Turner A, Sloan P. Potential applications of oral brush cytology with liquid-based technology. Results
from a cohort of normal oral mucosa. Oral Oncol. 2006;42:810-818.
• Maksem J, Knesel E. Liquid fixation of endometrial brush cytology ensures a well preserved, representative cell sample with frequent tissue
correlation. Diagn Cytopathol. 1996;14:367-373.
• Maksem J, Sager F, Bender R. Endometrial collection and interpretation using the TaoBrush and the CytoRich fixative system: a feasibility
study. Diagn Cytopathol. 1997;17:339-346.
• Michael CW, McConnel J, Pecott J, et al. Comparison of ThinPrep and TriPath PREP liquid-based preparations in nongynecologic specimens: a
pilot study. Diagn Cytopathol. 2002;25(3):177-184.
• Motherby H, Nicklaus S, Berg A, et al. Semiautomated monolayer preparation of bronchial secretions using AutoCyte® PREP. Acta Cytol.
1999;43(1):47-57.
• Nicol TL, Kelly D, Reynolds DI. Comparison of TriPath thin-layer technology with conventional methods on nongynecologic specimens. Acta
Cytol. 2000;44(4):567-575.
• Veneti S, Daskalopoulou D, Servoudis S, Papasotiriou E, Ioannidou-Mouuzaka L. Liquid-based cytology in breast fine needle aspiration.
Comparison with the conventional smear. Acta Cytol. 2003;47(2):188-192.
• Walts AE, Thomas P, Bose S. Anal cytology: is there a role for reflex HPV DNA testing? Diagn Cytopathol. 2005;33(3):152-156.
• Weidman J, Chaubal A, Bibbo M. Cellular fixation: a study of CytoRich Red and CytoSpin collection fluid. Acta Cytol. 1997;41(1):182-187.
• Weidmann J, King L, Bibbo M. Modification of CytoRich Red fixative system for use on bloody Pap and fine-needle aspiration smears. Diagn
Cytopathol. 1999;20(2):95-98.
• Wright RG, Halford JA. Evaluation of thin-layer methods in urine cytology. Cytopathol. 2001;12(5):306-313.
• Yang GC, Wan LS, Papellas J, Waisman J. Compact cell blocks. Use for body fluids, fine needle aspirations and endometrial brush biopsies.
Acta Cytol. 1998;42(3):703-706.
• Zardawi IM, Duncan J. Evaluation of a centrifuge method and thin-layer preparation in urine cytology. Acta Cytol. 2003;47(6):1038-1042.
18
Warnings and Precautions
Reagents used in the BD CytoRich™ non-gyn preparation process are not for internal or external
use in humans or animals.
Caution
Some reagents contain sodium azide. Sodium azide may react with lead or copper plumbing to form high explosive
metal azides. On disposal, flush a large volume of water to prevent building up of azide. For further information,
refer to the guidelines provided by the Centers for Disease Control..
Additional Warnings
It is expected that good laboratory practices will be followed.
1. Avoid splashing or generating aerosols.
2. Centrifugation and fixation times or temperatures other than those specified may give
erroneous results.
3. Microbial contamination of reagents may give incorrect results.
4. All reagents are stable until stated expiration date on the label, provided recommended storage
conditions are followed and maintained.
General Precautions
1. Do not pipette with mouth.
2. Do not allow any reagents to come in contact with open wounds.
Precautions for Diagnostic Applications
For all diagnostic and clinical applications of the BD PrepStain™ Slide Processor, it is essential that the user
strictly follow all instructions. The user must ensure that requirements of the diagnostic protocol are
carefully observed.
The BD PrepStain™ Slide Processor requires accurate positioning of all reagents, samples and racks on the
instruments workable by the operator. The user should verify that all components are correctly positioned
on the BD PrepStain™ Slide Processor and that the stain and solvent reservoirs are adequately filled
before executing any program.
19
Frequently Asked Questions
a Can I process BD SurePath™ and BD CytoRich™ slides at the same time?
• The BD CytoRich™ software program is different from the BD SurePath™ software program.
Different sample and stain dilutions are associated with the BD CytoRich™ program. In addition, a
different concentration of Hematoxylin stain is used for BD CytoRich™ non-gyn vs. BD SurePath™ test.
Therefore although BD SurePath™ and BD CytoRich™ specimens can be run on the same
BD PrepStain™ Slide Processor, they cannot be run at the same time.
a Can I substitute my own microscopic slides for the BD SurePath™ PreCoat slides?
• For optimal results, use BD SurePath™ PreCoat slides provided, which are coated with a proprietary
formula enhancing cell adherence.
• The use of substitute slides is not recommended.
a Can I coat my own slides with a different coating agent such as Poly-l lysine?
• For optimal results, use only BD SurePath™ PreCoat slides.
a Can I use commercially available pre-coated slides?
• For optimal results, use only BD SurePath™ PreCoat slides.
a Can I skip the water wash step?
• The water wash step removes any soluble proteins present in the sample. If left in the sample, these
proteins will compete for binding sites with cells on the coated slides. Washing the sample with
water removes the proteins and enhances overall cellularity.
a What do I do if a body cavity fluid grossly looks like “jello” after sitting 30 minutes in BD CytoRich™
Red preservative?
• This type of specimen would be classified as having “visible particles.” The jello-like material should
be removed from the sample. Removal of this material should be done according to current
laboratory procedures.
• Recommendations on how to remove this material include pushing the material through a gauze or
nylon mesh biopsy bag or using forceps to remove any clotted material.
a How do I collect fine needle aspirates (FNA)?
• Multiple options are available.
• Directly expel the FNA material into BD CytoRich™ Red.
• If air-dried slides are required, prepare direct smears first and place residual material directly into
BD CytoRich™ Red.
• If conventionally prepared direct smears are preferred, prepare these first and place residual material
in BD CytoRich™ Red.
20
a How do I collect brush samples such as bronchial and gastric brushes?
There are multiple options to include:
• Deposit brush head in BD CytoRich™ Red. Make sure there is enough BD CytoRich™ Red fixative
in the specimen container to completely cover the brush during transport.
• Make direct smears first and then rinse or deposit brush head into BD CytoRich™ Red.
a Can cerebral spinal fluids be processed with your method?
• Yes. Simply follow the protocol provided.
• However, since these samples may be limited in cellularity, consider adding BD CytoRich™ Red to the
collection fluid and letting sit for 30 minutes, then pour into 12 mL BD centrifuge tube and
centrifuge on program 3, decant, vortex and place on BD PrepStain™ for processing.
a Can you make a cell-block with the BD CytoRich™ collection material?
• Yes. Any residual material can be cell blocked according to your laboratory’s standard protocol.
a Can you make unstained wet-fixed slides with the BD CytoRich™ non-gyn method?
• Yes, refer to operating instructions.
a Can you air-dry a slide and stain it with Diff-Quik, Romanoffsky or Giemsa after the sample is fixed in
BD CytoRich™ non-gyn?
• It is best to prepare air dried slides with unfixed or fresh samples.
a Can you perform Immunocytochemical (ICC) stains with the BD CytoRich™ non-gyn method?
• BD Diagnostics does not have any data on ICC staining with non-gyn cytology; however, the
laboratory can evaluate this procedure as they normally would for other non-gyn methods.
a How do you store the centrifuge tube containing the residual specimen after processing?
• Follow your current routine laboratory procedure for storage and disposal of processed non-gyn
specimens.
• Note: residual samples processed on the BD PrepStain™ Slide Processor are suspended in water. To
preserve cellular material, consider adding BD CytoRich™ preservative for storage.
a Are there any storage requirements for BD CytoRich™ Preservatives?
• Store at room temperature (15º – 30º C).
• Keep in a tightly closed and labeled container in a cool, well-ventilated area.
• BD CytoRich™ Red may be used up to the expiration date printed on the label.
• Specimens fixed in BD CytoRich™ Red preservative fluid are stable for at least 30 days.
• Morphological stability has been demonstrated in specimens stored up to six months at room
temperature.
• Specimens fixed in BD CytoRichTM Red Preservative Fluid can withstand shipment at temperatures
ranging from about -5º to about +45º C.
21
a Are BD CytoRich™ Red pre-filled containers available?
• At this time, BD Diagnostics – TriPath does not provide pre-filled containers for this purpose. We
provide bulk fixative, and a commercially available pump can be purchased to facilitate filling
specimen containers.
a Does the BD PrepStain™ Slide Processor need to be placed under a laminar flow hood in order to
process non-gyn specimens?
• Since all specimens processed on the BD PrepStain™ Slide Processor are required to be fixed, the
processing does not need to be performed under a hood.
• However, pre-processing of fresh specimens should be performed according to the laboratory’s
protocol for safety and standard precautions.
a Do you need a separate BD PrepStain™ Slide Processor just for processing Non-Gyns?
• The BD PrepStain™ Slide Processor is capable of performing both gyn and non-gyn applications on the
same instrument.
• The total volume of gyn vs. non-gyn will determine the number of BD PrepStain™ Slide Processor’s
required in the laboratory. Please contact your local BD Diagnostics – TriPath Representative for
more details.
a Can I prepare a stat non-gyn specimen(s) if the Gyn program is in operation?
• A BD Diagnostics – TriPath Clinical Applications Specialist can provide consultation on workflow issues
such as handling a stat specimen.
a Do I have to do a non-gyn evaluation when converting to the BD CytoRich™ non-gyn method?
• This depends on the requirements of your local regulatory authorities. Please check local laboratory
guidelines or contact your local BD Diagnostics – TriPath Representative for more details.
a Is there a recommended evaluation protocol?
• Although the laboratory is ultimately responsible for the evaluation protocol and study results
documentation, BD Diagnostics – TriPath can provide consultation and recommendations.
a How much BD CytoRich™ fixative is needed for the sample?
• For processing, up to 30 mL in a 50 mL tube and up to 10 mL in the 12 mL tube.
• For fresh samples, the general rule is a 1:1 ratio.
a How long does the non-gyn sample need to be in the BD CytoRich™ Red or Blue fixative before processing?
• A minimum of 30 minutes.
a Can special stains be run on the BD CytoRich™ non-gyn slides?
• Unstained slides can be prepared using the BD CytoRich™ non-gyn method. The laboratory would
then be responsible for determining the staining protocols and performance for additional special stains.
22
a Do I need to use the density gradient step (BD PrepMate™ instrument) for BD CytoRich™ non-gyn
processing?
• The current BD CytoRich™ non-gyn protocol does not include using the BD PrepMate™ instrument;
however the laboratory can use its own judgment to validate other protocols.
a How do I split the non-gyn sample if my cell pellet is too large? How large is too large?
• If the cell pellet in the 50 ml tube is too large after decanting, re-suspend the pellet to homogenize
the sample and transfer 1–5 pipette drops into the 12 mL tube.
• Too large is > 1 mL.
a Should I spin down the non-gyn sample before adding fixative?
• Yes, if the sample is received fresh, mix to homogenize, then pour up to 50 mL of sample into a
centrifuge tube. Spin the sample down, decant the supernatant and then add the BD CytoRich™
fixative as indicated in the protocol.
a Can the non-gyn sample be fixed in formalin?
• Formalin should not be used to fix any cytologic sample including gyn and non-gyn samples.
a How are mucoid samples processed?
• Mucus is considered a visible particle and needs to be removed from the sample prior to
BD PrepStain™ processing.
• A variety of methods for reducing, homogenizing or emulsifying mucus are available. Examples
include extended vortexing in a fixative that contains a mucolytic agent, addition of mucolytic agents
such as Mucolexx or DTT to dissolve the mucus, etc.
• The laboratory can use its current methods for handling mucus when processing our non-gyns.
• Your BD Diagnostics – TriPath Representative can provide guidance at time of installation and
training. For additional questions after installation, contact Technical Support.
23
BD Diagnostics – TriPath
No part of this publication may be reproduced, transmitted, transcribed, stored in a retrieval system, or
translated into any language or computer language, in any form, or any means, electronic, mechanical,
magnetic, optical, chemical, manual, or otherwise, without the prior written permission of BD Diagnostics –
TriPath, 780 Plantation Drive, Burlington, North Carolina, 27215, United States of America.
Although this document has been prepared with precautions to ensure accuracy, BD Diagnostics – TriPath
assumes no liability for any errors or omissions, nor for any damages resulting from the application or use
of this information.
Information presented in this manual refers to specific applications and protocols for use of non-gynecological
samples on the BD PrepStain™ system. Specific instructions regarding preservative fluids may be found in
the BD CytoRich™ preservative package inserts.
24
BD, BD Logo and all other trademarks are property of Becton, Dickinson and Company. © 2007 BD
980-06789-01 Rev A 10/07
For Use Outside the US Only
BD Diagnostics
TriPath
Ikaros Business Park
Ikaroslaan 73
1930 Zaventem
BELGIUM
Phone: +32 3 704 43 80
Fax: +32 2 721 36 00
Email: [email protected]
www.tripathimaging.com
www.BD.com


![Estrogen Receptor (ER) [SP1]](http://vs1.manualzilla.com/store/data/005885543_1-e9d75303a2a759dcb2dd4dad516aa5ce-150x150.png)