1
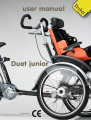
user manual
Duet junior
version 2012.1
2
Warranty
Pg. 5
General Characteristics
Pg. 6 –7
User Assembly
Pg. 8 – 13
Use of the product
Pg. 14 – 21
Maintenance
Pg. 22 - 24
Malfunctions
Pg. 25
Technical specifications
Pg. 26
3
4
INDEX
1.
2.
WARRANTY ........................................................................................................ 7
GENERAL CHARACTERISTICS ............................................................................ 8
2.1. User manual ........................................................................................................... 8
2.2. Huka BV ................................................................................................................. 8
2.3. Duet Junior ............................................................................................................. 8
2.4. Intended user ......................................................................................................... 9
2.5. Intended environment ............................................................................................. 9
2.6. Tyre pressure ......................................................................................................... 9
3.
USER ASSEMBLY .............................................................................................. 10
3.1. Introduction.......................................................................................................... 10
3.2. Saddle adjustment ................................................................................................ 10
3.3. Passenger seat adjustment .................................................................................... 10
Headrest adjustment ................................................................................................ 11
3.4. Steering height ..................................................................................................... 12
Seat belt adjustment ................................................................................................ 12
3.5. Wheels ................................................................................................................. 13
Tyre pressure and valves .......................................................................................... 13
Spokes .................................................................................................................... 13
Hub gears ................................................................................................................ 14
Chain and pedals ...................................................................................................... 14
Required tools and equipment ................................................................................... 14
3.6. Inspection for missing or damaged parts ................................................................ 14
3.7. Assembling, installing and removing instructions ..................................................... 14
3.8. Storage, shipment and travel ................................................................................. 15
4.
USE OF THE PRODUCT ..................................................................................... 16
4.1. Safety and driving precautions ............................................................................... 16
4.2. Theft prevention ................................................................................................... 16
4.3. General advises and warnings ................................................................................ 17
4.4. Use in combination with other products .................................................................. 17
4.5. Hot and cold surfaces ............................................................................................ 17
4.6. Danger of pinching ................................................................................................ 18
4.7. Use on slopes ....................................................................................................... 18
4.8. How to use the Duet ............................................................................................. 18
4.9. Where to use the Duet .......................................................................................... 19
4.10. How to connect or disconnect the wheelchair to the cycle ..................................... 19
4.11. Adjustment of the wheelchairs seat ...................................................................... 19
4.12. Closing the wheelchair positioning belt ................................................................. 19
4.13. Brakes ................................................................................................................ 19
Driving Brakes .......................................................................................................... 19
Parking brake ........................................................................................................... 20
4.14. Lights ................................................................................................................. 20
4.15. Luggage carrier ................................................................................................... 21
5
4.16. Bike stand .......................................................................................................... 21
4.17. Use of the gears (optional) .................................................................................. 21
4.18. Known misuse ..................................................................................................... 21
4.19. Transfer to and from the wheelchair ..................................................................... 21
4.20. Driving ............................................................................................................... 21
4.21. Accelerating, braking and steering ........................................................................ 22
4.22. Pushing .............................................................................................................. 22
4.23. Transportation .................................................................................................... 23
Lifting ...................................................................................................................... 23
Transport by car ....................................................................................................... 23
Partial disassembly ................................................................................................... 23
5.
MAINTENANCE ................................................................................................ 24
5.1. Maintenance, service and fault finding to be carried out by the user ........................ 24
Tyres ....................................................................................................................... 24
Puncture repair ........................................................................................................ 24
Protection against corrosion ...................................................................................... 25
Brakes and gears ..................................................................................................... 25
5.2. Required tooling and equipment ............................................................................ 25
5.3. Ordering for parts to be readily replaced ................................................................ 25
5.4. Cleaning ............................................................................................................... 25
5.5. Frequency of maintenance ..................................................................................... 25
5.6. Performance checks .............................................................................................. 26
5.7. Other repairs and maintenance .............................................................................. 26
Authorized dealers for repairs ................................................................................... 26
Spare parts .............................................................................................................. 26
Unauthorized repairs ................................................................................................ 26
5.8. Disposal of the product ......................................................................................... 26
6.
MALFUNCTIONS .............................................................................................. 27
6.1. Mechanical malfunctions ........................................................................................ 27
7.
TECHNICAL SPECIFICATIONS ......................................................................... 28
7.1. Certification .......................................................................................................... 28
7.2. Expected life time of the Duet ................................................................................ 28
7.3. Specification sheet ................................................................................................ 28
6
1. WARRANTY
Huka BV gives two years of guarantee on the Duet Junior. Your supplier will carry out this
guarantee.
The guarantee does not apply to damage or faults of the product caused by wrong or
improper use, or neglected maintenance. The evaluation of it is the privilege of Huka BV or a
representative to be appointed by Huka BV.
This guarantee does not apply to components susceptible to wear such as tyres, seat covers,
arm rests, brake cables etc..
Huka BV reserves the right to alter the specifications at any time. No responsibility can be
accepted for any change in the specifications. Change of specifications can be caused by e.g.
availability of parts, product improvement based on market experience, changed legislations
etc..
7
2. GENERAL CHARACTERISTICS
2.1. User manual
The user manual is written for the user of the Duet Junior. These are not only the children
who will use it as a passenger, but also the driver of the Duet Junior and any other persons
who are involved with it on a regular basis like parents and therapists.
The manual contains all the relevant information needed to adjust and adapt Duet Junior to
the users requirements and how to make the best use of the various functions.
NOTE:
With the aid of this manual, with its clear drawings and practical instructions, you will be
able to get even more enjoyment from your Duet II Junior. It is important that you take
the time to read it carefully and then tot keep it within arm’s reach for use in the future.
In the first instance, please approach your dealer if you have any questions and/or
complaints.
When you pick up your Duet II Junior, all the components described in this manual will
have been properly adjusted in accordance with your requirements. Any components to
be delivered separately will also have been fitted by your dealer.
Some components must be adjusted again after a time. It is best to have this carried out
by your dealer. We also advise when you want to make adjustments yourself, you
always consult your dealer before doing so. He is not only the supplier of your bicycle,
but also a specialist who can advise you on such matters.
Check whether there are any tips and/or recommendations before you start work on
your bicycle. These manufacturer’s tips and recommendations must always be followed.
These tips and recommendations will increase your safety and improve the cycling
comfort of your Duet II Junior.
2.2. Huka BV
Huka is a Dutch brand that is specialised in the development and production of aids for the
handicapped, mainly children.
Huka BV, producer of the Duet Junior, works closely with various companies and
rehabilitation centres in order to improve the products constantly.
The address of Huka BV is:
Huka BV
Munsterstraat 13
7575 ED Oldenzaal
Tel: 0541 572472
Fax: 0541 520415
e-mail: [email protected]
2.3. Duet Junior
The Duet is a combination of an individually adaptable wheelchair and a bike with multiple
gears. The front part of the cycle consists of a manual wheelchair that can be connected and
disconnected to the cycle mainframe. When connected, the wheelchair is the front part and
steering part of the cycle. When disconnected, the wheelchair can be used as a genuine
manual wheelchair.
8
2.4. Intended user
The Duet is meant to provide cycling mobility to children that are not able to walk or use a
bicycle themselves, but are very well able to sit in a wheelchair. The driver of the Duet can be
any person that is capable of driving a bicycle and that is able to take full responsibility for
the wheelchair passenger.
The wheelchair is specially meant for children with a maximum weight of 50 kg’s.
The Duet is meant for drivers with a maximum weight of 120 kg's. A maximum of 25 kg’s
may be carried on the luggage carrier. The total allowed driving weight
(cycle+driver+passenger+luggage) is therefore 255 kg’s.
2.5. Intended environment
The Duet is meant for use outside. There are not many environmental restrictions. After
being exposed to moist conditions it is advised to dry the Duet, and especially the seat shells
and cushions with a soft dry cloth.
WARNING:
It is allowed to use the wheelchair in rain or direct sun. It however must be noticed, that
metal or plastic surfaces of the wheelchair can become very hot when exposed to direct
sun for longer time.
NOTE:
It is allowed to use the wheelchair in rain or direct sun. It however must be noticed,
that metal or plastic surfaces of the wheelchair can become very hot when exposed
to direct sun for longer time.
Because of the harmful combination of salt water and sand it is advised not to use
the wheelchair on beaches. We advise to clean the wheelchair after having been in
contact with sand and/or salt water as described in the paragraph “cleaning”.
When the Duet is parked outside, the wheelchair seat must be protected from
weather influences such as rain by using a cover.
2.6. Tire pressure
In order to prevent tyre damage and to preserve the performance of the wheelchair, the tyre
pressure must be checked at least on a monthly basis. The recommended tyre pressure is
written on the tyres. Tyres at the right pressure means: lighter cycling, less wear and faster
and better braking. In case this can not be read clearly because of tyre wear, please use
following pressures.
front tires:
rear tire:
Min.
3 Bar/45 PSI
3 Bar/45 PSI
Max.
5 Bar/70 PSI
5 Bar/70 PSI
WARNING:
Never drive the Duet with too low tire pressure as this will damage the tire (dangerous
situations), will cause high rolling resistance and will cause higher wear.
9
3. USER ASSEMBLY
3.1. Introduction
The Duet Junior is ready to use when delivered to the customer. Based upon detailed
specification and eventual try out with the user, we build the product specific to the users
requirements as much as possible.
However it is always possible that the supplier e.g. the dealer has to adjust certain issues of
the cycle at the moment of delivery. These possible adjustments are described in this
chapter.
3.2. Saddle adjustment
1. The saddle height is adjusted by placing the saddle pin higher or lower. The height of the
seat must be adjusted to the driver’s length. Loosen the strap slightly and adjust the
saddle height so that the drivers legs are very slightly bend when the pedal is in the
lowest position and the heel of the foot is placed on the pedal. Re-tighten the strap when
the right height is obtained.
WARNING:
The maximum height marks with warning text may never be visible after the
adjustment. This means that the saddle pin is inserted far enough into the seat tube
(minimum of 6 cm).
The stem of the saddle may be inserted in the frame tube to the point where the stem
becomes smaller in diameter. This is the minimal saddle height. Placing the saddle in a
lower position will result in a saddle stem that cannot be tightened properly.
2. The angle of the saddle can be adjusted by loosening the saddle bolt under the saddle.
Adjust the angle so that a comfortable and stable body position is obtained without
unwanted pressure on specific body parts such as genitals.
3. By loosening this saddle bolt, you can also tilt the saddle as well as adjusting it forwards
as backwards. Moving the saddle forwards gives you a ‘sporty position’, while moving the
saddle backwards ensures a more ‘relaxed position’.
4. After having adjusted everything, tighten all the nuts and bolts again.
5. Check whether the nuts and bolts are tight regularly between trips.
NOTE:
Adjust the saddle so that it is horizontal.
When you park your bicycle make sure that the saddle is not up against a rough wall
or it will become damaged.
If it rains the saddle surface may run slightly. A separate saddle cover is easy to
carry with you and provides good protection from the rain when the bicycle is
parked.
Be careful when dismounting from your bicycle! The back of your coat can get
caught behind the saddle and cause an accident.
3.3. Passenger seat adjustment
The seat of the passenger should be adjusted very carefully. The right seat adjustment is
very much depending on the abilities and size of the user. The adjustment of footplate
height, lower-leg angle, back-rest angle and arm-rest angle are very much correlated and it is
advised to be set by a therefore trained person.
The footplate height is adjusted by loosening the straps.
The lower-leg angle can be set by loosening the knob on the knee joint of the foot support.
The back-rest angle can be set by loosening the two red coloured knobs between the seat
and back-rest.
The arm rest angle can be set by pulling out the knobs on the side of the arm-rest.
10
The optional head-rest can be set by pulling out the handle.
WARNING:
Please make sure that the bolts, straps and handles are re-tightened properly after
finishing the adjustment.
A very large amount of possible accessories is available for the Duet. Please ask your dealer
for an accessory programme. Also special adaptations are possible. In these cases please
ask your dealer to contact Huka BV.
Headrest adjustment
The optional headrest is mounted on the top of the backrest. It is adjustable in height, depth
and angle. The shape of the headrest can be flat or shaped-round-the-neck.
fig.1 flat headrest
fig.2 shaped-around-the-neck headrest
C
B
Fig. 3
To mount and dismount the headrest, the knob (B) needs to be loosened. With this knob you
can also adjust the height. For loosening this knob there is no tool needed. To adjust the
height, angle and depth of the headrest, you can loosen up the three bolts(C). For this you
need an Alan key size 6mm and a wrench size 13. both are delivered in the toolkit. Loosen up
these three bolts a bit so the levers of the headrest can be moved. move the headrest in the
required position. Now tighten the three bolts (C) again. Now the headrest is fixed in position.
11
WARNING:
If the user has poor head stability, we recommend to only change the headrest position if
someone is holding the head of the user. This way we prevent sudden movements which
3.4.
height sudden movements of the user’s head.
canSteering
result in unwanted
The height of the steering can be adjusted by loosening the two straps left and right (fig. 4).
You can adjust the height to the required position of your back. Lowering the steering will
cause a more bended forward position where a higher steering will give a more upright
driving position.
Fig. 4
When you want to change the position of the steering in angle, you can obtain the desired
position by loosening the bolts with which the steering parts are fixed (fig. 5).
Seat belt adjustment
The seat of the wheelchair has a five point belt. This belt is not a safety belt, but a belt
meant for positioning reasons only. The belt is adjusted in length to the body size of the
passenger by pressing the buttons (left and right belt). The belt will automatically shorten to
the body size both for the shoulder and for the hip belt-part at the same time..
Grips
In order to be able to steer safely it is important that the grips are firmly fixed. Regular
checks prevent trouble. Torn grips can also cause accidents during cycling so it is advisable to
replace them as soon as possible. Your Duet expert knows what to do here.
12
Fig. 5
NOTE:
It is not permitted to adjust your handlebars when cycling.
Check whether your handlebar is firmly secured before going cycling.
When applying corrections with the handlebar, always check that when you tighten
things up again, the handlebar are straight in relation to the wheel.
3.5. Wheels
Tire pressure and valves
Please keep the tyres inflated at the recommended pressure at all times. The used valves for
the inner tubes are specific for each country. Inflating is therefore easy by using a regular
bicycle tyre pump.
A properly inflated tyre is very hard to press with your thumbs. Please inflate the tyres
slightly harder when the Duet is used by relative heavy users.
WARNING:
Never exceed the maximum and minimum allowed tire pressure
Spokes
Spokes are essential components of your wheels. The spokes are tensioned by Huka BV.
The spokes must be re-tensioned after approximately the first 500 km's because of the
“setting” of the spokes. Please return to your dealer for this re-tensioning.
The spokes must be checked regular for broken or loose spokes. Any loose spoke must be
re-tightened and broken spokes must be replaced immediately to prevent more spokes from
breaking. It is advised to leave this to your Duet dealer.
NOTE:
If the wheel has a wobble or loose spoke, your dealer will correct this quickly so that
further damage to the wheel is prevented.
Have your dealer check the tension in the spokes regularly after that.
13
Hub gears
A smooth ride
A Freewiel bicycle with hub gears ensures smooth, easy gear shifting. It is advisable to
choose a lighter gear rather than one which is slightly too heavy to spare your back and
knees. Use the heaviest gear as much as possible for descents or if you have tail wind.
There is a grip shift on the bike frame below the saddle. It is ergonomically shaped and it is
light to operate. You will have s smoother gear shift and spare the mechanism if you stop
pedalling for a moment while shifting gear. If, as time goes by, gears jump spontaneously or
you experience some creaking, just cycle down to your Duet dealer and have your Duet
checked out. He can easily correct these defects.
The hub is adjusted by Huka BV. After the first 500 km's the cable for the (optional) hub-gear
must be re-adjusted because the cable will get longer during the first period of use. When this
re-adjustment is neglected, this might result in a malfunctioning of the gear.
Chain and pedals
Chain
The chain guard is a proven means of preventing dirt form the road getting into the chain as
far as possible. It may, however, be necessary to have a look behind the chain guard if you
hear a lot of squeaking an creaking. After a time, water (particularly if it is salty) will eventually
find its way in to the chain. For maintenance and adjustment of the chain tension, please see
your dealer.
Pedals
The pedals may have a just-perceptible degree of play. Check this regularly and, at the same
time, look at whether the pedals are firmly fixed to the cranks. Take extra care when wearing
hard and/or leather soles, as your feet may slip off the pedals while cycling. Make sure that
you wear shoes with sufficient grip.
Required tools and equipment
Most necessary adjustments can be made without special tooling. For some nuts and bolts a
box-wrench 10 mm or 13 mm is required. These regular wrenches will be supplied at the Duet
Junior plus version.
3.6. Inspection for missing or damaged parts
As the cycle is checked thoroughly by Huka BV and will be delivered in a ready to use
condition, it is not necessary to check for missing or damaged parts. Furthermore, your dealer
will be present at the moment you start to use the Duet. Your dealer is trained to re-check the
wheelchair that moment and will contact Huka BV immediately when any inaccuracy might
occur.
3.7. Assembling, installing and removing instructions
The Duet will be delivered “ready to use”. That means that the Duet will be fully assembled,
installed, charged (optional) and adjusted to the users needs. Your dealer will take care of the
therefore necessary activities. Your dealer is specially trained for this by the Duet
manufacturer Huka BV.
14
3.8. Storage, shipment and travel
Storage
When the Duet has to be stored for a longer period (more than 4 weeks) a couple of
precautions to preserve the product have to be taken.
Lower the tyre pressure to half the recommended pressure. High pressure without
use for longer time will deform the tyres. Too low pressure might lead to irreversible
damage of the tyre carcass. Check the tyre pressure every 4 weeks.
Do not expose the stored Duet to direct sunlight and do not place the stored product
close to electrical equipment that is in use. The influence of UV radiation (sunlight) or
high ozone concentrations (electrical equipment produces ozone) might lead to
damage of rubber or plastic parts on the long term.
Shelter the Duet from extreme high or low temperatures, high humidity and other
negative weather influences.
Take out both batteries (optional) and store fully charged at room temperature. Every
4 weeks the batteries have to be recharged to keep them in good condition.
Shipment
It is not necessary to take special precautions for shipment. However it is best to case the
Duet in a way that no movement or collision is possible. When shipped by boat, please give
special attention to prevent contact with salt water or air. Salt water is extremely corrosive and
might lead to unwanted damage of the product.
Travel
The Duet can be transported by car. For transport in a car it is possible to uncouple the
wheelchair from the cycle. To lower the wheelchair, the backrest can be positioned more
forward.
15
4. USE OF THE PRODUCT
4.1. Safety and driving precautions
WARNING:
In case it is the first time that you drive a tricycle, please be aware that you are not
used to the driving characteristics as they differ from regular bicycles.
Please do not tend to drive over-enthusiastic in your Duet and please do not drive
up and down pavements and kerbs, By doing this, the Duet can be damaged both
visible or invisible and bring in extra risks. Also try to avoid large irregularities in the
road.
The Duet may not be used by the wheelchair user or the bike user alone when both
parts are connected!
You use the Duet on public roads. It goes without saying that you will observe the
traffic rules, for your own safety and that of other road users. Furthermore, you
must ensure that that is bicycle is equipped such that is meets the statutory
minimum requirements. This is, it is true, the case when you purchase your Duet,
but it may no longer be so after a time because e.g. of wear on certain components
such as brakes or lighting. Have these things checked regularly, preferably by your
Duet dealer.
When cycling , keep your hands on the grips and remain seated on the saddle
(except of course, during mounting and dismounting)
Caution on journeys on wet, slanting, uneven and slippery road surfaces or on tram
rails.
NOTE:
The Duet biker must be at least 16 years old.
The Duet has to be checked for roadworthy condition before use.
The wheelchair user has to be fastened with belts according to his/her disability.
Please drive your Duet cycle according to the legislations of the country, for your
own safety and the safety of your surrounding. For safe use of your Duet, we
prescribe to replace any worn part like tyres, brakes and cables with original parts
directly. These parts can be bought at your dealer, who is also capable of carrying
out the replacement.
In pedestrian areas the Duet may go at walking pace only.
For journeys in darkness a proper lighting system has to be mounted on the Duet. At
night switch on the lights. Be visible; wear brightly coloured clothing.
The road traffic act and all traffic laws are to be obeyed on all journeys on public
roads. Every road user must act in such a way that no other person can be
jeopardized, damaged or hindered.
Always wear ANSI or BSI or GS approved safety helmets - both: the wheelchair user
and the biker.
Have the Duet checked by your supplier after any collision or when the Duet is
otherwise (visual) damaged.
Check the tyre pressure and refill the tyres if necessary every two weeks. Check the
tyres at the same time for excessive wear and damage. Replace if necessary.
Have the Duet checked on a yearly basis by your supplier.
4.2. Theft prevention
The Duet is provided with a high quality lock. Always lock the Duet when leaving is
unattended, even for a very short period.
Whenever you want to take extra precautions against theft, a additional cable lock can be
bought at any bicycle shop. It is worthwhile anchoring your Duet to a pole or fence with an
extra cable lock. The cable does have to through the frame, and one of the three wheels and
not just through the rear wheel.
16
4.3. General advises and warnings
WARNING:
●
●
●
●
●
●
●
●
It is not allowed to carry passengers other than the driver and its passenger on the
product.
The Duet may not be towed or pushed by other vehicles
Do not leave the Duet unattended with only the passenger in the chair.
Do not use the wheelchair for transport of objects of all kind.
Do not ride without a passenger. The Duet is balanced for loaded operation, and
actually is less stable to drive without a passenger
Caution on uneven and slanting road surfaces or tram rails.
Only charge the batteries (optional) of the Duet in well ventilated area's.
When driving the Duet in the dark, be sure that you have the lights switched on.
NOTE:
●
●
●
●
●
●
●
●
●
●
●
●
Drive slowly and with care when using the Duet for the first time. Because the Duet
is not a genuine bicycle, both the driver and the user have to get used to the driving
characteristics.
As a three wheeled cycle the Duet has a different performance than a regular two
wheeler. Inexperienced riders should practice slowly first.
Special care should be taken in driving on unequal surfaces such as slopes, unequal
pavements and during descending from footpaths.
On a bicycle, you steer largely by leaning into the corners. You cannot lean a three
wheeler this way. The cyclist may improve the balance of the Duet on curves leaning
into the inner curve. You will notice that the Duet automatically leans the bicycle
part into the curve.
Put the Duet always fully on the parking brake when parking.
The Duet has a wide turning circle so beware. Turning in a narrow situation can be
eased if the cyclist gets off, lifts the bike part a little and turns the whole machine on
the spot
On slippery surfaces, like ice and snow, the driving speed must be reduced
accordingly.
Always wear an approved safety helmets.
Note that no other persons or animals are in the direct contact zone of the Duet
when using it.
Always drive slowly in the near surrounding of other people or animals.
The materials of the cushions and seating shell are not flame retardant. It is strongly
advised not to smoke in the wheelchair and to keep a safe distance from open fire.
Do not neglect your legal responsibility towards the disabled.
4.4. Use in combination with other products
Special seat
When a special seat is required, the supplier has to make sure that:
● The combination of seat and user does not exceed the maximum allowed weight (60 kg).
● The seat is fixed properly to the wheelchair base.
● The centre of gravity of the combination of user and seat is on the same spot as when
the standard seat would be used.
● The used materials are in compliance with the accepted standards mentioned in EN
12182 and EN 12183 regarding flame resistance and bio-compatibility.
4.5. Hot and cold surfaces
17
Please note that parts of the Duet can reach high temperatures when exposed to direct sun.
Be careful with touching especially the plastic and metal parts under these circumstances in
order to prevent skin burning.
Please note that the Duet can reach low temperatures when exposed to cold weather (below
zero degrees Celsius). Take caution in touching especially the metal parts with wet body parts
under these circumstances as they easily can freeze and get stuck to these surfaces.
4.6. Danger of pinching
User
Special care has been taken to make sure that the chance that the passenger or driver
pinches him or herself while seated in the wheelchair is minimal. However there are few
situations that might lead to injury. Special caution has to be taken under the following
circumstances;
NOTE:
●
●
When mounting the foot-rest, note that no body parts are being pinched.
When adjusting the seat while the user is sitting in the chair, please note that no
body parts are in the direct zone of the moving parts.
Surroundings
Special care has been taken to make sure that the change that the surroundings pinches him
or herself is minimal. However there are few situations that might lead to injury. Special
caution has to be taken under the following circumstances;
NOTE:
When driving the Duet, make sure that no persons or animals are in the near
surrounding, because running over e.g. feet will lead to serious injury as a result of the
high weight of the Duet in combination with its users.
4.7. Use on slopes
The maximum slopes, facing downward, facing upward and facing sideways, are given in the
technical specification sheet. Exceeding the given maximum steepness might lead to
dangerous situations where it is no longer possible to bring the Duet to a standstill or where
the Duet will fall over.
WARNING:
Only drive downhill at low speed because sudden emergency stops might lead to falling
over of the Duet.
4.8. How to use the Duet
Put the Duet on its stand when you want to position the passenger in its seat. For an easy
transfer it is possible to remove the foot support. Put the Duet on the parking brake before
you make the transfer. When the passenger is seated properly, close the five pointed belt.
Reposition the foot support.
Push the Duet from the stand and take position on the cycle. Release the parking brake.
The Duet can be driven as a regular bicycle. There are two differences:
●
●
The Duet remains vertical at all times, also while curving.
The steering is done by pushing the bar sideways.
18
4.9. Where to use the Duet
The Duet can be used outside.
Since the Duet is a cycle, you have to use it on the therefore meant roads, such as cycling
roads.
Whenever the Duet is used in dirt, sand or under salty conditions (near or on the shore), the
cycle must be cleaned thoroughly with water and soap to prevent the dirt or salt to damage it
on the long term.
4.10. How to connect or disconnect the wheelchair to the cycle
Disconnecting the wheelchair from the cycle:
●
●
●
●
●
Pull out the safety pin.
Release the clamp that is holding the cycle to the wheelchair.
Lift the cycle by holding the saddle and the main frame
Put out the stand of the cycle with your foot.
Put the cycle on the stand.
Connecting the wheelchair to the cycle:
●
●
●
●
●
●
Lift the cycle with one hand on the saddle and one on the frame.
Fold away the stand with your foot.
Put the cycle in the wheelchair.
Release the cycle.
Tighten the wheelchair to the cycle with the clamp.
Place the safety pin in position
4.11. Adjustment of the wheelchairs seat
The wheelchairs seat can be adjusted as described in paragraph 3.3.
While using the Duet, you can change the seating angle easily. Just lift the lever and the gas
spring will bring the seat in the upright position. When you want the chair positioned under
an angle, just lift the lever and push the chair in he required position. When the required
position is reached, release the lever and the chair will remain in that position.
4.12. Closing the wheelchair positioning belt
After the passenger is seated, the five point belt can be closed. The centre belt has to be
guided hereto between the legs. The left and right belt part can be pushed in from the top
separately. Please note the “click” to assure yourself that the belt is locked properly.
To release the belt, push the red button. Both right and left belt will be released at the same
time.
4.13. Brakes
Driving Brakes
The brakes are depending on the type of Duet you have. The braking bar on the steering is
used for activating the two front drum brakes of the wheelchair.
The rear brake is or of the pedal brake type. The brake is activated when the pedals are
moved in backward direction. Please note that, as a result of chain clearance, the brake force
is activated after some small pedalling distance.
19
Parking brake
The parking brake is activated by braking with the bar for the front brakes and then locking
this brake by use of the brake lock as shown in fig. 6.
Fig. 6
4.14. Lights
Good visibility and easily visible
Effective lighting is exceptionally important for your safety an that of other road users. The
rule : Good visibility and easily visible still applies. In addition to a headlight and backlight
which work well, back and pedals and mudguard reflectors and reflecting strips on the tyres
are also very important.
The headlight and back light
In order to turn on the head and back light, turn on the dynamo that is placed on the rear
wheel.
Some back lights have a so-called ‘stand light’. In this light, the dynamo stores some energy
when turning. This extra stored energy is only used when you stop. The back light continues
to shine for a while (e.g. for safety at traffic lights)
What can you do yourself ?
1. The pictures show where the dynamo should be, relative to the tyre. Ensure that the
imaginary axis from the dynamo also goes through the axis of the wheel (the axle).
Furthermore, the grooves on the dynamo wheel must make maximum contact with the
ridges on the tyre.
20
2. Examine the electrical wiring to check that :
a) The wires are well fixed tot both light sources
b) Bulbs and dynamo are not corroded. Scrape clean the contact points with a blade, if
necessary.
c) There are no breaks in the wiring or jamming at the back axle.
d) Risk of a short circuit (worn protective layer)
WARNING:
Never switch on your dynamo when cycling!
NOTE:
Check whether the lights are working before you get on your bicycle when it is dark.
If wet conditions, check whether the dynamo has enough grip on the side of the
tires.
4.15. Luggage carrier
As the name indicates, the luggage carrier is intended for luggage and not for passengers.
Consult your Duet dealer for the maximum acceptable load and if it is possible to put a child’s
seat on the luggage carrier.
4.16. Bike stand
The Duet bike stand is sturdy and stable, so that the Duet is not as likely to fall over.
NOTE:
Do not push the bicycle forwards without lifting it slightly to get the double stand to
4.17. Use of the gears (optional)
fold away, or you damage the stand and frame.
Never sit or cycle on a bicycle if the stand is still down! This is for your own safety
The Duet
hasdamage
a seventospeed
gear. The gear is shifted by means of a grip shift
and Junior
to avoid
your bicycle.
mounted on the saddle stem.
4.18. Known misuse
Please take note of the following misuse warnings:
WARNING:
●
●
●
●
●
Do not use the Duet with a weight exceeding to maximum user weight.
It is not allowed to stand on or sit on the Duet by a person not being the driver or
the passenger in a different place than the therefore meant seats.
Do not drive into water deeper than normal rain pools.
Hold the saddle stem of the cycle with your hand when releasing the
cycle/wheelchair coupling. Not doing so might lead to falling over of the cycle part.
Keep the tyres well inflated. Too low tyre pressure will lead to tyre damage.
4.19. Transfer to and from the wheelchair
To lift a user to or from the wheelchair, stand in front of the wheelchair and put one hand
under the upper legs and one hand behind the shoulders. Pull the user toward you and lift
him or her from the chair.
It is allowed to make this transfer with the legs of the user positioned on the footrest.
4.20. Driving
21
Driving the Duet the first time must take place in the presence of your supplier. He will
explain shortly the functionalities and be able to give useful advises.
NOTE:
When you drive the Duet for the first time, do not take a passenger. Taking a
passenger increases the risk without necessity.
When you drive the Duet for the first time, do so in an area with at least 20 * 20
meters of free area, and notice the brake before you start.
4.21. Accelerating, braking and steering
Please drive slowly when using the Duet the first time. Before you start, put the gear
(optional) in the lowest position (1). Mildly start the Duet and try to break. After having done
this several times, try to make curves by using the steering. Every exercise must be carried
out at low speed.
4.22. Pushing
Stand besides the Duet with both hands on the steering. Exercise the pushing by walking
around with the Duet. When the Duet has to be turned, simply lift the cycle part and turn it
around. The wheelchair part will function as the turning axle.
22
4.23. Transportation
Lifting
Lifting of the complete Duet, the cycle part or the wheelchair part must be carried out with
two persons.
Complete Duet:
One person lifts the rear end of the Cycle where the second person lifts the frond end of the
wheelchair. Be aware that the weight of the wheelchair might be too high for one person so
that a third is required.
Cycle:
One person lifts the rear end where the second person lifts the front end and keeps the cycle
stable by holding the saddle stem.
Wheelchair:
Lock the parking brake. Each person takes a side of the wheelchair and lifts it by holding the
lower part of the large wheel and the front castor.
Transport by car
The Duet can be transported by car. For transport in a car it is possible to uncouple the
wheelchair from the cycle. To lower the wheelchair, the backrest can be positioned more
forward.
Partial disassembly
Without disassembling the Duet, partial disassembly is not possible. However the seat on the
wheelchair can be dismounted easily by unscrewing the shown bolts in fig. 7.
Fig. 7
23
5. MAINTENANCE
5.1. Maintenance, service and fault finding to be carried out by the user
The user and attendant have to take care of some maintenance, service and occasionally
fault finding activities. Other activities as described in this paragraph should be carried out
under supervision of your authorized dealer.
Tyres
Tyres should be checked every four weeks.
Turn the wheels (5 in total) and examine the tread and side walls of the tyres. If the tyre is
worn or damaged it should be replaced. Replacement of the tyres should be carried out by a
therefore trained person such as your dealer.
Check the tyre pressures ((5 in total) and adjust if necessary. The rear and front wheel tyres
are of the “air type”. It is important to keep the tyres inflated to the recommended pressure
any time in order to prevent excessive wear, sensibility for punctures or even damage. Please
check the tyre pressure at least every four weeks.
Tyre
Size (ETRTO) Recommended pressure Maximum pressure
castors
7 x 1 3/4
2.5 bar/36 PSI
3.0 bar/45 PSI
Front wheels
47-507
3.0 bar/45 PSI
5.0 bar/70 PSI
Rear wheel
47-559
3.0 bar/45 PSI
5.0 bar/70 PSI
Puncture repair
1. Place the bicycle (well protected) on its side such that the wheel with the puncture
can turn freely.
2. Check the tyre for small stones, pieces of glass or perhaps a nail. When you remove
the offending stone, glass or nail, the location of the puncture may immediately
become apparent. (check the inside of the tyre later for metal splinters etc., too)
3. Remove the valve and the rim nut. Press the edge of the tyre to the middle of the
rim. Place the first tyre lever between the tyre and the edge of the rim (not in the
vicinity of the valve). Wedge the tyre lever behind a spoke
4. Wedge the second tyre lever in place two spokes further up. Repeat with the third
tyre lever (again two spokes further). Remove the rest of the tyre with your hand.
5. Press the valve holder inwards, remove the inner tube and pump it up. In the case of
a large puncture you will hear air escaping. A smaller puncture can be found by
immersing the inner tube in a bowl of water. Mark the puncture with a ballpoint and
dry the inner tube off.
6. Clean the area around the puncture with sandpaper. Allow the air out of the inner
tube. Spread a thin layer of solution out over an area larger than the patch. Allow the
solution to dry over 1-2 minutes.
7. Remove the plastic backing from the patch. Press the patch firmly over the puncture.
8. Put the inner tube back into place such that the valve holder is immediately in front
of the hole in the rim through which it must pass. Screw the rim nut a number of
turns on the holder, put the valve back and screw tight. Blow the tyre slightly.
9. Return the tyre to its original position with your hands. It is very easy to cause a
puncture with tyre levers. Work form the valve holder and ensure that the inner tube
does not become jammed between the rim and tyre.
10. Push the valve part through the rim for a moment and pull it back out again. Pump
the tyre up, screw the valve nut up to the rim and put the dust cap back on.
24
Protection against corrosion
The Duet is coated in a way that the metal parts of the wheelchair are protected for
corrosion. The material of all other parts, like the mud shields, rims etc. is not susceptible to
corrosion.
It is however advised to clean the Duet with soft soap and warm water when it has been
exposed to unfriendly circumstances like mud, salt water or severe rains. After removal of the
dirt and salt, please dry the wheelchair with a soft cloth.
Brakes and gears
The rear brake is of the back pedalling type and cannot be adjusted. Please check the
tolerance of the chain frequently (e.g. each month). Too much clearance leads to unwanted
late reaction of the brake (while back pedalling, the clearance of the chain has to be over
won).
The used cables for the front brakes have to be re-adjusted from time to time. Re-adjusting
the brake can be done by tightening or loosening the shown adjustment bolt. The adjustment
must be so that the lever has a very small free play before pulling the inner cable. When
applying maximum brake force, the brake bar may not be obstructed by the steering
Adjustment of the gear cable must be carried out by a therefore trained person such as your
dealer.
Replacement of worn brake friction material must be carried out by an authorized dealer.
5.2. Required tooling and equipment
For the normal maintenance is no special tooling or equipment required. A wrench 10 mm
and a puncture repair kit is sufficient for the maintenance and repairs to be carried out by the
user.
5.3. Ordering for parts to be readily replaced
It is possible to order for any part of your wheelchair at your supplier. Your supplier will
contact the producer Huka BV that will send the part as soon as possible, normally within 24
hours.
5.4. Cleaning
Because your Duet is a high-tech vehicle, frequent cleaning is advisable to anticipate
malfunctions, and preserve the lacquer.
It is advised to clean the wheelchair with soft soap, warm water and cloth when it has been
exposed to unfriendly circumstances like mud, salt water or severe rains. After removal of the
dirt and salt, please dry the wheelchair with a soft cloth.
Do not clean the Duet with high pressure water cleaning equipment. The high pressure will
damage the lacquer, plastic and rubber parts and will influence lubricated parts negatively.
The cushions of the wheelchair can be washed by spraying with warm water and soap.
NOTE:
It is not allowed to wash the cushions in the washing machine, to dry the cushions in the
dryer and to iron the cushions.
5.5. Frequency of maintenance
The maintenance described in the previous paragraphs must take at least every four weeks.
It is dictated to overview the Duet for damages, loose connections and malfunctions the
same moment.
25
5.6. Performance checks
A performance check should be carried out in order to observe malfunctions, lack of
performance and indication for required maintenance. Following checks must be carried out
every four weeks.
●
●
●
●
Check the functioning of the rear and front lights.
Check the brakes, both front and rear by making an quick stop.
Check the parking brake. It must be very hard/impossible to push the Duet.
Check whether the chain is well lubricated by turning the pedals when the rear wheel
is lifted. The chain must run freely and make no sounds. The chain must have a free
play of 1 -2 cm's. Lubricate or tension the chain if necessary.
5.7. Other repairs and maintenance
All other possible repairs or maintenance should be carried out by your supplier.
Huka BV advises to have your Duet at your supplier at least once each year for general check
up and preventive maintenance.
Authorized dealers for repairs
Any dealer that is allowed to sell the Duet is also an authorized dealer for repairs. These
dealers are specially trained for repairing Duet. Whenever you need an address of an other
authorized dealer, please contact:
Huka BV
Munsterstraat 13
7575 ED Oldenzaal
The Netherlands
Tel: +31 (0) 541 572472
Fax: +31 (0) 541 520415
[email protected]
www.huka.nl
Spare parts
Your authorized dealer is able to supply every part of the Duet. Huka BV is able to supply
these parts on demand to these dealers.
Unauthorized repairs
It is not allowed to repair the Duet yourself, or to have it repaired with a non authorized
dealer. As a result of unauthorized repairs, Huka BV does not longer guarantee the product
and product liability of Huka BV will lapse.
5.8. Disposal of the product
The product must be returned to the supplier at the end of its life cycle. Your supplier is
obliged to dispose the product in a prescribed way with a high percentage of recycling. The
dealer has to follow the national regulations of disposal of these kind of products.
26
6. MALFUNCTIONS
Although your Duet has been carefully designed, produced and checked, a very small chance
of malfunctioning can not be excluded.
6.1. Mechanical malfunctions
Event
Possible cause
Solution
The pedal moves freely,
but does not bring the
cycle in motion.
1. The chain is not longer
on the sprocket chain
wheel or is broken.
2. The gear is not properly
thrown in.
1. Put the chain back on
the sprocket chain
wheel and retighten or
replace the broken
chain.
2. Re-adjust the gear
cable or contact your
dealer.
The pedal is stuck and
will not turn around.
1. The chain is not longer
on the sprocket chain
wheel and is stuck.
1. Put the chain back on
the sprocket chain
wheel and retighten.
The brakes do not
function.
1. The brake cable is not
properly adjusted.
2. The brake cable is
broken.
3. The brakes are worn.
1. Adjust the brake cable.
2. Replace the broken
brake cable.
3. Contact your dealer.
Lights do not function.
1. Loose electrical contact.
2. Broken lamps.
3. Broken dynamo.
1. Check and improve all
contacts.
2. Replace broken lamp.
3. Contact your dealer.
27
7. TECHNICAL SPECIFICATIONS
Following specifications are valid for your Duet wheelchair.
7.1. Certification
The product, the belonging documentations such as the users manual, and the followed
procedures at Huka BV satisfy the regulations from the “Medical Devices Directive
93/42/EEC”. As a result the product is CE marked.
7.2. Expected life time of the Duet
The Duet has an expected life time of at least seven years. This expectancy is under normal
user circumstances; no excessive use and no excessive surroundings.
7.3. Specification sheet
Manufacturer: Huka BV
Address: Munsterstraat 13, 7575 ED Oldenzaal, the Netherlands
Model: Duet Junior
Maximum drivers weight: 120 kg's
Maximum passengers weight: 50 kg's
Maximum luggage weight: 25 kg’s
Disclosure information
Description
Min.
Max.
Description Min.
Max.
27 cm
Overall length
Effective seat
33 cm (large)
216 cm
226 cm
(medium)
with legrest
depth
24/26 cm
26,5/28,5
Overall width
Effective seat
68 cm
(medium)
(large)
width
Length of
Seat surface
135 cm
65,5 cm
cycle part
height at
front edge
Lenth of
Backrest
97 cm
107 cm
-10°
32°
wheelchair
angle
part
Front wheel
Backrest
47-507
43 (medium)
53 (large)
size
height
Rear wheel
Footrest to
47-559
size
seat distance
Castor wheel
Leg to seat
7”x 1 3/4
size
surface angle
14-17,5 cm
16-19,5 cm
Total mass
Armrest to
60 kg
(medium)
(large)
seat distance
Seat plane
0°
22°
angle
28
29
30
31
Your local supplier:
Huka BV
P.O. Box 194, 7570 AD Oldenzaal
Tel.: +31 (0)541 572 472 . e-mail: [email protected]
32