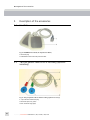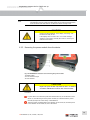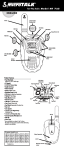
1
www.primedic.de Operating Instructions 21230 / GB / F02 Masthead Publisher METRAX GmbH Rheinwaldstr. 22 D-78628 Rottweil Germany Tel.: + 49 (0)741 257-0 Fax.: + 49 (0)741 257-235 [email protected] www.primedic.com by METRAX GmbH These operating instructions may not be reproduced, transferred, electronically saved or translated into a human or computer language in whole or in part without our permission. Violations of this prohibition not only infringe our copyright, but also reduce our possibilities to provide the users and operators of the device with precise and punctual information. We reserve the right to make amendments to these operating instructions. Printed in Germany 21230 / GB / F02 Table of contents Table of contents 1 Introduction 2 1.1 Foreword..................................................................................................................... 2 1.2 Validity ........................................................................................................................ 2 1.3 Warranty ..................................................................................................................... 2 1.4 Disclaimers .................................................................................................................. 3 1.5 Symbols used in these operating instructions ............................................................... 3 1.6 Pictograms on the device ............................................................................................. 4 1.7 Pictograms on SavePads .............................................................................................. 5 2 Intended use 6 2.1 Indications ................................................................................................................... 7 2.2 Contraindications ........................................................................................................7 3 Safety advice 8 3.1 General advice ............................................................................................................. 8 3.2 General safety advice................................................................................................... 9 3.3 Safety advice for you, the user ..................................................................................... 9 3.4 Safety advice for protection of the patient ................................................................. 10 3.5 Safety advice for the protection of third parties .......................................................... 11 3.6 Safety advice for the protection of the device ............................................................ 11 4 Description of device 12 4.1 General description .................................................................................................... 12 4.2 Description of device details ...................................................................................... 13 4.3 Icons in the status display .......................................................................................... 17 4.4 Capacity display ........................................................................................................ 18 4.5 Data management ..................................................................................................... 19 5 Description of the accessories 20 5.1 SavePads ................................................................................................................... 20 5.2 Two-pin patient cable for ECG recording (optional accessory) .................................... 20 5.3 Three-pin patient cable for ECG recording ................................................................. 21 5.4 SpO2 sensor (only on HeartSave 6S)........................................................................... 21 6 Preparatory measures before (initial) start-up 22 6.1 Unpacking .................................................................................................................22 6.2 Inserting / Replacing the SaveCard ............................................................................ 22 6.2.1 Inserting the SaveCard ................................................................................... 23 6.2.2 Replacing the SaveCard .................................................................................. 23 6.3 Inserting / replacing the energy module..................................................................... 23 6.3.1 Inserting the power module............................................................................ 24 6.3.2 Removing the power module from the device ................................................ 25 6.4 PRIMEDIC™ battery (optional) .................................................................................. 26 6.5 PRIMEDIC™ AkuPak ................................................................................................. 26 6.6 Charging the AkuPak with the PRIMEDICTM ClipCharger ............................................ 28 6.7 Charging the AkuPak in the optional PRIMEDIC™ Charger Basis / Charger Comfort . 29 6.8 Connecting up the PRIMEDIC TM PowerLine (optional accessory) ............................... 29 6.9 Periodic device self-test ............................................................................................. 30 6.9.1 Self-test after switching the HeartSave on ...................................................... 30 6.9.2 Periodic self-test ............................................................................................. 30 7 Using the device 31 7.1 Switching on/off ....................................................................................................... 31 7.1.1 Switching the PRIMEDIC™ HeartSave 6/6S on .............................................. 31 7.1.2 Switching the PRIMEDIC™ HeartSave 6/6S off .............................................. 31 7.2 Selecting the operating mode .................................................................................... 31 7.2.1 Automatic mode (AUTO mode) ..................................................................... 31 7.2.2 Manual mode (Auto Sync).............................................................................. 32 7.2.3 Changing the operating mode ........................................................................ 32 I Table of contents 7.3 7.4 Setup menu .............................................................................................................. 33 7.3.1 Simple change to configuration – example: Time ........................................... 34 7.3.2 Changing the PIN .......................................................................................... 35 7.3.3 Calling up/activating a profile ........................................................................ 35 7.3.4 Saving menu parameters in a single profile..................................................... 36 Alarms ...................................................................................................................... 37 7.4.1 ECG Alarm ..................................................................................................... 37 7.4.2 VF Alarm ....................................................................................................... 37 7.4.3 SPO2 Alarm .................................................................................................... 38 8 Positioning the electrodes 39 8.1 Undressing the patient .............................................................................................. 39 8.2 Positioning the defibrillation electrodes (SavePads) .................................................... 39 8.3 Checking the skin...................................................................................................... 40 8.4 Positioning the ECG adhesive electrodes ................................................................... 40 8.5 Connecting the electrodes ......................................................................................... 41 8.6 < Plug in electrode plugs > ........................................................................................ 42 8.7 Check electrodes ....................................................................................................... 42 9 Operation in Automatic Mode 43 9.1 Voice prompts by the device/Preliminary examination of the patient(ERC) ................ 43 9.2 Performing the ECG analysis in Auto Mode ............................................................... 43 9.3 Defibrillation required ............................................................................................... 44 9.4 Defibrillation not required ......................................................................................... 45 9.5 Keeping the defibrillator ready for use ....................................................................... 46 10 Operation in Manual Mode 46 10.1 Performing defibrillation ............................................................................................ 46 10.2 AUTO-SYNC............................................................................................................. 48 10.3 Keeping the defibrillator ready for use ....................................................................... 49 11 Attaching the SpO2 sensor 49 11.1 Connecting the SpO2 sensor ..................................................................................... 50 12 Cleaning, maintenance and dispatch 51 12.1 Cleaning ................................................................................................................... 51 12.2 Servicing ................................................................................................................... 51 12.2.1 Servicing check list ......................................................................................... 51 12.3 Dispatching the PRIMEDIC™ HeartSave ................................................................... 52 12.4 Disposal .................................................................................................................... 52 13 Technical Data 53 14 Warranty conditions 56 15 Depiction of the current-time function 57 16 Rhythm detection system 61 17 General advice for using pulse oximeters 64 18 Guidelines and manufacturer's declaration – Electromagnetic emissions 66 19 General instructions and rules for using the optional AkuPak 70 20 Safety checks 72 21 Using the equipment on ships 73 21.1 Use of PRIMEDIC™ HeartSave units together with a PRIMEDIC™ battery on ships in the merchant navy: ............................................................................................................ 73 21.2 Use of PRIMEDIC™ HeartSave units together with a PRIMEDIC™ AkuPak on ships in the merchant navy: ............................................................................................................ 73 21230 / GB / F02 Table of contents Contact details 74 III Introduction 1 Introduction 1.1 Foreword Dear User, You are faced with the task of using the PRIMEDIC™ HeartSave in a medical emergency on human beings. So that you react quickly and properly in these special circumstances and make optimal use of the opportunity the device provides you with , it is necessary for you to take your time and read through these operating instructions beforehand, thus familiarising yourself with the device, its functions and applications. Keep these operating instructions near the device so that you consult any queries which may arise. If you have any questions regarding the device or other PRIMEDIC™ products, we would be glad to be at your disposal. You will find our contact address on the masthead at the start of these operating instructions. 1.2 Validity This operating manual describes the HeartSave 6 and HeartSave 6S defibrillators supplied by METRAX GmbH. 1.3 Warranty The warranty period is 24 months and starts on the day of purchase. Please keep the invoice as proof of purchase. The general guarantee and warranty provisions of METRAX GmbH are applicable. Any repairs or changes to the device may only be carried out by the manufacturer or by a person or company authorised by the manufacturer. 2 Operating Instructions HeartSave 6 / 6S, 21230 / GB / F02 Introduction 1.4 Disclaimers Liability claims in the event of damages to people or property are excluded if they are based on one or more of the following reasons: 1.5 Using the device in a manner for which it was not intended. Improper use and maintenance of the device. Operating the device with the protective covers removed or when there is obvious damage to cables and/or electrodes. Non-compliance with the instructions in these operating instructions with regard to operation, maintenance and repair of the equipment. Using accessories and spare parts made by other manufacturers. Autonomous intervention, repairs or constructional changes to the device. Autonomous overrunning of the performance limits. Lack of monitoring parts that are subject to wear and tear. Treatment of patients without prior indication. Symbols used in these operating instructions DANGER Texts marked DANGER indicate an extraordinarily serious, current danger which will definitely lead to serious injury or even death if no preventative measures are adopted. It is imperative that you pay attention to these texts. WARNING Texts marked WARNING indicate an extraordinarily serious, potential danger which could lead to serious injury or even death if no preventative measures are adopted. It is imperative that you pay attention to these texts. CAUTION Texts marked with CAUTION indicate a possibly dangerous situation which could lead to minor injuries or damage to property. It is imperative that you pay attention to these texts. Note This symbol indicates text which contains important advice / comments or tips. This point identifies the description of tasks that you need to perform. 3 GB HeartSave 6 / 6S, 21230 / GB / F02 Introduction (3) < ... > 1.6 This point identifies a list. Numbers in brackets refer to items in diagrams. Texts set in pointed brackets denote acoustic advice/instructions by the device, which are also shown simultaneously on the monitor (only on HS6). Pictograms on the device IP55 Protection against contact and dust deposits on the inside Protection against jets of water (nozzle) from any angle (only in combination with a battery) IP53 IP33 IP53 in connection with a battery pack IP33 in connection with PowerLine Please observe the operating instructions. Do not dispose of device in domestic refuse. Dangerous electric voltage (high voltage) CF defibrillation-proof degree of protection, in connection with ECG patient cable Type certification GERMANISCHER LLOYD in accordance with Certificate No. 75 449-09 HH 4 Operating Instructions HeartSave 6 / 6S, 21230 / GB / F02 Introduction 1.7 Pictograms on SavePads Not to be reused Expiry date Batch ID Only for adults Order number Storage temperature information in Celsius and Fahrenheit 5 GB HeartSave 6 / 6S, 21230 / GB / F02 Intended use 2 Intended use The HeartSave is designed for use in automatic mode by suitably qualified first-aiders, trained paramedics and doctors in their everyday clinical activities, either within a hospital or in the preclinical area of emergency medicine. Only doctors are authorised to use the device in manual mode. It may only be used on patients who are unconscious and who are not breathing. The device may be powered from different removable power modules. Thanks to its compact, light design, the HeartSave can easily be transported in an ambulance with a patient. The device is used to carry out transthoracic defibrillations. The main application is defibrillation in asynchronous manual mode; an additional application is the cardioversion for atrial fibrillation in synchronous manual mode. The decision on whether delivery of a shock is required can be made either by the user in manual mode, or automatically with the shock recommendation from the device in AED mode. In automatic mode, the energy levels for the first, second and third shock are specified by the maximum voltage setpoint values of 20A, 25A and 30A, and by the capacitor voltage determined by the patient impedance; while in manual mode, you can select energy levels between 50- 360J to adjust the defibrillation energy appropriately in line with weight and the doctor's experience. The device is also used to record and display electrocardiograms (monitoring). The derivation from the defibrillation electrodes is calculated in compliance with correct use of the electrodes from the Einthoven II derivation. Dual-channel monitoring is possible if you use an ECG cable instead of defibrillation electrodes and commercially available ECG electrodes. A random (appropriate) selection of 2 signals from the Einthoven I, II, III or Goldberger aVR, aVL, aVF – analogue derivations can be displayed. Correct positioning is mandatory. The operator is guided by spoken instructions and clear written and pictorial information. After switching on the device, the patient is connected to it using the enclosed adhesive electrodes. After this, automatic rhythm analysis is carried out by the device. Only if a rhythm is detected by the device as being ventricular fibrillation (=requiring a shock) does it suggest treatment with a high energy shock. All other rhythms are classified as not requiring a shock. The time from the start of analysis until the shock is applied is less than 30 s. For safety reasons, no shock is given with asystolia, as no therapeutic effect is to be expected. Controlled ventricular electrical activity caused by supraventricular tachycardia such as atrial fibrillation, atrial flutter, ventricular extra-systoles and idioventricular rhythms does not lead to a shock being applied. Following application of the shock, the device carries out a new rhythm analysis. Additional shocks are recommended if other rhythms (ventricular fibrillation) are present that can be treated with a high-energy shock. The user performs resuscitation using manual cardio pulmonary resuscitation, in accordance with the applicable guidelines. Any use above or beyond this is not considered as intended use and can lead to personal injury or damage to property. Improper use of the defibrillator can lead to ventricular fibrillation, asystolia or other dangerous dysrhythmia. The operator of the HeartSave must ensure that the HeartSave is only used by authorised specialist personnel. 6 Operating Instructions HeartSave 6 / 6S, 21230 / GB / F02 Intended use General note: The guidelines governing the application of emergency treatment in the event of cardiac arrest may change. The current device can be operated either on the basis of the International Guidelines 2005 Resuscitation (2005) 67S1, S7—S23 by the European Resuscitation Council or on the basis of the American Heart Association (AHA) guidelines for cardiopulmonary resuscitation (CPR) 2005. The PRIMEDIC™ HeartSave may only be used as described and under the conditions detailed in these operating instructions. 2.1 Indications The PRIMEDIC™ HeartSave 6/6S may only be used for defibrillation if the patient 2.2 is unconscious and no normal breathing can be ascertained; and after talking to the patient, no other signs of life can be perceived. Contraindications The PRIMEDIC™ HeartSave 6/6S must not be used for defibrillation if the patient is conscious; or breathing; or shows other signs of life is a child under the age of 8 or weighs less than 25 kg respectively. Treatment should not be delayed to ascertain the precise age or weight of the patient. 7 GB HeartSave 6 / 6S, 21230 / GB / F02 Safety advice 3 Safety advice 3.1 General advice The PRIMEDIC™ HeartSave 6/6S fulfils the currently applicable safety standards and complies with the provisions of the medical products guidelines, both as a stand-alone device and in conjunction with its fittings and optional accessories. The device and its accessories are safe when used as intended and when following the descriptions and information detailed in these operating instructions. Nevertheless, if used incorrectly, the device and its accessories can be dangerous for the patient or third parties. DANGER We emphatically advise that before using the device for the first time, all those who are supposed to use or want to use it must be instructed in a training session about the medical background of defibrillation and the indications or contraindications and thus need to be authorised. need to read and take note of these operating instructions and in particular the safety tips and warning advice detailed in them. CAUTION The PRIMEDIC™ HeartSave 6/6S may only be used by trained and authorised personnel. Reading the operating instructions does not replace training. The PRIMEDIC™ HeartSave 6/6S is not licensed for use in explosive areas. DANGER Not using the device as intended or using it improperly, exposes the user, the patient or third parties to the danger of an electric shock from the high voltage generated by the device, of influencing active implants, of burns from incorrectly applied electrodes. Apart from that, the device can be damaged or destroyed through improper use. Refer to the advice and rules in the appendix when using the PRIMEDIC™ HeartSave 6/6S. 8 Operating Instructions HeartSave 6 / 6S, 21230 / GB / F02 Safety advice Applicable for Europe: The device complies with the Medical Device Directive (MDD). For Germany, the following also applies: The device complies with the Medical Devices Law (MPG) and is subject to the Ordinance on the Operation and Use of Medical Devices (MPBetreibV). According to the Ordinance on the Operation and Use of Medical Devices (MPBetreibV), the device must be subjected to the regular checks explained in the appendix. According to the Ordinance on the Operation and Use of Medical Devices (MPBetreibV), a medical devices log needs to be kept for the device. Regular checks of the device are to be documented in it. For the other states in the European Community, national regulations for operating medical devices apply. 3.2 General safety advice DANGER You must not use the device in the vicinity of flammable materials (e.g. cleaning solvents or similar) or in an atmosphere enriched with oxygen or flammable gases/vapours. 3.3 Safety advice for you, the user WARNING Only use the device on a patient if you have ensured its operational safety before use and are certain that the device is in good condition. the patient's condition requires or permits its application! Before using the device, check whether it is in the operating temperature range. This applies for example, if the defibrillator is stored in a rescue vehicle. Do not use the device if it is defective (e.g. if the defibrillation cable is damaged). 9 GB HeartSave 6 / 6S, 21230 / GB / F02 Safety advice 3.4 Safety advice for protection of the patient DANGER ● Use the unit on a patient only if you have made sure that functional safety and proper condition of the unit are present! ● Before using the device, check whether it is in the operating temperature range. This applies for example, if the defibrillator is stored in a rescue vehicle in the winter. ● Do not use the device if it is defective (e.g. if the defibrillation cable is damaged). ● Only use the device with accessories, wearing parts and disposable items which have proven to be completely safe to use by being tested by a testing authority licensed to test the device when equipped ready for use.These conditions are fulfilled by all original PRIMEDIC™ accessories and wear parts. ● Use new, undamaged defibrillation electrodes before their expiry date for every patient to avoid any possible burns to the skin! ● Connect the adhesive electrodes only using the PRIMEDIC™ HeartSave 6 / 6S. Using the electrode system with other devices may result in the release of dangerous leakage currents on the patient. ● Do not use the device in the immediate vicinity of other sensitive equipment (e.g. measuring equipment that is sensitive to magnetic fields) or strong sources of interference which could affect the way the PRIMEDIC™ HeartSave 6 / 6S works. Keep an adequate distance from other therapeutic and diagnostic energy sources (e.g. diathermy, high frequency surgery, magnetic resonance tomography). These devices can affect the PRIMEDIC™ HeartSave 6/6S and disrupt the way it operates. For this reason, disconnect the patient from the interfering devices. During defibrillation, disconnect the patient from all other medically used devices which do not have a defibrillation resistance application section. Keep the defibrillation electrodes away from other electrodes and from metallic parts which are in contact with the patient. ● Do not use the device on children under the age of 8 or on children with an estimated body weight of less than 25 kg! ● Position the electrodes precisely according to the description. ● Dry the chest and carefully remove any large amount of hair on the patient before applying the defibrillation electrodes. 10 Operating Instructions HeartSave 6 / 6S, 21230 / GB / F02 Safety advice DANGER • Do not touch the patient during the ECG analysis and avoid any vibration!. • Do not place the defibrillation electrodes directly over an implanted pacemaker to avoid a possible misinterpretation by the device and to avoid any damage to the pacemaker from the defibrillation impulse! • If the ECG analysis is being carried out in a vehicle, the vehicle has to stop and switch off the engine to guarantee correct analysis. • Interrupt the reanimation as long as the PRIMEDIC™ HeartSave 6 / 6S is analysing the ECG • Do not touch the patient during defibrillation! Avoid any contact between 3.5 parts of the patient's body (such as bare skin on head or legs), and conductive liquids (such as gels, blood or salt solutions) and metallic objects around the patient (such as bed frame or bedside stretching aid) that create unintended paths for the defibrillation current! Safety advice for the protection of third parties DANGER Give loud and clear warning to people in the vicinity before the defibrillation to stand clear of the patient and have no contact with the patient. 3.6 Safety advice for the protection of the device CAUTION Repairs, changes, extensions and installation of the PRIMEDIC™ HeartSave 6/6S may only be carried out by personnel authorised and trained by METRAX The PRIMEDIC™ HeartSave 6/6S does not have any parts that can be repaired by the user. The device may only be equipped and operated with original accessories from PRIMEDIC™. Clean the device only when it is switched off and the electrodes are unplugged. 11 GB HeartSave 6 / 6S, 21230 / GB / F02 Description of device 4 Description of device 4.1 General description The PRIMEDIC™ HeartSave 6/6S is an automatic external defibrillator, with an integrated 6-channel ECG and manual defibrillation mode. The ECG can be recorded either using the PRIMEDIC™ SavePads or the three-pin patient cable. In automatic mode (Auto Mode), the ECG is analysed with the implemented algorithm. If potentially fatal cardiac arrhythmia is detected, the device generates the electrical shock required to resuscitate the patient and recommends defibrillation. An electrical shock is not generated if the device does not detect a rhythm requiring defibrillation. In manual mode, either the doctor or the user decides whether defibrillation is necessary. The family of devices is set up on a modular basis. types of models: HeartSave 6 basic model with monitor and 6-channel ECG HeartSave 6S basic model with monitor and 6-channel ECG and pulse oximetry The PRIMEDIC™ HeartSave generation has been designed for rapid and safe use in emergency situations. All functional units and operating elements are subject to the following principles: Clear organisation of functional units Reduction of functions to those necessary Intuitive and logical operator guidance Clear, self-explanatory operating elements Ergonomic layout. The ECG monitor has a high-resolution graphical display that delivers high image contrast even under difficult light conditions. The defibrillator unit has been optimised to be safe and quickly ready to use. The loading time for a defibrillation is max. 12 seconds with a battery capacity of approx. 90% of the rated value. Power is supplied to the PRIMEDIC™ HeartSave 6/6S either by single-use lithium batteries or by rechargeable removable batteries with nickel-cadmium cells, or via a mains power unit, depending on the particular model. Note 12 The wall bracket and accessories are described in separate operating instructions. Operating Instructions HeartSave 6 / 6S, 21230 / GB / F02 Description of device 4.2 Description of device details Fig. 1: PRIMEDIC™ HeartSave 6/6S front view 1 Carry handle 2 Flap for removing the device cover 3 Device cover Fig. 2: PRIMEDIC™ HeartSave 6/6S rear view 1 Mounting slot for wall bracket 2 Name plate 13 GB HeartSave 6 / 6S, 21230 / GB / F02 Description of device Fig. 3: PRIMEDIC™ HeartSave 6/6S bottom view 1 Release button for removing the power module 2 Power module Fig. 4: PRIMEDIC™ HeartSave 6/6S control elements 1 On/Off button 2 Membrane keyboard with monitor 3 Key for scrolling upwards in the menu or for increasing parameters 4 Select/Confirm key (Enter key) 5 Key for scrolling downwards in the menu or for reducing parameters 6 Loudspeaker 7 Socket for electrode cable 8 Energy loading button (charging button in manual mode) 9 Socket for SpO2 sensor (on HeartSave 6S) 10 Shock button 14 Operating Instructions HeartSave 6 / 6S, 21230 / GB / F02 Description of device Fig. 5 Monitor representation 1 Display of switch-on duration / time sequence HLW cycle 2 Mode: MAN = asynchronous, Sync = synchronous, VF Auto = AED 3 EKG channel line 4 Indicator heart rate and alarm limits 5 Indicator Pulsoximeter and alarm limits 6 Status line to show CF card capacity, patient impedance, time of day, microphone, battery capacity 7 Indicator ECG-channels (max.2 ) 8 Energy stages (only in manual mode) 9 SpO2 curve (only HeartSave 6S), instructions, information (only HeartSave 6) Fig. 6: PRIMEDIC™ HeartSave 6/6S status display 1 Status display 15 GB HeartSave 6 / 6S, 21230 / GB / F02 Description of device Fig. 7: PRIMEDIC™ HeartSave 6/6S device cover with kit holder 1 Device cover 2 Kit holder with quick start guide, face shield and razor 3 SavePads 4 Rubber gloves 16 Operating Instructions HeartSave 6 / 6S, 21230 / GB / F02 Description of device 4.3 Display Icons in the status display Meaning Measures to be taken Passed device self-test Battery/battery pack capacity is sufficient Battery/battery pack is discharged Passed device self-test Icon also appears when no power module has been fitted. Device ready to use Equipment can be used, it may be necessary to charge or replace the battery / AkuPak Insert battery / AkuPak Symbol also appears if the use by date of the power module has been exceeded. Check use by date, if necessary replace with new ones. Device may be defective Device defective Carry out large self-test by replacing the battery / AkuPak or by switching the equipment on again Have the device repaired by a dealer Battery/battery pack is discharged Equipment can be used, it may be necessary to charge or replace the battery / AkuPak Carry out large self-test by replacing the battery / AkuPak or by switching the equipment on again Have device repaired by authorised dealer. Device may be defective Device defective 17 GB HeartSave 6 / 6S, 21230 / GB / F02 Description of device 4.4 Capacity display With the PRIMEDIC™ HeartSave 6/6S, the battery charge of the battery/battery pack appears on the display. The different images that may be displayed have the following meaning: 100% charged 60% charged 20% charged 0% (device runs on until charge is exhausted) Fault in the device or service life of the power module has expired The battery pack and the battery are monitored by means of electronic charge measurement to ensure the most accurate capacity display possible. In addition to this display, the device issues a warning if the battery is about to be exhausted. Audible warning. Display on monitor AkuPak < Charging status battery low. Please recharge> Recharge AkuPak Battery < Battery low, please replace battery > Replace battery. While the device is being operated, the relevant voice prompt is issued regularly in the selected language, provided the volume has not been set to 0%. The battery symbol in the status display is activated. 18 Operating Instructions HeartSave 6 / 6S, 21230 / GB / F02 Description of device 4.5 Data management The device automatically records all ECG data and all spoken communication/environmental sounds using a microphone (if activated). The max. recording period is 17 hours. The saved data can be displayed with the aid of a PC / Laptop and the software ECG Viewer. The dat is evaluated purely for administrative or legal purposes and can not be used for diagnosis or treatment of the patient. In the Software there is a deployment protocol in which additional patient data can be entered. Note The data saved on the SaveCard should be archived externally after every deployment if possible. The SaveCard should then be re-formatted if possible (instead of the usual deletion process). Once the storage capacity of the SaveCard is exhausted, no further data will TM be saved. The PRIMEDIC HeartSave is ready for operation, even if its memory is full and without a SaveCard. The SaveCard supplied with the device is already formatted and can be used straight away. If you have problems with the existing SaveCard or with a new CF card, you must format these using the FAT16 file system for use in HeartSave. When formatting, ensure that you do not accidentally transfer the FAT32 file system from a Windows XP system. To attain the highest possible degree of safety here, please proceed as follows: Windows 2000, Windows XP, Windows Vista Start a command line window using "Start->Run" and in the entry field, enter "cmd.exe". The command line window will then open. There you enter the following: format f: /U /FS:FAT /X /V: (where f: stands for the drive letter which you may have to change). 19 GB HeartSave 6 / 6S, 21230 / GB / F02 Description of the accessories 5 Description of the accessories 5.1 SavePads Fig. 8: PRIMEDIC™ SavePads (in unpacked condition) 1 Electrode plug 2 Defibrillation electrodes with protective film 5.2 Two-pin patient cable for ECG recording (optional accessory) Fig. 9: Two-pin patient cable for ECG recording (optional accessory) 1 2-pin electrode cable with plug 2 Electrode clips (red, green) 3 ECG electrodes (Ag/AgCl) 20 Operating Instructions HeartSave 6 / 6S, 21230 / GB / F02 Description of the accessories 5.3 Three-pin patient cable for ECG recording Fig. 10: Three-pin patient cable for ECG recording 1 3-pin electrode cable with plug 2 Electrode clips (red, yellow, green) 3 ECG electrodes (Ag/AgCl) 5.4 SpO2 sensor (only on HeartSave 6S) Fig. 11: SpO2 sensor with adapter cable 1 Cable for SpO2 sensor 2 SpO2 sensor 3 Plug for connection to the adapter cable 4 Socket with locking device 5 Plug for connection to the HeartSave 6 Adapter cable Additional accessories can be found on our home page "www.primedic.com" under "Online-Shop" 21 GB HeartSave 6 / 6S, 21230 / GB / F02 Preparatory measures before (initial) start-up 6 Preparatory measures before (initial) start-up 6.1 Unpacking After delivery, first of all check the packaging and the device for transport damage. If you notice any damage to the device, immediately contact your transport company, dealer or directly contact technical services at METRAX GmbH, stating the device number and describing the damage to the device. CAUTION Definitely do not use the device if you know of any damage. Endangering health cannot be ruled out. 6.2 Satisfy yourself that the scope of delivery is complete in accordance with the enclosed delivery note. Inserting / Replacing the SaveCard Fig. 12: PRIMEDIC™ HeartSave 6/6S SaveCard 1 SaveCard removal button 2 Slot with SaveCard inserted 22 Operating Instructions HeartSave 6 / 6S, 21230 / GB / F02 Preparatory measures before (initial) start-up 6.2.1 Inserting the SaveCard Procedure: Before switching the device on for the first time, insert the SaveCard into the specially designed slot (2). Gently press the SaveCard in until the button (1) projects slightly out of the device. Now insert the power module into the device. The device then starts up and carries out a self-test. The data saved on the SaveCard should be archived externally after every deployment if possible. Once the storage capacity of the SaveCard is exhausted, no further data will be saved. The device remains ready for operation even if the memory is exhausted and even without a SaveCard. Note 6.2.2 Replacing the SaveCard Procedure: Before you can remove or replace the SaveCard, you must first remove the power module. For more details, see chapter 6.3. Press the button (1) in fully: this pushes the SaveCard (2) slightly out of its holder. Completely remove the SaveCard from the device and transfer the data (if applicable) onto a PC and insert this card, or a new one, in the device with the pin end first. Gently press the card in until the button (1) projects slightly out of the device. Finally insert the power module into the device again. 6.3 Inserting / replacing the energy module The PRIMEDIC™ HeartSave 6/6S can be operated with three different power modules: Rechargeable battery pack AkuPak Non-rechargeable LiMnO2 battery (optional) PowerLine (optional) Before using the device for the first time, you must insert the power module in the specially designed slot. 23 GB HeartSave 6 / 6S, 21230 / GB / F02 Preparatory measures before (initial) start-up CAUTION Check the power supply every time after you have used the device. If necessary, replace the battery or recharge the battery pack. If this is not possible, a second charged battery pack must be available, to ensure that the device is ready for use. 6.3.1 Inserting the power module Fig. 13: PRIMEDIC™ HeartSave 6/6S inserting the power module 1 Power module slot 2 Power module 3 Limit stop 4 Release button 5 Power module tongue The HeartSave is always supplied with a power module. All three different types of power module are inserted the same way. Procedure: Lay the device on its back. Push the power module (2) in the direction of the arrow (1.) into the device until it makes contact with the back (3) of the device as shown in the diagram. Push the power module forward in the direction of the arrow (2.) into the slot (1) until the release button (4) locks the power module tongue (5) securely into position. Press the power module completely into the device until you hear the "click" when it slots into place and the power module is flush with the outside edge of the device. The power module must not fall out when the device is moved; if it does, it is not properly secured. 24 Operating Instructions HeartSave 6 / 6S, 21230 / GB / F02 Preparatory measures before (initial) start-up Note Once the power module has been correctly inserted, the device starts automatically and runs a self-test. Now follow the acoustic/visual instructions from the device and then switch it off. Now the device is ready to use. CAUTION Monitor the Status Display. If the display is showing "OK", the device is ready to use. If the display does not read "OK" or if a fault message appears on the monitor, remedy the cause or contact your nearest service station. 6.3.2 Removing the power module from the device Fig. 14: PRIMEDIC™ HeartSave 6/6S removing the power module 1 Release button 2 Power module tongue 3 Power module CAUTION Replace the power module only when the device is switched off and the defibrillation electrode cable is disconnected. Procedure: Lay the device on its back and press the release button (1) in the direction of the arrow (1.) until the tongue of the power module (2) is released and the power module (3) snaps out of the slot by a small distance. Twist the power module slightly in the direction of the arrow (2.) and then pull it in the direction of the arrow (3.) out of the device. 25 GB HeartSave 6 / 6S, 21230 / GB / F02 Preparatory measures before (initial) start-up 6.4 PRIMEDIC™ battery (optional) The battery is a disposable lithium battery. It is fully charged when delivered. This type of battery is state-of-the-art and was selected due to its extremely long service life and energy storage. DANGER On no account try to charge the battery. There would be risk of an explosion! Use the battery before its use-by date expires. After the equipment has been used, the battery should, if necessary, be replaced by a new one (so that the full period of operation will be available for the next deployment). In any event, heed the instruction leaflet enclosed with the battery and keep it safe with these operating instructions. If the device has to be sent away to technical services, remove the battery before sending it and put some adhesive insulation tape over its contacts. When sending the battery, observe the separate shipping regulations. 6.5 PRIMEDIC™ AkuPak You can charge the AkuPak in two different ways: with the PRIMEDICTM ClipCharger (optional) with the PRIMEDICTM Charger Basic / Comfort Charger (optional) The integrated detection of charge endpoint detection protects the battery from harmful deep discharge. If the battery charge is too low, both a visual and an acoustic signal are issued. In case an AkuPak is stored outside the equipment, its charge status can be checked by pressing button (2). 26 Operating Instructions HeartSave 6 / 6S, 21230 / GB / F02 Preparatory measures before (initial) start-up Fig. 15: PRIMEDIC™ AkuPak Battery charge indicator 1 Battery charge indicator 2 push button to activate battery charge indicator Battery charge indicator (1) means: Note 81% - 100 % charged 41% - 60% charged 1% - 20% charged When charging using the Charger Basis / Charger Comfort, the AkuPak is automatically charged up again fully if the level falls below 80% of the charge capacity. This 80%-limit can temporarily be made inoperative by pressing on push button (2), i.e., the AkuPak can be recharged even before reaching this limit. This, for example, is practical if you wish to fully recharge AkuPak prior to next use, independant of its current charge status. After recharging, the programmed 80%-limit is operative for the next automatic full recharge. Note Charging the AkuPaks outside the stipulated operating temperature can cause damage to the rechargeable battery. A completely discharged battery must be charged for at least 2 hours. If the charging time is too short, incorrect interpretation of the rechargeable battery charge status may occur. Trouble-free functioning of the equipment can not be assured. Charging the AkuPak is interrupted at temperatures of more than 45°C. 27 GB HeartSave 6 / 6S, 21230 / GB / F02 Preparatory measures before (initial) start-up 6.6 TM Charging the AkuPak with the PRIMEDIC ClipCharger Fig. 16: PRIMEDICTM AkuPak with PRIMEDICTM ClipCharger 1 AkuPak 2 ClipCharger 3 Mains plug 4 green LED (Power) 5 yellow LED (Charge) Procedure: Removing the AkuPak from the device Position the ClipCharger on the AkuPak in accordance with Fig. 14. Now plug the mains plug into a plug socket. The green LED (Power) and the yellow LED (Charge) light up and signal "Power Available". Charging is started if it becomes necessary because of the remaining residual energy. The yellow Charge LED on the ClipCharger indicates charging. Charging time is approx. 2 1/2 hours. The yellow LED goes out when charging is complete. Pull the mains plug out of the plug socket and release the ClipCharger from the AkuPak. Note 28 Nickel Cadmium batteries are subject to natural wear and should be exchanged at the latest after 2.5 years depending on the frequency of use. Operating Instructions HeartSave 6 / 6S, 21230 / GB / F02 Preparatory measures before (initial) start-up 6.7 Charging the AkuPak in the optional PRIMEDIC™ Charger Basis / Charger Comfort Please refer to the separate operating instructions for the charger Basic / Comfort. 6.8 Connecting up the PRIMEDIC accessory) TM PowerLine (optional Fig. 17: PRIMEDIC™ PowerLine Procedure: Insert the PowerLine as described in Chapter 6.3. Then plug the mains plug of the mains cable into a socket in the vicinity of the patient. The HeartSave carries out a self-test and is then ready for use. Note METRAX GmbH recommends that you keep the HeartSave unit, with the PowerLine inserted, continuously connected to the mains, so that the equipment self-tests are carried out automatically. 29 GB HeartSave 6 / 6S, 21230 / GB / F02 Preparatory measures before (initial) start-up 6.9 Periodic device self-test 6.9.1 Self-test after switching the HeartSave on The device self-test is run through automatically by switching on the PRIMEDICTM HeartSave or by inserting the power module in the device to check all important functions and signal setups. Automatically full sel-test is initiated in case an internal error is found by the equipment. Please proceed to follow the device instructions. 6.9.2 Periodic self-test Frequency 30 Test SHORT Daily Software, operating membrane, ECG calibration, clock, internal voltage supply and HV section at 0V MEDIUM First day of the month Software, operating membrane, ECG calibration, clock, internal voltage supply and HV section at 300 V LONG On the 1st. July and on the 1st. January each year Software, operating membrane, ECG calibration, clock, internal voltage supply and HV section at 1,600 V FULL After identifying an internal error Software, operating membrane, ECG calibration, clock, internal voltage supply and HV part at 1600 V, microphone test, key query Operating Instructions HeartSave 6 / 6S, 21230 / GB / F02 Using the device 7 Using the device 7.1 Switching on/off 7.1.1 Switching the PRIMEDIC™ HeartSave 6/6S on The device is automatically activated by removing its cover. If the device is not to be activated automatically, or if the device cover is not in use, switch on the device by pressing the On/Off button. All buttons are then activated, apart from the trigger button. Triggering of defibrillation is only enabled in automatic mode once ventricular fibrillation (VF) has been identified. Directly after switching it on, an internal self-test is carried out to check important functions and signal devices. Standby is confirmed by a beep. You must always wait for this beep. 7.1.2 Switching the PRIMEDIC™ HeartSave 6/6S off You can switch off the device in different ways: 7.2 By pressing the on/off button for approx. 3 seconds. A warning beep will sound simultaneously. This time has been chosen to prevent the device from being switched off accidentally. By closing the cover of the device. The device switches off automatically if it does not recognise a signal for 10 minutes and if no button/key is pressed during this period. If the device detects a fault, it will automatically switch off to avoid possible injuries. Selecting the operating mode The device offers two different operating modes: Automatic mode Manual mode 7.2.1 Automatic mode (AUTO mode) Once it is switched on and after successful completion of the self-test, the device is usually in Auto Mode. In this operating mode, the device performs an automatic heart rhythm analysis. If potentially fatal cardiac arrhythmia is detected, the device recommends defibrillation and generates the electrical shock required. An electrical shock is not generated if the device does not detect a rhythm requiring defibrillation. In this case, the device recommends cardio pulmonary resuscitation (reanimation). 31 GB HeartSave 6 / 6S, 21230 / GB / F02 Using the device 7.2.2 Manual mode (Auto Sync) With the "Manual Mode" operating mode, the user is free to apply his or her experience and knowledge to the ECG results. The user can choose the time of shock delivery and the shock energy. In manual mode, synchronous defibrillation (cardioversion) can be performed in addition to standard asynchronous defibrillation. 7.2.3 Changing the operating mode When switched on, the Primedic HeartSave is always in automatic mode (Auto Mode). To switch to manual mode, follow the steps below: Press the key once on the device. The "Man-Mode (AutoSync)" manual mode is selected. Press the key again; the "Man-Mode (AutoSync)" operating mode is activated. The device is switched to the Auto Mode operating mode: after it is switched off and back on again After you press the key, navigate in the Setup menu with the key and confirm Auto Mode with the key. 32 Operating Instructions HeartSave 6 / 6S, 21230 / GB / F02 Using the device 7.3 Setup menu Using the Setup menu, you can change the operating mode and the parameters. The setup covers several pages. Refer to the device for these. The device is pre-configured in the factory. You can change certain parameters in the Setup menu. Your configuration will be retained until another change is made, even if the device is switched off or if the power supply is replaced. Parameters Selection options Page 1 Automatic mode Option between automatic Man. Mode (Autosync) mode (AED mode) and manual mode. The currently active mode is displayed in brackets (">>…<<"). Page 2 Basic List of available profiles. Profile 1 The profile that is currently active is marked as "active" by the entry Profile 2 identified by the entry "active". Profile 3 Page 3 Alarm SpO2: Lower limit Upper limit Alarm SpO2: [On/Off] Alarm ECG: Lower limit Upper limit Alarm ECG: [On/Off] Systole sound: [0% / 25% / 50% / 75% / 100%] Derivation: Display channel 1 Volume: [0% / 25% / 50% / 75% / 100%] Display channel 2 Page 4 Microphone: [On/Off] BLS information: [On / Off] CPR sounds [0% / 25% / 50% / 75% / 100%] CPR cycles 1-5 Contrast: from 40 to 120 Page 5 Guideline Language ERC/AHA depending on language packages installed Date in format DD/MM/YYYY Time 00:00 in 24-hour format Network filter [50Hz/60Hz/Off] Display [0 degrees / 180 degrees] 33 GB HeartSave 6 / 6S, 21230 / GB / F02 Using the device Page 6 New PIN 0000-9999 PIN Repeat 0000-9999 Change PIN Confirmation for "Change PIN" Save to profile This is used the save the parameters in the selected profile PIN Input box for current PIN (for PIN changes and profile saves) 0000-9999 Profile selection Basic, Profile 1, Profile 2, Profile 3 Page 7 ARM SW x.xx(Version number) xxxxxxxx (check sum 8 digits), Date DSP SW x.xx(Version number) xxxx (Check sum 4-digits), Date MSP SW x.xx(Version number) xxxx (Check sum 4-digits), Date ULF Check sum 8-digit Serial No. XXXX Page 8 BQ SW Version: x.x BQ serial number: x 7.3.1 Simple change to configuration – example: Time After entering the setup menu (by pushing the button ) the "Man-Mode (AutoSync)" is marked. To change the time, proceed as follows: Navigate the cursor by pressing the key down several times to the menu item < To page 2 > Press the key to go to Page 5. Move the cursor by pressing the key to the menu item Time. Select the highlighted menu item Time by pressing the key. The hour is then highlighted. Change the hour by pressing the or key. Confirm the correct value with the key. The minute is now highlighted. Then change this as described under 3 and then press the key To exit the setup menu, move the marking with the key to the menu item End Setup and confirm this with the key . Note 34 If no key is pressed for one minute, the device automatically leaves the setup menu and goes back to standby. Operating Instructions HeartSave 6 / 6S, 21230 / GB / F02 Using the device 7.3.2 Changing the PIN The PIN is used to save profiles. Entering a PIN is absolutely necessary. If you want to change the PIN you will always need to know the old PIN. proceed as follows: Use the key to change into the setup menu Change to page 6 of the menu Navigate with the key to the entry < PIN > and confirm your selection with the key Enter the current PIN as follows: Using the keys you can increase or decrease a digit. With the key you can change to the next digit. After the fourth digit, it jumps back to the menu item Navigate to the entry < New PIN > and enter your new PIN as described above. Navigate to the entry < Repeat PIN > and enter your PIN again. Select the menu parameter < Change PIN > and confirm your new PIN with the key . On the right next to the cursor the entry < OK > should appear. This means your new PIN is active. Note When the device is first delivered, the PIN is always set in the factory to 0000. 7.3.3 Calling up/activating a profile Multiple menu parameters can be summarised into one profile. Saved profiles can be called up as follows: Use the key to change into the setup menu Select your required profile using the keys and confirm it with the key The selected profile is active Note Please note that your profile selection is only active until the device is switched off. The devices always starts with the profile "Basic" 35 GB HeartSave 6 / 6S, 21230 / GB / F02 Using the device 7.3.4 Saving menu parameters in a single profile Multiple menu parameters can be saved as one profile. The profiles Basic, Profile 1, Profile 2, and Profile 3 are available. If you want to save parameters in a profile or want to change a profile, proceed as follows: Use the key to change into the setup menu Change the required parameters from the various pages of the menu to suit your needs. Change to page 6 of the menu. Use the key to navigate to the entry < Profile selection > and confirm your selection with the key Use the keys to select the required profile which is to be used to save the menu parameters previously selected. Confirm this with the key Navigate with the key to the entry < PIN > and confirm your selection with the key Enter the current PIN as follows: Using the keys you can increase or decrease a digit. With the key you can change to the next digit. After the fourth digit, it jumps back to the menu Change to the menu entry < Save to profile > and confirm your selection with the key On the right next to the cursor the entry < OK > should appear. This means the profile is saved. Now leave the menu by using the key to navigate to the menu item < End Setup > and confirm this with the key Note If you want to change the configuration that your device starts up with when it is switched on, you have to save your changed menu parameters in the profile "Basic". Note You can only change the following parameters temporarily while the device is in operation: - Alarm ECG: - Alarm SpO2: - Network filter The following settings are always active after the device is started: 36 - Alarm ECG: On - Alarm SpO2: On - Mains filter: Off Operating Instructions HeartSave 6 / 6S, 21230 / GB / F02 Using the device 7.4 Alarms The PRIMEDIC™ HeartSave 6/6S, depending on the version, monitors the heart rate from the ECG signal and the oxygen saturation level of the patient from the data of the SPO2 sensor. If the SPO2 sensor only is connected to the patient, the heart rate displayed is that determined from the SPO2 signal. Accordingly the equipment ECG, VF Alarm and SPO2 Alarm differ. After switching on the PRIMEDIC™ HeartSave 6/6S, the alarms are always activated. The alarm limits can be specifically configured by the user in the Setup menu and are retained after the monitor has been switched off. Alarms are generally acoustic and visual, depending on the operational situation there can be deviations which are explained in the following chapters. 7.4.1 ECG Alarm The range of adjustment of the ECG Alarm is from 30 – 300 beats per minute [bpm]. The lower alarm limit can be selected in the range 30 – 99 beats per minute. The upper alarm limit cannot be lower than the lower limit and the value selected can be up to 300 beats per minute. The lower and upper alarm limits are displayed on the monitor. Changes can only be made in the Setup menu. When one of the set limits is attained an ECG Alarm is initiated. If no valid heart rate can be obtained (e.g. on the occurrence of an asystole (cardiac arrest) an alarm is likewise initiated. In this case the heart rate is indicated in the form of dashes. The Alarm in the event of an asystole (cardiac arrest) and on exceeding the set ECG limits takes the form of a loud tone, alternating quickly between 2 pitch levels of approx. 5 seconds duration. This alarm is repeated every 20 seconds. At the same time a bell symbol and the heart rate flash on the display. The ECG Alarm can be deactivated in the Setup menu. When the ECG Alarm is deactivated the bell symbol is permanently crossed out. If in this case the alarm limits are exceeded no acoustic alarm is initiated, but the bell symbol and heart rate flash, in order to inform the user. Note: If the unit is operated with PRIMEDIC™ SavePads electrodes, a bell symbol appears in auto mode for the ECG alarm and is always crossed out to indicate that no ECG alarm is made in this mode. By this means interfering messages are avoided during the repetition of the HLW request. 7.4.2 VF Alarm The VF Alarm only occurs during ECG monitoring with ECG electrodes / ECG cable, by means of which shocks cannot be applied. With the VF Alarm eight gong-type muffled tones are heard over a period of approx. 5 seconds, which are repeated every 20 seconds and accompanied by the verbal message < Analysis recommended, use SavePads >. If the ECG Alarm is activated, the acoustic Alarm takes place with the ECG Alarm tone. The speech output is always provided. The VF alarm requests replacing the ECG cable and the ECG electrodes for the PRIMEDIC™ SavePads, because otherwise defibrillation cannot take place. WARNING Warning: Defibrillation cannot take place via an ECG monitoring cable. If, during ECG monitoring, shock-requiring rhythms (e.g.VF) arise, we need to use the SavePads. 37 GB HeartSave 6 / 6S, 21230 / GB / F02 Using the device 7.4.3 SPO2 Alarm The SPO2 Alarm is only available for equipment with SPO2 functionality. The adjustment range for the SpO2 alarm is 70-100%. The lower and upper alarm limits of the SpO2 value are displayed on the monitor. Changes can only be made in the Setup menu. When one of the set limits is attained, a SpO2 Alarm is initiated. The Alarm on exceeding the set SPO2 limits takes place in the form of a deep interval tone, quickly alternating between 2 pitch levels of approx. 5 seconds duration. This alarm is repeated every 20 seconds. At the same time the bell symbol and the SpO2 value flash on the display. The SpO2 Alarm can be deactivated in the Setup menu. When the ECG Alarm is deactivated the bell symbol is permanently crossed out. If in this case the alarm limits are exceeded no acoustic alarm is initiated, but the bell symbol and heart rate flash, in order to inform the user. DANGER There is no acoustic warnings if the alarms are turned off in case one of the monitored parameters is beyond the permissible range. Hence, regularly check the patients and the equipment indicators so as to react rapidly to changes. 38 Operating Instructions HeartSave 6 / 6S, 21230 / GB / F02 Positioning the electrodes 8 Positioning the electrodes 8.1 Undressing the patient If during your preliminary examination, you have ascertained that the patient requires defibrillation, undress the upper body so you can position the electrodes. 8.2 Positioning the defibrillation electrodes (SavePads) Fig. 18: Position the electrodes on the patient 1 First electrode position (RA) 2 Second electrode position (LL) The positions of the defibrillation electrodes are: On the right side of the chest, below the collar bone (1) On the left side of the chest, above the apex of the heart on the axillary line (2). CAUTION Positioning the electrodes incorrectly may result in misinterpretations by the device. 39 GB HeartSave 6 / 6S, 21230 / GB / F02 Positioning the electrodes 8.3 Checking the skin CAUTION Before positioning the electrodes, make sure that the patient's skin is dry. Remove any medicated plasters at the electrode positions before applying the electrodes. You must also make sure that the patient does not have any hair at the electrode positions. If necessary, remove any hair at the affected electrode positions with the enclosed razor. 8.4 Positioning the ECG adhesive electrodes Fig. 19: Position the electrodes on the patient 1 First electrode position (R) 2 Second electrode position (F) 3 Third electrode position (L) The positions of the ECG adhesive electrodes are: 1 Red (R): Directly below the centre of the right-hand collar bone (medioclavicular) 2 Green (F): Directly below the left chest muscle on the medioclavicular line 3 Yellow (L): Directly below the centre of the left-hand collar bone (medioclavicular) Positioning the electrodes incorrectly or using electrodes that are of poor quality or too dry may result in device misinterpretations. You should therefore only used ECG adhesive electrodes that have been approved by Metrax. 40 Operating Instructions HeartSave 6 / 6S, 21230 / GB / F02 Positioning the electrodes 8.5 Connecting the electrodes Fig. 20: Removing the protective film 1 Protective film 2 Defibrillation electrode with gel layer The PRIMEDIC™ HeartSave 6 will give you a voice and text prompt to apply the defibrillation electrodes to the patient. To do so, follow the steps below: First, remove the protective film (1) from one electrode (2) and them immediately place the electrode on the position you had ascertained previously. Proceed to remove the protective film from the second electrode and place it in its position. Smooth the electrodes onto the patient ensuring there are no air bubbles under the electrodes! After the protective film is removed, do not allow the electrodes to come into contact with the floor, objects, clothing or other parts of the body, as this could remove the conductive gel layer on the electrodes. WARNING A reduced layer of gel could cause burns on the skin under the electrodes during defibrillation. Defibrillation can only be delivered if the patient is within the permissible impedance range. See the chapter on technical data for more details. You must therefore make sure that the electrodes adhere properly. Only use new adhesive electrodes and check that the use-by date has not expired. 41 GB HeartSave 6 / 6S, 21230 / GB / F02 Positioning the electrodes In the device variants with SpO2, the text display is disabled. Note 8.6 < Plug in electrode plugs > Fig. 21: Inserted electrode plug connector 1 Electrode plug connector with cable 2 Locking pin 3 Socket Procedure: Insert the plug connector (1) of the electrode cable in the HeartSave socket (3). Make sure that the locking pin (2) clicks into place. To be able to unplug the electrode plug, you have to push firmly on the top part of the locking pin while at the same time pulling the plug up. 8.7 Check electrodes If the units advises < Check electrodes > in the display by verbal message, this can have several causes: Electrode plug not plugged in There is contact or a conductive gel connection between the defibrillation electrodes. Hair growth on patient not removed. Air pockets between skin and defibrillation electrodes cause a bad contact. Dried out electrodes. Remedy the cause of the fault. 42 Operating Instructions HeartSave 6 / 6S, 21230 / GB / F02 Operation in Automatic Mode 9 Operation in Automatic Mode Reanimation is carried out in the device in accordance with the current recommended ERC/AHA guidelines. The device is ready for use after it has been switched on, a successful self-test is performed and the operating mode is selected. Triggering of defibrillation is only enabled by the HeartSave in automatic mode once ventricular fibrillation (VF) has been identified. 9.1 Voice prompts by the device/Preliminary examination of the patient(ERC) You will be asked to examine the patient during the course of the Voice Prompts. < Talk to patient > < Call emergency services > < Open up airways, carefully hyperextend head > < Check breathing > < If not breathing, 30 times cardiac massage > < 2x artificial respiration > < Position electrodes > < Plug in electrode plugs > Note Before applying the electrodes to the patient, carry out the actions as instructed. The instructions are automatically interrupted when you connect the electrodes to the patient. 9.2 Performing the ECG analysis in Auto Mode If the defibrillation electrodes have been applied, the device will automatically start the analysis. The device prompts: < Do not touch the patient, analysing rhythm > DANGER During the analysis, the patient must be put in an immobile position and must no longer be touched. The algorithm of the device program will now check the ECG for ventricular fibrillation. This process takes approx. 7 - 12 seconds. If the device identifies VF, it will recommend defibrillation. 43 GB HeartSave 6 / 6S, 21230 / GB / F02 Operation in Automatic Mode DANGER Observe the patient during the entire reanimation. It is possible at any time that the patient may regain consciousness and does not need to be defibrillated. If that is the case, do not carry out the defibrillation under any circumstances. DANGER Take care that during the analysis phase, the Auto switch is not continuosly pressed as otherwise safety shutdown of the equipment is effected. Note 9.3 The rhythm identification detector continuously analyses the ECG, even after a rhythm in need of defibrillation has been identified. Defibrillation required If the device clearly identifies VF, it will recommend defibrillation, for which automatic preparations are made inside the device. The device announces: < Shock advised > < Device is charging > < Do not touch the patient > < Device is charging > < Do not touch the patient > Once the energy is built up, it remains available for 15 seconds and is indicated by a continuous beep, a green light on the trigger button and the recorded message < Stand clear of patient. Deliver shock now > The remaining time is simultaneously displayed on the monitor. If you do not defibrillate within this period, an internal safety discharge will follow and the ECG will be analysed again. DANGER Before pressing the trigger button, ensure that all devices connected to the patient are removed if they are not defibrillation protected. Before and during the energy discharge, all those participating in the reanimation must stand clear and all contact with the patient or conductive parts (e.g. a stretcher) must be avoided. 44 Operating Instructions HeartSave 6 / 6S, 21230 / GB / F02 Operation in Automatic Mode Press the trigger button for defibrillation, which will occur immediately after the button is pressed. The request to perform Cardio Pulmonary Reanimation (CPR) is then issued. Note Pressing the trigger key during power charging (bevore it turns green) does not result in release of shock, rather it leads to internal safety discharge. Capacitor charging time for defibrillation depends on the available battery capacity. Charging may take longer if the power module is partly discharged. If a fault occurs whilst the energy is being loaded, an intermittent warning beep is sounded and the charge present in the capacitor is discharged within the device. CAUTION For the first message "Charging status battery low. Please recharge" or "Battery low, please replace battery" there are still at least 3 energy discharges at max. energy. If this message appears, you should replace the power module. If, when the device is switched on, no ECG is performed for 10 minutes and no button is pressed, the device automatically switches off. Approx. 30 seconds before the switch-off this is signalised by an interrupted warning tone. Pressing any button or any other activity will interrupt the switching off process. When the electrodes are not connected, a dotted line appears on the monitor in the basic state with the instruction <Check electrodes>. As soon as a derivation via the electrodes occurs, the ECG signal appears on the monitor. 9.4 Defibrillation not required If the device can not find a shockable rhythm, it recommends cardio pulmonary resuscitation (CPR). < No shock advised > < Cardiopulmonary resuscitation > < 30 x cardiac massage> < 2x artificial respiration > Once the CPR time has expired, the device returns to ECG analysis. 45 GB HeartSave 6 / 6S, 21230 / GB / F02 Operation in Manual Mode 9.5 10 Keeping the defibrillator ready for use At the end of a reanimation, clean the device, replace the SavePads and check or, if necessary, replace the power supply unit so that the device is ready to use again as soon as possible. Charge the battery pack so that sufficient power is available the next time the device is used. If any malfunctions or noticeable problems occur, contact your nearest service facility as soon as possible. Operation in Manual Mode Once it is switched on and after successful completion of the self-test, the device is in Auto Mode. To activate manual mode, press the key once. The monitor shows the 1st.page of the setup menu. The "Man-Mode (AutoSync)" operating mode is selected. Press the key again – the "Man-Mode(AutoSync)" operating mode is activated. 10.1 Performing defibrillation In contrast to Auto Mode (during which the device programme's algorithm analyses the ECG and proposes defibrillation), in manual mode, you must analyse the ECG yourself for a shockable rhythm. You decide whether defibrillation is required and when it should be initiated. Fig. 22: Primedic HeartSave 6/6S, trigger button 1 Energy loading button 2 Trigger button for shock 46 Operating Instructions HeartSave 6 / 6S, 21230 / GB / F02 Operation in Manual Mode Procedure: First use the two arrow keys to select an appropriate energy level for defibrillation. The energy levels for 50, 100, 200, 300 and 360 joules are displayed on the right hand edge of the screen. The energy setting is confirmed when the selected energy level is displayed in an inverse mode on the monitor. The energy level required for defibrillation/cardioversion depends on the patient, their height, weight and condition. Press the energy loading button (1). The selected energy level is loaded when you press the energy loading button; it is thus available to be applied as a shock through the SavePads. The recorded message says < Device is charging > Once charging is complete, the green trigger button (2) lights up. If the wrong energy level was selected by mistake, and if this energy has already been loaded for defibrillation, discharge the energy by pressing the energy loading button again. The loaded energy is then discharged for safety reasons. Make a new energy selection and confirm it with the energy loading button. The loaded energy cannot be adjusted. The capacitor charge remains available for 15 seconds and is indicated by a continuous beep and a green light on the trigger button. If defibrillation does not occur during this period, a safety discharge is carried out within the device. You can also cancel the capacitor charge internally by pressing the energy loading button again during the 15 second period. DANGER Before pressing the trigger button, ensure that all devices connected to the patient are removed if they are not defibrillation protected. Before and during the energy discharge, all those participating in the reanimation must stand clear and all contact with the patient or conductive parts (e.g. a stretcher) must be avoided. Press the trigger button to enable defibrillation, which will occur immediately after the button is pressed. After carrying out defibrillation, you must analyse the ECG again for shockable rhythms and trigger another defibrillation (or more) if necessary (or perform other resuscitation measures). The energy level is reset to 50 joules. Capacitor charging time for defibrillation depends on the available battery capacity. Charging may take longer if the power module is partly discharged. If a fault occurs whilst the energy is being loaded, an intermittent warning beep is sounded and the charge present in the capacitor is discharged within the device. CAUTION When the first message "Charge battery" appears, you still have at least 3 energy discharges at max. energy. If this message appears, you should replace the power module. 47 GB HeartSave 6 / 6S, 21230 / GB / F02 Operation in Manual Mode If the device is switched on and for 10 minute no ECG is recorded or no key is pressed, then the device will automatically switch off. Approx. 30 seconds before the switch-off this is signalised by an interrupted warning tone. Pressing any button or any other activity will end the switching off process. Note If the electrodes are not connected, a dotted line appears on the monitor in the basic state with the comment <Open electrodes>. As soon as a derivation via the electrodes occurs, the ECG signal appears on the monitor. 10.2 AUTO-SYNC Unlike conventional defibrillators, the HeartSave 6/6S has synchronisation (AUTOSYNC) that is automatically activated, i.e., the synchronous markers are set for the QRS complexes as soon as the ECG clearly identifies an R-wave. CAUTION Auto-synchronisation is only possible in manual mode. Synchronisation takes place using derivation II only. You must ensure that the patient cable or defibrillation electrodes are not mixed up and stuck in position. A clear QRS detection only occurs if the R-wave is positive. A synchronous shock is only delivered when "sync" appears in the display when the "Charge" button is pushed. Therefore make sure that the display shows the window "Sync" before energy charging. If an emergency situation calls for synchronous operation of the defibrillator (cardioversion), ECG markings are automatically displayed on the monitor screen. To ensure safe synchronous operation, these cardioversion markers in each QRS complex must appear directly at an R-wave. A clear, artefact-free ECG signal with sufficient amplitude is required in this case. If, during a period of 10 seconds, at least 3 R-waves are not detected, the unit switches to the synchronous mode. The "Sync" window in the display changes to "MAN". A warning tone is emitted. If then an adequate number of R-waves is detected again, the mode again jumps to "Sync." again. The delay time between detection of a QRS complex (synchronous pulse) and energy transfer is less than 60 ms. Before initiating cardioversion, observe the monitor display to check that the cardioversion markers are clearly assigned to the R waves and not, for example, reacting to pacemaker pulses or artefacts. In synchronous mode, the trigger button must be held pressed until the cardioversion time is reached. A beep is sounded during this period. Cardioversion is not performed if the trigger button is released again in the meantime. If, within a period of 3 seconds, whilst the trigger button is held down, synchronisation does not take place, the energy is discharged internally. The energy remains in the capacitor if the trigger button is only pressed briefly and if defibrillation was not triggered by synchronous markers. The amounts of energy used for cardioversion are usually less than for asynchronous defibrillation because depolarisation of all of the heart muscles is not required. The amount of energy is roughly determined by the height and weight of the patient. However, the determining factors are the indications, i.e. the following empirical values apply: 48 Operating Instructions HeartSave 6 / 6S, 21230 / GB / F02 Attaching the SpO2 sensor Ventricular tachycardia with unstable pulse: 50 joules; for additional cardioversions, select the next highest energy level (100 J, 200 J, 300 J,...) supraventricular tachycardia: 50 - 100 joules Atrial flutter: 50 joules Atrial fibrillation: 100 joules The above values are only recommendations for the procedure to use for the corresponding indications. Ensure that R-wave detection is continuous during cardioversion. Eliminate any faults before starting cardioversion, e.g. adjust the mains filter. 10.3 Keeping the defibrillator ready for use At the end of a reanimation, clean the device, replace the SavePads and check or, if necessary, replace the power supply unit so that the device is ready to use again as soon as possible. Charge the battery pack so that sufficient power is available the next time the device is used. If any malfunctions or noticeable problems occur, contact your nearest service facility as soon as possible. 11 Attaching the SpO2 sensor Fig. 23: Attaching the SpO2 sensor 1 Anti-kink sleeve 2 SpO2 sensor 3 Clip surface Press the two clip surfaces (3) together and slip the open sensor onto any finger so that the cable/socket end of the sensor is on the same side of the finger as the finger nail. The sensor may be allowed to remain for a maximum of four hours on the same measurement site, provided that the condition of the skin and correct positioning of the sensor are regularly checked. Since skin tolerance at the measurement site varies according to different skin types, you may need to switch the measurement site more often for some patients. 49 GB HeartSave 6 / 6S, 21230 / GB / F02 Attaching the SpO2 sensor 11.1 Connecting the SpO2 sensor Procedure: Insert the plug (1) on the SPO2 sensor in the unit plug socket so that the arrow (3) on the plug lines up with the arrow (4) on the socket. Make sure that the plug is fully inserted. To disconnect the plug connection, first raise the sleeve with the arrow (2) slightly and then pull the plug connector from the socket. Fig. 24: Inserting SpO2 plug 50 Operating Instructions HeartSave 6 / 6S, 21230 / GB / F02 Cleaning, maintenance and dispatch 12 Cleaning, maintenance and dispatch 12.1 Cleaning WARNING Only clean the device when it is switched off and with the electrodes unplugged. To do this, first remove the power module from the device or pull the plug from the power point (if the optional mains power unit is fitted). Do not use dripping wet cloths to clean it. Do not pour any liquids over the device and do not immerse it in any liquids. Clean the device and all its accessories, such as the wall bracket, with commercially available household cleaners. Use a slightly damp, clean cloth. Use ordinary wiping disinfectants to disinfect (e.g. Gigasept FF). 12.2 Servicing Regardless of device usage, we recommend that visual inspection of the PRIMEDIC™ HeartSave 6/6S and the accessories be carried out by the user/service technician at regular intervals (at least once a year). Make sure that the housing, cable, SavePads and all the other accessories are undamaged. 12.2.1 Servicing check list Check the expiry date o o of the SavePads of the power modules and if necessary, replace the parts with genuine parts. Check whether o the status display "OK" is showing. o you can switch on the device. o the device automatically carries out the self-test after being switched on. o the slot for the power supply is clean. o the device is fully equipped. o labelling is attached and legible 51 GB HeartSave 6 / 6S, 21230 / GB / F02 Cleaning, maintenance and dispatch DANGER When doing so, pay attention to the following: If parts of the housing or insulation are damaged, they must be repaired or replaced immediately. If parts of the housing or insulation are damaged, you should either refrain from using the device or switch it off immediately. Have the device repaired as soon as possible by the manufacturer. 12.3 Dispatching the PRIMEDIC™ HeartSave If the PRIMEDICTM HeartSave has to be returned for servicing or to be upgraded, then the power module must always be removed from the device and must be sent in with the device, but packaged separately. Protect the contacts of the power module with insulating adhesive tape. Where possible, use the original box. 12.4 Disposal In accordance with the founding principles of the company Metrax GmbH, your product has been developed and made using high quality materials and components which are recyclable. At the end of its service life, recycle the device through disposal companies registered under public law (council recycling facilities). Proper disposal of this product helps with environmental protection. Through the registration of Metrax GmbH with the responsible authorities we ensure that disposal and recycling of electrical devices introduced by us onto the market in accordance with the EU Directive on the disposal of waste electrical and electronic equipment (WEEE directive) is guaranteed. For Germany, in accordance with the law on bringing electrical and electronic equipment onto the market, taking back and disposing of in an environmentally friendly manner (Electrical and Electronic Equipment Act– ElektroG) Metrax is registered with EAR (register of old electronic equipment) under the number: 73450404. Improper disposal of the device or its individual parts can lead to injury. For business customers in the European Union Please contact your dealer or supplier if you want to dispose of electrical and electronic equipment. Your dealer or supplier will have further information available for you. 52 Operating Instructions HeartSave 6 / 6S, 21230 / GB / F02 Technical Data 13 Technical Data Defibrillation Operating modes: Asynchronous/synchronous, external in automatic/manual mode Patient impedance: 23 – 200 Ohm Synchronisation: SYNC only in manual mode Impulse shape: Biphasic, current regulated (CCD) Output power in AUTO mode at: Patient impedance 1st. stage 2nd. stage 3rd. stage 25 Ohm 143 J 201 J 277 J 50 Ohm 281 J 350 J 360 J 75 Ohm 348 J 360 J 360 J 100 Ohm 344 J 343 J 343 J 125 Ohm 314 J 316 J 317 J 150 Ohm 290 J 293 J 293 J 175 Ohm 269 J 272 J 272 J Accuracy: All data is subject to a tolerance of +/- 15% Impulse length: Positive phase 11.25 ms, negative phase 3.75 ms Discharges: 70 discharges at 20 °C with a new fully charged recharageable battery at any energy of 200 J. 50 discharges at 20 °C with a new fully charged recharageable battery at any energy of 360 J. 200 discharges at 20 °C with a new battery 6 at any energy of 360 J. Charge time: 12 +/-3 seconds in manual mode with fully charged new AkuPak 12 +/-3 seconds in manual mode with an AkuPak after energy removals for 15 shocks ≤ 23 seconds from the start of the analysis up to readiness to shock with maximum energy after energy removals for 15 shocks ≤ 37 seconds from switching on the unit up to readiness to shock with maximum energy after energy removals for 15 shocks ECG Derivation: 2 derivations from I, II, III, aVL, aVR, aVF Heart frequency: 30 – 300 min-1 (accuracy +/- 1/min or 1%) Input: CF class, for 2-pin patient cable, defibrillation-proof 53 GB HeartSave 6 / 6S, 21230 / GB / F02 Technical Data Input resistance: > 5 MOhm @ 10 Hz CMRR: > 85 dB Input d.c. voltage: ± 0.5 V Bandwidth: 0.5 – 40 Hz (- 3 dB) SR = 101 samples/s SpO2 NELLCOR® pulse oximetry module Indication range: 100…0 % Calibration range: 100 ... 50 % Accuracy: SpO2 Adults 100 ... 70 % +/- 2 digits Newborn infants 95 ... 70 % +/- 3 digits Contact the manufacturer for more details about test procedures. Wavelength: Red: 660 nm Infrared: Infrared: 920 nm Light intensity: 0.5 lumen/cm2 Operating mode: Continuous Refresh time: < 2 secs. Impedance measurement Defibrillation: 23 ... 200 Ohm (accuracy +/- 20%) Monitoring: 500 – 2500 Ohm Measurement frequency: 30 kHz Alarms System: ECG, SpO2,, defibrillator, power supply. Physiological: schockable rhythm Analysis duration: Approx. 7 secs. until VF is recognised Monitor Monitor type: 54 High-resolution LCD monitor Operating Instructions HeartSave 6 / 6S, 21230 / GB / F02 Technical Data Monitor size: 95 x 72 mm (diagonal 120 mm, 4.7") Resolution: 320 x 240 pixels (pixel size 0.36 x 0.36 mm) Displays: Heart frequency, number of defibrillations, number of recognised VF, reanimation time, date, time, rechargeable battery capacity, ECG. Power supply Removable battery (battery pack): NiCd, 12 V/1.4 Ah, service life 2.5 years PowerLine: 100 ... 240 volts, 50/60 Hz Battery: LiMnO2 ,15V, 2,8 Ah, (0° to 20°C), service life is 6 years at 20°C Data storage Memory type: Compact FlashCard 32MB – 2 GB Safety Classification: Device with internal power supply (battery pack and battery), medical product from Class IIb, protection class I, type CF, defibrillation-proof, Identification: 0123 The device is a medical product and complies with the EC Directive 93 / 42 / EEC Other Operating conditions: 0 ... 55 °C, 30 ... 95 % rel. humidity, but without condensation 700 hPa ... 1060 hPa continuous mode Storage conditions: - 20 ... 70 °C, 20 ... 95 % rel. humidity, but without condensation 500 hPa ... 1060 hPa continuous mode Dimensions: 28 x 25 x 9 cm (W x H x D) Weight: Approx. 2.0 kg (without power module) Standards applied Standards (for licensing in the EU, the corresponding harmonised European standards EN were used instead of the IEC standards): IEC 60601-1:1988 + A1:1991 + A2:1995 IEC 60601-1-2:2001 IEC 60601-2-4:2002 EN1789:2003 Subject to technical changes without notice. 55 GB HeartSave 6 / 6S, 21230 / GB / F02 Warranty conditions 14 Warranty conditions The warranty period is 24 months and starts on the day of purchase. Please keep the invoice as proof of purchase. Within this time period, METRAX will remedy any defects in the device free of charge if they are based on material or manufacturing errors. The device can be reinstated to its original condition as selected by METRAX either by repair or replacement. A claim under warranty does not extend the original warranty period. Warranty and also legally entitled warranty claims are not applicable if the usefulness of the device is only negligibly affected, or in the case of normal wear and tear (e.g. consumables such as AkuPak) or damage caused after transfer of risk as a result of incorrect or negligent handling, excessive wear or are caused by special external influences which are not provided for according to the contract. The same applies if inappropriate changes or incorrect repair work is carried out by the buyer or by a third party. All other claims against METRAX are excluded out unless such claims are based on intent or gross negligence or compulsory legal liability standards. Warranty claims made by the buyer against the seller (dealer) are not affected by this guarantee. In the case of a warranty claim, please return the device with proof of purchase (e.g. invoice) stating your name and address to your dealer or to METRAX. METRAX After-Sales Service is glad to be at your disposal, even after the warranty period has expired. 56 Operating Instructions HeartSave 6 / 6S, 21230 / GB / F02 Depiction of the current-time function 15 Depiction of the current-time function First shock Second shock Third shock First shock Second shock Third shock First shock Second shock Third shock I/A Time / ms Third shock I/A 50 Ohm Time / ms Second shock I/A 75 Ohm 100 Ohm Time / ms First shock I/A 25 Ohm The following shows the graph shapes of the defibrillation impulse in manual mode, depending on the load resistance. 57 GB HeartSave 6 / 6S, 21230 / GB / F02 Second shock Third shock First shock Second shock Third shock First shock Second shock Third shock I/A I/A First shock 175 Ohm 150 Ohm 125 Ohm Depiction of the current-time function Below you can see the graph shapes of the defibrillation impulse in manual mode depending on the load resistance. Time / ms Time / ms 50 Joule @ 50 Ohm 50 Joule @ 75 Ohm I/A Time / ms 50 Joule @ 25 Ohm 58 Operating Instructions HeartSave 6 / 6S, 21230 / GB / F02 Depiction of the current-time function 50 Joule @ 125 Ohm 50 Joule @ 150 Ohm 50 Joule @ 175 Ohm 100 Joule @ 25 Ohm 100 Joule @ 50 Ohm 100 Joule @ 75 Ohm 100 Joule @ 100 Ohm 100 Joule @ 125 Ohm 100 Joule @ 150 Ohm 100 Joule @ 175 Ohm 200 Joule @ 25 Ohm 200 Joule @ 50 Ohm 200 Joule @ 75 Ohm 200 Joule @ 100 Ohm I/A I/A I/A I/A I/A 50 Joule @ 100 Ohm 59 GB HeartSave 6 / 6S, 21230 / GB / F02 Depiction of the current-time function 200 Joule @ 150 Ohm 200 Joule @ 175 Ohm 300 Joule @ 25 Ohm 300 Joule @ 50 Ohm 300 Joule @ 75 Ohm 300 Joule @ 100 Ohm 300 Joule @ 125 Ohm 300 Joule @ 150 Ohm 300 Joule @ 175 Ohm 360 Joule @ 25 Ohm 360 Joule @ 50 Ohm 360 Joule @ 75 Ohm 360 Joule @ 100 Ohm 360 Joule @ 125 Ohm I/A I/A I/A I/A I/A 200 Joule @ 125 Ohm 60 Operating Instructions HeartSave 6 / 6S, 21230 / GB / F02 Rhythm detection system 360 Joule @ 175 Ohm I/A 360 Joule @ 150 Ohm 16 Rhythm detection system The rhythm detection system on the PRIMEDIC™ HeartSave analyses the patient's ECG and supports it if the unit detects a shockable or non-shockable rhythm. The device's rhythm detection system includes: Ascertaining the electrode contact Automatic evaluation of the ECG Operator control of the output of defibrillation shocks Ascertaining the electrode contact The transthoracic impedance of the patient is measured by the defibrillation electrodes. If the baseline impedance is greater that the maximum critical value, then the device determines whether the electrodes are not in good enough contact with the patient or if they are not connected properly to the device. ECG analysis and dispensation of defibrillation shocks are therefore prevented. The voice output says "Check electrodes" if the contact of the electrodes is insufficient. Automatic evaluation of the ECG The device's rhythm detection system has been designed so that a defibrillation shock is recommended if the system has been connected up to a patient who is unconscious, not breathing and has no pulse and the system ascertains a shockable rhythm. With all other ECG rhythms, including asystolia and normal sinus rhythms, the rhythm detection system in the device does not recommend defibrillation. Operator control of the output of defibrillation shocks The rhythm detection system of the device initiates automatic device charging if it detects a shockable heart rhythm. Optical and acoustic messages are emitted to show you that the device recommends giving a defibrillation shock. If a defibrillation shock is recommended, you decide whether and when the shock is to be given. 61 GB HeartSave 6 / 6S, 21230 / GB / F02 Rhythm detection system The Algorithm: Observes the ECG rhythm across a continuous recording of 10 seconds, of which 7 seconds have been used for an initial diagnosis or to display the message "Shock recommended." Measures the symmetry of the ECG signal by several wave form factors and area abive and below the moving average of the signal. Shockable ryhthms show greater symmetry than non-shockable rhythms. Measures the ratio of the signal energy content in a frequency band typical for shockable rhythms and the total of the signal energy content. For shockable rhythms the signal energy concentrates in a specific frequency band and its fraction with respect to the total signal energy is higher. Derives from these two signal processing steps two parameters and compares them to a threshold. If both parameters drop below their respective threshold for a specific amount of time, the device will rate the heart rhythm shockable. However, if one of the parameters exceeds its higher threshold value, this shocking recommendation is retracted. Filters and measures artefacts and interference. If a specific artefact level is exceeded no reliable signal analysis is possible and the heart rhythm is rated nonshockable. Detects pacemaker pulses and removes them from the ECG signal before rhythm evaluation. Measures the heart rate. If it drops below a threshold, the heart rhythm is rated non-shockable. Cardiac rhythms used to test the rhythm detection system in the device For validation the following databases have been used: AHA Database for Evaluation of Ventricular Arrhythmia Detectors (80 records with 35 min length each) MIT-BIH Arrhythmia Database (48 records with 30 min length each) European ST-T Database (48 records with 120 min length each) These databases contain ECG rhythms with ventricular fibrillation (VF) of varying amplitudes, ventricular tachycardia and sinus rhythms with – amongst others – supreventricular tacjycardias, atrial fibrillation/flutter, sinus rhythm with premature ventricular contractions (PVC), asystole and pacemaker pulses. All records are valid for evaluation of the VT-/VF-rhythm detector with respect to used electrode systems and ECG signal processing characteristics. For validation the ECG was converted to an analog signal and put out to the device under test. The detection result was than read back by the validation system and compared to the reference annotation. As shockable rhythms, in calculation, we look at the characteristic values of the sections in the ECG datasets of the above databases , which are marked with the PysioBank Annotationscode for ventricular flutter ("[" Begin, "]" End; also refer www.physionet.org) using the PhysioBank Annotationscode. These segments also include ventricular tachycardias, but these are not annotated seperately. Hence, they could not be considered in calculation of performance values. For evaluation, the test and reference annotations of segments with a length of 12 seconds were compared to each other. Segments containing a shift between shockable and non-shockable rhythms were not taken into account. Performance results (weighted average): 62 Operating Instructions HeartSave 6 / 6S, 21230 / GB / F02 Rhythm detection system Sensitivity 97,68% (Requirement of IEC 60601-2-4:2003: >90%) Specificity 99,99% (Requirement of IEC 60601-2-4:2003: >95%) False positive rate rate 0,01% Real predictive value 98,59% The databases used have a total length of about 10,000 minutes. The calculation was made in accordance with IEC60601-2-4-2003. Sensitivity = Number of "correct shockable" algorithm decisions Total number of ECGs in which administering an impulse is clinically recommended Specificity = Number of "correct not shockable" algorithm decisions Total number of ECGs where shock administration is not clinically recommended False positive rate = Number of "incorrect shockable" algorithm decisions Total number of ECGs where shock administration is not clinically recommended Positive predictive value = Number of "correct shockable" algorithm decisions Total number of ECGs in which administering an impulse is recommended by the device 63 GB HeartSave 6 / 6S, 21230 / GB / F02 General advice for using pulse oximeters 17 General advice for using pulse oximeters What is pulse oximetry? A pulse oximeter determines the SpO2 value (oxygen saturation) by means of an optical measurement. This measurement uses different wavelengths of light that are transmitted through tissues and vessels. The blood components that are important in an SpO2 measurement are oxygenated (oxygen-saturated) haemoglobin and deoxygenated haemoglobin (without oxygen): those components that are vital for supplying oxygen to the organism. Transmitter and receiver elements in an SpO2 sensor are used to transmit light through body tissue and vessels. The amount of light that reaches the receiver side depends on the level of oxygen saturation in the blood. Very accurate measuring of the SpO2 value is enabled by means of precise modules and calibrated sensors. The sensors are most commonly attached to the following measurement sites Fingertip Toe Ear lobe Heel Why are different sensors used? Different sensors must be used for different patients for measurements to be carried out accurately and reliably. The following factors should be taken into account when selecting the sensors: Patient's weight Patient's activity Duration of measurement Blood circulation in extremities Possible location of measurement Patient's condition Sterile measurement required? Obviously there is no one sensor that can fulfil all of the criteria, some of which are conflicting. The SpO2 sensors focus on particular tasks. As an example here, we will take the DS-100 A sensor or D-YS by NELLCOR®. The DS-100 A is extremely rapid in use and can easily be slipped onto fingers of different thicknesses thanks its ingenious design. The sensor is not suitable for children because of its shape. Nor can it be used for patients who are moving vigorously because the casing design cannot prevent the sensor from slipping off the finger. Since it has no casing, the D-YS sensor can be used for a greater weight range; it offers more flexibility in terms of the attachment site and can be attached with adhesive tape (this reduces the operation speed however). 64 Operating Instructions HeartSave 6 / 6S, 21230 / GB / F02 General advice for using pulse oximeters What factors can influence the SpO2 value? Since measuring the oxygen saturation is an optical procedure, the following variables may affect the result: Direct sunlight Strong ambient light (e. g. OT lights) Infrared emitter UV emitter (bilirubin lamps) Influence of these factors can be minimised by ensuring that the sensor is attached correctly and by covering the sensor with opaque material. Other variables are: Dirt contamination of the measurement site Inadequate cleaning of the sensor Colour of measurement site is distorted or opaque (e.g. nail varnish) Patient moving vigorously Injected contrast agent (e. g. indiocyanin green or methylene blue) High proportion of dysfunctional haemoglobin (e.g. carboxyhaemoglobin) Incorrect attachment site (e. g. site with a venous pulse) Use of the pulse oximeter in the vicinity of strong energy sources such as MRI Sensor attached too tightly Arterial occlusion Congestion caused e. g. by arterial catheter or blood pressure cuff Some of these variables may clearly recognised (e. g. nail varnish) and can be remedied or a reproducible result can be obtained at another measurement site. However, other variables (e. g. contrast agents or problems in the blood serum) cannot easily be identified. Given the large number of influencing variables, the SpO2 measurement must not be used as the sole means of monitoring vital signs. Other parameters must also be monitored (e. g. ECG, blood pressure, breathing). When used correctly and with reference to the sensor-specific warnings and instructions and clinical symptoms, SpO2 measurement can be an important tool in evaluating patients. 65 GB HeartSave 6 / 6S, 21230 / GB / F02 Guidelines and manufacturer's declaration – Electromagnetic emissions 18 Guidelines and manufacturer's declaration – Electromagnetic emissions for PRIMEDICTM HeartSave 6/6S, (referred to below as PRIMEDICTM HeartSave) The PRIMEDICTM HeartSave is designed for use in an environment as described below. The customer or user of the TM PRIMEDIC HeartSave should ensure that it is used in an environment of this kind. Emitted interference measurements Conformance Electromagnetic environment - code of practice HF emissions according to CISPR 11 Group 1 The PRIMEDICTM HeartSave only uses HF energy for its internal function. This means that its HF emission is very low and it is unlikely that electronic devices in the vicinity are disrupted. HF emissions according to CISPR 11 Group 2 The PRIMEDICTM HeartSave must emit electromagnetic energy to carry out its intended function efficiently. Neighbouring electromagnetic devices could be influenced. HF emissions according to CISPR 11 Class B Emission of harmonics according to IEC 61000-3-2 Not applicable for battery Transmission of voltage fluctuations / Flicker according to IEC 61000-3-3 Not applicable for battery 66 The PRIMEDICTM HeartSave is suitable for use in all facilities, including residential areas and those directly connected to a public supply network which also supplies buildings used for residential purposes. Operating Instructions HeartSave 6 / 6S, 21230 / GB / F02 Guidelines and manufacturer's declaration – Electromagnetic emissions The PRIMEDICTM HeartSave is designed for use in an environment as described below. The customer or user of the PRIMEDICTM HeartSave should ensure that it is used in an environment of this kind. Test for interference resistance IEC 60601 impulse test level Conformance level Electromagnetic environment code of practice Discharge of static electricity (ESD) according to IEC 610004-2 ± 6 kV contact discharge ± 8 kV air discharge ± 6 kV Floor should be made of wood or concrete or be tiled with ceramic tiles. If the floor is covered with a synthetic material, the relative air humidity should be at least 30%. Rapid transient electrical disturbances/ bursts according to IEC 610004-5 ± 2 kV for AC power lines ± 1 kV for incoming and outgoing lines Not applicable for battery The quality of the supply voltage should correspond to that of a typical commercial or hospital environment. Surges according to IEC 61000-4-5 ± 1 kV normal mode voltage ± 2 kV common mode voltage Not applicable for battery The quality of the supply voltage should correspond to that of a typical commercial or hospital environment. Voltage dips, short breaks and fluctuations in the supply voltage according to IEC 610004-11 < 5% Ut (> 95% dip in Ut) for ½ period 40% Ut (60% dip in Ut ) for 5 periods 70% Ut (30% dip in Ut ) for 25 periods < 5% Ut (> 95% dip in Ut) for 5s Not applicable for battery The quality of the supply voltage should correspond to that of a typical commercial or hospital environment. If the user of the TM PRIMEDIC HeartSave requires continued functioning even when disruptions in the power supply occur, it is recommended that the TM PRIMEDIC HeartSave is fed from a power supply free of disruptions or a battery. Magnetic field at the supply frequency (5060 Hz) according to IEC 61000-4-8 3 A/m 3 A/m Magnetic fields at the mains frequency should correspond to the typical values found in a commercial or hospital environment. ± 6 kV air Note: Ut is the a.c. supply voltage before applying the test level. 67 GB HeartSave 6 / 6S, 21230 / GB / F02 Guidelines and manufacturer's declaration – Electromagnetic emissions The PRIMEDICTM HeartSave is designed for operation in an environment as described below. The customer or user of the PRIMEDICTM HeartSave should ensure that it is used in an environment of this kind. Test for interference resistance Conducted HF interference according to IEC 61000-4-6 Radiated HF disturbances according to IEC 61000-4-3 IEC 60601 impulse test level Conformance level 3 Veff 150 kHz to 80 MHz outside the ISM bands a 3 Veff 150 kHz to 80 MHz outside the ISM bands a Not applicable for battery 10 V/m 80 MHz to 2 GHz 10 V/m for battery n.a. Electromagnetic environment code of practice Portable and mobile radio transceivers should TM not be used any closer to the PRIMEDIC HeartSave, including its cables, than the recommended protective distance which is calculated according to the equation applicable for the transmission frequency. Recommended protective distance: 3,5 d P V1 12 d P V 2 12 d P for 80 MHz to 800 MHz E1 23 d P for 800 MHz to 2.5 GHz E1 With P as the maximum power rating of the transmitter in Watts (W) in accordance with information provided by the manufacturer of the transmitter and d as the recommended b protective distance in metres (m). The field strength of stationary radio transmitters should be less than the conformance level in accordance with an onsite inspection. Interference is possible in the vicinity of devices which have the following pictogram. Note 1: At 80 MHz and 800 MHz the higher frequency range applies. Note 2: These guidelines may not be applicable in all cases. The spread of electromagnetic factors is affected by absorption and reflection from buildings, objects and people. a The ISM frequency ranges (for industrial, scientific and medical applications) between 150 kHz and 80 MHz are 6.765 MHz to 6.795 MHz; 13.553 MHz to 13.567 MHz; 26.957 MHz to 27.283 MHz and 40.66MHz to 40.70 MHz. b The conformance levels in the ISM frequency bands between 150 kHz and 80 MHz and in the frequency band from 80 MHz to 2.5 GHz are defined to reduce the probability that mobile/portable communication devices can cause interference, if they are unintentionally brought into the vicinity of the patient. For this reason the additional factor of 10/3 is applied when calculating the recommended safety distance in these frequency ranges. c The field strength of stationary transmitters, such as base stations of wireless telephones between 150 kHz and 80 MHz and mobile field radio transmitters, amateur radio stations, AM and FM radio and television transmitters can theoretically not be precisely determined in advance. To determine the electromagnetic environment with regards to the stationary transmitters, a study of the location should be considered. If the field strength measured at the location at which the PRIMEDIC™ HeartSave is being used exceeds the conformance levels for HF listed above, then the PRIMEDIC™ HeartSave should be observed to prove that it is functioning as intended. If unusual performance characteristics are observed, then it may be necessary to take additional measures, TM such as change the orientation or the location where the PRIMEDIC HeartSave is being used. 68 Operating Instructions HeartSave 6 / 6S, 21230 / GB / F02 Guidelines and manufacturer's declaration – Electromagnetic emissions Recommended protective distances between portable and mobile HF telecommunication devices and the PRIMEDICTM HeartSave The PRIMEDICTM HeartSave is designed for use in an electromagnetic environment in which the HF interference is controlled. The TM customer or user of the PRIMEDIC HeartSave can help avoid electromagnetic interference by maintaining the minimum distance between portable and mobile HF telecommunication devices (transmitters) and the PRIMEDICTM HeartSave – independently of the output power of the communication device, as shown below. Power rating of transmitter Protective distance depends on the transmission frequency W m 80 MHz to 800 MHz 800 MHz to 2.5 GHz 12 d P E1 23 d P E1 0.01 0.12 0.23 0.1 0.32 0.73 1 1.2 2.3 10 3.8 7.3 100 12 23 For transmitters with a maximum power rating that is not given in the table above, the distance can be determined by using the equation that belongs to the respective column, whereby P is the maximum power rating of the transmitter in Watts (W) according to the manufacturer of the transmitter. NOTE 1 At 80 MHz and 800 MHz the higher frequency range is applicable. NOTE 2 The ISM frequency ranges (for industrial, scientific and medical applications) between 150 kHz and 80 MHz are 6.765 MHz to 6.795 MHz; 13.553 MHz to 13.567 MHz; 26.957 MHz to 27.283 MHz and 40.66MHz to 40.70 MHz. NOTE 3 The purpose of the concordance levels in the ISM frequency bands between 150 kHz and 80 MHz and 2.5 GHz is to reduce the probability of mobile/portable communication devices causing interruptions if they are unintentionally brought into the vicinity of the patient. For this reason the additional factor of 10/3 is applied when calculating the recommended safety distance in these frequency ranges. NOTE 4 These guidelines may not be applicable in all cases. The spread of electromagnetic factors is affected by absorption and reflections from buildings, objects and people. 69 GB HeartSave 6 / 6S, 21230 / GB / F02 General instructions and rules for using the optional AkuPak 19 General instructions and rules for using the optional AkuPak A nickel-cadmium rechargeable battery (NiCd rechargeable battery) was selected to operate the PRIMEDIC™ HeartSave 6/6S, as this type of rechargeable battery offers some practical advantages over other rechargeable batteries. The NiCd battery has a high power density, i.e. with the same physical size, the PRIMEDIC™ battery can provide much more defibrillation or has longer standby time than, for example, a comparable lead battery. Handling of the NiCd rechargeable battery is virtually 100% problem-free. Thanks to modern, microprocessor-controlled charging connections, as used in the PRIMEDIC™ battery pack, the battery charging times required are very short, and the battery is protected during the charging process. If the NiCd rechargeable battery is only partially discharged and recharged over an extensive period, a "memory" effect typically occurs. In practice, this "memory" effect means that the rechargeable battery behaves as if it were a small rechargeable battery with low capacity, despite its nominally large battery capacity. For example A rechargeable battery has a capacity of 50 defibrillations, for example. The power for 5 defibrillations is used and the battery is then recharged. The "memory" effect may set in if this mode of operation is continued over a long period. As a result, the battery capacity is reduced to 5 or 6 defibrillations, since the rechargeable battery has been "trained" to expect 5 defibrillations. It is extremely difficult to reverse the "memory" effect. The rechargeable battery cannot therefore be used properly once its "residual capacity" falls below a viable value. Avoiding the "Memory" effect To avoid the memory effect, the battery must be fully discharged from time to time so that it is possible to intermittently carry out a complete charge cycle. In practice this can be done in several ways: If the battery has only been slightly discharged, do not recharge it immediately. There is usually still enough energy available that you can continue to work with the remaining energy at a later point in time. The PRIMEDIC™ ClipCharger does not always charge a rechargeable battery immediately. Only once it falls below a certain threshold, is the battery charged. The optimum way to achieve this is with a fully automatic discharger / charger, which performs defined discharging before every charging process. For safety reasons, this charging technique is not used for batteries that are charged in the defibrillator directly. Otherwise the unfortunate case could occur that the defibrillator is needed just at the moment in time at which the battery is fully discharged. The fully automatic discharge / charge device has been realised as a care function in TM the PRIMEDIC Charger Comfort available as an option. This optional accessory (it can also be retrofitted) allows you to charge a second PRIMEDIC™ battery pack and the Care Function prevents the occurrence of the "Memory" effect. 70 Operating Instructions HeartSave 6 / 6S, 21230 / GB / F02 General instructions and rules for using the optional AkuPak Other effects of rechargeable batteries: Batteries have two additional properties in daily practice: Self-discharge Deterioration after prolonged use In practice, self-discharging of a rechargeable battery means that a full rechargeable battery is slowly but steadily losing its charge. After around 4 weeks only around 90% of the capacity is still available. This effect normally only need to be taken into consideration if several batteries have been charged in "reserve". Even with optimum maintenance, a rechargeable battery is subject to deterioration after about 2 – 3 years (depending on frequency of use). After roughly 500 – 1,000 charging cycles (depending on the type), a rechargeable battery will no longer be capable of giving up the electrical energy absorbed to chemical storage. The battery is thus rendered useless and must be replaced with a new one. 71 GB HeartSave 6 / 6S, 21230 / GB / F02 Safety checks 20 Safety checks (it is possible that other national regulations may be applicable) In accordance with the German Medical Products User Regulations (MPBetreibV) § 6 (safety checks) the operator in the event of commercial and economic use undertakes to carry out regular checks or have them carried out. METRAX recommends carrying out safety checks in accordance with the MPBetreibV §6 every 24 months. The safety checks may only be carried out by or be assigned to the persons described in the MPBetreibV §6 (4). The safety checks carried out are to be documented in accordance with MPBetreibV §7. In accordance with the German Medical Products User Regulations (MPBetreibV) § 6 (Safety checks) the operator is obliged to have regular checks carried out. In accordance with the German Medical Products User Regulations (MPBetreibV) § 6, METRAX stipulate these checks be carried out in a 24-month cycle. The safety checks may only be assigned to people who, because of their training, their knowledge and their experience gained through practical activity, can carry the checks out properly and do not need instruction to do so. If during the safety check, faulty are found which could be hazardous to patients, employees or third parties, then the operator must immediately inform the responsible authorities in accordance with German Medical Products User Regulations (MPBetreibV) § 3. In the medical products log to be kept in accordance with the German Medical Products User Regulations (MPBetreibV) § 7, the following data is to entered: Time of carrying out the work Name of person or company carrying out the work and Measures taken. The responsibility of METRAX only covers the information provided in the operating instructions. This applies in particular for readjustments, repairs and changes to the device. 72 Operating Instructions HeartSave 6 / 6S, 21230 / GB / F02 Using the equipment on ships 21 Using the equipment on ships 21.1 Use of PRIMEDIC™ HeartSave units together with a PRIMEDIC™ battery on ships in the merchant navy: The use of the following PRIMEDIC™ HeartSave (M250)-units: PRIMEDIC™ HeartSave PAD / AED / AED-M / HS6 / HS6-S with the energy supply module PRIMEDIC™ Battery 15VDC 2.8Ah LiMnO4 fulfils the EMC requirements of "Zone for the bridge and the open deck" asper the "Guidelines for the Performance of Type Approvals" or "Test Requirements for Electrical / Electronic Equipment and Systems" of the "Rules for Classification and Construction", Book VI "Additional Rules and Guidelines" of "Germanischer Lloyd," 2003. 21.2 Use of PRIMEDIC™ HeartSave units together with a PRIMEDIC™ AkuPak on ships in the merchant navy: PRIMEDIC™ HeartSave units with a PRIMEDIC™ battery, have been EMC checked for compliance with “Test Requirements for Electrical / Electronic Equipment and Systems" of "Germanischer Lloyd," 2003. Because the "PRIMEDIC™ AkuPak 12VDC 1.2Ah NiCd", whilst supplying the PRIMEDIC™ HeartSave (M250) units behave as the "PRIMEDIC™ battery", we can transpose the experience gained from all EMC test results to the combinations of the PRIMEDIC™ AkuPak with all PRIMEDIC™ HeartSave (M250) units . These combinations fulfil, during supply mode, the requirements of "Zone for the bridge and the open deck". Recharging the PRIMEDIC™ AkuPak requires a PRIMEDIC™ ClipCharger as the chargerunit. Recharging must be carried out in a dry room which is isolated by metallic screening from "Zone for the bridge and the open deck". The equipment combination always fulfils, during charging, or in parallel charging mode, the EMC requirements of the "General Power Supply Zone". 73 GB HeartSave 6 / 6S, 21230 / GB / F02 Using the equipment on ships Contact details METRAX GmbH Rheinwaldstr. 22 D-78628 Rottweil Tel.: 0741/257-0 [email protected] www.primedic.com 74 Operating Instructions HeartSave 6 / 6S, 21230 / GB / F02 About Us. METRAX GmbH is specialised in developing state-of-the-art devices for emergency medicine. Established in 1973 in Rottweil, today Metrax is considered to be an outstanding example of the strengths in German development technology: Innovative vision, top quality and complete dedication in research and development have been the company's distinguishing features for the last 30 years. The result of this is high precision and extremely reliable high-tech devices which are Your dealers so user friendly that they set new standards. With the brand PRIMEDIC™, Metrax offers a reliable program for emergency medicine: Professional defibrillators and mobile ultrasound scanners. Emergency rescue services around the world are familiar with PRIMEDICTM as a guarantor for the highest quality and innovative medical technology. Manufacturer / company location: METRAX GmbH Rheinwaldstr. 22 D-78628 Rottweil Germany Tel.: +49 741 257-0 Fax: +49 741 257-235 www.primedic.com [email protected] Representatives: METRAX GmbH Shanghai Rep. Office Unit B, 11/F First Trade Tower No. 985 Dongfang Road, Pudong New Area Shanghai 200122 P. R. China Tel.: +86 21 632846-66 Fax: +86 21 633656-90 www.primedic.cn [email protected] METRAX GmbH Moscow Rep. Office Ul. Vavilowa 5, corpus 3 119334 Moscow Russia Tel.: +7 95 23170-61 Fax: +7 95 23170-62 www.primedic.ru [email protected]