Transcript
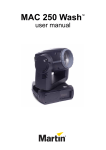
Index of Contents PS-150 Touch LCD Monitor 1. Control Panel ............................................................................. 2 2. Input/Output Interface ............................................................... 3 3. OSD Function............................................................................. 3 3.1 Input Interface Setting ......................................................... 3 3.2 Adjustment of Brightness / Contrast / Back Level ................ 3 3.3 Adjustment of Color ............................................................. 3 3.4 Adjustment of Image............................................................ 4 3.5 Tools ................................................................................... 4 Attention 1. This manual contains important information. Please read in advance carefully before use of the products. 2. This manual shall apply only to the product(s) coming along with it inside. 1. Control Panel Push Button User Manual 1 MENU ▲▼ Change and Selection for Detail of Each Setting 2 ¾ ¾ USB I/F FOR TOUCH OSD Menu & Confirmation Rev. v1.00 Date: 2007/12/12 2. Input/Output Interface RS232 I/F FOR TOUCH Description of Function Power On/Off DVI INPUT VGA INPUT 12V POWER INPUT ¾ ¾ Depending on interface of touch ¾ Rev. v1.00 Date: 2007/12/12 CMY : Press “+” & ”-” button to adjust RGB color and press “▲” button to select R,G,B. If you want to leave, press “▲” button to go back to prior menu. Skin Tone : Press “+” & ”-” button to adjust. When finish, press “▲” button to go back to prior menu. Hue : Press “+” & ”-” button to adjust hue of R,G,B. When finish, press “▲” button to go back to prior menu. Saturation : Press “+” & ”-” button to adjust saturation of R,G,B. Press “▲” button to go to prior menu. Exit 3. OSD Function 3.4 Adjustment of Image (1) Press “▲” button to start OSD menu shown above and press “+” button to go to each function described in following paragraphs. (2) After you select the function, press “▲” button to enter submenu and press “+” & ”-” button to select function you would like to adjust. Then, press “▲” button to enter to adjust details. 3.1 Input Interface Setting ¾ ¾ ¾ ¾ ¾ ¾ ¾ Analog Input Digital Input (Reserved) Exit ¾ 3.2 Adjustment of Brightness / Contrast / Back Level ¾ ¾ ¾ ¾ ¾ 3.5 Tools Brightness : Press “+” & ”-” button to adjust. Contrast : Press “+” & ”-” button to adjust. Black Level : Press “+” & ”-” button to adjust. Exit ¾ 3.3 Adjustment of Color ¾ ¾ ¾ Auto Color Setup : Press “▲” button to do auto color setup for optimal setting of color. sRGB : Press “▲” button to adjust standard color. Color Temperature : Press “+” & ”-” button to select color temperature or adjust R.G.B. color depth. 3 Auto-Configure : Please press “▲” button to automatically configure an optimal display setting. Image Width : Press “+” & ”-” button to adjust width of display. Phase : Press “+” & ”-” button to adjust the signal phase in the analog to digital converter. Horizontal Position : Press “+” & ”-” button to adjust horizontal position of display. Vertical Position : Press “+” & ”-” button to adjust vertical position of display. Exit Rev. v1.00 Date: 2007/12/12 ¾ ¾A ¾ OSD : Press “+” & ”-” button to select a function you would like to adjust and press “▲” button to enter. OSD Timeout (Time of automatic close of OSD menu) OSD Horizontal (Horizontal position of OSD menu) OSD Vertical (Vertical position of OSD menu) OSD Size (Size of OSD menu) Factory Reset : When selection, it will recover to default. Sharpness : Press “▲” button to enter and press “+” & ”-” A button to adjust sharpness of character. Exit 4 Rev. v1.00 Date: 2007/12/12