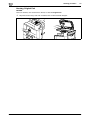
1
User’s Guide
User’s Guide
Copy Operations
Konica Minolta
Business Solutions Europe GmbH
Europaallee 17
30855 Langenhagen • Germany
Tel.: +49 (0) 511 74 04-0
Fax: +49 (0) 511 74 10 50
www.konicaminolta.eu
© 2009 Konica Minolta
Business Solutions Europe GmbH
All rights reserved. Printed in Germany.
*XXXXXXXX00*
*XXXXXXXX00*
.
Table of contents
1
2
3
4
Introduction
1.1
1.1.1
1.1.2
1.2
1.2.1
Welcome .......................................................................................................................................... 1-3
User's guides ..................................................................................................................................... 1-3
User's Guide ...................................................................................................................................... 1-3
Conventions used in this manual .................................................................................................. 1-4
Symbols used in this manual ............................................................................................................. 1-4
To use this machine safely................................................................................................................. 1-4
Procedural instruction........................................................................................................................ 1-4
Key symbols....................................................................................................................................... 1-5
1.2.2
Original and paper indications ........................................................................................................... 1-5
Original and paper sizes .................................................................................................................... 1-5
Original and paper indications ........................................................................................................... 1-5
Part names and their functions
2.1
2.2
2.2.1
2.2.2
2.2.3
2.2.4
Option configuration....................................................................................................................... 2-3
Main Body ........................................................................................................................................ 2-4
Outside of the main body (front) ........................................................................................................ 2-4
Outside of the main body (rear) ......................................................................................................... 2-5
Inside of the main body ..................................................................................................................... 2-6
Control Panel ..................................................................................................................................... 2-7
Adjusting the angle of the Control Panel ........................................................................................... 2-7
2.2.5
2.3
Touch Panel ....................................................................................................................................... 2-8
Option............................................................................................................................................. 2-10
Finisher FS-529................................................................................................................................ 2-10
Using this machine
3.1
3.2
3.2.1
Turning on or off the machine ....................................................................................................... 3-3
Basic copy operations .................................................................................................................... 3-4
Placing originals ................................................................................................................................. 3-4
Loading the original into the ADF ...................................................................................................... 3-4
Placing the original on the Original Glass .......................................................................................... 3-5
3.2.2
3.2.3
Basic copy operations ....................................................................................................................... 3-6
Copy operations using multiple functions ......................................................................................... 3-6
Functions that cannot be combined .................................................................................................. 3-8
3.3
Help .................................................................................................................................................. 3-9
Control Panel Keys
Control Panel and functions .............................................................................................................. 4-3
4.1
About Start, Stop, Reset, C (Clear), and Power Save .................................................................. 4-5
Start ................................................................................................................................................... 4-5
Stop.................................................................................................................................................... 4-5
Reset .................................................................................................................................................. 4-5
C (Clear) ............................................................................................................................................. 4-5
Power Save ........................................................................................................................................ 4-6
4.2
About Copy, Folder, E-mail, and Fax............................................................................................. 4-7
Copy................................................................................................................................................... 4-7
Folder ................................................................................................................................................. 4-7
E-mail ................................................................................................................................................. 4-7
Fax ..................................................................................................................................................... 4-8
bizhub 42/36
Contents-1
5
6
4.3
Utility/Counter ................................................................................................................................. 4-9
Accessibility ..................................................................................................................................... 4-10
4.4
4.5
Mode Memory ............................................................................................................................... 4-12
Access............................................................................................................................................ 4-13
Controlling access to the machine by user/account (user authentication/account track)............... 4-13
4.6
Interrupt ......................................................................................................................................... 4-15
Copy Function
5.1
[Original Size] .................................................................................................................................. 5-4
Copying mixed originals .................................................................................................................... 5-4
5.2
[Paper].............................................................................................................................................. 5-5
Configuring a custom size ................................................................................................................. 5-6
5.3
5.4
5.5
5.6
5.7
5.8
5.9
5.10
5.11
5.12
5.13
5.14
[Zoom].............................................................................................................................................. 5-7
[Duplex/Combine] ........................................................................................................................... 5-8
[Density] ......................................................................................................................................... 5-10
[Original Type] ............................................................................................................................... 5-11
[Finishing] ...................................................................................................................................... 5-12
[Proof Copy] .................................................................................................................................. 5-14
[Separate Scan]............................................................................................................................. 5-15
[ID Copy] ........................................................................................................................................ 5-16
[Page Margin] ................................................................................................................................ 5-18
[Image Quality] .............................................................................................................................. 5-19
[Mode Check] ................................................................................................................................ 5-20
[Job] ............................................................................................................................................... 5-21
[User Settings]
6.1
6.2
6.3
6.4
6.5
7
[Machine Settings] ..........................................................................................................................
[Copy Settings]................................................................................................................................
[Scan Settings] ................................................................................................................................
[Print Settings].................................................................................................................................
[Fax Settings]...................................................................................................................................
6-4
6-6
6-7
6-7
6-7
Maintenance
7.1
7.1.1
Paper ................................................................................................................................................ 7-3
Checking the paper............................................................................................................................ 7-3
Replenishment message.................................................................................................................... 7-3
Precautions regarding the use of paper ............................................................................................ 7-3
Paper storage..................................................................................................................................... 7-3
7.1.2
Loading paper.................................................................................................................................... 7-4
Loading paper in Tray 2, Tray 3, Tray 4, or Tray 5............................................................................. 7-4
Loading paper into the Tray 1 (Bypass Tray) ..................................................................................... 7-5
7.2
Consumables................................................................................................................................... 7-7
Checking consumables...................................................................................................................... 7-7
7.2.1
7.2.2
7.3
Replacement message ...................................................................................................................... 7-7
Checking consumables status........................................................................................................... 7-9
Number of Sheets Printed............................................................................................................ 7-10
Viewing counters.............................................................................................................................. 7-10
Checking the total number of pages printed ................................................................................... 7-10
7.4
Cleaning procedure ...................................................................................................................... 7-11
Slit Scan Glass................................................................................................................................. 7-11
Original Glass, Control Panel, Paper Take-Up Roller ...................................................................... 7-11
Housing, Original Pad ...................................................................................................................... 7-12
Contents-2
bizhub 42/36
8
9
Troubleshooting
8.1
When a problem is detected (call a service representative) ....................................................... 8-3
Problems that cannot be corrected by the user ................................................................................ 8-3
8.2
Troubleshooting table..................................................................................................................... 8-4
Simple troubleshooting ...................................................................................................................... 8-4
Main messages and their remedies ................................................................................................... 8-7
Icons that appear in the touch-panel screen ..................................................................................... 8-9
Authentication unit
9.1
10
11
Specifications
10.1
Paper .............................................................................................................................................. 10-3
Paper types and paper capacities ................................................................................................... 10-3
10.2
Machine specifications................................................................................................................. 10-4
bizhub 42/36 .................................................................................................................................... 10-4
Auto Duplex Unit.............................................................................................................................. 10-5
Reverse Automatic Document Feeder ............................................................................................. 10-6
10.3
Options........................................................................................................................................... 10-7
Paper Feed Cabinet PC-211............................................................................................................ 10-7
Finisher FS-529................................................................................................................................ 10-7
Authentication Unit AU-201 ............................................................................................................. 10-9
Appendix
11.1
12
Using authentication unit ............................................................................................................... 9-3
Logging in to this machine................................................................................................................. 9-3
Authentication with IC Card ............................................................................................................... 9-4
Authentication with IC Card + Password........................................................................................... 9-5
Glossary ......................................................................................................................................... 11-3
Index
12.1
12.2
bizhub 42/36
Index by item ................................................................................................................................. 12-3
Index by button.............................................................................................................................. 12-5
Contents-3
Contents-4
bizhub 42/36
1
Introduction
1.1
Welcome
1
Introduction
1.1
Welcome
1
Thank you for purchasing this machine.
This User's Guide describes the functions, operating instructions, precautions for correct operation, and simple troubleshooting guidelines of this machine. In order to obtain maximum performance from this machine
and use it effectively, please read this User's Guide as necessary.
1.1.1
1.1.2
User's guides
Printed manual
Overview
[Quick Guide Copy/Print/Fax/Scan Operations]
This manual describes operating procedures and the
functions that are most frequently used in order to enable you to begin using this machine immediately.
This manual also contains notes and precautions that
should be followed to ensure safe usage of this machine.
Please be sure to read this manual before using this
machine.
User's guide DVD manuals
Overview
[User's Guide Copy Operations]
This manual describes details on copy mode operations and the settings of this machine.
• Specifications of originals and copy paper
• Copy function
• Maintaining this machine
• Troubleshooting
[User's Guide Print Operations]
This manual describes details on printer functions.
• Printer settings and operations
• Printer troubleshooting
[User's Guide Scan Operations]
This manual describes details on scan functions.
• Scan settings and operations
• Scan troubleshooting
[User's Guide Fax Operations]
This manual describes details on fax functions.
• Fax settings and operations
• Fax troubleshooting
[User's Guide Administrator Operations]
This manual describes the functions or settings that
the administrator of the machine uses.
• Settings using the Control Panel
• Settings using PageScope Web Connection
User's Guide
This User's Guide is intended for users ranging from those using this machine for the first time to administrators.
It describes basic operations, functions that enable more convenient operations, maintenance procedures,
simple troubleshooting operations, and various setting methods of this machine.
Note that basic technical knowledge about the product is required to enable users to perform maintenance
work or troubleshooting operations. Limit your maintenance and troubleshooting operations to the areas explained in this manual.
Should you experience any problems, please contact your service representative.
bizhub 42/36
1-3
Conventions used in this manual
1
1.2
Conventions used in this manual
1.2.1
Symbols used in this manual
1.2
Symbols are used in this manual to express various types of information.
The following describes each symbol related to correct and safe usage of this machine.
To use this machine safely
7 WARNING
-
This symbol indicates that a failure to heed the instructions may lead to death or serious injury.
7 CAUTION
-
This symbol indicates that negligence of the instructions may lead to mishandling that may cause injury
or property damage.
NOTICE
This symbol indicates a risk that may result in damage to this machine or documents.
Follow the instructions to avoid property damage.
Procedural instruction
0
This check mark indicates an option that is required in order to use conditions or functions that are prerequisite for a procedure.
1
This format number "1" represents the first step.
2
This format number represents the order of serial steps.
% This symbol indicates a supplementary explanation of a procedural instruction.
%
The operation procedures are described
using illustrations.
This symbol indicates transition of the Control Panel to access a desired menu item.
This symbol indicates a desired page.
d Reference
This symbol indicates a reference.
View the reference as required.
1-4
bizhub 42/36
1.2
Conventions used in this manual
1
Key symbols
[]
Key names on the Touch Panel or computer screen, or a name of user's guide are indicated by these brackets.
Bold text
This presents a key name on the Control Panel, part name, product name or option name.
1.2.2
Original and paper indications
Original and paper sizes
The following explains the indication for originals and paper described
in this manual.
When indicating the original or paper size, the Y side represents the
width and the X side the length.
Original and paper indications
w indicates the paper size with the length (X) being longer than the
width (Y).
v indicates the paper size with the length (X) being shorter than the
width (Y).
bizhub 42/36
1-5
1
1-6
Conventions used in this manual
1.2
bizhub 42/36
2
Part names and their
functions
2.1
Option configuration
2
2
Part names and their functions
2.1
Option configuration
2
1
7
3
6
5
4
No.
Name
Description
1
Main unit
The original is scanned by the scanner section, and the
scanned image is printed by the printer section.
The main unit is hereinafter referred to as "the machine", "this machine", "main unit", or bizhub 42/36
through the manual.
2
Authentication Unit AU-201
Performs user authentication by scanning information
recorded on the IC card.
The Working Table WT-510 is required to install the
Authentication Unit AU-201.
This unit is hereinafter referred to as the Authentication Unit through the manual.
3
Working Table WT-510
Provides an area to temporarily place an original or
other materials. This is also used when the authentication unit is installed.
4
Desk DK-511
By using the Desk, you can install this machine on the
floor.
This unit is hereinafter referred to as the Desk through
the manual.
5
Paper Feed Cabinet PC-211
Allows you to load up to 500 sheets respectively in the
top and bottom trays.
This unit is hereinafter referred to as the Double Paper
Feed Cabinet through the manual.
6
Mount Kit MK-601
Required when installing the Finisher FS-529.
7
Finisher FS-529
Install this unit onto the output tray of the main unit to
sort, group or staple printed paper before feeding out.
The following options are built inside this machine and are not shown in the figure above.
8
bizhub 42/36
Fax Kit FK-509
Allows this machine to function as a fax machine.
• This option may not be available depending on the
sales area.
2-3
Main Body
2
2.2
Main Body
2.2.1
Outside of the main body (front)
2.2
The illustration above shows the main unit with the optional Paper Feed Cabinet PC-211.
3
4
2
5
6
7
8
1
9
20
10
11
19
12
18
13
17
16
14
15
2-4
No.
Name
1
Control Panel
2
Reverse Automatic Document Feeder (ADF)
3
ADF Feed Cover
4
Lateral Guide
5
Original Tray
6
Original Output Tray
7
Document Stopper
8
USB Port (Type A) USB2.0
9
Auto Duplex Unit Lock Release Lever
10
Top Right Door
11
Auto Duplex Unit
12
Top Right Door Release Lever
13
Tray 1 (Bypass Tray)
14
Paper-Empty Indicator
15
Tray 5
16
Tray 4
17
Tray 3
18
Tray 2
19
Front Door
20
Output Tray
bizhub 42/36
2.2
2.2.2
Main Body
2
Outside of the main body (rear)
The illustration above shows the main unit with the optional Paper Feed Cabinet PC-211 and Fax Kit
FK-509.
1
2
5
6
3
4
7
bizhub 42/36
No.
Name
1
USB Port (Type B) USB2.0
2
Network Connector (10Base-T/100Base-TX/1000Base-T)
3
Telephone Jack (LINE)
4
Jack for connecting a telephone (TEL)
5
Power Switch
6
Manual Holder
7
Power Cord
2-5
Main Body
2
2.2.3
2.2
Inside of the main body
The illustration above shows the main unit with the optional Paper Feed Cabinet PC-211.
13
12
11
1
10
2
3
4
9
5
6
7
8
2-6
No.
Name
1
Original Glass
2
Scanner Unit
3
Fusing Unit Top Cover
4
Fusing Unit Cover Lever
5
Fusing Unit
6
Drum Unit
7
Toner Bottle
8
Lock Release Lever
9
Total Counter
10
Scanner Lock Lever
11
Slit Scan Glass
12
Original Scale
13
Original Pad
bizhub 42/36
2.2
2.2.4
Main Body
2
Control Panel
1
2
5
No.
Name
1
Touch Panel
2
Function key
3
Keypad
4
Error Indicator
5
Data Indicator
4
3
Adjusting the angle of the Control Panel
The Control Panel of this machine can be moved up/down to the desired angle. Set it to your desired position.
NOTICE
When tilting the Control Panel, do not grab the Touch Panel.
bizhub 42/36
2-7
Main Body
2
%
2.2.5
2.2
Grab the front center of the Control Panel, and then move it
up/down.
Touch Panel
When the machine has been turned on and is ready to begin the copy operation, the home screen appears.
To activate a function or to select a setting, lightly press the desired button appearing in the screen.
NOTICE
Do not apply excessive pressure on the Touch Panel. Such impact may leave a flaw on the panel, inviting
damage to the Touch Panel. When operating in the Touch Panel, never press down on the Touch Panel
with force or with a pointed object such as a mechanical pencil.
Home screen
2
3
4
5
6
1
11
10
2-8
9
8
7
No.
Name
1
Message display area
2
Fax (Displayed if the Fax Kit FK-509 is installed and the fax function is available)
3
Scan to E-mail
4
Scan to Folder
5
Help
6
Copy
7
USB/HDD
8
Icon display area
9
Status
10
Job
11
Toner supply indicators
bizhub 42/36
2.2
Main Body
2
Copy screen
1
2
4
3
bizhub 42/36
No.
Name
1
Number of copies
2
Copy mode operations
3
Mode Check
4
Home
2-9
Option
2
2.3
2.3
Option
Finisher FS-529
5
4
3
2-10
No.
Name
1
Staple Holder
2
Jam Removal Dial
3
Lock Release Lever
4
Output Tray
5
Tray Extension
2
1
bizhub 42/36
3
Using this machine
3.1
Turning on or off the machine
3
Using this machine
3.1
Turning on or off the machine
3
The Power Switch turns on or off all functions of the machine. Normally, keep the Power Switch on.
0
0
0
0
0
0
0
0
0
1
When the Power Switch is turned on, the indicator on the Start key lights up in orange, and a screen
appears to indicate that the machine is starting up. After a few seconds, the message [Warming up]
appears in the Touch Panel, and the indicator on the Start key lights up in blue, indicating that a job
can now be queued.
A job can also be queued while the machine is warming up after the Power Switch is turned on. After
the machine has finished warming up, the scanned image will be printed.
The default settings are the settings that are selected immediately after the machine is turned on and
before any settings are configured from the Control Panel or Touch Panel, and those that are selected
when the Reset key is pressed to cancel all settings configured from the Control Panel or Touch Panel. The default settings can be changed.
Do not turn off the Power Switch while a queued job or stored data is waiting to be printed. The jobs
yet to be printed will be deleted.
Settings that have not been registered and jobs in the printing queue are cleared when the Power
Switch is turned off.
To turn the Power Switch on immediately after turning it off, wait for 10 or more seconds before turning
it on again. Not doing so may result in an operation failure.
Do not turn off the Power Switch while images are being scanned, transmitted, or received. Data being
scanned or communicated will be deleted.
Do not turn off the Power Switch during the copying or printing process. If you turn it off, a paper jam
may occur.
If the Auto Power OFF function is enabled by the administrator of the machine, the machine's Power
Switch is automatically turned off at the time specified by the administrator. To use the machine again,
turn the Power Switch on. For details, contact the administrator of the machine.
To turn the power on, press n on the Power Switch.
Check that the Touch Panel is turned on.
2
To turn the power off, press o on the Power Switch.
d Reference
To change the default settings for Copy:
Press the Utility/Counter key ö [User Settings] ö [Copy Settings] ö [Default Copy Settings].
bizhub 42/36
3-3
Basic copy operations
3
3.2
3.2
Basic copy operations
The following procedures describe how to set the original and the basic copy operations.
3.2.1
Placing originals
Place the original in the ADF or on the Original Glass. Select the optimal position for setting the original according to the type of the original to be copied.
Using the ADF, a multi-page original can be fed and scanned automatically, one page at a time from
the top. The ADF can also be used to scan 2-sided originals.
When using the Original Glass, place the original directly on the Original Glass for scanning. This
method is suited for originals in the form of a book and the like that cannot be fed through the ADF.
Load the original, and configure settings for relevant functions as needed.
Loading the original into the ADF
The following types of originals should not be loaded into the ADF. If loaded, paper may be jammed or the
original may be damaged.
Wrinkled, folded, curled, or torn originals
Highly translucent or transparent originals, such as OHP transparencies or diazo photosensitive paper
Coated originals such as carbon-backed paper
Originals of which basis weight is less than 13-5/16 lb (50 g/m2) or greater than 34-1/16 lb (128 g/m2)
Originals that are bound, for example, with staples or paper clips
Originals that are bound in a book or booklet form
Originals with pages bound together with glue
Originals with pages that have had cutouts removed or are cutouts
Label sheets
Offset printing masters
Originals with binder holes
Originals that have just been printed with this machine
Photographic paper
Glossy originals like gloss coated paper
1
Slide the Lateral Guide to fit the size of the original.
2
Load the original face up in the Original Tray and arrange according to the scanning order. Load the original by placing it so that its
head (top side) faces the left.
% Do not load more than 50 sheets and up to the point where the
top of the stack is higher than the , mark at one time. Such an
action may cause an original paper jam or damage to the original. It may also invite machine failure. However, an original
that exceeds 50 pages can be scanned in separate batches.
% If the original is not loaded correctly, it may not be fed in
straight, causing it to jam or become damaged.
% If the original is loaded in any orientation other than with the
head (top) of the original toward the left, be sure to select the
original orientation.
% The original must be set in w direction towards the direction for loading the paper.
3-4
bizhub 42/36
3.2
Basic copy operations
3
3
Slide the adjustable Lateral Guide against the edges of the original.
Placing the original on the Original Glass
0
0
Do not place an original weighing more than 6-5/8 lb (3 kg) on the Original Glass. Furthermore, do not
use a strong force to press down on a book or any other form of original that must be spread on the
original glass. Otherwise, the machine may be damaged or a failure may occur.
For thick books or large objects, perform scanning without closing the ADF. When a original is being
scanned with the ADF open, do not look directly at the Original Glass surface where light may be emitted through. Note, however, that the light coming through the original glass is not a laser beam, and will
not expose the user to the related hazards.
1
Lift open the ADF.
2
Place the original face down on the Original Glass.
% Load the original by placing it so that its head (top side) faces
the left.
3
Align the original with the
Original Scale.
mark in the back-left corner of the
% For transparent or translucent originals, place a blank sheet of
paper of the same size as the original over the original.
% For bound originals spread over two facing pages, such as a
book or a magazine, position the top of the original toward the back of this machine and align the
original with the
mark in the back-left corner of the Original Scale.
% If the original is loaded in any orientation other than with the head (top) of the original toward the
left, be sure to select the original orientation.
4
bizhub 42/36
Close the ADF.
3-5
Basic copy operations
3
3.2.2
3.2
Basic copy operations
The following procedure describes the basic copy operations. (Copy with 1>1 and Full Size)
0
This machine cannot automatically detect the size of an original document that will be scanned. Before
scanning the document, specify its size. If the size of the original document is not correctly specified,
some parts of the image may be lost. For details on specifying the size of an original document, refer
to page 5-4.
1
Arrange originals in the order you want them to be scanned and
load them face up in the ADF.
% The original should be placed face down on the Original
Glass.
2
Press [Copy] or the Copy key.
% When the Start key is pressed in the home screen, one sheet can be copied by setting the "Copy
Initial Setting".
3
Using the Keypad, enter a value for the number of copies you desire.
% If you have entered incorrect number of copies, press the C (clear) key on the keypad, and then reenter the correct number.
4
Press the Start key.
The original is scanned and copied.
% To interrupt the copy operation being performed, press the Stop key.
3.2.3
Copy operations using multiple functions
This section describes copy operations using combination of functions.
1
Load the original.
2
Press [Copy] or the Copy key.
3
Press [Original Size].
% For details on [Original Size], refer to page 5-4.
4
Configure each function as necessary.
% For details on [Paper], refer to page 5-5.
3-6
bizhub 42/36
3.2
Basic copy operations
3
% For details on [Zoom], refer to page 5-7.
% For details on [Duplex/Combine], refer to page 5-8.
5
Press [¯] to display [2/3], and configure each function.
%
%
%
%
6
Press [¯] to display [3/3], and configure each function.
%
%
%
%
bizhub 42/36
For details on [Density], refer to page 5-10.
For details on [Original Type], refer to page 5-11.
For details on [Finishing], refer to page 5-12.
For details on [Proof Copy], refer to page 5-14.
For details on [Separate Scan], refer to page 5-15.
For details on [ID Copy], refer to page 5-16.
For details on [Paper Margin], refer to page 5-18.
For details on [Image Quality], refer to page 5-19.
3-7
Basic copy operations
3
7
3.2
Press [Mode Check].
% For details on [Mode Check], refer to page 5-20.
8
Using the Keypad, enter a value for the number of copies you desire.
% If you have entered incorrect number of copies, press the C (clear) key on the keypad, and then reenter the correct number.
9
Press the Start key.
The original is scanned and copied.
% To interrupt the copy operation being performed, press the Stop key.
% A [Ready to Copy] message that appears during the current printing job indicates that the next original can be scanned.
Functions that cannot be combined
Some settings cannot be combined with each other. If they are combined improperly, the settings will be given priorities in either of the two ways described below.
The setting configured last is given priority. (The setting specified first is canceled.)
The setting configured first is given priority. (A warning message appears.)
3-8
bizhub 42/36
3.3
3.3
Help
3
Help
Press this key to view and check descriptions of various functions and operating procedures. When the [?] is
pressed, the help screen for the displayed screen appears. For details, refer to the [Quick Guide
Copy/Print/Fax/Scan Operations].
%
bizhub 42/36
Press [?].
3-9
3
Help
3.3
3-10
bizhub 42/36
4
Control Panel Keys
4
4
Control Panel Keys
This section describes the functions of the keys on the Control Panel.
Control Panel and functions
Press the keys on the Control Panel to use the Copy, Folder, E-mail, Fax, or other functions.
1
2
3
4
5
6
7
8
9
10
17 16 15 14
bizhub 42/36
13 12
11
No.
Name
Description
Page
1
Touch Panel
Various screens and messages are displayed. You
can configure various settings by directly pressing
the Touch Panel.
-
2
Power Save
Press to enter Sleep Mode. While the machine is in
Sleep Mode, the indicator on the Power Save key
lights up in green and the Touch Panel goes off. To
cancel Sleep Mode, press the Power Save key
again.
p. 4-6
3
Fax
Press this key to enter Fax mode. While the machine
is in Fax mode, the indicator on the Fax key lights up
in green.
Allows you to use this function if the Fax Kit FK-509
is installed and the fax function is available.
For details on the fax function, refer to the [User's
Guide Fax Operations].
p. 4-8
4
E-mail
Press this key to enter Scan to E-mail mode. While
the machine is in Scan to E-mail mode, the indicator
on the E-mail key lights up in green.
For details on the Scan to E-mail function, refer to
the [User's Guide Scan Operations].
p. 4-7
5
Folder
Press this key to enter Scan to Folder mode. While
the machine is in Scan to Folder mode, the indicator
on the Folder key lights up in green.
For details on the Scan to Folder function, refer to
the [User's Guide Scan Operations].
p. 4-7
6
Copy
Press this key to enter Copy mode. While the machine is in Copy mode, the indicator on the Copy key
lights up in green.
p. 4-7
4-3
4
4-4
No.
Name
Description
Page
7
Reset
Press this key to reset settings (except programmed
settings) entered using the Control Panel and
Touch Panel.
p. 4-5
8
Interrupt
Press this key to enter Interrupt mode. While the machine is in Interrupt mode, the indicator on the Interrupt key lights up in green. To cancel Interrupt
mode, press the Interrupt key again.
p. 4-15
9
Stop
Pressing this key while copying, scanning or printing
temporarily stops the operation.
p. 4-5
10
Start
Press to start the copy, scan or fax operation.
p. 4-5
11
Keypad
Allows you to specify the number of copies. Allows
you to enter the magnification. Allows you to enter
various settings.
-
12
C (Clear)
Clears a value (such as the number of copies, a
zoom ratio and size) entered using the Keypad.
p. 4-5
13
Error Indicator
Flashes in orange if an error occurred.
Lights up in orange when the service representative
is being called.
-
14
Data Indicator
Flashes in blue while a print job is being received.
Lights up in blue when a print job is queued to be
printed or while it is being printed.
-
15
Utility/Counter
Press to display the [Utility Settings] screen. From
the [Utility Settings] screen, settings can be specified for the parameters in the [Accessibility], [Meter
Count], [Address Registration], [User Settings], and
[Admin Settings] screens.
p. 4-9
16
Mode Memory
Allows you to register (store) the desired
copy/fax/scan settings as a program or to recall a
registered program.
p. 4-12
17
Access
If user authentication or account track settings have
been applied, press the Access key after entering
the user name and password (for user authentication) or the account name and password (for account track) in order to use this machine.
While logged on, press the Access key to log off,
and go back to the authentication screen.
p. 4-13
bizhub 42/36
4.1
4.1
About Start, Stop, Reset, C (Clear), and Power Save
4
About Start, Stop, Reset, C (Clear), and Power Save
Start
%
Start the copy, scan or fax operation.
Press this key again to restart a suspended job.
% When this machine is ready to begin the operation, the indicator on the Start key lights up in blue.
If the indicator on the Start key lights up in orange, the copy operation cannot begin. (Check that
no warning or message is displayed in the Touch Panel.)
Stop
%
Press the Stop key while copying to temporarily stop the scanning or printing operation.
% To resume a temporarily stopped job, press the Start key.
% To delete a temporarily stopped job, select a job in the suspended job list in the screen, and press
the [Delete] key.
Reset
Press this key to reset settings (except programmed settings) entered using the Control Panel and Touch
Panel.
%
Press the Reset key.
The each settings screen appears.
C (Clear)
Clears a value (such as the number of copies, a zoom ratio and size) entered using the keypad.
%
Press C (Clear).
The value is deleted. Enter the correct value.
bizhub 42/36
4-5
About Start, Stop, Reset, C (Clear), and Power Save
4
4.1
Power Save
To reduce power consumption of this machine, the following power save modes are provided.
Name
Mode activation condition
Low Power Mode
This mode works after the machine is idle for more
than the time specified in [Low Power Mode Time
Setting] when [Low Power Mode Setting] is set to
[ON] in Admin Settings.
Sleep Mode
•
•
0
0
0
0
0
0
%
This mode works after the machine is idle for
more than the time specified in [Sleep Time
Setting] of Admin Settings.
This mode works when you press Power Save.
Sleep mode can save more power than Low power mode, but needs longer warm-up time before being
ready to copy.
The factory setting of Lower power mode time is 15 minutes. The factory setting of Sleep mode is 60
minutes for bizhub 42 and 45 minutes for bizhub 36. If the time settings of Lower power mode and
Sleep mode are same, a higher priority is given to Sleep mode.
If the time setting of Low power mode is smaller than that of Sleep mode, the machine mode changes
from Lower power mode to Sleep mode after a lapse of the time specified in Sleep time setting.
If the time setting of Low power mode is greater than that of Sleep mode, a higher priority is given to
Sleep mode. Even after a lapse of the time specified in Lower power mode time setting, the machine
mode does not change from Sleep mode to Lower power mode.
The machine can receive jobs (PC print, Fax reception) during Lower power mode and Sleep mode.
Only in Sleep mode, the machine goes into Sleep mode again after completion of jobs (PC print, Fax
reception).
For details on Lower power mode and Sleep mode settings, contact the administrator of the machine.
When you press Power Save, the machine goes into Sleep mode. To wake the machine from Sleep
mode, press Power Save again.
The machine returns from Sleep mode when any other key on the Control Panel or the Touch Panel
surface is pressed.
4-6
bizhub 42/36
4.2
4.2
About Copy, Folder, E-mail, and Fax
4
About Copy, Folder, E-mail, and Fax
This machine operates in Copy, Folder, E-mail, and Fax modes, from which the user can select a desired
function. The indicator on the selected function key lights up in green.
Copy
%
Press this key to enter Copy mode.
The settings screen appears.
Folder
%
Press this key to enter Scan to Folder mode.
For details on Scan to Folder functions, refer to the [User's Guide Scan Operations].
E-mail
%
Press this key to enter Scan to E-mail mode.
For details on Scan to E-mail functions, refer to the [User's Guide Scan Operations].
bizhub 42/36
4-7
About Copy, Folder, E-mail, and Fax
4
4.2
Fax
%
Press this key to enter Fax mode.
For details on the fax function, refer to the [User's Guide Fax Operations].
4-8
bizhub 42/36
4.3
4.3
Utility/Counter
4
Utility/Counter
Press the Utility/Counter key to display the Utility screen. You can configure the machine settings and check
its use status in the Utility menu screen.
%
Press the Utility/Counter key.
Page 1/2
Page 2/2
Settings
bizhub 42/36
[Accessibility]
Provides items on machine settings. For details, refer to page 4-10.
[Meter Count]
Provides data on the operations made on the machine according to type
of operation. For details, refer to page 7-10.
[Address Registration]
Provides items on registration and deletion of addresses used on the machine.
For details, refer to the [User's Guide Fax Operations] and [User's Guide
Scan Operations].
[User Settings]
Provides setting items that can be operated by the user.
[Admin Settings]
Provides setting items that can only be operated by the administrator of the
machine. For details, refer to the [User's Guide Administrator Operations].
4-9
Utility/Counter
4
4.3
Accessibility
This section describes the procedures for configuring settings for the Control Panel and adjusting the Touch
Panel.
Page 1/2
Page 2/2
Settings
4-10
[Key Repeat /Interval]
The length of time until the value begins to change after a Touch Panel
button is held down and the length of time for the value to change can be
specified.
• [Time to Start]: Specify the length of time until a value begins to change
after a button is held down.
• [Key Interval]: Specify the length of time for the value to change.
[Sound Settings]
[Set All]
• [Enable]: Specify [ON] or [OFF] to output all sounds.
• [Volume]: To adjust the volume, press [Low], [Medium], or [High].
Configure the settings for sounding associated with key operations. The
following sound setting functions are available. To produce a sound, press
[ON], and then select the volume from [Low], [Medium] and [High]. To not
produce a sound, press [OFF].
[Operation Confirmation]
• [Input Confirmation Sound]: A sound produced when a key in the Control Panel or a button in the Touch Panel is pressed for an entry
• [Invalid Input Sound]: A sound produced for invalid button operation in
the Control Panel or the Touch Panel
• [Basic Sound]: A sound produced when the default value item is selected for an option subject to rotational switching
[Successful Completion]
• [Operation Completion]: A sound produced when the operation has
completed normally
• [Transmission Completion]: A sound produced when a communications-related operation is completed normally
[Completion Preparation]: A sound produced when a device is ready
bizhub 42/36
4.3
Utility/Counter
4
Settings
bizhub 42/36
[Sound Settings]
[Caution Sound]
• [Low Caution Sound (Level 1)]: A sound produced when the replacement time is nearing for supplies or a replaceable part and a message
appears in the Touch Panel
• [Low Caution Sound (Level 2)]: A sound produced for a user error
• [Low Caution Sound (Level 3)]: A sound produced when an error occurs
that can be corrected by the user by referring to the message that appears or the User's Guide
• [Severe Caution Sound]: A sound produced when an error occurs that
cannot be corrected by the user or requires action by a service representative
[Touch Panel Adjustment]
If no normal reaction is returned after pressing a key on the Touch Panel,
the key display position on the Touch Panel may not be correctly aligned
with the actual position of the touch sensor.
Adjust the display position of the Touch Panel.
• Press the four check point buttons [+] on the Touch Panel adjustment
screen while listening on a buzzer sound each time. When the checking
by pressing the check point buttons is completed successfully, the indicator on the Start key lights up in blue. Press the Start key.
• The check point buttons [+] can be pressed in any order.
• To perform adjustment again, press the C (Clear) key, and then press
the four check point buttons [+] again.
• To cancel the Touch Panel adjustment process, press the Stop or Reset key.
• If the Touch Panel cannot be adjusted, contact your service representative.
[Message Display Time]
Specify the duration of time for displaying warning messages, which appear, for example, when an incorrect operation is performed.
[LCD Brightness]
Adjust the brightness of the Touch Panel.
4-11
Mode Memory
4
4.4
4.4
Mode Memory
Combine frequently used copy settings into programs and register them with this machine. These programs
can easily be recalled as programs. Up to 400 programs (copy/fax/scan) can be registered.
0
0
Up to 15 copy programs can be registered.
To register a copy program, configure the copy settings to be registered before pressing the Mode
Memory key.
%
Press [Copy] or the Copy key ö Mode Memory key.
Settings
[Name]
Select the key registered with the copy settings to be recalled.
[Register]
•
•
4-12
After making the copy settings that you would like to register, press
[Register].
Enter the registration name, and then press [OK].
[Details]
Press this button to check the copy settings registered with the selected
key.
[Delete]
Press this button to delete the copy settings registered with the selected
key.
bizhub 42/36
4.5
4.5
Access
4
Access
If the administrator has configured user authentication settings/account track settings, only the users who
have been registered or the users whose accounts have been registered can use this machine.
Controlling access to the machine by user/account (user authentication/account track)
0
0
0
0
0
0
0
0
0
0
%
With the user authentication/account track functions enabled, only the users who enter passwords for
users or for accounts can use this machine.
Thus, the number of copies among others can be managed by user/account.
Contact the administrator for information on the user name, account name, password and server name.
The login page that appears may vary depending on the user authentication/account track settings.
User Authentication can be used together with Account Track. If the User Authentication/Account Track
is set to [Do Not Synchronize], complete user authentication, and then log in by using the Account Track
screen.
If MFP authentication or external server authentication has been set, a total of 1000 users and accounts
can be registered.
After copying is completed, press the Access key to log out from the machine.
You can use the authentication unit for authentication to handle this machine.
If authentication is performed with PageScope Authentication Manager, check with your server administrator for information on the login procedure.
For details of the settings of user authentication/account track, contact the administrator of the machine.
Press the Access key.
Screen for user authentication
Screen for account track
bizhub 42/36
4-13
Access
4
4.5
Settings
User Authentication
Account Track
4-14
Performs the user authentication procedure to use this machine.
[Card Authentication]
If the IC card function has been set by the administrator of the machine, authentication using the
IC card can be performed, in addition to that
based on entry of a user name and a user password. For details on the method of IC card authentication, refer to page 9-3.
[Device Authentication]
A user name and a user password are to be entered for authentication.
[Public User]
Allows users who have no access to the [User
Name] or [Password] to use this machine.
If the administrator of the machine restricts public
users, this cannot be selected.
If [Enhanced Security Mode] is set to [ON], [Public
User] cannot be selected.
[User Name]
Enter the user name.
[Password]
Enter the password.
[Server]
Press [Server] to display the names of the registered servers. Select the desired server.
[Begin Printing]
Displayed when the ID & Print function is enabled.
Prints only the ID & Print file of the corresponding
user. The home screen is not called to the screen.
[Access Basic
Screen]
Displayed when the ID & Print function is enabled.
Only the ordinary login procedure is applicable
and no ID & Print files are printed.
[Login]
Displays the home screen, enabling you to use
this machine.
Performs the account track procedure to use this machine.
[Account]
Enter the account name.
[Password]
Enter the password.
[Login]
Displays the home screen, enabling you to use
this machine.
bizhub 42/36
4.6
4.6
Interrupt
4
Interrupt
Press this key to start a new copy job with different copy settings by suspending the current job in process.
This is convenient when you need to make copies urgently.
0
0
The Interrupt key cannot be operated while an original is being scanned.
Pressing the Interrupt key restores the default settings.
1
Load the original.
2
Press the Interrupt key.
The indicator on the Interrupt key lights up in green and printing of the current job is suspended.
3
Configure the copy settings.
4
Press the Start key.
5
After the interrupting job has finished printing, press the Interrupt key.
The Interrupt indicator goes off and the interrupting copy settings are canceled.
The copy settings return to those specified before the interrupting copying job.
bizhub 42/36
4-15
4
4-16
Interrupt
4.6
bizhub 42/36
5
Copy Function
5
5
Copy Function
You can configure the settings for multiple copy features by pressing buttons on the Control Panel or Touch
Panel.
This chapter describes the functions that can be configured by pressing the buttons in the Touch Panel.
Item (Page 1/3)
[Original Size]
Press this button to specify the size of the original to be scanned.
p. 5-4
[Paper]
Press this button to configure the paper type and paper tray for making
copies.
p. 5-5
[Zoom]
Press this button to select the zoom ratio of the image to be copied.
p. 5-7
[Duplex/
Combine]
Press this button to configure the double-sided copy and combined copy
settings.
p. 5-8
[Density]
Press this button to specify the density for making copies.
p. 5-10
[Original Type]
Press this button to specify the image quality of the original according to its
type.
p. 5-11
[Finishing]
Press this button to select the settings for sorting and the finishing state of
copies.
p. 5-12
[Proof Copy]
Print a single proof copy for checking before printing a large number of
copies.
p. 5-14
[Separate Scan]
Select this item to divide a large number of original and scan it in a number
of batches.
p. 5-15
[ID Copy]
Copies the contents of the front and back sides of a card-size original, for
example, insurance card, driver's license, or business card, on one sheet.
p. 5-16
[Paper Margin]
Copies can be printed with a binding margin (blank area) so that the pages
can easily be filed.
p. 5-18
[Image Quality]
Select this item to specify the image quality of a copy on the basis of the
image quality and type of the original so that the quality of the copy can be
adjusted.
p. 5-19
[Mode Check]
Press to check the currently specified copy settings.
p. 5-20
[Job]
Press to check a print, transmission, reception or stored data job.
p. 5-21
[?]
Press this key to view and check descriptions of copy functions and operating procedures.
p. 3-9
Item (Page 2/3)
Item (Page 3/3)
Others
Item
bizhub 42/36
5-3
[Original Size]
5
5.1
5.1
[Original Size]
Press this button to specify the size of the original to be scanned.
%
Press [Copy] or the Copy key ö [Original Size].
Settings
[Standard Size]
Select the size of the document.
[Custom Size]
Specify the size of the document if it is a non-standard size.
[X] / [Y]
Enter the paper length [X] and width [Y]. Using [+]
and [-] or the ten key pad, specify the size.
Copying mixed originals
Loads originals of different sizes into the ADF and scan them at a time.
0
0
This function is available only for scanning from the ADF. It is unavailable for scanning from the original
glass.
This function is available only for originals of Letter and Legal sizes that have the same width (8-1/2
inch).
1
Slide the adjustable Lateral Guide of the ADF to fit the size of the
original page.
2
Arrange originals in the order you want them to be scanned and
load them face up in the ADF.
3
Press [Original Size].
4
Press [Letter/Legal].
% When [Letter/Legal] is selected, [Zoom] is set to [Full Size] and
[Paper] to [Auto].
5
5-4
Press the Start key.
bizhub 42/36
5.2
5.2
[Paper]
5
[Paper]
Select the paper type and size to be printed or change the paper size and paper type settings configured for
each paper tray.
The paper size can be selected automatically according to the original size or it can be specified manually.
0
0
The auto zoom setting and the auto paper setting cannot both be selected at the same time.
If a setting for special paper is selected for a paper tray, that tray is not selected automatically with the
Auto Paper setting. (However, a paper tray set to 1 Side Only is given priority to be selected with 1sided printing.) When setting special paper in the paper tray, be sure to set the paper type. For details
on special paper, refer to page 10-3.
%
Press [Copy] or the Copy key ö [Paper].
Settings
[Auto]
Automatically selects the paper size according to the original
size.
1#
Bypass Tray
2 to 5
Trays
[Change Tray Settings]
bizhub 42/36
Allows you to specify the paper manually.
Specify the paper type and paper size for the selected paper
tray.
[Paper Size]
Specify the paper size for the selected paper tray.
[Auto]:
Automatically detects the paper size.
[Standard Size] (only for [Bypass Tray]):
Specify a paper size to use the bypass tray
as a paper tray dedicated to the paper size.
[Custom Size] (only for [Bypass Tray]):
Enter the paper size.
[Paper Type]
Specify the paper type for the selected paper tray.
5-5
[Paper]
5
5.2
Configuring a custom size
%
Press [Copy] or the Copy key ö [Paper] ö [Bypass Tray] ö [Change Tray Settings] ö [Paper Size] ö
[Custom Size].
Settings
[X] / [Y]
5-6
Enter the paper length [X] and width [Y]. Using [+] and [-] or the ten key pad,
specify the size.
bizhub 42/36
5.3
5.3
[Zoom]
5
[Zoom]
Image size in the original can be enlarged or reduced.
0
The auto zoom setting and the auto paper setting cannot both be selected at the same time.
%
Press [Copy] or the Copy key ö [Zoom].
Settings
bizhub 42/36
[-] / [+]
Configure the zoom ratio (25.0% - 400.0%) of the copy.
With documents loaded into the ADF, the zoom ratio can be set between
25% and 200%.
[Set Zoom]
Select or change the registered zoom ratio (25.0 - 200.0%).
[Minimal] allows you to change the zoom ratio.
[Auto]
The most appropriate zoom ratio is automatically selected based on the
size of the loaded original and the specified paper size.
[Full Size]
A copy that is the same size as the original (100%) is produced.
[Manual]
Enter the zoom ratio (25.0% - 400.0%) of the copy.
[Minimal]
Copies an original image slightly smaller than the original size or the specified size. The image in the original is centered on the paper without any
cutoff.
Select this setting when you want to copy the entire scope of the original
within the paper used.
5-7
[Duplex/Combine]
5
5.4
5.4
[Duplex/Combine]
Single-sided or double-sided for both the original and the copy can be specified. Multiple (2 or 4) pages of
original images can be reduced in size and printed on a single page.
Using the [Duplex/Combine] function, you can save paper sheets for copying.
%
Press [Copy] or the Copy key ö [Duplex/Combine].
Settings
[Duplex]
Select whether simplex (single-sided) or duplex (double-sided) copies are
to be printed.
[1 > 1]
[1 > 2]
[2 > 1]
[2 > 2]
[Combine]
Select whether to make combined copies.
[No]
Disables combined copy.
[2 in 1]
Copies images on two original pages on one
sheet of paper.
Portrait original pages
Landscape original pages
5-8
bizhub 42/36
5.4
[Duplex/Combine]
5
Settings
[Combine]
[Binding Position]
[Original Direction]
bizhub 42/36
[4 in 1 Horizontal]
Select this setting to copy four document pages
onto one page. The document images will be arranged horizontally.
<Horizontal>
[4 in 1 Vertical]
Select this setting to copy four document pages
onto one page. The document images will be arranged vertically.
<Vertical>
Configure the binding position of the original and copies to be output.
Without setting the [Binding Position], the resulting copy may not be what
you intended.
When [1 > 1] is selected, the [Binding Position] cannot be set.
[Orig. Binding Position]
Select [Left Bind], [Right Bind], [Top Bind] or
[Auto] as the binding position for the document.
If [Auto] is selected for the original binding position, the binding margin is set at the top or on the
left.
[Output Binding Position]
Select [Left Bind], [Right Bind], [Top Bind] or
[Auto] as the binding position for the copies.
If Output Binding Position is set to [Auto], the
binding position is set at the top or on the left.
Select the orientation of the original loaded into the ADF or placed on the
Original Glass.
Without setting [Original Direction], the resulting copy may not be what you
intended.
5-9
[Density]
5
5.5
5.5
[Density]
Press this button to specify the density for making copies.
%
Press [Copy] or the Copy key ö [Density].
Settings
5-10
[-] / [+]
Adjust the copy density to one of nine levels.
[Standard]
Select this setting to return the copy density to the standard setting.
bizhub 42/36
5.6
5.6
[Original Type]
5
[Original Type]
Select the setting for the image type of the original to better adjust the copy quality.
%
Press [Copy] or the Copy key ö [Original Type].
Settings
[Text]
Select this setting when copying documents containing only text.
[Text/Photo]
Select this setting when copying documents containing both text and photos. Text color and shading are automatically recognized, and the most appropriate image processing is performed.
[Photo]
Select this setting when copying documents containing printed photos.
bizhub 42/36
5-11
[Finishing]
5
5.7
5.7
[Finishing]
Various settings can be selected for sorting and finishing copies fed into the copy output tray.
0
0
0
The staple function is available only if the optional Finisher FS-529 is installed.
[Staple] cannot be used together with [Offset].
For [Letter/Legal] (mixed original), [Group], and [Staple] options, the way in which any of these options
are prioritized or cancelled depends on the order in which you select these options.
%
Press [Copy] or the Copy key ö [Finishing].
Settings
[Sort/Group]
Specify any settings for finishing outputted copies.
[Sort]
When multi-page originals are copied for multiple
sets, copies can be fed out sorted by set of copies.
1
1
14
3
2
1
[Group]
When multi-page originals are copied for multiple
sets, copies can be fed out sorted by pages.
4
3
21
1
1
1
[Auto]
[Offset]
[Yes] / [No]
5-12
Select this option to automatically switch between
[Sort] and [Group] depending on the number of
printable sheets per copy.
Specify whether to separate each set of copies from another set in the output tray
when copying multiple sets of multi-page originals. The copies are fed out and
stacked on top of each other with each set shifted to separate it.
This function is available only when the Finisher FS-529 is installed.
bizhub 42/36
5.7
[Finishing]
5
Settings
[Staple]
Staples copies in corner or at two points before they are output.
[Corner]
[Position
Setting]
Select [Top Left], [Top Right], or [Auto] as the staple
position.
[Original Direction]
[2 position]
[Position
Setting]
Select [Top], [Left], [Right], or [Auto] as the staple
position.
[Original Direction]
[None]
Select the orientation of the
original loaded into the
ADF or placed on the Original Glass.
Without setting [Original
Direction], the resulting
copy may not be what you
intended.
Select the orientation of the
original loaded into the
ADF or placed on the Original Glass.
Without setting [Original
Direction], the resulting
copy may not be what you
intended.
Copies are not stapled.
Select Auto, and the machine automatically judges the staple positions for the paper relative to the original direction loaded.
• A staple position along the long side of the paper is selected if the original
length is 11-11/16 inches (297 mm) or less.
• A staple position along the short side of the paper is selected if the original
length exceeds 11-11/16 inches (297 mm).
• Staple positions are set on the upper or left-side end.
• Load the original by placing it so that its head (top side) faces the left.
bizhub 42/36
5-13
[Proof Copy]
5
5.8
5.8
[Proof Copy]
Print a single proof copy for checking before printing a large number of copies. This prevents copy errors
from occurring.
1
Load the original.
2
Press [Copy] or the Copy key.
3
Select the desired copy settings.
4
Press [Proof Copy].
5
Press [ON].
6
Press [OK].
7
Press the Start key.
A single proof copy is printed.
8
Check the proof copy.
%
%
%
%
9
If the proof copy is found all right, go to step 9.
Using the keypad, the number of copies can be changed.
To print another proof copy, press [Proof Copy].
To change the settings, press [Cancel], and then perform steps 2 through 8.
Press [Print].
The number of copies yet to be printed is registered as a copy job.
5-14
bizhub 42/36
5.9
5.9
[Separate Scan]
5
[Separate Scan]
When the original contains pages exceeding the capacity of the ADF, you can divide the original into several
batches to handle each lot as a single copy job. You can also use the copy function by switching between
the ADF and the Original Glass for scanning the originals.
0
0
Do not load original sheets beyond the upper limit for the ADF. It would cause jamming and/or spoiling
of the original or failure of the machine.
When making 2-sided or combined copies using the Original Glass, the machine can scan a number
of original pages without enabling Separate Scan.
1
Load the original.
2
Press [Copy] or the Copy key.
3
Specify the copy settings.
4
Press [Separate Scan].
5
Press [ON].
6
Press [OK].
7
Press the Start key.
The original is scanned.
8
Load the next batch of the original, and then press the Start key.
% To change the scanning settings, press [Change Settings].
9
Repeat Step 8 until all pages of the original are scanned.
10
After all original pages have been scanned, press [Finish].
d Reference
To set the Separate Scan output method:
Press the Utility/Counter key ö [User Settings] ö [Copy Settings] ö [Separate Scan Output Method].
bizhub 42/36
5-15
[ID Copy]
5
5.10
5.10
[ID Copy]
Separately scans the contents of the front and back sides of a card, for example, insurance card, driver's
license, or business card, and copies them together on one sheet.
Using the ID copy function, you can save the number of sheets to be used.
A
B
0
0
0
0
With the ID Copy operation, the zoom ratio is set to 100%.
The paper sizes that are available for copying are Letter, Legal, and A4.
The card can only be placed on the original glass. Position the card to be scanned aligned at the upperleft corner of the original glass. Since the image is printed 20 mm from the top and left side, reposition
the card as necessary.
To erase shadow, the borders of 2 mm from the left and rear sides (from the left and top ends of the
cards) of the original are not printed.
The ID copy function and the auto paper function cannot be selected at the same time.
1
Place the card, front side down, on the original glass.
2
Press [Copy] or the Copy key.
3
Specify the copy settings.
4
Press [ID Copy].
5
Press the Start key.
0
Scanning of the front side begins.
5-16
bizhub 42/36
5.10
[ID Copy]
6
5
Position the card, back side down, at the same location on the original glass.
% To copy only the front side, press [Print].
7
Press the Start key.
Scanning of the back side begins. The copy is fed out.
bizhub 42/36
5-17
[Page Margin]
5
5.11
5.11
[Page Margin]
Copies can be printed with a binding margin (blank area) so that the pages can easily be filed.
[Left]
4
22
ABC
1 ABC
ABC
DEF
DEF
ABC
GHI
DEF
GHI 4
DEF
GHI
GHI 22
1
4
23
ABC
ABC
DEF
ABC
DEF
ABC
GHI
DEF
GHI 4
DEF
GHI
GHI 23
1
1
3
1
ABC
2 DEF
GHI
AB 3
E
D
GH
[Top]
22
4
ABC
23
1 ABC
ABC
DEF
DEF
ABC
GHI
DEF
GHI 4
DEF
GHI
GHI 22
1
3
4
ABC
1 ABCDEF
ABC
DEF
ABC
GHI
DEF
GHI 4
DEF
GHI
GHI 23
1
ABC
DEF
GHI
3
2 ABC
ABC 1
DEF
DEF
[Right]
22
4
ABC
1 ABC
ABC
DEF
DEF
ABC
DEFGHI
GHI 4
DEF
GHI
GHI 22
1
0
0
0
%
ABC
ABC 1
DEFABC
DEF
ABC
GHIDEF
GHI
DEF
4 4GHI
GHI
2
2
1
3
ABC
1
DEF 2
GHIB
3 EFC
HI
For 2-sided copy, you need to set the paper binding position and the original direction. Otherwise, the
original image may be copied up-side-down.
If the positions of the staples are different from the binding position, the positions of the staples are
given priority.
If part of the image is lost when copied with the specified binding margin settings, reduce the zoom and
perform copying.
Press [Copy] or the Copy key ö [Page Margin].
Settings
5-18
[-] / [+]
Specify the width of the binding margin between 0.001 inches and 0.787
inches (0.1 mm and 20.0 mm).
[None]
Select this setting to leave no binding margin.
bizhub 42/36
5.12
5.12
[Image Quality]
5
[Image Quality]
Adjusts the image quality that meets an image based on the copied original.
%
Press [Copy] or the Copy key ö [Image Quality].
Settings
bizhub 42/36
[Background Removal]
Adjust the background density when copying documents with a colored
background (such as newspapers or recycled paper) or thin documents
where the back side is visible from the front side. Adjust the background
density to one of nine levels. Select a setting in the [+] direction to darken
the background, or select a setting in the [-] direction to lighten the background.
[Contrast]
The image can be adjusted to make it softer or sharper. Adjust the contrast
to one of nine levels. Select a setting in the [+] direction to make the image
sharper, or select a setting in the [-] direction to make the image softer.
[Sharpness]
The sharpness of text and image outlines can be adjusted. Adjust the
sharpness to one of seven levels. Select a setting in the [+] direction to increase the sharpness, or select a setting in the [-] direction to decrease the
sharpness.
5-19
[Mode Check]
5
5.13
5.13
[Mode Check]
From the Mode Check screens, the current copy settings can be checked and changed if desired.
5-20
1
Press [Mode Check].
2
Check the copy settings.
3
After checking the settings, press [Close].
bizhub 42/36
5.14
5.14
[Job]
5
[Job]
From the Job screen, the lists of the jobs being performed by the machine and the jobs that have been performed are displayed, and the details of the jobs can be viewed.
0
When there is a job being printed, another job can be registered. Up to 30 copy jobs can be registered.
%
Press [Job] in the Home screen.
Settings
[Active]
bizhub 42/36
Lists the jobs currently processed. Check the current status.
[Print]
Displays the lists of the print jobs that have
been registered and the print jobs being
processed.
[Send]
Displays the lists of the transmission jobs
that have been registered and the transmission jobs being processed.
For details, refer to the [User's Guide Fax Operations] and [User's Guide Scan Operations].
[Receive]
Displays the lists of the reception jobs that
have been registered and the reception jobs
being processed.
For details, refer to the [User's Guide Fax Operations].
[Save]
Displays the lists of the stored jobs that have
been registered and the stored jobs being
processed.
For details, refer to the [User's Guide Scan
Operations].
[Delete]
Deletes a job.
5-21
[Job]
5
5.14
Settings
[Log]
5-22
Lists completed jobs.
• This list includes jobs that failed because of an error.
• You can check the job logs and results.
[Print]
Displays the list of the completed print jobs.
[Send]
Displays the list of the completed transmission jobs.
For details, refer to the [User's Guide Fax Operations] and [User's Guide Scan Operations].
[Receive]
Displays the list of the completed reception
jobs.
For details, refer to the [User's Guide Fax Operations].
[Save]
Displays the list of the completed stored
jobs.
For details, refer to the [User's Guide Scan
Operations].
[Details]
Results, user name, registration time, completed time, number of sheets of originals,
number of copies and other items for the log
list can be checked.
bizhub 42/36
6
[User Settings]
6
6
[User Settings]
[User Settings] are for setting items that a user can adjust as appropriate.
[User Settings] cannot be initialized all at once. To initialize all settings, either manually reset them one by one
or consult the administrator of the machine.
Page 1/2
Page 2/2
Settings
bizhub 42/36
[Machine Settings]
Configure the basic functions of this machine.
[Copy Settings]
Configure the settings for copy functions to be used in copy operations.
[Scan Settings]
Configure the settings for scan functions to be used in scan operations.
For details, refer to the [User's Guide Scan Operations].
[Print Settings]
Configure the settings for print functions to be used in print operations.
For details, refer to the [User's Guide Print Operations].
[Fax Settings]
Configure the settings for fax functions to be used in fax operations.
For details, refer to the [User's Guide Fax Operations].
6-3
[Machine Settings]
6
6.1
6.1
[Machine Settings]
Configure the basic functions of this machine.
%
Press the Utility/Counter key ö [User Settings] ö [Machine Settings].
Page 1/2
Page 2/2
Settings
6-4
[Language]
Select the language for display in the Touch Panel.
[Measurement Unit Setting]
Select the units for the values displayed in the Touch Panel.
[Paper Tray Settings]
[Auto Tray Switch]
Select whether a paper tray loaded with paper of
the same size is selected automatically when a
paper tray that was selected manually becomes
empty while printing copies.
[Enable ATS/APS]
Select the trays to be selected automatically
when the Auto Paper Select function is enabled.
Select the trays to be selected automatically
when the [Auto Tray Switch] function is enabled.
[ACS Level]
Adjusts the criteria level of an original in color or black and white when
scanning. For details, refer to the [User's Guide Scan Operations].
[Scan to E-mail Default
Tab]
Configure the default tab of Scan to E-mail screen. For details, refer to the
[User's Guide Scan Operations].
[Scan to Folder Default
Tab]
Configure the default tab of Scan to Folder screen. For details, refer to the
[User's Guide Scan Operations].
[Fax Default Tab]
Configure the default tab of Fax screen. For details, refer to the [User's
Guide Fax Operations].
bizhub 42/36
6.1
[Machine Settings]
6
Factory default
[Language]
[English]
[Measurement Unit Setting]
This value varies depending on the area.
[Auto Tray Switch]
[OFF]
[Enable ATS/APS]
[Tray 1]
[ON]
[Tray 2]
[ON]
[Tray 3]
[ON]
[Tray 4]
[ON]
[Tray 5]
[ON]
When the optional paper tray is installed, [Tray 4] or [Tray 5] is displayed.
[ACS Level]
2
d Reference
To enable Auto Paper:
Press [Copy] or the Copy key ö [Paper] ö [Auto].
bizhub 42/36
6-5
[Copy Settings]
6
6.2
6.2
[Copy Settings]
Configure the settings used by the copy functions.
%
Press the Utility/Counter key ö [User Settings] ö [Copy Settings].
Settings
[Auto Zoom for Combine]
Configure whether the preset zoom ratios are automatically selected when
Combine is selected in Auto Paper mode.
• Select the Auto Zoom for Combine for the following zoom settings:
<Inch area> 2 in 1: 64.7%
<Metric area> 2 in 1: 70.7%
4 in 1: 50.0%
[Default Copy Settings]
Configure the initial values for the Copy function to be displayed when the
power in turned on or the Reset key is pressed.
[Separate Scan Output
Method]
[Factory Default]
The factory settings are used as the default settings.
[Current Setting]
The current settings are used as the default settings.
Configure the output for divided original loaded in the ADF or for multiple
pages of the original scanned on the Original Glass.
[Batch Print]
Printing begins after all pages of the original have
been scanned.
[Page Print]
Printing of copies that can be printed begins while
the original is being scanned.
Factory default
6-6
[Auto Zoom for Combine]
[Yes]
[Default Copy Settings]
[Factory Default]
[Separate Scan Output
Method]
[Page Print]
bizhub 42/36
6.3
6.3
[Scan Settings]
6
[Scan Settings]
This setting is for the scan operations. For details, refer to the [User's Guide Scan Operations].
6.4
[Print Settings]
This setting is for the print operations. For details, refer to the [User's Guide Print Operations].
6.5
[Fax Settings]
This setting is for the fax operations. For details, refer to the [User's Guide Fax Operations].
bizhub 42/36
6-7
6
6-8
[Fax Settings]
6.5
bizhub 42/36
7
Maintenance
7.1
Paper
7
Maintenance
7.1
Paper
7.1.1
Checking the paper
7
Replenishment message
If a tray has run out of paper during printing, the message [Replenish paper in Tray o or select other paper
tray.] appears. Load paper in the paper tray that is highlighted in color.
Precautions regarding the use of paper
Do not use the following types of paper. Not observing these precautions may lead to reduced print quality,
a paper jam or a damage to the machine.
OHP transparencies that have already been fed through the machine (even if they are still blank))
Paper that has been printed on with a heat-transfer printer or an inkjet printer
Folded, curled, wrinkled, or torn paper
Paper that has been left unwrapped for a long period of time
Damp paper, perforated paper, or paper with punched holes
Extremely smooth or extremely rough paper, or paper with an uneven surface
Treated paper such as carbon-backed paper, thermal paper, pressure-sensitive paper, or iron-on
transfer paper
Paper that has been decorated with foil or embossing
Paper of a non-standard shape (paper that is not rectangular)
Paper that is bound with glue, staples or paper clips
Paper with labels attached
Paper with ribbons, hooks, buttons, etc., attached
Paper storage
Store paper in a cool, dark location with little humidity. If the paper becomes damp, a paper jam may occur.
Store the paper flat, not on its edge. Curled paper may cause a paper jam.
bizhub 42/36
7-3
Paper
7
7.1.2
7.1
Loading paper
This section describes how to load paper into each tray.
If printing stops due to the tray being empty, load paper into the tray. Printing restarts automatically.
For the types of paper to be used, refer to page 10-3.
Loading paper in Tray 2, Tray 3, Tray 4, or Tray 5
The procedure for loading paper is common between Tray 2, Tray 3, Tray 4, and Tray 5.
The following procedure describes how to load paper into Tray 2.
0
0
Tray 4 and Tray 5 are optional.
The size of loaded paper is automatically detected.
1
Pull out Tray 2.
% 1. Film
NOTICE
Be careful not to touch the Film.
1
2
Slide the Lateral Guide to fit the size of paper being loaded.
% If the Lateral Guide are not positioned correctly for the loaded
paper, the paper size will not be correctly detected.
1
3
Load the paper into the tray so that the side of the paper to be
printed on (the side facing up when the package was unwrapped)
faces up.
% Do not load so many sheets of paper that the top of the stack
is higher than the , mark.
% If paper is curled, flatten it before loading it.
% If special paper is loaded, the paper type must be specified.
% Load letterhead paper so that the side to be printed on faces
up.
4
Close Tray 2.
d Reference
To configure paper settings:
Press [Copy] or the Copy key ö [Paper].
7-4
bizhub 42/36
7.1
Paper
7
Loading paper into the Tray 1 (Bypass Tray)
1
Open the Tray 1 (Bypass Tray).
% To load large-sized paper, pull out the tray extension.
NOTICE
Be careful not to touch the surface of the Paper Take-Up Roller
with your hand.
2
With the side to be printed on facing down, insert the paper as far as possible into the feed slot.
% The image will be printed on the surface of the paper facing down when the paper is loaded into the
bypass tray.
% Do not load so many sheets of paper that the top of the stack is higher than the + mark.
% If paper is curled, flatten it before loading it.
% Push the Lateral Guide firmly up against the edges of the paper.
% Load letterhead paper so that the side to be printed on faces down.
% When loading postcards:
Load them in the w orientation, as shown in the illustration. To
use postcards other than the 4 e 6 (A6) size, check the size of
postcards to be used, and then specify the size on the Custom
Size screen before using them.
% When using envelopes:
Expel air from the envelopes, and then load them while holding
the folds of the envelopes.
Load them with the flap side up, as shown in the illustration.
The flap side of envelopes cannot be printed on.
bizhub 42/36
7-5
Paper
7
3
Slide the Lateral Guide to fit the size of paper being loaded.
4
Select the paper type.
7.1
% To use postcards, select [Postcard].
% To use envelopes, select [Envelope].
d Reference
To configure paper settings:
Press [Copy] or the Copy key ö [Paper].
7-6
bizhub 42/36
7.2
7.2
Consumables
7
Consumables
Checking consumables
7.2.1
Replacement message
When it is time to replace the Toner Bottle or Drum Unit, an advanced warning message appears at the top
of the screen.
For details on replacing the Toner Bottle, refer to [Quick Guide Copy/Print/Fax/Scan Operations].
For details on replacing the Drum Unit, contact your service representative.
When the message appears, make a preparation and replace the Toner Bottle according to the guidance
contained in your maintenance agreement.
When it is almost time to replace the Toner Bottle, an advanced warning message similar to the one shown
below appears.
When the message appears, prepare to replace the Toner Bottle according to the guidance contained in
your maintenance agreement.
%
bizhub 42/36
Pressing the warning icon displays the screen below.
7-7
Consumables
7
7.2
When it is time to replace the Drum Unit, an advanced warning message similar to the one shown below
appears.
%
Pressing the warning icon displays the screen below.
If a user continues to operate the machine while a warning message is displayed, the following replacement
message appears. Replace the Toner Bottle according to the guidance contained in your maintenance
agreement. For Drum Unit, contact your service representative.
Toner Bottle
7-8
bizhub 42/36
7.2
Consumables
7
Drum Unit
7.2.2
Checking consumables status
In the Consumable screen, you can check the status (usage level) of consumables.
1
Press [Status] in the Home screen.
2
Press [Consumables].
bizhub 42/36
7-9
Number of Sheets Printed
7
7.3
7.3
Number of Sheets Printed
Viewing counters
On the Meter Count screen, you can check the number of sheets printed and etc. since counting started. For
details, refer to the [Quick Guide Copy/Print/Fax/Scan Operations].
%
Press the Utility/Counter key ö [Meter Count].
Checking the total number of pages printed
Pressing Total Counter displays the total number of pages printed to
date.
1. Total counter
1
7-10
bizhub 42/36
7.4
7.4
Cleaning procedure
7
Cleaning procedure
Slit Scan Glass
1
Open the ADF.
2
Wipe the Slit Scan Glass with a dry cloth.
% Wipe off stains from the back side to the front side along the
guide.
Original Glass, Control Panel, Paper Take-Up Roller
NOTICE
Do not press the Control Panel hard, or the keys and Touch Panel may be damaged.
%
bizhub 42/36
Wipe the surface using a soft, dry cloth.
7-11
Cleaning procedure
7
7.4
Housing, Original Pad
NOTICE
Never use solvents, such as benzene or thinner, to clean the Original Pad.
%
7-12
Wipe the surface using a soft cloth moistened with a mild household detergent.
bizhub 42/36
8
Troubleshooting
8.1
8
When a problem is detected (call a service representative)
8
Troubleshooting
This chapter describes troubleshooting.
8.1
When a problem is detected (call a service representative)
If a problem is detected, perform the operation described in the message. If the problem is not resolved, perform the following operations, and then contact your service representative.
Problems that cannot be corrected by the user
1
Write down the malfunction code in the Service Call screen.
2
Turn off the Power Switch.
3
Unplug the machine.
4
Contact your service representative and inform them of the written down malfunction code.
bizhub 42/36
8-3
Troubleshooting table
8
8.2
8.2
Troubleshooting table
Simple troubleshooting
The following explains simple troubleshooting procedures. If the problem is not corrected after the described
operation is performed, contact your service representative.
Description of problem
Check points
Remedy
The machine does not start up
when the Power Switch is
turned on
Is power being supplied from the
electrical outlet?
Correctly insert the power supply
plug into the electrical outlet.
Copying does not start
Is the Top Right Door of the machine open?
Securely close the Top Right
Door of the machine.
Is there any paper that matches
the original?
Load paper of the appropriate
size into the paper tray.
Is the copy density set to [-]?
Press [+] in the Density screen to
copy at the desired copy density.
(p. 5-10)
If the above does not resolve the
problem, make settings in [Maintenance Menu] available from
Admin Settings. For details, refer
to the [User's Guide Administrator Operations].
Is the paper damp?
Replace with new paper. (p. 7-4)
Is the copy density set to [+]?
Press [-] in the Density screen to
copy at the desired copy density.
(p. 5-10)
If the above does not resolve the
problem, make settings in [Maintenance Menu] available from
Admin Settings. For details, refer
to the [User's Guide Administrator Operations].
Was the original not pressed
close enough against the Original Glass?
Position the original so that it is
pressed closely against the
Original Glass. (p. 3-5)
The image is partially obscured
or blurry.
Is the paper damp?
Replace with new paper. (p. 7-4)
Was the original not pressed
close enough against the Original Glass?
Position the original so that it is
pressed closely against the
Original Glass. (p. 3-5)
There are dark specks or spots
throughout the printed output
There are streaks in the printed
output
Is the Original Glass dirty?
Wipe the Original Glass with a
soft, dry cloth. (p. 7-11)
Is the Slit Scan Glass dirty?
Clean the Slit Scan Glass with a
dry cloth. (p. 7-11)
Is the Original Pad dirty?
Clean the Original Pad with a
soft cloth dampened with a mild
detergent. (p. 7-12)
Was the original printed on highly
translucent material, such as diazo photosensitive paper or OHP
transparencies?
Place a blank sheet of paper on
top of the original. (p. 3-5)
Is a 2-sided original being copied?
If a thin 2-sided original is being
copied, the print on the back side
may be reproduced on the front
side of the copy. In the Background Removal screen, select a
lighter background density.
(p. 5-19)
The image is light.
The image is dark.
8-4
bizhub 42/36
8.2
Troubleshooting table
8
Description of problem
Check points
Remedy
The image is printed at an angle
Is the original positioned correctly?
Correctly position the original
against the Original Scale.
(p. 3-5)
Load the original into the ADF,
and slide the adjustable Lateral
Guide to fit the size of the original. (p. 3-4)
Is the original incorrectly positioned in the ADF?
If the original cannot be fed correctly through the ADF, make
copies by positioning the original
on the Original Glass. (p. 3-5)
Is the Slit Scan Glass dirty?
(while using the ADF)
Clean the Slit Scan Glass with a
dry cloth. (p. 7-11)
Are the adjustable Lateral Guide
incorrectly positioned against
the edges of the paper?
Slide the adjustable Lateral
Guide against the edges of the
paper.
Was curled paper loaded into the
paper tray?
Flatten the paper before loading
it.
Was paper that curls easily (as
with recycled paper) used?
Remove the paper from the paper tray, turn it over, and then
load it again.
The printed page is curled
Replace with new dry paper.
(p. 7-4)
The edge of the printed image is
dirty
bizhub 42/36
Is the Original Pad dirty?
Clean the Original Pad with a
soft cloth dampened with a mild
detergent. (p. 7-12)
Was the selected paper size larger than the original?
(With a Zoom setting of "Full
Size" (100.0%))
Select a paper size that is the
same size as the original.
Otherwise, select Auto to enlarge
the copy to the selected paper
size. (p. 5-7)
Is the size or orientation of the
original different from that of the
paper?
(With a Zoom setting of "Full
Size" (100.0%))
Select a paper size that is the
same size as the original. Otherwise, select a paper orientation
that is the same as that of the
original.
Was the copy reduced to a size
smaller than the paper? (with a
reduced zoom ratio specified)
Select a zoom ratio that adjusts
the original size to the selected
paper size.
Otherwise, select Auto to enlarge
the copy to the selected paper
size. (p. 5-7)
Even though a paper jam was
cleared, copies cannot be produced
Is paper jammed at other locations?
Remove any jammed paper from
other locations.
Printing with the "2 > 1" or "2 >
2" settings are not available
Have settings been selected that
cannot be combined?
Check the combinations of the
selected settings.
Copying is not possible even
though the password is entered
on a machine with user authentication settings configured
Did the message [Total counter
by user has reached the limit.]
appear?
Contact your administrator.
Copying is not possible even
though the password is entered
on a machine with account track
settings configured
Did the message [Total counter
by account reached the limit.]
appear?
8-5
Troubleshooting table
8
8-6
8.2
Description of problem
Check points
Remedy
The original is not fed
Is the ADF slightly open?
Securely close the ADF.
Is the original one that does not
meet the specifications?
Check that the original is one
that can be loaded into the ADF.
(p. 10-6)
Is the original correctly loaded?
Position the original correctly.
(p. 3-4)
The Finisher FS-529 does not
operate
Is any power being supplied to
the connector?
Check that the cord is correctly
inserted into the connector.
The staple is incorrectly positioned by 90
Has the staple position been correctly specified?
Specify the desired position for
stapling. (p. 5-12)
The pages that were fed out
were not uniformly loaded and
the staples are incorrectly positioned
Is the paper curled?
Remove the paper from the paper tray, turn it over, and then
load it again.
Is there a gap between the Lateral Guide in the paper tray and
the sides of the paper?
Slide the Lateral Guide in the
paper tray against the sides of
the paper so that there is no gap.
Is the paper type configured correctly?
Configure the paper type of the
selected tray correctly.
Though the authentication unit
is connected with this machine
sing a USB cable, the status indicator LED does not light in
green
A malfunction of the USB port of
this machine is suspected.
Turn off the Power Switch of this
machine, disconnect the USB
cable from this machine or authentication unit, and then connect it again. Wait at least 10
seconds, and then turn on the
Power Switch of this machine.
Though the authentication unit
is connected with the computer
using a USB cable, the status indicator LED does not light in
green
MA malfunction of the USB port
of your computer is suspected.
Restart your computer.
Has the authentication unit driver
being installed correctly?
Check that the driver is correctly
installed in your computer.
For details, refer to the [User's
Guide Administrator Operations].
When message [Failed to authenticate.] appears in the machine that failed in login
When [Card Authentication+
Password] is enabled
Did you enter the correct password?
Check the password, and then
enter the correct one if not.
Scanning does not start
Did you restart this machine after
connecting the authentication
unit to this machine?
Turn off the Power Switch of this
machine, disconnect the USB
cable from this machine or authentication unit, and then connect it again. Wait at least 10
seconds, and then turn on the
Power Switch of this machine.
Connecting the authentication
unit to the computer starts the
hardware uninstall wizard
Is the USB port to which the authentication unit is connected the
same as the one used when installing the driver?
If you connect the authentication
unit to a different USB port from
the one used when installing the
driver, the hardware uninstall
wizard may start. Use the same
USB port as the one used when
installing the driver.
For details, refer to the [User's
Guide Administrator Operations].
bizhub 42/36
8.2
Troubleshooting table
8
Main messages and their remedies
If any message other than those listed below appears, perform the operation described in the message.
Message
Cause
Paper of a suitable size is not
[Replenish Paper]
[Replenish paper in Tray o or se- loaded in a paper tray.
Remedy
Load paper of a suitable size or
select another paper tray.
lect other paper tray.
xxx]
The type and size of the paper
[Paper Size/Type Mismatch]
[Load the following paper in tray o. loaded into all of the paper trays
are different.
xxx]
bizhub 42/36
Load the specified paper into a
paper tray.
[Paper Size Mismatch]
[Load the following paper or
cancel job.
xxx]
The paper size specified from the
Touch Panel is different from the
size of paper loaded in the paper
tray.
Load paper of the correct size
into the indicated paper tray.
[Matching Paper not Available]
[Matching paper size not available.
xxx]
Paper of the same size as the
document cannot be selected
with the Auto Paper setting selected in Copy mode.
Load the paper tray with paper of
the same size as the document.
[Replenish paper]
[Replenish paper.
xxx]
The indicated tray has run out of
paper.
Add paper. (p. 7-4)
[Check Scanner Lock Lever]
[Unlock the scanner lock lever.]
The scanner is locked.
Cancel the job.
Unlock the scanner.
[Place Original on Glass]
[Unable to scan from ADF with
this original size]
The selected document size cannot be scanned from the ADF.
Place the document on the original glass if it has a size that cannot be scanned from the ADF.
[Place Original on Glass]
[Unable to scan from ADF with
this zoom ratio.]
The selected zoom ratio (200%
or more) cannot be used to scan
from the ADF.
Place the document on the original glass.
[Place Original on ADF]
[Place originals on the
Document Feeder.]
The document is not loaded into
the ADF when scanning a document containing pages of different sizes.
Load the document into ADF.
[Out of the Range of Auto Zoom]
[Zoom ratio for paper size is outlying. Select other paper or
zoom ratio.]
An appropriate zoom ratio cannot be selected with the Auto
Zoom setting selected.
Specify a zoom ratio between
25% and 400%.
[Duplex Copy Disabled]
[Duplex copy disabled.
Cancel or select:
xxx]
The selected paper type and size
cannot be used with duplex
(double-sided) printing.
Cancel duplex (double-sided)
printing, or change the paper
type and size settings.
[Output Tray Full]
[Output tray full. Remove paper
from the tray.]
Copy cannot be performed because the paper loading capacity
of the output tray of the displayed Finisher FS-529 has
reached the maximum.
Remove all paper from the indicated tray.
[Processing Tray Paper Left]
[Remove paper from finisher
tray]
While paper is present on the
processing tray of Finisher
FS-529, the power switch is
turned on.
Remove paper from the finisher
tray.
[User Authentication
Set user information.]
User authentication settings
have been configured. Copies
cannot be made unless a user
name and correct password are
entered.
Enter the correct user name and
password. (p. 4-13)
8-7
Troubleshooting table
8
Message
Cause
Remedy
[Account Track
Set account information.]
Account track settings have
been configured. Copies cannot
be made unless an account
name and correct password are
entered.
Enter the correct account name
and password. (p. 4-13)
[Total counter by user has
reached the limit.]
The limit on the number of pages
that can be printed has been
reached.
Contact the administrator of the
machine.
[Cover Open]
[Cover is open.
Close all covers properly.]
Since a machine door or cover is
open or an option is not installed
correctly, the machine is unable
to make copies.
Make sure that all doors and
covers of this machine and options are closed securely.
[ADF Initialize Error]
[Open and close ADF cover.]
The ADF cover is not securely
set.
Open the ADF cover, and close it
again.
[Toner is low]
[Prepare new toner bottle.]
The toner is about to run out.
Prepare a spare Toner Bottle for
replacement following the guidance contained in your maintenance agreement.
[Replace toner]
[Replace toner by following the
instruction and close front door.]
Toner is depleted.
Replace the Toner Bottle following the guidance contained in
your maintenance agreement.
[Imaging Unit Missing]
[Drum and Developing Unit is
not set.]
The imaging unit is not properly
set.
Contact your service representative.
[Replace Staples]
[Replace the staple cartridge.]
The staples have run out.
Replace the Staple Cartridge.
[Exceeds the no. of pages being
stapled.]
[Exceeds the number of pages
that can be stapled. Cancel stapling.]
The number of printed pages exceeds the maximum number of
pages that can be stapled.
Terminate the job.
[Misfeed Detected]
[Misfeed was detected.
Remove the paper.]
Since a paper jam occurred, the
machine is unable to make copies.
Clear the jammed paper.
[Reset Originals]
[Reset the following number of
originals
xxx]
After clearing a paper jam, it is
necessary to reload certain pages of the original that have already been fed through the ADF.
Load the indicated original pages
into the ADF.
[Job Registration Limit Over]
[Registered jobs reached limit.
Wait for job registration to complete.]
Copy, scan or fax transmission
operations were repeated while
printing or transmissions could
not be performed.
Wait a while. The error is canceled.
[Locked due to failed access attempts. Contact the administrator.]
The authentication information
has become invalid since the authentication attempts have failed
the specified number of times.
Turn the machine off, then on
again.
Turn off the Power Switch, and
then wait at least 10 seconds before turning it on again.
[Total counter by account
reached the limit.]
The administrator password has
become invalid since the authentication attempts have failed the
specified number of times.
[Service Call]
[Error occurred. Power OFF and
ON, or contact Service with
Trouble Code; xxx]
8-8
8.2
The machine malfunctioned and
is unable to make copies.
Take a remedy according to the
message displayed in the
screen. If the problem is not resolved or released, inform your
service representative of the
malfunction code displayed in
the screen.
bizhub 42/36
8.2
Troubleshooting table
8
Message
Cause
Remedy
When the message that
prompts the replacement of the
following consumables:
• Drum Unit
• Fusing Unit
• Developing Unit
• Developer
Consumables need replacement. Or consumables have
been used beyond the specified
period.
Contact your service representative.
Icons that appear in the touch-panel screen
Icon
Description
If the screen has multiple pages, press [↑] or [↓] to select a different page.
If values appear between [↑] and [↓], the current page number/total number
of pages is indicated.
If there are tabs that are not displayed, press [←] or [→] to select a different
tab.
Press to adjust the image quality during a copy, scan or fax operation.
Press [+] or [-] to change the entered value.
Press to view the error message when an error occurs.
Press to display descriptions of the various functions.
A description of the current screen will be displayed.
Press to display the address book. From this screen, you can select single
destinations and group destinations registered in the address book.
Appears while scanning and printing when making copies.
Appears while scanning with fax transmission and scanning operations.
Appears while printing with PC printing, received fax printing and report
printing.
Appears when using a fax (G3) connection.
Appears when there are documents queued for a timer transmission.
Appears when there are fax documents received with memory reception or
PC-FAX and stored to the SSD in this unit.
Appears when data or documents are being sent from this unit.
Appears when this unit is receiving data or documents.
bizhub 42/36
8-9
Troubleshooting table
8
Icon
8.2
Description
Appears when enhanced security settings have been applied.
Appears when a external memory device is connected.
Appears when the parts replacement by service engineer becomes necessary. Contact your service representative.
8-10
bizhub 42/36
9
Authentication unit
9.1
9
Using authentication unit
9
Authentication unit
This chapter describes the Authentication Unit AU-201.
1
1. Authentication Unit AU-201
9.1
Using authentication unit
The Authentication Unit AU-201 is an "IC card authentication" system that reads the IC card to perform personal authentication. Using this system, you can perform authentication with an IC card to log in to this machine or execute a print job when User Authentication is enabled in this machine.
The administrator of the machine performs the registration and configurations necessary for the authentication unit. For the registration of your card, contact the administrator of the machine.
The administrator of the machine must register cards and configure necessary settings before using the authentication unit. For details of the registration and setting necessary for using the authentication unit, refer
to the [User's Guide Administrator Operations].
NOTICE
Authentication Unit AU-201 must be installed inside the Working Table WT-510.
Do not disconnect the USB cable while using the authentication unit. Doing so may cause the system to become unstable.
Do not leave the IC card within 1-9/16 inch (40 mm) of the card reader.
Logging in to this machine
This section explains how to log in to this machine with IC card authentication.
To make card authentication available, the administrator of the machine must enable the card authentication function in PageScope Web Connection and register the information recorded in IC cards in
the machine. For details, contact the administrator of the machine.
If authentication fails frequently, IC card information may not be registered properly. Contact the administrator of the machine.
When the IC card authentication is enabled, a registered user is authenticated by simply placing the IC
card. Authentication is carried out when you place the IC card and enter the [Password] when the IC
card + password authentication is enabled.
Press [Device Authentication] to [Login] by entering the [User Name] and the [Password], without using
the authentication unit.
bizhub 42/36
9-3
Using authentication unit
9
9.1
Authentication with IC Card
This function is available if the followings are configured by the administrator of the machine.
PageScope Web Connection
In [Administrator Mode] ö [Security] ö [Authentication Device Settings], [Authentication Type] is set to
[Card Authentication].
Control Panel
In Utility/Counter key ö [Admin Settings] ö [Authentication Setting] ö [Card Authentication], the information of a user’s IC card is registered.
%
Place the IC card on the Working Table WT-510.
The home screen appears.
9-4
bizhub 42/36
9.1
Using authentication unit
9
Authentication with IC Card + Password
This function is available if the followings are configured by the administrator of the machine.
PageScope Web Connection
In [Administrator Mode] ö [Security] ö [Authentication Device Settings], [Authentication Type] is set to
[Card Authentication + Password].
Control Panel
In Utility/Counter key ö [Admin Settings] ö [Authentication Setting] ö [Card Authentication], the information of a user’s IC card is registered.
1
Place the IC card on the Working Table WT-510.
2
Press [Password], and enter the password.
3
Press [Login] or the Access key.
The home screen appears.
bizhub 42/36
9-5
9
9-6
Using authentication unit
9.1
bizhub 42/36
10
Specifications
10.1
10
Paper
10
Specifications
This chapter describes the specifications of the paper, machine, and options.
This product specification is subject to change without notice toward the improvement.
10.1
Paper
Paper types and paper capacities
Paper Type
Paper weight
Paper capacity
Plain paper
1 Side Only*1
Special Paper*2
Letterhead*3
Colored Paper*4
15-15/16 lb to 23-15/16 lb
(60 g/m2 to 90 g/m2)
Tray 1 (Bypass Tray): 150 sheets
Tray 2: 500 sheets
Tray 3: 500 sheets
Paper Feed Cabinet PC-211: 500 sheets
Thick 1
24-3/16 lb to 39-7/8 lb
(91 g/m2 to 150 g/m2)
Tray 1 (Bypass Tray): 20 sheets
Thick 2
40-3/16 lb to 55-7/8 lb
(151 g/m2 to 210 g/m2)
Tray 1 (Bypass Tray): 20 sheets
Transparency
-
Tray 1 (Bypass Tray): 20 sheets
Postcard
-
Tray 1 (Bypass Tray): 20 sheets
Envelope
-
Tray 1 (Bypass Tray): 10 sheets
*1
Paper where you do not print on both sides (for example, when something is already printed on the front
side).
*2
Fine and other special paper.
*3
Paper where company names, preset text, and others are already printed.
*4
Colored paper.
NOTICE
Paper other than plain paper, such as special paper and colored paper, is called special paper. Be sure to
select a special paper setting for paper trays loaded with media such as special paper and colored paper.
If the paper size or paper type is not correctly specified, it will result in a paper jam or image failure.
Plain Paper (2nd Side) can be selected for Tray 1 (Bypass Tray). Select 2nd Side when you load paper where
something is printed on one side.
bizhub 42/36
10-3
Machine specifications
10
10.2
10.2
Machine specifications
bizhub 42/36
Specifications
Type
Scanner, printer, desktop, or stand-alone
Document holder
Stationary (Unit scanning)
Photo conductor
OPC
Light source
CCFL Dual (Cold cathode fluorescent lamp)
Copy system
Laser electrostatic copying
Developing system
Dry 2-component HMT developing system
Fusing system
Roller fusing system
Resolution
Scanning
600 dpi e 1,200 dpi
Output
600 dpi e 600 dpi
Type
Sheets, books (two-page spread), three-dimensional
objects
Size
Max. 8-1/2 e 14 (A4)
Weight
6-5/8 lb (3 kg) Three-dimensional objects
Originals
Copying paper type
Plain paper (15-15/16 lb to 23-15/16 lb (60 g/m2 to 90 g/m2)), Thick 1* (243/16 lb to 39-7/8 lb (91 g/m2 to 150 g/m2)), Thick 2* (40-3/16 lb to 55-7/8
lb (151 g/m2 to 210 g/m2)), Letterhead, Colored paper, Transparency*,
Postcard*, Envelope*
2-Sided: Plain paper (15-15/16 lb to 23-15/16 lb (60 g/m2 to 90 g/m2))
* Available for Tray 1 (Bypass Tray).
Copy paper size
<Tray 2/Tray 3>
8-1/2 e 11 v, 5-1/2 e 8-1/2 w, A4 v, B5 v
<Tray 1 (Bypass Tray)>
8-1/2 e 14 w, 8-1/2 e 11 w/v, 10-1/2 e 7-1/4 v, 5-1/2 e 8-1/2 w, A4 v,
B5 v, A5 w, B6 w, A6 w, 4 e 6 w, 8 e 13 w*, 16K v
Width: 3-9/16 to 11-11/16 inches (90 mm to 297 mm), Length: 5-1/2 to 14
inches (140 mm to 356 mm)
* There are six types of foolscap: 8-1/2 e 13-1/2 w, 220 mm e 330 mm w,
8-1/2 e 13 w, 8-1/4 e 13 w, 8-1/8 e 13-1/4 w, and 8 e 13 w. Any one of
these sizes is selectable. For details, contact your service representative.
Number of sheets loaded in
Output Tray
Plain paper
250 sheets
Thick
10 sheets
Transparency
1 sheet
Tray 2/Tray 3
Plain paper: 500 sheets
Tray 1
(Bypass Tray)
Plain paper: 150 sheets, Thick 1/2: 20 sheets, Transparency/Postcard: 20 sheets, Envelope: 10 sheets
Paper tray capacity
(8-1/2 e 11(A4))
Warm-up time
Period from the time Power Switch was turned on to the time this machine
is ready for printing (room temperature: 73.4 °F (23 °C))
45 sec. or less
Warm-up time may vary depending on the operating environment and usage.
Image chipping width
Top edge
3/16 inches (4.2 mm)
Bottom edge
1/8 inches (3.0 mm)
Right edge
1/8 inches (3.0 mm)
Left edge
1/8 inches (3.0 mm)
First copy
(When printing 8-1/2 e 11 v
(A4 v))
10-4
8.7 sec. or less
bizhub 42/36
10.2
Machine specifications
10
Specifications
Copy speed
(When printing A4 v)
1-Sided
bizhub 42
42 sheets/min. (Thick 1/2: 13 sheets/min.)
bizhub 36
36 sheets/min. (Thick 1/2: 12.5 sheets/min.)
2-Sided
bizhub 42
42 sides/min.
bizhub 36
36 sides/min.
Copy magnification
Full size: 100.0% ± 0.5%
Enlarge
<Inch area>: 129.4%, 154.5%
<Metric area>: 115.4%, 122.4%, 141.4%, 163.1%, 200.0%
Reduce:
<Inch area>: 78.5%, 64.7%, 60.7%
<Metric area>: 86.6%, 81.6%, 70.7%, 50.0%
Manual: 25.0 to 400.0% (in 0.1% steps)
Number of continuous
copies
1 to 999
Density adjustment
Copy density
Manual density adjustment (9 levels)
Background density
Manual density adjustment (9 levels)
Power supply
AC 120 V, 12 A, 60 Hz (AC 220 V to 240 V, 7.0 A, 50/60 Hz)
Max. power consumption
1500 W
Size
Width 21-15/16 inches (558 mm)
Depth 24-7/8 inches (632 mm)
Height 31-3/4 inches (807 mm)
Size including the ADF
Machine occupation dimensions
Width 46-3/16 inches (1,173 mm)
Depth 46-3/4 inches (1,187 mm)
Height 53-11/16 inches (1,363 mm)
The dimensions above are measured when the tray extension or paper tray
of the Finisher FS-529 is pulled out while the ADF remains opened.
Memory capacity
1.5 GB
Hard disk capacity
320 GB
SSD
2 GB
Weight
Approx. 138-7/8 lb (63 kg)
Auto Duplex Unit
Specifications
bizhub 42/36
Paper Type
Plain paper (15-15/16 lb to 23-15/16 lb (60 g/m2 to 90 g/m2))
Paper Size
8-1/2 e 14 w, 8-1/2 e 11 w/v, 10-1/2 e 7-1/4 v, 5-1/2 e 8-1/2 w, A4 v,
B5 v, A5 w, 8 e 13 w*, 16K v
Width: 5-1/2 to 11-11/16 inches (140 mm to 297 mm), Length: 6-1/4 to 14
inches (158 mm to 356 mm)
*
There are six types of foolscap: 8-1/2 e 13-1/2 w, 220 mm e 330 mm w,
8-1/2 e 13 w, 8-1/4 e 13 w, 8-1/8 e 13-1/4 w, and 8 e 13 w. Any one of
these sizes is selectable. For details, contact your service representative.
Power supply
Supply from machine
10-5
Machine specifications
10
10.2
Reverse Automatic Document Feeder
Specifications
Original feed function
1-sided original, 2-sided original, mixed original
Original types
1-Sided
Plain paper (13-5/16 lb to 34-1/16 lb (50 g/m2 to
128 g/m2))
2-sided, mixed original
Plain paper (13-5/16 lb to 34-1/16 lb (50 g/m2 to
128 g/m2))
Original Size
1-Sided/2-Sided Originals: 8-1/2 e 14 w, 8-1/2 e 11 w, 10-1/2 e 7-1/4 w,
5-1/2 e 8-1/2 w, A4 w, B5 w, A5 w
For Mixed Original, only originals of Letter size (8-1/2 e 11 w) and Legal
size (8-1/2 e 14 w) can be loaded.
10-6
Original loading capacity
1- or 2-sided original: Max. 50 sheets (21-1/4 lb (80 g/m2))
Power supply
Supply from machine
bizhub 42/36
10.3
10.3
Options
10
Options
Paper Feed Cabinet PC-211
Specifications
Paper Type
Plain paper (15-15/16 lb to 23-15/16 lb (60 g/m2 to 90 g/m2))
Paper Size
<Tray 4/Tray 5>
8-1/2 e 14 w, 8-1/2 e 11 w/v, 5-1/2 e 8-1/2 w, A4 v, B5 v, 8 e 13 w*,
16K v
*
There are six types of foolscap: 8-1/2 e 13-1/2 w, 220 mm e 330 mm w,
8-1/2 e 13 w, 8-1/4 e 13 w, 8-1/8 e 13-1/4 w, and 8 e 13 w. Any one of
these sizes is selectable. For details, contact your service representative.
Number of loadable sheets
Top tray (Tray 4)
Plain paper: 500 sheets
Bottom tray (Tray 5)
Plain paper: 500 sheets
Power supply
Supply from machine
Max. power consumption
15 W or less
Size
Width 25-3/16 inches (640 mm)
Depth 27-3/8 inches (696 mm)
Height 14-5/8 inches (372 mm)
Weight
Approx. 63-15/16lb (29 kg)
Unit configuration
Paper tray, 2 levels
Finisher FS-529
Specifications
bizhub 42/36
Output tray
Output Tray 1 (Elevate tray)
Feeding function
Group, Sort, Offset Group, Offset Sort, Staple
Paper Type
Group/Sort: Plain paper (15-15/16 lb to 23-15/16 lb (60 g/m2 to 90 g/m2)),
Thick (24-3/16 lb to 55-7/8 lb (91 g/m2 to 210 g/m2)), Transparency, Envelope, Letterhead
Offset Group/Offset Sort: Plain paper (15-15/16 lb to 23-15/16 lb (60 g/m2
to 90 g/m2)), Thick (24-3/16 lb to 55-7/8 lb (91 g/m2 to 210 g/m2))
Staple: Plain paper (15-15/16 lb to 23-15/16 lb (60 g/m2 to 90 g/m2)), Thick
(24-3/16 lb to 39-7/8 lb (91 g/m2 to 150 g/m2))*
* Can be used only as a cover page. Print jobs can be requested only from
the printer driver.
Paper Size
Group/Sort:
8-1/2 e 14 w, 8-1/2 e 11 w/v, 10-1/2 e 7-1/4 v, 5-1/2 e 8-1/2 w, A4 v,
B5 v, A5 w, B6 w, A6 w, 4 e 6 w
Width: 3-9/16 to 11-11/16 inches (90 mm to 297 mm), Length: 5-1/2 to 14
inches (140 mm to 356 mm)
Offset Group/Offset Sort/Staple:
8-1/2 e 14 w, 8-1/2 e 11 w/v, 10-1/2 e 7-1/4 v, A4 v, B5 v
Width: 8-1/2 to 11-11/16 inches (216 mm to 297 mm), Length: 7-3/16 to 14
inches (182 mm to 356 mm)
10-7
Options
10
10.3
Specifications
Paper loading quality
Group/Sort
Offset
Group/Offset Sort
Staple
Plain paper (1515/16 lb to 2315/16 lb (60 g/m2
to 90 g/m2))
8-1/2 e 11, A4 or less
300
sheets
Up to 8-1/2 e 14
250
sheets
Thick (24-3/16 lb to 55-7/8 lb (91 g/m2 to 210
g/m2)), Transparency, Envelope, Letterhead
10 sheets
Plain paper (1515/16 lb to 2315/16 lb (60 g/m2
to 90 g/m2))
8-1/2 e 11, A4 or less
300
sheets
Up to 8-1/2 e 14
250
sheets
Thick (24-3/16 lb to 55-7/8 lb (91 g/m2 to 210
g/m2))
10 sheets
Plain paper (1515/16 lb to 2315/16 lb (60 g/m2
to 90 g/m2))
8-1/2 e 11, A4 or less
300
sheets or
30 copies
Up to 8-1/2 e 14
250
sheets or
30 copies
Paper loading height: 1-7/16 inches (37 mm)
Maximum number of stapled sheets
8-1/2 e 11, A4 or less
50 sheets
Up to 8-1/2 e 14
30 sheets
Example number of stapled sheets: Thick (31-15/16 lb (120 g/m2)) 2 sheets
+ Plain paper (21-1/4 lb (80 g/m2)) 48 sheets*
* Up to 8-1/2 e 14: 28 sheets. Print jobs can be requested only from the printer driver.
10-8
Shift amount
1-3/16 inches (30 mm)
Power supply
Supply from machine
Max. power consumption
56 W or less
Size
Width 18-9/16 inches (471 mm), 25-3/4 inches* (654 mm*)
Depth 22-5/16 inches (566 mm)
Height 5-13/16 inches (147 mm)
* Size when the tray is pulled out
Weight
Approx. 26-7/16 lb (12 kg)
Consumables
Staple SK-602
For EH-590 (Product No. 505 manufactured by MAX) (5000 staples included)
e 1 unit
bizhub 42/36
10.3
Options
10
Authentication Unit AU-201
Specifications
Name
AU-201
Dimensions
Width 3-5/8 inches (92 mm)
Depth 2-1/2 inches (64 mm)
Height 5/8 inches (16 mm)
Weight
Approx. 1/4 lb (Approx. 120 g)
Power supply
Power received from USB port
System conditions (during
operation)
Ambient temperature
32 °F to 104 °F (0 °C to 40 °C)
Humidity
20% to 85% (No dew condensation)
System conditions (during
non-operation)
Ambient temperature
-4 °F to 122 °F (-20 °C to 50 °C)
Humidity
20% to 85% (No dew condensation)
Radio law division
Self-guided read-write communication facility
Applicable card
ISO 14443 Type A, FeliCa-based noncontact IC
card, HID iClass
Acquired standard
VCCI class B
Compatible computer
CPU
PC/AT compatible, 1 GHz or more
Memory
128 MB or more
HDD
Free space: 100 MB or more
Monitor
800 e 600 pixels, 16-bit color or more
Network
TCP/IP
Application
Microsoft Internet Explorer 6.0 (SP1) or later
Microsoft .NET Framework (SP1) or later
Interface
USB 1.1 or later
Supported Operating Systems
bizhub 42/36
Windows XP Professional Edition (SP2)
Windows Vista Business/Enterprise
10-9
10
10-10
Options
10.3
bizhub 42/36
11
Appendix
11.1
Glossary
11
Appendix
11.1
Glossary
11
The following describes the terms used in Copy mode.
bizhub 42/36
Term
Description
[Background Removal]
Function that adjusts the background density of the original with a
colored background. Select a background removal method and level to copy the original.
[Binding Position]
Specify the original binding position (page margin) to prevent the
copy from being printed upside-down when scanning a 2-sided
original.
[Change Tray Settings]
Function that copies the original with a paper size not specified in
the paper tray or copies it on paper other than plain paper.
[Contrast]
Function that adjusts the contrast between light and dark.
[Density]
Function that adjusts the density of the print image in nine levels.
[Duplex/Combine]
Function to specify the scanning side of the original and the printing
side of the paper to be 1-sided or 2-sided.
[Finishing]
Allows you to select how to sort or finish copies when feeding them
into the output tray.
[Group] (Copy or Finishing)
Function that prints copies in pages. This function first prints the
specified number of copies of the first page, and then prints the second page in the same way.
[ID Copy]
Separately scans the contents of the front and back sides of a card,
for example, insurance card, driver's license, or business card, and
copies them together on one sheet. You can copy a card with the full
size or enlarge an image to fit paper. Using the card copy function,
you can save the number of sheets to be used.
[Manual]
Function that enlarges or reduces the loaded original with the zoom
ratio specified using the keypad, and copies it on paper.
[Minimal]
This setting slightly reduces the image of the original and copies it at
the center of the paper.
[Offset]
Function that sorts copies.
[Original Direction]
Function that specifies the orientation of the original loaded into the
ADF or placed on the Original Glass.
[Original Type]
Function that allows you to select the desired functions according to
the original text or image type and adjust it to obtain better image
quality.
[Paper]
Allows you to configure the type and the size of the paper to be printed on.
[Proof Copy]
Function that prints a sample copy and stops printing temporarily
before printing a large number of copies. This prevents copy errors
from occurring in a large number of copies.
[Separate Scan]
Function that divides the original into multiple parts for scanning
when the number of original pages exceeds the maximum (50 pages) that can be loaded into the ADF. You can scan the original and
batch-copies it as one copy job. You can also load the original on
the Original Glass or switch to the ADF during scanning.
[Sharpness]
Function that emphasizes the edges of text so that it can be read
more easily. This function also enables you to adjust the original image.
[Sort] (Copy or Finishing)
Function that prints a document in sets of copies. The second copy
set is printed after all of the first copy set is finished.
[Staple]
Function that staples copies.
11-3
Glossary
11
11-4
11.1
Term
Description
ADF
The acronym for Reverse Automatic Document Feeder. It can automatically scan originals. (ADF = Automatic document feeder)
APS
The acronym for Auto Paper Select. (APS = Auto Paper Select)
ATS
Function that automatically switches trays. (ATS = Auto Tray Switch)
Auto (Paper)
Function that automatically selects paper of the same size if it is set
to Full Size or selects the paper size appropriate to the specified
zoom ratio.
Auto (Zoom)
Function that automatically selects the appropriate zoom ratio when
you place an original in the ADF or on the Original Glass, and selects the paper size.
Combine Originals
Function that arranges reduced copies of multiple original pages on
a single copy page. You can select, "2in1" or "4in1" depending on
the number of pages to be combined.
Mixed Original
Function that detects the size of each original page and prints a
copy on paper of the appropriate size when loading originals in different page sizes into the Reverse Automatic Document Feeder.
This function is available only for originals of Letter and Legal sizes
that have the same width (8-1/2 inch).
Plain Paper (2nd Side)
Function used when printing on paper that has already been printed
on one side.
Zoom
Function that changes the zoom ratio of the copy.
bizhub 42/36
12
Index
12.1
Index by item
12
Index
12.1
Index by item
12
A
G
Access 4-13
Accessibility 4-10
Account track 4-13
ADF feed cover 2-4
Authentication unit 2-3, 9-3, 10-9
Auto (Paper) 5-5
Auto (Zoom) 5-7
Auto duplex unit 2-4, 10-5
Auto duplex unit lock release lever 2-4
Grouping 5-12
C
C (Clear) 4-5
Checking consumables 7-7
Checking the total number of pages printed 7-10
Cleaning procedure 7-11
Control panel 2-4, 2-7, 4-3, 7-11
Copy 2-8, 4-7
Copy function 5-3
Copy mode operations 2-8
Copy settings 6-6
Copying mixed originals 5-4
Custom size 5-6
D
Data indicator 2-7
Delete 4-12
Density 5-10
Desk 2-3
Document stopper 2-4
Drum unit 2-6
Duplex/combine 5-8
E
E-mail 4-7
Error indicator 2-7
F
Fax 2-8, 4-8
Fax kit 2-3
Fax settings 6-7
Finisher 2-3, 10-7
Finisher FS-529 2-10
Finishing 5-12
Folder 4-7
Front door 2-4
Function key 2-7
Fusing unit 2-6
Fusing unit cover lever 2-6
Fusing unit top cover 2-6
bizhub 42/36
H
Help 2-8, 3-9
Home 2-8
Housing 7-12
I
Icon display area 2-8
Icons 8-9
ID copy 5-16
Image quality 5-19
Inside of the main body 2-6
Interrupt 4-15
J
Jack for connecting a telephone (TEL) 2-5
Jam removal dial 2-10
Job 2-8, 5-21
K
Keypad 2-7
L
Lateral guide 2-4
Loading paper 7-4
Lock release lever 2-6
Low Power Mode 4-6
M
Machine settings 6-4
Machine specifications 10-4
Maintenance 7-3
Manual holder 2-5
Message display area 2-8
Meter count 7-10
Mode check 2-8, 5-20
Mode memory 4-12
Mount Kit 2-3
N
Name 4-12
Network connector 2-5
Number of copies 2-8
O
Offsetting 5-12
Option configuration 2-3
Options 10-7
Original glass 2-6, 7-11
Original output tray 2-4
12-3
Index by item
12
Original pad 2-6, 7-12
Original scale 2-6
Original size 5-4
Original tray 2-4
Original type 5-11
Output tray 2-4, 2-10
Outside of the main body (front) 2-4
Outside of the main body (rear) 2-5
P
Page margin 5-18
Paper 5-5, 7-3, 10-3
Paper capacities 10-3
Paper feed cabinet 2-3, 10-7
Paper types 10-3
Paper-empty indicator 2-4
Placing originals 3-4
Power cord 2-5
Power save 4-6
Power switch 2-5
Print settings 6-7
Proof copy 5-14
12.1
Tray 3 2-4, 7-4
Tray 4 2-4, 7-4
Tray 5 2-4, 7-4
Tray extension 2-10
Troubleshooting 8-3
Troubleshooting table 8-4
U
USB port (type A) USB2.0 2-4
USB port (type B) USB2.0 2-5
USB/HDD 2-8
User authentication 4-13
User settings 6-3
Utility/counter 4-9
W
Working table 2-3
Z
Zoom 5-7
R
Replacement message 7-7
Replenishment message 7-3
Reset 4-5
Reverse automatic document feeder 2-4, 10-6
S
Scan settings 6-7
Scan to E-mail 2-8
Scan to Folder 2-8
Scanner lock lever 2-6
Scanner unit 2-6
Separate scan 5-15
Service call 8-3
Sleep Mode 4-6
Slit scan glass 2-6, 7-11
Sorting 5-12
Specifications 10-3
Stapling 5-12
Start 4-5
Status 2-8
Stop 4-5
T
Take-up roller 7-11
Telephone jack (LINE) 2-5
Toner bottle 2-6
Toner supply indicators 2-8
Top right door 2-4
Top right door release lever 2-4
Total counter 2-6
Touch panel 2-7, 2-8
Tray 1 (Bypass tray) 2-4, 7-5
Tray 2 2-4, 7-4
12-4
bizhub 42/36
12.2
12.2
Index by button
12
Index by button
Numerics
F
1 > 1 5-8
1 > 2 5-8
2 > 1 5-8
2 > 2 5-8
2 in 1 5-8
2 position 5-13
4 in 1 Horizontal 5-9
4 in 1 Vertical 5-9
Fax 4-8
Fax Settings 6-7
Finishing 5-12
Folder 4-7
Full Size 5-7
A
Access 4-13
Access Basic Screen 4-14
Accessibility 4-9, 4-10
Account 4-14
ACS Level 6-4
Active 5-21
Address Registration 4-9
Admin Settings 4-9
Auto (Paper) 5-5
Auto (Zoom) 5-7
Auto Tray Switch 6-4
Auto Zoom for Combine 6-6
B
Background Removal 5-19
Begin Printing 4-14
Binding Position 5-9
Bypass Tray 5-5
C
C 4-5
Card Authentication 4-14
Change Tray Settings 5-5
Combine 5-8
Contrast 5-19
Copy 4-7
Copy Settings 6-6
Corner 5-13
Custom Size 5-4, 5-6
D
Default Copy Settings 6-6
Delete 5-21
Density 5-10
Details 4-12, 5-22
Device Authentication 4-14
Duplex 5-8
Duplex/Combine 5-8
E
E-mail 4-7
Enable ATS/APS 6-4
bizhub 42/36
G
Group 5-12
H
Help 3-9
I
ID Copy 5-16
Image Quality 5-19
Interrupt 4-15
J
Job 5-21
K
Key Repeat /Interval 4-10
L
Language 6-4
LCD Brightness 4-11
Log 5-22
Login 4-14
M
Machine Settings 6-4
Manual 5-7
Measurement Unit Setting 6-4
Message Display Time 4-11
Meter Count 4-9, 7-10
Minimal 5-7
Mode Check 5-20
Mode Memory 4-12
O
Offset 5-12
Orig. Binding Position 5-9
Original direction 5-9
Original Size 5-4
Original Type 5-11
Output Binding Position 5-9
P
Page Margin 5-18
Paper 5-5
Paper Tray Settings 6-4
Password 4-14
Photo 5-11
Power Save 4-6
Print 5-21, 5-22
Print Settings 6-7
12-5
Index by button
12
12.2
Proof Copy 5-14
Public User 4-14
R
Receive 5-21, 5-22
Register 4-12
Reset 4-5
S
Save 5-21, 5-22
Scan Settings 6-7
Send 5-21, 5-22
Separate Scan 5-15
Separate Scan Output Method 6-6
Server 4-14
Set Zoom 5-7
Sharpness 5-19
Sort 5-12
Sort/Group 5-12
Sound Settings 4-10
Standard 5-10
Standard Size 5-4
Staple 5-13
Start 4-5
Stop 4-5
T
Text 5-11
Text/Photo 5-11
Touch Panel Adjustment 4-11
Tray 2 5-5
Tray 3 5-5
Tray 4 5-5
Tray 5 5-5
U
User Name 4-14
User Settings 4-9, 6-3
Utility/Counter 4-9
X
X / Y 5-6
Z
Zoom 5-7
12-6
bizhub 42/36