1
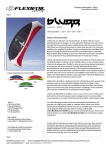
English
Deutsch
Français
Español
Owners manual
Produktinformationen
Mode d’emploi
Información de producto
English
Français
HQ CROSSFIRE 2
HQ CROSSFIRE 2
operating instructions
Mode d’emploi
Congratulations on your purchase of an
HQ CROSSFIRE. These kites create excitement and hours of fun for the user; however, you should first read these instructions
completely and always respect the safety
information.
Vous venez d’acheter une CROSSFIRE HQ et
nous vous en félicitons. Cet engin de sport
vous procurera beaucoup de plaisir. Avant
l’utilisation, vous devez lire attentivement
ce mode d’emploi et absolument respecter
les consignes de sécurité.
HQ developed the CROSSFIRE to be used
as parafoils. Handling requires discretion
and practice and occasionally courage. The
speed, pulling force and maneuverability
can surprise even the most experienced
pilots if they are not familiar with the kite.
Les CROSSFIRE sont spécialement conçues
comme ailes de traction. Leur pilotage exige
prudence, contrôle et parfois aussi un gros
cœur. La vitesse, la maniabilité et la traction
développée peut surprendre même des
pilotes avertis, tant qu’ils ne sont pas habitués au cerf-volant.
Deutsch
Español
HQ CROSSFIRE 2
HQ CROSSFIRE 2
Bedienungsanleitung
Instrucciones de manejo de
Wir beglückwünschen Sie zum Kauf einer
HQ CROSSFIRE. Dieses Sportgerät wird
Ihnen viel Spaß bereiten. Allerdings sollten
Sie vorher diese Anleitung gründlich lesen
und auf jeden Fall die Sicherheitshinweise
beachten.
Le felicitamos por la compra de su HQ
CROSSFIRE. Este artículo deportivo le deparará muchas horas de disfrute. No obstante,
antes de utilizarlo debe leer a fondo estas
instrucciones y tener siempre en cuenta
las instrucciones de seguridad.
Die HQ CROSSFIRE wurden für den Einsatz
als Zugschirme entwickelt. Der Umgang mit
ihnen erfordert Umsicht und Übung – und
manchmal auch Mut. Geschwindigkeit,
Zugkraft und Manövrierfähigkeit können
selbst erfahrene Piloten überraschen, solange sie mit dem Drachen nicht vertraut sind.
Los CROSSFIRE han sido desarrollados para
su uso como parapentes de tracción.
Su manejo requiere precaución y práctica,
en ocasiones también audacia. La velocidad, la fuerza de tracción y la maniobrabilidad pueden sorprender incluso a los pilotos
experimentados si no están familiarizados
con la cometa.
Graphics: Alex Hesse
Copyright by INVENTO 2007
2
Safety Rules
Do not fly your kite within range of people or vehicles!
2.
Onlookers should stand behind the pilot for maximum safety!
3.
Sport kites are not toys. Being hit by a flying kite could result in injury or death. Control lines can cause serious
cuts. Flying close to moving vehicles can distract the driver and cause an accident.
4.
Stop flying when conditions become strong or unpredictable!
5.
In strong winds sport kites can pull you to the ground and drag you downwind, potentially causing injury and
death.
6.
Do not fly around electrical lines or thunder storms! Wet lines can conduct electricity. Kites contacting electricial
lines, or being hit by lightning can cause serious injury or death.
7.
Never attempt to disentangle from power lines.
8.
This product should only be used by a child under competent adult supervision.
9.
Never use this kite or any HQ Kites product to jump, fly (paraglide) or rise above the ground. By jumping, you
seriously increase the chances of serious injury, paralysis or death.
10. Never leave your kite unattended.
Flying traction kites and the related sports, for example, buggying, are among extreme sports and should be participated in with the appropriate respect. Inappropriate use of the material can lead to serious or even fatal injuries!
This makes it all the more important that you read and follow the operating instructions and the safety rules!
Warranty and Liability
a guarantee cannot be taken over:
t damaged as a result of normal wear and tear, misuse or neglect
t repaired or modified without the authorisation of HQ-Invento.
t returned to HQ-Invento without a valid receipt
t All moving parts are basically wear parts. Check your kite continuously for abrasion and replace damaged parts
before you use your kite.
t HQ-InVento shall not be liable for any injury, loss or damage arising from the use of this kite.
t For your own safty you must read and understand the entire manual, and all the instructions and warnings
contained within it. You must also ensure that any other user of your HQ-Kite reads and understand the safty
instructions contained within this manual before using the kite
t HQ developed the CROSSFIRE to be used as a powerkite. Handling requires discretion and practice and occasionally courage. The speed, pulling force and maneuverability can surprise even the most experienced pilots if
they are not familiar with the kite. This product has NOT been designed or certified to allow you to fly or jump
into the air.
Please ensure that your private liability insurance provides you with sufficient coverage
for kite flying or power kiting!
3
English
1.
Leading
edge
Air inlet
openings
Trailing
edge
Airfoil/Rip
Main bridle
Braking
bridle
English
Braking
bridle
Main bridle
Power line
connection
point
Coated line
loops
Power lines
6
5
4
3
2
6
Brake lines
connection
points
5
Brake lines
Coated line loops
Securing the brake
lines for use when
flying with 4-line
handles
4
4-line handle
Brake line
3
Knots for harness line
2
4
Setting up and connecting the lines
Lay your CROSSFIRE on the ground so that
the bridle lines are at the top and the inlet
openings are facing away from the wind.
To secure the foil, place some sand, smooth
stones or filled sacks on the trailing edge.
Lay out the main bridle and braking bridle
lines without letting them twist in the wind.
The flyinglines provided are already
connected when delivered so that the
CROSSFIRE can become airborne as quickly
as possible.
ply use the 4-line handles to wind up the
lines without disconnecting the lines from
the bars and the foil. To do this, hold the
pair of handles in one hand and wind the
four fly lines together around the other end
of the handles, always moving in the same
direction. When unwinding, hold the bars
at the end with one hand without touching
the lines and unwind the lines so they are
laid out in a single specified direction. To
prevent twists in the lines, wind tightly and
unwind in the opposite direction.
Even so, when laying out the lines, allow
sufficient time. Wind the line up and move
toward the wind away from the kite.
Important! Always ensure that there is a
clear path for the quad-liner (see figure on
previous page).
The lines are stored on separate winders.
To prevent twists in the lines, wind them up
in eights figure of eights. Alternatively sim-
Foil secured on the ground with sand.
Winding up on a winder.
Winding up on handles-
5
English
Laying out the Foil
Attaching lines
Always lay out the flyinglines from the foil
opposite to the wind.
Wind
English
Use lark’s head knots to secure the lines to
the foil bridle and the handles (see drawing), which form loops on the ends of eachflying-line. Pull the lark’s head knots tight on
the bridle or handle line and stop the knots
at the connection points.
When hooking up the lines, ensure that
the flyinglines are correctly secured to the
bridle and the handles and make absolutely
certain that the left and right side and the
power lines (thicker) and brake lines (thinner) have not been switched.
Lark’s head knot
Securing the foil
A knot leader allows for the foil to be adjusted at different connection points on the
braking bridle. The bridle is adjusted so that
the third knot provided for good control via
the brake if the flyinglines are the same
length (see figure on page 4).
Once the foil is set up and the lines are connected, secure it to the ground stake. To do
this, wind the brake line around the ground
stake direct on the handles so that the foil
remains flat on the ground while braked.
Alternatively, you can use the extra loops
on the lower end of some 4-line handles.
The 4-line handle
Securing option
for harness line
Power line
Kitekiller
Connection
points
Power Leader
line
Brake Leader
line
Brake line
Loop for
securing to the
ground stake
6
The safety system kite-killer
Zenith
The safety system (kite killer) makes it
possible for you to release the handles in
dangerous situations without losing your
kite. HQ recommended to try out this function several times so your reflexes will be
formed, and you will gain confidence with
this maneuver
In order to use it, fasten the left and right
strap around the respective wrist. Do not
fasten it too loosely, in order to prevent
slipping over the hand. Now you can release
the handles during the flight. The System
will activate the brakelines and depower the
kite. Then the kite will land.
Larks Head
Knot
Start
The possible flight area of a kite or parafoil
is called the wind window.
The wind provides the greatest pulling force
at the center of the wind window. The pull
drops off at the edges. The park and initial
position for use is located directly above the
pilot in the zenith.
Launch and land
here if there is a lot
of wind
Wind
When launching, the foil is flown from the
ground in the center of the wind window
up into the zenith. The foil almost reaches
its maximum pulling force during this flight
into the zenith. Therefore, before launching,
check that the lines are laid correctly according to the wind direction and that the
foil size was chosen correctly for the wind
strength.
The handles are held at their upper ends,
directly below where the power lines feed
in. The brake lines (below) hang through
loosely. To launch the foil, pull on both
handles simultaneously. If the wind is light
to moderate, take a step backwards and
pull hard. The foil lifts from the ground and
flies directly upward into the zenith. Correct
deviations in the flight path by controlling
the kite (see section on controlling)
The foil can carefully be launched on the
side edge of the wind window if there is a
strong wind for the selected foil size. To do
this, a helper should secure the foil. The
build-up of foil pull is significantly less,
which means a safer launch and less stress
on the material.
7
English
We recommend the use of this
system!
Power zone
Flying and using the lower Lines
English
To control the foil, pull on one handle inthe
desired direction. If you pull on the right
handle, then the foil makes a right curve. If
you pull on the left handle, the foil makes
a left curve. If you hold the handles level
to each other, the foil remains on a straight
flight path.
If you tip a handle while pulling it, the
action is intensified. Thus, the lower end of
the handle is pulled toward the pilot, which
shortens the brake line. By combining
pulling and tipping, the kite can be controlled well and fly in all desired directions.
Landing
Both brake lines are pulled if both handles
are tipped down toward the pilot. At a
specific point, the lift current on the foil is
interrupted and it begins to fly backwards.
You can land the foil this way. This also
works in the middle of the wind window
so that the foil assumes the initial position
prior to launching and can be secured to a
ground stake.
Landing in high winds
The foil can also be landed on the side edge
of the wind window if there is a strong
wind for the selected foil size. The pull is
not as strong on the edge. If the foil wants
to break out, increase the pull on the corresponding brake line.
Once the kite is on the ground, grab below
the handle to the brake connection line with
one hand while holding the upper handle
ends with the other hand and place the
handles around a ground stake. For safety
reasons, weigh down the trailing edge of
the foil just like in setup.
8
Adjusting
Not all lines are the same. Thus, the foil
must be adjusted based on the line length
and the wind relationships. You can adjust
a foil by changing the length difference between the upper flight lines and the lower
brake lines.
Use the lark’s head knots in the lines at the
connection points (knots) of the braking
bridle and the handles to do this. Adjust
the foil such that the brake lines hang
loosely and do not pull on the trailing edge
when the kite is at a standstill, but so that
you can land the kite when you pull both
brake lines for the foil. Precision adjustment
is a matter of experience and preference.
Tips
Never let the foil hit the ground with the air
inlet openings first. There can be immense
internal pressure that the chambers cannot
withstand, which could damage the profiles.
Never steer the foil into people or objects,
such as fences, cars or similar items. This
could result in injuries to people and damage to objects or the foil.
Maintain the equipment in perfect condition. A wet foil should be washed with clean
water and thoroughly dried before packing
away.
Watch out for sharp-edged objects, shells
and fences and do not lay the foil down on
such items.
Before using the foil for kite sailing or as a
pulling unit for a buggy, skis, snowboard or
mountain board, first ensure that you can
handle the foil properly and safely.
Landing
Flying a right curve
Flying a left curve
Tight right turn
Tight left turn
English
Launching
9
DTS - Direct Trim System
1
2
To convert, you simply secure
the larks head under knot A and
secure the larks head under knot
B or vice versa.
Thus A is the base position
(Figure 1) with the highest
adjustment angle of the mat.
This position is preferable for kite
land boards. The kite has very
stabile flight, with somewhat
more base pressure and generates more lift into the zenith.
English
Base position
B
B
A
A
Base position
Expert position
t Larger adjustment angle
t Smaller adjustment angle
t More base pressure
t Less basic pressure
t More lift from stand
t Little side pull
t Lower speed
t Higher speed
t More stabile kite
t Demanding handling
t Good for kite land boarding
t For buggy driving
t Very good for beginners
t For advanced fliers
10
The DTS allows for the kite to be
adjusted to different conditions,
preferences and application
areas.
Knot A should thus be set such
that the collection point of the
lines – as shown in Drawing 1 by
the dashed line – is to be approximately in line. A fine trim is
achieved by loosening knots A
and B in the knot adapter and
shifting minimally. Depending
on the size of the kite, a few millimeters can be discernable in the
flight behavior and such changes
should be carefully considered.
In position B (Figure 2) the kite
mat is flatter. This makes the
kite fly faster and travel closer
to the edge of the wind window.
This is just right for a cross-course
in a buggy. However, this position requires a high level of fine
feeling to use the brake lines,
particularly in inconsistent winds.