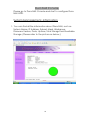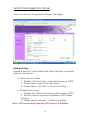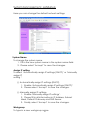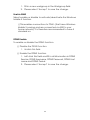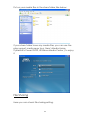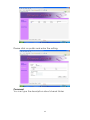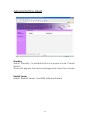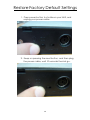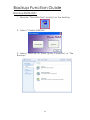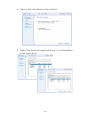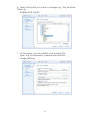
1
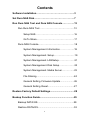
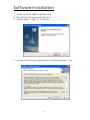
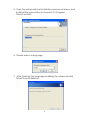
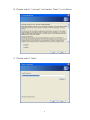
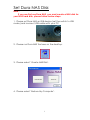
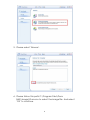
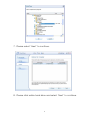
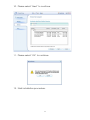
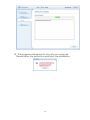
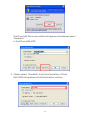
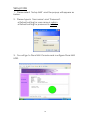
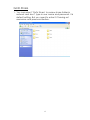
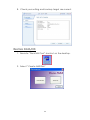
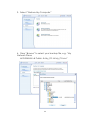
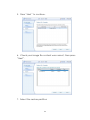
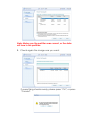
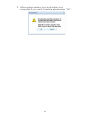
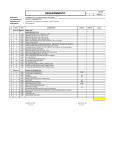
Dura NAS User Manual Contents Software Installation………………………...……………...3 Set Dura NAS Disk…..………………………………………7 Run Dura NAS Tool and Dura NAS Console……………13 Run Dura NAS Tool…………………………………….13 Setup NAS…………………………………………16 GoTo Share………………………………………..17 Dura NAS Console……………………………………...18 System ManagementInformation………………18 System ManagementSetup……………………..19 System ManagementLANSetup………………..21 System ManagementDisk Setup……………….23 System ManagementMedia Server…………....23 File Sharing........................................................24 General SettingFirmware Update.....................26 General SettingReset.......................................27 Restore Factory Default Settings....................................28 Backup Function Guide...................................................29 Backup DATA/OS......................................................29 Restore DATA/OS......................................................32 2 Software Installation 1. Insert the Dura NAS installation CD. 2. The wizard will automatically start. 3. Please select ‘Next’ to continue. 4. Accept the License Agreement and please select ‘Yes’. 3 5. Then the wizard will start installation process as below and install all the information in the path C:\Program Files\Dura NAS. 6. Please select a language 7. After finishing the language installing the wizard will start DriveClone installation. 4 8. Please select ‘I accept’ and select ’Next’ to continue. 9. Please select ‘Next’. 5 10. Please select ‘OK’. 11. Please select ‘Restart’ to finish installation. 6 Set Dura NAS Disk Note : If you are first use Dura NAS, you must create a NAS disk for your NAS hard disk, please follow below steps. 1. Please set Dura NAS as USB device (set the switch to USB mode) and connect USB cable with your PC. 2. Please run Dura NAS Tool.exe on the desktop. 3. Please select ‘Create NAS Disk’. 4. Please select ‘Restore My Computer’. 7 5. Please select ‘Browse’. 6. Please follow this path C:\Program Files\Dura NAS\Image\Dura.sco to select the image file. And select ‘OK’ to continue. 8 7. Please select ‘Next’ to continue. 8. Please click entire hard drive and select ‘Next’ to continue. 9 9. Please click the finial disk and select ‘Next’ to continue. Note: Please make sure the disk is correctly for NAS, or your data will be lost. 10 10. Please select ‘Next’ to continue. 11. Please select ‘OK’ to continue. 12. Start installation procedure. 11 13. The program will request to turn off your computer. Please follow the instruction and finish the installation. 12 Run Dura NAS Tool and Dura NAS Console Run Dura NAS Tool 1. Please set Dura NAS as NAS device (set the switch to NAS mode) and connect RJ45 cable with your PC. 2. Please run Dura NAS Tool.exe on the desktop. 3. Please select ‘Search Tool’. 4. Please select ‘Unblock’ to continue if you see ‘Windows Security Alert’ message. 13 The Dura NAS Discovery wizard will appear and please select ‘Research’ to find Dura NAS HDD. 5. Please select ‘DuraNAS’ and the information of Dura NAS HDD will appear in NAS Information column. 14 6. Here you can select ‘Setup NAS’ to configure Dura NAS HDD or select ‘GoTo Share’ to view the share folder. Note: 1. After create NAS disk, when first run, the NAS system need 3 ~5 minutes to check your hard drive. 2. If you check “Create Net Disk”, and press “OK”, then you can find a net disk in your computer. 15 Setup NAS 1. Please select ‘Setup NAS’ and the popup will appear as below. 2. Please type in ‘User name’ and ‘Password’. *Default setting for user name is admin. *Default setting for password is admin. 3. You will go to Dura NAS Console and configure Dura NAS HDD. 16 GoTo Share 1. You can select ‘GoTo Share’ to review share folder in network and don’t type in user name and password. It is default setting. But you need to enter it if having set username and password before. 17 Dura NAS Console Please go to Dura NAS Console and start to configure Dura NAS HDD. System ManagementInformation 1. You can find all the information about Dura NAS, such as System Name, IP Address, Subnet Mask, Workgroup, Firmware Version, Date, Uptime, Total Storage and Available Storage. (Please refer to the picture as below.) 18 System ManagementSetup Here you can do the general setting in this page. Date and Time Please enter the correct date and time manually or enable internet time server. ◎ Enter time and date 1. Disable ‘Set Clock from internet time server (NTP)’. 2. Please type correct time and date. 3. Please select ‘Accept’ to finish the setting. ◎ Enable time server. 1. Enable ‘Set Clock from internet time server (NTP)’. 2. Type in correct time server address in NTP server column. 3. Please select ‘Accept’ to finish the setting. Note : NTP server must input the NTP server’s IP address 19 Language To select language that you want. 1. Select the language in drop down menu. 2. Please select ‘Accept’ to save the changes. Administrator To change a new password. 1. Fill in a new password and retype the same password in the confirm password field. 2. Please select ‘Accept’ to save the changes. Enable FTP Server To enable the FTP function. 1. Select ‘Enable FTP Server’. 2. Please select ‘Accept’ to save the changes. 20 System ManagementLANSetup Here you can change the default network settings. System Name To change the system name. 1. Fill in the new system name in the system name field. 2. Please select ‘Accept’ to save the changes. Assign IP setting To select ‘Automatically assign IP settings (DHCP)’ or ‘Manually assign IP setting ‘. ◎ Automatically assign IP settings (DHCP). 1. Enable ‘Automatically assign IP settings (DHCP)’. 2. Please select ‘Accept’ to save the changes. ◎ Manually assign IP settings. 1. Enable ‘Manually assign IP settings’. 2. Please fill in all information in IP Address, Subnet Mask, Default Gateway and DNS Server. 3. Finally, select ‘Accept’ to save the changes. Workgroup To type in a new workgroup name. 21 1. Fill in a new workgroup in the Workgroup field. 2. Please select ‘Accept’ to save the change. Enable WM5 Select enable or disable to activate/deactivate the Windows Mobile 5 function. ◎This enables connections to PDA's (that have Windows Mobile 5 running and are connected via WiFi to your home network). It is therefore recommended to have it standard on. DDNS Enable To enable or disable the DDNS function. ◎ Disable the DDNS function. 1. Unclick this field. ◎ Enable the DDNS function. 1. Left click this field and fill in all information in DDNS Service, DDNS Username, DDNS Password, DDNS Host name and DDNS Period. 2. Please select ‘Accept’ to save the change. 22 System ManagementDisk Setup Here you can check disk information in this page. System ManagementMedia Server Here you can check disk information in this page. Enable ‘Enable Media Server’ and you can enjoy media server function. 23 Put on your media files in the share folder, like below: If your share folder have any media files, you can use the play support media sever (e.g. Nero’s Media Home, CyberLink’s Power DVD9, Windows Media Center ) to enjoy it. File Sharing Here you can check file sharing setting. 24 Please click on public and enter the setting. Comment You can type the description about shared folder. 25 Protect Shared Folder Enable this item and you can protect shared folder. Then input the password. General SettingFirmware Update Here you can update firmware. Please click on ‘Browse’ to find firmware file and click on ‘Update Firmware’ to execute updating. 26 General SettingReset Standby Select ‘Standby’ to enable NAS in low power mode. Current System Status will appear the same message and close the console. Restart Server Select ‘Restart Server’ and NAS will be restarted. 27 Restore Factory Default Settings 1. Press power button to shutdown your NAS, and unplug your power cable. 2. Keep on pressing the reset button, and then plug the power cable, wait 10 seconds then let go. 28 Backup Function Guide Backup DATA/OS: 1. Execute “Dura NAS Tool” shortcut on the desktop. 2. Select “Create NAS Disk” 3. Select “Back up”Æ “Back Up My Computer” or “File Backup”. 29 4. Type in the Job Name in the column 5. Select the backup target path e.g. C or all partition in this hard drive. 30 6. Select the path you want to storage e.g. “My Network Place Æ DURANAS Æ Public” 7. In this page, you can select your backup file type, e.g. compression, password protection, image splitting. 31 8. Check your setting and backup target are correct. Restore DATA/OS: 1. Execute “Dura NAS Tool” shortcut on the desktop. 2. Select “Create NAS Disk” 32 3. Select “Restore My Computer” 4. Press “Browse” to select your backup file, e.g. “My Network Place Æ DURANAS Æ Public Æ My_OS Æ My_OS.sco” 33 5. Press “Next” to continue. 6. Check your image file content was correct, then press “Next”. 7. Select the restore partition 34 Note: Make sure the partition was correct, or the data will lose in this partition. 8. Check again the image was you want. If everything checks ready, please press “OK”, or press “Cannel”. 35 9. When system restore, you must restart your computer, if you want to restore please press “OK”. 36