1
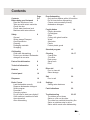
Use & Care Guide
Dishwasher
ASKO D3100
Dear ASKO-customer,
Congratulations on your excellent product choice and welcome to the Asko family. A global
family with its roots in Scandinavia.
Cleaning results, design, environmental impact on nature and home, user-friendliness, low
consumption of time, energy and water, a long life span, reliability.... Good appliances
should include all of these. And this is what we try to give you.
When you buy an ASKO product, we want you to feel assured that the inside is as good as
the outside and that the ethics and morals on which we built this machine are just as high as
the quality and performance you get from it. That is what Scandinavian quality is all about.
In order to get the best possible results from your machine and all its functions, please read
this Use and Care Guide before using the machine for the first time. And if you have any
questions, please do not hesitate to call us or contact us via our web site.
Best regards from Scandinavia and the people at Asko.
2
Contents
Contents
Before doing your first wash
Read the directions of use
Take care with certain materials
Check the door
Check water hardness level
Machines with water softener
Safety
General
Winter storage/Transport
Overfill protection
Cleaning
Packaging materials
Scrapping
Page
3-4
5
6
Child safety
7
Child-safe dishwashing
Protect your children! Dishwasher
detergent is corrosive
Parts of the dishwasher
8
Technical information
8
Baskets
9
Control panel
10
Dispenser
10
Basic Course
11-12
Load the baskets correctly
Dispense dishwasher detergent
Select program
Press start
Changing options
Do you want to load more dishes?
If the machine is switched off with
the main switch
After dishwashing
Eco-dishwashing
13
Only perform washes with a full machine
Do not rinse before dishwashing
Choose environmentally-friendly
dishwasher detergent
Fragile dishes
Fragile decoration
Crystal/glass
Silver
Cutlery with glued handles
Wood
Aluminium
Plastic
Protect plastic goods
14
Standard program
15
Cleaning
Coarse filter
-Fine filter
Drain pump
Spray arms
Door
16-17
Rinse aid
Pour in rinse aid
Select dosage
19
Salt
Pour in salt
20
Settings
Setting water hardness
21
Fault indications
22
Troubleshooting
23-25
The dishes are not clean
Stains or a film on the china
The china has a whitish-blue sticky film
Stains on stainless steel or silver
Stains which remain after dishwashing
3
Rattling sounds during dishwashing
The machine will not start
Water remains in the machine
Overfilling/leakage
Bad odour in the machine
Performance information
26
Installation
27-31
Suggestions on positioning the dishwasher
A. Built-in
B. Freestanding
C. Semi-freestanding
Connection to water supply
Connection to electricity
Drainage connection
Positioning the machine
A. Adjusting machines with six feet
(freestanding dishwasher)
B. Adjusting machines with three
or four feet
C. Adjusting dish washers with
adjustable foot
Installing the plinth
(Only with kick-plate as accessory)
Screw the dishwasher into place
Fitting fixed kick-plate
Fitting strip seal (on floor plinth
covering plate)
NB! Not all models
Setting water hardness
4
Service & guarantee
32
Own comments
33-34
Search words
35
Quick Guide
36
Before doing your first wash
Read the directions of! use
Check water hardness level
Read the directions of use before starting to
use your machine, especially the Safety,
Child Safety and Basic Course sections.
Phone your local Water Board to check the
water hardness in your area. This is important
when dispensing dishwasher detergent and
rinse aid.
Take care with certain materials
Read the section ‘Fragile dishes’ before
washing china with unglazed decoration or
other household goods made of plastic,
wood or crystal requiring careful treatment.
Machine with water softener
Once you know the water hardness, you
can set the water softener, see Settings.
Before you start dishwashing, you must
also fill with salt, see Salt.
Check the door
Check that the door of the dishwasher fits
properly: open the door a little and let it go.
Does it stay exactly where you released it?
If not, you should check the installation
instructions or consult the installer.
5
Safety
General
Packaging materials
• Read and keep the directions for use!
• Installation of water, drainage and electricity
must be carried out by a qualified professional.
• Do not use the dishwasher for any purposes other than those stated in these
directions for use.
• Do not load the dishwasher door or the
dishwasher baskets with anything other
than dishes.
• Only use dishwasher detergent!
• Place knives and other sharp objects so
that they cannot cause injury to people or
damage the dishwasher.
Sort at source in accordance with the recommendations of your local authority.
Never put dishes containing solvent residue
in the machine due to risk of explosion.
Neither may dishes containing ashes, wax
or lubricating grease be washed in the
dishwasher.
Winter storage/Transport
Store the machine away from frost.
Avoid long journeys in extreme cold. Transport the machine in an upright position or
lying on its back.
Overfill protection
The overfill protection starts pumping out
water and closes off the water intake if the
machine’s water level exceeds the normal
level. If the overfill protector starts up, shut
off the water supply and phone for service.
See also ‘Troubleshooting’ on pages 23-25.
Cleaning
Only use a slightly damp cloth for cleaning
around the edge of the door. Do not use a
spray bottle! Water can penetrate into the
lock and come into contact with the electrical components.
6
Scrapping
When the time comes for the machine to be
scrapped, it should immediately be rendered unusable. Remove the plug and cut
off the lead as short as possible.
Contact the refuse collection department or
your local authority for information on the
correct way to dispose of the dishwasher!
The dishwasher is manufactured and labelled for recycling.
Child safety!
Child-safe dishwashing
• Always close the door and start the program immediately once dishwasher detergent has been added.
• Keep children away from the dishwasher
when it is open. There might be the remains
of dishwasher detergent present!
• Do not allow children to use or play with
the dishwasher. Always take particular care
when the door is open.
Protect your children!
- Dishwasher detergent is corrosive!
WARNING: Dishwasher detergents are
strongly alkaline. They can be extremely
dangerous if swallowed. Avoid contact
with skin and eyes and keep children
away from the dishwasher when the door
is open.
Check that the detergent receptable is
empty after completion of the wash cycle.
Store dishwasher detergent and rinse aid
out of the reach of children!
Should dishwasher detergent be swallowed, immediately drink one or two
glasses of milk or water. Do not attempt to
induce vomiting. Contact a doctor! Should
dishwasher detergent come into contact
with the eyes, rinse (for at least 15 minutes)
with copious amounts of water.
7
Parts of the dishwasher*
1. Knife basket
2. Upper basket
3. Spray arms
4. Lower basket
5. Cutlery basket
6. Rinse aid dispenser
7. Dishwasher detergent compartment
8. Main switch
9. Program panel
10. Filter
11. Type plate
1
2
3
4
5
8
* Details may differ
depending on model and market!
7
11
10
6
9
Technical information
Height
Width
Depth
Weight
Capacity**
Water pressure
Connection
Max output
Accessories
* Details may differ depending on model and
market!
**In accordance with standard, AS/NZS 2007.
***See type plate.
****Without fitted wooden door.
8
820-870 mm
596 mm
550 mm****
48 kg/51 kg with water softener*
14 place settings
0.03-1.0 MPa (0.3–10 kp/cm2)
1-phase, 230 V, 50Hz 10/10A***
1900 W***
Work surface, Side panels, Anti-tilt
Baskets*
Upper basket with cup rack
Lower basket
Cutlery basket with door and folding
handle
*Details may differ depending on the model
and market!
9
Control panel
3
4
1
6
5
2
PROGRAM
PROGRAM
S TA R T
STOP
1. Program selector
2. Heavy wash
3. Normal wash
4. Quick wash
5. Rinse & Hold
6. Start/stop
Dispenser
1
2
3
1. Compartment for main wash dishwasher
detergent
2. Compartment for pre-wash detergent
3. Refill indicator rinse aid
4. Rinse aid cover
5. Detergent compartment cover
4
5
10
Basic Course
Below are step by step instructions to help you
achieve the best possible dishwashing results.
See Fragile dishes, if you want to wash
articles that may be fragile.
Load the baskets correctly!
Your dishwasher is equipped with Super
Cleaning System™. It is not necessary to
rinse the dishes before washing.
Simply remove large food particles and debris. Convenient and environmentally friendly!
Place glasses, cups, bowls, side plates and
dishes in the upper basket.
NB!
Ensure that all soiled surfaces face inwards
or downwards!
Detergent dosage
Detergent should be dispensed in accordance
with the water’s hardness level.
Follow the dosage instructions on the detergent package. If your dishwasher is fitted with
a water softener, dispense as for soft water.
Pour the dishwasher detergent into the
dishwasher detergent compartment. There
is one compartment for pre-wash and one
for main wash, see Dispenser. Phone the
dishwasher detergent manufacturer if you
have any questions regarding the detergent.
CAUTION!
Place dinner plates, side plates, serving
dishes, saucepans and cutlery (in the cutlery basket) in the lower basket.
Protect your children!
- Dishwasher detergent is corrosive!
NB!
Stand the cutlery with handles downward
and as spread out as possible. Ensure that
spoons are not resting inside each other.
Only use dishwasher detergent
Detergent for washing by hand cannot be
used as the build-up of foam impedes the
machine’s performance.
Do not put cutlery made of different materials, e.g. silver and stainless steel, in the
same compartment (risk of stains).
Check that the spray arms are able to move
freely.
11
Switch on the main switch
and close the door
Select program
Select a program by pressing the program
selector one or more times until the required
program is displayed.
Heavy wash 70°C
The Heavy Wash program should be used
for heavily soiled dishes, e.g. saucepans,
pots and gratin dishes. If there is still space
in the machine after loading such items, you
can add plates etc.
Normal wash 45°C
Used for washing normally soiled dishes
such as plates, serving dishes, cups and
glasses, etc.
Quick wash 30°C
Select Quick Wash if the dishes are very
lightly soiled. This program is used for very
lightly soiled glass and china, e.g. coffee
cups.
Rinse & Hold
For rinsing the dishes while waiting for the
machine to be filled.
Press Start
The dishwasher will now start. It manages
the entire wash automatically. Ensure that
the door is properly closed or the machine
will not start. The circle around the Start/
Stop button lights up progressively as it
works through the program.
Changing options
If you want to change program after having
started the dishwasher, press the Start/Stop
button for three seconds. Then select a new
program and press the Start/Stop button.
Do you want to load more dishes?
Open the door slowly; the machine stops
automatically, put in the dishes, close the
door and the dishwasher will continue from
where it left off.
If the machine is switched off
from the main switch
(or in the event of a power cut) before the
washing program has been completed, the
interrupted program will continue when
power comes back on.
After dishwashing
When the dishwasher has finished, the
whole circle around the Start/Stop button
will be lit up. It will then only consume
standing current. Should you wish to disconnect the current completely, just switch
off at the main switch. Turn off the water tap
if the machine is not to be used for an extended period, e.g. during holidays.
Advice!
For quicker drying allow the door to stand
slightly ajar.
12
Eco-dishwashing
Only perform washes with a full
machine
Put off dishwashing until the machine is full,
and in this way you will save energy.
Do not rinse before dishwashing
Thanks to the dishwasher’s Super Cleaning
System™ you do not need to rinse the
dishes under running water before loading
them into the machine.
Choose environmentally-friendly
dishwasher detergent
Read environmental declarations on the
package!
13
Fragile dishes
A number of household goods are not suitable for machine washing. There can be
many reasons for this. Certain materials
cannot withstand intense heat, others can
be damaged by the dishwasher detergent.
Fragile decoration
China with decoration on top of the glaze
(the article has a rough feel) should not be
machine washed.
Crystal/ glass
Cutlery with glued handles
Certain types of adhesive cannot withstand
machine washing. In such cases the handles
can come loose.
Wood
Wooden articles should only be machine
washed if they are labelled as dishwasher
proof.
Aluminium
Place the articles so that they do not knock
together during the wash. Antique and very
fragile items should not be machine
washed.
Aluminium can be dulled by machine washing. However, good quality aluminium
saucepans can be machine washed, although a reduction in lustre should be expected.
Silver
Plastic
Silver and stainless steel items should not
come into contact with each other as the
silver can discolour.
Certain types of plastic cannot withstand
the high temperature generated in machine
dishwashing.
To protect plastic articles
Select either the Normal wash or the Quick
wash program. Not Heavy Wash.
14
Standard program
Tested
program
Program
Press
Heavy
wash
Normal
wash
Quick
wash
Rinse &
Hold
--
--
--
--
70˚C
45˚C
30˚C
--
Pre-wash with
SCS* (number)
2
1
--
--
Main wash
(number)
1
1
1
--
Rinse & Dry
(number)
3
2
2
1
70˚C
60˚C
--
--
--
--
--
--
1. Wash time
(approx. min)**
160
--
15
4
1. Energy
(approx. kWh)
1,1
--
0,2
0,01
2. Wash time
(approx. min)**
185
95
15
4
2. Energy
(approx. kWh)
1,8
1,0
0,1
0,01
Water consumption (litres)
20
14
9,5
3
Program
Options
How the
machine works
Temperature
Final rinse
Fan
Consumption
values
*
**
SCS = Super Cleaning System™.
All quoted times are only indicative, fluctuations may occur. Due to water temperature, water pressure, variations in
voltage etc.
1. Hot water connection approx. 60°C.
2. Cold water connection approx. 15°C.
15
Cleaning
Cleaning
The dishwasher’s inner container is made of
stainless steel and is kept clean through
normal use. However, if you have calciferous
(hard) water, lime deposits can form in the
dishwasher. In this case, run a normal wash
program with two tablespoons of citric acid in
the dishwasher detergent compartment.
Coarse filter
Coarse
filter
Tubular
strainer
The coarse filter collects large food particles which cannot get past the outflow
pump. Lift out and empty the coarse filter as
necessary. Don’t forget to replace it!
Fine filter
Fine filter
The residue which collects on the fine filter is
automatically rinsed off with each wash. The
fine filter should still be cleaned once or
twice a month.
1. Remove the fine filter by first turning the
filter’s tubular strainer anti-clockwise and
then lifting it straight up with the coarse filter.
2. Clean with a dishwashing brush. Ensure
that the edges are properly sealed when
replacing the fine filter.
Drain pump
The pump can be accessed from the inside
of the machine.
1. Always remove the plug from the wall
socket before you clean the pump.
2. Remove the coarse screen first by
pressing together the two lugs and pulling
the screen upwards.
3. Now loosen the tubular part of the screen
by turning it anticlockwise and removing the
fine screen.
4. Finally remove the small adapter to the
left of the bottom drain.
5. It’s possible, by inserting your finger in
the hole, to turn the pump impeller and
remove any blockage.
6. Refit the adapter and screens.
7. Insert the plug in the wall socket.
16
Pump
plug
If you still cannot start the machine and a
humming noise can be heard, then the
overfilling protection has been activated.
• Shutoff the water
• Remove the plug from the wall socket
• Call Service
CAUTION!
Do not forget to replace the pump plug.
Spray arms
The holes and bearings can occasionally
become clogged.
1. Pull the lower spray arm straight up to
release it.
2. Scrape away the debris with a needle or
similar. The spray arms also have holes on
the underside.
To release the upper spray arm, the upper
basket must be removed.
3. Pull out the basket and turn the basket
stop outwards on both rails (see picture).
The basket can now be removed.
4. Remove the upper spray arm in the same
way as the lower arm and clean it.
Door
When cleaning the edge around the door,
use only a slightly damp cloth, possibly with
a little detergent. Do not use a spray bottle
or similar around the door catch. This is to
ensure that water does not penetrate into
the door catch and come into contact with
the electrical components.
CAUTION!
Do not use a spray bottle or similar around
the door catch.
Tip!
In order to prevent bad odours in the dishwasher, clean the strips and corners with a
dish brush and low-lather detergent.
17
18
Rinse aid
Pour in rinse aid
Rinse aid, helps quicken the drying
process. There is a refill indicator in the
middle of the dispenser (see picture). If the
refill indicator is totally black, there is sufficient rinse aid. However, if the indicator has
a more transparent appearance, you need
to top up with rinse aid.
1. Turn and lift up the cover of the rinse aid
compartment to the right of the dispenser.
This is where you top up and set the
amount of rinse aid to be dispensed in each
wash.
2. Fill until the indicator is totally black and
change the dosage as follows if required.
Do not forget to close the cover.
Open
Refill indicator
Closed
Cover for rinse aid
Open by turning and lifting the cover!
Select dosage
The dispenser is usually set at 1= soft water.
However, depending on the water hardness, it may be necessary to change the
dosage.
Open the rinse aid cover . Here you will find
the dispenser’s adjustment dial. Settings 16: the harder the water, the higher the dosage.
Where the water hardness exceeds 1012 odH you should use rinse aid with citric
acid (acid rinse aid) if the dishwasher does
not have a water softening filter. If the dishwasher has a water softening filter, dispense as for soft water.
Too much rinse aid can lead to the build-up
of foam. If your water is particularly soft, you
can dilute the rinse aid (1 part rinse aid, 1
part water).
Too much rinse aid can cause streaks on
the dishes, while too little can result in water
stains.
19
Salt
(applies to dishwashers with water softeners)
Pour in salt
Before using a dishwasher with a water
softening filter, you must fill the salt compartment with salt. Use coarse salt or special salt for dishwashers.
It is best to fill with salt when you are about
to do a wash, as the dishwasher needs to
be rinsed out immediately after filling.
Proceed as follows the first time:
1. First unscrew the cover as illustrated.
2. Place the funnel, which is supplied with
the dishwasher, into the compartment’s filler
hole. First pour in approximately 1 litre of
water.
3. Then fill the compartment with max 1.5 kg
salt.
4. Wipe away excess salt so that the cover
can be properly screwed into place.
5. Run a Normal wash program so that any
salt in the machine is rinsed away.
When the salt runs out, unscrew the cover
and fill the compartment with salt. Water is
only needed on the first occasion! Wipe
clean and screw back in place. Run a Normal wash program so that any salt is rinsed
away.
Occasionally check to see if more salt is
needed. A green indicator can be seen in
the cover of the salt compartment.
20
Cover for the salt compartment
CAUTION!
Never pour dishwasher detergent into the
salt compartment. The water softener will be
ruined!
Settings
Setting water hardness
If you have a dishwasher with a water softener, you may need to change the setting depending on the water’s hardness level. Phone your local Water Board to check the water
hardness in your area. The dishwasher is set for low water hardness on delivery.
L2
L3
L12
L7
L4
L1
L11
PROGRAM
START
STOP
S2
S1
1. Switch off the dishwasher with the main switch.
2. Press the main switch while holding in the Start/Stop button.
3. Release both buttons and the L7 light will flash.
4. Select desired setting (see table below) by pressing repeatedly on the Program
button.
Setting
˚dH
˚fH
All
extinguished
0-5*
0-9*
L1 lit
6-8
9-14
L1, L2 lit
9-14
15-25
L1, L2, L3
lit
15-19 26-34
L1, L2, L3, L4
lit
20-29 35-52
L1, L2, L3, L4,
L11 lit
30-44 53-79
L1, L2, L3, L4, 45 and 80 and
up
L11, L12 lit
up
5. Confirm your selection by pressing the Start/Stop button. You now automatically leave
the settings menu and the selected setting remains until you want to change it.
21
Fault indications
Indication
Type of fault
Action
L2 flashing
Too much water in the dishwasher
Phone service
L2
L3
L12
PROGRAM
S1
22
L7
L4
L1
L11
START
STOP
S2
Troubleshooting
Problems
Possible causes
Action
The dishes are not clean.
• The spray arms are not
rotating.
• Lift off the arms and clean.
• Old dishwasher detergent.
NB! Detergent is a perishable.
• Avoid large packs.
• Incorrect dosage of detergent.
• Dispense according to the
level of water hardness.
• Incorrect program chosen.
• Change to a more intensive program.
• Incorrect loading of the
dishwasher.
Stains or a film on the
china.
• Do not cover china with
large bowls or similar.
• Glasses and cups have
tipped over during the wash.
• Load the china securely.
• Dishwasher fitted with
water softener is leaking
salt.
• Check that the cover of the
salt compartment is properly
screwed on. Otherwise
phone for Service.
• Incorrectly set water softener.
• See the chapter on water
softeners.
• Incorrectly set rinse aid
dispenser.
• See the chapter on rinse
aid.
• The salt compartment is
empty.
• Top up with salt.
• Phosphate-free detergent in
combination with hard water.
• Change detergent.
• Too high a temperature
and/or too much detergent
can cause etching on (crystal) glass. Unfortunately this
cannot be remedied, only
prevented!
• Wash (crystal) glass at a
low temperature and dispense dishwasher detergent
with care. Contact the dishwasher detergent manufacturer.
• Use liquid detergents on
fine china.
23
Problems
Possible causes
Action
The china has a whitishblue sticky film.
• Too high dosage of rinse
aid.
• Reduce dosage. See the
chapter on rinse aid. If the
water is very soft, you could
try diluting the rinse aid (1
part rinse aid, 1 part water).
Stains on stainless steel
or silver.
• Certain food remnants
such as mustard, mayonnaise, lemon, vinager, salt
and dressings can cause
stains on stainless steel if
allowed to remain for any
length of time. All stainless
steel can mark silver if
allowed to come into contact during the dishwashing
process. Aluminium can
also cause stains on dishes.
• Rinse off food residue of
this type if you do not intend
to start the dishwasher
immediately.
Stains which remain after
dishwashing.
• Lipstick and tea can be
difficult to remove.
• Change to a detergent
with bleach.
Rattling sound during
dishwashing.
• The dishes are not properly loaded or the spray
arms are not rotating.
• Check that the china is
loaded securely. Spin the
spray arms to make sure
that they rotate.
The machine will not start.
• You have forgotten to
switch on the main switch.
• Check
• The door is not properly
closed.
• Check
• A fuse has blown.
• The plug is not plugged in.
• The water tap is off.
• Seperate your cutlery into
various compartments in
the basket. Make sure silver
and stainless steel are not
together.
• Check
• Check
• Check
” Overfilling/leakage
To restart the machine,
press Start/stop for 3
seconds. Now select a
new programme and
press Start/stop.
24
• A droning sound (drainage
pump) can be heard from
the machine, this does not
stop when the power is
switched off using the main
power switch.
1. Close the water tap.
2. Pull out the plug.
3. Call a service engineer
Problems
Possible causes
Action
Water remains in the
machine.
• Obstruction in the drain
hose.
• Disconnect the drain hose
where it is connected to the
sink’s water trap. Check that
no debris has become stuck.
Is the cone-shaped part of
the pipe cut so that the
diameter is at least 16 mm?
• Kinks in the drain hose.
• Check that the hose is free
from kinks or sharp bends.
• The filters are clogged.
• Clean out the coarse filter,
the fine filter and the filter.
• Objects in the drain pump.
• Clean out the drain pump.
See chapter on cleaning
• Dirt along the strips and in
corners
• Clean with a dish brush
and low-lather detergent
Bad odour in the machine
.
25
Performance information
Test dosage
Heavy wash/Normal wash
Main wash 25 gram Standard detergent.
Rinse aid dosage 3.
Energy labelling
Australia:
Dishwasher program:
Normal wash, 45°C
Program time:
Connection:
AS/NZS 2007
95 minutes.
Cold water
Test method noise measurement:
IEC-704-3
Example of dishwasher loading
AS/NZS 2007
AS/NZS 2007
Technical information
Height:
Width:
Weight:
Capacity:
Water pressure:
Connection:
Output:
*The weight can vary due to varying specifications.
26
820-870 mm
596 mm
48 kg*
51 kg with water softener*
14 IEC place settings
0.03-1.0 MPa
0.3-10 kp/cm2 (Bar)
3-100 N/cm2
See type plate
See type plate
Installation
Suggestions for positioning the
dishwasher
Built-in installation
The dishwasher can be built in, fully freestanding or semi-freestanding.
CAUTION!
Connection to electricity, water and drainage must be carried out by a suitably qualified person.
570
20
550
820-870
820870
100150
570
600
A. Built-in
The dishwasher can be built in under a
worktop with a working height of 820 - 870 mm.
The width measurement must be at least 600
mm. For additional measurements, see picture.
B. Freestanding
A freestanding dishwasher must be fitted
with anti-tilt. This comprises two fastening
irons which are screwed into place as illustrated.
The dishwasher is then pushed in so that
the fastening irons grip onto the rear feet.
The dishwasher cannot now tilt in the event
a load is placed on the open door. If the
dishwasher is to be fully freestanding, both
side panels and the work top should be
fitted. These accessories can be purchased
where you purchased the dishwasher.
175
-23
0
50
50-10
5
Freestanding installation
413
45
5-
47
5
600
CAUTION!
C. Semi-freestanding
If the dishwasher is positioned so that either
side is visible, a side panel can be fitted.
These accessories can be purchased
where you purchased the dishwasher.
A fully freestanding dishwasher must be
fitted with anti-tilt.
27
Connection to water supply
Connection to drainage
There must be a shut-off tap on the water
supply pipe. The shut-off tap should be
positioned above the work surface or at the
front of the sink unit.
The drain hose is routed to a connection
nipple at the sink’s water trap, as illustrated
below. Note that the hose must be fastened
level with the underside of the sink unit –
otherwise the dishwater from the sink will
run down into the dishwasher, as illustrated.
The water supply pipe has a connection
with a 1/2” or 3/4” internal thread depending
on country.
When the installation is complete, the shutoff tap should be opened to allow the pressure to settle for a while and to check that
all connections are tight.
Connection to electricity
A dishwasher fitted with a lead and plug
must be connected to an earthed socket.
Repairs and maintenance affecting safety or
performance must be carried out by a qualified professional.
Technical data
See the type plate on the right hand side of
the door.
CAUTION!
The drain hose is threaded onto a coneshaped connecting pipe at the sink unit’s
water trap. The cone-shaped pipe must be
cut to an internal diameter of at least 16 mm.
The drain hose may be lengthened by a
maximum of 3 m. Any connections and
connecting pipes must have an internal
diameter of at least 16 mm.
No part of the drain hose may be more than
950 mm above the floor.
The hose must not be routed directly to the
floor drain or similar. In such cases, the
hose can act as a siphon and empty the
dishwasher.
The hose must always discharge at least
350 mm above the floor.
The lead must be disconnected or the socket
voltage-free while the work is carried out!
Connection to drainage
NB!
The hose must be fastened level with the
underside of the work surface.
Details may differ depending on the model and the market!
28
Positioning the machine
A. Adjusting machines with 6 feet
(freestanding dishwasher)
1. Adjust the height of the dishwasher with
the four steel feet.
2. Lock the feet with the nuts.
NB! The dishwasher must not be allowed to
lean more than 5 mm.
Stålfötter
Steel feet
clockwise to raise or anti-clockwise to lower.
5. Check that the height of the machine
corresponds to the height from the floor to
the underside of the work surface.
Tighten the locking nuts (locking nut) on the
rear feet.
6. Push the dishwasher into place.
7. Finely adjust the front feet (the machine may
lean max. 5 mm) and tighten the locking nuts.
C. Adjusting dishwashers with
adjustable foot
1. Start by measuring the height from the
floor to the underside of the work surface.
2. Install the sliding feet on the dishwasher.
3. After the steel feet have been adjusted,
screw down the two rubber feet tightly
against the floor.
The rubber feet now work as anti-tilt protection.
B. Adjusting machines with three or four
feet
1. Start by measuring the height from the
floor to the underside of the work top of your
kitchen bench.
2. Install the sliding feet on the dishwasher.
3. Measure the height from the floor to the
top edge of the dishwasher.
4. Tilt the dishwasher forward a fraction and
roughly adjust the rear foot by screwing the
set screw at the front clockwise to raise or
anti-clockwise to lower (illustrated below).
Use a broad screwdriver or a hexagonal
head screwdriver.
5. Adjust the front feet by turning them clockwise to raise or anti-clockwise to lower.
6. Check that the height of the machine
corresponds to the height from the floor to
the underside of the work surface.
7. Push the dishwasher into place.
8. Finely adjust the feet (the machine may
lean max. 5 mm) and tighten the locking
nuts on the front feet.
3. Measure the height from the floor to the
top edge of the dishwasher.
4. Adjust all the feet by screwing them
29
Not all models
To prevent kinks, pull the drain hose and the
connecting pipe.
Fitting fixed kick-plate
Installing the plinth
(Only with kick-plate as accessory)
The dishwasher has two kick-plates (some
models).
The taller one should be used if the machine is to
be 850 - 870 mm high and the depth of the plinth
can be varied between 45 - 105 mm.The lower
one is to be used if the machine will be 820 - 845
mm with a plinth depth of between 50 - 105 mm.
Attach the enclosed felt insulation to the kick-plate
(some models).
Fitting strip seal
(on floor plinth covering plate)
Proceed as follows:
1. Remove the plastic plinth by gripping with both
hands under the plastic plinth (A), and break
outwards and upwards.
Set the correct plinth depth as follows:
1. Bring the grey hooks towards each other and pull
out the brackets as far as required. Press in the
catches so that they lock the brackets in place.
2. Suspend the kick-plate from the brackets by
pushing into the slots.
B
A
2. Undo the two screws on the covering plate (B).
3. Glue the accompanying rubber strip (C) to the
underside of the covering plate (against the floor).
4. Screw the covering plate back into place.
Adjust the covering plate so that the rubber strip is
just in contact with the floor.
Screw the dishwasher into place
The enclosed plastic plugs are used for covering
the screw holes if the dishwasher is to be
screwed at the sides. After fixing check that the
front feet are in contact with the floor.
x
C
5. Replace the plastic plinth
30
x
Setting water hardness
If you have a dishwasher with a water softener, you may need to change the setting depending on the water’s hardness level. Phone your local Water Board to check the water
hardness in your area. The dishwasher is set for low water hardness on delivery.
L2
L3
L12
L7
L4
L1
L11
PROGRAM
START
STOP
S2
S1
1. Switch off the dishwasher with the main switch.
2. Press the main switch while holding in the Start/Stop button.
3. Release both buttons and the L7 light will flash.
4. Select desired setting (see table below) by pressing repeatedly on the Program
button.
Setting
˚dH
˚fH
All
extinguished
0-5*
0-9*
L1 lit
6-8
9-14
L1, L2 lit
9-14
15-25
L1, L2, L3
lit
15-19 26-34
L1, L2, L3, L4
lit
20-29 35-52
L1, L2, L3, L4,
L11 lit
30-44 53-79
L1, L2, L3, L4, 45 and 80 and
up
L11, L12 lit
up
5. Confirm your selection by pressing the Start/Stop button. You now automatically leave
the settings menu and the selected setting remains until you want to change it.
31
Service & guarantee
32
Service
Guarantee
Before calling for service, check to see
whether the faults are due to something that
you can rectify yourself. See Trouble
shooting pages 23-25.
For guarantee details, see the guarantee
card.
Own comments
33
Own comments
34
Search words
C
Child safety 5, 7
Crystal 5, 14
D
Dishes 5, 6, 11, 12, 14
Dishwasher detergent 6, 8, 10, 11, 13, 17, 20
Drainage 27, 28
E
Energy 13, 26
Environment 36
G
Guarantee 32
L
Lime 17
P
Plastics 5, 14
Programs 12, 15, 16
Q
Quick Guide 36
R
Rinse aid 5, 8, 10, 18, 19
S
Safety 5, 6, 28
Salt 5, 20, 21
SCS 15
Service 6, 22
Settings 21
Silver 11, 14
W
Washing programs 12
Water hardness 5, 21, 31
Water softener 5, 8, 11, 20, 21, 26, 31
Winter storage 6
35
Quick Guide
1. Loading the baskets
Remove large food particles and debris. There is no need to rinse thanks to the Super
Cleaning System™.
2. Dispensing dishwasher detergent
The detergent compartment has a small compartment for pre-wash and one for main wash.
3. Ensure that the spray arms can rotate freely
4. Switch on the main switch
5. Close the door
6. Select program and press start
Mini Program Guide
Tested
program
Program
Press
Heavy
wash
Normal
wash
--
--
--
--
Temperature
Main wash
70˚C
45˚C
30˚C
--
Final rinse
70˚C
60˚C
--
--
Program
Options
Quick Rinse &
wash
Hold
How the
machine
works
Art. No.: 80 752 56. Rev. 02. We reserve the right to make changes. Desclaimer! Not all models contain all
the features listed in this manual.
Printed on environmentally-friendly paper which meets the demands of Friends of the Earth and the
Swedish Society for Nature Conservation.
36