1
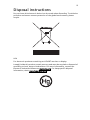
Extensa 6700 Series
User's Guide
Copyright © 2005. Acer Incorporated.
All Rights Reserved.
Extensa 6700 Series User's Guide
Original Issue: September 2005
Changes may be made periodically to the information in this publication without obligation
to notify any person of such revisions or changes. Such changes will be incorporated in new
editions of this manual or supplementary documents and publications. This company makes
no representations or warranties, either expressed or implied, with respect to the contents
hereof and specifically disclaims the implied warranties of merchantability or fitness for a
particular purpose.
Record the model number, serial number, purchase date and place of purchase information in
the space provided below. The serial number and model number are recorded on the label
affixed to your computer. All correspondence concerning your unit should include the serial
number, model number and purchase information.
No part of this publication may be reproduced, stored in a retrieval system, or transmitted, in
any form or by any means, electronically, mechanically, by photocopy, recording or otherwise,
without the prior written permission of Acer Incorporated.
Extensa 6700 Series Notebook PC
Model number: __________________________________
Serial number: ___________________________________
Date of purchase: ________________________________
Place of purchase: ________________________________
Acer and the Acer logo are registered trademarks of Acer Incorporated. Other companies'
product names or trademarks are used herein for identification purposes only and belong to
their respective companies.
iii
Disposal instructions
Do not throw this electronic device into the trash when discarding. To minimize
pollution and ensure utmost protection of the global environment, please
recycle.
USA
For electronic products containing an LCD/CRT monitor or display:
Lamp(s) inside this product contain mercury and must be recycled or disposed of
according to local, state or federal laws. For more information, contact the
Electronic Industries Alliance at www.eiae.org. For lamp-specific disposal
information, check www.lamprecycle.org.
iv
First things first
We would like to thank you for making the Extensa series of notebook PC your
choice for meeting your mobile computing needs.
Your guides
To help you use your Extensa, we have designed a set of guides:
First off, the Just for Starters... poster helps you get started with
setting up your computer.
The printed User's Guide introduces you to the basic features and
functions of your new computer. For more on how your computer
can help you to be more productive, please refer to the
AcerSystem User's Guide. This guide contains detailed
information on such subjects as system utilities, data recovery,
expansion options and troubleshooting. In addition it contains
warranty information and the general regulations and safety
notices for your notebook. It is available in Portable Document
Format (PDF) and comes preloaded on your notebook. Follow
these steps to access it:
1 Click on Start, All Programs, AcerSystem.
2 Click on AcerSystem User's Guide.
Note: Viewing the file requires Adobe Reader. If Adobe Reader is
not installed on your computer, clicking on AcerSystem User's
Guide will run the Adobe Reader setup program first. Follow the
instructions on the screen to complete the installation. For
instructions on how to use Adobe Reader, access the Help and
Support menu.
Basic care and tips for using your computer
Turning your computer on and off
To turn on the computer, simply press and release the power button below the
LCD screen beside the easy-launch buttons. See "Front view" on page 1 for the
location of the power button.
v
To turn the power off, do any of the following:
•
Use the Windows shutdown command
Click on Start, Turn Off Computer, then click on Turn Off.
•
Use the power button
You can also shut down the computer by closing the display cover, or by
pressing the sleep hotkey <Fn> + <F4>.
Note: If you cannot power off the computer normally, press and
hold the power button for more than four seconds to shut down
the computer. If you turn off the computer and want to turn it on
again, wait at least two seconds before powering up.
Taking care of your computer
Your computer will serve you well if you take care of it.
•
Do not expose the computer to direct sunlight. Do not place it near sources
of heat, such as a radiator.
•
Do not expose the computer to temperatures below 0 ºC (32 ºF) or above
50 ºC (122 ºF).
•
Do not subject the computer to magnetic fields.
•
Do not expose the computer to rain or moisture.
•
Do not spill water or any liquid on the computer.
•
Do not subject the computer to heavy shock or vibration.
•
Do not expose the computer to dust or dirt.
•
Never place objects on top of the computer.
•
Do not slam the computer display when you close it.
•
Never place the computer on uneven surfaces.
Taking care of your AC adapter
Here are some ways to take care of your AC adapter:
•
Do not connect the adapter to any other device.
•
Do not step on the power cord or place heavy objects on top of it.
Carefully route the power cord and any cables away from foot traffic.
•
When unplugging the power cord, do not pull on the cord itself but pull
on the plug.
•
The total ampere ratings of the equipment plugged in should not exceed
the ampere rating of the cord if you are using an extension cord. Also, the
total current rating of all equipment plugged into a single wall outlet
should not exceed the fuse rating.
vi
Taking care of your battery pack
Here are some ways to take care of your battery pack:
•
Use only batteries of the same kind as replacements. Turn the power off
before removing or replacing batteries.
•
Do not tamper with batteries. Keep them away from children.
•
Dispose of used batteries according to local regulations. Recycle if possible.
Cleaning and servicing
When cleaning the computer, follow these steps:
1
Turn off the computer and remove the battery pack.
2
Disconnect the AC adapter.
3
Use a soft, moist cloth. Do not use liquid or aerosol cleaners.
If either of the following occurs:
•
the computer has been dropped or the body has been damaged;
•
the computer does not operate normally
please refer to "Frequently asked questions" on page 23.
Caution
Changes or modifications not expressly approved by the manufacturer could
void the user's authority, which is granted by the Federal Communications
Commission, to operate this computer.
Operation conditions
This device complies with Part 15 of the FCC Rules. Operation is subject to the
following two conditions: (1) This device may not cause harmful interference,
and (2) This device must accept any interference received, including
interference that may cause undesired operation.
Users are requested to follow the RF safety instructions for wireless option
devices that are included in the user's manual of each RF option device.
An improper installation or unauthorized use may cause harmful interference
to radio communications. Also, any tampering of the internal antenna will void
the FCC certification and your warranty.
To prevent radio interference to the licensed service, this device is intended to
be operated indoors, and installation outdoors is subject to licensing.
For more information about our products, services, and support information,
please visit our website: http://global.acer.com.
iii
iv
iv
iv
iv
v
v
vi
vi
1
1
2
3
4
4
5
6
9
10
11
11
13
13
14
14
16
17
17
18
18
19
19
20
21
22
23
26
26
26
Contents
Disposal instructions
First things first
Your guides
Basic care and tips for using your computer
Turning your computer on and off
Taking care of your computer
Taking care of your AC adapter
Taking care of your battery pack
Cleaning and servicing
An Extensa tour
Front view
Closed front view
Left view
Right view
Rear view
Base view
Specifications
Indicators
Easy-launch buttons
Touchpad
Touchpad basics
Using the keyboard
Lock keys and embedded numeric keypad
Windows keys
Hotkeys
Special keys
Ejecting the optical (CD or DVD) drive tray
Using a computer security lock
Audio
Adjusting the volume
Using the system utilities
Acer eManager
Acer GridVista (dual-display compatible)
Launch Manager
Norton AntiVirus
Frequently asked questions
Requesting service
International Travelers Warranty (ITW)
Before you call
1
After setting up your computer as illustrated in the Just for Starters... poster,
let us show you around your new Extensa computer.
Front view
1
3
9
8
7
4
6
2
5
#
Item
Description
1
Display screen
Also called Liquid-Crystal Display (LCD); displays
computer output.
2
Microphone
Internal microphone for sound recording.
3
Keyboard
For entering data into your computer.
4
Palmrest
Comfortable support area for your hands when you use
the computer.
English
An Extensa tour
English
2
#
Item
Description
5
Click buttons
(left, center
and right)
The left and right buttons function like the left and
right mouse buttons; the center button serves as a 4-way
scroll button.
6
Touchpad
Touch-sensitive pointing device which functions like a
computer mouse.
7
Status
indicators
Light-Emitting Diodes (LEDs) that light up to show the
status of the computer's functions and components.
8
Easy-launch
buttons
Buttons for launching frequently used programs.
See "Easy-launch buttons" on page 10 for more details.
9
Power button
Turns the computer on and off.
Closed front view
10
#
Item
Description
1
Icon
Speakers
Left and right speakers deliver stereo
audio output.
2
Power indicator
Lights up when the computer is on.
3
Battery indicator
Lights up when the battery is being
charged.
4
Bluetooth
communication
button/indicator
(for selected models)
Press to enable/disable the Bluetooth
function. Indicates the status of
Bluetooth communication (optional).
5
Wireless
communication
button/indicator
Press to enable/disable the wireless
function. Indicates the status of WLAN
communication (optional).
6
Line-in jack
Accepts audio line-in devices
(e.g., audio CD player, stereo walkman).
3
Icon
Item
Description
7
Microphone jack
Accepts input from external
microphones.
8
Headphones/speakers/ Connects to audio line-out devices
line-out jack
(e.g., speakers, headphones).
9
USB 2.0 port
Connect to USB 2.0 devices
(e.g., USB mouse, USB camera).
10
Latch
Locks and releases the lid.
Left view
#
Item
Description
1
Optical drive
Internal optical drive; accepts CDs or DVDs depending
on the optical drive type.
2
LED indicator
Lights up when the optical drive is active.
3
Optical drive
eject button
Ejects the optical drive tray from the drive.
4
Emergency
eject hole
Ejects the optical drive tray when the computer
is turned off.
English
#
English
4
Right view
#
Item
Description
1
Icon
PC Card slot
eject button
Ejects the PC Card from the slot.
2
PC Card slot
Accepts one Type II PC Card.
3
Two USB 2.0
ports
Connect to USB 2.0 devices
(e.g., USB mouse, USB camera).
4
Ethernet (RJ-45)
port
Connects to an Ethernet
10/100-based network.
5
Modem (RJ-11)
port
Connects to a phone line.
6
Ventilation slot
Enable the computer to stay cool,
even after prolonged use.
Rear view
Item
Description
1
#
Icon
DC-in jack
Connects to an AC adapter.
2
External display
(VGA) port
Connects to a display device
(e.g., external monitor, LCD projector).
5
Icon
3
Item
Description
Kensington lock slot Connects to a Kensington-compatible
computer security lock.
Base view
1
6
5
4
3
2
#
Item
Description
1
Hard disk bay
Houses the computer's hard disk (secured with screws).
2
Battery
release latch
Releases the battery for removal.
3
Battery bay
Houses the computer's battery pack.
4
Battery lock
Locks the battery in place.
5
Cooling fan
Helps keep the computer cool.
Note: Do not cover or obstruct the opening of the fan.
6
Memory
compartment
Houses the computer's main memory and Mini PCI card.
English
#
English
6
Specifications
Operating
system
Microsoft® Windows® XP Home Edition (Service Pack 2)
Platform
Processor:
•
Intel® Pentium® M processor 730/740/750/760/
770/780 (2 MB L2 cache, 1.60/1.73/1.86/2/2.13/2.26
GHz, 533 MHz FSB)
Microsoft® Windows® XP Professional (Service Pack 2)
•
Intel® Pentium® M processor 725/725A (2 MB L2
cache, 1.60 GHz, 400 MHz FSB)
•
Intel® Celeron® M processor 360/370/380 (1 MB
L2 cache, 1.40/1.50/1.60 GHz, 400 MHz FSB)
Chipset: Intel® 915GM
Memory
256/512 MB or 1 GB of DDR2 533 memory, upgradeable to
2 GB using two soDIMM modules
Display
15.4" WXGA Acer CrystalBrite color TFT LCD, 1280 x 800
pixel resolution, supporting simultaneous multi-window
viewing on dual displays via Acer GridVista
15.4" WXGA color TFT LCD, 1280 x 800 pixel resolution,
supporting simultaneous multi-window viewing on dual
displays via Acer GridVista
15" XGA color TFT LCD, supporting 1024 x 768 pixel
resolution
16.7 million colors
Graphics
Intel® 915GM integrated 3D graphics, featuring Intel®
Graphics Media Accelerator 900 and up to 128 MB of
shared memory
Microsoft® DirectX® 9.0 and dual independent display
support
Simultaneous LCD and CRT display with LCD panel
resolution at 70 Hz
Up to 2048 x 1536 resolution via non-interlaced CRT display
MPEG-2/DVD hardware-assisted capability
Audio
Audio system with two built-in speakers
Storage
40/60/80/100 GB ATA/100 hard disk drive
Optical
media drive
Choice of:
Sound Blaster Pro™ and MS Sound compatible
Built-in microphone
•
•
DVD-Dual double-layer drive
DVD/CD-RW combo drive
7
Modem: 56K ITU V.92 with PTT approval;
Wake-on-Ring ready
LAN: 10/100 Mbps Ethernet; Wake-on-LAN ready
WLAN: integrated 802.11b/g Wi-Fi CERTIFIED™ network
solution, supporting Acer SignalUp™ wireless technology
WPAN: integrated Bluetooth®
Size and weight
364 (W) x 279 (D) x 33.9/38.9 (H) mm
(14.33 x 10.98 x 1.33/1.53 inches)
2.91 kg (6.4 lbs) for 15" LCD model
2.94 kg (6.5 lbs) for 15.4" LCD model
Power
ACPI 1.0b CPU power management standard: supports
Standby and Hibernation power-saving modes
29.6 W or 65 W Li-ion battery pack
2.5-hour rapid charge; 3.5-hour charge-in-use
65 W AC adapter
Special keys
and controls
88-/89-key keyboard, inverted "T" cursor layout, 2.5 mm
(minimum) key travel, international language support
Touchpad with 4-way scroll button
12 function keys, four cursor keys, two Windows® keys,
hotkey controls, embedded numeric keypad
Four easy-launch buttons: Internet, email, Empowering
Key, one user-programmable button
Two front-access LED-buttons: WLAN, Bluetooth®
I/O ports
Three USB 2.0 ports
PC card slot (one Type II)
External display (VGA) port
Headphones/speaker/line-out port
Microphone jack
Line-in jack
Ethernet (RJ-45) port
Modem (RJ-11) port
DC-in jack for AC adapter
Software
Acer Arcade
Acer eManager (ePowerManagement, eNetManagement,
ePresentation, eRecovery, eSettings)
Acer GridVista 2.0
Acer Launch Manager
Norton AntiVirus™
Adobe® Reader®
NTI CD-Maker™
English
Communication
English
8
Optional items
8-cell Li-ion battery pack
65 W AC adapter
256/512 MB or 1 GB DDR2 533 MHz soDIMM modules
External USB floppy disk drive
Environment
Temperature:
•
Operating: 5 °C to 35 °C
•
Non-operating: -20 °C to 65 °C
Humidity (non-condensing):
•
Operating: 20% to 80%
•
Non-operating: 20% to 80%
System
compliance
Mobile PC 2001
ACPI 1.0b
DMI 2.0
Warranty
One-year International Travelers Warranty (ITW)
Note: The specifications listed above are for reference only. The
exact configuration of your PC depends on the model purchased.
9
The computer has three easy-to-read status indicators on the upper-right above
the keyboard, and four on the front panel.
The power, battery and wireless communication status indicators are visible
even when the LCD display is closed.
Icon
Function
Description
Caps Lock
Lights up when Caps Lock is activated.
Num Lock
Lights up when Num Lock is activated.
Media activity
Indicates when the hard disk or optical drive is
active.
Bluetooth
Indicates the status of Bluetooth communication.
WLAN
Indicates the status of WLAN communication.
Power
Lights up when the computer is on.
Battery
Lights up when the battery is being charged.
English
Indicators
English
10
1. Charging: The light shows amber when the battery is charging.
2. Fully charged: The light shows green when in AC mode.
Easy-launch buttons
Above the keyboard, located at the upper-right, are four buttons. These
buttons are called easy-launch buttons. They are: mail, Web browser, Acer
Empowering Key <
> and one user-programmable button.
Press <
> to run the Acer eManager. Please see "Acer eManager" on page
19. The mail and Web browser buttons are pre-set to email and Internet
programs, but can be reset by users. To set the Web browser, mail and
programmable buttons, run the Acer Launch Manager. See "Launch Manager"
on page 21.
Easy-launch button
Default application
P
User-programmable
Acer eManager (user-programmable)
Web browser
Internet browser (user-programmable)
Mail
Email application (user-programmable)
11
The built-in touchpad is a pointing device that senses movement on its surface.
This means the cursor responds as you move your finger across the surface of
the touchpad. The central location on the palmrest provides optimum comfort
and support.
Touchpad basics
The following items show you how to use the touchpad:
•
Move your finger across the touchpad (2) to move the cursor.
•
Press the left (1) and right (4) buttons located beneath the touchpad to
perform selection and execution functions. These two buttons are similar
to the left and right buttons on a mouse. Tapping on the touchpad is the
same as clicking the left button.
•
Use the 4-way scroll (3) button to scroll up or down and move left or right
a page. This button mimics your cursor pressing on the right scroll bar of
Windows applications.
English
Touchpad
English
12
Right
button (4)
Function
Left button (1)
Execute
Quickly click
twice.
Tap twice (at the same
speed as double-clicking
a mouse button).
Select
Click once.
Tap once.
Drag
Click and hold,
then use
finger on the
touchpad to
drag the
cursor.
Tap twice (at the same
speed as double-clicking
a mouse button); rest
your finger on the
touchpad on the second
tap and drag the cursor.
Access
context
menu
Scroll
Main touchpad (2)
Center
button (3)
Click
once.
Click and
hold to
move up/
down/left/
right.
Note: When using the touchpad, keep it — and your fingers — dry
and clean. The touchpad is sensitive to finger movement; hence,
the lighter the touch, the better the response. Tapping harder will
not increase the touchpad's responsiveness.
13
The keyboard has full-sized keys and an embedded numeric keypad, separate
cursor, lock, Windows, function and special keys.
Lock keys and embedded numeric keypad
The keyboard has three lock keys which you can toggle on and off.
Lock key
Description
Caps Lock
When Caps Lock is on, all alphabetic characters typed are
in uppercase.
Num Lock
<Fn> + <F11>
When Num Lock is on, the embedded keypad is in numeric
mode. The keys function as a calculator (complete with the
arithmetic operators +, -, *, and /). Use this mode when you
need to do a lot of numeric data entry. A better solution
would be to connect an external keypad.
Scroll Lock
<Fn> + <F12>
When Scroll Lock is on, the screen moves one line up or down
when you press the up or down arrow keys respectively.
Scroll Lock does not work with some applications.
The embedded numeric keypad functions like a desktop numeric keypad. It is
indicated by small characters located on the upper-right corner of the keycaps.
To simplify the keyboard legend, cursor-control key symbols are not printed on
the keys.
Desired access
Num Lock on
Number keys on
embedded keypad
Type numbers in a normal
manner.
Cursor-control keys
Hold <Shift> while using
on embedded keypad cursor-control keys.
Main keyboard keys
Num Lock off
Hold <Fn> while using
cursor-control keys.
Hold <Fn> while typing
Type the letters in a
letters on embedded keypad. normal manner.
English
Using the keyboard
English
14
Windows keys
The keyboard has two keys that perform Windows-specific functions.
Key
Description
Windows key
Pressed alone, this key has the same effect as clicking on
the Windows Start button; it launches the Start menu.
It can also be used with other keys to provide a variety
of functions:
<
> + <Tab>: Activates the next Taskbar button.
<
> + <E>: Opens the My Computer window.
<
> + <F1>: Opens Help and Support Center.
<
> + <F>: Opens the Search Results window.
<
> + <R>: Opens the Run dialog box.
<
> + <M>: Minimizes all windows.
<Shift> + <
> + <M>: Undoes the minimize all
windows action.
Application
key
This key has the same effect as clicking the right mouse
button; it opens the application's context menu.
Hotkeys
The computer employs hotkeys or key combinations to access most of the
computer's controls like screen brightness, volume output and the BIOS utility.
To activate hotkeys, press and hold the <Fn> key before pressing the other key
in the hotkey combination.
15
Icon
Function
Description
<Fn> + <F1>
Hotkey help
Displays help on hotkeys.
<Fn> + <F2>
Acer eSettings
Launches Acer eSettings in Acer
eManager. See "Acer
eManager" on page 19.
<Fn> + <F3>
Acer ePower
Management
Launches Acer ePower
Management in Acer eManager.
See "Acer eManager" on page
19.
<Fn> + <F4>
Sleep
Puts the computer in Sleep
mode.
<Fn> + <F5>
Display toggle
Switches display output
between the display screen,
external monitor
(if connected) and both.
<Fn> + <F6>
Screen blank
Turns the display screen
backlight off to save power.
Press any key to return.
<Fn> + <F7>
Touchpad toggle
Turns the internal touchpad on
and off.
<Fn> + <F8>
Speaker toggle
Turns the speakers on and off.
<Fn> + <↑>
Volume up
Increases the sound volume.
<Fn> + <↓>
Volume down
Decreases the sound volume.
<Fn> + <→>
Brightness up
Increases the screen brightness.
<Fn> + <←>
Brightness down
Decreases the screen brightness.
English
Hotkey
English
16
Special keys
You can locate the Euro symbol and the US dollar sign at the upper-center
and/or bottom-right of your keyboard.
The Euro symbol
1
Open a text editor or word processor.
2
Either press <
> at the bottom-right of the keyboard, or hold <Alt Gr>
and then press the <5> key at the upper-center of the keyboard.
Note: Some fonts and software do not support the Euro symbol.
Please refer to www.microsoft.com/typography/faq/faq12.htm for
more information.
The US dollar sign
1
Open a text editor or word processor.
2
Either press < > at the bottom-right of the keyboard, or hold <Shift> and
then press the <4> key at the upper-center of the keyboard.
Note: This function varies according to the language settings.
17
To eject the optical drive tray when the computer is turned on, press the drive
eject button.
When the power is off, you can eject the drive tray by using the emergency
eject hole.
Using a computer security lock
A security keylock notch, located on the chassis of the computer, lets you
connect a Kensington-compatible computer security lock.
Wrap the computer security lock cable around an immovable object such as a
table or handle of a locked drawer. Insert the lock into the notch and turn the
key to secure the lock. Some keyless models are also available.
English
Ejecting the optical (CD or DVD)
drive tray
English
18
Audio
The computer comes with 16-bit high-fidelity AC'97 stereo audio and dual
stereo speakers.
Adjusting the volume
Adjusting the volume on the computer is as easy as pressing some buttons. See
"Hotkeys" on page 14 for more information on adjusting the speaker volume.
19
Note: The system utilities work under Microsoft Windows XP only.
Acer eManager
The innovative Acer eManager software is designed for easy access to
frequently used functions. Press <
> to launch the Acer eManager user
interface, which features five main settings: Acer ePowerManagement, Acer
eNetManagement, Acer ePresentation, Acer eRecovery and Acer eSettings.
To set the <
> key, see "Easy-launch buttons" on page 9.
Acer ePowerManagement
Provides a central location from which to control all your PC's power
schemes and maximize battery life.
Acer eNetManagement
Helps you to quickly and easily connect to networks in a variety
of locations.
Acer ePresentation
Simplifies resolution settings when connecting to a projector.
Acer eRecovery
Creates backups and recovers system configurations reliably.
Acer eSettings
Makes managing system settings and security easy.
English
Using the system utilities
English
20
For more information, open Acer eManager, click on the appropriate
application and select the Help function.
Note: If your computer did not come with a Recovery CD or
System CD, please use Acer eRecovery's "System backup to optical
disk" feature to burn a backup image to CD or DVD. To ensure the
best results when recovering your system using a CD or Acer
eRecovery, detach all peripherals (except the external Acer ODD, if
your computer has one), including your Acer ezDock.
Acer GridVista (dual-display compatible)
Note: This feature is only available on certain models.
To enable the dual monitor feature of your notebook, first ensure that the
second monitor is connected, then, select Start, Control Panel, Display and click
on Settings. Select the secondary monitor (2) icon in the display box and then
click the check box Extend my Windows desktop onto this monitor. Finally, click
Apply to confirm the new settings and click OK to complete the process.
Acer GridVista is a handy utility that offers four pre-defined display settings so
you can view multiple windows on the same screen. To access this function,
please go to Start, All Programs and click on Acer GridVista. You may choose
any one of the four display settings indicated below:
1
2
1
2
1
3
2
3
1
3
2
4
21
Acer Gridvista is dual-display compatible, allowing two displays to be
partitioned independently.
Acer GridVista is simple to set up:
1
Run Acer GridVista and select your preferred screen configuration for each
display from the taskbar.
2
Drag and drop each window into the appropriate grid.
3
Enjoy the convenience of a well-organized desktop.
Note: Please ensure that the resolution setting of your second
monitor is set to the manufacturer's recommended value.
Launch Manager
Launch Manager allows you to set the four easy-launch buttons located above
the keyboard. See "Easy-launch buttons" on page 10 for the location of the
easy-launch buttons.
English
Double (vertical), Triple (primary at left), Triple (primary at right), or Quad
English
22
You can access the Launch Manager by clicking on Start, All Programs, and then
Launch Manager to start the application.
Norton AntiVirus
Norton AntiVirus is an anti-virus software that finds and repairs infected files,
and protects against viruses to keep your computer data safe and secure.
How do I check for viruses?
A Full System Scan scans all files on your computer. To perform a system scan:
1
Start Norton AntiVirus.
Double click on the Norton AntiVirus Icon on the desktop or click on the
Start menu in the Windows taskbar, highlight Programs, and select
Norton AntiVirus.
2
In the Norton AntiVirus main window, click Scan for Viruses.
3
In the Scan for Viruses panel, click Scan My Computer.
4
Under Actions, click Scan.
5
When the scan is complete, a scan summary appears. Click Finished.
You can schedule customized virus scans that run unattended on specific dates
and times or at periodic intervals. If you are using the computer when the
scheduled scan begins, it runs in the background so that you do not have to
stop working.
For more information refer to the Norton AntiVirus Help menu.
23
The following is a list of possible situations that may arise during the use of
your computer. Easy solutions are provided for each one.
I pressed the power button, but the computer does not start or
boot up.
Look at the power indicator:
•
•
If it is not lit, no power is being supplied to the computer. Check the
following:
•
If you are using on the battery, it may be low and unable to power
the computer. Connect the AC adapter to recharge the battery pack.
•
Make sure that the AC adapter is properly plugged into the computer
and to the power outlet.
If it is lit, check the following:
•
Is a non-bootable (non-system) disk in the external USB floppy drive?
Remove or replace it with a system disk and press <Ctrl> + <Alt> +
<Del> to restart the system.
Nothing appears on the screen.
The computer's power management system automatically blanks the screen to
save power. Press any key to turn the display back on.
If pressing a key does not turn the display back on, three things might be
the cause:
•
The brightness level might be too low. Press <Fn> + <→> (increase) to
adjust the brightness level.
•
The display device might be set to an external monitor. Press the display
toggle hotkey <Fn> + <F5> to toggle the display back to the computer.
•
If the Sleep indicator is lit, the computer is in Sleep mode. Press and release
the power button to resume.
Image is not full-screen.
Each computer display has a different native resolution depending on the
screen. If you set the resolution lower than this native resoution, the screen
expands to fill the computer display. Right-click on your Windows desktop and
select Properties to bring up the "Display Properties" dialog box. Then click on
the Settings tab to make sure that the resolution is set to the appropriate
resolution. Resolutions lower than the specified resolution are not full-screen
on the computer or on an external monitor.
English
Frequently asked questions
English
24
No audio is heard from the computer.
Check the following:
•
The volume may be muted. In Windows, look at the volume control
(speaker) icon on the taskbar. If it is crossed-out, click on the icon and
deselect the Mute all option.
•
The volume level may be too low. In Windows, look at the volume control
icon on the taskbar. You can also use the volume control buttons to adjust
the volume. See "Hotkeys" on page 14 for more detail.
•
If headphones, earphones or external speakers are connected to the lineout port on the computer, the internal speakers automatically turn off.
I want to eject the optical drive tray without turning on the
power.
There is a mechanical eject hole on the optical drive. Simply insert the tip of a
pen or paperclip into the hole and push to eject the tray.
The keyboard does not respond.
Try attaching an external keyboard to a USB port on the computer. If it works,
contact your dealer or an authorized service center as the internal keyboard
cable may be loose.
The infrared port does not work.
Check the following:
•
Make sure that the infrared ports of the two devices are facing each other
(+/- 15 degrees) a maximum of 1 meter apart.
•
Make sure there is a clear path between the two infrared ports. Nothing
should be blocking the ports.
•
Make sure you have the appropriate software running on both devices (for
file transfers) or you have the appropriate drivers (for printing to an
infrared printer).
•
During the POST, press <F2> to access the BIOS utility and verify that the
infrared port is enabled.
•
Make sure both devices are IrDA-compliant.
The printer does not work.
Check the following:
•
Make sure that the printer is connected to a power outlet and that it is
turned on.
25
Make sure that the printer cable is connected securely to the computer's
parallel port or a USB port and the corresponding port on the printer.
I want to set up my location to use the internal modem.
To properly use your communication software (e.g. HyperTerminal), you need
to set up your location:
1
Click on Start, Settings, Control Panel.
2
Double-click on Phone and Modem Options.
3
Click on Dialing Rules and begin setting up your location.
Refer to the Windows manual.
Note: Please note, on first booting your notebook, that you can
skip the Internet Connection setup, as it is not necessary to
complete the installation of your Operating System. After the
Operating System is set up, you can proceed with the Internet
Connection setup.
I want to restore my computer to its original settings without
recovery CDs.
Note: If your system is the multilingual version, the operating
system and language you choose when you first turn on the
system will be the only option for future recovery operations.
This recovery process helps you restore the C:\ drive with the original software
content that is installed when you purchase your notebook. Follow the steps
below to rebuild your C:\ drive. (Your C:\ drive will be reformatted and all data
will be erased.) It is important to back up all data files before using this option.
Before performing a restore operation, please check the BIOS settings.
1
Check to see if Acer disk-to-disk recovery is enabled or not.
2
Make sure the D2D Recovery setting in Main is Enabled.
3
Exit the BIOS utility and save changes. The system will reboot.
Note: To activate the BIOS utility, press <F2> during POST.
English
•
English
26
To start the recovery process:
1
Restart the system.
2
While the Acer logo is showing, press <Alt> + <F10> at the same time to
enter the recovery process.
3
Refer to the onscreen instructions to perform system recovery.
Important! This feature occupies 2 to 3 GB in a hidden partition
on your hard disk.
Requesting service
International Travelers Warranty (ITW)
Your computer is backed by an International Travelers Warranty (ITW) that
gives you security and peace of mind when traveling. Our worldwide network
of service centers are there to give you a helping hand.
An ITW passport comes with your computer. This passport contains all you need
to know about the ITW program. A list of available, authorized service centers is
in this handy booklet. Read this passport thoroughly.
Always have your ITW passport on hand, especially when you travel, to receive
the benefits from our support centers. Place your proof-of-purchase in the flap
located inside the front cover of the ITW passport.
If the country you are traveling in does not have an Acer-authorized ITW service
site, you can still get in contact with our offices worldwide. Please consult
http://global.acer.com.
Before you call
Please have the following information available when you call Acer for online
service, and please be at your computer when you call. With your support, we
can reduce the amount of time a call takes and help solve your problems
efficiently. If there are error messages or beeps reported by your computer,
write them down as they appear on the screen (or the number and sequence in
the case of beeps).
You are required to provide the following information:
Name: _____________________________________________
Address: ___________________________________________
Telephone number: _________________________________
Machine and model type: ____________________________
Serial number: ______________________________________
Date of purchase: ___________________________________