1
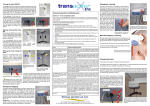
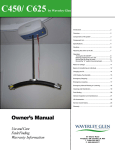
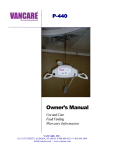
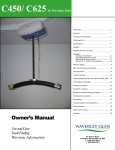
For Sales, Services & Repair Please Contact:
Westholme Ltd
Newcome Street, Elland,
West Yorkshire,
HX5 0EG
Tel: 01422 260011
Fax: 01422 371783
a b o v e
R I S I N G
transactive
TM
FROM WESTHOLME
ctiv
tr
s th
We
olm
e
sa
an
t ra
ns
fro
m
W a cti
esth ve
olm
e
e
Owner’s
Manual
Use and Care
Fault Finding
Warranty Information
a Prism Medical company
HOIST DIAGRAM
transactive from Westholme
TM
transactive from Westholme
9.
8.
1.
2.
tr a
s th
We
olm
ctiv
sa
e
10.
t ra
ns
fro
m
W a cti
esth ve
olm
e
n
Battery
Low
3.
Hand
Control
11.
Emergency
Stop & Reset
7.
e
5.
4.
11.
10.
6.
1.
2.
3.
4.
5.
6.
7.
8.
9.
10.
11.
Cover.
Safety Warning Load Label.
Low Battery Level Indicator. (Battery powered Models only).
Emergency Lowering Cord.
Lifting Tape.
Carry Bar.
Emergency Stop & Reset Button.
Manual Emergency Lowering Key Storage Location.
Manual Emergency Lowering Key Hole Location.
Coloured Directional Arrows.
Hand Control 2 button for Manual Traverse 4 Button for Motorised Traverse
2
CONTENTS
Page No
Hoist Diagram
2
Introduction
4
Instructions for use
5
Re-Charging the Batteries
8
Emergency Lowering
9
Technical Specifications
10
Diagrams of Carry bar Heights
11
Safety Features
12
Track Options
13
General Inspection and Maintenance
14
Fault Finding
15
Certificate of Conformity
16
Guarantee
17
Service Record -Initial Information
18
Service Record
19
Please note, the following components are included with your new transactive Hoist:
TM
• Westholme transactive Hoist (Manual or Motorised traverse) and carry bar
TM
• Transformer set
• Handset and hook
• Guarantee void stickers
• Manual Adaptor
• Completed log book
3
INTRODUCTION
We would like to welcome you as an owner/user of the transactive Overhead Hoist.
TM
We are sure you will be delighted with our product, the result of careful planning and
design, followed by careful construction using the highest quality components.
The transactive Hoist is intended only for the lifting and transfer of people and has been
TM
specifically designed for ease of use. Please read these instructions carefully before using
your transactive Hoist. You should ensure that not only you but any other person who is
TM
likely to use the hoist are familiar with these operating instructions. Please note that
Westholme Ltd will not be responsible for any damage caused by the misuse, neglect or
purposeful destruction of this hoist.
Your transactive Hoist is of robust construction and when properly used and serviced it
TM
will give many years of reliable service.
Please store these instructions carefully as they also contain your hoist’s service record
on which your guarantee depends.
Your hoist and installation have a maximum safe working load. Always ensure that this
rating is not exceeded. If in any doubt about the weight of person to be lifted, check
before proceeding with the lift
4
INSTRUCTIONS FOR USE
Westholme transactive Overhead Track Hoist
TM
1.
First check that the unit is ready for use:• Inspect lifting tape for signs of wear or fraying
• Test by depressing buttons on handset
• No red light should be showing on the underneath of the hoist. If the red light
shows, the unit will require charging before use. If a green light is showing this
means the unit is connected to the charger but no action is required (see
under “Re-charging the Batteries” page 8)
1.
Next, select an appropriate sling
Please note: slings should only be selected and used by persons having
appropriate training and instruction in their use.
2.
Raising and Lowering
Ensure that during both raising and lowering, there is nothing to obstruct the operation
• Fit the person to be lifted correctly and securely with the sling and in
accordance with sling instructions
• Position the unit directly above the person
• Lower the carry bar to the correct height so that the loops of the sling can be
securely fitted to the hooks of the carry bar
• Securely fit the loops of the sling to the carry bar hooks
• Press the up button ( ) on the handset to raise the carry bar. (ensure that the
sling remains in position and the tapes are securely over the carry bar until the
tension is taken. At this point, ensure the lifting tape is vertical prior to
continuing the lift – this prevents swinging)
• Press and hold the up button until the person has reached the required height
• When over the desired position press the lowering button ( ). Ensure that the
person being hoisted is fully lowered before releasing any part of the sling.
• Release the sling
• Raise the carry bar clear of the person and safely away from others
5
3. Traverse Movement
A. Powered Traverse Models
• After lifting the person, for traverse movement, look at the unit itself and note the
colour of the arrow indicating the desired direction
• Match this to the same coloured directional arrow on the handset
• Press that button and hold. The unit will move gradually off in the chosen direction
• When in the desired position, release the button and the unit will stop
• Ensure the person is not moving or swinging prior to lowering
Note: For safety reasons you cannot move in a horizontal and vertical plane at
the same time. If two buttons are pressed together only one will have any
action
B. Manual Traverse Models
• After lifting, push the unit in the appropriate direction. This can be done by either
gently pushing the unit itself or the carry bar, or a suitable position on the person.
Ensure that these last two methods cause no discomfort to the person
• Do not use excessive force: this is unnecessary as the unit will move easily along
the track
• Stop the unit in the desired position and commence lowering
Turntables
• A drive Hoist is the preferred model for use with a turntable
• To use the turntable, ensure the short piece of track on the turntable is aligned
with the main track on which the hoist is running.
• Drive the hoist along the track and onto the turntable, stopping the hoist when the
marker on the hoist lines up with the marker on the turntable. From below it will
appear that the hoist is off centre. This is normal and is because the trolley wheels
on the top of the hoist are not centralised on the hoist centre
• The turntable cord should then be pulled down fully. The turntable will rotate up to
its pre-determined stop. The hoist can now be driven off the turntable onto the
new track
• In order to pass through a turntable in a straight line, ensure the short piece of
track on the turntable is aligned with the main track on which the hoist is running.
Simply drive the hoist through the turntable
6
“H” System (Room Cover System)
• This system consists of two parallel fixed track beams with travelling cross beam
on which the hoist runs
• The hoist on the manual “H” system is propelled as a manual drive hoist (see
page 6)
• A powered “H” system has a six button handset on the hoist. These buttons
control the lift and lower feature of the hoist, the traverse along the travelling
beam, and the movement of the travelling beam along the fixed rails
• Only one button will function at once if more than one button is depressed
simultaneously
Transgate – for use only with a powered traverse hoist
• This track feature allows a hoist to exit a manual “H” system and pass straight
onto a straight track (which can then be joined to another manual “H” room cover
system if required)
• In order to exit the manual “H” system, propel the travelling beam along the fixed
rails towards the straight track until the latch clicks the travelling beam into
alignment with the straight track
• You may then drive the hoist from the travelling beam (now fixed) onto the straight
track. When the hoist moves through the transition gate onto the straight track, it
activates a locking mechanism
• The travelling beam cannot be moved from its locked position until the hoist
returns through the gate
• In order to enter the manual “H” system from the straight track, simply drive the
hoist through the transition gate onto the travelling beam. This disengages the
lock mechanism in the transition gate
• In order to release the travelling beam from its locked position, pull the cord fully.
Only a light force is required
CAUTION
• Always check you are not exceeding the maximum safe working load of the hoist, sling
or installation prior to use.
• Never expose the hoist directly to water. Warranty does not cover any misuse or abuse
of the hoist system.
• To maintain optimum hoist functions, batteries should be charged on a regular basis
(please see Charging Instructions).
• Any accessories used with the hoist, including slings, should be checked to ensure that
they are in good working order. Check for signs of wear or fraying prior to use.
7
RECHARGING THE BATTERIES
Batteries should be charged on a regular basis. It is recommended that the hoist is
stored in the charging bay (at the end of the track) at all times when not in use; this
ensures that the battery charge is maintained and the hoist is always ready for use.
• When the red indicator light shows, the hoist requires charging
• If the red light indicator begins to show during use, complete transfer and return
to charging bay.
To Re-Charge
• Move the hoist along to the charging bay at the appropriate end of the track.
• Ensure the red light goes out and the green light illuminates (to indicate that the
hoist is charging)
• The hoist may be used after one hour but a full recharge is desirable. This will take
about 12 hours and could be carried out overnight.
8
EMERGENCY LOWERING
There are two emergency lowering systems on the Freeway Hoist. Should these be
required then take note of the following:
Battery Powered Emergency Lowering:
• Remember to carefully position your chair or bed or suitable surface directly
underneath the person to be lowered
• Gently pull the cord with the red toggle, which extends from the underneath of the
hoist. The person will be slowly lowered. Releasing the cord stops the descent.
Manual Emergency Lowering:
• Remove the emergency-lowering Adaptor from its position on top of the hoist.
• Remove the black cap from the side of the unit. Insert the adaptor in the hole.
Locate it onto the shaft. If you find it difficult to locate the adaptor on the shaft,
gently turn the adapter by slowly pulling the chain in one direction until the
adaptor fits on to the shaft. The adapter will fit flush against the side of the hoist
when properly located. Using the chain, continue use of the hoist.
• After use remove emergency lowering adaptor and replace on top of hoist.
*REMEMBER TO REPLACE THE ADAPTOR IN ITS POSITION ON TOP OF
THE HOIST*
Using the manual
adaptor
9
TECHNICAL SPECIFICATION
Hoist Motor
24V DC
Traverse Motor
24V DC
+ System Traverse Motor
24V DC
Weight Unladen Hoist (Powered)
22.3Kg
Weight unladen Hoist (Manual)
21.9Kg
Weight of Carrybar
2Kg
Shipping Box Dimensions
510mm x 500mm x 500mm
Shipping Box Weight (Powered)
31Kg
Shipping Box Weight (Manual)
28Kg
Voltage
24V D.C.
Fuse Rating
3amp max.
Batteries
2 off 12V 7amp
sealed – rechargeable
Transformer Input
240V A.C. 50Hz
Transformer Output
33V A.C.
Approximate Charging Time
4 Hours
The policy of Westholme Ltd is one of continual improvement and we reserve the right to
modify designs without notice.
MAXIMUM SAFE WORKING LOAD
Maximum load of the hoist is determined by refering to the poduct
label on the end of the hoist
transactive
TM
130
130Kgs
(20 Stone)
transactive
TM
160
160Kgs
(25 Stone)
transactive
TM
200
200Kgs
(30 Stone)
10
Range for the transactive TM Overhead Track Hoist with the
Carrybar at its Highest Point
transactive
TM
Range for the transactive TM Overhead Track Hoist with the
Carrybar at its Lowest Point
transactive
TM
11
SAFETY FEATURES
Your transactive Hoist has an abundance of safety features so whether you are a user or
a carer, you can use the transactive with confidence.
TM
TM
• A failsafe over speed governor is fitted to all our models, so that in the unlikely
event of rapid descent owing to mechanical failure, a brake on the tape
automatically comes into operation. This action is similar to the seat belt on a car
• The carry bar stops automatically at its top and bottom limits
• There are two forms of emergency lowering: (A) battery wind down, using the
emergency lowering cord, (B) a manual wind down using the special adaptor
stored on the top of the hoist
• The attractive cover of the transactive is fire retardant ABS
TM
• All units are fitted with “soft start” so that no sudden movements are experienced
by the user
• The handset is lightweight and clearly marked. It is air operated which means
there is no electrical current directly to the hand of the user. Therefore can be
used in wet conditions without any worry. The controls need to be depressed for
the hoist to move, so if your hand slips, you will not move unexpectedly
• Emergency Stop/Overload Reset Button:- When pulled the emergency stop cord
operates an isolator switch which takes away all power from the hoist. The
emergency stop is re-set by pressing the reset button, situated directly above the
Emergency Stop cord. The emergency stop switch is combined with overload
protection and will operate to safeguard the hoist in the event of overload (e.g. an
excessive lift being attempted). If the handset does not operate the hoist, press
the reset button (to which the emergency cord is attached)
• Each unit is fully tested before leaving our factory
Battery Powered Models Only:
• An indicator light shows red when the batteries require re-charging
• The transformer from which the batteries are charged is specially thermally
protected and is rated for use in damp conditions
• The transformer is IP67 rated
• Section 601-02 of BS7671:1992 defines zones within the bath/shower area
• If siting the transformer in zone 3, there are no special requirements for siting the
transformer
• If siting in zone 2, because of the IP rating, this site is in order
• If siting the transformer in zone 1, the transformer will need to be protected by an
RCD
• It will never be necessary to site a transformer within zone 0 (In the interior of the
bath or shower basin)
12
TRACK
• Westholme Track is purpose made, constructed of strong aluminium and coated in hard
wearing tough white coating
• The Track is secured by brackets which are strong, secure but unobtrusive
• The special backing track enables spans of up to 5metres to be safely bridged
• Sections of curved track from 15 degrees to 90 degrees are available
Whole house coverage can be achieved by use of
• “H” Systems (powered and manual)
• Transgates (from manual “H” systems using a powered drive hoist onto straight track)
• Turntables
13
GENERAL INSPECTION & MAINTENANCE
A) Each Use - To be completed by User
Prior to each use the transactive hoist and associated track, accessories and sling (s),
must be visually inspected. Refer to the accessory and sling user guides for specific
details regarding their inspection.
TM
Should any of the these items fail the inspection do not use the hoist
Contact Westholme or your local authorised Westholme dealer for service.
Visually check for the following:
• The hoist lifting tape shows NO signs of fraying or breaking along its entire length.
• The stitching on the hoist lifting tape where it connects to the carry bar shows NO signs
of fraying, or breaking.
• The sling (s) that will be used shows NO signs of unusual wear and tear. The straps of
the sling that connect to the carry bar of the hoist show NO signs of fraying or breaking.
Refer to specific sling instructions.
• The airline tube that connects the hand control to the hoist is not kinked, twisted,
knotted, cut or damaged.
• All the functions on the hand control work correctly (e.g. UP/DOWN/.LEFT/RIGHT, etc..).
• The brackets that hold the track in place on the ceiling are secure and do not move or
appear loose.
• There are not cuts, dents or sharp edges on the carry bar that may damage the straps
of the sling.
• The hoist has no unusual sounds when the carry bar is moved UP/DOWN or the hoist is
moved LEFT/RIGHT.
• Ensure that there are end stops installed at each end of the track.
B) Monthly - To be completed by User
Should any of the these items fail the inspection do not use the hoist.
Contact your local authorised Westholme dealer for service.
• Complete the visual inspection as noted in the “Each Use” section above.
With no one in the sling nor attached to the hoist check the following:
• The hoist moves freely along the entire length of the track.
14
C) Half Yearly or Yearly - To be completed by a hoist technician
Consult your local authorised Westholme dealer for advice on whether this section should
be completed every 6 months or on a yearly basis. Generally, in frequent use, or in
situtations where heavier than normal clients are lifted, or in multi-user environments such
as in institutions the hoist should be checked every 6 months
!
This section to be only completed by a qualified service technician as authorised by Westholme
• Complete the visual inspection as noted in the “Monthly” section above
• Complete the preventative maintenance procedure as outlined in technical manuals for
the transactive system.
TM
• transactive hoist checked and passed. Any required repairs completed.
TM
The transactive Overhead Hoist should only be inspected, serviced and maintained by a
properly trained engineer.
TM
To clean the case of your transactive Hoist use a soft cloth and a soap solution.
TM
*Please note that your warranty is completely invalidated if the seal on the cover is broken*
In order to maintain your warranty and for reasons of safety and quality assurance, please
maintain this logbook and produce it to the service engineer on his every visit.
FAULT FINDING
IF YOUR HOIST DOES NOT OPERATE, CHECK THE FOLLOWING:
1.
Is the battery low light showing? If so, transfer hoist to charging bay and dock.
Check green light shows and leave to re-charge. After one hour the hoist may be
used, but an overnight charge is desirable as soon as possible.
2.
Is the handset tube properly connected to the hand set and the hoist unit
overhead?
Check that the tube is pushed home onto the metal connectors.
3.
Press the reset button in case the safety cut out has operated.
Please note: If the hand control set buttons do not operate according to their
designations (e.g. if pressing the up button initiates traverse movement this
means that the handset tube has been incorrectly connected to the hoist
unit. Move the tube connectors round one hole at a time until the hoist
moves correctly in relation to the handset.
The handset connecting tube is designed to pull out if subject to undue tension.
This facilitates easy rectification by replugging into the socket without damage to
the tubing. However, a securing clip can be supplied and fitted to the hoist casing if
required e.g. in pool areas or where the hoist is fitted at a higher than average level
or is not easily accessible.
After checking the above, if the hoist still does not operate contact your engineer.
15
a Prism Medical company
CE MARKING – DECLARATION OF
CONFORMITY
REGISTERED MANUFACTURER NUMBER:
CA004112
Westholme Ltd hereby declares that the transactive range of products listed below,
meet the provisions of the European Union Council Directive 93/42/EEC of 14th June
1993 concerning medical devices and are classified as Class 1 devices in accordance
with that Directive
TM
E4 Patient Hoist/Lifting Aids and Accessories:
transactive
TM
Overhead Hoist (130 kgs, 160 kgs, 200 kgs and 270 kgs models)
Westholme of Patient range slings
We hereby certify that the products listed above are manufactured labelled and packaged in accordance with
the provisions of Directive 93/42/EEC and conform in all respects to the specification(s) relevant to them at the
time of despatch and are CE marked in accordance with Directive 93/42/EEC.
For and on behalf of
Westholme
Colin Ayrton
NEWCOMBE STREET, ELLAND,
WEST YORKSHIRE, HX5 0EG
TEL: 01422 260011 FAX: 01422 371783
16
GUARANTEE
This hoist has been carefully manufactured in Great Britain to the highest
standards at all stages of design and build. Quality control throughout
manufacture is exacting and we are proud to guarantee this quality product.
Westholme Ltd will, subject only to the conditions set out below, replace
free of charge all mechanical parts found to be defective due to
manufacturers defect for a period of 2 years from the date of purchase.
CONDITIONS
(TO BE OBSERVED TO PRESERVE THE WARRANTY)
1.This hoist must at all times be used in accordance with the instructions
provided,
2.The hoist must be serviced at intervals of not more than twelve months
by Westholme or their authorised technicians. The Dates of service must
be recorded in this log book.
3.The hoist should not be inspected, maintained or tampered with in any
way. In the event of the seal on the cover being broken, this warranty is
completely invalidated.
4.Damage occurring due to misuse (including overloading) abuse or
accidental damage is not covered.
17
SERVICE RECORD HISTORY - INITIAL INFORMATION
• Complete the following section on Purchase and Service Information as soon
as this equipment is installed.
• Use the service record history to record to any completed service and repairs.
• Ensure that the service record is signed and dated each time it is used.
• Be sure to have this piece of equipment serviced on a regular basis as
described in the General Inspection and Maintenance Section
PURCHASE INFORMATION:
Product Name: transactive™ hoist
Model: ________________________
Serial#:________________________
Date of Purchase: ___________________
Date Installed: __________________
Purchased From: ____________________________________________________
Address: _______________________________________
City: _____________________________
Post Code: _____________________
Telephone No: __________________________
Comments:
SERVICE INFORMATION:
Contact the following company for service:
Company: __________________________________________________________
Address: _______________________________________
City: __________________________ Post Code: ________________
Telephone No: __________________________
Comments:
18
SERVICE RECORD HISTORY
Complete this section after each service, repair
inspection and / or maintenance.
Photocopy additional pages as required.
Date: ____________________________ Time: ____________________________
Service Type:
6 Month Inspection
Periodic Inspection
Repair
Monthly Inspection
Yearly Inspection
Other:_________
Completed By: __________________________ __________________________
Printed Name
Signature
Company: __________________________________________________________
Remarks & Action Taken:
19
SERVICE RECORD HISTORY
Complete this section after each service, repair
inspection and / or maintenance.
Photocopy additional pages as required.
Date: ____________________________ Time: ____________________________
Service Type:
6 Month Inspection
Periodic Inspection
Repair
Monthly Inspection
Yearly Inspection
Other:_________
Completed By: __________________________ __________________________
Printed Name
Signature
Company: __________________________________________________________
Remarks & Action Taken:
Date: ____________________________ Time: ____________________________
Service Type:
6 Month Inspection
Periodic Inspection
Repair
Monthly Inspection
Yearly Inspection
Other:_________
Completed By: __________________________ __________________________
Printed Name
Signature
Company: __________________________________________________________
Remarks & Action Taken:
20
SERVICE RECORD HISTORY
Complete this section after each service, repair
inspection and / or maintenance.
Photocopy additional pages as required.
Date: ____________________________ Time: ____________________________
Service Type:
6 Month Inspection
Periodic Inspection
Repair
Monthly Inspection
Yearly Inspection
Other:_________
Completed By: __________________________ __________________________
Printed Name
Signature
Company: __________________________________________________________
Remarks & Action Taken:
Date: ____________________________ Time: ____________________________
Service Type:
6 Month Inspection
Periodic Inspection
Repair
Monthly Inspection
Yearly Inspection
Other:_________
Completed By: __________________________ __________________________
Printed Name
Signature
Company: __________________________________________________________
Remarks & Action Taken:
21
SERVICE RECORD HISTORY
Complete this section after each service, repair
inspection and / or maintenance.
Photocopy additional pages as required.
Date: ____________________________ Time: ____________________________
Service Type:
6 Month Inspection
Periodic Inspection
Repair
Monthly Inspection
Yearly Inspection
Other:_________
Completed By: __________________________ __________________________
Printed Name
Signature
Company: __________________________________________________________
Remarks & Action Taken:
Date: ____________________________ Time: ____________________________
Service Type:
6 Month Inspection
Periodic Inspection
Repair
Monthly Inspection
Yearly Inspection
Other:_________
Completed By: __________________________ __________________________
Printed Name
Signature
Company: __________________________________________________________
Remarks & Action Taken:
22
SERVICE RECORD HISTORY
Complete this section after each service, repair
inspection and / or maintenance.
Photocopy additional pages as required.
Date: ____________________________ Time: ____________________________
Service Type:
6 Month Inspection
Periodic Inspection
Repair
Monthly Inspection
Yearly Inspection
Other:_________
Completed By: __________________________ __________________________
Printed Name
Signature
Company: __________________________________________________________
Remarks & Action Taken:
Date: ____________________________ Time: ____________________________
Service Type:
6 Month Inspection
Periodic Inspection
Repair
Monthly Inspection
Yearly Inspection
Other:_________
Completed By: __________________________ __________________________
Printed Name
Signature
Company: __________________________________________________________
Remarks & Action Taken:
23