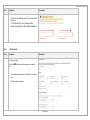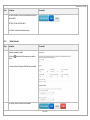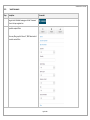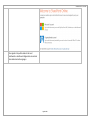
1
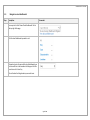
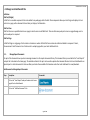
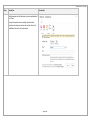
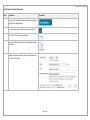
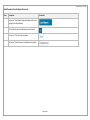
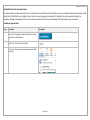
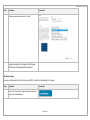
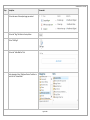
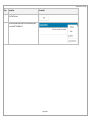
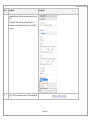
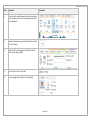
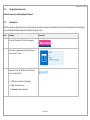
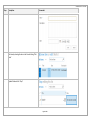
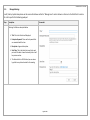
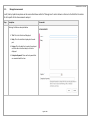
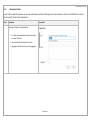
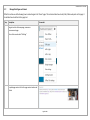
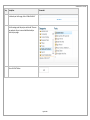
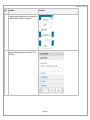
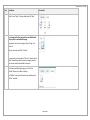
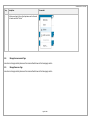
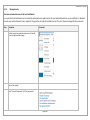
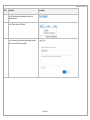
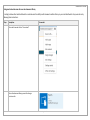
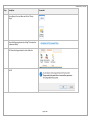
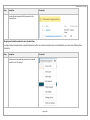
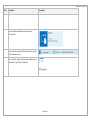
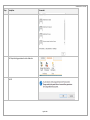
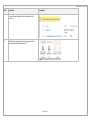
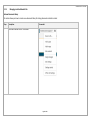
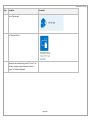
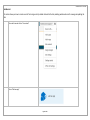
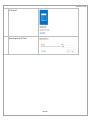
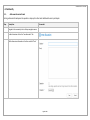
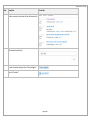
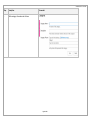
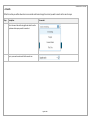
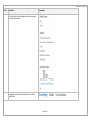
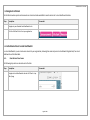
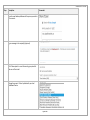
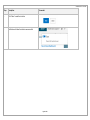
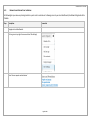
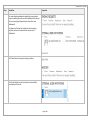
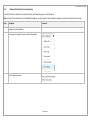
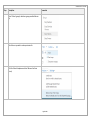
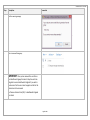
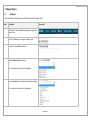
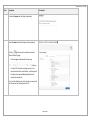
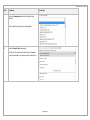
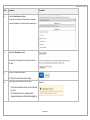
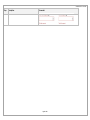
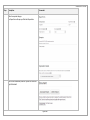
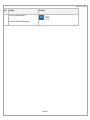
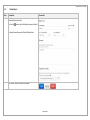
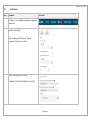
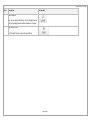
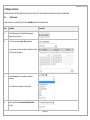
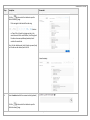
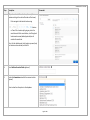
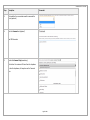
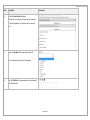
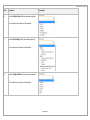
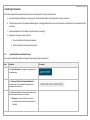
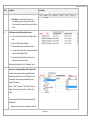
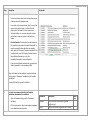
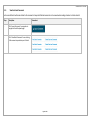
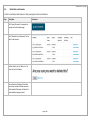
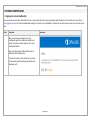
Healthwatch Hub - User Guide Healthwatch Hub – Local Healthwatch User Guide Author(s): Date: 7th May 2013 Reviewed by: Version: 1.0 Page 1 of 94 Healthwatch Hub - User Guide 1. LOCAL HEALTHWATCH ADMINISTRATOR ......................................................................... 4 1.1. COMMON TASKS ..................................................................................................................... 4 1.1.1. Navigate to the Hub ............................................................................................... 4 1.1.2. Navigate to a Local Healthwatch ........................................................................... 5 1.2. MANAGE LOCAL HEALTHWATCH SITE .......................................................................................... 6 1.2.1. Manage Report Documents ................................................................................... 6 1.2.2. Manage Guidance Documents ............................................................................. 17 1.2.3. Manage Issues ..................................................................................................... 17 1.2.4. Manage Meetings ................................................................................................ 20 1.2.5. Manage Announcements ..................................................................................... 21 1.2.6. Manage Useful Links ............................................................................................ 22 1.2.7. Manage Web Pages and Content ........................................................................ 23 1.2.8. Manage Announcements Page ............................................................................ 27 1.2.9. Manage Resources Page ...................................................................................... 27 1.2.10. Manage Security .............................................................................................. 28 1.2.11. Managing Local Healthwatch Site ................................................................... 38 1.3. COMMUNITY ........................................................................................................................ 42 1.3.1. Add a new discussion thread ............................................................................... 42 1.4. SEARCH ............................................................................................................................... 45 1.5. NAVIGATE TO INFO BANK ........................................................................................................ 47 1.6. INVITE EXTERNAL USERS TO LOCAL HEALTHWATCH ...................................................................... 47 1.6.1. Grant External User Access .................................................................................. 47 1.6.2. Review Current External User Invitations ............................................................ 50 1.6.3. Remove External User From Security Group ........................................................ 53 1.7. MANAGE REPORTS ................................................................................................................ 56 1.7.1. Add Report ........................................................................................................... 56 In order to create a new Report, you must fill in and save the ‘Report’ form .................... 56 1.7.2. Edit Report ........................................................................................................... 62 1.7.3. Delete Report ....................................................................................................... 65 1.7.4. Search Reports ..................................................................................................... 66 1.8. MANAGE COMMENTS ............................................................................................................ 68 1.8.1. Add Comment ...................................................................................................... 68 In order to enter a new comment, a user must complete and save the comment form ... 68 1.8.2. Edit Comment....................................................................................................... 76 Page 2 of 94 Healthwatch Hub - User Guide 1.8.3. Delete Comment .................................................................................................. 77 1.8.4. Search Comments ................................................................................................ 79 1.9. BULK IMPORT COMMENTS ...................................................................................................... 82 1.9.1. Upload Workbook and Schedule Import .............................................................. 82 1.9.2. Automated Processing of Comment Import Workbook ....................................... 89 1.9.3. View Batch and Comments .................................................................................. 90 1.9.4. Delete Batch and Comments................................................................................ 91 2. EXTERNAL PARTNER USER ............................................................................................. 92 2.1. SIGNING INTO A LOCAL HEALTHWATCH ...................................................................................... 92 2.2. ACCESSING OTHER LOCAL HEALTHWATCH SITES AND CONTENT ...................................................... 94 Page 3 of 94 Healthwatch Hub - User Guide 1. LOCAL HEALTHWATCH ADMINISTRATOR 1.1. Common Tasks 1.1.1. Step 1. Navigate to the Hub Description Screenshot If not already logged in, enter link to Hub in browser address bar https://hwhub.sharepoint.com 2. Enter login details sent to you by Healthwatch England and click ‘Sign in’ 3. You will be taken to the Hub or receive a warning message if entering incorrect details Page 4 of 94 Healthwatch Hub - User Guide 1.1.2. Step Navigate to a Local Healthwatch Description 1. From any site click the ‘View all local Healthwatch’ link in the top right of the page 2. Click the Local Healthwatch you wish to visit 3. Alternatively, enter the name of the Local Healthwatch you wish to search for in the box above the listing and click the search icon or hit ‘enter’ key Screenshot This will reduce the listing based on your search term. Page 5 of 94 Healthwatch Hub - User Guide 1.2. Manage Local Healthwatch Site Definitions Web Part (Widget) A Web Part is a reusable component that can be added to any web page within the Hub. These components allow you to do things such display rich text content on a page, surface documents from a library or display a YouTube video. Web Part Zone Web Part Zones are a predefined section on a page to which users can add Web Parts. There are often many web part zones on a page allowing users to position web parts as required. Web Part Page A Web Part Page is a single page of rich content and contains a number of Web Part Zones and can be edited and added to as required. ‘Home’, ‘Announcements’ and ‘Resources’ are all instances of a web part page within your Local Healthwatch site. 1.2.1. Manage Report Documents This part of the document shows you how to manage documents in the reports documents library. This document library is used within the “Local Reports” web part that is situated on the home page. The methods outlined in this part can be used to update other document libraries. Each Local Healthwatch can upload reports or other documents to their own library and make these available for themselves and other Local Healthwatch to view/download. Add Document to Manage Report Documents Step Description 1. Click on the “Local Reports” web part header on the home page of the local Healthwatch 2. Click on the “Add New Document” Link Screenshot Page 6 of 94 Healthwatch Hub - User Guide Step Description 3. Click on the “Browse” Button 4. Find file and click “open” and click “ok” Screenshot Page 7 of 94 Healthwatch Hub - User Guide Step 5. Description Screenshot Add information with the document you have uploaded and click “Save” Enterprise keywords are any word(s) you believe best describes your document and can be used by other Local Healthwatch to search for the document Page 8 of 94 Healthwatch Hub - User Guide Edit Document in Report Documents Step Description 1. Click on the “Local Reports” web part header on the home page of the local Healthwatch 2. Click on the tick next to the document you wish to edit 3. Click on the “Files” link in the top ribbon 4. Click on the “Edit Item” link the menu that appears below the ribbon. 5. Update the information within the form that appears and click the “Save” button Screenshot Page 9 of 94 Healthwatch Hub - User Guide Delete Document from the Report Documents Step Description 1. Click on the “Local Reports” web part header on the home page of the local Healthwatch 2. Click on the tick next to the document you wish to edit 3. Click on the “Files” link in the top ribbon 4. Click on the “Delete Document” link below the top ribbon. Screenshot Page 10 of 94 Healthwatch Hub - User Guide Adding Web Content to a Document Library This sections shows you how to add content to the “Local Reports” document library. This will enable you to create a Web Part Page and show you how to add content into that Web Part Page. You might choose to create a web part page when a document isn’t suitable for the content you wish to display. For example, a web page containing links to other sites or information you wish to let the user view quickly rather than having to open a document. Add web part page to library Step Description 1. Click on the “Local Reports” web part header on the home page of the local Healthwatch 2. Click on the “Files” link in the top ribbon 3. Click on the “New Document” drop down and select “Web Part Page” Screenshot Page 11 of 94 Healthwatch Hub - User Guide Step 4. 5. Description Screenshot Add name and select layout and click “Create” Change the properties of the page item by following “Edit Document in Manage Report Documents” Edit web part page Here you can add content, add a link to a document (PDF or other) and add web parts to the page Step 1. Description Screenshot Click on the “Local Reports” web part header on the home page of the local Healthwatch Page 12 of 94 Healthwatch Hub - User Guide Step Description 2. Click on the name of the web part page you created 3. Click on the “Page” link that is in the top ribbon 4. Click on “Edit Page” 5. Click on the “Add a Web Part” link 6. In the categories click on “Media and Content” and then in parts click on “Content Editor” Screenshot Page 13 of 94 Healthwatch Hub - User Guide Step Description 7. Click “Add” button 8. Click on drop down menu next to the content editor web part and click “Edit Web Part” Screenshot Page 14 of 94 Healthwatch Hub - User Guide Step 9. Description Screenshot Change the settings of the web part properties not to show a title: Scroll down to “Chrome Type” and select “None”. The header will not be displayed for your web part. Click “OK” to confirm. 10. Click on “Click here to add new content” link to add content Page 15 of 94 Healthwatch Hub - User Guide Step Description 11. To insert a link to a pdf document click on the insert button in the top ribbon, then click on Link drop down and click on “From SharePoint” 12. Browse to the document you wish to add a link for and click on “Insert” button 13. When the link is on the page select the link and click the “Link” menu in the top ribbon 14. Select “Open in new tab” check box 15. To save the page click on “Page” and “Stop Editing” Screenshot Page 16 of 94 Healthwatch Hub - User Guide 1.2.2. Manage Guidance Documents Follow the same process as Manage Report Documents 1.2.3. Manage Issues Within this section you will be shown how to manage Issues list items. When changes are made within this section the Issues web part on the home page of your Local Healthwatch will be updated with the latest content you create. Step Description 1. Click on the “Site Contents” link in the top navigation 2. Click on the list you wish to add / edit / delete item in. In this case the list is “Issues” 3. Add item by click on the “Add Item Link” and fill in the content. Finally click “Save” Screenshot Title: This is the title that will displayed Date: The date if the issue Description: A general description Page 17 of 94 Healthwatch Hub - User Guide Step Description 4. Edit item by selecting the item in the list and clicking “Edit Item” 5. Update fields and click “Stop” Screenshot Page 18 of 94 Healthwatch Hub - User Guide Step 6. Description Screenshot To Delete select the item as you did in previous section and click on the “Items” drop down in the top ribbon. Click “Delete Item” to confirm Page 19 of 94 Healthwatch Hub - User Guide 1.2.4. Manage Meetings To edit / delete / update items please use the same method shown within the “Manage Issues” section. Below is a reference to the fields this list contains. This is list is specific for the Meetings web part. Step 1. Description Screenshot Meetings list fields are descripted below Title: This is the title that will displayed Enterprise Keywords: These are the keywords that are associated with the item Description: A general description Start Date: This is the date that is used in the web part and if the date is lower than today’s date it will be previous section. The External Link is a URL field and you can enter a hyperlink to any related content for the meeting Page 20 of 94 Healthwatch Hub - User Guide 1.2.5. Manage Announcements To edit / delete / update items please use the same method shown within the “Manage Issues” section. Below is a reference to the fields this list contains. This list is specific for the Announcements web part. Step 1. Description Screenshot Meetings list fields are descripted below Title: This is the title that will displayed Body: This is the text that is displayed in the web part Expires: This is the date that is used in the web part and if the date is less than today it will not be displayed. Enterprise Keywords: These are the keywords that are associated with the item Page 21 of 94 Healthwatch Hub - User Guide 1.2.6. Manage Useful Links To edit / delete / update items please use the same method shown within the “Manage Issues” section. Below is a reference to the fields this list contains. This list is specific for the Useful Links web part. Step 2. Description Screenshot Meetings list fields are descripted below Url: Type is the web address and type description is the name of the link Notes: Details that are attached to the link Aggregate: Check this box if you wish to aggregate Page 22 of 94 Healthwatch Hub - User Guide 1.2.7. Manage Web Pages and Content Within this section we will be showing how to make changes to the “Home” page. This section includes how to add / edit / delete web parts on this page. It also includes how to add text to the page text. Step 1. Description Screenshot Navigate to either the home page, resources or announcements page. Click on the Icon and select “Edit Page” 2. To update page content click in the page content section and add text Page 23 of 94 Healthwatch Hub - User Guide Step Description 3. To add a web part to the page, click on “Add a Web Part” 4. Select the category and the part you wish to add. There are many web parts for you to use and add functionality or content to your pages. 5. Click on the “Add” button Screenshot Page 24 of 94 Healthwatch Hub - User Guide Step Description 6. To change the web part properties click on the arrow next to the web part title bar and click on “Edit web part” 7. Change the web part properties and click the “Apply” and “OK” button Screenshot Page 25 of 94 Healthwatch Hub - User Guide Step Description 8. Finally click on “Page” in the top ribbon and click “Save” 9. Your changes will not be seen by other Local Healthwatch until you check-in and publish the page Screenshot If you wish to check in your changes click on “Page” and “Check in”. Add your comments and click “Continue” The reason why you may want to “Check in” content and not publish is because you want to save the changes you have done but not make them available to everyone. 10. The last step to publishing the page is to click on the “Publish” button in the ribbon at the top. Click “Publish” icon and on the next screen add comments and click “continue” Page 26 of 94 Healthwatch Hub - User Guide Step 11. 1.2.8. Description Screenshot To delete a web part click on the drop down next to the web part header and click “Delete” Manage Announcements Page To see how to change content please use the same methods shown in the home page section 1.2.9. Manage Resources Page To see how to change content please use the same methods shown in the home page section Page 27 of 94 Healthwatch Hub - User Guide 1.2.10. Manage Security Give users read and write access to the Local Healthwatch If you want other Local Healthwatch users or externally invited partners to update content for your Local Healthwatch site, you can add them to a ‘Members’ group for your Local Healthwatch. Once a member of this group they can add, edit and delete content. They can’t however managed the site and security. Step Description 1. To allow users to have read and write access click on edit icon in top right hand side of page 2. Click on “site settings” 3. Under “User and Permissions” click “Site permissions” Screenshot Page 28 of 94 Healthwatch Hub - User Guide Step Description 4. Click the “Members group” prefixed with your Local Healthwatch name 5. Click on “New” and then “Add Users” 6. Type in the name of the person and any message you wish them to receive. Click Share to confirm. Screenshot Page 29 of 94 Healthwatch Hub - User Guide Giving read and write access for users to a document library If wishing to allow other Local Healthwatch or external users the ability to edit documents within a library on your Local Heathwatch site you can do so by following these instructions. Step Description 1. Click on edit icon and click on “site content” 2. Click on the document library you wish to change permissions for. Screenshot Page 30 of 94 Healthwatch Hub - User Guide Step Description 3. Click on library in the top ribbon and click on “Library settings” 4. Click on the library permissions by clicking “Permissions for the document library” 5. Click ‘Stop inheriting permissions’ on the ribbon bar 6. Click OK Screenshot Page 31 of 94 Healthwatch Hub - User Guide Step Description 7. Click ‘Grant Permissions’ on the ribbon 8. Enter the name of the Local Healthwatch or external user you wish to give permissions to. Click ‘Show Options’ and ensure user has ‘Edit’ permissions. Screenshot Click ‘Share’ to complete Page 32 of 94 Healthwatch Hub - User Guide Step 9. Description Screenshot The user will now be granted ‘edit’ permission for the document library Managing read and write permissions on a document item If wishing to allow read-write access to specific documents and for one or more users (external or Local Healthwatch) you can do so by following these instructions. Step 1. Description Screenshot To allow users to have read and write access click on edit icon and click on “site content” Page 33 of 94 Healthwatch Hub - User Guide Step Description 2. Click on the document library you wish to change permissions for. 3. Select the item that wish to edit permissions for. By clicking on the check box next to it. 4. Click on the “files” option in the top ribbon and then click on “shared with”. Finally click on “advanced” Screenshot Page 34 of 94 Healthwatch Hub - User Guide Step Description 5. Click ‘Stop inheriting permissions’ on the ribbon bar 6. Click OK Screenshot Page 35 of 94 Healthwatch Hub - User Guide Step Description 7. Click ‘Grant Permissions’ on the ribbon 8. Enter the name of the Local Healthwatch or external user you wish to give permissions to. Click ‘Show Options’ and ensure user has ‘Edit’ permissions. Screenshot Click ‘Share’ to complete Page 36 of 94 Healthwatch Hub - User Guide Step Description 9. The user will now be granted ‘edit’ permission for the document 10. Click ‘Delete unique permissions’ to remove all custom granted permissions for the document Screenshot Page 37 of 94 Healthwatch Hub - User Guide 1.2.11. Managing Local Healthwatch Site Add new Document Library This section shows you how to create a new document library for storing documents and other content Step 1. Description Screenshot Click on edit icon and click on “site content” Page 38 of 94 Healthwatch Hub - User Guide Step Description 2. Click on “Add new app” 3. Click “Document library” 4. Add name of new document library and click “Create”. This could be for storing any types of document, similar to “Reports” or “Guidance Documents” Screenshot Page 39 of 94 Healthwatch Hub - User Guide Add New List This section shows you how to create a new list for storing excel style tabular data within the Hub, enabling web based access for viewing and updating the data 5. Click on edit icon and click on “site content” 6. Click on “Add new app” Page 40 of 94 Healthwatch Hub - User Guide 7. Click “Custom List” 8. Add name of new list and click “Create” Page 41 of 94 Healthwatch Hub - User Guide 1.3. Community 1.3.1. Add a new discussion thread Starting a discussion thread opens the question or topic up for other Local Healthwatch users to participate Step Description 1. Navigate to the community site via the top navigation menu 2. To add a discussion click on the “new discussion” link 3. Add the discussion information in the form and click “Save” Screenshot Page 42 of 94 Healthwatch Hub - User Guide Step Description 4. To add a comment on a discussion click on the discussion link 5. Add comments and click reply 6. To create a discussion category click on “Create categories” 7. Then click “new item” Screenshot Page 43 of 94 Healthwatch Hub - User Guide Step 8. Description Screenshot Add the category information and click save Page 44 of 94 Healthwatch Hub - User Guide 1.4. Search Within this section you will be shown how to run searches and how to change the content you wish to search via the search scopes. Step Description 1. Click in the search box at the top right and select from the drop down what scope you wish to search at. 2. Type in your search words and click the search icon Screenshot Page 45 of 94 Healthwatch Hub - User Guide Step Description 3. On the right hand side of this page are filter you can use to refine your search results 4. To change the search type please select from one of the available links Screenshot Page 46 of 94 Healthwatch Hub - User Guide 1.5. Navigate to Info Bank The Info Bank is where reports and comments are stored and made available for search and extract to Local Healthwatch admins Step Description 1. Navigate to your allocated Local Healthwatch site 2. Click the ‘Info Bank’ link in the top navigation bar Screenshot 1.6. Invite External Users to Local Healthwatch As a Local Healthwatch you can invite users external to your organisation, allowing them read-only access to Healthwatch England Hub, Your Local Healthwatch and Info Bank data. 1.6.1. Grant External User Access The following steps invite an external user to the Hub Step 1. Description Screenshot Navigate to Local Healthwatch site and click ‘Share’ in top left of page Page 47 of 94 Healthwatch Hub - User Guide Step Description 2. Type the email address/addresses of the person you wish to give access to 3. Type a message to the recipient(s) (optional) 4. Click ‘Show options’ to reveal the security group to which the user will be invited 5. Change the group to ‘Visitors’ prefixed with your local Healthwatch name Screenshot Page 48 of 94 Healthwatch Hub - User Guide Step Description 6. Click ‘Share’ to send the invitation 7. Notification will show the invitation was successful Screenshot Page 49 of 94 Healthwatch Hub - User Guide 1.6.2. Review Current External User Invitations The following lets you review any sharing invitations you’ve sent to external user’s allowing access to your Local Healthwatch, Healthwatch England and the Info Bank. Step Description 1. Navigate to Local Healthwatch 2. Click cog icon in top right of screen and select ‘Site Settings’ 3. Select ‘Access requests and invitations’ Screenshot Page 50 of 94 Healthwatch Hub - User Guide Step 4. Description Screenshot The screen displays pending and requests for access received from users wishing to access your local Healthwatch but who do not have access (typically external users from other Local Healthwatch). Also shown are ‘External User Invitations’ that are sharing invitations you’ve sent to external users for your Local Healthwatch. 5. Click ‘Show history’ to show prior sharing invitations. 6. Click the edit button next to the invited user to amend their permissions and the invite Page 51 of 94 Healthwatch Hub - User Guide Step 7. Description Screenshot Change the dropdown to amend the group the user has been invited to (Visitors = Read and is the recommend group for external users unless you wish them to be able to edit content) Click ‘RESEND’ to send a reminder invitation to the external user via email Click ‘WITHDRAW’ to cancel the invitation Page 52 of 94 Healthwatch Hub - User Guide 1.6.3. Remove External User From Security Group To revoke access for an external user you must remove them from the group you invited them to. Note: this does not revoke their access to Healthwatch England – you must contact a system admin or support to have them remove the user entirely Step Description 1. Navigate to Local Healthwatch 2. Click cog icon in top right of screen and select ‘Site Settings’ 3. Select ‘People and Groups’ Screenshot Page 53 of 94 Healthwatch Hub - User Guide Step Description 4. Select ‘Visitors’ group (or whichever group you added the user to) 5. Check the user you wish to revoke permissions for 6. Click the ‘Actions’ dropdown and select ‘Remove User from Group’ Screenshot Page 54 of 94 Healthwatch Hub - User Guide Step Description 7. Confirm warning message 8. User is removed from group 9. Screenshot IMPORTANT: Once you’ve removed the user from a Local Healthwatch group this doesn’t stop the user from being able to access Healthwatch England. If you wish to revoke access for the user contact support and ask for the external user to be removed. See ‘Remove External User (PAL)’ in Healthwatch England User Guide Page 55 of 94 Healthwatch Hub - User Guide 1.7. Manage Reports 1.7.1. Add Report In order to create a new Report, you must fill in and save the ‘Report’ form Step Description 1. Click ‘Reports’ on the InfoBank homepage to navigate to the reports area 2. Then Click ‘Add Report’ to navigate to Report Form 3. Provide the Report Title (mandatory) 4. Screenshot Provide the Report Type (mandatory) Select a value from the options in the dropdown 5. Provide the Source where the Report originated (mandatory) Select a value from the options in the dropdown Page 56 of 94 Healthwatch Hub - User Guide Step Description Screenshot 6. Provide the Synopsis for the Report (mandatory) 7. Select a Provider to which the Report relates (optional) Click the button next to the textbox to open the ‘Select Provider(s)’ page. - Either navigate to the desired Provider using buttons - or ‘Search’ for a Provder by typing any text in the search box and hit the search button, it will bring back Providers whose name/address/postcode/crm id matches the search text Then, tick the checkbox next to the Provider you want (only one Provider can be selected) and click Ok. Page 57 of 94 Healthwatch Hub - User Guide Step 8. Description Screenshot Select a Location to which the Report relates (optional) Click the button next to the textbox to open the ‘Select Location(s)’ page. (If you have selected a Provdier above, then only those locations relating to the selected Provider will be shown) - Either navigate to the desired Location using buttons - or ‘Search’ for a Location byt typing any text in the search box and hit the search button, it will bring back locations whose name/address/postcode/crm id matches the search text Then, tick the checkbox next to the Location you want (only one location can be selected) and click Ok. Page 58 of 94 Healthwatch Hub - User Guide Step 9. Description Screenshot Provide the Commissioner to which the Report relates (optional) Select a value from the options in the dropdown 10. Provide the Report Topic (mandatory) Select atleast 1 or maximum 10 items from the dropdown. To close the dropdown, click anywhere on the Report form. Page 59 of 94 Healthwatch Hub - User Guide Step 11. Description Screenshot Provide the Service Type (mandatory) Select atleast 1 or maximum 10 items from the dropdown. To close the dropdown, click anywhere on the Report form. 12. Upload report Document (optional) Click ‘Choose File’ to browse to the file, select the file and click ‘Open’ 13. 14. Click ‘Save’ to save the form data Or Click ‘Cancel’ to exit the form without saving Before saving, the form will validate the data. - Example: If there are no validation issues, the form data will be saved If the validation fails, error message will be displayed and respective fields will be highlighted. Page 60 of 94 Healthwatch Hub - User Guide Step Description Screenshot Page 61 of 94 Healthwatch Hub - User Guide 1.7.2. Step Edit Report Description Screenshot 1. Click ‘Reports’ on the InfoBank homepage to navigate to the reports area 2. Select the Report Click on the button next to the Report you want to edit Page 62 of 94 Healthwatch Hub - User Guide Step 3. Description Screenshot Make the required changes The Report form will open pre-filled with Report data 4. You can also download, delete or replace the attached report document Page 63 of 94 Healthwatch Hub - User Guide Step 5. Description Screenshot Click ‘Save’ to save the form data Or Click ‘Cancel’ to exit the form without saving Page 64 of 94 Healthwatch Hub - User Guide 1.7.3. Step 1. Delete Report Description Screenshot Select the Report to delete Click on the button next to the Report you want to delete The Report form will open pre-filled with Report data 2. Click ‘Delete’ button to delete the Report Page 65 of 94 Healthwatch Hub - User Guide 1.7.4. Step 1. 2. Search Reports Description Screenshot Click ‘Reports’ on the InfoBank homepage to navigate to the reports area Expand the required filters Click on any filter group like ‘General’ , ‘Tags and Organisation’ to view the various filters 3. Enter or select value(s) in the filter(s) For example- Source: Email, Provider: 06 Care Ltd17319 Page 66 of 94 Healthwatch Hub - User Guide Step Description 4. Search Reports 5. After you’ve selected the filters, hit the ‘Update’ button and the matching Reports will be displayed in the grid Clear Search filters Screenshot Hit the ‘Reset’ button to clear all search filters Page 67 of 94 Healthwatch Hub - User Guide 1.8. Manage Comments One of the purposes of the Info Bank is to store comment data. This can be achieved one comment at a time or by bulk import. 1.8.1. Add Comment In order to enter a new comment, a user must complete and save the comment form Step Description 15. Click ‘Add Comment’ on the InfoBank homepage to navigate to Comment Form 16. Provide the comment Capture date (mandatory) Screenshot To enter a date, select the calendar icon beside the text box and click on the desired date. 17. Provide the Source where the comment originated (mandatory) Select a value from the options in the dropdown 18. Enter the details about Commentator Residential Area (optional) Page 68 of 94 Healthwatch Hub - User Guide Step Description Screenshot Example: Postcode of the commentator 19. Provide the Sentiment behind the comment (mandatory) Select a value from the options in the dropdown 20. Provide the Commentator Audience (mandatory) Select a value from the options in the dropdown 21. Provide the Commentator Type (mandatory) Select a value from the options in the dropdown 22. Enter Additional Event Details (if any) IF you are providing your own event details, please select ‘Event’ in the Source column 23. Select a Provider to which the comment relates (optional) Page 69 of 94 Healthwatch Hub - User Guide Step Description Screenshot Click the button next to the textbox to open the ‘Select Provider(s)’ page. - Either navigate to the desired Provider using buttons - or ‘Search’ for a Provder by typing any text in the search box and hit the search button, it will bring back Providers whose name/address/postcode/crm id matches the search text Then, tick the checkbox next to the Provider you want (only one Provider can be selected) and click Ok. 24. Select a Location to which the comment relates (optional) Click the button next to the textbox to open the ‘Select Location(s)’ page. Page 70 of 94 Healthwatch Hub - User Guide Step Description Screenshot (If you have selected a Provdier above, then only those locations relating to the selected Provider will be shown) - Either navigate to the desired Location using buttons - or ‘Search’ for a Location byt typing any text in the search box and hit the search button, it will bring back locations whose name/address/postcode/crm id matches the search text Then, tick the checkbox next to the Location you want (only one location can be selected) and click Ok. 25. 12 Enter Additional Location Details (optional) Provide the Commissioner to which the comment relates (optional) Select a value from the options in the dropdown Page 71 of 94 Healthwatch Hub - User Guide Step Description 13 Select whether the commentator would recommend the service (optional) 14 Enter the Comment text (optional) Screenshot Max 1000 characters 15 Provide the Comment Topic (mandatory) Select atleast 1 or maximum 10 items from the dropdown. To close the dropdown, click anywhere on the Comment form. Page 72 of 94 Healthwatch Hub - User Guide Step 16 Description Screenshot Provide the Service Type (mandatory) Select atleast 1 or maximum 10 items from the dropdown. To close the dropdown, click anywhere on the Comment form. 17 Provide the Age Band of the commentator (optional) Select a value from the options in the dropdown 18 Enter the Disability of the commentator concisely (optional) Max 1000 characters Page 73 of 94 Healthwatch Hub - User Guide Step 20 Description Screenshot Provide the Marital Status of the commentator (optional) Select a value from the options in the dropdown 21 Provide the Ethnic Origin of the commentator (optional) Select a value from the options in the dropdown 22 Provide the Religion Belief of the commentator (optional) Select a value from the options in the dropdown Page 74 of 94 Healthwatch Hub - User Guide Step 23 Description Screenshot Provide the Sex of the commentator (optional) Select a value from the options in the dropdown 24 Provide the Sexual Orientation of the commentator (optional) Select a value from the options in the dropdown 25 Enter the Progress/Outcome if investigating issues relating to the comment (optional) Max 1000 characters 26 Enter any Local Healthwatch Analysis carried out by the and to be stored against a comment (optional) Max 1000 characters 27 28 Click ‘Save and New’ to save the form data and enter a new comment Or Click ‘Save’ to save the form data Or Click ‘Cancel’ to exit the form without saving Before saving, the form will validate the data. Example: Page 75 of 94 Healthwatch Hub - User Guide Step Description - 1.8.2. Step 6. Screenshot If there are no validation issues, the form data will be saved If the validation fails, error message will be displayed and respective fields will be highlighted Edit Comment Description Screenshot Select the comment Click on the edit button next to the comment you want to - The comment form will open pre-filled with comment data - Make the required changes Page 76 of 94 Healthwatch Hub - User Guide Step 7. Description Screenshot Click ‘Save and New’ to save the form data and enter a new comment Or Click ‘Save’ to save the form data Or Click ‘Cancel’ to exit the form without saving 1.8.3. Step 3. Delete Comment Description Screenshot Select the comment to delete Click on the delete button next to the comment you want to The comment form will open pre-filled with comment data 4. Click ‘Delete’ button to delete the comment Page 77 of 94 Healthwatch Hub - User Guide Step 5. Description Screenshot Confirm Deletion Click ‘Yes’ on the confirmation to delete the comment Or ‘No’ to abort delete operation Page 78 of 94 Healthwatch Hub - User Guide 1.8.4. Step Search Comments Description 1. Navigate to the Info Bank homepage or hit the ‘Comments’ button in the top navigation bar 2. Expand the required filters Screenshot Click on any filter group like ‘General’ , ‘E&D Characteristics’ to view the various filters Page 79 of 94 Healthwatch Hub - User Guide Step 3. Description Screenshot Enter or select value(s) in the filter(s) For example- Age Band: 18 to 24, Provider: 06 Care Ltd17319 4. Run a Search: After you’ve selected the filters, hit the ‘Search’ button and the matching comments will be displayed in the grid 5. Clear Search filters: Hit the ‘Reset’ button to clear all search filters 6. Export comments: The ‘Export’ button will export all comments from the grid into an excel spreadsheet. User will be prompted (depending on browser) to save or open the excel spreadsheet User should ideally ‘Search’ the comments first and then export Please note that if no Comments filter criteria is specified, the Export function will by default export all Page 80 of 94 Healthwatch Hub - User Guide Step Description Screenshot comments from the database into the spreadsheet (this is limited to 10,000 records per export) Page 81 of 94 Healthwatch Hub - User Guide 1.9. Bulk Import Comments The Info Bank supports bulk upload of comments via an Excel workbook. The steps in this process are: a. Download template workbook containing extracts of all lookup data within the hub (providers, locations, topics etc.) b. Perform lookups within the template workbook against an existing workbook of your own local comments and transform into the expected format and values c. Upload workbook to the Info Bank and monitor batch for processing d. Review any warnings or errors and either: i. View the batch and all associated comments ii. Delete the batch and all associated comments 1.9.1. Upload Workbook and Schedule Import User completes workbook template and uploads for processing of required comments Step Description 7. Click ‘Import Comments’ in navigation to navigate to the bulk upload page 8. Click ‘Download Bulk Upload Template Workbook’ to download a copy of the workbook template used for uploading a comment batch 9. The downloaded workbook contains multiple sheets with lookup data required as part of a comment: Screenshot DataImport – sheet that should contain final transformed comment data to be imported into Info Bank Page 82 of 94 Healthwatch Hub - User Guide Step Description Screenshot Lookups – protected sheet used for validating data Other Sheets – contain lookup data for use in transforming your own comment data into the format and values required for import into the Info Bank 10. Bulk Comment Import Workbook Key Features: 1. Doesn’t replicate Comment Form and logic for data entry 2. Limited to 500 rows per workbook 3. Contains lookup values in multiple work sheets 4. ‘Lookups’ work sheet used for import and contains ID values for selected lookup fields 5. Maximum of 10 topics and service types can be selected for any comment record Mandatory fields marked in Red in ‘DataImport’ sheet 11. If you have an existing spreadsheet with comment data: Transform existing comment data using lookup data in template and copy final set into the ‘DataImport’ sheet For example in the existing excel workbook you have comment data such as: Source = “Email”, Sentiment = “Not Known”, Provider = “Argyle Care Group Limited”, Location = “Willow Tree Lodge” In this case, open the Template sheet downloaded from Info Bank and:- Organize the columns in your existing sheet similar to Page 83 of 94 Healthwatch Hub - User Guide Step Description Screenshot the column order in the template sheet - Ensure that column values in the existing sheet map to a lookup value in the template sheet For example in the scenario above, ‘Email’ is one of the options in the Source lookup – so that is fine but observe that ‘Not Known’ is not an option in the Sentiment lookup – so you must change the column text so that it maps to an option in the Sentiment lookup. - Provider/Location: The lookup for Provider/Location in the template sheet contains ProviderId/LocationId. To map the provider/location data from your existing sheet, open the ‘Providers’/‘Locations’ workbook in the template sheet, search for Provider/Location based on Name/Address/Postcode etc., copy the ProviderId/LocationId to your existing sheet. - If you are unsure about a column value, you may leave it blank (provided it is not a mandatory field) When all the data has been validated, copy the data from existing sheet to ‘DataImport’ workbook in the Template spreadsheet. Save final file locally for upload to Info Bank 12. To create new comment data within the Template spreadsheet downloaded from Info Bank - Field Name Description Open the Template sheet, go to the ‘DataImport’ workbook Captured Fill the column values. Select values where dropdowns are available otherwise type data. Source Date the actual comment was registered (dd/mm/yyyy) Source the comment originated from - lookup Page 84 of 94 Mand atory Y Y Healthwatch Hub - User Guide Step Description - - Provider/Location: The lookup for Provider/Location in contains ProviderId/LocationId. To find out the Id of your desired Provider/Location, open the ‘Providers’/‘Locations’ workbook within the template sheet, search for Provider/Location based on Name/Address/Postcode etc., note the ProviderId/LocationId, come back to the ‘DataImport’ workbook and selected the same Id in the Provider/Location dropdown. If you are unsure about a column value, you may leave it blank (provided it is not a mandatory field) Screenshot CommentatorRes Area Sentiment and select Address details of the commentator, Postcode is preferred Sentiment behind the comment (like positive, negative etc.) - lookup and select N Y CommentatorAu dience CommentatorTy pe Event Type of audience - lookup and select Y Type of Commentator - lookup and select Y Provider The Provider to which comment relates to lookup and select or leave blank Location The Location to which comment relates to lookup and select or leave blank AdditionalLocatio nDetails Commissioner Additional location details ServiceRecomme ndation Comments CommentSubTop ic1 CommentSubTop ic2 CommentSubTop ic3 CommentSubTop ic4 CommentSubTop ic5 Page 85 of 94 Enter the titleof your own event. If using this box, select Event in the Source column The commissioner for which a comment relates to - lookup and select or leave blank Would you recommend this service to others or members of your own family? Value must be "Yes", "No" or blank Comments received from commentator The topics used to classify and organise an individual comment (minimum of 1 and maximum of 10 items allowed) N N N Healthwatch Hub - User Guide Step Description Screenshot CommentSubTop ic6 CommentSubTop ic7 CommentSubTop ic8 CommentSubTop ic9 CommentSubTop ic10 ServiceSubType1 ServiceSubType2 ServiceSubType3 ServiceSubType4 ServiceSubType5 ServiceSubType6 ServiceSubType7 ServiceSubType8 ServiceSubType9 ServiceSubType1 0 AgeBand Disability MaritalStatus EthnicOrigin ReligionBelief Sex SexualOrientatio n ProgressOutcom e Page 86 of 94 The service types used to classify and organise an individual comment (minimum of 1 and maximum of 10 items allowed) N Commentator age band Commentator disability Commentator marital status Commentator ethnic origin Commentator religion or belief Commentator sex N N N N N N N Commentator sexual orientation For storing any progress made if investigating issues relating to the comment N Healthwatch Hub - User Guide Step Description Screenshot LocalHealthwatc hAnalysis 13. In order to eliminate obvious anomalies in the data (which may lead to the batch being rejected), please ensure that in a particular row: - all mandatory cells are filled-in - there are no duplicate values for CommentSubTopics - there are no duplicate values for ServiceSubTypes 14. Click ‘Upload New Batch’ to navigate to the workbook upload page 15. Click or double click (browser dependent) ‘Add bulk import file’ to upload completed workbook 16. Browse to the completed workbook held locally 17. Click ‘Start Upload’ to upload bulk import workbook and schedule the batch for processing Click ‘Cancel’ to abort the upload and return to batch listing 18. When the file is uploaded successfully, a new record is created and Batch import scheduled: The File name is updated and made unique Batch status marked as ‘Received’ Created date equals current date/time of upload Page 87 of 94 Any analysis carried out by the Local Healthwatch and to be stored against a comment N Healthwatch Hub - User Guide Step Description 19. The batch status will change to “Processing” when being imported 20. At the end of processing, the batch status will change to “Processing Completed” or “Processing Failed” based on the result. The “Error” column will be updated with either the error details in case of failure Or record count plus other information in case of successful import. Screenshot Page 88 of 94 Healthwatch Hub - User Guide 1.9.2. Automated Processing of Comment Import Workbook Scheduled job processes workbook, validates and accepts or rejects Step Description Screenshot 1. System processes newly created batches with a status of ‘Received’ every 30 minutes 2. On start of processing the batch is marked as “Processing” and validation begins 3. The workbook status will change to one of the following after processing: 4. Processing Failed – due to invalid workbook lookup values, invalid file format or general system error Processing Completed – all comment records imported The error/warnings column will display any issues encountered when processing. Depending on the issue the user can choose to: Delete the batch and all related comments Modify comments manually for any warnings received Amend and re-import workbook if workbook failed to import Page 89 of 94 Healthwatch Hub - User Guide 1.9.3. View Batch and Comments Each successful batch will remain linked to the comments it imported. Related comments can be viewed when making a decision to delete a batch. Step Description 1. Click ‘Import Comments’ in navigation to navigate to the bulk upload page 2. Click ‘View Batch Comments’ to see a listing of all comments imported as part of batch Screenshot Page 90 of 94 Healthwatch Hub - User Guide 1.9.4. Delete Batch and Comments If a batch is created by accident, before or after processing the batch can be deleted Step Description 3. Click ‘Import Comments’ in navigation to navigate to the bulk upload page 4. Click ‘Delete Batch and Comments’ for the batch to be removed 5. Confirm deletion or click ‘Back to List’ to return to the list of batches 6. On confirmation of deletion, if the batch has been processed all related comments will be deleted. Otherwise, the file will be removed before being processed. Screenshot Page 91 of 94 Healthwatch Hub - User Guide 2. EXTERNAL PARTNER USER 2.1. Signing into a Local Healthwatch External invited users must have a Microsoft Account or have associated their current email address with Windows Live ID. External users can do this at https://signup.live.com/ or the link is available when being first invited to a Local Healthwatch. Without this an external user cannot access the Hub or Info Bank. Step 1. Description Screenshot When an external user navigates to a Local Healthwatch (which they have been invited to via email), they will see a similar login screen to Local Healthwatch Admins. They must login using their Microsoft Account or Windows Live ID and password. If they don’t have one of the above they can create one by associating their existing email address with Windows Live ID. Page 92 of 94 Healthwatch Hub - User Guide 2. Once signed in they will be taken to the Local Healthwatch or Healthwatch England site entered into their address bar before signing in Page 93 of 94 Healthwatch Hub - User Guide 2.2. Accessing Other Local Healthwatch Sites and Content If an External User hasn’t been invited to a Local Healthwatch they will see an access request message. This occurs when navigating directly to the site or clicking the specific Local Healthwatch in the list displayed on the Healtwatch England site. Step Description 1. Navigate to a Local Healthwatch that you don’t have access to 2. Complete access reason request and click ‘Send Request’ Screenshot Request will be sent to the Local Healthwatch Admin Page 94 of 94