1
Ed. 00 OfficeServ DM User Guide COPYRIGHT This manual is proprietary to SAMSUNG Electronics Co., Ltd. and is protected by copyright. No information contained herein may be copied, translated, transcribed or duplicated for any commercial purposes or disclosed to third parties in any form without the prior written consent of SAMSUNG Electronics Co., Ltd. TRADEMARKS Adobe is a trademark and Adobe Acrobat is a registered trademark of Adobe Systems Incorporated. Install Shield is a registered trademark of Install Shield Software Corporation. Internet Explorer, Microsoft, Windows, Windows 2000, and Windows NT are registered trademarks of Microsoft Corporation. Netscape and Netscape Navigator are registered trademarks of Netscape Communication Corporation in the United States and other countries. All other company and product names may be trademarks of the respective companies with which they are associated. This manual should be read before the installation and operation, and the operator should correctly install and operate the product by using this manual. This manual may be changed for the system improvement, standardization and other technical reasons without prior notice. For further information on the updated manual or have a question for the content of manual, contact the address or homepage below. Address: Document Center 3nd Floor Jeong-bo-tong-sin-dong, Dong-Suwon P.O. Box 105, 416, Maetan-3dong Yeongtong-gu, Suwon-si, Gyeonggi-do, Korea 442-600 Homepage: http://www.samsungdocs.com © 2010 SAMSUNG Electronics Co., Ltd. All rights reserved. OfficeServ DM User Guide Overview Purpose This Guide contains the introduction, installation instructions and user guide for the OfficeServ DM, a PC-version MMC (Man Machine Communication) program designed to configure and set the OfficeServ key phone system’s environment. Document Content and Organization This Guide comprises eight Chapters and a list of abbreviations as follows. CHAPTER 1. Introduction In this chapter, we give a brief introduction to the OfficeServ DM and its core functionalities. CHAPTER 2. Launching the OfficeServ DM In this chapter, we discuss the installation environment and explain how to launch the OfficeServ DM. CHAPTER 3. OfficeServ DM General Functions In this chapter, we provide information for the OfficeServ DM menus in detail. CHAPTER 4. Using Page Screen In this chapter, we give an introduction to the page screens which can be set up from within the OfficeServ DM. Examples of page programming are also provided. © SAMSUNG Electronics Co., Ltd. 3 Error! Use the Home tab to apply 제목 1 to the text that you want to appear here. CHAPTER 5. Call Server Programming In this chapter, we describe the call server programming procedure with OfficeServ DM. CHAPTER 6. Voice Mail Programming In this chapter, we describe the voice mail programming procedure with OfficeServ DM. CHAPTER 7. Conference Card Programming In this chapter, we describe the conference card programming procedure with OfficeServ DM. CHAPTER 8. Troubleshooting This section describes how to handle the problems that may occur while using OfficeServ DM. ABBREVIATION Describes the acronyms used in this manual. 4 © SAMSUNG Electronics Co., Ltd. OfficeServ DM User Guide Conventions The following types of paragraphs contain special information that must be carefully read and thoroughly understood. Such information may or may not be enclosed in a rectangular box, separating it from the main text, but is always preceded by an icon and/or a bold title. WARNING Provides information or instructions that the reader should follow in order to avoid personal injury or fatality. CAUTION Provides information or instructions that the reader should follow in order to avoid a service failure or damage to the system. CHECKPOINT Provides the operator with checkpoints for stable system operation. NOTE Indicates additional information as a reference. Console Screen Output The lined box with ‘Courier New’ font will be used to distinguish between the main content and console output screen text. ‘Bold Courier New’ font will indicate the value entered by the operator on the console screen. © SAMSUNG Electronics Co., Ltd. 5 Error! Use the Home tab to apply 제목 1 to the text that you want to appear here. Revision History 6 EDITION DATE OF ISSUE REMARKS 00 11. 2010. First edition © SAMSUNG Electronics Co., Ltd. OfficeServ DM User Guide SAFETY CONCERNS In order to ensure product safety and proper operation, information followed by the following icons should be carefully read before installing or using the product: Symbols Caution Indication of a general caution. Restriction Indication for prohibiting an action for a product. Instruction Indication for commanding a specifically required action. CAUTION © SAMSUNG Electronics Co., Ltd. 7 Error! Use the Home tab to apply 제목 1 to the text that you want to appear here. Caution when installing/uninstalling the OfficeServ DM Existing data may be lost during installation/uninstallation of the OfficeServ DM. Backup all data before proceeding. Caution when uploading When uploading, the card slot of the user’s PC database should be identical to the key phone system’s card slot. Depending on the condition, it may be necessary to reboot after the upload (a message will be prompted). To protect memory data from accidental deletion, ensure that the MCP card’s backup switch is set to [ON]. 8 © SAMSUNG Electronics Co., Ltd. OfficeServ DM User Guide TABLE OF CONTENTS Overview 3 Purpose ..................................................................................................................... 3 Document Content and Organization ........................................................................ 3 Conventions .............................................................................................................. 5 Console Screen Output ............................................................................................. 5 Revision History ........................................................................................................ 6 SAFETY CONCERNS 7 Symbols .................................................................................................................... 7 CHAPTER 1. Introduction 15 Introduction to the OfficeServ DM .................................................................................... 15 Functionalities and Characteristics.................................................................................. 15 CHAPTER 2. Launching the OfficeServ DM 17 Environment ....................................................................................................................... 17 Connecting Web Server .....................................................................................................18 Java Web Start Plugin Installation .................................................................................... 19 Launching the OfficeServ DM ........................................................................................... 20 Registration site list for OfficeServ System ....................................................................21 Connect to OfficeServ System .......................................................................................... 22 CHAPTER 3. OfficeServ DM General Functions 23 Screen Layout .................................................................................................................... 23 OfficeServ DM Toolbar Icons ................................................................................... 24 System Menu ...................................................................................................................... 25 Connect ................................................................................................................... 25 © SAMSUNG Electronics Co., Ltd. 9 TABLE OF CONTENTS Disconnect ...............................................................................................................26 Download DB ..........................................................................................................26 Upload DB ...............................................................................................................30 Link Setup ...............................................................................................................33 File Menu ............................................................................................................................ 38 Open DB..................................................................................................................38 Close DB .................................................................................................................39 Exit ..........................................................................................................................39 Options Menu .................................................................................................................... 40 Language ................................................................................................................40 Partial Request ........................................................................................................41 Use Toolbar .............................................................................................................41 Util Menu ............................................................................................................................ 42 Package Update ......................................................................................................42 File Control ..............................................................................................................43 DB Import/Export .....................................................................................................46 DB Comparison .......................................................................................................47 DB Conversion ........................................................................................................50 Tab Menu ............................................................................................................................ 51 Close All ..................................................................................................................51 Help Menu .......................................................................................................................... 52 Help Topics ..............................................................................................................52 About program .........................................................................................................53 CHAPTER 4. Using Page Screen 54 Page Screen ....................................................................................................................... 54 Page Screen Icon ....................................................................................................55 Page Programming (example) .......................................................................................... 56 Port Base .................................................................................................................58 Card Base ...............................................................................................................59 Page Search ............................................................................................................61 CHAPTER 5. Call Server Programming 64 Configuration ..................................................................................................................... 64 System Configuration ..............................................................................................64 Cabinet Configuration ..............................................................................................73 Virtual Cabinet .........................................................................................................86 10 © SAMSUNG Electronics Co., Ltd. OfficeServ DM User Guide Port Configuration ................................................................................................... 91 Station Port Configuration ....................................................................................... 93 Trunk Port Configuration ....................................................................................... 102 Virtual Port Configuration ...................................................................................... 112 Numbering Plan .................................................................................................... 116 Call Routing ...................................................................................................................... 121 Outgoing (LCR) ..................................................................................................... 121 Incoming................................................................................................................ 127 Networking ............................................................................................................ 134 Group & Table................................................................................................................... 139 Grouping ............................................................................................................... 139 Station Pairing ....................................................................................................... 144 Ring Plan............................................................................................................... 147 System Speed Dial ................................................................................................ 149 Account/Authorize Code........................................................................................ 150 UCD ...................................................................................................................... 152 Class of Service .................................................................................................... 154 Toll Restriction ....................................................................................................... 159 Key Programming ................................................................................................. 163 Features ............................................................................................................................ 176 Call Restriction ...................................................................................................... 176 VoIP Options ......................................................................................................... 179 Wireless LAN ........................................................................................................ 199 Volume Control...................................................................................................... 202 System Control...................................................................................................... 211 System I/O Options ............................................................................................... 212 System Tone/Ring ................................................................................................. 217 Diagnostics............................................................................................................ 219 Voice Mail .............................................................................................................. 227 Call Costing ........................................................................................................... 229 System Features ................................................................................................... 232 Timer/Option Features .......................................................................................... 237 Station Features .................................................................................................... 249 System Control................................................................................................................. 264 Alarm Report ......................................................................................................... 264 Port Status ............................................................................................................ 270 Commands ............................................................................................................ 274 © SAMSUNG Electronics Co., Ltd. 11 TABLE OF CONTENTS CHAPTER 6. Voice Mail Programming 282 System Main Menu .......................................................................................................... 282 Open Block Table ..................................................................................................284 Save Application ....................................................................................................285 Schedule Table ......................................................................................................286 Subscriber List .......................................................................................................289 System Parameters ...............................................................................................290 Voice Studio ..........................................................................................................296 Operating Utilities ..................................................................................................298 Override Mode .......................................................................................................307 View System Report ..............................................................................................308 Site Information .....................................................................................................316 Status Screen ........................................................................................................316 Explanation of Default Configuration ............................................................................ 318 Application Design .................................................................................................318 Import Basic Concepts ..........................................................................................319 Configuration Blocks ...................................................................................................... 325 Bye Block ..............................................................................................................325 Dial Block ..............................................................................................................326 Directory Block ......................................................................................................331 EClass Block .........................................................................................................336 Extension Block .....................................................................................................346 List Block ...............................................................................................................363 Mailbox Block ........................................................................................................369 MClass Block .........................................................................................................383 Menu Block ............................................................................................................394 Mode Block ............................................................................................................402 Port Block ..............................................................................................................406 Query Block ...........................................................................................................412 Speak Block ..........................................................................................................419 Station Block .........................................................................................................423 CHAPTER 7. Conference Card Programming 429 Conference....................................................................................................................... 429 Conference Admin .................................................................................................429 Conference Management ......................................................................................434 12 © SAMSUNG Electronics Co., Ltd. OfficeServ DM User Guide CHAPTER 8. Troubleshooting 443 Can’t execute OfficeServ DM with Web Browser. .......................................................... 443 Current Installed Java Web Start is lower than the version 1.6 ...................................446 ABBREVIATION 447 A ~ D ..................................................................................................................... 447 E ~ M..................................................................................................................... 448 N ~ V ..................................................................................................................... 449 W ........................................................................................................................... 450 © SAMSUNG Electronics Co., Ltd. 13 TABLE OF CONTENTS This page is intentionally left blank. 14 © SAMSUNG Electronics Co., Ltd. OfficeServ DM User Guide CHAPTER 1. Introduction This chapter gives a brief introduction to the OfficeServ DM and its core functionalities. Introduction to the OfficeServ DM The OfficeServ DM is a PC-version MMC (Man Machine Communication) program designed to configure and set the OfficeServ key phone system’s environment. The OfficeServ DM comprises two parts: environment setting and file management. The former configures the environment to use the system’s internal devices, and the latter manages the database files and system program files. Functionalities and Characteristics Integrating/Managing the System Database The OfficeServ DM integrates and manages the OfficeServ key phone system’s environment database. Uploading/Downloading the Database The OfficeServ DM can be used to download or upload the database to the user’s PC or to the OfficeServ key phone system. Uploading/Deleting the Program The OfficeServ DM can be used to upload the program to the OfficeServ key phone system or to delete a file from the system. © SAMSUNG Electronics Co., Ltd. 15 Error! Use the Home tab to apply 제목 1 to the text that you want to appear here. This page is intentionally left blank. 16 © SAMSUNG Electronics Co., Ltd. OfficeServ DM User Guide CHAPTER 2. Launching the OfficeServ DM This chapter describes the environment for running the OfficeServ DM and how to launch the OfficeServ DM. Environment This section provides the minimum requirements for OfficeServ DM. Minimum Requirements Below are the minimum requirements for the OfficeServ DM to function properly. H/W PC Modem Requirement CPU Pentium IV 2.4 GHz or faster Main Memory 512 MB or more HDD Drive At least 1 GB of free space OS Microsoft Windows XP or later 1,200~115,200 baud rate Compatible web browser The table below is compatible web browser version lists we are tested. Web Browser Version Internet Explorer 6.0, 7.0 or 8.0 © SAMSUNG Electronics Co., Ltd. 17 Error! Use the Home tab to apply 제목 1 to the text that you want to appear here. Connecting Web Server A user can launch the OfficeServ DM with a web browser. Execute a web browser and type ‘http(s)://OfficeServ System IP address’ or ‘http(s)://OfficeServ System IP address/dm/’. If you want to connect public IP, type ‘http(s)://OfficeServ System IP address/dmp/’ or ‘http(s)://OfficeServ System IP address/dm_public/’. If OfficeServ system is under NAT so private with public IP is used, port 21, 80, 443 and 5090 must be opened to allow user to login. Launch the OfficeServ DM If Java Web Start Plugin is already installed in PC, you can see the OfficeServ DM Screen. 18 © SAMSUNG Electronics Co., Ltd. OfficeServ DM User Guide Java Web Start Plugin Installation Java Web Start Plugin should be installed to use OfficeServ DM. If it’s not, click [Java Web Start] PlugIn , then click the button ‘Agree and Start Free Download’ to install. JRE (Java Runtime Environment) Version Check At least JRE 1.6 should be installed to use OfficeServ DM. If an old version of JRE (i.e., lower than the version 1.6) is installed, please remove it and replace with a new one. © SAMSUNG Electronics Co., Ltd. 19 Error! Use the Home tab to apply 제목 1 to the text that you want to appear here. Launching the OfficeServ DM A user can see the screen below if OfficeServ DM is launched. 20 © SAMSUNG Electronics Co., Ltd. OfficeServ DM User Guide Registration site list for OfficeServ System You must register site list before connecting OfficeServ System. 1. Click on [System] [Link Setup]. The following screen is displayed. 2. Input [Site Name] and [Destination] about OfficeServ System. 3. Click on [Apply] for registration. 4. Click on [Close] for completion. © SAMSUNG Electronics Co., Ltd. 21 Error! Use the Home tab to apply 제목 1 to the text that you want to appear here. Connect to OfficeServ System Click on [System] [Connect]. The following screen is displayed. Enter the correct ‘ID’ and ‘Password’ then click on [OK]. The initial value for the ID/password is set to ‘admin’/’samsung’ by default. 22 © SAMSUNG Electronics Co., Ltd. OfficeServ DM User Guide CHAPTER 3. OfficeServ DM General Functions This chapter describes the general management functions of the OfficeServ DM and how to use its menus. Screen Layout The main screen of the OfficeServ DM is as displayed below. Menu Toolbar Tree Viewer Main Frame Status Bar © SAMSUNG Electronics Co., Ltd. 23 Error! Use the Home tab to apply 제목 1 to the text that you want to appear here. Below are details of the screen layout. Screen Layout Details Menu Displays all the functions used in the program Toolbar Displays the most commonly used functions Tree Viewer Displays the page tools and the page indexes Main Frame Displays the selected page function on the screen Status Bar Displays information such as online time/user DB file name, system type/locale/version, date and time OfficeServ DM Toolbar Icons Below are details of the OfficeServ DM toolbar icons. Icon Details Connect: To connect with the key phone system Disconnect: To disconnect from the key phone system Link Control: To configure the communication environment Download DB: To download a database file Upload DB: To upload a database file Open: To open a database file Close: To close a database file. File Control: To upload/delete a program file Bookmark: To manage bookmarked files/displays the page index History: To delete a previously opened page/displays the page index Exit: To terminate the program Information: To display the program’s version and its creation date Data: To setup data configuration 24 © SAMSUNG Electronics Co., Ltd. OfficeServ DM User Guide System Menu The [System] menu provides functions such as connecting/disconnecting, uploading/downloading the database and controlling the connection. Using the [System] menu The [System] menu’s [Link Setup] can only be used in off-line mode; the [Download DB], [Upload DB] can only be used in on-line mode. Connect This menu is used to connect the OfficeServ DM to the key phone system. Click on [System] [Connect]. The following screen is displayed. Enter the correct ‘ID’ and ‘Password’ then click on [OK]. The OfficeServ DM downloads the initial data and switches to on-line mode. Entering the password After unsuccessful login attempts, the program automatically go to the [Normal] screen. The initial value for the ID/password is set to admin/ samsung by default. © SAMSUNG Electronics Co., Ltd. 25 Error! Use the Home tab to apply 제목 1 to the text that you want to appear here. Disconnect During on-line mode, click on [System] [Disconnect] to disconnect from the system and switch to off-line. Download DB This menu is used to download the key phone system’s database to the user’s PC. 1. 2. 26 Click on [System] [Download DB]. On the following screen, create a new file or select an existing one. Create a new file or select an existing one. © SAMSUNG Electronics Co., Ltd. OfficeServ DM User Guide © SAMSUNG Electronics Co., Ltd. 27 Error! Use the Home tab to apply 제목 1 to the text that you want to appear here. 3. When an existing file is selected, the following screen is displayed. To download the file as new, click on [Yes]. Otherwise, click on [No] to cancel the download. Downloading a newly created file When creating and downloading a new file, the following screen is displayed. On the <New DB file...> screen, create and confirm the database file’s ‘Password’ to create a new file to download. 28 © SAMSUNG Electronics Co., Ltd. OfficeServ DM User Guide 4. 5. 6. You can select the desired page to download. To download all fields, click on [All Select]. Select the desired page and click on [Download]. The following screen is displayed, and the program initiates downloading. To cancel downloading, click on [Cancel]. When the download is finished, the following screen is displayed. Click on [OK]. © SAMSUNG Electronics Co., Ltd. 29 Error! Use the Home tab to apply 제목 1 to the text that you want to appear here. Upload DB This menu is used to upload the user PC’s database to the key phone system. 1. Click on [System] [Upload DB]. The following screen is displayed. 2. Select a file to display the following login screen. On the <Login> screen, enter the database file’s ‘Password’ to open the file to upload. 3. 30 You can select the desired page to download. To download all fields, click on [All Select]. © SAMSUNG Electronics Co., Ltd. OfficeServ DM User Guide © SAMSUNG Electronics Co., Ltd. 31 Error! Use the Home tab to apply 제목 1 to the text that you want to appear here. 4. 32 Select the desired page and click on [Upload] to initiate uploading. To cancel uploading, click on [Cancel]. © SAMSUNG Electronics Co., Ltd. OfficeServ DM User Guide 5. When the upload is finished, the following screen is displayed. Click on [OK]. Upload/download failure If the upload/download fails, an error message is displayed and the upload/download is cancelled. Caution when uploading - When uploading, the card slot of the user’s PC database should be identical to the key phone system’s card slot. - Depending on the condition, it may be necessary to reboot after the upload (a message will be prompted). To protect memory data from accidental deletion, ensure that the MCP (Main Control Processor) card’s backup switch is set to [ON]. Link Setup Site List This menu is used to configure the communication environment between the OfficeServ DM and the key phone system. Click on [System] [Link Setup]. The following screen is displayed. © SAMSUNG Electronics Co., Ltd. 33 Error! Use the Home tab to apply 제목 1 to the text that you want to appear here. 34 © SAMSUNG Electronics Co., Ltd. OfficeServ DM User Guide Refer to the following table to configure the communication environment. Field Details Site Name Enter the spot name. Link Type Select between Modem and LAN (Local Area Network). Refer to the next page’s ‘The two communication environments for [Link Type]’ for guidance. Destination Enter the spot’s IP Address (LAN)/telephone number (Modem). Data Port Enter which port the OfficeServ DM will use during LAN connection. (only use in specific circumstances such as NAT) File Port Enter which port the file control will use during LAN connection. (only use in specific circumstances such as NAT) FTP Port Enter which port the FTP will use during LAN connection. (only use in specific circumstances such as NAT) COM Port Select the modem’s COM port. Baudrate Select the appropriate modem speed. [Delete] Button To delete the selected spot information. [Apply] Button To set the selected spot to [Connect] button’s initial value. [Close] Button To close the screen. © SAMSUNG Electronics Co., Ltd. 35 Error! Use the Home tab to apply 제목 1 to the text that you want to appear here. The two communication environments for [Link Type] From the <Link Setup> screen, select one of the two following methods. Modem: Use the PC’s modem to connect to the key phone system. (COM 1~10: We suggest using an external modem for this purpose.) LAN: Use the PC’s LAN to connect to the key phone system. (You may use a cross-over LAN cable to connect directly to the key phone system’s LAN port. Alternatively, you may use a straight LAN cable to connect to the network.) Entering the system IP The IP address in the OfficeServ DM refers to the system’s IP address to which the OfficeServ DM will be connected. It can be verified from the MMC 830, ‘ETHERNET PAR’ field. MODEM Options This menu is used to set additional information regarding the communication environment (between the OfficeServ DM and the key phone system). 36 © SAMSUNG Electronics Co., Ltd. OfficeServ DM User Guide Refer to the following table to configure the communication environment. Field Details Dial Retry Set the number of attempts (dial counts) for the modem connection. Dial Duration Set the connection time (uptime) for the modem connection. Dial Type Set the dial type (DTMF/PULSE ) Initial Command Set the modem’s initialization command. © SAMSUNG Electronics Co., Ltd. 37 Error! Use the Home tab to apply 제목 1 to the text that you want to appear here. File Menu The [File] menu provides functions such as opening/closing the user database and exiting the program. Using the [File] menu The [File] menu’s [Open Database] can only be used in off-line mode. Open DB This menu is used to open a file. This can only be used in off-line mode. Click on [File] [Open DB]. The following screen is displayed. 38 © SAMSUNG Electronics Co., Ltd. OfficeServ DM User Guide Select a file, and then click on [Open]. The following <Login> screen is displayed. Enter the correct password to open the selected file. Entering the password Enter the correct password. After three unsuccessful login attempts, an error message is displayed and the [Open Database] menu is cancelled. Close DB This menu is used to close a file. This can only be used in off-line mode. Click on [File] [Close DB] to close an opened user database. Exit This menu is used to terminate the program. Click on [File] [Exit] to terminate the program. Save changes on exit When there are unsaved files when exiting the program, a ‘Do you want to save chage (s)?’ message is displayed. Click on [Yes] to save the files. Otherwise, click on [No] to discard files. © SAMSUNG Electronics Co., Ltd. 39 Error! Use the Home tab to apply 제목 1 to the text that you want to appear here. Options Menu The [Options] menu consists of Language, Partial Request and Use Toolbar Selection. Language You can select the language to be displayed in the OfficeServ DM program. Currently available languages are: English, Korean, Russian, Germany, and Italian. 1. 2. 40 From [Options] [Language], select which language to use. The following message is displayed. Restart the program to use the interface with the selected language. © SAMSUNG Electronics Co., Ltd. OfficeServ DM User Guide Partial Request You can request to the system that you selected items. 1. 2. Enable [Options] [Partial Request], following screen will be displayed in some menu. You can select items to the system. Field Details Total Item (s) Display all items that you can select Array Select items clicking with Total Item (s) or writing with text box (201, 202, 203, ...) Range Select items with range All Select all items Use Toolbar This menu is selecting display Toolbar option. © SAMSUNG Electronics Co., Ltd. 41 Error! Use the Home tab to apply 제목 1 to the text that you want to appear here. Util Menu The [Util] menu consists of Package Update, File Control, DB Import/Export, DB Comparison/Conversion. Package Update Select Package Update Select ‘Package Update’ in Menu tab of OfficeServ DM GUI. Select the file to update Click ‘…’ and assign the file to update. If the file is selected, ‘firmware version’ will be displayed in File Information. 42 © SAMSUNG Electronics Co., Ltd. OfficeServ DM User Guide Upload the package After check ‘Select’, click ‘Upload’ button to start to upload the file. To apply the uploaded file, Ubigate should be restarted, so you have to check ‘Restart’ to use it immediately. The progress bar displays current state. Progress bar will be closed if it completes to upload. File Control To upload/delete a program file to/from the key phone system’s Smart Media/MMC card, click on [Util] [File Control]. The following screen is displayed. © SAMSUNG Electronics Co., Ltd. 43 Error! Use the Home tab to apply 제목 1 to the text that you want to appear here. Refer to the following table to perform the file control. Field Details [Restart] Button Restart the system with the new program. [Cancel] Button Closes the screen. [Delete] Button To delete the selected file. [Change INI] Button To select which initialization file to use during the system startup. The current file is displayed as blue within the index. You must check the box in the INIT field to modify the selection. [Refresh] Button To refresh the system file index. Update (Slave) Button To update the slave system same with master system. Using the [Change INI] button The [Change INI] button can only be used in OS7100. Uploading the program file (Example) 1. 44 In [Program] tab, click on [File] and select the location (path) and name of the file to upload to the key phone system’s Smart Media/MMC card. © SAMSUNG Electronics Co., Ltd. OfficeServ DM User Guide © SAMSUNG Electronics Co., Ltd. 45 Error! Use the Home tab to apply 제목 1 to the text that you want to appear here. 2. 3. Click on [Upload] to upload. Upon successful completion of the file upload, the following message is displayed. Uploading the file You can verify the status of the file upload using the ‘MMC 818’, ’PGM DOWNLOAD’. DB Import/Export This menu is used to import/export a specific page content from/to the Excel file (*.xls). This can only be used in off-line mode. Click on [Util] [DB Import]/[DB Export]. The following screen is displayed. 46 © SAMSUNG Electronics Co., Ltd. OfficeServ DM User Guide DB Comparison This menu is used to compare two database files. Comparing the database (Example) 1. 2. Click on [Util] [DB Comparison]. The following screen is displayed. Click on […] and select the two files to compare, then click on [Compare]. The following screen is displayed. © SAMSUNG Electronics Co., Ltd. 47 Error! Use the Home tab to apply 제목 1 to the text that you want to appear here. 48 © SAMSUNG Electronics Co., Ltd. OfficeServ DM User Guide Comparing the data (Example) On the page with modified fields, click on [Details]. The following screen is displayed. © SAMSUNG Electronics Co., Ltd. 49 Error! Use the Home tab to apply 제목 1 to the text that you want to appear here. DB Conversion This menu is used to convert form Installation DB file to OfficeServ DM DB File. 50 © SAMSUNG Electronics Co., Ltd. OfficeServ DM User Guide Tab Menu You can select the alignment method from the [Tab] menu. You can focus the menu when you select in [Tab] menu. Close All Click on [Tab] [Close All] to close all opened windows. © SAMSUNG Electronics Co., Ltd. 51 Error! Use the Home tab to apply 제목 1 to the text that you want to appear here. Help Menu The [Help] menu is used to display the information of the OfficeServ DM. Help Topics This menu displays help topics for the menu of OfficeServ DM Click on [Help] [Help Topics] to display the following screen. 52 © SAMSUNG Electronics Co., Ltd. OfficeServ DM User Guide About program This menu displays additional information such as the OfficeServ DM program’s version, copyright, policy/permission and date. Click on [Help] [About program] to display the following screen. © SAMSUNG Electronics Co., Ltd. 53 OfficeServ DM User Guide CHAPTER 4. Using Page Screen This chapter gives an introduction to the page screen which can be set up from within the OfficeServ DM. Examples of page programming are also provided. Page Screen You can modify the MMC settings from the page screen. Below is an example taken from page 2.1.0. © SAMSUNG Electronics Co., Ltd. 54 OfficeServ DM User Guide Page Screen Icon Below are details of the page screen icon. Icon Details Save: To save to a file in off-line mode; or to upload a file in on-line mode. Reload: To refresh a page. Print: To display a preview of the page to print. (Click on [Print] from the preview screen to print.) Previous: To move to the previous page. Next: To move to the next page. Copy: To copy the selected text from a field. Cut: To cut the selected text from a field. Paste: To paste the previously cut/copied text to another field. You cannot paste if the data on the clipboard and the target field are of different data type. Search: To search within a field. Repeat: To enter a series of consecutive numbers in the selected field. You can use ‘,’ to define the intervals. Sort: To sort tel numbers. Add to Bookmarks: Add the current page to the bookmark. Help: Help topics for current page. Close: To terminate the page window. © SAMSUNG Electronics Co., Ltd. 55 Error! Use the Home tab to apply 제목 1 to the text that you want to appear here. Page Programming (example) This section introduces the page programming. We will use the ‘2.4.2 Port Common Data to illustrate this procedure. 1. 2. 56 Click on [System] [Connect]. Following screen is displayed. From the menu, click on [2] [2.4] [2.4.2 Port Common Data] to display the following screen. © SAMSUNG Electronics Co., Ltd. OfficeServ DM User Guide © SAMSUNG Electronics Co., Ltd. 57 Error! Use the Home tab to apply 제목 1 to the text that you want to appear here. 3. Set each field appropriately and click on 4. Click on to save changes. to terminate the <Page Screen>. Displaying the Cell Property When the cursor is in an input field, the OfficeServ DM displays the corresponding field properties on the status bar. Port Base The [Port Base] tab consists of Functional Mode and KMMC Mode. In Functional Mode, the page names are displayed. And in KMMC Mode, the KMMC Numbers are displayed. 58 © SAMSUNG Electronics Co., Ltd. OfficeServ DM User Guide Card Base The [Card Base] tab displays the structure of the current system. Click on ‘System’, ‘Cabinet’, ‘Card’ to display the following screen. Unlike the [Port Base], [Card Base] only displays the port corresponding to the given card. The corresponding menu is also displayed on the upper section of the screen. © SAMSUNG Electronics Co., Ltd. 59 Error! Use the Home tab to apply 제목 1 to the text that you want to appear here. 60 © SAMSUNG Electronics Co., Ltd. OfficeServ DM User Guide Using [Card Base] [Card Base] is enabled in on-line mode. Page Search This menu is used to find menu. Search (by Menu) Select [by Menu] and enter the keyword and click on the [Search] button. The corresponding menu names are displayed on [Result (s)]. If you click […], move to the page that you are selecting. © SAMSUNG Electronics Co., Ltd. 61 Error! Use the Home tab to apply 제목 1 to the text that you want to appear here. Search (by MMC) Select [by MMC] and enter the desired MMC number and click on the [Search] button. The corresponding menu (with the MMC number) is displayed on [Result (s)]. If you click […], move to the page that you are selecting. 62 © SAMSUNG Electronics Co., Ltd. OfficeServ DM User Guide This page is intentionally left blank. © SAMSUNG Electronics Co., Ltd. 63 OfficeServ DM User Guide CHAPTER 5. Call Server Programming This chapter describes each page function for call server programming in KMCC mode of port base tab. Configuration System Configuration System Selection Allows you to select the OfficeServ keyphone system that you want to program. System Selection Items Item Description System country Select the country. (Editable) IP version Displays the IP version. (Not editable) IP Address Displays the IP address of the SCM server. (Not editable) IP Gateway Displays the gateway address of the SCM server. (Not editable) Subnet Mask Displays the subnet mask of the SCM server. (Not editable) WBS Select The system can only interoperate with one type of AP. This field displays the AP type used. (Not editable) System Coding Specify the coding method of the system. E.g., a-law, u-law (Editable) © SAMSUNG Electronics Co., Ltd. 64 OfficeServ DM User Guide Viewing the System Selection Items 1. 2. Select [2. Configuration] [2.1 System Configuration] [2.1.0 System Selection] from the Tree Viewer. Check the current items selected on the system. System Information Displays the system software and hardware information and versions. System Information Items Item Description System Type Displays the system type. MCP DIP Switch Displays the selection status of the switch on the MCP card. MCP EPLD Version Displays the MCP EPLD (Erasable Programming Logic Device) version installed in the system. MCP PCB Version Displays the MCP PCB version installed in the system. MODEM EPLD Version Displays the EPLD modem version installed in the system. MODEM PCB Version Displays the PCB modem version installed in the system. MODEM Exist Displays whether there is a modem installed in the system. Virtual Cabinet Max Displays the maximum virtual cabinet value of the system. S/W Version Displays the versions of the software programs (System, MP, SP, VMS, MGI, BRI, WEB, Linux and MPS) installed in the system. LP Connect Displays if LP 1, 2, 3 is Connected. Free Speed Block Displays the number of available speed dial blocks. Free CID Block Displays the number of available CID blocks. Free Log Block Displays the number of available LOG blocks. Free TMSG Station Displays the number of available urgent text messages. Free GCONF Station Displays the number of available conference groups. © SAMSUNG Electronics Co., Ltd. 65 Error! Use the Home tab to apply 제목 1 to the text that you want to appear here. Viewing the System Information Items 1. 2. Select [2. Configuration] [2.1 System Configuration] [2.1.1 System Information] from the Tree Viewer. Check the current system information. LAN Parameter Specifies the LAN parameter values. After changing a LAN parameter value, the system must be restarted. LAN Parameter Items Item Description IP Version Specifies whether to use IPv4 or IPv6 as the system IP version. IP Address Sets the IP address of the system. Gateway Sets the gateway address of the system. Subnet Mask Sets the subnet mask for the system. MAC Address System hardware address. This address cannot be changed. Public IP Address System public IP address. DHCP Mode Sets whether to use DHCP mode or not. IP Type If the IP addresses used in the private network are different from the IP addresses used in the public network, this parameter is used to assign a public IP address to a packet to be transmitted to a public network. System Reset Sets whether to restart the system. Signal Type Sets the signal type to be used in communications. Slave IP Address Sets the IP address of the slave system. Requirements After a parameter value is modified, the MCP board must be reset to apply the changes. 66 © SAMSUNG Electronics Co., Ltd. OfficeServ DM User Guide Viewing and Changing the LAN Parameter Values 1. Select [2. Configuration] [2.1 System Configuration] [2.1.2 Lan Parameter] from the Tree Viewer. 2. View the current LAN parameter values. 3. Change the LAN parameter values. 4. Save the changes. SystemTime Sets the information related to the system time. System Time Items Item Description Current Time Changes the date and time of the system. Daylight Saving Time Sets daylight saving periods. Up to 10 daylight saving periods can be entered. For example, if the system date reaches the start date of a daylight saving period entered, when the system time reaches 2:00 a.m. it will advance to 3:00 a.m. automatically. Also, if the system date reaches the end date of the daylight saving period entered, when the system time reaches 3:00 a.m. it will go back to 2:00 a.m. automatically. Viewing and Changing the System Time Values 1. Select [2. Configuration] [2.1 System Configuration] [2.1.3 System Time] from the Tree Viewer. 2. View the current System Time values. 3. Change the System Time values. 4. Save the changes. © SAMSUNG Electronics Co., Ltd. 67 Error! Use the Home tab to apply 제목 1 to the text that you want to appear here. License Key Displays the current approval status for the Soft phone, SIP phone and OfficeServ News, which have a restriction on the number of copies that can be used, depending on their license keys. The approval status for these functions can only be viewed, they cannot be modified. License Key Items Item 68 Description PBX License (OLD) This is for backwards compatible with earlier version than V4.30. If having license in previous version, the license should be inserted in this parameter. PBX License Status This is for backwards compatible with earlier version than V4.30. If inserted license is valid, license details are shown. PBX License Stack This is for backwards compatible with earlier version than V4.30. Designate the SIP Stack within the number allowed in the license. SIP License Insert license for sip stack. SIP License Status If inserted license is valid, license details are shown. Display assigned information of sip stack for SIP Trunk, SIP Station including 3rd party, SIP application (e.g., IP-UMS/IVR) Resource License Insert the license for MGI, VMS. This parameter is shown in only OfficeServ 7100. Resource License Status If inserted license is valid, license details are shown. Service License Insert license for H323, Soft phone, MGS (MOBEX), IP Phone, WIFI Phone, Call Manager, SPNET used and CNF24. Service License Status If inserted license is valid, license details are shown. Temporary License This can have 3 values. - DISABLE - URGENT ENABLE: If a license key with an old MAC address is entered, even if the MAC addresses differ, the old license shall be able to be used for two weeks. If a normal license is entered while an urgent license is being operated, it shall be disabled automatically. The urgent license shall be used just one time on the same H/W. © SAMSUNG Electronics Co., Ltd. OfficeServ DM User Guide (Continued) Item Description Temporary License - TUTORIAL ENABLE: A license function for tutorial shall be added. It shall be operated only when there is no normal license key. But if normal license is inserted, tutorial license is changed to disable and the normal license is used automatically. After being enabled, it can be used for 2 weeks. When the tutorial license is enabled, the available resources shall be available as follows. 2 VM channels 2 MGI channels 2 MOBEX Executive users 2 Soft phones 2 H.323 trunks 2 SIP trunks 2 Samsung SIP phones 2 3rd-Party SIP phones 2 Samsung SIP applications Viewing the License Key 1. 2. Select [2. Configuration] [2.1 System Configuration] [2.1.4 License Key] from the Tree Viewer. Check the current license key. System Options Sets other system options. System Option Items Item Description Hotel State Sets whether to use the hotel function. Technician Password Changes the password to enter when programming the Technician System. The password consists of four (4) digits from 0 to 9. Country Code Sets the country code for the city where the system is installed. The country code and area code are required when using the CTI function. © SAMSUNG Electronics Co., Ltd. 69 Error! Use the Home tab to apply 제목 1 to the text that you want to appear here. (Continued) Item 70 Description Area Code Sets the area code for the city where the system is installed. The country code and area code are needed when using the CTI function. Carrier Code [718] CARRIER Daily Save DB Saves the system database (SYSDB) to a smart media card/MMC card, or copies the database (MCDB) saved on a smart media card/MMC card to the system database. The system database can be saved to a smart media card/MMC card automatically or manually during operation. Each day, at the Daily Save Time, the database is automatically saved to a smart media card/MMC card, unless the time is set to ‘00:00’, in which case it is not saved automatically. The database from a smart media card/MMC card can only be copied to the system manually while the system is operating. After copying, the system should be restarted, after which the system will operate with the copied database. Alarm Overflow Sets the processing method when all alarm buffers are filled. - Over Written: Overwrites, starting with the oldest alarm entry. - Stop Recording: No longer records alarm entries. System Speed Max Sets the number of common system speed dials to the maximum of 500 or 950. System Speed Block Assigns the common speed dial blocks. Up to 50 common speed dial blocks can be set. Idle when enblock When a large-scaled LCD phone is in Enblock mode and a number to send to is being entered on the keypad (before pressing the [Send] button), this option sets whether the system processes this period as Busy or Idle. LCD2 Enblock Sets whether to set the dial mode of a two (2) line LCD phone with a navigation button to Enblock mode. Simultaneous Zone External Page Sets whether an announcement is available or not from two (2) external announcement areas at the same time. Use Loud Bell For Page (Cabinet 1) Sets whether to use the LB port of the MISC card in Cabinet1 as the ROP port. Use Loud Bell For Page (Cabinet 2) Sets whether to use the LB port of the MISC card in Cabinet2 as the ROP port. © SAMSUNG Electronics Co., Ltd. OfficeServ DM User Guide (Continued) Item Description Use Loud Bell For Page (Cabinet 3) Sets whether to use the LB port of the MISC card in Cabinet3 as the ROP port. Loop Trunk Tone Disconnect Checks and disconnects after receiving a busy tone from the loop trunk. SLI2 PRS Service When a station connected to the SLI2 card sends an external number, this option sets whether to send the Polarity Reverse Signal (PRS) to the port when the opposite party’s answer is recognized. External BGM/MOH The BGM or MOH sound source can be either an internal sound source or an external sound source. This option sets which of them is used. Viewing and Changing the System Options 1. Select [2. Configuration] [2.1 System Configuration] [2.1.5 System Options] from the Tree Viewer. 2. View the System Option values currently set. 3. Change the System Option values. 4. Save the changes. © SAMSUNG Electronics Co., Ltd. 71 Error! Use the Home tab to apply 제목 1 to the text that you want to appear here. SVMi Options Sets the information related to the voice mailbox card. SVMi Option Items Item VMS Day/Night Description Ring Plan 1 Ring Plan 2 Sets the ring conversion mode between the system and the voice mailbox. Ring Plan 3 Ring Plan 4 Ring Plan 5 Ring Plan 6 Warning Destination Sets the station or station group to ring in the event of a voice mailbox card alarm. Alarm Threshold Sets the conditions for the voice mailbox card alarm. Halt Status Sets whether to stop the voice mailbox card in operation. Viewing and Changing the SVMi Options 1. Select [2. Configuration] [2.1 System Configuration] [2.1.6 SVMi Options] from the Tree Viewer. 2. View the Feature Option values currently set. 3. Change the Feature Option values. 4. Save the changes. Connect User Profile Sets the User Profile about Admin and User. Gateway Information Items Item 72 Description Admin Sets the Admin Password. User Sets the User ID, Password and Level © SAMSUNG Electronics Co., Ltd. OfficeServ DM User Guide Viewing and Changing the Connect User Profile 1. Select [2. Configuration] [ 2.1 System Configuration] [2.1.7 Connect Uesr Profile] from the Tree Viewer. 2. View the Connect Uesr Profile. 3. Change the Connect Uesr Profile. 4. Save the changes. Cabinet Configuration Cabinet Information This window displays the status of the daughter boards for a card installed in the system. This information can be viewed only. Using this window, you can easily view the information for the daughter cards mounted in a card without removing it. Cabinet Information Displays the information for the cabinet. Cabinet Information Items Item Description LP Version Displays the software version installed in the LP card. Fan Status Displays the power status of the fan located inside the cabinet. Option Board1 Displays the daughter cards installed in option slot 1 of the LP40 card of the cabinet. Option Board2 Displays the daughter cards installed in option slot 2 of the LP40 card of the cabinet. Option Board3 Displays the daughter cards installed in option slot 3 of the LP40 card of the cabinet. Board EPLD Version Displays the cabinet’s motherboard EPLD version. Board PCB Version Displays the cabinet’s motherboard PCB version. Card EPLD Version Displays the LP card EPLD version in the cabinet. Card PCB Version Displays the LP card PCB version in the cabinet. © SAMSUNG Electronics Co., Ltd. 73 Error! Use the Home tab to apply 제목 1 to the text that you want to appear here. Slot Information When installing a new card in the slot, if this new card is of a different type from the existing card, this option sets the information related to this new card. Slot Information Items Item Description Previous Card Information for the previously installed card. Previous Service 1 Service type of the previously installed card. Previous Service 2 Previous Service 3 Current Card Information for the new card. Current Service 1 Service type of the new card. Current Service 2 Current Service 3 Card Version Version of the new card. Max Channel 1 Maximum number of channels on the new card. Max Channel 2 Max Channel 3 Dip Switch Dip switch information for the new card. Option Board Option board information for the new card. ELPD Version ELPD version information for new card. PCB Version PCB version information for new card. Viewing the Cabinet Information 1. 2. 74 Select [2. Configuration] [2.2 Cabinet Configuration] [2.2.0 Cabinet Info] from the Tree Viewer. View the Cabinet information. © SAMSUNG Electronics Co., Ltd. OfficeServ DM User Guide LCP Card Specifies the mode of each DSP in the CRM board and specifies a relay service for each MISC port. D-Board The CRM board has two (2) DSPs. Each DSP can operate in DTMFR, R2MFC or CID modes. This D-Board tab is used to specify the modes for these two DSPs. If the CRM board is not installed, ‘NO CRM’ is displayed. If installed, the version of the Erasable Programming Logic Device (EPLD), which is the hardware installed in the system, is displayed. This version cannot be modified. Since the CRM board can only be used in the OfficeServ 7400 Gateway, this tab is not displayed for other gateways. Requirements for the D-Board The CRM board must be installed in the LP40 card. MISC Specifies a relay service for each MISC port. External Page, Common bell, Loud bell, or NOT USED can be selected as the relay service. This setting is only available in the OfficeServ 7100 Gateway. In the OfficeServ 7200/7400 Gateway, all MISCs relay ports are fixed to PAGE. The ring can be set to continuous (0. CONTINUOUS) or interrupted (1. INTERRUPTED) for the ordinary bell. For each auxiliary ring, the station that rings it can be set. An auxiliary ring and a station must be specified as a pair. When a station rings, the auxiliary ring with which it forms a pair also rings, simultaneously. © SAMSUNG Electronics Co., Ltd. 75 Error! Use the Home tab to apply 제목 1 to the text that you want to appear here. Viewing the LCP Card 1. Select [2. Configuration] [2.2 Cabinet Configuration] [2.2.1 LCP Card] from the Tree Viewer. 2. View the LCP Card. MGI Card Allows MGI card parameters to be set and a specific MGI port to be assigned as a dedicated port to a port that needs to call via the MGI. MGI Card Items MGI Parameter Description IP Version Sets whether the MGI IP version is IPv4 or IPv6. IP Type If the IP address used by the MGI board in the private network is different from the IP address used in the public network, this parameter is used to assign a public IP address to a packet to be transmitted to a public network. IP Address IP address of the MGI card Subnet Mask Subnet mask of the MGI card Gateway Default gateway address of the MGI card Public IP Address Public IP address of the MGI card Public Port Public port No. of the MGI card start channel. Two (2) ports are sequentially assigned to each one of the channels. MAC Address Displays the MAC address of the MGI card. (Available for MGI64/MGI16 cards only) Viewing and Changing the MGI Card 1. 76 Select [2.Configuration] [2.2 Cabinet Configuration] [2.2.2 MGI Card] from the Tree Viewer. 2. View and change the MGI Card values. 3. Save the changes. © SAMSUNG Electronics Co., Ltd. OfficeServ DM User Guide SVMi Card Sets a message on the voice mailbox card as the hold sound source, and also sets each port on the voice mailbox as a receive only or send only port. If a voice mailbox card port is set as the hold sound source, it does not operate as a normal voice mailbox port. You can also set an IP-UMS port as the hold sound source. If an IP-UMS port is set as the hold sound source, a system MGI will also always be assigned as a hold sound source. If no MGI is available in the system, the hold sound source cannot be specified. An IP-UMS port set as the hold sound source does not operate as a normal voice mailbox port. The method used to set the hold sound source message number is also used to specify the voice mailbox card. (5000 to 5099) SVMi Card Items Item Description VMMOH Message Specifies the message number to be used as the hold sound source for the voice mailbox port. VM In/Out Sets the voice mailbox port to receive or send. Viewing and Changing the Hold Sound Source of the Voice Mail Box, and Using a Port for Receiving or Sending 1. 2. 3. 4. 5. Select [2. Configuration] [2.2 Cabinet Configuration] [2.2.3 SVMi Card] from the Tree Viewer. Select a gateway and cabinet number. View the SVMi hold sound source and whether the port is to be used for receiving or sending. Change the SVMi hold sound source and whether the port is to be used for receiving or sending. Save the changes. © SAMSUNG Electronics Co., Ltd. 77 Error! Use the Home tab to apply 제목 1 to the text that you want to appear here. WLI Card Sets various parameters related to interoperation of the WLI board. Depending on the parameters, when they are changed the WBS24 wireless station will operate automatically, reflecting the changes. Parameter Parameter Description IP Address Sets the IP address of the WLI card Gateway Sets the gateway address of the WLI card. Subnet Mask Sets the net mask of the WLI card. Status Displays the status of the WLI card. WBS Status Displays the Alive operation status of the WBS24 installed on the system. Viewing and Changing the Wireless Parameter Values 1. Select [2. Configuration] [2.2 Cabinet Configuration] [2.2.4 WLI Card] from the Tree Viewer. 2. View the wireless parameter values. 3. Change the wireless parameter values. 4. Save the changes. DLI Card Displays the information for the Port, Port Common Data, CLI Send Number, DLI Data, Station Data, Station On/Off Data, Customer On/Off Data, Preset Forward and Hot Line of a DLI board. Use the [Prev] and [Next] buttons to move to any item. For more information for each item, refer to its description elsewhere in this manual. 78 © SAMSUNG Electronics Co., Ltd. OfficeServ DM User Guide Viewing and Changing the DLI Card Configuration 1. 2. 3. Select [2. Configuration] [2.2 Cabinet Configuration] [2.2.5 DLI Card] from the Tree Viewer. Select the Cabinet/Slot. View the DLI card information. (Use the Next or Prev button to move to an item.) 4. Change the DLI card information. 5. Save the changes. SLI Card Displays the information for the Port, Port Common Data, CLI Send Number, SLI Data, Station Data, Station On/Off Data, Customer On/Off Data, Preset Forward and Hot Line of an SLI board. Use the [Prev] and [Next] buttons to move to any item. For more information for each item, refer to its description elsewhere in this manual. Viewing and Changing the SLI Card Configuration 1. 2. 3. Select [2. Configuration] [2.2 Cabinet Configuration] [2.2.6 SLI Card] from the Tree Viewer. Select the Cabinet/Slot. View the SLI card information. (Use the Next or Prev button to move to an item.) 4. Change the SLI card information. 5. Save the changes. © SAMSUNG Electronics Co., Ltd. 79 Error! Use the Home tab to apply 제목 1 to the text that you want to appear here. Analog Trunk Card Displays the information for the Port, Port Common Data, CLI Send Number, Loop Trunk, Trunk Data, Trunk On/Off and Trunk Timer of the Analog Trunk cards. Use the [Prev] and [Next] buttons to move to any item. For more information for each item, refer to its description elsewhere in this manual. Viewing and Changing the Analog Trunk Card Configuration 1. 2. 3. Select [2. Configuration] [2.2 Cabinet Configuration] [2.2.7 Analog Trunk Card] from the Tree Viewer. Select the Cabinet/Slot. View the Analog Trunk card information. (Use the Next or Prev button to move to an item.) 4. Change the Analog Trunk card information. 5. Save the changes. Universal Trunk Card Displays the Universal Trunk card information. Viewing and Changing the Universal Trunk Card Configuration 1. 80 Select [2. Configuration] [2.2 Cabinet Configuration] [2.2.8 Universal Trunk Card] from the Tree Viewer. 2. Select the Cabinet/Slot. 3. View the Universal Trunk card information. 4. Change the Universal Trunk card information. 5. Save the changes. © SAMSUNG Electronics Co., Ltd. OfficeServ DM User Guide BRI Card Displays the BRI card information. Viewing and Changing the BRI Card Configuration 1. Select [2. Configuration] [2.2 Cabinet Configuration] [2.2.9 BRI Card] from the Tree Viewer. 2. Select the Cabinet/Slot. 3. View the BRI card information. 4. Change the BRI card information. 5. Save the changes. PRI Card Displays the information for the Port, Port Common Data, CLI Send Number, PRI Trunk Data, Trunk Data and Trunk On/Off of the PRI boards. Use the [Prev] and [Next] buttons to move to any item. For more information for each item, refer to its description elsewhere in this manual. Viewing and Changing the PRI Card Configuration 1. 2. 3. Select [2. Configuration] [2.2 Cabinet Configuration] [2.2.10 PRI Card] from the Tree Viewer. Select the Cabinet/Slot. View the PRI card information. (Use the Next or Prev button to move to an item.) 4. Change the PRI card information. 5. Save the changes. © SAMSUNG Electronics Co., Ltd. 81 Error! Use the Home tab to apply 제목 1 to the text that you want to appear here. T1 Card Displays the information for the Port, Port Common Data, CLI Send Number, T1 Trunk Data, Trunk Data, Trunk On/Off, Trunk Timer and Digits Translation of the T1 boards. Use the [Prev] and [Next] buttons to move to any item. For more information for each item, refer to its description elsewhere in this manual. Viewing and Changing the T1 Card Configuration 1. 2. 3. Select [2. Configuration] [2.2 Cabinet Configuration] [2.2.11 T1 Card] from the Tree Viewer. Select the Cabinet/Slot. View the T1 card information. (Use the [Next] or [Prev] button to move to an item.) 4. Change the T1 card information. 6. Save the changes. OAS Card Provides configuration of the OAS card (s) in the system. Viewing and Changing the OAS Card Configuration 1. 82 Select[ [2. Configuration]] [2.2 Cabinet Configuration] [2.2.14 OAS Card] from the Tree Viewer. 2. View the OAS Card information. 3. Change the OAS Card information. 4. Save the changes. © SAMSUNG Electronics Co., Ltd. OfficeServ DM User Guide MPS Card Provides network configuration of the MPS card (s) in the system. Slot Information Sets the MPS card parameters. Slot Information Items (MPS Parameters) MGI Parameter Description IP Version Specifies MPS IP version. (Ipv4/Ipv6) IP Address Specifies the IP address for the MPS card. Subnet Mask Specifies the IP subnet mask. This parameter is used by the system to calculate the range of IP devices (subnet) that are within ‘direct reach’ of the MPS. (without having to go through the designated network IP gateway) Gateway Specifies the designated IP gateway address used for contacting IP devices beyond the local subnet. IP Type Specifies if the system will be routing data over a public or private network. Local RTP Port (Start) Specifies local rtp port. The default value is 30000 and the value range is between 10000 and 60000. Public IP Address 1 Public IP Address is only used for VoIP signaling protocols in a NAT network. NAT system binds IP Address with Public IP and processes a voice stream. Public RTP Port 1 Public RTP Port which NAT system binds a private RTP port Public IP Address 2 Pulbic IP Address is only used for VoIP signaling protocols in a NAT network. NAT system binds IP Address with Public IP and processes a voice stream. Public RTP Port 2 Public RTP Port which NAT system binds a private RTP port Public IP Address 3 Pulbic IP Address is only used for VoIP signaling protocols in a NAT network. NAT system binds IP Address with Public IP and processes a voice stream. Public RTP Port 3 Public RTP Port which NAT system binds a private RTP port © SAMSUNG Electronics Co., Ltd. 83 Error! Use the Home tab to apply 제목 1 to the text that you want to appear here. Viewing and Changing the Slot Information 1. Select [2. Configuration] [2.2 Cabinet Configuration] [2.2.15 MPS Card]. 2. Select a gateway and cabinet number. 3. Select the Slot Information tab. 4. View and change the MGI parameter values. 5. Save the changes. CNF24 Card Provides network configuration of the CNF24 card (s) in the system. Slot Information Sets the CNF 24 card parameters. Slot Information Items (CNF24 Parameters) MGI Parameter 84 Description IP Version Specifies CNF24 IP version. (Ipv4/Ipv6) IP Address Specifies the IP address for the CNF24 card. Subnet Mask Specifies the IP subnet mask. This parameter is used by the system to calculate the range of IP devices (subnet) that are within ‘direct reach’ of the CNF24. (without having to go through the designated network IP gateway) Gateway Specifies the designated IP gateway address used for contacting IP devices beyond the local subnet. IP Type Specifies if the system will be routing data over a public or private network. Local RTP Port (Start) Specifies local rtp port. The default value is 30000 and the value range is between 10000 and 60000. Public IP Address 1 Public IP Address is only used for VoIP signaling protocols in a NAT network. NAT system binds IP Address with Public IP and processes a voice stream. Public RTP Port 1 Public RTP Port which NAT system binds a private RTP port © SAMSUNG Electronics Co., Ltd. OfficeServ DM User Guide (Continued) MGI Parameter Description Public IP Address 2 Pulbic IP Address is only used for VoIP signaling protocols in a NAT network. NAT system binds IP Address with Public IP and processes a voice stream. Public RTP Port 2 Public RTP Port which NAT system binds a private RTP port Public IP Address 3 Pulbic IP Address is only used for VoIP signaling protocols in a NAT network. NAT system binds IP Address with Public IP and processes a voice stream. Public RTP Port 3 Public RTP Port which NAT system binds a private RTP port FTP Port Specifies FTP Port for the CNF24 card. Viewing and Changing the Slot Information 1. Select [2. Configuration] [2.2 Cabinet Configuration] [2.2.16 CNF 24 Card]. 2. Select a gateway and cabinet number. 3. Select the Slot Information tab. 4. View and change the MGI parameter values. 5. Save the changes. © SAMSUNG Electronics Co., Ltd. 85 Error! Use the Home tab to apply 제목 1 to the text that you want to appear here. Virtual Cabinet Virtual Cabinet Information Views the card type of the virtual cabinet. Viewing the Virtual Cabinet Information 1. 2. Select [2. Configuration] [2.3 Virtual Cabinet] [2.3.0 Virtual Cabinet Information] from the Tree Viewer. View the current virtual cabinet information. Virtual DGP Displays the information for the Port, Port Common Data, CLI Send Number, DLI Data, Station Data, Station On/Off, Customer On/Off Data, Preset Forward and Hot Line of the virtual DGP. Use the [Prev] and [Next] buttons to move from item to item. For more information for each item, refer to its description elsewhere in this manual. Viewing and Changing the Virtual DGP Information 1. 2. 3. 86 Select [2. Configuration] [2.3 Virtual Cabinet] [2.3.1 Virtual DGP] from the Tree Viewer. Select the Cabinet/Slot. View the virtual DGP information. (Use the [Next] or [Prev] button to move to an item.) 4. Change the virtual DGP information. 5. Save the changes. © SAMSUNG Electronics Co., Ltd. OfficeServ DM User Guide Virtual SLT Displays the information for the Port, Port Common Data, CLI Send Number, SLI Data, Station Data, Station On/Off, Customer On/Off Data, Preset Forward and Hot Line of the virtual SLT. Use the [Prev] and [Next] buttons to move from item to item. For more information for each item, refer to its description elsewhere in this manual. Viewing and Changing the Virtual SLT Information 1. 2. 3. Select [2. Configuration] [2.3 Virtual Cabinet] [2.3.2 Virtual SLT] from the Tree Viewer. Select the Cabinet/Slot. View the virtual SLT information. (Use the [Next] or [Prev] button to move to an item.) 4. Change the virtual SLT information. 5. Save the changes. Desktop ITP Displays the information for the Port, Port Common Data, CLI Send Number, ITP Information, DLI Data, Station Data, Station On/Off, Customer On/Off Data, Preset Forward and Hot Line of the Desktop ITP. Use the [Prev] and [Next] buttons to move from item to item. For more information for each item, refer to its description elsewhere in this manual. Viewing and Changing the Desktop ITP Information 1. 2. Select 2. Configuation [2.3 Virtual Cabinet] [2.3.3 Desktop ITP] from the Tree Viewer. Select the Cabinet/Slot. © SAMSUNG Electronics Co., Ltd. 87 Error! Use the Home tab to apply 제목 1 to the text that you want to appear here. 3. View the Desktop ITP information. (Use the [Next] or [Prev] button to move to an item.) 4. Change the Desktop ITP information. 5. Save the changes. Mobile WIP Displays the information for the Port, Port Common Data, CLI Send Number, WIP Phone Information, Station Data, Station On/Off, Customer On/Off Data and Preset Forward of the Mobile WIP. Use the [Prev] and [Next] buttons to move from item to item. For more information for each item, refer to its description elsewhere in this manual. Viewing and Changing the Mobile WIP Information 1. 2. 3. 88 Select [2. Configuration] [2.3 Virtual Cabinet] [2.3.4 Mobile WIP] from the Tree Viewer. Select the Cabinet/Slot. View the Mobile WIP information. (Use the [Next] or [Prev] button to move to an item.) 4. Change the Mobile WIP information. 5. Save the changes. © SAMSUNG Electronics Co., Ltd. OfficeServ DM User Guide Standard SIP Phone Displays the standard SIP phone information. For more information for each item, refer to its description elsewhere in this manual. Viewing and Changing the Standard SIP Phone Information 1. Select [2. Configuration] [2.3 Virtual Cabinet] [2.3.5 Standard SIP Phone] from the Tree Viewer. 2. Select the Cabinet/Slot. 3. View the standard SIP phone information. 4. Change the standard SIP phone information. 5. Save the changes. IP-UMS Displays the IP-UMS information. For more information for each item, refer to its description elsewhere in this manual. Viewing and Changing the IP-UMS Information 1. Select [2. Configuration] [2.3 Virtual Cabinet] [2.3.6 IPUMS] from the Tree Viewer. 2. Select the Cabinet/Slot. 3. View the IP-UMS information. 4. Change the IP-UMS information. 5. Save the changes. © SAMSUNG Electronics Co., Ltd. 89 Error! Use the Home tab to apply 제목 1 to the text that you want to appear here. Virtual GCONF Displays the port common data information for the virtual GCONF. For more information for each item, refer to its description elsewhere in this manual. Viewing and Changing the Virtual GCONF Information 1. Select [2. Configuration] [2.3 Virtual Cabinet] [2.3.8 Virtual GCONF] from the Tree Viewer. 2. Select the Cabinet/Slot. 3. View the virtual GCONF information. 4. Change the virtual GCONF information. 5. Save the changes. VoIP Trunks Displays the information for the Port, Port Common Data, CLI Send Number, Trunk Data and Trunk On/Off of the VoIP trunks. Use the [Prev] and [Next] buttons to move from item to item. For more information for each item, refer to its description elsewhere in this manual. Viewing and Changing the VoIP Trunk Information 1. 2. 3. 90 Select [2. Configuration] [2.3 Virtual Cabinet] [2.3.9 VoIP Trunks] from the Tree Viewer. Select the Cabinet/Slot. View the VoIP trunk information. (Use the [Next] or [Prev] button to move to an item.) 4. Change the VoIP trunk information. 5. Save the changes. © SAMSUNG Electronics Co., Ltd. OfficeServ DM User Guide Port Configuration Port Information Displays the port information. Port Information Items Item Description Device Displays the station type, trunk, and virtual station. Tel No Sets the dial number. Viewing and Changing the Port Information 1. Select [2. Configuration] [2.4 Port Configuration] [2.4.1 Port Information] from the Tree Viewer. 2. View the Port Information settings. 3. Change the Port Information settings. 4. Save the changes. © SAMSUNG Electronics Co., Ltd. 91 Error! Use the Home tab to apply 제목 1 to the text that you want to appear here. Port Common Data Sets the common items for the station and trunk. Items to be Specified Item Description Station Name Sets the name of the station or trunk Made Busy Sets the station and trunk to the Busy state. MOH Specifies the hold sound source to be heard when the station or trunk is on hold. LCR Class Sets the grade (1 to 8) of the optimal line selection function, used to restrict the range of trunk groups that can be selected in that function. Call Priority When all members of the station group called are busy and there are multiple calls on standby, this option specifies which of the standby will be connected first if a member of that station group becomes available. (1 to 9) Priority 1 is the highest priority. Distinct Tone Sets the distinct ring tone of the digital phone. (1 to 8) Distinct Ring Sets the ring period of a normal phone. (1 to 5) SVMi Ring Back Sets whether to use the ring-back service using the VMS message. Collect Call Sets whether to use the collect call function. Viewing and Changing the Port Common Data 1. 92 Select [2. Configuration] [2.4 Port Configuration] [2.4.2 Port Common Data] from the Tree Viewer. 2. View the port common data. 3. Change the port common data. 4. Save the changes. © SAMSUNG Electronics Co., Ltd. OfficeServ DM User Guide CLI Send Number Sets the send number (caller number) to be sent by station/trunk when calling an ISDN trunk. You can set four (4) send numbers by station/trunk. When sending through the R2MFC, the first send number is used and up to sixteen (16) digits can be entered in a send number. Viewing and Changing the CLI Send Numbers 1. Select [2. Configuration] [2.4 Port Configuration] [2.4.3 CLI Send Number] from the Tree Viewer. 2. View the CLI send numbers. 3. Change the CLI send numbers. 4. Save the changes. Station Port Configuration Station Data Sets the call pickup group, branch group, display sender information option, ring-back service and individual speed dial block by station. Items to be Specified Item Description Pickup Group Sets the call pickup group for the station. (1 to 99) When a call pickup group is set for a station, the calls received by other phones can be picked up by the station. Branch Group Sets the branch group for the station. (1 to 99) Each station has a branch group. Calls received by other phones in the same branch group can be picked up by the station just by lifting the phone’s receiver. CID/ANI Allow Sets whether to allow sender information for the station to be displayed. Ringback Message Sets the ring-back service for the station. Enter the VMS message number to use for ring-back. (1 to 9999) Speed Block Assigns individual speed dial blocks. (0 to 5) © SAMSUNG Electronics Co., Ltd. 93 Error! Use the Home tab to apply 제목 1 to the text that you want to appear here. Viewing and Changing the Station Data 1. 2. 3. 4. Select [2. Configuration] [2.5 Station Port] [2.5.1 Station Data] from the Tree Viewer. View the Pickup Group, Branch Group, CID/ANI Allow, Ringback Message and Speed Block settings for the stations. Change the Pickup Group, Branch Group, CID/ANI Allow, Ring back Message and Speed Block settings for the stations. Save the changes. Station On/Off Data Sets the (On or Off) option for each function by station. Items to be Specified Item Description Off Hook Ring Sets whether to use the Off Hook Ring function. Access Dial Sets whether to select a trunk or trunk group directly by dialing when using the optimal line selection function. Next Group Tone Sets whether to use a signal sound to notify selection of a trunk group for the next step when performing the optimal line selection function. VMAA Forward Sets whether to use call forwarding to voice mailbox/auto attendant. Night Password Sets ON, the steps verifying the ring plan passcode will be added in Ring Plan change. Viewing and Changing Function On/Off Settings by Station 1. 94 Select [2. Configuration] [2.5 Station Port] [2.5.2 Station On/Off Data] from the Tree Viewer. 2. View the Function On/Off settings by station. 3. Change the Function On/Off settings by station. © SAMSUNG Electronics Co., Ltd. OfficeServ DM User Guide 4. Save the changes. Customer On/Off Sets the (On or Off) option for each function by station. Items to be Specified Item Description SMDR Print Sets whether to print the call information. Intercom SMDR Sets whether to output the calls between stations to the SMDR. Recall Operator If there is no answer from the opposite party after a call transfer, this sets the option of whether to re-ring the attendant or station that forwarded the call. HK Flash No Recall For a normal phone, this option sets whether to recall if the receiver is hung up without any digit being dialed after performing the Hook Flash. No Cost Print Sets whether to print the SMDR in the Hotel function even if there is no call charge. Viewing and Changing the Customer Function Settings 1. Select [2. Configuration] [2.5 Station Port] [2.5.3 Customer On/Off Data] from the Tree Viewer. 2. View the Customer function settings. 3. Change the Customer function settings. 4. Save the changes. © SAMSUNG Electronics Co., Ltd. 95 Error! Use the Home tab to apply 제목 1 to the text that you want to appear here. Preset Forward Sets the Preset Forward settings. Items to be Specified Item Description Forward Port Sets the station to which the call is forwarded when a station for which no answer forwarding is enabled does not answer the incoming call. Forward Option Sets whether to use no answer forwarding. Forward Override If call forwarding is enabled in the station that must ring when a call is received, this option sets whether to ignore its call forwarding setting and received the call if the station option of the calling station is set to On. No Answer Forward Delay For no answer forwarding, this option sets the period of time after which it is decided that a call has not answered. (0 to 250 sec) External Forward Delay Sets the period of time for which the station enabling the forwarding rings before the call is forwarded. (1 to 250 sec) CC Ring Delay If the called station does not answer within the set time, the station with the CC button corresponding to the station called is also called. However, this service is not provided for group incoming calls. (0 to 250 sec) Viewing and Changing the Preset Forward Settings 1. 96 Select [2. Configuration] [2.5 Station Port] [2.5.4 Preset Forward] from the Tree Viewer. 2. View the Preset Forward settings. 3. Change the Preset Forward settings. 4. Save the changes. © SAMSUNG Electronics Co., Ltd. OfficeServ DM User Guide Hot Line Sets the hot line and the related parameters. Items to be Specified Item Description Hot T/S # Enter the station number to be set as the hot line. Hot Outgoing Digit Enter the off hook trunk selection dial. Off Hook Delay Enter the delay period to wait before sending when the hot line is set. (0 to 250 sec) Trunk Pair Enter the trunk number to connect to the hot line trunk. Viewing and Changing the Hot Line Settings 1. Select [2. Configuration] [2.5 Station Port] [2.5.5 Hot Line] from the Tree Viewer. 2. View the hot line settings. 3. Change the hot line settings. 4. Save the changes. DLI Data Sets the CID Block, Log Block, Text Message, Group Message, BGM, Micro Phone, Ring Back Station Name and Group Listen by Speaker items for each station. Items to be Specified Item Description CID Block Assigns the entries to save a caller ID to each station. Since the number of entries that are not assigned is displayed, they can be added or removed for each station. Up to 50 entries can be assigned, in units of 10. Log Block Assigns the buffer to save the dialing information for outgoing calls. Up to 50 log blocks can be assigned to a digital phone that has LCD. © SAMSUNG Electronics Co., Ltd. 97 Error! Use the Home tab to apply 제목 1 to the text that you want to appear here. (Continued) Item Description Text Message Specifies the stations that can use urgent text messages. Up to 100 stations can be enabled to use urgent text messages. Group Conference Specifies the stations that can use the temporary conference function. Up to 100 stations can be enabled to use the temporary conference function. BGM Specifies the Background Music Source (BGM) by station. As system sound sources, one (1) internal sound source and two (2) external sound sources are supported by the MIS card . Micro Phone Sets whether to use the microphone. Ring Back Station Name Sets whether to display the opposite station name instead of the ‘calling’ message in the ring back state, when sending a station call. Group Listen by Speaker Sets whether to operate the Group Listen function with the Speaker button. Requirements When specifying an external sound source for the background music source, you must connect the terminal box port to the external sound source of the MIS card. If the BGM item is set to ‘None’ or a sound source is not connected to the external sound source specified as the background music source, even if the background music function is enabled, it will not be heard. Viewing and Changing the DLI Data 1. 98 Select [2. Configuration] [2.5 Station Port] [2.5.6 DLI Data] from the Tree Viewer. 2. View the DLI settings. 3. Change the DLI settings. 4. Save the changes. © SAMSUNG Electronics Co., Ltd. OfficeServ DM User Guide SLI Data Sets the functions related to the ports of the normal phone. Items to be Specified Item Description CID Phone Sets whether to send CID information to a normal phone when an RCM2 board is installed. Loop Open Sets whether or not to supply power to a normal phone for a certain time if it has been used and has switched to standby mode. ISDN Service Specifies the ISDN service type. Ring Type Specifies the ring type for a normal phone port. VMAA Port Specifies whether to use a normal phone port as the port for a voice mailbox or auto attendant port (VMAA), or normal phone (Normal). A voice mailbox or auto attendant equipment can be connected to a normal phone port. In this case, you must specify the type of terminal connected in order to use the service. DRMF Duration (100 ms) Sets the period of time for which the DTMF tone continues. (100 to 9900 ms) First Digit Delay (100 ms) Sets the period of time during which the first digit is sent after selecting the voice mailbox/auto attendant, etc. (100 to 9900 ms) ISDN Service Type ISDN Service Type Description Voice Performs the service using a normal phone. Fax 3 Performs the service using a phone to which a G3 Fax is connected. Audio 3.1 Performs the service using a 3.1 kHz voice phone. Modem Performs the service using a data communication phone to which a modem is connected. © SAMSUNG Electronics Co., Ltd. 99 Error! Use the Home tab to apply 제목 1 to the text that you want to appear here. Ring Types for Normal Phones Ring Type Setting ICM Ring Normal station ring of 0.4 sec ringing/0.2 sec off/2 sec ringing/3 sec off. CO Ring Normal trunk ring of 1 sec ringing/2 sec off Data Ring This is the same as the normal trunk ring of 1 sec ringing/2 sec off, but does not have the off hook tone. Viewing and Changing the SLI Data 1. 100 Select [2. Configuration] [2.5 Station Port] [2.5.7 SLI Data] from the Tree Viewer. 2. View the SLI settings. 3. Change the SLI settings. 4. Save the changes. © SAMSUNG Electronics Co., Ltd. OfficeServ DM User Guide Soft IVR Sets whether to use the Soft IVR that OfficeServ SCM Call Server provide basically. Items to be Specified Item Description Conference Sets whether to use Soft-IVR conference. It uses not conference chip of Gateway but conference function of Soft-IVR. It provides 3-way 8 group and supports G.711A codec. Station MOH Sets whether to use Soft-IVR station MOH. It uses not melody chip of Gateway but MOH file of Soft-IVR. It doesn’t provide for BGM. Announcement Sets whether to use Soft-IVR Announcement. It provides not tone/page but announcement of Soft-IVR about several error case while using phone. Viewing and Changing the Soft IVR 1. Select [2. Configuration] [2.5 Station Port] [2.5.8 Soft IVR] from the Tree Viewer. 2. View the Soft IVR settings. 3. Change the Soft IVR settings. 4. Save the changes. © SAMSUNG Electronics Co., Ltd. 101 Error! Use the Home tab to apply 제목 1 to the text that you want to appear here. Trunk Port Configuration Trunk Data Sets the trunk CO number, trunk dial type, night group by trunk and trunk time parameters. Items to be Specified Item Description CO Number Enter the Central Office (CO) trunk number. Dial Type Specifies the trunk dial type. Night Group Specifies the night group for each trunk. (0 to 9) Only trunks that belong to a night group operate in Ring Time plan Override (RTO) mode. They operate in that mode until it is changed to ring mode, when the night group mode is released. DTMF Duration Sets the period of time for which the DTMF tone continues. Set a value in units of 100 ms. (100 to 9900 ms) First Digit Delay Sets the period of time during which the first digit is sent after selecting the trunk. Enter a value in units of 100 ms. (100 to 9900 ms) Pause Time Specifies the waiting time to allow the opposite party time to prepare. Trunk Dial Types Dial Type Description DTMF Multi-Frequency type PULSE Dial pulse type R2MFC R2MFC type Viewing and Changing the Trunk Data 1. 2. 102 Select [2. Configuration] [2.6 Trunk Port] [2.6.1 Trunk Data] from the Tree Viewer. View the trunk settings. © SAMSUNG Electronics Co., Ltd. OfficeServ DM User Guide 3. 4. Change the trunk CO number, trunk dial type, night group by trunk and trunk time parameter values. Save the changes. Trunk On/Off Sets the trunk type and whether to use specific functions for each trunk. Items to be Specified Item Description CO/PBX Line Sets the trunk type for each trunk, i.e., whether it is a normal trunk or a PBX station. Co Line: Normal trunk PBX Line: PBX station Abandon Call If an incoming call is not connected because the caller replaced the receiver when the call was not answered, this field sets whether to save the information for this call. 1A2 Emulate Sets whether to use the truck call interrupting function. Incoming DND Sets whether to use the truck Do Not Disturb (DND) function. Trunk Forward Sets whether to use the truck call forwarding function. E-Forward CLI When performing external trunk forwarding, this field sets whether to use the station caller ID. Repeat CLI When performing external trunk forwarding, this field sets whether to use the CID of the called trunk or the CID of the trunk used for the forwarding as the CID information. Tandem CLI For a trunk tandem call, this field sets whether to put ‘0’ in front of the received caller ID. Coloring As To use coloring instead of the ring back tone, a call path must be connected for an incoming trunk. If it is not connected, the field sets whether to have the coloring heard by sending an ANSBACK message. Viewing and Changing Function On/Off Settings by Trunk 1. Select [2. Configuration] [2.6 Trunk Port] [2.6.2 Trunk On/Off] from the Tree Viewer. © SAMSUNG Electronics Co., Ltd. 103 Error! Use the Home tab to apply 제목 1 to the text that you want to appear here. 2. View the Function On/Off settings by trunk. 3. Change the Function On/Off settings by trunk. 4. Save the changes. Trunk Timer Changes the time parameters to be set and used for each trunk. Trunk Time Parameters Trunk Time Parameter (display unit) 104 Description Answer Back (100 ms) Sets the Answer Back detection time. (0 to 2500 ms) Clear Wait (100 ms) Sets the delay time for hook-on when re-calling a trunk. (100 to 9900 ms) Co SuperVision Timer (10 ms) Sets the interval for trunk checking during a call. (10 to 2500 ms) Flash Time (10 ms) Sets the trunk flash time. (20 to 2500 ms) No Ring Wait (sec) Sets the maximum time before recognizing that the call has disconnected because there is no trunk ring signal. (1 to 25 sec) PRS Detect (10 ms) Sets the duration of PRS signal pulse. If the PRS signal is reversed when opposite party is answered and maintain the status before the opposite party disconnect the call, the PRS Detect must be set to 0. (0 to 2500 ms) Ring Detect (10 ms) Sets the trunk ringing detection time. (10 to 2500 ms) Wink Start (10 ms) Sets the time to keep up the WINK signal on an E & M trunk. (100 to 300 ms) MF/DP Interval (100 ms) Sets the interval between digits in pulse dialing. (100 to 9900 ms) © SAMSUNG Electronics Co., Ltd. OfficeServ DM User Guide Requirements If the opposite party’s trunk exchange is S1240, the Co SuperVision Timer must be set to 300ms and the Ring Detect to 50 sec. If the opposite party’s trunk exchange is TDX-10, the Ring Detect must be set to 50 sec. Viewing and Changing the Trunk Time Parameter Values 1. Select [2. Configuration] [2.6 Trunk Port] [2.6.3 Trunk Timer] from the Tree Viewer. 2. View the trunk time parameter values. 3. Change the trunk time parameter values. 4. Save the changes. Digits Translation Sets the functions related to a leased line or DID trunk. Items to be Specified Item Description ENM Translate When a call is received by a leased line or Direct Inward Dialing (DID) trunk, this field specifies the receiving type. Receive Digit If the receiving type is selected as ‘Follow Trunk Ring’, this field sets the count for the received digits where the receiving service is to be performed. Insert Digit Sets the digit to insert into the received number when it is received from a leased line or DID trunk or when providing the TANDEM (trunk-trunk, trunkleased line, leased line network trunk) service. © SAMSUNG Electronics Co., Ltd. 105 Error! Use the Home tab to apply 제목 1 to the text that you want to appear here. ENM Translate Receiving Type Receiving Type Description Follow Incoming Digit When receiving a call, it is received by the station (group) with the same number as the received number. Follow DID Translation The call is received based on the ‘3.2.3 DID Ringing’ settings. Follow Trunk Ring The call is received based on the ‘3.2.1 Trunk Ringing’ settings. In this event, set in the Receive Digit field the number of received digits at which the receiving service is to be performed. Requirements For the R2MFC trunk, only the Follow Incoming Digit and Follow DID Translation receiving types are supported. Viewing and Changing the Digits Translation Settings 1. 2. 3. 4. 106 Select [2. Configuration] [2.6 Trunk Port] [2.6.4 Digits Translation] from the Tree Viewer. View the settings related to the use of a leased line or DID trunk. Change the settings related to the use of a leased line or DID trunk. Save the changes. © SAMSUNG Electronics Co., Ltd. OfficeServ DM User Guide Loop Trunk Data Sets whether to provide caller ID for an analog trunk, whether to use Tone Check, and the Connect Delay time parameter value. Items to be Specified Item Description CID Trunk Sets whether the analog trunk provides caller ID or not. Tone Check For an analog trunk, this field sets whether to use the function to check the BUSY tone and cut the trunk if detected. (This is applied only when the Loop Trunk Tone Disconnect in ‘2.1.5 System Options’ is enabled.) Connect Delay (100 ms) When sending a call using an analog trunk, this field sets the waiting time until the call path is connected. (0 to 2500 ms) Requirements The caller ID for the trunk must be provided by the phone service vendor. Before setting the caller ID display options, check whether the RCM option card or the RCM2 option card is installed. Viewing and Changing the Loop Trunk Data 1. Select [2. Configuration] [2.6 Trunk Port] [2.6.5 Loop Trunk Data] from the Tree Viewer. 2. View the loop trunk data. 3. Change the loop trunk data. 4. Save the changes. © SAMSUNG Electronics Co., Ltd. 107 Error! Use the Home tab to apply 제목 1 to the text that you want to appear here. Universal Trunk Data Sets the hybrid trunk type and the leased line/DID trunk signaling type. Items to be Specified Item Description Hybrid Trunk Mode Sets the E & M, DID, and R/D service type for each trunk of the Hybrid Trunk card. Trunk Signal Sets the signal type for each E & M trunk. Requirements The Analog E & M/DID Trunk card must be installed. If there is no E & M trunk, ‘No Data’ will be displayed. Settings Item Setting Hybrid Trunk Mode E&M Trunk Signal Immediate Start Viewing and Changing the Universal Trunk Data 1. 108 Select [2. Configuration] [2.6 Trunk Port] [2.6.6 Universal Trunk Data] from the Tree Viewer. 2. View the universal trunk data. 3. Change the universal trunk data. 4. Save the changes. © SAMSUNG Electronics Co., Ltd. OfficeServ DM User Guide BRI Trunk Data Sets the options for each Q-Signaling BRI trunk and BRI trunk used for networking. Requirements Check the following items before setting the BRI. For the TEPRI board, set the number 2 jumper on the TEPRI board to BRI mode. For the TEPRI2 board, set the number 2 jumper of the module that corresponds to the port to be used in the two (2) TEPRI2 board jumper modules to BRI mode. After these are set, reset as in ‘6.3.1 Pre-Install/Reset’ for the settings to be validated. Viewing and Changing the PRI Trunk Data 1. Select [2. Configuration] [2.6 Trunk Port] [2.6.7 BRI Trunk Data] from the Tree Viewer. 2. View the BRI trunk data. 3. Change the BRI trunk data. 4. Save the changes. PRI Trunk Data Sets the options for each Q-Signaling PRI trunk and PRI trunk used for networking. Items to be Specified Item Description Q-Sig Trunk Specifies the Q-Signaling PRI trunks to use for networking. The data should be set in TEPRI card units. CLIP Table Sets the number of the Calling Line Identification Presentation (CLIP) table in ‘2.4.3 CLI Send Number’ to use when sending a call. Channel Select Sets the channel to use when sending a call. Use Channel Sets the number of available channels. © SAMSUNG Electronics Co., Ltd. 109 Error! Use the Home tab to apply 제목 1 to the text that you want to appear here. (Continued) Item Description Auto Time Update Sets whether to update the system time automatically for ISDN calls. When an exact time value is transmitted from an ISDN trunk, the system time is updated if this option is On. Channel Any Channel When set to Yes, an available channel is selected from the card terminal regardless of the PRI the subscriber selected, and the call is sent through the selected channel. When set to No, the call is sent through the channel that the subscriber selected. Incoming Mode Normal Connects a received call to the designated representative number. DDI Connects a received call directly to the receiving number. Requirements Check the following items before setting the PRI. For the TEPRI board, set the number 2 jumper on the TEPRI board to PRI mode. For the TEPRI2 board, set the number 2 jumper of the module that corresponds to the port to be used in the two (2) TEPRI2 board jumper modules to PRI mode. After these are set, reset as in ‘6.3.1 Pre-Install/Reset’ for the settings to be validated. Viewing and Changing the PRI Trunk Data 1. 110 Select [2. Configuration] [2.6 Trunk Port] [2.6.8 PRI Trunk Data] from the Tree Viewer. 2. View the PRI trunk data. 3. Change the PRI trunk data. 4. Save the changes. © SAMSUNG Electronics Co., Ltd. OfficeServ DM User Guide T1 Trunk Data Sets the service type and signal type for each E1 trunk, whether to create and detect the CRC4 when serving the E1 or PRI, and whether the analog trunk provides the caller ID. Items to be Specified Item Description CRC6 On/Off When serving the E1 or PR, this field sets whether to create and detect the Cycle Redundancy Check (CRC4). Coding Mode Sets the T1 coding mode. Signal Mode Sets the T1 signal mode. ANI Trunk Sets whether the analog trunk provides caller ID or not. Channel T1 Line Sets the E1 trunk service mode. T1 Signal Sets the signal type to be used when the E1 trunk is used as DID or E & M. Requirements The CRC6 On/Off setting can be used in a network where the CRC4 frame service is available. An ANI trunk can only be specified if the phone service vendor provides its caller ID. To use the E1 trunk, the TEPRI board or TEPRI2 board must be installed in the system. For the TEPRI board, set the number 1 jumper on the TEPRI board to E1 mode and the number 2 jumper to E1/T1 mode. For the TEPRI2 board, set the number 1 jumper of the module that corresponds to the port you want to use in the two (2) TEPRI2 board jumper modules to E1 mode, and the number 2 jumper to E1/T1 mode. Otherwise, ‘No Data’ will be displayed. Viewing and Changing the T1 Trunk Data 1. 2. Select [2. Configuration] [2.6 Trunk Port] [2.6.9 T1 Trunk Data] from the Tree Viewer. View the T1 trunk data. © SAMSUNG Electronics Co., Ltd. 111 Error! Use the Home tab to apply 제목 1 to the text that you want to appear here. 3. Change the T1 trunk data. 4. Save the changes. Virtual Port Configuration ITP Information Sets various parameters of the IP phone. Parameter Parameter Description User ID Enter the ID to be used to identify the user when registering the phone. Password Enter the password to be used to identify the user when registering the phone. DSP Type Sets the DSP type to use when calling with the IP phone. Time Zone For a IP phone at a remote location, if the time displayed on the phone is to be different from the time on the system connected, this field sets the appropriate time difference. Remote MGI When calling between remote IP phones in the same private zone, this field sets whether to use MGI. Signal Type Selects the signaling method (UDP/TCP) for an IP phone. Video CODEC Sets the video standard compression type for an IP video phone. Video Size Sets the video input and output format of and IP video phone codec. IP Zone Type Sets the IP address type. QOS Enable Sets whether to use QoS. IP Phone SRTP Sets whether to use the SRTP protocol. Viewing and Changing the IP Phone Information 1. 112 Select [2. Configuration] [2.7 Virtual Port Configuration] [2.7.1 ITP Information] from the Tree Viewer. © SAMSUNG Electronics Co., Ltd. OfficeServ DM User Guide 2. View the IP phone information. 3. Change the IP phone information. 4. Save the changes. SIP Phone Information Displays the information for the registered standard SIP terminals. Parameter Parameter Description User ID User ID for the terminal Password User password for the terminal Hold Tone When calling using a SIP terminal, this field sets whether to use the hold sound on the system or the SIP terminal itself as the hold sound. Call Wait When a second call is received by the SIP terminal, this field sets whether to allow it to be received without processing it as a call received when busy. Hold Tone Types Hold Tone Type Description System Tone Uses the hold sound and the ring back tone in one of a variety of ring back states (callback, etc.) as the system tone. If the system tone is used for calls, such as SIP terminal calls or IP phone calls, where MGI is not used, an MGI is assigned to enable the hold tone to be heard. WIP Tone Uses the tone from the SIP terminal itself. Requirements In the ‘2.1.4 License Key’, the SIP Stack License key must be entered and the number of SIP phones must be set in the ‘SIP Allowed’ field. © SAMSUNG Electronics Co., Ltd. 113 Error! Use the Home tab to apply 제목 1 to the text that you want to appear here. Viewing and Changing the SIP Terminal Information 1. Select [2. Configuration] [2.7 Virtual Port Configuration] [2.7.2 SIP Phone Information] from the Tree Viewer. 2. View the SIP terminal information. 3. Change the SIP terminal information. 4. Save the changes. WIP Phone Information Displays the information for the registered wireless terminals. Parameter Parameter Description User ID User ID for the terminal Password User password for the terminal Insert Code Sets the trunk prefix to be inserted if the outgoing code has five (5) or more digits. Handover Thresh Hold Sets the threshold for handover. Handover Delta Value Sets the Delta value for handover. Handover Scan Period Sets the Scan period for handover. Viewing and Changing the Wireless Terminal Information 1. 114 Select [2. Configuration] [2.7 Virtual Port Configuration] [2.7.3 WIP Phone Information] from the Tree Viewer. 2. View the WIP terminal information. 3. Change the WIP terminal information. 4. Save the changes. © SAMSUNG Electronics Co., Ltd. OfficeServ DM User Guide Moblie Extension The system shall have virtual stations to serve the MOBEX function. This virtual station is called a MOBEX station. A MOBEX station shall be mapped to a MOBEX phone in a one-to-one relationship. The trunks that can make a call to a MOBEX phone shall be limited to PRI/BRI and SIP trunks. MOBEX Number: The phone number of an external device, such as a mobile phone, to be ringing. MOBEX Phone: An external phone that has a MOBEX number. MOBEX User: A user of a MOBEX phone. MOBEX Station: A virtual station to which a MOBEX number is assigned. Master Station: A station that assigns a group of MOBEX stations to which a simultaneous call is to be made. Parameter Parameter Description Dial Number (Trunk Number) The trunk number of an external device, such as a mobile phone, to be ringing. Dial Number (Outgoing Digit) The outgoing digit of an external device, such as a mobile phone, to be ringing. Incoming CLI Number The CLI of external MOBEX phone. It is possible to input 0~9 number and maximum 16 letters. Executive User Choose to use exclusive option or not. Executive License Priority License Priority of Executive User. Executive License Max License Max Number of Executive User. Master Station A station that assigns a group of MOBEX stations to which a simultaneous call is to be made. Status Set MOBEX station to be active or not. Viewing and Changing the Mobile Extension 1. 2. 3. 4. Select [2. Configuration] [2.7 Virtual Port Configuration] [2.7.5. Mobile Extension] from the Tree Viewer. View the Mobile Extension. Change the Mobile Extension. Save the changes. © SAMSUNG Electronics Co., Ltd. 115 Error! Use the Home tab to apply 제목 1 to the text that you want to appear here. Numbering Plan Numbering Plan Changes the dial numbers (function numbers) for calling stations, trunks, station groups and trunk groups. Cabinet Type Cabinet Type Description Virtual # Displays the phone type and number of the virtual station. Station Group Displays the dial number and group number of the station group. Trunk Group Displays the dial number and group number of the trunk group. Features Displays the dial numbers to call a function. Network LCR Displays the networking dial number and serial number. Below are the function types for which the dial number can be changed. Function Type 116 Description ACCT Charge (Account) LCR Optimal route selection (Auto Route Selection) OPER Attendant calling (Operator) AUTH Grade change code (Authorized Prefix) FAUTO Forced auto answer by the caller (Forced Auto Answer) BARGE Barge-in (Barge-in/Override) BOSS Boss and secretary CBK Call Back FWD Call Forward CAMP Station reservation (Station Camp-On) CONF Conference DIR Directory dial (Directory) DIRPK Direct pick up DND Do not disturb DLOCK Door phone ring answering (Door Unlock) FLASH Trunk flash (Flash) © SAMSUNG Electronics Co., Ltd. OfficeServ DM User Guide (Continued) Function Type Description LISTEN Group listening IG Whether to include the group or not (In/Out Of Group) GRPK Answering by any arbitrary group (Group pick up) HOLD Hold HLDPK Hold pick up LNR Redial (Last Number Redial)-This can only be specified only if it is not already included in the fixed keys. MMPG Announcement forward (Meet Me Page) MMPA Announcement forward answering (Meet Me Page Answer) MSG Message-This can only be specified only if it is not already included in the fixed keys. NEW New trunk call (New Call) CANMG Message canceling (Message-Cancel) SETMG Leaving a message (Set Message W/O Ring) OHVA Off hook announcement PAGPK Announcement hold answer (Pick Up Page Hold) PAGE Announcement (Page) SNR Saved number redial (Saved Number Redial) SPEED Speed dial SLTMMC Normal phone programming (SLT Programming) UA Night ring answer PMSG Absence message (Status Message) WCOS Changes to the service grade of the self-station. (Working COS) ALMCLR Clears the alarm. BLOCK Locks the off hook announcement. (OHVA Block) REJECT Rejects the off hook announcement. (OHVA Reject) DISALM Clears the DISA alarm. (DISA Alarm Clear) MYGRPK Self-group call pick up (Pick Up) PARK Saves/recovers the call. (Call Park/Retrieve) ALLCLR Initializes the station settings. © SAMSUNG Electronics Co., Ltd. 117 Error! Use the Home tab to apply 제목 1 to the text that you want to appear here. (Continued) Function Type 118 Description HDSET Headset mode ABAND Checks the information to establish whether the caller abandoned the call before it was answered SLTALM Sets the normal phone alarm. VMMEMO Calls the IP-UMS and embedded voice mailbox. (VM Memo) VMADM Changes the IP-UMS and embedded voice mailbox. (VM Administration) VMAME Auto answer for the IP-UMS and embedded voice mailbox (VM Auto Answer Emulation) VMMSG Checks the IP-UMS and embedded voice mailbox messages (VM Message) CR Records calls to the IP-UMS and embedded voice mailbox (Call Record) RTO Switches the mode. (Ring Plan Time Override) RP Switches the ring mode. LOG Searches the latest call sent/received. (Call Log) DNDO Ignores the Do not disturb setting. (DND Override) WAKEUP Sets the morning call time.-Hotel function BILL Bills the room charge.-Hotel function HOTEL Hotel-Hotel function RB Bills the call charge. (Room Bill)-Hotel function RSV Displays the room status. (Room Status View)-Hotel function CREDIT Checks and changes the charge at which the room is available.Hotel function CHIN Check-in-Hotel function CHOUT Check-out-Hotel function PTHR Aligns the networking call paths. (Path Replacement) CONP Displays the networking name. (Connected Name Display) SRELOC Exchanges station data. (Set Relocation) SLOCAT Checks the locations of hotel staff (Staff Locater)-Hotel function INFDSP Displays the SPOT View information. © SAMSUNG Electronics Co., Ltd. OfficeServ DM User Guide (Continued) Function Type Description NOCLIP Prevents calling line ID being sent. (No CLIP Send) ABW Connects/disconnects to the group agent for auto call distribution. DGPALM Sets the alarm time for multiple stations. CHOICE Displays the SPOT Choice information. STATE Sets the status for the boss. DIVERT Switches to the secretary NPAGE Networking announcement (Paging Across Networked Node) E-LCR1 Extended optimal route selection 1 E-LCR2 Extended optimal route selection 2 E-LCR3 Extended optimal route selection 3 E-LCR4 Extended optimal route selection 4 TCLIP Allows the phone to send a different calling line ID for each call (Temporary CLIP) RTO Switches the mode. (Ring Plan Time Override) RP Switches the ring mode. LOG Searches the latest call sent/received. (Call Log) DNDO Ignores the Do not disturb setting. (DND Override) WAKEUP Sets the morning call time.-Hotel function BILL Bills the room charge.-Hotel function HOTEL Hotel-Hotel function RB Bills the call charge. (Room Bill)-Hotel function RSV Displays the room status. (Room Status View)-Hotel function CREDIT Checks and changes the charge at which the room is available.Hotel function CHIN Check-in-Hotel function CHOUT Check-out-Hotel function PTHR Aligns the networking call paths. (Path Replacement) CONP Displays the networking name. (Connected Name Display) SRELOC Exchanges station data. (Set Relocation) SLOCAT Checks the locations of hotel staff (Staff Locater)-Hotel function © SAMSUNG Electronics Co., Ltd. 119 Error! Use the Home tab to apply 제목 1 to the text that you want to appear here. (Continued) Function Type Description INFDSP Displays the SPOT View information. NOCLIP Prevents calling line ID being sent. (No CLIP Send) ABW Connects/disconnects to the group agent for auto call distribution. DGPALM Sets the alarm time for multiple stations. CHOICE Displays the SPOT Choice information. STATE Sets the status for the boss. DIVERT Switches to the secretary NPAGE Networking announcement (Paging Across Networked Node) E-LCR1 Extended optimal route selection 1 E-LCR2 Extended optimal route selection 2 E-LCR3 Extended optimal route selection 3 E-LCR4 Extended optimal route selection 4 TCLIP Allows the phone to send a different calling line ID for each call (Temporary CLIP) Viewing and Changing the Number Plan 1. 120 Select [2. Configuration] [2.8 Numbering Plan] [2.8.0 Numbering Plan] from the Tree Viewer. 2. Select the cabinet type. 3. View the number plan for the selected cabinet type. 4. Change the number plan for the selected cabinet type. 5. Save the changes. © SAMSUNG Electronics Co., Ltd. OfficeServ DM User Guide Call Routing Outgoing (LCR) LCR Options Sets whether to use the LCR function and changes the LCR time parameter values. Items to be Specified Item Description LCR Enable Sets whether to use the optimal route selection function. LCR Dial Tone When using optimal route selection function, this option is used to connect the station dial tone and other dial tones. When set to On, a continuous sound similar to the trunk dial tone is connected. Extra LCR Tone Gives a different dial tone when a Second LCR is operated. Next Group Search (sec) When using the LCR, this option sets the time needed to pass to the next trunk group. (1 to 250 sec) LCR Advance Time (sec) When using the LCR, this option sets the time before selecting the next allowable route when a station is allowed to route advance. (1 to 250 sec) LCR Inter Digit Time (sec) When using the LCR, this option sets the maximum time between digits. (1 to 250 sec) Viewing and Changing the LCR Option Settings 1. Select [3. Call Routing] [3.1 Outgoing] [3.1.1 LCR Options] from the Tree Viewer. 2. View the LCR Option settings. 3. Change the LCR Option settings. 4. Save the changes. © SAMSUNG Electronics Co., Ltd. 121 Error! Use the Home tab to apply 제목 1 to the text that you want to appear here. Routing Digits Enter the routing table to be referred to and the digits of the optimal route selection function that analyzes the external phone number dialed by the user, and then connects the call to the lowest cost trunk group automatically. You can enter up to 2000 numbers in the optimal route selection function. Each of them can have up to 10 digits. Items to be Specified Item Description LCR Digit Enter the digits for the optimal route selection. Length Enter the number of digits entered. Router Table Enter the number of the routing table to be referred to. (1 to 99) Viewing and Changing the Optimal Route Selection Digits 1. 2. 122 Select [3. Call Routing] [3.1 Outgoing] [3.1.2 Routing Digits] from the Tree Viewer. Select the gateway for which you want to view the optimal route selection digits. 3. View the settings for the optimal route selection digits. 4. Change the settings for the optimal route selection digits. 5. Save the changes. © SAMSUNG Electronics Co., Ltd. OfficeServ DM User Guide Time Table Enter the time table to be referred to, based on the day and time of the optimal route selection function that analyzes the external phone number dialed by the user, and then connects the call to the lowest cost trunk group automatically. Viewing and Changing the Optimal Route Selection Time Table 1. 2. Select [3. Call Routing] [3.1 Outgoing] [3.1.3 Time Table] from the Tree Viewer. Select the gateway for which you want to view the optimal route selection time table. 3. View the settings for the optimal route selection time table. 4. Change the settings for the optimal route selection time table. 5. Save the changes. Routing Table Enter the trunk group to be selected, based on the time and grade of the optimal route selection function that analyzes the external phone number dialed by the user, and then connects the call to the lowest cost trunk group automatically, and enter the number of the dial conversion table to be referred to, based on the selected trunk group. If the user dials a valid number, the system selects the specific trunk group predefined in the ‘Optimal Route Selection Routing Table’. Up to 99 numbers can be entered in the routing table. If more than one trunk group is available for a call, the system established this, and selects an available trunk group from the first designated trunk group, in sequence. If all trunk groups are busy, the call will be connected to the next trunk group that becomes available, immediately and automatically. Items to be Specified Item Description Trunk Group Sets the phone number for the trunk group. Modify No Sets the dial conversion table. (1 to 200) © SAMSUNG Electronics Co., Ltd. 123 Error! Use the Home tab to apply 제목 1 to the text that you want to appear here. Viewing and Changing the Optimal Route Selection Routing Table 1. 2. Select [3. Call Routing] [3.1 Outgoing] [3.1.4 Routing Table] from the Tree Viewer. Select the gateway and routing table for which you want to view the optimal route selection routing table. 3. View the settings for the optimal route selection routing table. 4. Change the settings for the optimal route selection routing table. 5. Save the changes. Modify Digits Selects a trunk group in the optimal route selection function that analyzes the external phone number dialed by the user, connects the call to the lowest cost trunk group automatically, and then changes the dial button to be converted (inserted or added) in order to export the dialed number. Up to 200 dial conversion tables can be entered. Items to be Specified Item Description Delete Count Sets the number of the digits to be deleted. Insert Digits Sets the digits to be inserted before dialing. Append Digits Sets the digits to be added after dialing. The actual dialing sequence for all digits is ‘Insert Digits’ + ‘Dial Digits’ - ‘Digits to delete’ + ‘Append Digits’. 124 © SAMSUNG Electronics Co., Ltd. OfficeServ DM User Guide Viewing and Changing the Optimal Route Selection Dial Conversion Table 1. 2. 3. 4. 5. Select [3. Call Routing] [3.1 Outgoing] [3.1.5 Modify Digits] from the Tree Viewer. Select the gateway for which you want to view the optimal route selection dial conversion table. View the settings for the optimal route selection dial conversion table. Change the settings for the optimal route selection dial conversion table. Save the changes. Second LCR Digits Sets the value needed to use E-LCR (the additional optimal route selection). If multiple LCR codes have to be applied, they can be programmed using N-LCR code. For an N-LCR, in contrast to LCR code, there is the problem that the virtual tone will not be heard after entering the code. However, if E-LCR is used, the virtual tone can be added after entering the LCR code. For E-LCR, the digits the user dials can be converted to the digits to be sent externally, and a trunk group can then be selected so a detour call can be made. Option Items Item Description In Digit Digits that the user dials after pressing the E-LCR code. The user can enter up to sixteen (16) digits. Out Digit If the digits the user enters match the ‘In Digit’ of this table, this option sets the number to be sent externally on this occasion. It cannot be entered if ‘In Digit’ is not entered. The user can enter up to sixteen (16) digits. User LCR No When an LCR code from among E-LCR1, E-LCR2, E-LCR3 and E-LCR4 is selected, this option sets whether to use the digits entered in ‘In Digit’. © SAMSUNG Electronics Co., Ltd. 125 Error! Use the Home tab to apply 제목 1 to the text that you want to appear here. (Continued) Item Description User LCR No If this option is set to ALL, the ‘In Digit’ for the table matches all four (4) E-LCRs, and they can all be used. (To do so, the E-LCR in the Features Cabinet of the ‘2.8.0 Number Plan’ must be entered.) Next Route When digits matching the ‘In Digit’ are entered, this option specifies the trunk group to be used. For LCR, when digits matching the ‘In Digit’ of the table are entered, they follow the ‘3.1.2 Routing Digits’ with the converted ‘Out Digit’ The E-LCR tables can be used from No.1 to 200. The 200th table does not have the items for entering In Digit, Out Digit and User LCR No. This 200th table specifies the trunk group number or LCR to be used if the digits entered after pressing the E-LCR code do not match any of those in ‘In Digit’. Requirements To use the E-LCR, at least one from E-LCR1, E-LCR2, E-LCR3 and E-LCR4 must be entered in the Features Cabinet of the ‘2.8.0 Number Plan’. Viewing and Changing the Additional Optimal Route Selection Settings 1. 126 Select [3. Call Routing] [3.1 Outgoing] [3.1.6 Second LCR Digits] from the Tree Viewer. 2. View the additional optimal route selection settings. 3. Change the additional optimal route selection settings. 4. Save the changes. © SAMSUNG Electronics Co., Ltd. OfficeServ DM User Guide LCR GW Route Enter number of Routing Table selected by gateway that provides best route selection function to connect the cheapest station group automatically after analyzing external number dialed. Requirements GW Routing of ‘3.1.2 Routing Digits’ should be configured. Viewing and Changing LCR GW Route 1. 2. 3. 5. Select [3. Call Routing] [3.1 Outgoing] [3.1.7 LCR GW Route] from the Tree Viewer. View the additional optimal route selection settings. Change the value of LCR GW Route table according to Gateway of each index. Save the changes. Incoming Trunk Ringing Sets the subscriber to ring when a call is received from a trunk. This function allows a trunk call to ring in a station or station group by ring mode. Viewing and Changing the Trunk Ring Receiving Settings 1. Select [3. Call Routing] [3.2 Incoming] [3.2.1 Trunk Ringing] from the Tree Viewer. 2. View the stations (station groups) by ring mode. 3. Change the stations (station groups) by ring mode. 4. Save the changes. © SAMSUNG Electronics Co., Ltd. 127 Error! Use the Home tab to apply 제목 1 to the text that you want to appear here. Trunk DISA/Auto Answer Sets whether to perform DISA service and DISA time parameters for each trunk. This function also sets whether to use Auto Answer for each trunk. If Auto Answer is set to On, you should set the sound source to be heard when using Auto Answer for a trunk. Items to be Specified Item Description DISA Service Of Ring Plan Sets whether to perform DISA service for each ring mode of a trunk. Trunk Answer Time When receiving DISA, it will be answered after the time set in this option has elapsed. Alternatively, if there is a trunk for which the Trunk Auto Answer MOH of the ‘5.14.4 Incoming/CID/DISA Options’ is set to On, and the Auto Answer item is also set to On (for a DID/MSN trunk, if the DID Destination is set to A), the trunk is answered automatically after the time set in this option has elapsed. The sound source set in the Answer MOH option is then connected . Auto Answer If a call is received by a trunk with this item is set to On (if following the DID receiving table when received, the DID Destination must be set to A), the sound source specified in the Answer MOH item is heard by answering automatically after the time set in the Trunk Answer Time has elapsed. At this point, the call is received in the location designated in ‘3.2.1 Trunk Ringing’. If there is no answer before the Trunk Auto MOH Disconnect Time set in ‘5.14.2 Confirm/Disconnect/No Action Timer’ elapses, the call is disconnected automatically. This option is only applied when the Trunk Auto Answer MOH item in the ‘5.14.4 Incoming/CID/DISA Option’ is set to On. Answer MOH Sets the phone number of the sound source to be heard when performing Auto Answer. MFR Delay Time Sets the standby time for assigning the MFR. (0 to 25 sec) Requirements When a station is talking, pressing [*] enables another call to be tried, while pressing [#] disconnects the DISA call. 128 © SAMSUNG Electronics Co., Ltd. OfficeServ DM User Guide Viewing and Changing the Trunk DISA/Auto Answer Settings 1. Select [3. Call Routing] [3.2 Incoming] [3.2.2 Trunk DISA/Auto Answer] from the Tree Viewer. 2. View the DISA/Auto Answer settings. 3. Change the DISA/Auto Answer settings. 4. Save the changes. DID Ringing When direct dialing a station externally, this function changes the number dialed, the station number selected based on the number dialed, and the name of the number dialed. Items to be Specified Item Description Incoming digits Up to 16 digits can be entered for calls received externally. If only some of these digits change, and the others are identical, enter ‘*’ for the changeable digits. (For example, if the digits are 201, 202 and 203, enter only 20* or 2**.) MOH/BGM When an incoming trunk call is on hold, this option sets the hold sound to be used when giving a different hold sound for calls received externally. If this option is set to None, the hold sound set for the trunk will be used. Ring Plan (Dest 1~Dest 6) Sets the station (group)/trunk (group) to be received for each of the six (6) ring modes. ‘B’ means received digits are deleted, starting with the first digit and deleting the number specified in the ‘Delete Count’, with the remaining digits being received at the end. Delete Count Sets how many digits are ignored in the digits received externally, before the Ring Plan is referred to. Max call When calls are received simultaneously, this option sets the maximum number of incoming calls that can be processed. © SAMSUNG Electronics Co., Ltd. 129 Error! Use the Home tab to apply 제목 1 to the text that you want to appear here. (Continued) Item Description Max call If the number of calls received by a DGP and are being processed is higher than the number specified in this item, any new incoming call cannot be processed and will be disconnected. Call Wait When the station to which the call is forwarded is busy, this option sets whether to make it wait automatically. Translate Name Enter a name for the entered digits, which can be up to 11 characters long. Priority Sets the priority for a call. When all members of the station group called are busy and there are multiple calls on standby, this option is used to decide which standby call will be connected first if a member of that station group becomes available. (Range: 1 to 9, where 1 is the highest priority.) DGP Tone When a call is received by the ‘incoming digits’ phone, if the receiving station is a digital phone the tone can be differentiated so that it can be distinguished from other rings. SLT Ring When a call is received by the ‘incoming digits’ phone, if the receiving station is a digital phone the ring period can be differentiated so that it can be distinguished from other rings. Requirements Sets the ENM Translate item of ‘2.6.4 Digits Translation’ to Follow DID Translation, based on the station direct dial conversion table. Viewing and Changing the Station Direct Dials Conversion Table. 1. 130 Select [3. Call Routing] [3.2 Incoming] [3.2.3 DID Ringing] from the Tree Viewer. 2. View the station direct dials conversion table. 4. Change the station direct dials conversion table. 5. Save the changes. © SAMSUNG Electronics Co., Ltd. OfficeServ DM User Guide MSN Ringing Provides a method of assigning an incoming MSN call to a specific station. If any entry in the MSN DIGIT TABLE matches an incoming call’s called party number, either the specific station is alerted, if it is programmed to accept the call, or the call is cleared if it is programmed to reject the call.. Viewing and Changing the MSN Ringing. 1. Select [3. Call Routing] [3.2 Incoming] [3.2.4 MSN Ringing] from the Tree Viewer. 2. View the MSN Ringing. 3. Change the MSN Ringing. 4. Save the changes. CLI Ringing Sets the options to be processed, based on the external phone number type received. Items to be Specified Item Description CID Number Enter the number received externally. Ring Plan (Dest1~Dest6) Displays the station (group) received for each of the six (6) ring modes. Call Reject When an external phone number sends a call, this option sets whether to allow the call to be connected or disconnected immediately. Call Priority Sets the priority for the call. When all members of the station group called are busy and there are multiple standby calls, this option is used to decide which standby call will be connected first if a member of that station group becomes available. (Range: 1 to 9, where 1 is the highest priority.) Distinctive Tone When the external phone number sends a call, if the receiving station is a digital phone the tone can be differentiated so that it can be distinguished from other rings. © SAMSUNG Electronics Co., Ltd. 131 Error! Use the Home tab to apply 제목 1 to the text that you want to appear here. (Continued) Item Distinctive Ring Description When the external phone number sends a call, if the receiving station is a digital phone the ring period can be differentiated so that it can be distinguished from other rings. Viewing and Changing the Ringing Settings for Each Send Number 1. Select [3. Call Routing] [3.2 Incoming] [3.2.5 CLI Ringing] from the Tree Viewer. 2. View the ringing settings for each send number. 3. Change the ringing settings for each send number. 4. Save the changes. CLI Name Translation Enter the name of the received external phone number. If the name of the phone number received through a CID trunk differs from the name specified in this table, the ‘NO CID NAME’ message will be displayed. The maximum number of caller ID conversion table entries is 2000. Viewing and Changing the Caller ID Conversion Table 1. 132 Select [3. Call Routing] [3.2 Incoming] [3.2.6 CLI Name Translation] from the Tree Viewer. 2. View the caller ID conversion table. 3. Change the caller ID conversion table. 4. Save the changes. © SAMSUNG Electronics Co., Ltd. OfficeServ DM User Guide Door Ringing Sets the subscriber to ring when a ring is received from a door phone. This function rings a door phone call in a station (group), and sets the ring receive mode separately. If the Door Phone Interface Module (DPIM) does not exist in the system, the ‘There is no DPIM connected’ message will be displayed. The Door Phone Interface Module (DPIM) for the door phone can be connected to the port of any digital phone. Viewing and Changing the Door Ring Settings 1. Select [3. Call Routing] [3.2 Incoming] [3.2.7 Door Ringing] from the Tree Viewer. 2. View the door ring settings. 3. Change the door ring settings. 4. Save the changes. DISA Password Skip CLI This function allows DISA calls to be received without entering the DISA password, based on the CID number received by the DISA trunk. Up to 500 CID numbers can be set. When a DISA call received matches a CID number entered, the call can be sent without entering the DISA password, even if the Password Enable item of the ‘5.14.4 Incoming/CID/ DISA Options’ is set to On. Viewing and Changing the DISA-Allowed Caller ID Settings 1. Select [3. Call Routing] [3.2 Incoming] [3.2.8 DISA Password Skip CLI] from the Tree Viewer. 2. View the DISA-allowed caller ID settings. 3. Change the DISA-allowed caller ID settings. 4. Save the changes. © SAMSUNG Electronics Co., Ltd. 133 Error! Use the Home tab to apply 제목 1 to the text that you want to appear here. Networking System Link ID Sets the system node number to be used for networking. You can enter up to 12 digits as the node number. In the system where the MCP board is installed, an IP address can be entered for networking that uses VoIP. The IP address can also be set for the Self node for each opposite node, in order to give a different Self node IP address to the opposite nodes, based on whether the node to be connected to is connected to a private or public IP network. Items to be Specified Item Description IP Type For networking using VoIP, this option sets the IP address for the Self node to be sent to the opposite node. System ID Enter the node number of other system connected. The network can consist of up to 99 systems. For the Self entry, enter the node number of the ‘Self’ system. IP Address For networking using VoIP, enter the IP address for signaling. System Name Enter the name of the other system connected. Up to 11 characters can be entered. Time Sync Sets whether to update the time information between systems automatically. No MGI Sets whether to use MGI for IP calls. Audio Codec Sets Preferentially used CODEC for SPNET Requirements The Self entry represents the self node, and must be specified to use the networking function. The others are the items for displaying the station numbers. These can be left unspecified. 134 © SAMSUNG Electronics Co., Ltd. OfficeServ DM User Guide Viewing and Changing the System Link Numbers 1. Select [3. Call Routing] [3.3 Networking] [3.3.1 System Link ID] from the Tree Viewer. 2. View the system link numbers. 3. Change the system link numbers. 4. Save the changes. Network Dial Translation Specifies the dial number conversion data so that a station within another system connected through a trunk can be called, using the same number system. To call a station within another system connected via networking, the user must usually dial the system link number and station number. However, by using the data that this program specifies, the user can call an additional system link number by adding it to the station number entered. In this event, the call will be sent using the ‘3.1.2 Routing Digits’. This program can also be used if the system is not connected via networking, when multiple optimal route selection function codes are needed. In this case, this program gives the speed dial effect. Items to be Specified Item Description N-LCR Number Enter the number of Network LCR Translation Digits Enter the number of digits, up to a maximum of eight (8), to be converted. Mail Box Enter whether to assign the voice mailbox automatically. Wait Length Enter the digit count for the number to be entered when using the entry. Max Digit Enter the number of digits until the optimal route selection function starts to operate. Station Display Sets whether to display the number in the station format. © SAMSUNG Electronics Co., Ltd. 135 Error! Use the Home tab to apply 제목 1 to the text that you want to appear here. Viewing and Changing the Optimal Route Selection Station Dial Conversion Data 1. Select [3. Call Routing] [3.3 Networking] [3.3.2 Network Dial Translation] from the Tree Viewer. 2. View the optimal route selection station dial conversion data. 3. Change the optimal route selection station dial conversion data. 4. Save the changes. Extra System Link ID Specifies the information for the system to be communicated with via the Samsung Protocol for Networking (SPNET). This system interoperates with the optimal route selection function and has a total of 2000 tables. The SPNET is a VoIP networking function developed by Samsung, and is not a standard protocol. Items to be Specified Item Description Node ID Sets the ID for the other system. ID Address Sets the IP address for the other system. Tel Number Sets a trunk number to use as a detour when communicating with another system via SPNET, i.e., when the IP network has a defect. (This should be a trunk, but not a VoIP trunk.) Max Count When the number of digits in the Max Count is entered, the call is set up. No MGI Sets whether to use MGI for IP calls. Requirements The link ID of the other system must not be entered in the ‘3.3.1 System Link’ and the digits entered in the Access Number and Tel Number items must be entered in the LCR table. 136 © SAMSUNG Electronics Co., Ltd. OfficeServ DM User Guide Viewing and Changing the System Node Information 1. Select [3. Call Routing] [3.3 Networking] [3.3.3 Extra System Link ID] from the Tree Viewer. 2. View the system node information. 3. Change the system node information. 4. Save the changes. Networking Options Sets the various options needed for networking. Items to be Specified Item Description Ext No Sets whether to include the station number in the name field of the Q-Sig message. CID Number Sets whether to send the trunk CID number with the node number attached when sending it to the voice mail card. SPNet Digit Send Sets the SPNET dialing type and MCP or MGI signaling. Incoming Call Auto Timer When set to Off, the call time will not be displayed for the networking station call. Optimize Time (sec) Sets the time when the optimal route for a call is found and the route is reconnected after the call is set up through Q-Sig. (0 to 250 sec) Dial Mode Sets whether to operate SPNet dialing in Overlap mode. CLIP Table When a network call is received in the KB Net, this option sets so that the CLI number set in the ‘2.4.3 CLI Send Number’ is displayed instead of (Node + Station number). Real Ringback Tone When calling on the VoIP networking, this option sets whether to have a virtual tone heard or have a ring back tone received from the opposite party heard. Use 2 System ID In networking, this option sets so that a system can have two (2) node IDs. ELCR CLIP Table In case of the E-LCR call, this option sets so that it follows the CLIP Table. © SAMSUNG Electronics Co., Ltd. 137 Error! Use the Home tab to apply 제목 1 to the text that you want to appear here. (Continued) Item Description KB Call Trace Sets whether to perform the VoIP and PRI call traces. SPNet DTMF Forward In case of the SPNet, this option sets so that the ext fwd is performed in the state that only a trunk port is occupied and a dial tone is heard. Remote Voice Mail Sets whether to use the voice mailbox card of other system connected using the Q-Sig. Remote Attendant 1 to 6 Sets whether to use the attendant of other system for each ring mode. Viewing and Changing the Networking Option Settings 1. Select [3. Call Routing] [3.3 Networking] [3.3.4 Networking Options] from the Tree Viewer. 2. View the networking option settings. 3. Change the networking option settings. 4. Save the changes. Remote Station Dial Translation Assigns the digit translation table used per remote stations for networking. And the maximum value of the remote station is 2000 and it can be assigned in 2.8.0 Number Plan (‘R-STN’ option) Viewing and Changing the Remote Station Dial Translation Settings 1. 138 Select [3. Call Routing] [3.3 Networking] [3.3.5 Remote Station Dial Translation] from the Tree Viewer. 2. View the Remote Station Dial Translation settings. 3. Change the Remote Station Dial Translation settings. 4. Save the changes. © SAMSUNG Electronics Co., Ltd. OfficeServ DM User Guide Group & Table Grouping Station Groups Sets the station groups. Items to be Specified Item Description Group Type Sets the type of the station group. Ring Mode Sets the ring distribution method. Next Port Sets the station (group) to be received in the next time. Ringback Tone Message Used when performing the coloring service for a station group. Enter the VMS message number to use for the coloring. In case of the F-STN, it operates according to the station coloring message of the received group member. (0 to 9998, F-STN, None) Group Name Sets the name of the station group. Transfer Time Sets the group transfer time. Overflow Time Sets the ringing time for the next group. Hunt Time In Sequential or Distribute Receiving mode, if the member that is ringed does not answer within this time, the ring is disconnected and the next member is ringed. When set to 0 sec, this option does not operate. Group Busy If all members of the station group are buddy, this option sets whether to process a new call as a call during the busy state. (In case of an uncondition group, this is not applied.) Group Answer For a call received to a group, this option sets whether to apply the auto ringing. The auto ringing is available only if the ring distribution method is Sequential or Distributed. All Out Next When all members of the station group are logged out, this option sets whether to forward the call to the station (group) specified in the Next Port option without waiting for the Overflow time. Override Sets the waiting time to override forcibly. Announce Sets the auto announcement playback time. Member 1~99 Sets the members of the station group. © SAMSUNG Electronics Co., Ltd. 139 Error! Use the Home tab to apply 제목 1 to the text that you want to appear here. Station Group Type Station Group Type Description Normal Normal station group VMAA Voice mailbox/auto attendant group UCD Auto call distribution group Bi_VMS Embedded voice mailbox group MSG Message group. When a member of this group leaves a message, the answer call is received to the group. S0 BRI-S0 station group VMSUCD Group that uses the VMS as the next port of the UCD group AA Only VM AA group. Even if the MP MGI/VM key is not entered, the VM port can be used as the AA port. Ring Distribution Type For the Normal and MSG Group only among the station groups, you can set their type to Uncondition. Ring Distribution Type Description Sequential Always received to the first member of the group in standby. Distribute Received to the members by turns according to the specified order. Uncondition Received to all members. Requirements 140 You can specify so that one station belongs to all station groups. You can specify up to 99 members in a station group. But if the ring distribution method is Uncondition, you can specify up to 32 members only. To ring the off hook ring to a member which is busy when the call is received to a group, the Off Hook Ring item of the ‘2.5.2 Station On_Off Data’ must be set to On. But, at this time, the off hook ring is ringed only if the ring distribution method is set to Uncondition. © SAMSUNG Electronics Co., Ltd. OfficeServ DM User Guide Viewing and Changing the Station Group Settings 1. Select [4. Group & Table] [4.1 Grouping] [4.1.1 Station Groups] from the Tree Viewer. 2. View the station group settings. 3. Change the station group settings. 4. Save the changes. Trunk Groups Sets the trunk groups. You can specify so that one trunk belongs to one or multiple trunk groups. If setting a trunk group, it can be useful when performing the optimal route selection. Trunk Group Assignment Modes Item Description TYPE Specify the type of trunk group. This option have 7 kinds of values MIXED TRUNK: default. Associated in various kind of trunk channel - NORMAL TRK - ISDN TRK - SIP TRK - H.323 TRUNK - SPNET TRUNK - QSIG PRI MODE Select the way searching idle channel of trunk. MEMBER Trunk channel member You can input trunk channel corresponding trunk type. But in case of MIXED TRUNK type, It’s possible to input different kind of trunk channel © SAMSUNG Electronics Co., Ltd. 141 Error! Use the Home tab to apply 제목 1 to the text that you want to appear here. Viewing and Changing the Trunk Group Settings 1. Select [4. Group & Table] [4.1 Grouping] [4.1.2 Trunk Groups] from the Tree Viewer. 2. View the trunk group settings. 3. Change the trunk group settings. 4. Save the changes. Page Groups Sets the members to which internal/external announcements are to be announced and sets whether each announcement area can be the destination of internal area announcements. In case of the internal announcement, you can specify up to 99 members. In case of the external announcement, up to 8 members. The announcement area numbers 1 to 4 are used as the internal announcement areas. The announcement area numbers 5 to 8 are used as the external announcement areas. For a whole internal announcement or a whole internal/external announcement, the members of the announcement area number 0 are used. Viewing and Changing Internal/External Announcement 1. 142 Select [4. Group & Table] [4.1 Grouping] [4.1.3 Page Groups] from the Tree Viewer. 2. View the current announcement group settings. 3. Change the announcement group settings. 4. Save the changes. © SAMSUNG Electronics Co., Ltd. OfficeServ DM User Guide MGI Groups Sets an MGI port for each user type that must use an MGI port for calling. Port Type Port Type Description Local ITP MGI port to use when calling with a private type IP phone. Public IP ITP MGI port to use when calling with a public type IP phone. VoIP Networking MGI port to use when calling with a VoIP networking call Public IP Networking MGI port to use when calling with a networking call using a public type IP address VoIP Trunk MGI port to use when calling with a H.323 or SIP trunk Public IP Trunk MGI port to use when calling with a trunk using a public type IP address ITP Paged MGI port to use when the IP phone interoperates with the announcement function Viewing and Changing the MGI Group Settings 1. Select [4. Group & Table] [4.1 Grouping] [4.1.4 MGI Groups] from the Tree Viewer. 2. View the current announcement group settings. 3. Change the User type and Member item values for a port type. 4. Save the changes. © SAMSUNG Electronics Co., Ltd. 143 Error! Use the Home tab to apply 제목 1 to the text that you want to appear here. Pickup Groups According as Pickup Group Ring Service is enabled or disabled, the way of assignment of stations into call pickup groups is different. In case Pickup Group Ring Service is enabled in 2.1.5 System Options, it allows that the maximum 32 stations can be assigned per call pickup groups. But in case Pickup Group Ring Service is disabled in 2.1.5 System Options, it allows that call pickup groups can be assigned per stations. It is the same as before. An unlimited number of members can belong to each group. Stations can only be in one pickup group at any given time. Viewing and Changing the Pickup Groups Settings 1. Select [4. Group & Table] [4.1 Grouping] [4.1.5 Pickup Groups] from the Tree Viewer. 2. View the Pickup Groups settings. 3. Change the Pickup Groups settings. 4. Save the changes. Station Pairing Station Pair Sets the station pair which operates like a phone connected to the same port. If the information for call forwarding, service grade, optimal route selection grade, Do not disturb, or station lock, etc. is changed in a station pair member, the same information is changed in the other station pair member. Viewing and Changing the Station Pair Settings 1. 2. 3. 4. 144 Select [4. Group & Table] [4.2 Station Pairing] [4.2.1 Station Pair] from the Tree Viewer. View the current station pair settings. Enter the number of the station you want to set as the pair for the station number. Save the changes. © SAMSUNG Electronics Co., Ltd. OfficeServ DM User Guide Boss/Secretary Sets the boss or secretary phone. You can sets up to four (4) secretaries for each boss. If you specify as a secretary one of the four (4) numbers already assigned to a boss, the ‘Invalid Input-try again!’ message is displayed. Requirements The station sets to a boss cannot be set as a secretary of other boss. Viewing and Changing the Boss/Secretary Settings 1. Select [4. Group & Table] [4.2 Station Pairing] [4.2.2 Boss/Secretary] from the Tree Viewer. 2. View the current boss/secretary settings. 3. Enter the station number to set as the secretary for each boss number. 4. Save the changes. AOM Master Sets a station which operates as the master for each Add On module (AOM). Up to four (4) Add On modules can be set as a pair. Whether to give an off hook announcement Whether to give an off hook announcement Description Ohvaed Off Off hook announcement is not used as an Add On module. Ohvaed On Off hook announcement is used as an Add On module. Requirements The Add On module cannot be specified as a master. If the Add On module is specified as the first Add On module pair of the master phone, you have to also set whether the off hook announcement function can be performed using it. In this case, the DS-24SE AOM is not applicable. © SAMSUNG Electronics Co., Ltd. 145 Error! Use the Home tab to apply 제목 1 to the text that you want to appear here. Viewing and Changing the AOM Master Settings 1. 2. 3. 4. Select [4. Group & Table] [4.2 Station Pairing] [4.2.3 AOM Master] from the Tree Viewer. View the current AOM Master settings. Sets the phone number of the add on module and whether to give an off hook announcement for the station number you want to set as the master. Save the changes. Ring Group Pair Up to five stations shall be able to be assigned to a ring group. When a master station is ringing, the member stations of its ring group shall also be ringing simultaneously. If a master station cannot be ringing because the forward, DND, or Lock function etc. is enabled, its member stations shall also not be ringing. However, if the master station is unplugged, its member stations shall be ringing. If an off hook ring occurs a master station due to a camp-on call which came in while it was busy, its member stations shall also be ringing. If no off hook ring is ringing, they shall not be ringing either. If the forward all, DND, or Lock function is enabled in a member station, it shall not be ringing. However, if the forward busy or no answer function is enabled, this setting shall be ignored. When a master or one of its member stations answers a call, other rings shall be cleared. Viewing and Changing the Ring Group Pair Settings 1. 146 Select [4. Group & Table] [4.2 Station Pairing] [4.2.5 Ring Group Pair] from the Tree Viewer. 2. View the current Ring Group Pair settings. 3. Sets Ring Group Pair settings. 4. Save the changes. © SAMSUNG Electronics Co., Ltd. OfficeServ DM User Guide Ring Plan Ring Plan Time Sets the start time and end time for automatic switching to Night mode. You should select the ring mode for each day of the week and enter the start time and end time for the selected ring mode. When it reaches the start time of a ring mode of a day of the week, the station changes to that ring mode. When it reaches the end time, it changes to other ring mode. If the end time is earlier than the start time, the ring mode changes at the end time of the next day of the week. The ring mode change button ([RTO] or [RP] button) is not needed, but if you want to change the ring mode manually and forcibly, it is convenient to use the mode change button. If the Day/Night mode is changed manually using the [RTO] mode change button, the specified mode is preserved until you change it to other mode manually. Enter the hour and minute in 24 hours mode when entering the time. 01. SUN (Sunday) 02. MON (Monday) 03. TUE (Tuesday) 04. WED (Wednesday) 05. THU (Thursday) 06. FRI (Friday) 07. SAT (Saturday) Requirements When specifying the ring mode, it is convenient to specify the whole time to Night mode and then set your desired times to Day mode. Ring Mode Description Ring Mode 1 00:00~23:59 Night mode (Includes all the times that are not included in the modes 2 to 4) Ring Mode 2 08:00~12:00 morning business time Ring Mode 3 12:01~12:59 lunch time Ring Mode 4 13:00~17:00 afternoon business time © SAMSUNG Electronics Co., Ltd. 147 Error! Use the Home tab to apply 제목 1 to the text that you want to appear here. When connecting and using a device that has only the Day/Night mode, such as voice mailbox, etc., you must set the ‘2.1.6 VMS Day/Night Ring Plan’ items. Viewing and Changing the Ring Plan Time 1. 2. 3. 4. Select [4. Group & Table] [4.3 Ring Plan] [4.3.1 Ring Plan Time] from the Tree Viewer. View the current Ring Plan Time Option settings. Change the Ring Plan Time Override and Ring Plan Override settings. Save the changes. Holyday List Sets the vacation dates for a year. If it reaches one of the annual holidays, the station changes to Night mode automatically. You can enter a holiday in the format of month and day (MMDD). You can enter up to 20 holidays. The RING PLAN is the mode number to operate in a specified holiday. Viewing and Changing the Holyday List 1. 2. 3. 148 Select [4. Group & Table] [4.3 Ring Plan] [4.3.2 Holiday List] from the Tree Viewer. View the current vacations in a year. Enter a mode number to operate on a vacation set in the Ring Plan. 4. Enter the dates to set as vacations. 5. Save the changes. © SAMSUNG Electronics Co., Ltd. OfficeServ DM User Guide System Speed Dial System Speed Dial Enter the phone number and name of the common speed dials. You can enter up to 24 characters as a speed dial phone number. It consists of 0-9, *, #, P (p), F (f), C (c), ‘[’, or ‘]’. Speed dial phone number can include trunk (group). Code Inputs Text Code F (f) Trunk flash code P (p) Pause code C (c) Pulse/DTMF conversion code ‘[’ ‘]’ OCC code Viewing and Changing the System Speed Dial 1. 2. 3. 4. Select [4. Group & Table] [4.4 System Speed Dial] [4.4.0 System Speed Dial] from the Tree Viewer. View the current system speed dials. Enter the Trunk No., Outgoing Digits, and Speed Name for each speed dial. Save the changes. © SAMSUNG Electronics Co., Ltd. 149 Error! Use the Home tab to apply 제목 1 to the text that you want to appear here. Account/Authorize Code Forced Code This function specifies the type of code that must be entered when making a trunk call by station. Code Type Description NONE Do not input any code. AUTHORIZE CODE Enter registered grade change code. ACCT VERIFIED Enter registered charge code. ACCT NO VERIFIED Enter the account code (Does not check whether it is registered or not.) Viewing and Changing the Type of Forced Input Code 1. 150 Select [4. Group & Table] [4.5 Account/Authorize Code] [4.5.1 Forced Code] from the Tree Viewer. 2. View the current forced input codes. 3. Set a code type for a station number. 4. Save the changes. © SAMSUNG Electronics Co., Ltd. OfficeServ DM User Guide Account Code If the account code is pressed for charging whenever making a call, the account code changes. You can enter up to 999 account codes. Viewing and Changing the Account Codes 1. 2. 3. 4. Select [4. Group & Table] [4.5 Account/Authorize Code] [4.5.2 Account Code] from the Tree Viewer. View the current account codes. Enter the account code (up to 14 characters long) in the Account Code Number field. Save the changes. Authorization Code Sets the grade change code to enter when a call is made after changing the service grade of a station. You can enter up to 5000 grade change codes. A grade change code is 4 to 10 character long. Viewing and Changing the Authorization Codes 1. 2. 3. 4. Select [4. Group & Table] [4.5 Account/Authorize Code] [4.5.3 Authorization Code] from the Tree Viewer. View the current authorization codes. Enter the grade code that needs changing into the Authorization Code field then enter the grade to change in the Authorized COS field. Save the changes. © SAMSUNG Electronics Co., Ltd. 151 Error! Use the Home tab to apply 제목 1 to the text that you want to appear here. UCD UCD Group Options Specifies the auto call distribution option. If there is no UCD group, ‘-’ is displayed in Group No and ‘No Data’ is displayed as the control information. Control Information Control Information 152 Description First Message Sets the message to send when all members of the auto call distribution group are busy. Second Message When all members of the auto call distribution group is busy this option sets the message to send repeatedly until a member to be served appears. Retry Count Specifies the number of times to repeat sending the second message. Exit Code When you are hearing a message because all members of the auto call distribution group is busy, this option sets a dial (0-9, *, #) to press to connect to the ‘FINAL DEST’ without waiting. Final Destination Sets the station (group) or auto attendant table number to receive the call when there is no member to be served even if the caller has waited as many as Retry Count. (To input the table number of the auto attendant, you must press the [A] button.) Wrap Time Sets the memo time to prepare without processing the next call immediately after a member of the auto call distribution group finishes a call. Next Time When a member of the auto call distribution group does not answer, this option the time (00-99 sec) to disconnect the ring and ring the next member. If the time is set to 0 sec, it will not be applied. Recall Time Sets the time for which the hold sound is heard between the second message and second message. Auto logout When disconnecting a ring and ringing the next member because a member of the auto call distribution group does not answer, this option sets whether to log out the first member. All Out to Final When all members of the auto call distribution group are logged out, this option sets whether to forward the call to the final destination. © SAMSUNG Electronics Co., Ltd. OfficeServ DM User Guide (Continued) Control Information Description Group Busy Next When all agents are busy, this option sets whether to call the next port without waiting for the overflow time. MOH/BGM Sets the hold sound source to be heard between the second message and second message. (NONE, TONE, 371 to 376) Agent ID When an agent enters the auto call distribution group, this option sets whether to press the auto call distribution agent code. Viewing and Changing the Auto Call Distribution Control Information 1. Select [4. Group & Table] [4.6 UCD] [4.6.1 UCD Group Options] from the Tree Viewer. 2. View the current call distribution control information. 3. Change the call distribution control information. 4. Save the changes. UCD PIN Number Enter the auto call distribution agent code. The auto call distribution agent code you enter must belong to only one auto call distribution group. You can enter up to four (4) characters for it. The maximum number of agent codes is 300. Viewing and Changing the Auto Call Distribution Agent Codes 1. 2. 3. 4. Select [4. Group & Table] [4.6 UCD] [4.6.2 UCD PIN Number] from the Tree Viewer. View the current auto call distribution agent codes. Enter the agent code in the Agent ID field and the auto call distribution group umber in the Group No. field. Save the changes. © SAMSUNG Electronics Co., Ltd. 153 Error! Use the Home tab to apply 제목 1 to the text that you want to appear here. Class of Service Port Class Sets the service grade of the ring receiving mode for each station. Service grades are divided into 30 grades ([01]-[30]) as specified in the ‘4.7.2 COS Contents’. Viewing and Changing the Ring Receiving Mode for Each Station 1. 2. 3. 4. Select the [4. Group & Table] [4.7 Class of Service] [4.7.1 Port Class] from the Tree Viewer. View the current ring receiving mode for each station. Enter the service grade ([01]-[30]) for each station when its ring receiving mode is 1 to 6. Save the changes. COS Contents Changes the details of the service grade table. Type of Service Grade Table Service Grade Table 154 Description Features Sets whether the function that the system provides can be used or not for each service grade. Station Group Sets whether the eighty (80) station groups defined in the system can be called for each service grade. Trunk Group Sets whether a call can be sent to the thirty (30) trunk groups defined in the system for each service grade. BIVMS Sets whether the embedded voice mailbox port can be used for each service grade. © SAMSUNG Electronics Co., Ltd. OfficeServ DM User Guide Function of Service Grade Table Function Description TOLL Type Trunk call restriction grade by service grade AA CALER Auto answer by caller ABSENCE Absence/presence ALM CLR Clears alarm AUTO RDL Auto redial CALLBACK Reservation CID ABND Views the saved information for the unanswered incoming calls. CID INQR Views the sender’s information for the call on hold CID INVT Checking of the call status of other station/override/call disconnection CONFER conference DALM CLR Clears DISA alarm ring DIRECT Direct dial DISA DISA DND Do Not Disturb DND FWRD Call forward in the Do Not Disturb state DND OVRD Ignores the Do Not Disturb DOOR Door phone ring answer/Door Unlock DSS Station direct selection DTS Trunk direct selection EXT AREC Records the station call to the SVM-800 voice mailbox automatically. EXT FWD Forward call to external FEATURE Uses function FLASH Flash FOLLOW-ME Retrieve forwarded call FORWARD Call forwarding FWDTOVMS Forwards SVM-800 to voice mailbox GRP I/O Includes/excludes group HOLD Hold HOT LINE Hotline © SAMSUNG Electronics Co., Ltd. 155 Error! Use the Home tab to apply 제목 1 to the text that you want to appear here. (Continued) Function 156 Description INTERCOM Station call MESSAGE Message MM PAGE Announcement forwarding NEW CALL New trunk call OHVAED Receives off-hook announcement OHVAING Performs off-hook announcement ONEA2 Emulates trunk call OPERATOR Calls attendant OUT TRSF Forwards to trunk OVERRIDE Barge-in/Override PAGE 0 Broadcasts in area 0 PAGE 1 Broadcasts in area 1 PAGE 2 Broadcasts in area 2 PAGE 3 Broadcasts in area 3 PAGE 4 Broadcasts in area 4 PAGE 5 Broadcasts in area 5 PAGE 6 Broadcasts in area 6 PAGE 7 Broadcasts in area 7 PAGE 8 Broadcasts in area 8 PAGE 9 Broadcasts in area 9 PAGE * Broadcasts in area * PGM MSG Answer phone message PICKUP Call pick-up PRB Privacy clear/call confluence REM.HOLD Remote hold RNG PLAN Transfers ring mode SECURE Rejects Barge-in/Override SET RLOC Exchanges the station subscriber information. SSPD TOL Restricts speed dial call STN LOCK The station is locked. SYS SPD Common speed dial © SAMSUNG Electronics Co., Ltd. OfficeServ DM User Guide (Continued) Function Description TRK AREC Records the trunk call to the SVM-800 voice mailbox automatically. TRSF RCV Sets whether to receive a call sent and forwarded from the external. UNCO CNF Hold a conference among trunks VM AREC Records the call to the embedded voice mailbox automatically. VM AME Sets auto answer mode to embedded voice mailbox VM REC Records to embedded voice mailbox VMS PSWD Password of SVM-800 voice mailbox VMS REC Records SVM-800 voice mailbox Viewing and Changing the Service Grade Settings 1. Select [4. Group & Table] [4.7 Class of Service] [4.7.2 COS Contents] from the Tree Viewer. 2. Select a service grade. 3. View the settings for the selected service grade. 4. Change the settings for the selected service grade. 5. Save the changes. © SAMSUNG Electronics Co., Ltd. 157 Error! Use the Home tab to apply 제목 1 to the text that you want to appear here. Networking COS Specifies the service grade table to be applied when using the networking function. Defaults Service Function Setting Completion of Calls to Busy Subscriber N Completion of Calls on No Replay N Call Intrusion N Intrusion Capability Level 2 Intrusion Protection Level 2 CONP LEVEL 3 Transfer By Rerouting N DND Announcement Offer N DNDO Capability Level 2 DNDO Protection Level 2 Path Retention N Others Y Viewing and Changing the Networking Service Grades 1. 158 Select [4. Group & Table] [4.7 Class of Service] [4.7.3 Networking COS] from the Tree Viewer. 2. View the current networking service grade table. 3. Enter the service grade to use by function. 4. Save the changes. © SAMSUNG Electronics Co., Ltd. OfficeServ DM User Guide Toll Restriction Toll Deny Table Press the dial button to restrict trunk sending. Level A allows all outgoing trunks. Level H restricts all outgoing trunks. Therefore, the table below is about the Level ‘B to G’ outgoing trunk grades. Up to 500 dial buttons to restrict outgoing trunks can be saved. Each button has up to twelve (12) digits. For each dial button, whether to apply the six (6) outgoing trunk grades is set. Dial button Input Value 0-* Number you want to restrict A-C Meta character X, Y, Z These are used when checking several dial buttons simultaneously. If there is a meta character during dialing, the dial corresponding to the item [1] of the meta character table is used. End mark of the dial F (displayed with ‘E’) Viewing and Changing the Outgoing Trunk Restriction Dial Settings 1. 2. 3. 4. Select [4. Group & Table] [4.8 Toll Restriction] [4.8.1 Toll Deny Table] from the Tree Viewer. View the current outgoing trunk restriction dial settings. Enter a call restriction dial number and set whether to use it for each grade. Save the changes. © SAMSUNG Electronics Co., Ltd. 159 Error! Use the Home tab to apply 제목 1 to the text that you want to appear here. Toll Allow Table Enter the dial button to allow outgoing trunks. Level A allows all outgoing trunks. Level H restricts all outgoing trunks. Therefore, the table below is about the Level ‘B to G’ outgoing trunk grades. Up to 500 dial buttons to restrict outgoing trunks can be saved. Each button has up to twelve (12) digits. For each dial button, whether to apply the six (6) outgoing trunk grades is set. Dial button Input Value 0-* Number you want to permit A-C Meta character X, Y, Z These are used when checking several dial buttons simultaneously. If there is a meta character during dialing, the dial corresponding to the item [1] of the meta character table is used. End mark of the dial F (displayed with ‘E’) Viewing and Changing the Outgoing Trunk Call Settings 1. 2. 3. 4. Select [4. Group & Table] [4.8 Toll Restriction] [4.8.2 Toll Allow Table] from the Tree Viewer. View the outgoing trunk call settings. Enter a call allow dial number and set whether to use it for each grade. Save the changes. Toll Wild Characters When entering a outgoing trunk restriction table or allow table, if you need to enter several dial buttons of which only one place is different, this function sets whether a digit your enter can be inserted into that one place. For example, if 1 and 2 has the place [1] in X, and there is ‘0X’ in the restriction table or allow table, it corresponds to the dials ‘01’ and ‘02’. 160 © SAMSUNG Electronics Co., Ltd. OfficeServ DM User Guide Viewing and Changing the Meta Characters for Call Restriction 1. Select [4. Group & Table] [4.8 Toll Restriction] [4.8.3 Toll Wild Characters] from the Tree Viewer. 2. View the current meta characters for call restriction. 3. Sets whether to use for each meta character dial (0 to 9, *, #). 4. Save the changes. Toll Pass Codes Sets the special code that is excluded from the restriction targets when restricting outgoing trunks. Special Code Description PBX ACCESS CODE When the system is connected to a PBX, this options sets the code to press to use that PBX. (five (5) codes, four (4) digits) SPECIAL CODE Code to be only for special use, as it must be pressed to call with CO (ten (10) codes, four (4) digits) TOLL OVERRIDE Urgent sending code that ignores call restriction and forced input code, etc. (eight (8) codes, fourteen (14) digits) Override Use Trunk Group Trunk group to send the urgent sending code when it is pressed Viewing and Changing the Toll Pass Codes 1. Select [4. Group & Table] [4.8 Toll Restriction] [4.8.4 Toll Pass Codes] from the Tree Viewer. 2. View the current setting for Toll Pass Codes. 3. Change the setting for Toll Pass Codes. 4. Save the changes. © SAMSUNG Electronics Co., Ltd. 161 Error! Use the Home tab to apply 제목 1 to the text that you want to appear here. Trunk Toll Type Sets the restriction grade in call restriction for each trunk. This function also sets whether to perform call restriction by station or by giving a grade to each trunk. The call restriction grade of a trunk should be set for each ring mode. Below are the call restriction grades for trunks. Grade Description F-STN Depends o the call restriction grade of the station CLS-A Depends on the call restriction grade A. (Does not restrict calls.) CLS-B Depends on the call restriction grade B. CLS-C Depends on the call restriction grade C. CLS-D Depends on the call restriction grade D. CLS-E Depends on the call restriction grade E. CLS-F Depends on the call restriction grade F. CLS-G Depends on the call restriction grade G. CLS-H Depends on the call restriction grade H. (Cannot send trunk calls.) Viewing and Changing the Trunk Call Restriction Grades 1. 162 Select [4. Group & Table] [4.8 Toll Restriction] [4.8.5 Trunk Toll Type] from the Tree Viewer. 2. View the current trunk call restriction grades. 3. Change the call restriction grades. 4. Save the changes. © SAMSUNG Electronics Co., Ltd. OfficeServ DM User Guide Key Programming Default Key For each phone type that has the button that can be programmed, this function specifies the same functions to the same program button at a once. No. Phone Type Description 00 24 BTN SETS Phone that has twenty four (24) program buttons 01 12 BTN SETS Phone that has twelve (12) program buttons 02 7 BTN SETS Phone that has seven (7) program buttons 03 6 BTN SETS Phone that has six (6) program buttons 04 32 BTN AOMS In case that an add on module that has thirty two (32) program buttons is connected. 05 40-64 BTN AOMS In case that an add on module that has 40 to 64 program buttons is connected. 06 20 BTN SETS Phone that has twenty (20) program buttons 07 28 BTN SETS Phone that has twenty eight (28) program buttons 08 18 BTN SETS Phone that has eighteen (18) program buttons 09 8 BTN SETS Phone that has eight (8) program buttons 10 99 BTN SETS Phone that has ninety nine (99) program buttons 11 38 BTN SETS Phone that has thirty eight (38) program buttons 12 21 BTN SETS Phone that has twenty one (21) program buttons 13 14 BTN SETS Phone that has fourteen (14) program buttons 14 DS-07S SETS DS-5014S/5007S/5000S Personal Phone The program buttons 1 and 2 is assigned to the multi-purpose button (Call) by default. Below are the functions that can be assigned to the program buttons. Some functions (underlined) can specify and use function extension numbers independently. For the trunk and trunk group direct selection function, the extension number must be specified. For other functions, it is possible that the extension number is not specified. © SAMSUNG Electronics Co., Ltd. 163 Error! Use the Home tab to apply 제목 1 to the text that you want to appear here. Function that can be specified Function that can be specified 164 Description AAPLAY AA PLAY (This option may not be available in certain OfficeServ models.) AAREC AA RECORD (This option may not be available in certain OfficeServ models.) AB Absence/Presence (ABSENCE) ABAND Checks the information for whether the caller abandoned the call before answering. (CID ABANDON) ABW Connects/disconnects to the group agent for auto call distribution. ACC Charge (Account) AG Answer Group (Including or excluding in a temporary answer group) ALARM Alarm AN/RLS Answer/release (ANSWER/RELEASE)-It can be specified only when it does not exist in the fixed keys. BARGE Barge-in (BARGE-IN/OVERRIDE) BILL Bills the room charge: Hotel function BLOCK Locks the off hook announcement. (OHVA BLOCK) BOOK Booking function BOOTH Sets whether to use the booth phone: Hotel function BOSS Boss and secretary (BOSS AND SECRETARY) CAD Displays the call processing status. (CALL ACTIVITY DISPLAY) CALL Multi-purpose call button (CALL BUTTON)-An extension number specifies a purpose automatically. CAG Control Answer Group (Making or deleting a temporary answer group) CAMP Station reservation (STATION CAMP-ON) CANMG Message canceling (MESSAGE-CANCEL) CBK Reservation (CALL BACK) CC Multi-ring service and call pick up button by station (CALL COVERAGE) CHIN Check-in: Hotel function CHOUT Check-out: Hotel function CHOICE Displays the SPOT Choice information. © SAMSUNG Electronics Co., Ltd. OfficeServ DM User Guide (Continued) Function that can be specified Description CID Selects the CID function. CONF Conference (CONFERENCE) CONP Displays the networking name. (CONNECTED NAME DISPLAY) CR Records the call to embedded/IPUMS voice mailbox (CALL RECORD) CREDIT Checks and changes the charge at which the room is available: Hotel function CS Standby status of the auto call distribution group (CALL STATUS) CSNR Saves the caller ID in the SNR buffer. (CID SAVED NUMBER REDIAL) DGPALM Sets the alarm time for multiple stations. DICT Memo (DICTATION) DIR Directory dial (DIRECTORY) DIVERT Switches to the secretary DLOCK Door phone ring answering (DOOR UNLOCK) DND Do not disturb (DO NOT DISTURB) DNDO Ignores the Do not disturb setting. (DND OVERRIDE) DP Direct pick up (DIRECT PICK UP) DROP Drops and returns the opposite call when forwarding a call. (CALL DROP) DS Direct station selection button (DSS KEY) DT Direct trunk selection button (DTS KEY) EP Call pick up of an established call (ESTABLISHED CALLPICK UP) EXTEND CNF24 MEET-ME CONFERENCE EXTEND EXTMIC Selects the external or internal microphone in a phone to which the external microphone can be connected. (EXTERNAL MIC) FAUTO Forced auto answer by the caller (FORCED AUTO ANSWER) FLASH Trunk flash (FLASH) FWRD Call forward (CALL FORWARD) © SAMSUNG Electronics Co., Ltd. 165 Error! Use the Home tab to apply 제목 1 to the text that you want to appear here. (Continued) Function that can be specified 166 Description GPIK Group pick up (GROUP PICK UP) HDSET Headset mode (HEADSET MODE) HLDPK Hold pick up (HOLD PICK UP) HOLD Hold HOTEL Hotel function IG Whether to include the group or not (IN/OUT OF GROUP) INFDSP Displays the SPOT View information. INQIRE Views the caller information for a hold call. (CID INQUIRE) ISPY Checks the call status of other station. (CID I SPY) LANREQ Sends a control message to the LAN card. (LAN REQUEST) LISTN Group listening (GROUP LISTENING) LNR Redial (LAST NUMBER REDIAL): This can be specified only if it does not exist in the fixed keys. LOG Searches the last receiving/sending call. (CALL LOG) MCONF CNF24 Progressive Conference MGC CNF24 Predefined Conference MJOIN CNF24 Reserved Room Conference Join MACR MACRO MMPA Announcement forward answering (MEET ME PAGE ANSWER) MMPG Announcement forward (MEET ME PAGE) MOBEX MOBEX MS Sends a specific sound to the opposite party of a key. (MANUAL SIGNALING) MSG Message (MESSAGE): This can be specified only if it does not exist in the fixed keys. MUTE Drops the transmission. (MUTE): This can be specified only if it does not exist in the fixed keys. MW Displays the waiting message. (MESSAGE WAITING) NEW New trunk call (NEW CALL) NIGHT Trunk night group (NIGHT GROUP) © SAMSUNG Electronics Co., Ltd. OfficeServ DM User Guide (Continued) Function that can be specified Description NIGHT Trunk night group (NIGHT GROUP) NND Converts the number/name/date mode when checking the caller ID. (NUMBER/NAME/DATE) NOCLIP Rejects sending of the calling line ID. (NO CLIP SEND) NPG Networking announcement (PAGING ACROSS NETWORKED NODE) NS Calls a networking station. (NETWORKING STATION) NXT Selects the next data when checking the caller ID. (CID NEXT CALL) OHVA Off hook announcement (OFF HOOK VOICE ANNOUNCEMENT) OPER Attendant calling (OPERATOR) PAGE Announcement (PAGE) PAGPK Announcement hold response (PICK UP PAGE HOLD) PARK Saves/recovers the call. (CALL PARK/RETRIEVE) PAUSE Pauses dialing. (PAUSE) PMSG Absence message (STATUS MESSAGE) PRB Allows interrupting. (PRIVACY RELEASE/BRIDGE) PROG Individual program (PROGRAM) PTHR Aligns the networking call paths. (PATH REPLACEMENT) RB Bills the call charge. (ROOM BILL): Hotel function REJECT Rejects the off hook announcement. (OHVA REJECT) RETRY Auto redial (AUTO REDIAL ON BUSY) REVW Checks the caller ID. (CID REVIEW) RP Converts/displays the ring mode. (RING PLAN) RSV Displays the room status. (ROOM STATUS VIEW): Hotel function RTO Fixes ring mode (RING PLAN OVERRIDE) SETDND Sets/releases the Do Not Disturb function of other station. (REMOTE SET DND) SETMG Leaving a message (SET MESSAGE W/O RING) SG Direct station group selection (STATION GROUP) © SAMSUNG Electronics Co., Ltd. 167 Error! Use the Home tab to apply 제목 1 to the text that you want to appear here. (Continued) Function that can be specified 168 Description SLOCAT Checks the locations of the hotel staff. (STAFF LOCATER): Hotel function SMDR Displays, prints, and removes the call charge. SNR Saved number redial (SAVED NUMBER REDIAL) SP Monitors the auto call distribution groups. (SUPERVISOR) SPD Speed dial (SPEED DIAL) SPKR Speaker (SPEAKER). This can be specified only if it does not exist in the fixed keys. STATE Sets the status of the boss. STORE Saves the caller ID in the individual speed dial buffer. (CID STORE) SYSALM System alarm (SYSTEM FAULT ALARM) TCLIP Allows the phone to send the calling line ID differently for each call. (Temporary CLIP) TG Direct trunk selection button (TRUNK GROUP) TIMER Timer (TIMER) TRARPT Processes the statistics data. (TRAFFIC REPORT) TRSF Transfer (TRANSFER). This can be specified only if it does not exist in the fixed keys. UA Night ring answer (UNA PICK UP) VG SVM-800 group messages VM Calls the embedded/IPUMS voice mailbox. (VM MEMO) VMADM Changes the embedded/IPUMS voice mailbox. (VM ADMINISTRATION) VMAME Auto answer for the embedded/IPUMS voice mailbox. (VM AUTO ANSWER EMULATION) VMMSG Checks the messages of the embedded/IPUMS voice mailbox. (VM MESSAGE) VT Transfers the voice mailbox. (VMS TRANSFER) WAKEUP Sets the morning call time: Hotel function XCHIN Speed check-in: Hotel function © SAMSUNG Electronics Co., Ltd. OfficeServ DM User Guide Viewing and Changing the Buttons for Each Type of Phone 1. Select [4. Group & Table] [4.9 Key Programming] [4.9.1 Default Key] from the Tree Viewer. 2. View the current settings for each type of phone. 3. Select the type of phone. 4. 5. Select the button number and select a function in the Feature item. In case that station number is needed, inputs the station number in the Extension item. Save the changes. Station Key Sets a specific function to a program button of a phone that has the buttons that can be programmed. The program buttons 1 and 2 is assigned to the multi-purpose button (Call) by default. Below are the functions that can be assigned to the program buttons. Some functions (underlined with-at the latter part) can specify and use function extension numbers independently. For the trunk and trunk group direct selection function, the extension number must be specified. For other functions, it is possible that the extension number is not specified. Function that can be specified Function that can be specified Description AAPLAY AA PLAY (This option may not be available in certain OfficeServ models.) AAREC AA RECORD (This option may not be available in certain OfficeServ models.) AB Absence/Presence (ABSENCE) ABAND Checks the information for whether the caller abandoned the call before answering. (CID ABANDON) ABW Connects/disconnects to the group agent for auto call distribution. © SAMSUNG Electronics Co., Ltd. 169 Error! Use the Home tab to apply 제목 1 to the text that you want to appear here. (Continued) Function that can be specified 170 Description ACC Charge (Account) AG Answer Group (Including or excluding in a temporary answer group) ALARM Alarm AN/RLS Answer/release (ANSWER/RELEASE)-It can be specified only when it does not exist in the fixed keys. BARGE Barge-in (BARGE-IN/OVERRIDE) BILL Bills the room charge: Hotel function BLOCK Locks the off hook announcement. (OHVA BLOCK) BOOK Booking function BOOTH Sets whether to use the booth phone: Hotel function BOSS Boss and secretary (BOSS AND SECRETARY) CAD Displays the call processing status. (CALL ACTIVITY DISPLAY) CALL Multi-purpose call button (CALL BUTTON)-An extension number specifies a purpose automatically. CAG Control Answer Group (Making or deleting a temporary answer group) CAMP Station reservation (STATION CAMP-ON) CANMG Message canceling (MESSAGE-CANCEL) CBK Reservation (CALL BACK) CC Multi-ring service and call pick up button by station (CALL COVERAGE) CHIN Check-in: Hotel function CHOUT Check-out: Hotel function CHOICE Displays the SPOT Choice information. CID Selects the CID function. CONF Conference (CONFERENCE) CONP Displays the networking name. (CONNECTED NAME DISPLAY) CR Records the call to embedded/IPUMS voice mailbox (CALL RECORD) © SAMSUNG Electronics Co., Ltd. OfficeServ DM User Guide (Continued) Function that can be specified Description CREDIT Checks and changes the charge at which the room is available: Hotel function CS Standby status of the auto call distribution group (CALL STATUS) CSNR Saves the caller ID in the SNR buffer. (CID SAVED NUMBER REDIAL) DGPALM Sets the alarm time for multiple stations. DICT Memo (DICTATION) DIR Directory dial (DIRECTORY) DIVERT Switches to the secretary DLOCK Door phone ring answering (DOOR UNLOCK) DND Do not disturb (DO NOT DISTURB) DNDO Ignores the Do not disturb setting. (DND OVERRIDE) DP Direct pick up (DIRECT PICK UP) DROP Drops and returns the opposite call when forwarding a call. (CALL DROP) DS Direct station selection button (DSS KEY) DT Direct trunk selection button (DTS KEY) EP Call pick up of an established call (ESTABLISHED CALLPICK UP) EXTEND CNF24 MEET-ME CONFERENCE EXTEND EXTMIC Selects the external or internal microphone in a phone to which the external microphone can be connected. (EXTERNAL MIC) FAUTO Forced auto answer by the caller (FORCED AUTO ANSWER) FLASH Trunk flash (FLASH) FWRD Call forward (CALL FORWARD) GPIK Group pick up (GROUP PICK UP) HDSET Headset mode (HEADSET MODE) HLDPK Hold pick up (HOLD PICK UP) HOLD Hold HOTEL Hotel function © SAMSUNG Electronics Co., Ltd. 171 Error! Use the Home tab to apply 제목 1 to the text that you want to appear here. (Continued) Function that can be specified 172 Description IG Whether to include the group or not (IN/OUT OF GROUP) INFDSP Displays the SPOT View information. INQIRE Views the caller information for a hold call. (CID INQUIRE) ISPY Checks the call status of other station. (CID I SPY) LANREQ Sends a control message to the LAN card. (LAN REQUEST) LCR Optimal route selection (AUTO ROUTE SELECTION) LISTN Group listening (GROUP LISTENING) LNR Redial (LAST NUMBER REDIAL): This can be specified only if it does not exist in the fixed keys. LOG Searches the last receiving/sending call. (CALL LOG) MCONF CNF24 Progressive Conference MGC CNF24 Predefined Conference MJOIN CNF24 Reserved Room Conference Join MACR MACRO MMPA Announcement forward answering (MEET ME PAGE ANSWER) MMPG Announcement forward (MEET ME PAGE) MOBEX MOBEX MS Sends a specific sound to the opposite party of a key. (MANUAL SIGNALING) MSG Message (MESSAGE): This can be specified only if it does not exist in the fixed keys. MUTE Drops the transmission. (MUTE): This can be specified only if it does not exist in the fixed keys. MW Displays the waiting message. (MESSAGE WAITING) NEW New trunk call (NEW CALL) NIGHT Trunk night group (NIGHT GROUP) NND Converts the number/name/date mode when checking the caller ID. (NUMBER/NAME/DATE) NOCLIP Rejects sending of the calling line ID. (NO CLIP SEND) NPG Networking announcement (PAGING ACROSS NETWORKED NODE) © SAMSUNG Electronics Co., Ltd. OfficeServ DM User Guide (Continued) Function that can be specified Description NS Calls a networking station. (NETWORKING STATION) NXT Selects the next data when checking the caller ID. (CID NEXT CALL) OHVA Off hook announcement (OFF HOOK VOICE ANNOUNCEMENT) OPER Attendant calling (OPERATOR) PAGE Announcement (PAGE) PAGPK Announcement hold response (PICK UP PAGE HOLD) PARK Saves/recovers the call. (CALL PARK/RETRIEVE) PAUSE Pauses dialing. (PAUSE) PMSG Absence message (STATUS MESSAGE) PRB Allows interrupting. (PRIVACY RELEASE/BRIDGE) PROG Individual program (PROGRAM) PTHR Aligns the networking call paths. (PATH REPLACEMENT) RB Bills the call charge. (ROOM BILL): Hotel function REJECT Rejects the off hook announcement. (OHVA REJECT) RETRY Auto redial (AUTO REDIAL ON BUSY) REVW Checks the caller ID. (CID REVIEW) RP Converts/displays the ring mode. (RING PLAN) RSV Displays the room status. (ROOM STATUS VIEW): Hotel function RTO Fixes ring mode (RING PLAN OVERRIDE) SETDND Sets/releases the Do Not Disturb function of other station. (REMOTE SET DND) SETMG Leaving a message (SET MESSAGE W/O RING) SG Direct station group selection (STATION GROUP) SLOCAT Checks the locations of the hotel staff. (STAFF LOCATER): Hotel function SMDR Displays, prints, and removes the call charge. SNR Saved number redial (SAVED NUMBER REDIAL) SP Monitors the auto call distribution groups. (SUPERVISOR) SPD Speed dial (SPEED DIAL) © SAMSUNG Electronics Co., Ltd. 173 Error! Use the Home tab to apply 제목 1 to the text that you want to appear here. (Continued) Function that can be specified 174 Description SPKR Speaker (SPEAKER). This can be specified only if it does not exist in the fixed keys. STATE Sets the status of the boss. STORE Saves the caller ID in the individual speed dial buffer. (CID STORE) SYSALM System alarm (SYSTEM FAULT ALARM) TCLIP Allows the phone to send the calling line ID differently for each call. (Temporary CLIP) TG Direct trunk selection button (TRUNK GROUP) TIMER Timer (TIMER) TRARPT Processes the statistics data. (TRAFFIC REPORT) TRSF Transfer (TRANSFER). This can be specified only if it does not exist in the fixed keys. UA Night ring answer (UNA PICK UP) VG SVM-800 group messages VM Calls the embedded/IPUMS voice mailbox. (VM MEMO) VMADM Changes the embedded/IPUMS voice mailbox. (VM ADMINISTRATION) VMAME Auto answer for the embedded/IPUMS voice mailbox. (VM AUTO ANSWER EMULATION) VMMSG Checks the messages of the embedded/IPUMS voice mailbox. (VM MESSAGE) VT Transfers the voice mailbox. (VMS TRANSFER) WAKEUP Sets the morning call time: Hotel function XCHIN Speed check-in: Hotel function © SAMSUNG Electronics Co., Ltd. OfficeServ DM User Guide Viewing and Changing the Program Buttons for Each Station 1. Select [4. Group & Table] [4.9 Key Programming] [4.9.2 Station Key] from the Tree Viewer. 2. View the current program button settings for each station. 3. Select the station number to change. 4. 5. Select the button number and select a function in the Feature item. In case that station number is needed, inputs the station number in the Extension item. Save the changes. Program Key Status Display current program key status. Viewing the Program Key Status 1. 2. Select [4. Group & Table] [4.9 Key Programming] [4.9.3 Program Key Status] from the Tree Viewer. View the current program key status. © SAMSUNG Electronics Co., Ltd. 175 Error! Use the Home tab to apply 제목 1 to the text that you want to appear here. Features Call Restriction Port Use Group Specifies the call group to which each station or trunk belongs. When you want to restrict calls between stations or trunk calling/pick up, you can specify it for each call group. Requirements A station can be assigned to the call groups 001 to 300. A trunk can be assigned to the call groups 301 to 500. Viewing and Changing the Station/Trunk Call Groups 1. 2. 3. 4. Select [5. Features] [5.1 Call Restriction] [5.1.1 Port Use Group] from the Tree Viewer. View the current station/trunk call groups. Select the station/trunk number to change and enter the call group number. Save the changes. Station To Trunk (Dial) Sets whether a call can be sent to a specific trunk call group. (YES or NO) Requirements In the ‘5.1.1 Port Use Group’, one of call groups 001 to 300 can be set to a station and one of call groups 301 to 500 to a trunk. Viewing and Changing the Usage for Each Call Group 1. 2. 176 Select [5. Features] [5.1 Call Restriction] [5.1.2 Station To Trunk (Dial)] from the Tree Viewer. View whether a call can be sent for each call group currently set. © SAMSUNG Electronics Co., Ltd. OfficeServ DM User Guide 3. Select the station and trunk call group number to change. 4. Set whether a call can be sent. 5. Save the changes. Station To Trunk (Answer) Sets whether a call pick up can be performed to a specific trunk call group. (YES or NO) Requirements In the ‘5.1.1 Port Use Group’, one of call groups 001 to 300 can be set to a station and one of call groups 301 to 500 to a trunk. If ANS is set to NO, call pick up cannot be performed, but, it can be performed if the station is ringing due to an incoming call or call forward, or for a common hold trunk. Viewing and Changing the Usage for Each Call Group 1. 2. Select [5. Features] [5.1 Call Restriction] [5.1.3 Station To Trunk (Answer)] from the Tree Viewer. View whether a call pick up can be performed for each call group currently set. 3. Select the station and trunk call group number to change. 4. Set whether a call pick up can be performed 5. Save the changes. © SAMSUNG Electronics Co., Ltd. 177 Error! Use the Home tab to apply 제목 1 to the text that you want to appear here. Station To Station Sets whether a station call group can make a call to other station call groups. (YES or NO) Viewing and Changing the Station Call Groups Where Call Is Available 1. 2. 3. 4. Select [5. Features] [5.1 Call Restriction] [5.1.4 Station To Station] from the Tree Viewer. View the current station call groups where call is available. Select the station call group to receive the call and the station call group where call is available and set whether the call can be sent for each station call group. Save the changes. Trunk To Trunk Sets whether a trunk call group can make a call to other trunk call groups. (YES or NO) Viewing and Changing the Trunk Call Groups Where Call Is Available 1. 2. 3. 4. 178 Select [5. Features] [5.1 Call Restriction] [5.1.5 Trunk To Trunk] from the Tree Viewer. View the current trunk call groups where call is available. Select the trunk call group to receive the call and the trunk call group where call is available and set whether the call can be sent for each trunk call group. Save the changes. © SAMSUNG Electronics Co., Ltd. OfficeServ DM User Guide VoIP Options H.323 Trunk Options Sets the system parameters related to H.323 processing and H.323 Gatekeeper parameters. H.323 Trunk Option Item Description GATEWAY CALL ID Sets the caller ID to account. DIL Number If the dial digits is not included in the received call, this option specifies the number to which the call is made to be received. Signal Port Sets the IP port number for H.323 signaling. Call ID Type Sets the caller ID type to send to the receiving side when sending a call. It can be displayed only if it has the same type as the caller sent. MFR Alloc When an incoming VoIP trunk call is sent directly to other trunk without passing via a station, the DTMF signal is detected which enters from that trunk. At this time, this option sets whether to assign the DTMF Receiver. Real Ringback When calling with a VOIP trunk, this option sets whether to have a virtual tone heard or have a ring back tone received from the opposite party heard. RE-Route Time (sec) When sending a VOIP trunk call, if there is no answer from the opposite party within this time, it is processed as fail. In case of the LCR, this option specifies the time to call the next group. Gateway Allow In case that this option is set to ENABLE, when receiving a H.323 call, if the calling side IP address is not registered in the program 833 VoIP Internet addresses, the call cannot be received. Fast Setup Sets whether to use the H.323 Fast Start. Tunnel Mode For H.245 signaling, this option sets whether to use a Q.931 signaling channel together without using a channel separately. Codec Negotiation Sets whether to change the codec type to use automatically depending on the opposite party. © SAMSUNG Electronics Co., Ltd. 179 Error! Use the Home tab to apply 제목 1 to the text that you want to appear here. (Continued) Item 180 Description CLIP Table When sending a call to a VOIP network, this option sets ‘2.4.3 CLI Send Number’ to use as the caller ID to send. When set to NONE, the CO Number of ‘2.6.1 Trunk Data’ is used. Incoming Mode When a VOIP call is received, this option sets whether to use the received Called Party Number as it is or to follow the ‘3.2.3 DID Ringing’ or to follow the receiving location for trunks specified in ‘3.2.1 Trunk Ringing’. CLIR With Number When set to ENABLE, even if CLIP Restriction is set, the CLIP number is sent to the network. Dial Mode Selects whether to use OVERLAP mode or ENBLOCK mode. Gatekeeper Connect Sets whether to connect and use the Gatekeeper. Gatekeeper Route When connecting to the Gatekeeper, this option can be set when you want not the Gatekeeper but the system to perform the analysis for dialing digits. Usually the Gatekeeper analyzes digits. But when this function is enabled, it analyzes the dialing digit with the information specified in the Outband tables of ‘5.2.3 VoIP Outgoing Digits’ and ‘5.2.4 VoIP Incoming Digits’. Gatekeeper Address Sets the IP address of the Gatekeeper. Gatekeeper Alter IP Address If the Gatekeeper is used in redundancy mode, this option sets the IP address of the other Gatekeeper to use when the connection to the Primary Gatekeeper is disconnected. Gatekeeper Name Sets the alias name of the Gatekeeper. H.323 Gateway ID Sets the system ID to register in the Gatekeeper to H.323 ID. E.164 Gateway Number Sets the system ID to register in the Gatekeeper to E.164 ID. Gatekeeper Keep Alive (sec) Sets the RRQ transmission interval in the Gatekeeper. Gatekeeper Down Route Sets the routing method to use when the connection to the Gatekeeper being used is disconnected. - Alter Gatekeeper: Connects to the Alternative Gatekeeper. - PSTN: Uses the PSTN routing. Gatekeeper RAS Type When connecting the Gatekeeper manually according to the prefix, select MANUAL. For other cases, select AUTO. © SAMSUNG Electronics Co., Ltd. OfficeServ DM User Guide (Continued) Item Description URQ Reason Mode When the Gatekeeper transmits a URQ message to the gateway, the gateway disables the Gatekeeper connection according to the REASON code. RRQ Fail Time (sec) Sets the interval to transmit a RRQ again when the gateway transmits a PRQ to the Gatekeeper and it fails, GRQ Send Sets whether the gateway sends a GRQ message. Gatekeeper State Displays the status of the Gatekeeper. Viewing and Changing the H.323 Trunk Option Settings 1. Select [5. Features] [5.2 VoIP Options] [5.2.1 H.323 Trunk Options] from the Tree Viewer. 2. View the current H.323 Trunk option settings. 3. Change the SIP Option settings. 4. Save the changes. SIP Options Sets the SIP parameter values. SIP Option Item Description Gateway Call ID Sets the caller ID to account. DIL Number If the dial digits is not included in the received call, this option specifies the number to which the call is made to be received. Signal Port Sets the UDP port number for signaling. Caller ID Type Sets the caller ID type to send to the receiving side when sending a call. It can be displayed only if it has the same type as the caller sent. MFR Alloc When an incoming VoIP trunk call is sent directly to other trunk without passing via a station, the DTMF signal is detected which enters from that trunk. At this time, this option sets whether to assign the DTMF Receiver. © SAMSUNG Electronics Co., Ltd. 181 Error! Use the Home tab to apply 제목 1 to the text that you want to appear here. (Continued) Item 182 Description Real Ringback Tone When calling with a VOIP trunk, this option sets whether to have a virtual tone heard or have a ring back tone received from the opposite party heard. RE-Route Time (sec) When sending a VOIP trunk call, if there is no answer from the opposite party within this time, it is processed as fail. In case of the LCR, this option specifies the time to call the next group. Gateway Allow In case that this option is set to ENABLE, when receiving a H.323 call, if the calling side IP address is not registered in ‘5.2.5 VoIP Routing IP Address’, the call is not received. UDP Trunk Port Sets the UDP port number when the opposite party of the trunk is also a trunk. UDP Phone Port Sets the UDP port number when the opposite party of the phone is also a phone. T1 Time (100 ms) When using an unreliable transmission protocol such as UDP, if there is no answer after transmitting a call, it is retransmitted. The T1 Time is the first retransmission interval defined in the RFC2543. T2 Time (100 ms) Maximum retransmission interval defined in the RFC2542. General Ring Time (100 ms) In an unreliable transmission protocol, the server cannot ensure that the client has received the last answer after it sent it. In this case, until the retransmission that the server requested is received, it must retransmit the answer during this time. For example, it is the time to wait after sending a 200 OK message for an INFO message. Invite Ring Time (100 ms) In an unreliable transmission protocol, the client cannot ensure whether the server has received the ACK message after the client sent an ACK for an INVITE Final Response. At this time, this is the time to wait after sending an ACK for the Final Response. Provisional Time (100 ms) When a provision response is received, this is the time to wait before the user agent ends the timer. Inverse Response Time (100 ms) This is the time for the user agent to wait before sending a cancel for an Invite Request. T4 Time (100 ms) This is defined and used for several uses in the RFC 2543. For example, in an unreliable transmission protocol, one of them is the time to wait after the USA (User Agent Server) receives an ACK message. © SAMSUNG Electronics Co., Ltd. OfficeServ DM User Guide (Continued) Item Description CLIP Table Sets the UDP port number for signaling. Incoming Mode When a VoIP call is received, this option sets whether to use the received Called Party Number as it is or to follow the ‘3.2.3 DID Ringing’ or to follow the receiving location for trunks specified in ‘3.2.1 Trunk Ringing’. When a VOIP call is received, this option sets whether to use the received Called Party Number as it is or to follow the ‘3.2.3 DID Ringing’ or to follow the receiving location for trunks specified in ‘3.2.1 Trunk Ringing’. General Response Time (100 ms) This is the time for the user agent to wait before sending a cancel for a General Request. Request Retry Time (100 ms) This is the time for the user agent to wait until it receives a Final Response after sending a General Request. Server IP Address Sets the IP address of the SIP server. Registration per User When using the SIP server, if this item is set to Enable, you can register it for each user. If set to Disable, you can registers a representative number to it. Gateway Enable Sets whether to use the SIP server. Server Port Sets the port number of the SIP server. Regist Trunk Number Sets the representative number to register in the SIP server. Proxy Domain Name Sets the domain name for authentication when using the SIP server. User ID Sets the user ID for authentication when using the SIP server. Regist Password Sets the password to use when authentication is needed to register a number to the SIP Server, This is to used when registering the representative number. Regist Expire (sec) This expire time value is needed to register a number to the SIP server periodically. Generally, a value given by the SIP server is used. We recommend using the default value. Session Timer This the timer value to use when sending and receiving a message periodically to preserve a session after it is set up. Whether to use the session timer is predefined for each SIP server. We recommend using the default value. Session Vendor This option is used to discriminate the slightly different operations of each server. We recommend using the default value. © SAMSUNG Electronics Co., Ltd. 183 Error! Use the Home tab to apply 제목 1 to the text that you want to appear here. (Continued) Item 184 Description Regist Status Displays whether the terminal is registered to the SIP server. SIP Station Expire Time (sec) Sets the registration expire time of the SIP station terminal. We recommend using the default value. SIP Peering When making a call in interoperation with the SIP server, usually, the SIP server IP address is used in the From/To header. But, this option is used when you want use the IP address of the terminal for a specific SIP server. Codec Auto Negotiation Sets whether to set the voice codec automatically. TLS Port This is the port specified to use the TLS. Use TLS Sets whether to use the TLS when performing SIP signaling. Proxy Server Address Sets the domain name or IP address of the SIP server. If a domain name is entered in this option, the DNS query is executed and, through this, the IP address of the SIP server is obtained. Alter Proxy IP Address In case that the proxy address is specified to be an IP address type, this option sets the alternative proxy IP address to replace when the specified SIP server fails. DNS Server1 IP Address When executing a DNS Query using a domain name, this option sets the IP address of the name server that gives the IP address of the SIP server. DNS Server2 IP Address Set the alternate name server to use when the name server specified in the DNS Server1 IP Address field fails. © SAMSUNG Electronics Co., Ltd. OfficeServ DM User Guide Viewing and Changing the SIP Option Settings 1. Select [5. Features] [5.2 VoIP Options] [5.2.2 SIP Options] from the Tree Viewer. 2. View the current SIP Option settings. 3. Change the SIP Option settings. 4. Save the changes. VoIP Outgoing Digits Sets the digit code conversion settings when sending an H.323 and SIP VoIP trunk call. Items to be Specified Description Table No Index (0 to 62) of the first IP table to refer to when converting an access code to an IP address. Access Digit Digits needed to connect to the opposite party. This is needed to transmit a call to the opposite system. Insert Digit Digit to insert at the front of the called party number entered. Digit Length Length of the VoIP call digits Delete Length Length of a part of the ACCESS DGT to delete After connecting to the opposite VoIP trunk, as many digits as is removed from the ACCESS DGT and the remaining is used. IP Table Number When sending a VoIP call, this option sets the number of the table in which the destination IP address is saved. Start Entry of IP Table Sets the location to start searching in the IP table to distribute calls for a specific access code. Server Use Sets whether to use Gatekeeper for the access. (This is applicable only when the Gatekeeper Route is set to Enable in ‘5.2.1 H.323 Trunk Option’.) © SAMSUNG Electronics Co., Ltd. 185 Error! Use the Home tab to apply 제목 1 to the text that you want to appear here. Viewing and Changing the VoIP Outgoing Digits 1. Select [5. Features] [5.2 VoIP Options] [5.2.3 VoIP Outgoing Digits] from the Tree Viewer. 2. View the current VoIP Outgoing Digits. 3. Change the VoIP Outgoing Digits. 4. Save the changes. VoIP Incoming Digits Sets the digit code conversion settings when receiving an H.323 and SIP VoIP trunk call. Items to be Specified Description Table No Index (0 to 62) of the first IP table to refer to when converting an access code to an IP address. Access Digit Digits needed to connect to the opposite party. This is needed to transmit a call to the opposite system. Insert Digit Digit to insert at the front of the called party number entered. Digit Length Length of the VoIP call digits Delete Length Length of a part of the ACCESS DGT to delete After connecting to the opposite VoIP trunk, as many digits as is removed from the ACCESS DGT and the remaining is used. Viewing and Changing VoIP Incoming Digits 1. 186 Select [5. Features] [5.2 VoIP Options] [5.2.4 VoIP Incoming Digits] from the Tree Viewer. 2. View the current VoIP Incoming Digits. 3. Change the VoIP Incoming Digits. 4. Save the changes. © SAMSUNG Electronics Co., Ltd. OfficeServ DM User Guide VoIP Routing IP Address Sets the Internet address that can be connected via VoIP. Viewing and Changing the VoIP Routing IP Addresses 1. Select [5. Features] [5.2 VoIP Options] [5.2.5 VoIP Routing IP Address] from the Tree Viewer. 2. View the current VoIP routing IP addresses. 3. Change the VoIP routing IP addresses. 4. Save the changes. E.164 Numbers Sets the system ID to register in the Gatekeeper to E.164 ID. Viewing and Changing the E.164 Number 1. Select [5. Features] [5.2 VoIP Options] [5.2.6 E.164 Numbers] from the Tree Viewer. 2. View the current E.164 Number. 3. Change the E.164 Number. 4. Save the changes. © SAMSUNG Electronics Co., Ltd. 187 Error! Use the Home tab to apply 제목 1 to the text that you want to appear here. SIP Number Registers a SIP user ID and password. The number, i.e., user ID, should be sixteen (16) characters long. It can contain *, #, and blank. The password should be sixteen (16) alphanumeric characters long. Viewing and Changing the SIP Number 1. Select [5. Features] [5.2 VoIP Options] [5.2.7 SIP Number] from the Tree Viewer. 2. View the current number and password. 3. Change the number and password. 4. Save the changes. Private IP Address Registers the IP address of the devices which use a private IP address among other devices that you want to use to connect an H.323 or SIP call from the system. When connecting an H.323 or SIP call using the IP address that is registered here, this function recognizes that it is connected to a city private network and sends the private IP of the system to the opposite party. Viewing and Changing the Private IP Address 1. 188 Select [5. Features] [5.2 VoIP Options] [5.2.8 Private IP Address] from the Tree Viewer. 2. View the current private IP address. 3. Change the private IP address. 4. Save the changes. © SAMSUNG Electronics Co., Ltd. OfficeServ DM User Guide MGI Parameter Sets the DSP parameters of the MGI board. The parameters of the MGI 3 board and MGI 16/MG I64 board differ respectively. You can set them individually. MGI 3 Parameter Parameter Description Echo Cancel The Echo Cancellation is the function to remove echo generated by reflection of voice on the Packet Delay and PSTN. This option sets whether to use this function. Silence Suppression The Silence Suppression is the function that detects silence during talking and does not transmit those voice packets. This option sets whether to use this function. Input Filter Sets whether to perform the DSP Input Filtering. Input Gain Inputs the call receptivity of the PCM voice that enters the DSP. (-31~31 Db) Voice Volume Sets the volume used when converting voice packets to a PCM voice. (-31~31 Db) Frame Count Selects the audio codec of the MGI card and sets the transmission interval time for VoIP packets. Jitter Option Factor Sets the reference to control the Jitter buffering operation when converting voice packets received from the network to a PCM voice. If this option is set to a value less than 4, emphasis is put on the packet loss processing. If set to a value larger than 4, emphasis is put on the packet delay. Min Jitter Delay (ms) Selects the jitter delay value. Max Jitter Delay (ms) Selects the maximum jitter delay value. Loss Check Time (sec) Sets the loss check interval for RTP packets. FAX ECM When using the T.38 fax, this option sets the additional recovery function for fax transmission errors. FAX Count Sets the maximum allowable number of the Internet FAX channels. DTMF Type Sets whether to send DTMF signals along a voice channel (INBAND) or using a separate message (OUTBAND). © SAMSUNG Electronics Co., Ltd. 189 Error! Use the Home tab to apply 제목 1 to the text that you want to appear here. (Continued) Parameter Description TOS/DiffServ Consists of eight (8) bits. This option sets the priority to be used in a router or switch on the external networks. If the network does not support this, this option must be set to the default value. T38 Retry Count Sets the retry count in the T38 Redundancy Field. T38 G711 Sets whether to apply the T38 if the exit codec of the MGI is G.711. MGI 16/MGI 64 Parameter Parameter 190 Description Echo Cancel The Echo Cancellation is the function to remove echo generated by reflection of voice on the Packet Delay and PSTN. This option sets whether to use this function. Silence Suppression The Silence Suppression is the function that detects silence during talking and does not transmit those voice packets. This option sets whether to use this function. Input Filter Sets whether to perform the DSP Input Filtering. Input Gain Inputs the call receptivity of the PCM voice that enters the DSP. (-31~31 Db) Voice Volume Sets the volume used when converting voice packets to a PCM voice. (-31~31 Db) Frame Count Selects the audio codec of the MGI card and sets the transmission interval time for VoIP packets. Jitter Option Factor Sets the reference to control the Jitter buffering operation when converting voice packets received from the network to a PCM voice. If this option is set to a value less than 4, emphasis is put on the packet loss processing. If set to a value larger than 4, emphasis is put on the packet delay. Min Jitter Delay (ms) Selects the jitter delay value. Max Jitter Delay (ms) Selects the maximum jitter delay value. Loss Check Time (sec) Sets the loss check interval for RTP packets. FAX ECM When using the T.38 fax, this option sets the additional recovery function for fax transmission errors. FAX Count Sets the maximum allowable number of the Internet FAX channels. © SAMSUNG Electronics Co., Ltd. OfficeServ DM User Guide (Continued) Parameter Description DTMF Type Sets whether to send DTMF signals along a voice channel (INBAND) or using a separate message (OUTBAND). TOS/DiffServ Consists of eight (8) bits. This option sets the priority to be used in a router or switch on the external networks. If the network does not support this, this option must be set to the default value. T38 Retry Count Sets the retry count in the T38 Redundancy Field. T38 G711 Sets whether to apply the T38 if the exit codec of the MGI is G.711. 802.1 Priority Sets the priority field for Ethernet frames composed by the 802.1 standard. The priorities of packets are divided into the packets that must be processed urgently and the packets that have a time, and those packets are processed. (0 to 7) 802.1 VLAN ID Sets the 802.1Q VLAN. The Virtual Local Area Network (VLAN) is the function to group similar devices into workgroups and perform the switching processing according to the LAN operation policy regardless of the location of user’s device. (0 to 4095) 802.1Q Service Sets whether to use the 802.1Q. EC Gain Sets the EC GAIN value. (18~38) NLP Sets the NLP value. (0/1/2) Echo Tail Length (ms) Sets the echo tail length. (8 to 128) Jitter Delay Time Sets the jitter delay time. (0 to 500) Jitter Period Sets the jitter period. (1 to 10) Dual Filter EC Option Sets the dual filter option. SRTP Enable Sets whether to use SRTP protocol on the whole system. © SAMSUNG Electronics Co., Ltd. 191 Error! Use the Home tab to apply 제목 1 to the text that you want to appear here. Viewing and Changing the MGI Parameter Values 1. Select [5. Features] [5.2 VoIP Options] [5.2.9 MGI Parameter] from the Tree Viewer. 2. View the current MGI parameter values. 3. Change the MGI parameter values. 4. Save the changes. System IP Options This menu provides various proprietary Samsung VoIP and IP integration options. The options set in this menu apply system wide. System IP Option Items Item 192 Description Phone TFTP Address Sets the IP address to be connected to when upgrading the program of the IP phone. IPP Password When the IPP Registration is set to ‘System Password’, this option sets the password to be used for check. IPP Registration Disable: New registration is not allowed. System Password: Checks whether it is the same as the ITP REGIST PSWD of the program 841 when registering a new phone. Phone Password: Phone Password (Checks whether it is the same as the USER PSWD of the program 840 when registering a new phone.) Soft Key Version Sets the version of the Soft Menu. Update Type Selects MMC COMMAND, PHONE CONNECT, or AUTO TIME, etc. Update Interval (sec) Sets the interval with which the IP phone program is changed. Update Time When set to AUTO TIME, this option sets the start time to change the IP phone program. Frame Count Sets the number of buffering when transmitting a voice packet to the network. This system performs as many as voice packet buffering set in this item and sends them as one (1) voice packet. © SAMSUNG Electronics Co., Ltd. OfficeServ DM User Guide (Continued) Item Description Jitter Size Sets the reference to control the Jitter buffering operation when converting a voice packet received from the network to a PCM voice. TOS Field Sets the TOS (Type Of Service) field value. ITP Codec Nego When connecting a call path between the IP phone and MGI, this option sets whether to use the MGI codec or the IP phone codec. Parameter Base Sets whether to set the DSP parameter of IP phone to SYSTEM BASE or ITP BASE. ITP TX Limit Option Sets whether to restrict sending from the IP phone. Viewing and Changing the Phone Versions 1. Select [5. Features] [5.2 VoIP Options] [5.2.10 System IP Options] from the Tree Viewer. 2. Select Phone Version tab. 3. View the current phone versions. 4. Change the phone versions. 5. Save the changes. © SAMSUNG Electronics Co., Ltd. 193 Error! Use the Home tab to apply 제목 1 to the text that you want to appear here. ITP DSP Parameter Sets various parameters of the IP phone. ITP DSP Parameter Parameter Description Frame Count Sets the number of buffering when transmitting a voice packet to the network. This system performs as many as voice packet buffering set in this item and sends them as one (1) voice packet. Jitter Size Sets the reference to control the Jitter buffering operation when converting a voice packet received from the network to a PCM voice signal. TOS Field Sets the TOS (Type Of Service) field value. Viewing and Changing the ITP DSP Parameter Values 1. Select [5. Features] [5.2 VoIP Options] [5.2.11 ITP DSP Parameter] from the Tree Viewer. 2. View the current ITP DSP parameter values. 3. Change the ITP DSP parameter values. 4. Save the changes. SIP Stack/Ext/Trunk Options Sets SIP Stack/Ext/Trunk Options. Viewing and Changing the SIP Stack/Ext/Trunk Options Values 1. 194 Select [5. Features] [5.2 VoIP Options] [5.2.12 SIP Stack/Ext/Trunk Options] from the Tree Viewer. 2. View the current SIP Stack/Ext/Trunk Options values. 3. Change the SIP Stack/Ext/Trunk Options values. 4. Save the changes. © SAMSUNG Electronics Co., Ltd. OfficeServ DM User Guide SIP Carrier Options Sets SIP Carrier Options. Viewing and Changing the SIP Carrier Options Values 1. Select [5. Features] [5.2 VoIP Options] [5.2.13 SIP Carrier Options] from the Tree Viewer. 2. View the current SIP Carrier Options values. 3. Change the SIP Carrier Options values. 4. Save the changes. SIP Users Sets SIP Users. Viewing and Changing the SIP Users 1. Select [5. Features] [5.2 VoIP Options] [5.2.14 SIP Users] from the Tree Viewer. 2. View the current SIP Users values. 3. Change the SIP Users values. 4. Save the changes. © SAMSUNG Electronics Co., Ltd. 195 Error! Use the Home tab to apply 제목 1 to the text that you want to appear here. SIP Destination Sets SIP Destination. Viewing and Changing the SIP Destination 1. Select [5. Features] [5.2 VoIP Options] [5.2.15 SIP Destination] from the Tree Viewer. 2. View the current SIP Destination values. 3. Change the SIP Destination values. 4. Save the changes. MGI Options Sets MGI Options. Viewing and Changing the MGI Options 1. 196 Select [5. Features] [5.2 VoIP Options] [5.2.16 MGI Options] from the Tree Viewer. 2. View the current MGI Options values. 3. Change the MGI Options values. 4. Save the changes. © SAMSUNG Electronics Co., Ltd. OfficeServ DM User Guide VoIP Peering Sets VoIP Peering. Viewing and Changing the VoIP Peering 1. Select [5. Features] [5.2 VoIP Options] [5.2.17 VoIP Peering] from the Tree Viewer. 2. View the current VoIP Peering values. 3. Change the VoIP Peering values. 4. Save the changes. VoIP Options Sets VoIP Options. Viewing and Changing the VoIP Options 1. Select [5. Features] [5.2 VoIP Options] [5.2.18 VoIP Options] from the Tree Viewer. 2. View the current VoIP Options values. 3. Change the VoIP Options values. 4. Save the changes. © SAMSUNG Electronics Co., Ltd. 197 Error! Use the Home tab to apply 제목 1 to the text that you want to appear here. CNF24 Options Sets CNF24 Options. Viewing and Changing the VoIP Options 1. 198 Select [5. Features] [5.2 VoIP Options] [5.2.19 CNF24 Options] from the Tree Viewer. 2. View the current CNF24 Options values. 3. Change the CNF24 Options values. 4. Save the changes. © SAMSUNG Electronics Co., Ltd. OfficeServ DM User Guide Wireless LAN WLAN Parameter Sets the parameters related to WLI board interoperation and the parameters related to wireless terminal authentication. Depending on the parameters, when they are changed the WBS24 wireless station they can be operated automatically again to reflect the changes. And, when System ID or System Key, etc. is changed, all the existing registered terminal information is initialized. WLAN Parameter Parameter Description RF Channel Sets the RF channels that the WBS24 uses. Up to six (6) channels can be specified and the default is three (3) (No.1, No.6, No.11). Codec 1,2,3,4 Codec used for VoIP calls between the WBS24 and terminal. Any of G.711u, G.711a, G.726, and G.729 can be specified. Register VoWLAN Sets whether to permit a new registration of a wireless terminal. WIP Policy Sets whether to use the WIP IP address in static mode or not. WLI Slot Sets the location information of the cabinet and slot in which the WLI card is mounted. Version Parameter to view the version information of the WLAN module. WLAN Switch Option to support the WLAN switch. This option is applicable only if the AP TYPE is set to Commercial AP. Max AP Channel Used to restrict the number of channels for the Commercial AP. This option is applicable only if the AP TYPE is set to Commercial AP. Retransmission T1 When using an unreliable transmission protocol such as UDP, if there is no answer after transmitting a call, it is retransmitted. The RE-TRANS.T1 TIME is the first retransmission interval defined in the RFC2543. Retransmission T2 Maximum retransmission interval defined in the RFC2543 Retransmission T4 This is defined and used for several uses in the RFC 2543. For example, in an unreliable transmission protocol, one of them is the time to wait after the USA (User Agent Server) receives an ACK message. © SAMSUNG Electronics Co., Ltd. 199 Error! Use the Home tab to apply 제목 1 to the text that you want to appear here. (Continued) Parameter Description General Linger Timer In an unreliable transmission protocol, the server cannot ensure that the client has received the last answer after it sent it. In this case, until the retransmission that the server requested is received, it must retransmit the answer during this time. For example, it is the time to wait after sending a 200 OK message for an INFO message. Invite Linger Timer In an unreliable transmission protocol, the client cannot ensure whether the server has received the ACK message after the client sent an ACK for an INVITE Final Response. At this time, this is the time to wait after sending an ACK for the Final Response. Cancel General No Response Timer The time to wait before canceling a request related to the SIP Cancel Invite No Response Timer The time to wait before canceling an SIP INVITE Request General Request Timeout Timer The time to wait before the last answer for a request related to the SIP is received Provisional Timer When receiving a Provision Response, the user agent must wait for this time before it is timed out. Viewing and Changing the WLAN Parameter Values 1. 200 Select [5. Features] [5.3 Wireless LAN] [5.3.1 WLAN Parameter] from the Tree Viewer. 2. View the current WLAN parameter values. 3. Change the WLAN parameter values. 4. Save the changes. © SAMSUNG Electronics Co., Ltd. OfficeServ DM User Guide WLAN IP Pool This menu is used when viewing the IP list assigned to WLAN, or when creating a new IP list. This IP address is automatically assigned to WiFi phone during a new registration procedure. If the IP address is already assigned, the assigned terminal number will be shown in the USED field. Also, the MMC is used to set MAC addresses in the terminal in order to use the wireless LAN. (not yet implemented) Viewing and Changing the WLAN IP Pool Values 1. Select [5. Features] [5.3 Wireless LAN] [5.3.3 WLAN IP Pool] from the Tree Viewer. 2. View the current WLAN IP Pool values. 3. Change the WLAN IP Pool values. 4. Save the changes. © SAMSUNG Electronics Co., Ltd. 201 Error! Use the Home tab to apply 제목 1 to the text that you want to appear here. Volume Control System-Wide Volume Controls the volume or call sensitivity of the phones installed in the system. T-Switch Gain Controls the volume or call sensitivity of the phones installed in the system. There are 121 T-Switch gain connection types which control call sensitivity. When connecting between trunks, this is applied only if ‘5.4.3 Trunk Gain’ is set to 0. T-Switch Gain Connection Types Connection Type Description Tx DGP SLT 202 Rx DGP Digital Phone Tx Digital Phone Rx Sensitivity Control SLT Digital Phone Tx Normal Phone Rx Sensitivity Control ATRK Digital Phone Tx Analog Trunk Rx Sensitivity Control DTRK Digital Phone Tx Digital Trunk Rx Sensitivity Control ITP Digital Phone Tx ITP Rx Sensitivity Control VOIP Digital Phone Tx VoIP Trunk Rx Sensitivity Control SVMi Digital Phone Tx SVMi Rx Sensitivity Control WLAN Digital Phone Tx WLAN Rx Sensitivity Control SOFT Digital Phone Tx SOFT Phone Rx Sensitivity Control UMS Digital Phone Tx IP-UMS Rx Sensitivity Control SIP Digital Phone Tx SIP Station Rx Sensitivity Control DGP Normal Phone Tx Digital Phone Rx Sensitivity Control SLT Normal Phone Tx Digital Phone Rx Sensitivity Control ATRK Normal Phone Tx Analog Trunk Rx Sensitivity Control DTRK Normal Phone Tx Digital Trunk Rx Sensitivity Control ITP Normal Phone Tx ITP Rx Sensitivity Control VOIP Normal Phone Tx VoIP Trunk Rx Sensitivity Control SVMi Normal Phone Tx SVMi Rx Sensitivity Control WLAN Normal Phone Tx WLAN Rx Sensitivity Control SOFT Normal Phone Tx SOFT Phone Rx Sensitivity Control © SAMSUNG Electronics Co., Ltd. OfficeServ DM User Guide (Continued) Connection Type Description Tx SLT ATRK DTRK ITP © SAMSUNG Electronics Co., Ltd. Rx UMS Normal Phone Tx IP-UMS Rx Sensitivity Control SIP Normal Phone Tx SIP Station Rx Sensitivity Control DGP Analog Trunk Tx Digital Phone Rx Sensitivity Control SLT Analog Trunk Tx Normal Phone Rx Sensitivity Control ATRK Analog Trunk Tx Analog Trunk Rx Sensitivity Control DTRK Analog Trunk Tx Digital Trunk Rx Sensitivity Control ITP Analog Trunk Tx ITP Rx Sensitivity Control VOIP Analog Trunk Tx VoIP Trunk Rx Sensitivity Control SVMi Analog Trunk Tx SVMi Rx Sensitivity Control WLAN Analog Trunk Tx WLAN Rx Sensitivity Control SOFT Analog Trunk Tx SOFT Phone Rx Sensitivity Control UMS Analog Trunk Tx IP-UMS Rx Sensitivity Control SIP Analog Trunk Tx SIP Station Rx Sensitivity Control DGP Digital Trunk Tx Digital Phone Rx Sensitivity Control SLT Digital Trunk Tx Normal Phone Rx Sensitivity Control ATRK Digital Trunk Tx Analog Trunk Rx Sensitivity Control DTRK Digital Trunk Tx Digital Trunk Rx Sensitivity Control ITP Digital Trunk Tx ITP Rx Sensitivity Control VOIP Digital Trunk Tx VoIP Trunk Rx Sensitivity Control SVMi Digital Trunk Tx SVMi Rx Sensitivity Control WLAN Digital Trunk Tx WLAN Rx Sensitivity Control SOFT Digital Trunk Tx SOFT Phone Rx Sensitivity Control UMS Digital Trunk Tx IP-UMS Rx Sensitivity Control SIP Digital Trunk Tx SIP Station Rx Sensitivity Control DGP ITP Tx Digital Phone Rx Sensitivity Control SLT ITP Tx Normal Phone Rx Sensitivity Control ATRK ITP Tx Analog Trunk Rx Sensitivity Control DTRK ITP Tx Digital Trunk Rx Sensitivity Control ITP ITP Tx ITP Rx Sensitivity Control VOIP ITP Tx VoIP Trunk Rx Sensitivity Control 203 Error! Use the Home tab to apply 제목 1 to the text that you want to appear here. (Continued) Connection Type Description Tx ITP VOIP SVMi WLAN 204 Rx SVMi ITP Tx SVMi Rx Sensitivity Control WLAN ITP Tx WLAN Rx Sensitivity Control SOFT ITP Tx SOFT Phone Rx Sensitivity Control UMS ITP Tx IP-UMS Rx Sensitivity Control SIP ITP Tx SIP Station Rx Sensitivity Control DGP VoIP Trunk Tx Digital Phone Rx Sensitivity Control SLT VoIP Trunk Tx Normal Phone Rx Sensitivity Control ATRK VoIP Trunk Tx Analog Trunk Rx Sensitivity Control DTRK VoIP Trunk Tx Digital Trunk Rx Sensitivity Control ITP VoIP Trunk Tx ITP Rx Sensitivity Control VOIP VoIP Trunk Tx VoIP Trunk Rx Sensitivity Control SVMi VoIP Trunk Tx SVMi Rx Sensitivity Control WLAN VoIP Trunk Tx WLAN Rx Sensitivity Control SOFT VoIP Trunk Tx SOFT Phone Rx Sensitivity Control UMS VoIP Trunk Tx IP-UMS Rx Sensitivity Control SIP VoIP Trunk Tx SIP Station Rx Sensitivity Control DGP SVMi Tx Digital Phone Rx Sensitivity Control SLT SVMi Tx Normal Phone Rx Sensitivity Control ATRK SVMi Tx Analog Trunk Rx Sensitivity Control DTRK SVMi Tx Digital Trunk Rx Sensitivity Control ITP SVMi Tx ITP Rx Sensitivity Control VOIP SVMi Tx VoIP Trunk Rx Sensitivity Control SVMi SVMi Tx SVMi Rx Sensitivity Control WLAN SVMi Tx WLAN Rx Sensitivity Control SOFT SVMi Tx SOFT Phone Rx Sensitivity Control UMS SVMi Tx IP-UMS Rx Sensitivity Control SIP SVMi Tx SIP Station Rx Sensitivity Control DGP WLAN Tx Digital Phone Rx Sensitivity Control SLT WLAN Tx Normal Phone Rx Sensitivity Control ATRK WLAN Tx Analog Trunk Rx Sensitivity Control © SAMSUNG Electronics Co., Ltd. OfficeServ DM User Guide (Continued) Connection Type Description Tx WLAN SOFT UMS © SAMSUNG Electronics Co., Ltd. Rx DTRK WLAN Tx Digital Trunk Rx Sensitivity Control ITP WLAN Tx ITP Rx Sensitivity Control VOIP WLAN Tx VoIP Trunk Rx Sensitivity Control SVMi WLAN Tx SVMi Rx Sensitivity Control WLAN WLAN Tx WLAN Rx Sensitivity Control SOFT WLAN Tx SOFT Phone Rx Sensitivity Control UMS WLAN Tx IP-UMS Rx Sensitivity Control SIP WLAN Tx SIP Station Rx Sensitivity Control DGP SOFT Phone Tx Digital Phone Rx Sensitivity Control SLT SOFT Phone Tx Normal Phone Rx Sensitivity Control ATRK SOFT Phone Tx Analog Trunk Rx Sensitivity Control DTRK SOFT Phone Tx Digital Trunk Rx Sensitivity Control ITP SOFT Phone Tx ITP Rx Sensitivity Control VOIP SOFT Phone Tx VoIP Trunk Rx Sensitivity Control SVMi SOFT Phone Tx SVMi Rx Sensitivity Control WLAN SOFT Phone Tx WLAN Rx Sensitivity Control SOFT SOFT Phone Tx SOFT Phone Rx Sensitivity Control UMS SOFT Phone Tx IP-UMS Rx Sensitivity Control SIP SOFT Phone Tx SIP Station Rx Sensitivity Control DGP UMS Tx Digital Phone Rx Sensitivity Control SLT UMS Tx Normal Phone Rx Sensitivity Control ATRK UMS Tx Analog Trunk Rx Sensitivity Control DTRK UMS Tx Digital Trunk Rx Sensitivity Control ITP UMS Tx ITP Rx Sensitivity Control VOIP UMS Tx VoIP Trunk Rx Sensitivity Control SVMi UMS Tx SVMi Rx Sensitivity Control WLAN UMS Tx WLAN Rx Sensitivity Control SOFT UMS Tx SOFT Phone Rx Sensitivity Control UMS UMS Tx IP-UMS Rx Sensitivity Control SIP UMS Tx SIP Station Rx Sensitivity Control 205 Error! Use the Home tab to apply 제목 1 to the text that you want to appear here. (Continued) Connection Type Description Tx Rx SIP DGP SIP Station Tx Digital Phone Rx Sensitivity Control SLT SIP Station Tx Normal Phone Rx Sensitivity Control ATRK SIP Station Tx Analog Trunk Rx Sensitivity Control DTRK SIP Station Tx Digital Trunk Rx Sensitivity Control ITP SIP Station Tx ITP Rx Sensitivity Control VOIP SIP Station Tx VoIP Trunk Rx Sensitivity Control SVMi SIP Station Tx SVMi Rx Sensitivity Control WLAN SIP Station Tx WLAN Rx Sensitivity Control SOFT SIP Station Tx SOFT Phone Rx Sensitivity Control UMS SIP Station Tx IP-UMS Rx Sensitivity Control SIP SIP Station Tx SIP Station Rx Sensitivity Control Conference Gain Controls the volume for the conference attendants. You can control the volume for each analog trunk conference member. Conference Gain Control Items Item Description Member Number of the analog trunk conference members for which the volume is to be controlled. Trunk Analog trunk No. A number is given to each member sequentially, starting from 0. Conf. Gain Controls the sensitivity of the conference bridge. TSW Gain Controls the sensitivity of the time switch. ITP Volume Changes the handset and speaker gain of the IP phone. TX Level Control Controls the phone sending sensitivity. The maximum sending sensitivity is 9. 206 © SAMSUNG Electronics Co., Ltd. OfficeServ DM User Guide TX Level Control Items Item Description TX Level Controls the phone sending sensitivity. (Max. sensitivity: 9) INDEX: 0 1 2 3 4 5 6 7 Value: 0 1 2 3 4 5 6 7 Misc Level Controls the sensitivity for the internal sound source of the MCP card or the external sound source of the MIS card. (0 to 7, Greater the number lower the level) R2 Tx Level Controls the power sensitivity when sending the R2MFC data. R2 Rx Level Controls the power sensitivity when receiving the R2MFC data. R2 Threshold Controls the voltage level for recognizing an R2MFC signal. Viewing and Changing the System-Wide Volume Values 1. Select [5. Features] [5.4 Volume Control] [5.4.1 SystemWide Volume] from the Tree Viewer. 2. View the System-Wide Volume values. 3. Change the System-Wide Volume values. 4. Save the changes. © SAMSUNG Electronics Co., Ltd. 207 Error! Use the Home tab to apply 제목 1 to the text that you want to appear here. DGP Volume Controls the volume for the digital phones. You can set a different volume for each type of digital phone. If you change the volume for a type of digital phone, it is applied to all phones of the same type. Types of Digital Phones Phone Type US24 Description Unused in Korea. EU24 KR24 DS-24SE phone KP24 DS-24SI phone KP20 Unused in Korea. US07 EU06 EKTS AOM Add On module DOR Door phone 28B DS-4028E, DS-4018E, and DS-4008E phones 12L Large LCD phone 21D DS-5038D, DS-5021D, and DS-5014D phones ITP IP phone Viewing and Changing the DGP Volume Options 1. 208 Select [5. Features] [5.4 Volume Control] [5.4.2 DGP Volume] from the Tree Viewer. 2. Select the Option tab. 3. View the current option settings. 4. Change the option settings. 5. Save the changes. © SAMSUNG Electronics Co., Ltd. OfficeServ DM User Guide Trunk TSW Gain Controls the call sensitivity for each trunk. Viewing and Changing the Trunk Gains 1. Select [5. Features] [5.4 Volume Control] [5.4.3 Trunk TSW Gain] from the Tree Viewer. 2. View the current trunk gains. 3. Change the TX and RX gains. 4. Save the changes. Trunk TMC Gain Controls the reference sensitivity for each trunk. You can control the reference sensitivity within the range of -10~+20 dB. Requirements An analog trunk card must be mounted. Viewing and Changing the Trunk TMC Gains 1. Select [5. Features] [5.4 Volume Control] [5.4.4 Trunk TMC Gain] from the Tree Viewer. 2. View the current trunk TMC gains. 3. Change the TX and RX gains. 4. Save the changes. © SAMSUNG Electronics Co., Ltd. 209 Error! Use the Home tab to apply 제목 1 to the text that you want to appear here. SLI2 Gain Controls the receiving sensitivity for each port of the SLI2 card. You can control the receiving sensitivity by port but the actual application is performed by card. To have the ports operate with new values, you should first set the desired sensitivity for each port and then must perform downloading. Requirements Applicable for the 16SLI2 card only Viewing and Changing the SLI2 Gains 1. Select [5. Features] [5.4 Volume Control] [5.4.5 SLI2 Gain] from the Tree Viewer. 2. View the current receiving sensitivity for each SLI2 card. 3. Changes the receiving sensitivity for each SLI2 card. 4. Save the changes. Trunk Gain Controls the trunk call TX/RX sensitivity. Viewing and Changing the TRK Gain 1. 2. 3. 4. 210 Select [5. Features] [5.4 Volume Control] [5.4.6 Trunk Gain] from the Tree Viewer. View the current trunk call TX/RX sensitivity. Change the Type, TX Gain, and RX Gain for each trunk phone number. Save the changes. © SAMSUNG Electronics Co., Ltd. OfficeServ DM User Guide System Control System Control Changes the reference and system information for synchronizing the clock to use in the system. System Information Sets the message waiting lamp flash frequency for the regular phone. You can change also the dial pulse make/break ratio and the number of pulses per second for each trunk, and the system time variables which are specified and operated by system. System Information Items Item Description Make/Break Ratio (Make, %) Sets the dial pulse make/break ratio (1 to 99). Pulse Per Second (pps) Sets the number of pulses per second. (10 or 20) Message Waiting Lamp Cadence Sets the message waiting lamp flash frequency for the regular phone. Message Waiting Lamp On Time (100 ms) Sets the interval of time for which the message waiting lamp is turned on for the regular phone. (Default: 1 second) Message Waiting Lamp Off Time (100 ms) Sets the interval of time for which the message waiting lamp is turned off for the regular phone. (Default: 1 second) Hook Off Time (10 ms) Sets the minimum period of time to be recognized as a hook-off for the regular phone. Hook On Time (10 ms) Sets the minimum period of time to be recognized as a hook-on for the regular phone. Hook Flash Min Time (10 ms) Sets the minimum hook flash time for the regular phone. (Enter a value in units of 10 ms.) Hook Flash Max Time (10 ms) Sets the maximum hook flash time for the regular phone. (Enter a value in units of 10 ms.) Power Down Time (100 ms) Sets the power down time when the SLI is disconnected. (Enter a value in units of 100 ms.) © SAMSUNG Electronics Co., Ltd. 211 Error! Use the Home tab to apply 제목 1 to the text that you want to appear here. Viewing and Changing the System Information 1. Select [5. Features] [5.5 System Control] [5.5.0 System Control] from the Tree Viewer. 2. Select the System Information tab. 3. View the current system information values. 4. Change the system information values. 5. Save the changes. System I/O Options System I/O Parameter Sets the parameter values related to the LAN and the phone interoperation. If you changed a LAN parameter value, you have to restart the system. System I/O Parameter Parameter 212 Description Easyset Password Sets the password used for confirmation when connecting to an Easyset server. VDC SMDR Status Specifies whether to send the SMDR output information to the CTI link. VDC UCD Status Specifies whether to send the UCD output information to the CTI link. Easyset Alive Time (sec) Sets the time interval at which the link operation is checked or not checked during Easyset interoperation. CTI Alive Time (10 sec) Sets the period of time for checking the CTI link. If an ALIVE message is not received from the CLI in this period of time, the CLI link is processed as disconnected. MGI Alive Time (sec) Sets the time interval at which the MGI link is checked. IPC Data Card Specifies whether to perform the IPC operation with the Data card when it is installed in the system. Data Server IP Address Sets the IP address of the data server of the system. Feature Server IP Address Sets the IP address of the IP UMS server. © SAMSUNG Electronics Co., Ltd. OfficeServ DM User Guide (Continued) Parameter Description NMS Trap IP Address Sets the IP address of the NMS trap. Link IP Address Sets the IP address of the link IP. News IP Address Sets the IP address of the news server. E-Mail IP Address Sets the IP address of the email server. MMS IP Address Sets the IP address of the MMS server. MMS Web IP Address Sets the IP address of the MMS web server. IMPS IP Address Sets the IP address of the IMPS server. QOS IP Address Sets the IP address of the QOS check server. IVR Server IP Address Sets the IP address of the IP IVR server. Requirements If you changed a parameter value related to the system IP address, gateway, net mask, or DHCP mode, you have to reset the MCP board to apply the changes. Viewing and Changing the System I/O Parameter Values 1. Select [5. Features] [5.6 System I/O Options] [5.6.1 System I/O Parameter] from the Tree Viewer. 2. View the current system I/O parameter values. 3. Change the system I/O parameter values. 4. Save the changes. © SAMSUNG Electronics Co., Ltd. 213 Error! Use the Home tab to apply 제목 1 to the text that you want to appear here. LAN Printer Sets the various parameter values for using a LAN printer. You can print the following eight (8) kinds of information using a LAN printer. 01. SMDR 02. UCD REPORT 03. TRAFFIC REPORT 04. ALARM REPORT 05. 119 ANI/ALI 06. PERIODIC UCD 07. HOTEL REPORT 08. PMS LAN Printer Parameters Item 214 Setting Current Status Displays the current status of the LAN printer. Buffered Data Printout Specifies whether to print the data remaining in the buffer. Update to LAN Card Specifies whether to apply the changes. Printer IP Address Sets the IP address of the LAN printer. Printer TCP Port Sets the printer TCP port. LAN TCP Port Sets the LAN TCP port. Printer Destination Specifies the destination. Retry Count Sets the retry count (0 to 10). Retry Interval Sets the retry waiting time (5 to 250 sec). PJL Enable Enables or disables the PJL. Printer Language Sets the printer language. Paper Size Sets the paper size. Font Type Sets the font type. Duplex Enable Enables or disables duplex mode. Orientation Sets the orientation. Printer Tray Sets the printer tray. Resolution Sets the resolution. Line per Page Sets the number of lines per page. © SAMSUNG Electronics Co., Ltd. OfficeServ DM User Guide Viewing and Changing the LAN Printer Parameter Values 1. Select [5. Features] [5.6 System I/O Options] [5.6.2 LAN Printer] from the Tree Viewer. 2. View the current LAN printer parameter values. 3. Change the LAN printer parameter values. 4. Save the changes. SMDR Options Sets the printing options for the System Message Detail Recording (SMDR). SMDR Printing Options Printing Option Description Page Header Specifies whether to print a header at the top of each page. Line Per Page Sets the number of lines to print per page. (Maximum 99 lines) Incoming Call Specifies whether to print incoming calls. Outgoing Call Specifies whether to print outgoing calls. Authorization Code Specifies whether to print changed authorization codes. SMDR Start Time Specifies whether to print calls which have finished before the SMDR was started. Group In/Out Specifies whether to print group in/out information. DND Call Specifies whether to print DND calls. Wake Up Call Specifies whether to print station alarms. Caller ID Data Specifies whether to print caller ID SMDR. (Up to 16 characters long) Abandon Call Specifies whether to print the information for the calls abandoned by the caller, before the answer is received. Directory Name Sets the company name to print with the header. Number of Dial Mask Sets number of dialed digits not to be printed. Incoming Answer Specifies whether to print the times that incoming calls are answered. Used to know the answering times. Intercom Call Specifies whether to print calls between stations. © SAMSUNG Electronics Co., Ltd. 215 Error! Use the Home tab to apply 제목 1 to the text that you want to appear here. (Continued) Printing Option Description Key MMC In/Out Specifies whether the key programming is started or finished. ITP Regist Specifies whether to print information when an IP phone is registered. Set Relocate Specifies whether to print the information when a phone is relocated. Viewing and Changing the SMDR Printing Options 1. Select [5. Features] [5.6 System I/O Options] [5.6.3 SMDR Options] from the Tree Viewer. 2. View the current SMDR option values. 3. Change the SMDR option values. 4. Save the changes. Phone I/O Parameter This menu provides IP phone’s advance function. Phone I/O Parameter Items Items 216 Description XML SERVER URL Specifies the server url for the XML. LDAP SERVER URL Specifies the server url for the LDAP. LDAP BASE DN Specifies the LDAP Base Domain name. LDAP AUTH ID Specifies the ID for the LDAP authentication. LDAP AUTH PW Specifies the Password for the LDAP authentication. SNMP TRAP SERVER Specifies the server url for the SNMP Trap. SNMP S/G SERVER Specifies the set/get server url for the SNMP. SNMP COMMUNITY Specifies community name for the SNMP. © SAMSUNG Electronics Co., Ltd. OfficeServ DM User Guide Viewing and Changing the Phone I/O Parameter 1. Select [5. Features] [5.6 System I/O Options] [5.6.4 Phone I/O Parameter] from the Tree Viewer. 2. View the current Phone I/O Parameter values. 3. Change the Phone I/O Parameter values. 4. Save the changes. System Tone/Ring Tone Cadence Changes the tone cadence of the system. There are 14 different tones. You can set continuous and interrupt tones for each type. Except for ‘message wait dial tone’ and ‘trunk dial tone’, all tone types are of ‘interrupt tone’. The tone sound heard continuously without interrupting like ‘toot...’ is called ‘continuous tone’. The tone sound heard interrupted like ‘toot, toot, toot... ’ is called ‘interrupt tone’. (unit: ms) The ‘trunk busy tone’, ‘trunk ringback tone’ and ‘trunk dial tone’ are not provided by the system. They are the same tones provided by the local or long distance service providers. Viewing and Changing the Tone cadence of the System 1. Select [5. Features] [5.7 System Tone/Ring] [5.7.1 Tone Cadence] from the Tree Viewer. 2. View the current tone cadences of the system. 3. View the tone cadences of the system. 4. Save the changes. © SAMSUNG Electronics Co., Ltd. 217 Error! Use the Home tab to apply 제목 1 to the text that you want to appear here. Tone Source View the external tone source (e.g., a music source) instead of the normal system tone (TONE) for certain calls. Viewing and Changing the Tone Source 1. Select [5. Features] [5.7 System Tone/Ring] [5.7.2 Tone Source] from the Tree Viewer. 2. View the current tone source. 3. View tone source. 4. Save the changes. Ring Cadence View the ring cadences of the regular phone Viewing and Changing the Ring Cadences of the regular Phone 1. 218 Select [5. Features] [5.7 System Tone/Ring] [5.7.3 Ring Cadence] from the Tree Viewer. 2. View the current ring cadences of the regular phone. 3. View the ring cadences of the regular phone. 4. Save the changes. © SAMSUNG Electronics Co., Ltd. OfficeServ DM User Guide Diagnostics Alarm Ring Sets the type of alarm used by the system alarm ring. If the alarm ring is enabled, the system searches all digital phones and rings the alarm ring of those phones in which the system button is assigned. If the alarm ring is disabled, it is still processed that an alarm generated is stored in the alarm buffer or output to the alarm I/O port of those phones. Definitions of Alarm Keys and Their Alarm Names Alarm Name Definition MJA01 Power On Restart The MCP is restarted as the power is supplied to it. MJA02 Button Restart The MCP is restarted as the button is pressed. MJA03 MMC Reset The RAM area is initialized by the PCMMC or KMMC. MJA04 MCP Reset The MCP has restarted due to an exception. ************************************ Alarm Data: Reason ************************************ - BUS ERR: Bus error - ADDR.ERR: Address error - ILLEGAL: Wrong opcode - ZERO DIVID: Divided by zero - PRIVILEGE: Privilege violation - ENDL LOOP: Endless loop MJA05 LCP Reset The LCP has restarted. Alarm Data = Cabinet (1, 2) MJA06 PCM Switching Switching control error Alarm Data = MCP BASE, ESM: 1, ESM: 2 or ESM: 3 MJA08 FAN Out of Order A power fan sensor error has occurred. MJA09 FAN Recovery The power fan sensor error has recovered. MJA10 CPU Overload The current CPU load has reached more than 80%. MJA11 CPU Overload Rec The current CPU load has dropped below 80%. MJA12 FLASH FORMAT Err Formatting is performed in the NAND Flash as an error has occurred during its operation. MJA13 Invalid MMC Halt A halt occurs as the system is activated by an unauthorized MMC. MJA14 DUAL PWR Error A dual power error has occurred. © SAMSUNG Electronics Co., Ltd. 219 Error! Use the Home tab to apply 제목 1 to the text that you want to appear here. (Continued) Alarm Name MJA15 DUAL Recovery 220 Definition PWR The dual power error has recovered. MJA16 D-PWR FAN Error A dual power fan error has occurred. MJA17 D-PWR FAN Recov The dual power fan error has recovered. MJA18 PoE PWR Error A PoE power error has occurred. MJA19 PoE PWR Recovery The PoE power error has recovered. MJA20 PoE FAN Error A PoE power fan error has occurred. MJA21 PoE FAN Recovery The PoE power fan error has recovered. MJA22 PoE Battry Error A PoE power battery error has occurred. MJA23 PoE Battry Recov The PoE power battery error has recovered. MJA24 MAIN PWR Error A main power battery error has occurred. MJA25 MAIN PWR Recovery The main power battery error has recovered. MJA26 GW Connected The inter SCM-GW link is connected. MJA27 GW Disconnected The inter SCM-GW link is disconnected. MJB01 HDLC Comm Error An error has occurred in communication with the LCP. MJB02 Memory Alarm An MCP RAM area diagnostics error has occurred. MJB06 IPC MSGQ Over IPC TX queue full error has occurred in the MCP2. Alarm data = IPC Queue type (MCP-LAN, MCP-SCP, MCP-LCP1, MCP-LCP2) MJB07 IPC MSGQ Under IPC TX queue full recovery has occurred in the MCP2. Alarm data = IPC Queue type (MCP-LAN, MCP-SCP, MCP-LCP1, MCP-LCP2) MJC01 DTMF Fault An error has occurred in the DTMF resources of the system. Alarm Data = Location of the DSP to receive the DTMF. MJC02 Tone Fault An error has occurred in the tone resources of the system. Alarm Data = Location of the DSP to receive the tone. MJC03 CID DSP Fault CID DSP Fault MJC06 AC Pwr Loss AC Power Loss MJC07 AC Pwr Recovery AC Power Recovery MJC08 Low Battery Low Battery © SAMSUNG Electronics Co., Ltd. OfficeServ DM User Guide (Continued) Alarm Name Definition MJC09 Low Battery Rec Low Battery Rec MJC16 WLI Restart The WLI board is restarted. Alarm Data = Cabinet, Slot (Cx-Syy) MJC17 WLI Block The system has detected an error of the WLI board and prohibited its use. Alarm Data = Cabinet, Slot (Cx-Syy) MJD01 Sync Failure The clock of the TEPRI board has been out of sync. MJD02 Sync Recovery The clock out of sync error of the TEPRI board is recovered. MJD03 Red Alarm The PCM carrier of the TEPRI board is not detected for 250 ms. Alarm Data = Cabinet, Slot (Cx-Syy) MJD04 Red Alarm Rec The PCM carrier of the TEPRI board is detected. Alarm Data = Cabinet, Slot (Cx-Syy) MJD05 Yellow Alarm A frame transmission error has occurred in the TEPRI board. Alarm Data = Cabinet, Slot (Cx-Syy) MJD06 Yellow Alarm Rec The frame transmission error that occurred in the TEPRI board is cleared. MJD07 Blue Alarm A TEPRI board facility error has occurred. Alarm Data = Cabinet, Slot (Cx-Syy) MJD08 Blue Alarm Rec The TEPRI board facility error is cleared. Alarm Data = Cabinet, Slot (Cx-Syy) MJD09 Bit Error Alarm The bit error rate of the E1, PRI or BRI board is excessive. Alarm Data = Cabinet, Slot (Cx-Syy) MJD11 SPID Init Error The BRI board has received an error message from the network. Alarm Data = Cabinet, Slot, Channel (Cx-Syy-czz) MJD12 SPID Init Rec The BRI board has received a message from the network that the error was cleared. Alarm Data = Cabinet, Slot, Channel (Cx-Syy-czz) MJD13 LPBK Error A loopback test by an internal command has failed. Alarm Data = Cabinet, Slot, Channel (Cx-Syy-czz) MJD14 LPBK Recovery A loopback test by an internal command has succeeded. Alarm Data = Cabinet, Slot, Channel (Cx-Syy-czz) © SAMSUNG Electronics Co., Ltd. 221 Error! Use the Home tab to apply 제목 1 to the text that you want to appear here. (Continued) Alarm Name 222 Definition MJD15 BRI DL Unavail The data link of the BRI is invalid. Alarm Data = Cabinet, Slot, Channel (Cx-Syy-czz) MJD16 BRI DL Recovery The data link of the BRI is now valid. Alarm Data = Cabinet, Slot, Channel (Cx-Syy-czz) MJD18 T1 Restart The E1 board has restarted. Alarm Data = Cabinet, Slot (Cx-Syy) MJD19 PRI Restart The PRI board has restarted. Alarm Data = Cabinet, Slot (Cx-Syy) MJD20 BRI Restart The BRI board has restarted. Alarm Data = Cabinet, Slot (Cx-Syy) MJD21 PCM Loss A PCM code loss has occurred in the E1, PRI or BRI board. Alarm Data = Cabinet, Slot (Cx-Syy) MJD22 PCM Recovery The PCM code loss that occurred in the E1, PRI or BRI board is recovered. Alarm Data = Cabinet, Slot (Cx-Syy) MJD23 L2 Disconnect The PRI L2 is disconnected. MJD24 L2 Connect The PRI L2 is connected. MJE01 MGI Restart The MGI board is restarted. Alarm Data = Cabinet, Slot (Cx-Syy) MJE03 MGI IP Duplicate The IP address of the MGI board has duplicated. Alarm Data = Cabinet, Slot (Cx-Syy) MJE04 MGI NTWK Error The MGI board has stopped due to a system ping test error. Alarm Data = Cabinet, Slot (Cx-Syy) MJE05 MGI NTWK Rec The stopping of the MGI board has cleared due to a system ping test error. Alarm Data = Cabinet, Slot (Cx-Syy) MJE06 MGI DSP Error The DSP operation error has occurred in the MGI board. Alarm Data = Cabinet, Slot, Port (Cx-Syy-Pzz) MJE07 MGI DSP Run The DSP operation error that occurred in the MGI board is cleared. Alarm Data = Cabinet, Slot, Port (Cx-Syy-Pzz) MJE08 WBS Disconnect The WBS has been disconnected from the system. Alarm Data = CWBS: xx or BWBS: xx MJE09 WBS Connect The WBS has been connected to the system. Alarm Data = CWBS: xx or BWBS: xx © SAMSUNG Electronics Co., Ltd. OfficeServ DM User Guide (Continued) Alarm Name Definition MJE10 SVMi Restart The SVMi-20E board has restarted. MJE11 SVMi Halt The SVMi card has been halted. MJE12 SVMi Down The SVMi card has gone down. MJE13 MGI Self Restart The MGI board has restarted automatically. MNF01 Card Out No card is inserted into a specific slot. Alarm Data = Cabinet, Slot (Cx-Syy) MNF02 Card In A card is inserted into a specific slot. Alarm Data = Cabinet, Slot (Cx-Syy) MNF04 Trunk Fault A faulty trunk which cannot provide service is detected by the internal codec test. Alarm Data = Cabinet, Slot, Port (Cx-Syy-Pzz) MNF05 Trunk Recovery A trunk which can provide service is detected by the internal codec test. Alarm Data = Cabinet, Slot, Port (Cx-Syy-Pzz) MNF06 Trunk Disconnect A faulty trunk which cannot provide service has been detected by the external occupation test. Alarm Data = Cabinet, Slot, Port (Cx-Syy-Pzz) MNF07 Trunk Connect A trunk which can provide service is detected by the external occupation test. Alarm Data = Cabinet, Slot, Port (Cx-Syy-Pzz) MNF10 T1 Out Of Srv The T1 line is out of service. Alarm Data = Cabinet, Slot (Cx-Syy) MNF11 T1 In Service The T1 line is in service. Alarm Data = Cabinet, Slot (Cx-Syy) MNF14 TODC Error An MCP clock chip error has occurred. MNF18 SLI Fault A faulty SLI board which cannot provide service is detected by the internal codec test. Alarm Data = Cabinet, Slot, Port (Cx-Syy-Pzz) MNF19 SLI Recovery An SLI board which can provide service is detected by the internal codec test. Alarm Data = Cabinet, Slot, Port (Cx-Syy-Pzz) MNF28 LAN Printer Err An LAN printer error has occurred in the MCP board. Alarm Data = Data Type (SMDR) MNF29 LAN Printer Rec The LAN printer error that occurred in the MCP board is cleared. Alarm Data = Data Type (SMDR) © SAMSUNG Electronics Co., Ltd. 223 Error! Use the Home tab to apply 제목 1 to the text that you want to appear here. (Continued) Alarm Name Definition MNF30 SPNet Link Error An SPNet link connection error has occurred. Alarm Data = Link ID Index of ‘3.3.1 System Link’ MNF31 SPNet Send Error An SPNet message sending error has occurred. Alarm Data = xx:yyyy:zz xx: SPNet TRK index, yyyy: SPNet TRK No., zz: MMC 820 Link ID index MNF32 SVMi Ready The SVMi Card Ready has started. MNF33 SVMi Request The SVMi Card Request has started. MNF34 SVMi Ready End The SVMi Card Ready has ended. MNF35 SVMi Request End The SVMi Card Request has ended. MNF36 SVMi HDD Alarm An SVMi Card HDD alarm has occurred. MNF37 Manual Reset Req Card Manual Rest Request MNF38 Card Active Card Active notification Viewing and Changing the Alarm Key Settings 1. 224 Select [5. Features] [5.8 Diagnostics] [5.8.1 Alarm Ring] from the Tree Viewer. 2. View the current alarm key settings. 3. View the alarm key settings. 4. Save the changes. © SAMSUNG Electronics Co., Ltd. OfficeServ DM User Guide Maintenance Busy This function can make a station, trunk, and common resource busy. When made busy, a station operates as if it is in Halt state and Made Busy is displayed at the caller station. Moreover, this function can engage not only a station or trunk but also an external broadcasting port, AA port, and the DSPs that receive STMFR, R2MFCM, and CID. Those DSPs are set to Busy or Idle per chip. Status Items Item Description MFR The DSP that receives DTMF CID The DSP that receives CID R2 The DSP that receives R2MFC Conf.Group The DSP for conference Viewing and Changing the Maintenance Busy Settings 1. Select [5. Features] [5.8 Diagnostics] [5.8.2 Maintenance Busy] from the Tree Viewer. 2. Select a status item (MFR/CID/R2/Conf.Group) tab. 3. View the current Maintenance Busy settings. 4. Change the Maintenance Busy settings. 5. Save the changes. Diagnostic Time Sets the system diagnostics time for each day of the week. Viewing and Changing the Diagnostic Time 1. 2. Select [5. Features] [5.8 Diagnostics] [5.8.3 Diagnostic Time] from the Tree Viewer. View the current Diagnostic Time values. © SAMSUNG Electronics Co., Ltd. 225 Error! Use the Home tab to apply 제목 1 to the text that you want to appear here. 226 © SAMSUNG Electronics Co., Ltd. OfficeServ DM User Guide 3. Change the Diagnostic Time values. 4. Save the changes. Voice Mail SVMi Create Subscriber Sets assigning download option of station/group number and mailbox. Download option has 4 values, NONE, EXT, MBX, BOTH. BOTH value means that both extension number and mailbox are downloaded. Viewing and Changing the SVMi Create Subscriber Settings 1. Select [5. Features] [5.9 Voice Mail] [5.9.1 SVMi Create Subscriber] from the Tree Viewer. 2. View the current SVMi Create Subscriber settings. 3. Change the SVMi Create Subscriber settings. 4. Save the changes. SVMi Auto Record When a station is busy, the new call can be recorded, automatically, to the voice mailbox card. This function sets the information used for this operation. Viewing and Changing the Auto Voice Mailbox Recording Options 1. Select [5. Features] [5.9 Voice Mail] [5.9.2 SVMi Auto Record] from the Tree Viewer. 2. View the current auto voice mailbox recording options. 3. Change the auto voice mailbox recording options. 4. Save the changes. © SAMSUNG Electronics Co., Ltd. 227 Error! Use the Home tab to apply 제목 1 to the text that you want to appear here. VMAA Options Sets the variables related to the voice mailbox (VM) and auto attendant (AA). Voice Mailbox (VM) and Auto Attendant (AA) Options Item DN1 Extension No The first dial number of the station DN1 Trunk No The first dial number of the trunk DN2 Extension No The second dial number of the station DN2 Trunk No The first dial number of the trunk CID Number Whether to provide the caller ID Separator Separator symbol Disconnect Signal Disconnection signal Call Type Direct Call Direct calls All Forward Call Calls which are always forwarded Busy Forward Call Calls which are forwarded if busy No Answer Forward Call Calls which are forwarded if there is no answer Recall Calls recalled Direct Trunk Call Direct trunk calls Overflow Call Overflow calls DID Call Internal direct calls Message Call Message calls Dial Tone Dial tone Busy Tone Busy tone Ringback Tone Ringback tone DND Tone DND tone Handset Answer Tone Handset answer tone Speaker Answer Tone Speaker answer tone Progress Tone 228 Description © SAMSUNG Electronics Co., Ltd. OfficeServ DM User Guide Viewing and Changing the Voice Mailbox (VM) and Auto Attendant (AA) Options 1. 2. Select [5. Features] [5.9 Voice Mail] [5.9.3 VMAA Options] from the Tree Viewer. View the current Voice Mailbox (VM) and Auto Attendant (AA) options. 3. Change the Voice Mailbox (VM) and Auto Attendant (AA) options. 4. Save the changes. Call Costing Trunk Rate Specifies whether to use the charge rate table for each trunk. Viewing and Changing Whether to Use the Charge Rate Table for Trunks 1. 2. 3. 4. Select [5. Features] [5.12 Call Costing] [5.12.1 Trunk Rate] from the Tree Viewer. View the current settings for whether to use the charge rate table for trunks. View the settings for whether to use the charge rate table for trunks. Save the changes. © SAMSUNG Electronics Co., Ltd. 229 Error! Use the Home tab to apply 제목 1 to the text that you want to appear here. Cost Rate The cost rate is used to set the charge for each charging item. Charging Item Charging Item Description First Duration (sec) The period of time for which the charge is billed when a call is first made, is applied. First Cost (cent) The charge applied for the First Duration. Second Duration (sec) The period of time after the First Duration for which a charge is added for every specific time. Second Cost (cent) The charge added for every Second Duration. Sur Charge (cent) The additional charge added to the call charge. Viewing and Changing the Cost Rate 1. 230 Select [5. Features] [5.12 Call Costing] [5.12.2 Cost Rate] from the Tree Viewer. 2. View the current cost rate. 3. Change the cost rate. 4. Save the changes. © SAMSUNG Electronics Co., Ltd. OfficeServ DM User Guide Cost Dial Plan The Cost Dial Plan function analyzes the major dialed numbers and determines a dial plan to be applied. Digits There are 500 entries up to 10 digits can be assigned to each entry. These entries are used to find the dial plan that matches the number which a station dials to make a call. There are eight (8) different dial plans (1 to 8). They are used in the trunk call charge rate of program 433 and the exact charge is determined according to the charge calculation table of program 749. As the system analyzes numbers with a logical order, whenever a new entry is added all the entries are sorted by the number system. For example, when this program has the entries 1, 13, 1305, and 140, if 13056 is dialed then entry 1305 is selected because it is the closest to 13506. When this program has the entries 1, 13, 13056, and 140, if 1305 is dialed no operation occurs until the user dials another digit. Viewing and Changing the Cost Dial Plan 1. Select [5. Features] [5.12 Call Costing] [5.12.3 Cost Dial Plan] from the Tree Viewer. 2. View the current cost dial plan. 3. Change the cost dial plan. 4. Save the changes. © SAMSUNG Electronics Co., Ltd. 231 Error! Use the Home tab to apply 제목 1 to the text that you want to appear here. System Features Tenant Options Sets the tenant options. Tenant Option Sets the tenant options, such as night ringing, DISA alarm ringing, attendant group, and barge-in/override type, etc. Tenant Option Items Item 232 Description Universal Answer Device In special cases, such as Night mode, the user can forward a call dialed to a subscriber other than himself using the ‘UA’ code. This option specifies the subscriber whose dialed call the user can forward to himself. Below are the possible calling targets: - NONE-NO UA: When there is no phone number - STATION: When the target is a station number - STN GROUP: When the target is a station group number - RING PAGE: When the target is an external speaker number - COMMON BELL: When the target is a common bell number Ring Back Message Group - Barge-in/override Type Sets the method to barge-in/override a call. Below are the types of barge-in/override. - No barge In: No barge-in/override is allowed. - With Tone: A barge-in/override is started by sending a warning tone to the subscriber. - Without Tone: A barge-in/override is started without sending a warning tone to the subscriber. MMS SIP Trunk Group Set the SIP trunk group number for the MMS service. Operator Group Sets a station group which operates as the attendant. DISA Alarm Ringing Selects the subscriber to whom the DISA alarm is alerted when it is received. You should have the DISA alarm attached to a station and specify a station for each ring mode. © SAMSUNG Electronics Co., Ltd. OfficeServ DM User Guide Wake-up Announcement Specifies whether to play the announcement recorded in the auto-attendant (AA) or VMS card for alarm answering. Wake-up Announcement Items Item Description Source Set the auto-attendant (AA) or voice mailbox (VMS) group numbers to be connected for the coloring service. Group Busy Sets the background sound source to be played when all auto-attendants (AA) or voice mailbox (VMS) groups to be connected for alarm answering, are already being used. If set to None, the Dial tone is played. If set to Tone, the Hold tone is played. Prompt # Sets the number of the announcement to play for alarm answering. Automatic Traffic Report Sets the statistics data printing options (auto/manual). In Auto Print mode, after printing the data, all existing data is deleted and new data begins to be saved. Automatic Traffic Report Options Option Description Auto Print Off Automatic printing is disabled. Daily Time Prints the data at the same time every day. You have to set the hour and minute for printing. Every Time Prints the data every hour. You have to set the minute for printing. Three Time Shift Sets three printing times at which the data is printed. You have to set at least one printing time and set the start/end hour and minute. Feature Password You have to enter a password when specifying the administrator program node and there are also some functions that require a specific password before use. You can change these passwords with this function. They have four (4) digits and consist of the numbers 0 to 9. © SAMSUNG Electronics Co., Ltd. 233 Error! Use the Home tab to apply 제목 1 to the text that you want to appear here. Feature Password Items Item Description MMC The password to enter when specifying the administrator program mode. Ring Plan The password to enter when changing the mode. DISA Alarm The password to enter when clearing a DISA alarm. HMT Delete The password to enter when deleting the Hotel charge. WLI Regist The password to enter when registering a wireless phone. Alarm Clear The password to enter when clearing an alarm Viewing and Changing the Tenant Options 1. Select [5. Features] [5.13 System Features] [ 5.13.1 Tenant Options] from the Tree Viewer. 2. View the current tenant options setting. 3. Change the tenant options setting. 4. Save the changes. Customer Access KMMC Sets the System Administrator (customer) to have access to certain MMCs. This MMC is for both tenants. Viewing and Changing the Customer Access KMMC 1. 234 Select [5.13 System Features] [5.13.2 Customer Access KMMC] from the Tree Viewer. 2. View the Customer Access KMMC. 3. Change the Customer Access KMMC. 4. Save the changes. © SAMSUNG Electronics Co., Ltd. OfficeServ DM User Guide Programmed Message Sets the programmed messages. Viewing and Changing the Programmed Messages 1. Select [5. Features] [5.13 System Features] [5.13.3 Programmed Message] from the Tree Viewer. 2. View the programmed messages. 3. Change the programmed messages. 4. Save the changes. Large LCD Idle Display Specifies the announcement data to be displayed on the large LCD phone. Viewing and Changing the Announcement Data to Display on the Large LCD Phone 1. Select [5. Features] [5.13 System Features] [5.13.4 Large LCD Idle Display] from the Tree Viewer. 2. View the announcement data display on the large LCD phone. 3. Change the announcement data display on the large LCD phone. 4. Save the changes. © SAMSUNG Electronics Co., Ltd. 235 Error! Use the Home tab to apply 제목 1 to the text that you want to appear here. Customer Access WMMC/IT/DM Sets the menu for user level 2 and 3. Viewing the Customer Access WMMC/IT/DM 1. Select [5. Features] [5.13 System Features] [5.13.5 Customer Access WMMC/IT/DM] from the Tree Viewer. 2. View the Customer Access WMMC/IT/DM. 3. Change the Customer Access WMMC/IT/DM. 4. Save the changes. Menu Use Status Displays the menu use status. Viewing the Menu Use Status 1. 2. 236 Select [5. Features] [5.13 System Features] [5.13.6 Menu Use Status] from the Tree Viewer. View the menu use status. © SAMSUNG Electronics Co., Ltd. OfficeServ DM User Guide Timer/Option Features Transfer/Recall/Pickup Options Specifies whether to use the Transfer/Recall/Pickup function or not (1: ON, 0: OFF). You can also set time variables related to the Transfer/Recall/Pickup functions. Items to be Specified Function Description Transfer Ring Back MOH Specifies whether to use the function that sends the hold tone instead of the dial tone when a call is transferred. Cancel Key After the user has switched to the second caller on a phone without an LCD, whenever the hook switch is pressed the next caller is connected and others enter the hold state. This is called the alternate call state. This option is not used for an alternate call state. When this option is set to On, if the hook switch is pressed the new call, i.e., the second call, is released and the user returns to the first caller. VMS Transfer Key Specifies whether the VT key operation is transferred or not to the VM. Recall Pickup Specifies whether other stations can answer the recalled calls, in place of the ringing station. Any station can answer the recalled calls received on the attendant, regardless of this option’s setting. Pickup by DSS Key When set to On, if a call is received at a station to which the DS button is set, that DS button blinks. By pressing this button, a user can answer the call immediately in place of the original recipient. Pickup Hold Station Specifies which other station can pick up held calls. E & M Transfer Recall E & M Transfer Recall Transfer Recall Time (sec) Specifies the time after which a transferred call is recalled, if it is not answered. (0 to 250 sec) Camp On Recall Time (sec) Specifies the time after which an auto reserved call is recalled, if it is not answered. (0 to 250 sec) E-Hold Recall Time (sec) Sets the recall time for the calls that the station holds. (0 to 250 sec) © SAMSUNG Electronics Co., Ltd. 237 Error! Use the Home tab to apply 제목 1 to the text that you want to appear here. (Continued) Function Description System Hold Recall Time (sec) Sets the recall time for common hold calls. (0 to 250 sec) Park Recall Time (sec) Sets the recall time for park calls. (0 to 250 sec) ATT.Recall Time (sec) If a recalled call is not answered and this ATT recall time is set to 0 sec, the call is not recalled again and is disconnected. (0 to 250 sec) Recall Wait Time (sec) Sets the time that a call should wait before it is recalled to the attendant when the recalled station is busy. When set to 0 sec, it is not recalled to the attendant and is disconnected. (0 to 250 sec) Recall Disconnect Time (min) Sets the time after which a trunk call recalled to the attendant is disconnected if it is not answered. (1~250 min) Viewing and Changing the Transfer/Recall/Pickup Settings and their Timer Settings 1. 2. 3. 4. 238 Select [5. Features] [5.14 Timer/Option Features] [5.14.1 Transfer/Recall/Pickup Options] from the Tree Viewer. View the current Transfer/Recall/Pickup settings and their timer settings. Change the current Transfer/Recall/Pickup settings and their timer settings. Save the changes. © SAMSUNG Electronics Co., Ltd. OfficeServ DM User Guide Confirm/Disconnect/NoAction Timer Changes the system time variables related to the Confirm/Disconnect/No Action timers which are specified and operated per system. Confirm/Disconnect/No Action Time Variables Time Variable Description Alert Tone Time (100 ms) Specifies the period of time for which the alert tone is maintained. (100 to 2500 ms) Confirm Tone Time (100 ms) Sets the period of time for the confirm tone to be used. Enter a value in units of 100 ms. (100 to 250 ms) Page Tone Time (100 ms) Sets the period of time for which a confirm tone rings when hearing an announcement. Enter a value in units of 100 ms. (100 to 2500 ms) CRD Tone Interval (sec) Sets the interval of the tone which is heard when a call recording is performed using the SVMi-20E card. (0 to 250 sec) CO-CO Disconnect All Sets the option used to prevent binding of trunks by operating timers for all trunks. CO-CO Disconnect Time (min) Specifies the maximum allowable call time between trunks. (1 to 250 min) Trunk Auto MOH Disconnect Time (min) When the TRK AUTOMOH option is set to On, an incoming trunk call can be answered automatically and an MOH can be connected to it. In this case, the caller hears the MOH and the called station continues to ring. If the station does not answer for the TrunkAuto MOH Disconnect Time, the call is disconnected. Page Disconnect Time (sec) Sets the maximum period of time for which an external announcement can be played. (1 to 250 sec) First Digit Time (sec) Sets the period of time during which the first digit should be pressed when making a call. (1 to 250 sec) Inter Digit Time (sec) Sets the maximum period of time between two digits. (1 to 250 sec) Feature Out Time (min) Sets the maximum Future No Action Time. KMMC Lock Out Time (sec) Sets the period of time that the MMC become disabled if there is no operation. (10 to 250 sec) © SAMSUNG Electronics Co., Ltd. 239 Error! Use the Home tab to apply 제목 1 to the text that you want to appear here. (Continued) Time Variable Description WebMMC Lock Time (min) Sets the period of time that the WebMMC become disconnected if there is no operation. (1 to 60 min) Call Back No Answer Time (sec) Sets the period of time after which a reserved ring is canceled if there is no answer. (1 to 250 sec) OHVA Answer Time (sec) Sets the period of time that an off-hook announcement becomes disconnected if there is no answer. (1 to 250 sec) Viewing and Changing the Confirm/Disconnect/No Action Timer Settings 1. Select [5. Features] [5.14 Timer/Option Features] [5.14.2 Confirm/Disconnect/NoAction Timer] from the Tree Viewer. 2. View the current Confirm/Disconnect/No Action timer settings. 3. Change the Confirm/Disconnect/No Action timer settings. 4. Save the changes. Outgoing/Retry Options Specifies whether to use the Outgoing/Retry functions and changes the system counter and system time variables for the Outgoing/Retry functions. Outgoing/Retry Option Items Item 240 Description Dial Pass Time (sec) Sets the period of time that the call path is connected after a trunk call is dialed. (0 to 25 sec) New Call Count Sets the maximum time that a trunk can be reused for trunk calls. (1 to 99) Trunk Group 2 MBR Specifies whether to expand the number of members to 198 by grouping the 23rd to 30th trunk groups (the first groups of No. 821 to 828) into two groups. When this option is set to On, if an odd-numbered group is selected, the next even-numbered group is selected too. © SAMSUNG Electronics Co., Ltd. OfficeServ DM User Guide (Continued) Item Description Auto Redial Counter Sets the maximum time that a call is auto redialed in Auto Redial mode with just an operation. (1 to 99) Auto Redial Interval (sec) Sets the interval with which auto redial is tried in Auto Redial mode. (1 to 250 sec) Auto Redial RLS. (sec) Sets the period of time that, when an auto redial is successful but the recipient does not pick up the receiver, they are assumed to have left their seat and the call is disconnected. (1 to 250 sec) Viewing and Changing the Outgoing/Retry Option Settings 1. Select [5. Features] [5.14 Timer/Option Features] [5.14.3 Outgoing/Retry Options] from the Tree Viewer. 2. View the current Outgoing/Retry Option settings. 3. View the Outgoing/Retry Option settings. 4. Save the changes. Incoming/CID/DISA Options Sets whether to use the Incoming/CID/DISA functions and changes the system counter and system time variables for the Incoming/CID/DISA functions. Incoming/CID/DISA Option Items Item Description DID Busy Route Specifies whether to use the function which transfers a call received to a busy DID incoming station onto the trunk ring incoming station. DID Error Tone Specifies whether to transfer the number received by the DID to the attendant or play the error tone when that number does not exist. When this option is set to On, the error tone is played. When set to Off, the call is transferred according to the ‘DID Busy Route’ setting or a station is called according to the ‘3.2.1 Trunk Ringing’ settings. © SAMSUNG Electronics Co., Ltd. 241 Error! Use the Home tab to apply 제목 1 to the text that you want to appear here. (Continued) Item 242 Description Trunk Auto Answer MOH If a call is received to a trunk (if the incoming calls has to follow the DID Incoming table, the DID Destination must be set to A too.) for which this option is set to On and the Auto Answer option of ‘3.2.2 Trunk DISA/Auto Answer’ is set to On, it is answered automatically after the Trunk Answer Time of ‘3.2.2 Trunk DISA/Auto Answer’ has passed. At this time, the sound set by the Answer MOH option of ‘3.2.2 Trunk DISA/Auto Answer’ is played to the recipient and the call is received at the location specified by ‘3.2.1 Trunk Ringing’. If the call is not answered and the Auto MOH Disconnect Time of ‘5.14.2 Confirm/Disconnect/No Action’ has passed, it is disconnected automatically. CID Code Insert Sets whether to automatically insert the country code into the received caller ID. CID Display Time (sec) Set the display time of the caller ID. (1 to 25 sec) CID Message Receive Time (sec) Sets the time to detect the caller ID from an analog trunk. (1 to 25 sec) CID Display Allocation Time (100 ms) Sets the time to wait in order to attach the CID receiver after a call is received to a trunk. This time must be adjusted according to the time spent by the network to send the CID information. (0 to 2500 ms) Password Enable Specifies whether the caller must enter a password to send the call on when it is received by a DISA trunk. Dial Tone MOH Specifies whether to use the function that sends the hold tone instead of the dial tone to the caller, when a call is received by a DISA trunk. No Action Ring Station Specifies whether to transfer the call to the station specified by ‘3.2.1 Trunk Ringing’ if no digit is entered after it is received by a DISA trunk. Max Call Count Sets the maximum number of station calls that can be used at a time when using the DISA. (1 to 99) Lock Error Count Sets the maximum password re-entry count allowed for the DISA user when he enters a wrong password. If this count is exceeded, the port is locked. (1 to 99) Call DISC Time (min) Sets the period of time that can be used after calls are received to the DISA. (1 to 250 min) © SAMSUNG Electronics Co., Ltd. OfficeServ DM User Guide (Continued) Item Description DTMF Detect Time (min) Sets the DISA DTMF receiving time. Lock Out Time (min) Sets the period of time for which the DISA locking is maintained. (1 to 250 min) Pass Check Time (min) Sets the period of time that, if passwords entered are wrong more than the specified times, DISA locking is activated. (1 to 250 min) No Answer DISC Time (sec) Sets the period of time that, if the recipient does not answer while the DISA incoming station rings, the call is disconnected. (0 to 250 sec) No Action Ring Time (sec) Sets the period of time that, if no digit is entered after a DISA call is received, the call is processed according to the trunk ringing option. (10 sec) Viewing and Changing the Incoming/CID/DISA Option Settings 1. Select [5. Features] [5.14 Timer/Option Features] [5.14.3 Incoming/CID/DISA Options] from the Tree Viewer. 2. View the current Incoming/CID/DISA Option settings. 3. View the Incoming/CID/DISA Option settings. 4. Save the changes. ISDN/R2/Trunk Options Specifies whether to use the ISDN/R2/Trunk functions and changes the system counter and system time variables for the ISDN/R2/Trunk functions. ISDN/R2/Trunk Option Items Item Description ISDN Prog Conn Specifies whether to process the ISDN Progress message. DTMF to S0 Specifies whether to send the DTMF to the S0 station. ISDN Inter Digit Time (sec) Sets the maximum time before the next number dial when sending a call to the ISDM trunk (BRI or PRI. (1 to 15 sec)) © SAMSUNG Electronics Co., Ltd. 243 Error! Use the Home tab to apply 제목 1 to the text that you want to appear here. (Continued) Item Description TSW CONN.Delay Time (sec) Sets the period of time to wait until the call path is attached to the trunk when a trunk incoming call is forwarded to another trunk. (0 to 10 sec) Trunk Monitor Specifies whether to disconnect the call immediately or connect to a station which uses the barge-in/override function, when the barge-in/override function is used for a trunk call and the original caller disconnects. 3.1K Audio without HLC Specifies whether to allow ISDN incoming calls when their type is the 3.1K Audio without HLC. Viewing and Changing the ISDN/R2/Trunk Option Settings 1. Select [5. Features] [5.14 Timer/Option Features] [5.14.5 ISDN/R2/Trunk Options] from the Tree Viewer. 2. View the current ISDN/R2/Trunk Option settings. 3. View the ISDN/R2/Trunk Option settings. 4. Save the changes. UCD Forward/Wakeup Options Specifies whether to use the UCD Forward/Wakeup functions and changes the system counter and system time variables for the UCD Forward/Wakeup functions. UCD Forward/Wakeup Items Item 244 Description Periodic UCD Report Specifies whether to use the function that periodically outputs the statistics data of the auto call distribution groups. Periodic Report SIO Specifies whether to send the PERI UCD data to the UCD port instead of the PERI UCD port of the SIO service type ports. UCDS Visual Alarm Count During auto call distribution, this function is not used if the number of waiting calls which ring an alarm on the LED and LCD is zero. (1 to 25) © SAMSUNG Electronics Co., Ltd. OfficeServ DM User Guide (Continued) Item Description UCDS Audio Alarm Count During auto call distribution, this function is not used if the number of waiting calls which ring an alarm ring is zero. (1 to 25) UCD CS Level 1 During auto call distribution, this function is not used if the number of Level 1 calls, which notify the LED of their waiting level, is zero. (1 to 25) UCD CS Level 2 During auto call distribution, this function is not used if the number of Level 2 calls, which notify the LED of their waiting level, is zero. (1 to 25) UCDS Visual Alarm (10 sec) The alarm message is displayed and the LED is turned on if the period of time a call has spent waiting in the UCD group exceeds this time. (0 to 990 sec) UCDS Audio Alarm (10 sec) An alarm is sounded if the period of time a call has spent waiting in the UCD group exceeds this time. Enter a value in units of 10 ms. (0 to 990 sec) Periodic UCD Report (sec) Sets the interval with which the UCD statistic data is sent to the I/O. (3 to 99 sec) Intercom External Forward Specifies whether to forward external calls from a station. When set to Off, only trunk calls are forwarded to the external. When set to On, the station calls are also forwarded to the external. Preset Forward Busy Specifies whether to forward a call immediately if it is received by a station for which the busy forwarding is not activated but the system no answer forwarding is activated. VMAA Chain Forward Specifies whether to send the first or last forward station number as the station number, when a call is forwarded to the voice mailbox. Trunk Auto MOH Specifies whether to have the MOH heard when answering an alarm. Alarm Reminder Sets the maximum ringing time for an activated station alarm which is not answered. Specifies the number of times the alarm is sounded. (1 to 99) Alarm Reminder Interval Sets the interval at which the alarm is sounded when the alarm time, set by ‘5.15.8 Alarm Reminder’, is reached. (1 to 250 sec) Alarm Reminder Ring Off Sets the period of time after which the call is disconnected when the alarm set by ‘5.15.8 Alarm Reminder’ is sounded but is not answered. (1 to 25 sec) © SAMSUNG Electronics Co., Ltd. 245 Error! Use the Home tab to apply 제목 1 to the text that you want to appear here. Viewing and Changing the UCD Forward/Wakeup Option 1. Select [5. Features] [5.14 Timer/Option Features] [5.14.6 UCD Forward/Wakeup Options] from the Tree Viewer. 2. View the current UCD Forward/Wakeup Option settings. 3. View the UCD Forward/Wakeup Option settings. 4. Save the changes. SMDR/Alarm/Hotel Options Specifies whether to use the SMDR/Alarm/Hotel functions and changes the system counter and system time variables for the SMDR/Alarm/Hotel functions. SMDR/Alarm/Hotel Items Item 246 Description Auth On Account Allows the authorization code to be put above the account code when outputting the SMDR. Pulse Start Time (sec) Sets the SMDR start time of the dial pulse trunk. (1 to 250 sec) DTMF Start Time (sec) Sets the SMDR start time of the DTMF pulse trunk. (1 to 250 sec) System Alarm Interval (sec) Sets the period of time that when a system alarm is sounded and it is answered but not cleared, an alarm is sounded again. No Item Cost Allows the item code and cost entry to be skipped when checking the Hotel feature. SMDR Log All Allows the SMDR records to be saved in the Hotel feature if the requirements of ‘admin’ and ‘normal station’ are satisfied and the cost is 0. AOC Call Cost Specifies whether to charge the ISDN line in the AOC when the Hotel feature is enabled. Check-in Restrict Specifies whether to restrict the phone if the phone deposit is not entered at check-in. Check-in Forced Auth Code Specifies whether to set the phone allocated to the room to FAC mode at check-in. © SAMSUNG Electronics Co., Ltd. OfficeServ DM User Guide Viewing and Changing the SMDR/Alarm/Hotel Option Settings 1. Select [5. Features] [5.14 Timer/Option Features] [5.14.7 SMDR/Alarm/Hotel Options] from the Tree Viewer. 2. View the current SMDR/Alarm/Hotel Option settings. 3. View the SMDR/Alarm/Hotel Option settings. 4. Save the changes. Station/Phone/Group Options Specifies whether to use the Station/Phone/Group functions and changes the system counter and system time variables for the SMDR/Alarm/Hotel functions. Station/Phone/Group Items Item Group All Log Out Description Specifies whether the function, which excludes all members from a station group temporarily, can be used or not. Door Lock Open Time (100 ms) Sets the door open time. Enter a value in units of 100 ms. (100 to 2500 ms) Door Ring Detect Time Sets the ringing detection time for the door phone. (10 ms) Enter a value in units of 10 ms. (10 to 250 ms) Door Ring Time (sec) Sets the period of time that if a door phone is not answered it is disconnected. (1 to 250 sec) Long Key Detect Time Sets the Long key detection time. (10 ms) (0 to 1200 ms) Long Key Repeat Time (10 ms) Sets the time that this interval is regarded as a new Long key press while the Long key is held down continuously. (0 to 1200 ms) Redial Digit Display Specifies whether to display the redial or speed dial numbers starting from the first number, when there are twelve (21) or more numbers. Redial Review Dial Specifies, when the [LNR] button is pressed, whether to redial the number immediately or to show the dialed number and allow the user select whether to redial it or not. © SAMSUNG Electronics Co., Ltd. 247 Error! Use the Home tab to apply 제목 1 to the text that you want to appear here. (Continued) Item Original Dial Save Description Specifies whether to send the call logs for the normally processed calls only or all the call logs to the phone (large LCD). Pair Camp No Ring When set to Off and the receiving station is CAMP On, this option uses the off-hook service if the station is busy and if the paired station has not rung. Intercom Auto Hold Specifies whether to activate auto hold if the DT or DS key is pressed during an intercom call. One Touch Forced Specifies whether the one touch account code button Account Code can be used in Forced Account Code Input mode. Area Code Delete Specifies whether a phonebook can be sent with the area code deleted or not. Display Delay Time (sec) Sets the period of time for which the LCD message, such as an error message, remains displayed. (1 to 250 sec) Manual Signaling LED On Set the period of time for which the LED of the phone Duration (sec) of the opposite party remains turned on when the MS key is pressed. (0 to 10 sec) Display KSD Name Specifies whether to display the name of the speed dial for the transformer substation. Viewing and Changing the Station/Phone/Group Option Settings 1. 248 Select [5. Features] [5.14 Timer/Option Features] [5.14.8 Station/Phone/Group Options] from the Tree Viewer. 2. View the current Station/Phone/Group Option settings. 3. View the Station/Phone/Group Option settings. 4. Save the changes. © SAMSUNG Electronics Co., Ltd. OfficeServ DM User Guide Station Features Station Options Changes the lock status, DND status, subscriber password, and station name for each station. Items to be Specified Item Description Lock Status Locks the phone so that others cannot use it when you are away. DND Status Activates the DND function. Initialize Password Sets or changes the personal password. Station Name Changes the user name for a station. Station Lock Type Station Lock Type Description Unlocked The lock is released, Locked Outgoing Trunk outgoing is locked. Locked All Calls The station is locked. Viewing and Changing the Station Lock Settings 1. Select [5. Features] [5.15 Station Features] [5.15.1 Station Options] from the Tree Viewer. 2. View the Station Lock settings. 3. Change the Station Lock settings. 4. Save the changes. © SAMSUNG Electronics Co., Ltd. 249 Error! Use the Home tab to apply 제목 1 to the text that you want to appear here. Station Mode Changes the answer mode of a phone. This function also changes the format of the date and time displayed on the LCD of a phone, if it has an LCD, and changes the speed at which information is displayed on the LCD of the phone. Items to be Specified Item Description Answer Mode Changes the Answer mode of a digital phone or add-on module. Auto Answer Co Sets whether to answer the incoming trunk calls automatically or not. Date Mode Sets the Date mode to either Oriental or Western. Oriental: Month/Day Day-of-the-Week HH:MM Western: Day-of-the-Week Day Month HH:MM Time Mode Sets the Time mode to either 12Hour or 24Hour. Display Mode Sets the Displays mode to either Lower or Upper Case. Call Speed Sets the speed at which information is displayed on the LCD of the digital phone when the OfficeServ Call function is used. Answer Mode Types Item 250 Description Ring Mode The phone rings in one of eight (8) tones. If a user picks up the receiver or presses the [Speaker] button, the phone enters the conversation state. Auto Answer Mode An attention signal rings shortly and the speaker of the digital phone opens automatically and the phone enters the conversation state. When the trunk call is forwarded to the digital phone, which is specified as the auto answering phone, both the station which wants to forward it and that digital phone enter the Auto Answer mode. But, after the station forwards it, the receiver is placed and the trunk is forwarded to the digital phone, the digital phone rings until a user picks up its receiver or presses its [Speaker] button. Voice Announce The digital phone does not ring but emits a short attention tone and the voice of the opposite party is heard. If the user’s voice is not sent, he enters the conversion state when he picks up the receiver or presses the [Speaker] button. © SAMSUNG Electronics Co., Ltd. OfficeServ DM User Guide Viewing and Changing the Station Mode Settings 1. Select [5. Features] [5.15 Station Features] [5.15.2 Station Mode] from the Tree Viewer. 2. View the Station Mode settings. 3. Change the Station Mode settings. 4. Save the changes. Station Display Sets the caller information to display on the LCD of the phone when a R2MFC trunk, CID trunk, or ISDN trunk is received to it and it rings. Items to be Specified Item Description CID Display Sets the type of the caller ID information to display on the LCD of the digital phone. ANI Display Sets the type of the ANI information to display on the LCD of the digital phone. CLIP Display Sets the type of the CLIP information to display on the LCD of the digital phone. Language Sets the language of the text displayed on the LCD of the digital phone. Types of Caller Information Item Description No Display Displays no caller information. Number First Displays the caller’s number. Name First Displays the caller’s name. Requirements After selecting a language, the text is displayed in this language. Even if you select ‘Korean’ in a phone which supports Korean text, only the program name is displayed in Korean, others are displayed in English. © SAMSUNG Electronics Co., Ltd. 251 Error! Use the Home tab to apply 제목 1 to the text that you want to appear here. Viewing and Changing the Type of Caller Information and Display Language 1. Select [5. Features] [5.15 Station Features] [5.15.3 Station Display] from the Tree Viewer. 2. View the Station Display. 3. Change the Station Display. 4. Save the changes. Keyset On/Off Specifies whether to use a specific function for each station. Items to be Specified Item 252 Description Auto Hold Puts the current trunk on hold automatically when another trunk is selected during a trunk call. Auto Timer Starts a timer when a specific period of time is passed after a trunk call is sent. Headset Use Selects the Headset mode (On) or Handset mode (Off). If the Headset mode is selected, you have to press the [Speaker] phone to enter the conversation state when the phone rings. Hot Keypad This function operates immediately when a number is pressed in standby state without picking up the receiver or pressing the [Speaker] button. Key Tone Emits the corresponding key tone whenever a key is pressed. Page Rejoin When the station being used to send an announcement enters the standby state, this function automatically allows the station to hear the announcement. Ring Pref. When set to On, if you pick up the receiver when the phone rings, this function lets you answer the call first. When set to Off, if you pick up the receiver when the phone rings, a tone is heard and you have to press the button which is rapidly blinking to answer the call. Auto Campon If another trunk enters the system while you are talking on a trunk call, this function has it enter the standby mode automatically instead of hearing the busy tone. © SAMSUNG Electronics Co., Ltd. OfficeServ DM User Guide (Continued) Item Description AME PWD Specifies whether to have the user enter a password when changing the AME status. Call Cost Specifies whether to display the call charges instead of the call duration on the LCD for an outgoing trunk call. Disp Spdname When set to On, the name instead of the number is displayed when a call is made using the speed dial function. CID Review All When the caller ID is received, it is saved in the buffer allocated in ‘2.5.6 DLI D = ata’. When this function is set to On, all calls are saved. When set to Off, a call is saved only if it is not answered. Secure OHVA When set to On, the off-hook voice announcement (OHVA) is sent to the receiver. When set to Off, it is sent to the speaker. Enblock 2LCD Sets the dial mode of the phone which has the navigation buttons. Station No Ring Specifies whether to call the specified station for an incoming trunk or station call. When set to On, the specified station does not ring although a call is received to it. At this time, though it does not ring, the LED and LCD services function as though it does. Feature Tone When set to On, a tone other than the dial tone is heard for each of the specific functions enabled. Those are the DND, All Forward, Busy Forward, No Answer Forward, Follow Me, and Station Lock functions. Viewing and Changing the Keyset On/Off Settings 1. Select [5. Features] [5.15 Station Features] [5.15.4 Keyset On/Off] from the Tree Viewer. 2. View the Keyset On/Off settings. 3. Change the Keyset On/Off settings. 4. Save the changes. © SAMSUNG Electronics Co., Ltd. 253 Error! Use the Home tab to apply 제목 1 to the text that you want to appear here. Keyset Volume Sets the volume of a keyphone. Items to be Specified Item Volume Control Description Ring Sets the volume level when in standby state. (1 to 8) Off Ring Sets the volume level when the receiver is picked up. (1 to 8) Handset Sets the volume heard through the receiver. (1 to 8) Speaker Sets the volume heard through the speaker. (1 to 16) BGM Sets the volume of the background music. (1 to 16) Page Sets the volume of announcements heard through the speaker. (1 to 16) Headset Sets the volume of the headset. (1 to 14) Ring Frequency Specifies the ringtone. (1 to 8) If you set a different ringtone, it can prevent an incoming call being missed due to noise from the adjacent phones. Viewing and Changing the Volume and Tone of the Keyphone 1. 254 Select [5. Features] [5.15 Station Features] [5.15.5 Keyset Volume] from the Tree Viewer. 2. View the volume and tone of the keyphone. 3. Change the volume and tone of the keyphone. 4. Save the changes. © SAMSUNG Electronics Co., Ltd. OfficeServ DM User Guide Call Forwarding Specifies the phone number to which calls are forwarded and whether to use call forwarding or not. Types of Call Forwarding Item Description Forward Cancel Cancels the call forwarding. Forward All Forwards all calls. Busy Forwards calls when the phone is busy. No Answer Forwards calls when they are not answered. Busy/No Answer Forwards calls when the phone is busy or they are not answered. Requirements If ‘Busy/No Answer’ is selected, each call is forwarded to the station specified by the ‘Busy Forward’ or ‘No Answer Forward’ item, according to the user situation. Therefore, to use the ‘Busy/No Answer’ function, a phone number must be set in the ‘Busy Forward’ and ‘No Answer Forward’ items, respectively. If the FORWARD item of ‘4.7.2 COS Contents’ is set to No, no call forwarding can be set but it can be canceled. Calls can only be forwarded to an external number if the EXT FWD item of ‘4.7.2 COS Contents’ is set to Yes. If only the FORWARD item is set to Yes, calls can be forwarded to a station number only. Defaults All stations: Forward Cancel Viewing and Changing the Call Forwarding Settings 1. Select [5. Features] [5.15 Station Features] [5.15.6 Call Forwarding] from the Tree Viewer. 2. View the Call Forwarding settings. 3. Change the Call Forwarding settings. 4. Save the changes. © SAMSUNG Electronics Co., Ltd. 255 Error! Use the Home tab to apply 제목 1 to the text that you want to appear here. Station Speed Dial Sets the individual speed dial and its name for each station. You can enter up to 24 characters as a speed dial and it consists of 0-9, * and #. A trunk (group) can be included in the speed dial numbers. You can enter up to 11 characters for a speed dial name. The OCC code refers to the code after which all the numbers or internal numbers are displayed as (*) when they are sent. Requirements Each station can store up to 50 (0 to 49) speed dials and names in the speed block of the ‘2.5.1 Station Data’. Viewing and Changing the Individual Speed Dial and Name Settings. 1. Select [5. Features] [5.15 Station Features] [5.15.7 Station Speed Dial] from the Tree Viewer. 2. View the individual speed dial and name settings. 3. Change the individual speed dial and name settings. 4. Save the changes. Alarm Reminder Sets or changes three alarm times and messages (up to 16 characters long) for each station. An alarm time should be entered in 24 Hour mode. You don’t have to enter an alarm time again. The alarm message can be used in a digital phone with the LCD. When it reaches the set time, the alarm rings and the alarm message is displayed on the LCD, so that you can check your schedule. 256 © SAMSUNG Electronics Co., Ltd. OfficeServ DM User Guide Alarm Type Alarm Type Description Noset Does not ring the alarm. Today Rings the alarm once within 24 hours. Daily Rings the alarm at the specified time every day. Viewing and Changing the Alarm Time and Message Settings 1. Select [5. Features] [5.15 Station Features] [5.15.8 Alarm Reminder] from the Tree Viewer. 2. View the alarm time and message settings. 3. Change the alarm time and message settings. 4. Save the changes. User Programmed Message Selects one of twenty (20) reasons on your station when you leave your seat (20). If an absence message is selected, it is displayed on the LCD when the phone is in the standby state. If another station makes a call to the phone, the absence message is displayed on that station so that the caller can know that you are absent from your seat and the reason for this absence. Requirements The user can enter the absence message numbers [16] to [20]. The PGM MSG item of ‘4.7.2 COS Content’ must be set to Yes before you can set an absence message. If you do not change the default of the PGM MSG item, you cannot change or set an absence message, you can only cancel one. Viewing and Changing the Absence Message Settings 1. 2. Select [5. Features] [5.15 Station Features] [5.15.9 User Programmed Message] from the Tree Viewer. View the absence message settings. © SAMSUNG Electronics Co., Ltd. 257 Error! Use the Home tab to apply 제목 1 to the text that you want to appear here. 258 © SAMSUNG Electronics Co., Ltd. OfficeServ DM User Guide 3. Change the absence message settings. 4. Save the changes. Text Message Change or enter urgent text messages. A station can use up to ten (10) urgent text messages. Requirements Only the station for which the Text Message item of ‘2.5.6 DLI Data’ is set to Used can set and use the urgent text messages. Viewing and Changing the Urgent Text Messages 1. Select [5. Features] [5.15 Station Features] [5.15.10 Text Message] from the Tree Viewer. 2. View the urgent text messages. 3. Change the urgent text messages. 4. Save the changes. Group Conference Sets the conference groups for a large LCD phone. You can set up to five (5) conference groups for a station. The number of members you can register for a conference group can be up to four (4) person (s), excluding yourself. If you call a previously set conference group using the GCONF button on a large LCD phone, the call connection tone is heard and if a member answers it, the call connection tone stops and the phone is changed to Conference mode automatically. If a member is called via a normal analog trunk, your phone cannot know whether they has answered or not. Therefore, in this case, he is always regarded as having answered when the SMDR START TIME is passed and his phone is changed to Conference mode automatically. Also, if you are talking on a normal analog trunk, your phone cannot know whether a member is disconnected or not. Therefore, in this case, the conference chairman has to remove the member from Conference mode manually. © SAMSUNG Electronics Co., Ltd. 259 Error! Use the Home tab to apply 제목 1 to the text that you want to appear here. Requirements Only the station for which the Group Conference item of ‘2.5.6 DLI Data’ is set to ‘Used’ can set and use a conference group. Viewing and Changing the Conference Group Settings 1. Select [5. Features] [5.15 Station Features] [5.15.11 Group Conference] from the Tree Viewer. 2. View the conference group settings. 3. Change the conference group settings. 4. Save the changes. Large LCD Options Sets the options for phone that has a large LCD (DS-5012L). Items to be Specified Item 260 Description Screen Type Sets whether to display ‘Calendar’ or ‘Information’ on the LCD screen in the IDLE state. DssKey Type Sets whether to display the phone number or station name on the DS button screen. Dial Mode Sets the dialing mode of the phone. (Enbloc/Overlab) Screen Mode Sets whether to display the soft menu or AOM button first on the bottom of the LCD when changed to the busty state. Calendar Sets whether to display the previous screen status (soft menu, AOM button screen) or the Calendar (or Information) screen in the IDLE state. AOM Cursor Sets the position of the cursor when displaying the AOM button screen. (0 to 99, Prev Position) Video Mode Sets the video start mode of the video IP phone. If set to Auto Start, when a call is connected to Video IP phone, the video screen is displayed automatically. If set to Manual start, you can select whether to display video using the buttons of the video IP phone. (Auto Start/Manual Start) Video Ring Sets whether to display video during ringing after a call is received to the video IP phone. (Disable/Enable) This option is applicable to the video IP phone only. © SAMSUNG Electronics Co., Ltd. OfficeServ DM User Guide Viewing and Changing the Large LCD Option Settings 1. Select [5. Features] [5.15 Station Features] [5.15.12 Large LCD Options] from the Tree Viewer. 2. View the large LCD option settings. 3. Change the large LCD option settings. 4. Save the changes. Executive State You can view the status of stations specified as a bosses by interoperating with the OfficeServ EasySet. This is the program to use when setting the current status of bosses to be displayed. And, you can set the answer mode for a boss’ call using the boss/secretary function. Items to be Specified Item Description State Sets the status of the boss to be displayed when interoperating with EasySet. Exec Answer Mode Sets the answer mode when the boss calls the secretary. Display 1 When the status of the boss is set to In, this option sets the message to be displayed in the EasySet. Display 2 When the status of boss is set to Out, this option sets the message to be displayed in the EasySet. Viewing and Changing the Boss Presence Status 1. Select [5. Features] [5.15 Station Features] [5.15.13 Executive State] from the Tree Viewer. 2. View the boss presence status. 3. Change the boss presence status. 4. Save the changes. © SAMSUNG Electronics Co., Ltd. 261 Error! Use the Home tab to apply 제목 1 to the text that you want to appear here. MMS Service Sets the functions related to the multimedia service Items to be Specified Item Description MMS Ringback Sets the function to receive and display the multimedia information from the server instead of hearing the ring back tone in interoperation with the multimedia server. MMS Ring Sets the function to receive and display the multimedia information from the server instead of hearing the ring in interoperation with the multimedia server. MMS Busy Sets the function to receive and display the multimedia information from the server instead of hearing the busy tone in interoperation with the multimedia server. MMS MOH Sets the function to receive and display the multimedia information from the server instead of hearing the MOS that the opposite party held in interoperation with the multimedia server. Viewing and Changing the MMS Service Settings 1. 262 Select [5. Features] [5.15 Station Features] [5.15.14 MMS Service] from the Tree Viewer. 2. View the MMS Service settings. 3. Change the MMS Service settings. 4. Save the changes. © SAMSUNG Electronics Co., Ltd. OfficeServ DM User Guide Emergency Dial Sets the functions related to the emergency dial. Viewing and Changing the Emergency Dial Settings 1. Select [5. Features] [5.15 Station Features] [5.15.15 Emergency Dial] from the Tree Viewer. 2. View the Emergency Dial settings. 3. Change the Emergency Dial settings. 4. Save the changes. © SAMSUNG Electronics Co., Ltd. 263 Error! Use the Home tab to apply 제목 1 to the text that you want to appear here. System Control Alarm Report Alarm History Displays the alarms of the system and sets the types of alarms for which the system alarm ring is ringed. Alarms are stored in the alarm buffer. There are fifty (50) major alarm buffers and fifty (50) additional alarm buffers. They follow the First In First Out rule. The Remove option allows the current existing alarms to be removed from the alarm memory. An alarm is outputted to an alarm port automatically. If an alarm buffer is emptied, a new alarm enters it. If the alarm ring is enabled, the system searches all digital phones and rings the alarm ring of those phones in which the system button is assigned. If the alarm ring is disabled, it is still processed. The alarm generated is stored in the alarm buffer or output to the alarm I/O port of those phones. Definitions of Alarm ID ID 264 Alarm Name Description MJA-- MCP Error System Error MJA01 POR Restart The MCP restarts when the power is supplied to it. MJA02 Soft Restart The MCP restarts as the button is pressed. MJA03 MEM Reset The RAM area is initialized by the PCMMC or KMMC. MJA04 Watchdog Reset The MCP has restarted due to an exception. ************************************ Alarm Data: Reason ************************************ - BUS ERR: Bus error - ADDR.ERR: Address error - ILLEGAL: Wrong opcode - ZERO DIVID: Divided by zero - PRIVILEGE: Privilege violation - ENDL LOOP: Endless loop MJA05 LCP Reset The LCP has restarted. Alarm Data = Cabinet (1, 2) MJA06 PCM Switching Switching control error Alarm Data = MCP BASE, ESM: 1, ESM: 2 or ESM: 3 © SAMSUNG Electronics Co., Ltd. OfficeServ DM User Guide (Continued) ID Alarm Name MJA08 FAN Sensor Error A power fan sensor error has occurred. MJA09 FAN Recovery The power fan sensor error has recovered. MJA10 SW Except Reset System restart with SW exception. MJA11 CPU Overload The current CPU load has reached more than 80%. MJA12 Flash Format Err Formatting was performed in the NAND Flash as an error has occurred during its operation. MJA13 Invalid MMC Halt A Halt occurs as the system is activated by an unauthorized MMC. MJB-- LCP/Task Error LCP or task error MJB01 HDLC Com Error An error has occurred in communication with the LCP. MJB02 Memory Alarm 1 An MCP RAM area diagnostics error has occurred. MJB06 IPC MSGQ Over IPC TX queue full error has occurred in the MCP2. Alarm data = IPC Queue type (MCP-LAN, MCP-SCP, MCP-LCP1, MCP-LCP2) MJB07 IPC MSGQ Under IPC TX queue full recovery has occurred in the MCP2. Alarm data = IPC Queue type (MCP-LAN, MCP-SCP, MCP-LCP1, MCP-LCP2) MJC-- DSP Error System DSP Error MJC01 DTMF Fault An error has occurred in the DTMF resources of the system. Alarm Data = Location of the DSP to receive the DTMF MJC02 Tone Fault An error has occurred in the tone resources of the system. Alarm Data = Location of the DSP to receive the tone MJC03 CID DSP Fault CID DSP Fault MJC06 AC Pwr Loss AC Pwr Loss MJC07 AC Pwr Recovery AC Pwr Recovery MJC08 Low Battery Low Battery MJC09 Low Battery Rec Low Battery Rec MJC16 WLI Restart The WLI board has restarted. Alarm data = Cabinet, Slot (Cx–Syy) MJC17 WLI Block The system has detected an error with the WLI board and has prohibited its use. Alarm data = Cabinet, Slot (Cx–Syy) © SAMSUNG Electronics Co., Ltd. Description 265 Error! Use the Home tab to apply 제목 1 to the text that you want to appear here. (Continued) ID 266 Alarm Name Description MJD-- DTRK Error ISDN or E1 board error MJD01 Sync Failure The clock of the TEPRI board was out-of-sync. MJD02 Sync Recovery The out-of-sync clock error on the TEPRI board is now resolved. MJD03 Red Alarm The PCM carrier of the TEPRI board is not detected for 250 ms. Alarm Data = Cabinet, Slot (Cx-Syy) MJD04 Red Alarm Rec The PCM carrier of the TEPRI board has been detected. Alarm Data = Cabinet, Slot (Cx-Syy) MJD05 Yellow Alarm A frame transmission error has occurred in the TEPRI board. Alarm Data = Cabinet, Slot (Cx-Syy) MJD06 Yellow Alarm Rec The frame transmission error that occurred in the TEPRI board has cleared. MJD07 Blue Alarm A TEPRI board facility error has occurred. Alarm Data = Cabinet, Slot (Cx-Syy) MJD08 Blue Alarm Rec The TEPRI board facility error has cleared. Alarm Data = Cabinet, Slot (Cx-Syy) MJD09 Bit Error Alarm The bit error rate of the E1, PRI or BRI board is too high. Alarm Data = Cabinet, Slot (Cx-Syy) MJD11 SPID Init Error The BRI board has received an error message from the network. Alarm Data = Cabinet, Slot, Channel (Cx-Syy-czz) MJD12 SPID Init Rec The BRI board has received a message from the network that the error was cleared. Alarm Data = Cabinet, Slot, Channel (Cx-Syy-czz) MJD13 LPBK Error A loopback test by an internal command has failed. Alarm Data = Cabinet, Slot, Channel (Cx-Syy-czz) MJD14 LPBK Recovery A loopback test by an internal command has succeeded. Alarm Data = Cabinet, Slot, Channel (Cx-Syy-czz) MJD15 BRI DL Unavail The BRI data link is invalid. Alarm Data = Cabinet, Slot, Channel (Cx-Syy-czz) MJD16 BRI DL Recovery The data link of the BRI is now valid. Alarm Data = Cabinet, Slot, Channel (Cx-Syy-czz) MJD18 E1 Restart The E1 board has restarted. Alarm Data = Cabinet, Slot (Cx-Syy) © SAMSUNG Electronics Co., Ltd. OfficeServ DM User Guide (Continued) ID Alarm Name Description MJD19 PRI Restart The PRI board has restarted. Alarm Data = Cabinet, Slot (Cx-Syy) MJD20 BRI Restart The BRI board has restarted. Alarm Data = Cabinet, Slot (Cx-Syy) MJD21 PCM Loss A PCM code loss has occurred in the E1, PRI or BRI board. Alarm Data = Cabinet, Slot (Cx-Syy) MJD22 PCM Recovery The PCM code loss that occurred in the E1, PRI or BRI board is recovered. Alarm Data = Cabinet, Slot (Cx-Syy) MJE-- MGI and Card Error MGI, WBS, SVMi Error MJE01 MGI Restart The MGI board has restarted. Alarm Data = Cabinet, Slot (Cx-Syy) MJE03 MGI IP Duplicate The IP address of the MGI board has duplicated. Alarm Data = Cabinet, Slot (Cx-Syy) MJE04 MGI NTWK Error The MGI board has stopped due to a system ping test error. Alarm Data = Cabinet, Slot (Cx-Syy) MJE05 MGI NTWK Rec The stopping of the MGI board due to a system ping test error has now cleared. Alarm Data = Cabinet, Slot (Cx-Syy) MJE06 MGI DSP Error The DSP operation error has occurred in the MGI board. Alarm Data = Cabinet, Slot (Cx-Syy-Pzz) MJE07 MGI DSP Run The DSP operation error that occurred in the MGI board has now cleared. Alarm Data = Cabinet, Slot (Cx-Syy-Pzz) MJE08 WBS Disconnect The WBS has been disconnected from the system. Alarm Data = CWBS: xx or BWBS: xx MJE09 WBS connect The WBS is now connected to the system. Alarm Data = CWBS: xx or BWBS: xx MJE10 SVMi Restart The SVMi-20E board has restarted. MJE11 SVMi Halt The SVMi card has been halted. MJE12 SVMi Down The SVMi card has failed. MJE13 MGI Self Restart The MGI board has restarted itself. MNF-- Minor Error Minor error to be stored in the alarm buffer. © SAMSUNG Electronics Co., Ltd. 267 Error! Use the Home tab to apply 제목 1 to the text that you want to appear here. (Continued) ID 268 Alarm Name Description MNF01 Card Out No card has been inserted into any of the slots. Alarm Data = Cabinet, Slot (Cx-Syy) MNF02 Card In A card is inserted into one of the slots. Alarm Data = Cabinet, Slot (Cx-Syy) MNF04 Trunk Fault A faulty trunk which cannot provide the service, has been detected by the internal codec test. Alarm Data = Cabinet, Slot, Port (Cx-Syy-Pzz) MNF05 Trunk Recovery A trunk which can provide the service has been detected by the internal codec test. Alarm Data = Cabinet, Slot, Port (Cx-Syy-Pzz) MNF06 Trunk Disconnect A faulty trunk which cannot provide the service has been detected by the external occupation test. Alarm Data = Cabinet, Slot, Port (Cx-Syy-Pzz) MNF07 Trunk Connect A trunk which can provide the service has been detected by the external occupation test. Alarm Data = Cabinet, Slot, Port (Cx-Syy-Pzz) MNF10 E1 Out Of Srv The E1 line is out of service. Alarm Data = Cabinet, Slot (Cx-Syy) MNF11 E1 In Service The E1 line is in service. Alarm Data = Cabinet, Slot (Cx-Syy) MNF14 TODC Error The MCP clock chip error has occurred. MNF18 SLI Fault A faulty SLI board which cannot provide the service is detected by the internal codec test. Alarm Data = Cabinet, Slot, Port (Cx-Syy-Pzz) MNF19 SLI Recovery An SLI board which can provide the service is detected by the internal codec test. Alarm Data = Cabinet, Slot, Port (Cx-Syy-Pzz) MNF28 LAN Printer Err The LAN printer error has occurred in the MCP board. Alarm Data = Data Type (SMDR) MNF29 LAN Printer Rec The LAN printer error that occurred in the MCP board has cleared. Alarm Data = Data Type (SMDR) MNF30 SPNet Link Error A SPNet link connection error has occurred. Alarm Data = MMC 820 LINK ID INDEX number © SAMSUNG Electronics Co., Ltd. OfficeServ DM User Guide (Continued) ID Alarm Name Description MNF31 SPNet Send Error An SPNet message-sending error has occurred. Alarm Data = xx:yyyy:zz xx: SPNet TRK index, yyyy: SPNet TRK No., zz: MMC 820 Link ID index MNF32 SVMi Ready The SVMi Card Ready has started. MNF33 SVMi Request The SVMi Card Request has started. MNF34 SVMi Ready End The SVMi Card Ready is ended. MNF35 SVMi Request End The SVMi Card Request is ended. MNF36 SVMi HDD Alarm SVMi Card HDD Alarm MNF37 Manual Reset Req Card Manual Reset Request MNF38 Card Active Card Active notification Viewing the Alarm History 1. 2. Select [6. System Control] [6.1 Alarm Report] [6.1.1 Alarm History] from the Tree Viewer. View the alarm history. Programming Logs Displays the times when the system programming mode was enabled or disabled and the ports (station number, or input and output ports) which were programmed. In case of the WebMMC/PCMMC, this function displays input and output ports (in case of the MP40/MCP card, the LAN port is displayed). If the end time is not saved, ‘Illegal End’ is displayed. The self station that is viewing the programming logs in the program mode is displayed as ‘Current’. Saves the latest eight (8) pieces of information. Viewing the System Programming Time 1. 2. Select [6. System Control] [6.1 Alarm Report] [6.1.2 Programming Logs] from the Tree Viewer. View the system programming time © SAMSUNG Electronics Co., Ltd. 269 Error! Use the Home tab to apply 제목 1 to the text that you want to appear here. Port Status Connection Status Displays the connection status of a station or trunk and displays the phone type of the station. The opposite party is displayed during talking. All members are displayed during a conference. And, during dialing or when the opposite party is not displayed, only ‘Busy’ is displayed. Phone Types of Virtual Station Phone Type Description 14 BTN SET Phone that has fourteen (14) program buttons LARGE SET Large LCD phone 7 BTN LCD Phone that has seven (7) program buttons 0 BTN LCD Phone that has no program button NONE - 24 BTN SET Phone that has twenty four (24) program buttons 12 BTN SET Phone that has twelve (12) program buttons 7 BTN SET Phone that has seven (7) program buttons 6 BTN SET Phone that has six (6) program buttons 28 BTN SET Phone that has twenty eight (28) program buttons 18 BTN SET Phone that has eighteen (18) program buttons 8 BTN SET Phone that has eight (8) program buttons 38 BTN SET Phone that has thirty eight (38) program buttons 21 BTN SET Phone that has twenty one (21) program buttons Viewing the Connection Status 1. 2. 270 Select [6. System Control] [6.2 Port Status] [6.2.1 Connection Status] from the Tree Viewer. View the connection status. © SAMSUNG Electronics Co., Ltd. OfficeServ DM User Guide ITP Status Sets various parameters of the IP phone. Parameters for the IP Phone Parameter Description IP Address IP address of the IP phone Remote IP Address Private IP address of the IP phone MAC Address Hardware address of the IP phone Phone Version Displays the version of the registered IP phone. Signal Port Sets the IP port through which messages are sent and received for calls using the IP phone. Voice Port Sets the IP port through which voice packets are sent and received for calls using the IP phone Phone Type Sets the phone type (SAMSUNG/SIP STANDARD) Current Status Displays the current connection status of the IP phone. Clear Reg. & Software Upgrade Deletes the information of the registered IP phone and sets whether to upgrade the software. (No/Clear Registration/SW Upgrade) Viewing and Changing the ITP Phone Information 1. Select [6. System Control] [6.2 Port Status] [6.2.2 ITP Status] from the Tree Viewer. 2. View the ITP phone information. 3. Change the ITP phone information. 4. Save the changes. © SAMSUNG Electronics Co., Ltd. 271 Error! Use the Home tab to apply 제목 1 to the text that you want to appear here. SIP Phone Status Displays the information for the registered standard SIP terminals. Terminal Information Items Item Description IP Address IP address assigned to the registered standard SIP terminal. Current Status Displays whether the standard SIP terminal is registered. Phone Type Displays the manufacturer of the standard SIP terminal. If the terminal is not a standard Samsung SIP terminal, the registration is restricted as many as the number which is set according to the license key entered in the ‘2.1.4 License Key’. (Disconnected/Samsung SIPP/Non Samsung SIPP) Requirements A license key must be entered in the ‘2.1.4 License Key’. The number of SIP Phones must be set in the ‘SIP Stack License Allowed’, and the ‘SIP STN’ card must be set in the ‘mmc857’. Viewing and Changing SIP Terminal Information 1. 272 Select [6. System Control] [6.2 Port Status] [6.2.3 SIP Phone Status] from the Tree Viewer. 2. View the standard SIP terminal information. 3. Change the standard SIP terminal information. 4. Save the changes. © SAMSUNG Electronics Co., Ltd. OfficeServ DM User Guide WIP Status Displays the information for the registered wireless terminals. Terminal Information Items Item Description Current Status Displays whether the wireless terminal is registered. Located Displays whether the wireless terminal is connected to the current system. WLI Number The number of the WLI connected to the WBS24 in service in the area in which the terminal is being used WBS Number The number of the WBS24 in service in the area in which the terminal is being used IP Offset The location of the IP pool in which the IP address assigned to the terminal is located IP Address IP address assigned to the registered terminal MAC Address MAC address of the registered terminal Phone Type Displays the phone type of the wireless terminal. Viewing the Wireless Terminal Information 1. 2. Select [6. System Control] [6.2 Port Status] [6.2.5 WIP Status] from the Tree Viewer. View the wireless terminal information. System Resource Displays the system resource (DTMFR Display, CID Display, R2MFC Display, and Conf Group) and the numbers of the used and unused resources. You can only view this information. Viewing the System Resource Status 1. 2. Select [6. System Control] [6.2 Port Status] [6.2.6 System Resource] from the Tree Viewer. View the system resource status. © SAMSUNG Electronics Co., Ltd. 273 Error! Use the Home tab to apply 제목 1 to the text that you want to appear here. MPS Status Displays the system resource about MPS. You can only view this information. Viewing the MPS Status 1. 2. Select [6. System Control] [6.2 Port Status] [6.2.7 MPS Status] from the Tree Viewer. View the MPS status. Commands Pre-Install/Reset Replaces the card installed in the system to a card of other type and then deletes the information of the previous card. Then this function notifies the system that the new card can start and restarts the system using the software. When mounting a new card to the slot, if the type of this new card is different from that of the existing card, this function sets the information so that it matches the new card. When mounting a new card, to prevent the information from being removed, this function the system that the new card can start and has the system initialize it. The types of the existing and new cards are displayed so that you can check both of them. The dial number of the existing card remains after this program is performed, therefore, you have to change the dial number in the ‘2.8.0 Number Plan’. 274 © SAMSUNG Electronics Co., Ltd. OfficeServ DM User Guide Installing a New Card and Restarting The System 1. Select [6. System Control] [6.3 Commands] [6.3.1 PreInstall/Reset] from the Tree Viewer. 2. Select a gateway. 3. Set a new card, and set whether to restart the system. 4. Save the changes. Virtual Card Change Sets the card type of a virtual cabinet. Viewing and Changing the Card Types of Virtual Cabinets. 1. Select [6. System Control] [6.3 Commands] [6.3.2 Virtual Card Change] from the Tree Viewer. 2. View the card types of the virtual cabinets. 3. Change the card types of the virtual cabinets. 4. Save the changes. Halt/Processing Makes the system halted (Halt) or operated normally (Processing). Viewing and Changing the Halt/Processing Settings 1. Select [6. System Control] [6.3 Commands] [6.3.3 Halt/Processing] from the Tree Viewer. 2. View the Halt/Processing settings for the system. 3. Change the Halt/Processing settings for the system. 4. Save the changes. © SAMSUNG Electronics Co., Ltd. 275 Error! Use the Home tab to apply 제목 1 to the text that you want to appear here. Memory Dump Displays the values about memory address. Performing the Memory Dump 1. Select [6. System Control] [6.3 Commands] [6.3.4 Memory Dump] from the Tree Viewer. 2. Press the Start button. 3. Save the memory dump status. Port Clear Initializes forcibly the items related to call processing or DB for a station or trunk. Type of Port Initialization Type of Port Initialization Description Call Clear Initializes the call processing part. DB Initial Initializes the DB. Initializing a Station/Trunk Port 1. 2. 3. 276 Select [6. System Control] [6.3 Commands] [6.3.5 Port Clear] from the Tree Viewer. Select the number of station/trunk you want to initialize, and set the type of initialization. Save the changes. © SAMSUNG Electronics Co., Ltd. OfficeServ DM User Guide Set Relocation Exchanges all the information that each station has. Requirements The phone information auto exchange is available between the same type of phones only. If the phone type is not the same, the ‘Invalid device type’ message is displayed when saving the changes. Exchanging the Phone Information 1. Select [6. System Control] [6.3 Commands] [6.3.6 Set Relocation] from the Tree Viewer. 2. Set the station number to exchange the phone information with. 3. Save the changes. Copy Station Key Copies the button settings for a phone to other phone. Copying the Phone Button Setting 1. 2. 3. Select [6. System Control] [6.3 Commands] [6.3.7 Copy Station Key] from the Tree Viewer. Set the station number (From) of the original digital phone to copy from and the station number (To) to paste the copied information in. Save the changes. Save Default Key Saves and recovers the button settings for each station. When saving the phone button settings, they are saved to a buffer that each phone type has. Requirements The buffer is also used in the ‘4.9.1 Default Key’, and also used when initializing the program for a newly connected phone. Therefore, use it carefully. © SAMSUNG Electronics Co., Ltd. 277 Error! Use the Home tab to apply 제목 1 to the text that you want to appear here. Saving the Phone Button Settings 1. 2. 3. Select [6. System Control] [6.3 Commands] [6.3.8 Save Default Key] from the Tree Viewer. Enter the station number of the digital phone and select Save or Restore as shown in the figure below. Save the changes. Alarm Buffer Control Manages the alarm buffers of the system. Alarms are stored in the alarm buffer. There are fifty (50) major alarm buffers and fifty (50) additional alarm buffers. They follow the First In First Out rule. The Remove option allows the current existing alarms to be removed from the alarm memory. An alarm is outputted to an alarm port automatically. If an alarm buffer is emptied, a new alarm enters it. Items to be Specified Item Description Clear Clear the alarm buffer. Print Prints the alarm buffer to the alarm port. Clearing and Printing the Alarm buffer 1. 278 Select [6. System Control] [6.3 Commands] [6.3.9 Alarm Buffer Control] from the Tree Viewer. 2. Set whether to clear and print the alarm buffer. 3. Save the changes. © SAMSUNG Electronics Co., Ltd. OfficeServ DM User Guide WIP Clear Sets the items needed to release registrations of wireless terminals. Items to be Specified Item Description Clear You can release the registration for each terminal. There are two modes to release the registration, ‘Forced’ and ‘Normal’. The Forced mode deletes only the related DB of the system to register a new terminal due to damage to the terminal, etc. The Normal mode deletes all of the databases of the system and the terminal through exchange of messages between them. Current Status Sets whether to use the WIP IP address in static mode or not. Viewing and Changing the Wireless Terminal Registration Clear Settings 1. Select [6. System Control] [6.3 Commands] [6.3.11 WIP Clear] from the Tree Viewer. 2. View the wireless terminal registration clear settings. 3. Change the wireless terminal registration clear settings. 4. Save the changes. Memory Unmount This function is for memory UNMOUNT, before restart system, Items to be Specified Item Description STOP MEDIA Memory UNMOUNT in SD Card. (This option may not be available in certain OfficeServ models.) STOP MEMORY Memory UNMOUNT in SD Card and NAND Flash. © SAMSUNG Electronics Co., Ltd. 279 Error! Use the Home tab to apply 제목 1 to the text that you want to appear here. Viewing and Changing the Memory Unmount Settings 1. Select [6. System Control] [6.3 Commands] [6.3.13 Memory Unmount] from the Tree Viewer. 2. Change the Memory Unmount settings. 3. Save the changes. ITP Idle Logout This function is all IP-based phone logout now, Viewing and Changing the ITP Idle Logout Settings 1. Select [6. System Control] [6.3 Commands] [6.3.14 ITP Idle Logout] from the Tree Viewer. 2. Change the ITP Idle Logout settings. 3. Save the changes. ITP Forced Logout This function is used to logout the registration of a particular IP phone. IP phone should support IDLE MODE function and be login status. This is useful for maintenance, Viewing and Changing the ITP Idle Logout Settings 1. 280 Select [6. System Control] [6.3 Commands] [6.3.15 ITP Forced Logout] from the Tree Viewer. 2. Change the ITP Forced Logout settings. 3. Save the changes. © SAMSUNG Electronics Co., Ltd. OfficeServ DM User Guide This page is intentionally left blank. © SAMSUNG Electronics Co., Ltd. 281 OfficeServ DM User Guide CHAPTER 6. Voice Mail Programming The following section describes all the configurable options and detailed functional definitions in the Voice Mail features. System Main Menu The System Main Menu provides easy access to the different areas of OfficeServ System configuration. The specific areas can be accessed using the cursor controls or by selecting the designation letter. The areas that can be accessed are: [A] Open Block Table [B] Save Application [C] Schedule Table [D] Subscriber List [E] System Wide Parameter [F] Voice Studio [G] Operating Utilities [H] Override Mode [I] System Reports [J] Site Information [K] Status Screen © SAMSUNG Electronics Co., Ltd. 282 OfficeServ DM User Guide Select All Items If you want to select all items in 8.VMAA menus, please click title of select © SAMSUNG Electronics Co., Ltd. 283 Error! Use the Home tab to apply 제목 1 to the text that you want to appear here. Open Block Table The Block Table is used for building OfficeServ System call routing applications. This is the most frequently accessed area in the OfficeServ System and determines its behavior when it is routing calls. All the prompts and options offered to callers are programmed here. Because most of the configuration, for any customer, will usually be in the Block Tables, these are dealt in detail with separately in the next section. 284 © SAMSUNG Electronics Co., Ltd. OfficeServ DM User Guide Save Application If changes are made to the customer database they are live and immediate, however they are not immediately saved to disk. The save to disk will only take place if: The administrator reboots the system after gracefully exiting using ‘Operating Utilities’ and ‘Shutdown System’. Or the nightly maintenance runs. This happens each night at 3 A.M. Or the administrator selects ‘Save Application’ from the System Main Menu. The save application option forces the changes to be written to the database immediately. This will ensure that if the system looses power between the time that the changes are made and the nightly maintenance, the changes will be preserved. Warning: For this data to be saved the OfficeServ System must lock its ports temporarily. Any idle ports are immediately locked. As ports become free they are also locked. When all ports are locked the data will be saved and the ports placed back online. The system will politely Lock all ports before performing the save. If any port is off hook engaged in a call, the system will wait until the caller hangs up before locking that port. © SAMSUNG Electronics Co., Ltd. 285 Error! Use the Home tab to apply 제목 1 to the text that you want to appear here. Schedule Table The Schedule Table determines when the OfficeServ System will automatically change Modes. A mode is a set of operating rules for a specific situation, like DAY Mode or NIGHT Mode. These changes may be based on Port Number, Date or Day of Week, and Time of Day. The Schedule Table contains one record for each scheduled change. This selection of modes may be automatically set by this schedule table or manually overridden via a touch tone phone, using the MANUAL MODE SELECTION function. When a call comes in, the schedule table is checked to find out which mode rules to apply to the call session. If the entry says ‘DCS AUTO’ then the OfficeServ System will change between mode 1 (Day Mode) and Mode 2 (Night Mode) whenever the phone system changes between Day and Night operation. The OfficeServ System selects a mode from this schedule based on an Order of Precedence. Schedule table entries which select the mode based on Date takes precedence over Day of Week (DOW). Each entry defines a start time for that specific mode. The mode will continue until the next scheduled start time for a particular port. In the example screen shown, if an additional entry is made which selects Holiday Mode, when Date = 12/25, it will take precedence over the other records. In other words, the OfficeServ System will switch to Holiday Mode on December 25 at Midnight, regardless of what Day of Week, it happens to be. The information contained within the Schedule Table screen shown in this section is for discussion and display purposes only. One page contains the Schedule Table parameters. The parameters are grouped by category as follows: 286 © SAMSUNG Electronics Co., Ltd. OfficeServ DM User Guide Item Description Mode Name This is the mode block which will start the application. To create a new mode, press ADD button. Select a new or existing mode block. The Mode Name column is automatically filled in. To finish scheduling this mode, fill in the rest of the line with the following information. Ports The port number (1 through 6) sets a mode change for a particular port. If there are no other entries in the Schedule Table for this port, it will run the specified mode continuously. If this field is set to ‘All’, this entry will be used by all ports which do not have specific port entries. Ultimately the schedule is assigned to a port or group of ports. If you have an entry for All ports to go into the Holiday Mode and an entry for ports 5-6 to go into the Emergency Service Mode at the same Date, DOW, and/or Time then ports 5 & 6 will NOT follow the mode setting set for ALL ports. They will go into Emergency Service Mode and stay there until the net scheduled mode change that included or addressed ports 5-6 specifically. Date Month and day of month (mm/dd) when the change of mode will occur. If a date is entered in this field, no option will be given to make an entry in the DOW (Day of Week) field. This entry will take a higher order of precedence over records based on DOW only on the date specified. Therefore, to guarantee a particular mode setting over a three day period, a date entry should be created for each day of that period. © SAMSUNG Electronics Co., Ltd. 287 Error! Use the Home tab to apply 제목 1 to the text that you want to appear here. (Continued) 288 Item Description Week day Day of Week when a mode change is to occur regularly on specific day of the week. Either the Date or Weekday column may be filled in. If you should manage to make entries in both columns, OfficeServ System will realize a conflict and automatically delete one of them. You can select ranges such as ‘MON-FRI’ to cover week days only, or 'SUN- SAT' to cover all seven days (as used by SYSTEM AUTO). Start The Hour and Minute when a change in mode should occur. The hour must be specified in 24 Hr. format (i.e., 1:30 P.M. is entered as 13:30). © SAMSUNG Electronics Co., Ltd. OfficeServ DM User Guide Subscriber List To access the subscriber list, from the System Main Menu press SUBSCRIBER LIST. Then select a group number, the default subscriber group is 01. You can have up to 99 different subscriber groups on the OfficeServ System system. These are typically useful in multi-tenant environments, but also have other useful applications where you need to isolate some members of an application from others.) This area of configuration is used to quickly view, or edit the subscriber list. You will see a list of subscribers along with their extension and their mailbox number. Entering a New Subscriber To enter a new subscriber, press ADD button. Type in the subscriber’s last name, enter a comma (,) and type the subscriber’s first name. Then create or select the extension and mailbox for this subscriber. OfficeServ System stores the subscriber’s name in ‘last name, first name’ format. When entering the subscriber’s name this format should be followed. This format is only important because the directory feature will search on a specific field (first name or last name) and the search should be consistent for all entries. © SAMSUNG Electronics Co., Ltd. 289 Error! Use the Home tab to apply 제목 1 to the text that you want to appear here. System Parameters To access the System Parameters, from the System Main Menu press SYSTEM PARAMETERS. System Parameters include fields displaying the software release, version number, the authorized number of ports, and options. Other parameters control functionality for the whole system. It also displays the MAC ADDRESS of the LAN Port and number of authorized E-Mail subscribers. The first page mostly provides information only. This information may be useful to you or may be needed during a technical support call. General Information Default Volume Level The choices are Quietest, 2, 3, Normal, 4, 5, Loudest) Normal is the default for this parameter. 290 © SAMSUNG Electronics Co., Ltd. OfficeServ DM User Guide System Timers Daily Maintenance This is the time when OfficeServ System performs routine daily maintenance. Daily maintenance will save the system tables and perform message purging. The default setting is 3:00 AM. Maintenance will not occur until: a) It is after the daily maintenance time (typically it does not run until 2 to 10 minutes past the actual set time). b) 23 hours have elapsed since startup or the last daily maintenance interval. System Passwords SUBSCRIBER DEFAULT PASSWORD The digits used as the default settings for extension and mailbox passwords. The digit input may be from 1 to 8 digits in length. When a mailbox or extension password is reset, this is the value that the password will be reset to. The default setting is 0000. SUBSCRIBER PSWD MINIMUM LENGTH This parameter defines the minimum number of digits used in a subscriber’s password. A password can be equal to or larger then this value. If this value is changed to a larger value on a running system, subscribers will be forced to change their password to one that meets these requirements the next time they log in. The system will prevent them from doing anything including listening to new messages until they first change their password to meet the minimum requirements. A setting of ‘0’ equals NO minimum password length. Valid values can be set from 0 to 8, the default is:0 SYSTEM ADMIN This affects both the GUI and the TUI. With the GUI (Graphical User Interface); this password gives the administrator access to all parameters. It is the highest level password and enables the administrator access to shutting the system down. With the TUI (Telephony User Interface), this password along with the remote login procedure gives the administrator access to recording system prompts and overriding the scheduling by engaging a specific mode. This password is also required to access System Wide Parameters. Without this password you would not be able to set the other system level passwords. © SAMSUNG Electronics Co., Ltd. 291 Error! Use the Home tab to apply 제목 1 to the text that you want to appear here. Multilingual Voice Prompts Support The Multilingual Voice Prompt Support page shows a list of all installed languages. Languages are defined by Language and Locale (or dialect). KEY CODE The key code is the digit entered by the caller and used by the OfficeServ System to identify a language selection. This key code is used in a language selection menu that must be built specifically for your application. DEFAULT SYSTEM LANGUAGE This sets the default operating language of the system. All language selection is based on the order of the defined languages in this page. If the languages are to be re-ordered, added to or changed, then it should be done first, before any mailbox language options are set. Load Language Select the prompt to load and press save button, then it will be installed on the system. The installed prompts will be displayed in the list after completion. If the prompts that you want is not available, you have to upload it via management interface or ftp. This will take a few minutes, so do not turn off the system. Email Gateway The Parameters set in the SMTP Server section on this page, are used for sending mail to the address set in the ‘Report:’ field. The REPORT is used for sending error reporting to the ON or OFF site system administrator. These SMTP Server parameters are NOT used for Subscriber E-Message Delivery and/or Notification. See MCLASS SMTP Server settings for use with individual or groups of subscribers. HOST ID Enter the IP address of the Host Mail Server that the IVM will use to send the E-mail error report to the ON/OFF site System Administrator. 292 © SAMSUNG Electronics Co., Ltd. OfficeServ DM User Guide PORT The default (recommended) port to use is: 25. Most Mail Servers look at port 25 for receiving and sending Mail. SMTP USER ID (OPTIONAL) This is the User ID the IVM will use to log on to the Mail Server and Identify itself as a Client associated with sending Mail. PASSWORD (OPTIONAL) This is the password associated with the IVM’s User ID for logging into the Mail Server verifying it is the Client it said it was. DOMAIN (OPTIONAL) The Domain is used as part of the authentication process between the IVM and the Mail server. Based on the Local Domain Name and Domain ID the mail server can validate that it is accepting mail from this Client. Optional parameters are associated with Authentication to the Mail Server. Mail Servers that are on a Local (non-Public) IP, often do not require authentication. REPORT If an E-Mail fails or is rejected by the Mail server (a Failure is generated after the total number of Attempts parameter in the MCLASS has been exceeded) a Failure Message is generated and sent to the recipient entered in this field. This is usually the ON Site Systems or IT Administrator. The Recipient could be an OFF Site Administrator as well. Important Note: If the LAN is down, if the SMTP Server is Down, or for numerous other Network failures, it may not be possible for the IVM to notify the Administrator of a failure. REPLY TO Many Mail Servers will require a Valid ‘Reply To:’ address. E-Mails with a Blank or Non-Formatted ‘Reply To:’ could be considered SPAM and blocked by the Server. This parameter only applies to E-Mails sent that do not have a valid or known ‘From:’ address, as in a Public Caller. See the Mailbox Block ‘From:’ parameter of an individual subscriber for creating Valid ‘From:’ addresses for subscribers sending voice messages to other subscribers. © SAMSUNG Electronics Co., Ltd. 293 Error! Use the Home tab to apply 제목 1 to the text that you want to appear here. Important Note: Mail sent with this ‘Reply To:’ address should be blocked by the IT administrator or sent to a inbox that dumps it’s data at during preventative maintenance. Keep in mind that Voice Messages sent by public callers cannot be replied to via e-mail. The only purpose for this parameter is because of the requirements dictated by some Mail Servers or IT department policies. E-MAIL ADDRESS SYNTAX An e-mail address can be entered a couple of ways. The traditional e-mail syntax is: [email protected] (domain suffix = .com, .net, .org, etc…) in this case the name entered as the Mailbox label name will be displayed in the Inbox ‘From’ field if the voice message was sent subscriber to subscriber. In some cases the number of characters in a person’s name is longer than the label name length in a Mailbox Block. Until now no-one saw that name so it didn’t matter. If you do not want the Recipient to see the label name as it is typed you can use the following syntax: Firstname Lastname <[email protected]> OR Departmentname <[email protected]> This applies to all fields that accept an e-mail address: System Wide Parameters: ‘Report’ & ‘Reply To’ Mailbox Block: ‘From’, ‘Deliver MSG’, & ‘Notify Only’ TIME ZONE Select the Time Zone, from the list, associated with where the IVM will be installed. The default Time Zone is: ‘Eastern Standard Time’. DAYLIGHT SAVINGS Honor Daylight Savings in E-Mail Date stamp. The Default is: ‘Y’ 294 © SAMSUNG Electronics Co., Ltd. OfficeServ DM User Guide DNS Enter the domain name server address that the system refers to. You have to enter this information to use domain name for SMTP server of Email gateway instead of IP address. © SAMSUNG Electronics Co., Ltd. 295 Error! Use the Home tab to apply 제목 1 to the text that you want to appear here. Voice Studio The Voice Studio is an utility for recording custom prompts. To record a prompt with a telephone, enter the extension number and press ‘call’ button. 296 © SAMSUNG Electronics Co., Ltd. OfficeServ DM User Guide Prompt Recording Studio Item Description Prompt Number The number of the Prompt to be recorded or reviewed. After entering a valid prompt number you will be presented with instructions to record or re-record. You may re-record any prompt in the system, but if you re-record system prompts (prompts below # 1000) the original prompt will be lost. Language This is a language option. You may select from any installed language and from that point on the Voice studio will interact with that language. Length (sec) The length of the recording in seconds. This parameter is automatically filled in by the OfficeServ System when the Prompt is recorded. Recorded The date the recording was made or last updated. Description Space is provided for entering the text of the Prompt to be recorded. Use this space to provide information on the intended usage of the recording. The entered text has no effect on the actual recording. However, it is recommended that the recording be the same as the text to make later editing or re-recording easier. © SAMSUNG Electronics Co., Ltd. 297 Error! Use the Home tab to apply 제목 1 to the text that you want to appear here. Operating Utilities This page is used for accessing various display logs and System Administrator facilities. The utilities and parameters contained within the Operating Utilities are as follows: Display User Log This log provides information on all user accesses to the system. Information displayed includes Subscriber Logon, Port Used, Service Accessed, Message Center Activities, Greetings Recorded, and all other User Activities. During system maintenance this log will be truncated. Only the most recent 150 KB will be kept. 298 © SAMSUNG Electronics Co., Ltd. OfficeServ DM User Guide Display Error Log This is a log of all system errors and other information including startup and System Daily Maintenance. The information supplied in this log includes: OfficeServ System breeding mailbox, lost message file recovered, OfficeServ System shutting down and other system information. During system maintenance this log will be truncated. Only the most recent 150 KB will be kept. © SAMSUNG Electronics Co., Ltd. 299 Error! Use the Home tab to apply 제목 1 to the text that you want to appear here. Activity Log This screen provides a log of all of OfficeServ System activities. These include: changing to another mode, OfficeServ System hanging up, new call and call data, or searching on caller ID or entry. Everything OfficeServ System does is logged here. Usually this will only be used under direction of Samsung Technical Support. During system maintenance this log will be truncated. Only the most recent 150 KB will be kept. 300 © SAMSUNG Electronics Co., Ltd. OfficeServ DM User Guide Shutdown VM Shutdown System does exactly what you would expect. It will deactivate OfficeServ System and shut down the application. The OfficeServ System will not answer the telephone until restarted. This is the preferred and recommended method of shutting down the OfficeServ System, also referred to as a ‘Proper Shutdown’. © SAMSUNG Electronics Co., Ltd. 301 Error! Use the Home tab to apply 제목 1 to the text that you want to appear here. Subscriber Import The Subscriber Import provides an easy way to import large lists of subscribers into OfficeServ System from any existing text file. Use an existing text file with all employees listed to quickly create an import file and follow the instructions provided by OfficeServ System in the dialog screens. 1. 2. 302 Select Group. Select the Group Number the subscribers will be listed under. Group Numbers are convenient for organizing large sets of subscribers into specific groups. In special cases, e.g., multiple tenants sharing a switch, or when OfficeServ System is connected to more than one switch, it is necessary to partition subscribers extensions and mailboxes. In such cases, several subscribers may have the same Extension or Mailbox Number, or the tenants may wish to restrict transfers between the different groups. Because OfficeServ System does not allow the same Extension or Mailbox Number to be used more than once in a Group, and only allows transfers between members of the same Group, it is recommended that all subscribers use Group 01. Values from 01 to 99 are valid entries. Select the .txt file to import. The file name can be any text file with extension .txt. © SAMSUNG Electronics Co., Ltd. OfficeServ DM User Guide 3. Select Subscriber Objects. Select subscriber objects for easy importation of a large number of subscribers. In the selection field enter either: for Extensions for Mailboxes for Both EXT & MBX Create a text file, or use any existing text file, to import subscribers. The file can be named user.txt and include separate columns for the user name, extension, and/or mailbox. Only the subscriber list may be in the file. The user.txt file can look like: 4. Sandy Parks 217 217 Dusty Roads 222 202 Sonny Skies 227 007 Jane Doe 201 John Doe 202 Review Import List. Scroll through and review the subscriber list. The list may not be edited at this point. Accept it as is by pressing [OK] or reject the list by pressing the [Cancel] button. All editing that may need to be done on the subscriber list must be done in the text file that the list was created in. © SAMSUNG Electronics Co., Ltd. 303 Error! Use the Home tab to apply 제목 1 to the text that you want to appear here. Backup and Restore This facility allows backup and restoring the configuration, user mailboxes, customized prompts. This does not support to backup and restore the recorded messages in users’ mailboxes. You have to use ftp client program to do it. (The port number is 60021.) 304 © SAMSUNG Electronics Co., Ltd. OfficeServ DM User Guide Clear Report Count This clears all report counters. Report counters can be found throughout the OfficeServ System block definitions and on the Status Screen. This will not clear the total run time display in System Wide Parameters. © SAMSUNG Electronics Co., Ltd. 305 Error! Use the Home tab to apply 제목 1 to the text that you want to appear here. Iniialize VM This operation will set up the system to original configuration. 306 © SAMSUNG Electronics Co., Ltd. OfficeServ DM User Guide Override Mode The Override Mode bypasses control of the Schedule Table. This allows the System Administrator to immediately put a single port or group of ports in a specific mode. This override will stay active, on the specified ports, until the System Administrator reasserts the automatic schedule. The Override Mode can be activated remotely by the System Administrator. See Manual Mode Selection. The Override Mode has one page which contains all parameters. The parameters are grouped by category as follows: Item Description Port This parameter specifies which port (s) are to be set active to a specific Mode block. Mode This field is used to pick which Mode block is to be asserted. © SAMSUNG Electronics Co., Ltd. 307 Error! Use the Home tab to apply 제목 1 to the text that you want to appear here. View System Report Management Information The OfficeServ System architecture provides a large number of counters to track specific events occurring in an application and on a system wide basis, this allows an administrator to quickly view activity and parameter value settings. The OfficeServ System offers activity data and parameter value settings that provide management information on volume of calls, call connect time, messaging status, and resource utilization. Note that there are many applications that may be created that introduce complexity to the reporting process. For instance, blind transfers will cause a call record when the OfficeServ System answers and then another record when the station forwards or recalls (2 records for 1 call). Also the calculations are made by each module of software and may seem to be inconsistent if a comparison to another statistic is assumed. For this reason, we suggest you use these reports as a guideline only or to observe trends over time. We can explain how each number is generated, but because each application is different we may not be able to explain apparent inconsistencies. By Application 308 © SAMSUNG Electronics Co., Ltd. OfficeServ DM User Guide Item Description Reporting Indicates the report period. This is the date beginning when the Report Counters were last cleared and ending at the current date. Created The date and time the report was actually created. Calls The total number of calls serviced by an application type. One caller accessing more than one application, such as Voicemail and Fax Applications (two applications), counts as two callers. Minutes Total minutes callers were connected to an application type. %Connected Callers The total percentages of calls connected to an application type. Application Call Distribution A bar chart of the different applications and the percentages of calls each application serviced. IntraAppls is Intra-application which represents the callers who accessed more than one type of application. © SAMSUNG Electronics Co., Ltd. 309 Error! Use the Home tab to apply 제목 1 to the text that you want to appear here. To Subscribers Item 310 Description Reporting Indicates the report period. This is the date beginning when the Report Counters were last cleared and ending at the current date. Created The date and time the report was actually created. Subs Calls The total number of calls to the subscriber’s extensions, listed by how the calls were handled (completed, redirected, rejected, etc.). Calls to SubscribersExtensions A listing of how all calls to the subscribers were handled and their percentages. For example, 9% of all calls to subscribers were cases where the subscriber’s extension was busy. Total Subs Calls The total number of calls to the subscriber’s extensions. Caller Hold Time The total number of minutes callers were on hold. © SAMSUNG Electronics Co., Ltd. OfficeServ DM User Guide Messaging Activity Item Description Reporting Indicates the report period. This is the date beginning when the Report Counters were last cleared and ending at the current date. Created The date and time the report was actually created. Activity The Message Activity types. Several different categories are shown. Public The first column is the total number of public callers that accessed a particular type of Message Activity. The second column is the percentage of public callers out of the total number of callers, including subscribers, which accessed a particular type of Message Activity. Subscriber The first column is the total number of subscriber callers that accessed a particular type of Message Activity. The second column is the percentage of subscriber callers, out of the total number of callers, including public callers, which accessed a particular type of Message Activity. Totals The total number of all callers that accessed a particular type of Message Activity. © SAMSUNG Electronics Co., Ltd. 311 Error! Use the Home tab to apply 제목 1 to the text that you want to appear here. By Call Code Item 312 Description Reporting Indicates the report period. This is the date beginning when the Report Counters were last cleared and ending at the current date. Created The date and time the report was actually created. Calls The total number of calls listed by each Call Code. %Total Count The percentage of the calls of a particular Call Code. Minutes The total connect time, in minutes, of all calls of a particular Call Code. Port Utilization By Call Code A listing of the Call Code types and their port utilization by percentage. © SAMSUNG Electronics Co., Ltd. OfficeServ DM User Guide By Hour Item Description Reporting Indicates the report period. This is the date beginning when the report counters were last cleared and ending at the current date. Created The date and time the report was actually created. Calls The total number of calls that came in during a specific hour. %Total Count The percentage of all calls received during a specific hour. Minutes The total connect time, in minutes, of all calls during a specific time period. Port Utilization By Hour A listing of the time periods and their port utilization by percentage. © SAMSUNG Electronics Co., Ltd. 313 Error! Use the Home tab to apply 제목 1 to the text that you want to appear here. By Port Number Item 314 Description Reporting Indicates the report period. This is the date beginning when the Report Counters were last cleared and ending at the current date. Created The date and time the report was actually created. Calls The total number of calls that came in on a specific port. %Total Count The percentage of all calls received on a specific port. Minutes The total connect time in minute, of all calls on a specific port. Port Utilization A listing of the ports and the percentage of calls handled by each port represented by a bar chart. © SAMSUNG Electronics Co., Ltd. OfficeServ DM User Guide By Day of Week Item Description Reporting Indicates the report period. This is the date beginning when the Report Counters were last cleared and ending at the current date. Created The date and time the report was actually created. Calls The total number of calls that came in on a specific day of the week. %Total Count The percentage of all calls received on a specific day of the week. Minutes The total connect time in minutes of all calls on a specific day of the week. Port Utilization A listing of the days of the week and the percentage of calls handled by each day, represented by the bar chart. © SAMSUNG Electronics Co., Ltd. 315 Error! Use the Home tab to apply 제목 1 to the text that you want to appear here. Site Information This page allows the System Administrator access to helpful information about the site in which the OfficeServ System is installed. This information becomes very useful long after the system installation has been completed. These are only memo pages but it is recommended that these screens be filled out for all sites. Having a record of all port connections helps make trouble shooting easier, if it becomes necessary. Status Screen The is the normal operating page for the OfficeServ System. The Status Screen is a display only facility, and shows information in real time relating to the current status of the OfficeServ System. The following information is displayed. Item 316 Description Port The Port column indicates the voice port number. Mode The Mode Number column displays which mode the port is in. Active Block This column displays which block is currently servicing a call, as it gets directed through the call session. © SAMSUNG Electronics Co., Ltd. OfficeServ DM User Guide (Continued) Item Description Status The status column displays the current condition that the port is in. Some examples are Idle, Processing, Transferring, Messaging, etc. Calls To-Date The total number of calls that the OfficeServ System has processed. Average Calls Per Week The average number of calls per week. Directory Accesses The total number of callers that have accessed the directory. Times All Ports Busy The total number of times all ports have been busy. Number Of Subscribers The total number of subscribers on the system. This is actually a mailbox count. Extensions are created for every station port on the phone system. Total Message Count The total number of messages in the system. This includes new and saved messages. Avg Messages/Mai lbox The average number of messages per mailbox. Disk Space Available The total disk space available in hours and minutes. © SAMSUNG Electronics Co., Ltd. 317 Error! Use the Home tab to apply 제목 1 to the text that you want to appear here. Explanation of Default Configuration Application Design Creating an application consists of linking the appropriate Blocks into a set of Call ControlPaths which, for a particular caller, or group of callers, represents a Call Routing Solution. The number of ControlPaths, needed to establish a satisfactory Routing Solution, depends upon how many alternatives or variations the organization wishes to provide, to satisfy the anticipated needs of the caller (s). The default application is built using Blocks. Each block has a specific purpose and are chained together to build the application. This allows the caller to pass from one to the other as the call is processed. The default configuration in the OfficeServ System has been designed to simplify installation and reduce the amount of time it takes to learn the application. Many of the configuration options have been disabled or fixed at a default value. When a call is answered, it is processed by a number of blocks behind the scenes. These blocks are hidden for reasons of simplicity. The call is processed in the following way: NEW CO CALLS New calls are answered by the PORT Block which looks to the SCHEDULE Table to see which MODE Block should take control of the call session. The MODE Block based on the Call type will then pass control to one of the MENU blocks. This may have sounded complicated but is quite simple. By default all of the configuration is done for you. Most of the application for the customer actually starts at the MENU Block. Knowledge of how the call is routed through the system will help you create more complex applications only when and/or if necessary. Depending on the current mode (Day, Night, Holiday, or Weather). A custom Company greeting is played and the caller is directed to any other block in the system based on the DTMF input. The below Call Routing Solution Chart shows you the communication links and connections between each of the blocks in the system. FORWARDED CALLS Follow the same initial call flow as stated above. Their Call Type is identified as a Forwarded call and the call is passed to a MENU Block that handles forwarded calls. This MENU Block does not speak to the caller it simply looks at the Forward ID of the Cal and transfers the caller to the appropriate Subscriber’s Personal Greeting. Based on the Subscriber; s greeting the caller may leave a message, route themselves to another subscriber, return to the main men, or simply hang up. 318 © SAMSUNG Electronics Co., Ltd. OfficeServ DM User Guide Import Basic Concepts The Configuration Concept for the OfficeServ System is a series of Blocks, Pointers, and Objects configured together to create a ‘Call Routing Solution’ for specific Member (s) of the ‘TeleCommunity’ TeleCommunity Anybody and/or anything that needs to communicate with the organization Communicate The need to deliver and/or receive information Call Routing Solution The process in which the OfficeServ System products connects the caller to the Person and/or Device most suitable for communicating with the caller. © SAMSUNG Electronics Co., Ltd. 319 Error! Use the Home tab to apply 제목 1 to the text that you want to appear here. Blocks Blocks are the components used to build your individual customer application. All call flow is programmed using these blocks. Each block type has a specific function, and can be chained together with other blocks to provide a complete call processing solution. Bye Block Speaks a prompt, usually ‘Good-bye’, then terminates the call session. Dial Block This block is typically used for dial devices such as fax machines and modems, or paging systems. Any device where the power of having the functionality of a subscriber is not necessary. Directory Block This is a utility that sets up the necessary parameters used in the subscriber’s directory list. EClass Block This is a class of service block for extensions, and contains additional permissions that apply to all extensions in this class. Extension Block Represents the subscriber to a caller. Houses subscriber’s settings, personal greetings, and call coverage controls such as call blocking and screening. Contains Caller Option Processor and Designated Location facility for routing callers to subscriber’s current telephone, regardless of physical location. Multiple subscribers, each with their own Extension Object, can effectively share a single telephone. List Block Delivers recorded voice message to a list of mailboxes. May contain other lists as members. Mailbox Block Receives, records, sends, and stores multimedia messages. Contains default personal greeting, name and password for the subscriber. This block contains all the parameters for the mailbox including pager and cell phone notification. One usually exists for each phone on the system. 320 © SAMSUNG Electronics Co., Ltd. OfficeServ DM User Guide MClass Block This is a class of service block for Mailboxes, and contains additional permissions that apply to all Mailboxes in this class. Menu Block Speaks prompts to caller and routes on Input from caller entry. The Auto Attendant Main Menu is an example of a menu block. Mode Block Answers incoming calls for assigned port (s) by mode, as assigned in the Schedule Table. Collects and stores CallData in appropriate call session Memory Registers. Can speak salutation prompts. Port Block Contains all parameters to connect and communicate with the device the OfficeServ System is directly attached to. For most applications changes to this block are not required. It has been made visible because it contains parameters that define what disconnect signal, besides the switch’s IPC disconnect Message, we will hang-up on. This is useful when the CO does not provide a consistent disconnect. Query Block Speaks a question/statement and expects to record a voice and or DTMF response. Delivers recorded response to one or more mailboxes for transcription. Speak Block The purpose of a Speak Block is to speak a prompt or system information to the caller. A Speak Block can contain two prompts in addition to the ability of speaking system information or register contents. After speaking to the caller, control is passed to another Block based on the target of the NEXT pointer . Station Block The station block is responsible for dialing. When the OfficeServ System dials or transfers any calls it uses a station block. All devices accessible via Touch-Tone dialing in OfficeServ System use at least one of these. Each contains the call progress information to monitor and process calls to the associated device (s). © SAMSUNG Electronics Co., Ltd. 321 Error! Use the Home tab to apply 제목 1 to the text that you want to appear here. Extension and Mailbox Objects On the OfficeServ System Subscribers are defined by both extension blocks and mailbox blocks. The extension block is responsible for playing the appropriate personal greeting, and performing all transfers. It may initiate any hold conditions, park and page and other caller options. Through the access manager you can control call screening, forwarding and blocking, find me and follow me. It is the main component that callers will experience when they dial an extension number and it provides the subscriber with a collection of management tools and personal services including workload manager, availability schedule, stored phone numbers and direct calling. The mailbox block, is far more simple. It is used primarily for two things. Recording messages and notification Each subscriber may have one or both blocks. Call Directors Call Directors are powerful tools used to connect the various blocks together. All blocks that pass control of the call to another block use Call Directors. Call Directors pass control of the call to the next block. Which block they pass control to is dependent on certain conditions called events, that have occurred within the current block. Events may include no entry, invalid entry, no message left, operator requested and user exit. There are many possible events and they will vary depending on the type of block being programmed. In a Menu Block, the Call Director is called the ‘Menu Input Processor’ and also acts on data entered by the caller. In an Extension Block, the Call Director is called the ‘Caller Options Processor’ and also acts on data entered by the caller. In a Mode Block, the Call Director is called the ‘Call Code Processor’ and also acts on call type data received from the phone system. The Bye Block and the Station Block do not have Call Directors, as they are considered the end of a Call Control Path. 322 © SAMSUNG Electronics Co., Ltd. OfficeServ DM User Guide Event Pointers The Call Director uses EVENT POINTERS to pass control of the call to the next block. All Event Pointers consist of an INPUT value, an ACTION, a Block TYPE, and a TARGET. The INPUT value is the collection of digits, whether received from the caller via DTMF, or telephone system or network integration information, collected in the block. The ACTION is that which takes place when input from the caller equals the INPUT value. TYPE, is the type of Block to pass control to, there are five types of ACTIONS: GOTO,TRANSLATE, PASSWORD then GOTO, SEARCH ON, and FILE. The TARGET is the Name of the Block to pass control to next. Modes At any time of the day the OfficeServ System is in a specific operating mode. This may be as simple as Day Mode (business hours) or Night Mode (business closed) or it can be very complex (Special Mode for Port 2 Only, on July 19th between 7 and 8 p.m.). New modes may be added as needed. The times that operating modes are effective are defined in the Schedule Table. The behavior of the OfficeServ System when it answers a new call during each specific operating mode is defined in the Mode Block. OfficeServ System can be made to change modes either manually, by using Special Administrative commands, or automatically as specified in the Schedule Table. © SAMSUNG Electronics Co., Ltd. 323 Error! Use the Home tab to apply 제목 1 to the text that you want to appear here. Mode Specific Event Pointers When configuration any block that defines event targets (exit points from the block) the OfficeServ System will first ask you to select a mode. This allows the exit destinations to be different for each mode. For example, the next pointer might access an announcement informing callers of special daytime sales events during the ‘Day’ Mode, but after 5:00 p.m., it would pass control to a different announcement about evening shopping hours, during ‘Night’ Mode. Pointers set in the ‘Default’ mode are always in effect unless the same pointer is set in another Operating Mode. The OfficeServ System will display ‘Default’ mode pointers in a block while viewing pointers in another mode. The ‘Default’ mode pointers will be grayed out to denote that they are not in the current mode. Each Operating Mode is given an unique number by the system. Valid numbers are 01-99, and are assigned in sequence as new modes are created. Pressing ENTER at this field opens a Pointer Mode Target Generator, from which an existing mode name may be selected, or a new name may be entered. Entering a new name creates a new Mode with its corresponding Number. The mode number and name are associated with the block’s pointers, not the block itself. This allows one block to route calls to different destinations in different modes, using different Targets for the pointers’ various mode references. Template Blocks To simplify creating multiple blocks of a given type, OfficeServ System provides a template for each type of block. Templates have default values preset for many of their parameters. You may change these defaults and save the modified Template, or by using the 'Save As...' option , create a new block of that type, while preserving the original template. Each time a block is created, it will be initialized with the parameter values which are set in the template. This is particularly useful when building mailbox and extension blocks for subscribers, where many of the parameter settings will be uniform from subscriber to subscriber. 324 © SAMSUNG Electronics Co., Ltd. OfficeServ DM User Guide Configuration Blocks Bye Block The BYE Block is very simple. Its purpose is to say good-bye to the caller, disconnect the call, and free the port. The only parameter is the prompt to be spoken before disconnecting. There is only one bye block available in the OfficeServ System but additional Bye blocks can be added. Item Description Label The name of this block. A block name can be any alphanumeric string of up to 16 characters (including spaces). A block name may not be the same as another block name. MBX, EXT or LIST numbers may not be duplicated within the same group. Disconnect Prompt The number of the prompt that the OfficeServ System speaks before disconnecting the caller. Allowable inputs are 0001-9999 with blank indicating ‘say nothing’. © SAMSUNG Electronics Co., Ltd. 325 Error! Use the Home tab to apply 제목 1 to the text that you want to appear here. Dial Block The functions of a DIAL Block are to perform a dialing operation and then either release the call or branch to another Block, based on the outcome of the dialing operation. This Block is commonly used to transfer callers to an operator for assistance. It does not have the extensive automated attendant features of an Extension Block. However, it is useful for transferring calls to another system, such as a dictation system, answering machine, FAX machine, MODEM, or paging terminal. It can also be used to facilitate special features that a telephone system may lack, such as DISA (Direct Inward System Access a feature which enables employees at remote locations, such as their homes, a telephone booth, or a customer’s office, to use their company’s system to process telephone calls), or Least Cost Routing of outgoing long distance calls. DIAL Blocks may also be used in conjunction with an Extension Block to create various types of extension hunt groups. This is accomplished by setting up the Event Pointers in the Blocks to hunt through the designated extensions until an appropriate service provider is located. Each Dial Block is associated with a Station Block which can be used to provide circuit specific cadence filtering for unique remote (off premises) devices like answering machines, fax machines, tie lines, auto-attendant or voicemail systems, excessively noisy trunks, paging systems, or even attendant consoles. The Dial Block can play a prompt to the caller prior to connecting the call, and can activate a variety of other Call Processing or Service Provider Objects, based on the configuration of its Event Pointers. One of these the Answer Pointer can be set to play customized prompts, initiate a caller dialog, or invoke menu options after the call is answered. 326 © SAMSUNG Electronics Co., Ltd. OfficeServ DM User Guide General Information Item Description Prompt The number of the prompt spoken to the caller before executing the specified dialing operation. Allowable inputs are 0001 9999. Blank indicates ‘say nothing’. for prompts numbers above 0999. Number This is the DTMF string required for dialing the telephone or extension number. Valid dialing characters are 1234567890*#abcd&;,W. You can also enter OfficeServ System registers containing numeric data. When using Register information as part of a dialing sequence, the register character is always preceded by a ‘$’ sign. Supervision This is how the call is handled when transferred. Press ENTER for the following pick list options: - NONE: This is a blind transfer. A blind transfer indicates that once the call is transferred the system no longer monitors the call for any subsequent condition. - PARTIAL: This is used when the call is transferred and the system checks to identify if that line is busy. - FULL: This is used when the call is transferred and the system stays on the line to make sure the call was answered or not answered (NO-ANSWER). © SAMSUNG Electronics Co., Ltd. 327 Error! Use the Home tab to apply 제목 1 to the text that you want to appear here. (Continued) Item 328 Description Station Type This is the area where the call progress parameters are set up as referred to in the opening paragraphs of this block. You can assign the necessary Station Type to fit the appropriate conditions needed to be met. If this parameter is left blank the OfficeServ System will select a station Block based on the Station Block’s ‘Matching Dialing Strings’ (See Station Blocks for information on this parameter and field). If you assign one then you can click to review or edit the Station Block assigned. From-To This indicates the period from the date when the Report Counters were last cleared till the current date. Applies to all call counts in this report. Calls This shows the total number of calls processed by this block during the period specified in the following range. Answered This shows the number of calls processed by the block which were answered by the called party and what percentage of the total calls this number represents. No-Answer This shows the number of calls processed by this block which were unanswered (resulted in Ring-No-Answer) and what percentage of the total calls this number represents. Busy Count This shows the number of calls processed by this block which encountered a busy signal and what percentage of the total calls this number represents. Fbusy Count This shows the number of calls processed by this Block which encountered a fast busy signal (usually indicating an invalid number was dialed, or the destination returned fast busy in a DND condition), and what percentage of the total calls this number represents. Error Count This shows the number of calls processed by this Block which encountered a signal or condition which OfficeServ System could not recognize, or were terminated due to a processing error, and what percentage of the total calls this number represents. © SAMSUNG Electronics Co., Ltd. OfficeServ DM User Guide Call Director Item Description Operating Mode This indicates the Mode Name and Number for which the displayed Block Pointers’ Targets are active. Each Operating Mode is given a unique Number by the system. Valid numbers are 01 99, and are assigned in sequence as new Modes are created. Pressing ENTER at this field opens a Mode Target Generator, from which an existing Mode Name may be selected, or a new name may be entered. Entering a new name creates a new Mode with its corresponding Number. The Mode Number and Name are associated with the Block’s Pointers, not the Block itself. This allows one Block to route calls to different destinations in different Modes, using different Targets for the pointers’ various Mode references. For example, the No-Answer pointer might route callers to an operator’s Extension during the ‘Day’ Mode, but after 5:00 PM, it would route them to a Night Options Menu during ‘Night’ Mode. Pointers set in the Default Mode are always in effect unless the same Pointer is set in the current Operating Mode. OfficeServ System will display Default Mode pointers in a block while viewing pointers in another mode. The Default Mode pointers will be grayed out to denote that they are not in the current mode. © SAMSUNG Electronics Co., Ltd. 329 Error! Use the Home tab to apply 제목 1 to the text that you want to appear here. (Continued) Item Description ANSWER The block that the OfficeServ system will execute next if the dialed number is answered. Normally this pointer is left blank, in which case the OfficeServ system will hang up after completing the call transfer. NO-ANSR The OfficeServ system goes immediately to the designated target Block when a ring-noanswer condition is encountered. BUSY The OfficeServ system goes immediately to the designated target Block when a busy condition is encountered. FBUSY The OfficeServ system goes immediately to the designated target Block when a fast busy is encountered. ERROR The OfficeServ system goes immediately to the designated target Block if an error signal is encountered after dialing the number. If the applicable pointer is not set or the Supervision parameter is set to none, the OfficeServ System will go on hook after dialing. This is a typical situation for transferring callers to the Console for assistance. 330 © SAMSUNG Electronics Co., Ltd. OfficeServ DM User Guide Directory Block A Directory Block defines necessary information about how the system Dialby-Name Directory will function. Note that in order for the directory feature to work the included subscribers must have recorded their names and entered DTMF values for them. This information includes the maximum number of digits the caller may enter to search for an individual’s name, the maximum number of names matching the caller’s entry, and also, whether or not to speak the extension number of the matching name to the called party. The directory will search on extensions first, if no match is found then it will search mailboxes. Search Information Item Label Name © SAMSUNG Electronics Co., Ltd. Description This is the name of the block. A block name can be any alphanumeric string of up to 16 characters (including spaces). A block name may not be the same as another block name. 331 Error! Use the Home tab to apply 제목 1 to the text that you want to appear here. (Continued) Item 332 Description Maximum entry digits This is the maximum number of digits the caller may enter, to search for a target that a caller is trying to locate. This is usually set to three because most people’s names do not have the same first three letters. This number can be between 1 and 10. Wait for first digit This is the amount of time in seconds that the system waits for the caller to enter the first digit. Wait for subsequent digits This is the amount of time in seconds that the system waits for the caller to enter the digits following his first entry digit. Repeat prompts if no entry This is the number of times that the system repeats prompts if the caller does not enter any digits. Retries if no match This is the maximum number of names that a caller may enter if no match is found on the digits that the caller entered. If this occurs, it is considered an INVALID entry. Maximum number of matches This is the number of names played to a caller if more than one name matches the entry. The number can be between 1 and 8. Search based on first name When an extension is set up, generally people are listed by last name, comma, and first name. This parameter determines which part of the name (label) that will be searched for a match. Example name is entered in the subscriber list as Smith, John. If this value is set to N (no) the directory will search on Smith if this value is set to Y (yes) the directory will search on John. Include unnamed objects If this parameter is set to YES, Search Targets with no recorded name will be included in the directory listing played to the caller. In this case, the OfficeServ System speaks the number of the Search Target. This could, for example, be an extension or mailbox number. Speak name on exit If this parameter is set to YES, the selected object’s name is played to the caller prior to exiting the directory. If no name is recorded, the selected object’s number is played to the caller. This could, for example, be an extension or mailbox number. Speak key value on exit If set to YES, the selected object’s number is played to the caller prior to exiting the directory. Verify before exit If this parameter is set to YES, the system requests the caller to confirm the object selection before transferring the caller to that object. If set to NO, confirmation is not needed. © SAMSUNG Electronics Co., Ltd. OfficeServ DM User Guide (Continued) Item Description Type This is a list of the Block Type priority for this particular directory system to search. By default, the directory will search for extensions first and then mailboxes. Gp For each Type that is entered you must select the Group Number where the selected Block Type should be search for. In almost all standard installations you will only search in group 01. Prompts This page contains a list of the prompts that the OfficeServ System plays to the caller when the directory feature is being used. Item Description Enter name The prompt asking the caller to spell the called party’s name. This is the prompt you would change, if you wanted to ask the caller to enter the parties FIRST name. Target name prefix The prompt spoken in front of the target object’s name. ‘To reach…’ © SAMSUNG Electronics Co., Ltd. 333 Error! Use the Home tab to apply 제목 1 to the text that you want to appear here. (Continued) Item Description No matches found The prompt indicating no matches were found. Invalid entry The prompt indicating the caller input is invalid. Press ‘9’ for more names The prompt offering the caller additional matches. Press ‘0’ for a new name The prompt offering the caller the option to search for another name. Press ‘*’ to exit The prompt offering the caller the option to return to the previous menu. Press… (1…8) A brief description of the prompt that is played to the caller and its associated prompt number. Directory Activity This is a record of directory activity and may be used for system planning or troubleshooting. Call Director 334 © SAMSUNG Electronics Co., Ltd. OfficeServ DM User Guide Item Description Operating Mode This is used to select an operating mode for configuration the mode specific pointers. Examples of operating modes are Day, Night or Holiday. This field does not set the operating mode for the system, that is done in the schedule table. This selection allows you to program different destinations called event pointers for each mode. Choose the mode you would like to program. If you select ‘Default’ it means all the time-unless another mode is entered to override the default setting. If you want the same setting to be in effect all the time, simply program the ‘default’ mode and leave the settings for all other modes blank. ESCAPE The Block to go to if the caller presses the Escape digit to escape from an announcement (the Escape digit may be pressed anytime during the play of the announcement). It is recommended that the target Block be the initial MENU Block. This allows the caller to return to the main options. INVALID This is the Block to go to if the caller enters data (DTMF) that is not recognized by the system. NO-ENTRY This is the Block to go to if the caller is prompted to replay the announcement and does not enter anything. © SAMSUNG Electronics Co., Ltd. 335 Error! Use the Home tab to apply 제목 1 to the text that you want to appear here. EClass Block The ECLASS (Class of Service) Block is an expansion or extension of service parameters which pertain to an Extension Block. All extension blocks are associated with one ECLASS Block. ECLASS Blocks specify the voice prompts and operating parameters to be used when transferring calls to Extension Blocks and what to do in the event of a failed transfer (ring-no-answer or busy). It authorizes subscribers to make Outcalls and allows their callers to have them paged via Overhead Paging. There is no limit to the number of Extension Blocks the ECLASS Block may be associated with. The Operating Modes in the CallDirector section of the ECLASS Block provide the flexibility to handle calls differently for various modes of operation (typically at different times of the day). The CallDirector uses Event Pointers to pass control of the caller. 336 © SAMSUNG Electronics Co., Ltd. OfficeServ DM User Guide General Item Description VMS Group VMS group Label Name The first parameter is the Block Name. A Block name can also be referred to as the Label Name and can be any alphanumeric string up to 16 characters long (including spaces). A Block Name may not be the same as another Block Name. MBX, EXT or LIST Numbers may not be duplicated within the same group. The ECLASS Group Number is located to the left of the ECLASS Block Name. Group Numbers are convenient for organizing extensions into application specific groups. This number must be the same as the Group Number for the Extension Blocks assigned to this ECLASS. In most applications, the default value of 01 is normally used. Values from 01 to 99 are valid. You select which group the ECLASS Block belongs to before you create the ECLASS Block. Group Numbers for ECLASS, EXTENSION, MCLASS, MAILBOX, and LIST Blocks generally are used for Multi Tenant environments. Extension Retention The number of days, from 1 to 999, an inactive extension or EXT Block will be retained. If an extension goes unused for the specified number of days, it will be automatically deleted. The default value is 60 days. Wait for entry The time, in seconds, that extensions in this ECLASS will wait for the caller to make an entry. This parameter is in effect after prompts play requesting caller entry on a failed transfer. This time begins after a prompt is spoken or after the last digit is pressed. This parameter should be kept in the 3-5 second range to avoid long delays by the OfficeServ System. The allowable inputs are 0-99 seconds. Retries on invalid The number of times from 0 to 99 that the OfficeServ System will allow the caller to reenter his password if an invalid password was entered. Repeat on no entry The number of times from 0 to 9 that the OfficeServ System will repeat prompts, if no entry is made by the caller. This only effects prompts associated with the ECLASS Block. To have the caller ‘…Leave a message at the tone…’ after hearing an Extension call condition greeting (see the User Guides for information on the extension greetings), this parameter should be set to 0. Other Number No digit is assigned for this. This controls the ability of the OfficeServ System to allow callers reaching extensions, to dial another extension. © SAMSUNG Electronics Co., Ltd. 337 Error! Use the Home tab to apply 제목 1 to the text that you want to appear here. (Continued) Item 338 Description Leave a message This is the digit a caller enters to indicate they wish to leave a message. Allowable digits are 0-9, but cannot be the same as the hold digit. Hold This is the digit the caller enters when he elects to hold for an extension that is busy. Allowable digits are 0-9, but cannot be the same as the Digit to Leave Message, Digit to Request Paging or Digit for other options. This digit is active after a call transfer that results in a busy condition. Other options This is the digit the caller enters to indicate they wish options, other than leaving a message or holding. Allowable digits are 0-9, but cannot be the same as the Digit to Leave Message, Digit to Hold or Digit to Request Paging. Operator This is a digit that the caller enters to transfer to an operator. Control is passed to the block indicated by the Operator pointer. Escape This is the digit the caller enters to exit immediately from the current process. Control is passed to the block indicated by the Options pointer. This digit is also used by the Subscriber when exiting from the Extension Menu. Control is passed to the block specified by the USER-EXIT pointer. Allowable digits are 0-9, Q and #. © SAMSUNG Electronics Co., Ltd. OfficeServ DM User Guide Prompts Item Description Target herald prompt The prompt # that plays during a transfer. By default this is ‘transferring to…’. Forward herald prompt The prompt # that plays when a call is forwarded. By default this is ‘forwarding to…’. Blind xfer prompt The prompt # that plays during a blind transfer. By default this is ‘one moment please’. Monitored xfer prompt The prompt # that plays during a monitored transfer. By default this is ‘Please hold while I connect your call’. ‘Find me’ xfer prompt The prompt # that plays during a ‘find me’ operation. By default this is ‘Please hold while I locate your party’. Call screening The prompt # that plays during call screening. By default this is ‘Whose calling please?’. No answer prompt The prompt # that plays to a caller during an unanswered transfer. By default this is ‘I’m sorry the call was not answered’. Busy prompt The prompt # that plays when a caller is holding for a busy station. By default there are two, they are ‘I’m sorry the number is busy’ and ‘I’m sorry the number is still busy’. © SAMSUNG Electronics Co., Ltd. 339 Error! Use the Home tab to apply 제목 1 to the text that you want to appear here. (Continued) Item 340 Description Block prompt The prompt # that plays to a caller when the subscriber has blocked their calls. By default this is ‘I’m sorry, that party is not available’. Error prompt The prompt # that plays in an error condition. By default this is ‘I’m sorry, that call did not go through’. Accept call This is the digit a called party enters to indicate they will accept the call during a screened transfer. Allowable digits are 0-9. The prompt # indicates the prompt that will play to the called party to remind them of the digit selection. Redirect call This is the digit a called party enters to indicate they wish to redirect a screened call to another extension. Allowable digits are 0-9. The prompt # indicates the prompt that will play to the called party to remind them of the digit selection. Reject call This is the digit a called party enters to indicate they wish to reject a call. If the call is rejected, the blocked greeting is played to the caller. The prompt # indicates the prompt that will play to the called party to remind them of the digit selection. Realtime Greeting This is the digit a called party enters to indicate they wish to record real time greeting. After the recording, it will be played to the caller. © SAMSUNG Electronics Co., Ltd. OfficeServ DM User Guide Hold Controls Item Description Max hold queue size The maximum number of callers allowed holding in queue while waiting to be transferred to a WorkGroup member. Once this parameter is exceeded, the OfficeServ System will look to the Que-Full or Expand event pointer to determine what action to take. Allowable inputs are 1 to maximum number of ports installed. Max hold time (in minutes) The maximum amount of minutes the caller will hold in queue while waiting to be transferred to a WorkGroup member. Once this parameter is exceeded, OfficeServ System will look to the Que-Full or Expand event pointer to determine what action to take. Allowable inputs range from 1 to 99 minutes. Require input every nth try This allows the caller to remain on hold for a busy extension without pressing the hold digit for each retry interval. This parameter specifies the number of retry intervals that the caller is not prompted to enter a digit to indicate they wish to continue holding. Allowable entry for this parameter are 1-99. If this parameter is set greater than ‘1’, the OfficeServ System will default to ‘hold’ on a busy condition if the caller makes no input on the first busy. © SAMSUNG Electronics Co., Ltd. 341 Error! Use the Home tab to apply 제목 1 to the text that you want to appear here. (Continued) Item 342 Description Retry interval (in seconds) This is the maximum number of seconds, from 1 to 99, OfficeServ System waits when a caller elects to hold before retrying the extension. No digit hold prompt The prompt # that plays during caller hold options. By default this is ‘If you would like to hold, please stay on the line’. No digit continue holding prompt The prompt # that plays during caller hold options. By default this is ‘To continue holding, please stay on the line’. Announce hold interval prompt The prompt # that plays during caller hold options. By default this is ‘I will try that extension in a moment’. Announce hold position The system will advise the caller of his position in the hold queue when selecting to hold for a busy extension, there are two parameters for this feature. 1st-The Hold position will be played when the caller first begins to hold. 2nd-The Hold position will be played each time the OfficeServ System attempts to connect the call. Announce hold time The system will advise the caller of the average hold time when selecting to hold for a busy extension, if this parameter is set to ‘Y’. There are two parameters for this feature. st - 1 : The Estimated hold time will be played when the caller first begins to hold. nd - 2 : The Estimated hold time will be played each time the OfficeServ System attempts to connect the call. © SAMSUNG Electronics Co., Ltd. OfficeServ DM User Guide OutCall Item Description On premise Set to ‘Y’ to allow the subscriber to make on-premise Outcalls. The On Premise Station Type-Station type to use for on-premise out calls. If left blank, IVM will automatically select a Station type. Off premise Set to ‘Y’ to allow the subscriber to make local Outcalls. The Off Premise Station Type-Station type to use for off-premise out calls. Leave blank for auto select. Long distance Set to ‘Y’ to allow subscriber to make long distance Outcalls. The Long Distance Station Type-Station type to use for long distance out calls. Leave blank for auto select. Excepted Area Codes These 10 spaces are used to specify area codes subscribers may not call. Use these settings to restrict toll calls such as calls to 900 numbers. © SAMSUNG Electronics Co., Ltd. 343 Error! Use the Home tab to apply 제목 1 to the text that you want to appear here. Call Director 344 Item Description Operating Mode This is used to select an operating mode for configuration the mode specific pointers. Examples of operating modes are Day, Night or Holiday. This field does not set the operating mode for the system, that is done in the schedule table. This selection allows you to program different destinations called event pointers for each mode. If you select ‘Default’ it means all the time-unless another mode is entered to override the default setting. If you want the same setting to be in effect all the time, simply program the ‘default’ mode and leave the settings for all other modes blank. MESSAGE This causes the OfficeServ System to go directly to the designated Block, if the caller chooses to leave a message. This is usually an MCLASS Block, which routes the caller to a mailbox with the same number as the Extension Block. However, it may be a DIAL Block or Extension Block if messages are to be taken by a secretary or separate voice mail system. OfficeServ System will ignore this pointer if the <MSG> pointer is set in the Extension Block. © SAMSUNG Electronics Co., Ltd. OfficeServ DM User Guide (Continued) Item Description OPTIONS When a transfer to an extension results in a busy or ring-noanswer condition, the caller is given choices such as ‘To leave a message, press 1, to hold, press 2, or for additional options, press 3.’ This pointer determines the MENU Block which control will be passed to, if the caller presses the digit for additional options. OPERATOR This is the block control is passed to if the caller presses ‘0’ for the operator while listening to: ‘To leave a message, press 1, to hold, press 2, or for additional options, press 3’. ESCAPE This is the Block to go to if a public caller presses the escape digit. NO-ENTRY This is the block to go to if no entry is made within the ECLASS Block when prompted. INVALID This is the block to go to if an invalid entry is made within the ECLASS Block when prompted. QUE-FULL The next block to go to if the number of callers allowed holding in queue is exceeded. (See Max in hold queue parameter in the MODE Block.) OfficeServ System will ignore this pointer if the <QUE-FULL> pointer is set in the Extension Block. USER-EXIT The next block to go to if a subscriber presses star (*) to exit from their extension administration menu. It is recommended that the named Block, be the initial MENU Block to allow the user to return to the beginning of the application. DIRECTORY This is the block to go to if the caller presses the digit associated with the Directory Assistance. © SAMSUNG Electronics Co., Ltd. 345 Error! Use the Home tab to apply 제목 1 to the text that you want to appear here. Extension Block The Extension Block is one of the two Blocks (Extension, Mailbox) that describes a subscriber. The Extension Block controls the operating characteristics specific to a subscriber's extension. This includes all the caller options and transfer instructions. It is important to understand that in the OfficeServ System the only function of a mailbox block is to take a message and perform notification. All other subscriber features and options are provided by the extension block. General Item 346 Description VMS Group VMS group Label Name The name of this block. A Block name can be any alphanumeric string up to 16 characters long (including spaces). A Block name may not be the same as another Block name. MBX, EXT or LIST Numbers may not be duplicated within the same group. © SAMSUNG Electronics Co., Ltd. OfficeServ DM User Guide (Continued) Item Description OfficeServ System stores the subscriber name in either ‘lastname, firstname’ or ‘firstname lastname’.When entering the subscriber name it is suggested you follow one for mat or the other for the entire application. If the name is entered as ‘firstname lastname’ OfficeServ System will NOT automatically re-sort it to ‘lastname, firstname’, but the subscriber would still be able to be accessed correctly from the directory. However by mixing and matching formats with in an application would cause the list of blocks to appear to be out of order This format (‘lastname, firstname’ vs ‘firstname lastname’ is only important because the directory feature will search on a specific field, ‘lastname’ or ‘firstname’. If you did not put a comma after the ‘lastname’ in the ‘lastname, firstname’ format or put a comma after ‘firstname’ in the ‘firstname lastname’ format the directory search would not be accurate and subscribers entered out of format could not be accessed from the Directory. Number The number that must be entered by the caller in order to access the subscriber extension. It does not necessarily have to be the same number dialed by OfficeServ System when transferring to the extension on the telephone system. This cannot be the same number of any other extension, and is also referred to as the ‘Key’ Value. Mailbox The mailbox corresponding to the subscriber Extension Block. By entering a Mailbox Block here signifies that this extension owns the specified Mailbox. Eclass The name of the EClass block that contains the class of service information for this Extension. Much of the prompts, control, and parameters are located here. See the EClass Block for detailed information and operation. Language This is a language option. You may select from any installed language and from that point on, the extension will respond to the authorized owner in the language selected. Authorized owner means a user who has entered a valid password. The mailbox block also has a language field, and the OfficeServ System will try to resolve these fields to a single value (make them match). If conflicting information is contained in these fields, the Extension Block has priority and the Mailbox Block will be automatically changed to match. This selection is based on the order of the defined languages in page 3 of the System Wide Parameters. © SAMSUNG Electronics Co., Ltd. 347 Error! Use the Home tab to apply 제목 1 to the text that you want to appear here. (Continued) Item Description If the languages are to be reordered, added to or changed in page 3 of the System Wide Parameters then this field should be re-entered. 348 Dial Number mailbox The actual number that the OfficeServ System will dial to complete the transfer. OfficeServ System associates two types of numbers with an extension: the block identification number called the Key and the Dial Number. The Key is the number the caller enters for a particular called party’s telephone. The Dial Number is the number the telephone system database recognizes as one of its stations. When the OfficeServ System receives the Key from the caller, it transmits the Dial Number to the telephone system to execute the transfer to the called party's telephone. The Key and the Dial Number are usually the same, but they can be different. When they are different, the extension is a virtual extension. A virtual extension can be configured with the same set of call automation attributes as a regular extension. It is particularly useful when a group of people in an organization share a single telephone. Each person in the group can be assigned his own Key in the OfficeServ System subscriber database. The Dial Number, however, will be the same for each virtual extension. This allows callers to enter a distinctive Key for each member of the group, even though they ring the same telephone. A call presentation prompt can be customized for each virtual extension subscriber; for example, ‘Call for John Smith,’ or ‘Call for Jane Doe’. Alternate Number The OfficeServ System has a feature where a subscriber can enter an alternate location and all calls processed by the extension block will be transferred to this alternate number. This number can be an internal number (other extension) or an external number like your home number. The designated location option must be set to Yes to use this feature. When calls are transferred to a designated location (alternate number) the OfficeServ System will supervise the transfer, i.e., it will monitor the call progress until the call is answered. If the call is not answered it will be routed to the destination specified in this extension block’s call director, for the no answer event. © SAMSUNG Electronics Co., Ltd. OfficeServ DM User Guide (Continued) Item Supervision Level © SAMSUNG Electronics Co., Ltd. Description This sets the type of transfer that this extension block uses to transfer callers. - NONE (BLIND TRANSFER): OfficeServ System transfers the call, releases, and doesn’t wait for any subsequent condition. - PARTIAL (Supervise for Busy): OfficeServ System transfers the call, and waits to see if it gets one valid Ring. If it hears a valid ring it releases, and doesn’t wait for any subsequent condition. If it does not hear a valid ring, It aborts the transfer, pulling the call back and follows the Extension Blocks ‘Busy’ call condition rules. This can be play the subscriber’s Busy Greeting if recorded, their Primary Greeting if recorded, or be directed to the Call Director on page four for instructions on where to send the call for that call condition. - FULL (SUPERVISED): OfficeServ System transfers the call and waits until the call is answered. If the call is not answered (NO-ANSWER), the call transfer is aborted, pulling the call back and follows the extension Blocks ‘No-Answer’ call condition rules. This can be play the subscriber’s Primary/NoAnswer Greeting if recorded, or be directed to the Call Director on page four for instructions on where to send the call for that call condition.Each of the next supervision levels are simply Full Supervision levels with added functionality beneficial for the Subscriber being called. - PROMPT: A prompted supervision level performs a Full Supervision call transfer. If the call is answered it plays a prompt to the called party, ‘Transferring a call.’ after the answering party says ‘hello’. This is useful if simply trying to identify a call is being transferred by the OfficeServ System. - ANNOUNCE: This supervision level is very similar to the Prompted supervision. In this case the called party hears, ‘There is a call for Extension 2001’ or ‘There is a call for Jane Doe.’ After the that the call is handled in the same manner as a Full Supervision transfer. - CONFIRM: This level not only performs a an Announced Supervision but also now allows the Subscriber the option of accepting, redirecting, rejecting, or record a real time greeting for the call. If the call is rejected it is considered to be a ‘Blocked’ call condition. The call transfer is aborted, pulling the call back and follows the extension Blocks ‘Blocked’ call condition rules. 349 Error! Use the Home tab to apply 제목 1 to the text that you want to appear here. (Continued) Item Description This can be play the subscriber's Blocked Greeting if recorded, Primary Greeting if recorded, or be directed to the Call Director on page four for instructions on where to send the call for that call condition. This level of supervision is automatically used in all ‘Designated location’, ‘Follow Me’, and ‘Find Me’ applications or whenever the Alternate Number Field is used. - SCREEN: The system requests the name of the caller, rings the subscriber and announces who is calling. The subscriber has the option of accepting, redirecting, rejecting, or record a real time greeting for the call. If the call is rejected it is considered to be a ‘Blocked’ call condition. The call transfer is aborted, pulling the call back and follows the extension Blocks ‘Blocked’ call condition rules. This can be play the subscriber’s Blocked Greeting if recorded, Primary Greeting if recorded, or be directed to the Call Director on page four for instructions on where to send the call for that call condition. 350 Subscriber Password The digits the extension user enters to gain access to the extension user menu. In the IVM products, subscribers usually have both an Extension Block and a Mailbox Block (but may have only one of them). Since each of these blocks have a password option, if different password values are entered in each of these blocks (extension and mailbox) the OfficeServ System will try to resolve these two password fields into one value. The extension password will override the value in the mailbox field. Valid entries for this field are ‘NONE’-No password and ‘DEFAULT’-Password will be set to the default of 0000.This field will not display the subscribers password. Account code Entered if the subscriber has an access code used for long distance access. This access code can be inserted in any dial string using ‘$A’. Station If there is no entry entered here the system will automatically search the Station options for the appropriate Station block required to send the call. This block is used to dial the ‘Dial Number’. If there is an Alternate number it will select a station block automatically. Auto Login A ‘Y’ in this parameter, enables the subscriber to login without a password when logging in from their extension. © SAMSUNG Electronics Co., Ltd. OfficeServ DM User Guide (Continued) Item Description Directory public/user A ‘Y’ in these parameters, and the subscribers’ name recorded in the mailbox, allows this object to be listed in either of the appropriate Directories. The Public directory is the directory that callers access, the User directory is the directory that subscribers access. Retention days remaining The number of days remaining before this block is automatically discarded during system maintenance if unused. The range is 0999 days. An entry of 0 means indefinite. Authorization Item Blocking © SAMSUNG Electronics Co., Ltd. Description Call blocking will prevent any calls from being transferred to your extension or designated location. You may think of it as a DND feature. It will override all call transfer instructions (follow me, forward, find me etc.), but it will not override call screening. A ‘Y’ in this field allows the Subscriber to set Call Blocking for their extension. An ‘N’ in this field disables the option and it will not be spoken as an option in the extension user menu. 351 Error! Use the Home tab to apply 제목 1 to the text that you want to appear here. (Continued) Item Description The ‘enabled’ field shows if this option is currently set. This setting must be ‘Y’ to allow a subscriber to set this greeting. This option can only be set by the subscriber if the extension has Greeting type of ‘Basic.’ 352 Call forwarding A ‘Y’ in this parameter allows the Subscriber to remotely redirect calls to another extension. An ‘N’ in this parameter disables the option and it will not be spoken as an option in the extension user menu. The ‘enabled’ field shows if this option is currently set. If you ‘enable’ this feature here you must also assign a destination to the Remote-Fwd pointer in the Extension Block page 4 of 5. When this feature is activated the OfficeServ System will perform a blind transfer and the control of the call will then be passed to the forward destination. Call screening A ‘Y’ in this parameter allows the Subscriber to set call screening for their extension. OfficeServ System asks the calling party to speak his name before transferring the call and allows the called party to accept or reject the call when answered. If the call is rejected, OfficeServ System will prompt the caller that their party is unavailable and allow them to dial another extension or leave a message. Allowable inputs are ‘Y’ for yes or ‘N’ for no. The ‘enabled’ field shows if this option is currently set. This setting must be ‘Y’ to allow a subscriber to set this greeting. This option can only be set by the subscriber if the extension has Greeting type of ‘Basic’. Find me Find Me is a feature that may be programmed by the subscriber as a high priority call connection method. When this feature is set, the OfficeServ System will begin to dial the first 5 numbers in your stored number list until you are reached. The ‘enabled’ field shows if this option is currently set. Scheduling Each subscriber (if allowed by setting this parameter to ‘Y’), may define a weekly availability schedule. This schedule is used to automatically select a day or night greeting to play to callers. During the time a subscriber is (according to this schedule) available the call will be transferred to the extension blocks dial number, and the no answer greeting will play (if recorded). If the subscriber is ‘not available’ (according to this schedule) the call will be transferred to the extension blocks dial number, and the extension night greeting will play (if recorded). © SAMSUNG Electronics Co., Ltd. OfficeServ DM User Guide (Continued) Item Description Intercept (auto night intercept) This feature only affects subscribers who are using an availability schedule (this must be allowed by a System Administrator.) When the intercept feature is set, and the subscriber is unavailable, callers will not be transferred to the subscriber station, instead they will immediately hear the night message (if recorded). Retrieve public caller allowed Allowed When this option is available, a subscriber that accesses their mailbox while another caller is leaving a message will be given the opportunity to immediately connect with that caller. Busy greeting allowed Allows a subscriber to record a busy greeting This option can only be set by the subscriber if the extension has Greeting type of ‘Basic’. Designated location allowed If this is set to Yes, then a subscriber can use the Access Manager Menu (digit 4 from the Main Menu) to set an alternate number where they can be reached. This number can be an internal or external location. When this feature is activated, OfficeServ System will perform a full supervised ‘Confirmed’ transfer. If there is no answer at the designated location the transfer will be aborted and the caller will be returned to the OfficeServ System to follow the No-Answer call condition rules for that subscriber. Stored phone numbers allowed This allows the subscriber to enter a list of up to 9 personal phone numbers where the subscriber can be reached. Examples of this would be cell phone, branch office, home, etc. These numbers may be quickly entered into the designated location (Alternate #) or positions 1-5 may be used by the find me feature. See ‘Stored Numbers’. Extended prompting enabled A ‘Y’ in this parameter allows the subscriber to use Extended Subscriber Prompting. Extended Prompting plays all of the options available to a subscriber. An ‘N’ in this parameter, disables the option and will play only the first three or four prompts. © SAMSUNG Electronics Co., Ltd. 353 Error! Use the Home tab to apply 제목 1 to the text that you want to appear here. Additional Information 354 Item Description Stored Numbers This is a list of nine phone numbers where the subscriber can be reached. Examples of this would be cell phone, branch office, home, etc. These numbers may be quickly entered into the designated location (Alternate #) or positions 1-5 may be used by the Find Me feature. These numbers can be entered in this screen or if allowed, by setting the Stored Phone Numbers Allowed flag, in page 1 of 5, the subscriber may enter and edit them. Greeting Number Recorded GREETING NUMBERS When a subscriber is using the ‘Basic’ greeting type, different greetings will play depending on different call coverage conditions. When a subscriber has the ‘Basic’ greeting enabled, they will be able to access and program the Personal greeting menu from their telephone. There are 9 personal greetings available, and any greeting may be assigned to any call coverage condition. The call coverage conditions are: - NO ANSWER: Your telephone has rung but it did not answer. - BUSY: Your telephone is busy (must be allowed by Administrator) © SAMSUNG Electronics Co., Ltd. OfficeServ DM User Guide (Continued) Item Description - BLOCKED: A subscriber has 'blocked' calls to their extension (must be allowed by administrator). - NIGHT: The subscribers personal availability schedule reports that the subscriber is an unavailable extension (must be allowed by administrator). - CALL SCREENING: The subscriber has selected the call screening option (must be allowed by Administrator). If a subscriber records only the greeting assigned to the NoAnswer Call Coverage Condition, then that greeting will play to callers for all Call Coverage Conditions (No-Answer, Busy, Blocked, Night, and Rejected Caller). In this case the greeting should be very general. Availability Schedule © SAMSUNG Electronics Co., Ltd. If allowed by setting ‘Scheduling’ to ‘Y’, a subscriber may define an availability schedule. During the time a subscriber is (according to this schedule) available, the call will be transferred to the extension blocks dial number, and the no answer greeting will play (if recorded). If the subscriber is ‘not available’ (according to this schedule), the call will be transferred to the extension blocks dial number, and the extension night greeting will play (if recorded). 355 Error! Use the Home tab to apply 제목 1 to the text that you want to appear here. Caller Options Processor Item Greeting 356 Description Two greeting options are available in the OfficeServ System Extension Block. They are NONE and BASIC. If the greeting is NONE, the subscriber may not record a greeting in their extension (they may however, if allowed, record a mailbox greeting). The caller will be played a list of caller options that match the selections that have been allowed in EClass System Caller Options Digit Assignment. These may include any or all of the following: Dialing another number, leave a message, hold, have the subscriber paged on the overhead paging system, select other custom options or reach the operator. If the greeting type is BASIC the caller may record custom greeting (s) according to the features allowed in extension block Authorizations. The caller will still be able to access a list of caller options that match the selections that have been allowed in EClass System Caller Options Digit Assignment, but the subscribers greeting will have to announce these. Additionally any other options that have been assigned in the extension Caller Options Processor (Extension Block page 3 of 5) will be available to callers. © SAMSUNG Electronics Co., Ltd. OfficeServ DM User Guide (Continued) Item Description Option Description This column contains texts fields for a description of what the caller will experience as a result of pressing the ‘To Select’ column digit in the Caller Options Processor target generator. Example, ‘I’m in the facility, if you would like to page me, please press 3’. To Select The fields in this column are Event Pointers. They are activated by the administrator at time of installation for each mailbox. subscriber through the extension telephone interface in System Caller Options. Type Type indicates the type of block targeted. Gp GP represents the group number (if appropriate) and will always be 01. Target name Target Name specifies the block to pass control to. Call Director © SAMSUNG Electronics Co., Ltd. 357 Error! Use the Home tab to apply 제목 1 to the text that you want to appear here. Item 358 Description Operating Mode Indicates the Mode Name and Number for which the displayed Block Pointers’ Targets are active. Each Operating Mode is given an unique Number by the system. Valid numbers are 01-99, and are assigned in sequence as new Modes are created. The Mode Number and Name are associated with the Block’s Pointers, not the Block itself. This allows one Block to route calls to different destinations in different Modes, using different Targets for the pointers’ various Mode references. For example, the No-Answer pointer might route callers to an associate’s Extension during the ‘Day’ Mode, but after 5:00 PM, it would route them to a Mailbox during the ‘Night’ Mode. Pointers set in the Default Mode are always in effect unless the same Pointer is set in the current Operating Mode. The OfficeServ System will display Default Mode pointers in a block while viewing pointers in another mode. The Default Mode pointers will be grayed out to denote that they are not in the current mode. NO-ANSR OfficeServ System goes immediately to the designated target Block when a ring-no-answer condition is encountered. It will not prompt the caller prior to doing this. BUSY OfficeServ System goes immediately to the designated target Block when a busy condition is encountered. It will not prompt the caller prior to doing this. FBUSY OfficeServ System goes immediately to the designated target Block when a fast busy condition is encountered. It will not prompt the caller prior to doing this. BLOCKED OfficeServ System goes immediately to the designated target Block when call blocking is activated in the extension administration menu. It will not prompt the caller prior to doing this. ERROR OfficeServ System goes immediately to the designated target Block when an error is encountered during the transfer. It will not prompt the caller prior to doing this. MESSAGE This causes OfficeServ System to go directly to the designated Block if the caller chooses to leave a message for this extension. The target is usually a MBX Block. However, it may be another EXT or DIAL Block. If left unspecified in this block, and the <MSG> pointer in the EClass block associated with it is set, OfficeServ System will attempt to find a mailbox with the same number as the Extension. If a mailbox is not found OfficeServ System will automatically create one. © SAMSUNG Electronics Co., Ltd. OfficeServ DM User Guide (Continued) Item Description If this parameter is not specified in this block and the EClass block associated with it, OfficeServ System will not present the caller the option to leave a message in the event of a busy or no answer for this extension. OPTIONS This pointer is reached because the EClass (page 1 of 5) assigned a specific digit to ‘options’ and allowed the feature for at least one call condition. The extension block (page 3 of 5) will then show that ‘Other Options’ has been assigned to that digit. On this Call Director page you may assign any destination to this options pointer. This is used if a subscriber wants to offer callers the option to press a certain digit to route to an audiotext system, list of departments to transfer to or any other condition that may be programmed in the OfficeServ System. OfficeServ System goes immediately to the designated Target Block. It will not prompt the caller prior to doing this. OPERATOR This pointer is reached because the EClass (page 1 of 5) assigned a specific digit to ‘operator’ and allowed the feature for at least one call condition. The extension block (page 3 of 5) will then show that ‘Operator’ has been assigned to that digit. On this call director page you may assign any destination to this operator pointer. OfficeServ System goes immediately to the designated target Block. It will not prompt the caller prior to doing this. ESCAPE This pointer is reached because the EClass (page 1 of 5) assigned a specific digit to ‘escape’ and allowed the feature for at least one call condition. The extension block (page 3 of 5) will then show that ‘escape’ has been assigned to that digit. On this call director page you may assign any destination to this escape pointer. OfficeServ System goes immediately to the designated target Block. It will not prompt the caller prior to doing this. NO-ENTRY OfficeServ System goes to the designated target Block, when the caller makes no input. It will not prompt the caller prior to doing this. The ‘wait for input’ is located on page 1 of 5 of the EClass Block. INVALID OfficeServ System goes immediately to the designated target Block, when a caller makes an invalid input. OfficeServ System will not prompt the caller prior to doing this Page 1 of 5 of the EClass block allows for multiple caller mistakes in a parameter called ‘Retries on invalid input’. QUE-FULL The next block to go to if the number of callers allowed to hold in queue is exceeded. (See EClass page 2 of 5) © SAMSUNG Electronics Co., Ltd. 359 Error! Use the Home tab to apply 제목 1 to the text that you want to appear here. (Continued) Item REMOTEFWD Description The Remote-Forward pointer is used to display the target extension, when Call Forwarding is activated in the extension administration menu. This feature can be set by the Subscriber-(but must first be allowed by administrator-See Call Screening). MESSAGE Pointer The MESSAGE pointer may also be specified in the associated ECLASS block. However, the MESSAGE pointer in this extension block will take precedence. QUE-FULL Pointer The <QUE-FULL> Pointer may also be specified in the associated ECLASS block. However, the <QUE-FULL> Pointer in the EXT block will take precedence. Activity 360 © SAMSUNG Electronics Co., Ltd. OfficeServ DM User Guide This page will keep track of this extension blocks activity. It contains the following statistics. Item Description From, To Indicates the period, from the date when the Report Counters were last cleared, until the current date. Applies to all call counts in this report. Total Shows the total number of calls this Block has processed during the period specified in the following range. Answered The number of calls processed by this Block, which were answered by the called party, and what percentage of the total calls this number represents. No answer The number of calls processed by this Block, which encountered a ring-no-answer condition, and what percentage of the total calls this number represents. Busy The number of calls processed by this Block, which encountered a busy signal, and what percentage of the total calls this number represents. Blocked The number of calls which encountered call blocking set on this extension, and the percentage of the total calls this number represents. Rejected The number of calls processed as screened transfers, which were rejected by the subscriber, and the percentage of the total calls this number represents. Redirected The number of callers redirected to another extension by the subscriber, and the percentage of the total calls this number represents. Hold count The number of callers who elected to hold, after encountering a busy signal, and the percentage of the total calls this number represents. It includes callers who may have elected to hold and subsequently hung up prior to connecting. Abandoned The number of calls processed by this Block, during which the caller disconnected without selecting any options, and the percentage of the total calls this number represents. No response The number of calls processed by this Block, during which the caller made no entry in response to the available options, and what percentage of the total calls this number represents. Left message The number of calls processed by this Block, during which the caller chose to record a voicemail message, and the percentage of the total calls this number represents. © SAMSUNG Electronics Co., Ltd. 361 Error! Use the Home tab to apply 제목 1 to the text that you want to appear here. (Continued) Item 362 Description Operator The number of calls processed by this Block, during which the caller elected to go to the Operator, and what percentage of the total calls this number represents. Page The number of callers who chose to have the called party paged, while in this block, and the percentage of the total calls this number represents. Other option The number of calls processed by this Block, during which the caller elected to hear the other options, and what percentage of the total calls this number represents. Avg. hold time in sec The total time, in seconds, callers were holding for this extension. Dividing this number by the Hold Count gives an approximation of the average hold time per caller. © SAMSUNG Electronics Co., Ltd. OfficeServ DM User Guide List Block A LIST is a special type of Mailbox Block that is used to distribute copies of recordings to a predetermined list of mailboxes. When a message is addressed to a LIST mailbox, a copy of it is sent to each of the member mailboxes. A List Block can also verify addressees and password protect information. It can record a voice response or connect the recipient to the sender when authorized. Other LIST mailboxes may be members of this list, thereby creating ‘nested’ lists. Members may be changed according to changes in operating mode. General Item Description VMS Group VMS group Label Name The name of this block. A Block name can be any alphanumeric string up to 16 characters long (including spaces). A Block name may not be the same as another Block name. MBX, EXT or LIST Numbers may not be duplicated within the same group. The LIST Group Number is located to the left of the LIST Block Name. Group Numbers are convenient for organizing Lists into application specific groups. In most applications, the default value of 01 is normally used. © SAMSUNG Electronics Co., Ltd. 363 Error! Use the Home tab to apply 제목 1 to the text that you want to appear here. (Continued) Item Description Values from 01 to 99 are valid. You select which group the LIST Block belongs to before you create the LIST Block. Group Numbers for ECLASS, EXTENSION, MCLASS, MAILBOX, and LIST Blocks generally are used for Multi Tenant environments. 364 Number The number representing this LIST. It may not be the same as the Number of any other LIST or Mailbox with in a particular subscriber group. Extension The name of the Extension that belongs to this list. In many applications this parameter will be left blank. This parameter’s primary use is for an Extension block that is used as a Department extension that when unanswered and the caller leaves a message will actually leave the message for the List. The message will then be distributed to all the members of the List Block. Mclass The name of the mailbox class of service that defines operating characteristics for this List. Language This is a language option. You may select from any installed language and from that point on the LIST will respond to the authorized owner in the language selected. Authorized owner means a user who has entered a valid password. If the Extension parameter is filled in the OfficeServ System will try to resolve these fields to a single value (make them match). If conflicting information is contained in these fields, the Extension Block has priority and the LIST Block will be automatically changed to match. This selection is based on the order of the defined languages in page 3 of the System Wide Parameters. If the languages are to be reordered, added to or changed in page 3 of the System Wide Parameters then this field should be re-entered. Send broadcast MSG allowed Set this parameter to Y if this list is a subscriber administrator. Otherwise, set to N. If this is set to Yes then broadcast messages will be allowed from this list box. Extended prompting enabled Set this parameter to Y to use the full set of OfficeServ System menu prompts. Otherwise, set to N. Directory /Public A ‘Y’ in this parameter, and the recorded List name, allows the listing in the Public Directory. Directory /User A ‘Y’ in this parameter, and the name recorded in the List, allows the listing in the Voice Mail Directory. © SAMSUNG Electronics Co., Ltd. OfficeServ DM User Guide (Continued) Item Description Mailbox greeting allowed When set to yes the caller is allowed to record a greeting for the LIST block. This is rarely used. If the LIST Block is used a Department Mailbox for Public callers then the Greeting will be useful. Subscriber password Allows the list password to be changed to the default digits specified by Default password in the System Wide Parameters or removed completely. Inputs are ‘DEFAULT’ or ‘NONE’. Retention days remaining The number of days remaining before this block is automatically discarded during system maintenance if there are no list members. List Blocks are not automatically deleted for lack of use as long as they contain members. Delete all unheard copies of … A ‘Y’ in this parameter, and the OfficeServ System will un-deliver all unheard copies of a message sent to this list after the first listener saves the message. From ~ To Indicates the period from the date when the Report Counters were last cleared till the current date. Msgs distributed The total number of messages distributed to list members during the period specified in the range below. DELETION OF ALL OTHER UNHEARD COPIES WHEN ONE SAVED BY FIRST LISTENER This will not apply to members of the list that are Network MBX members. There is no way to un-deliver a message sent to a Network MBX after it has been sent. © SAMSUNG Electronics Co., Ltd. 365 Error! Use the Home tab to apply 제목 1 to the text that you want to appear here. List Members This page contains a list of the Mailbox Blocks, which messages left in this LIST Block will be distributed to. These mailbox blocks are referred to as Members. Members may include other LIST Blocks thereby creating ‘nested’ lists. A System Administrator using the PC interface must enter the members contained in this list. 366 © SAMSUNG Electronics Co., Ltd. OfficeServ DM User Guide Call Director Item Operating Mode © SAMSUNG Electronics Co., Ltd. Description Indicates the Mode Name and Number for which the displayed Block Pointers’ Targets are active. Each Operating Mode is given a unique Number by the system. Valid numbers are 01-99, and are assigned in sequence as new Modes are created. The Mode Number and Name are associated with the Block’s Pointers, not the Block itself. This allows each Block to route calls to different destinations in different Modes, using different Targets for the pointers’ various Mode references. For example, the No-Answer pointer might route callers to an associate’s Extension during the ‘Day’ Mode, but after 5:00 PM, it would route them to a Mailbox during ‘Night’ Mode. Pointers set in the Default Mode are always in effect unless the same Pointer is set in the current Operating Mode. OfficeServ System will display Default Mode pointers in a block while viewing pointers in another mode. The Default Mode pointers will be grayed out to denote that they are not in the current mode. 367 Error! Use the Home tab to apply 제목 1 to the text that you want to appear here. (Continued) Item 368 Description MSG-LEFT This is the Block that the OfficeServ System will pass control to if the caller leaves a message. The target block allows the caller the option of returning to the beginning of the application, or may send the caller to the Bye block, if the organization does not want to give the caller additional options. NOMSGLEFT This is the Block that the OfficeServ System will pass control to if the caller does not leave a message. The target block may allow the caller the option of returning to the beginning of the application, or sending the caller to the Bye block if the organization does not want to give the caller additional options. ESCAPE This is the Block that the OfficeServ System will pass control to if the caller presses the escape digit while listening to the List greeting or while leaving a message. When the Escape digit is pressed the OfficeServ System will immediately exit the process it’s in and go to the block defined in this pointer. GREETDTMF This is the Block that the OfficeServ System will pass control to if the caller enters any valid DTMF while listening to the List greeting. If defined, the Admin digit, escape digit, digit to skip the greeting, and the operator digit are not considered valid for this pointer. The target block is a menu. The menu will perform a search operation to match the caller ENTRY to the INPUT value of a pointer, or Number of an Extension, Mailbox or Announcement. OPERATOR This is the Block to go to if Operator assistance is requested. © SAMSUNG Electronics Co., Ltd. OfficeServ DM User Guide Mailbox Block The Mailbox Block is used to implement the Voice Mail messaging features on OfficeServ System. It also controls the operating characteristics specific to an individual mailbox such as whether the Mailbox is announce only or if the subscriber has Mailbox Administration capabilities. This Block maintains the message notification details. The Mailbox is where a subscriber receives, sends, and manages messages. The public caller may record a message after hearing a personal greeting from the Mailbox User and choose to review, re-record, send, or discard his message. Event pointers are used to provide the flexibility to handle messaging differently for various modes of operation (typically at different times of the day). The Mailbox Group Number is convenient for organizing Mailboxes and/or Subscribers into application specific groups. This number must be the same as the Group Number for the MClass used to control this Block. In most applications, the default value of 01 is normally used. Values from 01 to 99 are valid. You select which group the Mailbox Block belongs to before you create the Mailbox Block. In a ‘Multi-Tenant’ installation groups in the OfficeServ System can be used to partition the application between tenants. © SAMSUNG Electronics Co., Ltd. 369 Error! Use the Home tab to apply 제목 1 to the text that you want to appear here. General Item 370 Description VMS Group VMS group Label Name The name of this block. A Block name can be any alphanumeric string up to 16 characters long (including spaces). A block name may not be the same as another Block name. MBX, EXT or LIST Numbers may not be duplicated within the same group. OfficeServ System stores the subscriber name in either ‘lastname, firstname’ or ‘firstname lastname’. When entering the subscriber name it is suggested you follow one for mat or the other for the entire application. If the name is entered as ‘firstname lastname’ OfficeServ System will NOT automatically re-sort it to ‘lastname, firstname’, but the subscriber would still be able to be accessed correctly from the directory. However by mixing and matching formats with in an application would cause the list of blocks to appear to be out of order. This format (‘lastname, firstname’ vs ‘firstname lastname’ is only important because the directory feature will search on a specific field, ‘lastname’ or ‘firstname’ . © SAMSUNG Electronics Co., Ltd. OfficeServ DM User Guide (Continued) Item Description If you did not put a comma after the ‘lastname’ in the ‘lastname, firstname’ format or put a comma after ‘firstname’ in the ‘firstname lastname’ format the directory search would not be accurate and subscribers entered out of format could not be accessed from the Directory. Number This is the number of the mailbox. It can not be the same as any other mailbox block or list block. This is the number that is used to give the block a unique identity. It is also the number that is used to call the mailbox and can be referred to as it’s ‘Key’ Value. Extension The extension number to which the mailbox belongs. Mclass This is the name of the mailbox class of service that defines operating characteristics for this Mailbox. Language This is a language option. You may select from any installed language and from that point on the extension will respond to the authorized owner in the language selected. Authorized owner means a user who has entered a valid password. The Extension block also has a Language field, and the OfficeServ System will try to resolve these fields to a single value (make them match). If conflicting information is contained in these fields, the Extension block has priority and the Mailbox block will be automatically changed to match. This selection is based on the order of the defined languages in page 3 of the System Wide Parameters. If the languages are to be reordered, added to or changed in page 3 of the System Wide Parameters then this field should be re-entered. Announce only mailbox A ‘Y’ in this field designates this as an announcement only mailbox. When a public caller accesses this mailbox, it will play the greeting message (announcement) and exit immediately without recording a message. This may be used for bulletin boards and other simple audiotex applications. After playing the announcement, OfficeServ System will pass control to the block defined by the <No Msg Left> pointer. Send broadcast MSG allowed A ‘Y’ in this field gives the mailbox user the ability to send a broadcast message to all subscribers on the system. Use LIFO message ordering If set to ‘Y’, messages are reviewed in ‘Last In First Out’ order. If set to ‘N’, they are reviewed in ‘First In Last Out’ order. © SAMSUNG Electronics Co., Ltd. 371 Error! Use the Home tab to apply 제목 1 to the text that you want to appear here. (Continued) Item Description New message beep(s) If set to ‘Y’, the IVM will beep at the subscriber before requesting they enter their password when trying to log in. The beep signifies whether they have messages or not. This is useful when a caller is calling in from their cell phone and does not want to stay on the phone any longer then they have to so they can save minutes on their phone. The IVM will beep once for a single message and twice if there is more then one message. Directory Public/User A ‘Y’ in these parameters, and the subscribers’ name recorded in the mailbox, allows this object to be listed in either of the appropriate Directories. The Public directory is the directory that callers access, the User directory is the directory that subscribers access. Subscriber password Allows the mailbox password to be changed, to the default digits, specified by Default password in the System Wide Parameters or removed completely. Inputs are ‘DEFAULT’ or ‘NONE’. In the IVM products, subscribers usually have both an Extension Block and a Mailbox Block (but may have only one of them). Since each of these blocks have a password option, if different password values are entered in each of these blocks (extension and mailbox), the OfficeServ System will try to resolve these two password fields into one value. The extension password will override the value in the mailbox field. Retention days remaining (days) The number of days remaining before this block is automatically discarded during system maintenance. This only applies to unused mailboxes. MCLASS When enabling email gateway for a subscriber, make sure the MCLASS with the appropriate mail server is assigned. 372 © SAMSUNG Electronics Co., Ltd. OfficeServ DM User Guide Authorizations Item Description Forced messages allowed This option makes the mailbox capable of sending Forced Messages. Forced Messages are messages that have either ‘Reply Required’ or Delivery Imperative. When a message is designated as Reply Required, the messages recipient MUST reply to the message before the message can be saved or deleted. When a message is designated as Delivery imperative, the OfficeServ System will take extra steps to deliver it. The recipient’s pager will be called and then each of his stored telephone numbers will be tried. Workload manager This allows access to the subscriber workload manager in the subscriber telephone interface. It makes available option #1 (dial #1 at the Subscriber Main Menu), and will allow the subscriber to group their reminders as Commitments, Follow-ups or Tasks. Commitment /Follow up allowed If this is enabled, subscribers can designate the reminders they create as either a Commitment, Follow-up or Task. The individual meaning of these labels may vary from person to person, their intent is to provide a way of separating reminders into different categories. © SAMSUNG Electronics Co., Ltd. 373 Error! Use the Home tab to apply 제목 1 to the text that you want to appear here. (Continued) Item Description These categories can be reviewed in the subscriber Workload Manager. Workload Manager must be Y to make Commitment/Follow up Allowed Work. 374 Message grouping allowed If this is enabled a subscriber may group messages for playback. Reminders, messages from a specific sender, Urgent messages, Call back messages and Private messages may all be grouped separately. (Reminders may be further sub divided in the Subscriber Workload manager). Mailbox greeting allowed When set to yes the caller is allowed to record a mailbox greeting. Message alert control allowed When set to yes the caller is allowed to turn on and off the message alert and set the alert number. Extended prompting enabled A ‘Y’ in this field enables the full length, extended prompting to play to the subscriber the next time he logs into his mailbox. Once the flag is set to ‘N’, extended prompting does not play again and the subscriber does not have to listen to all the dialing options. The extended prompting is used to aid the new mailbox user. Auto play of new message enabled If set to ‘Y’, any new messages, or those messages not saved, will automatically begin to play when the subscriber logs in to their Subscriber Services Menu. Auto play of message info enabled If this option is set, the sender information and time will be automatically played for each message. If this is not set to Y, the caller can still get this information on demand by pressing ‘00’ while a message is playing. © SAMSUNG Electronics Co., Ltd. OfficeServ DM User Guide Message Alert Controls (Notification) Message Alert allows the subscriber to be notified at an alternate number (home, cell phone, etc.) of any new messages in their mailbox. Item Description Message alert is currently on A ‘Y’ in this field enables Message Alert capabilities for this mailbox. An ‘N’ disables the Message Alert feature. This parameter setting may be overridden by the phone interface. Alert on urgent message only Alerts the subscriber only if the message left was designated as urgent. Alert phone number This is the phone number where you want to be notified of your new messages, if you have enabled message alert in your mailbox. Delivery Schedule Enter the from-to times for each day of the week that this subscriber should be notified of new messages. Enter 2 digit for the hour (12 or 24 hour clock) and 2 digits for the minute. This schedule may also be set by the subscriber. © SAMSUNG Electronics Co., Ltd. 375 Error! Use the Home tab to apply 제목 1 to the text that you want to appear here. MWI & AutoFoward Item 376 Description This mailbox has an MWI It decides to notify that a new message has arrived. LCD, LED and Tone is used for it. MWI number It assigns a extension number to notify that a new message has arrived for this mailbox. Enable auto forward This option turns Auto Forward on. When set any messages arriving in this mailbox will be automatically forwarded to the destination specified on Mailbox Block page 4 of 5. Delete after forwarding If this parameter is set to ‘Y’, the new message that is to be Auto Forwarded will be discarded from this mailbox, when the forwarding takes place. If this parameter is set to ‘N’ the mailbox will retain a copy of the message that is Auto-Forwarded. This parameter is only active when ‘Enable Auto-Forward’ parameter is set to ‘Y’. Auto forward delay (HH:MM) The number of hours and/or minutes before a new message is automatically forwarded to another mailbox. Auto Forwarding is disabled if this parameter is left blank. The range for this is from 0 (no forward) to 23:59 (almost one day). © SAMSUNG Electronics Co., Ltd. OfficeServ DM User Guide E-Mail Gateway Item Description Enable EMail Gateway support This is a ‘Y’ or ‘N’ setting. ‘Y’ enables the E-Mail Gateway for that subscriber’s Mailbox, and ‘N’ disables the functionality. From Put in the E-Mail address the Subscriber would like to receive Replies to if a recipient of a Voice Message from him wishes to reply via e-mail. When filled in with a valid e-mail address the receiving party will see the Sending subscriber’s name as it appears in the Mailbox Label name. If left blank all Voice Messages sent by the subscriber will show VM in the From of the receiving parties Inbox. Deliver MSG Enter the e-mail address or addresses that the subscriber wishes to have E-Message Delivery sent to. (A subscriber or mailbox can have up to 5 different E-Mail addresses assigned.) Notify Only Enter the e-mail address or addresses that the subscriber wishes to have E-Message Notification sent to. (A subscriber or mailbox can have up to 5 different E-Mail addresses assigned.) © SAMSUNG Electronics Co., Ltd. 377 Error! Use the Home tab to apply 제목 1 to the text that you want to appear here. E-MAIL ADDRESS SYNTAX An e-mail address can be entered a couple of ways. The traditional e-mail syntax is: [email protected] (domain suffix = .com, .net, .org, etc…) in this case the name entered as the Mailbox label name will be displayed in the Inbox ‘From’ field if the voice message was sent subscriber to subscriber. In some cases the number of characters in a person’s name is longer than the label name length in a Mailbox Block. Until now no-one saw that name so it didn’t matter. If you do not want the Recipient to see the label name as it is typed you can use the following syntax: Firstname Lastname <[email protected]> OR Departmentname <[email protected]> This applies to all fields that accept an e-mail address: 378 System Wide Parameters: ‘Report’ & ‘Reply To’ Mailbox Block: ‘From’, ‘Deliver MSG’, & ‘Notify Only’ © SAMSUNG Electronics Co., Ltd. OfficeServ DM User Guide Call Director Item Operating Mode © SAMSUNG Electronics Co., Ltd. Description Indicates the Mode Name and Number for which the displayed Block Pointers’ Targets are active. Each Operating Mode is given a unique Number by the system. Valid numbers are 01-99, and are assigned in sequence as new Modes are created. The Mode Number and Name are associated with the Block’s Pointers, not the Block itself. This allows each Block to route calls to different destinations in different Modes, using different Targets for the pointers’ various Mode references. For example, the Message Left pointer might route callers to an operator during the ‘Day’ Mode, but after 5:00 PM, it would route them to a Bye block. Pointers set in the Default Mode are always in effect unless the same Pointer is set in the current Operating Mode. OfficeServ System will display Default Mode pointers in a block while viewing pointers in another mode. The Default Mode pointers will be grayed out to denote that they are not in the current mode. 379 Error! Use the Home tab to apply 제목 1 to the text that you want to appear here. (Continued) Item 380 Description MSG-LEFT This is the Block that the OfficeServ System will pass control to if the caller leaves a message. The target block allows the caller the option of returning to the beginning of the application, or sending the caller to the Bye block if the organization or individual does not want to give the caller additional options. NOMSGLEFT This is the Block that the OfficeServ System will pass control to if the caller does not leave a message or if this is an announcement only mailbox. The target block may allow the caller the option of returning to the beginning of the application, or sending the caller to the Bye block, if the organization or individual does not want to give the caller additional options. ESCAPE This is the Block that the OfficeServ System will pass control to if the caller presses the escape digit while listening to the mailbox greeting or while leaving a message in the mailbox. When the Escape digit is pressed IVM will immediately exit the process it's in and go to the block defined in this pointer. GREETDTMF This is the Block that the OfficeServ System passes control to if the caller enters any valid DTMF while listening to the mailbox greeting. If defined, the Admin digit, escape digit, digit to skip the greeting, and the operator digit are not considered valid for this pointer. The target block is a menu which performs a search operation to match the caller ENTRY to the INPUT value of a pointer, or Number of an Extension, Mailbox or Announcement. OPERATOR This is the target Block that the OfficeServ System will pass control to if the caller presses the Operator digit while listening to the mailbox greeting or recording a message. AUTO-FWD This is the Mailbox to forward new messages to when the time has expired in the ‘Auto-Forward Message After’ parameter. The target must be another mailbox and may not point back to itself. © SAMSUNG Electronics Co., Ltd. OfficeServ DM User Guide Activity This page will keep track of this mailbox blocks activity. It contains the following statistics. Three columns of statistics exist, Outside or Public callers, Call from other subscribers and Totals. Item Description Date last accessed The last time the subscriber logged into this Mailbox. Mailbox access count The number of times someone other than the subscriber (‘Public Callers’) accessed this Mailbox and the number of times the subscriber logged into this Mailbox, regardless of what functions they performed. Message sent The number of messages this subscriber has sent, regardless of destination. Message received The number of messages this subscriber has received, from ‘Public Callers’ and from other subscribers. Total connect minutes The total amount of time connected to the mailbox. The total number of messages in this Mailbox, listed according to those received from ‘Public Callers’ and from other subscribers. © SAMSUNG Electronics Co., Ltd. 381 Error! Use the Home tab to apply 제목 1 to the text that you want to appear here. (Continued) Item 382 Description Current message count The total number of messages in this mailbox, listed according to those received from public callers and from other subscribers. New messages The current message count broken down to reflect how many have not been saved, from both ‘Public Callers’ and other subscribers. Saved messages The current message count from ‘Public Callers’ and other subscribers reflecting how many have been saved. © SAMSUNG Electronics Co., Ltd. OfficeServ DM User Guide MClass Block The MClass (Class of Service) Block is a block containing many general parameters effecting Mailbox or List Block. Each MClass Block may be associated with one or several subscriber mailboxes (Mailbox Blocks) or List Blocks. This information includes the maximum length of a mailbox number, the number of days’ messages will be retained, the number of days unused mailboxes will be retained, Message Waiting Indication (MWI) dialing codes, Message Alert, and other parameters. There is no limit to the number of Mailbox Blocks the MClass Block may be associated with. General Item Description VMS Group VMS group Label Name This is the name of the MClass, and is used to reference this block. It must be a unique name and cannot be the same as any other MClass Block. Max greeting length Maximum greeting length that a subscriber can record for a mailbox and List box. This can be from 0 to 999 seconds. © SAMSUNG Electronics Co., Ltd. 383 Error! Use the Home tab to apply 제목 1 to the text that you want to appear here. (Continued) Item 384 Description Mailbox retention Specifies the number of days, from 1 to 999, an unused mailbox should be retained before being erased. Maximum number messages Maximum messages allowed, from 0 to 999 seconds, that a subscriber can receive and/or save in his mailbox. Zero means no limit. Once the maximum has been met callers attempting to leave a message will be informed of the message storage unit full condition. The subscriber will be informed of the message storage unit full condition immediately after entering his password. Maximum messages length (sec) Maximum message length allowed that a public caller can leave for a mailbox or List box, from 1 to 999 seconds. Message retention (day) The number of days from 1 to 999 that unread messages will remain before being automatically discarded. An individual message’s retention will be reset to this value each time the message is reviewed and saved. This is now associated with the ‘Adjust Message Retention’ parameter on page 4. When ‘Adjust Message Retention’ is set to ‘Y’, this parameter no longer applies. © SAMSUNG Electronics Co., Ltd. OfficeServ DM User Guide Public Caller Interface Item Description Wait for caller entry This is the number of seconds, from 1 to 99, that the OfficeServ System waits for an entry during the message editing and message retrieval operation. The time begins at the end of speaking the prompt that requests an entry from the caller. Upon entry of the first digit, the time is reset so that the caller has the full Wait for Caller Entry time to enter another digit. Retries if invalid entry This specifies the number of times, from 0 to 99, a caller may reenter his password if an invalid password was entered. This also applies if a caller makes an invalid entry while recording/editing a message. Repeat prompts no entry The number of times, from 1 to 99, to repeat prompts while the caller is recording/editing a message. If the caller does not respond to the prompts after this number of attempts, the OfficeServ System will go to the next Block specified by <Pub-Msg>. Record silence timeout This is the amount of time in seconds that OfficeServ System will listen to caller silence before assuming the caller has stopped talking. © SAMSUNG Electronics Co., Ltd. 385 Error! Use the Home tab to apply 제목 1 to the text that you want to appear here. (Continued) Item Description Digit for operator assistance The Operator digit, when defined, allows the caller, while listening to the subscribers personal greeting or recording a message, to press a specific digit to transfer to the operator defined by the ‘OPERATOR’ pointer. Digit to skip greeting The digit to skip the greeting, when defined, allows the caller, while listening to the subscribers personal greeting, to enter a specific DTMF digit to skip the greeting and enter record mode. Digit to escape The ESCape digit controls the following functions when using a mailbox: - In the mailbox public mode, if entered while the mailbox greeting is being played or any time prior to the caller beginning to speak, the message is canceled and OfficeServ System exits the mailbox using the <PUBESC> pointer. If entered after the caller begins, it will terminate the recording (just as with any other DTMF tone). - Used to exit from the opening menu of the mailbox or List box user mode. OfficeServ System will use the <USER-EXIT> pointer to determine where to go next. - In the mailbox or List box user mode, the Escape digit is generally used as a ‘cancel’ key to abort the current operation and return to the previous one. Digit log on as a user (administrati on digit) The Admin digit controls the following functions: - In the mailbox or List public mode, if entered at any time prior to the (beep) signaling the beginning of recording a message OfficeServ System will switch immediately to the user mode, requesting a password to be entered for the subscriber access to the mailbox. - When sending a message, recorded in the mailbox user mode, prefacing the mailbox number with the Admin digit will request delivery confirmation. Digit to escape Escape digit and Admin digit should not be set to the same digit. 386 © SAMSUNG Electronics Co., Ltd. OfficeServ DM User Guide OutCall The following configuration parameters can be entered for Message Alert (being called at a designated number and notified of new messages). Item Description Number of attempts The number of attempts made to perform notification. Busy retry time The time between notification outcall attempts, in minutes, if the previous attempt returned a busy signal. No answer retry time The time between notification outcall attempts, in minutes, if the previous attempt returned was not answered. On Premise Set to ‘Y’ to allow the subscriber to make on-premise callbacks. Off Premise Set to ‘Y’ to allow the subscriber to make off-premise callbacks. Long distance Set to ‘Y’ to allow the subscriber to make long-distance callbacks. Station Type Station block type to use for on-premise/off-premise/long-distance callbacks. Leave this field blank for the IVM to auto-select. Excepted Area Codes These 10 spaces are used to specify area codes that subscribers are not allowed to call. Use this to restrict toll calls such as calls to 1-900 numbers. © SAMSUNG Electronics Co., Ltd. 387 Error! Use the Home tab to apply 제목 1 to the text that you want to appear here. Prompts These prompts play to a public caller. Leaving the prompt field blank will prevent these prompts from playing. Item 388 Description Prompt prior to record Used in the system wide record facility for a public caller leaving a message. By default this prompt is ‘Please begin speaking at the tone. To stop recording, press ‘2’ or simply hang up’. It may be changed to any other system prompt or you may replace it with a custom prompt. This field is left blank, by default, at the request of our dealers. The system prompt recorded for this field is Prompt number 0760. Prompt indicating error Played when a caller has chosen to record something when the disk is full. By default this prompt is ‘Sorry. The message storage unit is full’ it may be changed to any other system prompt or you may replace it with a custom prompt. Prompt indicating discard Confirms that a message has been erased. By default this prompt is ‘Message discarded’, it may be changed to any other system prompt or you may replace it with a custom prompt. © SAMSUNG Electronics Co., Ltd. OfficeServ DM User Guide (Continued) Item Description Prompt indicating success By default this prompt is ‘Message sent’. It may be changed to any other system prompt or you may replace it with a custom prompt. Prompt for normal delivery By default this prompt is ‘To send your message with normal delivery, press ‘1’’. It may be changed to any other system prompt or you may replace it with a custom prompt. Prompt for urgent delivery By default this prompt is ‘To mark your message urgent, press ‘2’’. It may be changed to any other system prompt or you may replace it with a custom prompt. Prompt for call back By default this prompt is ‘To request a callback, press ‘3’’. It may be changed to any other system prompt or you may replace it with a custom prompt. Prompt for phone number By default this prompt is ‘Enter the telephone number where you can be reached’. It may be changed to any other system prompt or you may replace it with a custom prompt. Prompt for invalid entry By default this prompt is ‘Invalid entry. Try again’. It may be changed to any other system prompt or you may replace it with a custom prompt. Prompt for user available By default this prompt is ‘...is now available’. It may be changed to any other system prompt or you may replace it with a custom prompt. Prompt prior to transfer By default this prompt is ‘Please hold while I connect your call’. It may be changed to any other system prompt or you may replace it with a custom prompt. Prompt prior to record By default this prompt is blank. It may be changed to any other system prompt or you may replace it with a custom prompt. Beep before recording Enables a beep to play prior to recording conversations. © SAMSUNG Electronics Co., Ltd. 389 Error! Use the Home tab to apply 제목 1 to the text that you want to appear here. E-Mail Gateway Item 390 Description Host ID Enter the IP address of the Host Mail Server used by the subscribers assigned this MClass. Port The default (recommended) port to use is: 25. Most Mail Servers look at port 25 for receiving and sending Mail. SMTP User ID This is the User ID the IVM will use to log on to the Mail Server and Identify itself as a Client associated with sending Mail. (Mail Servers that are on a local LAN and that do not have Public IP addresses often do not require authentication.) Password This is the password associated with the IVM’s User ID for logging into the Mail Server verifying it is the Client it said it was. (Mail Servers that are on a local LAN and that do not have Public IP addresses often do not require authentication.) Domain The Domain is used as part of the authentication process between the IVM and the Mail server. Based on the Local Domain Name and Domain ID the mail server can validate that it is accepting mail from this Client. (Mail Servers that are on a local LAN and that do not have Public IP addresses often do not require authentication.) © SAMSUNG Electronics Co., Ltd. OfficeServ DM User Guide (Continued) Item Description Attempts How many times to do you want the IVM to attempt to deliver the EMail Message if it fails? The Default value is: 3. After the last attempt fails the IVM will generate a Failure report e-mail and attempt to deliver it to the ‘Report’ address assigned in System Wide Parameters. Retry interval This is how long the IVM will wait between failure attempts before trying to deliver the e-mail message again. Adjust message retention ‘N’ is the default setting. This means the IVM will leave the original Voice Message as New. The Subscriber can than go in and Delete or Save the Voice Message via the telephone interface at any time up to the number of days specified in the Message Retention timer set on page one of the MClass. ‘Y’ means the IVM will follow the ‘Message Retention to use:’ value set below in place of the Message Retention set on page one. Message retention to use Sets the number of days to retain the Voice Message as New after it sends it to the Mail server. A value of ‘0’ means delete the original voice message immediately after it is packed up and sent to the Mail Server. ‘Adjust Message Retention:’ must be set to ‘Y’ for this parameter to take effect. The selected range is from 0 to 999. © SAMSUNG Electronics Co., Ltd. 391 Error! Use the Home tab to apply 제목 1 to the text that you want to appear here. Call Director Item 392 Description Operating Mode Indicates the Mode Name and Number for which the displayed Block Pointers’ Targets are active. Each Operating Mode is given an unique Number by the system. Valid numbers are 01-99, and are assigned in sequence as new Modes are created. The Mode Number and Name are associated with the Block’s Pointers, not the Block itself. This allows one Block to route calls to different destinations in different Modes, using different Targets for the pointers’ various Mode references. For example, the NoAnswer pointer might route callers to an associate’s Extension during the ‘Day’ Mode, but after 5:00 PM, it would route them to a Mailbox during ‘Night’ Mode. Pointers set in the Default Mode are in effect unless overridden by the same Pointer set in the current Operating Mode. OfficeServ System will display Default Mode pointers in a block while viewing pointers in another mode. The Default Mode pointers will be grayed out to denote that they are not in the current mode. MSG-LEFT The Block to go to, after the caller has recorded and sent a message. NOMSG-LEFT The Block to go to, if the caller did not leave a message. © SAMSUNG Electronics Co., Ltd. OfficeServ DM User Guide (Continued) Item Description ESCAPE The Block to go to, if the caller presses the Escape digit to escape from a mailbox (the escape digit may be pressed anytime before the recording tone). It is recommended that the named Block be the initial MENU Block. This allows the caller to return to the main options that may include dialing another extension. GREET-DTMF This is the Block to go to, if the caller enters any valid DTMF while listening to the mailbox greeting. If defined, the Admin digit, escape digit, digit to skip the greeting, and the operator digit is not considered valid DTMF digits for this pointer. The target block is a menu. The menu will perform a search operation to match the caller ENTRY to the KEY value of a pointer, extension, mailbox or Announcement. OPERATOR This is the Block to go to, if the caller presses the operator digit while listening to the mailbox greeting. USER-EXIT The Block proceeded to, if a mailbox user presses star (Q) to exit from their mailbox. It is recommended that the named Block be the initial MENU Block to allow the user to return to the main options. DIRECTORY The Block to go to, if the caller presses the digit associated with Directory Assistance. © SAMSUNG Electronics Co., Ltd. 393 Error! Use the Home tab to apply 제목 1 to the text that you want to appear here. Menu Block The Menu is used to speak something to the caller, collect a caller’s DTMF entry, and pass control to another Block. A menu can accept entries from 1 to 16 digits in length. The Menu performs a search operation to match the caller ENTRY. For example, a Menu prompt may be, ‘You may dial an extension directly or for sales press 1, for service press 2’. If the caller presses 1, a pointer with an Input value of <1> directs the caller to an extension group within the phone system called ‘SALES.’ If the caller entered 223, the MENU may be configured to search for an extension or mailbox. When a match is found, the OfficeServ System looks to see if it should translate the input into a new value before performing the search. OfficeServ System then transfers control to Block defined in the target name field. This is all done in the in the Menu Input Processor. General 394 © SAMSUNG Electronics Co., Ltd. OfficeServ DM User Guide Item Description Label Name The name of this block. A Block name can be any alphanumeric string up to 16 characters long (including spaces). A Block name may not be the same as another Block name. Take INPUT from The value which the IVM uses to search INPUT values in the input processor on Menu Input Processor page. - ENTRY: If a menu is expecting DTMF digits from the caller, this should be set to ENTRY. - KEY: The search is based on input that has been stored in the KEY register that existed upon entry to the current menu block. After all <TRANSLATION> operations have been performed and a match has been found, the new search value is stored in KEY register for later use. - CID, FWDID, TRUNK: These are used in the menu blocks that handle system integration (Direct Station and Trunk and Forward Station and Trunk). These should not be changed. For specialized applications, you can create other menu blocks that can take input from these registers to use within the application. Store INPUT in Store the input to this menu in the CID, FwdID, TRUNK call session memory register for use as input to subsequent MENU search This is used for basic system integration with the phone system. The LANG Register is used to store the language option selected by the caller. Administrati on Normally the ‘#’ key is used as a prefix for signaling administrative functions. When it is the first digit pressed, it does not count as one of the digits pressed, when compared to Maximum Caller Entry Digits. In other words, if a caller enters #123, it will count as a total of 3 digits. Some applications may require restriction of administrative capabilities on specific ports or MENUs. This can be accomplished by setting Administration digit value to blank in the MENU Blocks where administration is not allowed. Allowable inputs are 0-9, ‘#’, ‘Q’, ‘a’, ‘b’, ‘c’, ‘d’. Escape The Escape digit (normally the ‘Q’ key) causes an immediate exit from a request for digit entry. When the Escape digit is pressed OfficeServ System will not wait for any subsequent digits to be pressed. The INPUT value will include any digits entered before the Escape digit as well as the Escape digit itself. Prompts 1~6 These are the voice prompts that the OfficeServ System speaks when the Menu Block is entered. Menu prompts 1-6 are spoken in succession and are normally used to prompt the caller for an entry. Allowable inputs include any four digit prompt number (1000-9999). A blank entry means ‘say nothing’. © SAMSUNG Electronics Co., Ltd. 395 Error! Use the Home tab to apply 제목 1 to the text that you want to appear here. (Continued) Item Description To use a different, or custom prompt, highlight the field to be changed and enter the desired prompt number. 396 Invalid condition prompt The prompt spoken when no match is found during a MENU search. It normally advises the caller that their entry is invalid, try again. Request password prompt The prompt which asks the caller to enter a password (when appropriate). The prompt is used when a caller has made an entry that requires a password for access to another Block or perform an administrative function. Maximum caller entry digits Indicates the maximum number of digits the caller may enter in response to the Menu prompts. The allowable values are 1-16.This should be set to the length of the maximum valid entry in this Menu. If set greater, the OfficeServ System will wait unnecessarily for additional digits to be entered. If the caller enters more than the specified number of digits, the excess will be carried forward to the next Block. Wait for first entry digits This is the time, in seconds (from 0 to 99), that OfficeServ System will wait for the caller to make an entry. This timer begins after the last menu prompt has been spoken. Wait for subsequent digits This is the time, in seconds (from 0 to 99), that OfficeServ System will wait for the caller to make a subsequent entry. This timer begins after the first caller entry digit has been received and resets after each digit pressed by the caller, up to the Max Caller Entry value. Repeat prompts if no entry Indicates the number of times, from 0 to 9, the menu prompts are repeated, if no entry is made by the caller. Retry if invalid condition The number of additional attempts that this MENU allows if the caller makes an invalid entry. The allowable inputs are 0-9. When retries are exhausted, the OfficeServ System will exit the MENU using the <INVALID> condition. Append to key register A ‘Y’ in this parameter instructs OfficeServ System to add the resulting KEY value to the previous KEY value stored in the KEY register. The new KEY will only be appended if the search in the current MENU was successful. This is useful in applications where the caller is asked to enter DTMF (usually one or two digits) in response to a series of prompts (MENUs). Each response is first validated (by matching an INPUT value) and then added (appended) to the previous response. After the final response, the combined KEY value may be used by another MENU to search for an Extension, Mailbox or Announcement. © SAMSUNG Electronics Co., Ltd. OfficeServ DM User Guide (Continued) Item Description If ‘N’ is specified, the previous KEY is cleared and replaced by the new value. Store key value in Store the resulting KEY from the menu search in the CID, FwdID, or TRUNK call session memory register for use as input to subsequent MENU operations. To change this value, press ENTER to bring up a pick list of appropriate values. Highlight and select one. Digit Assignment Administration and Escape digits should never be set to the same value. Menu Input Processor © SAMSUNG Electronics Co., Ltd. 397 Error! Use the Home tab to apply 제목 1 to the text that you want to appear here. 398 Item Description Operating Mode Indicates the Mode Name and Number for which the displayed Block Pointers’ Targets are active. Each Operating Mode is given a unique Number by the system. Valid numbers are 01-99, and are assigned in sequence as new Modes are created. The Mode Number and Name are associated with the Block’s Pointers, not the Block itself. This allows one Block to route calls to different destinations in different Modes, using different Targets for the pointers’ various Mode references. For example, the Invalid pointer might route callers to an operator’s Extension during the ‘Day’ Mode, but after 5:00 PM, it would route them to a Night Options Menu during ‘Night’ Mode. Pointers set in the Default Mode stay in effect unless overridden by Pointers set in the current Operating Mode. OfficeServ System will display Default Mode pointers in a block while viewing pointers in another mode. The Default Mode pointers will be grayed out to denote that they are not in the current mode. Event - NO-ENTRY POINTER: The Block that the OfficeServ System will execute next if the caller makes no entry in this MENU. - INVALID POINTER: The Block that the OfficeServ System will execute next if the caller has made too many invalid entries (determined by Retries allowed) or a search on a value other than ENTRY failed to find a match. - FAXCALL POINTER: The Block that the OfficeServ System will execute next after hearing a FAX Tone. This applies only when the FAX machine is an extension of the telephone system. Action - GOTO: Specifies the next Block to execute, if the caller’s entry matches the INPUT value. - PASS (PASSWORD THEN GOTO): Used only with MENU Blocks. A password pointer is used to restrict access to a target Block by requiring the caller to enter a password code before passing control to the target block. - TRANSLATIONS: Translates caller entry, telephone system or network integration information to the translated value specified. OfficeServ System then searches for a match, using the translated value. - SEARCH: Used only with MENU blocks. This type of ACTION uses the INPUT value to search a specified range of block types to find a Block with a Number that matches and then passes control to the block. More than one Block type may be searched at one time. Valid block types to be searched are Extensions, Mailboxes and Announcements (searched in that order). © SAMSUNG Electronics Co., Ltd. OfficeServ DM User Guide (Continued) Item Description - FILE: This type of action provides for a large amount of Input values, for a specific MENU, be stored in a database which is accessed at the time the MENU is executing. It directs OfficeServ System to search the specified data base file, located in the DTA directory of the hard disk, for a match to the INPUT value. The type of data file is POINTER files that have the filename extension of PTR respectively. This is used in applications that would otherwise require a very large number of individual event pointers to be programmed in a MENU Block. Pointer (PTR) files are simple text files, which may be produced on a word processor, notepad, or DOS editor. PTR Files are stored as. TXT files. Each line of a pointer file appears and acts exactly like a pointer on the OfficeServ System Menu’s Input Processor screen. This operates as an extension to the input pointers on the MENU Block. Also, a single pointer file can be used for more than one MENU Block. Type Is the three-character abbreviation for the type of block targeted. Below are a few examples: - MBX represents Mailbox - EXT represents Extension - MNU represents Menu Gp Group name Target Name Specifies the block to pass control to when the input value is matched with the input from the defined input source. Input Value Column The Input value is a defined event pointers that directs the OfficeServ System to other Blocks. The Input Processor contains Input Pointers that determine which Application Block receives control of the call next. Upon finding a match, it examines the type of action specified in that pointer and passes control to the object named in the pointer’s target. These pointers may go directly to an object (with or without requiring the caller to enter a password), translate the Input Value to a new value or search a large array of objects for one matching the Input Value. The input value can be any digits that are to be processed by the Menu. These can be digits dialed by the caller or digits passed from previous blocks. The origin for these digits are determined by the contents of the ‘input FROM…’ field. A question mark, ‘?’, may be used as the INPUT value to apply to a set of caller entries. An INPUT value of <2??> will match any 3 digit entry beginning with the digit ‘2’. An INPUT value of ‘4?57’ will apply to all 4 digit entries beginning with the digit ‘4’, ending with the digits ‘57’ and having any value © SAMSUNG Electronics Co., Ltd. 399 Error! Use the Home tab to apply 제목 1 to the text that you want to appear here. in the second digit. The Wild Card is placed in the INPUT value to indicate that any digit entered in that position will qualify as a match. The ‘?’ character may also be used in a translation to indicate that the translated value should include the character which is in the position of the corresponding ‘?’ in the pointer INPUT value. A dot (.) is used in the translation value to indicate that the corresponding ‘?’ in the INPUT value should be discarded. When searching for a match to a caller entry or for a particular pointer, OfficeServ System follows a consistent sequence. MENU Blocks require a more elaborate search than other Blocks. However, the pattern is consistent. It looks for the most specific match. A direct digit match on an INPUT value takes precedence over a wild card match. Also, a wild card pointer with a lesser number of ‘?’ characters will precede one with a greater number. A match on a pointer in the current mode of operation takes precedence over a pointer in Default mode. 400 © SAMSUNG Electronics Co., Ltd. OfficeServ DM User Guide Activity This page shows the activity for this mailbox from the time the statistics were last set in Main Menu/Operating Utilities/Clear report count to the present time. Item Description From ~ To Activity period Abandoned Callers who hung up while in this menu. Admin count The number of times an administrator accessed the system from this menu. Total count The total number of times that callers accessed this menu. © SAMSUNG Electronics Co., Ltd. 401 Error! Use the Home tab to apply 제목 1 to the text that you want to appear here. Mode Block A Mode block exists for each operating mode. An operating mode is defined by a combination of port (s) and time. It can be as simple as Day or Night mode, or more complex (e.g., a special mode that is in effect for port 2 and 3 between 9.23 AM and 7.41 PM on Mondays and Wednesdays). The MODE Block is the entry point into the call routing solution for a particular operating mode and can contain the opening voice prompts which the OfficeServ System will speak when answering a call. The main purpose of the MODE Block is to provide the OfficeServ System with an entry point into the call session and to direct it to other blocks depending on the type of call. The MODE Block receives call information from the phone system, speaks a salutation (optional), and then transfers control to the next Block. A mode can have only one MODE Block. Every Call reaching the OfficeServ System is identifies by a call code. A call code consists of 2 letters. The first letter will indicate how the call arrived and will be D (Direct Call), A (Forward All), B (Forward Busy), N (Forward No Answer) or T (Manual Transfer).The second letter indicates the type of call and will be T (trunk) or S (Station). OfficeServ System can direct the call to a different Block for each different Call code. OfficeServ System applications may contain up to 99 different modes, (although this many are seldom necessary) each corresponding to a particular style of organizational operation. As the organization changes its behavior by changing work shifts, scheduling inventory and other special events or conditions, OfficeServ System automatically adjusts the Call Routing Solutions required to meet callers’ needs. 402 © SAMSUNG Electronics Co., Ltd. OfficeServ DM User Guide Call Code Processor Item Description Label Name The name of this block. A Block name can be any alphanumeric string up to 16 characters long (including spaces). A Block name may not be the same as another Block name. Mode Number The number is identified with the name of the mode. NEXT The NEXT pointer will only be used if the OfficeServ System does not receive a Call Type IPC message from the phone system when the call is first presented. This parameter points to the next Block OfficeServ System will execute after answering a call and speaking the prompts in the MODE Block. The logic that is used is: the OfficeServ System receives a Call but does NOT receive a Call Typ indicator, what should it do NEXT? Any DTMF digits entered in the MODE Block will be carried forward to the next MENU block. DEFAULT The Default pointer of the MODE Block determines what to do if a condition occurs while operating in this mode and a pointer has not been set. This is intended to be a back-up precaution, in the event of configuration error. It is normally directed to a BYE Block which will hang up. © SAMSUNG Electronics Co., Ltd. 403 Error! Use the Home tab to apply 제목 1 to the text that you want to appear here. (Continued) Item Description This parameter will ONLY be referenced if an application is written with a hole within the application. A hole would be defined as an event that occurs that an event pointer was not programmed to handle. DT Direct call originating from a Trunk. DS Direct call originating from a Station. AT All calls forwarded, originating from a Trunk. AS All calls forwarded, originating from a Station. BT Forwarded on busy, originating from a Trunk. BS Forwarded on busy, originating from a Station. NT Forwarded on no answer, originating from a Trunk. NS Forwarded on no answer, originating from a Station. TT Manually transferred Trunk Call. TS Manually transferred Station Call. RC Record Call Request. If no Call Code is given or the Call Code does not match any programmed, the NEXT pointer is used. 404 © SAMSUNG Electronics Co., Ltd. OfficeServ DM User Guide Prompt SALUTATION PROMPTS The prompt numbers to be spoken when OfficeServ System answers a call in this mode. The prompts are only spoken if the call uses the NEXT pointer or is a Direct Trunk (DT) call. The prompts are spoken in sequence beginning with the prompt in the ‘First’ position. These should include prompts that are only spoken upon answering (e.g., ‘Thank you for calling ABC company.’) and are not repeated for the duration of the call. Allowable values include any four digit prompt number 1000-9999. If DTMF tones are entered while these prompts are being spoken, they will be interrupted and the digits will be carried forward into the next MENU Block. © SAMSUNG Electronics Co., Ltd. 405 Error! Use the Home tab to apply 제목 1 to the text that you want to appear here. Port Block The Port Block always precedes a Mode Block. This Block contains all the necessary parameters to link the PBX/Telephone system with the OfficeServ System. This includes all call setup protocols, hardware communication processes, handshaking, and switch integration. The Block tells the physical port how to communicate with the hardware it is connected to. The Port Block defines the physical connection between a OfficeServ System voice port and the phone system, describing all the signals passed between the phone system and OfficeServ System. It describes how calls are presented, how to answer them, and how to collect integration data describing an incoming call. It defines the necessary dial strings to place callers on consultation hold and draw dial tone, complete call transfers, abort call transfers, log on, and disconnect. The Port Block also defines what kind of disconnect supervision the phone system provides and how reliable it is. The Port Block answers incoming calls and checks the Schedule Table to find out which Mode Block to pass control to. The Block collects the Call Type Data and passes that data to the appropriate Mode Block along with the caller. In order to process calls, each port must be assigned a Port Block. This has been done for you and is hard coded into the system. Many of the parameters are not applicable to the Samsung switches while in an embedded environment. The Port Block was made visible to allow you to adjust the Disconnect Parameter. Many installations have been having trouble getting the CO to provide proper disconnect. Changing the disconnect signal in the port block will allow the OfficeServ System to disconnect on an alternate signal type. See Disconnect Signal below. Parameters prefixed below with (DO NOT USE) should not be played with. These parameters will ultimately be adjusted for use with the Samsung switches or eliminated from view. 406 © SAMSUNG Electronics Co., Ltd. OfficeServ DM User Guide General Item Description Label Name The name of this block. A Block name can be any alphanumeric string up to 16 characters long (including spaces). A Block name may not be the same as another Block name. Line is wink start (do not use) In a wink start situation, the CO transmits a signal to say a call is coming in. OfficeServ System issues a wink to acknowledge the call. The wink for loop current is used in DID installations in which case the wait for loop current is set to ‘Y’ for ‘yes’. The setting ‘N’ for ‘No’ acknowledges a flash hook. Wait for loop current (do not use) If this parameter is set to ‘Y’ for ‘Yes’, incoming calls are signaled via a loop current. If set to ‘N’ for ‘No’, incoming calls are signaled via a ring signal. Rings before answer (do not use) This is the number of rings for the system to wait before going off hook to answer a call. Hunt group type How are the calls presented to the OfficeServ System. By default this is set to ‘Linear’. © SAMSUNG Electronics Co., Ltd. 407 Error! Use the Home tab to apply 제목 1 to the text that you want to appear here. (Continued) Item 408 Description Disconnect signal Disconnect supervision is generally transparent to the installer and the user. When a calling party hangs up, a signal (IPC Message) is sent to OfficeServ System indicating the caller has dropped and the OfficeServ System should hang up it’s appropriate Port. The OfficeServ System will, by default, only hang-up if the switch tells it to do so. This parameter allows the installer to select an additional type of disconnect signal which will be used with this system. Mailbox services (do not use) This feature is used only for voice mail service bureaus. OfficeServ System’ toll saver feature will ‘guess’ the caller’s mailbox based on the caller ID (CID), check to see if the caller has messages, and delay pickup if there are no messages. Pickup is delayed by waiting additional rings and/or playing a prompt before answering. Toll saver group (do not use) Sets which mailbox group this functionality will be applied to. Toll saver rings (do not use) The additional number of rings the system waits for the Toll Saver feature. OfficeServ System’ toll saver feature ‘guesses’ the caller’s mailbox based on the caller ID, checks to see if the caller has messages, and delays pickup if there are no messages. Pickup is delayed by waiting additional rings and/or playing a prompt before answering. Toll saver prompt (do not use) The prompt played during the Toll Saver delay. Enter the four-digit number of the desired prompt. Leave this field blank if no prompt is to be played. Auto clear MWI (do not use) This parameter identifies under which conditions the switch will reset message waiting indicators. This helps OfficeServ System keep track of MWI status. Acceptable entries are: - 0: The switch never has permission to clear the indicators. - 1: Clear only by the port that set it. The user must dial into the port that set the indicator. - 2: Clears when the user dials directly into any voice mail port. - 3: Clears when the user gets routed into OfficeServ System by any means (i.e., Call Forward). - 4: Clears when the user reaches OfficeServ System by any means and from any port. © SAMSUNG Electronics Co., Ltd. OfficeServ DM User Guide Disconnet signal This parameter was the main reason for making this block visible again. If you are having trouble getting the CO to provide a proper disconnect this parameter can help you. Remember the problem is with the CO and this is simply trying to accommodate for the lack of proper disconnect. The most common alternatives are ‘Dial Tone’, ‘Busy Tone’, and/or ‘Reorder Tone’. It is best not to rely on a dial tone for a disconnect signal.Continuous background noise may be misconstrued as a disconnect signal, when a caller is leaving a message, resulting in the caller being suddenly, and rudely, cut off. Unreliable signals can also cause messages to end with long dial tones. Alternately, dial tone may not be detectable in a given installation resulting in ‘hung’ ports, phantom calls, etc. Test before using. OfficeServ System must have a reliable disconnect signal to set up conference calls. Set Information © SAMSUNG Electronics Co., Ltd. 409 Error! Use the Home tab to apply 제목 1 to the text that you want to appear here. 410 Item Description Port logon (do not use) The digit (s) dialed to initiate, or maintain, communications with the phone system. The Port Logon feature instructs OfficeServ System to pick up the phone and dial the indicated string. When starting or if no calls come in for one hour, the system assumes it’s not connected and checks. A comma (,) tells OfficeServ System to go off-hook for one second; a semicolon (;) places the line off-hook and tests for dial tone. If the logon fails, another attempt will be made in five minutes. It is not necessary to reset either the PBX or OfficeServ System in order to reinitialize the link. The system is informed if a port is working or if it even exists. The setting may be left blank except on electronic sets. The comma (,) is recommended. The Port Logon dial string is required in true ACD installations. Answer (do not use) The digits for the system to dial upon answering an incoming call (if applicable). Disconnect (do not use) The digits for the system to dial upon ending a call (if applicable). Hold (do not use) These are hold controls as associated with the port. These controls tell the system how to hard hold but do not enable OfficeServ System to do a hard hold. If left blank, PBX hard hold is not used, only consultation hold is used. The controls to enable or disable hard hold can be found in the EClass Block. Retrieve (do not use) The digit (s) dialed by the system to retrieve a caller from hard hold. Transfer (do not use) The digits to dial to place a caller on consultation hold (when transferring a caller from one extension to another) and get a dial tone. Connect (do not use) The digits to dial to complete a call transfer and connect the caller to the called party. Rejected (do not use) The digits the system dials to abort a call transfer if the called party rejects the call. No answer (do not use) The digits the system dials to abort a call transfer which resulted in a no answer condition. Busy (do not use) The digits the system dials to abort a call transfer which resulted in a busy signal. Error (do not use) The digits the system dials to abort a call transfer if an error occurs such as no dial tone. Initiate (do not use) The dial string used to initiate a conference call. © SAMSUNG Electronics Co., Ltd. OfficeServ DM User Guide (Continued) Item Description Abort (do not use) The dial string used to abort a conference call if the second station does not answer. Set up (do not use) The dial string used to set up a conference call after the second station answers. Tear down (do not use) The dial string needed to tear down a conference call and drop the second station. © SAMSUNG Electronics Co., Ltd. 411 Error! Use the Home tab to apply 제목 1 to the text that you want to appear here. Query Block Query Blocks are used to create a ‘voice questionnaire’. The OfficeServ System can be configured to ask the caller a series of questions, record the caller’s voice responses and combine the responses into single, or multiple, voice message (s) that is (are) placed into one, or more, specified mailbox (es). Common applications are order entry, caller opinion surveys and information requests. To send the voice response to more than one mailbox, send the response to a list. When the mailbox user reviews a message, recorded by QUERY Blocks, each of the responses is played back in the order it was recorded, preceded by a playback prompt (if used) to identify it. The operation can be configured to offer callers the options of playing back, changing or confirming their response with DTMF commands or it can be programmed so that it requires no DTMF entries at all. When used in conjunction with MENU Blocks, sequences can be created which involve both voice and DTMF responses (e.g., ‘Dial 1 to order nails or 2 to order bolts’). The Operating Modes in the CallDirector section of the Query Block are used to provide the flexibility to handle calls differently for various modes of operation (typically at different times of the day). The CallDirector uses Event Pointers to pass control of the call. General 412 © SAMSUNG Electronics Co., Ltd. OfficeServ DM User Guide Item Description Label Name The name of this block. A Block name can be any alphanumeric string up to 16 characters long (including spaces). A Block name may not be the same as another Block name. Query prompt This prompt requests a voice response to be recorded by the caller. It is followed by a short tone signal that indicates that the system is recording. Valid entries are 1000-9999, with blank indicating ‘say nothing’. Example: ‘Please speak your name at the tone. (beep)...’ Exit prompt This prompt is given after the response has been recorded. It may simply say ‘Thank you’ to acknowledge the response or prompt the caller to enter DTMF tones to playback, change, or confirm their response. Error prompt This prompt is played if a system error occurs. The most common error condition is that the message storage disk is full. Example: ‘Sorry. The message storage unit is full. Please hold the line for assistance’. Invalid prompt This prompt is played to the caller when an invalid DTMF entry is made. Repeat Query The number of times to repeat the query prompt if the caller does not begin speaking. (0~9) Repeat exit The number of times to repeat the Exit Prompt if no DTMF has been dialed. (0~9) Auto replay Set this parameter to Y to immediately play back the caller response. Otherwise, set to N. Last query If set to ‘Y’ a new message will be created for any subsequent queries during this call session. If this is set to ‘N’ the responses to any additional queries will be appended to the message created during this call session. Header prompt This prompt is used when the message is being played back. It is followed immediately by the caller’s recorded response. Valid entries are 1000-9999, with blank indicating ‘say nothing.’ Mailbox The mailbox to which this response should be sent. If the same mailbox was previously specified by another QUERY Block (during the same call session and the parameter Last Query was set to ‘N’ in the previous Query Block) the voice response to the current query will be appended to the same voice message, forming a composite message. If the mailbox has not been used by another Query block or the parameter Last Query was set to ‘Y’ in the previous Query Block, a new voice message will be created. © SAMSUNG Electronics Co., Ltd. 413 Error! Use the Home tab to apply 제목 1 to the text that you want to appear here. Call Information Item 414 Description Take input from This is a list of possible input types. This will usually only be Voice or in some cases DTMF. Important Note: If you are going to set any Query Block to take Input from anything other than Voice, you must set ‘Use 32/Kbit/s rate’ to ‘Y’. This will guarantee the accurate playing back of DTMF entries in a Voice Format during the transcription of the message. Maximum caller response The maximum length of recorded response allowed. (1~999 s) Wait for voice response This is the time that the IVM will wait for the caller to begin speaking a response to the query. (1~9 s) Wait for DTMF response This is the time to wait for the caller to enter a DTMF tone in response to the exit prompt. (1~99 s) The time interval begins after the prompt has been played. Digit to playback response The DTMF digit that causes OfficeServ System to play back the voice response, just recorded, to the caller. Digit to change response The DTMF digit that will cause OfficeServ System to repeat the query and allow the caller to change his response. © SAMSUNG Electronics Co., Ltd. OfficeServ DM User Guide (Continued) Item Description Digit to confirm response If this is set to a valid DTMF digit, OfficeServ System will automatically play back the response, just recorded by the caller, then play the exit prompt which should ask the caller to confirm the response by pressing this digit. Example: ‘Dial 3 to confirm your response or 2 to change it’. Terminator digit The digit to enter to indicate the caller DTMF entry is complete. This is usually the pound (#) key. Escape digit If the caller presses this key, typically ‘*’, at any time during the query or exit prompt, any response to this query that may have been recorded will be canceled and OfficeServ System will proceed immediately to the Block indicated by the <ESCAPE> pointer. This will have no effect on responses to other queries recorded during the current call. Call Director © SAMSUNG Electronics Co., Ltd. 415 Error! Use the Home tab to apply 제목 1 to the text that you want to appear here. Item 416 Description Operating Mode Indicates the Mode Name and Number for which the displayed Block Pointers’ Targets are active. Each Operating Mode is given a unique Number by the system. Valid numbers are 01-99, and are assigned in sequence as new Modes are created. The Mode Number and Name are associated with the Block’s Pointers, not the Block itself. This allows one Block to route calls to different destinations in different Modes. Pointers set in the Default Mode stay in effect unless overridden by the same Pointer set in the current Operating Mode. OfficeServ System will display Default Mode pointers in a block while viewing pointers in another mode. The Default Mode pointers will be Blued (grayed on a Black and white monitor) out to denote that they were not set in the current mode but will operate as indicated. NO-ENTRY The next Block to go to if no response was recorded (or if not confirmed and Digit to confirm response is set). ESCAPE The next Block to go to if the caller presses the Escape Digit. DISK-FULL The next Block to go to if a system error occurs. The most common error condition is that the message storage disk is full. NEXT The next Block to go to after a response has been recorded (and confirmed, if Digit to confirm response is set). This should be the block containing the next question. © SAMSUNG Electronics Co., Ltd. OfficeServ DM User Guide Activity Calls OfficeServ System shows the total number of calls this Block has processed during the period specified in the following range. Item Description From ~To Indicates the period from the date when the Report Counters were last cleared till the current date. Applies to all call counts in this report. Calls The total number of calls that this block has processed during the period specified in the following range. Abandoned The number of callers who hung-up during the time they were connected to this Block, prior to completing the Block’s function, and what percentage of the total calls this number represents. NOResponse The number of callers who did not record a response or make any entry while connected to this Block, and what percentage of the total calls this number represents. ESCAPE Count The number of callers who pressed the Escape digit while connected to this block, and what percentage of the total calls this number represents. © SAMSUNG Electronics Co., Ltd. 417 Error! Use the Home tab to apply 제목 1 to the text that you want to appear here. (Continued) Item 418 Description Error Count The number of calls processed by this Block which encountered a condition which OfficeServ System could not recognize, or were terminated due to a processing error, and what percentage of the total calls this number represents. NEXT Count The number of calls processed by this Block, during which the Block completed its function and the caller was passed to the Target of the Next pointer, and what percentage of the total calls this number represents. © SAMSUNG Electronics Co., Ltd. OfficeServ DM User Guide Speak Block The purpose of a Speak Block is to speak a prompt or system information to the caller. A Speak Block contains two prompts in addition to speaking system information. After speaking to the caller, control is passed to another Block based on the target of the NEXT pointer. This Block is commonly used to speak a salutation to the new caller and is useful for verifying caller input before passing control of the caller to the next Block. An administrator may select system prompts or record customized prompts in the Voice Studio for use in this Block. Up to three prompts may be played, but only the first and third prompt positions in the sequence are prompts. The second position speaks a unique ‘index’ (or Register) value, which may be any one of the following: current time; today’s date; voiced confirmation of digits entered by the caller; or the contents of one of the Call Session Memory Registers. This allows an administrator to create a scenario in which the caller enters their account number (in a preceding Menu Block) and the Speak Block plays ‘The account number you entered is 4788235. If this is correct, press 1. If not, press 3 to reenter it’. This uses all three prompt positions, the second one playing a confirmation of the number the caller entered in the previous Menu. The third prompt implies a Menu Block function within the Speak Block, which does not exist. Instead, an Event Pointer labeled Next has targeted a Menu, which receives control immediately following the end of the third prompt. Options ‘1’ and ‘3’ are actually processed in this second Menu Block. Speak Blocks may be ‘daisychained’ to play an extended series of prompts. The information contained within the Speak Block screen shown in this section is for discussion and display purposes only. One page houses all Speak Block parameters. The parameters are grouped by category as follows: © SAMSUNG Electronics Co., Ltd. 419 Error! Use the Home tab to apply 제목 1 to the text that you want to appear here. 420 © SAMSUNG Electronics Co., Ltd. OfficeServ DM User Guide Item Description Label Name Label name First prompt The first prompt spoken to the caller. Allowable inputs are 1000 9999. Blank indicates ‘say nothing.’ Prompt index The system information spoken to the caller can be either, the system date or time, the current key value, or the value stored in the CID, FWDID, TRUNK, REG 1, etc…call session memory registers. If the Speak block is used to only speak a salutation to the caller, then this field is left blank. Last prompt The prompt spoken to the caller after the first prompt and/or system information is spoken. The allowable inputs are 1000 9999. Blank indicates ‘say nothing.’ From ~ To Indicates the period from the date when the Report Counters were last cleared till the current date. Applies to all call counts in this report. Total calls Shows the total number of calls this Block has processed during the period specified in the following range. © SAMSUNG Electronics Co., Ltd. 421 Error! Use the Home tab to apply 제목 1 to the text that you want to appear here. (Continued) Item 422 Description Operating Mode Indicates the Mode Name and Number for which the displayed Block Pointers’ Targets are active. Each Operating Mode is given a unique Number by the system. Valid numbers are 01 99, and are assigned in sequence as new Modes are created. The Mode Number and Name are associated with the Block’s Pointers, not the Block itself. This allows one Block to route calls to different destinations in different Modes. Pointers set in the Default Mode stay in effect unless overridden by the same Pointer set in the current Operating Mode. The OfficeServ System will display Default Mode pointers in a block while viewing pointers in another mode. The Default Mode pointers will be Blued (grayed on a Black and white monitor) out to denote that they were not set in the current mode but will operate as indicated. NEXT This points to the next Block the OfficeServ System will execute after speaking the prompts. If the next Block is a MENU, any DTMF digits entered in the Speak Block will be carried forward to the MENU Block. © SAMSUNG Electronics Co., Ltd. OfficeServ DM User Guide Station Block The Station Block contains all the information needed to call or transfer a caller to a particular phone number. The bulk of the Station Block defines the various call progress signals. It also contains any additional dial strings needed to reach a particular station (like dialing ‘9’ to access a trunk or adding digits after the call to activate a beeper). One of the handiest features of the Station Block is the Call Progress Training facility. This feature allows you to provide phone numbers and have OfficeServ System call them to learn the ringback and busy signals automatically. The OfficeServ System then adjusts the appropriate parameter settings in the Station Block according to the data collected by calling the provided numbers. Blocks that reference a telephone number, such as Mailbox Blocks, must reference a Station Block which allows the OfficeServ System to dial. This is particularly useful for unique stations that must be handled in a special way. However, this usually isn't necessary. Station Blocks contain a set of matching strings which allow the OfficeServ System to select an appropriate Station Block based on the kind of number being dialed (all seven digit numbers, four digit numbers beginning with ‘3’, ‘0’, long distance numbers, etc.). The OfficeServ System requires at least one Station Block to make supervised calls and you can create as many Station Blocks as desired. Station blocks can be specifically selected. If an instruction to dial a number (such as a message alert number or pager notification-both found in the mailbox block) does not have a specific station block defined, a station block will be automatically selected based on the number to dial. See Matching Dial Strings for more on this subject. There are five types of Station Blocks preset on OfficeServ System: Template, Beeper, Long Distance, Off-Premise, and On-Premise. Each of these Station Block types comes with factory preset settings which should not be changed. If you want to change any of these parameter settings, press copy button and enter a new name for the Block. You now have a new Station Block. Make the necessary parameter setting changes to the new Block and assign it as necessary. Save the original five Station Blocks with their factory default settings for future reference and use. © SAMSUNG Electronics Co., Ltd. 423 Error! Use the Home tab to apply 제목 1 to the text that you want to appear here. General Item 424 Description Label Name Label name Matching Dial Strings There are two ways for the OfficeServ System to select a station block. The station is specifically selected by a Mailbox or Extension Block or Automatic selection. This Matching Dial String area is where the automatic selection takes place. If a Station Block has not been explicitly assigned to a phone number, OfficeServ System will search all Station Blocks to locate the one most closely matching the number being dialed. Station Blocks can contain up to six matching dial strings. These strings can include any digit which can be dialed and the wildcard character ‘?’. Zero would match the operator’s extension. Examples: - 3???: Match any four-digit number beginning with ‘3’. - 411: Match ‘411’ only. - ???5000: Match any seven-digit number ending in ‘5000’. - ???: Match any three-digit number. © SAMSUNG Electronics Co., Ltd. OfficeServ DM User Guide (Continued) Item Description Prefix The Dial Prefix instructs OfficeServ System what DTMF to dial, if any, prior to the actual number. Prefix examples include a tie line or trunk access code. One example is shown in the OffPremise Station Block: ‘9,’ tells OfficeServ System to dial ‘9’ and then pause before dialing the actual telephone number. Suffix Enter any DTMF that must be dialed after the actual number. This will usually be left blank but may include an account code or PBX feature code. Beepers usually require some form of DTMF entry after the telephone number. Simultaneous xfers Set this parameter to ‘Y’ to allow more than one port to transfer to the same station simultaneously. This applies to blind transfer conditions only. Station groups and operator positions are examples of ‘Yes’ situations. Internal station Not used. Monitor transfer Not used. Max Time of Waiting for Answer This is the maximum time of waiting for answers in seconds. Rings for no answer Number of ringback tones to decide that the callee does not answer. Busy cycles for busy Number of busy tones to decide that the callee is busy. Silence duration Not used. Max Time of waiting for Silence Not used. © SAMSUNG Electronics Co., Ltd. 425 Error! Use the Home tab to apply 제목 1 to the text that you want to appear here. Override Strings Item 426 Description Transfer The digits/string/command to dial to place a caller on consultation hold (when transferring a caller from one extension to another) and get a dial tone. No answer The digits/string/command the system dials to abort a call transfer which resulted in a no answer condition. Connect The digits/string/command to dial to complete a call transfer and connect the caller to the called party. Busy The digits/string/command the system dials to abort a call transfer which resulted in a busy signal. Rejected The digits/string/command the system dials to abort a call transfer if the called party rejects the call. Error The digits/string/command the system dials to abort a call transfer if an error occurs such as no dial tone. Initiate The digits/string/command used to initiate a conference call. Set up The digits/string/command used to set up a conference call after the second station answers. © SAMSUNG Electronics Co., Ltd. OfficeServ DM User Guide (Continued) Item Description Abort The digits/string/command used to abort a conference call if the second station does not answer. Tear down The digits/string/command needed to tear down a conference call and drop the second station. © SAMSUNG Electronics Co., Ltd. 427 Error! Use the Home tab to apply 제목 1 to the text that you want to appear here. This page is intentionally left blank. 428 © SAMSUNG Electronics Co., Ltd. OfficeServ DM User Guide CHAPTER 7. Conference Card Programming Conference Conference Admin Conference Options Permits the adjustments of CNF24 card options and is used in case of Meetme conference. System Selection Items Item Description Password Options User who wants to join Meet-me conference doesn’t have to input password when this option is set to DISABLE. Greeting Options Participant can’t hear greeting announcement when this option is set to DISABLE. Whoami Options Participant doesn’t have to record who am I when this option is set to DISABLE. SPA Options 1st participant can hear SPA when this option is set to ENABLE. Join Alarm Options Current participants can hear join-alarm tone when a new member joins Meet-me conference. Leave Alarm Options Current participants can hear leave-alarm tone when one of participants leaves Meet-me conference. End Alarm Options Participants can hear conference-end-alarm tone when current Meet-me conference is terminated. Early Ent Time Participants can join Meet-me conference earlier than reserved time. © SAMSUNG Electronics Co., Ltd. 429 Error! Use the Home tab to apply 제목 1 to the text that you want to appear here. (Continued) Item Description Mail Server Options Greeting mail is sending when this option is set to ENABLE. Mail Max Retry Specifies the number of times to repeat when sending the mail is failed . Mail Retry Interval Specifies the time interval to repeat when sending the mail is failed . Mail Day Saving Time Using day saving time when this option is set to SUMMER TIME. Mail Time Zone Offset Specifies time zone for mail server. Max Rec Time Specifies the maximum number of recording time. Mail Server IP Specifies the Mail Server IP address. Mail Server Port Specifies the port no of Mail Server . Local Domain Specifies the local domain name. Mail Server User ID Specifies the user id registered in mail server. Mail Server Password Specifies the user password registered in mail server. Viewing the System Selection Items 1. 2. 3. Click the Conference from Tree Viewer. Select [9.1 Conference Admin] [9.1.1 Conference Options] from the Tree Viewer. Check the current items selected on the system. CNF 24 Card Configuration Provides information of the CNF24 card (s) in the system. System Selection Items Item 430 Description Max License Displays the total number of conference channels allowed by system. Free License Displays the total number of conference channels that can be used by system. © SAMSUNG Electronics Co., Ltd. OfficeServ DM User Guide (Continued) Item Description Card Displays the index of CNF24 Card. Cabinet Displays the cabinet number of CNF24 Card. Slot Displays the slot number of CNF24 Card. Conference License Assign Displays the used number of conference channels by CNF24 Card. MeetMe Channel Specifies MeetMe Channel for the CNF24 card. Version Specifies CNF24 IP version. (Ipv4/Ipv6) EPLD Version Displays the CNF24 EPLD (Erasable Programming Logic Device) version installed in the system. PCB Version Displays the CNF24 PCB version installed in the system. IP Address Specifies the IP address for the CNF24 card. Mac Address Specifies the MAC address for the CNF24 card. Card Status Displays the current status of the CNF24 card. Viewing the System Selection Items 1. 2. 3. Click the Conference from Tree Viewer. Select [9.1 Conference Admin] [9.1.2 CNF 24 Card Configuration] from the Tree Viewer. Check the current items selected on the system. Meet-Me Contact List Specifies the phone number to join meet-me conference. System Selection Items Item Description Contact Numbers Specifies the phone number to join meet-me conference. © SAMSUNG Electronics Co., Ltd. 431 Error! Use the Home tab to apply 제목 1 to the text that you want to appear here. Viewing the System Selection Items 1. 2. 3. Click the Conference from Tree Viewer. Select [9.1 Conference Admin] [9.1.3 Meet-Me Contact List] from the Tree Viewer. Check the current items selected on the system. Predefined Groups Specifies the predefined groups. System Selection Items Item Description Descript Specifies the description for predefined group. Trunk Specifies the trunk or station number. Tel Specifies the outgoing number if trunk number is inputted in TRUNK. Viewing the System Selection Items 1. 2. 3. Click the Conference from Tree Viewer. Select [9.1 Conference Admin] [9.1.4 Predefined Groups] from the Tree Viewer. Check the current items selected on the system. Meet-Me Members List Specifies the member list for reservation of meet-me conference. When meet-me conference is reserved, this list is updated. System Selection Items Item 432 Description User Name Specifies the name of meet-me member. Tel Number Specifies the phone number to call for conference. Email Address Specifies the email address to receive the invite mail. © SAMSUNG Electronics Co., Ltd. OfficeServ DM User Guide Viewing the System Selection Items 1. 2. 3. Click the Conference from Tree Viewer. Select [9.1 Conference Admin] [9.1.5 Meet-Me Members List] from the Tree Viewer. Check the current items selected on the system. Email Address Specifies the email address for station users. System Selection Items Item Description Email Address Specifies the email address for station users. Viewing the System Selection Items 1. 2. 3. Click the Conference from Tree Viewer. Select [9.1 Conference Admin] [9.1.6 Email Address] from the Tree Viewer. Check the current items selected on the system. CNF 24 Voice Management Display the current prompt files and upload files. System Selection Items Item Description Card Select the card to manage. Language Set Select the language to use. Comments Display the description of prompt. File Display the prompt file name. © SAMSUNG Electronics Co., Ltd. 433 Error! Use the Home tab to apply 제목 1 to the text that you want to appear here. Viewing the System Selection Items 1. 2. 3. Click the Conference from Tree Viewer. Select [9.1 Conference Admin] [9.1.7 CNF24 Voice Management] from the Tree Viewer. Check the current items selected on the system. Conference Management Meet Me Conference Screen Layout Screen Layout Details Navigator Display the card position, and can select the previous/this/next week Buttons Displays the all the functions used in program Main Screen Displays the channel status Viewing the System Selection Items 1. 2. 434 Click the Conference from Tree Viewer. Select [9.2 Conference Management] [9.2.1 Meet Me Conference] from the Tree Viewer. © SAMSUNG Electronics Co., Ltd. OfficeServ DM User Guide 3. Check the current items selected on the system. Reservation 1. Drag the period in main screen 2. Click the [Create] button 3. Input the detail information for conference © SAMSUNG Electronics Co., Ltd. 435 Error! Use the Home tab to apply 제목 1 to the text that you want to appear here. Item 436 Details Subject Input the description for conference Conference Id After input the unique numeric id, click the [Check] button If the id is not unique, system will offer the unique id. Duration Select the duration for conference Repeat Select the repeat type # of Attendees Input the wanted channel count Owner Station Input the owner station id for the conference. Available Channel Display the max channel according to condition Attendee List If click the panel, will be displayed the <Select Conference Member> window Send Invitation… If you have party list, you can send the invitation Password Input the password for conference Early Entrance Determine if early entrance is allowed Recording Determine if recording is allowed Paging Determine if early paging is allowed Page Group If you enabled the paging, input the page group index Greeting Prompt You can upload personal greeting message file © SAMSUNG Electronics Co., Ltd. OfficeServ DM User Guide < Making the [Attendee List] > 1. Click the [Select…] button in ‘Conference Reservation’ window 2. After input the phone number or name, click the [Search] button 3. 4. After check the member for invitation, click the [Invite Selected] button a) If you want to add all member, click the [Invite All] button b) If can’t search the member, input the member’s information in [Attendee List], then click the [Add] button If complete to add member selection, click the [OK] button © SAMSUNG Electronics Co., Ltd. 437 Error! Use the Home tab to apply 제목 1 to the text that you want to appear here. < Sending the invitation > 1. 438 After make the conference checked with the ‘Send Invitation…’, you can see the below window 2. Input the [Mail Subject] 3. After modify the mail contents, click the [Send] button 4. The mail will be sent to conference party © SAMSUNG Electronics Co., Ltd. OfficeServ DM User Guide Detail If click the [Detail] button, you can see the today list And after select the range by dragging, click the [Detail] button, you can see the selected list <Detail> You can see the detail of selected conference <Cancel> You can cancel the selected conference. And you can send the mail with reason [Remark] You can run <Detail Reservation>, <Cancel Reservation> about yours © SAMSUNG Electronics Co., Ltd. 439 Error! Use the Home tab to apply 제목 1 to the text that you want to appear here. History If click the [History] button, you can see the today list And after select the range by dragging, click the [History] button, you can see the selected list <Detail Conference> You can see the detail of selected conference <View Reason> You can see the cancel reason of selected conference <Download Record> You can download the recording file if have been recorded <Delete Record> You can delete the recording file if have been recorded <Delete> You can delete the selected history <Delete All> You can delete all history 440 © SAMSUNG Electronics Co., Ltd. OfficeServ DM User Guide In Progress If click the [In Progress] button, you can see the conference list in progress. And after select the range by dragging, click the [List] button, you can see the selected list <Detail Reservation> You can see the detail of selected conference <Cancel Reservation> You can cancel the selected conference. And you can send the mail with reason © SAMSUNG Electronics Co., Ltd. 441 Error! Use the Home tab to apply 제목 1 to the text that you want to appear here. This page is intentionally left blank. 442 © SAMSUNG Electronics Co., Ltd. OfficeServ DM User Guide CHAPTER 8. Troubleshooting This section describes how to handle the problems that may occur while using OfficeServ DM. If the OfficeServ DM becomes abnormal, first check the following: If the problem still exists, contact a local service center. Can’t execute OfficeServ DM with Web Browser. When Web Browser is not allowed to execute OfficeServ DM, check if Web Browser setting is correct. From the Internet Explorer 8, click on [Tools] [Internet Options] [Security] [Custom Level]. Web Browser Setting This options must be set in Internet or Local Intranet or Trusted sites with connection status. ActiveX Controls and plug-ins Initialize and script ActiveX contols not marked as safe for scripting This must be [Prompt] or [Enable] © SAMSUNG Electronics Co., Ltd. 443 Error! Use the Home tab to apply 제목 1 to the text that you want to appear here. Downloads Automatic prompting for file downloads This must be [Enable] 444 © SAMSUNG Electronics Co., Ltd. OfficeServ DM User Guide Downloads File Download This must be [Enable] © SAMSUNG Electronics Co., Ltd. 445 Error! Use the Home tab to apply 제목 1 to the text that you want to appear here. Current Installed Java Web Start is lower than the version 1.6 At least JRE 1.6 should be installed to use OfficeServ DM. If current installed Java Web Start Version is lower than 1.6, you can see the picture below. In this case, you must uninstall an already installed Java program and reinstall. Uninstll Procedure From the Windows Taskbar, click on [Start] [Settings] [Control Panel] [Add/Remove Programs]. 446 © SAMSUNG Electronics Co., Ltd. OfficeServ DM User Guide ABBREVIATION A AA AOM Auto Attendant Add On Module BGM BRI Back Ground Music Basic Rate Interface CID CLI COS CPU CTI Caller ID Service Calling Line Identification Class of Service Central Processing Unit Computer Technology Interface DB DGP DHCP DID DISA DLI DM DND DSP DTMF Database Digital Phone Dynamic Host Configuration Protocol Direct Inward Dialing Direct Inward System Access Digital Line Interface Device Manager Do Not Disturb Digital Signal Processor Dual Tone Multi Frequency B C D © SAMSUNG Electronics Co., Ltd. 447 Error! Use the Home tab to apply 제목 1 to the text that you want to appear here. E ENM EPLD Ear and Mouth Erasable Programming Logic Device FTP File Transfer Protocol HDD Hard Disk Drive ID IP ISDN ITP IVR Identifier Internet Protocol Integrated Services Digital Network IP Telephone Interactive Voice Response JRE Java Runtime Environment KMMC Keyset MMC LAN LCD LCP LCR Local Access Network Liquid Crystal Display Local Control Processor Least cost Routing MAC MCP MGI MMC MMS MOBEX Media Access Control Main Control Processor Media Gateway Interface Man Machine Code Man Machine Subsystem Mobile Extention F H I J K L M 448 © SAMSUNG Electronics Co., Ltd. OfficeServ DM User Guide MOH MPS MSN Music on Hold Multi Programming System Multiple Subscriber Number NAT Network Address Translation OAS OS OfficeServ Application Server Operating System PBX PC PCB PRI PRS Private Branch eXchange Personal Computer Printed Circuit Board Primary Rate Interface Personal Response System SIP SLI SMDR SMTP SVMi Session Initiation Protocol Subscriber Line Interface Station Message Detail Recording Simple Mail Transfer Protocol Samsung Voice Mail integrated TMC TSW Trunk Module Controller Time Switch UCD UMS Universal Call Distribution Unified Messaging System VM VMS VoIP Voice Mail Voice Mail System Voice over Internet Protocol N O P S T U V © SAMSUNG Electronics Co., Ltd. 449 Error! Use the Home tab to apply 제목 1 to the text that you want to appear here. W WIP WLAN WLI 450 Wireless IP Phone Wireless LAN Wireless LAN Interface © SAMSUNG Electronics Co., Ltd. WEEE SYMBOL INFORMATION Correct Disposal of This Product (Waste Electrical & Electronic Equipment) (Applicable in the European Union and other European countries with separate collection systems) This marking on the product, accessories or literature indicates that the product and its electronic accessories (e.g. charger, headset, USB cable) should not be disposed of with other household waste at the end of their working life. To prevent possible harm to the environment or human health from uncontrolled waste disposal, please separate these items from other types of waste and recycle them responsibly to promote the sustainable reuse of material resources. Household users should contact either the retailer where they purchased this product, or their local government office, for details of where and how they can take these items for environmentally safe recycling. Business users should contact their supplier and check the terms and conditions of the purchase contract. This product and its electronic accessories should not be mixed with other commercial wastes for disposal. BATTERY SYMBOL INFORMATION Correct disposal of batteries in this product (Applicable in the European Union and other European countries with separate battery return systems.) This marking on the battery, manual or packaging indicates that the batteries in this product should not be disposed of with other household waste at the end of their working life. Where marked, the chemical symbols Hg, Cd or Pb indicate that the battery contains mercury, cadmium or lead above the reference levels in EC Directive 2006/66. If batteries are not properly disposed of, these substances can cause harm to human health or the environment. To protect natural resources and to promote material reuse, please separate batteries from other types of waste and recycle them through your local, free battery return system. OfficeServ DM User Guide © 2010 Samsung Electronics Co., Ltd. All rights reserved. Information in this Guide is proprietary to SAMSUNG Electronics Co., Ltd. No information contained here may be copied, translated, transcribed or duplicated by any form without the prior written consent of SAMSUNG. Information in this Guide is subject to change without notice.


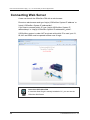
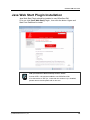

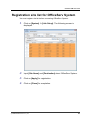
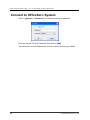
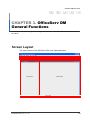

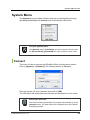

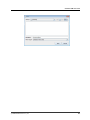
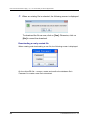

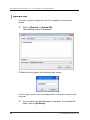
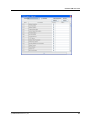

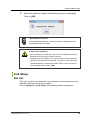
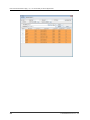
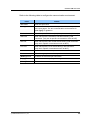

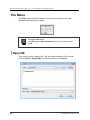
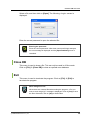
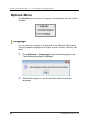
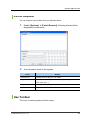
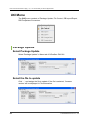
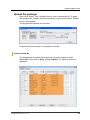
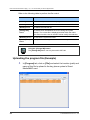

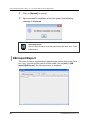
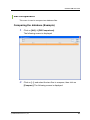
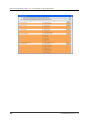

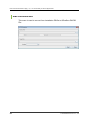
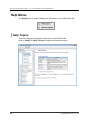
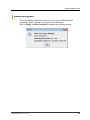
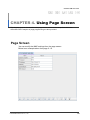

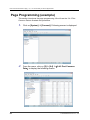

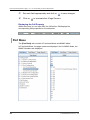
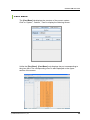

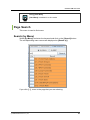
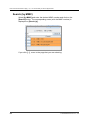


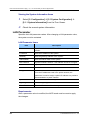
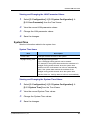

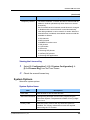
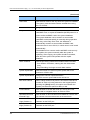
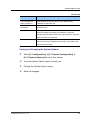
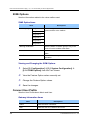
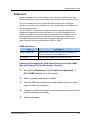
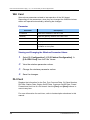
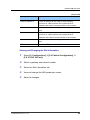

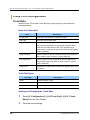
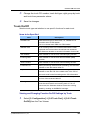
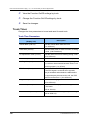
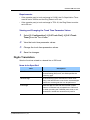

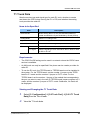
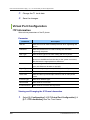
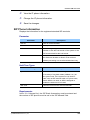
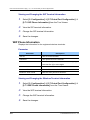
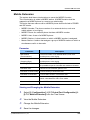
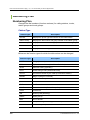
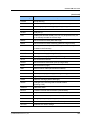
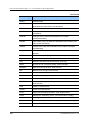

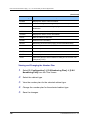
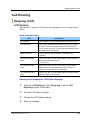
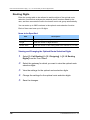


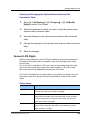
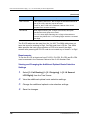

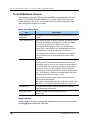
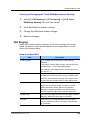
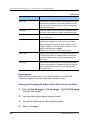
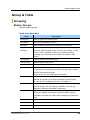

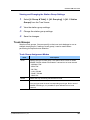
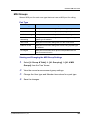

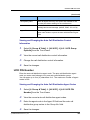
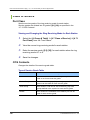
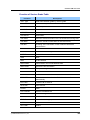
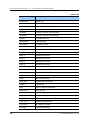
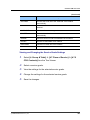

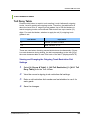
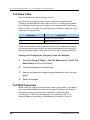
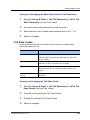

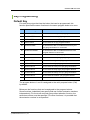
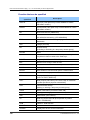
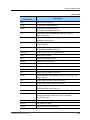
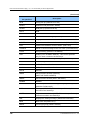
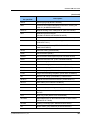
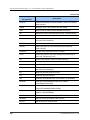
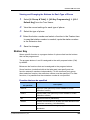
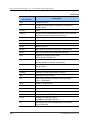

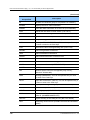
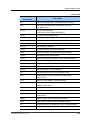
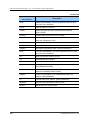
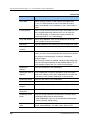
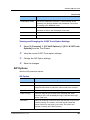
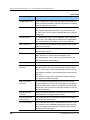
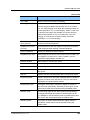

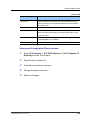
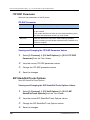

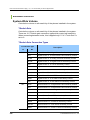
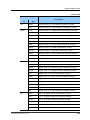
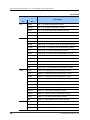
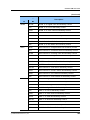
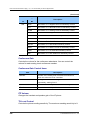
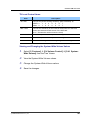
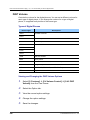
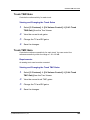


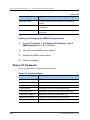
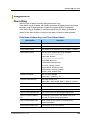
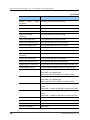
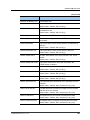
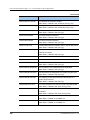
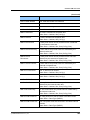
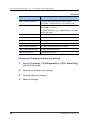


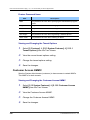
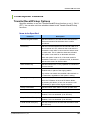

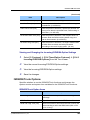
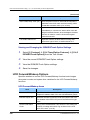
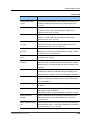
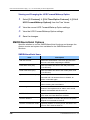


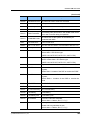
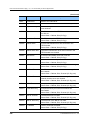
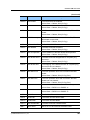
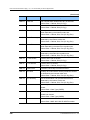
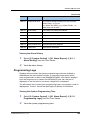
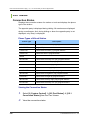
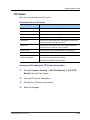
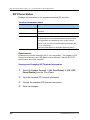


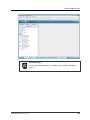
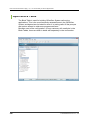
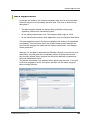
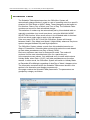

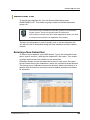
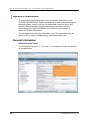
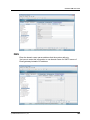
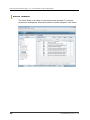
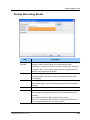
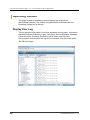
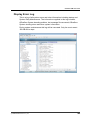
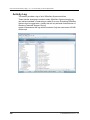

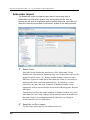
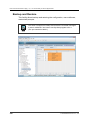
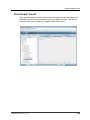
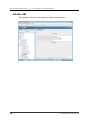
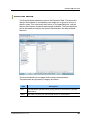
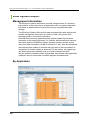
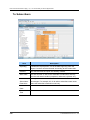
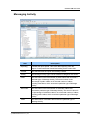
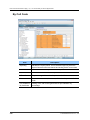
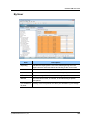
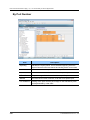
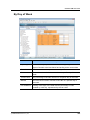
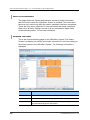

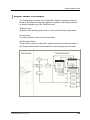


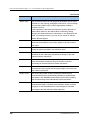
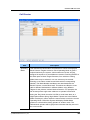
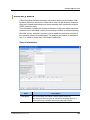
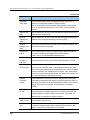
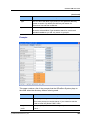
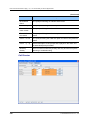
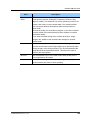
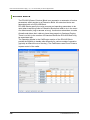
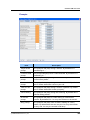
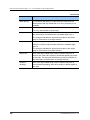
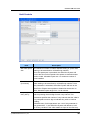
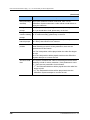
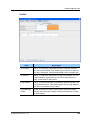

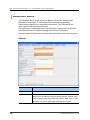

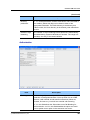

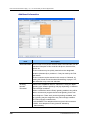
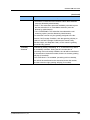
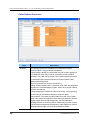
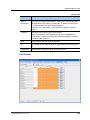
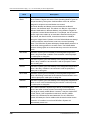
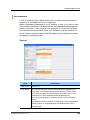
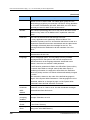
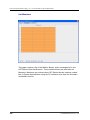

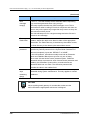
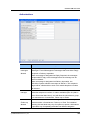


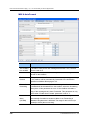
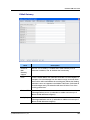
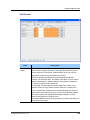
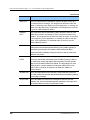
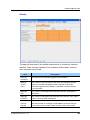
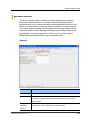
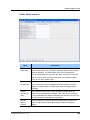
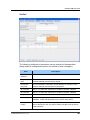
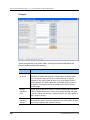

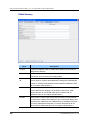
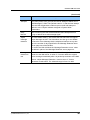
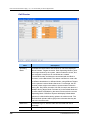
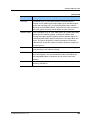
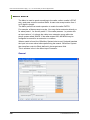
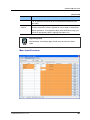
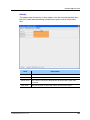
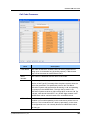
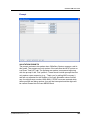
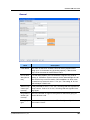
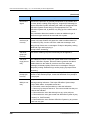
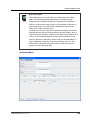
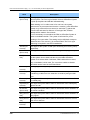
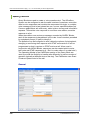
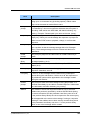
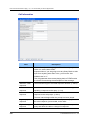

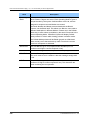
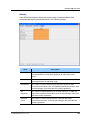

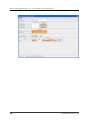
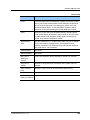
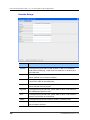


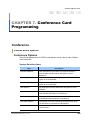
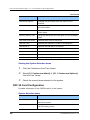
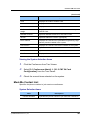
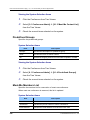
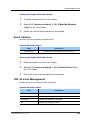
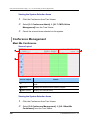
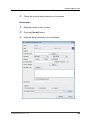
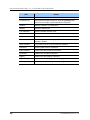
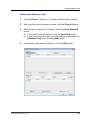
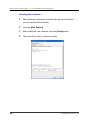
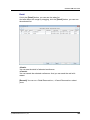
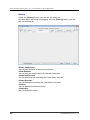
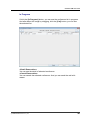


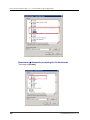
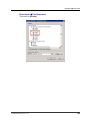
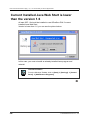
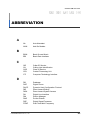
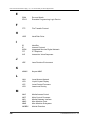


![SamsungProdBulletin_211_4_4x_Software_Release[1]](http://vs1.manualzilla.com/store/data/005825179_1-598976db56b1ef1012f4b9b7fb2b917f-150x150.png)