1
GoldMine User Guide
Rev: 85-.03-11-09
5675 Gibraltar Drive
Pleasanton, CA 94588 USA
TEL: 800.776.7889
www.frontrange.com
Copyrights and Trademarks
The following information pertains to copyrights and trademarks of FrontRange, its affiliates, and other companies.
FrontRange Copyright Information
Copyright 2009 FrontRange Solutions USA Inc. All Rights Reserved.
Window captures and dialog box sample views are the copyright of their respective owners.
Use of this software and its related user documentation IS subject to the terms and conditions of the applicable EndUser License Agreement (EULA), a copy of which is found in the user documentation. You must agree to the
terms and conditions of the EULA in order to use this software. If you do not agree to the terms and conditions of
the EULA, promptly return the unused software IN ITS UNOPENED CD PACKAGE to the place from which you
obtained it for a refund.
WARNING: The software described in this manual and its related user
documentation are protected by copyright law. In no event, shall any part
of the related user documentation be copied, reproduced, distributed,
transmitted, stored in a retrieval system, or translated into any language,
without the express written permission of FrontRange Solutions USA Inc.
Contact FrontRange Solutions at our Web site: www.frontrange.com
FrontRange Trademark Information
The following are trademarks of FrontRange Solutions USA Inc. and/or its affiliates in the United States and/or
other countries:
FrontRange Solutions®, FrontRange™, GoldMine®, GoldSync®, GoldMine® Answer Wizard™, GoldMine®
Management Intelligence™, GoldMine® Manager's Console™, iGoldMine™, HEAT®, HEAT® Service &
Support™, HEAT® PowerDesk™, iHEAT™, HEAT® Self Service™, HEAT® Manager's Console™, HEAT®
Answer Wizard™, HEAT® Quick Start Wizard™, InfoCenter®, Automated Processes™, First Level Support®,
enteo®, Centennial™, DeviceWall®, Centennial Discovery®, Discovery Dashboard®, MicroAudit®, SAM™ and
other FrontRange products and brands.
Other Trademark Information
The following are trademarks of their respective owners or companies:
Trademark or Registered Trademak
Company
ACT!®
CRM Division of Best Software Inc.
®
®
Adobe Systems Inc.
®
Adobe , Acrobat , Reader
®
®
Apple , Mac OS, Macintosh
Avaya
Apple Computer, Inc.
®
Avaya, Inc.
®
Beyond Gold™
Computerese
Blackberry®
Research in Motion Limited
Borland® Interbase®
Borland International Inc.
Calyx®
Calyx Software
Cisco®
Cisco Technology, Inc.
Citrix Systems, Inc.
®
Citrix
Corel Corporation
®
Corel
Crystal Reports
dBASE
Business Objects S.A.
®
dBASE Inc.
®
dbCams+
Financial Computer Support, Inc.
™
Ethereal®
Ethereal, Inc.
Fast™, Folio®, NXT®, LivePublish®, GetSmart™
Fast Search and Transfer SAS
Firebird®
FirebirdSQL Fundation Incorporated (Australia)
Genesys®
Genesys Telecommunications Laboratories, Inc.
Genesis 2000®
Genesis 2000, Inc.
GlobalCall®
IDT Corporation
GoldBox©
copyright of Redstone Softbase Company
GraphOn®, GO-Global®
Great Plains
Great Plains Software Inc.
Hewlett Packard
®
GraphOn Corporation
®
Hewlett Packard Company
®
®
IBM , Lotus , Lotus Organizer
™
IBM Corporation
®
InaPlex Limited
™
InaPlex , Inaport
®
®
Intel Corporation
®
Intel , Pentium , Dialogic
®
®
®
Intuit , QuickBooks , QuickBooks Pro
Intuit Inc.
The Office of Government Commerce
®
ITIL
™
KNOWLIX
Peregrine Systems Inc.
Trademark or Registered Trademak
Company
LANDesk®
LANDesk Group Ltd.
LANWare
LANWare, Inc.
®
Linux
Linus Torvalds
Maximizer Enterprise™
Multiactive Software
Microsoft®, Active Directory®, Microsoft® SQL Server™,
ActiveX®, Outlook®, Windows®, Windows NT®, .NET
logo, Visual FoxPro®, Outlook®, Windows®, Windows
NT®, Microsoft Exchange Server® and Windows Vista®
Microsoft Corporation
Netcensus®
Tally Systems Corporation
®
Netilla
Netilla Networks, Inc.
®
®
Netscape , Netscape Navigator
Netscape Communications Corp.
®
Novell®, Netware®, Groupwise®
Novell, Inc.
OmniRush™ (formerly FaxRush®)
Z-Firm LLC
Oracle Corporation
Oracle®
Palm , MyPalm , Palm Powered , Palm.Net ,
PalmOS®, PalmPak®
Palm, Inc.
Pink Elephant™
Pink Elephant Inc.
Red Hat®
Red Hat, Inc.
®
™
RightFax
™
®
Captaris, Inc.
®
Rolodex®
Rolodex Corp.
Sage Line™
The Sage Group plc
SaleMaker®
SaleMaker Corp.
SAP®
SAP Aktiengesellschaft Corporation
Scansoft®, SpeechPearl®
Scansoft, Inc.
SPARC®
SPARC International Inc.
®
™
Sun , Java , Solaris
Sybase
®
®
Sun Microsystems, Inc.
Sybase, Inc.
Symantec®, pcAnywhere®, WinFax®
Symantec Corporation
UNIX®
UNIX System Laboratories, Inc.
VNC™
AT&T Laboratories Cambridge
Voxpoint®
Cayo Communications, Inc.
Visor®
Handspring, Inc.
Zetafax®
Equisys PLC Company
Table of Contents
Welcome to GoldMine® Premium Edition
15
Overview...................................................................................................................................15
What's New in GoldMine ........................................................................................................16
About This Guide......................................................................................................................17
Audience and Expertise ............................................................................................................17
Document Conventions.............................................................................................................17
Resources ..................................................................................................................................18
Contact Us.................................................................................................................................18
Getting Started
19
Key Terms and Concepts ..........................................................................................................19
Launching GoldMine ................................................................................................................20
Changing the Default Login ..............................................................................................21
Viewing Information About GoldMine Premium Edition.................................................22
Navigating GoldMine ..............................................................................................................22
Main Menu Bar..................................................................................................................24
Work Area.................................................................................................................................25
Activity Window ...............................................................................................................26
Calendar.............................................................................................................................27
Mail....................................................................................................................................28
Opportunities .....................................................................................................................29
Projects ..............................................................................................................................29
Campaigns .........................................................................................................................30
Service Center....................................................................................................................31
Leads..................................................................................................................................31
Knowledge Base ................................................................................................................32
Global Toolbar...................................................................................................................33
Navigation Pane.................................................................................................................33
Status Bar...........................................................................................................................34
Navigating GoldMine ...............................................................................................................34
GoldMine User Guide
Table of Contents • 5
About Customizing Toolbars ....................................................................................................36
Editing Toolbar Options ....................................................................................................36
Renaming a toolbar ...........................................................................................................37
Renaming or editing or deleting a button on a toolbar ......................................................37
To rearrange buttons on a toolbar ......................................................................................37
Navigation Panel .......................................................................................................................37
Using Online Help ....................................................................................................................39
Shortcut Keys............................................................................................................................39
GoldMine Shortcut Keys ...................................................................................................40
Contact Record Shortcut Keys...........................................................................................40
Contact Tab Shortcut Keys ................................................................................................42
Shortcut Keys.....................................................................................................................43
Tree View Shortcuts ..........................................................................................................44
Combo Box Shortcuts ........................................................................................................45
Search Box Shortcuts.........................................................................................................45
Edit Box Shortcuts .............................................................................................................45
Other Control Shortcuts .....................................................................................................46
Navigation Shortcuts..........................................................................................................46
Microsoft Windows Shortcuts ...........................................................................................47
Microsoft Windows Explorer® Shortcuts .........................................................................47
Favorites Center Shortcuts.................................................................................................49
Tab Shortcuts .....................................................................................................................49
Address Bar Shortcuts .......................................................................................................50
Logging Away from GoldMine ................................................................................................51
Logging in as Another User..............................................................................................52
Viewing GoldMine Information ...............................................................................................52
Local Menus..............................................................................................................................53
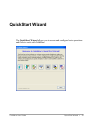
QuickStart Wizard
55
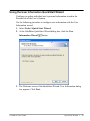
Using the User Information QuickStart Wizard .......................................................................57
Using the User QuickStart Wizard............................................................................................60
Using the Industry Templates Quick Wizard............................................................................63
Using the Key Fields QuickStart Wizard..................................................................................67
Using the Postal Codes QuickStart Wizard ..............................................................................69
Using the Data Import QuickStart Wizard................................................................................70
Using the GoldMine PLUS QuickStart Wizard ........................................................................74
6 • Table of Contents
GoldMine User Guide
Contact Management
75
About Contact Records .............................................................................................................75
About Contact Record Tabs......................................................................................................76
Contact Search Center Toolbar.................................................................................................78
About Creating Contact Records ..............................................................................................79
Creating a New Contact Record ...............................................................................................79
Duplicate Warnings ..................................................................................................................82
Duplicate Company or Contact Names .............................................................................82
Duplicate Phone Numbers .................................................................................................83
Duplicate Email Addresses................................................................................................83
Adding Contacts To an Existing Company ..............................................................................84
Editing Contact Records ...........................................................................................................85
Printing Contact Records ..........................................................................................................85
Linking Files to a Contact Record ............................................................................................87
Displaying Multiple Contact Records.......................................................................................87
Deleting Contact Records .........................................................................................................87
Using the Delete Wizard...........................................................................................................88
Working with Contact Details ..................................................................................................92
About the Relationships Tab.....................................................................................................93
Creating Relationships ..............................................................................................................93
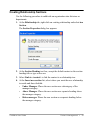
Adding Contacts To Existing Relationship Trees.....................................................................94
Creating Relationship Sections .................................................................................................95
Adding Contacts to Relationships.............................................................................................96
About the Details Tab ...............................................................................................................96
Adding Detail Records ......................................................................................................97
Deleting a Detail Record ...................................................................................................98
About the Pending Tab .............................................................................................................98
Activities Local Menu .......................................................................................................99
About the Notes Tab ...............................................................................................................100
About the Referrals Tab..........................................................................................................100
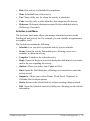
About the History Tab ............................................................................................................102
About the Summary Tab.........................................................................................................103
Searching for Contacts............................................................................................................104
Accessing the Contact Search Center .....................................................................................104
Saving Searches .....................................................................................................................105
Searching for Contact Records ...............................................................................................106
Contact Search Center Query Editor ......................................................................................111
Browser Column Selection ..............................................................................................112
Syncing Contacts in the Contact Search Center .....................................................................112
GoldMine User Guide
Table of Contents • 7
About Universal Search ..........................................................................................................113
Prerequisites ............................................................................................................................113
Security ............................................................................................................................114
Searching for Contacts with Universal Search .......................................................................114
Using the Universal Search Advanced Feature.......................................................................116
Setting Universal Search Options ...........................................................................................118
Format of Queries and Results of Searches ............................................................................125
General Format ................................................................................................................125
Examples..........................................................................................................................125
<For Whom> format........................................................................................................126
(From where wps) format ................................................................................................127
Search criteria format.......................................................................................................127
Memo Filters ...........................................................................................................................127
Example ...........................................................................................................................128
Configuring the Contact Search Center ..................................................................................128
Using Filters, Queries, and Groups .........................................................................................128
About Filters and Groups.................................................................................................128
Filters ...............................................................................................................................128
Example ...........................................................................................................................129
Creating Filters........................................................................................................................130
Groups .....................................................................................................................................130
How Groups Differ from Filters .....................................................................................130
Group Members Local Menu ..................................................................................................131
Using the Groups Tab .............................................................................................................132
Group Building Wizard...........................................................................................................133
Groups Based on Filtered Records..........................................................................................134
Group Optional Settings..........................................................................................................135
Group Based on Scheduled Activities ....................................................................................136
Group Based on Completed Activities....................................................................................137
Building a Group Based on Supplemental Contact Data ........................................................137
Saving Search Results as a Group...........................................................................................138
Using Filters and Groups .......................................................................................................138
Activating and Releasing Filters .............................................................................................139
Activating and Releasing Groups ...........................................................................................141
8 • Table of Contents
GoldMine User Guide
Activities
143
About Activities ......................................................................................................................143
Benefits of Using Activities.............................................................................................144
View Window (Activities)...............................................................................................145
Scheduling and Completing Activities ...................................................................................146
About Scheduling Activities............................................................................................146
Scheduling Activities.......................................................................................................147
Scheduling Activity Details.............................................................................................149
Scheduling Activities to Users.........................................................................................151
Scheduling Activities with Resources .............................................................................151
Scheduling Activities Based on Available Times ...........................................................152
Scheduling Recurring Activities......................................................................................153
Important Considerations.................................................................................................153
Scheduling Activities Based on Series ............................................................................155
Auto-Updating Activities........................................................................................................156
Scheduling Literature Requests ..............................................................................................158
Scheduling Forecasted Sales...................................................................................................160
About Completing Activities ..................................................................................................160
Completing Activities......................................................................................................161
Completing Letters and Memos.......................................................................................164
About GoldAlarm ...................................................................................................................165
About the Activity List ...........................................................................................................165
Activity List Toolbar .......................................................................................................166
Activity List Main Window.............................................................................................167
Activity List Date Range Dialog .....................................................................................168
Using the Activity List............................................................................................................169
View Window: Activity List ...........................................................................................171
View Scheduled Activity Zoom .............................................................................................172
Printing Activities ...................................................................................................................173
Calendars
175
About the Calendar .................................................................................................................175
Calendar Toolbar .............................................................................................................175
Accessing Your Calendar ................................................................................................176
Using the Calendar..................................................................................................................177
Using the Daily Calendar.................................................................................................178
Using the Weekly Calendar .............................................................................................179
Using the Monthly Calendar............................................................................................180
Using the Yearly Calendar...............................................................................................181
Using the Planner Calendar .............................................................................................182
Using the Outline Calendar .............................................................................................183
Using the Peg Board ........................................................................................................184
Using the Task List in the Calendar ................................................................................185
GoldMine User Guide
Table of Contents • 9
Using Occasions in the Calendar ............................................................................................186
Adding or Editing Occasions ...........................................................................................186
Deleting an Occasion .......................................................................................................188
About Sharing Free/Busy Times.............................................................................................189
Shared Free/Busy Times Example...................................................................................189
Scheduling Based on Free/Busy Times ...........................................................................190
Distributing Your Free/Busy URL to others....................................................................191
Setting Free/Busy Times..................................................................................................191
Configuring Free/Busy URLs ..........................................................................................193
About Scheduling from Meeting Requests .............................................................................194
Creating Meeting Requests ..............................................................................................195
Responding to Meeting Requests ....................................................................................195
Sharing Calendar Information.................................................................................................196
Accessing Shared Calendars ............................................................................................197
Publishing Free/Busy Times ............................................................................................197
Contact Communication
199
About Communicating with Contacts.....................................................................................199
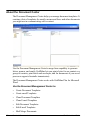
About the Document Center ...................................................................................................200
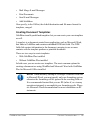
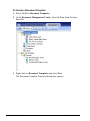
Creating Document Templates ........................................................................................201
Editing Document Templates ..........................................................................................206
Faxing Correspondence...........................................................................................................207
Faxing Your Default Fax Sheet ..............................................................................................209
Printing Documents.................................................................................................................210
Using Mail Merge Properties (Printing) .................................................................................211
Printing Envelopes and Labels ........................................................................................213
Using the E-mail Center..........................................................................................................213
E-mail Center Components .....................................................................................................214
General Email Toolbar.....................................................................................................215
Edit the Email Toolbar.....................................................................................................217
Local Menus ....................................................................................................................218
Creating and Sending Email ............................................................................................219
Creating Email Templates ...............................................................................................222
Sending Emails from the Document Management Center ..............................................224
Replying to an Activity....................................................................................................226
Spell-Checking Email ......................................................................................................227
Creating Dictionaries .......................................................................................................228
Retrieving Internet Email........................................................................................................230
Retrieving Email ..............................................................................................................231
Linking Email Messages to Contacts...............................................................................233
Reading Email..................................................................................................................234
Using E-mail Templates ..................................................................................................234
Configuring the E-mail Center ........................................................................................235
10 • Table of Contents
GoldMine User Guide
Creating Email Rules ..............................................................................................................235
Creating Distribution Lists ..............................................................................................235
Using the Document Management QuickStart Wizard to Access a Web Page......................236
Using Encryption and Digital IDs ..........................................................................................237
Using Digital IDs with Email Messages..........................................................................237
Using Digital IDs.............................................................................................................237
Public and Private Keys...................................................................................................237
Levels of Security ............................................................................................................238
Sharing Public Keys ........................................................................................................239
Using Digital IDs in GoldMine .......................................................................................239
Sending Encrypted Email .......................................................................................................240
Sending Email Messages Encrypted Using GoldMine....................................................240
Sending Email Messages Encrypted Using Digital ID....................................................241
Sending Digitally Signed Email .....................................................................................241
Reading Email Sent with Digital IDs ..............................................................................242
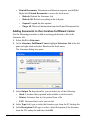
About the Literature Fulfillment Center .................................................................................243
Adding Documents to the Literature Fulfillment Center.................................................245
Editing Documents in the Literature Fulfillment Center.................................................246
Fulfilling or Rejecting Scheduled Literature Requests....................................................246
Fulfilling or Rejecting Queued Documents.....................................................................247
Editing Scheduled Literature Requests............................................................................248
About Telemarketing Scripts ..................................................................................................248
Branching Scripts Workflow ...........................................................................................249
Creating Telemarketing Scripts .......................................................................................249
Branching Scripts Listing Dialog Box.............................................................................250
Branching Script Profile Dialog Box...............................................................................250
Branching Script Question Dialog Box ...........................................................................250
Branching Script Answer Dialog Box .............................................................................251
Using Telemarketing Scripts ...........................................................................................252
Making and Answering Calls with SoftPhone........................................................................252
Using SoftPhone ..............................................................................................................252
About Personal Contacts.........................................................................................................253
GoldMine User Guide
Table of Contents • 11
Sales Management
255
About Sales Management .......................................................................................................255
Understanding Sales ........................................................................................................255
Scheduling Forecasted Sales ...................................................................................................256
Completing Forecasted Sales...........................................................................................258
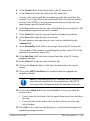
Using Forecasted Sales Analysis .....................................................................................259
Using Graphical Analysis .......................................................................................................261
Using Wild Cards in Activity and Result Code Fields ....................................................263
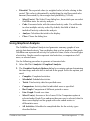
Using Leads Analysis..............................................................................................................264
Using Quota Analysis .............................................................................................................266
Using Sales Analysis...............................................................................................................267
Using Statistical Analysis .......................................................................................................270
About Territory Realignment..................................................................................................272
Using the Territory Realignment Wizard................................................................................273
To Reassign the Activities of a Particular User ...............................................................273
Opportunity and Project Management
275
About the Opportunity and Project Managers ........................................................................275
Customizing the Opportunity and Project Managers Properties.............................................276
Using the Opportunity Manager .............................................................................................278
Creating Opportunities.....................................................................................................279
Creating Opportunity Templates .....................................................................................281
Using the Opportunity Wizard.........................................................................................282
Using the Project Manager......................................................................................................286
Creating Projects..............................................................................................................287
Editing Project Contacts ..................................................................................................288
Editing Tasks ...................................................................................................................289
Editing Teams ..................................................................................................................290
Editing Issues ...................................................................................................................291
Editing Notes for Opportunities and Projects ..................................................................292
Editing Details/Links .......................................................................................................292
Editing Pending Activities for Opportunities and Projects..............................................293
Editing History Information for Opportunities and Projects ...........................................294
Editing Projects................................................................................................................295
Creating Project Templates..............................................................................................295
Using the Project Wizard .................................................................................................296
Editing Opportunity Influencers ......................................................................................298
12 • Table of Contents
GoldMine User Guide
Marketing Tools
299
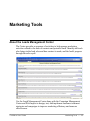
About the Leads Management Center ....................................................................................299
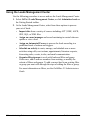
Using the Leads Management Center .....................................................................................300
About the Campaign Management Center..............................................................................301
Campaign Local Menu ....................................................................................................302
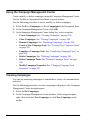
Campaign Management Center Toolbar.................................................................................303
Using the Campaign Management Center ..............................................................................304
Creating Campaigns................................................................................................................304
Cloning Campaigns.................................................................................................................306
Renaming Campaigns......................................................................................................307
Creating New Campaign Tasks ..............................................................................................307
Completing Campaign Tasks...........................................................................................308
Deleting Campaigns................................................................................................................308
Deleting Campaign Tasks................................................................................................308
Changing Campaign Task Properties ..............................................................................309
About WebImporting ..............................................................................................................309
Service Center
311
About the Service Center ........................................................................................................311
Using the Service Center ........................................................................................................312
Service Center List View.................................................................................................313
Using the Service Center Toolbar (List View) ................................................................314
Service Center Detail View .............................................................................................314
Using the Service Center Toolbar (List View) ................................................................315
Using the Service Center Toolbar (Detail View) ............................................................316
Creating a New Case...............................................................................................................317
Creating a New Template ................................................................................................319
Cloning an Existing Template .........................................................................................321
Reassigning a Case ..........................................................................................................321
Escalating a Case .............................................................................................................323
Resolving a Case..............................................................................................................324
Creating a Performance Report for a Case ......................................................................325
Customizing Data Appearance ........................................................................................326
GoldMine User Guide
Table of Contents • 13
Knowledge Base
327
Using the Knowledge Base .....................................................................................................327
Knowledge Base Toolbar........................................................................................................328
Creating and Editing Knowledge Base Books, Folders, and Topics ......................................329
To create Knowledge Base books, folders and topics .....................................................329
Adding HTML Text to Knowledge Base Topics....................................................................330
To add HTML text to a Knowledge Base topic...............................................................330
Knowledge Base Topic Text Local Menu ..............................................................................330
Adding Attachments to Knowledge Base Documents ............................................................331
To add an attachment to a Knowledge Base document ...................................................331
Glossary
333
Index
349
14 • Table of Contents
GoldMine User Guide
Welcome to GoldMine® Premium
Edition
Overview
GoldMine is a powerful tool designed to automate and manage your day-today business activities. Maintain business relationships, manage time, establish
and achieve goals more easily than ever before with new features and
enhancements in GoldMine Premium Edition.
GoldMine automates key areas of daily business activity:
•
Client/contact management
•
Time and task management
•
Document and email management
•
Sales management
•
Service management
For additional support, please visit: http://www.frontrange.com and http://
www.frontrange.com/community.
GoldMine User Guide
Welcome to GoldMine® Premium Edition • 15
What's New in GoldMine
GoldMine supports a variety of business processes with improved efficiency
and automated administration. New features and enhancements make
GoldMine Premium Edition more powerful and easy to use than ever.
•
New User Interface. GoldMine Premium Edition has been designed with a
sleek, modern look and feel. Navigation, automation, and communication
are now more streamlined and uniform, for improved workflow efficiency
and ease-of-use.
•
Customer Service Module (Service Center). GoldMine Premium Edition
includes a Customer Service Center module for tracking, resolving, and
reporting customer service cases for GoldMine contacts.
•
Tabbed View. Quicker navigation between open windows is now possible
in GoldMine Premium Edition, thanks to a new tabbed view that utilizes
available screen space more effectively. To enter the tabbed view, simply
maximize any open window in the GoldMine workspace.
•
Microsoft Windows Vista Support. Install GoldMine on Microsoft's
latest operating system. For more information, please refer to the
GoldMine Premium Edition Installation Guide.
•
Microsoft Office 2007 Support. GoldMine Plus for Microsoft Office,
now part of the standard GoldMine installation, supports Microsoft Word
and Excel 2007.
•
New Postal Code Import QuickStart Wizard. Add over 42,000 United
States Postal Codes to your database with one click using this new
QuickStart Wizard.
•
Firebird Native Driver. The Firebird Native Driver is now used for the
most time-intensive operations, providing a 400% performance
improvement for the slowest operations when using Firebird databases.
Underlying code changes provide additional 40% performance
improvements when using MSSQL databases as well.
•
Auto-complete capability has been added, improving speed and accuracy
during such tasks as entering field data, or adding recipients to e-mail
messages.
•
Tip of the day offers helpful information about various features in
GoldMine each time you open the application.
16 • Welcome to GoldMine® Premium Edition
GoldMine User Guide
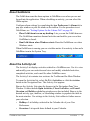
About This Guide
This guide introduces you to the main features in GoldMine® Premium
(GoldMine) and provides you with answers to basic questions about how it
works and provides definitions and procedures for basic functionality.
Audience and Expertise
The information in this guide is intended for users who will use the features of
GoldMine.
This material assumes users have a fundamental working knowledge of the
following:
•
Computers and databases
•
Microsoft Windows operating system
•
FrontRange Solutions and/or GoldMine software
GoldMine system administrators must have a higher level of expertise.
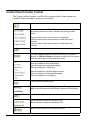
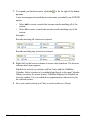
Document Conventions
Example
Description
File>>Print
Menu bar commands (in this example, select File on the
menu bar, then select Print in the drop-down menu)
The Select a Data Source dialog Dialog boxes and menu items in bold
box opens.
OK
Button names
Note
Additional information
CAUTION/WARNING
Critical information to prevent functionality or data loss
GoldMine User Guide
Welcome to GoldMine® Premium Edition • 17
Resources
•
GoldMine 8.5 Administrator Reference Guide
•
GoldMine 8.5 Installation Guide
Manuals are available in PDF format from the Installation CD-ROM, the
NetUpdate download, or from support.frontrange.com for maintenance
customers.
Contact Us
Support Site
FrontRange Solutions can answer your technical support questions about
HEAT, GoldMine, GMEE, and IT Service Management. Visit:
support.frontrange.com
Contact Information
FrontRange Solutions Headquarters:
5675 Gibraltar Drive
Pleasanton, CA 94588
TEL: 925.398-1800
Colorado Springs Office:
1150 Kelly Johnson Blvd.
Colorado Springs, CO 80920
TEL: 800.776.7889 and 719.531.5007
Offices are also located in Los Angeles, United Kingdom, Germany, Italy,
South Africa, Australia, Singapore, and China.
18 • Welcome to GoldMine® Premium Edition
GoldMine User Guide
Getting Started
This section provides information to help you understand and use the
application.
Key Terms and Concepts
The following is a list of GoldMine key terms and concepts.
•
Activity List. A categorized list of activities associated with a particular
contact record or assigned to a GoldMine user. Use the Activity List to
view details of an activity, display the contact record linked to an activity,
schedule and complete the activity, and save reference information in the
history file.
•
Browse Window. A list of contacts, Calendar events, reports, and other
items. Browse windows differ from other types of windows in GoldMine
because they display information in columns.
•
Calendar. Activity information organized in tabs that access different
levels and types of detail. Use the Calendar to schedule and complete
activities.
•
Contact record. Standard contact information, such as name, company,
phone number, and address. Most operations in GoldMine are performed
on the contact record. The contact record is the basis for scheduled work in
GoldMine, acting as the link between GoldMine’s Calendar and History by
maintaining pending and past events related to each contact record.
When multiple windows are open in your GoldMine work area, the title bar
of an active contact record is a different color from other items occupying
the work area.
GoldMine User Guide
Getting Started • 19
•
F2 Lookup. A data entry tool listing frequently used or code-specific
entries. Security options control F2 Lookups, ensuring user input and
allowing data standardization.
•
Work Area. Displays open contact records, the Calendar, Activity List, Email Center, and any other open windows. Although you can open,
position, and size multiple contact records in the work area, only one
contact record can be active at a time.
•
Universal Search. A one-box search to give you a summary view of the
information along with links to more detailed information.
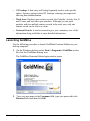
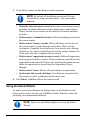
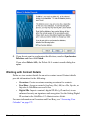
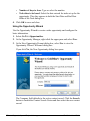
Launching GoldMine
Use the following procedure to launch GoldMine Premium Edition on your
desktop computer.
1.
On the Windows desktop, select Start>>Programs>>GoldMine or double-click the GoldMine desktop icon.
The GoldMine Premium Edition login window opens.
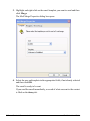
2.
Type your user name in the Username field, type your password in the
Password field and then click OK.
20 • Getting Started
GoldMine User Guide
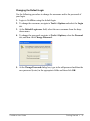
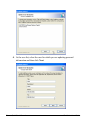
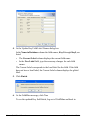
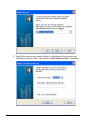
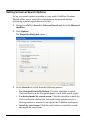
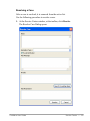
Changing the Default Login
Use the following procedure to change the username and/or the password of
your login.
1. Login to GoldMine using the default login.
2. To change the username, navigate to Tools>>Options and select the Login
tab.
3. At the Default Login user field, select the new username from the dropdown menu.
4. To change the password, navigate to Tools>>Options, select the Personal
tab, and then click Change Password.
5. At the Change Password dialog box, type in the old password and then the
new password (twice) in the appropriate fields and then click OK.
GoldMine User Guide
Getting Started • 21
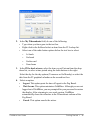
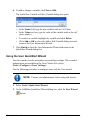
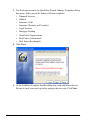
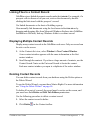
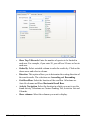
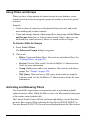
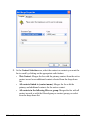
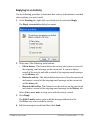
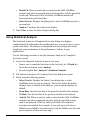
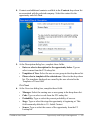
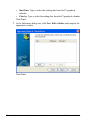
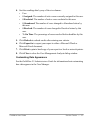
Viewing Information About GoldMine Premium Edition
View summary information, credits, installation details, or contact information
for FrontRange Solutions.
Use the following procedure to view information about GoldMine.
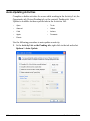
1.
Select Help>>About GoldMine.
2. At the About GoldMine window, view the version, registered owner,
product serial number, and copyright information. Select the following
buttons to see information for:
• Credits. Displays integrated applications.
• FrontRange. Displays contact information for FrontRange Solutions.
• System. Displays information about your GoldMine installation. To
copy the information, click Copy All. Paste the information into your
outside application.
3. Click OK.
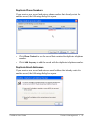
Navigating GoldMine
This section describes the navigation tools and procedures you can use to
navigate through GoldMine.The GoldMine Main Window can display a large
amount information based on your choices, and offers access to a wide array of
options to manage details.
22 • Getting Started
GoldMine User Guide
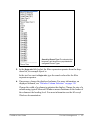
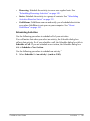
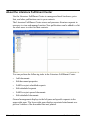
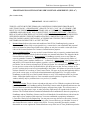
Parts of the main GoldMine window: main menu, Global Toolbar, Navigation
Pane, work area, and status bar.
NOTE: You can access the classic GoldMine menu configuration
by selecting Tools>>Options>>System tab and selecting the
checkbox for Use classic GoldMine menu.
GoldMine User Guide
Getting Started • 23
Main Menu Bar
The Main Menu bar offers the first level of commands, which display in
standard Windows-style pull-down menus.
NOTE: Menu options may be unavailable because the option does
not apply to the current selection, another command option must
be activated before, or security restrictions limit your menu rights.
Contact your GoldMine Administrator if a menu option you need
in unavailable.
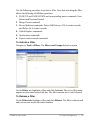
Accessing Menus on the Menu Bar
Use the following procedure to access a menu on the menu bar.
1. Click on the mouse to select the menu option from the main menu.
An ellipse (...) indicates there is a submenu.
2. Select the submenu option if needed.
The appropriate dialog box, wizard, or window opens.
3. Select the menus to perform a variety of tasks:
File. Create contact records, print reports, Import/Export, and log in
options. Also exit GoldMine from this menu.
Edit. Cut, copy and paste. Edit record properties. Edit, delete, and undo
changes to Contact records.
Go To. Access all of Goldmine's modules, as well as Analysis, and
Reporting tools.
Tools. Access GoldMine tools for synchronization, configuring GoldMine,
managing databases, creating and running Automated Processes, Server
Agents, globally replacing data, Synchronization tools, territory
realignment, and launching the Database Alias Manager and QuickStart
Wizard.
Actions. Access GoldMine communication tools, timer commands, and
manage mail merge functions.
24 • Getting Started
GoldMine User Guide
Schedule. Access scheduling options for the contact record, including
scheduling a call, appointment, literature request, forecasted sale, follow-up
action, and GoldMine e-mail.
Complete. Access completed action options for scheduled and unscheduled
calls, appointments, sales, other actions, correspondence, and other pending
activities.
Web. Access GM+Browser, web publishing, and other online options.
Window. Window display and status bar display options. Also open new
contact record windows.
Help. Access GoldMine online help, the GoldMine Web site, NetUpdate, and
important system information in About GoldMine.
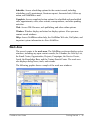
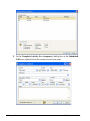
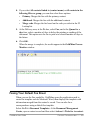
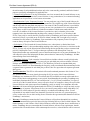
Work Area
The screen's center is the work area. The GoldMine work area displays active
windows, including any open contact records, the Calendar, the Activity List,
the Email Center, Opportunities, Projects, Campaigns, the Service Center,
Leads, the Knowledge Base, and the Contact Search Center. The work area
also displays dialog boxes, tools, and wizards.
The following graphic shows a couple of the work area windows.
GoldMine User Guide
Getting Started • 25
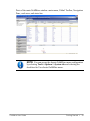
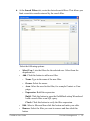
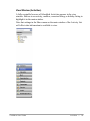
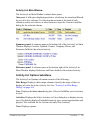
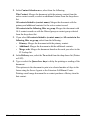
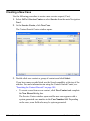
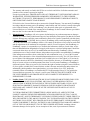
Activity Window
The Activity List Main Window contains three panes:
The first panel is the Folder panel and it lists the current activities folders.
This list includes Open Activities, Closed Activities and Email activity. Open
each folder by clicking on the plus sign (+). The selection you choose appears
in the Activity list panel.
The second panel is the Activities list panel and it displays the activities,
which may be sorted and filtered by any of its columns. Click on an activity
and the summary information displays in the Preview panel.
The third panel is the Preview panel and it displays the summary information
for a selected activity.
For more information and procedures on using the Activity window, see
“Activities” on page 139.
26 • Getting Started
GoldMine User Guide
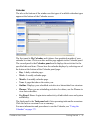
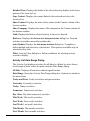
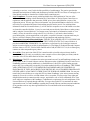
Calendar
The tabs at the bottom of the window are the types of available calendars types
appear at the bottom of the Calendar screen:
The first panel is My Calendar and it shows four graphical months of your
calendar at a time. Click on a date and the page appears in the Calendar panel.
The second panel is the Calendar panel and it displays the activities for the
specified date and time. Choose how the calendar displays by selecting one of
the button at the bottom of the Calendar panel page:
•
•
•
•
•
•
Day. A daily calendar page.
Week. A weekly calendar page.
Month. A monthly calendar page.
Year. A page that shows the entire year.
Outline. Displays your scheduled activities in a hierarchical tree structure.
Planner. When you are scheduling activities for others, use the Planner to
view their schedules.
• Peg Board. Shows Login status and activity of individual users and system
availability.
The third panel is the Task panel and it lists upcoming tasks and/or occasions.
Click the task or occasion to see a summary.
For more information and procedures to use the Calendar, see “Using the
Calendar” on page 173.
GoldMine User Guide
Getting Started • 27
Mail
This work window is a fully navigable browser for the Email Center.
The first panel is the Mail Folders panel and it lists all mail folders of the user.
Click on the folder and it will appear in the Mail panel.
The second panel is the Mail panel and it displays the selections from the Mail
Folder panel. Note that the click path appears at the top of the panel. For more
information on the Mail Center, see “Using the E-mail Center” on page 207.
28 • Getting Started
GoldMine User Guide
Opportunities
This window provides a history of recently viewed Opportunities and allows
you to create, edit and maintain your Opportunities. For more information on
Opportunities, see “Opportunity and Project Management” on page 267.
Projects
This window displays long-term projects to which a Contact record is linked.
You can create or edit projects on this window. For more information and
procedures to use Projects, see “Opportunity and Project Management” on
page 267.
GoldMine User Guide
Getting Started • 29
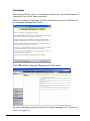
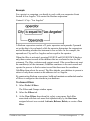
Campaigns
This window allows you to view customer interactions, from initial contact to
closing the first sale to future purchases.
When you click on Campaigns, the first window that opens is a Welcome to
the Campaign Management Center.
Click OK and the Campaign Management Center opens.
For more information and procedures for using Campaigns, see “Marketing
Tools” on page 291.
30 • Getting Started
GoldMine User Guide
Service Center
This window allows your service professionals to assign, escalate and resolve
customer service requests. For more information on the Service Center, see
“Using the Service Center” on page 304.
Leads
This window provides a sequence of activities to help manage marketing
activities related to the base of contacts and potential leads. It provides a set of
tools that assist you in defining leads. For more information on the Leads, see
“Marketing Tools” on page 291.
GoldMine User Guide
Getting Started • 31
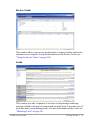
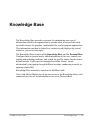
Knowledge Base
This window provides a resource for maintaining any type of information
useful to an organization or an individual.
When you click on Knowledge Base, the first window that opens is a Welcome
to the Knowledge Base Center.
Click OK and the Knowledge Center opens.
32 • Getting Started
GoldMine User Guide
For more information and procedures for using the Knowledge Base Center,
see “Knowledge Base” on page 319.
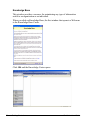
Global Toolbar
The Global Toolbar is located directly beneath the Main Menu. GoldMine
Premier Edition installs default content.
This toolbar can be customized. For more information on using and editing the
global toolbar, see “About Customizing Toolbars” on page 35.
Navigation Pane
The Navigation Pane is a new feature in GoldMine Premium Edition. The
Navigation Pane offers additional viewing and navigation options, depending
on the module selected.
For more information on the Navigation pane, see “Navigation Pane” on page
33.
GoldMine User Guide
Getting Started • 33
Status Bar
The bottom line of the window is called the status bar and contains:
•
The name of the open Contact Set on the left side. In the graphic above, it
is GoldMine Database. However, the left side of the status bar also displays
the help message for each toolbar button when the mouse is positioned on
the button.
•
The shift-state of [CAPS LOCK] and [NUM LOCK].
•
The username for the logged in user.
•
The date and time on the local computer.
Navigating GoldMine
Use the following options to navigate through GoldMine.
•
Navigating between open modules. Press Ctrl+Tab.
•
Navigating within a module (between top panel and bottom tabs). Each
of the following navigation items is some combination of Ctrl-Tab, Tab
and Arrow keys. These tools allow you to access every field and button
shown on screen.
•
Navigating among the fields of a module. Use Tab.
•
Navigating Primary sections within the currently open module. Each
module has unique features, but the following are examples of navigation:
•
•
Moving around the Module-specific toolbar. Moving through the
Grid (in Activity List, Contacts, and so on.) Use Tab or Arrows.
Moving around editable fields in a Contact record, and Custom
screen if open. Use Tab or Arrows
The Tab order is defined in Field Properties. If one of the contact field
is editable, Tab goes to the next field and make this field also editable.
34 • Getting Started
GoldMine User Guide
•
Moving around editable fields in Case detail view. Use Tab or
Arrows.
Tab should not be used to cycle between the tabs (for example, go from
the Pending tab to the History tab).
•
Moving in the Context pane. Use Tab, Arrows. Use Tab to move focus in
or out of this area. Then use arrows to move up or down or side to side in
the panel.
•
Moving in the Navigation panel. Use Tab or Arrows
•
Moving around the top-level toolbars (excluding Menu bar). Use Tab.
•
Moving in the Menu Bar. Use Alt.
•
Scrolling between contact record tabs (Pending, History and so on.)
Use Ctrl.
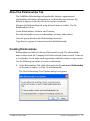
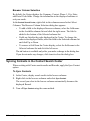
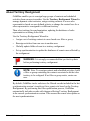
About Customizing Toolbars
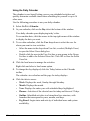
GoldMine allows you to create custom toolbars. You can also add, remove,
rearrange or rename buttons on existing toolbars.
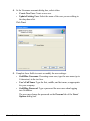
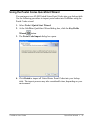
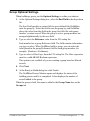
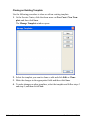
Editing Toolbar Options
The Global toolbar appears below the main toolbar. You can customize this
toolbar by adding, removing or rearranging the buttons that appear on it. You
can also create additional toolbars. Use the following procedure to create a
custom toolbar.
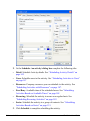
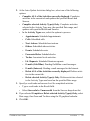
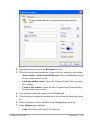
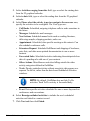
1.
Right-click in the empty space by the toolbar and from the pop-up menu,
select Customize.
2. Click New and type the name of the new toolbar in the New Toolbar popup box.
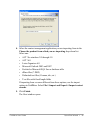
The new toolbar name appears in the Customize dialog box.
If you cannot find your new toolbar right away, right click in the empty
space by the toolbar to bring up the popup menu with the names of the
available toolbars. Click the new toolbar name you created and the toolbar
appears.
GoldMine User Guide
Getting Started • 35
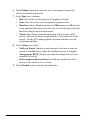
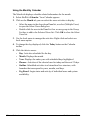
3. With the Customize dialog box still open, hold down Ctrl and then drag
and drop the menu items you want to appear as buttons on your new
toolbar.
For example, if you want User Groups on your new toolbar, click and hold
down Ctrl, then go to Tools>User Groups and then drag User Groups to
the new toolbar.
4. Close the Customize dialog box.
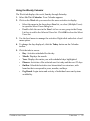
Renaming a toolbar
1. Right-click in the empty space by the toolbar and from the pop-up menu,
select Customize.
2. Select the toolbar you want to rename and click Rename.
3. Type in the new name in the dialog box.
4. Close the Customize dialog box.
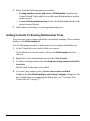
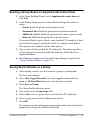
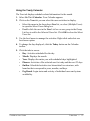
Renaming or editing or deleting a button on a toolbar
1. Right-click in the empty space by the toolbar and from the pop-up menu,
select Customize.
2. Select the toolbar on which the button you want to rename appears.
3. With the Customize dialog box still open, right-click on the button you
want to rename.
4. At the pop-up menu, at the Name field, type in the new button name.
The new button name appears on the toolbar.
5. Use the pop-up menu to edit or delete an existing button.
6. Close the Customize dialog box.
To rearrange buttons on a toolbar
Drag and drop the buttons to the desired configuration.
36 • Getting Started
GoldMine User Guide
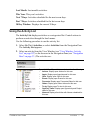
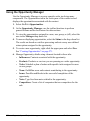
Navigation Panel
The Navigation Pane is a new feature in GoldMine Premium Edition.
Essentially mirroring the Go To menu, the Navigation Pane also offers
additional viewing and navigation options, depending on the module selected.
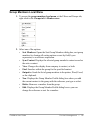
The Navigation Pane contains five sections:
Search Field. Type in search criteria and click Go. The Contact Search Center
opens in the work area.
Title Bar. Displays the title for the currently selected module. Click the Title
Bar to minimize or maximize the Navigation Pane.
View Window. Displays context-sensitive navigable history data, file browser,
or calendar, depending on the module selected.
View buttons. Each button displays the main window for its corresponding
module. For example, clicking Contacts opens the Contacts list view.
GoldMine User Guide
Getting Started • 37
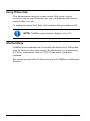
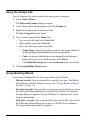
Using Online Help
View documentation using the extensive online Help system. Access
overviews, step-by-step instructions, tips, notes, descriptions, and reference
material while you work.
To implement window-level Help, click inside the dialog box and press F1.
NOTE: GoldMine requires Internet Explorer 6.0 or 7.0
Shortcut Keys
GoldMine menu commands can be executed with shortcut keys. Rather than
using the mouse to select menu options, the shortcut keys are keyboard keys
(F1) or key combinations (such as CTRL+P) that invoke a particular
command.
This section provides tables of shortcut keys in both GoldMine and Microsoft
Windows.
38 • Getting Started
GoldMine User Guide
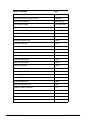
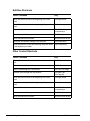
GoldMine Shortcut Keys
Menu Command
Key
Display online help for the active window
F1
Display context-sensitive help
Shift+F1
Display predefined field entries for lookups, calendar (date
fields), or clock (time fields)
F2
Display the Contact Search Center
F4
Display the E-mail Center
F5
Display the Activity List
F6
Display your Calendar
F7
Display the Opportunity Manager
F9
Launch Campaign Manager
F10
Close the active window or module
Ctrl+F4
Exit GoldMine
Alt+F4
Find next
F3
Move to the next open module
Ctrl+Tab
Move to previous module
Ctrl+Shift+Tab
Move to Search box
Ctrl
Move to recent panel
Ctrl+3
Move to first Contact field
Ctrl+1
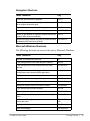
Contact Record Shortcut Keys
Menu Command
Key
Search for a string within the active tab
F3
Display predefined field entries for lookups, calendar
(date fields), or clock (time fields)
F2
Dial the Phone2 telephone number for the Contact
Alt+2
Dial the Phone3 telephone number for the Contact
Alt+3
Undo typing in Notes
Ctrl+Z
Cut selected text in Notes
Ctrl+X
Copy selected text in Notes
Ctrl+C
Paste copied text in Notes
Ctrl+V
GoldMine User Guide
Getting Started • 39
Menu Command
Key
Go to the next Contact record
Page Down
Go to the previous Contact record
Page Up
Go to the first record
Ctrl+Page Up
Go to the last record
Ctrl+Page Down
Cycle through last-viewed records
Shift+Page Up
Write an e-mail message to Contact
Ctrl+Shift+E
Dial the Phone1 telephone number for the Contact
Alt+1
Dial Fax for the Contact
Alt+4
View the Summary tab
Ctrl+S
View the Fields tab
Ctrl+F
View the Notes tab
Ctrl+N
View the Contacts tab for additional contacts
Ctrl+C
View the Details tab
Ctrl+D
View the Referrals tab
Ctrl+R
View the Pending tab
Ctrl+P
View the History tab
Ctrl+H
View the Links tab
Ctrl+L
View the Members tab
Ctrl+M
View the Processes tab
Ctrl+O
View the Opportunities tab
Ctrl+U
View the Projects tab
Ctrl+J
View the Cases Tab
Ctrl+A
View the GM+View Tab
Ctrl+V
Display Personal Contacts
F11
Start timer
F8
Stop timer
Shift+F8
Reset timer
Alt+F8
Restart timer
Ctrl+F8
40 • Getting Started
GoldMine User Guide
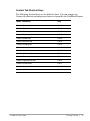
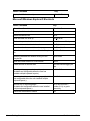
Contact Tab Shortcut Keys
The following shortcut keys are the default values. You can rename any
Contact tab shortcut and assign any shortcut to open this tab.GoldMine Reports
Menu Command
Key
View the Summary tab
Ctrl+S
View the Fields tab
Ctrl+F
View the Notes tab
Ctrl+N
View the Contact tab for additional contacts
Ctrl+C
View the Details tab
Ctrl+D
View the Referrals tab
Ctrl+R
View the Pending tab
Ctrl+P
View the History tab
Ctrl+H
View the Links tab
Ctrl+L
View the Members tab
Ctrl+M
View the Processes tab
Ctrl+O
View the Opportunities tab
Ctrl+U
View the Projects tab
Ctrl+J
View the Cases tab
Ctrl+A
View the GM+View tab
Ctrl+V
GoldMine User Guide
Getting Started • 41
Shortcut Keys
Menu Command
Key
Cut the object
Ctrl+X
Copy the object
Ctrl+C
Paste the object
Ctrl+V
Delete the object
Delete
Change the font for the text
Alt+F10
Align the text within the object
Ctrl+P
Specify outline properties
Ctrl+O
Select a background
Ctrl+B
Edit a field expression
Ctrl+F
Insert a section label
F6
Insert a text label
F9
Insert data field
F2
Insert expression field
F3
Insert system field
F4
Insert dialog field
F5
Insert line
Ctrl+F9
Insert picture from clipboard
Alt+F7
Insert picture from disk file
Alt+F8
Create a dialog field
Ctrl+R
Edit a dialog field
Ctrl+M
Delete a dialog field
Ctrl+D
Define margins, ruler, and date format
F7
Define a filter
Ctrl+F7
Save or update report template
F10
Save template with a new file name
Shift+F10
42 • Getting Started
GoldMine User Guide
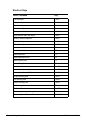
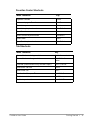
Tree View Shortcuts
Menu Command
Key
Display all sub-items under the selected item
* (Asterisk) on the
Numeric pad
Display the sub-items directly under the selected item
+ (Plus sign) on the
Numeric pad
Collapse the items directly under the selected item
- (Minus sign) on the
Numeric pad
Collapse the current selection if it is expanded and move <- (Left arrow)
the focus to the group leaf root
Display the sub-items directly under the selected item if
it is collapsed
-> (Right arrow)
View the previous group
Alt+Left arrow
View the next group
Alt+Right arrow
Scroll the view without change of the selection
Ctrl+Up arrow
Scroll the view without change of the selection
Ctrl+Down arrow
Move the selection to the item matching the prefix letters Any printable key
in the beginning of a label
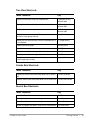
Combo Box Shortcuts
Menu Command
Key
Display the items in the active drop-down list or combo
box
F4+Alt+Up Arrow
Hide the items in the active drop-down list or combo box F4+Alt+Down Arrow
Search Box Shortcuts
Menu Command
Key
Select the Search box.
Ctrl+E
Enter Search for entered term using local search
Alt+. (Period)
Enter Search for entered term using Internet browser
Shift+. (Period)
Launch a program elevated if used from the Start Menu
Ctrl+Shift+Enter
GoldMine User Guide
Getting Started • 43
Edit Box Shortcuts
Menu Command
Key
Move the insertion point to the beginning of the next
word.
Ctrl+Right arrow
Move the insertion point to the beginning of the previous Ctrl+Left arrow
word.
Select a block of text.
Ctrl+Shift with any of
the arrow keys
Move the selected item up
Alt+Shift+Up arrow
Move the selected item down
Alt+Shift+Down arrow
Scroll the view without change of the selection
Ctrl+Down arrow
Move the selection to the item matching the prefix letters Any printable key
in the beginning of a label
Other Control Shortcuts
Menu Command
Key
Display the items in the active drop-down list or combo
box
F4+Alt+Up Arrow
Hide the items in the active drop-down list or combo box F4+Alt+Down Arrow
Down Cycle through the Tab controls
Ctrl+Tab, Ctrl+Page
Reverse cycle through the Tab controls
Ctrl+Shift+Tab,
Ctrl+Page Up
Move the insertion point to the beginning of the next
word.
Ctrl+Right arrow
Move the insertion point to the beginning of the previous Ctrl+Left arrow
word.
Select a block of text.
Ctrl+Shift with any of
the arrow keys
Move the selected item up
Alt+Shift+Up arrow
Move the selected item down
Alt+Shift+Down arrow
44 • Getting Started
GoldMine User Guide
Navigation Shortcuts
Menu Command
Key
Close the active window or program
Alt+F4
Close the active document in programs that allow you to Ctrl+F4
have multiple documents open
Moves to next pane or palette within a program
Ctrl+Tab
Moves to previous pane or palette within a program
Ctrl+Shift+Tab
Moves to next window in a group of related windows (or
between MDI document windows)
Ctrl+F6
Moves to previous window in a group of related windows Ctrl+Shift+F6
(or between MDI document windows)
Microsoft Windows Shortcuts
The following shortcuts are reserved for use by Microsoft Windows.
Menu Command
Key
Activate or inactivate the menu bar
Alt
Cycle through items in the order they were opened.
Alt+Esc
Cycle through items in the reverse order they were
opened
Alt+Shift+Esc
Display shortcut menu for the active child window
(multiple-document interface [MDI] application)
Alt+hyphen
Display the shortcut menu for the selected item.
Application
Copy the entire screen image to the clipboard.
Print Screen
Copy the active window image to the clipboard.
Alt+Print Screen
Display the system menu for the active window
Alt+spacebar
Cycle through open primary windows
Alt+Tab
Reverse cycle through open primary windows.
Alt+Shift+Tab
Cycle through open primary windows without closing the Ctrl+Alt+Tab
menu.
Reverse cycle through open primary windows without
closing the menu.
Ctrl+Alt+Shift+
Tab
Display the Start menu
Ctrl+Esc
Start Task Manager
Ctrl+Shift+Esc
GoldMine User Guide
Getting Started • 45
Menu Command
Key
Display the Windows security screen
Ctrl+Alt+Delete
Microsoft Windows Explorer® Shortcuts
Menu Command
Key
Search for a file or folder
F3 or Ctrl+F
Display the Address bar list
F4
Select the Address bar
Alt+D
View the folder one level up
Alt+Up arrow
Go back to previous location viewed
Alt+Left arrow or Backspace
Go forward to next location in viewed
Alt+Right arrow
Close the active item, or exit the active program.
Alt+F4 or Ctrl+W
Delete the selected item and move it to the Recycle
Bin
Ctrl+D or Delete
Delete the selected item without moving it to the
Recycle Bin
Shift+Delete
Open the current location in a new window
Ctrl+N
Create shortcut to selected item
Ctrl+Shift while dragging an
item
Switch input languages or keyboard layouts
(Available and configurable when the user has
installed multiple keyboard layouts.)
Left Alt+Shift
Switch keyboard layouts or input languages (Available Ctrl+Shift
and configurable when the user installed multiple
keyboard layouts.).
Shortcut key for input languages
(Available and configurable when the user installed
multiple keyboard layouts.)
Ctrl or left Alt+Shift+~,
number (0~9), or grave
accent key
Cancel the current task or search
Esc
46 • Getting Started
GoldMine User Guide
Favorites Center Shortcuts
Menu Command
Key
Organize Favorites
Ctrl+B
Add current page to Favorites
Ctrl+D
Open History
Ctrl+H
Open History in pinned mode
Ctrl+Shift+H
Open Favorites
Ctrl+I
Open Favorites in pinned mode
Ctrl+Shift+I
Open Feeds.
Ctrl+J
Open Feeds in pinned mode
Ctrl+Shift+J
Tab Shortcuts
Menu Command
Key
Open a link in new background tab
Ctrl+Left mouse button
Open a link in new foreground tab
Ctrl+Shift+Left mouse
button
Close tab (closes window if only one tab is open)
Ctrl+F4, Ctrl+W
Open Quick Tab view
Ctrl+Q
Open a new Tab
Ctrl+T
View the list of the open Tabs
Ctrl+Shift+Q
Switch to next tab
Ctrl+Tab
Switch to previous tab
Ctrl+Shift+Tab
GoldMine User Guide
Getting Started • 47
Address Bar Shortcuts
Menu Command
Key
View the list of previously typed addresses
F4
Select the Address bar
Alt+D
Open the Web site address that is typed in the
Address bar in new tab
Alt+Enter
Add http://www to the beginning of text and .com to
the end of text in Address bar
Ctrl+Enter
Add http://www. to the beginning of text and the Web Ctrl+Shift+Enter
site address suffix you have specified to the end of
text in the Address bar
Switch to the previous tab
Ctrl+Shift+Tab
Search Bar Shortcuts
Menu Command
Key
Open search results in new tab
Alt+Enter
View list of search providers
Ctrl+Down arrow
Logging Away from GoldMine
If you need to leave your desk for a period of time, post information about your
current location and the time and date of your expected return using the
following procedure.
Use the following procedure to log away from GoldMine.
1. Select File>>Log Away.
The I'm away from my desk dialog box (Peg Board) opens.
48 • Getting Started
GoldMine User Guide
2.
3.
In the My Whereabouts field, do one of the following:
• Type where you have gone in the text box
• Right-click in the field and select an item from the F2 Lookup list.
• Select one of the radio button options below the text box to select:
•
At lunch
•
On break
•
On the road
•
Gone home
In the I'll be back at area, select the time you will return from the dropdown list, or select a time period using the radio buttons to the right.
Select the day for the day options (Tomorrow or On Monday) or select the
date from the F2 graphical calendar on the second text box.
4.
Select an option:
• Logout. This option posts the time of logout in the Peg Board.
• Wait for me. This option minimizes GoldMine. Although you are not
logged out of GoldMine, you are prompted for your password to restore
the display. After returning to your work session, GoldMine
automatically clears the reference in the Whereabouts column of the
Peg Board.
• Cancel. This option cancels the action.
GoldMine User Guide
Getting Started • 49
Logging in as Another User
Use the following procedure to log into GoldMine as another user.
1. Select File>>Switch User.
2. GoldMine closes and a new login splash screen immediately appears.
3.
4.
Type in the Username and Password of the new user.
Click OK to log in as that user.
Viewing GoldMine Information
View summary information, credits, installation details, or contact information
for FrontRange Solutions.
Use the following procedure to view GoldMine information.
1. Select Help>>About GoldMine.
The About GoldMine window opens.
2. View the version, registered owner, product serial number, and copyright
information. Click the following buttons to access information for:
• Credits. Displays integrated applications.
• FrontRange. Displays contact information for FrontRange Solutions.
• System. Displays information about your GoldMine installation. To
copy the information, click Copy All. Paste the information into your
outside application.
3. Click OK.
50 • Getting Started
GoldMine User Guide
Local Menus
Use a local menu (shortcut menu) to access commands effecting options or
information in the selected browse window, tab, or pane.
Use the following procedure to access local menus.
1. Right-click in the window, tab, or pane you are working in. For example, if
you are working on the Pending tab, the following local menu opens:
2. Select the action from the menu.
GoldMine User Guide
Getting Started • 51
52 • Getting Started
GoldMine User Guide
QuickStart Wizard
The QuickStart Wizard allows you to access and configure basic operations
and tools to work with GoldMine.
GoldMine User Guide
QuickStart Wizard • 53
The QuickStart Wizard contains a set of individual wizards you access in one
central location to ensure you configure key operations:
•
User information. Configures personal information for users such as name
and title. See “Using the User Information QuickStart Wizard” on page 55.
•
User. Configures general user data and security settings such as the
individual’s GoldMine user name and password and QuickStart Wizard
access rights. See “Using the User QuickStart Wizard” on page 58.
NOTE: Contact your administrator before using this
wizard.
•
Industry Templates. Configures Industry Solutions templates and
GoldMine PLUS applications. See “Using the Industry Templates Quick
Wizard” on page 61.
•
Key Fields. Configures the key field labels to store data for your business.
See “Using the Key Fields QuickStart Wizard” on page 65
•
Postal Codes. Configures the process to import postal codes into
GoldMine. See “Using the Postal Codes QuickStart Wizard” on page 67
•
Data Import. Configures the process to import contact data from another
contact management application into GoldMine. See “Using the Data
Import QuickStart Wizard” on page 68.
•
GoldMine PLUS. Configures GoldMine’s links to document applications
including Microsoft Word and Adobe Acrobat. See “Using the GoldMine
PLUS QuickStart Wizard” on page 72.
The QuickStart Wizard appears immediately after installing GoldMine to help
set up the critical operations most users need immediately such as e-mail
accounts. Use the QuickStart Wizard after installation to add or change basic
configuration settings by selecting Tools>>QuickStart Wizard.
Users without Master Rights have access to the User Information Wizard and
Document Management Wizard.
54 • QuickStart Wizard
GoldMine User Guide
Using the User Information QuickStart Wizard
Configure or update individual user's personal information stored in the
Personal tab of the User's Options.
Use the following procedure to configure user information with the User
Information wizard.
1. Select Tools>>Quick Start Wizard.
2. At the GoldMine QuickStart Wizard dialog box, click the User
Information Wizard
button.
3. The Welcome screen of the QuickStart Wizard: User Information dialog
box appears. Click Next.
GoldMine User Guide
QuickStart Wizard • 55
4. At the user list, select the user for which you are updating personal
information and then click Next.
56 • QuickStart Wizard
GoldMine User Guide
5. Update the following fields as needed:
• Title. Type the appropriate title or salutation such as Ms., Dr., and so
on.
• Department. Type the user's organizational unit such as Marketing.
• Phone. Type the user's primary telephone number.
• Fax. Type the user's fax number.
Click Next.
The user variable options open. These variables supplement basic
information stored in the Personal tab.
GoldMine User Guide
QuickStart Wizard • 57
6. To add or change a variable, click New or Edit.
The Add a New Variable or Edit a Variable dialog box opens.
•
•
•
•
In the Name field, type the new variable such as Cell Phone.
In the Value text box, type the value of the variable such as the cell
phone number.
To remove a variable, highlight the variable and click Delete.
Click Add or OK to close the Add or Edit Variable dialog box and
return to the User Information Wizard.
7. Click Finish to close the User Information Wizard and return to the
QuickStart Wizard dialog box.
Using the User QuickStart Wizard
Use this wizard to create and update users and their settings. The created or
updated users are available in the Users' Master File (select
Tools>>Configure>>Users' Settings).
Use the following procedure to configure users with the User wizard.
NOTE: Contact your administrator before using this wizard.
1. Select Tools>>Quick Start Wizard.
2. At the GoldMine QuickStart Wizard dialog box, click the User Wizard
button.
58 • QuickStart Wizard
GoldMine User Guide
3. The Welcome screen of the QuickStart Wizard: User Settings dialog box
opens. Click Next.
GoldMine User Guide
QuickStart Wizard • 59
4. At the Username accounts dialog box, select either:
• Create New User. Create a new user.
• Update Existing User. Select the name of the user you are editing in
the drop-down list.
Click Next.
5. Complete these fields to create or modify the user settings:
• GoldMine Username. If creating a new user, type the user name (up to
8 characters) in the text box.
• User's Full Name. Type the first, middle, and last name, as appropriate
for your company.
• GoldMine Password. Type a password the user uses when logging
into GoldMine.
The user may change the password on the Personal tab of the Users'
Options dialog box.
60 • QuickStart Wizard
GoldMine User Guide
•
Select Master Rights if you are granting the user unrestricted access to
GoldMine features and settings except other users' Personal Contacts
and PersonalBase in the InfoCenter.
NOTE: Only GoldMine administrators or other authorized
individuals should have Master Rights.
6. Click Finish.
A Quick Wizard message box that acknowledges the user update is
successful.
Using the Industry Templates Quick Wizard
Use the following procedure to use this wizard to configure Industry Solutions
templates and GoldMine PLUS applications.
1. Select Tools>>Quick Start Wizard.
2. At the GoldMine QuickStart Wizard dialog box, click the Industry
Templates Wizard
GoldMine User Guide
button.
QuickStart Wizard • 61
3. The Welcome screen of the QuickStart Wizard: Industry Templates dialog
box opens. Select one of the Industry Solution templates:
• Financial Services
• iMarket
• Insurance (Life)
• Insurance (Property and Casualty)
• Legal Services
• Mortgage Lending
• Non-Profits Organizations
• Real Estate (Commercial)
• Real Estate (Residential)
4. Click Next.
5. At the GoldMine Template Installer dialog box, read and follow the text.
Be sure to back your work up before going to the next step. Click Next.
62 • QuickStart Wizard
GoldMine User Guide
6. Select the customization options.
• At the Additions/Update field, select the options you want to install.
• At the Deletion field, select the options you want to delete.
Click Next.
7. Read the screen text and the type in Yes over the No default.
This text explains that you cannot undo the customization. A dialog box
appears stating you must be logged in as a Master Rights user to install an
Industry Solution template.
8. Click Next.
GoldMine User Guide
QuickStart Wizard • 63
9. Click Finish to being the installation.
10. When the installation is complete, a message appears that states the fields
are updated and need to be rebuilt.
11. Click OK.
To see the changes, rebuild the database, log out, and log in to GoldMine.
64 • QuickStart Wizard
GoldMine User Guide
Using the Key Fields QuickStart Wizard
GoldMine indexes the five Key fields, making them excellent fields for data
you retrieve or filter on often. Assign field labels using this wizard.
Use the following procedure to configure key field customization with the Key
Fields wizard.
1. Select Tools>>Quick Start Wizard.
2. At the GoldMine QuickStart Wizard dialog box, click the Key Fields
Wizard
button.
The Welcome screen of the QuickStart Wizard: Key Fields Customization
dialog box opens.
3. Click Next.
GoldMine User Guide
QuickStart Wizard • 65
4. At the Update Key Field Label Names dialog box:
In the Name in Database column the field names, Key1 through Key5, are
listed.
•
•
The Current Label column displays the current field name.
In the New Label field, type the necessary changes for each field
names.
The Current Label corresponds to the local label for the field. If the field
does not have a local label, the Current Label column displays the global
label.
5. Click Finish.
6. At the GoldMine message, click Yes.
To see the updated Key field labels, log out of GoldMine and back in.
66 • QuickStart Wizard
GoldMine User Guide
Using the Postal Codes QuickStart Wizard
You can import over 42,000 United States Postal Codes into your lookup table.
Use the following procedure to import postal codes into GoldMine using the
Postal Codes wizard.
1. Select Tools>>Quick Start Wizard.
2. At the GoldMine QuickStart Wizard dialog box, click the Key Fields
Wizard
button.
3. The Postal Code Import dialog box opens.
4. Click Finish to import all United States Postal Codes into your lookup
table. The import process may take considerable time, depending on your
environment.
GoldMine User Guide
QuickStart Wizard • 67
Using the Data Import QuickStart Wizard
Import data from other contact management applications into GoldMine,
eliminating data entry. Incorporate new data into GoldMine and begin using it.
NOTE: This wizard is available for users with Master Rights
only.
1. Select Tools>>Quick Start Wizard.
2. At the GoldMine QuickStart Wizard dialog box, click the Data Import
Wizard
button.
The Welcome screen of the Data Import Wizard dialog box opens.
3. Click Next.
68 • QuickStart Wizard
GoldMine User Guide
4. Select the contact management application you are importing from in the
Choose the product from which you are importing drop-down list.
Select one:
• ACT! for windows 2.0 through 4.0
• ACT! 6.0
• Lotus Organizer 6.0
• Microsoft Outlook 2003 and 2007
• Firebird or Microsoft SQL Server database table
• dBase files (*.DBF)
• Delimited text files (Comma, tab, etc.)
• Text files with fixed length fields
If importing from a source different from these options, use the import
options in GoldMine. Select File>>Import and Export>>Import contact
records.
5. Click Finish.
The Alert window opens.
GoldMine User Guide
QuickStart Wizard • 69
6. Click OK. The Import Wizard opens.
7. Make your selection and then click Next.
70 • QuickStart Wizard
GoldMine User Guide
8. Enter the complete path and filename of the file to be exported in the field
and click Next.
If you chose SQL the following screen opens.
9. Complete the wizard screens and then click Finish.
GoldMine User Guide
QuickStart Wizard • 71
Using the GoldMine PLUS QuickStart Wizard
Use this quick wizard links GoldMine Plus products to document applications
including Microsoft Word and Adobe Acrobat.
Use the following procedure to import GoldMine PLUS data.
1. Select Tools>>Quick Start Wizard.
2. At the GoldMine QuickStart Wizard dialog box, click the GoldMine
PLUS
button.
The FrontRange Support site page opens.
3. Log into FrontRange and move through the Support site.
72 • QuickStart Wizard
GoldMine User Guide
Contact Management
About Contact Records
GoldMine uses the contact record (contact) as the core component to which all
information is tied. When a contact is added to GoldMine's database, a contact
record is created. It contains such basic information as name, address, and
telephone information about a person or company you keep in contact with.
The record's many fields record pertinent and updated information, always
making the newest information available to GoldMine users working with the
contact.
The default view for contact records is the Contact List view. Double-click on
a contact to open that contact record.
The contact record has two basic sections:
•
Upper section. Contains standard contact information such as name,
address and telephone numbers, and five user-definable fields. This part of
the screen is the primary contact information because it displays the
company's name and the name of the company's primary contact. It is
common to complete the rest of the contact record with information related
to the primary contact of that company.
•
Lower part. Organizes secondary information, such as Relationships,
notes, pending activities, and history records, into Contact tabs storing
information linked to the contact record. For contact tab information, see
“About the Relationships Tab” on page 91.
GoldMine User Guide
Contact Management • 73
Each record also has a set of associated customizable properties:
•
Record-related Settings. Phone number format, record ownership, and
alerts. For more information, see “About the Relationships Tab” on page
91.
•
Contact Details. Occasions, free/busy, and digital IDs. For more
information, see “Working with Contact Details” on page 90.
About Contact Record Tabs
The tab bar appears in the middle of a contact record. It contains a series of tab
folders for organizing information related to the contact including
Relationships, Details, Notes, GM+View, Pending, History, Opportunities,
Projects and Cases.
To view the information on a tab:
•
Select a tab from the default layout, or customize the tab layout by
selecting from the pull-down menu at the right of the window.
•
•
Shortcut key. Type a shortcut key to launch the tab.
Mouse. If your layout includes more tabs than fit in the contact record
window, click the drop-down arrow at the beginning of the row and
select the tab from the menu.
A selected tab moves to the front and changes color. The lower part of the
Record displays information specific to the tab. Use the scroll bars or resize the
window to view all the information. Or change the displayed tabs based on
User Options.
Tabs have local menus. Right-click to display. To apply a command to a listed
record, select the record, then right-click to display the local menu.
Contact Record Tabs
The following tabs are available in GoldMine:
•
Cases. Shows the case information for a contact. See “Using the Service
Center” on page 304.
•
Contacts. Displays information about additional contacts.
•
Details. Stores information about the contact, such as e-mail addresses,
pager PIN, birthdays and so on. See “About the Details Tab” on page 94.
•
Field. Displays information in the user-defined fields.
74 • Contact Management
GoldMine User Guide
•
GM+View. Creates a customizable information page using HTML
capabilities.
•
History. Stores completed scheduled/unscheduled activities for the
contact. See “Scheduling Activities” on page 143.
•
Relationships. Shows the graphic interface for a contact. For more
information, see “About the Relationships Tab” on page 91.
•
Link. Lists files linked to the contact. See “Linking Files to a Contact
Record” on page 85.
•
Members. Displays the contact Groups (Fixed set of contact records that
meet an initial set of conditions. See “Groups” on page 128.
•
Notes. Stores freeform information about the contact. See “About the
Notes Tab” on page 98.
•
Opportunities. Displays opportunities linked to the contact. See
“Opportunity and Project Management” on page 267.
•
Pending. Displays all activities scheduled for the contact. See “Scheduling
Activities” on page 143.
•
Projects. Displays long-term projects to which the contact is linked. See
“Opportunity and Project Management” on page 267.
•
Processes. Displays the Automated Processes attached to the contact.
•
Referrals. Referrals create a link between two contact records in the
database. See “About the Referrals Tab” on page 98.
•
Summary. Displays activity information for the contact and the contact
record. See “About the Summary Tab” on page 101.
•
Ticket. Available when using GoldMine with an E-License, on an SQL
database, and integrated with HEAT. For more information the Ticket tab,
see the Ticket Transfer Utility with HEAT Integration section in the
GoldMine 8.5 Administrators Guide.
GoldMine User Guide
Contact Management • 75
Contact Search Center Toolbar
The Center toolbar changes to reflect the current action. Some options are
available when creating or using a saved search.
Select from the drop-down menu:
Save search criteria as a Filter. Available only during an active search.
Save search results as a Group. Available only during an active
search.
Copy the results of the current search to the clipboard.
Export the results of the current search to a MicroSoft Word
document.
Export the results of the current search to a MicroSoft Excel
document.
Print the results of the current search.
Select All Tagged Records to schedule an activity for a group of
contacts, or Selected Contact to schedule an activity for one contact.
Select the activity type from the drop-down menu:
Open the Schedule a Call dialog.
Open the Schedule a Next Action dialog.
Open the Schedule an Appointment dialog.
Open the Schedule a To-do dialog.
Open the Schedule a Literature Request dialog.
Open the Schedule a Forecasted Sale dialog.
Open the Schedule an Event dialog.
Select from the drop-down menu:
Begin mail merge in the Mail Merge Properties (Printing) dialog.
Begin an e-mail merge in the Mail Merge Properties (E-mail) dialog.
Select from the drop-down menu.
Add the selected Contact to a Contact Group.
Add the selected Contact to a Distribution List.
Select a search option from the drop-down menu.
76 • Contact Management
GoldMine User Guide
Display default search options only.
Display a SQL Query Editor window underneath the default search
options.
Open the Lookup tab in User's Options.
Open the Browser Column Selection dialog.
About Creating Contact Records
Create contact records several ways:
•
Create a new record for a new company.
•
Create a new contact with a new relationship tree (organizational chart).
•
Create a new contact based on a record type.
Creating a New Contact Record
Use the following procedure to create a new record for a new company.
Note that required fields display with a surrounding red box. If you do not
enter data in a required field the Required Fields Alert dialog box opens.
1. Click New Button or navigate to File>>New>>New Record.
The New Record dialog box opens.
2. At the Record Type dropdown box, select the type of contact you want to
create from the pull-down menu.
The set of record types available depends on the configuration of your
GoldMine system.
To create a new contact record with a new contact or company, select
[Plain contact record].
GoldMine User Guide
Contact Management • 77
3. Click in the area right of each field name, and in the dropdown box select
or type the information for the field.
• Company. Type in the name of the organization for this record.
• Contact. Type in the first name of the primary contact at the company.
NOTE: You must enter a value for either Company or
Contact.
•
•
•
•
•
•
•
•
•
•
Last. Type in the last name of the primary contact at the company.
Prefix. Select the prefix (Mr., Mrs., and so on) of the primary contact at
the company.
Dept. Type in or select the Department designation of the primary
contact at the company.
Title. Type in or select the title designation, (Account Manager,
Consultant and so on) of the primary contact at the company.
Source. Type in or select the source of the contact, for example Phone
book, newspaper, and so on.)
Record type. Type in or select the type of record, for example EU
Customer, Press, and so on.
Industry. Type in or select the industry of the primary contact, for
Phone (1, 2, 3). Type in the telephone number(s) for the primary
contact.
If you are entering international telephone numbers, click the
International Phone Format checkbox.
•
If you leave this field blank, GoldMine applies United States and
Canadian formatting to the telephone number. If you select this
checkbox, telephone number are not formatted.
•
The International Format box is selected by default if the country
setting in the WIN.INI is not the United States.
Fax. Type in the Fax number for the primary contact.
78 • Contact Management
GoldMine User Guide
•
E-mail Address. Click the down arrow and complete the email internet
email address for the contact. The email address stores in the Details
tab and displays in the primary contact panes.
• Web Site. Type in or select the Web site associated with the contact or
the company. A typical Web site address appears in the format http://
www.something.com; for example, http://www.frontrange.com.
GoldMine stores this address as a Details t
4. In the Creation Method area, select the desired options.
• Copy Current record. Click on this option to use an existing contact
record as a template for a new record to avoid having to type the same
entries in primary fields. Click this checkbox to create a contact record
with the primary field entries copied from the active record. The
Contact, E-mail Address, Title, and Dept fields are not copied. To
create a completely new Contact record, do not select this option.
• View in new window. Click this checkbox to display the new record in
a separate window appearing in front of the current contact record,
which remains in your work area. The new record becomes the active
record.
5. In the Duplicate Checking area, select the fields to be checked for
duplicate data in other contact records. If GoldMine finds a match, you will
receive a warning that the record already exists and it asks you whether to
proceed.
• Company and Contact name. Click on this checkbox to have
GoldMine check the company and contact names and displays a
warning if they already exist.
• Phone number. Click on this checkbox to have GoldMine check the
Phone 1 field for existing records that have the same telephone number
as the one entered for the new contact.
• E-mail. Click on this checkbox to have GoldMine check the email
address to see if it already exists.
6. Click OK.
GoldMine User Guide
Contact Management • 79
Duplicate Warnings
GoldMine checks company names, contact names, phone numbers and emails
for possible duplicates. If a duplicate exists, a warning appears.
Duplicate Company or Contact Names
If you create a new record and enter a company name or contact name that
already exists for another record, the following dialog box opens.
•
Click Show Contact to see the record that contains the duplicate name.
•
Click Add Anyway to add the record with the duplicate company or
contact.
80 • Contact Management
GoldMine User Guide
Duplicate Phone Numbers
If you create a new record and enter a phone number that already exists for
another record, the following dialog box opens.
•
Click Show Contact to see the record that contains the duplicate telephone
number.
•
Click Add Anyway to add the record with the duplicate telephone number.
Duplicate Email Addresses
If you create a new record and enter an email address that already exists for
another record, the following dialog box opens.
GoldMine User Guide
Contact Management • 81
•
Click the Leave the E-mail address attached to contact XXX (do not
attach to this contact) radio button to keep the email address with the
original contact.
•
Click the Attached E-mail addresses to this contact (create duplicate)
radio button to keep the email address duplicate.
•
Click the Move the e-mail to this contact (remove from contact XXXX)
radio button to keep the email address and remove from the original
contact.
Adding Contacts To an Existing Company
You can create a new contact and add it to an existing company. These contacts
will appear on the Relationship tab.
1. At the Contact list view, double-click on a contact.
The Detail view for the contact opens.
2. Click on the Relationship tab and then click Add Contact.
The Add Relationship dialog box opens.
3. The company attached to the contact is the default in the Company field.
To search for another company, click the Search button.
The Search Center opens and you can select the company you want.
4. At the Contact field, click the down arrow to select the new contact.
5. At the Relation field, click the down arrow to select the relationship of the
new contact to the company.
To create a new relation, click the down arrow, then select Add New and
then type in the new relation.
6. Click one of the following:
•
•
•
Save and New. The new relationship appears in tree form on the
Relationship tab.
Save and Close. The new relationship appears in tree form on the
Relationship tab and then closes the Add Relationship dialog box.
Cancel. Cancel the relationship.
82 • Contact Management
GoldMine User Guide
Editing Contact Records
You can update contact records with new information or changes.
1. Position the mouse cursor inside the field and click to activate a cursor.
2. Type your changes in the selected field, or edit based on F2 Lookup values.
To edit based on the F2 Lookup list, click the right-facing arrow or press
F2 to display the predefined field values. Select the value to update the
field with. You can add values to the F2 Lookups.
3. To advance between fields, press the Tab key. You may also select fields by
clicking CTRL+(First letter of field label).
Note that the Tab key goes through fields in the order set in the Field
Properties dialog box>>Layout tab>> Field Order area.
Change the order by changing the Position Number. This does note affect
where the fields display in the Contact record.
4. After editing the contact fields, press ESC or go to the next record to edit.
Some fields, such as the Last Update field on the Summary tab, are
display-only. GoldMine generates the value of these fields automatically,
and prevents the user from making changes. If you click on one of these
fields with the left mouse button, no action will take place.
Printing Contact Records
When you make a print request, GoldMine gathers the contact information into
a report and then prints the report.
1. Select the contact record you want to print and click the Print button.
GoldMine User Guide
Contact Management • 83
2. At the Print Report dialog box, complete the fields:
• Type. Select the product type of report, for example GoldMine.
• Category. Select the category of report, for example Service Report or
Contact Report.
• User. Select the user of the report, if needed.
• Report. The name of the report.
• Current contact only. Select this option to print a report for the
contact.
• All contacts in the following filters or groups. Select this option to
print all contacts or all contacts in a filter or group, and then select the
filter or group. The default is All Contacts.
• To send the report to a window online, select Window. To send the
report to a printer, select Printer.
The report displays or starts to print.
84 • Contact Management
GoldMine User Guide
Linking Files to a Contact Record
GoldMine stores linked document records under the Links tab. For example, if a
prospect calls to discuss a bid you sent, retrieve the document by doubleclicking the link stored with the prospect’s record.
Use linked documents as the basis of building a group.
Also manually link documents using the local menu in the Links tab or by
dragging and dropping files from Microsoft Windows Explorer into GoldMine.
In addition to file links, link any Windows folder to a contact record.
Displaying Multiple Contact Records
Display many contact records in the GoldMine work area. Only one record can
be active on the screen.
1. At the Contacts list view, select Window>>New Contact Window.
A new contact window appears with the same information as the first
contact window.
2. Scroll through the contacts. If you have a large amount of contacts, use the
Contact Search Center or the Universal Search to locate the contact.
Each new contact window you open is a duplicate of the active window.
Deleting Contact Records
You can delete contact records from your database using the Delete option or
the Delete Wizard.
To use the Delete Wizard, you must have Master Rights. For more information
see “Using the Delete Wizard” on page 86.
To delete all or part of a record, the record must be active on the screen, and
you must have both Delete and Edit Tab Folders permissions.
Use the following procedure to delete a contact record.
1. Select the contact record to delete.
2. Click Delete
GoldMine User Guide
in the Contact toolbar.
Contact Management • 85
3. At the Delete contact record dialog box select an option.
NOTE: By default, all checkboxes are selected. Review
selected boxes before selecting Delete. You cannot undo
deletions.
•
•
•
•
•
•
Delete the selected contact record. Deletes the current contact record,
including its related additional contacts, detail entries, and referrals.
History records for the contact are not deleted, but become unlinked
activities.
Delete contact’s scheduled activities. Deletes all pending activities for
the current contact.
Delete contact’s history records. Deletes all history of activities for
the current contact record. Since the same history file is used for
viewing the Completed Activities history for a specific user, deleting
the history of a contact record affects the activity analysis statistics for
all the users who have completed those activities.
Delete contact’s opportunity/project records. Deletes all opportunity
and/or projects linked to a contact. These records are removed from the
Opportunities tab and/or the Projects tab. Selecting this option does not
delete the opportunity or project from the Opportunity/Project
Manager.
Delete contact's cases. Deletes all cases linked to an opportunity.
Synchronize this record’s deletions. Lets deletions associated with
this contact record be synchronized with remote sites.
4. Click Delete. GoldMine deletes the contact record.
Using the Delete Wizard
To update your contact database by deleting some or all calendar records,
history and or contact records, use GoldMine’s Delete Wizard to reduce the
possibility of an unintentional deletion.
NOTE: Only users with Master Rights can access the Delete
Wizard.
86 • Contact Management
GoldMine User Guide
Use the following procedure to delete records with the Delete Wizard.
1. Select Tools>>Data Management>>Delete Records.
The Delete Wizard opens.
2. Select one delete option and then click Next.
• Delete old history record. Purges old history data from the contact
database. Delete all history records from the contact database, or
activate a filter or group, then use this option to delete history records
from the subset of records.
NOTE: Removing old history records periodically can
significantly reduce the amount of disk space used by
contact sets.
•
Delete ALL (filtered) contact records. Deletes a subset of records
from the contact database based on a filter or group.
GoldMine User Guide
Contact Management • 87
3. Specify the records you want to delete by clicking the down-arrow and
selecting a group or filter. The default is All contact records. Click Next.
88 • Contact Management
GoldMine User Guide
4. If you selected Delete old history files, select a date from which you want
files deleted. If you want all files deleted up to 10/01, for example, select
that date. Then type in Delete All History Files. This requirement reduces
the possibility of an unintentional deletion of contact records. Click Next.
If you selected Delete ALL (filtered) contact records, complete the delete
window. For instructions on completing this window, see “Deleting
Contact Records” on page 85. Then type in Delete All contact records This
requirement reduces the possibility of an unintentional deletion of contact
records. Click Next.
GoldMine User Guide
Contact Management • 89
5. If you do not want to synchronize the deletions, unselect Synchronize
Deletions and then click Finish.
If you select Delete ALL, the Delete ALL contact records dialog box
opens.
Working with Contact Details
Define or view contact details for an active contact record.Contact details
provide information for the following:
•
•
•
Occasions. Create occasions recurring occasions for contacts.
Free/Busy. Access a contact's free/busy file (.ifb) to a file, ftp site, or
http site so GoldMine can read it.See
Digital IDs. Import a contact's digital ID file (.p7b and.cer) to use
enhanced security on signatures and encryption. See the Setting Digital
ID section in the GoldMine 8.5 Administration Guide.
For more information on Occasions and Free/Busy, see “Accessing Your
Calendar” on page 172.
90 • Contact Management
GoldMine User Guide
About the Relationships Tab
The GoldMine Relationships tab graphically displays organizational
relationships and contact information in a relationship tree structure. By
default, it appears as the first tab in the contact record tabs.
Navigate the Relationships tab using its local menu or toolbar. Use the
Relationships Tab to:
Create Relationships, Sections, and Contacts.
Set read and update access on relationships, sections, and contacts.
Activate groups based on the Relationships hierarchy.
Copy data to a group of contacts based on the Relationship.
Creating Relationships
Relationships are linked to the specified contact record. The relationship's
name is taken from the Company field of the selected contact record. Create up
to 5 subsidiary levels under each organization and link contacts to any section.
Use the following procedure to create a relationship.
1. At the Relationships Tab, right-click and select Create a new Relationship
(if the pane is empty), or Look Up a Relationship.
The New Relationship Tree Options dialog box appears.
GoldMine User Guide
Contact Management • 91
2. Select from the following options as needed:
• Lookup another contact and create a Relationship. Launches the
Contact Search Center and lets you add a new Relationship to another
contact record.
• Create a Relationship based on. Creates the Relationship based on the
current contact Record.
3. Add sections and contacts to existing relationship trees.
Adding Contacts To Existing Relationship Trees
You can create a new contact and add it to an existing company. These contacts
display on the Relationship tab.
Use the following procedure to add contacts to an existing relationship tree.
1. At the Contact list view, double-click on a contact.
At the Detail view for the contact, click on the Relationship tab if not
selected.
2. Right-click on the relationship tree and select New Contact.
3. To add an existing contact, select Lookup an existing contact and add it
to section.
Double-click on the name to be added.
4. To create a new contact, select Create a new contact and link.
Complete the New Relationship to an Existing Company dialog box. For
more information on completing this dialog box, see “Creating a New
Contact Record” on page 77.
92 • Contact Management
GoldMine User Guide
Creating Relationship Sections
Use the following procedure to subdivide an organization into divisions or
departments.
1. At the Relationship tab, right-click an existing relationship and select New
Section.
The Section Properties dialog box appears.
2. At the Section Heading text box, accept the default contact as the section
heading title or type a new one.
3. Select Link to <contact> to link the contact to a relationship tree.
4. At the Insert new section list, select where you want the new relationship
to reside and then click OK:
• Under Manager. Places the new section as a subcategory of the
manager category.
• Above Manager. Places the new section as a separate heading above
the manager category.
• Below manager. Places the new section as a separate heading below
the manager category.
GoldMine User Guide
Contact Management • 93
Adding Contacts to Relationships
Use the following procedure to add contacts to existing relationships and
relationship sections, creating links between contact records.
1. At the Relationship tab, select a relationship or section and right-click to
select New Contact.
2. To add a contact, select:
Look up an existing Contact and add it to the Section. Launches the
Center and lets you search for a contact. Double-click on a contact to add it
to the Relationship.
Create a new contact and link. Launches the New Company and Contact
dialog box. When finished, the contact is added to the existing Relationship
and to the Relationship on the new contact record.
Link all Group/Filter Contacts to the Section. Adds all the members of
the activated filter or group to the Relationship.
About the Details Tab
The Details tab stores information about the contact, such as email addresses,
pager PIN, birth dates and so on. This information is indexed for record
searching. Web site and Internet email addresses store in the Details tab.
Store additional user-defined information in the contact Details tab section.
The Details tab lets you store multiple pieces of information on the same
subject without creating new fields (for example, if keeping track of the types
of cars a contact owns, you can create a separate record for each vehicle
without creating new fields).
The Detail tab supports a one-to-many relationship with the contact. The data
stores in the ContSupp table. Each record contains at least the following:
• Date. The date the detail record was created.
• Detail. The name of the detail record entry (Credit Card Number,
Computer Type).
• Reference. The value associated with the detail entry (for example, if the
detail entry is Computer Type, the reference would be Dell).
Define standard detail records using the F2 Lookup list. Customize by creating
extended detail records. Add a Detail to the Detail Tab by right-clicking the tab
and selecting New. The Detail Properties dialog box opens.
94 • Contact Management
GoldMine User Guide
Adding Detail Records
Define a new Detail record to track basic information on topics meaningful to
your business. Detail records are added to the Detail Lookup list (F2).
Every Detail created also has its own Reference Lookup list.
Use the following procedure to add a detail record.
1. Right-click under the Details tab and select New.
2. At the Detail tab>> Detail field, select a predefined value from the Detail
F2 Lookup list.
3. In the Reference field, type or select a value from the Reference F2
Lookup.
4. To add any notes to this detail (up to 64,000 characters), type them in the
Notes field.
Notes are unique to each detail record.
GoldMine User Guide
Contact Management • 95
5. Click the Info tab if needed.
You can update up to twelve fields. Customize the field labels through the
Setup tab. For more information about the Setup tab, see the Creating
Details Information Fields section in the Goldmine 8.5 Administration
Guide.
Each field can be controlled by the F2 Lookup, requiring users to input
consistent information using the Setup tab on the dialog box.
6. If entering an email address, select Primary Address to use the selected
address as the primary (default) address for the contact.
7. In the Audit tab you can view the information about the contact record
creation and updates.
You cannot change the information on this tab.
Deleting a Detail Record
Use the following procedure to delete a detail record
1. Select the record to delete and right-click.
2. At the local menu, select Delete.
About the Pending Tab
The Pending tab displays all activities scheduled for the contact. Use the
Pending tab local menu to manage pending activities for the contact record.
The Pending tab contains the following fields:
•
Activity. Displays a value (based on type of scheduled activity). Activities
include:
•
•
•
•
•
•
•
•
•
Appt (appointment)
Call (call-back)
Action (next action)
Lit (literature request)
Message (message)
Sale (forecasted sale)
Other (other action)
To-do (to-do)
OutMail (queued Internet e-mail messages)
96 • Contact Management
GoldMine User Guide
•
Date. Date activity is scheduled for completion.
•
Time. Scheduled time of the activity.
•
User. Name of the user for whom the activity is scheduled.
•
Code. Activity code, or other identifier, that categorizes the activity.
•
Reference. Reference information entered for the scheduled activity
(Follow-up, Close deal).
Activities Local Menu
The Activities local menu allows you manage scheduled activities in the
Pending tab and Activity list. For example, you can schedule an appointment
or complete a call.
The local menu contains the following:
•
Schedule. Lets you select a particular activity type to schedule.
•
Zoom. Opens the activity Zoom dialog box, allowing you to view,
complete, or delete an activity.
•
Complete. Completes the selected activity.
•
Reply. Opens the Reply to an activity dialog box and then lets you send email to the user regarding the activity.
•
Options. Allows you select Auto-Update or Filter.
•
Find. Opens the Find dialog box, allowing you to search for a particular
activity record.
•
Output to. Allows you to select Printer, Word, Excel, Clipboard, or
iCalendar file for output options.
•
Delete. Removes the selected activity without creating a history record.
•
Edit. Opens the Schedule an activity dialog box, allowing you the edit the
information.
GoldMine User Guide
Contact Management • 97
About the Notes Tab
The Notes tab allows you to store free-form written information about the
contact, such as any general contact information that does not fit conveniently
into fixed-length fields on the contact. This tab field can hold several hundred
lines of text for each contact (a limit of 64,000 characters).
The actual amounts may be dependant on the free memory in your computer.
Screen refresh slows as the size of the Notes grows (because the entire Notes
field must be read from the database each time a contact record is displayed).
Use manageable segments, the History tab, or create a linked document.
Use the following procedure to add, edit or delete a note to the Note tab.
1. At the Notes tab, click Add note.
The Notes area opens.
2. After completing the note, click the Save button.
3. An Alert of Suggestions window appears. Use the suggestions if you need
them.
The note appears in the Notes tab with a timestamp.
4. To edit a note, select the note, right-click to bring up the local menu, and
then click Edit.
5. To delete a note, select the note, right-click to bring up the local menu, and
then click Delete.
Track daily interactions with the contact on the History tab. This tab has an
extensive notes field and is easy to sort and search.
About the Referrals Tab
Referrals create a link between two contact records in the database. When a
prospect is referred to a salesperson, a record of the referral is maintained here.
After you establish the link, jump to the linked contact record by doubleclicking on a referral record. The tab contains:
Date. Date created.
Referral. Name of the company linked to the referral record.
Reference. Detailed information (reason for the referral).
User. Name of the user creating the referral record.
98 • Contact Management
GoldMine User Guide
GoldMine adds a To: to the entry in the originating contact record, adds a For:
to the entry for the contact selected from the Contact Search Center, and then
records the action in the History tab.
Use the following procedure to create referral records.
1. Click on the Referrals tab or click the down-arrow and select Referrals
from the drop-down list.
2. Right-click in the area below the Referrals tab and select New.
3. Using the Contact Search Center, search for the contact you want to create
a link for.
4. Double-click the contact to launch the Referral Properties dialog box.
5. The Refer this contact field displays the active contact record and the To
this contact text box displays the contact selected. In the Reference fields,
type a description or select an F2 Lookup description.
6. Click Insert Notes to create a date/time stamp and then type a note.
The Audit tab displays historical information.
7. Select the Status tab to select the current status from a list that ranges from
Initial Contact to Done!
8. Select one or more of the options to share with other users and then click
OK.
GoldMine adds a To: to the entry in the originating contact record, a For: to
the entry for the contact selected from the Contact Search Center, and
updates the contact’s History record.
GoldMine User Guide
Contact Management • 99
About the History Tab
The History tab stores completed scheduled and unscheduled activities for the
contact. The tab displays the following information:
• Date. Date the activity was completed.
• User. Name of the GoldMine user who completed the activity.
• Activity. Type of activity. GoldMine records these types:
Action
Next Action
Appoint.
Appointment
Call Back
Scheduled call
Call In
Incoming call
Call Out
Outgoing call
E-mail In
Received email
E-mail Out
Sent e-mail
Event
Event
Form
Mail-merged correspondence form
Lit
Fulfilled literature request
MsgRtn
Returned message
Msg Filed
Filed message
Other
Other action
To-do
To-do action
Code. Activity code associated with the completed activity. To display the
Code column, place ShowHistActvCode=1 in the [ActvObj] section of the
username.ini.
Result. The result code lets you categorize the outcome of the activity. Use it
to analyze completed activities.
Reference. Reference information entered when the activity was completed.
Indicates what action was taken (Sent letter, Left voice mail). If you activate a
history filter from the local menu, GoldMine places [Filter Active] in the
Reference column title.
Notes. Freeform text about the completed activity. Can include all notes added
as the activity progressed or information explaining a user's involvement with
a contact. Field stores up to 32 kb per record, with no limit to the number of
history records per contact.
100 • Contact Management
GoldMine User Guide
About the Summary Tab
Displays activity information for the contact and the contact record. You
cannot change the field settings in the Summary tab. The tab contains:
Comments. Displays miscellaneous information of up to 65 characters. Scroll
to display entire contents.
Prev Result. Displays reference information entered for the last calendar
activity for this contact. Automatically updates each time a calendar activity is
completed. Edit as needed.
Next Step. Displays information about the next activity as sorted by record
type code.
Next Action. Earliest scheduled date of a next action for this contact.
Automatically maintains the date of the pending Next Action scheduled on the
Calendar.
Appointment. Date of the first scheduled appointment.
Call Back. Date of the earliest scheduled call back.
Forecast. Date of the forecasted sale recorded on the Calendar with the earliest
predicted close date.
Last Contact. Updates date and time fields whenever a telephone activity is
successfully completed.
Last Attempt. Updates date and time fields whenever any activity is
completed as unsuccessful.
Last Update. Updates fields to indicate user who last edited the contact record
and the date.
Creation. Updates fields to indicate user who created the contact record and
the date.
Record.
•
Firebird and SQL. Displays n/a in the field because SQL databases do not
run true record counts. Run an SQL query to get a record count. For more
information on running queries, see the GoldMine 8.5 Administrators
Guide.
GoldMine User Guide
Contact Management • 101
Searching for Contacts
When working in a large database, trying to locate a contact or for information
on a contact record by scrolling through the contact records one at a time is
inefficient and time-consuming.
GoldMine Premium Edition two search options to help you search for,
organize, and communicate with contacts, the Contact Search Center and
Universal Search.
To facilitate efficient searching, use the Contact Search Center, or create SQL
Query Filters.
The Contact Search Center is a central search window. You can find one
record, or groups of records, based on criteria you entered or searches you
saved.
Accessing the Contact Search Center
You can access the Contact Search Center by using one of the following
methods:
•
Clicking the Search toolbar button. Launches the Center with current
Contact (primary) as the selected search field.
•
Clicking on GoTo>>Contact Search Center.
•
Entering a name or text string in the Find Contact search field at the top of
the Navigation Pane, and clicking Go. Launches the Center with the results
from the search field.
•
Double-clicking an indexed field label. Launches the Center with the
selected field as the Lookup option.
The Contact Search Center contains a toolbar for easy access to search center
functions.
102 • Contact Management
GoldMine User Guide
Saving Searches
After creating and running searches, save the searches using these options:
•
Saving search as a filter
•
Saving search results as a group
Use the following procedure to save search criteria as a filter.
1. After creating a search in the Center, save it as a filter search and then click
Save.
The save menu appears.
2. Select All Listed Records.
3. Select Save as Filter.
The New Filter dialog box appears.
4. Type a name in the Filter Name text box.
5. Select a filter owner from the User drop-down list.
6. Click OK.
The filter is saved and the name appears below the specified user's filters in
the Filters tab of Filters and Groups.
Use the following procedure to save search criteria as a group.
1. After creating a search in the Contact Search Center, save the results as a
group and click Save.
The Save menu opens.
2. Select Only Tagged Records to save only tagged records in the new
group, or All Listed Records to save the entire list of records.
GoldMine User Guide
Contact Management • 103
3. Select Save as Group.
The Group Profile dialog box appears.
4. In the Group Name text box, type in a name.
5. In the Code text box, type or select a code from the F2 Lookup list.
6. From the User drop-down list, select a group.
7. Click OK.
The results are saved and the group name appears below the selected user's
groups in the Groups tab of Filters and Groups.
Searching for Contact Records
Searches can be based on indexed fields, primary and additional contacts,
email addresses, and user-defined fields. Use the following procedure to search
for a contact record.
1. Open a contact record.
2. In the contact record, do one of the following to open the Contact Search
Center:
• Double-click on a field such as Company or Contact.
• Right-click on a field and select Lookup <field name>.
•
•
Click Search in the Global Toolbar
Type search criteria in the search field at the top of the Navigation Pane
and click Go.
The Contact Search Center opens with the selected field in the
Lookup text box.
The default search tool uses filter expression operators and boolean
operators, and can be expanded to include many criteria. An optional
SQL Query Editor can be used simultaneously. For more information
on filter expressions, see “Using Filters, Queries, and Groups” on page
126 or contact your administrator.
3. At the Search-by drop-down list, select from the following criteria:
• Primary Search Criteria. The most commonly used search criteria is
at the top of the pull-down menu.
• Contact (primary). Searches the primary contacts based on the search
criteria.
104 • Contact Management
GoldMine User Guide
•
•
•
•
4.
Name (additional). Searches for additional contacts based on the
search criteria.
E-mail. Searches for e-mail addresses based on the search criteria.
Details. Opens the Lookup a contact based on a detail dialog.
Additional Search Criteria. The following shows the additional
search criteria you can select.
Type ALT+O to select Additional Contacts.
Contact 1Fields (Indexed)
Contact 1 and
Contact 2 Fields (Non-Indexed)
Note that text within parentheses () is the
database field name if different than what is
shown in the contact record.
GoldMine User Guide
Contact Management • 105
106 • Contact Management
GoldMine User Guide
Search by Record Type.The value text box
becomes a pull-down menu populated with
configured Record Types.
5. In the Begin with field, select the filter expression operator from the dropdown list, for example Equal to.
In the text box next to Begin with, type the search value after the filter
expression operator.
6. If necessary, change the displayed columns. For more information, on
displayed columns, see “Browser Column Selection” on page 110.
Change the width of a column to optimize the display. Change the size of a
column using typical Microsoft Windows mouse functions on the border of
the column at the heading level. For more information see the Microsoft
Windows documentation.
GoldMine User Guide
Contact Management • 107
7. To expand your boolean search, click Add
by menu.
at the far right of the Search
A new menu appears beneath the previous menu, preceded by an AND/OR
option.
•
•
Select AND to create a search that returns records matching all of the
criteria.
Select OR to create a search that returns records matching any of the
criteria.
Examples.
Records matching all criteria are returned:
Records matching any criteria are returned:
8. Right-click in the browse columns to access other functions. The browser
columns local menu appears.
Schedule an activity by working with the Center and the GoldMine
Calendar. Select a contact to be scheduled and drag it to the open Calendar.
When you release the mouse button, GoldMine displays the Schedule an
Activity window. Use it to schedule an appointment or other activity for
the selected contact.
9. Save your search criteria as a Filter or search results as a Group.
108 • Contact Management
GoldMine User Guide
Contact Search Center Query Editor
1. At the Default Search/Query Editor drop-down menu in the toolbar, select
Query Editor. This adds a window under the default search tools for editing
and previewing SQL searches within the Contact Search Center.
When Query Editor is selected from the Default Search/Query Editor dropdown menu, the following window appears:
2. Select the SQL radio button to view the query in SQL format.
3. Select the xBase radio button to view the query in xBase format.
4. To edit the query, click Edit. The view window becomes active for editing.
5. Edit the query in either SQL or xBase. Click Preview to view the result in
the Contact Search Center table.
6. To close the Query Editor, select Default Search from the Default Search/
Query Editor drop-down menu in the toolbar.
GoldMine User Guide
Contact Management • 109
Browser Column Selection
By default, the Center displays the Company, Contact, Phone 1, City, State,
and Postal Code fields. Change the information in the displayed columns to
suit your needs.
In the Contact Search Center, right-click in the column area and select Select
Columns. The Browser Column Selection dialog box appears.
•
•
•
To add a field to the displayed browser columns, select the field name
in the Available columns list and click the right arrow. The field is
added to the bottom of the Selected columns list.
Fields are listed in the order displayed in the Center. To change the
order to the displayed fields, select the field in the Selected columns list
and click Up or Down.
To remove a field from the Center display, select the field name in the
Selected columns list and click the left arrow.
The OK button is available only after you make a change in the dialog box.
If you do not make any changes, click Cancel to close the dialog box.
Syncing Contacts in the Contact Search Center
When working with Center search results and Records, apply the Sync Contact
option.
To Sync Contacts
1. In the Center, display search results in the browse columns.
2. Right-click in the browser columns and select Sync Contact.
The record you select in the browse columns automatically becomes the
displayed Record.
3. Turn off Sync Contact using the same method.
110 • Contact Management
GoldMine User Guide
About Universal Search
Your organization might have information stored in many places in your
GoldMine Premium Edition database - in emails, contact notes, activity notes,
linked documents, the Knowledge Base and so on. You may not even know all
the information that exists or where it is located because it was entered by
another person.
In GoldMine Premium Edition the Universal Search feature is provided as a
single view to quickly find out what information is in your system and how to
navigate to it.
Universal Search is a one-box search engine that allows you to quickly access
a summary view of the information you are looking for, along with links to
more detailed information.
With Universal Search you can create a clear picture of your customer because
you have access to all the information about your customer in your database
whether or not you entered it in the database. Universal Search is very useful
for searching on price lists, sales kickoffs, return policies and so on.
Prerequisites
Before using Universal Search, make sure you have the following applications
installed on your computer.
•
Microsoft SQL Server 2005.
If using SQL Server 2005 Express, you have to install Microsoft SQL
Server 2005 Express Edition with Advanced Services in order to use
Universal Search.
•
Microsoft SQL Server 2008.
If using SQL Server 2008 Express, you have to install SQL Server 2008
Express with Advanced Services in order to use Universal Search.
NOTE: Windows Search is not installed by default on
Windows Server 2008. The service can be installed through
the Server Manager (Start>>Administrative Tools>> Server
Manager>> Roles>>File Service>> Role Services).
GoldMine User Guide
Contact Management • 111
Microsoft Windows Desktop Search Engine. This tool can instantly find
documents, e-mail, attachments, and more. For installation and usage
information look at this website:
http://www.microsoft.com/windows/products/winfamily/desktopsearch/
default.mspx
Microsoft SQL Server Full-Text Engine. This tool is a full-text indexing and
search engine. For installation and usage information, look at this website:
http://msdn.microsoft.com/en-us/library/ms142587.aspx
Security
GoldMine Premium Edition will search emails. If the message is accessible
through GoldMine, it will be returned by a search and will check access rights
for the Calendar and History areas.
The Universal Search feature will not search for information in foreign emails.
Searching for Contacts with Universal Search
1. Navigate to GoTo>>Search>>Universal Search.
The Universal Search view opens.
2. At the Search field, type in the name or keyword for which you are
searching and then click Go.
112 • Contact Management
GoldMine User Guide
A grid showing the search results displays with the following field labels:
•
•
•
•
•
•
•
•
•
•
Tag. You can tag (that is, check) a result and then, by clicking on the
small down arrow next to the column title, select a filter criteria (for
example, True) to show only the tagged records. More important, you
can tag records in the search results to activate them as a contact filter.
Rank. The row ranking of the record. The lower the number the more
likely the information you are searching for exists in this record.
Contact.The name of the contact.
Company. The name of the company name.
Found In. The location of the search results. It may be in several
places such as the Contact tab or the Notes tab, History tab and so on.
Title. Depends on the result in the Found In column. For example, if
the result is Contact, the title is the contact’s title; if the result is an
email the title is subject of the email; if the result is Knowledge Base,
the title of the topic and so on.
Created. The date the result (contact, activity, email and so on) was
created.
Modified. The date the result (contact, activity, email and so on) was
modified.
Created By. The person who created the result.
Documents. Shows how a search result is linked to GoldMine.
For example, a file added to a contact record as a Links record. If the
file is part of the search result the Linked to column would display the
contact to which the file was linked. All. Brings up results of all.
3. To open the file you are looking for, do one of the following:
• Double-click on any of the links in the grid such as Name or Title.
4. Right-click on the line of the contact and select:
• Go to Contact. Opens the contact window with the selected contact.
• Go to Found In. Drills down on an object type,
• Output to Printer, Excel, Word. The output to printer option
generates the system report associated with this area. It displays the
report in a tab or window from which it can be printed.
• Save as. Save as a New Group or an Existing Group. If you tag a
Contacts type result, this option allows you add the contacts to a new
group or an exiting group.
GoldMine User Guide
Contact Management • 113
Using the Universal Search Advanced Feature
The following procedure provides the steps for more advanced searches.
1. For advanced search options, click on the Advanced checkbox.
The Advanced Search window opens.
2. At the Find these items area, select the area where the search item resides.
You can select All (all records) to see all items or one of the tabs such as
Activities, History, and so on. This also includes checkboxes
corresponding to search filters, except for those applied to contact records.
To clear your selection, click Clear.
3. To change your Universal Search options, click Options. For more
information on selecting options, see “Setting Universal Search Options”
on page 116.
• If the search filter is associated with Contacts, it will appear in the
drop-down list at the bottom of the Options pane when you select
Search Filter in the Choice dropdown.
• If the search filters is associated with any other type of information, it
will appear as a checkbox under Find these items. If a filter of this type
is owned by a different user, you need to go to Options>>Search
Filters, select the Owner, and then check the box next to each filter
you want to use.
NOTE: The checkboxes in the Find these items section
use “OR” logic, so items matching any of the checkboxes
will be returned. It is important to understand this to make
the search filters effective.
114 • Contact Management
GoldMine User Guide
4. In the Within these records area, at the Choice field, select a search
criteria and then click Go. The choices are:
• All Contact. Searches all contacts. Note that the owner and filter
name fields are not activated because this search includes all records.
• Active contact. Searches the active contact. Note that the owner and
filter name fields are not activated because this search includes the
active contact.
• Active filter. This search is limited to contacts returned by the
currently active contact filter.
• Contact Filter. Searches within a contact filter.
• Contact Group. Searches within a contact filter. If there are no active
filters, the owner and name fields are not activated (they are grayed
out).
If there are no active groups, the owner and filter name fields are not
activated (they are grayed out).
If there are active groups, at the Group owner field, select the group
owner. At the Group filter name field, select the name of the filter.
•
Search Filter. Searches within contact filters create for Universal
Search.
5. At the Filter owner field, select the group owner.
At the Filter name field, select the name of the filter.
NOTE: You can save Universal Searches by tagging a record,
then right-click and select Save As.
GoldMine User Guide
Contact Management • 115
Setting Universal Search Options
Set up your search options according to your needs. GoldMine Premium
Edition allows you to create filter expressions in an operation such as
performing a global replace based on a filter.
1. Navigate to GoTo>>Search>>Universal Search and click the Advanced
checkbox.
2. Click Options.
The Properties dialog box opens.
3. At the General tab, select from the following options:
• Use Universal Search By Default. Click this checkbox to enable
Universal Search as the Navigation panel, search field, search engine.
• Use docked mode for search screen. Click this checkbox to dock the
Universal Search window (the Universal Search window can be a
floating window or attached to an edge of the GoldMine workspace).
• Search by exact terms. Click this radio button to search for records
that match the search term.
116 • Contact Management
GoldMine User Guide
•
•
Search by alternative forms of search term. Click this button to
search for the different tenses of a verb, or for both the singular and
plural forms of a noun. This means you can search for any form of a
term; for example search you can search on foot and include feet as a
search term.
Search by synonyms of search terms. Click this radio button to
search for synonyms of search terms. In Microsoft SQL Server 2005,
the full-text queries use a thesaurus to find synonyms of search terms.
NOTE: The thesaurus file must be edited. For more
information, see How to: Edit a Thesaurus File at:
http://msdn.microsoft.com/en-us/library/
ms345187(SQL.90).aspx
•
Search by prefix. Click this button to search on the prefix (the first few
letters) of a word.
• Number of items to keep in history. Specifies the number of search
terms to save. Enter a value or click on the spinner control to increase
or decrease the number.
• Clear History button. Click this button to remove saved search terms.
• Language. Select the language for the search results from the
dropdown box.
4. At the Documents tab, you can specify the document locations that the
Windows Desktop Search Engine will search (this tab is not displayed if
Windows Desktop Search is not installed). Complete the following fields
as needed.
GoldMine User Guide
Contact Management • 117
Complete the following fields as needed.
•
Include items from local Windows index. Click this checkbox to
search documents using the local Windows Desktop Search index.
•
Include all indexed locations. Click this checkbox to search in all
locations which are defined in Control Panel>>Indexing Options.
In this case the check boxes are disabled, but if Local and UNC
Paths is checked the Add, Edit and Delete buttons remain active.
•
Include Microsoft Office Outlook (available on Vista only).
Click this checkbox to search information in the MS Outlook. To
pickup Outlook mail, the messages need to be cached locally (for
example, in a .pst, or .ost file).
118 • Contact Management
GoldMine User Guide
•
Local or UNC path. Click this checkbox to add, modify or remove
user specified search folders. To add a new path, click Add and
select the path. To edit an existing path, select the path and click
Edit. To delete an existing path, select the path and click Delete.
NOTE: On Microsoft Vista there is a Windows
Desktop Search: Add-in for Files on Microsoft
Networks that provides the option to add UNC paths as
an indexed location. To download this option, go to:
http://www.microsoft.com/downloads/
details.aspx?familyid=f7e981d9-5a3b-4872-a07e220761e27283&displaylang=en
•
Include items from remote Windows index. Click this checkbox
to search documents on the remote computer. WDS (Windows
Search) should be installed on both computers.
Select Host. Click this button to select the name of a remote
computer. The name appears in the Host field. To add a new path,
click Add and select the path. To edit an existing path, select the
path and click Edit. To delete an existing path, select the path and
click Delete.
•
Show linked contacts in search results. Select this checkbox to
display all contacts linked to the search.
5. At the Grid tab you can configure the grid to your personal specifications.
Complete the following fields as needed.
GoldMine User Guide
Contact Management • 119
•
•
•
•
•
•
Show Top N Records. Enter the number of queries to be limited in
each area. For example, if you enter 50, you will see 50 rows or less in
each area.
Order By. Select an initial column to order the results by. Click on the
down arrow and select a column.
Direction. This option allows you to determine the sorting direction of
the search results. The selections are Ascending and Descending.
Grid Scrollbar. Select the location of the scrollbar. Selections are
Auto-fit columns and Show Horizontal Scroll Bars.
Activity Navigation. Select the location in which you want to see the
found activity. Selections are Contact Pending Tab, Activities List and
Calendar.
Show columns. Select the columns you want to display.
120 • Contact Management
GoldMine User Guide
6. At the Search Filters tab, create the desired search filters. This allows you
limit a search to records returned by the search filter.
Select the following options:
•
•
Select User. Lists the filters for the selected user. Select from the
dropdown list.
Add. Click this button to add a new filter.
•
Name. Type in the name of the new filter.
•
Owner. Select the owner.
•
Area. Select the area for the filter, for example Contact or Campaign.
•
Expression. Build the expression:
Build. Click this button to open the GoldMineLookup Wizard and
build a search filter as an SQL query.
Check. Click this button to verify the filter expression.
•
•
Edit. Select a filter and then click this button and make your edits.
Remove. Select the filter you want to remove and then click this
button.
GoldMine User Guide
Contact Management • 121
7. At the Advanced tab, select the GoldMine tables that Microsoft Full Text
Search will index.
This property page (in this case the Advanced tab) is available only for
users with master rights.
•
Enable Indexing. Activate this checkbox to enable Microsoft Full Text
Search indexing of the selected tables.
To unselect a table, click on the checkbox next to it and the checkmark
will disappear. To reselect, click on the checkbox again.
NOTE: When you enable indexing, all the areas are
automatically selected. To unselect an area, click on the
checkbox next to it and the checkmark will disappear. To
reselect, click on the checkbox again.
122 • Contact Management
GoldMine User Guide
Format of Queries and Results of Searches
The following search query formats are supported in Universal Search, and
intended for advanced users.
General Format
The following format is supported:
< For whom > (From where - wps) search criteria
Where:
<For whom> is the contact(s) for which you want to find information.
(from where - wps) is a Universal Search filter, other than a Contacts area
filter, from where you want to search.
Search criteria is any word(s) you want to use in the search.
You do not need to complete all parts of this query. For example, if you
complete only <For whom>, this will return information that shows only
contacts. If you complete only (wps), this will return data from filters. If you
complete only search criteria, this will return data for all areas.
Examples
The following are examples where the words calls, emails, and cars are
Universal Search filters.
<Art Bar*> (calls)
This query returns all calls to contacts that contain Art Bar*.
NOTE: To return calls only from Art Bardtoll, use the <For
Whom> format.
Art Bar* (calls)
This query returns all calls that contain Art Bar*
<Art Bar*> (calls emails) California
This query returns all calls and emails with the word California for contacts
that contain Art Bar*
<Cars> California
GoldMine User Guide
Contact Management • 123
This query returns all records containing the word California from contacts
containing the word car.
California
This query returns all indexed objects where that contain the word California.
<For Whom> format
The <For Whom> format enables you to search on a particular contact or other
person. The following are examples using this format:
<c:"Contact Name"> This query returns information only for the selected
contact.
<f:"USER\FILTER">. This query returns information only for selected
contact filters (for example - <f:”EVGENY\CA">)
<g:"USER\GROUP">. This query returns information only for selected
groups (for example - <g:"EVGENY\Group1">)
NOTE: Searches are not case-sensitive.
NOTE: It is safe to use quotes (“) at all times. However the
format it would be to use quotes when there is a space.
You can use all different words in this form as well. For example:
< CA test >. This returns all contacts that contain words CA and test.
< CA or test >. This returns all contacts that contain either CA or test.
124 • Contact Management
GoldMine User Guide
(From where wps) format
The (From where) format enables you to search using a Universal Search filter.
The following are examples where the words notes and e-mails are the names
of Universal Search filters that return notes records and e-mail messages
respectively.
Examples
(notes) birthday. This returns all notes where the word birthday occurs.
(notes e-mails) birthday.This returns all notes and emails where the word
birthday occurs.
(notes). This returns all notes.
<Art Bardtoll> (Notes) - This returns all of Art Bardtoll’s notes.
Search criteria format
The Search criteria format enables you to search on words.
Word1 [and|or] [Word2]…
Examples test. This returns all objects that contain the word test.
cat or dog. This returns all objects that contain the word cat or dog are
returned
cat dog. This returns all objects that contain the words cat and dog.
cat*. This returns all objects that contain a word which begins with cat.
Memo Filters
A Memo filter allows combining multiple search parameters into a single filter.
It is helpful when you have to run the same query many times. It also can
reduce the length of a query, by substituting one word for many.
A Memo filter saves a particular search and is helpful when you have to run the
same query many times. It also reduced the length of a query, by allowing you
to substitute one word for many words.
The Memo filter name always begins with the exclamation (!) sign. The search
parameters are entered in the expression field.
GoldMine User Guide
Contact Management • 125
Example
You often perform these queries:
<Art Bar*> (calls emails) word1
<Art Bar*> (calls emails) word2
So you create a memo filter called !Artact for the expression <Art Bar*> (calls
emails):
!Artact word1
!Artact word2
Configuring the Contact Search Center
Configure the tab using the Lookup tab in User Options. For more information,
see “Setting Options for the Lookup Tab” on page 51.
Using Filters, Queries, and Groups
About Filters and Groups
To create a subset for longer-term use, build a filter or group. Both options
create subsets based on selected criteria, but differ in how they handle these
subsets.
Filters
GoldMine’s filters are based on Boolean expressions (logical statements that
have 2 possible outcomes: true or false). When activating a filter, the entire
database evaluates based on the Boolean expression. The contact records
matching the Boolean expression are selected. The filter ignores records that
do not match.
126 • Contact Management
GoldMine User Guide
Example
For a project or campaign, you decide to work with your corporate clients
located in Los Angeles. You create this Boolean expression:
Contact1->City= “Los Angeles”
A Boolean expression consists of 2 parts: operators and operands. Operands
act as the data to be evaluated, while the operator determines the comparison
method deciding whether the statement is true or false. In the example, the
operands are City and Los Angeles and are equal to the operator.
When this filter is activated, pressing PAGE UP and PAGE DOWN displays
only those contact records in the database that are evaluated as true for this
statement. The filter evaluates each contact record. If the record does not meet
the condition(s) of the statement, GoldMine continues to the next record and
repeats the process to find a contact record that does meet the conditions.
GoldMine then selects the record. The filter shrinks your database to present a
subset of only those contacts with addresses in Los Angeles.
By constructing Boolean expressions, build and maintain an unlimited number
of filters to categorize the records in your database.
To Access Filters
1. Select Tools>>Filters.
The Filters and Groups window opens.
2. Select the Filters tab.
3. At the View Filters drop-down list, select a user name. Each filter
associated with that user name lists alphabetically by the Filter Name
assigned when it was created. Activate, Release, Delete, or create a New
filter.
GoldMine User Guide
Contact Management • 127
Creating Filters
GoldMine contains a filter generator that builds a search expression based on
menu and browse window selections. Filters operate on the entire database.
For all procedures related to creating and using filters, see the GoldMine 8.5
Administrators Guide.
Groups
A group is a fixed set of records that meets a specified set of conditions and
allows instantaneous access to member records.
To access Groups:
1. Select Tools>>Filters. The Filters and Groups dialog box appears.
2. Select the Groups tab.
The upper pane lists the groups owned by the user. The lower pane lists
members of the group highlighted in the upper pane. GoldMine orders member
records by the Sort code, defined while building the group.
How Groups Differ from Filters
Working with groups can be more efficient than applying a filter. When you
activate a filter, GoldMine searches through the database for contact records
meeting the criteria.
Once a group is created, membership is fixed and you can work with the group
members without performing the search again.
Each member contact record remains in the group until removed. However,
since each record evaluates when the filter is activated, a selected filter
displays new contact records added to the database if they match the filter’s
criteria.
Groups also have optional sort capabilities, letting you list member records in
the order best fitting your needs.
128 • Contact Management
GoldMine User Guide
Group Members Local Menu
1. To access the group members local menu, at the Filters and Groups tab,
right-click in the Groups tab>>Member area.
2. Select one of the options:
• Sort Members. Opens the Sort Group Members dialog box; sort group
members by clearing all sorting options or sort by field, by an
expression, or a reference expression.
• Sync Contact. Displays the selected group member's contact record as
the active contact.
• View. Changes the display from company to contact, or both.
• Find. Searches within the group for the specified contact.
• Output to. Sends the list of group members to the printer, Word, Excel,
or the clipboard.
• New. Displays the Group Member Profile dialog box where you add
the current contact to the group with the reference you type or select.
• Delete. Removes a member from the group.
• Edit. Displays the Group Member Profile dialog box so you can
change the reference or sort for a member.
GoldMine User Guide
Contact Management • 129
Using the Groups Tab
Use the Groups tab to create and activate static groups of contacts.
1. Select Tools>>Filters.
The Filters and Groups dialog box opens.
2. At the Filters and Groups dialog box, click the Groups tab.
3. Right-click in the group tab and select New.
The New Group dialog box opens.
4. Type or select a name in the Name field.
• Type or select the code in the Code field.
• Select another user in the User field.
• Select the following options as needed:
•
Group Name. Assign a descriptive name to each group. Members
of the highlighted group displayed in the lower portion.
•
Code. An optional identification code assigned to each group to
help locate a group if you defined many in GoldMine.
•
Click Build the Group and/or the Synchronize button as needed.
5. The Group Building Wizard opens.
Group Building Wizard
In the Group Building Wizard, select one option and click Next:
•
Filtered records. Uses an existing filter created by any user. The Build a
Group based on a Filter dialog box opens. See “Groups Based on Filtered
Records” on page 131.
•
Previewed records. Uses records you are previewing in the Preview tab in
the Filters and Groups dialog box to preview filter results. The Optional
Settings dialog box appears. See the GoldMine 8.5 Administration Guide
for more information.
•
SQL Query records. Uses an existing SQL query on the SQL Query tab of
the Filters and Groups dialog box to query an MSSQL Server database.
The Optional Settings dialog box appears.
130 • Contact Management
GoldMine User Guide
•
Tagged records. Uses records you tagged in the Contact Search Center
using CTRL+click. Once multiple contacts are highlighted, select
GoTo>>Contact Groups and create a new group. The Optional Settings
dialog box appears.
•
Scheduled calendar activities. Creates a group based on scheduled
activities in the Calendar. The Group Based on Scheduled Activities
dialog box opens.
•
Completed history activities. Creates a group based on historical
activities. Select a User. Enter the date range and type an Activity code (the
default is blank). Select an Activity Type. The Build a Group based on
Completed Activities dialog box opens.
•
Supplemental contact data. Creates a group based on detail records,
linked documents, additional contacts, or referrals to build a group based
on supplemental data. The Build a Group based on Contact Details dialog
box opens.
Groups Based on Filtered Records
1. In the Group Building Wizard, select Filtered records.
2. Click Next.
GoldMine User Guide
Contact Management • 131
3. At the Build a Group based on Filtered Records dialog box, select one
option:
• Build on a Filter. Create a group based on an existing filter. Select the
filter Owner in the drop-down list and the filter name in the Build on a
Filter drop-down list.
• Build Filter. Create a filter if one does not exist.
• Build on an Expression. Type a new filter expression or edit the filter
expression.
4. Click Next.
5. The Optional Settings dialog box opens.
See “Group Optional Settings” on page 133.
132 • Contact Management
GoldMine User Guide
Group Optional Settings
When building a group, use the Optional Settings to refine your choices.
1. At the Optional Settings dialog box, select the Sort Field in the drop-down
list.
The Sort Field specifies a contact field or user-defined field GoldMine
sorts the group by. Select the field to sort the group by, and GoldMine
places the value from that field in the group Sort field for each group
member’s contact record. When the group is active, group members are
arranged alphabetically by this sort field.
2. Type or select the Reference value from the F2 Lookup list.
Each member has a group Reference field. The field contains information
you type or select. When GoldMine builds a group, you can select the
value placed in the group Reference field for each group member, for
example, {Database->Fieldname}.
3. Type or select a Filter Expr. from the F2 Lookup list. The filter expression
must be a valid dBASE Boolean expression.
This option is not available of you are creating a group based on filtered
records.
4. Click Next.
5. At the Ready to Build dialog box click Finish.
The GoldMine Process Monitor opens and displays the status of the
building process until it is completed. It then displays the number of
records added to the group.
When the group is built, the name is added to the Group Name box on the
Groups tab.
GoldMine User Guide
Contact Management • 133
Group Based on Scheduled Activities
1. In the Group Building Wizard, select Scheduled calendar activities and
click Next.
2. At the Build a Group based on Scheduled Activities dialog box, in the
Range area, select:
• User. Select the user in the drop-down list.
• From Date. Type or select the date from the F2 graphical calendar.
• To Date. Type or select the date from the F2 graphical calendar.
• Activity. Type the activity code.
3. In the Activity Type area, select All Activities or a specific activity.
4. Click Next and complete the Optional Settings dialog box opens. See
“Group Optional Settings” on page 133.
Group Based on Completed Activities
1. In the Group Building Wizard, select Completed history activities and
click Next.
2. At the Build a Group based on Completed Activities dialog box, in the
Range area, select:
• User. Select a user in the drop-down list.
• From Date. Type or select the date from the F2 graphical calendar.
• To Date. Type or select the date from the F2 graphical calendar.
• Activity. Type the activity code.
• Result. Type the result code.
3. In the Activity Type area, select All Activities or a specific activity.
4. Click Next and complete the Optional Settings dialog box opens. See
“Group Optional Settings” on page 133.
134 • Contact Management
GoldMine User Guide
Building a Group Based on Supplemental Contact Data
1. In the Group Building Wizard, select Supplemental contact data and
click Next.
2. At the Build a Group based on Contact Details dialog book, select an
option:
• Details. Builds the group based on detail records.
• Document Links. Builds the group based on linked documents.
• Additional Contact. Builds the group based on other contact records.
• Referrals. Builds the group based on referral records.
If you select Details, type or select a value from the F2 Lookup list to limit
the detail-based group to a particular detail, for example, email address.
This option is not available with the other options.
3. Type or select the Keyword in the F2 Lookup list. This option specifies a
word or phrase to be searched within the Reference field in the select
supplemental data.
4. Click Next and complete the Optional Settings dialog box appears. See
“Group Optional Settings” on page 133.
Saving Search Results as a Group
1. After creating a search, save the results as a group by clicking Save.
The Save menu appears.
2. Select Only Tagged Records to save only tagged records in the new
group, or All Listed Records to save the entire list of records.
3. Select Save as Group.
The Group Profile dialog box opens.
4.
5.
6.
7.
Type a name in the Group Name field.
In the Code text box, type or select a code from the F2 Lookup list.
Select a group owner from the User drop-down list.
Click OK.
The results are saved and the group name appears below the selected user's
groups in the Groups tab of Filters and Groups.
GoldMine User Guide
Contact Management • 135
Using Filters and Groups
When you have a large number of contact records in your database, create
subsets based on criteria to categorize groups of records to access for special
activities.
Example:
•
Create a subset of contacts you telephoned in the past week, and send a
mass mailing only to those contacts.
•
Create and manage subsets of data using filters and groups and the Filters
and Groups dialog box, or in the Contact Search Center, where you can
build and save search criteria as Filters, or search results as Groups.
To Create a Filter for Groups
1. Select Tools>>Filters.
The Filters and Groups dialog box appears.
2. Click a tab:
• Filters. Create and delete filters. Also activate and release filters. See
“Creating Filters” on page 128.
• Preview. Preview filter results. See the GoldMine 8.5 Administration
Guide for more information.
• Group. Build groups and review members. Also activate and release
groups. See “Groups” on page 128.
• SQL Query. Write and save a SQL query from scratch or using the
Lookup wizard. See the GoldMine 8.5 Administration Guide for more
information.
Activating and Releasing Filters
Use created filter expressions in an operation such as performing a global
replace based on a filter. While the filter is active, the filter name becomes part
of the contact record window title.
The Contact Search Center still lets you locate and display a record that does
not meet filter criteria. When selecting the Next Record (PAGE DOWN) or
Previous Record (PAGE UP), the next record displayed meets the filter criteria.
136 • Contact Management
GoldMine User Guide
Use the following procedure to activate a filter. Note that activating the filter
affects the following GoldMine operations:
1. PAGE UP and PAGE DOWN and corresponding menu commands, Next
Record and Previous Record
2. Merge Forms command
3. Record deletion commands: Delete Old History of ALL contact records
and Delete ALL contact records
4. Global Replace commands
5. Synchronize commands
6. Export contact records command
To Activate a Filter
Navigate to Tools>>Filters. The Filters and Groups dialog box opens.
On the Filters tab, highlight a filter and click Activate. The active filter name
appears in the contact record title bar. The filter remains active until released.
To Release a Filter
On the Filters tab, highlight a filter and click Release. The filter is deactivated
and you can now access the entire database.
GoldMine User Guide
Contact Management • 137
Activating and Releasing Groups
When selecting this command, GoldMine’s database opens containing only
contact records that are members of the group. After you build a group, it must
be activated before it can be used in an operation.
Create, activate, and release groups in the Contact Search Center.
Use the following procedure to activate a Group
1. Select Tools>>Filters.
2. At the Filters and Groups dialog box, click the Groups tab.
3. Highlight a group and click Activate.
Use the following procedure to release a Group
1. Select Tools>>Filters.
2. At the Filters and Groups dialog box, click the Groups tab.
3. Highlight a group and click Release.
138 • Contact Management
GoldMine User Guide
Activities
About Activities
An activity is a time-specific or event-based action linked to a contact.
You can schedule, view, and complete activities. Activities scheduled for a
future date and time store as records in GoldMine’s Calendar. Information
about completed calls, appointments kept, and messages received transfers
from the Calendar and the related contact’s Pending tab to the History tab,
where it stores as a completed activity record.
View activities for users, user groups, for a particular date, or for a contact.
Use the Calendar to view activities by date, the Activity List to view by
activity type, and the Pending tab on the contact record to view the contact’s
activities for the contact.
Each activity record, whether still pending on the Calendar or completed in the
history file, is linked to a contact record. Connecting activities to contacts
establishes a relational link to track the progress of customer relationships.
GoldMine User Guide
Activities • 139
Benefits of Using Activities
•
Track pending activities. List activities that need to be performed.
Control the scope of these listings; they can be daily, weekly, or monthly.
View activities pending for a contact or view only those calls that must be
made on a specific day. Also view pending activities of other users.
•
Set up reminders. Remind yourself about important activities. Alarms can
be set for activities GoldMine supports.
•
Record an electronic paper trail. When activities are completed,
GoldMine maintains a record of what was done, when it was done, and by
whom—providing powerful information for subsequent follow-up with
contacts.
•
Schedule meetings. When your activities are scheduled in GoldMine,
other GoldMine users can determine the times you are available for
meetings, conference calls, or appointments.
•
Delegate. Use the Calendar to assign scheduled activities to others and
track their progress.
•
Link activities with your contacts. Create linked activities and unlinked
activities. Linked activities associate with a contact record. By default,
created activities link to the active contact record. GoldMine updates the
information on a linked contact record to show the progress of these
activities. When scheduling an activity not linked to a contact, clear the
Link to selected contact option to remove the active contact’s name from
the Contact field.
Unlinked activities are not connected to any contact and are generally used
for incidental events. We recommend use of unlinked activities be limited,
since many of GoldMine’s features will not operate when the activity is not
linked to a contact record.
140 • Activities
GoldMine User Guide
View Window (Activities)
A fully navigable browser of Scheduled Activities appears in the view
window. Browse to an activity, mailbox, occasion listing, or holiday listing to
highlight it in the main window.
Note that settings in the Show menu on the main window of the Activity List
will effect what information is available to view.
GoldMine User Guide
Activities • 141
Scheduling and Completing Activities
Activities are time-specific or event-based actions linked to contacts (calls,
appointments, letters) or other types of activities (To Do tasks or events
assigned to users). GoldMine is designed to link contacts with scheduled
activities which lets you schedule the activity on your calendar and on the
contact's Pending tab. When you complete the activity, it is moved to the
contact's History tab, creating a record of communication and activity.
About Scheduling Activities
You can schedule activities using one of the following methods:
•
The Calendar
•
The Pending Tab
•
The Schedule Menu
You can schedule the following activities:
•
Call
•
Next Action
•
Appointment
•
Literature Request
•
Forecasted Sale
•
Other Action
•
To-Do
•
Event
Use the Schedule dialog box for Calls, Next Actions, Appointments, Other
Actions, and Events to configure:
•
Detail. Schedule Activity details. See “Scheduling Activity Details” on
page 145.
•
Users. Schedule users to the activity. See “Scheduling Activities to Users”
on page 147.
•
Resources. Company resources you can schedule to the activity. See
“Scheduling Activities with Resources” on page 147.
•
Free/Busy. Available time of the scheduled users. See “Scheduling
Activities Based on Available Times” on page 148.
142 • Activities
GoldMine User Guide
•
Recurring. Schedule the activity to occur on a regular basis. See
“Scheduling Recurring Activities” on page 149.
•
Series. Schedule the activity to a group of contacts. See “Scheduling
Activities Based on Series” on page 151.
•
GoldAlarm. GoldAlarm can run and notify you of scheduled activities
even when GoldMine is not open on your computer. See “About
GoldAlarm” on page 161.
Scheduling Activities
Use the following procedure to schedule all of your activities.
You will notice that when you select an activity, the Schedule dialog box
reflects that activity. So if you schedule a call, the Schedule dialog box title is
Schedule a Call. If you are schedule a next action, the Schedule dialog box
title is Schedule a Next Action.
Use the following procedure to schedule an activity.”
1. Select Schedule>><an activity> (such as Call).
GoldMine User Guide
Activities • 143
2. At the Schedule <an activity>dialog box complete the following tabs.
•
Detail. Schedule Activity details. See “Scheduling Activity Details” on
page 145
•
Users. Schedule users to the activity. See “Scheduling Activities to Users”
on page 147
•
Resources. Company resources you can schedule to the activity. See
“Scheduling Activities with Resources” on page 147.
•
Free/Busy. Available time of the scheduled users. See “Scheduling
Activities Based on Available Times” on page 148
•
Recurring. Schedule the activity to occur on a regular basis. See
“Scheduling Recurring Activities” on page 149
•
Series. Schedule the activity to a group of contacts. See “Scheduling
Activities Based on Series” on page 151.
3. Click Schedule to complete scheduling the activity.
144 • Activities
GoldMine User Guide
Scheduling Activity Details
Use this procedure to schedule Calls, Next Actions, Appointments, Other
Actions, and Events.
1. Select Schedule>>(an activity such as Call).
2. At the Schedule (an activity)>> Detail tab, select the contact(s). To
schedule the activity to the current contact and to other contacts, click the
search button to the left of the Contact field. Select one option:
•
Select another contact from this record. List additional contacts for the
contact record.
•
Look up another contact. Launch the Contact Search Center.
•
Select multiple contacts. Open the Contact(s) & User(s) Selection dialog
box.
•
Create a new contact. Open the New Company and Contact dialog box.
3. In the Reference field, type a reference line or select an entry from the F2
Lookup list.
4. In the Notes field, type related notes.
Enhanced text options such as bold, italics, underline, font color, and spell
checker are allowed.
To change settings in the GM.ini file to display all activity Notes as simple
text rather than HTML, in the [GoldMine] section type
HTML_Cal_Notes=0 to disable the HTML Notes, or contact your system
administrator.
5. In the Options area, configure:
• Activity. Changes the type of activity to schedule without restarting the
process.
• Code. Identifies the activity from the F2 Lookup list.
• Opportunity/Project. Specifies the opportunity or project. Click New
to create one.
• Color. Specifies the activity color.
• Mark as Private. Makes the activity readable only by the creating
user. It is marked (Private) in the contact's Pending tab.
•
Link to selected contact. Maintains the connection between the activity
and the contact. Clearing this option removes the contact's name from the
contact text box and does not link to any contact.
GoldMine User Guide
Activities • 145
6. In the Primary User area, select the user or user group to assign the
activity to in the drop-down list.
7. In the Time area, configure:
• Date. Date of the activity using the F2 graphical calendar.
• Time. Time the activity starts using the F2 graphical clock.
• Duration. Select a Duration increment of Min (minutes) or Hr (hours)
in the right-hand drop-down list, then type or select the time in the lefthand box using the up and down arrows.
• Alarm. Select Alarm to enable notification before the time of the
activity. The time the alarm sounds defaults to 10 minutes before the
activity. Use the F2 Lookup graphical clock and calendar to set the
alarm's time and date.
8. In the Actions area, select:
• Notify via E-mail. Sends an e-mail message to the user or users the
activity is scheduled for or when the scheduled activity is changed.
• Auto-generate RSVP. Notifies you when the assigned user or users
complete the activity.
• Send a request with the activity to. Sends an e-mail notice of the
activity to the contacts, users, or both.
9. Click Schedule to save and close the dialog box.
146 • Activities
GoldMine User Guide
Scheduling Activities to Users
Select the Users tab allows delegate the scheduled activity to selected users or
user groups.
Use the following procedure to schedule an activity to users.
1. With the contact for which you want to schedule the activity open, select
Schedule.
Select one of the Schedule options. The Schedule <an activity >dialog box
opens.
2. Click the Users tab.
3. To change the Primary User, select a user in the drop-down list.
4. To select more users, highlight the user in the User List box and click Select.
The user name displays in the Selected Users box. Repeat as necessary.
5. To select user groups, highlight the user group in the User Group List box
and click Select. The members of the group display in the Selected Users
box. Repeat as necessary.
6. In the Actions area, select:
•
Delegate to User(s) to notify users with a carbon copy (Carbon Copy: used
in e-mail messages, memos, and letters) of the scheduled activity
•
Send Bcc: E-mail User(s) to notify users with a blind carbon copy (Blind
Carbon Copy: A copy of a message, usually e-mail, sent to a recipient that
the main recipients cannot see.) of the scheduled activity.
•
Send a request with the delegation to and select User(s), Contact(s), or
Both User(s) & Contact(s).
7. Click Schedule to save and close the dialog box, or click the Resources
tab to schedule resources.
Scheduling Activities with Resources
When scheduling activities, you can also schedule company resources.
Use the following procedure to schedule an activity with resources.
1. In the Schedule <an activity> dialog box, click the Resources tab.
2. Double-click a resource in the Resource List box.
The resource is moved to the Selected Resources box.
3. Click Schedule to save and close the dialog box.
GoldMine User Guide
Activities • 147
Scheduling Activities Based on Available Times
Before scheduling a meeting for multiple participants, determine a time when
all participants are available. Before GoldMine can scan the participants’
Calendars to determine their availability, specify attendees and resources.
All potential attendees must maintain their daily schedules in GoldMine and
the contact's free/busy times must be configured in GoldMine. After selecting
the meeting time, GoldMine schedules the meeting and informs participants.
Use the following procedure to schedule an activity based on available times
1. In the Schedule <an activity> dialog box, click the Free/Busy tab.
The busy time pane displays availability of selected users, resources, and
the contact.
2. Click Options to specify what types of appointments are scanned and your
display options. In the Display area:
• If you selected Show Contacts, the contact adds to the display.
• If the Internet free/busy information is not configured or the contact
does not publish his or her free/busy information, the contact's busy
time displays the message: Internet Free/Busy information is not
available, click here for help.
• Use the Add Free/Busy URL dialog box to can add the URL where the
contact's free/busy time is published. The URL you add in the dialog box is
added to the contact's Edit>>Record Properties>>Contact
Details>>Free/Busy tab.
3. The Scan Settings area initially displays a Start Date, End Date, and
Duration. The values in these fields default to the values specified on the
Detail tab.
To expand the busy time display, click on the arrow to display the F2
graphical calendar and select new beginning and ending dates and click
and then click Refresh.
4. To look for a compatible time, click Find Time scan option,
• Select dates and the activity duration and click Find Time.
• Scan Settings changes to display the date being scanned and the time.
GoldMine scans for a time based on the duration of the activity. The
Duration defaults to the duration specified on the Detail tab but can be
modified on the Free/Busy tab in to successfully schedule an activity.
5. Select another tab or click Schedule to add the activity to the calendar.
148 • Activities
GoldMine User Guide
Scheduling Recurring Activities
Schedule recurring activities based on any interval of time; for example,
schedule a weekly sales meeting for the next 3 months, an appointment on the
same day each week over the next 12 weeks, or a reminder to send important
clients a birthday card the week before their birthday each year.
Recurring activities can schedule follow-up calls or any type of repeating
tasks. They contain the same information as a nonrecurring activity, including
alarms and notes.
Important Considerations
•
The Hourly scheduling option is unavailable when scheduling forecasted
sales.
•
Settings defined in the Advanced Recurrence dialog box override settings
defined in the Recurring tab of the Schedule dialog box. For example, if the
Fixed Frequency is defined as Daily in the Recurring tab, yet you select
Monthly in the Advanced Recurrence dialog box, the Monthly selection
from the Advanced Recurrence dialog box overrides the Daily selection in
Recurring tab.
•
GoldMine and Microsoft Outlook do not recognize recurring activities
when created in the other application. For example, if a user schedules a
recurring activity in Outlook, then synchronizes to GoldMine, GoldMine
creates each activity but does not “link” them as instances of a series.
•
If a GoldMine user changes or deletes one instance of the series, GoldMine
does not prompt the user to change all members of the recurring activity.
The same response occurs in Outlook for recurring activities originally
scheduled in GoldMine.
GoldMine User Guide
Activities • 149
To schedule a recurring activity
1. In the Schedule <an activity> dialog box, click the Recurring tab.
2. In the Date Span area, select:
• Start Date. First date to schedule the recurring activity. When the
recurring activity is weekly or biweekly, the day of the week this date
falls on is the day of the week all subsequent activities fall on.
• End Date. Last date to schedule a recurring activity. GoldMine only
schedules an activity on this date if it falls on the correct day as
determined by the schedule frequency. GoldMine does not schedule
activities after this date.
3. In the Fixed Frequency area, select how often the activity is scheduled,
including:
• Common frequencies from Daily to Yearly.
• Every x days. Manually sets the number of days between activities.
• Skip Weekends. Schedules recurring activities falling on a Saturday or
Sunday for the following Monday.
To schedule a recurring activity sent to Outlook users via Meeting Request,
clear Skip Weekends, and use other scheduling options to select the days
the activity can occur on. When selected, Outlook only schedules the first
instance of the recurring activity and not remaining activities.
4. In the Monthly Occurrence area, select a day—as opposed to a date—of
the month the activity should fall on such as the first, second, or last week
of the month and the specific day of the week on which to schedule the
activity.
5. Click Reset to returns settings to the original recurring activity parameters.
6. Click More to open the Advanced Recurrence dialog box, with additional
settings and controls.
• To have the activity occur on every week or as you need, in the
Repeats area, click one of the radio buttons.
• To have the activity weekly on a certain day, in the By Day of the
Week area, select a day.
7. Click Schedule to save and close the dialog box.
150 • Activities
GoldMine User Guide
Scheduling Activities Based on Series
Use the scheduling Series tab to schedule a series of contacts with any number
of contacts.
Use the following procedure to schedule an activity based on a series.
1. In the Schedule <an activity > dialog box, click the Series tab.
2. Select the Schedule the activity at the same time for all selected
contacts radio button to schedule the same activity at the same time.
Select the Schedule a series of activities with different times for
different users radio button to schedule a series of activities.
3. In the Time area, select the following:
• Start Date. Select the start date of the activity.
• Daily start time. Select the start time.
• Daily end time. Select the end time.
• To skip the weekends, select the Skip weekends checkbox.
4. In the Set activity start times by area, select:
• Maximum activities per day. Select the number of activities to schedule
per day.
• Activity duration. Select the length of the activity.
5. Select Wrap up time after each activity and select the time allowed for
activity wrap up.
6. Click Schedule to save and close the dialog box.
GoldMine User Guide
Activities • 151
Auto-Updating Activities
Complete or delete activities for a user while working in the Activity List, the
Opportunity tab, Project Pending tab, or the contact's Pending tab. AutoUpdate is available on these specific tabs in the Activities List.
•
Open
•
To-do
•
Alarmed
•
Others
•
Calls
•
Actions
•
Appts
•
Forecasts
•
Events
Use the following procedure to auto-update an activity.
1. At the Activity List or the Pending tab, right-click in the tab and select
Options>>Auto-Update.
152 • Activities
GoldMine User Guide
2. At the Auto-Update Activities dialog box, select one of the following
options:
• Complete ALL of the Activities currently displayed. Completes
activities in the current tab and updates the specified Result and
Success.
• Complete selected Activity Type(s) Only. Completes activities
selected in the Activity Type area, the specified Date range, and
updates with specified Result and Success.
• In the Activity Types area, select the options to process:
•
Appointments. Scheduled appointments.
•
Calls. Scheduled calls.
•
Next Actions. Scheduled next actions.
•
Others. Scheduled other activities.
•
Events. Scheduled events.
•
Forecasted Sales. Scheduled sales.
•
To-dos. Associated to-do activities.
•
Lit. Requests. Scheduled literature requests.
•
E-mails (GoldMine). Pending GoldMine e-mail messages.
•
E-mails (Internet). Pending e-mail messages for the Internet.
•
Delete ALL of the Activities currently displayed. Deletes activities in the current tab.
•
Delete selected Activity Type(s) Only. Deletes activities selected
in the Activity Type area based on the specified Date range.
3. Specify a result code and success level for completed activities.
• Type a result code in the Result field.
• Select Successful or Unsuccessful from the Success drop-down list.
4. If you selected Complete or Delete selected Activity Type(s) Only, select
Date range, then From and To dates using the F2 graphical calendar.
5. Click OK.
GoldMine User Guide
Activities • 153
Scheduling Literature Requests
Literature options must be configured in the Literature Fulfillment Center
before you can add them as a scheduled activity.
For more information on the Literature Fulfillment Center, see “About the
Literature Fulfillment Center” on page 236.
Refer to the following example when following the procedure to schedule a
literature request.
Example: Schedule a literature request to remind the user to send literature
and a cover letter to contacts on a particular day.
1. Select Schedule>>Literature Request, or Actions>>Send Literature
Request to Contacts.
2. At the Schedule a Literature Request dialog box, click the Detail tab.
3. Click the Contact drop-down arrow to select from additional contacts or
click the right-facing arrow to launch the Contact Search Center and
search for a new contact.
154 • Activities
GoldMine User Guide
4. At the Cover Letter drop-down list, select a cover letter.
The user name displayed in the User field determines the templates
displayed in the Cover Letter text box. Select (public) to see all the
templates with an owner of (public).
If you do not need a cover sheet for your request, skip this step.
NOTE: The Cover Letter and User fields are linked to the
Document Management Center.
5. At the Literature List drop-down list, select the literature type.
The items included in the list display in the text window below the
Literature List.
6. To schedule the literature request to a particular user, select the user in the
Assigned to drop-down list.
The request appears on the assigned user's calendar.
7. At the Code field, select the code in the F2 Lookup list to categorize the
request.
The activity code can be used to analyze specific completed activities.
8. At the Send Date field, select a send date using the F2 Lookup graphical
calendar.
9. Select the Alarm for GoldMine checkbox to alert the assigned user of the
activity before the scheduled time.
10. Select the RSVP checkbox to be notified when the assigned user completes
the activity.
11. At the Special Instructions field, type any instructions to the assigned
user.
12. At the Opportunity/Project field, select an opportunity/project o associate
the literature request with a particular opportunity or project or click New
to create a new opportunity or project.
13. Click Schedule to complete the process, or select the Series tab to assign
the literature request to a group of contacts.
14. For the procedure to complete the Series tab see “Scheduling Activities
Based on Series” on page 151.
GoldMine User Guide
Activities • 155
Scheduling Forecasted Sales
A forecasted sale is an estimate to record the anticipated close date of a
pending sale with one of your contacts. Forecasted sales are different from
other activities because they include a product or service, an anticipated sale
amount, and the probability of the sale closing.
For more information on scheduling forecasted sales, see “Scheduling
Forecasted Sales” on page 248.
About Completing Activities
Use the Complete menu to record any activity you complete, whether
scheduled or unscheduled. For example, if a contact calls unexpectedly, make
a notation in the history file, even though a call was unscheduled. In this
situation, select the type of activity to complete from the Complete menu.
After completing a scheduled activity, the Calendar record is removed and a
record is posted to the linked contact’s history file indicating what was
accomplished.
Complete a scheduled activity from:
•
The Contact record’s Pending tab
•
An Activity List's tabs
•
The Calendar
•
The Complete menu
•
Scheduled Calls
•
Unscheduled Calls
•
Message
•
Next Action
•
Appointment
•
Sale
•
Other Action
•
Event
•
To-do
•
Correspondence
156 • Activities
GoldMine User Guide
•
•
•
•
Letter/Memo
Literature Request
Pending Activities
If more than one than one activity is of the same type, the Complete
Activity dialog box appears to select the activity to complete.
NOTE: Configure your Calendar to display completed
activities. Right-click to display the local menu, then select
Activities, or click the Select Activities button. The Select
Activities to View dialog box appears. In the Completed
Activities column, select each activity type to display.
Completing Activities
Complete a scheduled or unscheduled activity such as a call, unscheduled
calls, message, next action and so on.
Use the following procedure to complete a scheduled activity (such as a call).
1. Access the Complete menu by one of these methods:
• Selecting Complete>><an activity> from the toolbar.
• At the contact's Pending tab, the Activity List, or the Calendar, select
the contact record, then right-click on the record and then select
Complete.
GoldMine User Guide
Activities • 157
2. At the Complete Activity for <company> dialog box, at the Scheduled
Call area, right-click on the contact record you want.
158 • Activities
GoldMine User Guide
3. At the Complete the <an activity> dialog box, select and complete the
following:
• Contact. The contact record name if the default. If you want to select
another user, click the down-arrow and select from the list of users.
• Activity. Select the type of activity you are completing for this
scheduled call, for example Call Back, Call-in, Event, and so on.
• User. Select the user completing the call.
• Private. Click this checkbox if the completed activity will be available
only to the selected user.
• Reference. Type in or select the reference.
• Opportunity/Project. Select the associated opportunity and/or project
in the drop-down list. Click New to create a new opportunity
• Or Case. If you are selecting a case instead of an opportunity/project,
select the case number. Click New to create a new case.
• Code. Type or select the code from the F2 Lookup list. This is the code
to categorize the completed calls by.
• Result. Type or select the result code from the F2 Lookup list. This is a
completion code to categorize the outcome of calls by.
You can use result codes to analyze specific completed activities. For
example, enter SDM as the result code whenever you send out a demo or
sample.
•
•
•
•
•
Date. Select the completion date by clicking the down-arrow and
selecting the date in the F2 graphical calendar.
Time. Select the completion time by clicking the down-arrow and
selecting the time in the F2 graphical clock.
Duration. Type or select the duration of the activity in the F2 Lookup
list.
Success. Select Successful or Unsuccessful depending on the outcome
after the call.
Notes. Type any notes about this call in the text area.type or append
added notes.
To see the toolbar, click inside the box.
•
Schedule a Follow-up. Select this checkbox and then select the type of
follow-up, for example, Call, Appoint. Next Action, and so on.
4. Click OK to return to the Complete a Call dialog box.
GoldMine User Guide
Activities • 159
Completing Letters and Memos
You can use this procedure to complete a letter or memo on a contact's Pending
tab, the Activity List, the Calendar, or the Complete menu.
Use the following procedure to complete a letter or memo.
1. Highlight the document, right-click, and select Complete,
or
Select Complete>>Correspondence>>Letter/Memo.
2. At the Complete a Form dialog box, click the Contact drop-down arrow to
select from additional contacts or click the right-facing arrow to launch the
Contact Search Center and search for a new contact.
3. In the Activity drop-down list, select the type of activity you are
completing for this correspondence.
4.
5.
6.
7.
8.
At the User field, select the user completing the correspondence.
Select Private if the document will be available only to the selected user.
Type or select the Reference.
Select the associated Opportunity/Project in the drop-down list.
Type or select the Code from the F2 Lookup list.
This is the code by which you categorize the correspondence.
9. Type or select the Result code from the F2 Lookup list. This is a
completion code by which to categorize the outcome of the
correspondence.
NOTE: You can use result codes to analyze specific
completed activities. For example, enter SDM as the result
code whenever you send out a demo or sample.
10. Select the completion Date in the F2 graphical calendar.
11. Select the Time in the F2 graphical clock.
12. Type or select the Duration in the F2 Lookup list.
13. n the Success drop-down list, select Successful or Unsuccessful.
14. In the Notes field, type or append added notes.
15. Select Schedule a Follow-up and the type of follow-up, Call, Appt., Next
Action, and so on, in the drop-down list and then click OK.
160 • Activities
GoldMine User Guide
About GoldAlarm
The GoldAlarm runs the alarm options in GoldMine even when you are not
logged into the application. When scheduling an activity, you can select the
Alarm option.
Configure alarm settings by completing the User Preferences>>Alarm tab to
pop up a window or post the alarm on the taskbar. For the procedure to set
GoldAlarm, see “Setting Options for the Alarms Tab” on page 50.
•
Place GoldAlarm icon on my desktop. Lets you run the GoldAlarm.exe.
The GoldAlarm monitors alarmed activities and notifies you even when
GoldMine is closed.
•
Run GoldAlarm when Windows starts. Runs the GoldAlarm.exe when
Windows starts.
When GoldAlarm is running you see a taskbar notice if an activity is due and a
GoldMine icon in the System Tray.
About the Activity List
The Activity List displays activities related to a GoldMine user. Use it to view
and modify your own activities and view and modify scheduled activities,
completed activities, and e-mail for other GoldMine users.
The Activity List contains two sections: the Toolbar and the Main Window.
To open the Activities list, select Go To>>Activities, or click the Activities
button in the Navigation Pane. The Activity List appears.
Browse the Activity List using the browser in the Navigation Pane View
Window. Folders include Open Activities, Closed Activities, and E-mail.
Occasion and Holiday scheduling windows are also included. Browse to the
desired activity type, mailbox, or scheduling window to populate the table in
the main window. Use settings in the Activity List toolbar to further narrow
your selection.
•
Holidays. List holidays selected in the Calendar tab of your User
Preferences.
•
Occasions. List special dates defined in your Calendar.
GoldMine User Guide
Activities • 161
Activity List Toolbar
When you click on the Activity List tab, the Activity List toolbar appears with
the following tools.
Schedule button. This button allows you to schedule your activity. Click on
the down-arrow and select the type of action you want. For example, if you
want to schedule a call, select Call, or to schedule an appointment, select
Appointment. A corresponding popup window where you can select
scheduling options appears for each selection.
Show button. This button allows you to select the list of activities you want to
view. For example, you can see all activities, or activities for Today or This
Week or This Month. Click on the down-arrow to select a view. To see
activities within a date range, select Date Range and at the popup window,
select the dates.
User button. This button lets you view activities for a user or for the users on a
master list. Click the down-arrow to select a User or Master.
Link button. This button allows you to link an activity to a user, roll over an
activity to another User or automatically update several activities at one time.
Click the down-arrow button to select Link, Rollover or Auto Update. Select
Output to send the Activities List output to a printer, Microsoft Word, or
Microsoft Excel. A corresponding popup window where you can select your
link or rollover options appears for each selection.
Edit button. This button allows you to edit an activity. For example, you can
change the Activity, or the User, or the scheduled Date and Time of the
activity. Select an activity and then click the Edit button. A popup window
where you can edit your activity appears.
Complete button. This button allows you to view and/or edit a completed
task. For example, you might complete a sale but you want to Schedule a
Follow-up phone call, or add Notes to the activity. Select the activity and click
the Complete button. A popup window where you can add or edit your activity
appears.
162 • Activities
GoldMine User Guide
Activity List Main Window
The Activity List Main Window contains three panes:
Table panel. A
table pane displaying activities, which may be sorted and filtered
by any of its five columns. Use the drop-down menu at the head of each
column to select sort criteria, or select custom to open the Custom Autofilter
dialog for the selected column.
Summary panel. A summary pane at the bottom left of the Activity List Main
Window displays Creation, Updated, Contact, Company, Phone, and
Extension fields for the selected activity.
Reference panel. A reference pane at the bottom right of the Activity List
Main Window displays Reference and Notes fields for the selected activity.
Activity List Options Sub-Menu
The Activity List Options sub-menu consists of the following:
Date Range. Displays a date range submenu. Specify the range of dates to
display activities for in the Activity List. See “Activity List Date Range
Dialog” on page 164.
User. Displays the Select a User dialog box. Select a GoldMine user's activities
to view.
Activities. Displays the Select Activities to View dialog box to display activity
types. By default, display all scheduled activity types except opportunities and
projects. Not available for the Actions tab (only Next Actions).
View. Displays options.
GoldMine User Guide
Activities • 163
Detailed View. Displays the details of the selected activity display in the lower
portion of the Activity List.
Sync Contact. Displays the contact linked to the selected activity in the
Activity List.
Show Contact. Displays the name of the contact in the Contact column of the
browse window.
Show Company. Displays the name of the company in the Contact column of
the browse window.
Link. Displays the links a selected activity to the active Record.
Roll-over. Displays the Roll over ALL displayed activities dialog box. Forward
activities to another user and/or another date.
Auto-Update. Displays the Auto-Update Activities dialog box. Complete or
delete multiple activities for a selected user. This option is available only on
selected activity tabs.
Filter. Activity Filter dialog box. Define conditions for selecting activity
records to display.
Activity List Date Range Dialog
The Activity List displays activities for all dates by default; to select from a
broad range of dates, select an option from the Date Range dialog.
All Date. Displays all activities without regard for date.
Date Range. Opens the Activity Date Range dialog box. Options are similar to
the menu items.
Today and Prior. Today's activities and past activities.
Yesterday. Yesterday's activities.
Today. Today's activities.
Tomorrow. Tomorrow's activities.
Day After. Day after tomorrow's activities.
This Week. This week's activities.
Next Week. Next week's activities.
Last Week. Last week's activities.
This Month. This month's activities.
Next Month. Next month's activities.
164 • Activities
GoldMine User Guide
Last Month. Last month's activities.
This Year. This year's activities.
Next 7 Days. Activities scheduled for the next seven days.
Past 7 Days. Activities scheduled for the last seven days.
30 Day Window. Displays the current 30 days.
Using the Activity List
The Activity List displays activities as a categorized list. Control actions to
perform on activities through the local menus.
Use the following procedure to use the activity list.
1. Select Go To>>Activities, or select Activities from the Navigation Pane.
The Activity List appears.
2. Select an activity from the View Window (see “View Window: Activity
List” on page 167) or the browser in the Navigation Pane (see “Navigation
Pane” on page 33.) The activities are:
Open Activities: Expand folder and select from the following
•
Actions: Display open Actions for this user
•
Appts: Display open Appointments for this user
•
Calls: Display open Calls for this user
•
Events: Display open Events for this user
•
Forecasts: Display open Forecasted Sales for this user
•
Others: Display open Other Actions for this user
•
To-do: Display open To-dos for this user
•
Opp/Proj Tasks: Display open Opportunity and Project
tasks for this user
•
Alarmed: Display all activities with Alarms scheduled for
this user
GoldMine User Guide
Activities • 165
Closed Activities: Expand folder and select from the
following
•
Actions: Display closed Actions for this user
•
Appts: Display closed Appointments for this user
•
Calls: Display closed Calls for this user
•
Events: Display closed Events for this user
•
Forecasts: Display closed Forecasted Sales for this user
•
Others: Display closed Other Actions for this user
•
To-do: Display closed To-dos for this user
•
Opp/Proj Tasks: Display closed Opportunity and Project
tasks for this user
•
Real Time: Display a chronological listing of activities for
this user
E-mail: Expand Folder and select from the following
•
Inbox: Display messages in the inbox of the E-mail
Center
•
Outbox: Display messages in the outbox of the E-mail
Center
•
Filed: Display messages that have been previously filed
in the E-mail Center
Occasions: Display Occasions set in your Calendar
Holidays: Display Holidays set in your Calendar User
Preferences
3. To perform an action, such as completing a call or replying to an e-mail,
right-click on an activity in the Activity List Main window.
4. At the local menu, select the action.
5. Reverse the sort order of the activities on the screen, click on the column
title (the exception is the Contact column).
6. Click X to close the window.
166 • Activities
GoldMine User Guide
View Window: Activity List
A fully navigable browser of Scheduled Activities appears in the view
window. Browse to an activity, mailbox, occasion listing, or holiday listing to
highlight it in the main window. Note that settings in the Show menu on the
main window of the Activity List will effect what information is available to
view.
GoldMine User Guide
Activities • 167
View Scheduled Activity Zoom
Use the Scheduled Activity Zoom to view basic information about an activity
and complete or delete the activity.
Use the following procedure to use the Activity Zoom.
1. Right-click an activity and select Zoom on the local menu.
2. At the Scheduled Activity Zoom dialog box, select the following:
• Activity. Activity type
• Code. Assigned code
• Name. Linked contact name
• Company. Name of the linked company
• Phone. Phone number
• Reference. Reference assigned to the activity
• Alarm. If Yes, the activity has an alarm
• RSVP. If Yes, an RSVP is required from users
• Scheduled. Primary user and date for the activity's scheduled time
• Creation. The creating user and time created
• Updated. If updated after creation, the updating user and the time of
update.
• Text area. Displays other assigned users, resources, and notes
3. To scroll through activities, click Previous or Next or click the up and
down arrows beside Previous.
4. Click Complete.
The Complete Activity dialog box opens.
5. To remove the displayed activity, click Delete.
When confirmed, the activity is deleted without creating a history record.
6. Click Close.
168 • Activities
GoldMine User Guide
Printing Activities
You can print a single activities or all activities for a contact record.
To print all activities
1. Navigate to GoTo>>Activities.
2. Right-click on any activity and select Output to>>Printer>>All entries.
3. The list of activities opens.
4. Click the Printer icon and then click OK.
To print a single activity
1. Navigate to GoTo>>Activities.
2. Right-click on any activity and select Output to>>Printer>>Current
selection.
3. The activity report for that selection opens.
4. Click the Printer icon and then click OK.
To print an activity from the Pending tab
1. At the Contact view, double-click on a contact.
2. At the Contact Detail view, select the Pending tab.
3. Select the activity you want to print.
4. Right-click on any activity and select Output to>>Printer>>Current
selection.
5. The activity report for that selection opens.
6. To print all activities, select All entries.
7. Click the Printer icon and then click OK.
To print an activity from the Calendar
1. Navigate to GoTo>>Calendar.
2. Right-click on the activity you want to print and select Output
to>>Printer>>Current selection.
3. The activity report for that selection opens.
4. To print all activities, select All entries.
5. Click the Printer icon and then click OK.
GoldMine User Guide
Activities • 169
170 • Activities
GoldMine User Guide
Calendars
About the Calendar
The Calendar works as a time management tool. Quickly determine what is
scheduled and review available times for new appointments and activities. The
Calendar displays day, week, month, year, planner, and outline calendars for a
single user or for a group of users. You can launch the calendar and leave it
running in the GoldMine work area.
Calendar Toolbar
The Calendar toolbar consists of these buttons. The default values are:
•
Schedule. Click on this button to access the activities you can schedule
from your calendar. The dialog box for the activity opens.
•
Show. Click on this button to show a particular day or activity. The dialog
box for the date or activity opens.
•
User. Click on this button to select the user of the calendar you want to
view. The Select Users dialog box opens. Select from the User List or
Group List.
GoldMine User Guide
Calendars • 171
•
Today. Select the date and/or activity you want to view. Select an activity
and then select a date or activity. The dialog box for the date or activity
opens.
•
Edit. Select an activity and click this button. Make the changes as needed.
•
Complete. Select a task and click this button to complete an activity
NOTE: The drop-down buttons (other than Schedule) are ‘split’
buttons which means the name of the button will change as you
make your selections. For example, if you select the Today button
and then select a menu item, you will see a name of the menu item
as the name of the button.
Accessing Your Calendar
The Calendar displays scheduled activities for the selected user or user group.
Use the following procedure to open your calendar or a calendar of another
user.
1. Select Go To>>Calendar
or
Select F7
or
Click Calendar on the Navigation Panel.
Your calendar opens.
2. To see calendars of other users, select the user or user group in the User
drop-down list.
172 • Calendars
GoldMine User Guide
Using the Calendar
The Calendar displays scheduled activities for the selected user or user group.
Use the following procedure to use your calendar functions.
1. Select Go To>>Calendar or select F7, or click Calendar on the Navigation Panel.
Your Calendar appears.
•
To see calendars of other users, select the user or user group in the User
drop-down list.
2. To change your view, click a tab:
• Day. See “Using the Daily Calendar” on page 174.
• Week. See “Using the Weekly Calendar” on page 175
• Month. See “Using the Monthly Calendar” on page 176
• Year. See “Using the Yearly Calendar” on page 177
• Planner. See “Using the Planner Calendar” on page 178
• Outline. See “Using the Outline Calendar” on page 179
• Peg Board. See “Using the Peg Board” on page 180
3. Click the toolbar options to schedule and complete activities, move through
the calendar, set the display, delete and edit the scheduled activities.
4. Right-click and select the local menu options to manage specific activities,
synchronize and set the output to options, change users, and access other
options.
GoldMine User Guide
Calendars • 173
Using the Daily Calendar
The calendar is user-based, letting you see your scheduled activities and
quickly determine available times when scheduling for yourself or up to 16
other users.
Use the following procedure to use your daily calendar.
1. Select Go To>>Calendar.
2. At your calendar, click on the Day tab at the bottom of the window.
Your daily calendar opens displaying today’s date.
To see another date, click the arrows in the top right corner of the window
to display the date you want.
3. To see other calendars, click the User drop-down to select the user for
whom you want to view activities.
• Select the name in the drop-down User list, or select (Multiple Users)
to open the Select Users dialog box.
• Double-click the user in the User List box or user group in the Group
List box to add to the Selected Users list. Click OK to close the Select
Users list.
4. Click the local menu to manage the activities.
Right-click and select a local menu option.
5. To change the day displayed, click the Today button on the Calendar
toolbar.
The calendar view refreshes and the page for today displays.
6. Click the tabs to access:
• Week. Displays the week, Sunday through Saturday.
• Month. Displays the month.
• Year. Displays the entire year with scheduled days highlighted.
• Planner. Activities of the selected user for today and the next 22 days.
• Outline. Scheduled activities in a hierarchical tree structure, with
branches that correspond to years, months, and days.
• Peg Board. Login status and activity of individual users and system
availability.
174 • Calendars
GoldMine User Guide
Using the Weekly Calendar
The Week tab displays the week, Sunday through Saturday.
1. Select Go To>>Calendar. Your Calendar appears.
2. Click on the Week tab you can select the users activities to display.
• Select the name in the drop-down User list, or select (Multiple Users)
to open the Select Users dialog box.
• Double-click the user in the User List box or user group in the Group
List box to add to the Selected Users list. Click OK to close the Select
Users list.
3. Use the local menu to manage the activities. Right-click and select a local
menu option.
4. To change the day displayed, click the Today button on the Calendar
toolbar.
5. Click the tabs to access:
• Day. Activities scheduled for the day.
• Month. Displays the month.
• Year. Displays the entire year with scheduled days highlighted.
• Planner. Activities of the selected user for today and the next 22 days.
• Outline. Scheduled activities in a hierarchical tree structure, with
branches that correspond to years, months, and days.
• Peg Board. Login status and activity of individual users and system
availability.
GoldMine User Guide
Calendars • 175
Using the Monthly Calendar
The Month tab displays schedule-related information for the month.
1. Select Go To>>Calendar. Your Calendar appears.
2. Click on the Month tab you can select the users activities to display.
• Select the name in the drop-down User list, or select (Multiple Users)
to open the Select Users dialog box.
• Double-click the user in the User List box or user group in the Group
List box to add to the Selected Users list. Click OK to close the Select
Users list.
3. Use the local menu to manage the activities. Right-click and select one
local menu option.
4. To change the day displayed, click the Today button on the Calendar
toolbar.
5. Click the tabs to access:
• Day. Activities scheduled for the day.
• Month. Displays the month.
• Year. Displays the entire year with scheduled days highlighted.
• Planner. Activities of the selected user for today and the next 22 days.
• Outline. Scheduled activities in a hierarchical tree structure, with
branches that correspond to years, months, and days.
• Peg Board. Login status and activity of individual users and system
availability.
176 • Calendars
GoldMine User Guide
Using the Yearly Calendar
The Year tab displays schedule-related information for the month.
1. Select Go To>>Calendar. Your Calendar appears.
2. Click on the Year tab you can select the users activities to display.
• Select the name in the drop-down User list, or select (Multiple Users)
to open the Select Users dialog box.
• Double-click the user in the User List box or user group in the Group
List box to add to the Selected Users list. Click OK to close the Select
Users list.
3. Use the local menu to manage the activities. Right-click and select one
local menu option.
4. To change the day displayed, click the Today button on the Calendar
toolbar.
5. Click the tabs to access:
• Day. Activities scheduled for the day.
• Month. Displays the month.
• Year. Displays the entire year with scheduled days highlighted.
• Planner. Activities of the selected user for today and the next 22 days.
• Outline. Scheduled activities in a hierarchical tree structure, with
branches that correspond to years, months, and days.
• Peg Board. Login status and activity of individual users and system
availability.
GoldMine User Guide
Calendars • 177
Using the Planner Calendar
When you are scheduling activities for others, you can use the Planner to view
their schedules. Each users activities are represented by a colored bar showing
the amount of time reserved for the activity.
By default, the Planner tab displays the activities of the currently logged in
user for 22 days from the current date.
1. Select Go To>>Calendar. Your Calendar appears.
2. Click on the Planner tab you can select the users activities to display.
• Select the name in the drop-down User list, or select (Multiple Users)
to open the Select Users dialog box.
• Double-click the user in the User List box or user group in the Group
List box to add to the Selected Users list. Click OK to close the Select
Users list.
3. Use the local menu to manage the activities. Right-click and select one
local menu option.
4. To change the day displayed, click the Today button on the Calendar
toolbar.
5. Click the tabs to access:
• Day. Activities scheduled for the day.
• Month. Displays the month.
• Year. Displays the entire year with scheduled days highlighted.
• Planner. Activities of the selected user for today and the next 22 days.
• Outline. Scheduled activities in a hierarchical tree structure, with
branches that correspond to years, months, and days.
• Peg Board. Login status and activity of individual users and system
availability.
178 • Calendars
GoldMine User Guide
Using the Outline Calendar
The Outline tab displays your scheduled activities in a hierarchical tree
structure with branches corresponding to years, months, and days.
1. Select Go To>>Calendar. Your Calendar appears.
2. Click on the Outline tab you can select the users activities to display.
• Select the name in the drop-down User list, or select (Multiple Users)
to open the Select Users dialog box.
• Double-click the user in the User List box or user group in the Group
List box to add to the Selected Users list. Click OK to close the Select
Users list.
3. Use the local menu to manage the activities. Right-click and select one
local menu option.
4. To change the day displayed, click the Today button on the Calendar
toolbar.
5. At the tree display:
• Year. As the highest level in the hierarchy, a year contains all activities
grouped by months. To display the months associated with the year,
double-click the year.
• Month. Depending on whether you selected Show Word Days Only on
the local menu Options area, each month displays all calendar dates or
only your working days for the month. All specified dates appear
regardless of whether activities are scheduled. To display individual
dates in a month, double-click the month.
• Date. Each date lists all scheduled activities. The associated user
displays if you display more than one user's calendar. To display the
activities, double-click the date.
NOTE: To display all the listings under a year or month, select
Options>>Expand All from the local menu.
6. Click the tabs to access:
• Day. Activities scheduled for the day.
• Month. Displays the month.
• Year. Displays the entire year with scheduled days highlighted.
GoldMine User Guide
Calendars • 179
•
•
•
Planner. Activities of the selected user for today and the next 22 days.
Outline. Scheduled activities in a hierarchical tree structure, with
branches that correspond to years, months, and days.
Peg Board. Login status and activity of individual users and system
availability.
Using the Peg Board
The Peg Board displays the login status and activity of individual users. For the
users, the Peg Board tracks the login and logout times, total logged time, and
keyboard and mouse-click activity.
1. Select Go To>>Calendar. Your Calendar appears.
2. Click the Peg Board tab.
3. Use the local menu to manage the activities. Right-click and select one
local menu option.
On the Peg Board, the tacks indicate whether a user is currently logged in
(green), logged away (yellow), or logged out (red).
4. To post your Whereabouts for others, right-click and select Log Away.
In the My whereabouts text box, type or select your whereabouts.
5. In User Inactivity area, blue bars indicate the length of time a user is
inactive, based on the absence of mouse clicks or keystrokes.
The Peg Board displays a column indicating when user's systems perform
various actions.
•
•
•
The gear symbol indicates the user is performing batch processing,
such as globally replacing fields or synchronizing.
The bell symbol indicates the user logged away but is still logged into
GoldMine.
The question mark indicates the user terminated without logout.
6. Users with Master Rights can force all users to exit GoldMine to perform
maintenance on the system. The forced logout grants users a specified
amount of time to save their work before being logged out.
NOTE: A Master user can also force a single user to log
out by double-clicking the user's green tack in the Peg
Board display.
180 • Calendars
GoldMine User Guide
7. Click the tabs to access:
• Day. Activities scheduled for the day.
• Month. Displays the month.
• Year. Displays the entire year with scheduled days highlighted.
• Planner. Activities of the selected user for today and the next 22 days.
• Outline. Scheduled activities in a hierarchical tree structure, with
branches that correspond to years, months, and days.
NOTE: By default, GoldMine periodically updates the
Peg Board display beneficial for notebook PCs that use
power conservation features that shut down the hard disk.
To disable the periodic update feature, enter
UpdatePegboard=0 in the [GoldMine] section of
Username.ini.
Using the Task List in the Calendar
1. Select Go To>>Calendar.
The Calendar window opens.
The Task list displays on the Day, Week, or Planner calendar and displays
pending Forecasted Sales, Literature Requests, Events, and To-Do items.
2. Use the local menu to manage tasks. Highlight the item and right-click.
• Schedule. Schedule an activity.
• Complete. Remove task from the Task list and saves it as history.
• Reply. Open an e-mail message addressed to the creator of the task.
• E-mail Contact. Write a new e-mail message to the creator of the task
• Delete. Delete the task from the list.
• Edit. Open the appropriate dialog box for the selected task. Edit the
contents.
GoldMine User Guide
Calendars • 181
Using Occasions in the Calendar
Occasions are one-time or recurring events to display on your calendar. Link
the occasion to a contact or leave it unlinked. Or set an alarm on the occasion
to remind you in advance.
Occasions displayed in the Calendar on the day of creation. View all occasions
on the Occasions tab of the Activity List. Occasions are not linked to a
contact's until you schedule an activity from the activated GoldMine Occasion
Alarm.
•
New. Adds an occasion.
•
Delete. Deletes the selected occasion.
•
Edit. Displays the Edit an Occasion dialog box. Edit the information.
Adding or Editing Occasions
Use the following procedure to add or edit an occasion.
1.
Select an option:
• On the Day or Week tab of the Calendar, right-click the Occasions list
area.
Select New or Edit. The Detail tab of the Edit an Occasion dialog box
opens.
or
•
Select Edit>>Record Properties>>Contact Details. The Contact
Details dialog box opens.
Select the Occasions tab and click New. The Detail tab of the Edit an
Occasion dialog box opens.
182 • Calendars
GoldMine User Guide
2. Type the occasion name in the Reference text box.
3. Click the search button beside the Contact text box. and select one option:
• Select another contact from this Record. Select an additional contact
on the current contact record.
• Look up another contact. Opens the Contact Search Center to search
for a contact.
• Create a new contact. Opens the New Company and Contact dialog
box to create a new contact.
4. Type any notes about the occasion in the Notes field.
5. If the occasion is assigned to another user, select from the User drop-down
list.
6. Select a category, such as birthday, in the Category drop-down list.
7. In the Options area, configure:
• Code. Select the code in the F2 Lookup list.
GoldMine User Guide
Calendars • 183
•
Color. Select the calendar display color for the occasion in the dropdown list.
• Mark as Private. Select to keep others from seeing the occasion on the
Pending tab.
• Link to Contact. Select to link the occasion to the contact record and
display on the Pending tab.
8. Click the Date Span tab.
9. In the When area, select the starting Date from the F2 graphical calendar
and type or select the number of days in the Duration: x day(s) field.
10. To place an alarm on the occasion, select Before: x day(s) and type or
select the number of days.
11. In the Occurs area, select the frequency of the occasion in the Every: x
year(s) field and select one of the following:
12. By Specific Date. Select the month and day in the drop-down lists.
13. By Day of the Week. Select the week of the month, day of the week, and
month in the drop-down lists.
14. Click OK to close the window and add the occasion to the calendar.
Occasions are linked to contacts but not displayed on the contact record
until an activity is scheduled from the GoldMine Occasion Alarm dialog
box appearing at the time specified on the Date Span tab.
Deleting an Occasion
1. Select Edit>>Record Properties>>Contact Details. The Contact Details
dialog box opens.
2. Select the occasion and then click Delete.
184 • Calendars
GoldMine User Guide
About Sharing Free/Busy Times
Scheduling becomes more dynamic and efficient when you and your contacts
share free/busy times. As a GoldMine user you can publish your free/busy time
in an iCalendar recognized format, making it available to non-GoldMine users
for easy scheduling and to save time when proposing and counter-proposing
meeting times between participants.
GoldMine users can view a contact’s published free/busy time in the GoldMine
calendar when scheduling an activity.
Shared Free/Busy Times Example
GoldMine's ability to publish and to read calendar data provides efficient
collaboration with non-GoldMine users.
The following table displays some scenarios where you may use the various
options to improve your ability to work with outside contacts and with users
who may not have immediate access to GoldMine:
Action
Configuring user
free/busy settings
GoldMine
Outlook
Tools>>Options>>Calendar>>Mor Tools>>Options>>Calendar
e Options>>Free/Busy (.ifb)
Options>>Free/Busy
Options (.vfb)
See the Outlook online Help for
more detailed information.
Initializing user free/
busy publishing
Automatically: After the Free/Busy
tab is configured, GoldMine begins
publishing based on a specified
time.
Manually: Web>>Publish
Calendar>>Publish Free/Busy
Times.
Automatically: After the Free/
Busy Options are configured,
Outlook begins publishing based
on a specified time.
Reading a contact's
published free/busy
time
Select contact record and then
Edit>>Record
Properties>>Contact
Details>>Free/Busy tab (.ifb)
Select Contact and click the
Details tab. Complete the
Internet Free-Busy Address.
Scheduling based on Select Schedule>>Select activity
free/busy times
and configure Detail, Resources,
and Free/Busy. Click Options and
select Show Contacts.
GoldMine User Guide
In Calendar, select
Actions>>Select activity.
Select Attendee
Availability>>Invite Others.
Select contact with published
free/busy information.
Calendars • 185
Action
Distributing your
free/busy URL to
others
GoldMine
Copy and paste the URL into an email message to send to a contact.
Outlook
Add to the Details tab of your
Contact record and save as
vCard (.vcf). When you send a
vCard with your signature, the
free/busy URL is included.
Scheduling Based on Free/Busy Times
1. Select Schedule>><an activity> and configure Detail, Resources, and
Free/Busy fields.
2. Click Options and select Show Contacts.
3. In Calendar, select Actions>>select activity.
4. Select Attendee Availability>>Invite Others and select contact with
published free/busy information.
For more information on free/busy times, see the GoldMine 8.5
Administrators Guide.
Distributing Your Free/Busy URL to others
1. Copy and paste the URL into an email message to send to a contact.
2. Add to the Details tab of your Contact record and save as vCard (.vcf).
When you send a vCard with your signature, the free/busy URL is included
For more information on free/busy times, see the GoldMine 8.5
Administrators Guide.
Setting Free/Busy Times
For GoldMine to read a contact's published free/busy times, you must
configure the contact's Contact Details to access the file. After setting the path,
you should see the contact's free/busy times when using the Free/Busy tab while
scheduling an activity.
Use the following procedure to set free/busy times.
1. With the contact record active in GoldMine, select Edit>>Record Properties>>Contact Details.
186 • Calendars
GoldMine User Guide
2. At the Contact Details dialog box, select the Free/Busy tab.
3. In the Contact's name drop-down list, leave the primary contact name or
select an additional contact's name.
4. In the Free/Busy URL drop-down list, select file, ftp, or http. In the text
box type or browse to the location where the file is published. If you select
ftp, type the Username and Password in the text boxes.
The configured URLs appear in the Contact pane.
5. To add a new contact to the Contact list, click New and complete the various
drop-down boxes and text boxes as needed.
6. To remove a URL from the pane, select the contact and click Delete.
7. Click OK to close and save the URL.
If accessing a contact's free/busy time on an http location, you must
configure the Internet Information Services to accept .ifb. See the
GoldMine 8.5 Administrators Guide for more information.
GoldMine User Guide
Calendars • 187
Configuring Free/Busy URLs
For more information on configuring IIS to access .ifb file types, see the
GoldMine 8.5 Administrator’s Guide.
About Scheduling from Meeting Requests
The GoldMine Meeting Request option emails meeting request to GoldMine,
Outlook, and other iCalendar-enabled applications.
You can:
•
Be the meeting organizer or the recipient of the e-mail meeting request.
Schedule an activity from a Meeting Request received in your e-mail from
a contact, whether the sender created the activity in GoldMine or another
iCalendar-enabled contact management application.
•
Retrieve the meeting notice as you would in other Internet e-mail. After
retrieving the notice, if you accept, GoldMine records the activity in your
Calendar.
•
GoldMine decrypts the winmail.dat meeting requests created by Outlook
and displays them to users, making it easier to work with Outlookgenerated meeting requests.
When retrieving e-mail messages from GoldMine’s E-mail Center, the
incoming messages look like the following:
188 • Calendars
GoldMine User Guide
Creating Meeting Requests
As organizer of an activity, you can send a meeting request for the activity to a
user or contact who has iCalendar enabled.
Use the following procedure to create a meeting request.
1. Select Schedule>><an activity>. appears.
2. At the Schedule an activity dialog box, complete the Details tab with the
appropriate information.
3. On the Details tab, select Send a Meeting Request to the contact.
4. On the Users tab, select the GoldMine users to include in the activity.
5. On the Resources tab, select the resource(s) to schedule with the activity.
6. On the Recurring tab, select the date span, frequency, and monthly schedule
of a recurring activity.
Outlook is unable to resolve the Skip Weekends option in GoldMine. If
you are sending a recurring meeting request to Outlook users, do not select
skip weekends in GoldMine.
7. In the Group Schedule tab, select the group of contacts to send the meeting
request to.
8. After configuring scheduling options, click Schedule.
A meeting request is sent to all participants.
Responding to Meeting Requests
You can respond to a meeting request in your e-mail you can respond several
ways.
Use the following procedure to respond to a meeting request.
1. In your GoldMine E-mail Center, double-click to display the message in a
window.
2. From the e-mail header, select one option:
• Accept. Accepts the meeting date and time and creates the activity in
your calendar. Displays the Meeting Request Reply dialog box.
• Tentative. Tentatively accepts the date and time. Displays the Meeting
Request Reply dialog box.
• Decline. Declines the meeting. Displays the Meeting Request Reply
dialog box.
GoldMine User Guide
Calendars • 189
When the Meeting Request Reply dialog box appears, select Send reply,
Edit reply before sending, or Don't send reply.
•
•
Propose new time. Sends a counter-proposal to the meeting organizer.
Displays the activity editing dialog box where you change the date and
time of the meeting, then send an updated Meeting Request to the
contact.
View Calendar. Displays your calendar for the date of the received
meeting notice so you can check your schedule before accepting. If you
accept, the new activity appears in your Calendar.
GoldMine updates according to the option selected.
Sharing Calendar Information
GoldMine enables several calendaring options including sharing your free/
busy times or publishing your entire calendar as well as accessing a contact's
shared calendar.
NOTE: Users with limited access to others user calendars may not
see other users’ forecasts.
Use the following procedure to share GoldMine User calendars
1. To publish your calendar as .ics and .htm, select Tools>>Options.
• Select the Calendar tab, then click More Options and select the
Publishing Tab.
•
To automate with Server Agents select Tools>>Services>>Manage
Server Agents. Select the Calendar Publishing tab and adjust settings.
•
To manually publish, select Web>>Publish Calendar>>Publish
Calendar(s).
2. To publish your free/busy time as .ifb, select Tools>>Options.
• Select the Calendar tab, then click More Options and then select the
Free/Busy Tab.
• To manually publish, select Web>>Publish Calendar>>Publish
Free/Busy Times; Note that .ifb is an iCalendar standard extension.
3. To export your calendar as .ics, select File>>Import/Export>>Export to
an iCalendar File.
190 • Calendars
GoldMine User Guide
Accessing Shared Calendars
• To read a contact's published .ifb, select Edit>>Record
Properties>>Contact Details>>Free/Busy tab. See “Setting Free/Busy
Times” on page 186.
• To use the Contact's published .ifb in the Schedule an activity dialog box,
select Schedule>>activity>>Free/Busy tab. See the GoldMine 8.5
Administrator’s Guide.
• To importing a contact's .isc and link to a GoldMine contact record
(iCalendar), select File>>Import/Export>>Import from an iCalendar
File. See the GoldMine 8.5 Administrator’s Guide
Publishing Free/Busy Times
Publish your free/busy times to a network, ftp, or html location. The publishing
parameters are set in the calendar preferences:
Tools>>Options>>Calendar(tab)>>More Options>>Free/Busy(tab)
1. Select Web>>Publish Calendar>>Publish Free/Busy Times.
2. At the Free/Busy Publishing Settings dialog box, review the settings in
the text box.
• To alter the settings, click Edit Options. The Calendar Options Free/
Busy tab appears. Make changes and click OK.
3. Click OK on the Free/Busy Publishing Settings dialog box and your
schedule publishes to the .ifb file specified on the Free/Busy tab.
GoldMine User Guide
Calendars • 191
192 • Calendars
GoldMine User Guide
Contact Communication
About Communicating with Contacts
You can use GoldMine to print and fax correspondence, send email, send
pages, and distribute literature. GoldMine integrates the functionality of your
word processor and email software to communicate with contacts and
coworkers.
•
Email. Send, retrieve, and manage Internet email. Individuals within an
organization can use GoldMine email, providing the same features as
Internet email, but not requiring an online connection.
•
Printing and Faxing Correspondence. GoldMine works with Microsoft
Word to merge contact information from GoldMine into templates,
generating personalized correspondence. GoldMine’s Document
Management Center provides a central location to access and manage
correspondence.
•
Distributing Literature. Organizations can manage requests for printed
material, such as brochures and price lists, using GoldMine’s Literature
Fulfillment Center.
•
Paging. Send a pager message by dialing or sending email.
GoldMine User Guide
Contact Communication • 193
About the Document Center
The Document Management Center helps you manage document templates. It
contains a lists of templates for emails, memos and faxes and other documents
you might use in communicating with a contact.
Use the Document Management Center's merge form capability to generate
letters, memos, and emails. GoldMine lets you print a letter for one contact or a
group of contacts, print labels and envelopes, and fax documents if your word
processor supports facsimile transmission).
The Document Management Center works with GoldMine Plus for Microsoft
Word.
Use the Document Management Center to:
•
Create Document Templates
•
Create email Templates
•
Clone Document Templates
•
Clone E-mail Templates
•
Edit Document Templates
•
Edit E-mail Templates
•
Mail Merge Documents
194 • Contact Communication
GoldMine User Guide
•
Mail Merge E-mail Messages
•
Print Documents
•
Send E-mail Messages
•
Add Subfolders
Also specify, in the GM.ini, the default destination and file name format for
templates, merged.
Creating Document Templates
GoldMine installs predefined templates but you can create your own templates
as well.
A template is a document created in an application, such as Microsoft Word,
that links to GoldMine and contains embedded DDE link fields. The DDE
fields link contact information to the document; merging to one or more
contacts with the template produces a printable document.
There are two ways to create templates:
•
With GoldMine Plus installed
•
Without GoldMine Plus installed
In both cases you can create new templates. The most common options for
creating a document are using WordPad and Microsoft Word with GoldMine
Plus for Microsoft Office installed.
NOTE: When manually editing or creating a GoldMine field link
in Microsoft Word, you must specify only one formatting system,
otherwise the formatting will be ignored in the resulting field set.
It is recommended instead that you use IIF (inline if, or a ternary
operation statement) to accomplish your formatting goals. Please
see Microsoft Word documentation for more information on IIF
statements.
GoldMine User Guide
Contact Communication • 195
To Create a Document Template
1. Select Go To>>Document Templates.
2. At the Document Management Center, select the User from the dropdown list.
3. Right-click on Document Templates and select New.
The Document Template Properties dialog box appears.
196 • Contact Communication
GoldMine User Guide
4. At the Document Name field, type in the document name you want to
appear in the Document Management Center and in the template dropdown list on the Merge Form dialog box.
5. At the Document User drop-down box, select the owning user.
6. At the Template Filename text box, type or browse to the location of the
template.
7. Click Edit to open the document and make changes.
8. In the Document Management area, click on the appropriate checkbox as
needed:
• Save in Links Tab when merging for a single contact. Creates a
linked document when the document is merged.
• Create History when merging. Creates a history record when this
template is merged.
9. In the Document Type area, select a document type and then click OK.
The following Alert Message appears.
GoldMine User Guide
Contact Communication • 197
10. If you have defined a Filter/Group defined and are ready to do the merge
now, click OK.
The Mail Merge Template dialog box opens.
198 • Contact Communication
GoldMine User Guide
11. At the Document Type field, select a document type for a mail merge.
At the User field, select and user and, if it does not already appear, at the
Template field select the template for the mail merge,
12. Click OK.
The actual merge occurs after you click OK. The settings of this merge will
be defined after filling the information on Recipient tab, where you can
select a current contact (filter/group) and delivery method (printer/fax) or
queue for day(s).
So, if the default settings are selected, the template will be printed with the
current contact information.
GoldMine User Guide
Contact Communication • 199
Editing Document Templates
You can edit document templates using the application you used to create the
template. In the following procedure, Microsoft Word is used as an example.
1. Select Go To>>Document Templates.
2. At the Document Management Center, select a user at the User
dropdown box, select a user.
3. Right-click on a template name and select Properties.
The Document Template Properties dialog box appears.
4. Click Edit.
The document opens in the application used to create it. Use your Word
functionality to add, delete, or edit the text.
5. To add GoldMine fields to the document, at the Word document, select
GoldMine>>Insert GoldMine Field.
6. At the Insert GoldMine Field dialog box, select the field or field macro
from the drop-down list.
Contact is an example of the field macro format.
7. To save the edited template to the same file, select GoldMine>>Update
GoldMine Form.
8. To save the edited template as a new template, select GoldMine>>Save as
GoldMine Form.
9. At the Title field type in a new title and then click OK.
200 • Contact Communication
GoldMine User Guide
Faxing Correspondence
You can fax correspondence from GoldMine if you install one of these
applications:
•
•
•
Symantec WinFax PRO 7.01 or later. Check the version of WinFax
PRO by selecting the WinFax main menu command Help>>About. To
use Symantec WinFax PRO, you must have Microsoft Word version
7.0 or later installed with the WinFax PRO printer driver.
RightFax. a network faxing system. To use RightFax, you must install
a printer driver in Windows named RightFax configured to print to the
RightFax server.
Zetafax 7.5 or later.
Third-party add-on OmniRush provides an integrated fax support solution.
For details, visit www.frontrange.com or the Z-Firm LLC Web site at
www.zfirmllc.com.
Use the following procedure to fax a correspondence from the GoldMine
Document Center.
1. Select Go To>>Document Templates.
2. At the Document Management Center, right-click on Fax, Fax Cover
Sheet>>Fax.
The Mail Merge Properties dialog box opens.
GoldMine User Guide
Contact Communication • 201
3. At the Contact Selection area, select the contact or contacts you want the
fax to reach by clicking on the appropriate radio button.
• This Contact. Merges the fax with the primary contact from the active
contact record or an additional contact selected from the drop-down
list.
• All contacts linked to (contact name). Merges the fax with the
primary and additional contacts for the active contact.
• All contacts in the following filter or group. Merges the fax with all
contact records or with the filtered group or contact group you select
from the drop-down list.
202 • Contact Communication
GoldMine User Guide
4. If you select All contacts linked to (contact name) or All contacts in the
following filter or group, you can also select these options:
•
Primary. Merges the fax with the primary contact.
•
Additional. Merges the fax with the additional contacts.
•
Merge code. Merges the fax based on the code you select in the F2
Lookup list.
5. At the Delivery area, at the To box, select Fax, and at the Queue for x
days box, select a number of days to delay the printing or sending of the
document. This option sets the fax to print at a selected number of days in
the future.
6. Click OK.
When the merge is complete, the results appear in the GoldMine Process
Monitor window.
Faxing Your Default Fax Sheet
When you use the Fax capability, GoldMine opens the application used to
create the template such as Microsoft Word, then displays the template with
information merged from the contact’s record. You can also fax a
correspondence using a default fax template.
Select Go To>>Document Templates. At the Document Management
Center, open a contact record and then select Actions>>Write fax to contact.
GoldMine User Guide
Contact Communication • 203
Printing Documents
You can print documents for one contact or for a filtered group or group of
contacts.
Use the following procedure to fax to print documents from the Goldmine
Document Center.
1. Select Go To>>Document Templates.
The Document Management Center opens.
2. Select the User from the drop-down list.
3. Highlight the document template you are printing, right-click, and select
one of the following options:
• Merge & Edit. Opens the document on the screen with the inserted
GoldMine fields populated with information for the current contact
record. Edit the document as needed and print using the program's print
command.
NOTE: Due to a Microsoft limitation, the GoldMine menu
in Microsoft Word is disabled during the Merge & Edit
process.
•
Print. Opens the Mail Merge Properties dialog box. See "Using Mail
Merge Properties (Printing)" on page -205.
If you print immediately, a record of what was sent to the contact is filed on
the History tab.
204 • Contact Communication
GoldMine User Guide
Using Mail Merge Properties (Printing)
Use the following procedure when merging and printing documents.
1. In the Document Management Center, right-click a document template and
select Print or Fax.
The Mail Merge Properties dialog box opens.
To access this dialog outside of the Document Management Center select
Actions>>Begin Mail Merge. The Mail Merge Properties dialog appears
with an additional Template Tab.
GoldMine User Guide
Contact Communication • 205
2. In the Contact Selection area, select from the following:
This Contact. Merges the document with the primary contact from the
active contact record, or select an additional contact from the drop-down
list.
All contacts linked to (contact name). Merges the document with the
primary and additional contacts for the active contact record.
All contacts in the following filter or group. Merges the document with
ALL contact records or with the filtered group or contact group selected
from the drop-down list.
3. If you select All contacts linked to (contact name) or All contacts in the
following filter or group, select from the following:
• Primary. Merges the document with the primary contact.
• Additional. Merges the document with the additional contacts.
• Merge code. Merges the document based on the code you select in the
F2 Lookup list.
4. In the Delivery area, select the To method from the drop-down list (Printer
or FAX).
5. Type or select the Queue for x days to delay the printing or sending of the
document.
This option sets the document to print at a selected number of days in the
future using the Server Agents or the Literature Fulfillment Center.
Printing a mail merge document for a contact produces a History item for
that contact.
206 • Contact Communication
GoldMine User Guide
Printing Envelopes and Labels
You can use the same method as for printing letters, memos, and faxes. Set up
GoldMine to print envelopes or labels for documents waiting in a print queue
on the same date GoldMine generates the queued documents.
Use the following procedure to print envelopes and labels.
1. To check on queued correspondence in GoldMine’s Literature Fulfillment
Center, select GoTo>>Literature.
2. To print envelopes or labels when queued documents are printed, select
GoTo>>Literature.
3. Select the folder under Queued Documents corresponding to the date the
queued correspondence is scheduled to be sent. For example, if the letters
are scheduled to be printed later in the current week, select This Week.
4. In the upper-right area, right-click each queued document for which to
print an envelope or label. From the local menu, select Print Envelopes or
Print Labels. GoldMine displays the Print Envelopes dialog box or the
Print Labels dialog box that contain the same commands.
5. In the Print Envelopes dialog box, select the contacts for whom to print
envelopes, then select the envelope template to use. By default, GoldMine
displays your templates. However, look in the User drop-down list and
select a (public) template or another user’s template.
Using the E-mail Center
Use GoldMine’s E-mail Center to view, organize, and send your queued
Internet emails.
Use the E-mail Center to:
•
Edit email preferences.
•
Link email messages to contacts
•
Creating emails
•
Create and use email templates
•
Send email messages
•
Set email rules
•
Retrieve email messages
•
Create distribution lists
If you subscribe to more than one Post Office Protocol version 3 (POP3) mail
server, you can set up the E-mail Center to retrieve mail from multiple Internet
mail servers.
GoldMine User Guide
Contact Communication • 207
E-mail Center Components
The E-mail Center contains the following components:
•
E-mail Center Toolbars. Allows quick access to E-mail Center functions.
•
E-mail Center tree. Allows you to connect to your mail server and
organize incoming, outgoing, and filed messages.
•
E-mail message listing browse window. Displays messages available in
the in-box, out-box, or selected folder.
The default limit for messages that can be displayed at once is set at 2,500. You
or your administrator can implement a <USER>.ini file setting to override this
limit, but this is not recommended because of the negative side effects are
associated with this action, including:
•
•
•
Increased load on the database server and the network (the database
server will have to read your records from disk, and they will be sent
over the network).
Increased time to load the list of emails in the Email Center list. During
this time GoldMine may be unresponsive.
Increased memory usage by GoldMine. You may have a slower
response in the Email Center because it has to process a large number
of emails and use more memory.
For more information on message limits, see the System Settings
section of the GM 8.5 Administrators Guide.
•
Text display. Preview the body of a message selected in the listing browse
window.
To turn the preview option on and off, right-click the E-mail Center tree
and select Options>>Show Preview.
NOTE: Set Show Preview as the default in the [Internet] section
of the Username.ini using this command: ShowPreview=1.
208 • Contact Communication
GoldMine User Guide
General Email Toolbar
The General E-mail Center Toolbar contains buttons and menus for creating,
sending, receiving, and filing email messages, setting up email rules,
templates, and distribution lists, and editing email options. Buttons in the
toolbar appear and disappear depending on the type of activity performed.
The General E-mail Center Toolbar differs depending on which folder is
opened in Email Center assuming there are letters in them.
• If an online folder is opened then General E-mail Center Toolbar consists
of:
• New Message, Print, Refresh, Delete, Stop, Reply, Reply to all,
Forward and Actions (which is a drop-down button with the following
functions: Get selected items, Get all Items, Set up E-mail rules,
Customize E-mail templates, Set up Distribution lists, Sync Contact,
Show Preview, Edit E-mail Options)
• If an Inbox (or any sub-), Deleted or Filed subfolder is opened then General
E-mail Center Toolbar consists of:
• New Message, Print, Refresh, Delete, Reply, Reply to all, Forward,
File it (with its options), Re-link/Unlink and Actions (which is a dropdown button with the following functions: Mark as Read (Un-read), Set
up E-mail rules, Customize E-mail templates, Set up Distribution lists,
Sync Contact, Show Preview, Edit E-mail Options)
• If an Outbox or Drafts folder is opened then General E-mail Center
Toolbar consists of:
• New Message, Print, Refresh, Delete, Re-link/Unlink, Send, Send all,
Re-Send, Re-Queue and Actions (which is a drop-down button with the
following functions: Set up E-mail rules, Customize E-mail templates,
Set up Distribution lists, Sync Contact, Show Preview, Edit E-mail
Options)
GoldMine User Guide
Contact Communication • 209
•
If a Sent subfolder is opened then the General E-mail Center Toolbar
consists of:
•
New Message, Print, Refresh, Delete, Forward, File it (with its options)
Re-link/Unlink, Re-Send, Re-Queue and Actions (which is a dropdown button with the following functions: Set up E-mail rules,
Customize E-mail templates, Set up Distribution lists, Sync Contact,
Show Preview, Edit E-mail Options)
Depending on the action being performed, the following commands are
available in the General Toolbar:
• New Message. Creates a new message in the Edit E-mail window, or
create a new mail subfolder.
• Re-link/Unlink. Links files to or unlink files from contacts.
• Print. Prints the currently selected message.
• Refresh. Refreshes the contents of the email list.
• Delete. Deletes the currently selected message.
• Stop. Stops any current retrieval process.
• Set up Email Rules. Sets up email rules.
• Customize E-mail Templates. Creates and edits email templates, in the
Document Management Center.
• Set up Distribution Lists. Creates and edit Distribution Lists.
• Send. Sends the selected message.
• Send All. Send all outbox messages.
• Re-Send. Resends the selected message.
• Re-Queue. Opens the selected message in the Edit E-mail window and add
to the queue in the Outbox.
• Reply. Opens a reply to the sender using the Edit E-mail window.
• Reply to All. Opens a reply to the sender and all recipients in the Edit Email window.
• Forward. Forwards the currently selected message to a new recipient.
210 • Contact Communication
GoldMine User Guide
•
•
•
Mark as Read. Marks currently selected message as read.
File. Selects a filing method for the selected message from the drop-down
menu
• File it. Opens the Complete and E-mail dialog boxes.
• Fast File. Files the selected message in your Filed folder and in the
linked contact's History tab.
• File to. Saves the selected message directly to a filed folder or
subfolder.
Actions. Opens the list of actions such as E-mail, Message and so on.
Edit the Email Toolbar
The Edit E-mail Toolbar is present when the Edit E-mail window is active. It
contains buttons and menus useful when creating and editing email messages.
Symbol
Description
Send the selected message immediately
Queue the selected message in the Outbox
Select from the drop-down menu
Save as Draft
Save the selected message to the Drafts folder and close
Save as Draft Continue
Editing
Save the selected message to the Drafts folder and leave open for editing
Browse for files to attach to the selected message
Sign with Digital ID
Do Not Encrypt Send messages without encryption
Encrypt Using
GoldMine
Send messages with GoldMine encryption
Encrypt Using
Digital ID
Send messages encrypted with Digital ID
GoldMine User Guide
Contact Communication • 211
Symbol
Description
Spell check selected message
Save the selected message as an HTML or text file
Print the selected message
Cut selection
Copy selection
Paste selection
Local Menus
Use the E-mail Center local menu (also called a shortcut menu) to access
commands in the selected browse window, tab, or pane.
Use the following procedure to access a local menu.
1. Right-click in the window, tab, or pane you are working in
2. Select the action from the menu.
3. Use GoldMine’s E-mail Center to view, organize, and send your queued
Internet emails.
Use GoldMine’s E-mail Center to view, organize, and send your queued
Internet emails.
212 • Contact Communication
GoldMine User Guide
Creating and Sending Email
Use the following procedure to create an email message.
1. Access the Edit E-mail dialog box in one of the following ways:
•
•
Click the E-mail button
included on the Global Toolbar.
Select Actions>>Send Email Message or Actions>>Send Outlook
Message.
• Clicking the New Message button on the E-mail Center toolbar.
• Replying to pending activities.
2. The From text box uses the logged in user's name and email account. To
change to a different email account for the logged in user, select the
account in the drop-down list.
3. The To text box populates with the name and email address of the current
contact. To change to an alternative name and email address associated
with the current contact, select the name from the drop- down list.
4. To send the email to additional recipients, at the Additional Recipients
box, click on a line and select one of the following:
• To: Contact. Displays the Contact Search Center to locate a new
contact.
• To: Manual recipient. Displays the Manual Recipients Entry dialog
box. Type a manual email address.
• To: GoldMine user or group. Displays the GoldMine User Recipient
dialog box. Select a GoldMine user or user group.
• To: Distribution list. Displays the Distribution List dialog box. Select
a predefined distribution list.
• To: Outlook (MAPI) recipient: Launches your local or network
Outlook address book.
5. Click Link to link the email message to the current contact and file the
message in the History tab when sent.
6. To add recipients, click Cc:. At the pop up menu, select one of the
following:
• To: Adds recipients to the To list.
• Cc: Sends copies to other recipients.
• Bcc: Sends a blind copy to other recipients.
GoldMine User Guide
Contact Communication • 213
7. Click the Recipients button
again and select one of the recipient
types listed in step 6. Multiple types of recipients are allowed.
8. In the Subject text box, type a subject or select a template in the Subject
drop-down list.
9. Type a message in the message text box. To use HTML formatting in the
message, in the Options tab, select Rich text (HTML). Check your
spelling by right-clicking and selecting Actions>>Spell check.
10. To configure settings for: for the
• Adding email attachments
• Options tab
• Mail merge tab
11. Click the Attachments icon to add email attachments.
12. Click Send to send the message immediately or Queue to queue it for
sending at the times defined in the Server Agents Administrator.
Sending Email to Multiple Recipients
Use the Mail Merge tab on the Edit E-mail dialog box to send the email to all
contacts or to a filtered group of contacts.
Use the following procedure to send an email to multiple recipients
1. At the Edit E-mail dialog box, click the Mail Merge tab.
2. Select Merge this E-mail to a group of contacts to activate the mail merge
options.
3. Select your filter or group in the drop-down list, or click on <Filters of:>
or <Groups of:> to select other users and use their filters or groups.
4. Select Confirm each recipient to display a confirmation prompt for each
selected recipient.
5. Select merge options:
• Primary. Merges primary contact information with the selected
template.
• Additional. Merges additional contacts with the selected template.
GoldMine can mass merge both primary and additional contacts into
documents. This control is used to include or exclude additional
contacts from a mass mailing.
214 • Contact Communication
GoldMine User Guide
•
•
Other. Merges other email addresses linked to the primary contacts.
Limit to E-mail merge code. Merges primary and additional contacts
with the specified merge codes. Select the merge codes from the F2
Lookup list. To enter multiple merge codes, separate each entry with a
semi-colon (;).
6. Click Send to send the message immediately or Queue to queue it for
sending at the times defined in the Server Agents Administrator.
Creating Email Templates
Use the following procedure to create an email template.
1. Select Go To>>Document Templates.
2. At the Document Management Center, at the User drop-down list on the
toolbar, select the user to create the template for. If the template is for all
users, select (public).
3. Right-click on E-mail Templates and select New.
The Edit E-mail window opens.
GoldMine User Guide
Contact Communication • 215
4. At the Subject field, type the subject of the email.
NOTE: The subject you type becomes the subject line
when using the template; consider what you are sending to
contacts. The subject is also the template name appearing
in the Document Management Center, so it must be
unique.
5. Click Attach files button on the Edit E-mail toolbar to attach a file to the
template.
6. Browse to locate the file you are attaching to the template.
7. Select the Options tab to configure template formatting and encoding
options.
8. Select Rich text (HTML) to send the message in HTML. The Rich text
format options lets you use specialized fonts and insert .bmp files.
9. If your recipient's system does not support HTML, leave the check box
blank to send the message as plain ASCII text.
10. Wrap lines is the default. When a word is typed at the end of a line, the
next word is placed at the beginning of the following line.
When creating a template, you cannot change this option.
11. Select Attach VCard to include a .vcf file with your message. The VCard
contains basic contact information.
12. Select Request a return receipt to receive an email acknowledgement
from the recipient upon receipt. This option returns results only if the
recipient's email system supports the return receipt feature.
13. Click in the lower pane and begin creating the body of the message. Use
these editing options to create the message:
• HTML Toolbar
• Local Menu
216 • Contact Communication
GoldMine User Guide
14. If desired, insert GoldMine fields into the message body, creating a
dynamic email message using data from the contact record in the merged
document. Right-click in the message box and select Actions>>Insert
GoldMine Field.
15. I.To save the template, right-click and select Actions>>Save template.
TIP: Insert Key1-Key5 fields by placing the cursor at the
location to insert the field and type. For example, <<key1>>,
to insert the data from the Key1 field in the merged email.
Insert user-defined fields by placing the cursor and typing
<<Contact2->Ufieldname>>
Sending Emails from the Document Management Center
Use the following procedure to send emails from the Document Management
Center.
1. Select Go To>>Document Templates or click the Documents button on
the toolbar.
The Document Management Center opens.
2. At the User field, select a user from the drop-down list.
GoldMine User Guide
Contact Communication • 217
3. Highlight and right-click on the email template you want to send and then
click Merge.
The Mail Merge Properties dialog box opens.
4. Select the user and template in the appropriate fields, if not already selected
and then click OK.
The email is ready to be sent.
If you send the email immediately, a record of what was sent to the contact
is filed on the History tab.
218 • Contact Communication
GoldMine User Guide
Replying to an Activity
Use the following procedure to determine how activity information is recorded
when replying to a user's email.
1. At the Pending tab, right-click on a listed activity and select Reply.
The Reply to an activity dialog box opens.
2. Select one of the following radio buttons:
• File in history. This button deletes the activity and creates a record of
the outgoing email message on the current tab. It creates a history
record of the activity and adds a record of the outgoing email message
on the History tab.
• Delete the activity. This button deletes the activity from the current tab
and creates a record of the outgoing email message on the current tab
and the History tab.
• Retain in the In-Box. This button leaves the activity on the current tab
and creates a record of the outgoing email message on the History tab.
Select Carry over notes to keep notes with the activity record.
3. Click Reply.
The Edit E-mail window opens with the message addressed to the
GoldMine user who created the activity.
4. Edit the message as needed and then click Send.
GoldMine User Guide
Contact Communication • 219
Spell-Checking Email
Use the E-mail Center to check the spelling in the message, improve
professional presentation, and customize the spell-checker.
Open the User Options>>Spell tab dialog box for basic customization; for
more information. see “Setting Options for the Speller Tab” on page 72.
You can customize the speller as you work, adding words and creating
individual or company dictionaries. For more information, see “Creating
Dictionaries” on page 221.
Use the following procedure to spell check an email.
1. After creating your email, click Check Spelling button on the E-mail
Center toolbar.
The Check Spelling dialog box opens.
The questionable word appears in the Not in Dictionary field.
Suggestions are listed in the Suggestions list. The words displayed are
based on the options selected on the Speller tab.
2. Select an option:
• Ignore. Skips this occurrence of the questionable word; if the word
comes up again, it will be tagged and displayed.
• Ignore All. Skips this and all subsequent occurrences of the word in
this document.
• Add. The word is added to the dictionary displayed in the Add words to
text box.
• Change. Replaces the questionable word with the one highlighted in
the Suggestions list; or, if the word is edited, the edited word is used as
the replacement.
• Change All. Changes this and all subsequent occurrences of the word
in the document. The selected word in the Suggestions list is used
unless the word is edited, in which case the edited word is used.
• Suggest. Searches more thoroughly for a suggested replacement word
for the questionable word. Each time you press the Suggest button, a
deeper search is made. When the spell checker exhausts all
possibilities, the Suggest button is disabled.
220 • Contact Communication
GoldMine User Guide
3. To edit a questionable word, type a revised version of the word in the Not in
Dictionary text box. Ignore changes to Undo edit.
Clicking Undo edit returns the edited word to the original form.
4. Use the Check Spelling dialog box to change the Options and Dictionaries.
5. Select Undo if you made changes to a document with Ignore or Change
and wish to undo the changes.
The Undo button takes you back one word at a time.
6. Click Cancel to stop the spell checker and close the window.
Creating Dictionaries
Use the GoldMine spell checker to configure and customize the dictionary for
each user. Add words, import files, and change the action on individual words.
Use the following procedure to create dictionaries.
1. Select Tools>>Options, and select the Speller tab.
2. Click Setup Dictionaries.
3. At the Dictionaries dialog box, select from the following options as
needed.
GoldMine User Guide
Contact Communication • 221
The Words text box lets you add a word or edit the highlighted word from
the text box. The text box listing displays the words in the Files.tlx file.
•
•
To add a word, type the word and then click Add Word.
To edit a word, highlight the word, type the correction and click Add
Word.
• To type case variations on a word, at the Other word text box type in the
word and then click Add Word.
4. Click Delete Word to remove the word from the dictionary file.
5. Click Import to import the words in a .txt file to the current Files .tlx file.
NOTE: When files with multiple word phrases are imported,
each word adds individually rather than as a phrase.
6. Click Export to export the words in the current Files .tlx file to a .txt file.
7. At the Action drop-down list, select an action to apply to individual words:
• Auto change (use case of checked word)
• Conditionally change (use case of other word)
• Conditionally change (use case of checked word)
• Ignore (skip)
• Exclude (treat as misspelled)
8. To apply an action to a word:
• Highlight the word in the Words field listing.
• Select the action from the Action drop-down list.
• Click Add Word. The action you selected applies to that word.
9. The Files drop-down list displays available custom .tlx dictionaries.
Click Add File to browse to other .tlx files.
NOTE: The .tlx files store in user folders in the Speller folder
of the main GoldMine directory.
222 • Contact Communication
GoldMine User Guide
10. To create a new dictionary, click New File.
A .tlx file is created, and the New Dictionary dialog box opens.
Type the new File Name. Select the Language from the drop-down list and
click OK.
11. Click Remove File to delete the current .tlx file.
12. Click Close to save the settings.
Retrieving Internet Email
To retrieve Internet email within GoldMine using a dial-up Internet Service
Provider (ISP), you must use a ISP with true Internet mail access. Internet
access provided by most commercial online services, such as CompuServe or
Microsoft Network, will not work with the GoldMine Internet email feature.
You must configure Windows for dial-up networking to connect to your ISP.
NOTE: For assistance with setting up Windows to communicate
with your Internet service provider, contact your service provider.
You can retrieve email two ways.
Retrieve Email Manually
The default configuration in Windows requires manual dialing.
1. From the Microsoft Windows status bar, click Start.
2. Select Programs>>Accessories>>Dial-up Networking.
3. In the Dial-Up Networking window, double-click the icon for your service
provider.
4. In the Connect To window, ensure all settings are correct, then select
Connect.
5. After your computer connects successfully, start or switch to GoldMine,
then retrieve Internet email.
GoldMine User Guide
Contact Communication • 223
Retrieve Email Automatically
Your Internet Preferences must be configured properly in the User's Options.
Using the Microsoft Internet Explorer, you can configure Windows to
automatically dial your ISP when you retrieve Internet email. The default
configuration in Windows requires manual dialing.
1. From the Microsoft Windows status bar, click Start and then select Programs>>Accessories>>Dial-up Networking.
2. In the Dial-Up Networking window, double-click the icon for your service
provider.
3. In the Connect To window, ensure all settings are correct, then select
Connect.
4. After your computer connects successfully, start or switch to GoldMine,
then retrieve Internet email.
Retrieving Email
Use the following procedure to retrieve Internet email.
1. Select Go To>>E-mail to jump directly to the POP Password dialog box
for retrieving from your primary account.
2. If you are in the E-mail Center, click the email account to retrieve.
3. The POP Password dialog box appears if you do not have your Internet
email password configured in the Internet tab of your User's Options.
4. Type the Password and click OK.
GoldMine downloads the waiting email from your POP3 server email
account.
5. Read and process your email while connected online or move it to your
GoldMine Inbox and disconnect from your email server. To read email in
the E-mail Center, double-click the message.
NOTE: When you move messages from Online to Inbox, the
Attach E-mail to Contact dialog box appears. Select how to
link messages to contacts.
224 • Contact Communication
GoldMine User Guide
6. To process the message, right click the message in the E-mail re: text box
and select Actions.
You can also read retrieved email by selecting Read from the local menu
in the Activity List or on the Pending tab of the contact record.
7. Configure email settings by selecting Tools>>Options.
The User's Options dialog box opens. Select the E-mail tab.
8. After the email options have been set, retrieve internet or Outlook email
messages manually or automatically in the E-mail Center.
9. Select Go To>>Mail. The E-mail Center opens.
In the view window of the Navigation Pane, click an account in your
Online folder to check internet email, or open the Outlook folder to manage
Outlook messages.
10. To process the message, right click on Action.
You can select any option depending on how you want to process the
message (for example, Reply, Forward, and so on.)
You can also read retrieved email by navigating to the local menu in the
Activity List or Pending tab of the contact record and the selecting Read.
11. Configure email settings by selecting Tools>>Options.
The User's Options dialog opens. Select the E-mail tab.
12. After email options have been set, retrieve internet or Outlook email
messages manually or automatically in the E-mail Center.
• Select Go To>>Mail.
13. In the view window of the Navigation Pane, click an account in your
Online folder to check internet email, or open the Outlook folder to manage
Outlook messages.
GoldMine User Guide
Contact Communication • 225
Linking Email Messages to Contacts
You can attach email messages to contacts using the Attach E-mail to Contact
dialog box.
Use the following procedure to link an email to a contact.
1. Select GoTo>>Mail.
2. In the E-mail Center, move messages to the Inbox or right-click and select
File.
The Attach E-Mail to Contact dialog box appears displaying the sender's
Internet account name, return address, subject of the message, and the
VCard name if there is one.
If the message was sent with a VCard, select Use the VCard information if
you create a new contact based on the VCard information.
3. For an unlinked message select one:
• Find an existing contact and link this message to it. Use the Contact
Search Center to select a contact. GoldMine will associate the message
and VCard file with the selected contact.
• Create a new contact and link this message to it. Uses the VCard
information to create a contact and displays the Read E-mail dialog
box. GoldMine will associate the message and VCard file with the
selected contact.
• Find an existing contact, create a new additional contact, and link
this message to it. Use the Contact Search Center to select a contact.
GoldMine will create an additional contact from the sender of the
message, then link the message to the contact record.
• Do not link this message to any contact. Displays the Read E-mail
dialog box without associating the message or VCard information to a
new or existing contact. If you have selected one of the first three
options, you may select Link the address <E-mail Address> to the
contact to link the From: email address of the retrieved mail to the
contact. Click OK. If linking multiple messages, the dialog box appears
for the next message.
226 • Contact Communication
GoldMine User Guide
Reading Email
The E-mail Reader window is the primary way you work with individual email
messages.
Use the following procedure to read an email
1. Launch the E-mail Reader by double-clicking a message in the E-mail
Center or the contact.
2. On the Retrieval tab of the Internet Preferences dialog box, select Open
Read E-mail.
GoldMine opens your email upon retrieval.
3. The E-mail Reader window displays the full message with selected header
information. Use the toolbar or right-click the message body and select an
option from the local menu.
NOTE: GoldMine decodes and displays email messages and
attachments created in the MS RTF (Rich Text Format) sent as
winmail.dat files rather than displaying them as attachments.
This creates smooth inter-operability between Outlook
messages created in Outlook and GoldMine.
Using E-mail Templates
After creating an email template in the Document Management Center, select it
when creating an email.
1. Select Actions>>E-mail, or Schedule>>GoldMine E-mail.
2. From the E-Mail Center, click New Message in the toolbar.
The Edit E-mail dialog box opens.
3.
4.
5.
6.
At the Subject drop-down list. select the template.
To select the template of another user, click Select Template User.
Edit the message as needed.
Click Send to send the message immediately or Queue to queue it for
sending at the times defined in the Server Agents Administrator. For more
information about the Server Agents, see the GoldMine 8.5 Administrators
Guide.
GoldMine User Guide
Contact Communication • 227
Configuring the E-mail Center
Use GoldMine for your email by acquiring an email account and setting up
your system to access the Internet e-mail account. Your administrator can
configure settings to:
•
Format outgoing messages.
•
Handle incoming messages.
•
Add Internet e-mail accounts.
•
Customize the GoldMines E-mail Center.
•
Define advanced settings to apply globally to the E-mail Center, existing
attachment files, message operations, and data imported from a World
Wide Web (www) site.
For information and procedures to configure the E-mail Center, see the
GoldMine 8.5 Administrators Guide.
Creating Email Rules
Create rules set to specify conditions and actions for handling email. For
example, use email rules to filter incoming messages, minimizing the amount
of unwanted email.
Your administrator can set up email rules for you. For more information, see
the GoldMine 8.5 Administrators Guide.
Creating Distribution Lists
Use the following procedure to create custom email Distribution Lists of
contacts, users, and manual email addresses.
1. In the E-mail Center, right-click and select Options>>Set up Distribution
Lists.
2. At the Distribution List Center, right-click the upper-right pane and select
New Distribution List.
3. Type a descriptive name for the list and press Enter.
228 • Contact Communication
GoldMine User Guide
4. Right-click the new distribution list and select one of the following
options:
• Add Contact. Add a contact from the Contact Search Center.
• Add Contacts E-mail. Add a contact from the Contact Search Center
and specify the email address.
• Add User. Add a user or user group.
• Add Manual E-mail address. Select or type the email address.
NOTE: You can add more than one recipient to the
Distribution list.
Using the Document Management QuickStart Wizard to
Access a Web Page
GoldMine Plus for Microsoft Office is installed during the main GoldMine
application installation. It can also be installed independently by using the
Add/Remove Programs Windows control panel.
GoldMine Plus for Adobe Acrobat is installed from its own installer. For more
information about installing and using GoldMine Plus for Adobe Acrobat,
please see the document: GMAcrobatLink.pdf, located on your GoldMine
installer CD, or via: http://support.frontrange.com
NOTE: GoldMine must be installed locally in order to install the
Acrobat Link. It will not function from a shared folder location.
This Document Management QuickStart Wizard directs you to an
informational web page. It does not install any add-on products.
1. Select Tools>>Quick Start Wizard.
The GoldMine QuickStart Wizard dialog box opens.
2. Click the Document Management Wizard button
.
A web page opens in your browser showing details about the GoldMine
Plus suite of products.
GoldMine User Guide
Contact Communication • 229
Using Encryption and Digital IDs
Using Digital IDs with Email Messages
If you and your contacts use digital IDs to verify signatures and send encrypted
email messages, you can use GoldMine to configure your Internet E-mail
Options.
Your digital ID, also known as a digital certificate, is a file sent with an email
message identifying you as the authentic sender. Digital ID certificates are files
issued by a certified security authority such as VeriSign, Inc., or from your
Microsoft Exchange Server administrator. Digital IDs have an expiration date
and must be renewed periodically to remain valid. A digital ID typically
contains:
•
Your name and email address as a digital signature
•
Your public key
•
Expiration date of the public key
•
Name of the Certification Authority (CA) who issued your Digital ID
•
Serial number of the Digital ID
•
Digital signature of the CA
Using Digital IDs
A digital signature provides security by verifying the message originated from
a specific person and that the message has not been altered. A digital ID also
works as a message encryption method. Digital ID encryption scrambles a
message with a recipient-specific algorithm.
Public and Private Keys
The digital ID encryption uses a system of key pairs that include a public key
used to encrypt a message and a private key used to decrypt a message. The
sender of a secure email must have the recipient's public key to encrypt the
message. When the message is received, it is decrypted using the recipient's
matching private key.
Using GoldMine you can exchange encrypted email messages with a contact.
You must have the contact's digital ID that includes his or her public key and
the contact must have your digital ID that includes your public key.
230 • Contact Communication
GoldMine User Guide
In GoldMine, you must then import the contact's Digital ID using the contact's
Edit>>Record Properties>>Contact Details>>Digital IDs tab and import
your Digital ID using your Internet E-mail Preferences>>Security tab.
For example, when you send an encrypted message to a contact, it is encrypted
in GoldMine using the public key the contact provided you. When he or she
receives the message, it is decrypted by the contact's email application using
his or her private key. Conversely, when a contact sends you an encrypted
message it is encrypted by the sender's email application with your public key
(provided earlier). When you receive the message, it is decrypted using your
private key.
Levels of Security
• Signed. The message is signed with the sender's private key. Sending a
message with a digital signature confirms the message was sent by the
sender listed in the From address.
• Encrypted. The message is sent with the recipient's public key. The
recipient provides you with his or her public key before you send the
message. When a message is encrypted, the body and attachments are
hidden from anyone who does not have the recipient's private key. Only
the recipient should have the recipient's private key. An encrypted
message does not guarantee to the recipient that the sender is the name
in the From address.
• Signed and Encrypted. The message is signed with the sender's
private key, confirming for the recipient the message was sent by the
sender in the From address, and it is encrypted with the recipient's
public key and then decrypted with the recipient's private key when he
or she receives the message.
GoldMine User Guide
Contact Communication • 231
Sharing Public Keys
For security reasons do not share your private key. You can share your public
key with contacts two ways:
•
•
Digital ID Signature. Your Digital ID is attached to any message that
includes a Digital ID Signature. The recipient can then extract it and
import it into his or her email application. For example, in Outlook the
user can right-click the sender's name on a message and add the contact
to his or her existing contacts. The digital ID certificate is included.
Export. Export your Digital ID send it to a contact who can then
import the file into his or her email application. For example, in
Outlook the file is imported on the contact's Certificate tab.
Using Digital IDs in GoldMine
•
•
•
•
•
Configuring Contacts' Digital IDs. Imports a contact's digital ID into
the contact record.
Configuring GoldMine Users' Digital IDs. Imports your digital ID
into GoldMine. You determine the signature and encryption settings.
Sending Digitally Signed E-mail Message. Sends a message with
your Digital ID signature.
Sending Encrypted E-mail Messages. Sends individual messages
with a digital ID signature or GoldMine encryption.
Reading E-mail Messages Sent with Digital IDs. Reading digitally
signed, encrypted, or signed and encrypted email messages.
232 • Contact Communication
GoldMine User Guide
Sending Encrypted Email
Protect email messages with encryption. Messages encrypted with Encrypt
using GoldMine can only be read by GoldMine users with the correct
password. Messages sent as Encrypt using Digital ID can only be sent using
the recipient's public key and can only be decrypted and read using the
recipient's private key.
•
Sending Encrypted Messages Using GoldMine. See “Sending Email
Messages Encrypted Using GoldMine” on page 233.
•
Sending Encrypted Messages Using Digital ID. See “Sending Email
Messages Encrypted Using Digital ID” on page 234.
To automatically encrypt outgoing messages with digital IDs, configure your
settings on the Security tab in your Internet Preferences. Use the Encrypt
Message toolbar button drop-down menu to select Do not Encrypt and send a
message without encryption.
Sending Email Messages Encrypted Using GoldMine
You can protect email messages with encryption. Messages encrypted with
Encrypt using GoldMine can be read only by other GoldMine users with the
correct password.
Use the following procedure to send an encrypted email.
1. On the toolbar, click the Encrypt Message
button (if you are reading
a message and want to encrypt it before sending it to other GoldMine users
or filing the message, automatically encrypt using GoldMine; otherwise,
select Encrypt using GoldMine.
The Encryption Settings dialog box opens.
2.
3.
4.
5.
Select Encrypt the message.
In the Password field, type the password you are using on the message.
In the Encryption mode drop-down list, select the encryption level.
Click OK to save your settings.
NOTE: Only users with the proper password and working in
GoldMine can open the message.
GoldMine User Guide
Contact Communication • 233
Sending Email Messages Encrypted Using Digital ID
When you encrypt a message using a digital ID, you must have the contact/
recipient's digital ID configured in the Record Properties>>Contact Details.
Encrypting a message to a recipient with a digital ID encrypts the message
using the recipient's public key. When recipients receive the message, they
decrypts it using his or her private key. You can configure your Internet
Security settings to automatically encrypt all outgoing messages with a Digital
ID.
Use the following procedure to send an encrypted email using digital ID.
1. On the tool bar, click the Encrypt Message drop-down arrow
and select Encrypt using Digital ID.
button
The outgoing message will be sent encrypted.
2. If a Digital ID is not configured for the contact, a warning box states
GoldMine cannot encrypt the message. Click OK to return to the unsent
message window.
3. Configure the contact's Digital ID or remove the encryption from the
message by clicking the Encrypt Message drop-down arrow and toggling
the Encrypt using Digital ID option off.
For more information on encrypted email messages, see the GoldMine 8.5
Administrator’s Guide.
Sending Digitally Signed Email
When digitally signing a message, you must have a digital ID configured in
GoldMine. The digital signature contains your private key and confirms for the
recipient your From address matches the signature. Configure your Internet
Security settings to automatically sign all outgoing messages with your digital
ID. For more information, see the GoldMine 8.5 Administrator’s Guide.
On the toolbar, click the Sign with Digital ID
signature is added to the outgoing message.
234 • Contact Communication
button. Your digital
GoldMine User Guide
Reading Email Sent with Digital IDs
Receive email messages digitally signed and encrypted from non-GoldMine
users.
Senders must have a Digital ID from a valid Certificate Authority before they
can send you a signed email.
To send you an encrypted email message, senders must have your Digital ID
public key from a valid Certificate Authority. When receiving the message,
GoldMine asks you for your password in the Private Key Password dialog
box.
Signed Icon in Inbox
Signed with a Digital ID. When receiving a
digitally signed message, the message includes
the sender's digital signature and public key.
When the message signature is verified, the
Inbox displays a signature icon next to the
message. When you open the message, you
are notified if the signature is verified or if the
signature verification failed.
Encrypted Icon in Inbox
Encrypted. When receiving a digitally
encrypted message, the message was
encrypted with your public key (supplied to the
sender at an earlier time). The message is
decrypted using your private key You are asked
to supply the password to your private key to
read the message.
Signed and Encrypted Icon in Inbox
Signature Verified Banner on Message
Failed Encrypted and Signed Icon in Inbox
Signature Verification Failed Banner on
Message
Reasons signatures can fail.
•
The sender and signature do not match.
•
The digital signature is expired.
•
The Certificate Authority is not configured in GoldMine.
GoldMine User Guide
Contact Communication • 235
About the Literature Fulfillment Center
Use the Literature Fulfillment Center to manage and track brochures, price
lists, and other publications sent to your contacts.
The Literature Fulfillment Center stores and processes literature requests in
one easy-to-view and manage location. New publications can be added to a list
for other users to select for their contacts.
You can perform the following tasks in the Literature Fulfillment Center:
•
Add documents
•
Edit document properties
•
Fulfill or reject scheduled requests
•
Edit scheduled requests
•
Fulfill or reject queued documents
•
Edit scheduled documents
General management displays in the left pane and specific requests in the
upper right pane. The lower right pane displays associated attachments or a
preview window of the document that was printed.
236 • Contact Communication
GoldMine User Guide
Use the following procedure to access the Literature Fulfillment Center
1. Select Go To>>Literature.
The Literature Fulfillment Center opens.
2. Use the toolbar to execute commands or local menu options in the left pane
to manage:
•
•
•
Literature List. A predefined literature list that varies depending on
which user created the literature packet. This list is available when you
schedule a Literature Request. When selecting a Literature List in the
left-hand pane, the literature options display in the right pane.
Right-click on the Literature List to access the local menu.
• Refresh. Refresh the Literature List.
• Refresh All. Refresh everything in the left pane.
Literature Requests. Literature requests by date. When you select a
date, the literature requests scheduled for that date or date range are
displayed in the upper right pane. The literature requests are added by
scheduling a Literature Request.
Right-click on Literature Requests to access the local menu.
• Refresh. Refresh the Literature List.
• Refresh All. Refresh everything in the left pane.
• Expand. Expand the date options.
Queued Documents. Queued requests by date. When selecting a date,
the literature requests scheduled for that date or date range display in
the upper right pane.
Queued documents are added to the Literature Fulfillment Center when
configuring Mail Merge properties through the Document Management
Center. Queued documents can be manually fulfilled through the
Literature Fulfillment Center or automatically executed at the selected
time if you configured the Server Agents to Print/FAX.
Right-click Queued Documents to access the local menu. For more
information on server agents, see the GoldMine 8.5 Administrators
Guide.
Queued Documents Local Menu
•
•
Refresh. Refresh the Literature List.
Refresh All. Refresh everything in the left pane.
GoldMine User Guide
Contact Communication • 237
•
Printed Documents. Documents and literature requests you fulfilled.
Right-click Printed Documents to access the local menu.
•
•
•
•
Refresh. Refresh the Literature List.
Refresh All. Refresh everything in the left pane.
Expand. Expand the date options.
Purge All. Delete all information from the Printed Documents list.
Adding Documents to the Literature Fulfillment Center
Use the following procedure to add an existing publication or file to the
Literature List.
1. Select Go To>>Literature.
2. At the Literature Fulfillment Center, highlight Literature List in the left
pane and right-click and select New from the local menu.
The Literature dialog box opens.
3. In the Output To drop-down list you can select one of the following:
• Stock. Literature that is printed and available as shelved stock.
• Printer. Literature that is to be printed from a file.
• FAX. Literature that is to be sent via fax.
4. In the Type field, type or select the literature type from the F2 Lookup list.
5. In the Description field, type or select a brief description of the literature
from the F2 Lookup list and then click OK.
238 • Contact Communication
GoldMine User Guide
Editing Documents in the Literature Fulfillment Center
Use the following procedure to edit documents
1. Select Go To>>Literature.
2. At the Literature Fulfillment Center, highlight Literature List in the left
pane.
The documents are listed in the upper right pane.
3. Right-click the document to edit and select Edit from the local menu. The
Literature dialog box appears.
4. In the Output To drop-down list, select one:
• Stock. Printed literature available as shelved stock.
• Printer. Literature to print from a file. Select the file path and click
Edit to make changes.
• FAX. Literature to fax. Select the file path needed and click Edit to
make changes.
5. In the Type field, type or select the literature type from the F2 Lookup list.
6. In the Description field, type or select a brief description of the literature
from the F2 Lookup list. and then click OK.
Fulfilling or Rejecting Scheduled Literature Requests
When a Literature Request is assigned to you, the request appears on your
calendar as Lit in the Task pane.
Use the following procedure to fulfill or reject scheduled literature requests
1. Select Go To>>Literature.
2. At the Literature Fulfillment Center, select your name in the User dropdown list to view requests assigned to you.
3. Select the Literature Requests date or date range for the request. The
literature request appears in the upper right pane.
4. Highlight the literature request and right-click. Select options in the local
menu.
5. To fulfill the request, note the attachments to send and select Fulfill.
If a literature request is to be printed or faxed, the document is printed or
faxed. Attachments are not sent automatically and must be handled as per
your usual office procedure.
GoldMine User Guide
Contact Communication • 239
6. To reject the request, select Reject.
7. At the Rejection of Literature Requests dialog box, type or select the
reason in the F2 Lookup list.
If this activity was scheduled with an RSVP, GoldMine notifies the person
who assigned it to you stating why it was rejected.
Fulfilled requests are moved from Pending to the History tab; the request
appears in the Printed Documents area of the Literature Fulfillment Center.
Fulfilling or Rejecting Queued Documents
Queued Documents in the Literature Fulfillment Center come from the
Document Management Center and were merged with one or more contacts.
For multiple contacts, each contact is listed separately in the upper right pane
when you select the assigned user and date the document was queued for.
Queued documents are fulfilled when using the Print/FAX Server Agent; to
send the document immediately or remove it from the queue, use the Queued
Documents area of the Literature Fulfillment Center.
Use the following procedure to fulfill or reject queued documents.
1. Select Go To>>Literature.
2. At the Literature Fulfillment Center, select your name in the User dropdown list to view requests assigned to you.
3. Select the Queued Documents date or date range for the request. The
queued document appears in the upper right pane.
4. Highlight the document and right-click. Select options in the local menu.
5. To fulfill the print or fax request, right-click and select Fulfill.
The document will print or send, depending on the settings configured.
6. To reject the request, right-click and select Reject.
7. At the Rejection of Queued Document dialog box, type or select the
reason in the F2 Lookup list.
Fulfilled requests are written to the History tab; the request appears in the
Printed Documents area of the Literature Fulfillment Center.
240 • Contact Communication
GoldMine User Guide
Editing Scheduled Literature Requests
Use this procedure to edit a Literature Request assigned to you
1. Select Go To>>Literature Fulfillment.
2. At the Literature Fulfillment Center, select your name in the User dropdown list to view requests assigned to you.
3. Select the Literature Requests date or date range for the request to act on.
The literature request appears in the upper right pane.
4. Highlight the literature request, right-click, and select Edit.
The Schedule a Literature Request dialog box appears.
About Telemarketing Scripts
Using GoldMine’s branching scripts, a user can gather information by working
through a series of interactive questions. Branching scripts organize questions
in a flowchart-type format.
Use scripts to automate a variety of tasks such as guiding telemarketers
through sales calls, collecting survey information, and training new
salespeople.
Branching scripts are GoldMine’s version of online questionnaires. With a
branching script, telemarketers can deliver structured information to a prospect
and, based on the prospect’s response, work through a predefined dialog of
related information.
Additional information can be designed to answer the customer’s anticipated
inquiries or provide requested information, so an accurate response to the
customer’s needs is readily available.
Each script question can contain an unlimited number of possible answers, and
each answer can branch out to a different question. A script can contain up to
99 questions.
While the script is being executed, information on the prospect’s responses can
be saved in the Notes field of the active contact record or placed directly into
one of the fields of the contact’s record. Once this data is entered, filter
expressions can be used to select contacts who responded similarly to script
questions.
GoldMine User Guide
Contact Communication • 241
Branching Scripts Workflow
Before attempting to enter a branching script in GoldMine, map the entire
script structure on paper. This strategy can be helpful in creating a branching
script:
1. Decide what questions to ask and the possible responses. List questions
with all the related responses directly below them. Draw lines connecting
each response to the appropriate follow-up question. Note each question
can have several response lines leading to it. However, no response should
have more than one line leading from it (each response can only branch to
one question).
2. Number each question. Try to select a numbering scheme that keeps
questions in a natural sequence. If there are sub-branches within the script,
you will have to jump numbers. A good rule to follow is to number the
questions in a way that no answer leads to a lower-valued question.
Number questions in intervals of 5 or 10 so additional questions can be
inserted later in the script without having to change the numbering scheme.
3. When all the questions are numbered, follow each question back to the
preceding answer, and enter the question number next to the response.
These numbers are the Goto values entered into GoldMine.
4. Determine if any questions should be omitted from the dialog. Mark
them on the worksheet.
5. To store the text of a selected response in a field, enter the name of the
field to be used next to the question number on the worksheet. Most
fields in the contact record can be used to store script responses.
Now you are ready to enter the script in GoldMine.
Creating Telemarketing Scripts
Use the following procedure to create a telemarketing script.
1. Select Go To>>Scripts.
At the Script dialog box, click Maintain Scripts.
The Branching Scripts Listing dialog box opens. It lists the script names in
the main pane and the number of times it was run.
2. Click New.
The Branching Scripts Profile dialog box opens.
242 • Contact Communication
GoldMine User Guide
Branching Scripts Listing Dialog Box
The following buttons appear on the Branching Scripts Listing dialog box:
•
New or Edit. Opens the Branching Script Profile dialog box.
Click New to create a telemarketing script.
•
Delete. Removes the script.
•
Reset. Resets the selected script statistics, including all response
percentages, and the number of runs.
•
Close. Exits the dialog box.
Branching Script Profile Dialog Box
The following options appear on the Branching Scripts Profile dialog box:
•
Number. Determines the location of the script in the browse window.
Lower numbered scripts appear higher on the list.
•
Script. Descriptive title for the script.
•
Existing questions display in the Script Questions pane.
•
•
New. Displays the Branching Script Question dialog box where you
add a script question.
Click New to create a telemarketing script.
•
Edit. Displays the Branching Script Question dialog box where you edit
the highlighted script question’s number, title, or responses.
•
Delete. Deletes
the selected script question.
Branching Script Question Dialog Box
When you select New or Edit from the Branching Script Profile, the
Branching Script Question dialog box opens.
•
Title. Descriptive title for the question that appears at the top of the
question screen when the script is used.
•
Update field. Optionally, you can select a field in the drop-down list to
store the response to this question when the script is executed. When a field
is used, GoldMine places the text of the response in the selected field in the
contact record.
•
Notes. Question and any other text to be delivered to the participant.
GoldMine User Guide
Contact Communication • 243
•
Question No. The question number assigned to the script question.
You should have selected a question number for each question when you
designed the script. Enter numbers lower than 10 with a leading zero. For
example, enter 1 as 01.
•
Save History. Select this field to include the question’s title and response
in the script dialog text. If this field is cleared, the question is excluded
from the dialog when the script is executed.
•
New. Adds a response record.
The Branching Script Answer dialog box appears.
•
Edit. Edits a response. The Branching Script Answer dialog box appears.
•
Delete. Removes the selected response.
Branching Script Answer Dialog Box
When you select New or Edit to add a response record, the Branching Script
Answer dialog box opens.
•
Number. The number of the response determines the position of the
response in the listing. Lower number responses appear on the top of the
list.
•
Goto. Type the number of the question this response leads to. The Goto
question number displays if this response is selected during script
execution.
•
Answer. Type the text of the response.
•
Prompt for response. Select this field to prompt the operator to enter a
response when this answer is selected.
This option can be selected only when an entry is made in Update field in
the Branching Script Question dialog box. The operator’s response saves to
the field specified by Update field.
If the script question contains only one answer and that script answer has
the Response box checked, GoldMine automatically displays the Enter
Response dialog box, eliminating the need to select the answer.
After entering all the questions and responses into GoldMine, perform a test by
running the script.
244 • Contact Communication
GoldMine User Guide
Using Telemarketing Scripts
Use telemarketing scripts to construct structured dialogs with customers.
1. Select Go To>>Scripts.
The Telemarketing Script dialog box opens.
NOTE: All the responses you log while using the script are
applied to the current contact record.
2. Select the script in the Script drop-down list and begin asking questions.
Update fields as needed.
Making and Answering Calls with SoftPhone
SoftPhone integration with GoldMine uses SIP (Session Initiation Protocol)
and VoIP (Voice over IP) technology to place and answer contact calls. The
SIP Proxy (not included with GoldMine) must be configured and its
functionality verified by an administrator.
Your administrator can then configure GoldMine to make and receive calls
through the SIP Proxy Server by setting SoftPhone preferences.
For more information on configuring Softphone, see the Goldmine 8.5
Administrators Guide.
Using SoftPhone
1. Select Actions>>Call Contact>>Launch SoftPhone.
The SoftPhone control dialog box opens.
2. Use SoftPhone to Answer incoming calls, manually Dial phone numbers,
Transfer calls, Hang up, place calls on Hold, and make Blind Transfer
calls to another number or GoldMine user.
GoldMine User Guide
Contact Communication • 245
3. GoldMine reads the phone1, phone2, and phone3 fields and pulls those
numbers into the Contact Numbers area. Click a number to dial it.
NOTE: UPHONE fields are user-defined fields GoldMine
users can create and use as extra phone fields. If the name
starts with UPHONE, GoldMine recognizes the field as an
extra phone field.
4. After placing or receiving a call, adjust the speaker and microphone
volume.
5. To use SoftPhone by default, select Tools>>Options>>Telephony and
select Use SoftPhone by default.
About Personal Contacts
To keep a separate phone log for other important or commonly used telephone
numbers, use the Personal Contacts feature to maintain a private file you can
access easily while working in GoldMine. Only the user who created the file
can access a Personal Contacts.
Use the following procedure to use Personal Contacts.
1. Select Go to >Personal.
Your Personal Contacts dialog box opens.
2.
3.
4.
5.
6.
Click Dial to use the Phone Dialer.
Click New to add a new entry.
Click Edit to change the selected entry.
Click Delete to remove the selected entry.
Click OK to close.
NOTE: The Contact field must be limited to 30 characters.
246 • Contact Communication
GoldMine User Guide
Sales Management
About Sales Management
Plan, schedule, and record sales. Individuals can forecast sales they are
responsible to close. Managers can assign and track sales quotas. GoldMine
also provides the Opportunity Manager for a sales team to manage a complex
sale composed of multiple components and participants.
Understanding Sales
A forecasted sale is an estimate to record the anticipated close date of a
pending sale with one of your contacts. GoldMine stores potential sales
information in the same database where it stores contact information.
When closing the sale, GoldMine moves the record into the contact’s History
tab. Scheduling and completing a forecasted sale is similar to scheduling and
completing other types of activities. However, forecasted sales differ from
other activities because they involve a product or service, an anticipated sale
amount, and the probability of closing the sale.
Some transactions involve one salesperson and one client for a relatively brief
period, while others involve multiple components and require the coordinated
efforts of a team over a relatively long sales cycle. View sales on these levels:
• Individual sales. Assigned to a single user and involve the sale of a
product or service to a single contact. GoldMine provides tools to schedule,
or forecast, an individual sale. The tools also help managers assign and
analyze sales quotas.
• Complex sales. Involve multiple participants over a longer period and
typically involve multiple components of products or services bundled as a
package; individual sales can be planned, tracked, and recorded as part of a
complex sale. A complex sale is known as an opportunity.
GoldMine User Guide
Sales Management • 247
Scheduling Forecasted Sales
A forecasted sale is an estimate to record the anticipated close date of a
pending sale with one of your contacts. Forecasted sales are different from
other activities because they include a product or service, an anticipated sale
amount, and the probability of the sale closing.
Use the following procedure to schedule a forecasted sale.
1. With the contact to scheduling for active on the screen, select Schedule>>Sale.
The Schedule a Forecasted Sale dialog box opens.
The Contact field is populated with the Contact VIN#.
2. To select another contact, click on the Contact drop-down arrow and select
the contact or click the right-facing arrow to launch the Contact Search
Center and search for a new contact.
3. In the drop-down list, select the Opportunity/Project to associate the sale
with or click New to create a new opportunity or project.
248 • Sales Management
GoldMine User Guide
4. At the Product field, select the product in the F2 Lookup list.
5. At the Code field, select the code in the F2 Lookup list.
Activity codes can be used later to analyze specific sales activities. For
example, if you code all your forecasted sales that were referrals with an
activity Code of REF, you can determine how many referred sales you
made during a specific period of time.
6. At the User field, select the user who will schedule the forecasted sale. The
forecasted sale appears on the user's calendar.
7. At the Units field, type the expected number of product to purchase.
8. At the Price field, type the price of each unit.
The unit amount value and price per unit value are calculated in the
Amount field.
9. At the Probability field, select a percentage value in the F2 Lookup list.
For example, if the customer is evaluating the product, select 50%. If the
customer is purchasing, select 90%.
10. At the Sale Date field, select the expected sale date in the F2 Lookup
graphical calendar.
11. In the Notes field, type any notes about the sale.
12. Click on the Link checkbox to link this forecasted sale to the current
contact.
13. Click on the RSVP checkbox to be notified when the assigned user
completes the sale.
NOTE: GoldMine posts RSVP messages on the Activity List
when the sale completes by the assigned user. The RSVP
record provides information about the outcome of the sale.
14. Click on the Alarm field if you want GoldMine to warn you when the
activity is due.
•
•
To set a time for the alarm, click the upper down-arrow box and select
the time.
To set the date for this alarm, click the lower down-arrow box and
select the date.
15. Click OK to save and close the dialog box, or select the Recurring tab to
schedule recurring activities
GoldMine User Guide
Sales Management • 249
Completing Forecasted Sales
Complete forecasted sales from a contact's Pending tab or the Activity List.
Use the following procedure to complete a forecasted sale.
1. Right-click the sale and select Complete, or select Complete>>Sale. The
Complete a Sale dialog box appears.
2. Click the Contact drop-down arrow to select from additional contacts; or
click the right-facing arrow to launch the Contact Search Center and
search for a new contact.
3. Select the Sale Date using the F2 graphical calendar.
4. Select the User completing the action.
5. Select Private if the completed action will be available only to the selected
user.
6. Select the Product in the F2 Lookup list.
7. In the drop-down list, select the Opportunity/Project to associate the sale
with.
8. Select the Code from the F2 Lookup list.
9. Select the Result code from the F2 Lookup list.
10. Type the number of product Units sold.
11. Type the Price of each unit.
250 • Sales Management
GoldMine User Guide
12. The Amount field automatically calculates the total based on the entries in
the Units and Price.
13. At the Success drop down list, select Closed Sale or Lost Sale.
14. Type any Notes related to the sale.
15. To schedule a follow-up activity, click on the Schedule a Follow-up
checkbox and select the activity from the drop-down list and then click
OK.
16. After completing a sale, GoldMine changes the forecasted sales record into
a history record. View the record in one of these:
• Contact record. The sales record moves from the Pending tab to the
History tab.
• Activity List. The sales record moves from the Forecasts tab to the
Closed tab. Also see the completed sales record in the Real-Time tab.
• Calendar. If you configure the Calendar to show completed forecasted
sales, the sale record appears in the Day tab or the Week tab on the date
completed.
Using Forecasted Sales Analysis
Generate an analysis of the forecasted sales activities in the database.
1. Select GoTo>>Analysis>>Forecast Analysis tab and right-click on an
open Activity List.
2. Select Analyze.
The Forecasted Sales Analysis dialog box opens.
GoldMine User Guide
Sales Management • 251
The Forecasted Sales Analysis dialog box provides this information about
projected sales or cash flows for individuals, groups of individuals, or the
entire organization:
•
•
•
•
•
Analyze Users. The users included in the analysis; your username
displays by default. To add or change the analyzed users, click Select
User(s).
Period. Forecasted sales statistics divided into several periods. The top
portion of the analysis screen shows forecasted sales statistics by week,
for the next four weeks. Total amounts for the four week period display
below the weekly section. Below the weekly section, forecasted sales
for the next four months are broken down by month. The Beyond line
includes forecasted sales scheduled to close after the next four months.
Grand totals for the lower section display at the bottom of the screen.
# of Sales. The total number of forecasted sales activities scheduled on
the calendar for the period.
Forecasted. The total dollar amount of sales scheduled on the calendar
for the period.
% Prob. The average probability of a sale closing in this period (calculates
by averaging values in the Probability field for all Forecasted Sales
activities scheduled in the period).
252 • Sales Management
GoldMine User Guide
•
Potential. The expected value (or weighted value) of sales closing in this
period. This value is determined by multiplying the total forecasted sales
amount (Forecasted) by the average close probability (% Prob).
•
•
•
•
Select User(s). The Select Users dialog box, from which you can select
GoldMine users for activity analysis.
Code. Forecasted sales with the entered activity code. Use wild cards
to select multiple activity codes. By default, this field is blank to
include all activity codes in the analysis.
Analyze. Calculates the totals in the display.
Close. Closes the dialog box.
Using Graphical Analysis
The GoldMine Graphical Analysis tool generates summary graphs of user
activity data based criteria. You can display data as a bar graph or a line graph.
GoldMine can represent all activity for a period of time, or one of several types
of activities. Graphs can also represent total activities, a comparison of all
users, or selected users.
Use the following procedure to generate a forecasted sale.
1. Select Go To>>Analysis>>Graphical Analysis.
2. The Graphical Analysis Options dialog box contains options determining
the time range and activities to include in the graph. Select the options you
need:
• Complete. Completed activities.
• Scheduled. Scheduled activities.
• Totals. Total activity data for specified users.
• Comparison. Activity data for individual users as specified.
• Bar Graph. Comparison of different periods or users.
• Line Graph. Trends over time.
• Select User(s). Accesses a list of users. If the Comparison option is
selected under Graph Type and more than one user is selected, data for
these users displays on one graph with color-coded entries to
differentiate users.
• All Activities. Scheduled or completed data for the activity types
described below.
GoldMine User Guide
Sales Management • 253
3. At the Activity types field, select an activity.
Graphical representations depend on whether Completed or Scheduled is
selected under Graph Type):
•
•
•
•
•
•
•
•
•
•
•
Call Backs. Graph for completed or scheduled Call Backs.
Messages. Graph for completed or scheduled Messages.
Next Actions. Graph for completed or scheduled Next Actions.
Appointment. Graph for completed or scheduled appointments.
Sales. Graph for completed or scheduled sales.
Others. Graph for completed or scheduled other actions.
High End. Type a numeric value corresponding to the uppermost
number to display on the graph's vertical axis. For example, if
experience shows users rarely schedule more than 30 appointments per
week, entering 30 in the High End field generates a graph with a
vertical axis ending at 30. The default, zero (0), lets GoldMine generate
the high end value based on included data.
Low End. Type a numeric value corresponding to the smallest number
to display on the graph's vertical axis. For example, if experience
shows that users have never scheduled fewer than five call backs per
week, entering 5 in the Low End field generates a graph with a vertical
axis starting at 5.0. The default is zero (0).
Activity Cd. Generates the graph from activity records with the
specified Activity Code. Use wild cards to select multiple activity
codes. By default, this field is blank to include all activity codes in the
graph. For more information, see “Using Wild Cards in Activity and
Result Code Fields” on page 255.
Result Cd. Type a Result Code to use as the basis for graph data. Only
activity records with this Result Code are included in the graph. Use
wild cards to select multiple activity codes. The default value for this
field is blank to include all result codes in the generated graph. This
field is available only if Completed is selected for Graph Type.
From Date. Beginning date from which data is graphed. The default is
the current date. This field is available only for a graph of scheduled
activities; the ending date for scheduled activity graphs is always the
current date.
254 • Sales Management
GoldMine User Guide
•
To Date. Ending date of data being graphed. The default is today's date.
This field is available only for a graph of completed activities; the
beginning date for completed activity graphs is always today's date.
• From Time. Beginning time included in the graph. The default is 12:00
am. When combined with the default To Time entry of 12:00 am, the
graph displays data for a 24-hour period. This field is unavailable when
generating hourly graphs for completed activities.
• To Time. Ending time included in the graph. The default is 12:00 am.
When combined with the default From Time entry of 12:00 am, the
graph displays data for a 24-hour period. This field is unavailable when
generating hourly graphs for scheduled activities.
• Show Grid. Displays lines representing the horizontal axis of the graph
(default). To generate a graph without this grid, clear the option.
4. Click Graphs to generate a graph.
Based on your selection in the Graph Type area of the Graphical Analysis
Option dialog box, you see a bar or line graph.
5. To return to the Graphical Analysis Options dialog box from the graph
display, click Options.
Using Wild Cards in Activity and Result Code Fields
GoldMine recognizes the asterisk (*)character as a wild card in the Activity
Code or Result Code fields on an analysis screen, When placed in these fields,
an asterisk tells GoldMine, “This position can contain any character”.
For example, entering S*S in the Activity Code field makes GoldMine
calculate the analysis based on any activity code with S in the first and last
positions of the Activity Code field. The second character in this field can be
any character in the history or calendar records being analyzed. To calculate all
activity codes that begin with S, enter S** in the Activity Code field.
GoldMine User Guide
Sales Management • 255
Using Leads Analysis
Managers can track valuable information on the status of sales efforts and the
effectiveness of advertising and promotional efforts in generating inquiries and
sales. GoldMine, then, becomes a strategic asset by providing timely and
accurate information helping managers make better decisions on deploying
resources.
You can use Leads Analysis to:
•
Track valuable information on the status of sales efforts and analyze the
effectiveness of advertising and promotional efforts in generating inquiries
and sales.
•
Generate a list of the values in any Contact1 or Contact2 field; typically,
analysis is performed on values in the Source field.
•
Calculate a number of statistics for each unique value, such as the number
of Contact Records (leads) containing a unique Source field value.
To Use Leads Analysis
1. Select View>>Analysis>>Leads Analysis. The Leads Analysis dialog box
appears.
2. To add, edit, or delete a leads analysis, click Maintain. The Open Leads
Analysis File dialog box appears.
3. Select the lead file you are analyzing in the File Description drop-down
list.
NOTE: You can use the local menu to change display and
other options.
256 • Sales Management
GoldMine User Guide
4. The information pane displays these columns:
• Source: Name of the lead source, such as Comdex. This entry appears
in the Source field of the contact record. Use the source to determine
the profitability of individual marketing sources or groups of
campaigns. GoldMine can report the total number of leads generated
from seminars, advertisements, or trade shows in the Source field; the
total sales volume generated from each source value; and the potential
sales pending from each source value. Then identify effective lead
sources based on total leads or sales volume generated. Also, to know
the cost of each lead, calculate profit and locate the most profitable lead
source. For example, this tool helps you determine whether to run an ad
again.
• Leads: Total number of contact records in the database with this value
in the selected field.
• Closed: Total number of contact records with this source that have at
least one purchase, as recognized by the presence of a sales activity
record in the history file.
• Ratio: Percentage of closed sales based on number of leads.
• Sales: Total dollar amount of sales generated by this lead source. This
value is a sum of all sales activity history records linked to the Contact
Records with this source.
• Potential: Total dollar amount of future sales activities scheduled on
the Calendar (calculated by summing all Forecasted Sales calendar
records linked to the contact records with this source).
NOTE: Also view Cost and Profit, and Cost and Price per
lead. To view the other options, right-click in the information
pane and select View.
5. To locate a source, type the first few letters of the source in the Find Source
text box.
GoldMine User Guide
Sales Management • 257
6. Also use these options:
• Analyze: Displays the Leads Analysis - Analyze dialog box.
Regenerates the leads analysis information for the current leads
analysis database. Select the field on which to base the analysis, and the
range of dates to scan for statistic calculation.
• Sort: Displays the Leads Analysis Sort Menu dialog box to select the
ordering of the records in the Leads Analysis dialog box.
• Zoom: Displays complete information about the highlighted leads
analysis record in the Leads Analysis Zoom dialog box.
7. Click Close to close the Leads Analysis dialog box.
Using Quota Analysis
Use the Quote Analysis to review the status of sales efforts by analyzing how
sales team members are meeting quota for a specified period. This analysis
uses data about the assigned quota, forecast sales, completed sales, and lost
sales to derive a percentage of quota or a percentage of forecast sales attained
by a salesperson. Because GoldMine analyzes data by period, a process record
for each salesperson can be seen using listings over multiple periods.
1. Select Go To>>Analysis>>Quota Analysis.
The Quota Listing dialog box opens.
2. Select an option from the Quota Listing dialog box:
• User. An entry for each user assigned a quota in the Quota Profile
dialog box. Users have an entry for each period they were assigned a
quota.
• Period. The range of dates comprising the quota period. By default,
GoldMine defines a quota period as one month, but the period can be
changed in the Quota Profile dialog box.
• Quota. The dollar amount of expected sales assigned to the user for the
period.
• Forecast. The total dollar amount of sales scheduled on the calendar
for the period.
• Closed Sales. The total dollar amount of sales recorded as Closed Sales
when the forecasted sales activities are completed.
• Lost Sales. The total dollar amount of sales recorded as Lost Sales
when the forecasted sales activities are completed.
258 • Sales Management
GoldMine User Guide
•
Quota Period. By default, GoldMine sorts quota entries by the
calendar period for quota assignments. When a user has entries for
multiple quota periods, the listings appear in chronological order (the
oldest quota assignment appears first, and the most current quota
assignment appears last).
• User. Alphabetize quota entries by username. Multiple quota entries for
a User appear in chronological order.
• Quota. By default, GoldMine uses data in the Quota, Forecast, Closed
Sales, and Lost Sales columns to calculate the percentage of quota
achieved by the salesperson during the period. The percentage of
successfully completed sales to assigned quota appears in the Closed
Sales column, while the percentage of unsuccessful sales appears in the
Lost Sales column.
• Forecast. Calculates the percentage of forecasted sales against sales
already completed during the period. The percentage of successfully
completed sales to forecasted sales appears in the Closed Sales column.
The percentage of unsuccessful sales appears in the Lost Sales column.
• New. Access the Assign new quota dialog box to assign a quota to a
user for a defined period.
• Delete. Deletes the highlighted record for the salesperson.
• Edit. Access the Quota Profile dialog box to modify a previously
assigned quota.
3. Select Close to exit the dialog box.
Using Sales Analysis
GoldMine can generate a summary analysis of sales performance by one or
more individuals. This analysis displays actual numbers and percentage-ofgoal figures for quotas, forecast sales, and closed sales for a specified period of
time.
1. Select Go To>>Analysis>>Sales Analysis.
The Select Users dialog box appears on top of the Sales Analysis dialog
box to select the users to analyze. Select users or groups of users if
necessary.
GoldMine User Guide
Sales Management • 259
2. Configure the following options:
• From Date. Sets the first date of the period to include in the analysis.
• To Date. Sets the last date of the period to include in the analysis.
To reflect an accurate quota amount, type From and To dates corresponding
to the quota periods defined in the Quota Profile.
•
•
•
•
Quota. Displays the dollar amount of expected sales assigned to the
user for the specified period.
Forecast. Displays the total dollar amount of sales scheduled on the
calendar for the specified period.
Closed Sales. Displays the total dollar amount of sales recorded as
Closed Sales when the forecasted sales activities are completed.
Quota Diff. Displays the difference between Closed Sales and Quota
amount (Quota Diff. = Closed Sales - Quota). Negative values are
shown in parentheses (). See the examples below:
If Closed = Quota, Diff = 0
If Closed < Quota, Diff < 0%(Negative amounts should be shown in
parentheses)
If Closed > Quota, Diff > 0
•
Quota Diff. Percentage. The Quota Diff. Percentage is the difference
between Closed Sales and Quota amounts in percentage of Quota value
for the specified period. The equation is:
Quota Diff. Percentage = (Closed Sales - Quota) * 100% / Quota
•
0% indicates that Closed Sales and Quota values were equal for the
specified period.
•
Negative/positive values mean that Closed Sales were less/more
then Quota correspondingly. Absolute value of this parameter can
be used as one of indicators of Sales Planning Efficiency.
•
Negative values are shown in parentheses ().
Examples:
Quota Diff. Percentage = ($9,000 - $10,000) *100 / $10,000 = (10%); Closed Sales were 10% less then Quota;
Quota Diff. Percentage = ($15,000 - $10,000) *100 / $10,000 =
50%; Closed Sales were 10% more then Quota.
260 • Sales Management
GoldMine User Guide
•
Forecast Diff. The Forecast Diff. is the difference between Closed
Sales and Forecasted Sales amount for the specified period. The
equation is:
Forecast Diff. = Closed Sales - Forecasted Sales
•
Negative values are shown in parentheses ().
Examples:
Forecast Diff. = $9,000 - $0 = $9,000; Forecasted Sales trail
Closed Sales by $9000
Forecast Diff. = $1,500 - $2,000 = (-$500); Forecasted Sales
exceed Closed Sales by $500
Forecast Diff. = $9,000 - $9,000 = $0; Forecasted Sales equal
Closed Sales.
•
Forecast Diff. Percentage. The Forecast Diff. Percentage is the
difference between Closed Sales and Forecasted Sales amounts in
percentage of Forecasted Sales value for the specified period.The
equation is:
Forecast Diff. Percentage = (Closed Sales - Forecasted) * 100% /
Forecasted
•
0% indicates that Closed Sales and Forecasted values were equal
for the specified period.
•
Negative/positive values mean that Closed Sales were less/more
then Forecasted correspondingly. Absolute value of this parameter
can be used as one of indicators of Sales Planning Efficiency.
•
Negative values are shown in parentheses ().
Examples:
Forecast Diff. Percentage = ($0 - $9,000) *100 / $9,000 = (-100%);
No revenue stream;
Forecast Diff. Percentage = ($1,400 - $1,000) *100 /$1,000 = 40%;
revenue stream exceeds Forecasted Sales by 40%
•
Activity Cd. When an activity code is entered in this field, GoldMine
includes only those forecasted sales and closed sales with the specified
activity code. When the field is left blank, GoldMine includes all
forecasted sales and closed sales.
GoldMine User Guide
Sales Management • 261
•
Result Cd. When a result code is entered in this field, GoldMine
includes only those forecasted sales and closed sales with the specified
result code. When the field is left blank, GoldMine includes all
forecasted sales and closed sales.
• Select User(s). Displays the dialog box to select GoldMine users for a
new analysis.
• Analyze. Calculates the totals in the display.
3. Click Close to close the Sales Analysis dialog box.
Using Statistical Analysis
The Statistical Analysis of Completed Activities dialog box displays
completed activity information for an individual user, a group of users, or on a
system-wide basis. The analysis of completed activities can provide useful
insight into your performance or the performance of others in your
organization.
Use the following procedure to use the Statistical Analysis of Completed
Activities wizard.
1. Access the Statistical Analysis in one of two ways:
• From a user’s completed activities on the Activity List’s Closed tab.
From the local menu, select Analyze.
• By selecting Go To>>Analysis>>Statistical Analysis.
2. The Statistical Analysis of Completed Activities dialog box opens.
3. Select from the following options:
• Select User(s). Displays the Select Users dialog box to select
GoldMine users for activity analysis. The list box below the button
displays users to include in the analysis; your username displays by
default.
• From Date. Sets the first date of the period to include in the analysis.
• To Date. Sets the last date of the period to include in the analysis.
• Activity Cd. When an activity code is entered in this field, GoldMine
includes only those completed activities with the specified activity
code to be analyzed. When the field is left blank, all completed
activities are included. For example, if you code your activities as
billable or non-billable, enter the activity code for billable activities and
get an analysis of these activities only.
262 • Sales Management
GoldMine User Guide
•
•
•
•
•
•
•
Result Cd. When a result code is entered in this field, GoldMine
includes only those completed activities with the specified result code
to be analyzed. When the field is left blank, all completed activities are
included.
Phone Calls Analysis. Total number of completed telephone calls of
the specified type in the history file. Call-backs, outgoing calls,
incoming calls and returned messages are shown, as well as the total
duration of calls in each category. GoldMine displays the average
duration of calls below the grand totals line for this section. Successful
Calls shows the number and percentage of calls with a satisfactory
outcome, while Unsuccessful shows the telephone calls without a
satisfactory outcome.
Activities Analysis. Total number of completed activities in the history
file, including to-do actions, received messages, appointments, and
other activities.
Sales Analysis. Completed sales statistics. Closed Sales shows the total
number of completed sales activities in the history file. The total value
of each sale prints on the right. % of Calls Closed compares the number
of completed sales as a percentage of completed call activities. The
average sales value per completed call activity also displays.
Analyze. Calculates the totals in the display.
Close. Closes the dialog box
Print. Prints analysis results.
GoldMine User Guide
Sales Management • 263
About Territory Realignment
GoldMine enables you to reassign large groups of contacts and scheduled
activities from one user to another. Use the Territory Realignment Wizard to
manage dynamic sales territories, assign existing contacts to a new sales
representative based on user-defined criteria, or change the contact base for a
sales representative reassigned to a different territory.
Then select settings for synchronization, updating the databases of sales
representatives working in the field.
Use the Territory Realignment Wizard to:
•
Assign a set of existing contacts to users based on a filter or group
•
Reassign activities from one user to another user
•
Globally update fields relevant to a territory realignment
•
Set up synchronization to update the databases of remote users affected by
the realignment
WARNING: It is strongly recommended that you back up data
before performing territory realignment.
NOTE: Note: To reassign contacts and scheduled activities, build
a filter or group containing the contacts associated with the sales
territory to be realigned. If no filter or group exists, create one
now.
By default, GoldMine tracks and stores the filtered records included in the last
synchronization session’s transfer set for a remote site based on the Territory
Realignment. By performing this filter qualification process, GoldMine
automatically includes records with changes affecting Territory Realignment
in the current synchronization session. This ensures the remote sites update on
the next synchronization.
264 • Sales Management
GoldMine User Guide
Using the Territory Realignment Wizard
The Territory Realignment Wizard reassigns contacts and scheduled activities.
Use the following procedure to use the territory realignment wizard.
1. Select Tools>>Data Management>>Territory Realignment.
2. At the Territory Realignment Wizard, click Next.
3. At the Filter Selection dialog box, select the filter or group in the dropdown list.
To change the filters or groups to those of a different owner, select <Filters
of:> or <Groups of:>.
•
At the Select a User dialog box, select the user in the drop-down list
and click OK to return to the filters and groups drop-down list.
4. Select the filter or group and click Next.
5. At the Replace dialog box, replace the data in up to two fields and change
the owner in the third.
6. In the Replace drop-down list select the field to replace.
In the with field, type or select the value to appear in that field.
7. In the third Replace field you can reassign record ownership. Select
Owner in the drop-down list.
In the with text box select the new user or user group to which you are
assigning ownership of the contacts.
NOTE: Territory Realignment changes the owner but not the
curtaining level. To globally change record curtaining, see
Technical Document 362, “Using the Global Replace Wizard”
at support.frontrange.com
8. Click Next.
To Reassign the Activities of a Particular User
1. To reassign the activities of a particular user, select the user's name in the
Reassign the activities of this user drop-down list.
2. In the To this user drop-down list, select the new user who will be
responsible for the activities.
GoldMine User Guide
Sales Management • 265
3. In the Activities ranging from date field, type or select the starting date
from the F2 graphical calendar.
4. In the to date field, type or select the ending date from the F2 graphical
calendar.
5. In the Please select the activity types to reassign to the new user area,
specify the activities to be reassigned. The View types are:
• Call Backs. Scheduled, outgoing telephone calls to make sometime in
the future.
• Messages. Scheduled e-mail messages.
• Next Actions. Scheduled manual tasks such as sending literature,
delivering samples, shipping products, and so on.
• Appointment. Scheduled, date-specific meetings with contacts. Can
also schedule conference calls.
• Literature Request. Scheduled fulfillment and shipping of brochures,
price lists, and other mass-printed documentation to one or more
contacts.
• Forecasted Sales. Scheduled activities indicating the anticipated close
date of a pending sale with one of your contacts.
• Other Actions. Miscellaneous activities falling outside the other
activity categories defined in GoldMine.
• To-do. Priority-ranked activities without an activity date appear on a
separate To-do list, rather than the date-based Scheduled Activities
windows.
NOTE: By default, GoldMine does not link To-Do
activities. Each To-Do activity is forwarded daily.
•
Event. Date-specific activities scheduled for one or more days such as
conferences and conventions.
6. Select Reassign unlinked activities to include the user's scheduled
activities not linked to a contact record.
7. Click Next and then click Finish.
266 • Sales Management
GoldMine User Guide
Opportunity and Project
Management
About the Opportunity and Project Managers
Sales processes often involve multiple contacts and multiple organizations.
GoldMine offers two systems for handling the processes:
•
Project Manager. Oversees complex, long-term projects with multiple
components. Projects are usually not related directly to a particular sale,
although they can be converted to an Opportunity when it becomes
apparent that a project has become a sale. The Project Manager window
contains relevant information needed to track a long-term project involving
the same components and contacts as a large sales opportunity.
•
Opportunity Manager. Lends itself to a complex sales process involving
a group of users working as a team with multiple organizations and
contacts. The sale may involve multiple products or services as a package
deal where the customer purchases a part of the package but renegotiates
other parts into a different package. The Opportunity Manager window
contains relevant information needed to track a medium-to-long sales cycle
involving multiple contacts, issues, and activities.
Use the Opportunity and Project Manager windows to view details of the
opportunity or project from initial contact to a closed sale. The sales team can
view summary and detailed information about forecasted sales and activities
linked to the opportunity. As the project or opportunity progresses, a complete
record of associated activities ensures the team is making a coordinated effort
to complete the sale. The team can also see the decision makers and linked
contacts in the project and act accordingly.
GoldMine User Guide
Opportunity and Project Management • 267
Customizing the Opportunity and Project Managers Properties
Opportunity and Project share the same table, fields, and user-defined fields.
Modify the field labels or reorder and hide tabs of an opportunity listed in the
Manager.
Use the following procedure to customize the opportunity and project
properties or contact your administrator.
1. Select Go To>>Opportunities, or click Opportunities on the Navigation
Pane.
The Opportunities window opens.
•
To customize Project Manager, select Go To>>Projects, or click
Projects on the Navigation Pane.
The Projects Manager window opens.
2. Select a listed opportunity or project. and click Customize.
3. At the Opportunity Manager Customization Properties dialog box,
click the Fields tab and select from these options:
• New. Creates a new user-defined field on the Opportunity/Project
Properties dialog box.
Click New. At the User Defined Field Profile dialog box enter the
Field Name, Description and select a field type.
•
•
Character. A character field.Select the length of the field in the
Len. drop-down list.
•
Numeric. A numeric field. Select the number of decimals in the
Dec. drop-down list
•
Date. A date field.
Edit. Edits a user-defined field.
Click Edit. At the User Defined Field Profile dialog box enter the
Field Name, Description and select a field type.
•
Character. A character field.Select the length of the field in the
Len. drop-down list.
•
Numeric. A numeric field. Select the number of decimals in the
Dec. drop-down list
•
Date. A date field.
268 • Opportunity and Project Management
GoldMine User Guide
•
•
•
Delete. Deletes a user-defined field. Click Delete and click Yes at the
message.
Move Up. Reposition the selected field above other fields. Select a
field and click Move Up. The field moves up one position
Move Down. Reposition the selected field below other fields. Select a
field and click Move Down. The field moves down one position.
4. Click the Labels tab. Allows you to change the name of a label.
• In the Default Label list, find the label name you want to change. Click
once next to the field (under the New Label list). A text box opens.
• Type in the new label name and click OK.
• At the message click Yes.
5. Click the Tabs tab. Select from the following options:
NOTE: For each tab title listed, clear the associated checkbox
to hide tab from view.
•
•
•
•
•
Move Up. Repositions the tab. Select a tab and click Move Up. The tab
moves up one position.
Move Down. Repositions the tab. Select a tab and click Move Down.
The tab moves down one position.
Customize tab labels globally. Applies changes to all users. Select the
checkbox if you want changes to apply to all users.
Rename. Renames the tab. Select a tab and click Rename. At the Edit
Tab label dialog box, type in the new tab label and click OK. The new
tab name appears.
Reset. Return the tabs to default order.
6. Click the Options tab and select the When adding a New Opportunity/
Project, prompt the user to use either the wizard or the manual
method checkbox and then click OK.
GoldMine User Guide
Opportunity and Project Management • 269
Using the Opportunity Manager
Use the Opportunity Manager to oversee complex sales involving many
components. The Opportunities tab in the lower pane of the contact record
displays the opportunities associated with the contact.
1. Select Go To>>Opportunities.
2. At the Opportunity Manager, use the toolbar functions to perform
general actions and the local menu for other actions.
3. To view the opportunities assigned to a user, user group, or (all), select the
user in the Manager drop-down list.
4. To narrow displaying opportunities, select the Status in the drop-down list.
The results are based on win/lose processing and not on any user-defined
status options assigned to the opportunity.
5. To create a new opportunity, right-click the upper pane and select New.
See “Creating Opportunities” on page 271.
6. Manage Opportunity details using elements located in these tabs:
• Influencers. Contacts associated with the opportunity.
• Products. Products or services you are pursuing as a sales opportunity.
• Tasks. Schedule a plan of action with specific tasks assigned to users
or user groups.
• Team. GoldMine users and contacts contributing to the opportunity.
• Issues. Possible roadblocks to the successful completion of the
opportunity.
• Notes. Type free-form notes related to the opportunity.
• Competitors. Create a list of companies that are competitors for the
sale.
270 • Opportunity and Project Management
GoldMine User Guide
•
•
•
Details/Links. Simple details and allows you to link documents.
Pending. Scheduled activities for the opportunity.
History. Completed activities for the opportunity.
TIP: To sort opportunities or projects in alphanumeric order
by one of the column criteria, click the column label. For
example, to list records in alphabetical order by company
name, click the Company label.
7. To complete an opportunity, select the opportunity, right-click, and select
Win or Lose.
Creating Opportunities
Use the following procedure to create an opportunity in the Opportunity
Manager.
1. Select Go To>>Opportunities.
2. At the Opportunity Manager window click New on the Opportunity
Manager toolbar
or
Right-click and select New>>New Opportunity from the local menu.
3. At the New Opportunity Prompt dialog box, click:
• Yes. The Opportunity Wizard opens. (See “Using the Opportunity
Wizard” on page 274 to continue this procedure.)
• No. The New Opportunity dialog box appears. Go to step 4.
4. Configure these settings:
• Company. The company in the current contact record populates this
field. To change the contact, click the Search button and select a
company from the Contact Search Center.
• Contact. Select the primary or additional contact in the drop-down list.
Available contacts are those associated with the selected company.
The Contact field label will change according to the type of record
selected. For example, if the selected record type is Car, then the field
label will appear as VIN# with a drop-down list of Vehicle
Identification Numbers.
GoldMine User Guide
Opportunity and Project Management • 271
•
•
•
Type. Defaults to Opportunity and cannot be changed in this dialog
box.
Templates of User. Select the user who is the owner of the template.
Please select a template of the selected user. Select a template in the
drop-down list. See “Creating Opportunity Templates” on page 273.
5. Click OK.
6. At the Opportunity Properties dialog box, select:
• Opportunity. Change the opportunity name as needed.
• Company. Defaults to the company selected on the previous dialog
box. Type a new company name, as needed.
• Manager. Select the user who will be the opportunity manager in the
drop-down list.
• Code. Select the opportunity code by typing or clicking the F2 Lookup
arrow.
• Status. Type or select from the F2 Lookup list.
• Stage. Type or select from the F2 Lookup list.
• Source. Type or select the opportunity source from the F2 Lookup list.
• Units. Type the number of units forecast for the opportunity.
• Price. Type the price per unit.
• Probability. Type or select the percentage from the F2 Lookup list.
• Forecast. Automatically calculates a forecasted sale amount based on
the Units and Price; or type or select the forecasted sale amount from
the F2 Lookup list.
• Closed Amt. Updates with the final amount of a successfully closed
sale based on the forecasted amount.
• Start Date. Select the date the opportunity starts from the F2 graphical
calendar.
• Close by. Select the date the opportunity should end from the F2
graphical calendar.
• Actual Close. Defaults to the date displayed in End Date. Updates when
the opportunity is actually completed.
7. Click OK to return to the Opportunity Manager window with your new
opportunity in the upper pane.
8. Each tab must be updated manually. See “Using the Opportunity Manager”
on page 270.
272 • Opportunity and Project Management
GoldMine User Guide
Creating Opportunity Templates
Use the following procedure to create an opportunity template.
1. Select View>>Sales Tools>>Opportunities.
The Opportunity Manager window opens.
2. Click the Toggle to Show Templates button
.
The upper pane switches to the opportunity templates, and the first column
is labeled Opportunity Template.
3. Right-click and select New from the local menu. The Opportunity
Templates Properties dialog box opens.
NOTE: The settings you configure in the template are used
when an opportunity is created based on the template.
Carefully consider the settings, for example, the Acct.
Manager becomes the default owner and therefore the default
Manager of the opportunity. Users can change the settings as
they create the opportunity.
•
•
•
•
•
•
•
•
Template Name. Type the name of the template or select a name in the
F2 Lookup list.
Acct. Manager. Select the user or user group in the drop-down list.
Code.Type or select a code in the F2 Lookup list.
Default Status. Type or select the starting status for the opportunities
created using this template.
Default Stage. Type or select the beginning stage for the opportunities
created using this template.
Source. Type or select the source of the opportunity.
Probability. Select the percent opportunities should begin at.
Revenue. Type or select the expected revenue for the template type.
When you create an opportunity based on the template, the information
in the Revenue text box populates the Forecast text box on the
Opportunity Properties dialog box.
GoldMine User Guide
Opportunity and Project Management • 273
•
•
Number of days to close. Type or select the number.
Task dates to be based. Select the date entered for tasks set up for the
opportunity. This date appears in both the Start Date and End Date
fields of the Task dialog box.
4. Click OK to save and close.
Using the Opportunity Wizard
Use the Opportunity Wizard to create a sales opportunity and configure the
basic information.
1. Select Go To>>Opportunities.
2. At the Opportunity Manager, right-click the upper pane and select New.
3. At the New Opportunity Prompt dialog box, select Yes to view the
Opportunity Wizard: Welcome dialog box.
If you click No, the New Opportunity dialog box opens.
The Company field defaults to the active contact record. Click the Search
button to launch the Contact Search Center and then select the new contact
record.
274 • Opportunity and Project Management
GoldMine User Guide
4. Contacts and additional contacts available in the Contacts drop-down list
are associated with the selected company. Select the contact for the
opportunity and click Next.
5. At the Description dialog box, complete these fields:
• Enter or select a description for the opportunity below. Type or
select a name from the F2 Lookup list.
• Templates of User. Select the user or user group in the drop-down list.
• Please select a template of the selected user. Select in the drop-down
list. The templates displayed are owned by the user selected in the
Templates of Users field.
Click Next.
6. At the Overview dialog box, complete these fields:
• Manager. Select the owning user or user group in the drop-down list.
• Code. Type or select a code from the F2 Lookup list.
• Probability. Type or select the percent probability of success.
• Stage. Type or select the stage the opportunity is beginning at. This
field commonly defaults to 10 - Initial Contact.
• Source. Type or select the source of the opportunity from the F2
Lookup list.
GoldMine User Guide
Opportunity and Project Management • 275
•
•
Start Date. Type or select the starting date from the F2 graphical
calendar.
Close by. Type or select the ending date from the F2 graphical calendar.
Click Next.
7. At the Influencers dialog box, click New, Edit or Delete and complete the
appropriate window.
Click Next.
276 • Opportunity and Project Management
GoldMine User Guide
8. At the Finish dialog box complete these fields:
• Manager. Select the user or user group in the drop-down list.
• Probability. Type or select the percent probability of success from the
F2 Lookup list.
• Forecast. The field auto-populates based on data entered in the
Forecasted Sales dialog box.
• Close by. Select the closing date from the F2 graphical calendar.
9. Click Finish.
The opportunity is added to the upper pane of the Opportunity Manager.
GoldMine User Guide
Opportunity and Project Management • 277
Using the Project Manager
The Project Manager enables you to oversee complex projects involving many
components.
Use the following procedure to open and use the Project Manager.
1. Select Go To>>Projects.
2. At the Project Manager window, use the icons on the toolbar to perform
general actions and the local menu for other actions.
3. To create a project, right-click the upper pane and select New.
See “Creating Projects” on page 279.
4. Select the project and manage project details using the tabs:
• Contacts. Contacts associated with the project. See “Editing Project
Contacts” on page 280.
• Task. Schedule a plan of action with specific tasks assigned to users or
user groups. See “Editing Tasks” on page 281.
• Team. GoldMine users and contacts contributing to the project. See
“Editing Teams” on page 282
• Issues. Possible roadblocks to the successful completion of the project.
See “Editing Issues” on page 283.
• Notes. Type free-form notes related to the project. See “Editing Notes
for Opportunities and Projects” on page 284.
• Details/Links. Displays simple details; lets you link documents. See
“Editing Details/Links” on page 284.
• Pending. Scheduled activities for the project. See “Editing Pending
Activities for Opportunities and Projects” on page 285.
• History. Completed activities for the project. See “Editing History
Information for Opportunities and Projects” on page 286.
278 • Opportunity and Project Management
GoldMine User Guide
Creating Projects
Use the following procedure to create a project.
1. Select Go To>>Projects.
2. At the Project Manager dialog box, click New, or right-click and select
New>>New Project from the local menu.
3. At the New Project Prompt dialog box, click:
• Yes. The Project Wizard appears.See “Using the Project Wizard” on
page 288.
• No. The New Project dialog box appears.
4. Complete the following fields as needed and then click OK.
• Company. The company in the current contact record populates this
field. To change the contact, click the Search button to the right and
select a company from the Contact Search Center.
• Contact. Select the primary or additional contact in the drop-down list.
The Contact field label will change according to the type of record
selected. For example, if the selected record type is Car, then the field
label will appear as VIN# with a drop-down list of Vehicle
Identification Numbers.
•
•
Type. Defaults to Project and cannot be changed in this dialog box.
Templates of User. Select the user who is the owner of the template to
use.
• Please select a template of the selected user. Select a template in the
drop-down list. (See Creating Project Templates)
5. At the Project Properties dialog box, complete these fields as needed.
• Project. Type or select the project name from the F2 Lookup list.
• Company. Type the new company name if the name in the field is not
the correct company name.
• Manager. Select the project manager in the drop-down list.
• Code. Select the project code by typing or selecting an entry from the
F2 Lookup list.
• Status. Type or select.
• Stage. Type or select.
• Source. Type or select the source of the project from the F2 Lookup
list.
GoldMine User Guide
Opportunity and Project Management • 279
•
Start Date. Select the date the project starts from the F2 graphical
calendar.
• End Date. Select the date the project should end from the F2 graphical
calendar.
• Actual End. Defaults to the date displayed in the End Date. Updates
when the project is completed.
6. Click OK to return to the Project Manager window with your new project
listed in the upper pane.
Each tab must be updated manually.
Editing Project Contacts
The Project Manager Contacts tab displays the Company, Contact, Title, and
Role of related contacts. Edit the contacts using the Contacts local menu.
1. In the Project Manager, select a project and click the Contact tab in the
lower pane.
2. Right-click and select New.
3. At the Contact dialog box, edit the fields:
• Company. Click the search button to the right to launch the Contact
Search Center and select the company.
• Contact. The contacts and additional contacts listed in the drop-down
list depend upon the company selected.
• Title.Type or select the contact’s official title.
• Role. Type or select the role defining the contact’s relevance to the
project.
• Notes. Type in extra information about the contact.
4. To change a linked contact, right-click and select Relink to Another
Contact. The Contact Search Center appears. Double-click the new
contact you want to link to.
5. To display the Contact Record of the selected contact in the Project
manager, right-click and select Go to Contact Record.
The Contact Record window displays the selected contact.
6. To delete a contact from the list, right-click and select Delete.
7. To edit the information in the Contact dialog box, right-click and select
Edit.
280 • Opportunity and Project Management
GoldMine User Guide
Editing Tasks
The Tasks tab in the Opportunity Manager and the Project manager displays
Reference, Status, Priority, and User columns, as well as a Gantt chart
calendar. Tasks represent the scheduled plan of actions for the successful
completion of an opportunity or project. Edit tasks using the local menu.
Use the following procedure to edit tasks.
1. In the Opportunity or Project Manager, click the Tasks tab in the lower
pane. Right-click and the local menu appears.
2. To view the Gantt chart for tasks outside the viewing dates, right-click and
select Go to Task.
The Gantt chart jumps to the starting date for the selected task.
NOTE: To change the date ranges displayed in the Gantt chart
calendar, right-click the chart. Each right-click on the chart
takes you up one level, starting at weekly and going on to
monthly, yearly, and so on. To go down an increment, leftclick for each level.
3. To mark a task as completed, right-click and select Complete.
The task is marked out on the calendar and the Status column is updated to
Completed.
4. To locate a particular task, use the Find option.
• Right-click and select Find.
• Type a character string in the Find What box on the Find dialog box.
A character string is any series of alphanumeric characters (including
spaces) treated as a group.
5. To send data in the Task tab to an outside format, right-click and select
Output to.
Select from Send data to the printer (as a GoldMine Report), Word, Excel,
or the clipboard.
6. To change the options for a task, right click and select Edit.
At the Task dialog box complete the following fields as needed.
•
Reference. Type or select a predefined reference from the F2 Lookup
list.
GoldMine User Guide
Opportunity and Project Management • 281
•
•
Status. Type or select a status level for the task.
Start Date. Type or select the beginning date of the task from the F2
graphical calendar.
• End Date. Type or select the date the task should be completed from
the F2 graphical calendar.
• User. Select the user or user group the task is assigned to in the dropdown list.
• Priority. Type or select the rank from the F2 Lookup list.
• Color. In the drop-down list, select the color to displays for the task on
the Gantt chart calendar.
• % Done. Using the up and down arrows, select the percent of the task
completed.
• Notes. Add notes as needed.
• Completed Task. Select this option if the task is already completed.
The Status in the Task tab is updated as (Completed).
7. To remove the task from the list, right-click and select Delete.
8. To add a task, right-click and select New.
Editing Teams
The Team tab displays Member, Title, Department, and Role columns. Edit the
team using the local menu.
Use the following procedure to edit teams.
1. In the Opportunity or Project Manager, click the Team tab in the lower
pane.
2. To change settings for a team member, right-click and select Edit.
3. At the Opportunity or Project Team Member dialog box, complete the
fields as needed.
• Type. Select User (for GoldMine users) or Other Contact (for a contact
in the database).
• Member. If you selected User, the drop-down list displays users to
choose from. If you selected Other Contact, click the search button to
the right and locate the contact to add in the Contact Search Center.
Then select one additional contacts in the drop-down list.
• Title. Type or select the team member's title from the F2 Lookup list.
• Department. Type or select the team member's department.
282 • Opportunity and Project Management
GoldMine User Guide
•
Role. Type or select the team member's role in the opportunity or
project from the F2 Lookup list.
• Notes. Type specific notes related to the team member.
4. To display the Contact Record for the Other Contact, right-click and
select Go to Contact Record.
The contact displays in the Contact record window.
5. To remove the team member from the list, right-click and select Delete.
6. To add a team member, right-click and select New.
Editing Issues
The Issues tab displays Priority, Date, Status, Issue, and User columns. Edit
issues using the local menu.
Use the following procedure to edit issues.
1. In the Opportunity or Project Manager, select the Issues tab in the lower
pane. Right-click, and the local menu appears.
2. To update an issue, right-click and select Edit.
3. At the Issue dialog box, complete the fields as needed.
• Issue. Type or select a descriptive title for the issue from the F2
Lookup list.
• Status. Type or select a status.
• Priority. Type or select a relative priority for the issue from the F2
Lookup list.
• Date. Click on the F2 Lookup arrow to select a date using the graphical
calendar.
• User. Select the user in the drop-down list.
• Notes. Type a complete description of the issue.
4. To remove the task from the list, right-click and select Delete.
5. To add an Issue, right-click and select New.
GoldMine User Guide
Opportunity and Project Management • 283
Editing Notes for Opportunities and Projects
The Notes tab displays a general text box. Edit the notes using the local menu.
Use the following procedure to edit notes.
1. In the Opportunity or Project Manager, click the Notes tab in the lower
pane.
2. To add a note, click the mouse in the text box. A blinking cursor appears.
Type text to add to the note.
3. To edit the note, highlight the text to alter and right-click.
4. At the local menu, complete the fields as needed.
Editing Details/Links
In the Opportunity or Project Manager, the Details/Links tab links documents,
program executables, and Web sites to the opportunity or project. The tab
displays Item, Reference, and Linked Document columns. Edit the Detail/
Links information using the local menu.
Use the following procedure to edit details and links.
1. In the Opportunity or Project Manager, select the Details/Links tab in the
lower pane.
2. To change the options on a detail or link, right-click and select Edit.
3. At the Detail Properties dialog box, complete the fields as needed.
• Item. Type or select a name for the detail from the F2 Lookup list.
• Reference. Type or select a description of the item; or, if you are
linking a Web site, type the URL. For example, www.frontrange.com.
• Document is GoldMine Merge Form. Select this option if linking a
Word document you used with the document merge functionality.
• Allow File to Synchronize. Select a Detail/Link to synchronize to
remote users.
• File Name. Browse to the location of the document or .exe to link.
4. To launch a linked document or .exe, highlight the detail, right-click, and
select Launch.
5. To launch a linked Web site, highlight the detail, right-click, and select
Launch Web Site from the local menu.
284 • Opportunity and Project Management
GoldMine User Guide
Editing Pending Activities for Opportunities and Projects
The Pending tab displays Activity, Date, Time, User, Code, Contact, and
Reference columns. Edit the pending activities using the local menu.
Use the following procedure to edit pending activities.
1. In the Opportunity or Project Manager, select the Pending tab in the lower
pane.
2. Right-click, and select Zoom.
The Scheduled Activity Zoom window opens.
•
•
Scroll through the activities by clicking Next and Previous.
Click Complete to complete the activity or Delete to remove it from
the list.
3. To complete an activity and file it in the History tab, right-click and select
Complete.
At the Complete an activity dialog box, update the fields and click OK.
4. To schedule activities, right-click and select Schedule and select an option.
5. To quickly send an email to the linked customer on a pending activity,
right-click and select Reply.
• At the Reply to an Activity dialog box, file the email in History, delete
it, or retain it in the inbox. Notes can carry over.
6. To display only pending activities that meet a particular criteria, right-click
and select Options>>Filter.
At the Activity Filter dialog box, use the Find option to locate a particular
detail.
•
•
Right-click and select Find.
Type a character string in the Find What box on the Find dialog box.
A character string is any series of alphanumeric characters (including
spaces) treated as a group.
GoldMine User Guide
Opportunity and Project Management • 285
7. To send the data in the Pending tab to an outside format, right-click and
select Output to.
• Send the data to the printer (as a GoldMine Report), Word, Excel,
or the clipboard.
8. To quickly update a many activities, right-click and select
Options>>Auto-Update.
9. To remove the detail from the list, right-click and select Delete.
10. To add a Detail, right-click and select New.
Editing History Information for Opportunities and Projects
The History tab displays Date, User, Activity, Result, Code, Contact, and
Reference columns. Edit history information using the local menu.
Use the following procedure to edit history information.
1. In the Opportunity or Project Manager, click the History tab in the lower
pane.
2. To change options for a History record, right-click and select Edit.
3. Right-click and select Zoom.
At the Completed Activity Zoom, scroll through the activities by clicking
Next and Previous.
4. To display only history records that meet a particular criteria, right-click
and select Options>>Filter.
At the Activity Filter dialog box, to locate a particular record, use the Find
option.
•
•
Right-click and select Find.
Type a character string in the Find What box on the Find dialog box.
A character string is any series of alphanumeric characters (including
spaces) treated as a group.
5. To send the data in the History tab to an outside format, right-click and
select Output to.
• Send the data to the printer (as a GoldMine Report), Word, Excel,
or the clipboard.
6. To remove the record from the tab, right-click and select Delete.
286 • Opportunity and Project Management
GoldMine User Guide
Editing Projects
The Project Manager Contacts tab displays the Company, Contact, Title, and
Role of related contacts. Edit the contacts using the Contacts local menu.
Use the following procedure to edit a project.
1. In the Project Manager, select the project to edit.
2. Right-click and select Edit.
3. At the Project Properties dialog box appears, edit the fields as needed and
then click OK.
Creating Project Templates
Use the following procedure to create a project template.
1. Select GoTo>>Projects.
2. At the Project Manager window click the Toggle to Show Templates
button
.
The upper pane switches to the project templates and the first column is
labelled Project Template.
3. Right-click in the upper pane and select New from the local menu.
The Project Templates Properties dialog box opens.
The settings you configure in the template are used when an opportunity is
created based on the template. Carefully consider the settings, for example,
the Acct. Manager becomes the default owner and therefore the default
Manager of the opportunity. Users can change the settings as they create
the opportunity.
4. Complete the fields as needed.
• Template Name. Type the name of the template or select a name in the
F2 Lookup list.
• Acct. Manager. Select the user or user group in the drop-down list.
• Code. Type or select a code in the F2 Lookup list.
• Default Status. Type or select the starting status for the opportunities
created using this template.
• Default Stage. Type or select the beginning stage for the opportunities
created using this template.
• Source. Type or select the source of the opportunity.
GoldMine User Guide
Opportunity and Project Management • 287
•
•
Number of days to complete. Type or select the number of days
needed to complete the project.
Task dates to be based. Select the date entered for tasks set up for the
project. This date appears in both the Start Date and End Date fields of
the Task dialog box.
5. Click OK to save and close.
Using the Project Wizard
The Project Wizard takes you through the process of creating a project,
configuring basic information, and setting the initial information in the tabs.
The Projects tab on the contact record displays the projects associated with the
contact.
Use the following procedure to open and use the Project Wizard.
1. Select Go To>>Projects.
2. At the Project Manager window, right-click the upper pane and select New.
3. At the New Project Prompt dialog box, select Yes.
The Project Wizard: Welcome dialog box opens. The Company defaults to
the active contact record.
For another contact record, click the search button to launch the Contact
Search Center and then select the contact.
4. The contacts and additional contacts available in the Contacts drop-down
list depend on the company selected. Select the contact for the project and
click Next.
5. At the Description dialog box, complete the fields as needed.
• Enter or select a description for the project below. Type or select a
name from the F2 Lookup list.
• Templates of User. Select the user or user group in the drop-down list.
• Please select a template of the selected user. Select in the drop-down
list. The templates displayed are owned by the user selected in the
above field.
Click Next.
288 • Opportunity and Project Management
GoldMine User Guide
6. At the Overview dialog box, completed as needed.
• Manager. Select the owning user or user group in the drop-down list.
• Code. Type or select a code from the F2 Lookup list.
• Stage. Type or select from the F2 Lookup list the stage the project
begins at.
• Source. Type or select from the F2 Lookup list.
• Start Date. Type or select from the F2 graphical calendar.
• Close Date. Type or select from the F2 graphical calendar.
7. Click Next to view the Influencers dialog box. See “Editing Opportunity
Influencers” on page 290.
8. Click Next to view the Team Members dialog box. See “Editing Teams”
on page 282.
9. Click Next to view the Issues dialog box. See “Editing Issues” on page
283.
10. Click Next to view the Details/Links dialog box. See “Editing Details/
Links” on page 284.
11. Click Next to view the Finish dialog box.
12. At the Finish dialog box, complete the following fields as needed:
• Manager. Select the user or user group in the drop-down list.
• Code. Type or select the code from the F2 Lookup list.
• Stage. Type or select the beginning stage from the F2 Lookup.
• Close by. Select the closing date from the F2 graphical calendar.
13. Click Finish.
The project is added to the upper pane of the Project Manager.
GoldMine User Guide
Opportunity and Project Management • 289
Editing Opportunity Influencers
The Influencers tab in the Opportunity Manager displays the Company,
Contact, Title, Role, and Response Mode columns. Influencers are contacts
associated with the Opportunity. Edit influencers using the local menu.
Use the following procedure to edit influencers.
1. In the Opportunity Manager, select the Influencers tab in the lower pane.
2. Right-click and select Edit.
3. At the Influencer dialog box, complete the fields as needed.
• Company. Click the search button to the right of the field and select
Look up contact which launches the Contact Search Center.
Select a contact, or select Create a new contact which launches the
New Company and Contact dialog box to create a new contact record.
•
Contact. The contacts and additional contacts listed in the drop-down
list depend upon the company selected.
• Title. Type or select the contact's official title.
• Role. Type or select the role defining the contact's relevance to the
opportunity.
• Response Mode. Type or select the way the influencer is likely to
respond when contacted about a sale.
• Notes. Extra information about the influencer.
4. To change a linked contact, right-click the Influencer tab and select Relink
to Another Contact.
The Contact Search Center appears.
•
Select the contact to exchanging with the highlighted contact from the
Influencer tab.
5. To display the contact record of the selected contact in the Opportunity
manager, right-click and select Go to Contact Record.
The contact record displays.
6. To delete a contact from the list, right-click and select Delete.
7. To add an influencer, right-click and select New.
290 • Opportunity and Project Management
GoldMine User Guide
Marketing Tools
About the Leads Management Center
The Center provides a sequence of activities to help manage marketing
activities related to the base of contacts and potential leads. Identify and track
who brings in the lead, who and how contact is made, and the lead's progress
through the sales cycle.
Use the Leads Management Center along with the Campaign Management
Center and Web Import to design, test, and implement customer treatment
strategies and campaigns to improve marketing efficiency and measure
effectiveness.
GoldMine User Guide
Marketing Tools • 291
Using the Leads Management Center
Use the following procedure to access and use the Leads Management Center.
1. Select GoTo>>Leads Management Center, or click Administer leads on
the Getting Started toolbar.
2. At the Leads Management Center, select from these options to process
your set of leads:
• Import data from a variety of sources including ACT!, DBF, ASCII,
SDF, SQL, or XML files.
• Assign an owner/manager and record curtaining to control who can
update or view a lead.
• Assign an Automated Process to process the leads according to a
predefined track of actions and triggers.
• Schedule an activity to route, manage, and schedule one or more
activities using calls, next actions, appointments, literature requests,
forecasting sales, events, to-dos, and email communication.
• Organize filters/groups to work with leads and filter and group.
Create new, add or remove members from existing, or modify the
criteria of filters and groups. To add a current lead to an existing filter
or group you must walk through the steps of editing the filter or group.
For more information on filters, see the GoldMine 8.5 Administrators
Guide.
292 • Marketing Tools
GoldMine User Guide
About the Campaign Management Center
One of GoldMine's marketing tools, this interface lets you view customer
interactions from initial contact to closing the first sale to future purchases.
Use the Campaign Management Center, Web Import, and the Leads
Management Center to design, test, and implement customer treatment
strategies and campaigns to improve marketing efficiency and measure
effectiveness. By tying sales and marketing promotions with customer data
you can provide consistent, personalized customer experiences.
The Center interface contains three panes, a menu, and a toolbar. The
navigation pane (tree view) displays each campaign. Expand a campaign in the
tree to reveal its Open, Completed and Contacts folders. Select a folder to
display details and contact names (in the right panes).
The Center tracks open/completed activities and which customers have been
contacted. When you complete a scheduled activity generated from a
campaign, GoldMine tracks the activity and records it as completed in the
Completed folder. A completed campaign activity is also noted in the Contract
Record History tab.
The Campaign Creation Wizard provides a checklist of activities for
conducting a campaign. Use the Wizard to import data, schedule calls, perform
mail merges, and run Automated Processes.
Click the Configure Web Import button on the toolbar. A wizard appears.
Use it to create the HTML form and the script for Web imports. Web import
capabilities help you collect contact information from interested visitors
directly from your Web site, to feed that into marketing campaigns.
GoldMine User Guide
Marketing Tools • 293
Campaign Local Menu
Access the local menu by right-clicking on a campaign in the Campaign
Management Center.
•
New Campaign. Launches Campaign Creation Wizard.
•
Delete Campaign. Removes selected campaign.
•
Rename Campaign. Renames selected campaign.
•
Clone Campaign. Copies selected campaign to a new campaign.
•
New Task. Adds new task to selected campaign.
•
Task Properties. Modifies selected campaign.
•
Delete Task. Removes selected task from the campaign.
•
Complete Task. After task is accomplished, marks it as complete.
•
Assign Contacts. Opens the Contact Search Center.
•
Expand/Collapse. Opens or folds up sub-entries in the navigation pane.
•
Expand All. Opens all folders in the navigation pane.
•
Refresh. Updates campaigns listed in the navigation pane.
294 • Marketing Tools
GoldMine User Guide
Campaign Management Center Toolbar
New Campaign: Launches the Campaign Creation Wizard.
Clone Campaign: Copies selected campaign to a new campaign.
Rename Campaign: Changes given name of a campaign.
Delete Campaign: Removes selected campaign.
New Task: Adds new task to selected campaign.
Complete Task: Updates a task to Completed.
Delete Task: Removes selected task from campaign.
Task Properties: Modifies selected campaign task.
Assign Contacts: Opens the Contact Search Center.
Configure WebImport: Displays the WebImport Profiles dialog box.
GoldMine User Guide
Marketing Tools • 295
Using the Campaign Management Center
Create, modify, or delete campaigns using the Campaign Management Center.
Use the Toolbar or Navigation Pane Menu to access actions.
Use the following procedure to create, modify, or delete campaigns.
1. Select Go To>>Campaigns, or click Campaigns in the Navigation Pane.
2. At the Campaign Management Center, click OK.
3. At the Campaign Management Center dialog box, select an option:
• Create Campaigns. See “Creating Campaigns” on page 296.
• Clone Campaigns. See “Cloning Campaigns” on page 298.
• Rename Campaigns. See “Renaming Campaigns” on page 299.
• Create a New Campaign Task. See “Creating New Campaign Tasks”
on page 299.
• Complete a Campaign Task. See “Completing Campaign Tasks” on
page 300.
• Delete Campaigns. See “Deleting Campaigns” on page 300.
• Delete Campaign Tasks. See “Deleting Campaign Tasks” on page
300.
• Modify Campaign Properties. See “Changing Campaign Task
Properties” on page 301.
Creating Campaigns
You can use marketing campaigns to consolidate a variety of communication
activities.
Use the following procedure to create a campaign; it displays in the Campaign
Management Center navigation pane.
1. Select GoTo>Campaigns.
2. At the Campaign Management Center window, in the navigation pane,
right-click and select New Campaign, or click New Campaign on the
toolbar.
296 • Marketing Tools
GoldMine User Guide
The Campaign Creation Wizard opens.
3. Click Next.
4. At the Select Contacts dialog box, select a filter or group from the dropdown list.
• To change the filters or groups to those of a different owner, select
<Filters of:> or <Groups of:>.
The Select a User dialog box opens.
•
Select a user and then click OK.
Click Next.
5. At the Assign tasks to this campaign dialog box, click New task.
6. Configure the following:
• Import Data. GoldMine provides several ways to import data. Select
to open the Select Import Data Source dialog box.
• Mail Merge. Merge contact information with templates (document,
envelope, or label). Select to open the Mail Merge Properties dialog
box.
• E-mail Merge. Use templates to communicate a promotion to
customers using queued Internet e-mail. Select to open the Mail Merge
Properties dialog box appears.
GoldMine User Guide
Marketing Tools • 297
•
•
Call. Schedule outgoing telephone calls to initiate a contact or followup. Select to open the Schedule a Call dialog box. Only the Detail tab is
available.
Automated Processes. Use predefined or create new. Select to open
the Select an Automated Processes dialog box.
You can add tasks as needed.
7. Click Edit to modify a task.
8. Click Delete to delete a task from the campaign.
9. Click Next to move to the Summary of selections dialog box.
10. Review the information presented. If you need to modify the tasks, click
Back.
11. Click Finish.
Cloning Campaigns
Cloning a campaign is useful if you want to create a campaign with similar
attributes to an existing campaign.
Use the following procedure to clone a campaign.
1. Select GoTo>>Campaign.
2. At the Campaign Management Center window, select a campaign.
3. Click Clone Campaign.
GoldMine copies the campaign and displays it in the navigation pane with
the same name and a number. for example, Chicago051604 cloned would
appear Chicago051604 (1).
4. Select the cloned campaign and click Rename Campaign.
5. Type a new name and then press Enter.
298 • Marketing Tools
GoldMine User Guide
Renaming Campaigns
Use the following procedure to rename a campaign.
1. Select GoTo>>Campaign.
2. At the Campaign Management Center window, select a campaign.
3. Click Rename Campaign.
4. The insertion point is positioned in the campaign name in enter mode.
5. Type a new name and then press Enter.
Creating New Campaign Tasks
Use the following procedure to create a new campaign task.
1.
2.
3.
4.
Select GoTo>>Campaign.
At the Campaign Management Center window, select a campaign.
Expand the Open folder and then click New Task.
Configure the following:
• Import Data. GoldMine provides several ways to import data. Select
to open the Select Import Data Source dialog box.
• Mail Merge. Merge contact information with templates (document,
envelope, or label). Select to open the Mail Merge Properties dialog
box.
• E-mail Merge. Use templates to communicate a promotion to
customers using queued Internet e-mail. Select to open the Mail Merge
Properties dialog box appears.
• Call. Schedule outgoing telephone calls to initiate a contact or followup. Select to open the Schedule a Call dialog box. Only the Detail tab is
available.
• Automated Processes. Use predefined or create new processes. See
the GoldMine 8.5 Administrators Guide.
5. Add tasks as needed and then click OK.
GoldMine User Guide
Marketing Tools • 299
Completing Campaign Tasks
Use the following procedure to complete a campaign task.
1. Select GoTo>>Campaign.
2. At the Campaign Management Center window, select a campaign.
3. Expand the Open folder and select a task.
4. Click Completed Tasks.
A confirmation prompt appears.
5. Click Yes.
Deleting Campaigns
Use the following procedure to delete a campaign.
1. Select GoTo>>Campaign.
2. At the Campaign Management Center window, select a campaign.
3. Click Delete Campaign.
A confirmation prompt appears.
4. Click Yes.
NOTE: If an Automated Processes process was attached to a
campaign, GoldMine removes the process from the designated
records.
Deleting Campaign Tasks
Use the following procedure to delete a campaign task.
1. Select GoTo>>Campaign.
2. At the Campaign Management Center window, select a campaign.
3. Click Delete Tasks.
A confirmation prompt appears.
4. Click Yes.
300 • Marketing Tools
GoldMine User Guide
Changing Campaign Task Properties
Use the following procedure to change a campaign task’s properties,
1. Select GoTo>>Campaign.
2. At the Campaign Management Center window, select a campaign.
3. Expand the Open folder and select a task.
4. Click Properties.
The specific task dialog box opens.
5. Change task properties as needed.
About WebImporting
Set up Internet Web sites to collect contact information from interested
visitors. Use the data in GoldMine by creating a Web form that includes
instructions for handling the data.
After the information is submitted, a Web server script can format the data into
an Internet email message which can then be sent to a designated recipient.
When retrieving the email message, GoldMine recognizes the import
instructions and creates a contact record with data captured from the Web
page. Or, if a WebImport contact duplicates an existing contact, update
selected fields.
GoldMine User Guide
Marketing Tools • 301
302 • Marketing Tools
GoldMine User Guide
Service Center
About the Service Center
Case management functionality in GoldMine® Premium Edition provides
customer service agents the ability to capture service requests, then filter and
access the details of each case. The customer service center enables your entire
service division to pursue, arrange and filter all service requests and optimize
work flow throughout the day.
GoldMine Premium Edition case management features allow your service
professionals to assign, escalate and resolve customer service requests quickly
and efficiently. Quickly access customer service issues, route them to the
service agent who can best solve the problem, and keep clients informed of
their service request progress, all within your customized GoldMine
environment.
Your GoldMine users can now accept incoming customer service requests
from multiple sources, be alerted to upcoming and urgent cases, and get details
for any open or closed service request. Individual agents and customer service
managers can filter their daily case activities, improving work efficiency and
enabling optimal customer care.
GoldMine User Guide
Service Center • 303
Using the Service Center
The Service Center window is divided into two sections; a List view and a
Detail view.
Double-click on a case in the List view and the Details view opens.
Click on the bread crumb link in the upper left corner of the Service Center
Details view to return to the List view.
Service Center List View
The Service Center list view consists of the following elements:
•
A Search field for finding an existing case. Select the search field from the
drop-down menu:
304 • Service Center
GoldMine User Guide
•
A toolbar with buttons for managing the elements in the List view
•
A case list displaying all existing cases in the database
•
An Activity and Notes panel
•
A Summary of the specified case
To switch to the detail view, double-click on a case in the list. Click the
chevron button
in the right portion of the window to view both the case list
and case details in the main window.
Using the Service Center Toolbar (List View)
The toolbar in the service center List view provides elements that allow you to
view and manage details for cases. Open new cases and create case templates,
choose viewing and grouping options, reassign, escalate, and resolve cases.
•
New Case /Template. To open a new case, select New Case from the New
Template drop-down menu
•
Show. The Show menu allows you to filter the information displayed in the
case list.
•
Group. The Group menu allows you to group cases in the List view.
•
Reassign. The Reassign Case dialog box allows you to assign the specified
case to another user or service representative
•
Escalate. Open the Escalate Case dialog, where you can escalate the
specified case to a higher priority
•
Resolve. The Resolve Case dialog box allows you to mark a case as
Resolved and enter resolution notes and an email notification message.
GoldMine User Guide
Service Center • 305
Service Center Detail View
The Service Center Detail View consists of the following elements:
•
A toolbar, which allows you to create new cases and templates, edit the
status of the specified case, and analyze the specified case
•
A Case Details window, which includes fields and drop-down menus that
allow you to view and manage details for the specified case
•
A Case Manager, a customizable workspace where you can schedule and
manage activities, notes, tasks, and resources for the specified case.
To switch to the list view, use the chevron button in the top-right portion of the
window.
Using the Service Center Toolbar (List View)
The toolbar in the service center List View provides elements that allow you to
view and manage details for cases. Open new cases and create case templates,
choose viewing and grouping options, reassign, escalate, and resolve cases.
•
New Case. Click this button to create a new case or template.
•
Show. Click this button to filter how your Cases list displays information,
for examples Open Cases or My Group’s Cases.
NOTE: The headings will change based on your selections.
•
Group. Click this button to group your cases by category, for example,
Due Date or Owner.
•
Reassign. Click on this button to assign a specific case to a new service
representative or reassign an existing case to a new service representative.
•
Escalate. Click on this button to escalate a specific case to a higher
priority.
•
Resolve. Click on this button to mark a specific case as Resolved and enter
resolution notes for the case.
306 • Service Center
GoldMine User Guide
Using the Service Center Toolbar (Detail View)
The Service Center Detail View toolbar provides the following elements,
which allow you to view and manage details for an individual case:
The Service Center workspace tool bar consists of these buttons:
•
Reassign. Click this button to open the Reassign Case dialog box where
you can assign a case to a new service representative, or reassign an
existing case to a new service representative.
•
Escalate. Click this button to open the Escalate Case dialog box where you
can escalate the specified case to a higher priority.
•
Resolve. Click this button to open the Resolve Case dialog box where you
can mark a case as Resolved and enter resolution notes for that case.
•
Abandon. Click on this button to mark a specific case Abandoned and
enter resolution notes for that case.
•
Templates. Select from drop-down menu:
•
•
Save as Template. Open the Manage Case Templates dialog with
predefined values populated from the specified case
Manage Templates. Open the Manage Case Templates dialog with
predefined values not populated
•
Analyze. Click this button to open the Case Management Analysis dialog
box where you can filter performance data by user. You can also export
this information to a Microsoft Excel spreadsheet or Microsoft Word.
•
Customize. Click this button to customize the Customize Case Manager
settings.
GoldMine User Guide
Service Center • 307
Creating a New Case
Use the following procedure to create a new service request (Case).
1. Select GoTo>>Service Center or select Service from the main Navigation
Panel.
2. At the Service Center, click New Case.
The Contact Search Center window opens.
3. Double-click on a contact or group of contacts and click Select.
If you have many records listed, use the Search capability at the top of the
window. For more information on using the Contact Search Center, see
“Searching for Contact Records” on page 104.
•
To create a case from a new contact, click New Contact and complete
the New Record dialog box.
The Service Center window opens and the new case appears with a
system-generated case number in the Case Number field. Depending
on the case, some fields also may be system-generated.
308 • Service Center
GoldMine User Guide
4. Complete each field by clicking next to the field and either entering text in
the field box or selecting values by clicking the down arrow on the box.
NOTE: As the user, you (or your administrator) define the
values in the drop-down box using F2 Lookup. If you have not
created any values, no values will appear.
5. Click on the Pending tab and complete the dialog box as needed.
For more information on the Pending tab, see “Scheduling Activities” on
page 143.
6. Click on the Notes tab and then click Add Notes.
Type any notes you have in the workspace, as needed and then click the
Save icon in the top left side of the Notes workspace.
7. Click on the Team tab and complete the team information as needed.
• To add a team member, click Add. At the Add Member dialog box,
select a user from the drop-down box and type in the user’s role in the
Role field.
• To edit a team member, either double-click on the team member or
click on the team member and click Edit, and then make the changes.
• To delete a team member, click on the team member and then click
Delete.
8. Click on the Task tab and complete the tasks properties as needed.
• To add a team member, click Add and complete the New Task dialog
box.
• To edit a task, double-click on the task or select the task and click Edit.
• To mark a task Complete, click Complete and at the Complete
Task>>Options section, select or type 100 in the % completed field.
• To print a task, select the task and click Print>>Print.
• To delete a task, select the task and click Delete.
GoldMine User Guide
Service Center • 309
9. Click on the Attachments tab and add attachments as needed.
• To add an attachment, click Add and complete the New Attachment
dialog box.
• To delete an attachment, click on the attachment and click Delete.
• To view an attachment, click View.
10. Click on the Resolution tab to add resolution information to the case, as
needed.
• To add a note, click Add Note and type the note in the workspace.
• To search the Knowledge Base, click Search Knowledge Base.
• To delete a Knowledge base entry, click Remove Knowledge Entry.
11. When an activity or task is competed, it is moved from the Pending or
Tasks tab to the History tab. Click on the History tab and double-click on
an activity or task to view additional details about the history of that item.
12. Click on the Contacts tab to view the contacts associated with this case.
13. Click on the Save icon in the toolbar to save the case.
Creating a New Template
The Template fields are based on typical service case categories and
prioritization. For example, a template might be used when the service call
center logs a request from a customer to repair a telephone that is under
warranty.
Use the following procedure to create a new template.
1. At the Service Center, click the down arrow on New Case>>New Template.
2. The Edit Template dialog window opens.
310 • Service Center
GoldMine User Guide
3. At the New Template Name field, type a name for the new template.
4. Select or type or select appropriate F2 lookup field values and then click
Save.
GoldMine User Guide
Service Center • 311
Cloning an Existing Template
Use the following procedure to clone or edit an existing template.
1. At the Service Center, click the down arrow on New Case>>New Template and then click Save.
The Manage Template window opens.
2. Select the template you want to clone or edit and click Edit or Clone.
3. Make the changes in the appropriate fields and then click Save.
4. To make changes on other templates, select the template and follow steps 3
and step 4, and then click Close.
312 • Service Center
GoldMine User Guide
Reassigning a Case
You can reassign a case to another user or another group.
Use the following procedure to reassign a case.
1. At the Service Center window, at the toolbar, click Reassign.
The Reassign Case dialog box opens and displays the selected case's
unique number.
2. Click the Use the Reassign To drop-down menu to select a user to whom
you will reassign the case.
To notify the selected user of the reassignment via e-mail, make sure the Email Notification checkbox is checked, and type your message into the
Message box provided.
3. Click Reassign to reassign the case or Cancel to exit the dialog without
reassigning the case.
GoldMine User Guide
Service Center • 313
Escalating a Case
The Escalate function enables you to escalate a case to a higher priority.
Use the following procedure to escalate a case.
1. At the Service Center window, at the toolbar, click Escalate.
The Escalate Case dialog opens and displays the selected case's unique
number.
2. Click the Escalate To drop-down menu to select the user to whom you will
escalate the case.
To notify the selected user of the escalation via e-mail, make sure the Email Notification checkbox is checked, and type your message into the
Message box provided.
3. Click Escalate to escalate the case or Cancel to exit the dialog without reescalating the case.
314 • Service Center
GoldMine User Guide
Resolving a Case
After a case is resolved, it is removed from the active list.
Use the following procedure to resolve a case.
1. At the Service Center window, at the toolbar, click Resolve.
The Resolve Case Dialog opens.
GoldMine User Guide
Service Center • 315
2. In the Notes field, enter information about the resolution of the case.
• To notify the selected user of the resolution via e-mail, make sure the
E-mail Notification checkbox is checked, and type your message into
the Message box provided.
3. When finished, click Resolve, or select Cancel to exit the dialog without
resolving the case.
Creating a Performance Report for a Case
Use this procedure to filter performance data by user and create reports.
1. At the Service Center window, at the toolbar, click Analyze.
The Case Management Analysis dialog box opens.
2. At the For User(s) drop-down box, select which user(s) to include in the
report by selecting check boxes in the drop-down menu
3. Choose a date range for the report in the View From and to fields.
316 • Service Center
GoldMine User Guide
4. Sort the resulting data by any of the six columns:
• User
• # Assigned. The number of active cases currently assigned to this user.
• # Escalated. The number of active cases escalated to this user.
• # Abandoned. The number of cases changed to Abandoned status by
this user.
• # Resolved. The number of cases changed to Resolved status by this
user.
• % On Time. The percentage of cases resolved before deadline by this
user.
5. Click Refresh to refresh results after entering new criteria.
6. Click Export to to export your report to either a Microsoft Word or
Microsoft Excel document.
7. Click Print to print a hard-copy of your report to a local or network printer.
8. Click Close to close the Case Management Analysis dialog window.
Customizing Data Appearance
See the GoldMine 8.5 Administrators Guide for information about customizing
how data appears in the Case Manager.
GoldMine User Guide
Service Center • 317
318 • Service Center
GoldMine User Guide
Knowledge Base
The Knowledge Base provides a resource for maintaining any type of
information useful to an organization or an individual. It can provide easily
accessible storage for graphics, multimedia files, and/or program applications.
This information can then be linked to a contact record (displays the record
whenever you access that topic).
The Knowledge Base consists of the Knowledge Base, and the Personal Base.
Configure them to present newly added information to the user, control user
reading and updating privileges, and search for specific entries based on userdefined criteria. Topic pages are arranged in outline format. Locate
information by navigating through different sections, conducting a search, or
opening a linked file.
Knowledge Base material is stored in the InfoMine table.
Users with Master Rights can set up user access to the Knowledge Base; each
connected user can set up information in his or her Personal Base.
GoldMine User Guide
Knowledge Base • 319
Using the Knowledge Base
Use the following steps to access the Knowledge Base.
1. Select Go To>>Knowledge Base, or select Knowledge Base from the
main navigation pane. The Knowledge Base window appears.
2. Use the Knowledge Base toolbar to navigate and manage.
3. View information by selecting a tab:
• Knowledge Base. Maintains information created by, for, and about an
organization and available to multiple users.
Depending on rights, all users can potentially view all Knowledge Base
topics. However, only users with Master Rights can add, edit, or delete
Knowledge Base items.
•
Personal Base. Maintains information useful to an individual user that
only the user can view and update. The only way to access a
PersonalBase is to log in to GoldMine as the user who created the
PersonalBase.
4. Create, edit, and search the Knowledge Base. Set security and notification
for users.
5. Create and edit topic text and linked files. See Adding HTML Text and
Adding Attached Files.
6. Click X to close.
Knowledge Base Toolbar
Adds a book to the Knowledge tree.
Adds a folder to the selected book.
Adds a topic to the selected book or folder
Displays the Topic or Section Properties dialog box for the selected item.
320 • Knowledge Base
GoldMine User Guide
Displays the Attach File tab of the Topic or Section Properties dialog box.
Deletes the selected item.
Displays a Table of Contents in the lower right pane of the selected book.
Displays the Search dialog box and allows you enter search terms.
Launches attachments, graphics, or other applications.
Creating and Editing Knowledge Base Books, Folders, and
Topics
Organize information in the either Knowledge Base or Personal Base by
creating high level books, internal folders, and pages to address individual
topics.
To create Knowledge Base books, folders and topics
1. Select Go To>>Knowledge Base, or select Knowledge Base from the
main navigation panel.
The Knowledge Base window opens.
2. To create a book, click the New Book toolbar icon
.
At the <new book> in the left pane under Knowledge Base, type a name.
Click in the right pane to add HTML text or click the Attach a file toolbar
icon to add an attachment.
Adding text or attachments at the book level is possible but will interfere
with a book level Table of Contents. Adding a TOC replaces the text on the
book, folder, or topic.
GoldMine User Guide
Knowledge Base • 321
3. To add a folder, highlight the book to which you want to add the folder and
click the New Folder toolbar icon. The new folder appears under the
selected book.
Type in the name of the folder.
Click in the right pane to add HTML text or click the Attach a file toolbar
icon to add an attachment.
4. To add a topic page, highlight the book or the folder to which you want to
add the topic and click the New Topic Page toolbar icon.
The new page appears under the selected book or folder.
Type the name of the topic.
Adding HTML Text to Knowledge Base Topics
Use the capabilities of HTML to create pages in the InfoCenter.
The information provided here is specifically for the topic level, but is
applicable at the Book and Folder levels.
To add HTML text to a Knowledge Base topic
1. In the Knowledge Base window, click the right pane.
A blinking cursor and the HTML toolbar appear.
2. Type the information into the page, or copy and paste it in from other
sources.
3. Right-click the text pane and use the local menu options to format your
document an add features.
The HTML lets you format the text in a pleasing display and add Internet
hyperlinks and graphics.
4. Click Save.
322 • Knowledge Base
GoldMine User Guide
Knowledge Base Topic Text Local Menu
To open the Knowledge Base topic local menu, right-click in the right pane of
the Knowledge Base window.
The menu options are:
Save. Saves the page you have created.
Cut. Cuts the highlighted text.
Copy. Copies the highlighted text.
Paste. Pastes copied text to the location of the blinking cursor.
Delete. Deletes highlighted text.
Select All. Selects all the text on the page.
Font. Sets the font style, type, and size.
Paragraph. Sets text alignment on the page.
Style. Sets the text style, including format, heading, definitions.
Insert. Select the following.
Insert Picture. Select this option and the Picture dialog box opens. Browse to
a saved file or type the hyperlink to a web-based picture.
Insert Link. Select this option and the Hyperlink dialog box opens. Select the
file type to link and type the URL.
Spell Check. Select this option and the Check Spelling dialog box opens.
Save as File. Saves the HTML page you created as a separate file.
Print. Prints the page.
Edit HTML Source. Toggles the display from your formatted WYSIWYG to
HTML source code. Edit the document in the HTML source code.
WYSIWYG means What You See Is What You Get. A WYSIWYG display
allows you to see on the screen exactly what will appear when the document is
printed.
HTML means HyperText Markup Language. The authoring language used to
define the structure and layout of a Web document by using a variety of tags
and attributes.)
GoldMine User Guide
Knowledge Base • 323
Adding Attachments to Knowledge Base Documents
Attach existing documents to Knowledge Base topics to maintain such
specialized documents as contracts, price charts, and invoice forms in other
applications and launch them from InfoCenter. Attachments can also be other
applications.
To add an attachment to a Knowledge Base document
1. Select the book, folder, or page to which to attach a file.
2. Right-click and select Attach file.
3. The Attached File tab of the Topic Properties dialog box opens.
4. In the Attached file field, type or browse to the location of the file to
attach.
If attaching an application, browse to the .exe file for the program.
5. Select Synchronize the file to include the attachment when the
Knowledge Base information is synchronized to remote users.
6. Click OK.
The path to the attached file appears on the right of the Knowledge Base
toolbar and the Launch Attached File button is active.
7. To open the attached file or application, click the button, or right-click and
select Launch.
324 • Knowledge Base
GoldMine User Guide
Glossary
#
.gmb: (The file extension for a backup file created by the Back-Up Wizard)
.ics: (iCalendar file extension)
A
AccountNo: (The Account Number field uniquely identifies a contact record and is the
common field value that links the Contact1 table to Contact2, Cal, ContSupp,
ContHist, and OpMgr)
Action: (The Automated Process action is the activity performed when triggered)
Activities: (Activities are time-specific or event-based actions linked to contacts; for example
calls, appointments, letters, or other types of activities, such as To Do tasks or events
that are assigned to users)
Activity list: (A window that displays task or event information. The Activity List displays
eleven categories of information in a set of tabs)
Additional Contact: (Individual associated with the primary contact, such as an
administrative assistant. GoldMine stores this information in the Contacts tab of the
primary contact’s record)
Alphanumeric characters: (Letters A - Z and numeric digits)
Attachment: (A file, for example, a Word document, created outside of GoldMine and
attached to GoldMine as a linked document, InfoCenter attachment, or e-mail
attachment)
Auto-updating: (Allows you complete or delete many activities or resources)
B
Bcc: (Blind Carbon Copy. A copy of a message, usually e-mail, is sent to a recipient that the
main recipients cannot see)
BDE: (Borland Database Engine. Serves as a connector between GoldMine and the
databases)
GoldMine User Guide
Glossary • 325
Break fields: (Break fields manage the grouping of information, determining how multiple
entry information, such as Details, Calendar, and History, is displayed in a report
template. The break field ensures that all the details or calendar entries are grouped
together before moving on to the next contact record. Break fields can only be used in
Sort Headers)
C
Calculated field: (Field containing a mathematical expression rather than data)
Cc: (Carbon Copy. Used in e-mail messages, memos, and letters)
Character string: (Any series of alphanumeric characters (including spaces) that are treated
as a group)
Cloning: (The process of copying a user or report settings and configurations in order to
quickly create a new user or report)
CommonDir: (Used in the GM.ini, the CommonDir specifies the location of your default
contact files)
Contact files: (The tables storing a database's contact information. Also referred to as
Common files. The CommonDir line in the GM.ini points to the default contact files)
Contact record: (Standard unit of information in GoldMine. GoldMine’s contact record
incorporates standard information, such as name, company, phone, and address, and
also serves as the basis for all scheduled work in GoldMine, acting as the central link
between GoldMine’s Calendar and History by maintaining all past and pending events
related to the individual contact records in the GoldMine database)
Contact set: (Database consisting of the contact information: Contact1, Contact2, ContSupp,
ContHist, ContGrps, ContUdef, Conttlog, and sometimes Lookup. GoldMine allows
you to have more than one contact set)
Contact tabs: (Set of tabs located below the main Contact Record containing information
associated with the contact, including additional contacts, pending, and history
information)
Contacts tab: (Additional contacts associated with the Contact Record)
Curtaining: See Record curtaining
Custodian: (The person responsible for the resource)
D
Database: (A collection of data fields and related tables storing information that facilitates
access and retrieval)
326 • Glossary
GoldMine User Guide
Details tab: (Structured, user-defined information associated with each Contact Record)
Dialog field: (A field created to open a dialog box and prompt the user for parameters to
include in the report)
Digital ID: (Digital signature and encryption keys sent with e-mail messages)
E
Entity: (Used to refer to a single record type. Consists of a customized combination of primary
fields views, custom screens, and GM+Views)
Event: (Step-by-step instructions contained in an Automated Process, or track, that GoldMine
must evaluate to perform a specified series of activities. An event consists of a trigger
and an action. An Automated Process consists of a sequence of one or more events)
F
F2 Lookup: (Special type of browse window that can be customized to contain frequently
used or code-specific entries. Security options can control F2 lookups to ensure user
input and allow standardization of data)
Field typing: (Customizing field labels and colors using direct data or dBASE expressions)
Fields tab: (Displays user-defined fields grouped together in user-defined screens)
File code: (The unique 3-character identification assigned to each Contact Set, enabling
synchronization and backing up)
Filter: (Sort condition used to select a subset of records from the entire database)
Force log out: (Forces users out at a particular time or when inactive for a period of time)
Free/busy times: (Free and busy calendar times published to file, ftp, or http locations and
made available to other users)
G
GM.ini: (A file located in the GoldMine directory containing commands for general GoldMine
operation. The most important are the SysDir, GoldDir, and CommonDir)
GM+View tab: (User-defined HTML template-based views)
gmb: (The .gmb file extension for a backup file created by the Back-Up Wizard)
GoldDir: (Used in the GM.ini, the GoldDir specifies the location of your GoldMine files (also
called your GMBase files))
GoldMine User Guide
Glossary • 327
GoldMine Business Contact Manager: (An installation of GoldMine using a D-License and a
dBASE database)
GoldMine Business Contact Manager Corporate Edition: (An installation of GoldMine
using an E-License and an optional SQL database. Includes GoldSync)
GoldMine e-mail: (E-mail message to another GoldMine user or user group)
GoldMine files: (The tables storing other database information. Also referred to as GMBase
files. The GoldDir line in the GM.ini points to the shared GoldMine files)
GoldMine link to Excel: (Creates a link between GoldMine and Excel, allowing you to add
GoldMine fields to Excel or export data from Excel to GoldMine)
GoldMine link to Word: (Creates a link between GoldMine and Word, allowing you to add
GoldMine fields to a Word document or template)
GoldSync Server: (A computer that handles the synchronization processes)
GoldSync Service: (Runs the GoldSync application in the background without requiring a
user to launch GoldMine)
Group: (Fixed set of contact records that meet an initial set of conditions. Once selected,
member records subsequently have instantaneous access to the subset. Alternate
method to filters of maintaining a subset of data)
H
History tab: (Completed activities associated with the Contact Record)
HTML: (HyperText Markup Language. The authoring language used to define the structure
and layout of a Web document by using a variety of tags and attributes)
Hyperlink: (An element in an electronic document that links to another place in the same
document or to an entirely different document. Click on the hyperlink to follow the link)
I
IIS: (Internet Information Services)
InfoCenter: (A resource used to maintain and display any type of information useful to an
organization or an individual. The InfoCenter can archive information in a variety of
formats, such as graphics, multimedia files, and program applications. Any of this
information can be linked to a Contact Record)
Installing locally: (Installing GoldMine .exes and .dlls on a local workstation in a network
environment)
328 • Glossary
GoldMine User Guide
Instant sync: (Automatically reminds undocked users to synchronize whenever a connection
GoldSync is detected)
Internet e-mail: (E-mail message to customers using you POP3 e-mail account)
K
Keyboard shortcuts: See Shortcut keys
Keyword: (One or more words that succinctly describe a document's contents)
KnowledgeBase: (Information created by, for, and about an organization and available to
multiple users)
L
Linked activities: (Scheduled activities linked to a contact record)
Links tab: (Documents, programs, and other files linked to the Contact Record)
Local menu: (Also known as a shortcut menu, the local menu provides quick access to a set
of commands affecting only the current browse window, tab, or pane)
LogStamp: (Contains the time and date that the record was last changed)
M
Macros: (A series of commands and/or keystrokes that launches or runs a action)
Maintaining: (Process to improve performance by regenerating indexes, packing and
rebuilding tables, and sorting and verifying data. The maintenance of the database
should be performed by the system administrator or manager)
Members tab: (Lists the contact Groups of which the Contact Record is a member)
Merge codes: (Three-character codes used as the basis for e-mail and document merging for
mass mailings)
N
Net-Update: (Process of updating GoldMine over the Internet)
Notes tab: (Free text notes associated with each Contact Record)
O
GoldMine User Guide
Glossary • 329
ODBC: (Open Database Connectivity)
Operator: (Specifies the value a field must have to be included in a record selection criteria.
Examples of operators include the following: equal to, greater than, lesser than or
equal to)
Opportunity: (Involves a group working as a team with multiple organizations and contacts to
successfully close a complex sale)
Opptys tab: (Displays the Opportunities associated with the Contact Record)
Organization Chart: (Graphically displays contact information and organizational
relationships in a tree structure)
P
Packing: (The process of actually deleting records that were marked for deletion. This
process is only necessary for a dBASE database. Periodically packing the database
files removes the “dead space” between records)
: (Activities scheduled for the Contact Record)
Personal Base: (Information useful to an individual user that only the logged-in user can view
and update)
Primary contact: (The name of the contact on the Contact record)
Primary fields views: (Primary field views are customized views of the primary fields. Primary
fields are those in the upper four panes of a Contact Record and are Contact1 fields)
Project: (Involves a group working as a team to complete a long-term project that involves
multiple component tasks)
Projects tab: (Displays the Projects associated with the Contact Record)
R
Rebuilding: (Creates a new file structure (or table), and copies data, record-by-record, from
the old files/tables to the new ones)
Record curtaining: (A Contact record can be curtained so that a user who does not own the
record cannot view the record or can view only part of the record)
Record types: (Customized combination of primary fields views, custom screens, and
GM+Views. Configured in the Record Types Administration Center)
Record Types Administration Center: (Allows you to create many Record Types based on
combinations of your different Primary Field Views, Custom Screens, and GM+Views
and to apply them based on your user-defined Record Type Rules)
330 • Glossary
GoldMine User Guide
Record typing: (Customized combinations of Primary Fields Views, Custom Screens, and
GM+Views)
Rectype: (A record type code identifying different types of records within the database)
Referrals tab: (Internal referrals within the Contact Set)
Rehost: (Rehosting data is the process where one database is copied or converted to a new
database)
Reports Center: (Provides easy visual access to several reporting options available within
GoldMine)
Required field: (A field requiring data)
Resources: (Resources that are commonly requested include conference rooms, projectors,
demonstration products, company vehicles)
Rich Site Summary: (See RSS)
RSS: (Rich Site Summary -- a simple XML format designed for sharing Web Headlines)
S
Screen design toolbar: (Used when you are designing your primary fields or Fields tab
screens)
Seq: (Sequence ordered number for each event in an Automated Process. The sequence
number begins with either P for a Preemptive event or S for a Sequential event. Each
event is processed in order based on the sequence number)
Shortcut keys: (Shortcut keys are keyboard keys or key combinations that invoke a particular
command)
Shortcut menu: See Local Menu
Site code: (Matches a synchronization process to a site)
Sort Header: (A section in a report that holds the labels, filters, and break filters for the section
or for the corresponding detail section)
Sort order: (The order that Contact records are displayed based on a specified field. The sort
order for the database is determined by the Sort Order you select in the Contact
Listing window. If a filter or group is active, the Sort Field you selected takes
precedence)
Sorting: (Orders the records in the files/tables by the most-used indexes)
Summary tab: (Displays activity information about the current Contact Record)
GoldMine User Guide
Glossary • 331
Synchronization: (GoldMine’s remote synchronization is a process that can update one
GoldMine system with new or changed information that has been entered in another
GoldMine system)
SyncStamp: (Contains the time and date when the record was last successfully retrieved
during synchronization)
SysDir: (Used in the GM.ini, it specifies the location of gmw6.exe)
T
Task group: (A group of task items on the GoldMine Taskbar)
Task item: (An item on a taskbar that launches an action)
Taskbar: (Frequently used GoldMine Menu commands and macros, links to documents and
files, and a quick step for launching applications and web sites)
Tickets tab: (Displays tickets from HEAT Call Logging when GoldMine/HEAT integration is
installed)
Tlogs: (The general name for the two types of logs: ContTlog and GMTlog. They track date
and time stamps for changes to fields and the synchronization of the data)
Track: (A sequence of two or more events, which are the step-by-step instructions that
GoldMine evaluates to perform a defined series of activities. Also known as an
Automated Process.)
Tracks tab: (Lists the Automated Process tracks attached to the Contact Record)
Transfer set: (A database of all the changes made to Contact Records during a specified time
frame. The database with the changes is sent to other GoldMine locations and
retrieved, updating that database with the new information)
Transformation sheet: (A language for transforming XML documents into other XML
documents)
Trigger: (A predefined condition in an Automated Process event that, when the condition is
true, causes GoldMine to execute an action)
U
Unlinked activities: (Scheduled activities that are linked to a user but not to a contact)
URL: (Abbreviation of Uniform Resource Locator, the global address of documents and other
resources on the World Wide Web)
User groups: (Users can be logically grouped according the functions that they perform)
332 • Glossary
GoldMine User Guide
User Preferences: (Various settings that control how GoldMine looks and acts for each user)
User Properties: (These settings define a user's security and access in GoldMine)
UserID: (Field that contains the name of the user an activity is assigned to. UserID is based
on the GoldMine username)
Username: (Use this name to log into GoldMine. Identifies the user's activities)
Username.ini: (An initialization file located in the GoldMine directory that stores user's
individual settings)
Username.tbi: (Stores the user's taskbar settings)
V
Verifying: (Ensures that the data is readable and that all sync fields in the synchronization
records of the database file(s) are populated, and no unique fields are duplicated)
W
WYSIWYG: (What You See Is What You Get. Pronounced wizzy-wig. A WYSIWYG display
allows you to see on the screen exactly what will appear when the document is
printed)
X
XML: (Acronym for Extensible Markup Language. XML is a universal format that uses tags for
exchanging structured documents and data on the Internet)
GoldMine User Guide
Glossary • 333
334 • Glossary
GoldMine User Guide
End-User License Agreement (EULA)
FRONTRANGE SOLUTIONS END USER’S LICENSE AGREEMENT (“EULA”)
(Rev. October 2008)
IMPORTANT - READ CAREFULLY
THIS EULA SETS FORTH THE TERMS AND CONDITIONS UNDER WHICH FRONTRANGE
SOLUTIONS USA INC. (“FRONTRANGE”), GRANTS TO YOU (“YOU” OR “CUSTOMER”) THE
RIGHT TO USE THE FRONTRANGE SOFTWARE AND ACCOMPANYING DOCUMENTATION
ORDERED AND PAID FOR BY YOU (COLLECTIVELY “LICENSED SOFTWARE”). THIS EULA
REPLACES AND SUPERCEDES ANY LICENSE AGREEMENT THAT YOU MAY BE PRESENTED
WITH WHEN OPENING THE SOFTWARE PACKAGING, COMPLETING THE ACTIVATION
PROCESS, DOWNLOADING, INSTALLING, ACCESSING OR UTILIZING THE LICENSED
SOFTWARE OR CLICKING THE “I ACCEPT” BUTTON.
1.
License Grant. Subject to the terms and conditions of this EULA, FrontRange hereby grants to
Customer, and Customer fully accepts upon delivery, a nonexclusive, non-transferable and perpetual
(unless terminated or limited as provided below) right to use only the executable version (not source
code) of the Licensed Software for Customer’s internal business purposes.
2.
Scope of Authorized Use. You may use the Licensed Software only as expressly permitted under this
EULA and in accordance with the technical and other user manuals and read me files shipped with the
Licensed Software (collectively, “Documentation”). FrontRange expressly reserves any rights not
expressly granted to Customer. Your right to use the Licensed Software is limited to the number of
server(s), user(s), assets, modules, databases etc… (collectively, “License Limits”) that You have ordered
and paid for. All Licensed Software updates, upgrades, or new releases (collectively, “Updates”) are
provided to You on a license exchange basis. By using an Update You voluntarily terminate Your right to
use any previous version of the Licensed Software; provided, however, that You may continue to use
previous versions solely to assist You in transitioning to the Update. All Updates are part of the Licensed
Software. Should You exceed any of Your License Limits, You agree to pay the then applicable full list
price for the excess usage, as well as the related maintenance and support fees. You agree to allow
FrontRange to audit Your use of the Licensed Software to verify Your compliance with Your License
Limits. Audit rights shall be subject to Your reasonable securities policies as applied to all of Your
vendors, and may only be performed once every twelve (12) months.
3.
Restrictions.
a. Proprietary Rights. This is a license only and no title passes to You. With the exception of the license
granted under this EULA, FrontRange and any Third Party Licensor retain all right title and interest to the
Licensed Software and all related intellectual property and proprietary rights. You will not remove or
obscure any copyright notices, logos, or other proprietary rights notices or legends in the Licensed
Software. The Licensed Software contains information deemed confidential or otherwise proprietary to
FrontRange and any Third Party Licensor, and You will handle the Licensed Software with at least the
same degree of care employed with respect to Your own confidential or proprietary information.
b. Derivative Works, Reverse Engineering. You may not create any derivative works to the Licensed
Software except to facilitate Your authorized use of the Licensed Software, provided that Your use of
such limited derivative works is subject to this EULA. You may not modify, decompile, translate,
disassemble or reverse engineer the Licensed Software except if the laws of Your jurisdiction proscribe
End-User License Agreement (EULA)
the enforcement of such prohibitions but then only to the extent actually permitted, and for the limited
purposes specifically contemplated, by applicable law.
c. Commercial Exploitation. You may not distribute, rent, lease or transfer the Licensed Software or any
portion thereof. You may not use the Licensed Software, or any portion thereof, in a commercial hosting,
application service provider or service bureau environment.
d.Non Production Copies; Temporary Licenses. You may make one copy of the Licensed Software for
safekeeping purposes and as permitted in the Documentation. The original copy of the Licensed Software
and all copies that You may make may not leave Your control. If the Licensed Software is provided for
testing or other nonproduction purposes, You may not use it in a production or live environment and
Your right to use the Licensed Software is limited in accordance with the terms under which You
received it. In addition, if the Licensed Software is provided on a trial, evaluation, pilot or other
temporary basis, then notwithstanding anything to the contrary in Sections 1, 6 or elsewhere in this
EULA, it may only be used for the time period specified by FrontRange (and if none specified, then no
more than 30 days), is provided on an AS-IS basis without warranty and Your right to use it may be
terminated for convenience by FrontRange. Upon termination of any temporary license You agree to
return or destroy all copies of the Licensed Software.
e. Subscription. If You licensed the Licensed Software on a ‘subscription’ (or limited time) basis
(“Subscription Product”), then notwithstanding anything to the contrary in Section 1 or elsewhere in this
EULA, you may only use the Subscription Product during the time period that you have contracted and
paid for (“Subscription Term”). You agree that upon expiration of the Subscription Term, the
Subscription Product may automatically cease to function and irrespective of any auto-disablement, You
will return all copies of the Subscription Product (unless otherwise instructed by FrontRange). All other
nonconflicting terms herein shall apply.
f. Third Party Software. To the extent the Licensed Software includes software owned by third parties
(collectively “Third Party Licensors”) You may only use such third party software with the Licensed
Software and at all times subject to this EULA. The Third Party Licensors are intended third party
beneficiaries of this EULA. Notwithstanding the foregoing, to the extent that the Documentation provides
a separate license agreement for such third party software, then You agree that such separate agreement
shall govern.
4.
Term/Termination. This EULA will remain in effect until terminated pursuant to this Section 4. You
may terminate this EULA at any time by destroying all of Your copies of the Licensed Software.
FrontRange may terminate this EULA if You breach this EULA and fail to remedy such breach after a
thirty (30) days notice and opportunity to cure period. Notwithstanding the preceding, FrontRange may
immediately terminate this EULA if You breach Section 2, 3 or 9. Upon any termination, You agree to
cease all use of the Licensed Software, remove all copies from Your computers, destroy all copies of the
Licensed Software, and, upon request from FrontRange, certify in writing Your compliance herewith.
5.
Payments. All licenses and rights granted under this EULA by FrontRange are subject to timely receipt
by FrontRange of payment. All payments for fees, taxes and expenses must be made within thirty (30)
days of invoice, unless otherwise agreed in writing by an authorized FrontRange officer. You are
responsible for any and all federal, state, dominion, provincial or local sales, use, personal property,
excise, or other taxes, fees or duties arising from or related to this Agreement (other than taxes based on
FrontRange’s net income).
6.
Warranty. FrontRange warrants that the Licensed Software will perform substantially in accordance
with its Documentation for a period of ninety (90) days following delivery of the Licensed Software. This
limited warranty is void if failure of the Licensed Software results from accident, abuse, modification, or
misuse. FrontRange does not warrant that the Licensed Software will meet Your requirements, that the
operation of the Licensed Software will be uninterrupted or error free, or that all defects will be corrected.
End-User License Agreement (EULA)
The warranty and remedy set forth in this EULA are exclusive and in lieu of all other warranties and
remedies, oral or written, expressed or implied.
Except as provided above, FRONTRANGE AND ANY THIRD PARTY LICENSOR DISCLAIM ALL
WARRANTIES, EITHER EXPRESSED OR IMPLIED, WITH RESPECT TO THE LICENSED
SOFTWARE, ITS QUALITY, PERFORMANCE, NON-INFRINGEMENT, MERCHANTABILITY,
OR FITNESS FOR A PARTICULAR PURPOSE.
If You believe the Licensed Software does not meet this Limited Warranty, You must notify FrontRange
in writing within the warranty period. FrontRange’ entire liability and Your exclusive remedy with regard
to the Limited Warranty, will be, at FrontRange’ sole discretion, either repair or replacement of the
Licensed Software or a refund of the amount paid to FrontRange for the Licensed Software (provided in
that case that You also return the Licensed Software).
7.
Indemnification. FrontRange will, at its expense, defend and pay any settlement amounts or damages
awarded by a court of final jurisdiction arising out of any third party claim against You that the Licensed
Software infringes any copyright, patent, trademark or trade secret owned or controlled by the third party
(“Infringement Claims”); provided, however, that (i) FrontRange will be notified promptly in writing by
You of any such claim; (ii) FrontRange will have sole control of the defense of any action on such claim
and all negotiations for its settlement or compromise; and (iii) You will cooperate with FrontRange, at
FrontRange’ expense, in a reasonable way to facilitate the settlement or defense of such claim; except
that such indemnification obligation does not apply with respect to a claim of infringement if and to the
extent such claim arises out of (A) Your modifications not authorized by FrontRange, (B) the
combination or use of the Licensed Software with products not provided or recommended by FrontRange
if the infringement would have been avoided but for such combination or use, (C) use of the Licensed
Software after written notice of the claimed infringement has been received by You, (D) Your failure to
use an Update if the infringement would have been avoided by the use of the Update, or (E) actions by
Customer in breach of this EULA. Should the Licensed Software become, or in FrontRange’s opinion
likely to become, subject to an Infringement Claim, then You will permit FrontRange, at FrontRange’s
option and expense, either (a) to procure for Customer the right to continue using the Licensed Software,
or (b) to replace or modify the Licensed Software so that it becomes non-infringing and performs in a
substantially similar manner to the original product, or (c) upon failure of (a) or (b), despite the
reasonable efforts of FrontRange, to terminate this EULA and return the license fee You paid for the
Licensed Software pro-rated over a four (4) year life span. THIS SECTION SETS FORTH YOUR
EXCLUSIVE REMEDY AND FRONTRANGE’S SOLE LIABILITY WITH RESPECT TO
INFRINGEMENT CLAIMS.
8.
Liability Limits. THE LICENSED SOFTWARE IS NOT DESIGNED OR INTENDED FOR USE IN
ANY MEDICAL OR NUCLEAR SYSTEMS, OR FOR ANY OTHER MISSION CRITICAL
APPLICATION IN WHICH THE FAILURE OF THE LICENSED SOFTWARE COULD CAUSE
SUBSTANTIAL PROPERTY DAMAGE, PERSONAL INJURY OR DEATH. FRONTRANGE
DISCLAIMS ANY LIABILITY FOR USE OF THE LICENSED SOFTWARE IN ANY SUCH
APPLICATION(S).
TO THE MAXIMUM EXTENT PERMITTED BY APPLICABLE LAW, AND EXCEPT FOR
LIABILITY ARISING UNDER THE INDEMNIFICATION PROVIDED IN SECTION 7 ABOVE,
FRONTRANGE’ AND ITS THIRD PARTY LICENSORS’ ENTIRE LIABILITY UNDER THIS EULA
WILL BE LIMITED TO THE AMOUNT PAID BY YOU TO FRONTRANGE FOR THE LICENSED
SOFTWARE. IN NO EVENT WILL FRONTRANGE OR ITS THIRD PARTY LICENSORS BE
LIABLE FOR INDIRECT, SPECIAL, INCIDENTAL OR CONSEQUENTIAL DAMAGES ARISING
OUT OF THE USE OR INABILITY TO USE THE LICENSED SOFTWARE, including without
limitations damages for lost profits, loss or corruption of data, costs of procurement of substitute
End-User License Agreement (EULA)338
technology or services, even if advised of the possibility of such damages. The parties agree that the
limitations and exclusions of liability and disclaimers specified in this EULA will survive and apply even
if the limited remedies are found to have failed of their essential purpose.
9.
Legal Compliance. You must comply with all applicable laws and regulations in Your use of the
Licensed Software including without limitations any United States or foreign Export Control laws or
regulations, and all applicable data protection, SPAM, privacy laws and regulations. As part of the
registration process You may provide user information. Any personal information collected (1) will be
used solely for registration and license limit auditing purposes and to provide You with important
information about the Licensed Software, (2) will be stored in computer servers with limited access that
are located in controlled facilities, (3) may be stored and processed in the United States or other country
and by using the Licensed Software, You consent to any such transfer of information outside of Your
country, (4) may be stored for as long as the EULA is in effect, (5) will not be shared with any
government agency, private organization, or the public, except that Customer's corporate name may be
used as a reference company in the context of sales presentations and marketing activities.
10. United States Government Restricted Rights. THIS SECTION APPLIES ONLY TO LICENSING OR
USE BY THE FEDERAL GOVERNMENT OF THE UNITED STATES. The Licensed Software is
provided with RESTRICTED RIGHTS. Use, duplication, or disclosure by the federal government is
subject to restricted rights as set forth in subparagraph (c) of The Rights in Technical Data and Computer
Software clause at 252.227-7014 for DOD contracts and at FAR (48 CFR 52.227-19) for civilian agency
contracts or other comparable agency clauses.
11. Severability. If any provision of this EULA is unenforceable or invalid, such provision(s) shall be
amended to achieve as nearly as possible the same economic effect as the original provision(s) and the
remainder of the EULA shall remain in full force and effect.
12. Miscellaneous. This EULA constitutes the entire agreement between You and FrontRange relating to the
license rights for the Licensed Software (and any subsequent orders of additional License Limits or new
FrontRange products), and any additions to, or modifications of, this EULA will be binding upon the
parties only if in a writing duly executed by You and an authorized officer of FrontRange. THE TERMS
AND CONDITIONS OF ANY CUSTOMER PURCHASE ORDER ARE ONLY BINDING ON
FRONTRANGE IF THEY ARE AGREED TO IN WRITING BY AN AUTHORIZED FRONTRANGE
OFFICER AND IN A DOCUMENT OTHER THAN THE PURCHASE ORDER FORM. You may not
transfer the Licensed Software or assign this EULA without FrontRange’ prior written consent and any
attempt by You to do so will be void and without effect; except that, You may assign Your rights and
obligations hereunder in connection with a merger, acquisition or sale of all or substantially all of Your
assets subject to compliance with FrontRange’s administrative requirements for such assignments. If the
Licensed Software is acquired through a Reseller, You agree that (i) this EULA constitutes the entire
agreement between You and FrontRange regarding the Licensed Software (and the terms and conditions
of any purchase order or any other agreement between You and the Reseller are not binding on
FrontRange);
339 End-User License Agreement (EULA)
End-User License Agreement (EULA)
Index
A
About the Pending Tab 96
About WebImporting 301
Accessing the Contact Search Center 102
Activities 163
About 139
Auto-Updating 152
Benefits of using 140
Scheduling 142
Activity List 161, 165
Activity List Options Sub-Menu 163
Activity List Toolbar 162
Adding
Document templates 195
Documents to LFC 238
Adding Attachments to Knowledge Base
Documents 324
Advanced checkbox 114
Analyze leads 291
Assigning
Quotas 258
Auto-Updating Activities 152
B
Branching Script Answer Dialog Box 244
Building a Group Based on Supplemental
Contact Data 135
GoldMine Administrators Guide
C
Calendar 171, 172
Launching 172
Occasions 182
Shared 191
Task List 173
Calendars
Accessing 172
Calls
completing 157
Campaign
Creating New Campaign Tasks 299
Campaign Local Menu 294
Campaign Management Center 293, 296
Campaign Management Center Toolbar 295
Campaigns
Cloning 298
Deleting 300
Renaming 299
Certification Authorities 230
Changing
Users 50
Communicating with Contacts
About 193
Completing
Activities 156
Completing Calls 157
Completing Campaign Tasks 300
Contact Record Tabs 91
Index • 341
Contact Records 73, 82
Creating 77, 77
Deleting 85
Editing 82
Multiple Contact Records 85
Contact Search Center
Toolbar 76
Contact tabs
Pending 96
Creating
E-mail rules 228
Opportunities 242
Records 77
Creating a New Campaign Task 299
Creating a Performance Report for a Case
316
Creating Web Forms 301
Customizing 50
Properties 268
D
d 114
default destination 194
Deleting Campaigns 300
Digital IDs 230
Certification Authorities 230
Digital signatures 230
Keys 230
Reading e-mail 235
Sending
Signed 234
Digital Signatures 230, 234
Document enter
About 194
Document Management Center
Adding 195
Editing 200
E-mail 217
Printing 204
Documents
Printing 204
Templates 195, 200
Duplicate records 77
E
Edit Email Toolbar 211
Editing
Contact records 82
Documents 200, 239
Literature Fulfillment Center 239, 241
Editing Toolbar Options 35
E-mail
Encrypted 233
Reading 227
Digital IDs 235
Rules 228
Sending
Digitally signed 234
Document Management Center 217
Encrypted 233
Templates 227
Email
Retrieving 223
E-mail Center Components 208
Encrypted 233, 235
F
Fax
Correspondence 201
Filters 136
About 126
see Groups 136
Forecasted Sales
Completing 250
Scheduling 248
Using 251
Free/Busy
Tab 188
Times 191
URLs 188
Fulfilling 239, 240
G
GoldMine
Add-ons 72
Graphical Analysis 253
Groups 136
About 126
see Filters 136
H
Help 50
I
iCalendar
Meeting requests 188, 189, 189
Industry templates 61
InfoCenter 320
Installing
GoldMine Add-ons 72
K
Key fields 65, 67, 68
Key Terms 19
Keyboard shortcuts 38, 50
Knowledge Base 320, 320
Knowledge Base Books, Folders, and
Topics 321
Knowledge Base Topic Text Local Menu
323
L
Launching 20, 50
Launching the Calendar 172
Leads
Management Center 291, 292
Linking
Files to a Contact Record 85
Linking Email Messages to Contacts 226
List Options sub menu 163
Literature Fulfillment Center 236
Adding documents 238
Editing documents 239
Fulfilling 239
Rejecting 239
Literature requests 154
Local
Menu
Accessing 51
Local menus
Campaign 294
Logging Away 38
Logging Away from GoldMine 48
Logging in 50
N
Navigating 34
O
Opportunities 267
Creating 271
Opportunity Manager 270
Opportunity Wizard 274
P
Pending tab 96
Personal Rolodex 246
Printing 204
Correspondence 193
Envelopes and labels 207
Private Key 230
Projects 267
Creating 279
Manager 278
Wizard 288
Public Key 230
Publishing
Free/busy times 191
Q
Queued Documents
Literature Fulfillment Center 240
QuickStart Wizard
Key Fields 65
Postal Codes 67, 68
User Setup 58
Quitting a Work Session 38
Quota Analysis 258
R
Reassigning a Case 313
Record
Contact
see Contact Records 73, 82
Curtaining
About 91
Properties
Record-Related Settings 91
Related Settings 91
Rejecting 239
Renaming 36
Renaming a toolbar 36
Renaming Campaigns 299, 299
Replying to an Activity 219
Retrieving Email 224
Rules
E-mail 228
S
Sales
Managing 247
Sales Analysis 259
Schedule
Literature Requests 239
Scheduling 142
Forecasted Sales 248
Free/Busy URLs 188
Scheduling a Call 143
Scheduling Literature Requests 154
Scripts
see Telemarketing Scripts 241, 245
Sending 217, 233, 234
Service 304
Service Center 304
Setting Universal Search Options 116
Shared Calendars 191
SoftPhone
Using 245
Spell check 220
Starting 20, 50
Statistical Analysis 262
T
Tabs
See Contact Tabs 91
Telemarketing Scripts 241, 245
Templates
Creating 195
Territory Realignment 264, 265
To rearrange buttons on a toolbar 36
Toolbars
Contact Search Center 76
U
Universal Search Advanced checkbox 114
Users
Creating 58
Logging away 38
Logging in 50
Territory Realignment 264
Using
Campaign Management Center 296
Leads Management Center 292
Local menus 51
Using the Monthly Calendar 176
Using the Outline Calendar 179
Using the Yearly Calendar 177
W
What's New 16
Work Area 25
346 • Index
GoldMine Administrators Guide