1
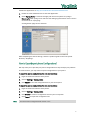
The following provides information that can assist you in troubleshooting problems with your Yealink SIP-T2xP IP phone. The phone can provide feedback in the form of on-screen error messages, status indicators, and log files for troubleshooting issues. You can try to troubleshoot the problem referring to the solution tips. For additional information, refer to the user guide of Yealink SIP-T2xP IP phones or contact Yealink FAE (Field Application Engineer). We may need you to provide debug log information to help analyze your problem. By default, you can export the debug system log information to local PC. To export the system log to local PC via web user interface: 1. Login the web user interface of the phone. 2. Click on Settings->Configuration. 3. Select 6 from the pull-down list of Log Level. The default system log level is 3. 4. Click Confirm to accept the change. The web user interface prompts “Do you want to restart your machine?”. The configuration will take effect after reboot. 5. Click OK to reboot the phone. The system log level is set as 6, the debug level. 6. Mark the Local radio box in the Export System Log field. 7. Click Export to download and save the system log file to your local PC system. You can also export the debug log information to a syslog server. Refer to the following for more information. Refer to the above steps to configure the system log level. Instead of step 6, mark the Server radio box in the Export System Log field, enter the syslog server address. The following takes the 3CDaemon application as an example. You can download the 1 3CDaemon application at: http://www.oldversion.com/3Com-Daemon.html. 1. Double click the 3CDaemon.exe to start the application. 2. Select Syslog Server. Locate the storage path from local system for syslog in Directory for field. Syslog server will store the debug log information which is shown on the server as “syslog.log”. A configuration page shows as below: After completing the above settings, check the system log file saved in the preset directory “D:\Syslog\”. We may need you to provide your phone configurations to help analyze your problem. In some instance, you may need to import configurations to your phone. To export the phone configurations via web user interface: 1. Login the web user interface of the phone. 2. Click on Settings->Configuration. 3. Click Export to save the configuration file to your local system. To import the phone configurations via web user interface: Note 1. Login the web user interface of the phone. 2. Click on Settings->Configuration. 3. Click Browse to select a configuration file from your local system. 4. Click Import to import the configuration file. The file format of configuration file must be “.bin”. 2 We may need you to provide a PCAP trace to help analyze your problem. To export a PCAP trace via web user interface: 1. Login the web user interface of the phone. 2. Click on Settings->Upgrade. 3. Click Start to start the SIP trace capture. 4. Recreate the error to be documented in the trace. 5. Click Stop to stop the capture. 6. Click Export to save the file to your local system. There are three ways to obtain the MAC address of a phone: You can ask your supplier for shipping information sheet which includes MAC addresses according to the corresponding PO. You can find the MAC address in the label of carton box. You can also find the MAC address from the phone’s bar code at the back of the phone. Press the OK key when the IP phone is idle to check the basic information of the IP phone, such as IP address and firmware version. Do one of the following: Ensure that the phone is properly plugged into a functional AC outlet. Ensure that the phone isn’t plugged into a plug controlled by a switch that is off. If the phone is plugged into a power strip, try plugging it directly into a wall outlet instead. If the phone is powered from PoE, ensure you use a PoE compliant switch or hub, or contact your system administrator for more information. Check that the power LED is on to ensure the phone is powered on. 3 Do one of the following: Ensure that the Ethernet cable is plugged into the Internet port on the phone and the Ethernet cable is not loose. Ensure that the switch or hub in your network is operational. Contact your system administrator for more information. The phone LCD screen prompts “No Service” message when there is no available SIP account on the IP phone. Do one of the following: Confirm if any account is actively registered on the IP phone at the path Menu->Status->More->Accounts. Check if the SIP parameters of the account have been set up correctly. Both user name and register name are defined in the SIP server. A user name is used to identify the account, while a register name and a password are used for authentication required by the SIP server. Display name is the caller ID that will be displayed on the callee’s phone LCD screen. Some server configuration may override the local configuration. ’ Check for any loose connections and that the phone has been installed properly. For the installation instructions, refer to the Installation Guide of Yealink SIP-T2xP IP phones. Check whether dial tone is present on one of the audio modes: Switch between the Handset, Headset (if present) or Hands-Free Speakerphone to check whether dial tone is present on one of the audio modes. If the dial tone exists on another audio mode, connect a different handset or headset to isolate the problem. ’ Do one of the following: Check that the SIP registration with your system administrator. Check that DND (Do Not Disturb) mode is turned off on your phone. If the DND 4 mode is activated, the LCD screen displays the DND icon . Press the DND soft key on the phone to deactivate the DND mode. Check that call forward feature is disabled on the phone. If the call forward feature is activated, the LCD screen displays the forward icon . Press the TRAN key on the phone to deactivate the call forward feature. Check whether the calling number is stored in the blacklist directory. ’ Check the ringer volume on your phone. To adjust the ringer volume setting, press the Volume key when the phone is idle. The IP phone plays a call hold warning tone every 30 seconds when there is a call placed on hold. The call hold warning tone feature is enabled by defau.lt. You can disable it or change the interval via web user interface only. To configure the call hold tone and call hold tone delay via web user interface: 1. Login the web user interface of the phone. 2. Click on Features->General Information. 3. Select the Enabled or Disabled from the pull-down list of Play Hold Tone. 4. Enter the desired time in the Play Hold Tone Delay field. 5. Click Confirm to accept the change. ’ Check if you have configured your phone to obtain the time and date from the SNTP server automatically. If your phone is unable to access the SNTP server, configure the time and date manually. The phones manufactured before February 2010 use the power adapter preferentially, otherwise the phones use PoE preferentially. ’ The SMS feature depends on support from a SIP server. Contact your system administrator for more information. 5 You can change the user password via web user interface: 1. Login the web user interface of the phone. 2. Click on Security->Password. 3. Select user from the pull-down list of User Type. 4. Enter the new user password in the New Password field and Confirm Password field. 5. Click Confirm to accept the change. The user passwords for phone user interface and web user interface are both changed. You can also contact your system administrator for help. Note If logging in the web user interface of the phone with the user credential, you need to enter the current user password in the Current Password field. You can enable SRTP to encrypt the audio stream(s) of phone calls. The parties participating in the call should enable SRTP. You can enable SRTP on per-account basis. To enable SRTP via web user interface: Note 1. Login the web user interface of the phone. 2. Click on Account. 1. Select the desired account from the pull-down list of Account. 2. Click on Advanced. 3. Select the desired value from the pull-down list of Basicencryption (SRTP). 4. Click Confirm to accept the change. The SRTP feature is not available on all servers. Contact your system administrator for more information. To reboot the phone via web user interface: 1. Login the web user interface of the phone. 2. Click on Settings->Upgrade. 6 3. Note Click Reboot to reboot the IP phone. Any reboot of the phone may take a few minutes. Reset the phone to factory configurations after you have tried almost all troubleshooting suggestions but do not solve the problem. You need to note that all customized settings will be overwritten after reset. To reset the phone via phone user interface: 1. Press Menu->Settings->Advanced Settings (password: admin). 2. Press or to scroll to Reset to factory, and then press the Enter soft key. The LCD screen prompts the following message: 3. Press the OK soft key. The phone LCD screen prompts “Resetting…Please Waiting!”. The phone will be reset to factory sucessfully after startup. Note Reset of the phone may take a few minutes. Do not power off until the IP phone starts up successfully. To upgrade firmware via web user interface: 1. Login the web user interface of the phone. 2. Click on Settings->Upgrade. 3. Click Browse to select the firmware from your local system. 4. Click Upgrade to upgrade the firmware. The browser pops up the dialog box “Firmware of the SIP Phone will be updated. It will take 5 minutes to complete. Please don't power off!”. 5. Click OK to confirm upgrading. 7