1
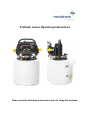
Proflush Junior Operating Instructions
Please read the following instructions prior to using the machine.
SETUP PROCEDURE
1. When you take delivery of your Proflush Junior, firstly check visually to make sure there are no signs of
damage during transit. If there is any damage please report it straight away to Norstrom Group Ltd office on
01942 722677 ask for Terry Dyson.
2. On unpacking the Proflush Junior, please keep the box and packing safe in case you ever have a need to
return the Proflush for repair etc. If there are no signs of damage proceed with the set-up by unpacking the
adapter kit supplied.
3. Take the machine and hoses etc out of the box, connect the short hose with screw fittings at either end to
the downward pointing outlets either side of the machine, make sure the supplied washers are used.
4. Connect the supplied ½. PVC hose with screw adaptor on one end to the centre connection on the hose
you have just fitted, this is the dump hose and should be extended to suit so that it will reach a Foul Drain. It
is possible to connect a pipe from the overflow which is located at the side of the machine to the dump hose
by obtaining a suitable T piece to fit onto the dump hose.
5. A suitable garden hose can be obtained and fitted to the fill line tap. The other end of the fill hose is then
connected to a cold water supply with the water valve on the ProFlush closed. The ball valves on the
ProFlush dump lines should be in the closed position. The Flow and Return ball valves should be closed until
the machine has been started.
6. Place the ProFlush on a flat / level surface, nearest to where you are going to connect to the system i.e.
the pump, boiler or radiator.
7. When all pipe connections are made, locate a 240v power supply and plug in the ProFlush then refer to
the Detailed Operating Instructions.
8. When the flush has been completed to your satisfaction, disconnect the ProFlush and clean out with fresh
water. To remove any water left in the bottom of the tank, remove the tank filler cap and tilt the tank over on
its end, over a suitable drain.
9. Make sure you remove any water in the flow and return pipes, this is most important if in sub zero
overnight temperatures, when the pipes could freeze resulting in fracture of the ball valves. When all water
has been removed you can stow the ProFlush away in your vehicle after cleaning ready for the next job.
OPERATING INSTRUCTIONS
1. Turn off the heating system, after identifying problem flow areas, cold radiators, radiators with cold spots,
etc.
2. Open all radiator valves, including balancing valves, fully. Before opening valves fully, first note how many
turns are required to shut, so that settings may be re-instated after flushing, to avoid system balancing.
3. Set any thermostatic radiator valves to the fully open position where appropriate. Check that diverter or
zone valves are in the fully open position, setting manually if necessary.
4. If any anti-gravity valve is present, this must be by-passed or bridged, or the benefit of the flow reverser
will be lost. It may be possible to dissemble the anti-gravity valve, and remove internal components, allowing
two way flow during the system flushing.
5. It is necessary to make the heating system into a closed circuit by capping off, or alternatively looping
together, the cold feed and expansion pipes. This enables the high flow rate of the ProFlush pump to force
sludge and deposits from the system out through the dump valve, and also prevents an overflow of the
expansion tank. This stage involves draining some water from the system until the water level is below the
F & E tank, and is best left until after the ProFlush pump has been connected into the system making sure
the F & E tank ball valve is tied up or water supply isolated.
These few litres can be allowed to drain into the ProFlush tank by briefly opening the two isolating valves.
(When flushing sealed systems, there is obviously no requirement to isolate an expansion pipe or cold feed).
6. Isolate the cold water feed to the tank, or tie up the ball valve. Install a temporary compression fitting gate
valve to the end of the open safety vent pipe where it discharges over the f & e tank. Proprietary sealing
caps may be used, but MUST be secured tightly with a worm drive clip.
7. Install a temporary gate valve into the cold feed pipe close to the f & e tank. The tank fitting securing the
pipe to the f & e tank sometimes has a male ¾. BSP thread protruding on the inside of the tank, and an
alternative is to screw a cap on this. These are temporary measures only, and must be removed after the
flushing process is completed. (If the system flushing pump connection method detailed in point 8d
is utilised, cold feed and expansion pipes are automatically isolated).
As an alternative to points 6 & 7, the cold feed and expansion pipe may be securely coupled together. The
cold feed and expansion pipes are then included in the flushing process, which is beneficial if there is a
deposit problem at the junction of the cold feed with the heating system. We recommend Prochem Scale
Remover to remove these deposits.
Location / Connection
The optimum location for the ProFlush unit will vary depending on the system to be cleaned, and availability
of suitable connection points. Generally the unit should be located in a room with a suitable drain or waste,
and near to a convenient mains water supply, such as a bathroom or kitchen. The cold water supply for a
washing machine or dishwasher is a convenient source when a mixer tap makes connection of a supply
hose difficult. The normal precautions during work on any heating system should be taken, and it is prudent
to place a drip tray or waterproof ground sheet underneath the ProFlush and surrounding area.
8. Ensure that the isolating valves either side of the ProFlush flow reverser on the flow and return pipes are
in the closed position. Connect flow and return hoses of the ProFlush pump to the system at the selected
point. This may be either:
8.1 Across the .tails. to a radiator (having drained and disconnected the radiator) using appropriate 15mm or
¾” BSP female adapters to connect to the valve bodies. The radiator valves are available to isolate the
flushing pump from the system if necessary.
8.2 Across the 1 ½” BSP female couplings left once the circulating pump has been removed. The circulating
pump isolating valves are available for system isolation if required. An adapter set enabling the ProFlush to
connect to the system can be supplied as an optional extra.
8.3 Across the flow and return connections at the boiler, isolating the boiler itself. This is the preferred
method when flushing a heating system prior to installing a new boiler.
8.4 By breaking into and connecting across the cold feed and expansion pipes (after isolation of the water
supply to the f & e tank) if these are easily accessible, (perhaps in an airing cupboard), and not adjacent to
each other in the same pipe run. This method can clear deposit accumulations at the lower end of the cold
feed pipe. The powerful action of Prochem Scale Remover will be required to achieve this.
9. If the ProFlush is not standing in a secondary containment tank, then a suitable length of ½” PVC pipe as
required should be attached to the overflow and be connected to the dump hose via a suitable T piece.
10. Connect a suitable length of ½” PVC hose to the dump line and lead to a suitable foul drain.
11. Connect mains water supply hose ½” PVC to the inlet connection marked .fill. and run the other end to
suitable mains water connection point, open the fill line ball valve and fill the ProFlush up to half way
between the min and max fill lines, and then close the fill line ball valve. (If the F & E tank has drained down
into the ProFlush tank, only topping up if required is necessary).
Method
Note: In the following procedure, the ProFlush is used to forcibly expel existing system water before
establishing full chemically treated circulation through the unit itself. In order to expel as much loose debris
and sludge as possible at an early stage, and prevent an excessive amount of debris collecting in the
ProFlush tank. By removing loose material before the addition of any chemical, the full effect of the
chemical is available to disturb, loosen, and dissolve more stubborn accumulations of debris.
12. Open isolating valves between flushing pump and system and switch on ProFlush immediately. Ensure
that liquid level in tank remains above the minimum mark, adding more water if necessary, and allow pump
to run for ten minutes, reversing direction of flow regularly. (Make sure that all radiator valves, TRV’s and anti
gravity valves are fully open) Check all hoses and connections for leaks.
13. Ensure that flow reverser handle points to right side of pump. Close return ball valve on left side of the
pump and open the dump valve on that side. By doing this, system water is diverted to waste down the dump
hose, instead of returning back into the tank. The liquid level in the tank will immediately begin to fall, and the
mains water inlet supply should be turned on so that the volume of incoming water compensates for that
being forced out of the system to waste. Allow to run until the waste water runs relatively clear, check with a
TDS Meter to ensure that the reading is within 20% of the reading on mains water. Ensure that liquid level in
tank remains above the min line at all times.
14. Restore circulation through the ProFlush pump by opening the return isolating ball valve, at the same
time closing the dump valve and water supply inlet ball valve. Check that the liquid level in the tank remains
stable. Add more water if necessary. Vent all radiators to ensure that there are no air pockets. Use a cloth to
absorb any liquid expelled from a vent, as the system water may be discoloured and likely to stain.
15. Add appropriate quantity of flushing chemical into the ProFlush tank. If scale is present in the system use
1 Litre of Prochem Scale Remover, this should be adequate for a normal three-bed house, i.e. ten single
radiators/ 100 Litres. If the system has severe flow problems double dose the system with chemical. For
systems with modest sludge problems 1 litre of Prochem Sludge Remover should be adequate or double
dose for heavily contaminated systems.
16. Circulate throughout the complete system for 15 minutes checking the entire system for leaks, if there
are no leaks, you may fire up the boiler and run at temperature not exceeding 50o Centigrade for no more
than 2 hours during which time any cold spots should be easily recognised as being cleared, if stubborn cold
spots persist, aid the removal by gently tapping the radiator with a rubber mallet. During this period the F &
E tank can be cleansed separately with a good bleach and disinfectant and reinstalled ready for reconnection after the flush is completed.
17. If using Prochem Sludge Remover proceed straight to 19 omitting point 18.
18. If using an acid based product and there is a requirement to neutralise the solution before pumping out to
waste. Slowly add the Neutraliser Liquid (or other agent as specified on the product being used) to the
solution in the ProFlush tank whilst circulation throughout the entire system is taking place. Continue adding
the contents of the bottle until neutralisation has taken place. A pH test can be carried out with the Proflush
Combo Meter and if ph figure is between 6.5 and 8.5 you can dump safely. Proceed with individual flushing
as in point 19.
19. Close the boiler down and close off all radiator valves except those on the radiator nearest to where the
ProFlush is connected to the system. Flush this radiator for about 5 to 10 minutes using the flow direction
diverter valve frequently to change the direction of flow and aid removal of all debris. Note: If the precleaning system check identified cold or partially blocked radiators, commence the individual radiator
flushing procedure with the worst affected radiator first, progressing to less problematic radiators. This
ensures that the strongest concentration of chemical is directed at the worst areas of the system. It is not
necessary to remove or disconnect radiators individually during this process.
20. When ready to dump the contents of this radiator to drain, close the return ball valve and open the dump
line ball valve, ensure that the diverter valve is pointing away from the dump valve, this will allow the
contaminated water to go to drain. On double dumper models the diverter valve should always point
towards the opposite side of the machine to the dump valve being used. The beauty of this double dump
operation is that if you are working on a system that has voids in the pipe work or the boiler, by changing the
flow direction when dumping it is possible to ensure that all debris is removed at the first attempt.
21. Open the mains water inlet ball valve and fill with fresh water keeping the level in the tank the above half
way at all times, after a short period of time the contents of the tank will have changed colour from dirty to
clear, again check the water running to drain with the TDS Meter, this time to get a reading within 10% of the
mains water, if ok close the dump valve, open the return valve and close the mains water inlet valve.
Then close the radiator valves and move on to the next radiator in the series, repeating this procedure to the
end of the system.
22. On completion of the flushing process open all radiator valves to give a flow on entire system. Repeat
point 13 to flush out entire system and replace with clean water ensuring the level in the tank never falls
below the minimum mark.
23. Check a sample of the system water taken from the end of the dump hose, with a TDS (Total Dissolved
Solids) Meter again looking for a reading within 10% of the sample of mains water. (Alternatively use of a
professional system analysis test kit if available is desirable) If there is any difference visible, (a difference of
10% between the figure of mains water supply and system water is considered acceptable) continue to flush
system until both samples show a figure within 10% of mains water. (Remember that the TDS Meter will
need calibration from time to time).
24. Prochem Corrosion Inhibitor can be added to the system either via the ProFlush tank before
disconnecting from the system and allowed to circulate for approx 15 minutes. Alternatively the Prochem
Inhibitor can be put into the system after cleaning via the header tank. Best practice to put 1 litre in the
machine followed by 1ltr in the header tank before dropping the ball valve.
25. Close water inlet ball valve, isolate the flushing pump from the heating system by turning off the Flow and
Return Ball Valves and switch of the ProFlush.
26. Close the circulating pump gate valves, radiator valves if connected via a radiator and before removing
the ProFlush, open the Flow valve and the dump valve on the same side as the diverter valve is pointing to,
this will allow the contents of the ProFlush tank to be sent out to the foul drain leaving a small amount of
water in the tank. Now stop the ProFlush with the ball valves open and disconnect from the heating system
allowing any water in the hoses to gravity feed back into the ProFlush tank and stow the pipes in a safe
place. Restore system to normal, restoring circulation pump, radiator, and balance valves to original settings,
removing any temporary isolating valves or caps on the Feed and Expansion tank and restore anti-gravity
valve to normal operation if necessary.
27. If the F & E tank was not cleaned during the initial cleaning period as point 16, make sure it is thoroughly
cleaned and disinfected before reconnecting the F & E pipes, allow the F & E tank to fill with water if Inhibitor
has already been deployed, if not, put the required amount of Inhibitor into the F & E Tank and top up with
water.
28. Fire up the system and check for leaks and dispel any air in the system, balance if required.
29. When dosing with corrosion inhibitor a further test should be carried out within two hours to establish that
the inhibitor is up to strength using the Prochem Inhibitor Test Kit if Prochem Inhibitor has been used. Always
over dose the inhibitor rather than under dose if testing is not carried out. As part of the Benchmark Initiative
it is imperative to chemically clean a central heating system when installing a new boiler or indeed on a new
installation and inhibit with the correct strength of corrosion inhibitor to give lasting protection upon
commissioning.
FREQUENTLY ASKED QUESTIONS ABOUT POWER FLUSHING
1. How long does it take to powerflush a system thoroughly?
A. It will vary from house to house, but generally about four to five hours for a three bed house with a vented
system, but less time for a sealed / combi system, because you don’t have to cap off the cold feed and
expansion piping.
2. How big a heating system can you use the Proflush on?
A. Follow the normal procedures for systems up to 12 radiators. Tackle larger systems, in sections. For
example, with a twenty radiator system, close off ten radiators totally, and flush the rest of the house
normally. Once done, close down all the flushed radiators, and repeat the procedure on the rest of the
system.
3. Do you need to drain down the system before you start?
A. No. You only need to run some water out of the system to lower the water level in the feed and expansion
tank, so that you can cap it off.
However, if the system is particularly dirty it would be an advantage to drain the entire system first and then
refill adding the chemical cleaner. By doing this the chemical will work much better. If you are able to predose the system with a cleaner two or three days before doing the actual powerflush this will save a lot of
time on the day as the chemical will have already done its work and you may be able to start dumping
straightaway. It will also show which radiators are satisfactorily hot and which ones need further attention.
4. Can you tell if the cold feed on a vented system is blocked, without cutting into the pipe
work?
A. Not conclusively, but if you cap off the expansion pipe before attempting to drain down the contents of the
expansion tank into the Proflush tank (see the Proflush instructions), then if water doesn’t run down into the
Proflush tank, there’s a very strong possibility of a blockage.
Engineer’s tip:If the blockage contains much black iron oxide (known as magnetite), you can tell it’s there by holding a
small magnet near the copper pipe – you’ll feel it being attracted to the magnetite through the wall of the
copper pipe
5. Can I use a rubber bung kit, for use when changing radiators, to make the system a
closed circuit?
A. No. The tapered bung inserted in the cold feed pipe will be forced out, and the expansion tank will fill up
and overflow.
6. Can I use plastic or metal push fit caps, such as “Speedfit” fittings, to make the system a
closed circuit?
A. Yes, but check the push fit cap ‘O’ ring for wear regularly, and replace it if in doubt
7. What do I do if the expansion pipe on an old system is imperial size copper piping?
A. Why not extend the pipe slightly, using a compression fitting with a special imperial size olive, enabling
you to add a short length of metric piping? Then use a push fit end cap as usual.
8. If I connect my Proflush pump into the system across the tails of one (removed) radiator,
what happens to that radiator? How should I clean it?
A. You’ll need to flush this separately with a hose pipe (so pick a small radiator!).
Some engineers will adapt the outer end of their dump hose to fit onto one side of this removed radiator, with
another adapted tube leading from the other side of the radiator to the drain.
This way, every time you dump, you’re putting a good flow of water through the radiator. By the time you’ve
finished the power flush, the radiator should be very clean. Alternatively a manual flush of the radiator
outside in the garden which will take time if done with the powerflush unit because of the fact that you would
need to alter the entry valves on the radiator and make up a connection, one top and one bottom diagonally
and flush out the radiator for 10-15 minutes with the aid of the diverter valve.
9. What about firing the boiler whilst carrying out a system flush?
A1. By all means fire the boiler if you can – most chemical reactions will proceed faster with some heat, and
also, when you come to put the full flow through each radiator in turn, it’s useful to be able to feel whether
the radiators are heating up across the whole area, or whether they have cold areas / panels. If they do, then
you can give that radiator extra attention.
You will find that whilst the chemical is in the system some radiators will get hotter quicker than others. When
you are happy that an individual radiator is clean and has achieved an adequate temperature both top and
bottom it can then be isolated allowing the pump to concentrate on those radiators needing further attention.
Further radiators may be isolated where necessary until all radiators have been satisfactorily dealt with.
Should any radiators need further attention (i.e. with a heavy duty Descaler) flush the system out to plain
water and then add a descaler allowing that to circulate only through those radiators until you are happy the
required temperatures have been achieved. Normal flushing out to foul drain can then be carried out.
A2. Proflush Professional pumps will handle water temperatures up to 85°C. If the boiler is non functional, or
being replaced, then you won’t be able to fire it anyway. If you’re using a powerful chemical such as
Prochem Descaler, you’ll still get a good result even if you can’t fire the boiler.
It is unlikely that the boiler will operate at the same time as the Norstrom powerflushing unit on a combi
system but you could, once the chemical has been put into the system, close the valves to the powerflushing
pump, re-pressurise the system and then fire up the boiler allowing the boiler to get to operating temperature
with the chemical still in the system. Once the chemical has done its work the boiler can then be switched off
and the powerflushing pump brought back to start flushing the radiators.
10. Can you over pressurise a system, and cause joints to leak?
A. No. The Proflush is a centrifugal type pump. What it can't push through a system, it will simply re-circulate
in the tank. Maximum pressure is less than two bars. It is the flow rate through a system that is important
when power flushing.
11. Is it OK to dump very hot water from a heating system down a drain or sewer?
A. There is a Public Health Act regulation of 1936, which states that water should not be discharged down a
public sewer at a temperature greater than 43°C, but in reality this is unlikely to be a problem when
powerflushing. However, do consider the risk of cracking a toilet pan if you discharge very hot water into it
when powerflushing.
NOTE: All flushing of heating systems must be to foul drainage only. All liquids discharged to drain
must be within the parameters of 6.5 - 8.5 pH. If using acids you MUST neutralise the water in the
system before discharging to drain.
12. Are there any other possible problems when dumping water into a toilet pan?
A. Yes, and the most likely one is the dump hose sliding out of the toilet pan when you start dumping, and
flooding the bathroom, so trap it in place with the toilet seat before you start work. Better still, use a piece of
cord to tie the dump hose to the seat hinge. Also, consider whether the porcelain might be stained by the
discoloured dump water.
13. On some systems, when I am dumping the water from the system, and I have used the
boiler to heat the water during the powerflush, I notice that the radiators are cold at the
bottom, and warm at the top. What’s happening?
A. A Proflush pump circulates the water through a system much faster than the standard system pump, and
it is the cool fresh water speeding straight across the base of the radiator that you can feel.
Eventually the warmer water will be swept from the radiator, but you can speed it up by introducing some air
into the top.
14. Can you powerflush a Microbore system?
A. Yes, but connection of the Proflush should be directly on to the main circuit or on to the circulator pump
fittings, and not on to a radiator, otherwise the small bore tubing will drastically reduce the flow rate, and the
system power flush will be less successful than normal. We advise double dosing the amount of Prochem
chemical, to ensure the particles of debris are dispersed in as fine a form as possible.
If you can’t clear a radiator on a Microbore system, it may be that a plug of sludge is blocking the narrow
diameter pipe work leading back to the manifold.
For further and more detailed information relating to powerflushing of single pipe and Microbore systems see
the website under the FAQ section.
15. Can you powerflush a Microbore system with double entry radiator valves?
A. Yes, but we suggest that you double the amount of Prochem chemical. If the distributor / spreader tube,
which directs the incoming water towards the far side of the radiator, has broken away, so that the entrance
and exit are effectively only 1/2" apart, any flushing effect on that radiator will be minimal. Conversion to
opposing inlet and outlet valves is a better long term proposition.
16. Can you powerflush a single pipe system?
A. If the radiators on a single pipe system have severe deposit build-ups, or cold panels, then the powerflush
is not likely to be successful. If you do take on such a system, improve the chances of success by pretreating with two litres of Prochem Descaler, and operate the flow reverser more often than usual whilst
flushing individual radiators.
For further and more detailed information relating to powerflushing of single pipe and Microbore systems see
the website under the FAQ section.
17. Can you powerflush a system with plastic piping, such as Hep²0?
A. Yes you can. Prochem Sludge Remover and Prochem Descaler can be used on plastic pipe work
systems, and will not damage either the pipe work, or the ‘O’ ring materials.
18. Can the Proflush be used on a system which has a Primatic single feed cylinder?
A. It is necessary to disconnect or loop out the Primatic cylinder otherwise the high flow rate of the Proflush
will dislodge the air bubble in the cylinder, leading to mixing of radiator and tap water.
Be aware that the Primatic cylinder was often used in a gravity hot water system, with separate pumped flow
and return piping to the radiators. Consequently, connecting your Proflush onto the flow and return piping to
the Primatic will not enable you to powerflush the radiator circuit.
This would have to be Powerflushed separately, ideally by connecting across the system circulator pump
connections.
N.B. Remember that Water Bye-laws prohibit the use of chemicals in systems with a Primatic
cylinder, because of the risk of the heating system and tap water mixing and contaminating the
domestic water supply.
19. Can you powerflush a very old system which has passivated steel or stainless steel
piping, such as Truweld or Gecol?
A. Yes, you can, but we advise extreme caution, and you should always point out to the householder that
you cannot guarantee that there will not be any leaks. These were ‘stop-gap’ materials used during a period
(late sixties/early seventies) when there was a copper shortage, and were not expected to have a very long
life.
The passivated steel tube (similar dimensions to 15mm copper tube) was fabricated from sheet steel, folded
over, seam welded and galvanised. Thirty years later it has generally corroded internally such that it is on
borrowed time.
Stainless steel tube supplied at that time was of low quality and prone to pitting corrosion, and is therefore on
borrowed time. Care should also be taken where very old iron pipes are still being used, probably on old
gravity systems with few valves.
If in doubt, do not powerflush the system. If you accept the job, use a non acidic chemical such as the
Prochem Descaler – and always ask the householder to sign a disclaimer! (See also Para.36 for further
information on Disclaimer Notices)
Note: There have been cases where very old systems have been fitted with a stainless steel circuit but with
copper pipe being used to the radiators. In these cases corrosion has been shown to be continuous despite
periodic flushing out and the systems being re-treated with an Inhibitor. Such problems have come about
where no buffer, such as brass, has been used between the mixed metals, stainless steel and copper, and
unless action is taken to introduce a buffer then problems will continue. In theses cases extreme care should
be taken when assessing costs of remedies as you may be looking at complete pipe work renewal or, at
best, the addition of brass buffers between the mixed metals under the floor level.
20. Are there any other systems I should treat with caution?
A. Look out for low quality15mm copper tubing of continental original, also supplied at the time of copper
shortages. It was prone to pitting, and had a very thin wall thickness, such that it could not be bent. You can
recognise it because the manufacturers kindly printed a red line along it!
21. What about double panel radiators - won't the water take the course of least resistance
and just clear one panel?
A. Yes, it will. However, whilst carrying out the individual radiator flush, gently tap the front panel with a
rubber mallet, where the brackets attach to the rear panel. There will always be at least four points of
connection, at both ends, top and bottom. This vibrates debris loose with surprisingly good effect.
Many engineers tap every radiator along the lower edge with a rubber mallet as they open it up for the
individual radiator flush, to vibrate loose any compacted sludge trapped in the bottom seam. This method
has also been shown to be extremely useful in removing larger cold areas on radiators in order to regain
circulation.
22. Any problems with thermostatic valves (TRV’s)?
A. Generally, no. Some thermostatic valves may stick down, or act as non return valves, so open valves fully,
and remove the valve heads. Push down on the sprung pin a few times to ensure valve is fully open.
If you cannot achieve full flow when dumping an individual radiator it may be the lock shield valve is not
opening fully in which case it is suggested that the valve be replaced.
23. What happens if there is no apparent flow through the Proflush unit when the flow
reverser handle is in one direction?
A. If the system is a gravity hot water system, there is probably an anti gravity / non return valve in the
radiator circuit. If the non return valve is accessible, either loop it out, or remove the plunger so that it doesn't
prevent the flow of water in one direction. If you can't find the non return valve, the flow reverser lever must
be left in one direction. If you can’t dump with the lever in this direction, swap the two flow and return hoses
over where they connect to the system.
If you have the double dump valve version of the Proflush, then you’ll just dump through the one dump valve
that does work.
24. I’ve connected my Proflush into a heating system, opened the isolating valves, and
switched on. The pump appears to be working, but the water level in the Proflush tank is
overflowing. What’s happening?
A1. You may have found that there’s a non return / check valve in the system, and it is preventing the
Proflush from pumping the water from its tank out into the heating system, i.e. no water is actually leaving
the tank. However, some water will drain back into the tank through the ‘return’ hose, and so the water level
starts to rise.
You’ll have to point the flow reverser lever in the opposite direction, and leave it there, unless you can find,
remove / bridge out the check valve.
(This occurs most often in a gravity hot water system, or one that has at some time been converted from
such a system.)
A2. It’s less likely, but if it is a sealed system, there may be an automatic pressurisation unit (sometimes
known as an auto filler) connected to the system, to maintain the required pressure.
Switch it off, or it will be continually introducing more water into the system to try to top up the pressure, and
as a side effect forcing water against the direction of flow you need for a successful powerflush.
25. If the system has a gravity hot water circuit, won't that reduce the flow rate of water
through the radiators when carrying out the individual radiator flush?
A. If you use the circulator pump adaptor leads to connect across the circulator pump connections, or
connect onto radiator tails, you shouldn’t lose much of the flow, if any, through the large diameter pipework
of the gravity hot water circuit.
However, this will not clean the gravity hot water pipe work. Some engineers will re-locate the Proflush pump
and connect it across the cold feed and expansion piping to force water through the gravity hot water circuit.
If there is one radiator on the gravity hot water circuit or a towel rail, as is sometimes the case, you may be
able to connect your Proflush across the radiator tails.
In an ideal world, you would disconnect the gravity hot water pipe work at the boiler, and then powerflush the
hot water circuit separately – but this is far from easy in a back boiler fired gravity hot water system.
26. Is it really necessary to carry out the individual radiator flushing procedure?
A. Yes. You can prove it for yourself by flushing a system without putting the full flow through each radiator in
turn, and then dumping until the waste water is clear. Now put the full flow through each radiator in turn, and
watch the water discolour again as more debris is brought into suspension. By flushing individual radiators
you are also ensuring that there are no dead-legs or stagnant areas and that you are achieving full flow to
each radiator without any restrictions.
27. Do I need to carry out a separate dumping procedure on each radiator?
A. Yes, but don’t do so immediately after adding the flushing chemical. If you do, you’ll be dumping your
flushing chemical straight down the drain, and will have to keep adding more as you work your way around
the house. Whilst we think that this is an excellent idea from a suppliers’ point of view, it isn’t generally
necessary, as loosened debris takes many hours to settle or compact, and will have been purged from the
system long before this could happen. Put the full flow, with chemical treatment, through each individual
radiator in turn. Only then, commence dumping, working your way round the house, ensuring the full flow
through each radiator individually as you dump, by closing off all other radiators.
28. Is there a better way than a simple visual inspection to ensure that the system water is
really clean?
A. Yes. The only recommended way to check that the water is chemically as clean as the mains tap water at
the particular site is to take a sample of tap water before starting the flush and testing with a Total Dissolved
Solids (TDS) electronic meter. This figure of PPM (Parts per Million) becomes the benchmark for that job.
By sampling the water running to drain from the dump hose from each individual radiator and checking that it
is within 10% above the mains water reading this will ensure the system water is clean. Any readings above
this figure and you would need to continue flushing through with fresh water from the mains into the machine
and out again to drain, checking periodically until clean. If the TDS reading is shown to be less than the
mains water sample it is probable that there is still chemical left in the system and further flushing is
necessary.
Another method is to use a turbidity tube to give a reading of suspended particulate matter in the dump
water.
The turbidity tube is a long clear tube, with a marker on the base. Turbidity is determined by the degree of
obscuration of the marker when looking along the length of the tube containing system water.
29. What do I do if the mains water supply is very poor, and can't replenish the Proflush
tank fast enough whilst dumping? Should I part close the dump valve?
A. Don’t partially close the dump valve if the water level in the tank keeps falling as this will restrict the water
flow. The main reason for using a powerflushing machine is so that you always have a fast movement of
water running through the system. Wait until the water level is about 12 cm from the bottom, close the dump
valve and re-open the isolating valve on that side (i.e. re-establish circulation through the system). However,
leave the water inlet tap OPEN, and allow the tank to fill until the level is close to maximum. As soon as the
water level reaches maximum switch into dumping mode again until the water level falls to 12 cm from the
bottom, then repeat the exercise until the dump water finally runs clear. This method ensures that the water
is always moving vigorously throughout the system, ensuring that debris is kept moving, in suspension.
30. When flushing a system with a combi boiler fitted with a filling loop, do I need to
connect a water supply hose to the Proflush inlet valve? Can’t I just run water in through
the filling loop during dumping?
A. No. It is important that fresh water is fed into the system via the Proflush tank. Introducing the water
through a filling loop elsewhere will destroy the high velocity mono-directional flow and hence the efficiency
of the whole powerflushing process.
31. Is it necessary to bleed radiators after a powerflush?
A. Yes. However, the amount of air in the radiators is usually small. If you keep the water level in the
Proflush tank at least 10 cm above the minimum, you'll minimise the air to be bled from radiators.
32. Can I use Prochem Descaler liquid on a system with aluminium radiators or an
aluminium heat exchanger such as found on condensing boilers?
A. Yes. As the Prochem Descaler is non-acidic there is no problem with this type of system although we
would not wish to see it left in the system for too long.
33. Can you use the Proflush pump to add corrosion inhibitor to a system?
A. Yes, it's a good way to get corrosion inhibitor rapidly into a system and thoroughly dispersed. Before
disconnecting the Proflush pump, lower the water level in the Proflush tank to just above the half way level,
close the dump valve, and add the inhibitor into the Proflush tank. Allow circulation through the system for
ten minutes before finally disconnecting. Assess the approximate water content in the system as you may
have to add additional Inhibitor to offset any amount that has to be drained from the Norstrom tank after
completion.
Part L: 2006 of the Building Regulations now requires you to treat a system with corrosion inhibitor.
Benchmark members specify the use of a corrosion inhibitor that has passed the DWTA (Domestic Water
Treatment Association) performance Standard. Suitable inhibitors, including Prochem Inhibitor, will display
the Buildcert sticker on the pack, so check for this to ensure that you use an inhibitor that has been
performance tested.
34. Can the Proflush pump be set up and left unattended whilst I carry out another job
elsewhere?
A. No, it is unwise to leave any powered equipment unsupervised in a domestic environment, with runs of
hose and power cable which could be in close proximity to householders, children, and pets.
Should there be an electricity power cut, the Proflush would stop pumping, causing its tank to overflow.
You will be using powerful flushing chemicals, and as for all chemical products, they should be treated with
respect and kept away from children.
35. How can I reduce the time taken to powerflush a heating system?
A. In order to clean a system effectively you must carry out the full procedure, including putting the full flow
through all radiators and sections of the heating system. However, you can reduce the overall procedure
time if you use an inline magnetic powerflushing filter. In the Proflush Magmaster this is built into the
machine integrally. However a stand alone Magmaster filtration unit can be joined to the Proflush Thermal or
Standard unit via a short hose.
This is installed between the heating system and the powerflushing pump, and extracts magnetite (the major
corrosion constituent) from the circulating water, which consequently clears much faster, reducing the time
taken to obtain clear fresh water throughout the system. The volume of water required to powerflush a
system is also significantly reduced by up to half the volume. On an average 10 radiator system you would
use around 500 litres of water, With a Magmaster this can be reduced to around 250 litres.
36. Will powerflushing cause damage to a heating system?
A. It is rare for a heating system to experience leaks after the powerflushing process. When using ProFlush
Sludge Remover, this product is used to suspend particulates ready for flushing out and is not designed to
go back to the metal. It is very unlikely, therefore, to cause any damage. Prochem Descaler is a more heavy
duty non-acidic product and, on a particularly bad system, may dissolve solids that are holding previously
formed pin-holes together. This possibility should always be pointed out to the customer and we do supply a
standard Disclaimer Form that can be obtained from our website under the FAQ’s section.
However, experienced heating engineers will probably explain the following to householders:Sludge and debris are present as a result of corrosion over a long period of time.
The powerflushing process will cure most circulation problems, but cannot undo the corrosion and gradual
decay of heating system components that has led to the need to power flush the system.
Occasionally some systems may have radiators with localised deep corrosion pits, with only a scab of rust
preventing the system water from leaking out. The vigorous flow rate required to mobilise sludge and
deposits may dislodge such a scab, leading to a leak from the radiator during the flushing process.
The advanced stage of corrosion required for such a situation means that the leak would occur imminently
even without a powerflush. If it should be brought forward slightly by the flushing process, then it is better
that it occurs whilst a heating engineer is present to remedy the problem, rather than for it to arise over a
weekend or whilst the house is unoccupied.
Prochem powerflushing chemicals are comprehensively inhibited, so that they do not affect the metals from
which heating systems are constructed. They are formulated so that they loosen and dissolve the corrosion
products that cause boiler noise and circulation problems, enabling the powerflushing process to power them
out of the heating system.
---------------------------It is important after the flushing process to add a good quality inhibitor, such as Prochem Inhibitor which is
Build Cert approved, to the heating system to prevent future decay.
WARRANTY
Warranty Period
12 Months from date of purchase.
Warranty - Return To Base
During the initial 12 months warranty period Norstrom Group will correct any defects in material or
workmanship at no charge for in-house labour and materials. Any replacement parts used will be new and
are warranted for the remainder of the original warranty, or thirty days from the date of shipment of such
parts, whichever is the longer. You are responsible to return the faulty product to:
Norstrom Group Ltd, 13&14 Kingfisher Court, Bryn, Wigan, Lancashire. WN4 9DW
in original packaging whenever possible.
Terms of Warranty
1) Any attempt to dismantle the Proflush Junior will invalidate this warranty. There are no user serviceable
parts.
2) Maximum water temperature that can safely be used with this equipment is 55 degree’s C.
3) Voltage range is 220-240volts. (Unless 110volt option)
4) We have tested this machine with our own range of Prochem chemicals and would recommend these for
use with our machine; however the machine is compatible with any make of chemical on the market.
5) We recommend the Proflush Junior is always washed out and any water must be removed from all pipe
work on the machine if it is to be left in sub zero conditions, cracked pipes/valves caused by freezing will not
be covered by this warranty. On inspection any problem found not to be validated under the terms of this
warranty, would become chargeable, however the customer will always be informed before any repairs are
carried out, transportation back to the customer would also be chargeable in this instance.
Where a warranty claim is proved justified, the unit in question will be shipped back to the customer at the
cost of Norstrom Group.
The warranty is not transferable