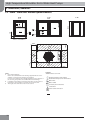
1
High-Temperature Monobloc Air-to-Water Heat Pumps Airand Source Heat Manual Pump Installation Maintenance Installation Manual Model numers: KHP00: 6kw Heat Pump KHP00: 8kw Heat Pump KHP00: 12kw Heat Pump A9317A 6HSW 2010 High-Temperature Unit protection Monobloc devices Air-to-Water Heat Pumps Contents 1 1.1 1.2 1.3 1.4 1.5 INTRODUCTION Check equipment received Installation safety considerations Equipment and components under pressure Maintenance safety considerations Repair safety considerations 4 4 4 5 5 6 2 2.1 2.2 2.3 2.4 MOVING AND SITING THE UNIT Moving Siting the unit Checks before system start-up Lifting labels 7 7 7 7 8 3 3.1 3.2 3.3 3.4 DIMENSIONS, CLEARANCES Aeromax Plus 022-035, units with and without hydronic module Aeromax Plus 045-055, units with and without hydronic module Aeromax Plus 075-105, units with and without hydronic module Multiple-unit installation 9 9 10 11 11 4 PHYSICAL DATA 12 5 5.1 5.2 ELECTRICAL DATA 12 Compressor usage and electrical data for standard units 13 Short-circuit stability current (TN system*) - standard unit (with main disconnect without fuse) 13 6 6.1 6.2 6.3 6.4 6.5 APPLICATION DATA Unit operating range Plate heat exchanger water flow Minimum water flow rate Maximum plate heat exchanger water flow rate Water loop volume 14 14 14 14 14 14 7 7.1 7.2 7.3 7.4 7.5 7.6 7.7 ELECTRICAL CONNECTION 15 Control box Power supply Voltage phase imbalance (%) Recommended wire sections Field control wiring Power supply 24 V user power reserve 15 15 15 15 15 16 16 8 - WATE R CONNECTIONS 8.1 Operating precautions and recommendations 8.2 Hydronic connections 8.3 Protection against cavitation 8.4 Frost protection 2 16 16 17 17 17 9 9.1 9.2 9.3 9.4 NOMINAL SYSTEM WATER FLOW CONTROL Water flow control procedure Plate heat exchanger pressure drops Pump pressure/flow rate curve for units with hydronic module Available system pressure for units with hydronic module 19 19 20 20 21 10 10.1 10.2 10.3 10.4 START-UP Preliminary checks Actual start-up Operation of two units in master/slave mode Supplementary electric resistance heaters 22 22 22 22 23 11 11.1 11.2 11.3 11.4 11.5 11.6 11.7 11.8 11.9 11.10 11.11 11.12 11.13 MAJOR SYSTEM COMPONENTS Compressors Lubricant Air evaporators Fans Electronic expansion valve (EXV) of the main circuit Electronic expansion valve (EXV) of the economised circuit Four-way valve Moisture indicator Filter drier Condenser Economiser Refrigerant High-pressure safety switch 23 23 23 23 23 23 23 24 24 24 24 24 24 24 12 OPTIONS AND ACCESSORIES 25 13 13.1 13.2 13.3 13.4 13.5 13.6 13.8 13.7 STANDARD MAINTENANCE Level 1 maintenance Level 2 maintenance Level 3 (or higher) maintenance Tightening torques for the main electrical screw connections Tightening torques for the main bolts and screws Evaporator coil Characteristics of R-407C Condenser maintenance 26 26 26 27 27 27 27 28 28 14 START-UP CECKLIST FOR AEROMAX PLUS HEAT PUMPS (USE FOR JOB FILE) 29 The cover photograph is for illustrative purposes only and is not part of any offer for sale or contract. 3 High-Temperature Unit protection Monobloc devices Air-to-Water Heat Pumps 1. INTRODUCTION Prior to the initial start-up of the Aeromax Plus units, the people involved should be thoroughly familiar with these instructions and the specific project data for the installation site. The heat pumps are designed to provide a very high level of safety and reliability making installation, start-up, operation and maintenance easier and more secure. They will provide safe and reliable service when operated within their application range. The procedures in this manual are arranged in the sequence required for machine installation, start-up, operation and maintenance. Be sure you understand and follow the procedures and safety precautions contained in the instructions supplied with the machine, as well as those listed in this guide, such as: protective clothing i.e. gloves, safety glasses, safety shoes and appropriate tools, and suitable qualifications (electrical, air conditioning, local legislation). To find out, if these products comply with European directives (machine safety, low voltage, electromagnetic compatibility, equipment under pressure, etc.) check the declarations of conformity for these products. 1.1 - Check equipment received t*OTQFDUUIFVOJUGPSEBNBHFPSNJTTJOHQBSUT*GEBNBHF is detected, or if shipment is incomplete, immediately file a claim with the shipping company. t $POöSNUIBUUIFVOJUSFDFJWFEJTUIFPOFPSEFSFE Compare the name plate data with the order. t5IFOBNFQMBUFJTBUUBDIFEUPUIFVOJUJOUXPMPDBUJPOT - on the outside on one of the unit sides - on the inside of the control box This shows the following information: - Model number - size - CE marking - Serial number - Year of manufacture and pressure and leak tightness test date - Refrigerant used - Refrigerant charge per circuit - PS: Min./max. allowable pressure (high and low pressure side) - TS: Min./max. allowable temperature (high and low pressure side) - Globe valve cut-out pressure - Pressure switch cut-out pressure - Unit leak test pressure - Voltage, frequency, number of phases - Maximum current drawn - Maximum power input - Unit net weight t$POöSNUIBUBMMBDDFTTPSJFTPSEFSFEGPSPOTJUFJOTUBMMBUJPO have been delivered, and are completeand undamaged. 4 The unit must be checked periodically, if necessary removing the insulation (thermal, acoustic), during its whole operating life to ensure that no shocks (handling accessories, tools, etc.) have damaged it. If necessary, the damaged parts must be repaired or replaced. See also chapter “Maintenance”. 1.2 - Installation safety considerations After the unit has been received, when it is ready to be installed or reinstalled, and before it is started up, it must be inspected for damage. Check that the refrigerant circuits are intact, especially that no components or pipes have shifted or been damaged (e.g. following a shock). If in doubt, carry out a leak tightness check. If damage is detected upon receipt, immediately file a claim with the shipping company. This machine must be installed in a location that is not accessible to the public and protected against access by non-authorised people. Do not remove the skid or the packaging until the unit is in its final position. These units can be moved with a fork lift truck, as long as the forks are positioned in the right place and direction on the unit. The units can also be lifted with slings, using only the designated lifting points marked on the unit (labels on the chassis and a label with all unit handling instructions are attached to the unit tank - refer to chapter 2.4). Use slings with the correct capacity, and always follow the lifting instructions on the certified drawings supplied for the unit. Safety is only guaranteed, if these instructions are carefully followed. If this is not the case, there is a risk of material deterioration and injuries to personnel. These units are not designed to be lifted from above. Never cover any safety devices. This applies to the safety valve in the water circuit and the safety valve(s) in the cooling circuit(s). Ensure that the valves are correctly installed, before operating the unit. The safety valves are designed and installed to ensure protection against fire risk. Removing the safety valves is only permitted if the fire risk is fully controlled and the responsibility of the user. All factory-installed safety valves are lead-sealed to prevent any calibration change. The safety valves must be connected to discharge pipes for units installed in confined spaces. These pipes must be installed in a way that ensures that people and property are not exposed to refrigerant leaks. These fluids may be diffused in the air, but far away from any building air intake, or they must be discharged in a quantity that is appropriate for a suitably absorbing environment. High-Temperature Unit protection Monobloc devices Air-to-Water Heat Pumps 1. INTRODUCTION Safety valves must be checked periodically. See paragraph “Repair safety considerations”. If the safety relief valves are installed on a reversing valve (changeover), this is equipped with a safety relief valve on each of the two outlets. Only one of the two safety relief valves is in operation, the other one is isolated. Never leave the reversing valve in the intermediate position, i.e. with both ways open (locate the control element in the stop position). If a safety valve is removed for checking or replacement please ensure that there is always an active safety valve on each of the reversing valves installed in the unit. Provide a drain in the discharge circuit, close to each globe valve, to avoid an accumulation of condensate or rain water. All precautions concerning handling of refrigerant must be observed in accordance with local regulations. Accumulation of refrigerant in an enclosed space can displace oxygen and cause asphyxiation or explosions. Inhalation of high concentrations of vapour is harmful and may cause heart irregularities, unconsciousness, or death. Vapour is heavier than air and reduces the amount of oxygen available for breathing. These products cause eye and skin irritation. Decomposition products can be hazardous. Aeromax Plus units use refrigerant R-407C. Special equipment must be used when working on the refrigerant circuit (pressure gauge, charge transfer, etc.). Any manipulation (opening or closing) of a shut-off valve must be carried out by a qualified and authorised engineer, observing applicable standards (e.g. during draining operations). The unit must be switched off while this is done. During any handling, maintenance and service operations the engineers working on the unit must be equipped with safety gloves, glasses, shoes and protective clothing. Never work on a unit that is still energized. Never work on any of the electrical components, until the general power supply to the unit has been cut. If any maintenance operations are carried out on the unit, lock the power supply circuit in the open position and secure the machine upstream with a padlock. If the work is interrupted, always ensure that all circuits are still deenergized before resuming the work. ATTENTION: Even if the unit has been switched off, the power circuit remains energized, unless the unit or circuit disconnect switch is open. Refer to the wiring diagram for further details. Attach appropriate safety labels. 1.3 - Equipment and components under pressure These products incorporate equipment or components under pressure, manufactured by Kingspan Renewables or other manufacturers. We recommend that you consult your appropriate national trade association or the owner of the equipment or components under pressure (declaration, re-qualification, retesting, etc.). The characteristics of this equipment/these components are given on the nameplate or in the required documentation, supplied with the products. Do not introduce high static and dynamic pressure compared with the existing operating pressures - either service or test pressures in the refrigerant circuit or in the heat transfer circuit, especially: tMJNJUJOHUIFFMFWBUJPOPGUIFDPOEFOTFSTPSFWBQPSBUPST tUBLJOHUIFDJSDVMBUJOHQVNQTJOUPDPOTJEFSBUJPO 1.4 - Maintenance safety considerations Engineers working on the electric or refrigeration components must be authorized, trained and fully qualified to do so (e.g. electricians trained and qualified in accordance with IEC 60364 Classification BA4). All refrigerant circuit work must be carried out by a trained person, fully qualified to work on these units. He must have been trained and be familiar with the equipment and the installation. All welding operations must be carried out by qualified specialists. If any work is carried out in the fan area, specifically if the grilles or casings have to be removed, cut the power supply to the fans to prevent their operation. It is recommended to install an indicating device to show if part of the refrigerant has leaked from the valve. The presence of oil at the outlet orifice is a useful indicator that refrigerant has leaked. Keep this orifice clean to ensure that any leaks are obvious. The calibration of a valve that has leaked is generally lower than its original calibration. The new calibration may affect the operating range. To avoid nuisance tripping or leaks, replace or re-calibrate the valve. Operating checks : t *NQPSUBOUJOGPSNBUJPOSFHBSEJOHUIFSFGSJHFSBOUVTFE This product contains fluorinated greenhouse gas covered by the Kyoto protocol. 3FGSJHFSBOUUZQF3$ (MPCBM8BSNJOH1PUFOUJBM(81 Periodic inspections for refrigerant leaks may be required depending on European or local legislation. Please contact your local dealer for more information. t %VSJOHUIFMJGFUJNFPGUIFTZTUFNJOTQFDUJPOBOEUFTUT must be carried out in accordance with national regulations. 4BGFUZEFWJDFDIFDLTBOOFY%o&/ t *GUIFSFBSFOPMPDBMSFHVMBUJPOTUIFTBGFUZEFWJDFTNVTU be checked on site once a year (high-pressure switches), and every five years for external overpressure devices (safety valves). 5 High-Temperature Unit protection Monobloc devices Air-to-Water Heat Pumps 1. INTRODUCTION At least once a year thoroughly inspect the protection devices (valves). If the machine operates in a corrosive environment, inspect the protection devices more frequently. Regularly carry out leak tests and immediately repair any leaks. Ensure regularly that the vibration levels remain acceptable and close to those at the initial unit start-up. Before opening a refrigerant circuit, transfer the refrigerant to bottles specifically provided for this purpose and consult the pressure gauges. $IBOHFUIFSFGSJHFSBOUBGUFSFRVJQNFOUGBJMVSFTGPMMPXJOH BQSPDFEVSFTVDIBTUIFPOFEFTDSJCFEJO/'&PS carry out a refrigerant analysis in a specialist laboratory. Avoid spilling liquid refrigerant on skin or splashing it into the eyes. Use safety goggles. Wash any spills from the skin with soap and water. If liquid refrigerant enters the eyes, immediately and abundantly flush the eyes with water and consult a doctor. Never apply an open flame (blowlamp) or overheated steam (high-pressure cleaner) to the refrigerant circuit. Dangerous overpressure can result. During refrigerant removal and storage operations follow applicable regulations. These regulations, permitting conditioning and recovery of halogenated hydrocarbons under optimum quality conditions for the products and optimum safety conditions for people, property and the environment are EFTDSJCFEJOTUBOEBSE/'& If the refrigerant circuit remains open for longer than a day after an intervention (such as a component replacement), the openings must be plugged and the circuit must be charged with nitrogen (inertia principle). The objective is to prevent penetration of atmospheric humidity and the corrosion on the unprotected internal steel walls. Refer to the certified dimensional drawings for the units. 1.5 - Repair safety considerations Do not attempt to remove refrigerant circuit components or fittings, while the machine is under pressure or while JUJTSVOOJOH#FTVSFQSFTTVSFJTBUL1BCFGPSFSFNPWJOH components or opening a circuit. All installation parts must be maintained by the personnel in charge, in order to avoid deterioration and injury. Faults and leaks must be repaired immediately. The authorized technician must have the responsibility to repair the fault immediately. Each time repairs have been carried out to the unit, the operation of the safety devices must be re-checked. Comply with the regulations and recommendations in unit and HVAC installation safety standards, such as: EN 378 and ISO 5149. Do not use oxygen to purge lines or to pressurize a machine for any purpose. Oxygen gas reacts violently with oil, grease, and other common substances. Never exceed the specified maximum operating pressures. Verify the allowable maximum high- and low-side test pressures by checking the instructions in this manual and the pressures given on the unit name plate. Do not use air for leak testing. Use only dry nitrogen. Do not unweld or flamecut the refrigerant lines or any refrigerant circuit component until all refrigerant (liquid and vapour) has been transferred from the heat pump. Traces of vapour should be displaced with dry air nitrogen. Refrigerant in contact with an open flame can produce toxic gases. The necessary protection equipment must be available, and appropriate fire extinguishers for the system and the refrigerant type used must be within easy reach. Do not siphon refrigerant. 6 It is dangerous and illegal to re-use disposable (non-returnable) reclaim bottles or attempt to refill them. When reclaim bottles are empty, evacuate the remaining gas pressure, and move them to a designated place for recovery. Do not incinerate. Do not attempt to repair or recondition any safety devices when corrosion or build-up of foreign material (rust, dirt, scale, etc.) is found within the valve body or mechanism.If necessary, replace the device. Do not install safety valves in series or backwards. ATTENTION: No part of the unit must be used as a walkway, rack or support. Periodically check and repair or if necessary replace any component or piping that shows signs of damage. Do not step on refrigerant lines. The lines can break under the weight and release refrigerant, causing personal injury. Do not climb on a machine. Use a platform, or staging to work at higher levels. Use mechanical lifting equipment (crane, hoist, winch, etc.) to lift or move heavy components. For lighter components, use lifting equipment when there is a risk of slipping or losing your balance. Use only original replacement parts for any repair or component SFQMBDFNFOU$POTVMUUIFMJTUPGSFQMBDFNFOUQBSUTUIBU corresponds to the specification of the original equipment. Do not drain water circuits containing industrial brines, without informing the technical service department at the installation site or a competent body first. High-Temperature Unit protection Monobloc devices Air-to-Water Heat Pumps 1. INTRODUCTION $MPTFUIFFOUFSJOHBOEMFBWJOHXBUFSTIVUPòWBMWFTBOEQVSHF the unit hydronic circuit, before working on the components installed on the circuit (screen filter, pump, water flow switch, etc.). Periodically inspect all valves, fittings and pipes of the refrigerant and hydronic circuits to ensure that they do not show any corrosion or any signs of leaks. It is recommended to wear ear defenders, when working near the unit and the unit is in operation. Always ensure you are using the correct refrigerant type before recharging the unit. $IBSHJOHBOZSFGSJHFSBOUPUIFSUIBOUIFPSJHJOBMDIBSHFUZQF 3$ XJMMJNQBJSNBDIJOFPQFSBUJPOBOEDBOFWFOMFBEUPB destruction of the compressors. The compressors operating with 3$BSFDIBSHFEXJUIBTZOUIFUJDQPMZPMFTUFSPJM Before any intervention on the refrigerant circuit, the complete refrigerant charge must be recovered. 2 - MOVING AND SITING THE UNIT 2.1 - Moving See chapter “Installation safety considerations”. 2.2 - Siting the unit Always refer to the chapter “Dimensions and clearances” to confirm that there is adequate space for all connections and service operations. For the centre of gravity coordinates, the position of the unit mounting holes, and the weight distribution points, refer to the certified dimensional drawing supplied with the unit. Typical applications of these units do not require earthquake resistance. Earthquake resistance has not been verified. CAUTION: Only use slings at the designated lifting points which are marked on the unit. Before siting the unit check that: tUIFQFSNJUUFEMPBEJOHBUUIFTJUFJTBEFRVBUFPSUIBU appropriate strenghtening measures have been taken. tJGUIFIFBUQVNQJTSFRVJSFEUPPQFSBUFJOUFNQFSBUVSFT below 0°C it must be raised at least 300 mm from the ground. This is necessary to avoid ice build-up on the unit chassis and also to permit correct unit operation in locations where the snow level may reach this height. tUIFVOJUJTJOTUBMMFEMFWFMPOBOFWFOTVSGBDFNBYJNVN tolerance is 5 mm in both axes). tUIFSFJTBEFRVBUFTQBDFBCPWFUIFVOJUGPSBJSøPXBOE to ensure access to the components (see dimensional drawings). tUIFOVNCFSPGTVQQPSUQPJOUTJTBEFRVBUFBOEUIBU they are in the right places. tUIFMPDBUJPOJTOPUTVCKFDUUPøPPEJOH CAUTION: Before lifting the unit, check that all casing panels are securely fixed in place. Lift and set down the unit with great care. Tilting and jarring can damage the unit and impair unit operation. If Aeromax Plus units are hoisted with rigging, it is advisable to protect coils against crushing while a unit is being moved. Use struts or a lifting beam to spread the slings above the unit. Do not tilt a unit more than 15°. WARNING: Never push or lever on any of the enclosure panels of the unit. Only the base of the unit frame is designed to withstand such stresses. 2.3 - Checks before system start-up Before the start-up of the refrigeration system, the complete installation, including the refrigeration system must be verified against the installation drawings, dimensional drawings, system piping and instrumentation diagrams and the wiring diagrams. During these verifications observe all national regulations. If no national regulations exist, please refer to annex G of standard EN378-2, specifically: External visual installation checks: t$PNQBSFUIFDPNQMFUFJOTUBMMBUJPOXJUIUIFSFGSJHFSBUJPO system and power circuit diagrams. t$IFDLUIBUBMMDPNQPOFOUTDPNQMZXJUIUIFEFTJHO specifications. t$IFDLUIBUBMMTBGFUZEPDVNFOUTBOEFRVJQNFOUTUIBUBSF required by current European standards are present. t7FSJGZUIBUBMMTBGFUZBOEFOWJSPONFOUBMQSPUFDUJPO devices and arrangements are in place and comply with the current European standard. t7FSJGZUIBUBMMEPDVNFOUGPSQSFTTVSFDPOUBJOFST certificates, name plates, files, instruction manuals that are required documents required by the current European standards are present. t7FSJGZUIFGSFFQBTTBHFPGBDDFTTBOETBGFUZSPVUFT t7FSJGZUIFJOTUSVDUJPOTBOEEJSFDUJWFTUPQSFWFOUUIF deliberate removal of refrigerant gases. t7FSJGZUIFJOTUBMMBUJPOPGDPOOFDUJPOT t7FSJGZUIFTVQQPSUTBOEöYJOHFMFNFOUTNBUFSJBMT routing and connection). t7FSJGZUIFRVBMJUZPGXFMETBOEPUIFSKPJOUT t$IFDLUIFQSPUFDUJPOBHBJOTUNFDIBOJDBMEBNBHF t$IFDLUIFQSPUFDUJPOBHBJOTUIFBU t$IFDLUIFQSPUFDUJPOPGNPWJOHQBSUT t7FSJGZUIFBDDFTTJCJMJUZGPSNBJOUFOBODFPSSFQBJSBOE to check the piping. t7FSJGZUIFTUBUVTPGUIFWBMWFT t7FSJGZUIFRVBMJUZPGUIFUIFSNBMJOTVMBUJPOBOEPGUIF vapour barriers. t&OTVSFUIBUUIFWFOUJMBUJPOJOUIFNBDIJOFSPPNJT sufficient. t$IFDLUIFSFGSJHFSBOUEFUFDUPST 7 High-Temperature Unit protection Monobloc devices Air-to-Water Heat Pumps 2.4 - Lifting labels 22kW to 35Kw 45kW to 55Kw 1000 Z + 20 1000 M Y+ 20 X + 40 1000 ÁŽÆËÁÇÆËÁÆÅÅ 61AF 075 to 105 Z + 10 ʽʿʿ 22kW ʽˀʽ 30kW 35kW ʽˀ˂ 0 +2 0 X+4 ˃ʾ ÁŽÆËÁÇÆËÁÆÅÅ ʽˁ˂ 45kW 55kW ʽ˂˂ Y Z + 20 ˃ʾ X+ NOTES: 1. Material: self-adhesive vinyl 9800 2. The symbols must be centred. 3. The symbols are black on a red background. 8 ˃ʾ 75kW ʽ˄˂ 105kW ʾʽ˂ 50 Y+ ÁŽÆËÁÇÆËÁÆÅÅ 50 High-Temperature Unit protection Monobloc devices Air-to-Water Heat Pumps 3 - dimensions, clearances 3.1 - 22kW - 35kW units without hydronic module 1110 300 1330 1327 1000 1000 1 2 1000 1 2 1000 NOTES: ƕ A Non-certified drawings. Refer to the certified dimensional drawings supplied with the unit or !"#$%%#!!$&#'# ($)!## available on request, when designing an installation. For the location of fixing points, weight distribution and coordinates of *!#,%)!'$! the centre of gravity refer to the certified dimensional drawings. B &-!"# In multiple-unit installations (maximum four units), the side clearance . /"$#%#$##3","$"$$6)!#' between the units should be increased from 1000 to 2000 mm. !$!$#'" "" C 8!!!!#$"$," The height of the solid surface must not exceed 2 m. 7 Legend ½¿½Æ¼ƕ All dimensions are in mm ##"&"" 7#', Required clearances for air flow ;# Recommended space for maintenance Water inlet ;$# outlet 1 Water Air outlet, do not obstruct 2 Control box ($#< ""#" $#)'$ Power cable connection ='#- 9 High-Temperature Unit protection Monobloc devices Air-to-Water Heat Pumps 3 - dimensions, clearances 3.2 - 45kW - 55kW units without hydronic module 2100 300 1330 1114 1000 1000 1 2 1000 1 NOTES: ƕ A Non-certified drawings. Refer !"#$%%#!!$&#'# to the certified dimensional drawings supplied with the unit or ($)!## available on request, when designing an installation. For the location of fixing points, weight distribution and coordinates of *!#,%)!'$! the centre of gravity refer to the certified dimensional drawings. &-!"# B. In multiple-unit installations (maximum four units), the side clearance /"$#%#$##3","$"$$6)!#' between the units should be increased from 1000 to 2000 mm. !$!$#'" "" C7 The height of the solid surface must not exceed 2 m. 8!!!!#$"$," 10 2 1000 Legend All½¿½Æ¼ƕ dimensions are in mm ##"&"" 7#', Required clearances for air flow Recommended space for maintenance ;# Water inlet ;$# 1Air outlet, do not obstruct 2Control box Water outlet ($#< ""#" $#)'$ Power cable connection ='#- High-Temperature Unit protection Monobloc devices Air-to-Water Heat Pumps 3 - dimensions, clearances 3.3 - 75kW - 105kW units without hydronic module 2273 300 1330 2100 2053 2261 1000 ƕ NOTES: A Non-certified drawings. Refer !"#$%%#!!$&#'# to the certified dimensional drawings supplied with the unit or ($)!## available on request, when designing an installation. the location of fixing points, weight distribution and coordinates of For *!#,%)!'$! the centre of gravity refer to the certified dimensional drawings. &-!"# B . In/"$#%#$##3","$"$$6)!#' multiple-unit installations (maximum four units), the side clearance !$!$#'" "" between the units should be increased from 1000 to 2000 mm. 8!!!!#$"$," C7 The height of the solid surface must not exceed 2 m. 1000 1 2 Legend All dimensions are in mm 1 Required clearances for air flow Recommended space for maintenance Water inlet Water outlet 1000 1 Air outlet, do not obstruct 1000 Control box Power cable connection 3.4 - Multiple - Unit installation (Two units maximum lined together) >### >### NOTE: If the walls are higher than 2 m, contact the factory 11 High-Temperature Unit protection Monobloc devices Air-to-Water Heat Pumps 4 - PHYSICAL DATA Aeromax Plus Nominal heating capacity* Power input Coefficient of performance (COP) Eurovent class, heating Nominal heating capacity** Power input Coefficient of performance (COP) Eurovent class, heating Operating weight*** Standard unit (without hydronic kit) Standard unit (plus hydronic module option) Sound levels Sound power level 10-12 W**** Sound pressure level at 10 m† Compressor Quantity Number of capacity stages Refrigerant Charge Capacity control Minimum capacity Condenser Water volume Max. water-side operating pressure without hydronic module Max. water-side operating pressure with hydronic module Fan Quantity Total air flow (high speed) Speed Evaporator Hydronic module (option 116) Three-speed single pump Water connections with/without hydronic module Connections†† Outside diameter Chassis paint colour kW kW kW/kW A kW kW kW/kW 22 kW 20.8 5.8 3.6 A 21.2 4.9 4.3 A 30 kW 25.7 7.3 3.5 A 26.1 6.1 4.3 A 35 kW 32.2 9.2 3.5 A 32.8 7.8 4.2 A 45 kW 43.6 11.8 3.7 A 43.8 9.9 4.4 A 55 kW 52.2 14 3.7 A 52.8 11.9 4.4 A 75 kW 66.7 19.4 3.4 A 64.7 16.1 4 B 102 23.6 4.3 A kg kg 343 349 396 403 421 436 509 524 533 549 900 926 1020 1046 83 51 84 53 84 52 85 53 1 1 1 1 2 2 2 2 10 13.2 22 26.5 100 100 50 50 9.6 1000 400 12.1 1000 400 16.4 1000 400 22.7 1000 400 1 3800 12 1 3800 12 2 7600 12 2 7600 12 dB(A) 81 82 83 dB(A) 50 51 51 Hermetic scroll 48.3 r/s 1 1 1 1 1 1 R-407C kg 8 8.8 9.7 Pro-Dialog+ % 100 100 100 Direct-expansion plate heat exchanger l 4.9 6.4 8.2 kPa 1000 1000 1000 kPa 400 400 400 Axial with rotating shroud, Flying Bird IV 1 1 1 l/s 3800 3800 3800 r/s 12 12 12 Grooved copper tubes and aluminium fins 105 kW 102 28.1 3.6 Pump, Victaulic screen filter, safety valve, purge valves (water and air), cavitation presssure sensor Victaulic inch 1¼ 1¼ 1½ 1½ 1½ 2 2 mm 42.4 42.4 48.3 48.3 48.3 60.3 60.3 Colour code: RAL 7035 * Maximum instantaneous start-up current (maximum operating current of the compressor + fan current + locked rotor current of the compressor). ** Power input, compressor and fan, at the unit operating limits (saturated suction temperature 10°C, saturated condensing temperature 65°C) and nominal voltage of 400 V (data given on the unit nameplate). *** Standardised Eurovent conditions: condenser entering/leaving water temperature = 40°C/45°C, outside air temperature db/wb = 7°C/6°C. **** Maximum unit operating current at maximum unit power input and 400 V (values given on the unit nameplate). † Maximum unit operating current at maximum unit power input and 360 V. Electrical Data DATA 5 - ELECTRICAL Aeromax Plus (without hydronic module) 22 kW 30 kW 35 kW 45 kW 55 kW 75 kW 105 kW Power circuit Nominal power supply V-ph-Hz 400-3-50 Voltage range V Control circuit supply 24 V, via internal transformer 360-440 Maximum start-up current (Un)* Standard unit A 104.6 102.6 131 171 191 154.5 221.5 Unit with electronic starter option A 56.1 55.1 70 90.8 101.2 101.5 142.5 0.82 0.82 0.82 0.82 0.82 0.82 0.82 kW 8.7 11.6 12.9 14.6 16.8 25.8 33.7 Unit power factor at maximum capacity** Maximum unit power input** Nominal unit current draw*** A 14.3 16.9 20.2 23.2 27.9 39.7 55.1 Maximum unit current draw (Un)**** A 16.1 21.3 24.1 27.1 31.1 47.5 61.5 Maximum unit current draw (Un-10%)† A 21.1 28.4 32.2 36.4 42 63.7 83.3 Customer-side unit power reserve Customer reserve at the 24 V control power circuit Short-circuit stability and protection See table on the next page * Maximum instantaneous start-up current (maximum operating current of the compressor + fan current + locked rotor current of the compressor). ** Power input, compressor and fan, at the unit operating limits (saturated suction temperature 10°C, saturated condensing temperature 65°C) and nominal voltage of 400 V (data given on the unit nameplate). *** Standardised Eurovent conditions: condenser entering/leaving water temperature = 40°C/45°C, outside air temperature db/wb = 7°C/6°C. **** Maximum unit operating current at maximum unit power input and 400 V (values given on the unit nameplate). † Maximum unit operating current at maximum unit power input and 360 V. 12 High-Temperature Unit protection Monobloc devices Air-to-Water Heat Pumps 5.1 - Compressor usage and electrical data for standard units ÇÅÈʽËËÇÊ ÇÅ ʾ˅ ʿˁ ˀˀ ˁʽ ˁ˅ ¹Ð ƼÆƽ ¹Ð ƼÆƘʾʽ̍ƽ Lj LjLj ÇËÁƽ ÀÁŹÐƖ ʽʿʿ 22 kW ʽˀʽ 30 kW ʽˀ˂ 35 kW ʽˁ˂ 45 kW ʽ˂˂ 55 kW ʽ˄˂ 75 kW ʾʽ˂ 105 kW ½¿½Æ¼ /" "#$@$&3$"#$$6) /A, A,"$"%$ B) C DE$"#&#) CC DE$"#&#)# 5.2 - Short-circuit stability current (TN system*) # - standard unit (with main disconnect without fuse) Standard unit (main disconnect switch) 22 kW 30 kW 35 kW 45 kW 55 kW 75 kW 105 kW Value with unspecified upstream protection Short-term current at 1 s (Icw) kA rms 0.6 0.6 0.6 1.26 1.26 1.26 2 Admissible peak current (Ipk) kA pk 4.5 4.5 4.5 6 6 6 10 Maximum value with upstream protection by Siemens circuit breaker Conditional short-circuit current (Icc) kA rms Siemens circuit breaker - Compact range Reference number** 5.4 7 7 7.7 7.7 6.1 10 32 40 40 50 63 80 100 5SY6332-7 5SY6340-7 5SY6340-7 5SY4350-7 5SY4363-8 5SP4380-7 5SP4391-7 17 50 50 50 50 14.5 22 40 40 40 63 63 80 125 Maximum value with upstream protection by fuses (gL/gG) Conditional short-circuit current (Icc) Siemens fuse (gL/gG) kA rms * Earthing system type ** If another current limitation protection system is used, its time-current and thermal constraint (I²t) trip characteristics must be at least equivalent to those of the recommended Siemens circuit breaker. Contact your nearest Kingpsan Renewables office. The short-circuit stability current values above are in accordance with the TN system. Electrical data and operating conditions notes: t "FSPNBY1MVTVOJUTIBWFBTJOHMFQPXFSDPOOFDUJPOQPJOUMPDBUFE immediately upstream of the main disconnect switch. t 5IFDPOUSPMCPYJODMVEFTUIFGPMMPXJOHTUBOEBSEGFBUVSFT - a main disconnect switch, - starter and motor protection devices for the compressor, the fan and the pump, - the control devices. t 'JFMEDPOOFDUJPOT All connections to the system and the electrical installations must be in full accordance with all applicable local codes. t 5IF"FSPNBY1MVTVOJUTBSFEFTJHOFEBOECVJMUUPFOTVSFDPOGPSNBODFXJUIUIFTF codes. The recommendations of European standard EN 60204-1 (machine safety electrical machine components - part 1: general regulations corresponds to IEC 60204-1) are specifically taken into account, when designing the electrical equipment. Notes: t (FOFSBMMZUIFSFDPNNFOEBUJPOTPG*&$BSFBDDFQUFEBTDPNQMJBODFXJUI the requirements of the installation directives. Conformance with EN60204-1 is the best means of ensuring compliance with the Machinery Directive § 1.5.1. t "OOFY#PG&/EFTDSJCFTUIFFMFDUSJDBMDIBSBDUFSJTUJDT used for the operation of the machines. t 5IFPQFSBUJOHFOWJSPONFOUGPSUIF"FSPNBY1MVTVOJUTJTTQFDJöFECFMPX 1. Environment* - Environment as classified in EN 60721 (corresponds to IEC 60721): - outdoor installation* - ambient temperature range: -20°C to +40°C, class 4K4H - altitude: ≤ 2000 m - presence of hard solids, class 4S2 (no significant dust present) - presence of corrosive and polluting substances, class 4C2 (negligible) 2. Power supply frequency variation: ± 2 Hz. 3. The neutral (N) conductor must not be connected directly to the unit (if necessary use a transformer). 4. Overcurrent protection of the power supply conductors is not provided with the unit. 5. The factory-installed disconnect switch is of a type suitable for power interruption in accordance with EN 60947-3 (corresponds to IEC 60947-3) 6. The units are designed for connection to TN networks (IEC60364). For IT networks the earth connection must not be at the network earth. Provide a local earth, consult competent local organisations to complete the electrical installation. Caution: If particular aspects of an actual installation do not conform to the conditions described above, or if there are other conditions which should be considered, always contact your local Kingspan Renewables representative. t 5IFSFRVJSFEQSPUFDUJPOMFWFMGPSUIJTDMBTTJT*1#8BDDPSEJOHUPSFGFSFODF document IEC 60529). All Aeromax Plus units are protected to IP44CW and fulfil this protection condition. 13 High-Temperature Unit protection Monobloc devices Air-to-Water Heat Pumps 6 - APPLICATION DATA 6.5 - Water loop volume 6.1 - Unit operating range Aeromax Plus Minimum Maximum °C 8 57 Leaving water temperature during operation °C 30 65 Entering/leaving water temperature difference K 3 ** °C -20 40 6.5.1 - Minimum water loop volume Condenser Entering water temperature at start-up The heat pump is used in a domestic hot water application and must heat an intermediate loop that supplies domestic hot water via a heat exchanger. The primary loop is charged with softened water. Regular checks must be carried out on the water system to detect possible scale formation. The heat pump in this type of application must never supply domestic hot water directly. Evaporator Entering air temperature* * Outside temperature: For transport and storage of the Aeromax Plus units the minimum and maximum allowable temperatures are -20°C and +50°C. It is recommended that these temperatures are used for transport by container. ** Refer to the minmum unit flow rate. The minimum water loop volume, in litres, is given by the following formula: Note: Do not exceed the maximum operating temperature. 70 Volume (l) = CAP (kW) x N, where CAP is the nominal heating capacity at nominal operating conditions. 65 D&"%$)N7 60 55 Heating or domestic hot water application N 50 Aeromax Plus 022-055 5,0 l 45 Aeromax Plus 075-105 3.0 l 40 This volume is required to obtain temperature stability and precision. 35 30 25 20 -25 -20 -15 -10 -5 0 5 10 15 20 25 30 35 40 45 To achieve this volume, it may be necessary to add a storage tank to the circuit. This tank should be equipped with baffles to allow mixing of the fluid (water or brine). Please refer to the examples below. @"%$)N7 V *$##V# 6.2 - Unit operating range Flow rate, l/s Minimum Maximum* with hydronic module Maximum** without hydronic module 22kW 0.4 1.6 1.8 30kW 0.5 1.7 2.4 35kW 0.7 3.3 3.1 45kW 0.8 3.3 3.8 55kW 0.9 3.2 4.6 75kW 1.2 5.9 6.4 105kW 1.6 6.1 8.5 * Maximum flow rate at an available pressure of 15 kPa. ** Maximum flow rate at a water temperature difference of 3 K in the plate heat exchanger. Note: For a domestic hot water application (leaving water temperature = 65°C), the water temperature difference must be at least 8 K. 6.3 - Minimum water flow rate If the installation flow rate is below the minimum flow rate, there is a risk of excessive fouling of the condenser. 6.4 - Maximum plate heat exchanger water flow rate This is limited by the permitted plate heat exchanger pressure drop. Also, a minimum condenser ΔT of 3 K must be guaranteed, which corresponds to a water flow rate of 0.09 l/s per kW. 14 . H . H 6.5.2 - Expansion tank volume Units with hydronic module do not incorporate an expansion tank. This must be included in the water loop. The table below gives the buffer tank volume that must be provided, based on the water loop volume, the fluid used and its concentration. Expansion tank volume required % of water loop volume* Pure water 3 10% ethylene glycol 3 20% ethylene glycol 3.5 30% ethylene glycol 3.8 40% ethylene glycol 4.2 * Calculation based on a charge temperature of 10°C. High-Temperature Unit protection Monobloc devices Air-to-Water Heat Pumps 7 - ELECTRICAL CONNECTION 7.1 - Control box Please refer to the certified dimensional drawings, supplied with the unit (also available on the internet). 7.2 - Power supply The power supply must conform to the specification on the heat pump nameplate. The supply voltage must be within the range specified in the electrical data table. For connections refer to the wiring diagrams and the certified dimensional drawings. WARNING: Operation of the unit with an improper supply voltage or excessive phase imbalance constitutes abuse which will invalidate the Kingspan Renewables warranty. If the phase JNCBMBODFFYDFFETGPSWPMUBHFPSGPSDVSSFOUDPOUBDU your local electricity supply at once and ensure that the heat pump is not switched on until corrective measures have been taken. 7.4 - Recommended wire sections Wire sizing is the responsibility of the installer, and depends on the characteristics and regulations applicable to each installation site. The following is only to be used as a guideline, and does not make Kingspan Renewables in any way liable. After wire sizing has been completed, using the certified dimensional drawing, the installer must ensure easy connection and define any modifications necessary on site. The connections provided as standard for the field-supplied power entry cables to the general disconnect/isolator switch are designed for the number and type of wires, listed in the table below. The calculations are based on the maximum machine current (see electrical data tables). Standard installation practises for units installed outside have been applied in accordance with IEC 60364, table 52C: t/PTVTQFOEFEBFSJBMMJOFT t/PCVSJFEDPOEVJUXJUIBEFSBUJOHDPFóDJFOUPG 7.3 - Voltage phase imbalance (%) 100 x max. deviation from average voltage Average voltage Example: On a 400 V - 3 ph - 50 Hz supply, the individual phase voltages were measured to be: AB = 406 V; BC = 399 V; AC = 394 V Average voltage = (406 + 399 + 394)/3 = 1199/3 = 399.7 say 400 V Calculate the maximum deviation from the 400 V average: deviation from the 4 (AB) = 406 - 400 = 6 (BC) = 400 - 399 = 1 (CA) = 400 - 394 = 6 A The calculation is based on PVC or XLPE insulated cables with copper core. A maximum ambient temperature of 40°C has been taken into consideration for Aeromax Plus units. The given wire length limits the voltage drop to < 5%. IMPORTANT: Before connection of the main power cables --- POUIFUFSNJOBMCMPDLJUJTJNQFSBUJWFUPDIFDL UIFDPSSFDUPSEFSPGUIFQIBTFTCFGPSFQSPDFFEJOHUPUIF connection on the main disconnect/isolator switch. Power cable entry The power cables can enter the Aeromax Plus control box from below or from the side of the unit, at the bottom of the angle iron. Pre-punched holes facilitate the entry. Refer to the certified dimensional drawing for the unit. An opening below the control box allows introduction of the cables. 7.5 - Field control wiring The maximum deviation from the average is 6 V. The greatest percentage deviation is: 100 x 6/400 = 1.5% This is less than the permissible 2% and is therefore acceptable. Refer to the Aeromax Plus Pro-Dialog+ Control IOM and the certified wiring diagram supplied with the unit for the field control wiring of the following features: t$POEFOTFSQVNQJOUFSMPDLNBOEBUPSZ t3FNPUFPOPòTXJUDI t%FNBOEMJNJUFYUFSOBMTXJUDI t3FNPUFEVBMTFUQPJOUTXJUDI Table of minimum and maximum wire sections for connection to Aeromax Plus units ˃ʾ 22kW ʽʿʿ 30kW ʽˀʽ 35kW ʽˀ˂ 45kW ʽˁ˂ 55kW ʽ˂˂ 75kW ʽ˄˂ 105kW ʾʽ˂ ÁË»ÇÆƽ»ÌËÏÁÌ»À ¹ÐƖ»ÇÆƽ»Ì¹ºÄ½Ë½»ÌÁÇÆ ½»ÌÁÇÆƼÅÅʿƽ , , , , , , , ÇÆƽ»Ì¹ºÄ½ÏÁʽ ÁÆƖÏÁʽ˽»ÌÁÇÆ ½»ÌÁÇÆƼÅÅʿƽ , , , , , , , ¹ÐƖĽƿÌÀƼÅƽ Ç̽ƕ=$%%#-'#3!"!!%a@##b6 ÁʽÌÑȽ `D=@7$ `D=@7$ `D=@7$ `D=@7$ `D=@7$ `D=@7$ `D=@7$ ¹ÐƖÏÁʽ˽»ÌÁÇÆ ½»ÌÁÇÆƼÅÅʿƽ , , , , , , , ¹ÐƖĽƿÌÀƼÅƽ ÁʽÌÑȽ =B77$ =B77$ =B77$ =B77$ =B77$ =B77$ =B77$ 15 High-Temperature Unit protection Monobloc devices Air-to-Water Heat Pumps 7.6 POWER SUPPLY After the unit has been commissioned, the power supply must only be disconnected for quick maintenance operations (one day maximum). For longer maintenance operations or when the unit is taken out of service and stored the power supply must be maintained to ensure supply to the heaters (unit frost protection). 7.7 - 24 V user power reserve After all possible options have been connected, the transformer ensures the availability of a usable 24 VA or 1 A power reserve for the control circuit on site. 8 - WATER CONNECTIONS For size and position of the unit water inlet and outlet connections refer to the certified dimensional drawings supplied with the unit. The water pipes must not transmit any radial or axial force to the heat exchangers nor any vibration. The water supply must be analysed and appropriate desilting, filtering, treatment, control devices, shut-off and bleed valves built in, to prevent corrosion (example: damage to the protection of the tube surface if the fluid is polluted), fouling and deterioration of the water circuit. Before any start-up verify that the heat exchange fluid is compatible with the materials and the water circuit coating. In case additives or other fluids than those recommended by Kingspan Renewables are used, ensure that the fluids are not considered as a gas, and that they belong to class 2, as defined in directive 97/23/EC. Kingspan Renewables recommendations on heat exchange fluids: t/P/)BNNPOJVNJPOTJOUIFXBUFSUIFZBSFWFSZ detrimental for copper. This is one of the most important factors for the operating life of copper piping. A content of several tenths of mg/l will badly corrode the copper over time. t$M$IMPSJEFJPOTBSFEFUSJNFOUBMGPSDPQQFSXJUIBSJTL of perforations by corrosion by puncture. If possible keep below 10 mg/l. t4042- sulphate ions can cause perforating corrosion, if their content is above 30 mg/l. t/PøVPSJEFJPOTNHM t/P'F2+ and Fe3+ ions with non negligible levels of dissolved oxygen must be present. Dissolved iron < 5 mg/l with dissolved oxygen < 5 mg/l. t%JTTPMWFETJMJDPOTJMJDPOJTBOBDJEFMFNFOUPGXBUFS and can also lead to corrosion risks. Content < 1mg/l. t8BUFSIBSEOFTTNNPMM7BMVFTCFUXFFOBOE 1.5 mmol/l are recommended. This will facilitate scale deposit that can limit corrosion of copper. Values that are too high can cause piping blockage over time. A total alkalimetric titre (TAC) below 100 is desirable in primary domestic hot water loops and for heating applications. t%JTTPMWFEPYZHFO"OZTVEEFODIBOHFJOXBUFS oxygenation conditions must be avoided. It is as detrimental to deoxygenate the water by mixing it with inert gas as it is to over-oxygenate it by mixing it with pure oxygen. The disturbance of the oxygenation conditions encourages destabilisation of copper hydroxides and enlargement of particles. t4QFDJöDSFTJTUBODFFMFDUSJDDPOEVDUJWJUZUIFIJHIFSUIF specific resistance, the slower the corrosion tendency. 16 Values above 30 Ohm·m are desirable. A neutral environment favours maximum specific resistance values. For electric conductivity values in the order of 20-60 mS/m can be recommended. tQ)*EFBMDBTFQ)OFVUSBMBU¡$Q) ATTENTION: $IBSHJOHBEEJOHPSESBJOJOHøVJEGSPNUIF water circuit must be done by qualified personnel, using air vents and materials suitable for the products. The water DJSDVJUDIBSHJOHEFWJDFTBSFöFMETVQQMJFE$IBSHJOHBOE removing heat exchange fluids should be done with devices that must be included on the water circuit by the installer. 8.1 - Operating precautions and recommendations The water circuit should be designed to have the least number of elbows and horizontal pipe runs at different levels. Below the main points to be checked for the connection: t$PNQMZXJUIUIFXBUFSJOMFUBOEPVUMFUDPOOFDUJPOT shown on the unit. t*OTUBMMNBOVBMPSBVUPNBUJDBJSQVSHFWBMWFTBUBMMIJHI points in the circuit. t6TFBOFYQBOTJPOEFWJDFUPNBJOUBJOQSFTTVSFJOUIF system and install a safety valve and an expansion tank. t6OJUTXJUIBIZESPOJDNPEVMFJODMVEFBTBGFUZWBMWF t*OTUBMMUIFSNPNFUFSTJOCPUIUIFFOUFSJOHBOEMFBWJOH water connections. t*OTUBMMESBJODPOOFDUJPOTBUBMMMPXQPJOUTUPBMMPXUIF whole circuit to be drained. t*OTUBMMTUPQWBMWFTDMPTFUPUIFFOUFSJOHBOEMFBWJOH water connections. t6TFøFYJCMFDPOOFDUJPOTUPSFEVDFWJCSBUJPOUSBOTNJTTJPO t*OTVMBUFBMMQJQFXPSLBGUFSUFTUJOHGPSMFBLTUPQSFWFOU heat loss. t8SBQUIFJOTVMBUJPOTXJUIBEFNJTUJOHTDSFFO t*GUIFFYUFSOBMVOJUXBUFSQJQFTBSFJOBOBSFBXIFSFUIF ambient temperature is likely to fall below 0°C, they must be protected against frost (frost protection solution or electric heaters). /05&'PSVOJUTOPUFRVJQQFEXJUIBIZESPOJDNPEVMFBTDSFFO filter must be installed. This must be installed on the water entering pipes upstream of the pressure gauge at the unit inlet. It must be located in a position that is easily accessible for removal BOEDMFBOJOH5IFNFTITJ[FPGUIFöMUFSNVTUCFNN The plate heat exchanger can foul up quickly at the initial unit start-up, as it complements the filter function, and the unit operation will be impaired (reduced water flow rate due to increased pressure drop). Units with hydronic module are equipped with this type of filter. High-Temperature Unit protection Monobloc devices Air-to-Water Heat Pumps 8 - WATER CONNECTIONS Do not introduce any significant static or dynamic pressure into the heat exchange circuit (with regard to the design operating pressures). The products that may be added for thermal insulation of the containers during the water piping connection procedure must be chemically neutral in relation to the materials and coatings to which they are applied. This is also the case for the products originally supplied by Kingspan Renewables. cannot be guaranteed. For this reason the main unit disconnect switch as well as the auxiliary protection switch for the heaters must always be left closed (for the location of these components see the wiring diagram). To ensure frost protection of the units with hydronic module water circulation in the water circuit must be maintained by periodically switching on the pump. If a shut-off valve is installed, a bypass must be included as shown below. 8.2 - Hydronic connections The diagram on the following page shows a typical hydronic installation. When charging the water circuit use air vents to evacuate any residual air pockets. 7# ; E U% c 7# 8.3 - Protection against cavitation To ensure the durability of the pumps in the integreated hydronic modules (options 116), the control algorithm of the Aeromax Plus units incorporates anti-cavitation protection. It is therefore necessary to ensure a minimum pump entering pressure of 40 kPa (0.4 bar) during operation and at shutdown. A pressure below 40 kPa will prohibit unit start-up or cause an alarm with the unit shutting down. In order to obtain sufficient pressure, it is recommended: tUPQSFTTVSJTFUIFIZESPOJDDJSDVJUCFUXFFOBOECBS (maximum), t UPDMFBOUIFIZESPOJDDJSDVJUCFGPSFDIBSHJOHXBUFS (see chapters 9.2 and 9.3), t UPSFHVMBSMZDMFBOUIFTDSFFOöMUFS tOPUUPVTFUIFJOUFHSBUFEIZESPOJDLJUTGPSBOPQFOMPPQ 8.4 - Frost protection The plate heat exchangers, the piping and the hydronic module pump can be damaged by frost, despite the built-in anti-freeze protection of the units. *.1035"/5%FQFOEJOHPOUIFBUNPTQIFSJDDPOEJUJPOT in your area you must do the following when switching the VOJUPòJOXJOUFS t "EEFUIZMFOFHMZDPMPSQSPQZMFOFHMZDPMXJUIBOBEFRVBUF concentration to protect the installation up to a temperature PG,CFMPXUIFMPXFTUUFNQFSBUVSFMJLFMZUPPDDVSBUUIF installation site. If ethylene glycol or propylene glycol is added, ensure that the unit pump is not used to add pure glycol and to apportion the fluid amount (possible pump damage). Always add a mixture that is measured in advance. t *GUIFVOJUJTOPUVTFEGPSBOFYUFOEFEQFSJPEJUJT recommended to drain it, and as a safety precaution introduce ethylene glycol or propylene glycol in the heat exchanger, using the water entering purge valve connection. t "UUIFTUBSUPGUIFOFYUTFBTPOSFöMMUIFVOJUXJUIXBUFSBOE add an inhibitor. t 'PSUIFJOTUBMMBUJPOPGBVYJMJBSZFRVJQNFOUUIFJOTUBMMFSNVTU comply with basic regulations, especially for minimum and maximum flow rates, which must be between the values listed in the operating limit table (application data). t 5PQSFWFOUDPSSPTJPOCZEJòFSFOUJBMBFSBUJPOUIFDPNQMFUF drained heat transfer circuit must be charged with nitrogen for a period of one month. If the heat transfer fluid does not comply with the Kingspan Renewables regulations, the nitrogen charge must be added immediately. Frost protection of the plate heat exchanger and all hydronic circuit components is guaranteed: t%PXOUP¡$CZFMFDUSJDIFBUFSTIFBUFYDIBOHFS and internal piping) that have an automatic supply (units without hydronic module), t%PXOUP¡$CZBOFMFDUSJDIFBUFSPOUIFIFBU exchanger that has an automatic supply and by pump cycling (standard for units with hydronic module), t%PXOUP¡$CZFMFDUSJDIFBUFSTIFBUFYDIBOHFS and internal piping) that have an automatic supply and by pump cycling (units with hydronic module and “Reinforced frost protection” option). Never switch off the plate heat exchanger and hydronic circuit heaters or the pump, otherwise frost protection 17 High-Temperature Unit protection Monobloc devices Air-to-Water Heat Pumps TYPICAL HYDRONIC CIRCUIT DIAGRAM 15 17 14 18 19 2 1 6 3 7 5 5 16 13 4 4 22 14 4 8 16 17 20 19 11 10 9 5 21 Legend ½¿½Æ¼ Components of the unit and hydronic module 1ÇÅÈÇƽÆÌËǾÌÀ½ÍÆÁ̹ƼÀѼÊÇÆÁ»ÅǼÍĽ Victaulic screen filter 2 Pressure sensor B$## Gives pump suction pressure information (see installation manual) Note: =$ 3 Safety valve LH&%$"%$%$"3##"$#6 4 Water drain valve >-&#& A second valve is located on the heat exchanger leaving piping Note: ;&#& 5 Shut-off valve L&#&#!!,!#&%% 6 Available pressure pump >!$\&#& 7 Temperature probe, BPHE inlet &#'#%$%$"% Gives heat exchanger entering temperature information (see installation Note: 8"%$%').=Q@# manual) LH&!,!"%$"3## 8 Pressure "$#6gauge Allows measuring of the pump suction pressure, the pump leaving Note: =$$ and the heat exchanger leaving pressure pressure L##"$!%$"%$%$)!%$"%#& 9 Temperature probe, BPHE outlet %$!!,!#&%$ Gives heat exchanger leaving temperature information (see installation Note: 8"%$%').=Q@$# manual) LH&!,!#&"%$"3## 10 Automatic "$#6 air vent 11 switch Flow $"& 12 heat exchanger frost protection heater Plate *#! 13 heat exchanger Plate =#!,!%! =#!,! Installation components (not included with hydronic module) ÆË̹ÄĹÌÁÇÆ»ÇÅÈÇƽÆÌË 14 probe well Temperature 8"%$%'## 15 vent Air& 16 connection Flexible *#,'# 17 valve Shut-off >!$\&#& 18 filter (obligatory for a unit without hydronic module) Screen >#3'#-$!$!-"$#6 19 gauge Pressure =$$ 20 flow control valve Water ;<#&#& 21 valve Charge 7!&#& 22 protection bypass valve (when shut-off valves [17] are closed during Frost *%'-%&#&3!!$\&#&de#$ winter) 6 --- Hydronic module (unit with hydronic module) Q-"$#3$!!-"$#6 Notes: Ç̽Ëƕ tK 6OJUTXJUIPVUIZESPOJDNPEVMFTUBOEBSEVOJUT BSFFRVJQQFEXJUIBøPXTXJUDI c!$!-"$#3$6($%%!<! and two temperature sensors (7 and 9). "%$36 tK 'PSVOJUTFRVJQQFEXJUIIZESPOJDNPEVMFUIFQSFTTVSFTFOTPSMPDBUFE *$($%%!!-"$#)!%$# upstream of the pump to prevent cavitation is installed on a connection without $%"!%$"%%&&##!$ Schraeder valves. Depressurise and drain the system before any intervention. >!&#&W%$!-"'-& 18 Option 16F ѼÊÇÆÁ»ÅǼÍĽƘ˃ʾ 12 High-Temperature Unit protection Monobloc devices Air-to-Water Heat Pumps 9 - NOMINAL SYS TEM WATER FLOW CONTROL The optional water circulation pumps of the Aeromax Plus units have been sized to allow the hydronic modules to cover all possible configurations based on the specific installation conditions, i.e. for various temperature differences between the entering and the leaving water (ΔT) at full load, which can vary between 3 and 10 K. This required difference between the entering and leaving water temperature determines the nominal system flow rate. It is essential to know the nominal system flow rate to be able to control it, using a manual valve that must be on the water leaving piping of the system (item 20 in the typical hydronic circuit diagram). Due to the pressure drop it generates in the hydronic system this flow control valve permits adjustment of the pressure/system flow rate curve in accordance with the pump pressure/flow rate curve to obtain the nominal flow rate at the required operating point (see example for unit size Aeromax Plus 35kw). The pressure drop reading in the plate heat exchanger is used as means of control and adjustment of the nominal system flow rate. This reading can be taken with a differential pressure gauge that must be installed at the heat exchanger inlet and outlet (item 19) Use the specifications used for the unit connection to find out the system operating conditions and to work out the nominal flow rate and the plate heat exchanger pressure drop at the specified conditions. If this information is not available at the system start-up, contact the technical service department responsible for the installation to get it. These characteristics can be obtained from the technical literature using the unit performance tables for a ΔT of 5 K at the condenser or with the Electronic Catalogue selection program for all ΔT conditions other than 5 K in the range of 3 to 10 K. For domestic hot water applications (leaving water temperatures above 60°C) the control cannot be made at a ΔT below 8 K at the condenser. 9.1 - Water flow control procedure Hydronic circuit cleaning procedure t0QFOUIFWBMWFGVMMZJUFN t4UBSUVQUIFTZTUFNQVNQPSUIFVOJUQVNQCZRVJDL test), if the unit is equipped with a hydronic module with a pump. t3FBEUIFQMBUFIFBUFYDIBOHFSQSFTTVSFESPQCZUBLJOH the difference of the readings of the pressure gauge connected to the unit inlet and outlet (item 19). t-FUUIFQVNQSVOGPSUXPDPOTFDVUJWFIPVSTUPDMFBO the hydronic circuit of the system (presence of solid contaminants). t5BLFBOPUIFSSFBEJOH t$PNQBSFUIJTWBMVFUPUIFJOJUJBMWBMVF t*GUIFQSFTTVSFESPQIBTEFDSFBTFEUIJTJOEJDBUFTUIBU the screen filter must be removed and cleaned, as the hydronic circuit contains solid particles. In this case close the shut-off valves at the water inlet and outlet (item 17) and remove the screen filter (item 18 or 1 for a unit with hydronic module) after emptying the hydronic section of the unit (item 4). t1VSHFUIFBJSGSPNUIFDJSDVJUJUFNTBOE t3FOFXJGOFDFTTBSZUPFOTVSFUIBUUIFöMUFSJTOPU contaminated. Water flow control procedure t8IFOUIFDJSDVJUJTDMFBOFESFBEUIFQSFTTVSFTBUUIF differential pressure gauge (BPHE leaving water pressure - BPHE entering water pressure), to find out the pressure drop for the plate heat exchanger and the internal piping. t$PNQBSFUIFWBMVFPCUBJOFEXJUIUIFUIFPSFUJDBM selection value. t*GUIFQSFTTVSFESPQNFBTVSFEJTIJHIFSUIBOUIFWBMVF specified this means that the unit flow rate (and thus system flow rate) is too high. The pump supplies an excessive flow rate based on the global pressure drop of the application. In this case close the control valve and read the new pressure difference. t1SPDFFECZTVDDFTTJWFMZDMPTJOHUIFDPOUSPMWBMWFVOUJM you obtain the specific pressure drop that corresponds to the nominal flow rate at the required unit operating point. NOTE: If the system has an excessive pressure drop in relation to the available static pressure provided by the system pump the nominal water flow rate cannot be obtained (the resulting flow rate is lower) and the temperature difference between the condenser entering and leaving water will increase. To reduce the pressure drops of the hydronic system, it is necessary: tUPSFEVDFUIFJOEJWJEVBMQSFTTVSFESPQTBTNVDIBT possible (bends, level changes, accessories, etc.). tUPVTFBDPSSFDUMZTJ[FEQJQJOHEJBNFUFS tUPBWPJEIZESPOJDTZTUFNFYUFOTJPOTXIFSFWFSQPTTJCMF 19 High-Temperature Unit protection Monobloc devices Air-to-Water Heat Pumps 9 - NOMINAL SYS TEM WATER FLOW CONTROL Example: Aeromax Plus 35kw at Eurovent conditions of 1.76 l/s 20 9.3 - Pump pressure/flow rate curve for units with hydronic module 2 Available pressure, kPa =$%)E= =$%)E= A йÅÈĽƕ˃ʾʽˀ˂¹Ì ÍÊÇνÆÌ»ÇƼÁÌÁÇÆËǾʾƖ˄˃ÄƯË 16 20 The Aeromax Plus units are equipped with a fixed-speed pump with three different speeds. 2 12 A 16 B 8 4 12 84 40 B 1 5 4 3 1 0,5 0,5 Legend 5 1 0 Water flow rate, l/s 1 3 3 2,5 2 1,5 3 2,5 2 1,5 3,5 3,5 4 4 ;<)#G 1 ‘BPHE pressure drop/flow rate’’ curve 2 ½¿½Æ¼ With the valve open the pressure drop read (18 kPa) gives point A on the curve. h.=Q@%$%G<ii$& A Operating ;!!&#&%!%$%3E=6&%! point reached with the valve open. $& 3 With the valve open the flow rate achieved is 3.4 l/s: this is too high, and U%%!!!&#&% valve must be closed again. the;!!&#&%!<!&#GL!!!)! 4 If the valve is partially closed, the pressure drop read (6 kPa) gives point B &#&"$'# on /!&#&%##-#)!%$%3E=6&%. the curve. !$& B Operating point reached with the valve partially closed. U%%!!!&#&%##-# 5 With the valve partially closed the flow rate achieved is 1.76 l/s: this is the ;!!&#&%##-#!<!&#GL!! required flow rate and the valve is in an adequate position. ($<!&#&($% ˆƖʿƘĹ̽À½¹Ì½Ð»À¹Æ¿½ÊÈʽËËÍʽ¼ÊÇÈË These speeds can be manually adjusted by changing the speed terminal board inside the terminal box (this operation can only be carried out by approved personnel). The speed initially selected corresponds to standard use for heating water loops. If this speed needs to be changed, the pressure/flow curves for the three speeds are shown below. Aeromax Plus Condenser water flow rate, l/s Minimum Maximum* 022 0.4 1.8 030 0.5 2.4 035 0.7 3.1 045 0.8 3.8 055 0.9 4.6 075 1.1 6.4 105 1.5 8.5 * Maximum flow rate at a water temperature difference of 3 K in the plate heat exchanger (unit without hydronic module) 9.2 - Plate heat exchanger pressure drops For pure water at 20°C 120 25 =$%)E= Available pressure, kPa Available pressure, kPa =$%)E= 30 4 3 20 2 1 15 10 100 80 3 60 40 2 20 1 5 0 0 0 0 1 2 3 4 1,0 1,2 1,4 1,6 1,8 * 3%6 100 3 Available =$%)E= pressure, kPa 40 =$%)E= Available pressure, kPa 0,8 120 * 2 30 1 20 10 3 2 80 1 60 40 20 0 0 0,4 0,8 1,2 1,6 2,0 Water;<)#G flow rate, l/s 0 0 2 1 Aeromax Plus 055 2 ½¿½Æ¼ Aeromax Plus 075 3 * Aeromax Plus 105 * * 20 0,6 Water ;<)#G flow rate, l/s 50 0,4 1 ½¿½Æ¼ Aeromax Plus 022-030 (speed 1) 2 * 3%6 Aeromax Plus 022-030 (speed 2): selected 3 * 3%6L# Aeromax Plus 022-030 (speed 3) ;<)#G Water flow rate, l/s 1 ½¿½Æ¼ Aeromax Plus 022 2 * Aeromax Plus 030 3 * Aeromax Plus 035 4 * Aeromax Plus 045 0,2 5 4 6 ;<)#G Water flow rate, l/s 8 10 1 ½¿½Æ¼ Aeromax Plus 075-105 (speed 1) 2 * 3%6 Aeromax Plus 075-105 (speed 2): selected 3 * 3%6L# Aeromax Plus 075-105 (speed 3) * 3%6 2,4 2,8 3,2 2,0 High-Temperature Unit protection Monobloc devices Air-to-Water Heat Pumps 9 - NOMINAL SYS TEM WATER FLOW CONTROL 3 80 2 60 1 80 Available pressure, kPa &#'#%$)E= Available pressure, kPa =$%)E= 100 100 40 20 60 40 3 1 0 0 0,5 1,0 1,5 2,0 2,5 3,0 3,5 4,0 4,5 ;<)#G Water flow rate, l/s 5,0 5,5 6,0 0 6,5 0,5 1,0 1,5 2,0 2,5 3,0 3,5 ;<)#G Water flow rate, l/s 1 Aeromax Plus 035-055 (speed 1) ½¿½Æ¼ 2 * 3%6 Aeromax Plus 035-055 (speed 2): selected 3 * 3%6 Aeromax Plus 035-055 (speed 3) 2 20 1 ½¿½Æ¼ Aeromax Plus 035 2 * Aeromax Plus 045 3 * Aeromax Plus 055 * 3%6L# * 100 The available pressure curves for the Aeromax Plus units are given for the speed initially selected (see chapter 9.3). If the speed is changed by the user, the curves below do not apply. For purePlus water at 20°C Aeromax Condenser water flow rate, l/s Minimum Maximum* 022 0.4 1.6 030 0.5 1.7 035 0.7 3.3 045 0.8 3.3 055 0.9 3.2 075 1.1 5.9 105 1.5 8.5 &#'#%$)E= Available pressure, kPa 9.4 - Available system pressure for units with hydronic module 80 60 40 2 1 20 0 1 2 3 4 Water ;<)#G flow rate, l/s 5 6 1 ½¿½Æ¼ Aeromax Plus 075 2 * Aeromax Plus 105 * * Maximum flow rate at an available pressure of 15 kPa (unit with hydronic module). 100 &#'#%$)E= Available pressure, kPa 90 80 70 60 50 40 30 20 1 2 10 0 0,4 0,6 0,8 1,0 1,2 1,4 1,6 1,8 ;<)#G Water flow rate, l/s 1 ½¿½Æ¼ Aeromax Plus 022 2 * Aeromax Plus 030 * 21 High-Temperature Unit protection Monobloc devices Air-to-Water Heat Pumps 10 - START-UP 10.1 - Preliminary checks Never be tempted to start the heat pump without reading fully, and understanding, the operating instructions and without having carried out the following pre-start checks: t$IFDLUIFXBUFSDJSDVMBUJPOQVNQTBJSIBOEMJOHVOJUT and all other equipment connected to the condenser. t3FGFSUPUIFNBOVGBDUVSFSTJOTUSVDUJPOT t3FGFSUPUIFXJSJOHEJBHSBNTVQQMJFEXJUIUIFVOJU t&OTVSFUIBUUIFSFBSFOPSFGSJHFSBOUMFBLT t $POöSNUIBUBMMQJQFTFDVSJOHCBOETBSFUJHIU t$POöSNUIFUIFFMFDUSJDBMDPOOFDUJPOTBSFTFDVSF Standard configuration: return water control 10.2 - Actual start-up IMPORTANT: t $PNNJTTJPOJOHBOETUBSUVQPGUIFDIJMMFSNVTUCFTVQFSWJTFE by a qualified refrigeration engineer. t 4UBSUVQBOEPQFSBUJOHUFTUTNVTUCFDBSSJFEPVUXJUIB thermal load applied and water circulating in the condenser. t "MMTFUQPJOUBEKVTUNFOUTBOEDPOUSPMUFTUTNVTUCFDBSSJFEPVU before the unit is started up. t 1MFBTFSFGFSUPUIF"FSPNBY1MVT1SP%JBMPHDPOUSPMNBOVBM ÇÆŲ¿ÍʹÌÁÇÆƕĽ¹ÎÁƿϹ̽ʻÇÆÌÊÇÄ Configuration: leaving water control The unit should be started up in Local ON mode. Ensure that all safety devices are satisfied, especially the high pressure switches. 10.3 - Operation of two units in master/slave mode The control of a master/slave assembly is in the entering water and does not require any additional sensors (standard configuration). It can also be located in the leaving water. In this case two additional sensors must be added on the common piping. All parameters, required for the master/slave function must be configured using the Service Configuration menu. All remote controls of the master/slave assembly (start/stop, setpoint, load shedding, etc.) are controlled by the unit con-figured as master and must only be applied to the master unit. Depending on the installation and control type, each unit can control its own water pump. Please install check valves in the leaving water piping of each unit, as shown in the following diagrams. If there is only one common pump for the two units, the master unit can control this. In this case shut-off valves must be installed on each unit. They will be activated at the opening and closing by the control of each unit (and the valves will be controlled using the dedicated water pump outputs). 22 ½¿½Æ¼ A$ >#&$ #77'3%$)!&""$'$6 7#',!"#&$ ;# ;$# ;%$"%!$3#$$!!-"$#6 ##&#)'!# !#&'!"#&$ 77""$'$ 7# High-Temperature Unit protection Monobloc devices Air-to-Water Heat Pumps 10 - START-UP 10.4 - Supplementary electric resistance heaters Example of additional electric heaters 120 These heaters can be controlled via an integrated electronic board. Four outputs are available to control the heater contactors, permitting gradual compensation of the heat pump capacity reduction. These outputs are configurable to obtain a choice of two, three or four stages. The last stage will only be activated after a shut-down of the heat pump following a fault condition (safety device). This requires only a 400 V-3 ph-50 Hz power supply source. For the required configuration of the stages consult the Aeromax Plus Pro-Dialog+ control manual. A 100 =$"%%-)^ To permit staging of the capacity reduction of the heat pump at low ambient temperatures, as shown in the diagram below, it is possible to install supplementary electric heaters in the leaving water line. Their capacity can compensate for the capacity drop of the heat pump. 1 80 1 2 60 2 3 40 0 -25 C B 4 20 1 -20 -15 -10 -5 0 U$"%$)N7 5 10 15 U%)!!!!%$"%%-#!! '$#!"## U%)!!!!%$"%%-!!!! '$#!"## Legend 1 Stage 1 2 Stage 2 3 Stage 3 4 Stage 4 A Heat pump capacity variation as a function of the air temperature B Building thermal load C Balance point between the capacity supplied by the heat pump and the thermal load of the building 11 - MAJOR SYSTEM COMPONENTS 11.1 - Compressors Aeromax Plus units use hermetic scroll compressors with vapour injection. Each compressor is equipped with a crankcase oil heater, as standard. Each compressor function is equipped with: t"OUJWJCSBUJPONPVOUJOHTCFUXFFOUIFVOJUDIBTTJTBOEUIF compressor(s). t"TJOHMFQSFTTVSFTBGFUZTXJUDIBUUIFEJTDIBSHF 11.2 - Lubricant The compressors installed in these units have a specific oil charge, indicated on the name plate of each compressor. The oil level check must be done with the unit switched off, when then suction and discharge pressures are equalised. The oil level must be visible and above the middle of the sight-glass in the oil equalisation line. If this is not the case, there may be an oil leak in the circuit. Search and repair the leak, then recharge oil, so that it reaches a level between the middle and three quarters of the sight-glass (unit in vacuum). ATTENTION: Too much oil in the circuit can cause a unit defect. Use only oils which have been approved for the compressors. Never use oils which have been exposed to air. 3PJMTBSFBCTPMVUFMZOPUDPNQBUJCMFXJUI3$PJMT and vice versa. 11.3 - Air evaporators The Aeromax Plus coils are air evaporators with internally grooved copper tubes with aluminium fins. 11.4 - Fans The fans are axial Flying Bird fans equipped with rotating shroud and made of composite recyclable material. The motors are three-phase, with permanently lubricated bearings and insulation class F. 11.5 - Electronic expansion valve (EXV ) of the main circuit The EXV is equipped with a stepper motor that is controlled via the EXV board. 11.6 - Electronic expansion valve (EXV ) of the economised circuit The EXV is equipped with a stepper motor that is controlled 23 High-Temperature Unit protection Monobloc devices Air-to-Water Heat Pumps 11 - MAJOR SYSTEM COMPONENTS 11.7 - Four-way valve The four-way valve allows the reversal of the refrigerant cycle, required during the unit defrost phases. 11.8 - Moisture indicator Located on the liquid line, permits control of the unit charge and indicates moisture in the circuit. The presence of bubbles in the sight-glass indicates an insufficient charge or non-condensables in the system. The presence of moisture changes the colour of the indicator paper in the sight-glass. 11.9 - Filter drier This is a one-piece, brazed filter drier, located in the liquid line. The role of the filter drier is to keep the circuit clean and moisture-free. The moisture indicator shows when it is necessary to change the filter drier. A difference in temperature between the filter inlet and outlet shows that the element is dirty. 11.10 - Condenser The condenser is a plate heat exchanger. The water connection of the heat exchanger is a Victaulic connection. The condenser has a thermal insulation of 19 mm thick polyurethane foam. As standard the condenser is equipped with frost protection. 11.11 - Economiser The economiser is a plate-type economiser. 11.12 - Refrigerant Aeromax Plus units are charged with liquid HFC-407C refrigerant. This non-azeotropic refrigerant blend consists of 23% R-32, 25% of R-125 and 52% R-134a, and is characterised by the fact that at the time of the change in state the temperature of the liquid/vapour mixture is not constant, as with azeotropic refrigerants. All checks must be pressure tests, and the appropriate pressure/temperature ratio table must be used to determine the corresponding saturated temperatures (saturated bubble point curve or saturated dew point curve). Leak detection is especially important for units charged with refrigerant R-407C. Depending on whether the leak occurs in the liquid or in the vapour phase, the proportion of the different components in the remaining liquid is not the same. NOTE: Regularly carry out leak checks and immediately repair any leak found. If there is a leak in the plate heat exchanger, this part must be replaced. 24 The refrigerant must always be recharged in the liquid phase into the liquid line. The refrigerant cylinder must always contain at least 10% of its initial charge. For the refrigerant quantity per circuit, refer to the data on the unit name plate. 11.13 - High-pressure safety switch Aeromax Plus units are equipped with automatically reset highpressure safety switches, calibrated to 3130 kPa relative pressure (soft alarm is manually reset). NOTES: .POJUPSJOHEVSJOHPQFSBUJPO t 'PMMPXUIFSFHVMBUJPOTPONPOJUPSJOHQSFTTVSJTFEFRVJQNFOU t *UJTOPSNBMMZSFRVJSFEUIBUUIFVTFSPSPQFSBUPSTFUTVQBOE maintains a monitoring and maintenance file. t 'PMMPXUIFDPOUSPMQSPHSBNNFTPG&/BOOFY% t *GUIFZFYJTUGPMMPXMPDBMQSPGFTTJPOBMSFDPNNFOEBUJPOT t 3FHVMBSMZJOTQFDUUIFDPOEJUJPOPGUIFDPBUJOHQBJOU UPEFUFDU blistering resulting from corrosion. t 3FHVMBSMZDIFDLGPSQPTTJCMFQSFTFODFPGJNQVSJUJFTFHTJMJDPO grains) in the heat exchange fluids. These impurities maybe the cause of the wear or corrosion by puncture. t 'JMUFSUIFIFBUFYDIBOHFøVJEDIFDLBOEDBSSZPVUJOUFSOBMJ OTQFDUJPOTBTEFTDSJCFEJO&/BOOFY$ t5IFSFQPSUTPGQFSJPEJDBMDIFDLTCZUIFVTFSPSPQFSBUPS must be included in the supervision and maintenance file. REPAIR Any repair or modification, including the replacement of NPWJOHQBSUT t NVTUGPMMPXMPDBMSFHVMBUJPOTBOECFNBEFCZRVBMJöFE operators and in accordance with qualified procedures, t NVTUCFNBEFJOBDDPSEBODFXJUIUIFJOTUSVDUJPOTPGUIF original manufacturer. Repair and modification that necessitate permanent assembly (soldering, welding, expanding etc.) must be made using the correct procedures and by qualified operators. An indication of any modification or repair must be shown in the monitoring and maintenance file. High-Temperature Unit protection Monobloc devices Air-to-Water Heat Pumps 12 - OPTIONS AND ACCESSORIES Options No. Description Advantages Use Anti-corrosion protection, traditional coils 3A Fins made of pre-treated aluminium (polyurethane or epoxy) Improved corrosion resistance, recommended for marine environments 22 kW-105 kW Low noise level 15 Acoustic compressor enclosure Noise emission reduction 22 kW-105 kW Low noise level 15LS Acoustic compressor enclosure and fan speed reduction, when ambient air temperature is above 20°C. Noise emission reduction 22 kW-105 kW Soft starter 25 Electronic compressor starter Reduced compressor start-up current 22 kW-105 kW Frost protection down to -20°C 42 Electric heater on the hydronic module (option 116) Hydronic module frost protection at low outside temperature 22 kW-105 kW with option 116F Low-pressure single-pump hydronic module 116F See hydronic module chapter Easy and fast installation 022 kW-105 kW JBus gateway 148B Two-directional communications board, complies with JBus protocol Easy connection by communication bus to a building management system 022 kW-105 kW BacNet gateway 148C Two-directional communications board, complies with BacNet protocol Easy connection by communication bus to a building management system 22 kW-105 kW LonTalk gateway 148D Two-directional communications board, complies with LonTalk protocol Easy connection by communication bus to a building management system 22 kW-105 kW Heating system control* 157 Additional remotely installed control box, allows control of the various Allows control of pre-configured heating systems 22 kW-105 kW heating system components Accessories Description Advantages Use Remote user interface Remotely installed user interface (via communication bus). Remote heat pump control up to 300 m 22 kW-105 kW JBus gateway communication Two-directional communications board, complies with JBus protocol Connection by communication bus to a building management system 22 kW-105 kW BacNet gateway communication Two-directional communications board, complies with BacNet protocol Connection by communication bus to a building management system 22 kW-105 kW LonTalk gateway communication Two-directional communications board, complies with LonTalk protocol Connection by communication bus to a building management system 22 kW-105 kW Twinning (lead-lag kit) Unit equipped with an additional field-installed leaving water temperature sensor, allowing master/slave operation of two units connected in parallel Operation of two units connected in parallel with operating time equalisation 22 kW-105 kW * Option available in 2011. 25 High-Temperature Unit protection Monobloc devices Air-to-Water Heat Pumps 13 - STANDARD MAINTENANCE The heat pumps must be maintained by professional technicians, whilst routine checks can be carried out locally by specialised technicians. Electrical checks t"UMFBTUPODFBZFBSUJHIUFOUIFQPXFSDJSDVJUFMFDUSJDBM screw connections (see table with tightening torques). t$IFDLBOESFUJHIUFOBMMDPOUSPMDPNNBOETDSFX connections, if required (see table with tightening torques). t3FNPWFUIFEVTUBOEDMFBOUIFJOUFSJPSPGUIFDPOUSPM boxes, if required. t$IFDLUIFTUBUVTPGUIFDPOUBDUPSTBOEEJTDPOOFDUTXJUDIFT t$IFDLUIFQSFTFODFBOEUIFDPOEJUJPOPGUIFFMFDUSJDBM protection devices. t$IFDLUIFDPSSFDUPQFSBUJPOPGBMMIFBUFST t3FQMBDFUIFGVTFTFWFSZZFBSTPSFWFSZIPVST ( age-hardening). t$IFDLUIBUOPXBUFSIBTQFOFUSBUFEJOUPUIFDPOUSPMCPY All refrigerant charging, removal and draining operations must be carried out by a qualified technician and with the correct material for the unit. Any inappropriate handling can lead to uncontrolled fluid or pressure leaks. WARNING: Before doing any work on the machine ensure that the power is switched off. If a refrigerant circuit is opened, it must be evacuated, recharged and tested for leaks. Before any operation on a refrigerant circuit, it is necessary to remove the complete refrigerant charge from the unit with a refrigerant charge recovery group. Simple preventive maintenance will allow you to get the CFTUQFSGPSNBODFGSPNZPVSIFBUQVNQVOJU tJNQSPWFEIFBUJOHQFSGPSNBODF tSFEVDFEQPXFSDPOTVNQUJPO tQSFWFOUJPOPGBDDJEFOUBMDPNQPOFOUGBJMVSF tQSFWFOUJPOPGNBKPSUJNFDPOTVNJOHBOEDPTUMZ interventions tQSPUFDUJPOPGUIFFOWJSPONFOU Mechanical checks t$IFDLUIFUJHIUFOJOHPGUIFGBOUPXFSGBODPNQSFTTPS and control box fixing bolts. 13.1 - Level 1 maintenance Water circuit checks t$IFDLUIFXBUFSDPOOFDUJPOT t1VSHFUIFXBUFSDJSDVJUTFFDIBQUFSA8BUFSøPXDPOUSPM procedure’). t$MFBOUIFXBUFSöMUFSTFFDIBQUFSA8BUFSøPXDPOUSPM procedure’). t$IFDLUIFPQFSBUJPOPGUIFøPXTXJUDI t$IFDLUIFTUBUVTPGUIFUIFSNBMQJQJOHJOTVMBUJPO t$IFDLUIFDPODFOUSBUJPOPGUIFBOUJGSFF[FQSPUFDUJPO solution (ethylene glycol or polyethylene glycol). Simple procedures, can be carried out by the user on a weekly basis: t7JTVBMJOTQFDUJPOGPSPJMUSBDFTTJHOPGBSFGSJHFSBOUMFBL t"JSIFBUFYDIBOHFSFWBQPSBUPS DMFBOJOHTFFDIBQUFS ‘Evaporator coil - level 1’, t$IFDLGPSSFNPWFEQSPUFDUJPOEFWJDFTBOECBEMZDMPTFE doors/covers, t$IFDLUIFVOJUBMBSNSFQPSUXIFOUIFVOJUEPFTOPUXPSL (see Aeromax Plus Pro-Dialog+ control manual), t(FOFSBMWJTVBMJOTQFDUJPOGPSBOZTJHOTPGEFUFSJPSBUJPO t7FSJGZUIFDIBSHFJOUIFTJHIUHMBTT t$IFDLUIBUUIFUFNQFSBUVSFEJòFSFODFCFUXFFOUIFIFBU exchanger inlet and outlet is correct. Refrigerant circuit t'VMMZDMFBOUIFBJSFWBQPSBUPSTXJUIBMPXQSFTTVSFKFU and a bio-degradable cleaner (counter-current cleaning - see chapter ‘Evaporator coil - level 2). t$IFDLUIFVOJUPQFSBUJOHQBSBNFUFSTBOEDPNQBSF them with previous values. t$BSSZPVUBOPJMDPOUBNJOBUJPOUFTU3FQMBDFUIFPJMJG necessary. t$IFDLUIFPQFSBUJPOPGUIFIJHIQSFTTVSFTXJUDIFT Replace them if there is a fault. t$IFDLUIFGPVMJOHPGUIFöMUFSESJFS3FQMBDFJUJGOFDFTTBSZ t,FFQBOENBJOUBJOBNBJOUFOBODFTIFFUBUUBDIFEUPUIF unit. 13.2 - Level 2 maintenance All these operations require strict observation of adequate TBGFUZNFBTVSFTJOEJWJEVBMQSPUFDUJPOHBSNFOUTDPNQMJBODF with all industry regulations, compliance with applicable local regulations and using common sense. There are five maintenance levels for the heat pump units, as defined by the AFNOR X60-010 standard. This level requires specific know-how in the electrical, hydronic and mechanical fields. It is possible that these skills are available locally: existence of a maintenance service, industrial site, specialised subcontractor. The frequency of this maintenance level can be monthly or annually depending on the verification type. In these conditions, the following maintenance operations are recommended. Carry out all level 1 operations, then: 26 It is not necessary to rinse the coil, as the products used are pH neutral. To ensure that the coil is perfectly clean, we recommend rinsing with a low water flow rate. The pH WBMVFPGUIFXBUFSVTFETIPVMECFCFUXFFOBOE 8"3/*/(/FWFSVTFQSFTTVSJTFEXBUFSXJUIPVUBMBSHF EJòVTFS%POPUVTFIJHIQSFTTVSFDMFBOFSTGPS$V"MDPJMT $PODFOUSBUFEBOEPSSPUBUJOHXBUFSKFUTBSFTUSJDUMZ forbidden. Never use a fluid with a temperature above ¡$UPDMFBOUIFBJSIFBUFYDIBOHFST $PSSFDUBOEGSFRVFOUDMFBOJOHBQQSPYJNBUFMZFWFSZUISFF NPOUIT XJMMQSFWFOUPGUIFDPSSPTJPOQSPCMFNT Protect the control box during cleaning operations. High-Temperature Unit protection Monobloc devices Air-to-Water Heat Pumps 13 - STANDARD MAINTENANCE 13.3 - Level 3 (or higher) maintenance The maintenance at this level requires specific skills/ Approval/tools and know-how and only the manufacturer, his representative or authorised agent are permitted to carry out these operations. These maintenance operations concern for example: tBNBKPSDPNQPOFOUSFQMBDFNFOUDPNQSFTTPSDPOEFOTFS tBOZJOUFSWFOUJPOPOUIFSFGSJHFSBOUDJSDVJUIBOEMJOH refrigerant), tDIBOHJOHPGQBSBNFUFSTTFUBUUIFGBDUPSZBQQMJDBUJPO change), tSFNPWBMPSEJTNBOUMJOHPGUIFVOJU tBOZJOUFSWFOUJPOEVFUPBNJTTFEFTUBCMJTIFENBJOUFOBODF operation, tBOZJOUFSWFOUJPODPWFSFECZUIFXBSSBOUZ To reduce waste, the refrigerant and the oil must be transferred in accordance with applicable regulations, using methods that limit refrigerant leaks and pressure drops and with materials that are suitable for the products. Any detected leaks must be repaired immediately. The compressor oil that is recovered during maintenance contains refrigerant and must be treated accordingly. Refrigerant under pressure must not be purged to the open air. If a refrigerant circuit is opened, plug all openings, if the operation takes up to one day, or for longer periods charge the circuit with nitrogen. NOTE: Any deviation or non-observation of these maintenance criteria will render the guarantee conditions for the unit nul and void, and the manufacturer, Kingspan Renewables SCS, will no longer be held responsible. 13.4 - Tightening torques for the main electrical screw connections »Ê½ÏÌÑȽ ½ËÁ¿Æ¹ÌÁÇÆÁÆ ÇÊÉͽƼ͈Åƽ ÌÀ½ÍÆÁÌ Çļ½Ê½¼Ë»Ê½ÏƼ ƽ»ÍËÌÇŽʻÇÆƽ»ÌÁÇÆ A =@ »Ê½ÏÇÆËÏÁÌ»ÀÁÆĽÌÒÇÆ½Ë >!DW 8P n>o >!DW 8P >!DW 8P >!DW 8P ÍÆƽÄ̽ÊÅÁƹÄ˻ʽÏƓ»ÇÅÈʽËËÇÊÈÊÇ̽»ÌÁÇÆ *$; nAC ÍÆƽÄ̽ÊÅÁƹÄ˻ʽÏƓ»ÇÅÈʽËËÇÊ»ÇÆ̹»ÌÇÊ 78 . PAC ÍÆƽÄ̽ÊÅÁƹÄ˻ʽÏƓ¾¹ÆƓÀ½¹Ì½ÊƓÈÍÅÈÈÊÇ̽»ÌÁÇÆ W!B . nAC ÍÆƽÄ̽ÊÅÁƹÄ˻ʽÏƓÀ½¹Ì½ÊÊ½Ä¹Ñ #-Q. PAC ÍÆƽÄ̽ÊÅÁƹÄ˻ʽÏƓ¹ÍÐÁÄÁ¹ÊÑ»ÇÆ̹»Ì $,#-"#'#EQ* $,#-"#'#EQ* ÍÆƽÄ̽ÊÅÁƹÄ˻ʽÏƓ»ÇÆÌÊÇÄÈÇϽÊÌʹÆ˾ÇÊÅ½Ê 8"A *> @ 87 ÇÅÈʽËËÇʽ¹ÊÌÀ̽ÊÅÁÆ¹Ä A H C 8!%#"#$%" J,$!$ 13.5 - Tightening torques for the main bolts and screws screw type Used for Compressor strut Compressor support M8 nut BPHE* fixing M10 nut Compressor mounting M16 nut Compressor fixing Oil nut Oil equalisation line Taptite screw M6 Fan support Taptite screw M8 Fan motor fixing H M8 screw Fan scroll fixing Metal screw Sheet metal plates H M6 screw Stauff clamps Earth screw Compressor * BPHE = Brazed plate heat exchanger Torque (N·m) 30 15 30 30 75 7 13 18 4.2 10 2.8 13.6 - Evaporator coil We recommend, that finned coils are inspected regularly to check the degree of fouling. This depends on the environment where the unit is installed, and will be worse in urban and industrial installations and near trees that shed their leaves. For coil cleaning, two maintenance levels are used, based on the AFNOR X60-010 standard: Level 1 t *GUIFFWBQPSBUPSDPJMTBSFGPVMFEDMFBOUIFNHFOUMZJO a vertical direction, using a brush. t0OMZXPSLPOBJSFWBQPSBUPSTXJUIUIFGBOTTXJUDIFEPò t'PSUIJTUZQFPGPQFSBUJPOTXJUDIPòUIFIFBUQVNQJG service considerations allow this. t$MFBOFWBQPSBUPSTHVBSBOUFFPQUJNBMPQFSBUJPOPGZPVS unit. Cleaning is necessary when the evaporators begin to become fouled. The frequency of cleaning depends on the season and location of the unit (ventilated, wooded, dusty area, etc.). Level 2 The two cleaning products can be used for any Cu/Al coil with protection. Clean the coil, using appropriate products. We recommend TOTALINE products for coil cleaning: Part No. P902 DT 05EE: traditional cleaning method Part No. P902 CL 05EE: cleaning and degreasing. These products have a neutral pH value, do not contain phosphates, are not harmful to the human body, and can be disposed of through the public drainage system. Depending on the degree of fouling both products can be used diluted or undiluted. For normal maintenance routines we recommend using 1 kg of the concentrated product, diluted to 10%, to treat a coil surface of 2 m2. This process can either be carried out using a high-pressure spray gun in the low-pressure position. With pressurised cleaning methods care should be taken not to damage the coil fins. The spraying of the coil must be done: tJOUIFEJSFDUJPOPGUIFöOT tJOUIFPQQPTJUFEJSFDUJPOPGUIFBJSøPXEJSFDUJPO tXJUIBMBSHFEJòVTFS¡ tBUBNJOJNVNEJTUBODFPGNNGSPNUIFDPJM 27 High-Temperature Unit protection Monobloc devices Air-to-Water Heat Pumps 13 - STANDARD MAINTENANCE It is not necessary to rinse the coil, as the products used are pH neutral. To ensure that the coil is perfectly clean, we recommend rinsing with a low water flow rate. The pH value of the water used should be between 7 and 8. WARNING: Never use pressurised water without a large diffuser. Do not use high-pressure cleaners for Cu/Al coils. 13.7 - Condenser maintenance Check that: tUIFJOTVMBUJOHGPBNJTJOUBDUBOETFDVSFMZJOQMBDF tUIFDPPMFSIFBUFSTBSFPQFSBUJOHTFDVSFBOEDPSSFDUMZ positioned. tUIFXBUFSTJEFDPOOFDUJPOTBSFDMFBOBOETIPXOPTJHO of leakage. Concentrated and/or rotating water jets are strictly forbidden. Never use a fluid with a temperature above 45°C to clean the air heat exchangers. Correct and frequent cleaning (approximately every three months) will prevent 2/3 of the corrosion problems. Protect the control box during cleaning operations. ʾˀƖ˅ƘÀ¹Ê¹»Ì½ÊÁËÌÁ»ËǾƘˁʽ˄ ¹Ê ƼʽĹÌÁνƽ ¹ÌÍʹ̽¼ºÍººÄ½ ÈÇÁÆÌ̽ÅÈƖƓͳ ¹ÌÍʹ̽¼¼½Ï ÈÇÁÆÌ̽ÅÈƖƓͳ ¹Ê ƼʽĹÌÁνƽ ¹ÌÍʹ̽¼ºÍººÄ½ ÈÇÁÆÌ̽ÅÈƖƓͳ 61AF units use R-407C refrigerant. Special equipment must be used when working on the refrigerant circuit (pressure gauge, charge transfer, etc.). 28 ¹ÌÍʹ̽¼¼½Ï ÈÇÁÆÌ̽ÅÈƖƓͳ ¹Ê ƼʽĹÌÁνƽ ¹ÌÍʹ̽¼ºÍººÄ½ ÈÇÁÆÌ̽ÅÈƖƓͳ ¹ÌÍʹ̽¼¼½Ï ÈÇÁÆÌ̽ÅÈƖƓͳ High-Temperature Unit protection Monobloc devices Air-to-Water Heat Pumps 14 - START -UP CHECKLI ST FOR Aeromax Plus HEAT PUMP S (USE FOR JOB FILE ) Preliminary information Job name:... Location:. Installing contractor:... Distributor:. Start-up preformed by:... Date: .. Equipment Model Aeromax Plus:... S/N... Compressors 1. Model No. .. 2. Model No... Serial No. ... Serial No.. Air handling equipment Manufacturer.Model No Serial No.. Additional air handling units and accessories.. ... Preliminary equipment check Is there any shipping damage?. If so, where? .. ... Will this damage prevent unit start-up?. Unit is level in its installation Power supply agrees with the unit name plate Electrical circuit wiring has been sized and installed properly Unit ground wire has been connected Electrical circuit protection has been sized and installed properly All terminals are tight All cables and thermistors have been inspected for crossed wires All plug assemblies are tight Check air handling systems All air handlers are operating All water valves are open All fluid piping is connected properly All air has been vented from the system Hot-water pump is operating with the correct rotation. CWP amperage: Rated:. Actual Unit start-up Hot-water pump control has been properly interlocked with the heat pump Oil level is correct Compressor crankcase heaters have been energised for 12 hours Unit has been leak checked (including fittings) Locate, repair, and report any refrigerant leaks ... ... Check voltage imbalance: AB. AC.. BC.. Average voltage = (see installation instructions) Maximum deviation = . (see installation instructions) Voltage imbalance = (see installation instructions) Voltage imbalance is less than 2% WARNING: Do not start the heat pump if voltage imbalance is greater than 2%. Contact local power company for assistance. All incoming power voltage is within rated voltage range 29 High-Temperature Unit protection Monobloc devices Air-to-Water Heat Pumps 14 - START -UP CHECKLI ST FOR Aeromax Plus HEAT PUMP S (USE FOR JOB FILE ) Check condenser water loop Water loop volume = ... (litres) Calculated volume = ... (litres) Proper loop volume established Proper loop corrosion inhibitor included..litres of Proper loop freeze protection included (if required). litres of... Water piping includes electric tape heater up to the condenser Return water piping is equipped with a screen filter with a mesh size of 1.2 mm Check pressure drop across the unit condenser (without hydronic module) or the external static pressure (with hydronic module) Entering condenser = .. (kPa) Leaving condenser = ... (kPa) Pressure drop (entering - leaving) = .. (kPa) WARNINGVOJUXJUIPVUIZESPOJDNPEVMF 1MPUUIFQSFTTVSFESPQPOUIFDPOEFOTFSøPXQSFTTVSFESPQDVSWFUPEFUFSNJOF the flow rate in l/s at the nominal operating conditions for the installation. For units with hydronic module, a flow rate JOEJDBUJPOJTEJTQMBZFECZUIFVOJUDPOUSPMDPOTVMUUIF"FSPNBY1MVT1SP%JBMPHDPOUSPMNBOVBM Flow rate from the pressure drop curve, l/s = ... Nominal flow rate, l/s = ... The flow rate in l/s is higher than the minimum unit flow rate The flow rate in l/s corresponds to the specification of (l/s) Carry out the QUICK TEST function (see Aeromax Plus Pro-Dialog+ control manual): Check and log on to the user menu configuration Load sequence selection. Capacity ramp loading selection.. Start-up delay.. Burner section. Pump control...Setpoint reset mode.. Night-time capacity setback.. Re-enter the setpoints (see controls section) To start up the heat pump WARNING: Be sure that all service valves are open, and that the pump is on before attempting to start this machine. 0ODFBMMDIFDLTIBWFCFFONBEFTUBSUUIFVOJUJOUIFi-0$"-0/wQPTJUJPO Unit starts and operates properly Temperatures and pressures WARNING: Once the machine has been operating for a while and the temperatures and pressures have stabilized, SFDPSEUIFGPMMPXJOH BPHE entering water. BPHE leaving water Outside air temperature . Suction pressure. Discharge pressure Suction temperature Discharge temperature Liquid line temperature... notes:... .. .. 30 High-Temperature Unit protection Monobloc devices Air-to-Water Heat Pumps 31 As a consequence details given in this brochure are subject to alteration without notice. Kingspan Renewables Limited Kingspan Renewables 180 Gilford Road, Portadown, Co. Armagh, Northern Ireland, BT63 5LF, United Kingdom. Tel: +44 (0) 28 3836 4500 Fax: +44 (0) 28 3836 4501 E-mail: [email protected] Tadman Street, Wakefield, WF1 5QU. Tel: +44 (0) 1924 376 026 Fax: +44 (0) 1924 385 015 E-mail: [email protected] www.kingspan-renewables.co.uk www.kingspansolar.com Kingspan Renewables: A trading name of Kingspan Hot Water Systems Ltd. Registered Office: Tadman Street, Wakefield WF1 5QU Registered in England, No. 04357772