1
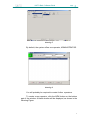
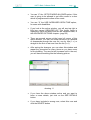
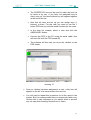
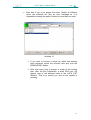
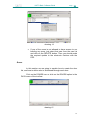
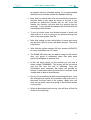
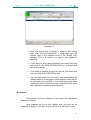
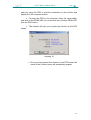
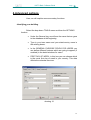
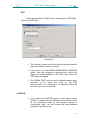
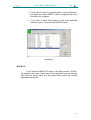
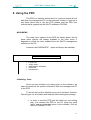
Basic Software
USER’S MANUAL
SALTO Basic Software Guide
Page: 1
BASIC SOFTWARE GUIDE
BASIC SOFTWARE GUIDE
1
0. INTRODUCTION
2
1.
3
INSTALLING THE SOFTWARE
SOFTWARE OPERATORS AND COMPETENCIES.
OPERATORS COMPETENCIES
2.
DESIGNING A LOCKING PLAN
4
6
11
Users
11
Doors.
16
Read a key
19
4.ADVANCED OPTIONS.
21
Identifying your building
21
Lock
22
PPD
23
AUDITOR
23
BACK UP
24
RESTORE BACK-UP
25
5. USING THE PPD
27
MAIN MENU
27
Initializing locks.
27
Up –dating locks:
30
Diagnostic.
31
1
SALTO Basic Software Guide
Page: 2
0. Introduction
SALTO Basic software has been designed to manage the
access control of a building, with ROM identification carriers.
You can create locking plans, with this system, that allow you
to control where different people are authorised to gain entry in a
building.
Once we have made the whole lock plan, ,we will carry all this
information from the PC to every escutcheon, using the PPD,(portable
programming device) which will turn to be the most important piece
to do the maintenance in our access control.
You will find the SALTO BASIC software very intuitive to use,
but please note that there are some inoperative greyed out icons
(disabled functions) in the main tool bar. These icons match functions
in the more advance PRO-ACCESS software. Please, contact your
local SALTO dealer if you require these functions for your system and
would like to use the professional software.
2
SALTO Basic Software Guide
1.
Page: 3
Installing the software
To install the SALTO Basic software, your computer needs
some minimum requirements, which are the following:
•
RAM memory: 64MB (minimum), 128MB, (advisable).
•
Available memory in HD: 20 MB.
•
Operative system: windows 98,99,2000,NT 4.0.
•
MDAC version 2.1 or higher.
•
PROCESSOR: Pentium II or greater.
The SALTO CD_ROM contains an installation assistant which
starts automatically if you double click the icon “SETUP .EXE”.
Follow the on screen instructions to complete the software
installation.
INSTALLATION PROBLEMS
SALTO software requires MDAC version 2.1 or higher
(Microsoft Data Access Components) to be installed in your system.
Windows 2000 and Windows Millennium comply with this
requirement.
However, Windows 95,98 or NT, may not have it. To see
whether your system has MDAC 2.1 or higher, follow the instructions
below:
•
Start the SALTO Access software and select the menu
option HELP/ABOUT.
•
An information window will be displayed, with the main
system data. Here you can see your computers’ MDAC
version. If the MDAC software does not exist or your
version is lower than 2.1, you will have to install a new
MDAC on your hard disk.
3
SALTO Basic Software Guide
Page: 4
INSTALLING MDAC ON YOUR HARD DISK
On the SALTO CD_ROM, you will find a file called
“mdac_typ.exe”. This file installs MDAC version 2.5. on to your
computer. To install this file, follow the steps below:
•
Make sure your system has no MDAC software or shows
a version lower than 2.1 (see the paragraph above).
•
Close all your active applications, because they may use
MDAC: Word, Excel, Access, Power Point, Internet
Explorer, Outlook…etc
•
Log on to your system as the administrator.
•
Double click “mdac_typ.exe” on the SALTO CD_ROM to
install MDAC version 2.5 on to your hard disk. Follow this
path: D:\ Mdac\ Mdac2.5SP2 \Language\ mdac_typ.
•
We recommend you read the following file on the SALTO
CD_ROM: D:\Mdac\mdac_readme.txt.
WARNING:
1. It is very important to make a back-copy of the database you are working with, in your computer. Salto
Systems strongly recommends it, in order to be able
to keep the system control even when the original
data base has been lost .
Software operators and competencies.
Before starting to design a locking plan, the first thing to do is
name the system database that we are going to work with.
Then you have to assign a directory and a path to this
database.
•
First of all start the SALTO software.
•
Then select the FILE menu.
•
And then select the NEW DB option.
4
SALTO Basic Software Guide
•
Page: 5
A window will be displayed :
drawing 1.
drawing 2.
•
Now give a name to the database and assign a directory
to it.( if you are working in a LAN connected system, you
must define the path to the server on which the database
will reside.)
•
It is a good idea to name the database with the company
name so that the file is easy to recognise.
5
SALTO Basic Software Guide
Page: 6
•
It is also important to remember the database directory,
and to make a database back copy after designing the
locking plan.
•
When you are sure about the database name and its
location, you must click on the OK button.
The first time you login the program must be opened as
administrator.
A window like the following figure, with 2 fields will be
displayed:
User name:
Password:
type admin.. in upper case
In your first login session is not necessary to
choose one.
Validate both field clicking "OK" box.
OPERATORS COMPETENCIES
The administrator must specify program operators, their
competencies, in other words, which options of the main menu will be
allowed to use. The administrator could also define his own and other
operators' program access passwords.
Go to pop-up menu TOOLS/ OPERATORS
PERMISSIONS / OPERATORS, as is shown in the Figure.
AND
6
SALTO Basic Software Guide
Page: 7
drawing 3
By default, the system offers one operator, ADMINISTRATOR.
drawing 4
You will probably be required to create further operators.
To create a new operator, click the NEW button on the bottom
part of the window. A blank window will be displayed, as shown in the
following Figure:
7
SALTO Basic Software Guide
Page: 8
drawing 5
•
You will have to write the operator's name, his user name
(that is stored at the login), and a password.
•
The system brings , by default, 1 operator group:
Administrator.
•
Specify also the language this operator will use when
running the application.
•
Next, save changes and close the window.
•
You must immediately inform the password you have just
registered to the operator, since he will need it to access
the application.
Follow this procedure as many times as new operator you
want to create, and you will see how the operator list enlarges.
drawing 6
8
SALTO Basic Software Guide
Page: 9
Once you have created the necessary new operators on your
system, you may close this window and return to the TOOLS/
OPERATORS AND PERMISSIONS / OPERATORS GROUPS pull-up
menu. Within this option operator group competencies can be set.
drawing 7
Operators belonging to ADMINISTRATOR group may have
access to full program menu functionality.
Administrator has the ability to create further operator groups,
if he seems it convenient.
To create a new group, click the NEW button on the bottom
part of this window.
9
SALTO Basic Software Guide
Page: 10
drawing 8
In order to modify competencies of an existing group, you must
grey out this group in the list (the line gets blue) and click the VIEW
DETAILS button.
A window like the previous one will be displayed.
•
From this window, the operator may add or delete
program functionality, by clicking with the mouse on the
“check boxes” located on the left-hand side of every
option. The option being ticked off, this option will appear
as an enabled option for the operator handling the
program. Were the option not ticked off, it will not appear
as an enabled option for the operator within this group.
•
Administrator should save changes when he has finished
adding or deleting menu options for these group
operators.
10
SALTO Basic Software Guide
Page: 11
2. Designing a locking plan
To explain how the SALTO Basic Access software works, this
guide is going to use a hypothetical locking development.
It is important to note that you can do some operations with
either the drop down menus or the tool bar icons.
Two main areas exist, which we are going to work with,
although ,it does not matter you design the lock plan following this
order or any other else. The result will be the same:
1. Users
2. Doors
In reality it does not matter in which order you use these
options to design the locking plan as the result will be the same.
However, if you want to design your locking plan more easily, first of
all decide whether your installation has a lot of users or has a lot of
doors. If it has many doors, then first define the doors and then the
users, then you can define each users access to a group of doors.
If you have many users, define the users first, followed by the
doors.
The three other icons used are; Connect - used to connect
to the PPD, Read key, and Audit Trail. The functions of these icons
will be explained later in this guide.
Users
With this menu option we are going to create a user list
containing details of people who use the building.
Click the USERS icon or click on the USERS option in the
DATA menu of the tool bar.
If it is the first time this window has been activated, the user list
will be empty.
11
SALTO Basic Software Guide
Page: 12
drawing 9
•
To add a new user to the list, click the NEW button
•
You will see a large blank field in the window just opened.
Our system doors will appear in this field when we have
defined them. So, the area is still blank.
•
Type in your first user name.
Now you need to define this users attributes:
drawing 10
12
SALTO Basic Software Guide
Page: 13
•
You can “X” the OFFICE MODE ALLOWED option, if this
user is going to be allowed to set office mode in a door
which is programmed to allow office mode.
•
You can “X” the USE INCREASED OPEN TIME option.,
for users with disabilities.
•
If you look at the active window, you will see top right a
little box named GROUPED BY. This facility helps in
organising users and doors and will be explained later, in
the ADVANCED OPTIONS chapter. (page 22)
•
There are several arrows at the lower left corner of this
active window. You can use these arrows to go upwards
of downwards through the user list, one by one( < >) or
straight to the first or last user from the list (l< >l).
•
After saving the changes, you can close this window and
repeat the procedure as many times as you have users
for the building. The user list will increase until in the end,
you will have something like the following picture.
drawing 11
•
If you have the above window active and you want to
know a users details, just click on the SEE DETAILS
button.
•
If you have included a wrong user, select this user and
click the DELETE button
13
SALTO Basic Software Guide
Page: 14
•
The SORTED BY box can be used to order the user list
by name or by key. If you have not assigned keys to
every user yet, the users without key will appear together
at the end of the list.
•
Now that all users are set up you can assign keys (Ibuttons) to them. For this task you need to use the Ibutton PPD and you will also need i-buttons for the users.
•
In the User list window, select a user and click the
ASSIGN KEY button.
•
Connect the PPD to the PC using the serial cable. (this
will work OK with the PPD turned off)
•
The software will then ask you to put the i-button on the
PPD reader.
drawing 12
•
Once an i-button has been assigned to a user, a key icon will
appear on the left of a users name in the user list.
•
You will need to repeat this procedure for all the users in the
system. But it is recommended that you temporarily label every
I-button with a user reference as you assign them to prevent
any mix ups when handing I-buttons out to users.
14
SALTO Basic Software Guide
•
Page: 15
Note that if you try to assign the same I-button to different
users, the software will give an error message as it is
impossible to assign the same I-button to more than one user.
drawing 13
•
If you want to remove a users key which has already
been assigned, select the relevant user and click the
REMOVE KEY button.
•
Note that every time a change is made to the locking
plan, after the first initialization, a small PPD icon, will
appear next to the affected locks in the LOCK LIST
Window. This is to remind you that a lock update is
pending.
15
SALTO Basic Software Guide
Page: 16
drawing 14
•
If one of the users is not allowed to have access to our
building any more, just select that user from the user list
and click on the DELETE button. Then you should make
the required update to the electronic furniture with the
PPD.
Doors.
In this section we are going to explain how to create the door
list, and how to define who is authorised through each door.
Click on the DOORS icon or click on the DOORS option in the
DATA menu of the tool bar:
drawing 15
16
SALTO Basic Software Guide
Page: 17
•
To create the first door in the lock list, just click on the
NEW button.
•
This opens the LOCK VIEW window, where you can type
in the name for the door and select which working mode
is intended for that lock.
1. Standard: the door only opens with an authorised Ibutton. Nobody can set office mode in this door.
2. Office mode: an authorised user is able to set and clear
office mode for this door.
To physically set office mode for a door, just hold down the
inner handle while presenting an authorised I-button to the outer
reader.
To clear office mode, just repeat the same procedure.
drawing 16
•
In this LOCK VIEW window you can change the time
delay between presenting an I-button and the electronic
furniture re locking by entering the time delay in seconds
in the OPEN TIME (sec) box.
•
For people with disabilities you can use the INCREASED
OPEN TIME box and enter a different time to the
standard open time setting. This allows the I-buttons of
users who have the USE INCREASED TIME box checked
17
SALTO Basic Software Guide
Page: 18
to operate with the extended setting. (It is recommended
that this time should be double the standard setting).
•
Note that you should take into account that the electronic
furniture locks in two ways: by action or by time. If you
present an authorised I-button but do not touch the
handle, the furniture will lock after the opening time.(in
seconds) . if you operate the handle, the furniture will lock
immediately after release.
•
To set up which users are allowed access to each lock
mark with an X who is going to be allowed through the
door in the locking plan user list.
•
Note that setting up the locking plan of users and doors
can be done here or in the user detail window. The result
is the same.
•
Note that the system assigns 24 hour access (ALWAYS)
to every authorised user of a door.
•
The SAME AS button can be used to assign to the current
door, any group of authorised users that have been
previously assigned to another door.
•
At the left lower corner of this window you can see a
button called FIRMWARE. This button will be not active
until the first time the lock is initialized. From the
initialization point onwards, this button will provide us
access to information about the electronic furnitures serial
number and its date of manufacture.
•
Once you have defined all data concerning the door, save
the changes and repeat the procedure with every set of
electronic furniture used in the system. Make sure you
have set up which users are going to be allowed access
in every door.
•
When all doors have been set up, you will have a Door list
similar to the following:
18
SALTO Basic Software Guide
Page: 19
drawing 17
•
Note that every time a change is made to the locking
plan, after the first initialization, a small lock icon, will
appear next to the affected locks in the DOOR LIST
window. This is to remind you that a lock update is
pending.
•
If you want to see a doors settings, just select this door
and click on the VIEW DETAILS button, or double click
the door in the list.
•
If we want to remove a lock from the list, just select this
lock and click on the DELETE button.
•
You can see a little icon for every door representing the
battery status. It is important to note that this value will not
be real until the first PPD to lock initialization has been
performed and the PPD has been connected back up to
the computer to update the real situation.
Read a key
This function is used to display on the screen the information
about any I-button.
Let’s suppose we find a lost I-button and, as there are no
markings or tags on it, we do not know whose it is. We can find out
19
SALTO Basic Software Guide
Page: 20
easily by using the PPD to read the information on the I-button and
display it on the computer screen.
• Connect the PPD to the computer using the serial cable,
and click on the READ KEY icon on the tool bar (or select READ KEY
from the PPD menu).
• The software will ask you to place the I-button on the PPD
reader.
drawing 18
•
Once you have placed the I-button on the PPD reader the
name of the I-button owner will immediately appear.
20
SALTO Basic Software Guide
Page: 21
4.Advanced options.
Here, we will explain some secondary functions.
Identifying your building
Select the drop down TOOLS menu and then the OPTIONS
function.
•
Under the General tag, we will see the name that we gave
to the database at the beginning.
•
Type in your town name and your state/country name in
the relating boxes.
•
In the GENERAL PURPOSE FIELDS FOR USERS you
can define different features which are going to appear (if
enabled) in the detail windows for users.
•
FIRST DAY OF WEEK : in this box you can choose which
is the usual first day of week in your country. This data
affects the calendar structure.
drawing 19
21
SALTO Basic Software Guide
Page: 22
•
On the right-hand side column, there is a box called
GENERAL PURPOSE FIELDS FOR USERS. If you
enable any of these fields as well, it will later appear in
the user detail window, to be fill in with the piece of
information at your only option.
•
Save changes before proceeding to the following tags.
Lock
In this window we will specify some operating features of the
electronic locks.
•
ALLOW LOCK ERASING: if you enable this option, any
user will be able to erase any locking plan from a set of
electronic furniture. This option should only be enabled in
special circumstances as accidental (or planned) erasure
of the locking plan could pose a security risk.
Note: if you want to enable the lock erasure for a particular set of
electronic furniture , you will have to initialize again this electronic lock
in order to enable the lock erasure.
22
SALTO Basic Software Guide
Page: 23
PPD
Select the drop down TOOLS menu and then go to OPTIONS.
Click on the PPD tab.
drawing 20
•
The first box is used to set how long locking plan data will
stay in the PPD’s memory (in days).
•
If you put an X in the ENABLE EMERGENCY OPENING
option, then the emergency opening menu option will
always be made available in the PPD, even when the
PPD data has expired.
•
The COMM. PORT area is used to choose between autodetection of the serial port used for the PPD
communication, or it allows you to manually define the
serial port you use for the PPD.
•
If you select the AUDITOR option in the pop-up menu
TOOLS, a window like the following will be shown. Here,
all the operations made by the operator appear in
cronological order. You can choose the order between
operators, operations, etc…
AUDITOR
23
SALTO Basic Software Guide
Page: 24
•
If you want to have in a printed paper all this information,
just press the button PRINT, when a proper printer is on
line with your computer.
•
If you want to clean this window, to get more available
memory space , just press the PURGE button.
drawing 21
BACK UP
If you select the BACK UP option in the pop-up menu TOOLS,
the program will make a back copy of the data-base you are working
with, and will always save it in the same fólder where the original
data-base was saved.
24
SALTO Basic Software Guide
Page: 25
drawing 22
It is strongly recommended to save the data-base backup in a
safe support in order to be able to react in a hard disk crash.
RESTORE BACK-UP
This menu option is used when the original data-base has
been lost by any reason and it is necessary to restore the back-up
copy.
In order to use this function , it is necessary that there is no
data-base running in the software.
Go to TOOLS and select the option RESTORE BACKUP.
A wizard will be shown which will ask you , the path in your
computer to reach the back-up copy.
Once you have indicated the path to the back-up copy , the
wizard will make a new folder with the restored data-base and the
software will start working again with this data-base.
25
SALTO Basic Software Guide
Page: 26
drawing 23
26
SALTO Basic Software Guide
Page: 27
5. Using the PPD
The PPD is a transfer device which is used to transmit all lock
data from the management PC to the electronic furniture. If you are in
any doubt about how to use the PPD, please read the PPD user
manual that is supplied on the SALTO software CD-ROM.
MAIN MENU
The main menu options for the PPD are shown below. Not all
these menu options are always available in the main menu, it
depends on which you have enabled from the SALTO management
software on the PC.
However, the DIAGNOSTIC option will always be available:.
PPD MAIN MENU
•
•
•
•
•
LOCK LIST
AUDIT TRAIL
EMERGENCY OPENING
INITIALIZE
DIAGNOSTIC
Initializing locks.
Once we have finished our locking plan on the software, we
have to transfer all the system information from the management PC
to the PPD.
To do this we need to initialize every set of electronic furniture.
This will give it a fixed name and load the initial locking plan settings.
•
In order to load the PPD with the data from our locking
plan, just connect the PPD to the PC using the serial
cable, and go to the main menu in the software. Click on
the icon CONNECT PPD.
27
SALTO Basic Software Guide
Page: 28
Drawing 24
•
If this is the first time you are using the PPD to download
a locking plan, you may find an error message like the
one in the drawing above. Click on the YES button to
confirm that this PPD is to be used in this building only
(exclusive use).
•
Now , a window like the one in the drawing below , will be
opened and you will see the doors needing initialization
already marked with an X.
drawing 25
28
SALTO Basic Software Guide
Page: 29
In this window you can see at the lower left corner a box
named ACTIONS TO DO . You have to mark in this box the action
you are going to do with the PPD.
1. if you mark ALLOW EMERGENCY OPENING , this option
will be then available in the PPD main menu.
2. If you mark INITIALIZE LOCKS this option will be then
available in the PPD main menu. ( this is what we are
going to do now)
•
If you do not mark any of this actions , the only thing you
could do would be UP-DATE LOCKS.
•
You can change the language for the messages in the
PPD display . In order to do this, just clic on the CHANGE
LANGUAGE button.
•
When you have the doors in the desired order , clic on the
DOWNLOAD button.
•
The data transmission between PC and PPD will take
several seconds. Look at the PC display and when you
see the progress bar reaching 100% , you will know the
transfer is finished.
•
Connect the communication cable (which has an i-button
on one end) to the PPD.
•
Turn the PPD on by pressing the “C” key. Then look for
the INITIALIZE option.
•
Press the OK key and you will see the first door in the list
displayed.
•
Make sure this name belongs to the Electronic Furniture
you are about to initialize. (Make sure no mistakes are
made when giving names to furniture as this could result
in furniture being fitted to the wrong doors and access
being incorrectly set up in a building).
•
Press the OK key and you will see the CONNECT TO
LOCK message.
•
Place the i-button connection cable on the reader of the
Electronic Furniture. Make sure you hold the connector in
contact for a few seconds while the data transfer is
working. If the transmission finishes successfully, you will
see the INITIALIZED message displayed
29
SALTO Basic Software Guide
•
Page: 30
In order to initialize the remaining sets of Electronic
Furniture, repeat this procedure being careful to assign
the correct door names to every set of furniture.
Note: If you want to know which sets of Electronic
Furniture are still pending for initialization, go to the LOCK
LIST option in the PPD main menu and you will see a list
of the doors to be initialized.
•
When you have finished initializing all doors , go to the
computer and connect the PPD to it using the serial
cable. Click on the software main menu icon CONNECT
PPD to pass all data from the PPD to the software. Now
the software will show you the latest updated information
about furniture battery status, the sets of furniture that
require updating and the lock firmware.
Up –dating locks:
When you make any lock plan change , you have to transmit
this change to the concerned doors.
•
In order to load the PPD with the modified lock plan,
connect the PPD to the PC using the serial cable and go
to the software main menu. Clic on the CONNECT PPD
icon.
•
A window like the one below, will open and you will see
already marked the doors needing updating.
drawing 26
30
SALTO Basic Software Guide
Page: 31
Note that when updating furniture it is not necessary to check
any options in the ACTIONS TO DO box.
•
Click on the DOWNLOAD button.
•
Look at the PC display and when you see the progress
bar reach 100%, you will know the data transfer is
finished.
•
Then you can unplug the serial cable and go to the first
set of Electronic Furniture that requires an update.
•
Now connect the communication cable (the one which
has an i-button on one end) to the PPD.
•
Go to the first set of Electronic Furniture that requires
updating. Turn the PPD on and you will see the LOCK
LIST option displayed. Place the cable I-button on the
reader of the Electronic Furniture and the furniture will be
automatically updated. (This operation can be also made
with the PPD turned off, )
•
You will see that as each set of furniture is updated, its
name disappears from the LOCK LIST.
•
When you have finished updating all Electronic Furniture
in a building (LOCK LIST will show the message
NOTHING TO DO) connect the PPD to the PC again and
go to the software main menu. Click on the CONNECT
PPD icon to pass the PPD information to the PC. Now the
software will show you the latest updated information
about the furniture’s battery status and the furniture that
requires updating.
Diagnostic.
The PPD can be used to view a list of diagnostic information
about each set of Electronic Furniture.
Connect the communication cable (which has an i-button on
one end), to the PPD and visit the door you want to diagnose.
•
Turn the PPD on by pressing the “C” key.
•
You will see MAIN MENU displayed.
31
SALTO Basic Software Guide
Page: 32
•
Using the arrow keys, go through the menu options until
you see the DIAGNOSTIC option.
•
Press the OK key.
•
The message CONNECT TO LOCK will be displayed.
•
Place the communication cable i-button on the reader and
hold in contact for 1 or 2 seconds.
All the Electronic Furniture information will appear in the PPD
display. Use the arrow keys to go through the lines and see all
diagnostics.
Below is an example of a diagnostic read out:
-
DEVICE: 101
FIRMWARE
SERIAL NUM.
FACT DATE.
MEMORY:
2.1
AS1003457
: 10-02-2001
16kb
BELONGS TO THE SYSTEM.
7-05-2001
13:06
In order to repeat the diagnose procedure with more doors,
press the “C” key and go to the next door.
Do not worry about the PPD turning off while you go from one
door to the next because it will automatically turn on when connected
to the next set of Electronic Furniture. The PPD switches on
automatically for reiterative operations.
32
SALTO Basic Software Guide
Page: 33
Emergency opening.
This PPD menu option is used to open a lock which has run
out of batteries.
The fact the EMERGENCY OPENING option is available or
not in the PPD main menu, depends on your selection in the software
(TOOLS/ OPTIONS/ PPD menu)
WARNING: if you leave this option enabled by default, you must
realise that any unauthorised person who takes the PPD will be
able to open all building doors needing no user key.
Take this risk into account if you are responsible for the security
of the building.
To do an emergency opening, follow these steps:
•
In the Access software on the PC, put an X in the ALLOW
EMERGENCY OPENING option in the ACTIONS TO DO
box.
•
Download data from the PC to the PPD.
•
Take the PPD and go to the blocked door.
•
Turn the PPD on and select the EMERGENCY OPENING
option.
•
Press the OK key and you will see the CONNECT TO
LOCK message displayed.
•
Connect the special three pin connector cable to the PPD
and insert the three pin
connector end into the
emergency opening port below the reader on the
Electronic Furniture.
•
Wait for 3 or 4 seconds, and the PPD will give you the
message: DOOR OPENED (If the door belongs to the
locking system)
•
Replace the batteries in the Electronic Furniture and up
date it (via the PPD) with the current locking plan .
33