1
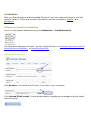
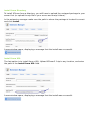
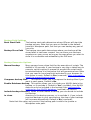
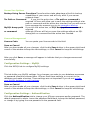
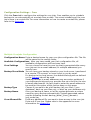
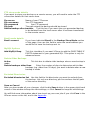
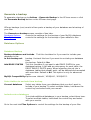
XCloner Official User Manual Copyright © 2010 “XCloner.com” www.xcloner.com All rights reserved. xcloner.com is not affiliated with or endorsed by Open Source Matters or the Joomla! Project. What is XCloner? XCloner is a tool that will help you manage your website backups. It allows you to generate, move, and restore backups to make sure that your website will always be secure. Once you have configured XCloner you will be able to backup, move, or clone your site to any other location with just a few clicks. XCloner is a flexible tool that works with Joomla, with Wordpres, or standalone to back up any PHP/MySQL site, or parts of a site. The tool allows you to exclude files, directories, or databases from your backups. XCloner can work as a files-only backup utility, as a database backup utility or as a full backup utility which includes the previous two options. With XCloner you can generate cron backups which can be stored locally or remotely through FTP or email. About this manual This manual will take you through all the functionality XCloner offers, with clear instructions and screenshots, to help you back up and restore your website(s). Please note that this manual assumes a certain level of knowledge of databases and FTP programs. Installation After you have bought and downloaded XCloner2.1.zip from www.xcloner.com, you will need to install it. There are currently two options for the installation: Joomla, and Wordpress. XCloner for Joomla installation Log in to your Joomla backend and go to Extensions – Install/Uninstall. The Extension Manager will open. You can install XCloner by uploading the entire zip file, installing from a directory, or installing from URL. Upload Package File Click Browse... to locate the XCloner2.1.zip file on your computer. Click Upload File& Install. A new window opens, displaying a message that the install was successful. Install from Directory To install XCloner from a directory, you will have to upload the unzipped package to your server first (or upload the zip file to your server and unzip it there). In the extension manager make sure the path to where the package is located is correct and click Install. A new window opens, displaying a message that the install was successful. Install from URL The last option is to install from a URL. Upload XCloner2.1.zip to any location, and enter the path in the Install from URL field. A new window opens, displaying a message that the install was successful. XCloner for Wordpress Installation Unzip the XCloner for Wordpress package and upload the directory to the wpcontent/plugins/ directory. After this step, you need to also create the WP_ROOT/administrator/backups directory and make it writeable. Log into your Wordpress dashboard and click Plugins in the menu on the left. The plugin page opens and you will see XCloner at the bottom of your list of available plugins. Click Activate to activate the plugin. A message will appear at the top of your screen to let you know the plugin was activated successfully. XCloner Configuration To access and configure XCloner in Joomla, login to the Joomla backend and go to Components – XCloner. To access and configure XCloner in Wordpress, login to the Wordpress dashboard and go to Plugins – XCloner. Alternatively, you can access XCloner directly using this link: http://yourwebsite.com/administrator/index.php?option=com_xcloner A new window opens (all functionality from this point on is the same, independent of the platform you use): Use username “admin” with password “admin” and click Login to log in to the XCloner backend for the first time. You are strongly advised to change your password immediately. You now have access to the XCloner backend as shown below. To configure the XCloner settings, click either the Settings button or the Configuration link from the menu on the left. The XCloner Configuration consists of six tabs: General controls the main backup settings such as paths and backup type MySQL holds your MySQL connection settings Authetification holds your XCloner username and password System controls the system language and FTP settings Cron controls the configuration of all cron process settings Info displays information about your PHP configuration and general paths Configuration Settings – General Backup Path Settings Back Start Path Backup Store Path The backup start path determines where XCloner will start the backup process. Note that you are not limited to the default Joomla or Wordpress path, but that you can backup any part of your site. The backup store path determines where your backup will be stored after is has been created. You can store your backups anywhere on your server as long as the area where you want to store it is accessible and writeable by the PHP user. Backup Generator Options Manual backup Many servers have a time limit for the execution of scripts. The default is 30 seconds. If your backup is very big or takes long to execute, set this option to manual to prevent the script being terminated before it is finished as this will generate errors. Note that you need to have JavaScript activated in your browser for this option to work. Default is Yes (=manual). More information about the manual backup option. Compress backup files This option allows you to compress the backup files if you want to save space. Default is No. Enable Database backup This option allows you to include your MySQL data in the backup, or to exclude it. Default is Yes (=include). Your MySQL data can only be included in the backup if the configuration settings for your MySQL database (next tab) are correct. Include backup directory When XCloner makes a backup you can decide to include the backup in clone directory in the backup process, or to exclude it. If you include previous backups in your new backup, the size of your backups will increase dramatically. Default is No (=exclude). Note that this option only works if the backup path is within the Joomla or Wordpress main path. Server Use Options Backup Using Server Functions These functions take advantage of built-in backup capabilities of your server and will only work if your server supports them. Tar Path or Command If you tick the active box, a Tar path or command is required. XCloner will allow you to save the settings without a tar path or command and the active box checked, but you will see an error message the moment you try to generate a backup. MySQL dump path If you tick the active box, an SQL dump path or command is required or command although XCloner will let you save the settings without an SQL dump path or command and the active box checked. License Management License Code You can paste your license code in this field. Save or Cancel After you have made all your changes, click the big Save button in the upper right-hand corner of the window to keep the new settings, or click Cancel to keep the old settings. After you click Save, a message will appear to indicate that you changes were saved successfully. Configuration Settings – MySQL Click the MYSQL tab to configure MySQL settings. This tab holds your MySQL settings. Any changes you make to your database username or password should be entered here. XCloner uses these settings to connect to the database and make a backup. These settings are not important if you do not include your MySQL database in your backups. Save or Cancel After you have made all your changes, click the big Save button in the upper right-hand corner of the window to keep the new settings, or click Cancel to keep the old settings. Configuration Settings – Authentification Click the Authentification tab to change your XCloner username and/or password. The default password is admin. Leave the password field blank to keep the default password, or change it by typing the new password in the password field. Save or Cancel After you have made all your changes, click the big Save button in the upper right-hand corner of the window to keep the new settings, or click Cancel to keep the old settings. Configuration Settings – System Click the System tab to change the standard system settings. Display Settings Language Choose between English or German. Default is English. System Settings FTP Transfer Mode Choose between Direct and Passive transfer modes. Default is Direct. This option is only for advanced users. FTP Connection Mode Choose between Normal and Secure connection modes. Default is Normal. This option is only for advanced users. Backup Manual Process Files to process per manual session Time between sessions refreshes. This only refresh Define the number of files to process per manual session. This controls the pause time between session works if Manual Backup is set to Yes on the General tab. Save or Cancel After you have made all your changes, click the big Save button in the upper right-hand corner of the window to keep the new settings, or click Cancel to keep the old settings. Configuration Settings – Cron Click the Cron tab to configure the settings for cron jobs. Cron enables you to schedule backups to run automatically at a certain time or date. The actual scheduling of the cron job is done in a crontab file. For more information on how to create a crontab file, please refer to the Appendix. Multiple CronJobs Configuration Configuration Name Enter a desired name for your cron jobs configuration file. The file will be saved to the configs folder. Available Configurations After you have saved your first configuration file, all available configurations will be shown here. Cron Settings You can choose to have the cron log that is generated after every cron job sent to an email address (or multiple addresses) you specify here. Backup Store Mode You can have your backup stored on your local server, transferred to a remote FTP account, or have it sent to you by email. For backup to the local server, the default backup path as defined on the General tab will be used. Sending backups to email addresses may encounter problems if your backups are big and your provider has set a limit for the size of email attachments. You will need to enter the email address to be used for this option a little further down on this page. Backup Type Choose if you want to do a full backup (all your files + your database), back up your files only, or back up your database only. Backup Name Give your backup a name, or let the system generate a unique name for every backup automatically. System generated names use the following format: backup_(date)_(time)_(domain)(sql_mode).tar Cron Allowed IPs Enter any additional IPs you want to have access to the cron job. Enter one IP per line. Please refer to the appendix for more information on allowed IPs. FTP store mode details If you want to store your backup on a remote server, you will need to enter the FTP connection details for that server here. Ftp server Ftp username Ftp password Ftp path Delete backup after Name of your FTP server Your FTP username Your FTP password The path where the backup should be stored transfer Tick this box if you want the cron generated backup to be deleted from the local server after it has been transferred to the remote server. Email mode details Email account If you have indicated Email in the Backup Store Mode section of this page, then use this field to enter the email address you would like to have the backup sent to. MySQL Options Add MySQL Drop Tick this checkbox if you want XCloner to add the DROP TABLE IF EXISTS statement to your generated SQL. This option is only for advanced users. Delete Older Backups Active Tick this box to delete older backups when a new backup is made. Delete backups older than Enter the number of days to determine which older backups (e.g. older than 30 days) you want to delete when a new backup is made. Excluded Directories Excluded directories list Use this field to list directories you want to exclude from the backup. List only one directory per line and use the full path of the server directory. Save or Cancel After you have made all your changes, click the big Save button in the upper right-hand corner of the window to keep the new settings, or click Cancel to keep the old settings. You will find more information about how to set up your cron jobs if you click Cron in the XCloner menu on the left, and in the Appendix. Configuration Settings – Info Click the Info tab to get information about your PHP Configuration and General Paths. You cannot make any changes here. Generate a backup To generate a backup go to Actions – Generate Backup in the XCloner menu or click the Generate Backup button on the XCloner start page. XCloner backups (can) consist of two parts: a backup of your database and a backup of your files. The Generate a backup screen consists of two tabs. Database Options controls the settings for the backup of your MySQL database Files Options controls the settings for the backup of your website’s files Database Options Database Backup Backup database and include Tick this checkbox for if you want to include your database in the in this backup set backup. Uncheck this box if you want to exclude your database from the backup. Default is Yes. Add DROP SYNTAX Tick this checkbox if you want to add DROP SYNTAX to your database backup. It will add an extra query for each table, the DROP TABLE IF EXISTS query. When importing the sql into a database, tables that already exist, will be deleted and recreated with new data. Default is No. This option is only for advanced users. MySQL CompatibilityOptions are ‘default’, ‘MYSQL40’, ‘MYSQL323’. Select tables to exclude from backup Current database Select any tables from your database that you don’t want to include in your backup. To select multiple tables, hold down the control key and select with your mouse. Include extra databases To include additional databases in your backup, select them here. To select multiple tables, hold down the control key and select with your mouse. Go to the next tab Files Options to control the settings for the backup of your files. Files Options 1. Choose a name for your backup or leave the field blank so a name for the backup will be generated by XCloner. XCloner assigns a descriptive name that will help you remember when you made the backup and what it includes. Like this: backup_2010-08-25_09-23_yourwebsite.com-nosql.tar (files only backup) backup_2010-08-25_11-26_yourwebsite.com-sql-nodrop.tar (files and database, no drop syntax) backup_2010-08-25_11-31_yourwebsite.com-sql-drop.tar (files and database, drop syntax) 2. Then decide if you want to exclude any files or folders from your backup. Just tick the checkbox in front of the files or folders you want to exclude. You will see those items appear on the right, in the Excluded Items List. To go into a folder, just click on its name. To go up one level, click [Up a level] directly above the folder list. Continue or Cancel After you adjusted all the settings for your backup, click the big Continue button in the upper right-hand corner of the window to start the backup process, or click Cancel if you don’t want to make the backup yet. After you click Continue XCloner will start by backing up your database (if on the first tab you ticked the checkbox to include the database in the backup) and the following message will appear. Click the red link Please click here to continue! XCloner will now make a backup of your files. The time it takes to make the backup depends on the size of your website. You will see your browser screen refresh several times until XCloner has processed all the files. When XCloner is done, you will see messages appear at the top and bottom of the page, showing you the number of files in the backup and the size of the backup. For messages generated after an automatic backup, please refer to the Appendix. Click the red link Click here to continue to be taken to an overview of all your backups. View Backups You will be taken to this screen automatically after you make a backup, but you can also navigate here by clicking Actions – View Backups in the XCloner menu on the left or click the View Backups button on the XCloner start page. The following screen will open. 1. To download a backup, click the diskette in the download column. A popup window will open, prompting you to save the file on your computer. 2. To rename a backup, tick the checkbox next to the backup name and click the Rename button. You’ll be taken to the following screen where you can change the name. Click Save to keep the new name or cancel to exit. 3. To delete a backup, tick the checkbox next to the backup name and click the Delete button. You will not be asked to confirm; the backup will be deleted at once. 4. To move a backup, tick the checkbox next to the backup name and click the Move button. The next screen will open where you can fill out all the FTP connection settings and the location where you want to move the backup to. Click the Continue button to proceed. You will see the following message on the next screen. 5. To clone or restore a backup, tick the checkbox next to the backup name and click the Clone button. Please refer to the Restore Backup section of this manual for detailed information about cloning and restoring backups. Restore Backup – Automatically To clone or restore a backup, go to Actions – View Backups in the XCloner menu on the left. The following screen will open. Tick the checkbox of the backup you want to clone or restore and click the Clone button. The next screen will open. Enter the website URL where you want the backup to be moved, enter all the FTP connection settings, and the directory where you want to move the backup to. Tick the checkbox for incremental transfers if you want FTP to transfer the files in incremental mode. Click the Continue button to proceed. Your backup and the restore scripts will now be moved to the location you specified and you will see the following message on the next screen. To start the actual restore process, click the click here to continue link. You’ll be taken to the XCloner.php file on the website you specified in the clone settings and you will see the following screen. anker Path Configuration Check to make sure that the install directory, the install URL, and the backup/clone to be installed are correct. Install directory Install URL Needs to indicate the full server path of where the backup will be restored to. It will replace $mosConfig_absolute_path in your configuration.php file. Is the web address from where you are able to access the install directory. If you don't set it right you will run into template problems. If you want to update it after restore you need to edit the $mosConfig_live_site variable in your configuration.php file. Choose Clone Archive to Install Select the backup you want to restore from the dropdown list. MySQL Configuration Import MySQL database Tick the checkbox if you want to import the backup of your MySQL database. If you don’t tick this box, you can skip the rest of the MySQL configuration. Incremental SQL import Tick this box if you have a large database. Your data will be transferred in an incremental transfer mode, which means that the browser will refresh the connection after 100 files have been transferred. MySQL server The new MySQL server address of the location where you are restoring MySQL username The MySQL username to access the database MySQL password The MySQL password for the selected username MySQL database The database into which you will import the MySQL backup. You will need to create this database manually before you start the restore process. If you are on the same server as the original database, for security reasons use a different database name. Files transfer and configuration Skip files restore Tick this checkbox if you only want to restore the database and no files. Restore original file Tick this checkbox if you want XCloner to restore the original file permissions permissions of your files. Restore by using the server Tick this checkbox if you want XCloner to make use of server utilities utilities unzip/tar (if supported). Install files through FTP or If you install through and FTP session, the script will attempt to connect to an FTP server from the provided FTP details and upload the files in the provided FTP directory. When you choose FTP you also have the option to transfer your files in an incremental transfer mode; which means that the browser will refresh the connection after 100 files have been transfered. directly If you install directly, the PHP script will write all the files on the server. The only problem with this method is that on some servers the owner and group of the files will get changed to the apache default. To fix this you will need to contact your hosting support and ask them to change this for you, or, if you are allowed, use the following command through SSH (chown -R myuser directory, and chgrp -R mygroup directory) Ftp server Name of your FTP server Ftp username Your FTP username Ftp password Your FTP password Ftp path The path where the backup should be stored Note: Always be careful when doing a restore on a live site and make a backup first. When you have filled out all the details on this page, click Start install to start the restore. After you click Start install you will see the following screen. The script is now restoring your files and database to the new location. This page will refresh a number of times until the restore script has processed all your files. The time it takes to do the restore depends on the size of your backup. When the restore process is finished, you’ll see the following message and your clone will be accessible in its new location. For more information about the restore process, go to Actions – Restore Backup. When you have successfully cloned or restored a backup, remove the XCloner.php file from your server. Restore Backup – Manually If for some reason the server-to-server FTP connection doesn’t work (the Move and Clone buttons on the View Backups screen) you can also manually restore a backup. First you transfer the files manually and then you restore manually. Transfer Backup Manually (using FTP) 1. Download the backup you want to restore to your computer as explained in the section View Backups. 2. Download TAR.php and XCloner.php to your computer from the /administrator/components/com_xcloner/restore folder using your FTP program. 3. Upload the backup to the server where you want to restore the backup using your FTP program 4. Upload TAR.php and XCloner.php to the same location as the backup (e.g. yourwebsite/clone) so you have all three files in the same place. 5. Open XCloner.php in your browser (e.g. yourwebsite.com/clone/XCloner.php). Now follow the steps for automatic restore from this point onwards. Or continue with the manual restore using FTP as explained below. Restore Backup Manually (using FTP) If you experience slow-downs or sudden stops while restoring the clone files (and after you have tried both the FTP and the Direct mode option for restore) you can restore the backup manually. Open the clone on your computer and copy all the files inside to the restore location using an FTP client. You can extract the contents of a .tar file with a program like 7-zip. When all the files have been copied (and assuming that you had already uploaded TAR.php and XCloner.php to the same location in step 4 above), launch the XCloner.php script in your browser and tick the checkbox Skip files restore, will attempt to restore only database. That way you will restore the database and configuration only, leaving the files intact. Click the button to restore your MySQL database. Forum & Website If you have any questions about XCloner, the quickest way to get an answer is probably our forum. We all go through the same stages and many of your questions may have been asked and answered before. In the XCloner menu on the left, go to Support – Forums. For general information and documentation, visit our website. In the XCloner menu on the left, go to Support – Website. Appendix Execute a cron job from within XCloner Go to Administration – Configuration. Clik the Cron tab. To execute a cron job from the cron tab, click execute cron. If you receive the following error message, then add the IP from the error message to the allowed IPs field on the cron tab. Make sure to add the name of the configuration file to the Configuration Name field before you click Save. See Making changes to an existing cron configuration file. Now execute the cron job again. You should see a message similar to the one below. You should also receive a notification message in your email. How to create a crontab file A cron job can be used to back up data, to automatically send out emails at a certain time, etc. In order to execute such a cron job, you need a crontab file. The crontab file is nothing more than a very small and simple text file that contains a schedule (when should the cron job be executed) and the path to your cron script (which cron job should be executed). You will have to place this crontab file on your server using a shell account so that your server can execute the cronjob at the moment you have specified in the crontab file. This section will explain how to create a crontab file and how to place that crontab file on your server. Crontab file A crontab file consists of five time and date fields, followed by the path to your script. It can look like this: 15 11 1 3 1 /home/username/www/mycronjob.php The time and date fields are: field minute allowed values 0-59 hour day of month month day of week 0-23 1-31 1-12 (or names, see below) 0-7 (0 or 7 is Sun) So the line above means that the script mycronjob.php will be executed at 15 minutes, 11 hours (meaning a quarter past eleven), on the first day of the month (1), in the month March (3), on a Monday (1). Instead of a single number, you are also allowed to use ranges. Let’s say you want the script above to be executed three hours in a row, at 9:15, 10:15 and 11:15. It would look like this: 15 9-11 1 3 1 /home/username/www/mycronjob.php You may have noticed that the fields ‘day of the month’ and ‘day of the week’ might contradict each other. The first day of the month does not have to be a Monday. To solve this, you are also allowed to use * to mean all possible values. Let’s say you want this script to run every 1st of the month, no matter what day of the week or what month it is. The script would look like this: 15 9-11 1 * * /home/username/www/mycronjob.php Some other examples: 52 * * * * will run every hour on the 52nd minute. 43 18 * * 7 will run at 6:43pm every Sunday. That’s all there is to creating a crontab file. You specify when it should run and what script to execute. Placing the crontab on your server If you have no experience with this, it might be smart to get in touch with your host and ask them how to do this. Option 1 – Crontab Manager If your host has a cron tab manager you will only have to login to your control panel and find the cron tab manager (might be under FTP options). Fill out the schedule as explained above, enter the command line and save the settings. Command lines can be one of the following: /usr/bin/php /path_to_backup_dir/cloner.cron.php myconfig.php or links http://link_to_backup_dir/cloner.cron.php or lynx -source http://link_to_backup_dir/cloner.cron.php For Running Multiple Crons, you need to first create a custom configuration file in the XCloner Configuration -> Cron tab and then replace "cloner.cron.php" with "cloner.cron.php? config=myconfig.php", only use 'links' or 'lynx' options to run the cronjob. Option 2 – SSH or Telnet 1. Create your crontab file (as described above) in Notepad. Make sure to have wordwrap turned off and press enter once (to create a blank line after the cron job line). 2. Save the file as cron.txt. 3. Upload the file to your root directory. 4. Use SSH or Telnet software to connect to your server (PuTTY is a free open source SSH and Telnet client) 5. Type the following at the command prompt: crobtab cron.txt 6. Press Enter to return to the command prompt 7. Now type crontab -l (that’s a lowercase L) 8. Press Enter again 9. You will be shown a list of all the cronjobs you had save in your cron.txt file 10. You’re done. Your cronjob will run according to the schedule you have indicated and you will receive a notification email every time your cronjob runs. Backup Email Notification This is a typical email notification for an XCloner backup. Backup confirmation message for automatic process For the automatic process, you should get a confirmation message like this: Archive Name backup_name.tar name or the created backup Number of Files 1080 total number of files in the backup Size of Original File 369.8 MB the size of the backup without archiving Size of Archive 276.94 MB the current archive size on server Database Backup Settings Completed (3.85MB) will inform you how the database backup went. you can check the file size by opening the archive and looking at administrator/backups/databasesql.sql Making changes to an existing cron configuration file To make any changes to an existing cron configuration file, make sure to add the name of the configuration file to the Configuration Name field before you click Save. This field is blank by default to prevent you from accidentally saving changes to the wrong configuration file. If you don’t add the name of the cron job to the field (even if you have only one cron configuration file) your changes will not be saved when you click the Save button. What is the manual process? The manual process was created to help users who have limitations on the time a PHP script can be executed. For example if you need to run the backup process for more than 30 seconds, and your host only allows the script to run no more than that limit , the script will end prematurely and get you either a blank screen or a 500 error. The solution is to set Manual Backup to Yes. This will allow for the creation of incremental backups. The administrator will configure how many files should be processed by session so the script will fit the time limit, and when starting the backup process, XCloner will refresh the backup adding x number of files at a time. Note: This is also an automatic process, you don't need to take any other action (except starting the backup process) but you will need to leave your browser open for refreshing. Note: The manual backup process doesn't work in cron mode, the cron process will set the Manual Backup option to No. Possible Run Time Problems You may run into the following errors or problems during the restore process. Process stops before it is finished Increase the max_execution_time variable in your php.ini configuration file, and/or increase the memory_limit variable. The database details provided are incorrect and/or empty. Unable to connect to MySQL The provided MySQL details were incorrect, you need to verify them. Could not continue, unable to read the clone backup file You didn't select a backup to restore from the drop down menu Choose clone archive to install Directory /home.../mydir/ is not writeable or does not exist. Could not continue... You need to verify that your Install URL exists and it has writing permissions 500 error Possible causes: The permissions are set to 777 on the file or directory you are in. You need to set them to 755. This only happens on some servers. You have a .htaccess in the present directory, you need to remove any code from it that's not supported by your host, usually replacing it with a default Joomla one will do the job. XCloner Limitations XCloner works as a backup script, so its job is to read file data and archive it. Because of some server configurations there are 2 types of limitations: Memory Limitation: The XCloner needs to use more memory than it has been allocated. This is usually related to the memory_limit variable and occurs when XCloner generates backups without the server utilities support. Time Limitations: Some hosts are configured in a way that if a PHP script runs for more than a certain time limit, it will be stopped; giving back a connection timeout, a save index.php message, a blank page, or a 500 error. This is related to the max_execution_time variable but also to an expire setting in the Apache httpd.conf file. Solutions For the memory limitation, we have introduced the possibility for users to use server utilities instead of PHP functions to archive the file data. To be able to use this functionality, you will have to check that you have tar utilities and MySQLdump for MySQL backups installed on your server and that your hosts allows you to access them through the PHP exec() function. If for any reason you can't use the server utilities for backups, you will need to increase the memory_limit in your php.ini file if you encounter any problems. See http://ro.php.net/manual/en/ini.core.php for more information. For the time limitation XCloner has added the Manual Backup option. By choosing the option Manual Backup in the XCloner configuration your backup will get created in incremental mode--it will archive a certain number of files per session until it reaches the last file. That way the total backup process is split into smaller pieces, avoiding the time limitation. The only requirement to be able to use this option is that you have JavaScript enabled in your browser. If you want to generate your backup at once, without using the refresh mode, you will need to increase this variable max_execution_time in your php.ini file. See http://ro.php.net/manual/en/ini.core.php for more information. Why is my backup file incomplete or corrupt? This happens only when the cloning process was stopped by a server error, and the archive couldn't be completed. Try to increase your php.ini memory_limit (see above), or set the Backup using Server Functions option in your configuration area to Yes. For more information please refer to our Requirements page http://www.xcloner.com/Tools/JoomlaCloner/JoomlaCloner_Requirements.html Upgrading XCloner Upgrading JoomlaCloner is a simple two step process. 1. Uninstall your current version of XCloner 2. Install the new, updated version Usually the only thing you need to check after upgrading is the configuration area. XCloner License XCloner is licensed under the GNU GENERAL PUBLIC LICENSE. XCloner License Agreement By purchasing ANY Component from xcloner.com you agree to this license. The license is for installing the component only for the owner’s websites; other websites are not included in the support agreement with our staff. xcloner.com reserves the right to change, without notice, any of the specifications, drawings and information contained in this manual. xcloner.com will take every effort to fix bugs, errors and further functionality. xcloner.com does not assume responsibility for any errors that may occur as a result of using xcloner.com products. xcloner.com's components are provided without warranty of any kind whether express, statutory or implied, including all implied warranties of merchantability and fitness for a particular purpose. Components are provided on an "as is" basis. xcloner.com will make every effort to help restore lost or damaged information if possible. But neither xcloner.com nor its team shall in any event be liable for any direct, consequential, incidental, indirect or special damages even if advised of the possibility of such damages. In particular, xcloner.com shall have no liability for any damage loss or corruption of data or programs stored in or used in conjunction with xcloner.com's Components, nor shall the authors be liable for the cost of retrieving or replacing damaged lost or corrupted data. Refund Policy As all our components and support are distributed without an encrypted source and not bound to a particular domain we do not provide a refund policy. Please be very careful; we do not refund. Our extensions code is licensed under a GNU/GPL compatible Joomla license. Though we cannot control all sites we do not support or allow use of our components on adult sites. This license shall be governed by and construed in accordance with the laws of your country. If for any reason a court of competent jurisdiction finds any provision of this license to be unenforceable, the other provisions of this limited warranty and software license agreement shall remain in effect without limitation. All xcloner.com products mentioned in this user manual are trademarks of xcloner.com. The Purchased License type allows you to request support only for your websites. You will need to purchase extra licenses if you would like to request support for your clients or other third parties. To ensure the proper level of support, we require all users, after purchasing xcloner.com products, to register their supported websites in the Downloads area -> Profile , in the "Register Supported Websites" field.