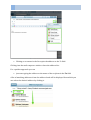
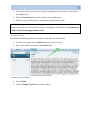
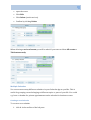
1
PRONTO! LITE USER MANUAL 1 Pronto! Lite User Manual Communigate Pro Version 6 C o m m u n i G a t e S y s t e m s , w w w . c o m m u n i g a t e . c o m 2 PRONTO! LITE USER MANUAL Contents Getting started with Pronto! Lite ........................................................................................ 7 System requirements ......................................................................................................................................................... 7 Install Browser-‐Plugin ...................................................................................................................................................... 8 First encounter: start application and log in ........................................................................................................... 9 Forgot my password ....................................................................................................................................................... 11 Getting around: Elements of the user interface .................................................................................................. 12 Toolbars ................................................................................................................................................................................ 13 Setting your personal preferences ............................................................................................................................ 14 Editing your personal information ............................................................................................................................ 14 Change language and time zone ................................................................................................................................ 16 Sounds .................................................................................................................................................................................... 17 Change password ............................................................................................................................................................. 18 Logging out .......................................................................................................................................................................... 19 E-‐mails: Reading, composing, sending and managing messages ....................................... 21 Basic settings ...................................................................................................................................................................... 21 Navigating the Mail app ................................................................................................................................................. 22 Composing and Sending E-‐Mails ................................................................................................................................ 24 Composing e-‐mails the smart way ............................................................................................................................ 29 Options for sending e-‐mails ......................................................................................................................................... 31 Signaling high priority .................................................................................................................................................... 31 Requesting a notification from recipients .............................................................................................................. 32 Signing e-‐mails ................................................................................................................................................................... 32 Encrypting e-‐mails ............................................................................................................................................................ 34 Reading E-‐Mails ................................................................................................................................................................. 35 Navigating the Mail App ................................................................................................................................................ 35 Incoming e-‐mails ............................................................................................................................................................... 36 Using e-‐mail options and states .................................................................................................................................. 38 Printing e-‐mails ................................................................................................................................................................. 42 Replying an e-‐mail ........................................................................................................................................................... 42 Forwarding e-‐mails ......................................................................................................................................................... 42 Deleting e-‐mails ................................................................................................................................................................ 43 More options for trash management ........................................................................................................................ 45 PRONTO! LITE USER MANUAL 3 Using folders ....................................................................................................................................................................... 46 Creating a new folder ...................................................................................................................................................... 46 Moving e-‐mails to folders .............................................................................................................................................. 47 Renaming folders .............................................................................................................................................................. 48 Moving a folder .................................................................................................................................................................. 49 Deleting a folder ................................................................................................................................................................ 50 Searching e-‐mails .............................................................................................................................................................. 50 Managing several e-‐mails at once ............................................................................................................................. 51 Managing and finding important e-‐mails .............................................................................................................. 53 Advanced e-‐mail operations ........................................................................................................................................ 55 Vacation message ............................................................................................................................................................. 55 Using Mail Rules ................................................................................................................................................................ 56 Sharing Mail Folders ........................................................................................................................................................ 58 Subscribing to a shared folder ..................................................................................................................................... 59 Unsubscribing from a shared a folder ...................................................................................................................... 61 Using Mail Encryption and Signing ........................................................................................................................... 62 What is Secure Mail? ....................................................................................................................................................... 62 How does Secure Mail work? ........................................................................................................................................ 62 Activating certificate for encrypting messages ................................................................................................... 62 Managing certificate for Secure Mail ....................................................................................................................... 64 Contacts ........................................................................................................................... 66 Navigating the Contacts App ....................................................................................................................................... 66 Creating a new Contact .................................................................................................................................................. 67 Creating a new contact from an e-‐mail ................................................................................................................... 69 Adding an image ................................................................................................................................................................ 70 Deleting a contact ............................................................................................................................................................. 70 Creating and using Contact Groups .......................................................................................................................... 70 Groups ................................................................................................................................................................................... 72 Creating a new Group ..................................................................................................................................................... 72 Editing, renaming or deleting Groups ...................................................................................................................... 73 Moving a contact to a Group ........................................................................................................................................ 73 Sharing Groups .................................................................................................................................................................. 74 Special Groups ................................................................................................................................................................... 75 Buddies .................................................................................................................................................................................. 76 Recent Addresses ............................................................................................................................................................... 78 Presence status .................................................................................................................................................................. 78 4 PRONTO! LITE USER MANUAL Exporting addresses ........................................................................................................................................................ 80 Importing addresses ........................................................................................................................................................ 80 Chats ................................................................................................................................ 82 Starting a Chat .................................................................................................................................................................... 83 Other ways to start a Chat ............................................................................................................................................ 84 Chatting ................................................................................................................................................................................. 85 Closing a chat ...................................................................................................................................................................... 87 More Chat functions ........................................................................................................................................................ 88 Sending files ......................................................................................................................................................................... 88 Initiating a Call .................................................................................................................................................................. 88 Sending e-‐mails .................................................................................................................................................................. 89 Deleting chat messages .................................................................................................................................................. 89 Creating a Group Chat .................................................................................................................................................... 89 Adding a chat partner to an active chat ................................................................................................................. 89 Starting a Group Chat from a Contact Group ....................................................................................................... 91 Calendar .......................................................................................................................... 93 Navigating the Calendar App ....................................................................................................................................... 93 Basic settings ...................................................................................................................................................................... 94 Creating an appointment .............................................................................................................................................. 95 All-‐Day Event ...................................................................................................................................................................... 97 Recurring Events ............................................................................................................................................................... 97 Attachments ........................................................................................................................................................................ 98 High Priority Event ........................................................................................................................................................... 99 Editing an Event ................................................................................................................................................................ 99 Quickly changing the event duration .................................................................................................................... 100 Changing a series of events ........................................................................................................................................ 101 Appointment Alarms .................................................................................................................................................... 102 Deleting an event ........................................................................................................................................................... 102 Multiple Calendars ........................................................................................................................................................ 103 Creating a new Calendar ............................................................................................................................................ 103 Editing Calendar settings ........................................................................................................................................... 104 Display multiple Calendars ........................................................................................................................................ 105 Attaching an event to a specific Calendar ........................................................................................................... 105 Deleting a Calendar ...................................................................................................................................................... 106 Scheduling appointments and meetings ............................................................................................................. 106 PRONTO! LITE USER MANUAL 5 Creating an appointment with invitations ......................................................................................................... 107 Manage response status for appointments ......................................................................................................... 108 Replying to an invitation ............................................................................................................................................ 109 Sharing Calendars ......................................................................................................................................................... 112 Grant access to a Calendar ........................................................................................................................................ 112 Subscribing to a shared Calendar from invitation e-‐mail ............................................................................ 113 Unsubscribing from a calendar ................................................................................................................................ 114 Subscribing to a shared Calendar without e-‐mail ........................................................................................... 114 Publishing a Calendar .................................................................................................................................................. 115 Exporting calendar data ............................................................................................................................................. 116 Importing event data ................................................................................................................................................... 117 Phone Calls .................................................................................................................... 118 Phone Plugin .................................................................................................................................................................... 118 Receiving a Phone Call ................................................................................................................................................ 118 Making a Phone Call ..................................................................................................................................................... 119 Phone calls with multiple contacts ........................................................................................................................ 120 To call using a phone number .................................................................................................................................. 121 Switching from Phone Call to Chat ......................................................................................................................... 122 File storage .................................................................................................................... 123 Navigating the Files App ............................................................................................................................................. 123 Navigating folders and finding files ....................................................................................................................... 124 Switching views and sorting file lists ..................................................................................................................... 125 Searching for files or folders ..................................................................................................................................... 126 Managing folders ........................................................................................................................................................... 126 Creating a folder ............................................................................................................................................................. 127 Editing folders ................................................................................................................................................................. 127 Renaming a folder ......................................................................................................................................................... 128 Deleting a folder ............................................................................................................................................................. 128 Moving a folder ............................................................................................................................................................... 128 Copying a folder .............................................................................................................................................................. 129 Managing files ................................................................................................................................................................. 130 Uploading files ................................................................................................................................................................. 130 Editing a single file ........................................................................................................................................................ 132 Editing multiple files ..................................................................................................................................................... 132 Viewing files ...................................................................................................................................................................... 133 Downloading files .......................................................................................................................................................... 133 6 PRONTO! LITE USER MANUAL Deleting files ..................................................................................................................................................................... 134 Moving files ....................................................................................................................................................................... 135 Copying files ...................................................................................................................................................................... 136 Sharing files and folders ............................................................................................................................................. 136 Granting read access to files or folders ................................................................................................................ 136 Sharing files and folders with CommuniGate Pro users ................................................................................ 138 Managing subscriptions .............................................................................................................................................. 140 PRONTO! LITE USER MANUAL 7 PRONTO! LITE USER MANUAL CHAPTER 1 Getting started with Pronto! Lite CommuniGate Pro is a comprehensive suite of programs for communication among groups of people using the internet. In one single Web client email, calendar, instant messaging, telephony, videoconferencing and a central file storage are all at your fingertips. This manual gives an introduction to the functions of Pronto! Lite – the Web client for CommuniGate Pro. System requirements With Pronto! Lite you only need three things to use CommuniGate Pro: 1. a webbrowser (find a list of supported webbrowsers in the table below) 2. an internet connection 3. login data provided to you by your CommuniGate Pro service provider Should you wish to use the integrated programs for telephony and video conferencing your computer will need a microphone and preferably a web cam. Which browser do I need? Pronto! Lite supports Google Chrome, Mozilla Firefox, Safari and Microsoft Internet Explorer. The following table gives an overview of the browsers and the recommended versions: Browser Version Google Chrome 37 Microsoft Internet Explorer 10 Mozilla Firefox 32 Opera 24 Safari (Mac OS) 7.1 Android 4.2 iOS 8 8 PRONTO! LITE USER MANUAL Please note: It is safest to use the most current version of your preferred browser. Install Browser-‐Plugin Depending on your browser you will need to install an additional plugin. The plugin adds media capabilities to your browser needed for the voice functions of Pronto! Lite. The plugin installation process is simple, yet it differs from browser to browser. Just follow the messages and instructions on your screen. The setup process for Microsoft Internet Explorer and Windows 7 is as follows: 1. If the plugin is needed you will see the following message after logging in to Pronto! Lite. 2. The browser will then display the following prompt, asking you to install the add-‐ on. Click Install. 3. The plugin installation will ask for your permission to install the program on your computer. Confirm by clicking Yes. PRONTO! LITE USER MANUAL 9 4. If your firewall is enabled the install program will ask you to add a firewall rule allowing network traffic for the CommuniGate plugin to pass your firewall. Accept by clicking Allow access. 5. Installation is finished. You can now start using the telephone functions in Pronto! Lite. First encounter: start application and log in Your CommuniGate Pro service provider has already supplied you with an internet address (URL) for accessing CommuniGate Pro using Pronto! Lite. • Enter the URL in the address bar of your browser. CommuniGate Pro will present the login screen: 10 PRONTO! LITE USER MANUAL • Enter your email address or CommuniGate Pro account name in Account Name. • Enter the provided password in Password. • Click Enter. You can make Pronto! Lite remember your credentials so you do not need to enter them again the next time. Just set the check mark for Remember me on this computer. PRONTO! LITE USER MANUAL 11 When you see the login screen the next time your credentials will already be filled in so you only need to click Enter in order to log in. If you do not wish this to happen any more just remove the check mark before clicking Enter the next time. Warning: This function is a potential security risk. Anyone able to access your computer can log in to your account without needing to know your credentials. Please use this function with caution and in a private environment only. I forgot my password. What can I do? Read on. Forgot my password In case you forgot your password • click on Forgotten Password Recovery in the start-‐up screen of Pronto! Lite. • Enter the account name of your CommuniGate Pro account in the form and click E-‐mail me my Password. 12 PRONTO! LITE USER MANUAL Your password will be mailed to the recovery mail address specified in your account. Instructions for specifying a recovery address can be found below. Getting around: Elements of the user interface Learn to navigate basic areas of Pronto! Lite to find your way around the app quickly. After logging in your are presented with the Pronto! Lite main window. It is divided in three sections: • Navigation bar (left): clicking the buttons in the navigation bar will open the corresponding app: Mail, Contacts, Chats, Phone, Calendar, Call history, File manager or Preferences. • Folders (middle): here depending on the app you are using data or information is organized in folders. • Workspace (right): the content you are dealing with, e.g. e-‐mails or events, is presented on the right hand side. PRONTO! LITE USER MANUAL 13 You start the desired program by clicking the appropriate button in the navigation bar. Toolbars In most of the Pronto! Lite apps a toolbar is displayed at the top. E.g. in the e-‐mail window you will find buttons for answering, forwarding and deleting e-‐mails at the top of the workspace window. The buttons are represented by familiar icons for quick reference. Tipp: Hovering the mouse pointer over a button displays a short explanatory text about the button. 14 PRONTO! LITE USER MANUAL Setting your personal preferences You can immediately start using CommuniGate Pro after your first login in order to write e-‐mails or manage events. It is, however, recommended, to first edit some basic settings: • Complete your CommuniGate Pro user profile • set language and time zone • change your password Editing your personal information Your profile communicates who you are to other users you communicate with. It features your photo and basic information such as your professional title and contact details. In order to update your profile data 1. click the picture in the left upper corner and 2. click Edit profile. The picture in your profile can be seen by other CommuniGate Pro users you are connected with. To update the picture 1. click Upload. PRONTO! LITE USER MANUAL 15 2. Choose a picture from your computer. 3. Click Open. The selected image will be uploaded and shown in your profile. Please note: Your profile image must be a JPG, PNG or GIF file. To edit your name and your contact details 1. click into the appropriate field of your profile, 2. edit and complete the data as desired. When you are finished click Save. To discard the changes click Cancel. After saving your changes your new profile will be shown in the Contact window. Click x to close it and return to the main window. 16 PRONTO! LITE USER MANUAL Change language and time zone To change the language that Pronto! Lite uses 1. click Preferences and select General. 2. Choose your preferred language from the Language list. To change the time zone PRONTO! LITE USER MANUAL 17 • select your time zone from the list in the Time Zone section. To confirm the changes click Save All Settings. Why do I have to set the time zone? The time zone setting is important because then the correct time of day can be displayed, e.g. when receiving or sending e-‐mails or choosing events in the calendar. Sounds Pronto! Lite will play a sound every time you receive a new message or for alerting you accoustically about a current event. To deactivate sounds 1. click Preferences, 2. click General, 3. set the Mute Sounds switch to ON by clicking it once. 18 PRONTO! LITE USER MANUAL Change password It is recommended that you change the initial password after logging in for the first time: • Click Preferences and select Password. • Enter your password in Current Password. • Enter your new password in the field below and repeat this in Reenter Password • Complete changing your password by clicking Save All Settings. PRONTO! LITE USER MANUAL 19 Please note that your service provider may have set requirements for password length and complexity. Should your newly chosen password not comply with these requirements it will be rejected and you will have to choose a different password. Important: Your password is relevant for the security of your account and the data contained in it. Therefore please pick a secure password, i.e. one that cannot be guessed easily. While already in the Password Preferences window you can also set an e-‐mail address for recovery of your password in case you forget it. Please specify an address that is different from your address you use in Pronto! Lite. When you use the Recover Forgotten Password function your password will be sent to the e-‐mail address you specify in the preferences. Logging out To end your current CommuniGate Pro session log out from the system • click on your profile picture and then • click Log Out. Important: Always log out this way, especially when using a publically accessible computer. Otherwise someone else might have access to the data in your account. 20 PRONTO! LITE USER MANUAL Closing the browser or browser tab does not close your current session automatically. You always have to choose Log Out to do this. PRONTO! LITE USER MANUAL 21 PRONTO! LITE USER MANUAL CHAPTER 2 E-‐mails: Reading, composing, sending and managing messages In this chapter you will be introduced to the Pronto! Lite Mail App. In the first part you will learn about the basic functions for reading, writing and answering e-‐mails. The second part will cover more advanced options like signing and encrypting e-‐mails, subscribing to mail folders and using advanced preferences. Basic settings Depending on the basic settings by your CommuniGate Pro service provider you can start using the e-‐mail app immediately after your first log in. It is, however, recommended to first check your account configuration and adjust your app preferences if needed. Time Zone In Preferences / General check that the time zone is set correctly (please refer to the instructions in chapter 1). Identities An identity is a combination of Name and E-‐Mail address. You can have a number of different identities from which you can choose when sending an e-‐mail. Depending on the initial settings by your service provider several different identities may have been provided for your account. In Preferences / Mail / Identities you can add identities and change existing ones. To edit an existing identity • click Edit (cog wheel icon) of the identity you want to change. • Edit the identity. • Complete with Save All Settings. To add an identity • Click +. • Enter a name and the e-‐mail address to be associated with the identity. • Complete with Save All Settings. 22 PRONTO! LITE USER MANUAL Please note that depending on the policies implemented by the service provider you will be able to specify only e-‐mail addresses for domains that have been whitelisted by the provider. Signature Pronto! Lite can attach your signature automatically to every e-‐mail you send. You will be able to edit the signature when composing the e-‐mail. To specify your signature • go to Preferences / Mail. • Enter your signature text in Signature. • Save by clicking Save All Settings. Please note: HTML tags are not allowed in the signature text. Navigating the Mail app The Mail app is divided in to three sections: • Left pane: your mail folders • Middle pane: list of e-‐mails contained in the current mail folder • Right pane: e-‐mail content PRONTO! LITE USER MANUAL 23 Each window pane has a toolbar at the top with different buttons. In the following sections you will learn how to use them. To allow for more space for reading and display e-‐mails you can hide the folder pane: • Click the left arrow at the top of the middle pane. • To unhide the folder pane click the arrow again. To have more room for displaying the middle pane containing the list of e-‐mails • click the right arrow at the top of the middle pane. 24 PRONTO! LITE USER MANUAL The pane containing the mail view will be hidden. • You guessed it: to unhide the right pane click the arrow again. Composing and Sending E-‐Mails To compose an e-‐mail • click Compose at the top of the right pane. The Mail Composer window will open. PRONTO! LITE USER MANUAL 25 To compose the e-‐mail 1. specify the sender (“From”), 2. specify one or more recipients (“To”), 3. enter a subject, 4. write the e-‐mail text, 5. click Send to send the e-‐mail. Sender (From): In From your default identity will already be selected which will be okay for most instances. If you want to use a different identity click on the arrow on the right to select it. Recipient (To): Specify one or more addressees you want the mail to send to. • You can select the recipient addresses from your address book by clicking the + icon on the right. 26 PRONTO! LITE USER MANUAL • Clicking on a contact in the list copies the address to the To field. Clicking into the mail composer window closes the address list. For a quicker approach you can • just start typing the address or the name of the recipient in the To field. A list of matching addresses from the address book will be displayed from which you can select the desired address by clicking it. PRONTO! LITE USER MANUAL 27 If the address is not listed in the address book you can just type it into the To field. Such an address will be marked in red color. To have a recipient receive your e-‐mail as CC or BCC click the + button and choose Cc or Bcc. A new address field will open where you can enter the recipient address(es). If you want to remove a recipient from your e-‐mail click on the x right next to the name: Subject: Enter a subject in the Subject field. E-‐Mail Text: Enter the e-‐mail text in the text field. To apply rich formatting to your text or add images you can use the tools from the toolbar located below the Subject field. Choose from the formatting tools by selecting text and clicking the appropriate icon (left to right): • Formatting style (normal, heading, etc.) 28 PRONTO! LITE USER MANUAL • Font color • Bold • Italics • Underline • Strikethrough / deleted • Align left • Center text • Align right • Justify text • Unordered list – bullet points • Ordered list -‐ numbered • Outdent paragraph • Indent paragraph • Insert link • Insert image • Insert / format table To hide the toolbar click Plain Text. To unhide it click Rich Formatting. Tipp: To hide the toolbar by default set Use HTML compose to OFF under Preferences / Mail. Attach files: You can send files as attachments. To attach a file to your e-‐mail • drag the file into the Mail Composer window and drop it there. • Alternatively click the Attach file button (staples icon) at the top of the compose window, select the file from your computer and confirm by clicking Open. All currently attached files will be shown below the Subject field. To remove an attached file click the x icon next to the file name. PRONTO! LITE USER MANUAL 29 Send e-‐mail: Once you are done composing your e-‐mail send it by clicking the Send button. The e-‐mail will be sent and a copy of it will be placed in the Sent folder. To change this folder in Preferences / Mail edit the Save Sent Messages in setting. Composing e-‐mails the smart way Pronto! Lite offers some helpful functions for composing and editing e-‐mails. Auto save: An e-‐mail that is being composed will be saved automatically every 5 minutes by default. A message box will appear on your desktop every time the save action is performed. You can save the e-‐mail at any time yourself by clicking the Save button. When you do this your e-‐mail will be saved in the Drafts folder until you send it or delete it. You can specify a different folder for saving drafts in Preferences / Mail / Store Drafts in. Cancel e-‐mail: In order to cancel the e-‐mail you are currently composing • click the x icon in the upper left corner of the Mail Composer window. A message will appear asking whether you want to Save the message (in the drafts folder) or if it should be Discarded (permanently deleted). 30 PRONTO! LITE USER MANUAL • Click Discard to delete the e-‐mail and close the composer window. Working with drafts: If you have previously saved an e-‐mail without sending it you will find it in the Drafts folder from where you can continue editing it. Simply • select the e-‐mail in the middle pane and then • click the Edit Draft button. The e-‐mail will be opened in the Mail Composer window where you can edit and send it in the usual way. Hide Composer window: In some cases it may be necessary to interrupt editing an e-‐mail, e.g. because you need to read another e-‐mail or for accessing a mail folder. To do this • click the Minimize button. The Composer window will be closed. PRONTO! LITE USER MANUAL 31 • Open it any time by clicking Restore. Options for sending e-‐mails The Mail Composer window contains several advanced features you can use for e-‐mail communications. Signaling high priority You can let your recipient(s) know that your e-‐mail is very important. • Click the exclamation mark icon which is located next to the Subject field. The icon will turn red. To switch off priority signaling click the icon again. 32 PRONTO! LITE USER MANUAL Requesting a notification from recipients You can request a notification from the recipient(s) when they have received your e-‐ mail and/or when they have read it. • Click Notify (bell icon) and select the notification option(s): o Notify when Delivered (e-‐mail was received) o Notify when read (e-‐mail was opened in the Mail App) • To unselect one of these options click it again. The checkmark will be removed. The notification will be sent to you as an automatic e-‐mail from the recipient(s). Signing e-‐mails When sending e-‐mails you can sign them electronically by applying your digital signature. This provides verification of the authenticity of you as the sender, thereby helping prevent message tampering. To digitally sign the e-‐mail PRONTO! LITE USER MANUAL 33 • click the check mark icon at the top of the Mail Composer window. Upon sending the e-‐mail you will be asked for the password that protects your digital certificate used for signing. • Enter your password. • Click Send signed. In case you do not want to apply the digital signature after all just click Send unsigned. 34 PRONTO! LITE USER MANUAL Note: To be able to digitally sign e-‐mails a certificate has to be added to your account by either generating it or importing an existing one. Please refer to the Secure E-‐Mail section of this chapter for a description of the involved process. Encrypting e-‐mails Pronto! Lite enables you to send your e-‐mails securely be encrypting them. Only recipients owning your public key will be able to decrypt and read your e-‐mails. For this to work you need a digital S/MIME certificate attached to your account and you have to share your public key in advance with the recipients that should read your secure mails. Note: To be able to encrypt e-‐mails an S/MIME certificate has to be added to your account by either generating it or importing an existing one. This process is described in the Secure E-‐Mail section of this chapter. To encrypt an e-‐mail • click the lock symbol next to the Subject field. The lock will display a closed state symbolizing that the e-‐mail will be encrypted upon sending. After clicking the Send button you will be asked for the password securing the digital certificate. Proceed in the same fashion as when signing an e-‐mail (described in the previous section). PRONTO! LITE USER MANUAL 35 Reading E-‐Mails Navigating the Mail App The Mail App displays your e-‐mails and mail folders similarly to many other mail programs: • The left pane contains all your mail folders in which you can save your e-‐mails. Click a folder in order to ... • ... display all e-‐mails saved in the selected folder to be shown in the middle pane. • Click on an e-‐mail in the middle pane to view its content in the right pane Tip: When you open the Mail App the first mail in the inbox folder will be automatically shown. If you do not want this to happen you can change this behavior in Preferences / Mail by setting Automatically select message to OFF. You can sort the list of mails in the middle pane whenever needed. • Click the arrow icon and choose how you want to sort your list of messages. You can choose to have an ascending or descending order by selecting the appropriate entry from the sorting list. 36 PRONTO! LITE USER MANUAL Incoming e-‐mails Whenever you receive an e-‐mail an alert box comes up. From this box you can perform these actions: • Close the box by clicking the x in the left upper corner. • Jump to the new message by clicking the subject line. • Mark the message as read by clicking the Mark Read button. • Delete the message by clicking the Delete button. After reading the e-‐mail the alert box will be closed automatically. Tip: You can disable the alert box in Preferences / Mail by setting Notify about new mail to OFF. Unread e-‐mails PRONTO! LITE USER MANUAL 37 New e-‐mails have the status Unread. Unread e-‐mails are printed in bold letters in the middle pane (subject line). The number of currently unread e-‐mails is shown in the navigation bar on top of the Mail App button. The folder pane shows the number of unread e-‐mails behind the folder title. When clicking on an e-‐mail to read it its status changes automatically to Read. Tip: In Preferences / Mail / Mark as read after change the time after which the e-‐mail changes the state to read after clicking it. The default is 2 seconds. You can change the read status of an e-‐mail yourself by clicking Toggle Read Status (letter icon) in the toolbar. This button acts as a toggle: clicking it again changes the state to the opposite. To quickly see only all unread e-‐mails • click Show Unread (envelope icon) in the toolbar of the middle pane. All mails marked as read will be hidden. • To make all mails visible again click again on the envelope icon. 38 PRONTO! LITE USER MANUAL Using e-‐mail options and states Incoming e-‐mails can have different characteristics; they can contain attachments or signatures or have a high priority setting. In this section you will learn how to deal with these options. E-‐Mail with attachments Attachments are included below the subject line and displayed as an icon per file. • Click on an attachment to open it. Forwarded E-‐Mails E-‐Mails that have been forwarded to you are included in individual collapsed boxes in the mail. • To read the content of a forwarded e-‐mail click on the arrow icon in the box. The e-‐mail content will be expanded so you can read it. • To collapse the content box by clicking the arrow again. PRONTO! LITE USER MANUAL 39 Prioritized E-‐Mail An e-‐mail that has been marked as important by the sender will contain a red exclamation mark shown next to the subject. Signed E-‐Mail An e-‐mail that was signed by the sender with a valid certificate will be marked with two visual elements: • Blue check mark next to sender’s address. • The content is enclosed in a green box with the title Signed Data. 40 PRONTO! LITE USER MANUAL Reading Encrypted E-‐Mails When receiving an encrypted e-‐mail the content will be hidden. • Enter your encryption password to unlock the e-‐mail. The e-‐mail content will be decrypted. PRONTO! LITE USER MANUAL 41 An encrypted e-‐mail is marked by a lock symbol in the mail window. To have encrypted e-‐mails decrypted automatically you have to include the certificate of the sender in your address book: • Click on the mail address of the sender. • Click Add Certificate. A decrypted e-‐mail is visualized by an opened lock icon and the title Encrypted. 42 PRONTO! LITE USER MANUAL Printing e-‐mails • To print an e-‐mail click on the Print button. The e-‐mail will be opened in a new browser window with the print dialog of the browser ready for printing. • Click OK to print the page. After printing you can close the browser window containing the print version of the e-‐ mail. Replying an e-‐mail • To reply an e-‐mail click on the Reply button (arrow left) in the toolbar. • To reply to all recipients click Reply to All (double arrow left). • Write your message and click Send to send your reply. Forwarding e-‐mails To forward a single e-‐mail • click the Forward button (arrow right). • Select the recipient(s), change the subject if needed, enter text if needed. • Click Send to forward the e-‐mail. To forward several e-‐mails at once follow these steps: PRONTO! LITE USER MANUAL 43 1. Select all e-‐mails you want to forward by setting the check mark for each mail in the middle pane. 2. Click the Forward button in the toolbar of the middle pane. 3. The next steps are identical to forwarding an individual e-‐mail . Tip: The Mail App will by default send the forwarded e-‐mails in an inline style. You can change this behavior so forwarded e-‐mails are handled as attachments: Set Preferences / Mail / Forward messages inline to OFF. Deleting e-‐mails By default the Mail App will move deleted e-‐mails into the Trash folder. 1. To delete an e-‐mail click the Delete button (trash can icon). 2. The e-‐mail will be moved into the Trash folder. To clear the Trash folder, 1. Select Trash. 2. Click the Empty Trash button in the toolbar. 44 PRONTO! LITE USER MANUAL Instead of moving the deleted mails to the Trash folder you can have the Mail App simply mark e-‐mails as deleted. To configure this behavior go to Preferences / Mail / Trash Management and change Message Delete Method to Mark. Deleting messages will now work like this: 1. To delete a message click the Delete button (crossed out envelope icon). 2. The message will be crossed out in the folder but still visible. Tip: To undelete the message simply click the Delete button again. PRONTO! LITE USER MANUAL 45 • To purge all deleted e-‐mails from a folder click Purge Deleted. More options for trash management You can have the Mail App remove all deleted messages directly after hitting the Delete button: Set Preferences / Mail / Trash Management / Message Delete Method to Immediately. If you have chosen the Trash folder option you can change the interval in which the Trash folder will be emptied automatically when logging out from Pronto! Lite: Change the interval in the On Logout Remove from Trash if Older than setting. 46 PRONTO! LITE USER MANUAL You can have Junk e-‐mails moved to a folder of your choice and removed automatically after a certain time – see section Junk Mail Control for editing these settings. Using folders Folders help you to maintain your e-‐mails in a structured and orderly fashion so you do not get lost even with many messages. You can add, delete and rename folders whenever you like. Your Mail App contains several important folders by default. INBOX: All incoming e-‐mails will be put here automatically. Sent: All e-‐mails you sent will be saved as a copy in this folder. Drafts: E-‐mails that are saved when being edited or that you explicitly save as drafts will be found in this folder. You can continue editing these e-‐mails at any time. Trash: All deleted messages will be moved into this folder if you selected the Trash folder management option (please refer to the previous section for instructions). Junk: All e-‐mails identified as spam by the CommuniGate Pro system will be moved into this folder. You can rename all inbuilt folders and delete all but the INBOX folder. It is recommended to not delete any default folders. Creating a new folder To create a new folder, • click + in the toolbar of the folder pane, 1. click Create Folder, PRONTO! LITE USER MANUAL 47 2. enter the folder name, 3. select the folder location from the select box: either below an already existing folder or on top level (choose root). 4. Click Save. Moving e-‐mails to folders You can move e-‐mails individually or several at once to a different folder. To move a single e-‐mail, 1. click Move into… in the toolbar of the mail window, 2. select the target folder from the select box. 48 PRONTO! LITE USER MANUAL To move several e-‐mails at once into a different folder, 1. select the e-‐mails in the middle pane, 2. click Move into… from the toolbar of the middle pane, 3. select the target folder from the select box. All previously selected e-‐mails will be moved into the selected folder. Renaming folders You can rename any folder. PRONTO! LITE USER MANUAL 49 1. Click on the folder to be renamed. 2. Click Edit in the toolbar of the folder pane. 3. Change the folder name. 4. Click Save. Moving a folder You can move a folder into another folder. 1. Click on the folder to be moved. 2. Click Edit in the toolbar of the folder pane. 50 PRONTO! LITE USER MANUAL 3. Select the new location from the Folder location select box. 4. Confirm by clicking Save. Deleting a folder You can delete folders. 1. Click on the folder to be deleted. 2. Click Edit in the toolbar of the folder pane. 3. Click Delete. 4. Confirm by clicking Delete. Important: The folder and all messages contained in it will be deleted unrecoverably by this operation! Searching e-‐mails You can perform full text searches in individual mail folders: 1. Select a folder. 2. Enter the search string in the Search box. 3. Hit Enter. PRONTO! LITE USER MANUAL 51 The search will look for matching content in subjects, e-‐mail content and addresses. All found e-‐mails will be listed below the Search box. FAQ: Why is no Search box shown in the folder I selected? One or more e-‐mails have previously been selected (check mark in the check box next to the subject). Deselect the e-‐mails by clicking the Toggle Selection button in the folder toolbar and perform the search as described above. Managing several e-‐mails at once The middle pane containing the mail folders supports mass editing functions so you can work on several e-‐mails at once, e.g. by changing their read status, deleting or forwarding more than one e-‐mail at a time. To prepare for mass editing • select the e-‐mails by setting the check mark for each e-‐mail. • click Select all to have all mails in the folder selected at once. Or 52 PRONTO! LITE USER MANUAL • To unselect all e-‐mails click the Select all button again. To use the options for mass editing click the appropriate button in the toolbar of the middle folder pane. Delete selected e-‐mails 1. Select all e-‐mails you want to delete. 2. Click Delete. Forward e-‐mails 1. Select all e-‐mails you want to forward. 2. Click Forward. PRONTO! LITE USER MANUAL 53 Change read state of e-‐mails 1. Select all e-‐mails you want to change to a different Read state. 2. Click Toggle Read Status. Move e-‐mails to other folder 1. Select all e-‐mails you want to move. 2. Click Move into.... Flag e-‐mails 1. Select all e-‐mails you want to flag. 2. Click Toggle Flag Status. FAQ: Why would I want to flag e-‐mails? Read on. Managing and finding important e-‐mails If you have hundreds or thousands of e-‐mails in your mailbox it can be difficult to access the really important messages quickly. To help you with this the Mail App lets you flag individual e-‐mails. Flagged e-‐mails can then be highlighted by a click of a button. Flagging a single e-‐mail: • Click Toggle Flagged Status (star icon) in the toolbar of the mail window. 54 PRONTO! LITE USER MANUAL A flagged mail will show an orange star next to the subject line, and the toggle button will change to orange color. Flagging many e-‐mails at once 1. Select e-‐mails by setting the check mark. 2. Click Toggle Flagged Status (star icon) in the toolbar of the middle pane. All selected e-‐mails will be flagged. You will easily recognize them in the folder by their orange star mark. To highlight all flagged mails so all the other mails are hidden in the current folder • click Show Flagged (star icon). The button will change to orange color. • To unhide the e-‐mails without flag click Show Flagged again. PRONTO! LITE USER MANUAL 55 Advanced e-‐mail operations In this chapter you will learn about more advanced e-‐mail functions of Pronto! Lite such as Vacation messages, using mail rules and shared mail folders. Vacation message Pronto! Lite can send automatic replies to incoming e-‐mails when you are away, e.g. on vacation or traveling. To activate a Vacation message 1. go to Preferences / Mail / Vacation message, 2. set Vacation message enabled to ON, 3. enter the text to be sent as automatic reply in the Text box. 56 PRONTO! LITE USER MANUAL 4. Select the date when the Vacation message should be disabled in Ends. 5. Click Save all settings. Using Mail Rules Rules are like a digital servant: they perform automatic actions on incoming mails quietly in the background. PRONTO! LITE USER MANUAL 57 With rules you can filter e-‐mails containing certain words or strings in the body or the subject, you can move e-‐mails automatically to certain folders, reject e-‐mails from specific recipients or have them deleted automatically. You can specify as many rules as you like. Creating Rules In Preferences / Mail / Rules you can create, edit and delete rules and arrange the order in which they are executed. • To create a new rule click +. • To edit an existing rule click Edit Rule (cog wheel icon). • To delete a rule click Delete (trash can icon). • To set the order in which the rules are executed click the arrow left of the rule name and select the appropriate number. Always remember to click Save All Settings after you have finished changing settings. Please note that all rules will be executed for all incoming e-‐mails. The execution will take place in the order you specified. Creating a Rule 1. To create a new rule click +. 2. Enter a name for the rule. 3. In the section Applies To select one or more conditions each incoming mail will be checked for. Only the e-‐mails that meet these conditions will be processed by the rule. To add more conditions, click +. a. A condition can apply to these elements of an e-‐mail: Subject, From, Sender, To, CC, Reply-‐To. 58 PRONTO! LITE USER MANUAL b. Enter the content that should be matched. You can match using these operators: is, is not, in, is not in. 4. Define the Action that should be performed on e-‐mails that match the conditions set up in the Applies To section. You can combine different actions performed on an e-‐mail choosing from: Store in, Stop processing, Discard, Reject with, Mark, Add Header. For some actions you have to specify a target, e.g. the action Store In needs a folder where to store the matching messages in. 5. Optionally enter a descriptive text in Description. 6. Confirm your settings by clicking Save Rule or discard the rule with Cancel. Sharing Mail Folders You can share folders with other CommuniGate Pro users. All mails in the folder will be available to the persons you are sharing with. Depending on the permissions other users can also save mails to this folder or delete messages. To share a mail folder with other users, 1. select the folder to be shared, 2. click Edit (cog wheel icon). 3. In section Access Control List add all users you want to share the folder with: Type their name or mail address and select from the list. 4. Select the desired permission for each user by choosing from the select box: Read, Write, Admin, Custom. With the Custom option you can combine different options in greater detail: Lookup, Select, Seen, Flags, Insert, Create, Delete, Admin. PRONTO! LITE USER MANUAL 59 5. Confirm with Save. After saving the sharing options each user will receive an e-‐mail informing them about their access to the shared mail folder. They have to actively accept by clicking the Subscribe button in the mail received (refer to the next section). Tip: If you are sharing with many users and you want to grant different permissions to them do so by grouping the users by their permissions. To do this enter all users with the same permission on one line, then continue with the next group. Subscribing to a shared folder When you receive access to a shared folder, activate it with these steps: 1. Click Subscribe in the activation e-‐mail. 60 PRONTO! LITE USER MANUAL 2. Confirm sharing access by clicking Save in the Folder Subscription dialog. After that you will see the shared folder in your folder pane. On the top folder level there will be a folder with the name of the person sharing the folder. Beneath this folder you will find all folders shared by this person. Instead of using the e-‐mail to confirm the subscription you can 1. click + in the toolbar of the folder pane. 2. Choose Folder Subscription. 3. Type the e-‐mail address or name in Account Name of the user who is sharing the folder, 4. select the folder to include in your folder list, 5. and confirm with Save. PRONTO! LITE USER MANUAL 61 Shared folders are visualized by a chain icon. Depending on the permission granted to you shared folders behave like normal “local” folders. Therefore you can • select the folder to show its content; • move e-‐mails into the folder (requires write permission); • delete e-‐mails from the folder (requires write permission). If you do not need the folder anymore you can simply delete it. Unsubscribing from a shared a folder In order to cancel a folder subscription begin in the same way as with subscribing to a folder: 62 PRONTO! LITE USER MANUAL • Click +, 1. select Folder subscription, 2. type the e-‐mail address or name of the user who is sharing the folder. 3. Remove the check marks from all the folders you want to unsubscribe from. 4. Confirm by clicking Save. The folder will be removed from you folder list. Using Mail Encryption and Signing What is Secure Mail? S/MIME (Secure Multi-‐Purpose Internet Mail Extensions) is a widely used secure method for communicating securely with e-‐mail. It is built into many modern mail programs, web browsers and also into CommuniGate Pro and Pronto! Lite. S/MIME provides cryptographic security services for electronic messaging applications: authentication, message integrity and non-‐repudiation of origin (using digital signatures), and data confidentiality (using encryption). How does Secure Mail work? S/MIME works as a paired-‐key-‐system with a public and a private key. The private key is held only by its owner, the public key is shared with contacts. You and the persons you want to exchange secure mails with each need their own S/MIME digital certificate that contains their public and private key. In this system, each participant has two separate keys: a public encryption key and a private decryption key. When someone wants to send you an encrypted message, he or she uses your public key to generate the encryption algorithm. When you receive the message, you use your private key to decrypt it. For the process of encrypting and decrypting to work you have to exchange public keys with your communication partners first. To give someone your public key, it is only necessary to send him or her an email signed with your certificate. Activating certificate for encrypting messages To be able to encrypt e-‐mails you need an S/MIME security certificate. PRONTO! LITE USER MANUAL 63 You can either import an existing one into your account or generate one in the Mail App Preferences. Import existing certificate 1. Go to Preferences / Mail / Secure Mail. 2. Expand the Import Key and Certificate section by clicking the arrow. 3. Enter the password with which the certificate should be protected in your account. Reenter the password. 4. Enter the password of the certificate in File Password. 5. Click Import and select the certificate file (.pfx). The certificate will be added to your account. You can verify the certificate details in Preferences / Mail / Secure Mail in the section S/MIME Certificate. Generating a certificate Use this option if you do not yet have a certificate. 1. Go to Preferences / Mail / Secure Mail. 2. Expand the Create section. 3. Enter the password with which the certificate should be protected in your account. Reenter the password. 4. Click Apply. 64 PRONTO! LITE USER MANUAL The certificate will be generated and added to your account. You can now begin encrypting and signing e-‐mails. Managing certificate for Secure Mail Go to Preferences / Mail / Secure Mail to manage certificate details. Change secure mail password This password is needed for encrypting or signing new e-‐mails. It protects your secure mail certificate. 1. Expand the section Modify Secure Mail Password. 2. Enter the new password. Reenter it. 3. Save All Settings. Certificate details Information about your current certificate can be found in the section S/MIME Certificate. PRONTO! LITE USER MANUAL 65 Exporting Certificate You can export your certificate as .pfx file, e.g. to use it in another mail program. 1. Expand the section Export Key and Certificate. 2. Enter your certificate password. Reenter the password. 3. Click Export. The certificate file will be downloaded. Typically it will be saved in the Downloads folder, depending on your browser and its configuration. Removing certificate from your account 1. Expand the section Remove Key and Certificate. 2. Enter the File Password. 3. Click Compare with File and Delete. 4. Select the file from your computer and click OK. 66 PRONTO! LITE USER MANUAL PRONTO! LITE USER MANUAL CHAPTER 3 Contacts In this chapter you will be introduced to the Contacts App. The Contacts App is your online address book. It helps you to find a person and reach out to them by e-‐mail, phone or a chat. The address book is an integral part of most other Pronto! Lite apps: it is needed when sending e-‐mails, connecting to a person using the Phone App or creating appointments in the Calendar App. E.g. when you start typing a recipient address in the Mail App (see Chapter 2) a list of matching recipients will be displayed from the address book stored in the Contacts App. The Contacts App is also the place to check the current personal online status – called presence -‐ of your contacts. Navigating the Contacts App To open the Contacts App click on Contacts in the Navigation bar. The app window is divided into two sections: • Contact Groups (left pane): Groups help you to divide your contacts into lists • Addresses (right pane): List of all addresses stored in the current group. To open up an address and display its details, PRONTO! LITE USER MANUAL 67 1. select the appropriate Group in the left pane, 2. click on the contact in the right window. The selected contact will be displayed in the Contact popup window. If you have many addresses stored in the Contacts App the search function will help you retrieve an address quickly: 1. Click into the Search box. 2. Enter a search string. You can search for all details of a contact: Name, postal address, mail addresses, phone number etc. 3. Hit Enter. All matching addresses will be listed in the right pane. Creating a new Contact To create a new contact, 1. select the group you want to add it to in the Contacts pane on the left, 2. click + in the toolbar of the right pane, 3. select New Contact. 68 PRONTO! LITE USER MANUAL 4. Fill in the necessary information in the appropriate fields. 5. Confirm by clicking Save. To discard the contact click Cancel. Things to know about the contact details you can store in the address book: • There are no mandatory fields. Enter only the information you need for the contact you are editing. Please bear in mind, however, that at least an email-‐ address is needed to be able to connect to the person using Pronto! Lite. • File As is a field that will automatically be combined from First Name and Last Name. It is used for displaying the contact in the Contact App and everywhere addresses are used, e.g. when selecting recipients in the Mail Composer window (Chapter 2). • Every time you enter a new e-‐mail address or phone number a new field will be added below so you can add more addresses or numbers. You can add as many e-‐ mail addresses and phone numbers as needed. • A contact can have several postal addresses. Click Add New to add more postal addresses. PRONTO! LITE USER MANUAL 69 Creating a new contact from an e-‐mail This is an easy way to create a new contact. 1. Click on the recipient’s e-‐mail address in the Mail App. 2. Click Create New Contact or Add to Existing Contact. 70 PRONTO! LITE USER MANUAL 3. Complete the address information in the contact window and click Save. Adding an image You can add an image to a contact. 1. Open the contact and click Edit. 2. Click Upload. This button is located on top of the image section. 3. Select the image from your computer and click OK. The image has to be of the type JPG, PNG or GIF. To remove an existing image click Clear. • Save all changes by clicking Save. Deleting a contact 1. Select the contact. 2. Click Edit. 3. Click Delete at the bottom of the Edit Contact window. Creating and using Contact Groups Contact Groups are lists of contacts. You can group certain contacts in lists which helps you to • send an e-‐mail to all group members, • have a chat with all members of a group, • hold a telephone conference with the members of a group. To create a Contact Group, PRONTO! LITE USER MANUAL 71 1. select the group in the left pane you want to add the Contact Group to . 2. Click + in the toolbar of the right pane. 3. Click New Contact Group. 4. Enter a name for the Contact Group. 5. Add all contacts to the Group – either by typing the name of the contacts or by selecting them from your address book. 6. Complete creating the Contact Group with Save. To use the Contact Group find it in the right pane and then click the corresponding icon for the desired communication channel: • Click the E-‐Mail icon to send an e-‐mail to all members of the group. • Click the Phone icon to call all members of the group. • Click the Chat icon to invite all members of the group into a chat. You can also contact a member individually by opening up the Contact Group and selecting one of the communication channels from the dropdown next to the name of the member. 72 PRONTO! LITE USER MANUAL Groups Groups are basically folders in your address book: You can use them to group your contacts in separate folders. You could e.g. have a folder for business contacts and one for private contacts. You can create as many folders (groups) as you like. Your account contains several groups by default: • Buddies: Your chat contacts. • Contacts: Default group for contacts. • Recent Addresses: All addresses recently used but not contained in Contacts are automatically collected here. Please refer to section Special Groups for information about Buddies and Recent Addresses. Creating a new Group You can create as many Groups as you like. Groups can also be created inside existing groups. PRONTO! LITE USER MANUAL 73 1. Click + in the Groups window pane. 2. Type a Group (folder) name. 3. Select the Folder location from the drop down. Choose Root if you want to place the new folder on the top level. 4. Confirm by clicking Save. Editing, renaming or deleting Groups To edit a Group, 1. click on the Group name from the list, 2. click Edit (Cog wheel icon) in the toolbar of the left pane. 3. Edit the settings and confirm with Save. To delete a group • click Delete (trash can icon) and confirm the action. Warning: All contacts contained in the Group will be deleted, too! Moving a contact to a Group You can move any contact to any Group (except special groups): 1. Open the contact. 2. Click Edit. 3. Click Move into.... 4. Select the Group you want to move the contact to from the list. 74 PRONTO! LITE USER MANUAL Sharing Groups You are already familiar with sharing e-‐mail folders with other CommuniGate Pro users. Much in the same fashion you can also share Contact folders. Sharing enables you and the people you share with to have common lists of contacts that are kept and edited in one central place: when an address is added to a shared contacts folder it automatically becomes visible in the Contacts App of the users who share this folder. To share a Group (folder), 6. click on the folder you want to share. 7. Click Edit. PRONTO! LITE USER MANUAL 75 8. In the section Access Control List add all users that you want to give access to the folder: Either type their name or mail address or select them from the address book. 9. Select the access right each you want to grant: read, write, administration, custom. 10. Confirm by clicking Save. To subscribe to a folder that has been shared with you, • click the Subscribe button in the e-‐mail you have received informing you about the sharing of a folder. Or • click + in the left Group pane, click Folder Subscription, enter the account name or e-‐mail address of the user who is sharing their folder with you, set the checkbox for the shared folder and confirm with Save. Special Groups Your account contains several special groups that have been created automatically for you and which you cannot delete. 76 PRONTO! LITE USER MANUAL Buddies Buddies are special contacts. Contacts with Buddy status can share and see their personal presence status which facilitates real time communications by chat and telephone. To establish Buddy status you have to request it from the other user. Once this request has been confirmed you both will be able to see each other’s presence status. Adding a Buddy 1. Create a new contact in the Buddies folder. Specify the e-‐mail address of your future buddy and click Save. 2. Your contact will receive a Contact request by e-‐mail. After they confirm your request you will be able to see their current presence status in your Buddy folder list. As long as your contact has not confirmed your request their contact will be shown in strikethrough fashion to indicate you are not connected as buddies yet. Creating a Buddy from an existing contact To establish Buddy status with an existing contact, 1. select the contact. 2. Click Edit. 3. Click Request Presence. Then wait for confirmation as described above. PRONTO! LITE USER MANUAL 77 Confirming a Buddy request When one of your contacts requests Buddy status you will receive an e-‐mail message with their request. • To confirm the request click Accept. This will create a new contact in your Buddies folder where you can see the presence of your contact. • To deny the request, click Decline. 78 PRONTO! LITE USER MANUAL Recent Addresses Contacts you were recently in touch with over e-‐mail, chat or voip and who have not yet been saved in your address book will automatically be listed in the Recent Addresses special folder. You can find it below the Simple Address Books root folder. You can create Contacts from these addresses or add them to an existing contact with just two clicks: 1. Click on the address. 2. Click + and choose New Contact or Add to Existing Contact. Presence status In your list of contacts the personal presence status of each contact like Online, Offline or Busy will be indicated. This helps you to determine at a glance if a person is reachable at the moment. PRONTO! LITE USER MANUAL 79 Your own presence status is shown in the profile image in the top left corner of the Pronto! Lite window. To change your status 1. click on your profile image. 2. Pick a status from the list by clicking it. In addition you can change the status text by typing your own status message at the bottom of the window. When you are done press Enter. In some cases your presence status will be updated automatically: • Away will be shown after you have not been active for some time in Pronto! Lite. After you start working again it will automatically change back to Online. • Invisible will be shown to your contacts when you log off from Pronto! Lite. 80 PRONTO! LITE USER MANUAL • On the Phone will be set when you are using the Phone App. Exporting addresses You can export addresses from the Contacts App. The export will create the widely used VCard file format. You can use the resulting file to import the addresses in a different program saving you from having to type all addresses again. To export addresses, 1. select the group from which you want to export addresses. 2. Click on More (cog wheel icon) in the toolbar of the right pane. 3. Select the file format – either VCard 2.1 or VCard 3.0 – by clicking the appropriate button. The file containing the addresses will be downloaded in the browser. Please note: Contact Groups will not be exported. Importing addresses You can import addresses. You will need an address file in the VCard format. To import addresses, 1. select the group you want to import addresses into. 2. Click on More (cog wheel icon) in the toolbar of the right pane. 3. Click Import vCard Data. 4. Select your address file and confirm with OK. PRONTO! LITE USER MANUAL 81 82 PRONTO! LITE USER MANUAL PRONTO! LITE USER MANUAL CHAPTER 4 Chats The Chats App is for Instant Messaging with your contacts. You can chat with one person at a time or with a group of people. You can use the Chats App to share files with your chat partners. The only thing you need for Instant Messaging is Pronto! Lite and the e-‐mail address of your chat partners. They have to be connected to the same CommuniGate Pro server or the same chat room. You can have parallel chat sessions. The Chats App has a simple structure, being divided into two windowpanes: • Active chats are listed in the left plane. • The messages in the current chat are displayed in the right window. Here you type your messages and receive messages from your chat partner(s). PRONTO! LITE USER MANUAL 83 Starting a Chat To invite a contact for a chat you will need his address listed in your Contacts App. Create the contact first if necessary adding the user’s e-‐mail address. If you and the user you want to chat with are Buddies (see Chapter 3) you will be able to see the presence status of that user. If his status is online you will very likely be able to chat with him spontaneously. That is very easy: 1. Start the Chat App by clicking Chats in the Navigation bar. 2. Click + in the Active Chats window pane. 3. Select the contact from your address book. A new Active Chat will be added to your Chat App. 4. You can now start typing messages in the message field on the right. Messages from your chat partner will appear above the box. 84 PRONTO! LITE USER MANUAL Other ways to start a Chat There are many spots in Pronto! Lite from where you can start a chat: Just click on the Chat icon (bubble). You will find it in these places: • Contacts App: in the list of contacts, right pane • Contacts App: in the contact window of the selected contact • Contacts App: in the window of Contact Groups • Mail App: Clicking on the address in an e-‐mail will give you the chance to start a chat. PRONTO! LITE USER MANUAL 85 Tip: All your contacts with presence status Online will be shown at the top of the address lists when choosing a chart partner. Chatting Chatting is easy. To send an instant message to your chat partner, 1. type your message in the message field at the lower end of the chat window and 2. click Send or hit Enter. You can use smileys in your messages: 1. Click :) . 2. Select the desired icon by clicking on it. It will be added to your message at the position of the cursor. 86 PRONTO! LITE USER MANUAL You can also type smileys following the usual conventions: • :) for a smiling face • :( for a sad face etc. Whenever an instant message is sent to you it will be displayed in the chat window in the right pane. If you are currently in a different app within Pronto! Lite a message box will pop up to notify you about new incoming chat messages. PRONTO! LITE USER MANUAL 87 • Click into the message box to jump directly to the associated chat. • If you do not want to reply you can just close the box by clicking x. Closing a chat To close a chat and the chat window, 1. click More (cog wheel icon) in the toolbar of the chat window. 2. Select Close. 3. Your chat partner will be shown a message that you have closed the chat. If you want to continue chatting with this contact you have will to create a new chat. 88 PRONTO! LITE USER MANUAL More Chat functions While in an active chat you have additional useful functions at your fingertips: sending files, initiating Calls, starting Group Chats. Sending files You can upload files to your chat partner(s). 1. Click Upload in the toolbar of the chat window. 2. Select the file from your computer and confirm with OK. Your chat partner will receive a download link for your file in their chat window. To open the file the link has to be clicked. Initiating a Call To initiate a phone call from the chat, • click the Call button in the toolbar of the chat window. The Chat window will be replaced by the Call window – you can now speak to your chat partner. PRONTO! LITE USER MANUAL 89 Sending e-‐mails To send an e-‐mail to your chat partner, • click the Compose E-‐Mail button in the toolbar of the chat window. The Mail Composer window will open up with the e-‐mail address of your chat contact already filled in. Deleting chat messages To clear the chat message history from the current chat window, 1. click More (cog wheel icon) in the toolbar. 2. Select Clear. You can perform this action whenever you like, even in an active chat. Creating a Group Chat You can have a Chat with several chat partners at the same time. You have two options to initiate a Group Chat: • Add a new Chat partner to an active chat. • Start a Group Chat from a contact group. Adding a chat partner to an active chat 1. Click + in the toolbar of the chat window. 2. Select a contact. 90 PRONTO! LITE USER MANUAL 3. Your chat partner will receive a notification in the message box. By clicking Accept they join the Group Chat. 4. You as the initiator will receive a confirmation that the partner has joined the chat. The chat window will show a panel with all active chat partners; the window title will change to Group Chat. A Group Chat behaves exactly as a normal chat except that you are dealing with at least two persons at the same time. Messages you type are shared with all members of the Group Chat simultaneously. When using the E-‐Mail or Call buttons in the Chat all group members will be contacted. You can contact a single person in the chat by selecting a contact option in the contacts pane on the right side. Here you can choose between (single) Chat, (single) Call or opening the Contact details of the person. PRONTO! LITE USER MANUAL 91 You can resize the panel showing the active group chat members so you have more space for the chat window: • Click the arrow button to reduce the panel size. • Click it again to restore it to the original size. Starting a Group Chat from a Contact Group Contact Groups are lists of contacts you have combined in your Contacts App (please refer to Chapter 3 Contacts for more information). You can start a Group Chat with all Contact Group members with a single click: 1. Open Contacts App. 2. Find the Contact Group. 3. Click the Chat icon. 92 PRONTO! LITE USER MANUAL A Group Chat with all group members will automatically be initiated. PRONTO! LITE USER MANUAL 93 PRONTO! LITE USER MANUAL CHAPTER 5 Calendar Pronto! Lite’s Calendar App helps you to schedule your appointments and events in a single program. You can schedule appointments with your contacts, send event invitations and share calendars with other users. Navigating the Calendar App The calendar app window is divided into two panes: • Your available calendars are listed in the left window pane. • The events and appointments from the selected calendar(s) are displayed in the right window pane. You can choose between a daily, weekly or monthly view for displaying the calendar. • To switch views simply click the appropriate button in the toolbar of the right pane: Daily, Weekly, Monthly. • Click Today to switch the date selection to the current day. 94 PRONTO! LITE USER MANUAL • Use the arrows Previous and Next to browse through your calendar – depending on the chosen view between day, weeks or months. • The red line indicates the current time of day. Basic settings It is recommended to check and – if applicable – modify the basic settings in Preferences / Calendar of your Calendar App so the configuration matches your preferences. • Main Calendar: Select the calendar that will be opened by default when you start the Calendar App. • Calendar View: Select which view – day, week or month – will be shown by default. • Starts at: Choose the first day of the week. PRONTO! LITE USER MANUAL 95 • Time slice: Select in which intervals a day will be divided into. • Working hours: Select your typical working hours (from and to). The calendar view will by default show this part of the day. While you are here you can also choose your preferred channel for being alerted about upcoming events: • By E-‐Mail • By Instant Message • By Phone Call Simply set the switch to ON or OFF. Remember to confirm your selections by clicking Save All Settings. Creating an appointment You can create an appointment in two ways: • Click + in the calendar window. • Click directly into the calendar at the desired date and start time, hold the mouse Or button and drag to the end time. Then release the mouse button. 96 PRONTO! LITE USER MANUAL The window New Event will be opened. To create the event: 1. Enter a Subject. This will be the title shown in the calendar for your event. 2. Select the start date and the end date of the event. To help you with this task a small calendar will pop up when clicking into the field from which you can choose the date. 3. Select the start time and end time. 4. Optionally enter text in Where and Description. 5. In the select box Alarm choose if you want to be alerted and for how long in advance. 6. Mark Private if this event should be hidden from other users. 7. Confirm with Save. The Event will be created and shown in your calendar. PRONTO! LITE USER MANUAL 97 All-‐Day Event If your Event is an all-‐day Event mark All-‐Day Event. All-‐Day Events will be shown in the first row of the calendar titled All day. Recurring Events You can create Recurring Events, e.g. for a Meeting that is held weekly at the same time each week. 98 PRONTO! LITE USER MANUAL 1. Mark Recurrence. 2. In the select box Recurrence choose the rhythm in which the Event will be repeated – daily, weekly, monthly, yearly... 3. Enter an End by date. 4. In Every … days enter the interval in which the Event will be repeated. 5. Click Save to finish creating the recurring event. Attachments You can attach one or more files to an event. 1. In the window New Event click Attach file. 2. Choose the file(s) from your computer and confirm. 3. All attached files will be shown in the event window. You can open a file by clicking on it. You can delete a file by clicking X next to the file name. 4. Confirm with Save. The attached files will be shown in the preview window of the event. You can open the preview by simply clicking on the event object in the calendar. PRONTO! LITE USER MANUAL 99 High Priority Event You can mark an event as a High Priority Event. • In the window New Event click Priority (exclamation mark icon). The icon will change to red color. After saving it will be shown in the calendar view next to the event title. • To remove the priority property click the icon again. Editing an Event There are two options for editing an existing event: • Use Drag+Drop to move the event to a different date or time: 1. Click the event object. 100 PRONTO! LITE USER MANUAL 2. Drag it to its new position in the calendar view. 3. Release the mouse button. The event has been moved to the new date/time. • Click on the event object and select Edit. Tip: Clicking on an event object once will open the event preview. Here all import event facts are displayed including event priority and attached files. Quickly changing the event duration With only one mouse click you can change the duration of an event by moving the end date/time: 1. Hover the mouse button over the lower end of the event object in the calendar view until an arrow appears. 2. Click and hold the mouse button and pull the lower edge of the event object to the end time desired: up to shorten the duration, down to extend the duration. 3. Release the mouse button at the desired position. PRONTO! LITE USER MANUAL 10 1 Changing a series of events When you open an event for editing that is part of a series of events (recurring appointment) you will be asked if you would like to edit only this specific event or all events in the series. • Click All Events to edit the complete series of events and change settings. • Click This Instance only to edit only this one event you selected. When moving an event that belongs to a series to a different date or time (refer to the previous section on how to do that) you will be asked if you want to create an exception to the current series for the current instance. 102 PRONTO! LITE USER MANUAL • Click Yes to create an exception. After that the current event will not belong to the original event series any more. • Click No to not having an exception created. Your recent change will be reverted. Appointment Alarms If you set an alarm time in an event you will be reminded before the appointment begins. Depending on your calendar configuration you set in Preferences / Calendar you will be reminded by: • Message box • Instant Message in Chat • Phone Call Deleting an event To delete an event, PRONTO! LITE USER MANUAL 10 3 • open the event. • Click Edit. • Click Delete (trash can icon) • Confirm by clicking Delete. When deleting a series of events you will be asked if you want to delete All events or This Instance only. Multiple Calendars You can create as many different calendars in your Calendar App as you like. This is useful for grouping events belonging to different topics or parts of your life. You could e.g. have a calendar for private appointments and a calendar for business events. Creating a new Calendar To create a new calendar 1. click + in the toolbar of the left pane. 104 PRONTO! LITE USER MANUAL 2. Click Create Calendar. 3. Insert a name for the new calendar. 4. In Calendar Location select the placement of the new calendar – either below an existing calendar or below Root to place it at the top level. 5. Complete with Save. Editing Calendar settings To change settings for a calendar, e.g. its name or location 1. click on the calendar in the left pane to select it, 2. click Edit (cog wheel icon). 3. Perform the desired changes. 4. Complete with Save. You can set a specific color for the calendar. This will change the color in the Calendar list and the appointment objects in the calendar views. 1. Click on the calendar in the left pane to select it. 2. Click Change Calendar Color (color icon). 3. Select the desired color from the palette by clicking on it. The calendar color will be changed directly. PRONTO! LITE USER MANUAL 10 5 Note: Carefully choosing different colors for your calendars can be helpful because it helps you to discern appointments by their color, especially when you choose to display all appointments from all calendars at once. Display multiple Calendars You can choose to display events from one calendar only or from multiple calendars at the same time. • To display appointments from a calendar, set the check mark for that calendar in the Calendar list of the left pane. When the check mark is set the appointments from this calendar will be displayed. • To stop displaying events from a specific calendar uncheck it. The appointments from this calendar will be hidden. • To display appointments from multiple calendars set the check mark for all the Calendars you want to display. All their events will be shown together in the calendar view. Attaching an event to a specific Calendar When creating a new appointment you determine to which calendar it should belong by 1. first selecting the target calendar – simply click on its name in the left pane. 106 PRONTO! LITE USER MANUAL 2. Then create the appointment as usual. After saving it will be attached to the selected calendar. Note: You cannot move an existing appointment to a different calendar. To achieve this you have to delete the original appointment and then recreate it after selecting the target calendar. Deleting a Calendar To delete a calendar, 1. select it by clicking on its name. 2. Click Delete (trash can icon). 3. Confirm by clicking Delete. Important: This action will also delete all events contained in the calendar you are deleting! Scheduling appointments and meetings You can manage attendees of an appointment or meeting. Using the Calendar App you can • send invitations to attendees, • confirm or decline invitations you receive, • manage the list of attendees for an appointment. PRONTO! LITE USER MANUAL 10 7 Creating an appointment with invitations 1. Create the event as usual. 2. Add all attendees – either by typing their name or mail address in the Attendees field or by selecting them from your contact list. 3. Click Send Requests (envelope icon) and select Send. 4. Confirm with Save. All attendees will now receive an invitation by e-‐mail. 108 PRONTO! LITE USER MANUAL Manage response status for appointments When creating an appointment with attendees you become the Organizer of this appointment. This role enables you to see the current response status of all attendees -‐ whether they responded and how (accept, decline, tentative): 1. Open the event preview. 2. In the section Who you will see all attendees and how they responded: green check mark for accept or red circle for decline. As organizer you will also receive an automatic e-‐mail for every response containing the response status in the subject line and their comments (if any). • To process this response click Update Attendee Status. The e-‐mail will be deleted automatically after this action. PRONTO! LITE USER MANUAL 10 Important: you must click the button Update Attendee Status to complete the 9 scheduling for this attendee. Replying to an invitation When you are invited to an event you will receive an e-‐mail informing you about the appointment details (date, time, subject, attendees). You can reply directly from this e-‐mail to send your scheduling response. To accept the invitation, 1. click Accept or Tentative. 2. In the list that opens choose an option. Send the response now will send an e-‐ mail response to the organizer. 110 PRONTO! LITE USER MANUAL 3. You can add a personal message for the organizer of this event. To do this choose Edit the response before sending. Enter some text in the message box. 4. Click Accept to send your reply. To decline an invitation, 1. click Decline. 2. In the list that opens choose an option. Send the response now will send an e-‐ mail response to the organizer. If the organizer changes date or time for an existing event you will receive a new invitation mail. Proceed as described above. PRONTO! LITE USER MANUAL 11 If the organizer cancels the appointment you will receive a notification by e-‐mail. • 1 In the e-‐mail click Remove Event from Calendar to delete the event. An alternative way to reply to an invitation is to set your response in the event object in the calendar. 1. Open the event in the calendar. The preview will be shown. 2. Click one of the buttons Accept, Tentative or Decline. 3. Select a reply option (no response, send response, edit response). 112 PRONTO! LITE USER MANUAL Replying in this way can be useful if you have already deleted the invitation mail or if you want to change your attendee status at a later time. Sharing Calendars You can share any calendar with other users. This can be useful for groups of persons because it enables them to keep and manage all appointments in one single place. Grant access to a Calendar To grant access to one of your calendars for other users 1. select the calendar. 2. Click Edit (cog wheel icon). 3. Insert all persons you want to share your calendar with in the section Access Control List. 4. Choose the appropriate access rights per person from the select box. PRONTO! LITE USER MANUAL 11 3 5. Confirm with Save. Subscribing to a shared Calendar from invitation e-‐mail When you are granted access to a shared calendar you will receive an invitation e-‐mail. To subscribe to the calendar 1. click Subscribe in the e-‐mail. The Calendar Subscription window will open up. 2. Confirm your subscription by clicking Save. 114 PRONTO! LITE USER MANUAL After subscribing the shared calendar will be displayed in your calendar list in a subfolder. The top folder will carry the name of the person sharing the calendar. Example: If Harry shared a calendar with you all calendars you subscribed from Harry will be placed inside the folder Harry. Unsubscribing from a calendar To remove a calendar you are subscribed to from your Calendar App simply delete it as usual (please refer to section Deleting a Calendar). Subscribing to a shared Calendar without e-‐mail You can at any time subscribe to a calendar that has been shared with you without the need for accessing the original invitation e-‐mail. 1. Click + in the toolbar of the left pane. 2. Click Calendar subscription. 3. Insert the name or mail address of the person sharing the calendar with you. 4. Select the calendar(s) by setting the check box for each calendar to be subscribed. PRONTO! LITE USER MANUAL 11 5 5. Confirm with Save. Publishing a Calendar You can share calendars to persons that are not users of CommuniGate Pro. These persons will be able to see all appointments not marked as private, but will not be able to change events or create appointments themselves. 1. Select the calendar you want to share over the Internet. 2. Set Public Access through Web to ON. 3. Copy the Calendar URL that will be displayed and send it to the persons that you want to have access to your calendar. 4. Confirm by clicking Save. Tip: To have a quick preview of the public calendar display simply 116 PRONTO! LITE USER MANUAL • click Open Calendar (chain icon) – the calendar will open up in your browser in the exact same way as the users you are sharing it with. To stop sharing the calendar and prevent anyone accessing it publicly 1. select the calendar you are sharing. 2. Set Public Access through Web to OFF. 3. Confirm by clicking Save. Other users will not be able to see the calendar anymore. Exporting calendar data You can export events stored in your calendar. The export will create iCal files you can use to import the data into other calendar programs. 1. Select the calendar you want to export events from. 2. Click More (cog wheel icon) in the toolbar of the right pane. 3. Click Export Calendar Data. PRONTO! LITE USER MANUAL 11 7 Your web browser will download the file containing the calendar data. Importing event data You can import calendar data that you have exported from another calendar program in iCal format. 1. Select the calendar you want to import event data to. 2. Click More (cog wheel icon) in the toolbar of the right pane. 3. Select the iCal file containing the calendar data and confirm. The events will be imported into the selected calendar. 118 PRONTO! LITE USER MANUAL PRONTO! LITE USER MANUAL CHAPTER 6 Phone Calls You can use Pronto! Lite to make Phone Calls with other users of CommuniGate Pro – or, depending oft he setup of the system – with persons outside of CommuniGate Pro. All you need is • an Internet Connection, • the e-‐mail address of your contact(s) you want to talk with, preferably saved as a contact in your Contacts App, • microphone and loudspeakers or a headset attached to your computer. Phone Plugin Depending on your web browser you will need a special plugin. If you do not see the Call App in the Navigation bar you will have to install it first. Please refer to chapter 1 for installation instructions. Receiving a Phone Call An incoming call will be signaled in a popup window showing the name, e-‐mail address and photo of the caller. • To accept the call, click Answer. • Click Hang Up to decline the call. PRONTO! LITE USER MANUAL 11 9 Making a Phone Call A Call button is available in many places of Pronto! Lite – just like the e-‐mail and chat buttons you are already familiar with. Wherever you see the Call button (phone icon) you can initiate a call: • Contacts App: list of contacts • Contacts App: in the details of a contact or a contact group • Mail App: Click on the sender’s address to open more contact options, among them Phone Call. • History App: In this list you will find the history of all previous or missed phone calls. You can establish phone calls directly from here. To call someone, 1. find the contact and click the Call button. 2. Wait until the other person answers your call. 120 PRONTO! LITE USER MANUAL To end a call, • click End Call. To mute your microphone during an ongoing call, • click Mute. To hold the call, • click Hold. Phone calls with multiple contacts There are two options to initiate a phone call with multiple parties: • Add user(s) to an ongoing call. • Call all members of a contact group at once. To add a call partner to an ongoing call: 1. click + in the Call window, 2. select the person(s). PRONTO! LITE USER MANUAL 12 1 To call all members of a contact group, 1. find the contact group in the Contacts App and 2. click Call. To call using a phone number 1. Click Call in the Navigation bar. 2. Enter the phone number – either by typing it or clicking the number buttons. 3. Click Call. 122 PRONTO! LITE USER MANUAL Switching from Phone Call to Chat You can chat with your communication partner during a call: • Click Chat. The view will switch to the Chat App. The call will be kept open. • Switch back to the call by clicking on the call button in the Active Chats pane. PRONTO! LITE USER MANUAL 12 PRONTO! LITE USER MANUAL CHAPTER 7 3 File storage CommuniGate Pro contains a cloud based file storage called eDisc. You can access and manage your files using the Files App of your Pronto! Lite client. eDisc enables collaborative work on shared documents and instant file sharing with selected individuals based on central network storage. eDisc can be a valuable tool because you can access your files from anywhere with any of the CommuniGate Pro client options and with WebDAV clients. Navigating the Files App Access the eDisc system by clicking the Files button in the Navigation bar. The Files App window is divided into two panes: • The left pane contains the folders you can use to organize your files. • In the right pane you can see and manage all files contained in the selected folder. • At the lower end of the left pane your current storage capacity is displayed. 124 PRONTO! LITE USER MANUAL Navigating folders and finding files • To select a folder click on its name – either in the left or the right pane. • If a folder contains subfolders an arrow will indicate this. To open the subfolder(s) click the arrow. To collapse the subfolders click the arrow again. • To hide the folder list pane click on the arrow in the toolbar of the right pane. PRONTO! LITE USER MANUAL 12 5 • The breadcrumb navigation at the top of the right pane indicates your current position in the folder hierarchy. Click on an entry in the breadcrumb navigation to switch to the selected folder. Switching views and sorting file lists • Files are shown in tile view by default. You can switch to grid view by clicking the Grid button placed above the file list. • Click the Tile button to switch back. 126 PRONTO! LITE USER MANUAL • Files can be sorted by Name, Size or Date of the files. Click on the column title to sort the files by that criterion in an ascending order. Switch to descending order by clicking it again. Searching for files or folders • Use the search function to access files or folders quickly. This is especially useful if a folder contains many files: The search works as a filter reducing the list of displayed files to the files matching the search string. 1. Go to the folder in which you want to look for a folder or file. 2. Enter a search string in the Search Box. 3. All file or folder names matching the search strings will be displayed; all other objects will be hidden. Managing folders You can create, rename, move and delete folders. PRONTO! LITE USER MANUAL 12 Creating a folder 7 1. Click + in the toolbar of the folder pane. 2. Select Create Folder. 3. Insert a folder name. 4. In Folder location select the position of the new folder relative to existing folders. 5. Complete by clicking Save. Tip: To save you one click with the mouse you can first select the folder under which you want to create the new folder by clicking it. The new folder will automatically be placed beneath the selected folder. Editing folders Folders can be renamed, moved or deleted. There are two ways to reach these editing functions: Edit button in the toolbar of the left pane. 1. Select the folder you want to edit by clicking on its name. 2. Click Edit (cog wheel icon) in the left toolbar. 128 PRONTO! LITE USER MANUAL Context menu in the right window pane. 1. Click on the arrow next to the folder and open the context menu. 2. Select the Editing function by clicking on the appropriate button. Tip: The context menu offers more options than the Edit button described first. In the following sections we will therefore only be looking at the former. Renaming a folder 1. Open the context menu and click Rename. 2. Insert the new folder name. 3. Confirm with Save. Deleting a folder 1. Open the context menu and click Delete. 2. Confirm by clicking Delete. Attention: All files and subfolders contained in the folder will also be deleted permanently! Moving a folder To move a folder into another folder 1. Open the context menu. 2. Click Move into... 3. Select the target folder by clicking on it. The folder will be moved into it. PRONTO! LITE USER MANUAL 12 9 Copying a folder 1. Open the context menu. 2. Select Copy into... 3. Select the target folder by clicking on it. The folder will be copied into it. 130 PRONTO! LITE USER MANUAL Managing files Once you uploaded some files to eDisc you can manage them using Pronto! Lite in a similar manner to the local file manager on your computer: You can display, copy, rename, move and delete files. Uploading files To store files in the eDisc system you have to upload them first. 1. Go into the target folder. 2. Click the Upload button in the toolbar of the right pane. 3. Select the files to be uploaded from your computer and confirm with OK. Tip: Alternatively you can drag & drop the files directly into the right pane. PRONTO! LITE USER MANUAL 13 1 The files will be uploaded. During upload a progress bar is displayed below the files window indicating the remaining time. Here you can cancel the upload by clicking All Cancel or the X behind a file name. When the upload is completed a notification will be shown in the message box. Note: Please make sure that the size of the files you want to upload does not exceed your remaining storage capacity! 132 PRONTO! LITE USER MANUAL Editing a single file To edit a single file, e.g. to rename, copy or delete it: 1. Open the context menu of the file. 2. Choose the desired function by clicking on the matching button and perform the action. Editing multiple files Most operations like Downloading, Sharing, Moving and Deleting can be performed for several files at once saving you time. 1. Select all files you want to edit by setting the check mark for each file. To select all files in the current folder click Select All. 2. Perform the desired action by clicking one of the editing buttons in the toolbar. PRONTO! LITE USER MANUAL 13 Viewing files 3 You can view some of the most widely used file formats directly in the Files App: • Images: JPG, PNG, GIF • Videos: MP4, MOV, AVI • Music: MP3 • Text: TXT, HTML To view a file • perform a double click on the file name. The file will be opened in a new browser window. In case of video or music files a player will be started to play the file. Downloading files Sometimes you will need to download files to your local computer, e.g. to execute a program file or view a file format not supported by Pronto! Lite. 1. Select the file(s) you want to download. 2. Click the Download button in the toolbar of the right pane. 134 PRONTO! LITE USER MANUAL The download for all selected files will be started; a progress bar will be displayed below the files window. • To hide the progress bar click Hide Info. • To cancel the download click All Cancel or the X behind the file name. The files will be saved on your local computer. Deleting files 1. Select the file(s) you want to delete. 2. Click Delete... (trash can icon) in the toolbar of the right pane. Alternatively choose Delete.... from the context menu of the file. PRONTO! LITE USER MANUAL 13 5 3. Confirm by clicking Delete. Important: the file(s) will be deleted permanently! Moving files 1. Select the file(s) you want to move to a different folder. 2. Click Move into… -‐ either in the toolbar or in the context menu of the file. 3. Select the target folder. The file(s) will be moved there. 136 PRONTO! LITE USER MANUAL Copying files Files can only be copied one by one. 1. Select the file you want to copy. 2. Open the context menu and click Copy into.... 3. Select the target folder by clicking on its name. The file will be copied there. Sharing files and folders Files and folders can be shared in a number of ways with other users: • Grant access to a folder • Grant access to a file or number of files • Sharing folders with other users with editing options Granting read access to files or folders You can share files or folders with persons outside of CommuniGate Pro. This, however, works on a read only basis. To grant read access to a file or folder 1. select the file(s) or folder(s) you want to share. 2. Select Share in the toolbar or context menu. 3. Set the check mark for Enabled. PRONTO! LITE USER MANUAL 13 7 4. Copy the link and send it to the persons that should have access. 5. Close. The shared file or folder will have a globe icon in list view to indicate that it is currently in sharing state. • To revoke external access to the file or folder open up the Share dialog again and unset the check mark for Enabled. Tip: To have the sharing link directly sent by e-‐mail to the persons you want to grant access • click E-‐Mail Link instead of Share. This will open up the Mail Composer window with the link already inserted in the body. Recipients opening up the link in their browser will have a simplified view of the file or folder they have access to. No editing functions will be available. 138 PRONTO! LITE USER MANUAL Sharing files and folders with CommuniGate Pro users You can share files or folders with other CommuniGate Pro users and control their access rights. Depending on their permissions they will be able to read, write, create or delete files or even manage access rights themselves. To share a file or folder including access permissions 1. select the file or folder and open the context menu. 2. Click Access Granted To… 3. Choose all persons that should have access to the file or folder – either by typing their name or e-‐mail address or by selecting them from your address book. 4. Confirm with Save. PRONTO! LITE USER MANUAL 13 9 Shared folders or files will be indicated by a head symbol in list view. The persons you are granting access will receive an e-‐mail message informing them about their new permission. To complete the process each user has to simply click the Subscribe button in the e-‐ mail. The file or folder will be shown in their Files App. 140 PRONTO! LITE USER MANUAL A chain icon indicates subscribed folders. Managing subscriptions To manage your subscriptions (either to subscribe or to unsubscribe) individually by file or folder 1. select the file or folder and open the context menu. 2. Click Unsubscribe. The file or folder will instantly be removed from your Files App. To manage subscriptions for all subfolders of a subscribed folder • select the subscribed folder on top level. • Click Edit. • Subscribe or unsubscribe by setting the check marks for the folders.