1
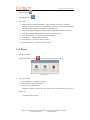
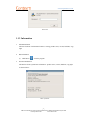
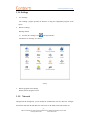
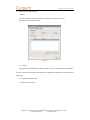
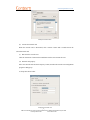
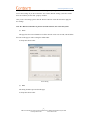
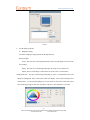
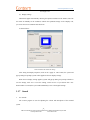
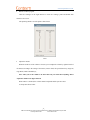
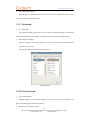
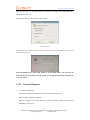
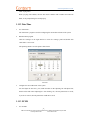
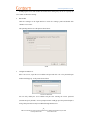
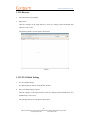
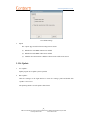
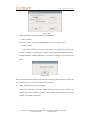
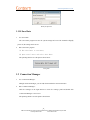
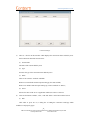
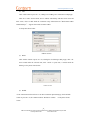
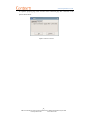
Centerm Information Co.,Ltd
User Manual
Model
GM810
History
Document
1.1(2013-08-01)
Add “Save Data” description
1.0(2013-07-16)
First Created
Apply to system
1.16.06(2013041001)
1
ADD:2/F #22 Star-net Science Plaza Juyuanzhou #618 Jinshan Road,Fuzhou Fujian China
[email protected]
www.centerm.com
Centerm Information Co.,Ltd
Index
1.1
Applications .................................................................................................................. 3
1.1.1
Login Window................................................................................................... 3
1.1.2
Power ................................................................................................................ 4
1.1.3
Information........................................................................................................5
1.1.4
Settings .............................................................................................................. 6
1.1.5
Network ............................................................................................................. 6
1.1.6
Display ............................................................................................................ 10
1.1.7
Sound .............................................................................................................. 12
1.1.8
Mouse .............................................................................................................. 15
1.1.9
Keyboard ......................................................................................................... 16
1.1.10 User Password ................................................................................................. 16
1.1.11
Network Diagnosis .......................................................................................... 17
1.1.12 Date/Time ........................................................................................................19
1.1.13 ZCMS .............................................................................................................. 19
1.1.14 Browser ........................................................................................................... 21
1.1.15 ICA Global Setting .......................................................................................... 21
1.1.16 Update ............................................................................................................. 22
1.1.17 Security ........................................................................................................... 23
1.1.18 Save Data ........................................................................................................ 25
1.2
Connection Manager ................................................................................................... 25
1.2.1
Citrix Connection Guide ................................................................................. 28
2
ADD:2/F #22 Star-net Science Plaza Juyuanzhou #618 Jinshan Road,Fuzhou Fujian China
[email protected]
www.centerm.com
Centerm Information Co.,Ltd
1.1 Applications
1.1.1 Login Window
1.
Run login window
When there is a “Default” connection item in connection manager, “Login Window” will
display by default when starting the OS.
In this login window, you can enter the login credential like user name, password and domain
to log on the server.
Login Window
Note: Add a “Default” item in connection manager when starting computer for the first time.
The operating interface is as the picture shows below:
And in the left bottom of this window, you’ll find three buttons:
Power button:
3
ADD:2/F #22 Star-net Science Plaza Juyuanzhou #618 Jinshan Road,Fuzhou Fujian China
[email protected]
www.centerm.com
Centerm Information Co.,Ltd
Settings button:
Information button:
2.
How to use.
(1) Add new item in “connection manager”, and set “Default” item. Close “connection
manager” or reboot system, enter “Login Window”. Input user name, password, Domain,
and click “Login”, and then it will connect to “Default” server.
(2) Click “Auto Login”, then the user name, password and domain information would be
saved and it would automatically login the server upon powering on.
(3) Click “Remember me” will save user name and domain.
(4) Click “Power” will show “Power” window.
(5) Click “Settings” will show “Setting” window.
(6) Click “Information” will show “About” window.
1.1.2 Power
1.
Run Power window
Click power button as shown
, window will be shown picture as follow
Power window
2.
Use power window
1 click “Shut Down”, will turn off computer.
2 click “Restart”, will reboot computer.
3 click “Lock”, will lock screen.
Screen lock function is set for users who want to lock screen when leaving, in case of
other’s use.
As the picture shows follow:
4
ADD:2/F #22 Star-net Science Plaza Juyuanzhou #618 Jinshan Road,Fuzhou Fujian China
[email protected]
www.centerm.com
Centerm Information Co.,Ltd
Screen lock
1.1.3 Information
1.
Information button
The basic function of Information button is viewing product series, version, build No, copy
right.
.
2.
Run information
(1) Click button
3.
enter the program.
Function introduction
The interface shows system basic information product series, version, build No, copy right
As shown below
Basic system info
5
ADD:2/F #22 Star-net Science Plaza Juyuanzhou #618 Jinshan Road,Fuzhou Fujian China
[email protected]
www.centerm.com
Centerm Information Co.,Ltd
1.1.4 Settings
1.
Use “Settings”
The “Settings” program provides the interface of using the configuration programs in the
system
2.
Run the “Settings”
Running method:
(1) Left click the “Settings” icon
in the login interface;
The interface of “Settings” is as below:
Settings
3.
Run the programs in the Settings
Double click the program to run it.
1.1.5 Network
Through network management, you can modify the terminal name; activate, inactivate, configure
the network card; add, edit and delete the router item, set the default router and set DNS, etc.
6
ADD:2/F #22 Star-net Science Plaza Juyuanzhou #618 Jinshan Road,Fuzhou Fujian China
[email protected]
www.centerm.com
Centerm Information Co.,Ltd
1.
Run the network management
Method
Click the “Settings” in the login interface and double click “Network” to run it.
The interface is as the picture below:
Network
(1) General
This page lists the information of all the network cards. You can modify the terminal name,
activate or deactivate the network card and edit the configuration information of the network card
in this page.
(a) Modify the terminal name
As the picture shows below:
7
ADD:2/F #22 Star-net Science Plaza Juyuanzhou #618 Jinshan Road,Fuzhou Fujian China
[email protected]
www.centerm.com
Centerm Information Co.,Ltd
Modify the terminal name
(b) Activate the network card
When the network card is deactivated, click “activate” button and it would activate the
selected network card.
(c) Deactivate the network card
Click the “Deactivate” button and it would deactivate the selected network card.
(d) Network card property
Select one network card and click “Property” button, and then the network card configuration
program would pop up.
As the picture shows below:
Configure the network card
8
ADD:2/F #22 Star-net Science Plaza Juyuanzhou #618 Jinshan Road,Fuzhou Fujian China
[email protected]
www.centerm.com
Centerm Information Co.,Ltd
After you set the IP address, subnet mask and default gateway here, please click the “save” button
to save these settings. If you do not click the “save” button, then the settings you do here would
not be saved when you close this “property” window.
After you save the settings, please click the “Restart” button to restart the network to apply the
new settings.
Note: the “Restart” button here is just for restart the network, not restart the system.
(2) Route
This page lists the router information of all the network cards. You can add, edit and delete
the router in this page as well as setting the default router.
As the picture shows below:
Router Setting
(3) DNS
The setting of DNS is processed in this page.
As the picture shows below:
9
ADD:2/F #22 Star-net Science Plaza Juyuanzhou #618 Jinshan Road,Fuzhou Fujian China
[email protected]
www.centerm.com
Centerm Information Co.,Ltd
DNS Setting
1.1.6 Display
1.
Use “Display”
Display properties can customize wallpaper, screen resolution etc., the display properties
include: wallpaper, screen resolution, refresh rate, colors etc.
2.
Run the “Display” property
Operation method:
Click the “Settings” in the login interface to enter the “settings” panel and double click
“Display” icon to run it.
The running interface is as the picture shows below:
10
ADD:2/F #22 Star-net Science Plaza Juyuanzhou #618 Jinshan Road,Fuzhou Fujian China
[email protected]
www.centerm.com
Centerm Information Co.,Ltd
Display
3.
Set the display properties
(1) Wallpaper settings
Can choose wallpaper, image position and background color
Position include
Center The same size of the background image, drawn from the upper-left corner of the
screen image
Tiling The same size of the background image, the image covered with screen
Stretch: The size of the image is scaled to the size of the screen, as shown above.
Background color
The color is when background image as “none”, or smaller than screen, will
filling the background. Select color block button will display color selection dialog box(as
shown below) in color selection dialog box, can use mouse to select color in the color round,
also can through red, green, blue, hue, saturation, value and other parameters to set color.
11
ADD:2/F #22 Star-net Science Plaza Juyuanzhou #618 Jinshan Road,Fuzhou Fujian China
[email protected]
www.centerm.com
Centerm Information Co.,Ltd
Set wallpaper color
(2) Display settings
Thin clients support automatically detecting the optimum resolution of the monitor, but if the
user wants to manually set the resolution, uncheck the "optimum settings" in the "Display" tab,
you can set the screen resolution and refresh rate.
As shown below
Screen resolution and refresh rate settings
After setting the Display Properties, click on the "Apply" or "OK" button, the system will
pop-up dialog box prompts system will be applied to the new display settings.
When the new display settings applied, system will pop-up dialog box prompts whether to
save the settings, click “Yes” to save the settings, cancel not save. If you did not click “Yes”
button within 15 seconds, the system will automatically revert to the original settings.
1.1.7 Sound
1.
Use “Sound”
The “sound” program is used for adjusting the volume and microphone of the terminal
system
12
ADD:2/F #22 Star-net Science Plaza Juyuanzhou #618 Jinshan Road,Fuzhou Fujian China
[email protected]
www.centerm.com
Centerm Information Co.,Ltd
2.
Run the “Sound” program
Click the “Settings” in the login interface to enter the “settings” panel and double click
“Sound” icon to run it.
The operating interface is as the picture shows below:
Sound
3.
Adjust the volume
When the scroll bar of the volume is focused, you can adjust the volume by right/left click of
the mouse(according to the setting of the mouse), mouse wheel, the up and down keys, Page UP,
Page Down, Home and End keys;
Note: when you set the volume to be lower than 30, you cannot hear anything. Please
adjust the volume to be higher than 30.
When “Mute” is checked, the volume cannot be adjusted and the system is mute.
As the picture shows below:
13
ADD:2/F #22 Star-net Science Plaza Juyuanzhou #618 Jinshan Road,Fuzhou Fujian China
[email protected]
www.centerm.com
Centerm Information Co.,Ltd
Mute of Volume
4.
Adjust the volume of microphone
When the scroll bar of the microphone is focused, you can adjust the microphone volume by
right/left click of the mouse (according to the setting of the mouse), mouse wheel, the up and
down keys, Page UP, Page Down, Home and End keys; When “Mute” is checked, the volume of
the microphone cannot be adjusted and the system is mute.
As the picture shows below:
Mute of Microphone
14
ADD:2/F #22 Star-net Science Plaza Juyuanzhou #618 Jinshan Road,Fuzhou Fujian China
[email protected]
www.centerm.com
Centerm Information Co.,Ltd
1.1.8 Mouse
1.
Use “Mouse”
The “Mouse” property program is used for switching the left and right button of the mouse
and mouse speed
2.
Run “Mouse” program
Click the “Settings” in the login interface to enter the “settings” panel and double click
“Mouse” to run it.
The operating interface is as the picture shows below:
Mouse Property
3.
Set the left and right button of the mouse
In “Button Configuration”, check “Swap left and right button”, and you can switch the
function of left and right button of the mouse. The setting has immediate effect. If the checkbox is
checked, then the right button of the mouse becomes the primary button. Right click the checkbox
to restore it to not-checked status, and the left button of the mouse is restored to the primary
button.
4.
Set the mouse speed
Drag the slider of “mouse speed” and you can set the mouse speed. The setting has
immediate effect.
15
ADD:2/F #22 Star-net Science Plaza Juyuanzhou #618 Jinshan Road,Fuzhou Fujian China
[email protected]
www.centerm.com
Centerm Information Co.,Ltd
5.
Set “double-click timeout”
Drag the slider of “double-click timeout” and you can set the double-click timeout of the
mouse. The setting has immediate effect.
1.1.9 Keyboard
1.
Use “Keyboard”
The keyboard property program is used for setting the keyboard language and keyboard
model of the terminal as well as whether to enable NumLock key when the system boots up.
2.
Run “Keyboard” property
Click the “Settings” in the login interface to enter the “settings” panel and double click
“Keyboard” icon to run it.
The operating interface is as the picture shows below:
Keyboard Property
1.1.10 User Password
1.
Use “User Password”
Through using the “user password” program, you can set the user password which is the
password for starting up/restart and system lock.
2.
Run the “user password” program
16
ADD:2/F #22 Star-net Science Plaza Juyuanzhou #618 Jinshan Road,Fuzhou Fujian China
[email protected]
www.centerm.com
Centerm Information Co.,Ltd
Click the “Settings” in the login interface to enter the “settings” panel and double click
“Password” icon to run it.
The operating interface is as the picture shows below:
Set user password
After you set the password here and restart the system, it would ask you to input this password to enter the system,
as the picture shows below:
Note: The default focus of the login window is in this input frame, you can enter the
password directly. If you need to use the cursor, you can just move the mouse and then you
can see the cursor.
1.1.11 Network Diagnosis
1.
Use “Network Diagnosis”
The “network diagnosis” program is used for checking the network status.
2.
Run the “network diagnosis” program
Click the “Settings” in the login interface to enter the “settings” panel and double click
“Diagnosis” icon to run it.
17
ADD:2/F #22 Star-net Science Plaza Juyuanzhou #618 Jinshan Road,Fuzhou Fujian China
[email protected]
www.centerm.com
Centerm Information Co.,Ltd
The operating interface is as the picture shows below:
Network Diagnosis
3.
The destination of network diagnosis
When you ping a certain address, input this address in the text box of “Destination” and set
ping times 5 times by default and 0 represents unlimited times
. For example, pin the
address 192.168.1.1, press enter and the operating interface is as the picture shows below:
Ping the address 192.168.1.1
The destination box cannot be blank, or the prompt dialog box would pop up.
18
ADD:2/F #22 Star-net Science Plaza Juyuanzhou #618 Jinshan Road,Fuzhou Fujian China
[email protected]
www.centerm.com
Centerm Information Co.,Ltd
Limit of ping times:
When you ping some address, the time box must be filled in with a number and cannot be
blank, or the prompt dialog box would pop up.
1.1.12 Date/Time
1.
Use “Date/Time”
The “Date/Time” program is used for configuring the current date and time of the system.
2.
Run Date/Time program
Click the “Settings” in the login interface to enter the “settings” panel and double click
“Date/Time” icon to run it.
The operating interface is as the picture shows below:
Date/Time
3.
Configure the current date/time of the system
You can adjust the time area, year, month and date in date adjusting bar and adjust hour,
minute and second in time adjusting bar. After clicking “ok”, the time parameters are saved;
if you click “cancel”, then the parameters would not be saved.
1.1.13 ZCMS
1.
Use “ZCMS”
19
ADD:2/F #22 Star-net Science Plaza Juyuanzhou #618 Jinshan Road,Fuzhou Fujian China
[email protected]
www.centerm.com
Centerm Information Co.,Ltd
ZCMS program can set that whether the terminal can be managed by the server or specify the
server which is allowed to manage.
2.
Run ZCMS
Click the “Settings” in the login interface to enter the “settings” panel and double click
“ZCMS” icon to run it.
The operating interface is as the picture shows below:
ZCMS
3.
Configure ZCMS server
Select “Set server”, input the server address and port and click “ok”. The password input
window would pop up. As the picture shows below:
Password Confirmation
You can only modify the server address and port after entering the correct password
(centerm123!@# by default). An error prompt window would pop up if the password input is
wrong. This password can only be modified through ZCMS server.
20
ADD:2/F #22 Star-net Science Plaza Juyuanzhou #618 Jinshan Road,Fuzhou Fujian China
[email protected]
www.centerm.com
Centerm Information Co.,Ltd
1.1.14 Browser
1.
The Linux has browser installed
2.
Run browser
Click the “Settings” in the login interface to enter the “settings” panel and double click
“Browser” icon to run it.
The operating interface is as the picture shows below:
Firefox
1.1.15 ICA Global Setting
1.
Use “ICA Global Setting”
ICA global setting is used for setting in ICA session.
2.
Run “ICA Global Setting” program
Click the “Settings” in the login interface to enter the “settings” panel and double click “ICA
Global Setting” icon to run it.
The operating interface is as the picture shows below:
21
ADD:2/F #22 Star-net Science Plaza Juyuanzhou #618 Jinshan Road,Fuzhou Fujian China
[email protected]
www.centerm.com
Centerm Information Co.,Ltd
ICA Global Settings
3.
Option
The “option” page is used for below settings in ICA session:
(1) Whether the video HDX redirection is enabled
(2) Whether the audio HDX redirection is enabled
(3) Whether the connection bar is hidden or showed in ICA full-screen session
1.1.16 Update
1.
Use “Update”
Update program use to update system or patches
2.
Run “Update”
Click the “Settings” in the login interface to enter the “settings” panel and double click
“Update” icon to run it.
The operating interface is as the picture shows below:
22
ADD:2/F #22 Star-net Science Plaza Juyuanzhou #618 Jinshan Road,Fuzhou Fujian China
[email protected]
www.centerm.com
Centerm Information Co.,Ltd
Update
1.1.17 Security
1.
Use “Security”
Through the “Security” program, you can configure the program list of the "Settings" and
lock or unlock the connection manager. The password of this program can be modified.
2.
Run “Security”
Click the “Settings” in the login interface to enter the “settings” panel and double click
“Security” icon to run it.
When running the security settings, the password verification dialog box would pop up first.
As the picture shows below:
Password Verification
The default password is blank, you just need to click the “OK” button to enter the security
program, as the picture shows below:
23
ADD:2/F #22 Star-net Science Plaza Juyuanzhou #618 Jinshan Road,Fuzhou Fujian China
[email protected]
www.centerm.com
Centerm Information Co.,Ltd
Security Program
3.
Modify the authority of configuring the System Modification
(1) Allow to modify
If you select “Allow” for the System Modification, the users modify the system.
(2) Forbid to modify
If you select “Forbid” for the System Modification, the connection clauses in the
connection manager is not allowed to be added, deleted, edited and defaulted. ICA Global
Settings, Date/Time, ZCMS and Network are not allowed to modify. As the picture shows
below:
Forbid to modify
But for the applications like Display, Sound, Mouse, Password, keyboard which are related with
user experiences, they are not in control of the security program.
4.
Modify the password for “Security” program
Choose "Use Password" and Click “Modify Password” button and the interface for
modifying password would pop up where you can modify the password of the security
program. As the picture shows below:
24
ADD:2/F #22 Star-net Science Plaza Juyuanzhou #618 Jinshan Road,Fuzhou Fujian China
[email protected]
www.centerm.com
Centerm Information Co.,Ltd
Modify the password
1.1.18 Save Data
1.
Use “Save Data”
The “Save Data” program can save the system settings and even if the terminal is illegally
power off, the settings can be saved.
2.
Run “Save Data” program
(1) Run “Save Data” in start menu;
(2) Open control center and select “Save Data”
The operating interface is as the picture shows below:
Saving Data
1.2 Connection Manager
1.
Use “Connection Manager”
Through connection manager, you can add, edit and delete the connection clauses.
2.
Run “Connection Manager”
Click the “Settings” in the login interface to enter the “settings” panel and double click
“Connection Manager” icon to run it.
The operating interface is as the picture shows below:
25
ADD:2/F #22 Star-net Science Plaza Juyuanzhou #618 Jinshan Road,Fuzhou Fujian China
[email protected]
www.centerm.com
Centerm Information Co.,Ltd
Connection Manager
a)
There is a list box in this interface which displays the connection clauses added by users.
Each connection clause has four sub-items:
(1) Session name
The name of the session added by users
(2) Type
It means: the type of the connection items added by users.
(3) Status
There are two statuses: “Default” and blank.
When not set as Default connection upon starting up, the status is blank;
When set as default connection upon starting up, it shows “Default” in “Status”;
(4) Server
It shows the name of the server or application which users want to connect to.
b)
There are the buttons “default”, “edit”, “add” and “delete” on the bottom of the list box.
(1) Edit
Click “Edit” or press Alt + E, a dialog box of editing the connection would pop which
includes several property pages.
26
ADD:2/F #22 Star-net Science Plaza Juyuanzhou #618 Jinshan Road,Fuzhou Fujian China
[email protected]
www.centerm.com
Centerm Information Co.,Ltd
(2) Add
Click “Add” button or press Alt + A, a dialog box of adding a new connection would pop up
There are 3 items: Session Name, Server Address and Desktop. Fill these three items and
click “Next”, thus it would finish the connection setup. When Selected“With VDI-in-a-Box
Virtual Desktops
support client mode as VDI-in-a-Box.
As the picture shows below:
Add new session
(3) Delete
Click “Delete” button or press Alt + D, a dialog box for deleting would pop up, click “ok”
and it would delete the selected item; click “cancel” or press ESC, it would cancel the
deleting. As the picture shows below:
Delete a session
(4) Default
If one connection item has not been set as direct connection upon starting up, click “Default”
button or press Alt + T, the connection shows “Default” in “Status”.
As the picture shows
below:
27
ADD:2/F #22 Star-net Science Plaza Juyuanzhou #618 Jinshan Road,Fuzhou Fujian China
[email protected]
www.centerm.com
Centerm Information Co.,Ltd
Default session
1.2.1 Citrix Connection Guide
Click “Add” in connection manager and select Citrix connection type, click “Next” to enter
Citrix connection guide.
1.
General
In “General” property page, you must input the name of the new connection in “Session
Name” and server IP address or server name in “server address”. The connection name cannot
be the same with other Citrix connections. As the picture shows below:
General Properties of New ICA Session
2.
Options
28
ADD:2/F #22 Star-net Science Plaza Juyuanzhou #618 Jinshan Road,Fuzhou Fujian China
[email protected]
www.centerm.com
Centerm Information Co.,Ltd
In “Options” property page, users can select close connection page after connected. As the
picture shows below:
Options of New ICA Session
29
ADD:2/F #22 Star-net Science Plaza Juyuanzhou #618 Jinshan Road,Fuzhou Fujian China
[email protected]
www.centerm.com