Download Top E604 User guide

Transcript
CX 253i / SWZ PTT en / A31008-X353-P100-1-19 / cover_0_Koeln.fm / 03.12.2007
Top E604ISDN
User guide
CX 253i / SWZ PTT en / A31008-X353-P100-1-19 / cover_0_Koeln.fm / 03.12.2007
2
Number keys
Enter text
Volume
Adjust
Handsfree
on/off
Phonebook
Open
Last number redial
Enter menu key
Opens the main menu
Playing back messages
Answering machine key
Lit: AM activated
Pause / end playback
of messages
Microphone
Function keys
Message key
flashes: New message, new
entries in call list
Exit menu key
back to previous
menu
Display keys
Antenna
CX 253i / SWZ PTT en / A31008-X353-P100-1-19 / SAG_covers_I-II.fm / 13.04.2005
Brief overview of base station
1
CX 253i / SWZ PTT en / A31008-X353-P100-1-19 / IVZ.fm / 03.12.2007
Contents
Contents
Brief overview of base station . . . . . . . . . . . . . . . . . 1
Safety precautions . . . . . . . . . . . . . . . . . . . . . . . . . . 6
Display explanation . . . . . . . . . . . . . . . . . . . . . . . . . . 7
Preparing the base station for use . . . . . . . . . . . . . 8
Pack contents . . . . . . . . . . . . . . . . . . . . . . . . . . . . . . . . . . . . . . . . . . . . . . . . . . . . . . . . . 8
Installing the base station . . . . . . . . . . . . . . . . . . . . . . . . . . . . . . . . . . . . . . . . . . . . . . . 8
Connecting the base station . . . . . . . . . . . . . . . . . . . . . . . . . . . . . . . . . . . . . . . . . . . . . 9
Operating the base station – menu system . . . . . . . . . . . . . . . . . . . . . . . . . . . . . . . . . 11
Using the base station via handset . . . . . . . . . . . . . . . . . . . . . . . . . . . . . . . . . . . . . . . 13
Preparing the base station for use – Getting started wizard . . . . . . . . . . . . . . . . . . . . 14
Making calls . . . . . . . . . . . . . . . . . . . . . . . . . . . . . . . 20
Making external calls and ending a call . . . . . . . . . . . . . . . . . . . . . . . . . . . . . . . . . . . .
Making an internal call . . . . . . . . . . . . . . . . . . . . . . . . . . . . . . . . . . . . . . . . . . . . . . . . .
Answering a call . . . . . . . . . . . . . . . . . . . . . . . . . . . . . . . . . . . . . . . . . . . . . . . . . . . . . .
Withholding Calling Line Identification . . . . . . . . . . . . . . . . . . . . . . . . . . . . . . . . . . . .
Activating/deactivating handsfree and open listening . . . . . . . . . . . . . . . . . . . . . . . .
Picking up a call during ring delay (Call PickUp) . . . . . . . . . . . . . . . . . . . . . . . . . . . . .
Rejecting a call . . . . . . . . . . . . . . . . . . . . . . . . . . . . . . . . . . . . . . . . . . . . . . . . . . . . . . .
Reserving a line . . . . . . . . . . . . . . . . . . . . . . . . . . . . . . . . . . . . . . . . . . . . . . . . . . . . . .
Defining the send MSN for the next call . . . . . . . . . . . . . . . . . . . . . . . . . . . . . . . . . . .
Callback when the number is busy (CCBS) . . . . . . . . . . . . . . . . . . . . . . . . . . . . . . . . .
20
20
21
22
23
24
24
24
25
25
Functions during a call . . . . . . . . . . . . . . . . . . . . . . 27
Muting the base station . . . . . . . . . . . . . . . . . . . . . . . . . . . . . . . . . . . . . . . . . . . . . . . .
Making a call to several users . . . . . . . . . . . . . . . . . . . . . . . . . . . . . . . . . . . . . . . . . . .
Forwarding an incoming call – CD (Call Deflection) . . . . . . . . . . . . . . . . . . . . . . . . . .
Working with call waiting for an external call – CW (Call Waiting) . . . . . . . . . . . . . . .
Call hold . . . . . . . . . . . . . . . . . . . . . . . . . . . . . . . . . . . . . . . . . . . . . . . . . . . . . . . . . . . .
Parking/continuing a call . . . . . . . . . . . . . . . . . . . . . . . . . . . . . . . . . . . . . . . . . . . . . . .
27
27
30
31
32
32
Using the Phonebook and other lists . . . . . . . . . . 33
Phonebook and speed dial list . . . . . . . . . . . . . . . . . . . . . . . . . . . . . . . . . . . . . . . . . . .
Display available memory . . . . . . . . . . . . . . . . . . . . . . . . . . . . . . . . . . . . . . . . . . . . . .
Last number redial list . . . . . . . . . . . . . . . . . . . . . . . . . . . . . . . . . . . . . . . . . . . . . . . . .
Opening lists with the message key . . . . . . . . . . . . . . . . . . . . . . . . . . . . . . . . . . . . . .
Caller lists . . . . . . . . . . . . . . . . . . . . . . . . . . . . . . . . . . . . . . . . . . . . . . . . . . . . . . . . . . .
2
33
37
37
38
39
CX 253i / SWZ PTT en / A31008-X353-P100-1-19 / IVZ.fm / 03.12.2007
Contents
Making cost-effective calls . . . . . . . . . . . . . . . . . . 42
Displaying the call duration . . . . . . . . . . . . . . . . . . . . . . . . . . . . . . . . . . . . . . . . . . . . . 42
SMS (text messages) . . . . . . . . . . . . . . . . . . . . . . . 44
General . . . . . . . . . . . . . . . . . . . . . . . . . . . . . . . . . . . . . . . . . . . . . . . . . . . . . . . . . . . .
Before you can send and receive text messages . . . . . . . . . . . . . . . . . . . . . . . . . . . . .
Managing SMS service centres . . . . . . . . . . . . . . . . . . . . . . . . . . . . . . . . . . . . . . . . . .
Entering, editing or deleting phone numbers for SMS centres . . . . . . . . . . . . . . . . .
Activating/deactivating SMS send centre . . . . . . . . . . . . . . . . . . . . . . . . . . . . . . . . . .
Registering/de-registering with an SMS centre . . . . . . . . . . . . . . . . . . . . . . . . . . . . . .
Memory . . . . . . . . . . . . . . . . . . . . . . . . . . . . . . . . . . . . . . . . . . . . . . . . . . . . . . . . . . . .
Sending a text message and the outgoing message list . . . . . . . . . . . . . . . . . . . . . . .
Sending a text message to an e-mail address . . . . . . . . . . . . . . . . . . . . . . . . . . . . . . .
Receiving text messages, incoming message list . . . . . . . . . . . . . . . . . . . . . . . . . . . .
Text messages to a PABX . . . . . . . . . . . . . . . . . . . . . . . . . . . . . . . . . . . . . . . . . . . . . . .
Errors when sending and receiving a text message . . . . . . . . . . . . . . . . . . . . . . . . . .
44
44
45
46
47
48
48
48
52
53
58
59
Operating the answering machine . . . . . . . . . . . . 61
Selecting an answering machine . . . . . . . . . . . . . . . . . . . . . . . . . . . . . . . . . . . . . . . .
Activating/deactivating the answering machine . . . . . . . . . . . . . . . . . . . . . . . . . . . .
Selecting announce only and AM mode . . . . . . . . . . . . . . . . . . . . . . . . . . . . . . . . . . .
Recording/changing announcements . . . . . . . . . . . . . . . . . . . . . . . . . . . . . . . . . . . . .
Playing back/deleting announcements . . . . . . . . . . . . . . . . . . . . . . . . . . . . . . . . . . . .
Recording memos . . . . . . . . . . . . . . . . . . . . . . . . . . . . . . . . . . . . . . . . . . . . . . . . . . . .
Two-way recording . . . . . . . . . . . . . . . . . . . . . . . . . . . . . . . . . . . . . . . . . . . . . . . . . . .
Picking up a call from the answering machine . . . . . . . . . . . . . . . . . . . . . . . . . . . . . .
Playing messages . . . . . . . . . . . . . . . . . . . . . . . . . . . . . . . . . . . . . . . . . . . . . . . . . . . . .
Returning a call during playback . . . . . . . . . . . . . . . . . . . . . . . . . . . . . . . . . . . . . . . . .
Playing a message to another caller . . . . . . . . . . . . . . . . . . . . . . . . . . . . . . . . . . . . . .
Playing back memos . . . . . . . . . . . . . . . . . . . . . . . . . . . . . . . . . . . . . . . . . . . . . . . . . .
Setting the playback speed . . . . . . . . . . . . . . . . . . . . . . . . . . . . . . . . . . . . . . . . . . . . .
Deleting messages/memos . . . . . . . . . . . . . . . . . . . . . . . . . . . . . . . . . . . . . . . . . . . . .
Marking an old message or memo as "new" . . . . . . . . . . . . . . . . . . . . . . . . . . . . . . . .
Adding a number to the Phonebook . . . . . . . . . . . . . . . . . . . . . . . . . . . . . . . . . . . . . .
Remote control . . . . . . . . . . . . . . . . . . . . . . . . . . . . . . . . . . . . . . . . . . . . . . . . . . . . . .
61
62
62
63
63
64
64
65
65
66
67
67
68
68
69
69
70
Setting the answering machine
(on Top E604 ISDN) . . . . . . . . . . . . . . . . . . . . . . . . . 74
Setting a different language . . . . . . . . . . . . . . . . . . . . . . . . . . . . . . . . . . . . . . . . . . . .
Assigning a receive MSN . . . . . . . . . . . . . . . . . . . . . . . . . . . . . . . . . . . . . . . . . . . . . . .
Hiding/showing an answering machine . . . . . . . . . . . . . . . . . . . . . . . . . . . . . . . . . . .
Specifying the number of rings before the answering machine starts . . . . . . . . . . .
Activating/deactivating voice announcement of date and time . . . . . . . . . . . . . . . . .
Setting the recording time and recording quality . . . . . . . . . . . . . . . . . . . . . . . . . . . .
Activating/deactivating automatic pause . . . . . . . . . . . . . . . . . . . . . . . . . . . . . . . . . .
74
74
75
76
76
77
78
3
CX 253i / SWZ PTT en / A31008-X353-P100-1-19 / IVZ.fm / 03.12.2007
Contents
Locking the answering machine, defining AM PIN . . . . . . . . . . . . . . . . . . . . . . . . . . .
Setting time control . . . . . . . . . . . . . . . . . . . . . . . . . . . . . . . . . . . . . . . . . . . . . . . . . . .
Activating/deactivating automatic call screening on a handset . . . . . . . . . . . . . . . . .
Activating/deactivating automatic pick up . . . . . . . . . . . . . . . . . . . . . . . . . . . . . . . . .
78
79
81
82
Date and Time . . . . . . . . . . . . . . . . . . . . . . . . . . . . . 83
Setting the date and time . . . . . . . . . . . . . . . . . . . . . . . . . . . . . . . . . . . . . . . . . . . . . . 83
Setting appointments . . . . . . . . . . . . . . . . . . . . . . . . . . . . . . . . . . . . . . . . . . . . . . . . . 84
Night service . . . . . . . . . . . . . . . . . . . . . . . . . . . . . . . . . . . . . . . . . . . . . . . . . . . . . . . . 85
Security settings . . . . . . . . . . . . . . . . . . . . . . . . . . . 89
Changing the system PIN . . . . . . . . . . . . . . . . . . . . . . . . . . . . . . . . . . . . . . . . . . . . . . . 89
Defining authorisation . . . . . . . . . . . . . . . . . . . . . . . . . . . . . . . . . . . . . . . . . . . . . . . . . 90
Emergency numbers . . . . . . . . . . . . . . . . . . . . . . . . . . . . . . . . . . . . . . . . . . . . . . . . . . 90
System settings . . . . . . . . . . . . . . . . . . . . . . . . . . . . 93
Changing the name for an internal user . . . . . . . . . . . . . . . . . . . . . . . . . . . . . . . . . . . 93
Setting up/deleting ISDN phone numbers (MSN) . . . . . . . . . . . . . . . . . . . . . . . . . . . . 93
Assigning a phone number (MSN) . . . . . . . . . . . . . . . . . . . . . . . . . . . . . . . . . . . . . . . . 95
Setting up the list of send MSNs for the next call . . . . . . . . . . . . . . . . . . . . . . . . . . . . 96
Setting up a busy signal when the MSN is being used (Busy on Busy) . . . . . . . . . . . . 97
Assigning an MSN a ringer melody . . . . . . . . . . . . . . . . . . . . . . . . . . . . . . . . . . . . . . . 97
Setting up rejecting for the entire MSN group . . . . . . . . . . . . . . . . . . . . . . . . . . . . . . 98
Diverting calls . . . . . . . . . . . . . . . . . . . . . . . . . . . . . . . . . . . . . . . . . . . . . . . . . . . . . . . . 98
Activating/deactivating handsfree dialling . . . . . . . . . . . . . . . . . . . . . . . . . . . . . . . . 102
Pre-assigning the call diversion destination – CD (Call Deflection) . . . . . . . . . . . . . . 103
Setting up automatic call diversion when not reaching a terminal . . . . . . . . . . . . . 103
Setting up an internal group call group . . . . . . . . . . . . . . . . . . . . . . . . . . . . . . . . . . . 104
Setting up ring delay . . . . . . . . . . . . . . . . . . . . . . . . . . . . . . . . . . . . . . . . . . . . . . . . . 105
Activating/deactivating call waiting – CW . . . . . . . . . . . . . . . . . . . . . . . . . . . . . . . . . 106
Setting an external/internal enquiry call . . . . . . . . . . . . . . . . . . . . . . . . . . . . . . . . . . 106
Setting up the waiting melody . . . . . . . . . . . . . . . . . . . . . . . . . . . . . . . . . . . . . . . . . 107
Changing the long distance prefix . . . . . . . . . . . . . . . . . . . . . . . . . . . . . . . . . . . . . . . 108
Restoring the factory settings . . . . . . . . . . . . . . . . . . . . . . . . . . . . . . . . . . . . . . . . . . 108
Checking the status . . . . . . . . . . . . . . . . . . . . . . . . . . . . . . . . . . . . . . . . . . . . . . . . . . 109
Checking the software version . . . . . . . . . . . . . . . . . . . . . . . . . . . . . . . . . . . . . . . . . 109
Setting the volume, display and keys . . . . . . . . . 110
Setting the display . . . . . . . . . . . . . . . . . . . . . . . . . . . . . . . . . . . . . . . . . . . . . . . . . . . 110
Adjust volume . . . . . . . . . . . . . . . . . . . . . . . . . . . . . . . . . . . . . . . . . . . . . . . . . . . . . . 111
Changing the ringer tone . . . . . . . . . . . . . . . . . . . . . . . . . . . . . . . . . . . . . . . . . . . . . . 112
Activating/deactivating advisory tones . . . . . . . . . . . . . . . . . . . . . . . . . . . . . . . . . . . 113
Using function keys . . . . . . . . . . . . . . . . . . . . . . . . . . . . . . . . . . . . . . . . . . . . . . . . . . 113
4
CX 253i / SWZ PTT en / A31008-X353-P100-1-19 / IVZ.fm / 03.12.2007
Contents
Operating with other devices . . . . . . . . . . . . . . . 116
Registering handsets . . . . . . . . . . . . . . . . . . . . . . . . . . . . . . . . . . . . . . . . . . . . . . . . . 116
De-registering handsets . . . . . . . . . . . . . . . . . . . . . . . . . . . . . . . . . . . . . . . . . . . . . . 120
Gigaset Repeater . . . . . . . . . . . . . . . . . . . . . . . . . . . . . . . . . . . . . . . . . . . . . . . . . . . . 120
Operating when connected to a PABX . . . . . . . . 122
Access code . . . . . . . . . . . . . . . . . . . . . . . . . . . . . . . . . . . . . . . . . . . . . . . . . . . . . . . . 122
Dialling options . . . . . . . . . . . . . . . . . . . . . . . . . . . . . . . . . . . . . . . . . . . . . . . . . . . . . 122
Appendix . . . . . . . . . . . . . . . . . . . . . . . . . . . . . . . . 125
Care . . . . . . . . . . . . . . . . . . . . . . . . . . . . . . . . . . . . . . . . . . . . . . . . . . . . . . . . . . . . . .
Contact with liquid . . . . . . . . . . . . . . . . . . . . . . . . . . . . . . . . . . . . . . . . . . . . . . . . . .
Guarantee/maintenance/repair/approval . . . . . . . . . . . . . . . . . . . . . . . . . . . . . . . . .
Specifications . . . . . . . . . . . . . . . . . . . . . . . . . . . . . . . . . . . . . . . . . . . . . . . . . . . . . .
Character set chart . . . . . . . . . . . . . . . . . . . . . . . . . . . . . . . . . . . . . . . . . . . . . . . . . .
125
125
127
129
130
Compatibility . . . . . . . . . . . . . . . . . . . . . . . . . . . . . 131
Menu Tree . . . . . . . . . . . . . . . . . . . . . . . . . . . . . . . 132
Main menu . . . . . . . . . . . . . . . . . . . . . . . . . . . . . . . . . . . . . . . . . . . . . . . . . . . . . . . .
"Set base" submenu . . . . . . . . . . . . . . . . . . . . . . . . . . . . . . . . . . . . . . . . . . . . . . . . . .
"Answering mach." submenu . . . . . . . . . . . . . . . . . . . . . . . . . . . . . . . . . . . . . . . . . .
Phonebook key and last number redial key . . . . . . . . . . . . . . . . . . . . . . . . . . . . . . .
132
133
136
138
Accessories . . . . . . . . . . . . . . . . . . . . . . . . . . . . . . 139
Handsets . . . . . . . . . . . . . . . . . . . . . . . . . . . . . . . . . . . . . . . . . . . . . . . . . . . . . . . . . . 139
Glossary . . . . . . . . . . . . . . . . . . . . . . . . . . . . . . . . . 143
Index . . . . . . . . . . . . . . . . . . . . . . . . . . . . . . . . . . . 151
5
CX 253i / SWZ PTT en / A31008-X353-P100-1-19 / sec_hints.fm / 03.12.2007
Safety precautions
Safety precautions
O
!
Only use the power supply unit supplied, as indicated on the underside of
the telephone.
The operation of medical appliances may be affected. Be aware of the
technical conditions within the particular environment (e.g. doctor's practice).
Do not install the telephone in bathrooms or shower rooms (see page 9 and
page 125). The handset and base station are not watertight.
Do not use the phone in environments subject to explosion hazard
(e.g. auto paint shops).
ƒ
Ensure that your device is accompanied by this user guide when you give it to
others to use.
Please dispose of the telephone in an environmentally friendly manner.
i
6
◆ Not all of the functions described in this manual are available in all
countries.
◆ All SMS functions are dependent on the network provider.
CX 253i / SWZ PTT en / A31008-X353-P100-1-19 / sec_hints.fm / 03.12.2007
Display explanation
Display explanation
A table below a heading specifies the base station or handsets on which the function is
available.
Example: Phonebook or speed dial list: Sending a single entry or complete list to a
handset
To handset: Top S328/S326i/E6x4i
Example: Set answering machine in network for fast access
On Base:
Top E604 ISDN
7
CX 253i / SWZ PTT en / A31008-X353-P100-1-19 / starting.fm / 03.12.2007
Preparing the base station for use
Pack contents
The pack contains:
◆ one base station,
◆ one handset and a coiled handset cord,
◆ one power supply unit with power cord,
◆ one ISDN connection cable,
◆ one label card,
◆ one tab cover,
◆ one user guide (3 languages, German, French, Italian).
Installing the base station
Installation instructions
The base station is designed to be operated in enclosed, dry areas at temperatures
ranging from +5 °C to +45 °C. Install the base station at a central location in your home,
e.g., in the hall.
W
◆ Never expose the telephone to: heat sources, direct sunlight or other
electrical appliances.
◆ Protect your device from moisture, dust, corrosive liquids and
vapours.
Range and signal strength for operation with handset
The base has a range of approx. 250 m outdoors and up to 40 m indoors. The signal
strength display indicates the quality of the radio contact between the base station and
the handset:
Ð
Ñ
|
8
Reception strength 100 %
Reception strength 50 %
No reception (flashes)
i
Ò
Reception strength 75 %
Low reception strength
CX 253i / SWZ PTT en / A31008-X353-P100-1-19 / starting.fm / 03.12.2007
Preparing the base station for use
Connecting the base station
Note the specified sequence
Socket for
power cord
Socket for ISDN
connection cable
Socket for coiled
receiver cord
Schematic illustration
1.
◆ Insert the plug on the long end of the coiled receiver cord into the socket on the
base station
◆ Place the receiver cord in the cable recess
◆ Plug the other end of the receiver cord into the receiver
ISDN connection
cable (NT2a/b)
Underside of
base station
(enlarged view)
1.
Telephone plug
with ISDN cable
2.
◆ Plug one of the ISDN connecting cable jacks into the socket on the base station
(it clicks into place)
◆ Position cable in the cable recess
◆ Insert the second ISDN connecting cable jack into the NT2a/b (ISDN connection).
9
CX 253i / SWZ PTT en / A31008-X353-P100-1-19 / starting.fm / 03.12.2007
Preparing the base station for use
Outlet
Cable recess
Underside of
base station
(enlarged view)
2.
Power supply unit
with power cord
3.
◆ Insert the small jack on the power cord into the socket on the base station
◆ Position cable in the cable recess
◆ Ensure that the receiver is positioned correctly on the base station!
Plug the power supply unit into your power outlet.
i
10
Keep the power supply unit plugged in at all times to ensure your phone
is ready for use whenever you need it.
Neither the base station nor the registered handsets will operate in the
event of a power failure. However, all the settings and stored information
(messages, Phonebook entries etc.) are retained indefinitely.
CX 253i / SWZ PTT en / A31008-X353-P100-1-19 / starting.fm / 03.12.2007
Preparing the base station for use
Operating the base station – menu system
Display keys
The display keys are the horizontal rocker keys just below the display. Their function
changes depending on the particular operating situation. The current function is shown
in the display directly above the key to which it relates.
Example:
Display key functions
(depending on the operating situation)
YZ
{
Display keys
The various display symbols have the following meanings:
Display
Symbol
OK
W
X
{
stuv
Meaning when pressed
OK key: confirm menu function or confirm an input and store.
Menu+ key: Open submenu, e.g. in input fields.
Delete key: Delete input from right to left one character at a time.
Escape key: Go back one menu level, or cancel the operation.
Arrow keys
Correcting incorrect inputs
After a correct input you will hear a confirmation tone (rising tone sequence). An
incorrect input is indicated by an error tone (descending tone sequence). You can repeat
the input.
If you have entered the wrong character in the text, you can correct it as follows:
Delete characters to the left of the cursor with ß
To correct a phone number or text, use the display keys to move the cursor to the right
of the incorrect character. Then press the display key ß . The character is deleted.
Now enter the correct character.
Inserting characters to the left of the cursor
If you have left out a character, use the display keys to move the cursor to where you
want to insert the character, and then enter it.
Overwriting characters
When entering Date/time the number of digits is fixed and there is a default entry in the
field. Using the display keys, position the cursor on the digit that is to be changed and
overwrite it.
11
CX 253i / SWZ PTT en / A31008-X353-P100-1-19 / starting.fm / 03.12.2007
Preparing the base station for use
Overwriting characters
For pre-configured fields with fixed number, position the cursor on the wrong digit and
overwrite it using the display keys.
For pre-configured fields with a fixed number of digits, position the cursor on the wrong
digit and overwrite it using the display keys.
Idle status
Display in idle status (example)
Top E604 ISDN
Two lines with situation specific
system information
(Date and time have already
been set)
AM:
Internal 11
20.09.03
09:45
Ÿ
INT SMS
Reverting to idle status from anywhere in the menu:
◆ Press the exit menu key j for around 1 second or
◆ do not press any key: The display automatically reverts to idle status after 1 minute.
Changes which you have not confirmed or saved by pressing OK , YES, Store, Send or
with Store OK will be lost.
Menu operation, with "Setting Handsfree Volume" as an example
1. i
Press the enter menu key. The menu opens.
2.
s
OK
3.
v
Press the display key until Audio is marked in the display (by the
frame) and then use the display key OK to confirm.
OK
4.
uv
Press the display key until Vol.Loudspeaker is marked in the display
(by the frame) and then use the display key OK to confirm.
Press the display keys to select the volume (1-5).
5. OK
Now press the display key to confirm the setting.
6. j
Hold down the exit menu key to return to idle status.
12
CX 253i / SWZ PTT en / A31008-X353-P100-1-19 / starting.fm / 03.12.2007
Preparing the base station for use
Using the base station via handset
The base E604 ISDN supports the Top S328/S326i/E6x4i handsets. Your base and
handset offer you a multitude of features. Depending on handset used, you can use a
specific number of these features; page 140 shows which feature can be used with
which handset.
The user guide for the handsets is included. The user guide can be found on the internet
under www.swisscom.com/eShop/Alle Bedienungsanleitungen.
For "Assigning an MSN a ringer melody" a comfort handset is used for illustration in the
following examples of operating the base station.
Operating the base using a comfort handset
As a central operating element, the handsets have a control key p which has four black
direction arrows and the accompanying symbols. Pressing the various icons (up, down,
right, or left) opens a different function. In the operating instructions, the side you must
press is marked with a black triangle, e.g. key v for right = Open Menu.
Example:"Assigning an MSN a ringer melody"
v
Open the menu.
ì
s Base
s Settings
Select the menu item and confirm.
OK
Select the menu item and confirm.
OK
Select the menu item and confirm.
~ OK
s ISDN settings
s Set up MSN
Enter system PIN if required (page 89).
OK
Select the menu item and confirm.
OK
Select the menu item and confirm.
s
Select MSN, e.g. MSN1: Anna.
v
r Ringer Melody: 5
Open the submenu.
OK
Select melody and confirm,
e.g., Ringer Melody: 5 (‰ = set).
13
CX 253i / SWZ PTT en / A31008-X353-P100-1-19 / starting.fm / 03.12.2007
Preparing the base station for use
Preparing the base station for use – Getting started wizard
A few settings are necessary before using your base station. The Getting started wizard
is designed to help you with this. It can be opened at any time using the display of your
base station (page 16) or a comfort handset (see user guide of handset). The following
settings can be set one after the other.
◆ Date and time
◆ Show/hide answering machine 1… 3
◆ Find out/enter the MSN for your connection
◆ Set the device type for the connected device
◆ Set the receive MSN
◆ Set the send MSN
◆ Outside line code (when using a PABX)
What is an MSN?
MSN = Multiple Subscriber Number. You can apply for up to ten different telephone
numbers for one multiple ISDN connection. An MSN is one of the phone numbers
assigned to you without an area code.
You telephone uses the MSN entirely as you require. The following differentiation is
made:
◆ Receive MSN: Phone numbers you may be called on. You can assign the receive
MSNs to specific internal users (terminals) (page 95). Incoming calls are only
forwarded to the terminals to which the relevant MSN has been assigned. Terminals
can be e.g. handsets or answering machines.
◆ Send MSN: Phone numbers that are identified to the person you are calling. The
network operator calculates charges based on the send MSN's. You can assign a
fixed send MSN to each internal user (page 96).
Internal users
Your base station is assigned the fixed internal number 10.
14
CX 253i / SWZ PTT en / A31008-X353-P100-1-19 / starting.fm / 03.12.2007
Preparing the base station for use
Potential internal parties are:
◆ Handsets which can be assigned the internal call numbers 11 to 16.
◆ The integrated answering machines, which are assigned the internal phone
numbers 91 to 93.
Example of how to assign an MSN:
You have applied for four MSN's, two for business use (MSN1, MSN2) and two for private
purposes (MSN3, MSN4). Four handsets are connected to a base station. Two handsets
(Int.11 and 12) and the answering machine AM 91 are intended for business use, and
two handsets (Int.13 and 14) and the answering machine AM 92 are intended for
private use.
Internal users
handsets
Answering
machine
Handset
Handset
Answering
machine
Int.11 , 12
AM 91
Int.13
Int.14
AM 92
Use
Business
Receive MSN
MSN1, MSN2
MSN1, MSN2
Send MSN
MSN1
---
Private
MSN3
MSN4
MSN3
MSN4
---
MSN3, MSN4
Ring delay
When ring delay is active, the signal for an incoming call is delayed on the base station
(e.g. after 5 rings – the number can be set). Ring delay can be set individually for each
internal subscriber and for each incoming MSN (page 105).
As an example, an incoming call should be signalled to MSN1 Int.11 when Int.12 does
not answer the call. To do this, activate the ring delay for Int.11 and MSN1 (e.g., to
5 rings). The call is signalled directly to Int.12 , but Int.11 is signalled after the 5th ring.
15
CX 253i / SWZ PTT en / A31008-X353-P100-1-19 / starting.fm / 03.12.2007
Preparing the base station for use
Launching the Getting started wizard and setting the basic settings
You can operate the Getting started wizard of your base station either directly using the
base station or via the handsets.
Launching the Getting started wizard:
i
Open the menu.
s Set base
s Installation
OK
Select the menu item and confirm.
OK
Select the menu item and confirm.
Press the display key to launch the Getting started
wizard.
If you already have set a system PIN (not 0000)
(page 89), you will be asked to enter it.
[RRRRRRRRRRRRRRRRRRRRRRRRRRR]
YES
~
If required, enter the system PIN and confirm.
OK
◆ The Getting started wizard cannot be used simultaneously by multiple
internal users.
◆ If there is already settings data (factory default or previous settings),
i
this data is shown at the appropriate positions in the display and can
be modified there.
◆ To cancel the Getting started wizard, press the exit menu key and
hold. All changes you have already saved using Save entry §§OK§§ are
retained. The base station returns to idle status.
◆ To skip a setting, press the display key §§NO§§.
Setting the date and time:
The date and time are transferred automatically from the telephone network during the
first outgoing call.
The display shows: Enter time?
Press the display key to set the date and time.
[RRRRRRRRRRRRRRRRRRRRRRRRRRR]
YES
~
Enter the date (6-digit) and time (4-digit in 24-hour
mode) in series, e.g. 200903 0945 for 9/20/03
9:45 a.m..
W
Press the display key to open the submenu.
Save entry
OK
Select the menu item and confirm.
If the time should be displayed in 12-hour mode, you can modify the setting later
(page 83).
16
CX 253i / SWZ PTT en / A31008-X353-P100-1-19 / starting.fm / 03.12.2007
Preparing the base station for use
Showing/hiding answering machines:
The answering machines AM1, AM2, and AM3 are available. You can use the answering
machine when it is shown. By factory default, only AB1 is shown (only AB1 is displayed
in the menus).
The display shows: Suppress display of AM1?
Respond with
◆ YES, if you want to hide AM1,
◆ with NO, if you want to use AM1.
This sequence will then be repeated for AM2 and AM3.
i
An answering machine can only be hidden if there are no messages/
memos stored in it (page 75).
Entering your phone numbers (MSNs) and names for MSNs:
The feature Find own numbers (MSN)? is not supported by Swisscom ISDN network.
Programming the MSN.
[RRRRRRRRRRRRRRRRRRRRRRRRRR]
YES
Press the display key to confirm the prompt.
[RRRRRRRRRRRRRRRRRRRRRRRRRR]
YES
Press the display key, to confirm query
MSN1 MSN %f?.
~
s~
Enter name. Entering a name for an MSN is optional.
W
Press the display key to open the submenu.
Save entry
If necessary, scroll to the line <Number> and enter
the MSN. If the MSNs were found automatically, the
numbers will already be entered.
OK
Select the menu item and confirm.
The MSNs entered will automatically be assigned to all handsets as incoming and
outgoing MSNs.
This sequence will then be repeated for MSN2 to MSN10.
i
The MSN must be programmed without the area code (e.g. 031).
17
CX 253i / SWZ PTT en / A31008-X353-P100-1-19 / starting.fm / 03.12.2007
Preparing the base station for use
Setting the receive MSN
The display shows: Set incoming MSN?
The receive MSN is used to answer incoming calls. The MSNs allocated to your ISDN
connection can be allocated to various end devices according to your preferences. You
can assign an end device multiple receive MSNs.
[RRRRRRRRRRRRRRRRRRRRRRRRRRR]
YES
Press the display key to confirm the prompt.
[RRRRRRRRRRRRRRRRRRRRRRRRRRR]
YES
Press the display key to confirm the Set allocation
Internal 11 ? prompt.
The list of entered MSNs is displayed.
s MSN 1:12345678
OK
j
Select the MSN which should be assigned to this end
device, and confirm.
Repeat this sequence for all MSNs which should be
assigned to this end device as a receive MSN.
Briefly press the exit menu key, to complete the
assignment for this terminal.
This sequence is repeated for all handsets registered for your telephone and for the
integrated answering machine.
i
When setting the receive MSN for an answering machine, only the MSNs
are offered in the MSN list which have not yet been assigned to another
answering machine.
Setting the send MSN:
The display shows: Set outgoing MSN?
Each internal user can be assigned exactly one of the available send MSNs. It is
identified to the person called and the network provider bills the call charges to this
MSN. Each end device can be assigned exactly one of the available send MSNs.
[RRRRRRRRRRRRRRRRRRRRRRRRRRR]
YES
Press the display key to confirm the prompt.
[RRRRRRRRRRRRRRRRRRRRRRRRRRR]
YES
Press the display key to confirm the Set allocation
Internal 11 ? prompt.
The list of entered MSNs is displayed.
s MSN 1:12345678
j
OK
Select the MSN which should be assigned to this end
device, and confirm.
Press the display key to end this assignment for this
terminal.
This process is repeated for all handsets registered on your base station.
i
18
The MSN must be programmed without the area code (e.g. 031).
CX 253i / SWZ PTT en / A31008-X353-P100-1-19 / starting.fm / 03.12.2007
Preparing the base station for use
Using with a PABX:
Only carry out the following steps if you want to connect your telephone to a private
PABX (not directly to a NT2a/b).
The display shows: Operate behind PABX?
[RRRRRRRRRRRRRRRRRRRRRRRRRR]
YES
Press the display key to confirm the prompt.
[RRRRRRRRRRRRRRRRRRRRRRRRRR]
YES
Press the display key to confirm the Set access
code? prompt.
~
Enter the access code (outside line code).
W
Save entry
Press the display key to open the submenu.
OK
Select the menu item and confirm. The Getting
started wizard is closed.
The display shows Installation completed. The base station returns to idle status.
19
CX 253i / SWZ PTT en / A31008-X353-P100-1-19 / telephony.fm / 03.12.2007
Making calls
Making calls
Making external calls and ending a call
External calls are calls using the public telephone network. Two external calls can be
made at the same time on your base station.
either ...
Immediate dialling:
c
~
Lift the receiver.
Enter the telephone number. The phone number is
dialled.
or ...
Block dialling:
~
c
Enter the telephone number.
a
Replace the receiver.
Lift the receiver. The phone number is dialled.
End the call:
◆ Replace the receiver to cancel dialling.
◆ If Dial handsfree is activated (page 102), you can also dial and make
i
calls without lifting the receiver. Dial the number and handsfree mode
is activated.
◆ If you have previously assigned a function key accordingly (page 114),
you can also use that function key to dial.
◆
Making an internal call
Internal calls are calls
◆ between the base station and a terminal registered on the base station.
◆ between terminals registered on the same base station.
They are toll-free. Three internal calls can be made at the same time on your base
station.
You can either call a specific terminal or call all the other registered internal users at the
same time ("group call").
i
20
If you receive a call during an internal call or group call, the call is not
interrupted. You will hear a call waiting tone.
CX 253i / SWZ PTT en / A31008-X353-P100-1-19 / telephony.fm / 03.12.2007
Making calls
Calling a specific handset
c
Lift the receiver.
Press the display key to initiate the internal call.
[RRRRRRRRRRRRRRRRRRRRRRRRRR]
INT
either ...
~
Enter the number of the internal user you want.
or ...
Press the display key.
[RRRRRRRRRRRRRRRRRRRRRRRRRR]
LIST
s Int.11
OK
... then
Select and confirm the internal number you want,
e.g. Int.11 .
End the call:
a
Replace the receiver.
◆ If Dial handsfree is activated (page 102), you can also dial and make
i
calls without lifting the receiver. Dial the number and handsfree mode
is activated.
◆ If you have previously assigned a function key accordingly (page 114),
you can also use that function key to dial.
Starting a group call to all internal users
You can make a group call from your base station to all other registered internal users
entered for group calls (page 104). By factory default, this option is activated.
Press the display key to initiate the internal call.
[RRRRRRRRRRRRRRRRRRRRRRRRRR]
INT
either ...
Press the display key.
[RRRRRRRRRRRRRRRRRRRRRRRRRR]
LIST
s Collective call
OK
Select the menu item and confirm.
or ...
P
Press the star key.
The first internal user who answers the call is connected to you.
Answering a call
Your base station rings, the call is shown in the display and the handsfree key d
flashes. Lift the receiver or press the handsfree key d to answer the call.
21
CX 253i / SWZ PTT en / A31008-X353-P100-1-19 / telephony.fm / 03.12.2007
Making calls
Withholding Calling Line Identification
Precondition: The "Withhold Calling Line Identification" feature is supported by your
network provider.
When supplied, your phone number is displayed on the phone of the person you are
calling (CLIP – for outgoing connections) and a caller's phone number is displayed on
your handset (COLP – for incoming connections).
You can withhold this Calling Line Identification (CLIR – for outgoing connections/ COLR
– for incoming connections). CLIP/CLIR are paired with COLP/COLR: if you withhold
Calling Line Identification both – CLIR and COLR – are activated.
You will find explanations for the abbreviations used in the glossary on page 145.
Displaying caller's phone number
When you get a call, you will see the caller's number and/or name displayed on the
screen.
Precondition: Calling Line Identification is activated for the caller.
Screen display with CLIP
With Calling Line Identification, the caller's telephone number is displayed on the
handset screen. If you have stored an entry for this number in your Phonebook, then
that entry will be displayed instead of the number, e.g. "Anna".
Ext. call from
0891234567
for private
REJECT
Telephone number or "Anna"
Receive MSN that is being called
RNG OFF
Ext. call from unknown is displayed on the screen if the caller's phone number is not
identified.
Withholding phone number identification
If you do not wish your phone number to be revealed to the person you are speaking
to you can stop your number being identified. You can withhold identification of your
phone number specifically for the next call or else for all calls. If set for all calls, the
phone number is withheld both for outgoing calls (CLIR) and for incoming calls (COLR).
Withholding identification of the phone number for the next call only:
i
s Set base
s Call preparat.
s Temp.withhold
j
22
Open the menu.
OK
Select the menu item and confirm.
OK
Select the menu item and confirm.
OK
Select the menu item and confirm (‰ = activated).
Hold down (back to idle status).
CX 253i / SWZ PTT en / A31008-X353-P100-1-19 / telephony.fm / 03.12.2007
Making calls
i
After the call, the setting is reset again. Your phone number will be
identified to your next caller. When you call the selected phone number
from the last number redial list again, this call is also not anonymous.
Withholding or permitting identification of your phone number for all calls:
When the phone is supplied Withhold no. is not activated.
i
s Set base
s Settings
s ISDN settings
s Withhold no.
j
Open the menu.
OK
Select the menu item and confirm.
OK
Select the menu item and confirm.
OK
Select the menu item and confirm.
OK
Select the menu item and confirm (‰ = activated).
Hold down (back to idle status).
Activating/deactivating handsfree and open listening
The function of the handsfree key d depends on the current status of your base
station:
Your base station is in idle status:
Activate handsfree while dialling:
~d
Enter the number and press the handsfree key.
You are making a call using the receiver or
you are making a call using the receiver and you have activated open listening:
Activating/deactivating open listening:
d
Press the handsfree key.
d+c
Hold down handsfree key and replace receiver.
a
Replace the receiver.
Activating handsfree during a call:
End the call:
You are making a call using the handsfree function:
c
d
i
Deactivate handsfree:
Lift the receiver.
End the call:
Press the handsfree key.
You can adjust volume during handsfree operation using ð und ñ.
23
CX 253i / SWZ PTT en / A31008-X353-P100-1-19 / telephony.fm / 03.12.2007
Making calls
Picking up a call during ring delay (Call PickUp)
You can pick up a call despite any set ring delay (page 105).
Preconditions:
◆ The party picking up must be authorised with at least Incoming only status
(page 90).
◆ Both parties must be assigned the same receive MSN (page 95).
c
Lift the receiver. Accept? is displayed.
[RRRRRRRRRRRRRRRRRRRRRRRRRRR]
YES
Confirm to pick up the call.
Rejecting a call
You get an external call or you are making a call and receive an external call. The call is
signalled acoustically and also shown in the display on all telephones or handsets in this
MSN group. You can reject this external call.
Press the display key REJECT.
Depending on the setting (page 98) the call can be rejected on the base station rejecting
the call only (telephones or handsets with the same receive MSN continue to ring) or it
can be rejected for the entire MSN group (the caller hears the busy tone).
Reserving a line
Your ISDN connection offers you 2 simultaneously usable telephone lines (B channels).
Precondition: You want to make calls externally, but both telephone lines of your
connection are busy (being used by other internal users).
Press the display key CALLBCK. The next available free line will be reserved for you.
You base station rings as soon as an external line is free.
either ...
Use a free line:
c
Lift the receiver. You can now enter the phone
number as usual.
or ...
Delete the reservation:
[RRRRRRRRRRRRRRRRRRRRRRRRRRR]
DELETE
i
24
Press the display key. The reservation is cancelled.
If the reservation is neither accepted or deleted, it will be deleted
automatically after 30 sec.
CX 253i / SWZ PTT en / A31008-X353-P100-1-19 / telephony.fm / 03.12.2007
Making calls
Defining the send MSN for the next call
Even if you have defined an individual send MSN for the base station (page 96), you can
select another MSN as the send MSN before each call, e.g. for individual recording of
charges.
By factory default, MSN next call is not activated for an MSN.
i
s Set base
s Call preparat.
s MSN next call
s MSN
j
i
Open the menu.
OK
Select the menu item and confirm.
OK
Select the menu item and confirm.
OK
Select the menu item and confirm.
OK
Select the required MSN and confirm
(‰ = activated).
The next call uses this MSN.
Hold down (back to idle status).
◆ The temporary send MSN is transferred to the person called as phone
number information.
◆ To make this function easier to use, you can also set one of the
function keys accordingly (page 115).
You can set up your base station so that after lifting the receiver or pressing the
handsfree key d a list of all available send MSNs is displayed (page 96).
Callback when the number is busy (CCBS)
Precondition: The exchange supports this service.
Callback on busy – CCBS (Completion of calls to busy subscriber)
The user you are calling is currently making a call. Automatic callback saves you making
repeated attempts to dial the number.
Activating callback
The number you are calling is busy or your call is not answered:
[RRRRRRRRRRRRRRRRRRRRRRRRRR]
CALLBCK
Press the display key.
Wait for confirmation from the exchange.
Accepting a callback
The base station rings with a special ringer tone and the display shows the callback
number.
c
Lift the receiver. The connection is established.
25
CX 253i / SWZ PTT en / A31008-X353-P100-1-19 / telephony.fm / 03.12.2007
Making calls
Checking and deleting a callback
Deleting the callback while it is incoming
The base station rings and the display shows the callback number.
Press the display key. The callback function is
cancelled.
[RRRRRRRRRRRRRRRRRRRRRRRRRRR]
DELETE
Checking or deleting the callback before it is incoming
i
s Set base
s Status
OK
Select the menu item and confirm.
OK
s Callback
Select the menu item and confirm. The status list is
displayed (‰ = activated).
OK
either ...
[RRRRRRRRRRRRRRRRRRRRRRRRRRR]
BACK
or ...
[RRRRRRRRRRRRRRRRRRRRRRRRRRR]
DELETE
26
Open the menu.
Select the menu item and confirm. The current
callback number is shown on the screen.
Check:
Press the display key. The callback remains active.
Cancel:
Press the display key. The callback function is
cancelled.
CX 253i / SWZ PTT en / A31008-X353-P100-1-19 / during.fm / 03.12.2007
Functions during a call
Muting the base station
You can mute your base station during a call, e.g. if you wish to talk confidentially to
another person in the room. Your party on the line cannot hear your conversation
during this time. But you can continue to hear him/her.
Press the display key. The call is put on hold.
[RRRRRRRRRRRRRRRRRRRRRRRRRR]
MUTE
To cancel muting:
Press the display key.
[RRRRRRRRRRRRRRRRRRRRRRRRRR]
AUDIBLE
i
When redialling or when performing other functions such as an internal
enquiry call, the muting is cancelled.
Making a call to several users
You initiate a call to several users through an enquiry call. You can then speak to the
other parties either one at a time ("toggling", page 29) or at the same time ("conference
call", page 30).
External enquiry call
You wish to call another external user during an external or internal call.
i
The enquiry call from an external call to another external call can be set
so (page 106) that both ISDN lines are occupied (hold connection
internally), or so that your second ISDN line remains free (hold
connection externally – HOLD).
Initiate enquiry call:
i
Enquiry call
Open the menu.
OK
Select the menu item and confirm.
The call to the first user is now put on hold. If the connection is on hold internally
(page 106), the first party hears the set waiting melody (page 107).
27
CX 253i / SWZ PTT en / A31008-X353-P100-1-19 / during.fm / 03.12.2007
Functions during a call
Make a call to the second external user:
~
Enter the second user's telephone number.
You can also make a call via the Phonebook or other
lists (page 33).
If the second external user you have dialled is
busy:
Press the display key to return to the first party.
[RRRRRRRRRRRRRRRRRRRRRRRRRRR]
BACK
If the second external user rings:
either ...
Toggle (page 29):
st
Switch between call parties using display keys.
[RRRRRRRRRRRRRRRRRRRRRRRRRRR]
CONF.
Press the display key to establish conference
switching.
or ...
Conference call (page 30):
or ...
Transfer the call (page 30).
Internal enquiry call
You would like to call an internal user during an external call.
Initiate an internal enquiry call:
either ...
Initiate an internal call.
[RRRRRRRRRRRRRRRRRRRRRRRRRRR]
INT
or ...
i
CONSULT
[RRRRRRRRRRRRRRRRRRRRRRRRRRR]
INT
Open the menu.
OK
Press the display key.
Initiate an internal call.
The call to the first user is now put on hold. The first (external) party hears the set up
waiting melody (page 107), when the connection is on hold internally (page 106).
28
CX 253i / SWZ PTT en / A31008-X353-P100-1-19 / during.fm / 03.12.2007
Functions during a call
Make a call to the internal user:
either ...
~
Enter the number of the internal user you want.
[RRRRRRRRRRRRRRRRRRRRRRRRRR]
LIST
Press the display key.
or ...
s Int.11
OK
Select the required internal number,
e.g. Int.11 , and confirm.
The connection to the internal user is established.
The internal user dialled is busy:
Press the display key to return to the external party.
[RRRRRRRRRRRRRRRRRRRRRRRRRR]
BACK
The internal user has answered:
either ...
Toggle (page 29):
st
Switch between call parties using display keys.
[RRRRRRRRRRRRRRRRRRRRRRRRRR]
CONF.
Press the display key to establish conference
switching.
or ...
Conference call (page 30):
or ...
Transfer the call (page 30).
Toggling
Precondition: You have established an enquiry call (page 27 and page 28).
There is both an active call (the one established with an enquiry call) and a held call (the
first). You can speak to both callers one at a time.
Use s t to switch between the two callers.
An external party hears the set-up waiting melody in a connection on hold (page 107)
when the connection is on hold internally (page 106). An internal user in a connection
on hold does not hear a waiting melody.
Ending an enquiry call/toggling
either ...
i
s End
End the call that is currently active:
Open the menu.
OK
Select the menu item and confirm. You return to the
waiting caller.
or ...
a
Replace the receiver (return to idle status).
The active connection is ended. You will
automatically be called again by the person on hold.
29
CX 253i / SWZ PTT en / A31008-X353-P100-1-19 / during.fm / 03.12.2007
Functions during a call
Conference call
Precondition: You have established an enquiry call (page 27 and page 28).
There is both an active call (the one established with an enquiry call) and a held call (the
first). In a conference call you can speak to both other callers at the same time.
i
You can make a conference call with
◆ two external users or
◆ with one internal user and one external user.
It is possible to conduct two conference calls at the same time on your base station.
Establishing a conference
You are making an enquiry call. The first caller is put on hold.
Press the display key CONF. to establish conference switching.
Ending a conference
You have several options for ending a conference call:
either ...
You end the conference:
a
Replace the receiver (return to idle status).
[RRRRRRRRRRRRRRRRRRRRRRRRRRR]
INDIV.
Press the display key to change the conference
switching to an enquiry call (page 27 or page 28).
The connection that was active immediately before
the conference was established becomes the active
call again.
or ...
You change the conference to an enquiry call:
Forwarding an incoming call – CD (Call Deflection)
CD enables an incoming call to be diverted to any phone number while it is ringing,
without having to answer the call.
You can pre-set a divert destination (page 103), dial a phone number from the
Phonebook or enter a new number.
i
s Forward
Open the menu.
OK
Select the menu item and confirm.
The pre-set divert destination is dialled.
Forwarding a call to another terminal
You are making an external call and would like to transfer it to another internal
+terminal.
Establish an internal enquiry call (page 28) and replace the receiver (before answer), to
forward the call.
30
CX 253i / SWZ PTT en / A31008-X353-P100-1-19 / during.fm / 03.12.2007
Functions during a call
Working with call waiting for an external call – CW (Call Waiting)
Precondition: CW (Call Waiting) set up, see page 106.
You hear the call waiting tone (short beep) if you receive an external call while
conducting another call (internal or external). The caller's number or name will appear
in the display if Calling Line Identification is enabled.
There are four ways to work with call waiting for an external call:
Accept the waiting call – enquiry call:
Press the display key ACCEPT. You answer the call waiting call, and the first call is put on
hold. Both parties are shown on the display, the current one is marked.
To toggle between both callers see page 29, for a conference call see page 30.
Reject the waiting call
Press the display key REJECT to reject a call on call waiting.
i
If you reject the call waiting tone on your base station, it can still be heard
on other registered terminals.
Changing parties
a
End your current call. The waiting call becomes a
normal call.
c
Lift the receiver to answer the call.
Forward call waiting internally
You can forward the call waiting call internally without answering the call.
i
s Forward
s Int.11
either ...
Open the menu.
OK
Select the menu item and confirm.
OK
Select and confirm the internal number you want,
e.g., Int.11 .
The call waiting tone ceases. The call on call waiting
was successfully forwarded.
Continue the active call.
or ...
i
You continue to hear the call waiting tone. The call
on call waiting could not be forwarded.
Forwarding is only possible to internal users who are not already being
called.
31
CX 253i / SWZ PTT en / A31008-X353-P100-1-19 / during.fm / 03.12.2007
Functions during a call
Call hold
Hold external party
You are conducting an external call.
Press the display key INT. The external caller is put on hold. The waiting external party
hears the waiting melody (page 107), when the connection is on hold internally
(page 106). You can initiate an internal enquiry call (page 28).
Internal users on hold
You are conducting an internal call.
Press the display key CONSULT. The internal user is on hold.
Parking/continuing a call
You are making an external call and would like to transfer this to another terminal on
your ISDN connection.
i
s Call park
~ OK
Open the menu.
OK
Select the menu item and confirm.
Enter a one or two digit park number and confirm.
Wait for the positive response Call parked.
a
Replace the receiver (return to idle status).
"De-parking" a call before lifting receiver
i
s Set base
s Call preparat.
s Canc. call park
~ OK
c
Open the menu.
OK
Select the menu item and confirm.
OK
Select the menu item and confirm.
OK
Select the menu item and confirm.
Enter previously assigned park number and confirm.
Lift the receiver.
"De-parking" a call after lifting receiver
c
i
s Canc. call park
~ OK
32
Lift the receiver.
Open the menu.
OK
Select the menu item and confirm.
Enter previously assigned park number and confirm.
CX 253i / SWZ PTT en / A31008-X353-P100-1-19 / directories.fm / 03.12.2007
Using the Phonebook and other lists
Phonebook and speed dial list
You can store up to 100 phone numbers in the Phonebook. You can store up to 10
phone numbers in the speed dial list.
The Phonebook makes dialling easier for you. You open the Phonebook in idle status
using the h key.
The speed dial list is a special Phonebook, where you can store particularly important
phone numbers, e.g. private phone numbers. You open the speed dial list using the
Ÿ key.
You create an individual Phonebook and speed dial list for your base station. If you want
the lists/individual entries to be available to handsets, you can send the list/entries to
those handsets (page 36).
The speed dial list is operated in just the same way as the Phonebook, except for the way
in which entries are stored.
i
◆ Please refer to the Character Set Chart (page 130) to see how to
enter text correctly.
◆ You can enter up to 32 digits for a number and up to 16 letters for a
name.
Storing a telephone number in the Phonebook
h
Open the Phonebook.
W
sNew entry
Open the menu.
OK
Create an entry
~
s~
Enter name.
Scroll to the next line and enter the name.
W
Save entry
j
Select the menu item and confirm.
Press display key to open menu.
OK
Select the menu item and confirm. The entry is
stored.
Hold down (back to idle status).
33
CX 253i / SWZ PTT en / A31008-X353-P100-1-19 / directories.fm / 03.12.2007
Using the Phonebook and other lists
Storing a telephone number in the speed dial list
The maximum number of entries in the speed dial list is dependent on the number of
entries in the directory.
Ÿ
New entry
Open the speed dial list.
OK
Create an entry:
~
s~
Enter name.
Scroll to the next line and enter the name.
W
Save entry
Confirm.
Press display key to open menu.
OK
j
Confirm. The entry is stored.
Hold down (back to idle status).
Dialling with the Phonebook/speed dial list
hŸ
Open the Phonebook or speed dial list.
s
Select entry.
~
Enter the first letter of the name you are searching
for, e .g. "N", to scroll to the first entry beginning
with that letter.
st
Select the desired user.
either ...
Scroll to the entry:
or ...
Enter the first letter:
... then
either ...
Dial after line seizure
cd
Lift the receiver or press the handsfree key.
W
s Display Number
Open the menu.
OK
or ...
Dial before line seizure (block dialling)
W
Dial number
Select the menu item and confirm.
Open the menu.
OK
Confirm.
The call is initiated immediately. If you do not lift the
receiver, the handsfree function is activated
automatically.
Defining the MSN for the next call
You can select a valid send MSN for this call only even when dialling from the
Phonebook. Precondition: MSN next call must be activated (page 96). Select an
entry and press W to open the submenu. Using Dial number OK displays the list of
MSNs.
34
CX 253i / SWZ PTT en / A31008-X353-P100-1-19 / directories.fm / 03.12.2007
Using the Phonebook and other lists
Viewing and editing an entry in the Phonebook/speed dial list
hŸ
Open the Phonebook or speed dial list.
s
Scroll to the entry.
either ...
Display the entry:
sDisplay entry
OK
Select the menu item and confirm.
Press the display key to exit the display.
[RRRRRRRRRRRRRRRRRRRRRRRRRR]
BACK
or ...
Changing an entry:
sEdit entry
OK
Select and confirm to start making changes.
Proceed as described on page 33 (Phonebook) or page 34 (speed dial list) under
"Create entry".
Deleting a single entry or Phonebook/speed dial list
hŸ
sW
Open the Phonebook or speed dial list.
Select entry and open the submenu.
either ...
Delete a single entry:
s Delete entry
OK
s Delete list
OK
or ...
Select the menu item and confirm.
Delete the entire Phonebook/speed dial list:
Select the menu item and confirm.
Press the display key to confirm the prompt.
[RRRRRRRRRRRRRRRRRRRRRRRRRR]
YES
j
Hold down (back to idle status).
Adding a displayed telephone number to the Phonebook
When a phone number appears in the display (CLIP) you can add it to your Phonebook.
This can be done while dialling from the last number redial list, from the calls list/
answering machine list, or during a call.
W
s Copy to dir.
s~
Open the menu.
OK
If you do not have a CNIP, scroll to the name line and
enter the name.
W
Save entry
i
Select the menu item and confirm.
Press display key to open menu.
OK
Confirm. The entry is stored.
If you have CNIP as well as CLIP, then the name that goes with the
telephone number will also be displayed (up to 16 characters long).
35
CX 253i / SWZ PTT en / A31008-X353-P100-1-19 / directories.fm / 03.12.2007
Using the Phonebook and other lists
Selecting a phone number from the Phonebook
If you are prompted to enter an external phone number while you are operating your
telephone, you can use the Phonebook from your base station to do this.
Precondition: The input field for external telephone numbers is displayed.
h
s
Open the Phonebook.
Select entry and confirm.
OK
The phone number of the entry is added to the entry field.
Sending a single entry or complete list to a handset
to MT:
Top S328/S326i/E6x4i
You can send single entries or the complete list to another handset that is registered on
your base station. This avoids entering information twice.
hŸ
sW
Open the Phonebook or speed dial list.
Select an entry and open the menu.
either ...
Send a single entry:
s Send entry
OK
s Send list
OK
or ...
Select the menu item and confirm.
Send complete list:
Select the menu item and confirm.
... then
~
OK
Enter the internal number of the receiving handset
and confirm. Sending is initiated.
After an entry has been sent you are asked if you want to send another entry. If you
confirm with the display key YES you can select more entries to send; once you have
finished sending, press the display key NO to end it.
The successful transfer of data is confirmed with a message and with the confirmation
tone at the receiving handset. Existing entries in the receiving handset are retained.
Entries with identical numbers are not overwritten. The number of entries that are
stored in the receiving handset may therefore differ from the number of entries that you
have sent to it.
The transfer is cancelled if the phone rings or if the memory of the receiving handset is
full. The last entry to be transferred appears in the display.
If an entry with no name is sent to a handset, the last 16 digits of the phone number are
entered as the name.
36
CX 253i / SWZ PTT en / A31008-X353-P100-1-19 / directories.fm / 03.12.2007
Using the Phonebook and other lists
Display available memory
The memory is divided between the Phonebook and the speed dial list (page 33). The
available memory of all these lists is displayed.
h
sW
s Available memory
j
Open the Phonebook.
Select any entry and open the menu.
OK
Select the menu item and confirm.
Hold down (back to idle status).
Last number redial list
The last number redial list contains the last ten numbers dialled (on your base station).
If there are several identical entries only the most recent will be displayed. If the last
number redial list is full, the oldest entry is deleted when you next make a call. You can
use the last number redial list to redial the telephone numbers.
Manual last number redial
k
Open the last number redial list.
sc
Select an entry and lift the receiver.
The phone number is dialled.-{}◆ To add or change the phone number, press WsDisplay Number
i
OK .
◆ When a name is displayed, you can press W s Display entry OK
to display the associated phone number.
◆ You can add the phone numbers to your Phonebook from the last
number redial list (page 35).
Defining the MSN for the next call
You can select a valid send MSN for this call only even when dialling from the last
number redial list. Precondition: MSN next call must be activated (page 96).
Select an entry and press W to open the submenu. Using Dial number OK displays
the list of MSNs.
37
CX 253i / SWZ PTT en / A31008-X353-P100-1-19 / directories.fm / 03.12.2007
Using the Phonebook and other lists
Automatic redial
With this function, the phone number of a party you did not reach is redialled
automatically every 20 seconds. The handsfree key flashes and "Open listening" is
activated. If the party answers, press the talk key c. "Open listening" remains activated.
If the party does not answer, the call is terminated after approx. 30 seconds. The
function switches itself off after twelve unsuccessful dialling attempts.
Precondition: For the base station, MSN next call must be deactivated (page 96).
a
Press end call key.
k
Open the last number redial list.
The party who could not be reached is selected.
v
Open the menu.
Automatic Redial
OK
Confirm.
To cancel automatic redial, press the display key CANCEL or any key.
i
A call in the meantime deactivates the automatic redial. You must
activate it again afterwards.
Deleting a single phone number
k
sW
s Delete entry
j
Open the last number redial list.
Select an entry and open the menu.
OK
Select the menu item and confirm.
Hold down (back to idle status).
Opening lists with the message key
Providing a new entry is present in the relevant list, you can open the following lists
using the message key f:
1. List of missed calls Missed calls (page 39)
2. Answering machine lists AM1 , AM2 , AM3 (to base station Top E604 ISDN, page 65)
These lists display the calls and messages belonging to the receive MSNs assigned to the
base station.
As soon as a new entry (calls, messages on an integrated answering machine) is added
to one or more lists, the f key flashes and an advisory tone is heard.
If the flashing key f is pressed, the following is displayed:
◆ If only one list has new entries, you will see the first new entry in that list.
Open entry: s (select entry) OK
◆ If several lists have new entries, those lists are offered for your selection.
Open entry: s (select list) OK, s (select entry) OK
If the key f is pressed, and it is not blinking, the following is displayed:
The message No new messages is displayed. Then the list of missed calls are opened.
38
CX 253i / SWZ PTT en / A31008-X353-P100-1-19 / directories.fm / 03.12.2007
Using the Phonebook and other lists
Caller lists
There are two caller lists:
◆ the list of missed calls
It contains all calls that have not been answered or have been rejected and all calls
answered by an answering machine for which there is no message.
◆ the list of answered calls
This contains all the calls answered by an internal user or answering machine.
These lists show the calls on a receive MSN assigned to the base station. In each case
the phone numbers for the last 20 calls are stored. The oldest entry is deleted if a caller
list is full and new entries are added. The most recent entry is at the top of the list and
the oldest at the bottom.
A caller is entered in the relevant caller list at the end of a call. If his phone number is
transferred and this phone number is entered in the Phonebook, his name is inserted.
If there are several identical entries only the most recent will be displayed in the two
lists. If an outgoing call is made to a caller who is entered in the list of missed calls, then
this entry is transferred to the last number redial list and deleted from the list of missed
calls.
The following is displayed for each entry:
◆ the number of calls for this caller,
◆ the phone number of the caller or his name (if it exists as a Phonebook entry) or
unknown, if the phone number was not transferred,
◆ the receive MSN
◆ the date and time of the last call
Opening caller lists
You can open both caller lists via the menu. The list of missed calls can also be opened
using the f-key, providing there is a new entry present (page 38). New entries in the
list of missed calls are signalled by the f key flashing.
i
s Set base
Open the menu.
OK
Select the menu item and confirm.
s Accepted calls
OK
Select the menu item and confirm.
s Missed calls
OK
Select the menu item and confirm.
either ...
or ...
i
If another internal user has already opened a caller list you cannot open it.
39
CX 253i / SWZ PTT en / A31008-X353-P100-1-19 / directories.fm / 03.12.2007
Using the Phonebook and other lists
Calling back a caller
Precondition: The caller's number has been identified (page 22).
Open the list of missed or answered calls (page 39). Now:
s
Select entry.
cd
Lift the receiver or press the handsfree key.
either ...
Dial after line seizure
W
Open the menu.
s Display Number
OK
or ...
Select the menu item and confirm.
Dial before line seizure (block dialling)
W
Open the menu.
Dial number
OK
Confirm.
Callback begins at once. If you do not lift the
receiver, the handsfree function is activated
automatically.
The phone number is deleted from the caller list and entered in the last number redial
list.
i
To a PABX: The access code (outside line code) is automatically put before
the phone number (page 122).
Defining the MSN for the next call
You can select a valid send MSN for this call only for callback. Precondition: MSN next
call must be activated (page 96). Select an entry and press W to open the submenu.
Using Dial number OK displays the list of MSNs.
Displaying an entry
Open the list of missed or answered calls (page 39). Now:
sW
s Display entry
Select entry and open the submenu.
OK
Select the menu item and confirm.
Changing the caller's phone number
Open the list of missed or answered calls (page 39). Now:
sW
s Change number
Select entry and open the submenu.
OK
~
Change the number.
W
Save entry
40
Select the menu item and confirm. You will now see
the number.
Press the display key to open the submenu.
OK
Confirm.
CX 253i / SWZ PTT en / A31008-X353-P100-1-19 / directories.fm / 03.12.2007
Using the Phonebook and other lists
Adding an entry to the Phonebook from the caller list
Open the list of missed or answered calls (page 39). Now:
sW
s Copy to dir.
~
Select entry and open the submenu.
OK
Enter names in the line marked by <Name>
(for details of entering text see page 130).
W
Save entry
Select the menu item and confirm.
Press the display key to open the submenu.
OK
j
Confirm. The entry is stored.
Hold down (back to idle status).
Deleting an entry from the caller list
Open the list of missed or answered calls (page 39). Now:
either ...
sW
s Delete entry
Delete a single entry:
Select entry and open the submenu.
OK
or ...
Delete all entries:
W
s Delete list
[RRRRRRRRRRRRRRRRRRRRRRRRRR]
YES
j
Select the menu item and confirm. The entry is
deleted.
Open the submenu.
OK
Select the menu item and confirm.
Confirm the prompt.
Hold down (back to idle status).
41
CX 253i / SWZ PTT en / A31008-X353-P100-1-19 / charges.fm / 03.12.2007
Making cost-effective calls
i
You can manage entries in the speed dial list in exactly the same way as
entries in the Phonebook. You will find instructions on storing, editing
and deleting entries starting on page 33.
Displaying the call duration
i
Charges are transmitted automatically by the central office. The factor is
CHF 0.10. If a factors is entered (e.g. CHF 0.20) this factor is overwritten
by the factors transmitted from the central office by CHF 0.10 during
every call.
The charges between display and invoice of the network provider can be
different.
The invoice from the network provider is always legally binding.
You can check the total charges and the charges of the last call made (depending on
setting, see page 43) on each terminal. The total charges include the charges accrued
by this terminal.
Displaying and deleting the cost overview
Depending on the setting, call charge units for each internal party, for each set-up MSN,
and for the entire system are displayed.
i
s Costs
Open the menu.
Cost overview
OK
Select the menu item and confirm.
OK
Confirm. The total amount (for all internal users) is
displayed.
s
Scroll to the accounts for the individual internal
users or MSNs set up.
If necessary, delete the amount from the cost
overview:
W
Press the display key to open the submenu.
s Delete amount
i
42
OK
Select the menu item and confirm.
Total and individual charges must be deleted separately, i .e. if
for example you delete the amount for an MSN, the individual charges for
the terminals are retained, and must be deleted separately.
CX 253i / SWZ PTT en / A31008-X353-P100-1-19 / charges.fm / 03.12.2007
Making cost-effective calls
Activating/deactivating the charges of the last call
You can display the total charges and the charges of the last call for this handset on the
terminal.
By factory default, Last charge is deactivated.
i
s Costs
s Last charge
j
Open the menu.
OK
OK
Select the menu item and confirm.
Select the menu item and confirm (‰ = activated).
Hold down (back to idle status).
Once the function has been activated, the call charges are displayed on the terminal
when you lift the receiver. If the connection was not successful, the charges are
displayed after ending the call.
43
CX 253i / SWZ PTT en / A31008-X353-P100-1-19 / sms.fm / 03.12.2007
SMS (text messages)
SMS (text messages)
You can use your base station to send and receive SMS text messages (Short Message
Service). You ca send an SMS to any fixed network or mobile phone network number.
Your SMS can be received as a text message by any device with SMS functionality
(mobile phone, PC, another telephone). If the recipient of your SMS does not have a
phone with SMS functionality, then the SMS is played back (SMS 2phone).
i
All SMS functions are dependent on the network provider.
General
Text messages are exchanged between SMS centres that are operated by service providers. The telephone number of the SMS centres through which you wish to send and
receive text messages must be entered in your phone (page 46). Up to ten SMS centres
can be entered. You can change the phone numbers of the SMS centres.
You can receive text messages via any of the SMS centres whose number you have entered. Of course you must be registered to receive text messages with those SMS centres
(page 48).
Your text message is sent through the SMS centre that is entered as the active send
service centre.
i
The mobile phone is delivered with the access number (062 210 00 00)
of the Swisscom SMS Center already pre-programmed.
Before you can send and receive text messages
◆ Calling Line Identification may not be permanently deactivated for the MSN used
(page 23).
◆ To receive text messages you must be registered with your service provider
(page 48).
◆ You must not allow the network provider to bar the phone numbers you have
entered for SMS centres.
If the telephone of a receiver cannot receive an SMS in the fixed network, the SMS is
automatically read as a voice message. Between 7.00 and 22.00 hrs, these text
messages are delivered immediately in the form of a telephone call. Text messages sent
after 22.00 hrs are stored and delivered the next day.
If you have concluded a preselection contract with a network provider, ask whether they
support the "Fixed line SMS" feature. (Preselection means you are bound contractually
to a network provider.)
44
CX 253i / SWZ PTT en / A31008-X353-P100-1-19 / sms.fm / 03.12.2007
SMS (text messages)
Ask your service provider,
◆ what charges are billed for sending and receiving a text message,
◆ which mobile phone operators you ca send text messages to and which mobile
phone operators you ca receive text messages from,
◆ which functions your SMS service offers,
◆ how you are registered with SMS centres for which your phone may already be pre-
configured – automatically by sending a message or by a special registration
procedure.
Managing SMS service centres
SMS messages are exchanged through SMS service centres. To send and receive a text
message, you require the phone number for your service provider's SMS centre. You
have to store this phone number in your telephone.
You may enter up to ten SMS centres in your telephone.
Sending an SMS – send centre
You must enter the phone number of the SMS centre via which you want to send the
SMS in your telephone and activate it as the "send centre" (page 46 and page 47). This
phone number will be used for sending all SMS messages.
You can activate another SMS centre as your send centre. The send centre that was
activated previously is then automatically deactivated.
Receiving an SMS
Text messages can be received via all SMS centres entered, assuming you are registered
with these SMS centres as an SMS recipient (for information about registering, see
page 48).
i
The mobile phone is delivered with the access number (062 210 00 00)
of the Swisscom SMS Center already pre-programmed.
45
CX 253i / SWZ PTT en / A31008-X353-P100-1-19 / sms.fm / 03.12.2007
SMS (text messages)
Entering, editing or deleting phone numbers for SMS centres
You can enter up to ten SMS centres.
Before entering or editing the number, please obtain information about special features
and what the SMS service provider offers.
i
s Set base
s Settings
s Service centres
Open the menu.
OK
Select the menu item and confirm.
OK
Select the menu item and confirm.
OK
Select the menu item and confirm. The phone
number list appears.
s
Select entry, e.g. <empty>.
W
Open the submenu.
either ...
Changing an entry:
OK
Edit entry
~
Confirm.
Enter the phone number of the SMS centre.
W
Press the display key to open the submenu.
OK
Save entry
or ...
Confirm.
Delete an entry:
s Delete entry
j
OK
Select the menu item and confirm.
Hold down (back to idle status).
◆ If you delete the phone number of a send centre, then you must
i
46
activate another SMS centre to be the send centre in order to be able
to continue sending text messages.
◆ If your telephone is connected to a PABX, you may have to prefix the
phone number with an access code (number with which you obtain
an exchange line, usually "0") (this depends on your PABX), see
page 58.
CX 253i / SWZ PTT en / A31008-X353-P100-1-19 / sms.fm / 03.12.2007
SMS (text messages)
Activating/deactivating SMS send centre
To send an SMS you must activate the phone number for the required SMS centre as the
send centre. By doing this you determine via which SMS centre the text message is to
be sent. Text messages can be received via all SMS centres entered, as long as you have
previously been through the registration procedure (see the next chapter) as an SMScapable connection.
i
s Set base
s Settings
s Service centres
Open the menu.
OK
Select the menu item and confirm.
OK
Select the menu item and confirm.
OK
Select the menu item and confirm. You will now see
the phone number list.
s
Select the required telephone number.
W
Open the submenu.
either ...
s Serv.centre on?
Activate SMS centre as the send centre:
OK
j
Quick press (back to list of send centres).
The SMS centre is activated as the send centre. In the
list the phone number of the SMS centre is marked
with a ‰. The previous active send service centre is
deactivated automatically.
or ...
s Serv.centre off?
j
Select the menu item and confirm. The display
switches to Serv.centre off?
Deactivate SMS centre:
OK
Select the menu item and confirm. SMS centre is
deactivated.
Quick press (back to list of send centres).
◆ When the Service centres phone number list is opened, the display
i
jumps immediately to the send centre.
◆ If you have not activated an SMS send centre you will not be able to
send an SMS, but you will be able to receive text messages from all
the SMS centres you have entered.
47
CX 253i / SWZ PTT en / A31008-X353-P100-1-19 / sms.fm / 03.12.2007
SMS (text messages)
Registering/de-registering with an SMS centre
In order to be able to receive text messages on your phone you must first register your
phone number with an SMS service provider. You can find out from the service provider
concerned which information you need to send to register and de-register.
The phone number of the SMS centre must be entered and activated as the active send
service centre in order to register with them.
After you have registered, remember to re-activate the SMS centre as the send centre
via which you wish to send text messages.
i
Make sure that you register the phone number (MSN) that is assigned to
the base station as the send MSN (page 96), and with which you are
sending the text message. If you also want to send and receive text
messages using other registered handsets with different send MSNs,
then you must also have these phone numbers registered.
Memory
The number of text messages that can be stored by the base station depends on the size
of the messages (around 11 text messages of up to 160 characters each). The memory
is used for the incoming and outgoing message list. If the memory is full, the message
Text list full! Please delete entries is displayed. Delete text messages you no longer
require from the incoming and outgoing message lists.
You can check how much capacity your SMS memory has left (in %).
i
Open the menu.
Confirm.
SMS OK
s Available memory
[RRRRRRRRRRRRRRRRRRRRRRRRRRR]
Back
OK
Select the menu item and confirm. The available
memory will be displayed (in %).
Press (back to idle display).
Sending a text message and the outgoing message list
Notes on writing and sending an SMS message
If you are interrupted as you are writing (by a call, an incoming SMS or because the
handset changes to idle status because of prolonged inactivity), the SMS is
automatically stored in the outgoing message list. You can continue writing the SMS
later (page 51).
Text messages that cannot be sent are assigned an error status (page 59) and are placed
in the incoming message list.
Text messages are only stored automatically if sending is interrupted. If you wish to
store a message then you must do so before it is sent.
i
48
Remember that some service providers will bill you for a cancelled call
to the SMS centre.
CX 253i / SWZ PTT en / A31008-X353-P100-1-19 / sms.fm / 03.12.2007
SMS (text messages)
Writing text messages
A text message can be up to 160 characters long.
Remember that the service provider cannot deliver a text message that contains Greek
or Cyrillic characters.
Write text messages as follows:
i
Open the menu.
SMS
OK
Confirm.
Write message
OK
Confirm. The input field opens.
~
Input your text (for text input see page 130).
tomorrow with
<>
XW
◆ Please refer to the Character Set Chart (page 130) to see how to
enter text correctly.
i
◆ Use Q to insert a space, and P to toggle between upper case, lower
case and digits (page 130).
◆ You can find out how to correct text on page 11.
◆ If you receive a text message that is incomplete (e.g. because your
phone memory is full), you will see a message.
Saving text messages
Precondition: You have written a text message (page 49) and the input field is open.
W
s Store
Press the display key to open the submenu.
OK
Select the menu item and confirm. You can then
send the text message (page 49).
The message is stored in the outgoing message list. It can be retrieved and sent at a
later time (page 51).
Sending a text message without saving it
Precondition: You have written a text message (page 49) and the input field is open.
W
Send
Press display key to open menu.
OK
Confirm.
either ...
49
CX 253i / SWZ PTT en / A31008-X353-P100-1-19 / sms.fm / 03.12.2007
SMS (text messages)
~
Enter the recipient's number (with prefix).
Dest.call no.
089123456
<>
or ...
XW
Select a number from the Phonebook:
W
s No.from dir.
s OK
Press the display key to open the submenu.
OK
Open the Phonebook.
Select entry and confirm. The number appears in the
display.
... then
W
Press the display key to open the submenu.
OK
Send
i
Confirm.
The recipient's number must always include the area code (prefix), even
if you are in that area.
Examples of phone number inputs:
0623456789
A national telephone number within the fixed network
07x1234567
A number within the mobile phone network
50
CX 253i / SWZ PTT en / A31008-X353-P100-1-19 / sms.fm / 03.12.2007
SMS (text messages)
Opening the outgoing message list
The outgoing message list shows you:
◆ Text messages which you saved before you sent them (page 49).
◆ Text messages you could not send, e.g. you were interrupted by an incoming call
while you were writing the message.
However, the list only shows text messages that are assigned to the same send MSN as
the base station.
These messages are stored until you delete them.
i
Open the menu.
SMS
OK
Confirm.
s Outbox 4
OK
Select the menu item and confirm. The figure shown
indicates how many text messages are stored in the
outgoing message list.
The total number of SMS saved
in the outgoing message list
Saved 2/ 4
19.03.03
ZY
09:45
{W
Number of the text message
displayed
Use Z Y to scroll through the list.
i
When the memory is full, you are prompted to delete messages
(page 48).
Reading and deleting text messages in the outgoing message list
Precondition: You have opened the outgoing message list (page 51).
s
Select SMS.
W
Open the submenu.
either ...
Read textmessage
Read SMS:
OK
or ...
s Delete textmess.
Confirm. Use s to view the continuation of the text
message in the display.
Delete SMS:
OK
Select the menu item and confirm.
51
CX 253i / SWZ PTT en / A31008-X353-P100-1-19 / sms.fm / 03.12.2007
SMS (text messages)
Deleting the entire outgoing message list
This function deletes all the messages in the outgoing message list.
Precondition: You have opened the outgoing message list (page 51).
W
Open the submenu.
s Delete list
OK
Confirm.
Press the display key to confirm the prompt.
[RRRRRRRRRRRRRRRRRRRRRRRRRRR]
YES
j
Hold down (back to idle status).
Sending or editing text messages in the outgoing message list
Precondition: You have opened a text message in the outgoing message list to read
(page 51).
W
Open the submenu.
either ...
Write and send a new text message:
Write message
OK
or ...
s Use text
Confirm. The input field is opened (page 49).
You can write a new text message.
Edit and send a stored text message:
OK
Select the menu item and confirm. The input field is
opened with the contents of the stored text
message. You can edit the text.
You can now send the message as described on page 49.
Sending a text message to an e-mail address
You ca send a text message to an e-mail address. To do this you should write the
recipient's e-mail address at the start of the text message and send this text message to
the call number of the e-mail service of your SMS send centre.
i
Varies according to the network provider.
Not yet possible in the Swisscom network.
Entering the e-mail address at the start of the text message
Enter the recipient's e-mail address at the start of your text message. Separate the email
address from the text of the message by a space or a colon (this depends on the
provider).
Enter the "@" character using the hash key R (press x 2), the colon using the Q key
(press x8), and the space with 1 (press once).
Use W , s Store OK to save temporarily.
Precondition: You are writing a text message (page 49) and the input field is open.
~
52
Enter the full e-mail address and end it with a space
or a colon.
CX 253i / SWZ PTT en / A31008-X353-P100-1-19 / sms.fm / 03.12.2007
SMS (text messages)
Entering the text of the message
~
Enter the SMS text.
[email protected]
Hello Peter
<>
W
Send
Email address, space, SMS
text (example)
XW
Press the display key to open the submenu.
OK
Confirm.
Sending a text message as an e-mail
You must send the text messages to the number for the e-mail service of your send
centre.
~
Enter the number of the e-mail service.
Dest.call no.
6245
<>
W
Send
XW
Press the display key to open the submenu.
OK
Confirm.
Receiving text messages, incoming message list
Notes on receiving a text message
New text messages are signalled by a message in the display, flashing of the message
key f and a confirmation tone. The date and time (transferred from the SMS centre)
are indicated for each SMS received.
In the receiving list the new (unread) messages are before the old messages. New and
old messages are sorted according to their time of arrival:oldest new message, ...,
newest message, oldest old message, ..., newest old message.
Linked text messages are displayed as one SMS. If an incoming linked message is too
long or has not transferred completely, it will be split into individual messages and
stored in the incoming message list.
Opening the incoming message list
The incoming message list shows you:
◆ all received messages,
◆ messages that could not be sent despite several attempts. These messages are all
stored with an error status (page 59).
53
CX 253i / SWZ PTT en / A31008-X353-P100-1-19 / sms.fm / 03.12.2007
SMS (text messages)
The message list is displayed, e.g. follows:
Number of new text messages in the list
Inbox 2/ 5
Number of old, read text messages in the list
Opening with the message key
Precondition: There is at least one new message in the list.
f
Press the message key.
If there are no new calls/messages in the other lists,
then the first new text message is opened
immediately. Otherwise:
[RRRRRRRRRRRRRRRRRRRRRRRRRRR]
SMS
Press the display key.
s Inbox 2/ 5
OK
If necessary, select and confirm. The incoming
message list is opened and the first new message is
displayed.
Opening with the menu
i
Open the menu.
SMS
OK
s Inbox 2/ 5
Confirm.
OK
Select the menu item and confirm.
A new text message is displayed, e.g. as follows:
Text message status:
New, Old, Error
Phone number of the sender
New textm.
1234567890
12.07.03
YZ
1/ 2
09:45
XW
Total number of new SMS
Number of the text
message displayed
If the SMS memory is full and the SMS centre is unable to transfer any more, an
appropriate message will appear on the screen. Press OK to confirm and delete text
messages you no longer need from the incoming and outgoing message list (see also
page 51 and page 55). The SMS centre will then re-transmit the text message.
54
CX 253i / SWZ PTT en / A31008-X353-P100-1-19 / sms.fm / 03.12.2007
SMS (text messages)
Reading and deleting text messages in the incoming message list
Precondition: You have opened the incoming message list (page 53).
s
Select SMS.
W
Open the submenu.
either ...
Read textmessage
Read SMS:
OK
or ...
s Delete textmess.
j
Confirm. Use s to view the continuation of the text
message in the display.
Delete SMS:
OK
Select the menu item and confirm.
Hold down (back to idle status).
Once you have opened a new message it acquires the status Old textm..
Deleting the entire incoming message list
This function deletes all new and old text messages in the incoming message list.
Precondition: You have opened the incoming message list (page 53).
W
s Delete list
[RRRRRRRRRRRRRRRRRRRRRRRRRR]
YES
j
Press the display key to open the submenu.
OK
Select the menu item and confirm.
Press the display key to confirm the prompt.
Hold down (back to idle status).
55
CX 253i / SWZ PTT en / A31008-X353-P100-1-19 / sms.fm / 03.12.2007
SMS (text messages)
Replying to or forwarding text messages
While you read a text message you can use the following functions:
W
Press the display key to open the submenu.
either ...
Reply
Reply to an incoming message:
OK
or ...
Answer 'Yes':
s Answer: Yes
OK
s Answer: No
OK
or ...
Select the menu item and confirm.
Answer 'No':
or ...
s Use text
~
Confirm. You can reply to the message immediately
in the input field.
Select the menu item and confirm.
Edit the incoming message and return it:
OK
Select the menu item and confirm.
Edit text.
... then
W
Send
Press the display key to open the submenu.
OK
Confirm and then send the message as described on
page 49. The sender’s phone number is provided
automatically.
OK
Select and confirm to store the entry.
or ...
s Store
To forward a text message, open the menu with W and select the Send option. Now
send the message as described on page 49.
56
CX 253i / SWZ PTT en / A31008-X353-P100-1-19 / sms.fm / 03.12.2007
SMS (text messages)
Calling back the text message sender
Open the SMS incoming message list (page 53). Now:
s
Select entry.
c
Press the talk key.
W
Press the display key to open the submenu.
either ...
or ...
Dial number
OK
or ...
Select.
Dial using network provider's prefix:
W
s NET list
s OK
Press the display key to open the submenu.
OK
Open the speed dial list.
Select entry and confirm. The network provider's
prefix is put in front of the phone number.
... then
s
If MSN next call is set for the handset (page 96),
select the outgoing MSN and confirm.
OK
Callback begins at once. The phone number is deleted from the caller list and entered
in the last number redial list.
i
To a PABX: The access code (outside line code) is automatically put before
the phone number (page 122).
Copying a phone number from the SMS text into the Phonebook
You telephone can "detect" phone numbers in a received SMS. It displays these by
highlighting the string of digits (max. 32 characters). If the SMS text contains multiple
strings of digits, the first string of digits is highlighted. Scrolling the SMS text with s
will automatically highlight the next string of digits etc..
Precondition: You have opened a text message in the incoming message list to read
(page 55).
Hello Sabine, here is my
new number
1234567890
YZ
XW
The string of digits is
highlighted in black.
57
CX 253i / SWZ PTT en / A31008-X353-P100-1-19 / sms.fm / 03.12.2007
SMS (text messages)
W
Press display key to open menu.
s Copy to dir.
s~
OK
Go to the Name line and enter the name
(max. 16-digits) (for entering text, see page 130).
W
Press display key to open menu.
OK
Store
j
i
Select the menu item and confirm.
Confirm. The entry is stored.
Hold down (back to idle status).
The phone number must be stored in the Phonebook together with its
area code (prefix) so that it can also be used for sending text messages.
Adding a text message sender's telephone number to the Phonebook
Precondition: You have opened the incoming message list and selected a message
(page 53).
W
Press display key to open menu.
s Copy to dir.
s~
OK
Go to the Name line and enter the name
(max. 16-digits) (for entering text, see page 130).
W
Store
Press display key to open menu.
OK
j
i
Select the menu item and confirm.
Confirm. The entry is stored.
Hold down (back to idle status).
You can create a special Phonebook for SMS within your main Phonebook
by putting an star (*) before the names.
Text messages to a PABX
You can only receive a text message when the Calling Line Identification is
forwarded to the extension of the PABX (CLIP).
The CLIP of the phone number of the SMS centre is evaluated in your telephone.
If your phone is connected to a PABX, you may have to prefix the number of the SMS
centre with an access code (this depends on your PABX). You can store the access code
on your base station (page 122).
If in doubt, you can test your PABX by sending a text message e.g. to your own number
and putting the access code before the number of the SMS centre. If you do not receive
the message, send another one, this time without the access code.
When you send messages, your sender number may be sent without your extension
number. The recipient cannot reply to you directly in this case.
58
CX 253i / SWZ PTT en / A31008-X353-P100-1-19 / sms.fm / 03.12.2007
SMS (text messages)
Errors when sending and receiving a text message
Errors when sending a text message
Text messages that cannot be sent are assigned an error status e .g. FD error: and are
stored in the incoming message list.
The following error codes are displayed:
Error code
Description
E0
FE
FD
Calling Line Identification is permanently deactivated (page 23).
Error occurred during message transfer.
Connection to SMS centre failed.
Text messages cannot be sent or received if the number of an SMS
centre is missing or incorrectly stored. Check that the number of the
SMS centre has been correctly stored.
Wrong recipient phone number
C3
You can display information about the cause of errors on the screen.
Precondition: You have opened the incoming message list (page 53).
s
Scroll to the text message you were unable to send.
W
s Error status
[RRRRRRRRRRRRRRRRRRRRRRRRRR]
BACK
Open the submenu.
OK
Select the menu item and confirm. The cause of the
error appears in the display.
Now press the display key to return to the incoming
message list.
Errors when receiving a text message
A message appears on the screen if your phone cannot receive any more text messages.
You cannot receive text messages under the following conditions:
◆ call diversion has been activated with Immediately,
◆ the memory (incoming and outgoing message lists) is full.
59
CX 253i / SWZ PTT en / A31008-X353-P100-1-19 / sms.fm / 03.12.2007
SMS (text messages)
Self-help with error messages
Error Message
Possible Cause
You cannot send messages.
The "Calling Line Identification" Permit Calling Line
(CLIP) is permanently withheld. Identification (CLIP) again
(page 23).
Message transmission was
Re-send the message.
interrupted (e.g. by an
incoming call).
No number or an invalid
Enter phone number
number is entered for the SMS (page 46).
centre activated as the send
centre.
Your phone's memory is full.
Delete some old messages
(page 55).
Your terminal is stored in the
Register the terminal (again)
database of your SMS provider for SMS reception.
as having no fixed network
SMS functionality, i. e. you are
no longer registered with the
provider.
If your SMS network provider's Register the terminal (again)
database does not yet know
for SMS reception to get it rethat your terminal supports
assigned in the database.
fixed network SMS
functionality, then it will only
attempt to deliver messages
during the day.
You have not entered an SMS Activate an SMS centre
centre.
(page 47).
You receive a message whose
text is incomplete.
The message is played back.
Messages are only received
during the day.
No send centre available! SMS
only saved.
Remedy
If you have set up an SMS centre but have not yet registered with the centre, Sending
text notification appears in the display. The message is stored in the incoming message
list FD error: .
60
CX 253i / SWZ PTT en / A31008-X353-P100-1-19 / answeringm_use.fm / 03.12.2007
Operating the answering machine
The device has three answering machines (AB1, AB2, AB3), which can be used
independently of each other. You can operate the answering machines either directly
via the base station, a registered handset or by remote control (internal or external call
to the answering machine, see page 70).
Answering machines are not assigned an MSN (factory default).
◆ AM1 answers all calls.
◆ Each answering machine can be set, operated and played back from each handset/
terminal.
One or more MSNs are assigned to each answering machine:
Each answering machine can only be set and played back using handsets/terminals with
the same receive MSN.
Exception: If a receive MSN is exclusively assigned to an answering machine, then this
answering machine can be used from all internal users.
i
If an answering machine is being used by a user (directly or via remote
operation), no other user can access the answering machine during this
time.
The date and time of each message is logged, provided these items have been set
correctly (page 83).
You can hide answering machines you do not wish to use, see page 75.
Definitions of terms used below:
Message
Memos
AM mode
Message that a caller leaves on the answering machine.
"Spoken notes" that you can leave on the answering machine for
members of your family or office colleagues, for example.
Answer and record or announce only.
The caller hears the announcement and may then leave a message.
Answer and record
mode
Announce only mode The caller hears the announcement but cannot leave a message.
Selecting an answering machine
i
s Answering mach.
s AM1
~ OK
Open the menu.
OK
Select the menu item and confirm.
OK
If necessary, select answering machine and confirm,
e.g. AM1 .
If AM lock is set (page 78): enter the answering
machine PIN and confirm.
The list only contains the shown answering machines. If only one answering machine
is shown, the list is skipped.
61
CX 253i / SWZ PTT en / A31008-X353-P100-1-19 / answeringm_use.fm / 03.12.2007
Operating the answering machine
Activating/deactivating the answering machine
You can only activate/deactivate an answering machine when time control is not active
(page 79).
Precondition: You have selected an answering machine (page 61).
either ...
Activate the answering machine:
s Activate?
OK
s Deactivate?
OK
or ...
Select the menu item and confirm.
Deactivate the answering machine:
Select the menu item and confirm.
When activating, the remaining memory time (in %) is shown on the display.
Which AM mode the answering machine assumes after activation (answer and record
mode or announce only mode) depends on the announcement selected (page 62).
You can only activate an answering machine in answer and record mode if there is
memory still available. If the remaining memory is less than 60 seconds, you will be
prompted to delete old messages. When the remaining memory is less than 10 seconds,
the answering machine is started in announce only mode.
If the answering machine is activated the ö key is illuminated.
Selecting announce only and AM mode
You can activate Announcement 1 , Announcement 2 or Announcem. only for each
answering machine. As supplied, the three announcements already contain standard
announcements. You can delete the pre-recorded announcement and record your own
announcement.
When you select an announcement you also determine in which AM mode the
answering machine is to run (page 61).
◆ Announcement 1 , Announcement 2: Answer and record mode
◆ Announcem. only: announce only mode
In answer and record mode a Concl.announcem is given automatically at the end of a
recording provinding you have recorded a concluding announcement (page 63).
When the phone is supplied Announcement 1 is selected. The Concl.announcem
contains nothing.
Precondition: You have selected an answering machine (page 61).
s Announcements
s Announcement 2
OK
Select announcement, e.g. Announcement 2
(‰ = activated).
W
Select
62
Select the menu item and confirm.
Press the display key to open the submenu.
OK
Confirm. The previously set announcement is
automatically deactivated.
CX 253i / SWZ PTT en / A31008-X353-P100-1-19 / answeringm_use.fm / 03.12.2007
Operating the answering machine
i
The answering machine switches automatically from recording mode to
announce only mode when the memory is full. As soon as memory space
is made available (e.g., because you have deleted some messages) the
answering machine automatically switches back to answer and record
mode.
Recording/changing announcements
You can record the following announcements: Announcement 1 , Announcement 2,
Announcem. only and Concl.announcem.
Precondition: You have selected an answering machine (page 61).
s Announcements
s Announcement 2
OK
Select announcement, e.g. Announcement 2
(‰ = activated).
W
s Record
Select the menu item and confirm.
Press the display key to open the submenu.
OK
Select the menu item and confirm.
Press the display key to start recording.
[RRRRRRRRRRRRRRRRRRRRRRRRRR]
START
Say the announcement message.
Press the display key to end the recording. The
announcement is repeated for you to check.
[RRRRRRRRRRRRRRRRRRRRRRRRRR]
STOP
Recording is automatically terminated if:
◆ if you pause for more than 8 seconds when recording your announcement
◆ the memory is full. Delete old messages or announcements you no longer require.
The announcement will not be stored if you press the end call key during the recording
or repeat playback.
Playing back/deleting announcements
Precondition: You have selected an answering machine (page 61). You can only delete
announcements you have recorded yourself. The default announcement cannot be
deleted.
s Announcements
s Announcement 2
OK
Select announcement, e.g. Announcement 2
(‰ = activated).
W
Press the display key to open the submenu.
either ...
Play back the announcement:
s Play back
OK
s Delete
OK
or ...
[RRRRRRRRRRRRRRRRRRRRRRRRRR]
YES
Select the menu item and confirm.
Delete the announcement:
Select the menu item and confirm.
Press the display key to confirm the prompt.
63
CX 253i / SWZ PTT en / A31008-X353-P100-1-19 / answeringm_use.fm / 03.12.2007
Operating the answering machine
Recording memos
Memos are "spoken notes" recorded, for example, for members of your family. A memo
is played back, saved and deleted in the same way as a message. If there is a new memo,
the message key f flashes on all handsets assigned to the answering machine.
You can also record memos when the answering machine is deactivated.
When the memory is full, and when there are pauses in the recording longer than 8
seconds, the recording of the memo is cancelled automatically.
Precondition: You have selected an answering machine (page 61).
s Memos
s Record memo
OK
Select the menu item and confirm.
OK
Select the menu item and confirm.
Press the display key to start recording.
[RRRRRRRRRRRRRRRRRRRRRRRRRRR]
START
Say the memo message.
Press the display key to end the recording.
[RRRRRRRRRRRRRRRRRRRRRRRRRRR]
STOP
To cancel the recording, press the display key BACK.
Two-way recording
You can make a two-way recording of a call. The two-way recording can then be played
back or deleted like a message.
During a call:
i
s Record
s AM1
[RRRRRRRRRRRRRRRRRRRRRRRRRRR]
STOP
i
64
Open the menu.
OK
Select the menu item and confirm.
OK
Select an answering machine and confirm,
e.g. AM1 . The two-way recording starts at once.
Press the display key to end the two-way recording.
The two-way recording is also ended when the call ends or when the
memory is full. You should inform the person you are speaking to in
advance that you are making a two-way recording.
CX 253i / SWZ PTT en / A31008-X353-P100-1-19 / answeringm_use.fm / 03.12.2007
Operating the answering machine
Picking up a call from the answering machine
You can pick up a call, even if the answering machine has already switched itself on (the
ö key is flashing), your announcement is running or the caller is already leaving a
message. When you pick up the call the recording stops.
Precondition:To pick up an answering machine call, the minimum authorisation
"Answer only" is required (page 90).
Automatic call pick up is activated (see page 82,
factory default):
c/d
Press the talk or handsfree key. You pick up the call.
Automatic pickup is deactivated:
c/d
Press the talk or handsfree key.
either ...
Press the display key to screen the call.
The caller cannot hear you.
[RRRRRRRRRRRRRRRRRRRRRRRRRR]
OP.LIST
or ...
Press the display key to pick up the call.
[RRRRRRRRRRRRRRRRRRRRRRRRRR]
ACCEPT
In order to call another external party while the answering machine is recording a call
you must deactivate the automatic pickup (page 82).
Playing messages
New messages are indicated by the flashing message key f. Pressing the message
key f gives you direct access to the new messages.
You can also open the lists of messages via the menu.
Precondition: You have selected an answering machine (page 61).
Messages
OK
Confirm. Playback starts with the newest message.
When all the messages have been played back you will be asked whether you wish to
delete the messages.
The following is shown on the screen for each message:
Date and time of call
Caller's phone number
12.09.03
1234567890
09:45
ZY
1/15
ÏW
Number of the message displayed
Total number of messages in the list
If automatic pause is activated the answering machine switches to pause mode after
playing back a message. Press the display key Ï or the ô key to continue playback.
65
CX 253i / SWZ PTT en / A31008-X353-P100-1-19 / answeringm_use.fm / 03.12.2007
Operating the answering machine
Jumping to the next or previous message during playback
s
t
Go to the next message.
Jump to the previous message.
Ï
Repeat the last 5 seconds of the current message.
If less than 5 seconds have elapsed, the current
message is played back from the beginning.
Switching to pause mode during playback, ending pause mode
v
Continue
Switch to pause mode.
OK
Confirm. Continue playback.
Returning a call during playback
You can call back a caller immediately while a message is being played. Precondition:
The caller's number has been identified.
During playback:
W
Press the display key to open the submenu.
either ...
s Call back
Call back:
OK
Call back using the network provider's phone
number:
or ...
s NET list
s OK
66
Select the menu item and confirm.
OK
Select the menu item and confirm.
Select the network provider's number and confirm.
CX 253i / SWZ PTT en / A31008-X353-P100-1-19 / answeringm_use.fm / 03.12.2007
Operating the answering machine
Playing a message to another caller
During an external call you can play messages from the answering machine to the
person you are calling.
Precondition: The same receive MSN is assigned to the handset and the answering
machine.
During the call:
W
s Play message
s AM1
~
Press the display key to open the submenu.
OK
Select the menu item and confirm.
OK
If necessary, select answering machine and confirm,
e.g. AM1 .
If AM lock is set (page 78): enter the answering
machine PIN and confirm.
Information about the oldest message is displayed
on the screen. The message is not played back.
OK
sW
s Playback
Select message and open the submenu.
OK
Select the menu item and confirm. The playback
starts. The other party can hear the message being
played.
End playback:
W
s Exit
Press the display key to open the submenu.
OK
Select the menu item and confirm. The playback
stops. You can speak to the caller again.
Playing back memos
Precondition: You have selected an answering machine (page 61).
s Memos
s Play memo
st
OK
Select the menu item and confirm.
OK
Select the menu item and confirm.
Jump to the next or previous memo.
67
CX 253i / SWZ PTT en / A31008-X353-P100-1-19 / answeringm_use.fm / 03.12.2007
Operating the answering machine
Setting the playback speed
You can set the playback speed of messages/memos in four levels: Slow, Normal
speed, Fast or Very fast. When the phone is supplied Normal speed is set for all
answering machines.
During playback:
W
s Speed
s Fast
Press the display key to open the submenu.
OK
Select the menu item and confirm.
OK
Select the speed level and confirm,
e.g. Fast (‰ = set).
Playback continues at the new speed. All subsequent messages/memos are played back
at this speed until you make another change.
Deleting messages/memos
You can delete messages or memos individually or all together. Only messages and
memos that have been listened to for at least 3 seconds can be deleted. These
recordings are then designated as "old".
Deleting single messages/memos
Precondition: You have selected an answering machine (page 61).
either ...
Messages
Delete a single message:
OK
st
Select message.
W
s Delete message
Press the display key to open the submenu.
OK
or ...
s Memos
s Play memo
OK
Select the menu item and confirm.
OK
Select the menu item and confirm.
Select memo.
W
68
Select the menu item and confirm. The current
message is deleted.
Delete a single memo:
st
s Delete curr.memo
Confirm. Message playback begins.
Press the display key to open the submenu.
OK
Select the menu item and confirm. The current
memo is deleted.
CX 253i / SWZ PTT en / A31008-X353-P100-1-19 / answeringm_use.fm / 03.12.2007
Operating the answering machine
Deleting all old messages/memos
Precondition: You have selected an answering machine (page 61).
either ...
Messages
Delete all old messages:
OK
W
s Del.old messages
Press the display key to open the submenu.
OK
or ...
Delete all old memos:
OK
Select the menu item and confirm.
OK
Select the menu item and confirm.
W
s Delete old memos
Select the menu item and confirm.
Confirm.
[RRRRRRRRRRRRRRRRRRRRRRRRRR]
YES
s Memos
s Play memo
Confirm. Message playback begins.
Press the display key to open the submenu.
OK
Select the menu item and confirm.
Confirm.
[RRRRRRRRRRRRRRRRRRRRRRRRRR]
YES
Marking an old message or memo as "new"
You can mark messages/memos you have already played back as "new". This will display
this message/memo on the handset as a new entry by flashing the message key f or
by text in the display.
Pressing the messages key f gives you direct access to the message/memo once more.
During playback:
W
s Status to 'new'
Press the display key to open the submenu.
OK
Select the menu item and confirm. The current
recording is given the status "new".
If other recordings are available, playback continues.
Adding a number to the Phonebook
While a message is being played back you can display the caller's phone number and
store it in the Phonebook.
Precondition: The caller's number has been identified.
During playback:
W
s Save number
~
Press the display key to open the submenu.
OK
Enter name.
W
Store
Select the menu item and confirm.
Press the display key to open the submenu.
OK
Confirm.
69
CX 253i / SWZ PTT en / A31008-X353-P100-1-19 / answeringm_use.fm / 03.12.2007
Operating the answering machine
Remote control
You can control your answering machine remotely from a registered handset or any
external connection or mobile telephone, e.g., to play back and delete messages. Apart
from the first step, the procedure is the same for both kinds of remote control.
Precondition:
◆ Remote control from an external connection is only possible if you have defined an
AM PIN (page 78). You must always enter the AM PIN when operating from an
external device.
◆ To be able to operate an answering machine from an external device fully (change
settings, delete messages) you must enable remote control and remote delete (see
below).
Notes on remote control
If a function requires two keys to be pressed, then you must press both keys within
4 seconds. Otherwise the entry is terminated or only the function of the second key is
carried out. If you press the wrong key first you can press E to cancel the wrong entry.
You can call up voice-guided help for some functions:
0;
Help with deletion
:;
Help with new messages/phrases
F;
Help with recording
9;
Help with different operating modes
Enabling remote control and remote delete
When the phone is supplied, remote control and remote delete are deactivated.
You must enter the settings for each of the three answering machines you wish to
operate remotely.
Preconditions:
◆ You have selected an answering machine (page 61).
◆ To activate Remote control: You have assigned a PIN to the selected answering
machine (page 78).
s Settings
s Remote options
Remote control
OK
Select the menu item and confirm.
OK
Select the menu item and confirm.
Set remote control:
OK
Select the menu item and confirm
(‰ = activated).
If required, set remote delete:
s Remote delete
70
OK
Select the menu item and confirm
(‰ = activated).
CX 253i / SWZ PTT en / A31008-X353-P100-1-19 / answeringm_use.fm / 03.12.2007
Operating the answering machine
Introduction to remote operation while you are away from home
For remote control you need a telephone that transmits DTMF tones (tone dialling). It is
important to enter the AM PIN immediately while the announcement is being played. In
addition Remote control and, if required, Remote delete must be activated.
~
~
Dial your own telephone number.
When the announcement starts, enter the AM PIN at
once.
If the AM PIN is entered three times incorrectly in succession, the connection is
interrupted.
After this you can operate the answering machine using the key commands (page 72).
Introduction to remote operation from a handset (internal)
Comfort handset
u INT
Press INT.
[RRRRRRRRRRRRRRRRRRRRRRRRR]
LIST
Press the display key.
s
~
OK
Select an confirm the internal phone number for the
answering machine: 91 for AM1, 92 for AM2 or 93
for AM3.
If the AM lock has been set (page 78), enter the
AM PIN.
Handset made by another manufacturer (GAP mode)
Lift the handset and if necessary, press another key to initiate an internal call.
~
Enter internal phone number for the answering
machine: 91 for AM1, 92 for AM2 or 93 for AM3.
~
If the AM lock has been set (page 78), enter the
AM PIN.
Cordless phone adapter and normal telephone
Automatic line seizure must be activated. As supplied, automatic line seizure is
activated!
Lift the receiver and then:
~
Enter internal phone number for the answering
machine: 91 for AM1, 92 for AM2 or 93 for AM3.
~
If the AM lock has been set (page 78), enter the
AM PIN.
71
CX 253i / SWZ PTT en / A31008-X353-P100-1-19 / answeringm_use.fm / 03.12.2007
Operating the answering machine
Key sequences for remote control
Once you have initiated remote control of the answering machine, the functions of the
keys are the same for all telephones.
A
B
3
Pause/Stop
Record
Announcemen
t
On/Off
Operating mode
New
Delete
Status/Help
D
G
:
E
H
0
F
9
;
Playing back messages and memos
All messages
B
New messages only
:B
Pause/Stop
E
Continue playback
B
End playback
EE
Skipping messages and memos
To start of message
A
To the previous message
AA
To the next message
3
Deleting messages and memos
Single message during playback
0B
All messages after playback
0B
72
CX 253i / SWZ PTT en / A31008-X353-P100-1-19 / answeringm_use.fm / 03.12.2007
Operating the answering machine
Recording an announcement
Announcement 1
FGA
Announcement 2
FGB
Announcement
FG3
Concluding announcement
FGD
Playing back an announcement
Announcement 1
GA
Announcement 2
GB
Announcement
G3
Concluding announcement
GD
Selecting an announcement
Announcement 1
9A
Announcement 2
9B
Announcement
93
Concluding announcement
9D
Recording internal memos
Begin recording
FB
End recording
E
Activating/deactivating the answering machine
Activate/deactivate
H
Help
Check settings
;
Check functions requiring one key to be
pushed
;;
Check functions requiring two keys to be
pushed
see page 70
End check
E
73
CX 253i / SWZ PTT en / A31008-X353-P100-1-19 / answeringm_config.fm / 03.12.2007
Setting the answering machine (on Top E604 ISDN)
Setting the answering machine
(on Top E604 ISDN)
Once you have connected your telephone your answering machine is ready for use.
Answering machine AM1 is set to be shown and activated. It records all messages (on
all receive MSNs). AB1 can be played back and set from all handsets (factory default).
All phrases in the answering machine are in English (default setting).
AB2 and AB3 are hidden by factory default (page 75) and deactivated. To use them, they
must be shown and all shown answering machines must be assigned their own incoming MSN.
You can configure AM1, AM2 and AM3 separately.
Setting a different language
You can change the language for voice prompt and the pre-recorded announcement.
Requirement: You have selected an answering machine.
Comfort handset Top S328/S326i/E6x4i
v
æ
s
s
s
Open the menu.
OK
Select the answering machine and confirm.
Settings
OK
Select the menu item and confirm.
AM language
OK
Select the menu item and confirm.
Select the language.
OK
Assigning a receive MSN
You can assign one or more receive MSN's to each (shown) answering machine (AM1,
AM2, AM3). However, each MSN can only be assigned to one answering machine (only
one recording can be running at any one time).
i
s Set base
s Settings
s Setup user
Setup device
Open the menu.
OK
Select the menu item and confirm.
OK
Select the menu item and confirm.
OK
Select the menu item and confirm.
OK
Confirm.
s
Select answering machine, INT 91: AM 91 for AM1,
INT 92: AM 92 for AM2 or INT 93: AM 93 for AM3.
W
s Receive MSN
74
Open the submenu.
OK
Select the menu item and confirm.
CX 253i / SWZ PTT en / A31008-X353-P100-1-19 / answeringm_config.fm / 03.12.2007
Setting the answering machine (on Top E604 ISDN)
s
OK
j
Select the receive MSN and confirm, e.g. MSN1:
Anna. Only the MSN's that are still not assigned to
an answering machine are offered.
Repeat this process for all receive MSNs you want to
assign to the answering machine (‰ = activated).
Hold down (back to idle status).
Once an answering machine has been assigned to a receive MSN it can only be set and
operated via handsets/terminals to which the same receive MSN is assigned.
Hiding/showing an answering machine
If you only want to use one or two answering machines for your connection, you can
hide the other answering machine(s) from all displays and menus. By default, AM1 is
shown, AM2 and AM3 are hidden.
When hidden there must be no messages or memos remaining in the answering
machine:
◆ If there are new messages/memos you have not yet played back on the answering
machine, you will be notified when you try to hide it. The answering machine will
continue to be shown.
◆ If, when you wish to hide an answering machine, it still contains old messages/
memos that have already been played back, you will be asked if you wish to delete
the old recordings. The answering machine is only hidden if you confirm with YES.
i
s Set base
s Settings
s Setup user
Setup device
Open the menu.
OK
Select the menu item and confirm.
OK
Select the menu item and confirm.
OK
Select the menu item and confirm.
OK
Confirm. The list of internal numbers is displayed.
s
Select the internal numbers for the answering
machine (INT 91, INT 92 or INT 93).
W
Open the submenu.
either ...
s Hide AM?
Hide answering machine:
OK
or ...
s Show AM?
j
Select the menu item and confirm.
Show answering machine:
OK
Select the menu item and confirm.
Hold down (back to idle status).
When an activated answering machine is hidden it is deactivated. When it is set to show
again, the answering machine returns to the status it had before it was hidden.
75
CX 253i / SWZ PTT en / A31008-X353-P100-1-19 / answeringm_config.fm / 03.12.2007
Setting the answering machine (on Top E604 ISDN)
Specifying the number of rings before the answering machine
starts
You can set when you want the answering machine to activate (after how many rings).
The options are: 1 ring tone, 2 ring tone, ..., 9 ring tone. Instead of a set number of
rings, you can also choose the cost saving setting Automatic 2/4 (factory default). In
this setting the answering machine activates automatically:
◆ after 2 rings if there are new messages;
◆ after 4 rings if there are no new messages.
When operating remotely (page 70) by the third ring you will know that there are no
new messages (otherwise the answering machine would have already activated). There
will be no call charges if you hang up now.
Precondition: You have selected an answering machine (page 61).
s Settings
s No. of rings
s Automatic 2/4
OK
Select the menu item and confirm.
OK
Select the menu item and confirm.
OK
Select the number of rings or Automatic 2/4 and
confirm (‰ = set).
j
Hold down (back to idle status).
Activating/deactivating voice announcement of date and time
You can have the recording date and time (time stamp) announced when each
message/memo is played back (activated when supplied).
Precondition: You have selected an answering machine (page 61).
s Settings
OK
Select the menu item and confirm.
Message/Memo
OK
Confirm.
s Time stamp
j
76
OK
Select the menu item and confirm (‰ = activated).
Hold down (back to idle status).
CX 253i / SWZ PTT en / A31008-X353-P100-1-19 / answeringm_config.fm / 03.12.2007
Setting the answering machine (on Top E604 ISDN)
Setting the recording time and recording quality
You can set the maximum length of a message and its recording quality. The recording
quality determines the total recording time of your answering machine.
On the High quality setting the total recording time is up to 12 min, on Long
recording (standard quality, generally adequate) up to 25 min. The Long recording
recording quality and the Maximum recording time are set by factory default.
i
The recording of a call ends:
◆ after a pause in speaking lasting more than 8 seconds;
◆ at the end of a call; the caller terminates the connection;
◆ after the maximum set recording time has elapsed, if the setting
Maximum was used, when the memory is full.
Setting the recording time
You can limit the maximum length of a message to 1 minute, 2 minutes or 3 minutes.
If you set Maximum for the recording time (factory setting) then it is "unlimited" (until
the memory is full).
Precondition: You have selected an answering machine (page 61).
s Settings
OK
Select the menu item and confirm.
Message/Memo
OK
Confirm.
Message length
OK
s Maximum
Confirm.
OK
Select the recording time and confirm,
e.g. Maximum (‰ = activated).
j
i
Hold down (back to idle status).
When the recording duration is reached, the concluding announcement
is played automatically, if recorded. Then the connection is closed down.
There is no limit to the duration of memo recordings.
Setting recording quality
Precondition: You have selected an answering machine (page 61).
s Settings
s AM quality
OK
Select the menu item and confirm.
OK
Select the menu item and confirm.
either ...
High quality
Set high quality:
OK
or ...
s Long recording
j
Confirm (‰ = activated).
Set long recording:
OK
Select the menu item and confirm (‰ = activated).
Hold down (back to idle status).
77
CX 253i / SWZ PTT en / A31008-X353-P100-1-19 / answeringm_config.fm / 03.12.2007
Setting the answering machine (on Top E604 ISDN)
Activating/deactivating automatic pause
If automatic pause is activated the answering machine switches to pause mode after
playing back a message or memo. The next message will not be played back until you
press the Ð display key or the ô key.
When the phone is supplied automatic pause is deactivated.
Precondition: You have selected an answering machine (page 61).
s Settings
s Automatic pause
j
OK
OK
Select the menu item and confirm.
Select the menu item and confirm (‰ = activated).
Hold down (back to idle status).
Locking the answering machine, defining AM PIN
You can protect your answering machine against unauthorised access. To do this, define
an AM PIN (Personal Identification Number) and activate the AM- lock. The settings may
then only be changed and the messages played back after the PIN has been entered.
i
The answering machine can only be controlled remotely if you have
defined an AM PIN.
Entering and changing the AM PIN
When supplied, the AM PIN is preconfigured to 0000.
Precondition: You have selected an answering machine (page 61).
s Settings
s Change AM-PIN
~ OK
~ OK
OK
Select the menu item and confirm.
OK
Select the menu item and confirm.
Enter new AM PIN (max. 8 digits) and confirm.
Repeat the new AM PIN and confirm.
If you make an error when keying in the AM PIN you can delete your entry using the
ß key and enter it again.
Activating/deactivating the AM lock
When the phone is supplied the answering machine lock is deactivated.
Precondition: You have selected an answering machine (page 61).
s Settings
s AM lock
78
OK
OK
Select the menu item and confirm.
Select the menu item and confirm (‰ = activated).
CX 253i / SWZ PTT en / A31008-X353-P100-1-19 / answeringm_config.fm / 03.12.2007
Setting the answering machine (on Top E604 ISDN)
Setting time control
You can set the answering machine so that it is activated or deactivated depending on
the time of day, as well as using different announcements depending on the time of
day.
You can define (for the 24-hour day) up to four time sections with different settings for
the answering machine. You must specify a start time for each time section. The start
time of the 2nd time section is the end time of the 1st time section, etc.. The start time
of the 1st time section is the end time of the last defined time section. For each section,
you can set if the answering machine should be activated/deactivated and which
announcement or announcement only should be used.
You specify the time control for work days (Monday to Friday). At the weekend
(Saturday and/or Sunday), either the time control for working days can be used, one of
the announcements is activated for the entire day, or the answering machine is
deactivated for the entire day.
Example:
The answering machine in your office should be deactivated during normal office hours
(8:00 to 5:00 p.m.). The answering machine should only be activated during the lunch
hour (12:00 to 1:00 p.m.) using announcement 1. After office hours (5:00 to 8:00 p.m.)
the answering machine should use announcement only. The following time sections
must be defined:
1. Start time 08:00, AM off
2. Start time 12:00, announcement 1
3. Start time 13:00, AM off
4. Start time 5:00 p.m., announce only
Defining start times and announcements for Monday to Friday
Precondition: You have selected an answering machine (page 61).
s Settings
s Time control
s Mon - Fri
s
Select the menu item and confirm.
OK
Select the menu item and confirm.
OK
Select the menu item and confirm. ‰ = at least one
start time is entered.
Select entry for the time section,
e.g. **:** Announcement 1, and confirm.
OK
s Select ann.
s Announcement 1
{
OK
OK
Select the menu item and confirm.
OK
Announcement 1, Announcement 2, Select
Announcem. only or AM off and confirm.
Press the display key.
79
CX 253i / SWZ PTT en / A31008-X353-P100-1-19 / answeringm_config.fm / 03.12.2007
Setting the answering machine (on Top E604 ISDN)
s Start time
~
OK
Enter the start time (4-digit). The start time specifies
the end of the previous time section.
W
Save entry
Select the menu item and confirm.
Press the display key to open the submenu.
OK
j
Confirm.
Hold down (back to idle status).
Setting time control for Saturday or Sunday
With the factory default, the time control for working days is used: As for Mon-Fri.
Precondition: You have selected an answering machine (page 61).
s Settings
s Time control
OK
Select the menu item and confirm.
OK
Select the menu item and confirm.
s Saturday
OK
Select the menu item and confirm.
s Sunday
OK
Select the menu item and confirm.
s As for Mon-Fri
OK
Select As for Mon-Fri, Ann. 1 24h, Ann. 2 24h,
Ann. only 24h or AM off and confirm.
either ...
or ...
... then
j
Hold down (back to idle status).
Activating/deactivating time control
By factory default, time control is deactivated.
Precondition: You have at least set a start time (page 79) and have selected an
answering machine (page 61).
s Settings
s Time control
OK
OK
either ...
Activate?
80
Select the menu item and confirm (‰ = activated).
Activate time control:
OK
or ...
Deactivate?
Select the menu item and confirm.
Confirm.
Deactivate time control:
OK
Select the menu item and confirm.
CX 253i / SWZ PTT en / A31008-X353-P100-1-19 / answeringm_config.fm / 03.12.2007
Setting the answering machine (on Top E604 ISDN)
Activating/deactivating automatic call screening on a handset
You can set your answering machine to switch a handset assigned to it automatically to
listen in when a message is recorded.
By default, automatic listen in is deactivated.
Assigning a handset
Only one handset may be assigned to an answering machine. You can choose a handset
to which one of the answering machine's receive MSN's is assigned. Only terminals that
support handsfree mode are displayed. Auto answer (page 82) must be activated.
Precondition: You have selected an answering machine (page 61).
s Settings
s Aut. listen in
s Select HS
s Internal 11
OK
Select the menu item and confirm.
OK
Select the menu item and confirm.
OK
Select the menu item and confirm.
OK
Select the handset and confirm, e.g. Internal 11.
Activating/deactivating listen in
You can only activate the listen in function if a handset has been assigned to the
answering machine.
Precondition: You have selected an answering machine (page 61).
s Settings
s Aut. listen in
OK
Select the menu item and confirm.
OK
Select the menu item and confirm.
either ...
Activate?
Activate listen in:
OK
or ...
Deactivate?
Confirm.
Deactivate listen in:
OK
Confirm.
81
CX 253i / SWZ PTT en / A31008-X353-P100-1-19 / answeringm_config.fm / 03.12.2007
Setting the answering machine (on Top E604 ISDN)
Activating/deactivating automatic pick up
With automatic call pick up, you can pick up the call from the answering machine
directly (announcement or call recording is running) on any handset that has been
assigned the same incoming MSN as the answering machine. You just need to press the
talk key c on the handset. The recording of the call will then stop.
As supplied, automatic pickup is activated.
Requirements:
◆ To pick up a call, the minimum authorization Incoming only is required for the
handset (page 90).
◆ The answering machine and the handset have the same incoming MSN assigned to
them.
i
If automatic listen in is activated for a handset (page 81) then the call can
only be taken on this handset.
i
s Set base
s Settings
s System settings
s AM auto. pickup
82
Open the menu.
OK
Select the menu item and confirm.
OK
Select the menu item and confirm.
OK
Select the menu item and confirm.
OK
Select the menu item and confirm (‰ = activated).
CX 253i / SWZ PTT en / A31008-X353-P100-1-19 / time_calendar.fm / 03.12.2007
Date and Time
Date and Time
Setting the date and time
The first time you make a call on your phone, the date and time are transmitted by the
exchange.
You can choose between the 12 hour and the 24 hour display (factory setting) for the
time (a.m. = 1st half of the day; p.m. = 2nd half of the day).
i
s Set base
s Settings
s System settings
s Date/time
Open the menu.
OK
Select the menu item and confirm.
OK
Select the menu item and confirm.
OK
Select the menu item and confirm.
OK
Select the menu item and confirm.
either ...
Select display modes:
s 12 hours
OK
s Date DD.MM
If necessary, choose between 12 hours- and 24 hours
display (‰ = on).
OK
If necessary, choose between Date DD.MM (DayDate) and Date MM.DD (Date-Day) display (‰ = on).
or ...
Set time
Setting the date and time:
OK
~
Enter the date and time. If necessary skip settings
that are already correct using u v.
If necessary, in the 12 hoursdisplay use the display
keys AM and PM to switch between AM and PM.
W
Save entry
Select the menu item and confirm.
Press the display key to open the submenu.
OK
Select and confirm to store the setting.
Activating/deactivating time display
You can activate and deactivate the display of the date and time in your base station’s
idle display.
i
s Settings
s Time display
j
Open the menu.
OK
Select the menu item and confirm.
OK
Select the menu item and confirm (‰ = on).
Hold down (back to idle status).
83
CX 253i / SWZ PTT en / A31008-X353-P100-1-19 / time_calendar.fm / 03.12.2007
Date and Time
Setting appointments
You can use your base station to remind yourself of an appointment. To do this, you
have to save the times.
Setting an appointment
i
s Reminder
Open the menu.
OK
W
Change reminder
Select the menu item and confirm.
Press the display key to open the submenu.
OK
Select the menu item and confirm.
~
OK
~
Enter the date and time. If necessary skip settings
that are already correct using u v.
If necessary, in the 12 hoursdisplay use the display
keys AM and PM to switch between AM and PM.
Confirm.
OK
Enter message (up to 16 characters) and confirm.
The entry is stored.
j
Hold down (back to idle status).
◆ If you do not enter a message, Reminder will appear in the display at
i
the relevant time.
◆ How to change the volume and melody is explained starting on
page 111.
◆ An appointment will only be displayed only if the base station is in idle
status. During a call or automatic last number redial, the appointment
is not displayed. In this case, the appointment alarm is made once the
base station has returned to idle status.
◆ The appointment cannot be signalled during a power failure. In this
case, the appointment alarm is made as soon as the time has been
reset on the system (page 83).
Cancelling an appointment
i
s Reminder
Open the menu.
OK
W
Delete reminder
j
84
Select the menu item and confirm.
Press the display key to open the submenu.
OK
Select the menu item and confirm. The entry is
deleted.
Hold down (back to idle status).
CX 253i / SWZ PTT en / A31008-X353-P100-1-19 / time_calendar.fm / 03.12.2007
Date and Time
Switching off or answering an appointment alarm
An appointment is signalled with the selected ringer melody (page 112). The stored
message (page 84) or Reminder is shown in the display. Press the display key Off to
switch off the appointment alarm. The appointment alarm will ring for 30 seconds if it
is not answered sooner. Expired appointments remain in the memory. In order to be
able to set a new appointment, you must first delete the expired appointment.
Night service
You can set up call diversion for each incoming MSN. This can be done daily for a
specified period of time (Start time to End time) and if required, on the weekend (Sat/
Sun all day), automatically for all incoming calls to an external call number, to another
internal subscriber, or via Top E604 ISDN to an answering machine. For example, when
a business is closed (from 6:00 p.m. to 8:00 a.m.) all calls from the office can be
diverted to a private number.
When forwarding a call externally, only the MSN which is assigned to the base station
as the incoming MSN can be forwarded from the base station.
By default, night service is deactivated. To switch on Night service, first the forward destination must be defined.
i
If external call diversion to an external phone number is activated using
Immediately (page 99) at the time when Night service is supposed to
start, the following applies:
◆ The call is forwarded to another phone number:
Call diversion remains active until it is explicitly deactivated.
◆ The call is forwarded to the same phone number:
Call diversion is deactivated until the end time of Night service is
reached.
The same applies when call diversion is set up during Night service.
85
CX 253i / SWZ PTT en / A31008-X353-P100-1-19 / time_calendar.fm / 03.12.2007
Date and Time
Setting the forward destination
Precondition: Night service is deactivated (page 88).
i
s Set base
s Night service
s
s Forward. dest.
Open the menu.
OK
Select the menu item and confirm.
OK
Select the menu item and confirm (‰ = Night
service is activated). The list of MSNs is displayed.
OK
Select MSN and confirm, e.g. MSN1: Anna.
OK
Select the menu item and confirm (‰ = set).
either ...
Set the external forward destination:
OK
External
~
Select the menu item and confirm.
Enter the external destination phone number.
W
Press the display key to open the submenu.
OK
Save entry
or ...
Select the menu item and confirm.
Set the internal forward destination:
s Internal
s Internal 11
OK
Select internal number, e .g. Internal 11.
or ...
s Answering mach.
s AM2
Select the menu item and confirm.
Select the answering machine:
OK
Select the menu item and confirm.
Select the answering machine you would like e.g.
AM2 . The calls are forwarded to the selected
answering machine.
... then
j
Hold down (back to idle status).
◆ Night service, internal: If the internal user is not registered or cannot
i
86
be reached (e.g. terminal deactivated), the call is not signalled and
the caller receives the busy signal.
◆ Night service to an answering machine: Even if the answering
machine is deactivated, a call is signalled on the answering machine
and the answering machine takes the call after the set number of
rings (page 76).
CX 253i / SWZ PTT en / A31008-X353-P100-1-19 / time_calendar.fm / 03.12.2007
Date and Time
Entering the start and end time for Night service
By default, the Start time is pre-set to 20:00 or 8:00 pm, and 08:00 or 8:00 am for the
End time.
i
s Set base
s Night service
s
Open the menu.
OK
Select the menu item and confirm.
OK
Select the menu item and confirm.
OK
Select MSN and confirm, e.g. MSN1: Anna.
either ...
s Start time
~
Enter the start time:
OK
Enter the start time (4-digit).
or ...
s End time
~
Select the menu item and confirm.
Enter the end time:
OK
Select the menu item and confirm.
Enter the end time (4-digit).
... then
W
Save entry
Press the display key to open the submenu.
OK
j
Confirm.
Hold down (back to idle status).
Activating/deactivating Saturday/Sunday all day Night service:
If Sat/Sun all day is set, then Night service is active between the indicated start and
end times from M-F, and all day on weekends. If Sat/Sun all day is deactivated, then
calls are forwarded on the weekend between the set start and end time.
By factory default, Sat/Sun all day is activated.
i
s Set base
s Night service
s
s Sat/Sun all day
j
Open the menu.
OK
Select the menu item and confirm.
OK
Select the menu item and confirm.
OK
Select MSN and confirm, e.g. MSN1: Anna.
OK
Select the menu item and confirm (‰ = activated).
Hold down (back to idle status).
87
CX 253i / SWZ PTT en / A31008-X353-P100-1-19 / time_calendar.fm / 03.12.2007
Date and Time
Activating/deactivating Night service
You can only activate Night service when you have entered a forward destination for the
incoming MSN and when there is no forward destination currently activated for it.
i
s Set base
s Night service
s
Open the menu.
OK
Select the menu item and confirm.
OK
Select the menu item and confirm.
OK
Select MSN and confirm, e.g. MSN1: Anna.
either ...
Activate?
Activating Night service:
OK
or ...
Deactivate?
j
Select the menu item and confirm.
Deactivating Night service:
OK
Select the menu item and confirm.
Hold down (back to idle status).
If Night service is activated for an MSN, Night service is marked with ‰.
88
CX 253i / SWZ PTT en / A31008-X353-P100-1-19 / security.fm / 03.12.2007
Security settings
Security settings
Changing the system PIN
You can protect the following settings against unauthorised access using the system PIN
(Personal Identification Number):
◆ Call charge settings (i / Costs)
◆ Internal and external call diversion
◆ (i Set base/ Ext. call forw. or Int. call forw.)
◆ Subscriber configurations, security, ISDN, and system settings (i / Set base /
Settings)
◆ Getting started wizard (i / Set base / Installation)
The system PIN will not work with the number 0000.
When supplied, the system PIN is preconfigured to 0000.
i
s Set base
s Settings
~ OK
Open the menu.
OK
Select the menu item and confirm.
OK
Select the menu item and confirm.
Providing you choose a number other than 0000:
Enter PIN and confirm.
Security
OK
Confirm.
Change PIN
OK
Select the menu item and confirm.
~
~
j
!
OK
Enter new system PIN (up to 8 digits, 0 to 9) and
confirm.
OK
Repeat the new system PIN and confirm.
Hold down (back to idle status).
Memorise the new system PIN! If you forget it, the device will require
technical intervention (there is a charge for this). If this happens, contact
the Swisscom Hotline.
89
CX 253i / SWZ PTT en / A31008-X353-P100-1-19 / security.fm / 03.12.2007
Security settings
Defining authorisation
You can set different authorisations for all registered devices:
◆ Unrestricted (set as factory default)
All devices can answer incoming calls and make internal/external calls.
◆ Incoming only
The devices can only answer incoming calls. External calls are not possible. Internal
calls can be made. Emergency numbers can be dialled.
◆ Internal only
The devices can only make and answer internal calls. Emergency numbers can be
dialled.
i
s Set base
s Settings
~ OK
Security
s Authorisation
s Int.11
Open the menu.
OK
Select the menu item and confirm.
OK
Select the menu item and confirm.
If required, enter the PIN and confirm (page 89).
OK
Confirm.
OK
Select the menu item and confirm.
Select internal number, e .g. Int.11 .
W
s Internal only
j
Press the display key to open the submenu.
OK
Select authorisation and confirm (‰ = set),
e.g. Internal only.
Hold down (back to idle status).
Emergency numbers
By default, the country-specific emergency numbers are entered (No. 117, 118, and
144). You cannot change or delete these. You can enter five emergency numbers of
your own.
i
90
The emergency number can also be dialled by a handset with restricted
authorisation (e .g. Internal only).
CX 253i / SWZ PTT en / A31008-X353-P100-1-19 / security.fm / 03.12.2007
Security settings
Setting up, editing, reading and deleting personal emergency numbers
i
s Set base
s Settings
~ OK
Open the menu.
OK
Select the menu item and confirm.
OK
Select the menu item and confirm.
If required, enter the PIN and confirm (page 89).
OK
Security
s Emergency nos.
s <no entry>
Select. The emergency numbers list is opened.
Select list entry, e .g. <no entry>.
W
Press the display key to open the submenu.
either ...
Set up or edit emergency number:
Change number
OK
~
Confirm.
Enter new emergency number (up to 32 digits) or
edit existing emergency number. You can transfer
the number from the Phonebook h .
W
Press the display key to open the submenu.
OK
Save entry
or ...
s Display number
s Delete number
j
Confirm.
View emergency number:
OK
or ...
i
Confirm.
Select the menu item and confirm.
Delete emergency number:
OK
Select the menu item and confirm.
Hold down (back to idle status).
If your phone is connected to a PABX you may have to enter the applicable
access code (outside line code, e.g. 0; see page 122) before the
emergency number. This also applies to preset emergency numbers for
which you need to re-enter e.g. "0117", "0118" and "0144" as an
alternative.
91
CX 253i / SWZ PTT en / A31008-X353-P100-1-19 / security.fm / 03.12.2007
Security settings
Dialling emergency numbers
Precondition: The base station is blocked for external dialling (page 90).
c
Lift the receiver.
Press the display key.
[RRRRRRRRRRRRRRRRRRRRRRRRRRR]
EMERG.
... then
Dial the emergency number:
~
Enter the emergency number.
If the dialled number does not match the emergency number entered, the call is
rejected with the display "Number is not emergency no.".
The following emergency numbers for Switzerland are programmed ex works:
92
117
Police
118
Fire department
144
Sanitation department
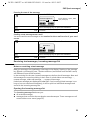
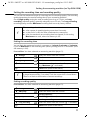
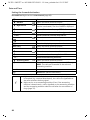
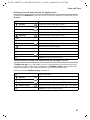
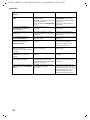
CX 253i / SWZ PTT en / A31008-X353-P100-1-19 / settings_bs.fm / 03.12.2007
System settings
System settings
The abbreviations in brackets after the titles indicate the ISDN service concerned. Some
features may only be used if they have been authorised by the network provider (there
may be an extra charge).
Changing the name for an internal user
By factory default, all internal numbers are given the names Int.11 , Int.12 , etc.,
according to their numbering. You can change these entries to suit your individual
needs.
i
s Set base
s Settings
~ OK
s Setup user
s Setup device
s Int.11
Name
~
Save entry
i
Open the menu.
OK
Select the menu item and confirm.
OK
Select the menu item and confirm.
Enter system PIN if required (page 89).
OK
Select the menu item and confirm.
OK
Select the menu item and confirm.
W
OK
W
OK
Select internal number and open submenu,
e .g. Int.11 .
Confirm.
Change the name and open the submenu.
Confirm. The name is now shown in the internal list,
including when an internal call is made from this
internal number.
Since names are saved in the base station, another name can be allocated
to a terminal when registering to a different base. This makes it possible
to identify which base the terminal is currently connected to.
Setting up/deleting ISDN phone numbers (MSN)
Your ISDN connection offers you two telephone lines (B channels) that you can use at
the same time. You can set up a maximum of ten individual phone numbers (MSNs) on
your base station.
The MultiLine connection provides three call numbers. All further numbers must be
activated.
93
CX 253i / SWZ PTT en / A31008-X353-P100-1-19 / settings_bs.fm / 03.12.2007
System settings
Setting up an ISDN phone number (MSN) / changing the name
If you have not saved all the phone numbers with the Getting started wizard (page 16),
you can enter them now. All phone numbers that are subsequently stored are
automatically assigned to all registered terminals.
i
The MSN must be programmed without the area code (e.g. 031).
Each newly set up phone number automatically gets its own ringer melody, which can
be changed to suit your individual requirements (page 97).
i
s Set base
s Settings
~ OK
s ISDN settings
Set up MSN
s
Open the menu.
OK
Select the menu item and confirm.
OK
Select the menu item and confirm.
Enter system PIN if required (page 89).
OK
Select the menu item and confirm.
OK
Confirm.
W
OK
Edit entry
Select MSN and open submenu, e.g. MSN1: Anna.
Confirm.
~
Enter a name (up to 16 characters – optional) (for
inputting text see page 130).
s~
Scroll to the line <Number> and enter the phone
number.
W
Press the display key to open the submenu.
OK
Save entry
Confirm.
Cancelling ISDN phone numbers (MSN)
i
s Set base
s Settings
~ OK
s ISDN settings
Set up MSN
s
s Delete entry
i
94
Open the menu.
OK
Select the menu item and confirm.
OK
Select the menu item and confirm.
Enter system PIN if required (page 89).
OK
Select the menu item and confirm.
OK
Confirm.
W
OK
Select MSN and open submenu, e.g. MSN1: Anna.
Select the menu item and confirm.
If the MSN you have cancelled was the send MSN (page 96) of an internal
user then a new send MSN (the MSN with the lowest ranked number) will
automatically be assigned to this internal user.
CX 253i / SWZ PTT en / A31008-X353-P100-1-19 / settings_bs.fm / 03.12.2007
System settings
Assigning a phone number (MSN)
You can assign particular individual phone numbers (MSN's) to registered terminals.
When doing this determine
◆ which phone number makes a registered terminal ring (receive MSN),
◆ under which number an internal user dials (send MSN).
Assigning a receive MSN
As supplied, a newly registered handset will ring whenever a phone number you have
set up is dialled.
If you only want to assign the terminal specific receive MSNs:
i
s Set base
s Settings
~ OK
s Setup user
s Setup device
s Int.11
s Receive MSN
s
j
Open the menu.
OK
Select the menu item and confirm.
OK
Select the menu item and confirm.
Enter system PIN if required (page 89).
OK
Select the menu item and confirm.
OK
Select the menu item and confirm.
W
Select internal number of the terminal and open the
submenu, e.g. Int.11 .
OK
Select the menu item and confirm.
OK
Select MSN and confirm, e.g. MSN1: Anna
(‰ = set).
Hold down (back to idle status).
95
CX 253i / SWZ PTT en / A31008-X353-P100-1-19 / settings_bs.fm / 03.12.2007
System settings
Assigning a send MSN
When the phone is supplied no send MSN has been entered. The telephone exchange
adds the send MSN.
You can define one send MSN per internal user. This MSN is shown to the person you
call and the call is also charged to this MSN.
i
s Set base
s Settings
~ OK
s Setup user
s Setup device
s Int.11
Open the menu.
OK
Select the menu item and confirm.
OK
Select the menu item and confirm.
Enter system PIN if required (page 89).
OK
Select the menu item and confirm.
OK
Select the menu item and confirm.
Select internal number, e .g. Int.11 .
W
s Send MSN
s
Press the display key to open the submenu.
OK
Select the menu item and confirm.
OK
Select MSN and confirm, e.g. MSN1: Anna
(‰ = set).
j
Hold down (back to idle status).
Setting up the list of send MSNs for the next call
You can set up your base station so that after lifting the receiver or pressing the
handsfree key d a list of all available send MSNs is displayed.
By factory default, MSN next call is not activated.
i
s Set base
s Settings
~ OK
s Setup user
s Setup device
s Int.11
s MSN next call
j
96
Open the menu.
OK
Select the menu item and confirm.
OK
Select the menu item and confirm.
Enter system PIN if required (page 89).
OK
Select the menu item and confirm.
OK
Select the menu item and confirm. The list of
entered internal numbers is displayed.
W
OK
Select internal number of the terminal and open the
submenu, e .g. Int.11 .
Select the menu item and confirm (‰ = activated).
Hold down (back to idle status).
CX 253i / SWZ PTT en / A31008-X353-P100-1-19 / settings_bs.fm / 03.12.2007
System settings
Setting up a busy signal when the MSN is being used (Busy on Busy)
This setting allows callers to get a busy signal immediately when an external call is
already being made on this MSN, independent of the setting Call waiting.
By factory default, the function is not set.
i
s Set base
s Settings
~ OK
s ISDN settings
s Busy on busy
j
Open the menu.
OK
Select the menu item and confirm.
OK
Select the menu item and confirm.
Enter system PIN if required (page 89).
OK
OK
Select the menu item and confirm.
Select and confirm (‰ = activated).
Hold down (back to idle status).
Assigning an MSN a ringer melody
Each receive MSN is assigned a ringer melody when setting up. You can change this
assignment for each receive MSN individually. This means that all terminals will use this
ringer melody to indicate an incoming call to a receive MSN.
i
s Set base
s Settings
~ OK
s ISDN settings
Set up MSN
s
s Ringer melody
uv
j
Open the menu.
OK
Select the menu item and confirm.
OK
Select the menu item and confirm.
Enter system PIN if required (page 89).
OK
Select the menu item and confirm.
OK
Confirm.
W
OK
Select MSN and open submenu, e.g. MSN1: Anna.
Select the menu item and confirm.
Select melody and confirm, e.g. Ringer Melody: 5.
Hold down (back to idle status).
97
CX 253i / SWZ PTT en / A31008-X353-P100-1-19 / settings_bs.fm / 03.12.2007
System settings
Setting up rejecting for the entire MSN group
You can reject an external call not only on your base station, but for all members of an
MSN group. Pressing REJECT will give the caller a busy signal instead of a ringing tone.
The entire group will no longer be called. A waiting call can also be rejected during a
call. The call is added to the caller list.
By factory default, the function is not activated.
i
s Set base
s Settings
~ OK
s ISDN settings
s Reject all
j
Open the menu.
OK
Select the menu item and confirm.
OK
Select the menu item and confirm.
Enter system PIN if required (page 89).
OK
OK
Select the menu item and confirm.
Select the menu item and confirm (‰ = activated).
Hold down (back to idle status).
Diverting calls
i
To make this function easier to use, you can also set one of the function
keys accordingly (page 114).
Diverting internal calls
◆ Only one forward destination can be selected for internal call
i
diversion.
◆ Only one-level call diversion is supported: If the subscriber to whom
you divert your calls has activated their own call diversion, this is no
longer effective. The forwarded call will ring at the party you diverted
it to.
By factory default, internal call diversion is deactivated.
Setting up the forward destination
i
s Set base
s Forward. base
~ OK
s Forward. dest.
s Int.11
98
Open the menu.
OK
Select the menu item and confirm.
OK
Select the menu item and confirm.
Enter system PIN if required (page 89).
OK
Select the menu item and confirm.
Select internal number, e .g. Int.11 .
(‰ = activated).
CX 253i / SWZ PTT en / A31008-X353-P100-1-19 / settings_bs.fm / 03.12.2007
System settings
Activating/deactivating internal call diversion
Requirement: Internal call diversion can only be activated if a destination has been set
up.
i
s Set base
s Int. call forw.
~ OK
Open the menu.
OK
Select the menu item and confirm.
OK
Select the menu item and confirm.
Enter system PIN if required (page 89).
either ...
Activate:
OK
Activate?
or ...
Confirm.
Deactivate:
OK
Deactivate?
Confirm.
Defining the number of rings
When ring delay is used, the number of rings before the call is diverted must be defined.
Between 0 (= immediate call diversion) and 9 rings can be set. There are 5 seconds
between rings.
The factory default setting is 0 rings (= immediate call diversion).
i
s Set base
s Forward. base
~ OK
s No. of rings
~
j
Open the menu.
OK
Select the menu item and confirm.
OK
Select the menu item and confirm.
Enter system PIN if required (page 89).
OK
Select the menu item and confirm.
OK
Enter the number of rings and confirm.
Hold down (back to idle status).
Diverting calls externally – CF (Call Forwarding)
For each receive MSN you can store a destination number for each of the following
conditions:
Immediately – On busy – On no reply
◆ If call divert is carried out on the base station (internal) (page 102),
i
the condition On busy is not available.
◆ All three conditions can be activated at the same time.
◆ If Night service has been set up for a receive MSN (page 85), external
call divert cannot be set up or changed for this receive MSN.
Set up external call diverts are entered in a list. Active call diverts are identified in this
list.
When the phone is supplied external call divert is not set.
99
CX 253i / SWZ PTT en / A31008-X353-P100-1-19 / settings_bs.fm / 03.12.2007
System settings
Setting up the forward destination
i
s Set base
s Ext. call forw.
~ OK
Open the menu.
OK
Select the menu item and confirm.
OK
Select the menu item and confirm.
Enter system PIN if required (page 89). The list of
set-up call diversions is displayed.
W
Press the display key to open the submenu.
New entry
OK
Confirm.
s
W
Select receive MSN and open submenu,
e.g. MSN1: Anna.
s Immediately
OK
Select the condition and confirm,
e.g. Immediately.
You will be notified if you have selected an MSN for
which another internal user has already set up call
divert. You can either return using BACK to select
another setting or use NEXT to continue.
~
Save entry
W
OK
Enter the phone number and open the submenu.
Confirm.
Confirm to set up call diversion.
[RRRRRRRRRRRRRRRRRRRRRRRRRRR]
YES
Activating/deactivating external call diversion
i
s Set base
s Ext. call forw.
~ OK
s
Open the menu.
OK
Select the menu item and confirm.
OK
Select the menu item and confirm.
Enter system PIN if required (page 89).
W
either ...
Activate:
s Activate?
OK
s Deactivate?
OK
or ...
100
Select call diversion and open the submenu.
Select the menu item and confirm.
Deactivate:
Select the menu item and confirm.
You will be notified if you have selected a call divert
that another internal user has already set up. You
can either return using BACK to select another
setting or use NEXT to continue.
CX 253i / SWZ PTT en / A31008-X353-P100-1-19 / settings_bs.fm / 03.12.2007
System settings
Editing an entry
i
s Set base
s Ext. call forw.
~ OK
s
s Edit entry
~
Save entry
Open the menu.
OK
Select the menu item and confirm.
OK
Select the menu item and confirm.
Enter system PIN if required (page 89).
W
OK
W
OK
Select call diversion and open the submenu.
Select the menu item and confirm.
You will be notified if you have selected a call divert
that another internal user has already set up. You
can either return using BACK to select another
setting or use NEXT to continue.
Enter the new phone number and open the
submenu.
Confirm.
Confirm to set up call diversion.
[RRRRRRRRRRRRRRRRRRRRRRRRRR]
YES
Deleting external call diversion
i
s Set base
s Ext. call forw.
~ OK
s
s Delete entry
Open the menu.
OK
Select the menu item and confirm.
OK
Select the menu item and confirm.
Enter system PIN if required (page 89).
W
OK
Select call diversion and open the submenu.
Select the menu item and confirm.
You will be notified if you have selected a call divert
that another internal user has already set up. You
can either return using BACK to select another
setting or use NEXT to continue.
101
CX 253i / SWZ PTT en / A31008-X353-P100-1-19 / settings_bs.fm / 03.12.2007
System settings
Switching external call divert internal/external
Your ISDN connection offers you two telephone lines (B channels) that you can use at
the same time.
You can set up your base station so that:
◆ call divert is carried out at the telephone exchange (external), so that your second
ISDN line remains free.
◆ call divert is carried out in your base station (internal); in this case both ISDN lines
are engaged. You will be liable for any additional connection charges.
By factory default, Forward. netw. is activated.
i
s Set base
s Settings
~ OK
s ISDN settings
Open the menu.
OK
Select the menu item and confirm.
OK
Select the menu item and confirm.
Enter system PIN if required (page 89).
OK
Select the menu item and confirm.
s Forward. base
OK
Select the menu item and confirm (‰ = set).
s Forward. netw.
OK
Select the menu item and confirm (‰ = set).
either ...
or ...
Activating/deactivating handsfree dialling
If you have activated Dial handsfree, you can dial without lifting the receiver. As soon as
you have entered the first digit, the line is seized and handsfree is automatically
activated.
i
s Settings
s Dial handsfree
j
102
Open the menu.
OK
Select the menu item and confirm.
OK
Select the menu item and confirm (‰ = set).
Hold down (back to idle status).
CX 253i / SWZ PTT en / A31008-X353-P100-1-19 / settings_bs.fm / 03.12.2007
System settings
Pre-assigning the call diversion destination – CD (Call Deflection)
The call diversion destination for incoming calls is pre-set here. This destination number
is offered as a preset for manual forwarding (page 30).
i
s Set base
s Settings
~ OK
s ISDN settings
s Forward. dest.
~
Save entry
Open the menu.
OK
Select the menu item and confirm.
OK
Select the menu item and confirm.
Enter system PIN if required (page 89).
OK
Select the menu item and confirm.
OK
Select the menu item and confirm.
W
OK
j
Enter destination number and open the submenu.
Confirm.
Hold down (back to idle status).
Setting up automatic call diversion when not reaching a terminal
If your handset is out of the radio range of the base station, the battery is flat, or the
handset has been deactivated, a call will be forwarded an external phone numbers you
specify.
Preconditions:
◆ You have exclusively assigned the handset its own receive MSN (page 95). This
MSN must not be assigned as the receive MSN for any other device, not even the
ISDN bus!
◆ Call diversion can only be set up for one incoming MSN on the base station.
By factory default, automatic call diversion is not set up.
i
s Set base
s Settings
~ OK
s ISDN settings
s Auto.forwarding
s
~
Save entry
j
Open the menu.
OK
Select the menu item and confirm.
OK
Select the menu item and confirm.
Enter system PIN if required (page 89).
OK
Select the menu item and confirm.
OK
Select the menu item and confirm.
W
W
OK
Select MSN and open submenu, e.g. MSN1: Anna.
Enter destination number and open the submenu.
Confirm. Automatic call diversion is activated
(‰ = on).
Hold down (back to idle status).
The line set up for automatic call diversion is marked in the list of set-up call diversion
lines.
103
CX 253i / SWZ PTT en / A31008-X353-P100-1-19 / settings_bs.fm / 03.12.2007
System settings
Setting up an internal group call group
You can make a group call from any telephone registered on the base station to all other
registered internal users (page 21).
By default, all registered users with the device type Telephone or Neutral are set up in
the group call group.
i
s Set base
s Settings
~ OK
s Setup user
s Setup device
s Int.11
s Hunt group
j
104
Open the menu.
OK
Select the menu item and confirm.
OK
Select the menu item and confirm.
Enter system PIN if required (page 89).
OK
Select the menu item and confirm.
OK
Confirm.
W
OK
Select internal number and open submenu,
e .g. Int.11 .
Select the menu item and confirm (‰ = activated).
Hold down (back to idle status).
CX 253i / SWZ PTT en / A31008-X353-P100-1-19 / settings_bs.fm / 03.12.2007
System settings
Setting up ring delay
Ring delay can be used to individually set up a party per incoming MSN to ring later.
During this ring delay time, the terminal can take the call using the function Accept?
without hearing a ring. The ring delay time is given in rings. There are 5 seconds
between rings.
The factory default setting is 0 rings (= not activated).
Take into account the response time of the answering machine when making this
setting (default: Automatic 2/4). If the set ring delay is longer than the setting for an
active answering machine, the phone will not ring, because the answering machine will
answer it first.
For each programmed MSN, at least one subscriber must be able to be called
immediately. Therefore, a party set up for ring delay will be called immediately if he is
the only one on this incoming MSN, or no one else can be reached on this incoming
MSN.
Picking up a call during ring delay (Call PickUp), see page 24.
i
s Set base
s Settings
~ OK
s Setup user
s Setup device
s Int.11
s Ring delay
s
~
Open the menu.
OK
Select the menu item and confirm.
OK
Select the menu item and confirm.
Enter system PIN if required (page 89).
OK
Select the menu item and confirm.
OK
Select the menu item and confirm.
W
Select internal number and open submenu,
e .g. Int.11 .
OK
Select the menu item and confirm.
OK
Select the receive MSN and confirm,
e.g. MSN1: Anna.
OK
No. of rings enter and confirm, e.g. 2.
105
CX 253i / SWZ PTT en / A31008-X353-P100-1-19 / settings_bs.fm / 03.12.2007
System settings
Activating/deactivating call waiting – CW
This function can be set up separately for each user. When call waiting is activated the
caller will hear the ringing tone if you are already making a call. This call is indicated
both acoustically and visually on your base station display.
When call waiting is deactivated, the caller will hear the ringing tone if you are already
making a call and other phones are assigned to this MSN.
When call waiting is deactivated, the caller will hear the busy tone if you are already
making a call and yours is the only phone assigned to this MSN.
The function is activated when the phone is supplied. Taking a waiting external call see
page 31.
i
s Set base
s Settings
~ OK
s Setup user
s Setup device
s Int.11
s Call waiting
j
Open the menu.
OK
Select the menu item and confirm.
OK
Select the menu item and confirm.
Enter system PIN if required (page 89).
OK
Select the menu item and confirm.
OK
Select the menu item and confirm.
W
OK
Select internal number and open submenu,
e .g. Int.11 .
Select the menu item and confirm (‰ = activated).
Hold down (back to idle status).
Setting an external/internal enquiry call
Your ISDN connection offers you two telephone lines (B channels) that you can use at
the same time.
You can set up your base station so that:
◆ when an enquiry call is made to another external party during an external call, the
call is put on hold in the telephone exchange so that your second ISDN line remains
free.
◆ when an enquiry call is made to another external party during an external call, the
call is put on hold in your base station; in this case both ISDN lines are engaged.
By factory default, Ext. enq. call is activated.
i
106
If Int. enq. call is set and the second B-channel is being used, the "Hold"
takes place automatically in the telephone exchange.
CX 253i / SWZ PTT en / A31008-X353-P100-1-19 / settings_bs.fm / 03.12.2007
System settings
Initiating an enquiry call see page 27 or page 28.
i
s Set base
s Settings
~ OK
s ISDN settings
Open the menu.
OK
Select the menu item and confirm.
OK
Select the menu item and confirm.
Enter system PIN if required (page 89).
OK
either ...
s Int. enq. call
Set Int. enq. call:
OK
or ...
s Ext. enq. call
j
Select the menu item and confirm.
Select the menu item and confirm (‰ = activated).
Set Ext. enq. call:
OK
Select the menu item and confirm (‰ = activated).
Hold down (back to idle status).
Setting up the waiting melody
An external caller hears the set waiting melody when the connection is on hold in the
base station (internal) (page 106). An external party whose connection is on hold in the
telephone exchange (external), and an internal user who is on hold, will not hear a
waiting melody.
The following settings can be selected:
The party on hold hears the waiting melody of
the base.
When the waiting melody is deactivated, a setting
cannot be made.
Internal
Off
By factory default, Internal is activated.
i
s Set base
s Settings
~ OK
s System settings
s Music on hold
s Internal
j
Open the menu.
OK
Select the menu item and confirm.
OK
Select the menu item and confirm.
Enter system PIN if required (page 89).
OK
Select the menu item and confirm.
OK
Select the menu item and confirm.
OK
Select and confirm the desired setting, e.g. Internal
(‰ = on).
Hold down (back to idle status).
107
CX 253i / SWZ PTT en / A31008-X353-P100-1-19 / settings_bs.fm / 03.12.2007
System settings
Changing the long distance prefix
Long distance prefixes are the first few digits required when dialling another city
(national) or to another country (international). The default settings for Switzerland are
as follows:
0
00
For connections to other towns (national)
For connections abroad (international)
Otherwise, you would not be able to make some calls, e.g. callbacks from the call list.
i
s Set base
s Settings
~ OK
s ISDN settings
s Lg.-dist. code
s National : 0
Change number
~
Save entry
Open the menu.
OK
Select the menu item and confirm.
OK
Select the menu item and confirm.
Enter system PIN if required (page 89).
OK
Select the menu item and confirm.
OK
Select the menu item and confirm.
W
OK
W
OK
Select the type of long distance prefix and open
submenu, e.g. National : 0.
Confirm.
Enter a new or changed long distance prefix and
open the submenu.
Confirm.
Restoring the factory settings
You can select which type of reset should be performed:
Operational – All MSNs and access codes (outside line code) are deleted and the AB
(answering machine) PIN is set to 0000. The authorisations are reset to "Dial and
answer".
Reset all – All functions are reset to their factory defaults. The system PIN is reset to
"0000". All entries (caller list, charges) are deleted.
i
108
The following applies to both functions: Before resetting, deactivate all
active call transfers! The terminals remain registered.
CX 253i / SWZ PTT en / A31008-X353-P100-1-19 / settings_bs.fm / 03.12.2007
System settings
i
s Set base
s Settings
~ OK
s System settings
s Spec. function
s Factory setting
Open the menu.
OK
Select the menu item and confirm.
OK
Select the menu item and confirm.
Enter system PIN if required (page 89).
OK
Select the menu item and confirm.
OK
Select the menu item and confirm.
OK
Select the menu item and confirm.
either ...
Restore the functionality:
s Operational
OK
s Reset all
OK
or ...
Select the menu item and confirm.
Restore factory settings:
Select the menu item and confirm.
Checking the status
The status of the following settings can be checked:
◆ Callback
◆ Unknown call
◆ Diversion
◆ External connections
◆ AM1, AM2, AM3
i
s Set base
s Status
Open the menu.
OK
Select the menu item and confirm.
OK
Select the menu item and confirm. The status list is
displayed (‰ = activated).
j
Hold down (back to idle status).
Checking the software version
You can check the version of the software for the base station:
i
s Set base
s Settings
~ OK
s System settings
s Spec. function
s SW version
j
Open the menu.
OK
Select the menu item and confirm.
OK
Select the menu item and confirm.
Enter system PIN if required (page 89).
OK
Select the menu item and confirm.
OK
Select the menu item and confirm.
OK
Select the menu item and confirm.
Hold down (back to idle status).
109
CX 253i / SWZ PTT en / A31008-X353-P100-1-19 / settings_tel.fm / 03.12.2007
Setting the volume, display and keys
Your base station has default settings. You can change these settings as required.
Setting the display
Changing the display language
You can view the display texts in different languages.
i
s Settings
Language
s
j
i
Open the menu.
OK
Select the menu item and confirm.
OK
Confirm. The current language is checked ‰
(Default setting: German).
Select a language and confirm.
OK
Hold down (back to idle status).
When you change the display language the character set can change too,
e.g. for Russian.
Activating/deactivating display lighting
You can activate and deactivate the display lighting. If you have deactivated the display
lighting, the display on your base station lights up when:
◆ You are called on the base station.
◆ You make a call on the base station.
◆ You press keys on the base station.
◆ You have just replaced the receiver – for approx. 3 seconds while the charges for the
last call are displayed.
◆ The base station returns to idle status for approx. 30 seconds.
i
s Settings
s Autom. illumin.
j
110
Open the menu.
OK
Select the menu item and confirm.
OK
Select the menu item and confirm ( = set).
Hold down (back to idle status).
CX 253i / SWZ PTT en / A31008-X353-P100-1-19 / settings_tel.fm / 03.12.2007
Setting the volume, display and keys
Setting the display contrast
You can set the contrast of the display.
i
s Settings
s Contrast
uv
j
i
Open the menu.
OK
Select the menu item and confirm.
OK
Select the menu item and confirm.
OK
Set the display contrast and confirm.
Hold down (back to idle status).
After calling the menu item Contrast the display contrast can be set with
the ð and ñ.
Activating/deactivating the time display
You can set the display of the time on your base station. By default, the time display is
activated.
i
s Settings
s Time display
j
Open the menu.
OK
Select the menu item and confirm.
OK
Select the menu item and confirm ( = set).
Hold down (back to idle status).
Adjust volume
You can adjust the earpiece volume to three levels and the handsfree volume to five
levels - even while an external call is in progress.
i
s Audio
Open the menu.
OK
Select the menu item and confirm.
OK
Select the menu item and confirm. You will hear the
current earpiece volume setting.
OK
Select the menu item and confirm. You hear the
current volume setting for handsfree talking.
OK
Set volume and confirm.
either ...
s Handset Volume
or ...
s Vol.Loudspeaker
... then
uv
j
i
Hold down (back to idle status).
After opening up the menu item Handset Volume or the menu item
Vol.Loudspeaker, you can also set the volume using the ð and ñ keys.
111
CX 253i / SWZ PTT en / A31008-X353-P100-1-19 / settings_tel.fm / 03.12.2007
Setting the volume, display and keys
Changing the ringer tone
A range of options is available:
◆ Six volume levels:
– Five volume levels (1–5; e.g. volume level 2 = ˆ),
– "Crescendo" call (6; the volume increases with each ring = ‰).
◆ Ten melodies (1–10; melodies 1–3 are the "traditional ringer tones").
Setting the ringer tone volume
i
s Audio
s Ringer Volume
uv
j
i
Open the menu.
OK
Select the menu item and confirm.
OK
Select the menu item and confirm. You will hear the
current ringer tone volume setting.
OK
Set the ringer tone volume and confirm.
Hold down (back to idle status).
After opening up the menu item Ringer Volume, you can also set the
ringer tone volume using the ð and ñ keys.
Setting the ringer melody
i
s Audio
s Ringer melody
OK
Select the menu item and confirm.
OK
uv
Select the menu item and confirm. You will hear the
current ringer tone volume setting.
OK
Select the ringer melody. The current melody rings,
the digits at the end of the line indicate the current
setting.
j
i
112
Open the menu.
Hold down (back to idle status).
After opening up the menu item Ringer melody , you can also set the
ringer melody using the ð and ñ keys.
CX 253i / SWZ PTT en / A31008-X353-P100-1-19 / settings_tel.fm / 03.12.2007
Setting the volume, display and keys
Activating/deactivating advisory tones
Your handset uses "advisory tones" to tell you about different activities and statuses.
The following advisory tones can be activated and deactivated individually (the default
setting is on).
◆ Key click: every key press is confirmed
◆ Confirmation tone (rising tone sequence): at the end of input/setting
◆ Error tone (descending tone sequence): with incorrect inputs
i
s Audio
s Advisory tones
OK
Select the menu item and confirm.
OK
Select the menu item and confirm.
s Key Beeps
OK
Select the menu item and confirm (‰ = set).
s Confirm. Beep
OK
Select the menu item and confirm (‰ = set).
s Error Beep
OK
Select the menu item and confirm (‰ = set).
Open the menu.
either ...
or ...
or ...
... then
j
Hold down (back to idle status).
Using function keys
Your base station has four function keys, to which you can assign functions or phone
numbers. Pressing the function key executes the relevant function or dials the stored
phone number.
Assigning a function key
i
s Settings
s Function keys
÷
W
Open the menu.
OK
Select the menu item and confirm.
OK
Select the menu item and confirm.
Press the function key.
Open the submenu.
113
CX 253i / SWZ PTT en / A31008-X353-P100-1-19 / settings_tel.fm / 03.12.2007
Setting the volume, display and keys
Assigning a phone number to a function key
You can use a function key with a phone number assigned to it for targeted dialling of
a particular party.
Precondition: You have assigned the function key (page 113).
... then
OK
Edit entry
~W
Confirm.
Enter the phone number and open the submenu.
OK
Save entry
Confirm.
Assigning a phone number from the Phonebook to a function key
You can use a function key with a phone number assigned to it for targeted dialling of
a particular party.
Precondition: You have assigned the function key (page 113).
... then
OK
Edit entry
h
s
Confirm.
Open the Phonebook.
OK
W
Select an entry from the Phonebook and confirm.
Open the submenu.
OK
Save entry
Confirm.
Assigning function key with call diversion
You can set an immediate call diversion to a function key, the general call diversion
route set for call diversion applies here (page 102).
Precondition: You have assigned the function key (page 113).
... then
s ISDN Functions
s Forward immediat
s
~W
Save entry
i
114
OK
Select the menu item and confirm.
OK
Select the desired call diversion and confirm,
e.g. Forward immediat.
OK
Select MSN and confirm, e.g. MSN1: Anna.
OK
Confirm.
Enter the phone number and open the submenu.
◆ After this function key is pressed, the display now indicates the
current entry. Call forwarding has been activated.
◆ Pressing the function key will switch off the call diversion again.
CX 253i / SWZ PTT en / A31008-X353-P100-1-19 / settings_tel.fm / 03.12.2007
Setting the volume, display and keys
Assigning a send MSN to a function key
You can use the send MSN to specify which phone number you want to use for the next
call. Dialling this send MSN using the function key only applies to the next outgoing call.
Precondition: You have assigned the function key (page 113).
... then
s ISDN Functions
s MSN next call
s
OK
Select the menu item and confirm.
OK
Select the menu item and confirm.
OK
Select MSN and confirm, e.g. MSN1: Anna
(‰ = set).
115
CX 253i / SWZ PTT en / A31008-X353-P100-1-19 / devices.fm / 03.12.2007
Operating with other devices
On your base station, you can register up to six cordless devices (including the
Gigaset Repeater V2 (page 120)).
You must initiate registration of a cordless device on the base station and on the
cordless device itself. The internal numbers 11 to 16 are reserved for the cordless
devices. If these internal numbers have already been assigned on your telephone, deregister a handset you no longer require before registering a new one (page 120).
Registering handsets
When you have prepared the base station for registration, it remains so for approx.
30 seconds. Therefore you should prepare the handset for registration before starting
preparation of the base station.
1. On the base station
i
Open the menu.
s Set base
s Settings
s Setup user
s Register device
OK
Select the menu item and confirm.
OK
Select the menu item and confirm.
OK
Select the menu item and confirm.
OK
Select the menu item and confirm.
The base station is only ready for registration for as long as Registration
proced.running is shown in the display (approx. 30 seconds).
2. On the handset (within 30 sec.)
Register the handset as described in the relevant operating instructions.
After registration the handset reverts to idle status. The handset's internal number is
shown in the display.
The next unassigned internal number between Int.11 and Int.16 is automatically
assigned to the handset as it is registered.
i
116
If the handset terminates the base search, e.g. because the registration
time has been exceeded, repeat the process.
CX 253i / SWZ PTT en / A31008-X353-P100-1-19 / devices.fm / 03.12.2007
Operating with other devices
Registering the Top S328/S326i/E6x4i handset manually
v
s ì
s Register H/Set
s Base 1
Open the menu.
OK
Select the menu item and confirm.
OK
Select the menu item and confirm.
OK
Select base (1–4) and confirm, e.g. Base 1.
~ OK
Enter the system PIN of the base (the default is 0000)
and confirm. The display shows Regstr.Procedure
and the name of the base station, e.g. Base 1.
Once the handset has located the base station, the
list of free internal numbers is shown in the display.
Prepare basis for registering a mobile handset
(page 116).
s Int.11
OK
Select internal number and confirm, e.g. Int.11 .
After registration the handset reverts to idle status. The handset's internal number is
shown in the display.
Registering handset Comfort Top E414i/E514i/S314i and Top S317
a
Press and hold to switch on the handset.
OK
Confirm the prompt.
either ...
or ...
G Settings
G Register H/Set
G Base 1
OK
Select the menu item and confirm.
OK
Select the menu item and confirm.
OK
Select base (1–4) and confirm, e.g. Base 1.
... then
~ OK
Enter the system PIN of the base (the default is 0000)
and confirm.
Press the illuminated register key on the base station
(page 116), key flashes. The base station is ready for
registering only when the key is flashing.
s Int.11
OK
Select internal number and confirm, e.g. Int.11 .
The successful registration is shown on the display.
117
CX 253i / SWZ PTT en / A31008-X353-P100-1-19 / devices.fm / 03.12.2007
Operating with other devices
Registering the handset Comfort Top E304/Top E414i/E514i
−
Press and hold to switch on the handset.
OK
Confirm the prompt.
either ...
or ...
.
s Stations
Open the menu.
OK
s Station 1
s Register
Select the menu item and confirm.
Select base (1–4) and open the submenu.
OK
Select the menu item and confirm.
... then
~ OK
Enter the system PIN of the base (the default is 0000)
and confirm.
Press the illuminated register key on the base station
(page 116), key flashes. The base station is ready for
registering only when the key is flashing.
s Int.11
OK
Select internal number and confirm, e.g. Int.11 .
The successful registration is shown on the display.
The next unassigned internal number between Int.11 and Int.16 is automatically
assigned to the handset as it is registered.
Registering handset Classic E104
−
Press and hold to switch on the handset.
¦¨ «
Press one after the other.
~ OK
Input the number of the base (normally 1) and
confirm. The standby symbol C flashes and later
lights continuously when the connection to the base
has been established.
~ OK
Enter the system PIN of the base (the default is 0000)
and confirm.
Press the illuminated register key on the base station
(page 116), key flashes. The base station is ready for
registering only when the key is flashing.
s Int.11
118
OK
Select internal number and confirm, e.g. Int.11 .
When registration is finished, the standby symbol
goes out.
CX 253i / SWZ PTT en / A31008-X353-P100-1-19 / devices.fm / 03.12.2007
Operating with other devices
Registering handset Pronto 210 C, Top E401
h
Press to switch on the handset.
.
s Settings
Open the menu.
OK
Select the menu item and confirm.
OK
Select the menu item and confirm.
s Station 1
OK
Select base (1–4) and confirm.
s Register
OK
s Register
Open the submenu.
~ OK
Select the menu item and confirm.
Enter the system PIN of the base (the default is 0000)
and confirm.
Press the illuminated register key on the base station
(page 116), key flashes. The base station is ready for
registering only when the key is flashing.
s Int.11
OK
Select internal number and confirm, e.g. Int.11 .
The successful registration is shown on the display.
Registering the handset Pronto 210S
For the registration procedure described below:
You can register a maximum of four other handsets (e.g. Pronto 210S, GAP handsets).
Register these devices first.
Registering the handset Pronto 210S
h
Press h (off).
o h
Press number of base station and an h (on) at the
same time
o
Enter system code.
Press the illuminated register key on the base station
(page 116), key flashes. The base station is ready for
registering only when the key is flashing.
The lowest free internal number is assigned. It is not possible to select a free internal
number.
119
CX 253i / SWZ PTT en / A31008-X353-P100-1-19 / devices.fm / 03.12.2007
Operating with other devices
De-registering handsets
i
s Set base
s Settings
~ OK
s Setup user
s De-reg. device
s Int.16
Open the menu.
OK
Select the menu item and confirm.
OK
Select the menu item and confirm.
Enter system PIN if required (page 89).
OK
Select the menu item and confirm.
OK
Select the menu item and confirm.
OK
Select the handset that you wish to de-register and
confirm, e.g. Int.16.
j
Hold down. Return to the idle state.
Gigaset Repeater
You can increase the range of your handsets with the Gigaset Repeater V2. You can
operate up to six repeaters on your base station. To ensure the repeater is installed
correctly, repeater capability must be activated on the base station.
Activating/deactivating repeater mode
You can use this function to activate and deactivate repeater mode.
By factory default, this repeater capability is deactivated.
i
s Set base
s Settings
~ OK
s System settings
s Spec. function
s Repeater
[RRRRRRRRRRRRRRRRRRRRRRRRRRR]
NEXT
120
Open the menu.
OK
Select the menu item and confirm.
OK
Select the menu item and confirm.
Enter system PIN if required (page 89).
OK
Select the menu item and confirm.
OK
Select the menu item and confirm.
OK
Select the menu item and confirm.
Press the display key to save the setting. The handset
goes off briefly (‰ = activated).
CX 253i / SWZ PTT en / A31008-X353-P100-1-19 / devices.fm / 03.12.2007
Operating with other devices
Registering a repeater V2
Precondition: Gigaset Repeater V2 has been deactivated (mains cable unplugged).
1. Prepare the base station for registration:
i
Open the menu.
s Set base
s Settings
~ OK
s Setup user
s Register device
OK
Select the menu item and confirm.
OK
Select the menu item and confirm.
Enter system PIN if required (page 89).
OK
Select the menu item and confirm.
OK
Select the menu item and confirm.
The base station is ready for registration for as long as Registration
proced.running is shown in the display.
i
Check that there are no other base stations that are ready for
registration in the vicinity of the Gigaset Repeater V2 during this
procedure.
2. Plug the Gigaset Repeater V2 into the mains. The LED on the Gigaset repeater V2
flashes. After a short while the LED lights continuously. This indicates that registration has been completed and the repeater is ready for use.
Further information is available in the operating instructions for the Gigaset Repeater
V2.
121
CX 253i / SWZ PTT en / A31008-X353-P100-1-19 / pabx.fm / 03.12.2007
Operating when connected to a PABX
If you are operating your base station on a PABX, special characteristics for receiving
text messages should be noted (page 58).
Access code
Precondition: If your phone is connected to a PABX you may have to enter an access
code (outside line code) for external calls when first getting started, depending on the
PABX. See the operating instructions for your PABX. You can enter a one to four-digit
access code.
For incoming calls, the access code is automatically placed in front of the caller's phone
number in the display and in the caller lists, and likewise when copied to the
Phonebook. The saved phone number can then be dialled directly, e.g. from the caller
list (page 39).
i
s Set base
s Settings
~ OK
s System settings
s Access code
~W
s Save entry
i
Open the menu.
OK
Select the menu item and confirm.
OK
Select the menu item and confirm.
Enter system PIN if required (page 89).
OK
Select the menu item and confirm.
OK
Select the menu item and confirm.
Enter access code and open the menu.
OK
Confirm.
For manual dialling and entering Phonebook, emergency and direct dial
numbers you must also enter the access code.
Dialling options
The KEYPAD function allows you to control certain services by entering sequences of
characters and digits.
The KEYPAD function must be set when connecting your device to an ISDN PABX or to a
telephone exchange which uses KEYPAD protocol for controlling. The digits/characters
0–9, *, # are sent as keypad information elements. Please ask your service provider
about the information and codes you can transmit.
122
CX 253i / SWZ PTT en / A31008-X353-P100-1-19 / pabx.fm / 03.12.2007
Operating when connected to a PABX
Setting options
You can switch between the settings Standard dial (factory setting), Auto keypad and
Dial * and #.
Standard dial
Once Standard dial has been activated, * and # are not transmitted during dialling, and
if * and # are entered it is not possible to switch to the keypad.
Auto keypad
Once * or # has been entered, this setting automatically transfers ringing during dialling
to the keypad. This automatic switchover is needed for giving commands to the
exchange or PABX.
Dial * and #
Once Dial * and # has been activated, the * and # characters are transmitted during
dialling as commands to the exchange or PABX.
Regardless of the setting options above, after dialling or during the conversation, the
phone switches automatically to tone dialling (DTMF), e.g. for remote control of an
answering machine.
i
s Set base
s Settings
~ OK
s System settings
s Spec. function
s Dial properties
s Standard dial
Open the menu.
OK
Select the menu item and confirm.
OK
Select the menu item and confirm.
Enter system PIN if required (page 89).
OK
Select the menu item and confirm.
OK
Select the menu item and confirm.
OK
Select the menu item and confirm.
OK
Select the setting and confirm, e.g. Standard dial
(‰ = activated).
Activating/deactivating the keypad during a call
In addition to the ongoing settings described above, you can also switch over
temporarily to the keypad.
The setting is only applicable to the current external call and is automatically
deactivated after the call is ended.
i
Open the menu.
either ...
s Keypad on?
~
Activate the keypad:
OK
Enter the keypad code.
or ...
s Keypad off?
Select the menu item and confirm.
Deactivate the keypad:
OK
Select the menu item and confirm.
123
CX 253i / SWZ PTT en / A31008-X353-P100-1-19 / pabx.fm / 03.12.2007
Operating when connected to a PABX
Activating the keypad for the next connection
All dialling characters (0–9, *, #) will be sent as a string of keypad characters with the
next connection (dial and call). In the connection status, the keypad is retained and is
not automatically switched over to tone dialling (DTMF).
i
s Set base
s Call preparat.
s Temp. keypad
124
Open the menu.
OK
Select the menu item and confirm.
OK
Select the menu item and confirm.
OK
Select the menu item and confirm (‰ = activated).
CX 253i / SWZ PTT en / A31008-X353-P100-1-19 / appendix.fm / 03.12.2007
Appendix
Appendix
Care
Wipe the base station and handset with a damp cloth (do not use solvent) or an
antistatic cloth. Never use a dry cloth. This can cause static.
Contact with liquid
!
If the handset should come into contact with liquid, on no account switch the device
on. Remove all batteries immediately.
Allow the liquid to drain out of the device, and then pat all parts of the device dry.
Keep the handset with the batteries removed in a warm, dry place for at least 72 hours.
In many cases, you will then be able to use it again.
Faults and Self-help with Troubleshooting
Not every fault is due to a defective phone. In certain circumstances, it can come from
a brief interruption in the power supply to the base station (unplug/plug in power
supply) or if the batteries of the handset are removed and inserted again. The following
instructions should be of help for specific faults.
Important: problems or faults can only be remedied if you bring the complete unit (base
station, handset, as well as connecting cable) to the place of purchase.
What has happened
when …
Possible Cause
Possible solution
… the base station does not
ring?
The ringer is switched off.
Internal call diversion is set to
0 rings (= immediate call
diversion).
Night service is active.
… the call units/charges are
not displayed?
… the phone number of the
caller is not displayed even
though CLIP is set?
… the caller list does not
indicate a time for a
message?
… the answering machine
says "PIN is incorrect" during
remote operation?
… the answering machine
does not record any messages
or has automatically switched
over to 'announce only'?
… you can't dial a phone
number any longer?
There are no metering pulses.
Activate (page 112) ringer.
Increase the number of rings
for the internal call diversion
(page 99).
Deactivate Night service
(page 85).
Ask your network provider to
transmit the metering pulses.
Calling Line Identification is
blocked.
Date/time are not set.
Set the date/time (page 83).
The entered system PIN is
incorrect or still set to 0000.
Enter the system PIN again or
set a PIN that is different from
0000 (page 89).
Delete old messages
Play back new messages and
delete.
Its memory is full.
The long distance prefix has
changed.
Check the long distance prefix
and correct it (page 108).
125
CX 253i / SWZ PTT en / A31008-X353-P100-1-19 / appendix.fm / 03.12.2007
Appendix
What has happened
when …
Possible Cause
Possible solution
… there are no incoming
calls?
Call diversion Immediately has
been activated.
The MSN has not been assigned
to the internal user.
The authorisation Internal only
is set.
Internal call diversion is
activated.
Deactivate call diversion
Immediately (page 99).
Determine the receive MSN
(page 95).
Change the authorisation
(page 90).
Activate external call diversion
(page 99).
You have entered the wrong
prefix or no prefix.
Delete the corresponding
phone number (MSN) in the list
(page 94).
Enter answering machine PIN
(page 78).
Delete old messages/
information (page 68).
Reduce the quality of the
recordings (page 77).
Check and correct the prefix
(page 122).
The ISDN function is not
enabled.
Check with your network
provider.
… during call diversion the
forwarding conditions are
not displayed?
… the telephone also rings for The phone number is in the
fax-PC calls?
phone number list of the base
telephone.
… you cannot access the
The answering machine lock has
answering machine?
been activated.
… you are unable to record
There is insufficient remaining
any new information or
memory.
announcements?
… you have a PABX and, after
dialling, the wrong
connection or no connection
is made?
… some of the ISDN
functions do not work as
stated?
… another telephone on the
So bus does not ring?
The same MSN was assigned to
the telephones. One of the
telephones also has internal call
diversion activated.
… the caller hears the phone The MSN was saved in devices
ringing although the MSN is also used on the ISDN
busy?
connection.
126
Deactivate internal call
diversion or set external call
diversion.
The phone number which is
supposed to be used for call
protection during a call should
be deleted from the list of
phone numbers for each
individual additional device.
CX 253i / SWZ PTT en / A31008-X353-P100-1-19 / appendix.fm / 03.12.2007
Appendix
Guarantee/maintenance/repair/approval
Guarantee
The guarantee period is two years from the date of purchase.
For repairs to be carried out under the guarantee, the defective item must be
accompanied by a completed guarantee card that has been stamped by the dealer at the
time and place of purchase.
The guarantee does not cover any defects or damage caused by improper use or wear
and tear or third-party intervention. The guarantee does not cover consumables or
defects which only have a minor effect on the value or operability of the phone.
If a defect occurs please contact your dealer.
Repair/maintenance
Rental phones
If your phone does not operate properly, notify Technical Assistance (phone number
175).
The repair 1) and the fault action are free of charge.
Purchased phones
Within the guarantee period, repairs to the phone will be carried out free of charge in
accordance with the provisions of the guarantee1. The defective phone must be
returned to the original place of purchase for repair.
Where the Repair Service Team is called out (including during the guarantee period), the
repair process will be chargeable (travel costs and time spent). Beyond the guarantee
period the repair costs incurred will also be chargeable.
Battery
A battery is a consumable good and is therefore not covered by the guarantee. There
will be a charge for replacing defective batteries. This applies to both leased and
purchased phones.
Assistance
Online Support can be obtained on the Internet under
www.siemens-mobile.ch/Service
(Gigaset CX253isdn)
If you have any general enquiries about our products or services please contact the
Swisscom information helpline (Freephone 0800 800 135).
1
An exception are damages to wearing parts (cable, labels, batteries, etc.) and due to improper
handling (damage from dropping, infiltrated fluids, etc.).
127
CX 253i / SWZ PTT en / A31008-X353-P100-1-19 / appendix.fm / 03.12.2007
Appendix
Approval and conformity
This device is intended to be operated on the ISDN Swiss network.
Country-specific conditions have been taken into consideration. If you have any
questions about the differences between the public phone networks, please contact
your specialist dealer or network provider.
The CE mark attests to the phone's compliance with the essential requirements of the
R&TTE directive.
Excerpt from the original declaration
"We, the manufacturer, declares, that the above mentioned product is manufactured according to
our Full Quality Assurance System certified by CETECOM ICT Services GmbH in compliance with
ANNEX V of the R&TTE-Directive 99/5/EC. The presumption of conformity with the essential
requirements regarding Council Directive 99/5/EC is ensured."
Senior Approvals Manager
The Declaration of Conformity (DoC) has been signed. In case of need a copy of the original DoC
can be made available via the company hotline.
The Declaration of Conformity can be found on the following web site:
www.swisscom.com
under the rubric eShop, Phone, Declaration of Conformity or can be ordered from the
following postal address:
Swisscom Fixnet AG
Retail business
Customer Premises Equipments (CPE)
3050 Bern
128
CX 253i / SWZ PTT en / A31008-X353-P100-1-19 / appendix.fm / 03.12.2007
Appendix
Specifications
General specifications
Feature
Value
DECT standard
GAP standard
No. of channels
Radio frequency range
Duplex method
Channel grid
Bit rate
Modulation
Language code
Transmission power
Range
Power supply/Base
is supported
is supported
120 duplex channels
1880–1900 MHz
Time multiplex, 10 ms frame length
1728 kHz
1152 kbit/s
GFSK
32 kbit/s
10 mW, average power per channel
up to 250 m outdoors, up to 40 m indoors
220/230 V ~/ 50 Hz
(mains unit C39280-Z4-C373)
ISDN-Multiple Connection IAE
+5 °C to +45 °C;
20 % to 75 % relative humidity
DTMF (tone dialling)
approx. 210 x 245 x 82 mm (L x B x H)
Base station, approx. 970 g
Telephone connecting cord approx. 3.0 m
Mains cable approx. 1.85 m
ISDN connection
Environmental conditions for operation
Dialling mode
Dimensions
Weight incl. mains unit
Length of cords
Power consumption
Operating state
Top E604isdn
Idle status
Internal connection between the base station (via the receiver) and a handset
External connection to base station via receiver
External connection to base station via handsfree talking
External connection to base station via handset
External connection to base station via receiver and two-way recording on
voice mail service
2.6 W
2.7 W
2.8 W
2.8 W
2.8 W
3.1 W
129
CX 253i / SWZ PTT en / A31008-X353-P100-1-19 / appendix.fm / 03.12.2007
Appendix
Character set chart
Standard characters
Either press the relevant key several times, or hold down.
1
2
I
4
5
L
M
N
O
Q
P
R
1x
a
d
g
j
m
p
t
w
.
2x 3x
\
1
b
c
e
f
h
i
k
l
n
o
q
r
u
v
x
y
,
?
Abc-->
abc
abc -->
123
#
@
Space
*
\
4 x 5 x 6 x 7 x 8 x 9 x 10 x 11 x 12 x 13 x 14 x
£
2
3
4
5
6
s
8
z
!
/
&
$
ä
ë
ï
¥
á
é
í
¤
à
è
ì
â
ê
î
ã
ç
ö
7
ü
9
0
(
§
ñ
ß
ú
ÿ
+
)
ó
ò
ô
õ
ù
ý
<
û
æ
:
=
ø
¿
>
å
¡
%
"
‘
;
_
Creating and editing text
You can create and edit text in a number of ways:
◆ The cursor is controlled with u v t s.
◆ Characters (to the left of the cursor) are deleted with ß .
◆ Characters are added to the left of the cursor (page 11).
◆ To switch from upper case (1st letter in capitals , all others in lower case) to lower
case, press the P key before you key in the letter. When key is pressed again P
change from lower case to digits. Press again to return to upper case letters.
◆ The first letter of the name of Phonebook entries is automatically capitalised,
followed by lower case letters.
◆ When you press a key and hold it, the characters of that key appear in the bottom
display line and are highlighted one after the other. When you release the key the
highlighted character is inserted into the input field.
You can see in the display whether upper case, lower case or digits are selected:
– 'A' or 'a' appears on the bottom display line when you make an entry in the
directory.
Order of Phonebook entries
As a rule, entries in the Phonebook are arranged in alphabetical order, although blank
spaces and numerals (digits) take first priority. The order in which entries occur is as
follows:
1. Space (shown here as s)
2. Digits (0–9)
3. Letters (alphabetical)
4. Other characters
130
CX 253i / SWZ PTT en / A31008-X353-P100-1-19 / appendix.fm / 03.12.2007
Compatibility
If you want to circumvent the alphabetical order of the entries in the directory, insert a
space before the name. This entry then goes to the first position (example: "sKarla")
You can also number the entries with digits (e.g. "1Jane", "2Mary", "3John").
Names prefixed with a star (e.g. "*Jane") appear at the end of the directory.
Compatibility
You can see in the list which functions are supported by your handset or by handsets of
other manufacturers. You can register up to 6 handsets (see also page 116).
Function
Top S328/
S326i/
E6x4isdn
Other
manufacturers
Registering
Dialling
Display charges
Call duration
Callback
Calling Line Identification CLIP
Accepting call waiting
Reject call waiting
Transfer external calls
+
+
+
+
+
+
+
+
+
Three-party conference
Toggling
Consultation call (external)
Internal group call (when auto.
line seizure is deactivated)
Internal group call (when auto.
line seizure is deactivated)
Display new message
Check calls list
Different ringer tones for each
MSN
Last number redial
+
+
+
+
+
+
+
+
R key
Recall key,
then
0 key
R key
R key
Set, then
* key
Set, 11-16
+
+
+
-
+
Dial from local directory
+
Send/receive text messages
+
Dependent
on
manufacturer
Dependent
on
manufacturer
-
131
CX 253i / SWZ PTT en / A31008-X353-P100-1-19 / menuetree.fm / 03.12.2007
Menu Tree
Menu Tree
Main menu
In base station idle status press i (Open menu:
SMS
Write message
Inbox 2/5
Outbox 2
Reminder
Appointment editor
Audio
Ringer Volume
Ringer melody
Handset Volume
Vol.Loudspeaker
Advisory tones
Key Beeps
Confirm. Beep
Error Beep
Costs
Cost overview
Type of calcul.
Units cent.off.
Costs cent.off.
No rate
Rate --.-Rate ----
Last charge
Settings
Language
Contrast
Autom. illumin.
Time display
Dial handsfree
Function keys
Set base
Answering mach.
132
To continue see submenu
"Setting the base" (page 133)
AM1
AM2
AM3
For continuation see submenu
"Answering machine" (page 136)“
CX 253i / SWZ PTT en / A31008-X353-P100-1-19 / menuetree.fm / 03.12.2007
Menu Tree
"Set base" submenu
To begin: with the base station in idle status press v Set base OK or i N:
Status
Missed calls
Callback
Withhold no.
Call forwarding
Ext.occupations
AM1 on
AM2 on
AM3 on
‰ = on
(phone number list) -> Caller list menu (page 39)
Accepted calls
(phone number list) -> Caller list menu (page 39)
Call preparat.
Temp.withhold
MSN next call
Temp. keypad
Canc. call park
Ext. call forw.
List of external
forwarding
(select MSN)
New entry
List of MSNs
Immediately
On busy
(only for call divert in
the telephone
exchange, see
page 102)
On no reply
Activate?
or Deactivate?
– if call divert
Edit entry
Immediately
On busy
activated
(only for call divert in
the telephone
exchange, see
page 102)
On no reply
Delete entry
133
CX 253i / SWZ PTT en / A31008-X353-P100-1-19 / menuetree.fm / 03.12.2007
Menu Tree
Int. call forw.
Night service
Activate?
Forward. dest.
or Deactivate? – if call divert is activated
List of
Internal users
No. of rings
(enter the number)
List of MSNs
Activate?
Forward. dest.
or Deactivate?
– if night service is activated
External
Number editor
Internal
List of handsets
Answering mach. List of handsets
Start time
End time
Sat/Sun all day
Settings
Security
Change PIN
Authorisation
Enter PIN
List of
Internal users
Unrestricted
Incoming only
Internal only
Emergency nos.
Setup user
System settings
Register device
Setup device
Change number
Delete number
Display number
List of
internal numbers
Device type specific
submenu
De-reg. device
List of
Internal users
Select device
Music on hold
Internal
Off
Set time
24 hours
12 hours
Date DD.MM
Date MM.DD
Date/time
Access code
AM auto. pickup
134
Emergency numbers
(pre-set)
Emergency numbers
‰ = on
CX 253i / SWZ PTT en / A31008-X353-P100-1-19 / menuetree.fm / 03.12.2007
Menu Tree
Spec. function
Factory setting
Dial properties
Operational
Reset all
Standard dial
Auto keypad
Dial * and #
Repeater
SW version
ISDN settings
Ext.room monit.
'Call to' number
display
Set up MSN
List of all
set up MSNs
Change number
Delete number
Edit entry
Ringer melody
Delete entry
Display entry
Withhold no.
Forward. dest.
Lg.-dist. code
Int. enq. call
Ext. enq. call
Transfer(ECT)*
Forward. base
Forward. netw.
Reject all
Busy on busy
Auto.forwarding
(Enter phone number)
National : 0
Internat.: 00
Change number
Delete number
List of all
set up MSNs
Call beats data
Service centres
List of SMS service
centres
Edit entry
Serv.centre on? or
Serv.centre off?
Delete entry
Installation
*ECT does not work in the Swisscome ISDN network.
135
CX 253i / SWZ PTT en / A31008-X353-P100-1-19 / menuetree.fm / 03.12.2007
Menu Tree
"Answering mach." submenu
To begin: with the base station in idle status press i Answering mach. OK or i O,
select an answering machine, e .g. AM1 , and confirm with OK.
Messages
List of all
messages AMx
Continue
Delete message
Call back
NET list
Repeat
Del.old
messages
Display
Status to 'new'
Save number
Speed
Slow
Normal speed
Fast
Very fast
Exit
Memos
Record memo
Play memo
List of all memos
AMx
Continue
Delete
curr.memo
Repeat
Delete old
memos
Status to 'new'
Speed
Exit
Announcem
ents
Announcement 1
Announcement 2
Announcem. only
Concl.announce
m
Select
Record
Play back
Delete
Record
Play back
Delete
136
Slow
Normal speed
Fast
Very fast
CX 253i / SWZ PTT en / A31008-X353-P100-1-19 / menuetree.fm / 03.12.2007
Menu Tree
Settings
Message/Memo
Message length
Time control
Time stamp
Activate?
Mon - Fri
1 minute
2 minutes
3 minutes
Maximum
or Deactivate? – if time control is activated
List of four
adjustable
time
periods
Select ann.
Announceme
nt 1
Announceme
nt 2
Announcem.
only
AM off
Start time
Saturday
Sunday
No. of rings
As for Mon-Fri
Ann. 1 24h
Ann. 2 24h
Ann. only 24h
AM off
Automatic 2/4
1 ring tone
to
9 ring tone
Automatic pause
Remote options
Change AM-PIN
AM lock
AM quality
AM language
Aut. listen in
SMS notificat.
Activate?
Remote control
Remote delete
High quality
Long recording
English
Italiano
Français
Activate?
or Deactivate? – if activated
Select MT
Activate?
or Deactivate? – if activated
Change number
Delete number
or Deactivate? – if currently activated
137
CX 253i / SWZ PTT en / A31008-X353-P100-1-19 / menuetree.fm / 03.12.2007
Menu Tree
Phonebook key and last number redial key
Press the Phonebook key h or the last number redial key k, select an entry with
sand press W to open the corresponding menu. The following menu functions are
available:
For an entry in the Phonebook list:
Dial number
Display Number
New entry
Edit entry
Delete entry
Display entry
Send entry
Delete list
Send list
Available memory
For an entry in the last number redial list:
Dial number
Display Number
Automatic Redial
Copy to dir.
Edit entry
Delete entry
Display entry
138
CX 253i / SWZ PTT en / A31008-X353-P100-1-19 / SAG_Accessories.fm / 03.12.2007
Accessories
Accessories
All accessories and batteries are available from your mobile phone retailer. Or you can
order direct online via the online shop: www.swisscom.com/eshop.
The Online Shop also has the latest product information.
Handsets
Upgrade your Gigaset to a cordless PABX:
Top S328/S326i/E6x4i
◆ Large illuminated graphic colour display with date and
time
◆ Directory for up to 200 entries
◆ Full duplex grade handsfree
◆ SMS
◆ EATONI predictive text
◆ Caller-based ringer melody setting
◆ (for VIP calls)
◆ Download options for obtaining melodies via SMS
◆ Room monitor
◆ Walk and Talk
◆ Voice selection for 29 names
◆ Announce name when calling
Gigaset repeater V2
The Gigaset repeater V2 can be used to increase the
reception range of your Gigaset handset to the base.
139
CX 253i / SWZ PTT en / A31008-X353-P100-1-19 / SAG_Accessories.fm / 03.12.2007
Accessories
Features
Your base Top E604 ISDN with handset offers you a multitude of features. The following
table shows which features can be used with which handset. The table is organised
according to the Contents of the user guide for the handsets.
Feature
Setting up the handset for use
Handset operation – Menu system
Control key
Setting up the base station – Getting started wizard
Making calls
Handsfree operation
Reserving a line
Defining the send MSN for the next call
Callback when the number is busy (CCBS)
Functions during a call
Muting the handset
Making a call to several subscribers
External/internal enquiry call
Toggling
Conference call
Diverting an incoming call – CD (Call Deflection)
Dealing with a waiting external call – CW (Call Waiting)
Using the directory and other lists
Directory and speed dial list
Dialling with the directory/speed dial list
Copying and changing a directory entry
Marking a directory entry as VIP
Adding a displayed telephone number to the directory
Sending a single entry or complete list to a handset
Saving an anniversary to a phone number
Voice dialling
Announcing the caller's name
Last number redial list
Caller lists
Making cost-effective calls
Displaying call charges
SMS (text messages)
Sending a text message and the outgoing message list
Saving text messages
Inserting pre-written text or an email address in an SMS
Sending a text message to an e-mail address
Receiving text messages, incoming message list
140
Top S328/
326i/E6x4i
Yes
Yes
Yes
Yes
Yes
Yes
Yes
Yes
Yes
Yes
Yes
Yes
Yes
Yes
Yes
Yes
Yes
Yes
Yes
Yes
Yes
Yes
Yes
Yes
Yes
Yes
Yes
Yes
Yes
Yes
CX 253i / SWZ PTT en / A31008-X353-P100-1-19 / SAG_Accessories.fm / 03.12.2007
Accessories
Feature
Top S328/
326i/E6x4i
Replying to or forwarding text messages
Yes
Calling back the text message sender
Yes
Copying a phone number from a text message to the directory
Yes
Adding a text message sender's telephone number to the direcYes
tory
Using new ringer tones and logos for the handset
Yes
Using several handsets
Using a handset as a room monitor
Yes
Setting the Walk and Talk mode
Yes
Time functions
Setting the date and time
Yes
Setting the alarm clock
Yes
Setting an appointment
Yes
Displaying missed appointments, anniversaries
Yes
Night service
Yes
Security settings
Changing the system PIN
Yes
Defining authorisations
Yes
Emergency numbers
Yes
System settings
Changing the name for an internal party
Yes
Assigning a phone number (MSN)
Assigning a receive MSN
Yes
Assigning a send MSN
Yes
Setting up the list of send MSNs for the next call
Yes
Setting up a busy signal when the MSN is being used (Busy on Busy)
Yes
Assigning a ringer melody to an MSN
Yes
Setting up call reject for the entire MSN group
Yes
Diverting calls
Diverting internal calls
Yes
Diverting calls to an external number – CF (Call Forwarding)
Yes
Pre-assigning the call diversion destination – CD (Call Deflection)
Yes
Setting up automatic call diversion when not reaching a handset
Yes
Setting up an internal group call group
Yes
Setting up ring delay
Yes
Activating/deactivating CW (call waiting)
Yes
Setting an external/internal enquiry call
Yes
Setting up the waiting melody
Yes
Activating/deactivating Call before data
Yes
Changing the access code
Yes
Checking the software version
Yes
141
CX 253i / SWZ PTT en / A31008-X353-P100-1-19 / SAG_Accessories.fm / 03.12.2007
Accessories
Feature
Individual handset settings
Changing the display language
Activating/deactivating auto answer
Changing the name of the base station
Adjusting the loudspeaker volume
Ringer echo
Changing ringtones
Activating/deactivating the ringtone
Activating/deactivating the alert tone
Vibration alarm
Activating/deactivating advisory tones
Resetting a handset to the default settings
Operation with other devices
Specifying the device type
Activating/deactivating repeater mode
Operation in a PABX
Dialling options
Activating/deactivating the keypad during a call
Activating the keypad for the next connection
Operation with door intercom
Assigning internal subscribers to the door intercom call group
Making calls with the door intercom
Calls from the door intercom
Door intercom call waiting
Internal call with door intercom
Diverting the door intercom externally
Appendix
Predictive text
142
Top S328/
326i/E6x4i
Yes
Yes
Yes
Yes
Yes
Yes
Yes
Yes
No
Yes
Yes
Yes
Yes
Yes
Yes
Yes
Yes
Yes
Yes
Yes
Yes
Yes
Yes
CX 253i / SWZ PTT en / A31008-X353-P100-1-19 / glossary.fm / 03.12.2007
Glossary
Glossary
A
AM PIN
Abbreviation for answering machine PIN
AOC-D
Advice of Charge: During the Call. Transfers the charge information during the
connection.
AOC-E
Advice of Charge: At the End of the Call. Transfers the charge information at the end
of the connection.
Authorisation class
Defines which connections are permitted on PABX terminals, e.g., internal only,
incoming only, or unlimited call authorisation.
Authorisation for direct outward dialling
Different users may be assigned different levels of authorisation on a base station.
For example, while User A may only take incoming calls, User B may make calls
without restriction.
Automatic callback
See "Callback on busy"
Automatic redial
Several attempts to call are made automatically when the line is busy.
B
Block dialling
Also pre-dialling. You may only dial or, if required, correct the phone number. Then
you should lift the receiver or press the loudspeaker key.
143
CX 253i / SWZ PTT en / A31008-X353-P100-1-19 / glossary.fm / 03.12.2007
Glossary
C
Call diversion during the call phase
CD, Call Deflection. Must be explicitly enabled by the network provider for each ISDN
connection. CD enables an incoming call to be forwarded to any phone number
while it is ringing, without having to answer the call. Because the caller has no affect
on where it is forwarded (for example, to a mobile phone), you will pay the resulting
charges. The caller must only pay the normal telephone charges for the connection
he dialled.
Call forwarding
CF, Call Forwarding. You want to forward calls to another number permanently.
You can forward calls externally via the exchange or internally in the device itself.
Call forwarding can be set up individually for each separate phone number (MSN)
(to your mobile phone when on holiday, to the office, to a neighbour etc.).
This is carried out at the network provider's local exchange. This means the call
never reaches the original destination.
There are three kinds of call forwarding:immediate (CFU, Call Forwarding
Unconditional), when the line is busy (CFB, Call Forwarding Busy), and when the call
is not answered (CFNR, Call Forwarding No Reply).
Call diversion (via the second B-channel) / internal call diversion
While external call diversion takes place in the local telephone exchange of the
network provider, internal call diversion is implemented by your telephone.Your
telephone forwards the call via the second line of your ISDN connection. This means
both phone lines are engaged for the duration of the call. You pay the charges
for the connection to the forwarding number. However, you save yourself the
network provider's charges for this function.
Call waiting
CW, Call Waiting. Service provided by the network provider. An acoustic signal
during a call indicates that another caller is waiting. In addition, ISDN phones
indicate this with a displayed message. You can then decide whether to accept or
reject the second call.
Call waiting protection
Deactivates the call waiting signal.
Callback on busy
Callback must first be activated on the caller's terminal. A connection is established
automatically as soon as the destination phone is no longer busy. As soon as the
connection is free the caller is rung back. As soon as the caller lifts his receiver the
connection is made automatically.
Caller identification
Displays caller's phone number, name or type of connection (e.g., exchange/
internal) on the telephone screen.
144
CX 253i / SWZ PTT en / A31008-X353-P100-1-19 / glossary.fm / 03.12.2007
Glossary
Caller list
Depending on the setting, the caller list contains callers you haven't reached, or
those you have spoken to. The last 20 missed calls and the last 20 answered calls are
stored with their phone number, date and time. If you wish, you can call back these
callers directly from the list.
CCBS (Completion of Calls to Busy Subscriber)
See "Callback on busy"
CCNR (Completion of Calls No Reply)
See "Callback on no answer"
CD (Call Deflection)
See "Call forwarding during the call phase"
CF (Call Forwarding)
See "Call divert"
Channel
Like an analogue connection, an ISDN connection enters the building through two
cables, but for ISDN a distinction is made between the two bearer channels called
the B-channels (which have nothing to do with the physical cables!) and the control
channel, otherwise known as the D channel.
Charge detail display
See "AOC-D" and "AOC-E".
CLI (Calling Line Identification)
The caller's phone number is transmitted.
CLIP (Calling Line Identification Presentation)
User A calls User B. A's phone number appears on B's telephone screen.
CLIR (Calling Line Identification Restriction)
Stops your personal phone number being displayed.
CNIP (Calling Name Identification Presentation)
User A calls User B. A's name appears on B's telephone screen.
COLP (Connected Line Identification Presentation)
User A calls User B. B's phone number is displayed on A's telephone. If, for example,
B has programmed call diversion to C, and the dialled number and transmitted
number are not the same, then C's phone number is displayed if C permits this
phone number to be displayed.
COLR (Connected Line Identification Restriction)
If C has set up COLR, then C's phone number is not displayed on A's phone.
Conference call
See "Three-party conference".
CW (Call Waiting)
See "Call waiting".
145
CX 253i / SWZ PTT en / A31008-X353-P100-1-19 / glossary.fm / 03.12.2007
Glossary
D
D channel
Control channel for an ISDN connection. See "Channel".
Digital exchange
Computer controlled switching units allow quick connection and the activation of
such additional services as => enquiry calls, => call waiting, => three-way
conference, => call diversion etc.
Direct call
Block the telephone for all phone numbers except for an individually entered
number. After picking up the handset and pressing any key, the connection to the
saved phone number is established. Ideal for children who cannot yet dial phone
numbers (baby call).
E
Electronic code lock
Personal code (=> PIN), used, for example, to protect a phone against unauthorised
use – only calls to emergency numbers may still be made. Incoming calls may be
answered.
Enquiry call
You are making a call. Using the "Enquiry call" function, you interrupt the
conversation briefly to establish a second internal or external connection to another
user. If you terminate the connection to this user immediately, then this was an
enquiry call. If you switch to and fro between the first and second user, it is called
toggling.
Exchange
Nodal point in the public telephone network. A distinction is made, for example,
between local exchanges and long-distance or trunk exchanges.
H
Handsfree
A phone's handsfree set not only permits open listening but also allows you to talk
to the person on the other end without lifting the receiver by means of an integrated
microphone. This means others present in the room can also participate in the
conversation.
Hold
(Hold the line). Interrupts and re-instates an existing connection. In particular, it
permits enquiry calls and toggling between calls.
I
Internal calls
Connection between the base station and handsets made free of charge.
Internal ringer
Special ringtone on PABX's to distinguish between internal and external calls.
146
CX 253i / SWZ PTT en / A31008-X353-P100-1-19 / glossary.fm / 03.12.2007
Glossary
ISDN
Abbreviation for Integrated Services Digital Network, i.e., a digital network for
integrating services. This includes the integration of telephone, fax or data
transmission.
ISDN abbreviations
CW
Call waiting
CF
Call forwarding
3PTY
Three-party conference
CCBS
Callback on busy
CD
Call forwarding during the call phase
K
Keypad
The keypad supports special function keys such as the star (*) and hash (#) keys. In
this way, special functions offered by your network provider can be initiated using a
code, such as "#4711*".
M
MSN
Multiple Subscriber Number. The phone numbers belonging to a multiple ISDN
connection. Each terminal is addressed separately, e.g., a separate number for a fax
machine. Up to ten MSN's can be assigned to one ISDN connection.
Multiline
The ISDN multiple connection from Swisscom.
There are 3 MSN in the basic price. Additional numbers (max 7) must be ordered and
incur a charge.
Multiple connection
ISDN connection which, unlike PABX connection, provides up to ten MSN's instead
of having a direct dialling number block. This is the preferred type of ISDN
connection for private customers.
Multiple subscriber number
See "MSN".
Music on hold
See "Waiting melody".
Mute
Convenience feature for telephones, which deactivates the built-in microphone (in
handset or handsfree unit).
147
CX 253i / SWZ PTT en / A31008-X353-P100-1-19 / glossary.fm / 03.12.2007
Glossary
N
Notebook function
During a phone call you can enter a phone number in the phone's temporary
memory to be dialled later.
NT/NTBA (NT2 a/b)
Network terminating device (NT = Network Terminator and NTBA = Network
Terminator Basic Access). The public ISDN network is terminated with the NT. The NT
acts as a bridge to the existing telephone outlet. Only the NT can or may be
connected to the ISDN telephone outlet. Under no circumstances should analogue
terminals also be connected to the phone outlet. ISDN terminals and additional ISDN
outlets are connected to the NT.
Analogue telephones must only be connected to analogue ports (a/b-Port) of the NT
2 a/b.
O
Open listening
At the touch of a key, all those present in a room can listen in to a phone call via an
integrated loudspeaker. See also "Handsfree talking".
Outgoing MSN, freely selectable
A performance feature which helps you to individually determine which MSN should
be used for the following call. This is not only important for the phone number
display on the called handset but also for billing charges. This is because call
charges, which can be broken down free of charge according to MSN on the network
provider invoice, are billed according to the MSN used to make the call.
P
Parking
A call is parked when you want to unplug the telephone during a call, or you want
to continue your call from another telephone with the same connection. The
connection is retained while it is parked.
PDA (Personal Digital Assistant)
Small portable computer, for example including calendar, address book and notes
function and other applications such as a web browser for Internet access and a
media player for playing back music.
Phonebook
An added feature on a phone allowing the name and phone number of several users
to be stored. The phone numbers can quickly be found and dialled.
PIN
Abbreviation for Personal Identification Number. Protects against unauthorised use,
e.g., system PIN, AM PIN, handset PIN.
148
CX 253i / SWZ PTT en / A31008-X353-P100-1-19 / glossary.fm / 03.12.2007
Glossary
Plugging to bus
TP, Terminal Portability. Also called parking. An incoming call can be held at the local
exchange for up to three minutes to then be answered, for example, by another
phone, a fax machine or a PC. In the meanwhile the caller hears an appropriate
announcement.
Pre-dialling, see also "Block dialling"
For some telephones with a display you can enter the phone number first, and check
it once more before dialling.
R
Remote activation
Allows the answering machine to be activated and deactivated during a call. This
function is PIN-protected.
Remote check
Answering machine function. Listen to messages remotely, mostly together with
options like delete messages or change announcements.
Repeater
A repeater increases the range of a handset connected to a base station. The device
receives the radio signal from the base station and broadcasts it further.
Ring delay
For each internal party, you can specify how many rings take place before this party
hears the ring. This can also be set for each MSN phone number.
For example, your handset, in addition to the base telephone (which rings on the
first ring) could ring after three rings for the private phone number, and ring on the
first ring for the business phone number.
S
S0 Bus
Four-wire ISDN connection wiring. It provides two B-channels and one D-channel.
Up to twelve ISDN outlets can be connected to it, on which up to eight terminals can
be operated at the same time.
T
Three-party conference
3PTY, three-party. Interconnection with two external users (ISDN or analogue
network customers).
Toggling
Toggling allows you to switch between two external callers without allowing the
waiting caller to listen in.
TP
Terminal Portability, see "Unplugging on the bus".
149
CX 253i / SWZ PTT en / A31008-X353-P100-1-19 / glossary.fm / 03.12.2007
Glossary
Two-way recording of phone calls
Answering machine feature which allows you to record a conversation during a
phone call.
W
Waiting melody
Music on hold. During an enquiry call or when a call is being transferred, a melody
is played which the waiting person can hear.
Withhold own number (CLIR)
Stops your personal phone number being transferred.
150
CX 253i / SWZ PTT en / A31008-X353-P100-1-19 / SIX.fm / 03.12.2007
Index
Index
A
Access code . . . . . . . . . . . . . . . . . . 122
Accessories . . . . . . . . . . . . . . . . . . . 139
Features . . . . . . . . . . . . . . . . . . . 140
Gigaset handset S1. . . . . . . . . . . . 139
Gigaset repeater. . . . . . . . . . . . . . 139
Adjusting the loudspeaker volume . . 111
Advisory tones
Activate/deactivate . . . . . . . . . . . . 113
Confirmation tone . . . . . . . . . 11, 113
Error tone . . . . . . . . . . . . . . . 11, 113
Key click . . . . . . . . . . . . . . . . . . . 113
AM lock
Activate/deactivate . . . . . . . . . . . . . 78
AM PIN . . . . . . . . . . . . . . . . . . . 78, 143
Enter . . . . . . . . . . . . . . . . . . . . . . . 78
AM, see Answering Machine
Announcement (AM) . . . . . . . . . . 61, 62
Announcement (answering machine)
Changing . . . . . . . . . . . . . . . . . . . . 63
Clear . . . . . . . . . . . . . . . . . . . . . . . 63
Playing . . . . . . . . . . . . . . . . . . . . . 63
Recording . . . . . . . . . . . . . . . . . . . 63
Announcement (answering
machine) . . . . . . . . . 61, 62
Answer and record
(answering machine) . . . 61
Setting quality . . . . . . . . . . . . . . . . 77
Setting time . . . . . . . . . . . . . . . . . . 77
Answering
Call (telephone, handset) . . . . . . . . 21
Answering machine . . . . . . . . . . . . . . 61
About . . . . . . . . . . . . . . . . . . . 61, 64
Activate . . . . . . . . . . . . . . . . . . . . . 62
Announcement . . . . . . . . . . . . 61, 62
Answer and record . . . . . . . . . . . . . 61
Assigning a receive MSN . . . . . . . . . 74
Automatic listen in . . . . . . . . . . . . . 81
Automatic pause . . . . . . . . . . . . . . 78
Concluding announcement . . . . . . 62
Deactivate . . . . . . . . . . . . . . . . . . . 62
Define AM PIN . . . . . . . . . . . . . . . . 78
Denying . . . . . . . . . . . . . . . . . . . . . 78
Getting started wizard . . . . . . . . . . 17
Hide . . . . . . . . . . . . . . . . . . . . 17, 75
Memory is full . . . . . . . . . . . . . 63, 77
151
Message . . . . . . . . . . . . . . . . . . 61, 65
Number of rings before AM starts . . 76
Phone numbers in the Phonebook . . 69
Picking up a call . . . . . . . . . . . . . . . 82
Remaining memory time . . . . . . . . . 62
Remote check . . . . . . . . . . . . . . . . 149
Remote control . . . . . . . . . . . . . . . . 70
Remote delete . . . . . . . . . . . . . . . . 70
Returning a call during playback . . . 66
Selecting . . . . . . . . . . . . . . . . . . . . 61
Setting . . . . . . . . . . . . . . . . . . . . . . 74
Setting the language . . . . . . . . . . . . 74
Showing . . . . . . . . . . . . . . . . . . . . . 75
Spoken date/time . . . . . . . . . . . . . . 76
Time control . . . . . . . . . . . . . . . . . . 79
Two-way recording . . . . . . . . . . . . . 64
AOC-D . . . . . . . . . . . . . . . . . . . . . . . 143
AOC-E . . . . . . . . . . . . . . . . . . . . . . . 143
Appointment
Cancelling . . . . . . . . . . . . . . . . . . . 84
Setting . . . . . . . . . . . . . . . . . . . . . . 84
Approval . . . . . . . . . . . . . . . . . . . . . 128
Area code . . . . . . . . . . . . . . . . . . . . . 50
Area prefix, see Area code
Arrow keys . . . . . . . . . . . . . . . . . . . . . 11
Assign
Phone number (MSN) . . . . . . . . . . . 95
Receive MSN . . . . . . . . . . . . . . . . . . 95
Ringer melody for MSN . . . . . . . . . . 97
Send MSN. . . . . . . . . . . . . . . . . . . . 96
Authorisation . . . . . . . . . . . . . . 143, 148
Classes . . . . . . . . . . . . . . . . . . . . . 143
Defining . . . . . . . . . . . . . . . . . . . . . 90
Authorisation class . . . . . . . . . . . . . . 143
Authorisation for direct outward
dialling . . . . . . . . . 143, 148
Automatic
Callback, see Callback on busy . . . . 143
Last number redial . . . . . . . . . 38, 143
Automatic pause (answering machine)
Activate/deactivate . . . . . . . . . . . . . 78
B
Base station
Brief overview. . . . . . . . . . . . . . . . . . 1
Care . . . . . . . . . . . . . . . . . . . . . . . 125
CX 253i / SWZ PTT en / A31008-X353-P100-1-19 / SIX.fm / 03.12.2007
Index
Connecting . . . . . . . . . . . . . . . . . . . 9
Installation . . . . . . . . . . . . . . . . . . . 8
Installing . . . . . . . . . . . . . . . . . . . . . 6
Menu system . . . . . . . . . . . . . . . . . 11
Operating . . . . . . . . . . . . . . . . . . . 11
Preparing for use . . . . . . . . . . . . . . . 8
Setting . . . . . . . . . . . . . . . . . . . . . 16
Using via handset . . . . . . . . . . . . . 13
Block dialling . . . . . . . . . . . . . . 20, 143
C
Call
Answer (telephone, handset) . . . . . 21
Continuing . . . . . . . . . . . . . . . . . . 32
Display duration . . . . . . . . . . . . . . 42
Display name . . . . . . . . . . . . . 22, 144
Display number(CLI/CLIR) . . . . . . . . 22
Display telephone number . . . 22, 144
Diverting . . . . . . . . . . . . . . . . . . . . 98
End call . . . . . . . . . . . . . . . . . . . . . 20
Ending . . . . . . . . . . . . . . . . . . . . . 20
Forward . . . . . . . . . . . . . . . . . . . 144
Forwarding . . . . . . . . . . . . . . 30, 144
Internal . . . . . . . . . . . . . . . . . 20, 146
Internal diversion . . . . . . . . . . . . . 144
Parking . . . . . . . . . . . . . . . . . . . . . 32
Picking up from answering
machine . . . . . . . . . . . . . . . . . . . 82
Rejecting . . . . . . . . . . . . . . . . . . . . 24
Transfer internally (connect) . . . . . . 21
Two-way record (AM) . . . . . . . 64, 150
Call back
On no answer . . . . . . . . . . . . . . . . 25
Call charges
Clear . . . . . . . . . . . . . . . . . . . . . . . 42
View . . . . . . . . . . . . . . . . . . . . . . . 42
Call delay
Set up . . . . . . . . . . . . . . . . . . . . . 105
Call diversion . . . . . . . . . . . . . . 98, 144
In the exchange . . . . . . . . . . . . . . 144
Internal . . . . . . . . . . . . . . . . . . . . 144
Via the second B channel . . . . . . . 144
Call Forwarding. . . . . . . . . . . . . . . . 145
Call waiting . . . . . . . . . . . . . . . . . . 144
Activate . . . . . . . . . . . . . . . . . . . . 106
Deactivate . . . . . . . . . . . . . . . . . . 106
Call waiting protection . . . . . . . . . . 144
Callback
Accept . . . . . . . . . . . . . . . . . . . . . . 25
Activating. . . . . . . . . . . . . . . . . . . . 25
Checking the . . . . . . . . . . . . . . . . . 26
Delete . . . . . . . . . . . . . . . . . . . . . . 26
During playback (AM) . . . . . . . . . . . 66
On busy . . . . . . . . . . . . . . . . . 25, 144
Callback from caller list . . . . . . . . . . . 40
Caller identification . . . . . . . . . . . . . 144
Caller list . . . . . . . . . . . . . . . . . . 39, 145
Calling back a caller . . . . . . . . . . . . 40
Opening . . . . . . . . . . . . . . . . . . . . . 39
Calling
External . . . . . . . . . . . . . . . . . . . . . 20
Handset . . . . . . . . . . . . . . . . . . . . . 21
Calling back a caller . . . . . . . . . . . . . . 40
Calling back an SMS sender . . . . . . . . 57
Calling Line Identification
Withholding . . . . . . . . . . . . . . . . . . 22
Cancel
Process . . . . . . . . . . . . . . . . . . . . . . 11
Care
Base station . . . . . . . . . . . . . . . . . 125
Handset . . . . . . . . . . . . . . . . . . . . 125
CCBS, see Callback on busy
CCNR, see Callback on no answer
CD, see Call forwarding
Change
Announcement (answering
machine) . . . . . . . . . . . . . . . . . . . 63
Display language . . . . . . . . . . . . . 110
Long distance prefix . . . . . . . . . . . 108
Loudspeaker volume . . . . . . . . . . . 111
Name for an internal user . . . . . . . . 93
Ringer tone . . . . . . . . . . . . . . . . . 112
SMS in outgoing message list . . . . . 52
System PIN . . . . . . . . . . . . . . . . . . . 89
Changing the long distance prefix . . 108
Changing the system PIN . . . . . . . . . . 89
Channel . . . . . . . . . . . . . . . . . . . . . 145
Character set chart . . . . . . . . . . . . . . 130
Characters
Delete . . . . . . . . . . . . . . . . . . . . . . 11
Insert . . . . . . . . . . . . . . . . . . . . . . . 11
Overwriting . . . . . . . . . . . . . . . 11, 12
Charge detail display . . . . . . . . . . . . 145
Check
Software version . . . . . . . . . . . . . 109
Status of settings . . . . . . . . . . . . . 109
CLI . . . . . . . . . . . . . . . . . . . . . . . . . 145
CLIP. . . . . . . . . . . . . . . . . . . . . . . . . 145
CLIR . . . . . . . . . . . . . . . . . . . . . . . . 145
152
CX 253i / SWZ PTT en / A31008-X353-P100-1-19 / SIX.fm / 03.12.2007
Index
CNIP . . . . . . . . . . . . . . . . . . . . . . . . 145
COLP. . . . . . . . . . . . . . . . . . . . . . . . 145
COLR . . . . . . . . . . . . . . . . . . . . . . . 145
Compatibility . . . . . . . . . . . . . . . . . 131
Concluding announcement (answering
machine) . . . . . . . . . . . . 62
Conference call . . . . . . . . . . . . . 30, 145
Confirmation tone . . . . . . . . . . . 11, 113
Connect the receiver . . . . . . . . . . . . . . 9
Connecting
Base station . . . . . . . . . . . . . . . . . . . 9
Correct
Incorrect inputs . . . . . . . . . . . . . . . 11
Correct incorrect inputs . . . . . . . . . . . 11
Cost overview
Clear . . . . . . . . . . . . . . . . . . . . . . . 42
View . . . . . . . . . . . . . . . . . . . . . . . 42
CW, see Call waiting
D
D channel . . . . . . . . . . . . . . . . . . . . 146
Date and time . . . . . . . . . . . . . . . . . . 83
Date setting . . . . . . . . . . . . . . . . 16, 83
Default settings
Restore . . . . . . . . . . . . . . . . . . . . 108
Delete
Announcement (answering
machine) . . . . . . . . . . . . . . . . . . . 63
Callback . . . . . . . . . . . . . . . . . . . . . 26
Characters . . . . . . . . . . . . . . . . . . . 11
Cost overview . . . . . . . . . . . . . . . . 42
Entry in speed dial list . . . . . . . . . . 35
ISDN phone numbers (MSN) . . . . . . 94
Memo (answering machine) . . . . . . 68
Message (answering machine) . . . . 68
Phonebook entry . . . . . . . . . . . . . . 35
SMS. . . . . . . . . . . . . . . . . . . . . . . . 51
SMS in incoming message list . . . . . 55
SMS in outgoing message list . . . . . 52
Delete key . . . . . . . . . . . . . . . . . . . . . 11
De-registering
From SMS centre . . . . . . . . . . . . . . 48
Handset . . . . . . . . . . . . . . . . . . . . 120
Dialling
Cancel . . . . . . . . . . . . . . . . . . . . . . 20
Preparing . . . . . . . . . . . . . . . . . . . 143
With the Phonebook . . . . . . . . . . . . 34
With the speed dial list . . . . . . . . . . 34
Digital exchange . . . . . . . . . . . . . . . 146
153
Direct call. . . . . . . . . . . . . . . . . . . . . 146
Display
12/24 hour display . . . . . . . . . . . . . 83
Activate/deactivate lighting . . . . . . 110
Activate/deactivate time display . . . 111
Call duration . . . . . . . . . . . . . . . . . . 42
Caller's phone number . . . . . . . . . . 22
Change language . . . . . . . . . . . . . 110
Cost overview . . . . . . . . . . . . . . . . . 42
Display keys . . . . . . . . . . . . . . . . . . 11
In Display . . . . . . . . . . . . . . . . . . . . 11
In idle status . . . . . . . . . . . . . . . . . . 12
Memory . . . . . . . . . . . . . . . . . . . . . 37
Number of caller . . . . . . . . . . . . . . . 22
Set contrast . . . . . . . . . . . . . . . . . 111
Setting . . . . . . . . . . . . . . . . . . . . . 110
Time . . . . . . . . . . . . . . . . . . . . . . . 83
Display the available memory . . . . . . . 37
Displaying call charges
At the end of the call . . . . . . . . . . . 143
During the call . . . . . . . . . . . . . . . 143
Displaying the call duration . . . . . . . . 42
Divert
SMS . . . . . . . . . . . . . . . . . . . . . . . . 56
Diverting
Calls . . . . . . . . . . . . . . . . . . . . . . . . 98
E
Electronic code lock . . . . . . . . . . . . . 146
Email service . . . . . . . . . . . . . . . . . . . 53
Emergency numbers . . . . . . . . . . . . . 90
Dialling. . . . . . . . . . . . . . . . . . . . . . 92
Enable
SMS send centre . . . . . . . . . . . . . . . 47
Enquiry call . . . . . . . . . . . . . . . . . . . 146
External . . . . . . . . . . . . . . . . . . . . . 27
Internal . . . . . . . . . . . . . . . . . . . . . 28
Setting . . . . . . . . . . . . . . . . . . . . . 106
Enter the PABX, access code . . . . . . . . 19
Entry (Phonebook)
Delete . . . . . . . . . . . . . . . . . . . . . . 35
Display and edit . . . . . . . . . . . . . . . 35
Find and dial . . . . . . . . . . . . . . . . . . 34
Error
Receiving SMS . . . . . . . . . . . . . . . . 60
Tone . . . . . . . . . . . . . . . . . . . . 11, 113
When receiving an SMS . . . . . . . . . . 59
When sending a text message . . . . . 59
Escape key . . . . . . . . . . . . . . . . . . . . . 11
CX 253i / SWZ PTT en / A31008-X353-P100-1-19 / SIX.fm / 03.12.2007
Index
Exchange . . . . . . . . . . . . . . . . . . . . 146
External
Call . . . . . . . . . . . . . . . . . . . . . . . . 20
Enquiry call . . . . . . . . . . . . . . . . . . 27
F
Features (handsets) . . . . . . . . . . . . 140
Finding an MSN . . . . . . . . . . . . . . . . 17
Forwarding
Calls . . . . . . . . . . . . . . . . . . . . . . . 30
Function keys . . . . . . . . . . . . . . . . . 113
G
Getting started wizard . . . . . . . . . . . . 14
Answering machine . . . . . . . . . . . . 17
MSN . . . . . . . . . . . . . . . . . . . . . . . 17
PABX . . . . . . . . . . . . . . . . . . . . . . . 19
Receive MSN . . . . . . . . . . . . . . . . . 18
Send MSN . . . . . . . . . . . . . . . . . . . 18
Gigaset
Repeater . . . . . . . . . . . . . . . . . . . 120
Group call to internal users . . . . . . . . 21
H
Handset
Call . . . . . . . . . . . . . . . . . . . . . . . . 21
Care . . . . . . . . . . . . . . . . . . . . . . 125
De-register . . . . . . . . . . . . . . . . . 120
Features . . . . . . . . . . . . . . . . . . . 140
Idle status . . . . . . . . . . . . . . . . . . . 12
Using base station . . . . . . . . . . . . . 13
Handset idle status . . . . . . . . . . . . . . 12
Handsfree . . . . . . . . . . . . . . . . . . . . 146
Activate/deactivate. . . . . . . . . . . . . 23
Hide answering machine . . . . . . . 17, 75
Hold . . . . . . . . . . . . . . . . . . . . . . . . 146
I
Incoming message list (SMS) . . . . 48, 53
Delete SMS . . . . . . . . . . . . . . . . . . 55
Open SMS . . . . . . . . . . . . . . . . . . . 53
Insert
Characters . . . . . . . . . . . . . . . . . . . 11
Installation
Base station . . . . . . . . . . . . . . . . . . . 8
Instructions . . . . . . . . . . . . . . . . . 6, 8
Internal
Call . . . . . . . . . . . . . . . . . . . . . . . . 20
Calls . . . . . . . . . . . . . . . . . . . . . . . 146
Enquiry call . . . . . . . . . . . . . . . . . . 28
Ringer . . . . . . . . . . . . . . . . . . . . . 146
Internal users. . . . . . . . . . . . . . . . . . . 14
Changing the name . . . . . . . . . . . . 93
ISDN . . . . . . . . . . . . . . . . . . . . . . . . 147
Abbreviations . . . . . . . . . . . . . . . . 147
Connection cable . . . . . . . . . . . . . . . 9
ISDN phone numbers (MSN)
Delete . . . . . . . . . . . . . . . . . . . . . . 94
Setting up . . . . . . . . . . . . . . . . . . . 94
K
Keypad . . . . . . . . . . . . . . . . . . 122, 147
Activate/deactivate . . . . . . . . . . . . 123
Activating for a connection . . . . . . 124
Automatic . . . . . . . . . . . . . . . . . . 123
Dialling * and # . . . . . . . . . . . . . . 123
Keys
Arrow keys . . . . . . . . . . . . . . . . . . . 11
Cancel operation . . . . . . . . . . . . . . 11
Delete key . . . . . . . . . . . . . . . . . . . 11
Display keys . . . . . . . . . . . . . . . . . . 11
Escape key . . . . . . . . . . . . . . . . . . . 11
Key click (confirmation tone) . . . . . 113
Menu+ key . . . . . . . . . . . . . . . . . . . 11
OK key . . . . . . . . . . . . . . . . . . . . . . 11
L
Language
Setting AB . . . . . . . . . . . . . . . . . . . 74
Last number redial
Automatic . . . . . . . . . . . . . . . 38, 143
Manual . . . . . . . . . . . . . . . . . . . . . 37
Last number redial list . . . . . . . . . . . . 37
Liquid, contact with . . . . . . . . . . . . . 125
List
Speed dial list . . . . . . . . . . . . . . . . . 33
Listen in on answering machine . . . . . 81
Assigning a handset . . . . . . . . . . . . 81
Listening in on the answering machine
Activate/deactivate . . . . . . . . . . . . . 81
154
CX 253i / SWZ PTT en / A31008-X353-P100-1-19 / SIX.fm / 03.12.2007
Index
M
N
maintenance . . . . . . . . . . . . . . . . . . 127
Making calls
Answering a call . . . . . . . . . . . . . . . 21
Calling back a caller . . . . . . . . . . . . 40
End call . . . . . . . . . . . . . . . . . . . . . 20
External . . . . . . . . . . . . . . . . . . . . . 20
Internal . . . . . . . . . . . . . . . . . . . . . 20
To several users . . . . . . . . . . . . . . . 27
Manual last number redial . . . . . . . . . 37
Mark as "new"
Message (answering machine) . . . . 69
Medical appliances . . . . . . . . . . . . . . . 6
Melody (ringer tone) . . . . . . . . . . . . 112
Memo (answering machine) . . . . . . . 61
Clear . . . . . . . . . . . . . . . . . . . . . . . 68
Mark as "new" . . . . . . . . . . . . . . . . 69
Playing . . . . . . . . . . . . . . . . . . . . . 67
Recording . . . . . . . . . . . . . . . . . . . 64
Memory full (answering machine) 63, 77
Menu
Back one menu level . . . . . . . . . . . 11
Menu system . . . . . . . . . . . . . . . . . 11
Tree . . . . . . . . . . . . . . . . . . . . . . . 132
Menu+ key . . . . . . . . . . . . . . . . . . . . 11
Message (answering machine) . . . 61, 65
Clear . . . . . . . . . . . . . . . . . . . . . . . 68
Mark as "new" . . . . . . . . . . . . . . . . 69
Playing . . . . . . . . . . . . . . . . . . . . . 65
Message key
Open list . . . . . . . . . . . . . . . . . . . . 54
Opening lists . . . . . . . . . . . . . . . . . 38
MSN . . . . . . . . . . . . . . . . . . . . . 14, 147
Assigning names . . . . . . . . . . . . . . 17
Assigning the ringer melody . . . . . . 97
Enter . . . . . . . . . . . . . . . . . . . . . . . 17
Finding . . . . . . . . . . . . . . . . . . . . . 17
Outgoing, freely selectable . . . . . . 148
Receive MSN . . . . . . . . . . . . . . 14, 18
Send MSN . . . . . . . . . . . . . . . . 14, 18
MSN group
Setting up rejecting . . . . . . . . . . . . 98
Multiple connection . . . . . . . . . . . . 147
Multiple subscriber number, see MSN
Music on hold, see Waiting melody
Mute . . . . . . . . . . . . . . . . . . . . . . . 147
Night service . . . . . . . . . . . . . . . . . . . 85
Activate/deactivate . . . . . . . . . . . . . 88
Entering the start and end time . . . . 87
Notebook function . . . . . . . . . . . . . . 148
Notes (spoken), see Memo
NT . . . . . . . . . . . . . . . . . . . . . . . . . . 148
NTBA . . . . . . . . . . . . . . . . . . . . . . . . 148
Number
Display caller . . . . . . . . . . . . . . . . . 22
Number, see Phone number or Entry
155
O
OK key . . . . . . . . . . . . . . . . . . . . . . . . 11
Open
Caller list . . . . . . . . . . . . . . . . . . . . 39
SMS in incoming message list . . . . . 53
Speed dial list . . . . . . . . . . . . . . . . . 34
Open listening . . . . . . . . . . . . . . . . . 148
Activate/deactivate . . . . . . . . . . . . . 23
Order in Phonebook . . . . . . . . . . . . . 130
Outgoing message list . . . . . . . . . . . . 48
Outgoing message list (SMS) . . . . 48, 51
Delete SMS . . . . . . . . . . . . . . . . . . . 52
Edit SMS . . . . . . . . . . . . . . . . . . . . . 52
Sending text messages . . . . . . . . . . 52
Outgoing MSN, freely selectable . . . . 148
Overwriting
Characters . . . . . . . . . . . . . . . . 11, 12
P
PABX
Operating when connected to
a PABX . . . . . . . . . . . . . . . . . . . . 122
Text messages to PABX's . . . . . . . . . 58
Pack contents. . . . . . . . . . . . . . . . . . . . 8
Parking . . . . . . . . . . . . . . . . . . . 32, 148
PDA . . . . . . . . . . . . . . . . . . . . . . . . . 148
Phone cord . . . . . . . . . . . . . . . . . . . . . 9
Phone jack . . . . . . . . . . . . . . . . . . . . . . 9
Phonebook . . . . . . . . . . . . . . . . 33, 148
Adding the phone number of an
SMS message sender . . . . . . . . . . 58
Delete an entry . . . . . . . . . . . . . . . . 35
Dialling. . . . . . . . . . . . . . . . . . . . . . 34
Find entry and dial . . . . . . . . . . . . . 34
Order of entries . . . . . . . . . . . . . . 130
Phone numbers from SMS text . . . . 57
Send . . . . . . . . . . . . . . . . . . . . . . . 36
CX 253i / SWZ PTT en / A31008-X353-P100-1-19 / SIX.fm / 03.12.2007
Index
Send an entry to a handset . . . . . . . 36
Sorting order . . . . . . . . . . . . . . . . 130
Storing a number . . . . . . . . . . . . . . 33
Transfer number from AM . . . . . . . 69
Transfer number to/from
Phonebook . . . . . . . . . . . . . . . . . 36
Use to enter telephone number . . . 36
View and change entry . . . . . . . . . 35
Pickup (AM) . . . . . . . . . . . . . . . . . . . 82
Activate . . . . . . . . . . . . . . . . . . . . . 82
Deactivate . . . . . . . . . . . . . . . . . . . 82
PIN . . . . . . . . . . . . . . . . . . . . . . . . . 148
PIN (answering machine), see AM PIN
Play back
Announcement (answering
machine) . . . . . . . . . . . . . . . . . . 63
Memo (answering machine) . . . . . . 67
Message (answering machine) . . . . 65
Playback speed (AM)
Setting . . . . . . . . . . . . . . . . . . . . . 68
Plugging to bus . . . . . . . . . . . . . . . . 149
Power cord . . . . . . . . . . . . . . . . . . . . 10
Power failure . . . . . . . . . . . . . . . . . . 10
Power supply unit . . . . . . . . . . . . . 6, 10
Pre-dialling . . . . . . . . . . . . . . . . . . . 149
Prefix, see Area code
Preparing for use
Base station . . . . . . . . . . . . . . . . . . . 8
Pre-setting the call forwarding
destination . . . . . . . . . 103
Putting a call on hold . . . . . . . . . . . . 32
R
Range . . . . . . . . . . . . . . . . . . . . . . . . . 8
Read (SMS) . . . . . . . . . . . . . . . . . . . . 51
Receive MSN
Assigning . . . . . . . . . . . . . . . . . . . 95
Assigning for answering machine . . 74
Setting . . . . . . . . . . . . . . . . . . . . . 18
Receiving an SMS . . . . . . . . . . . . 44, 53
Record
Announcement (answering
machine) . . . . . . . . . . . . . . . . . . 63
Call (answering machine) . . . . . . . . 64
Memo (answering machine) . . . . . . 64
Registering
Repeater . . . . . . . . . . . . . . . . . . . 121
With SMS centre . . . . . . . . . . . . . . 48
Rejecting
Call . . . . . . . . . . . . . . . . . . . . . . . . 24
Setting up for the MSN group . . . . . 98
Remaining memory time (answering
machine) . . . . . . . . . . . . 62
Remote activation . . . . . . . . . . . . . . 149
Remote check (answering machine) . 149
Remote control (answering machine) . 70
Enable . . . . . . . . . . . . . . . . . . . . . . 70
Key sequences . . . . . . . . . . . . . . . . 72
Remote delete (answering machine)
Enable . . . . . . . . . . . . . . . . . . . . . . 70
Repair . . . . . . . . . . . . . . . . . . . . . . . 127
repair . . . . . . . . . . . . . . . . . . . . . . . 127
Repeater . . . . . . . . . . . . . . . . . 120, 149
Activate/deactivate . . . . . . . . . . . . 120
Registering . . . . . . . . . . . . . . . . . . 121
Reply
SMS . . . . . . . . . . . . . . . . . . . . . . . . 56
Reserving a line . . . . . . . . . . . . . . . . . 24
Ring delay . . . . . . . . . . . . . . . . . 15, 149
pick up call . . . . . . . . . . . . . . . . . . . 24
Ringer
Assigning melody for MSN . . . . . . . 97
Number before AM starts . . . . . . . . 76
Ringer tone
Set volume . . . . . . . . . . . . . . . . . . 112
Setting . . . . . . . . . . . . . . . . . . . . . 112
Setting a melody . . . . . . . . . . . . . 112
S
S0 Bus . . . . . . . . . . . . . . . . . . . . . . . 149
Safety precautions . . . . . . . . . . . . . . . . 6
Security settings . . . . . . . . . . . . . . . . 89
Send
Phonebook entry to a handset . . . . . 36
Phonebook to a handset . . . . . . . . . 36
SMS . . . . . . . . . . . . . . . . . . 44, 48, 49
SMS in outgoing message list . . . . . 52
Send an e-mail, see SMS
Send centre, see SMS
Send MSN
Assigning . . . . . . . . . . . . . . . . . . . . 96
Defining . . . . . . . . . . . . . . . . . . . . . 25
Setting . . . . . . . . . . . . . . . . . . . . . . 18
Setting up the list . . . . . . . . . . . . . . 96
Service provider . . . . . . . . . . . . . . . . . 44
156
CX 253i / SWZ PTT en / A31008-X353-P100-1-19 / SIX.fm / 03.12.2007
Index
Set
Authorisation . . . . . . . . . . . . . . . . . 90
Send MSN . . . . . . . . . . . . . . . . . . . 25
Set time by . . . . . . . . . . . . . . . . . 16, 83
Set up
Call delay . . . . . . . . . . . . . . . . . . . 105
Setting
Answering machine . . . . . . . . . . . . 74
Appointment . . . . . . . . . . . . . . . . . 84
Base station . . . . . . . . . . . . . . . . . . 16
Date . . . . . . . . . . . . . . . . . . . . 16, 83
Display . . . . . . . . . . . . . . . . . . . . 110
Enquiry call . . . . . . . . . . . . . . . . . 106
Forward destination . . . . . . . . . . . . 86
Playback speed (AM) . . . . . . . . . . . 68
Receive MSN . . . . . . . . . . . . . . . . . 18
Send MSN . . . . . . . . . . . . . . . . . . . 18
System . . . . . . . . . . . . . . . . . . . . . 93
Time . . . . . . . . . . . . . . . . . . . . 16, 83
Setting the forward destination . . . . . 86
Setting up
Busy signal . . . . . . . . . . . . . . . . . . 97
Group call group . . . . . . . . . . . . . 104
ISDN phone numbers (MSN) . . . . . . 94
Rejecting for the MSN group . . . . . . 98
Waiting melody . . . . . . . . . . . . . . 107
Setting up a group call group . . . . . . 104
Setting up the busy signal . . . . . . . . . 97
Setting up the waiting melody . . . . . 107
Settings
Check status . . . . . . . . . . . . . . . . 109
Reset . . . . . . . . . . . . . . . . . . . . . . 108
Short Message Service, see SMS
Short message, see SMS
Show answering machine . . . . . . . . . 75
Sicherheitshinweise. . . . . . . . . . . . . . . 6
Signal strength . . . . . . . . . . . . . . . . . . 8
Signal tone, see Advisory tones
SMS . . . . . . . . . . . . . . . . . . . . . . . . . 44
Calling back message sender . . . . . 57
Delete . . . . . . . . . . . . . . . . . . . . . . 51
Entering e-mail address . . . . . . . . . 52
Errors when receiving . . . . . . . . . . . 59
Errors when sending . . . . . . . . . . . 59
Forwarding . . . . . . . . . . . . . . . . . . 56
Incoming message list . . . . . . . . . . 53
Managing SMS service centres . . . . 45
Outgoing message list . . . . . . . . . . 51
Phone numbers from SMS text . . . . 57
Phone numbers in the Phonebook . 58
157
Read. . . . . . . . . . . . . . . . . . . . . . . . 51
Receiving . . . . . . . . . . . . . . . . . 44, 53
Reply to . . . . . . . . . . . . . . . . . . . . . 56
Saving . . . . . . . . . . . . . . . . . . . . . . 49
Self-help with error messages . . . . . 60
Send . . . . . . . . . . . . . . . . . 44, 48, 49
Send centre . . . . . . . . . . . . . . . . . . 44
Sending as an e-mail . . . . . . . . . . . . 52
Sending to a PABX . . . . . . . . . . . . . . 58
Service provider . . . . . . . . . . . . . . . 44
Storage capacity . . . . . . . . . . . . . . . 48
Writing . . . . . . . . . . . . . . . . . . . . . . 49
SMS centre . . . . . . . . . . . . . . . . . . . . 48
De-register . . . . . . . . . . . . . . . . . . . 48
Managing phone numbers . . . . . . . 46
Registering . . . . . . . . . . . . . . . . . . . 48
SMS send centre
Activate . . . . . . . . . . . . . . . . . . . . . 47
Deactivate . . . . . . . . . . . . . . . . . . . 47
Software version
Check . . . . . . . . . . . . . . . . . . . . . . 109
Specifications. . . . . . . . . . . . . . . . . . 129
Speed dial list. . . . . . . . . . . . . . . . . . . 33
Delete a single entry . . . . . . . . . . . . 35
Dialling. . . . . . . . . . . . . . . . . . . . . . 34
Edit a single entry . . . . . . . . . . . . . . 35
Opening . . . . . . . . . . . . . . . . . . . . . 34
Storing a number . . . . . . . . . . . . . . 34
View a single entry . . . . . . . . . . . . . 35
Storage capacity, see SMS
Storing
Phone number in the Phonebook . . . 33
Phone number in the speed
dial list . . . . . . . . . . . . . . . . . . . . . 34
SMS . . . . . . . . . . . . . . . . . . . . . . . . 49
Switching call divert . . . . . . . . . . . . . 102
Switching off an appointment alarm . . 85
System settings . . . . . . . . . . . . . . . . . 93
T
Telephone
Contact with liquid . . . . . . . . . . . . 125
Preparing for use. . . . . . . . . . . . . . . . 8
Telephone number
Adding to the Phonebook (AM) . . . . 69
Assigning (MSN) . . . . . . . . . . . . . . . 95
Display caller's . . . . . . . . . . . . . . . . 22
Enter from Phonebook . . . . . . . . . . 36
CX 253i / SWZ PTT en / A31008-X353-P100-1-19 / SIX.fm / 03.12.2007
Index
From the SMS text into the
Phonebook . . . . . . . . . . . . . . . . . 57
Into the Phonebook (SMS) . . . . . . . 58
Managing numbers for SMS centres 46
Storing in the Phonebook . . . . . . . . 33
Storing in the speed dial list . . . . . . 34
Transfer from/to Phonebook . . . . . . 36
Withhold identification . . . . . . . . . 22
Terminal
Transferring a call . . . . . . . . . . . . . 30
Text message, see SMS
Three-party conference . . . . . . . . . . 149
Time control (answering machine) . . . 79
Activate/deactivate. . . . . . . . . . . . . 80
Define announcement . . . . . . . . . . 79
Define start time (Mon-Fri) . . . . . . . 79
Setting . . . . . . . . . . . . . . . . . . . . . 79
Setting for Sat and Sun . . . . . . . . . 80
Time display
Activate/deactivate. . . . . . . . . 83, 111
Toggling . . . . . . . . . . . . . . . . . . 29, 149
Tone
Confirmation . . . . . . . . . . . . . . . . . 11
Confirmation tone . . . . . . . . . . . . 113
Error tone . . . . . . . . . . . . . . . 11, 113
Key click . . . . . . . . . . . . . . . . . . . 113
TP . . . . . . . . . . . . . . . . . . . . . . . . . 149
Two way record
Call (answering machine) . . . . 64, 150
V
Voice announcement (answering
machine)
Date/time . . . . . . . . . . . . . . . . . . . 76
Volume
Earpiece . . . . . . . . . . . . . . . . . . . 111
Handsfree . . . . . . . . . . . . . . . . . . 111
Ringer tone . . . . . . . . . . . . . . . . . 112
W
Waiting melody . . . . . . . . . . . . . . . . 150
Warning tone, see Advisory tones
Withholds your own phone number . 150
Writing a text message . . . . . . . . . . . 49
158
CX 253i / SWZ PTT en / A31008-X353-P100-1-19 / cover_back_Koeln.fm / 03.12.2007