1
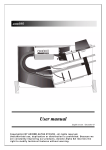
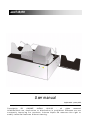
axc474B/BB
U s e r m an ual
En glish v ersion - Jan uary 2 0 0 3
Copyright(c)
BY
AXIOME
ALPHA
16.06.03
all
rights
reserved.
Unauthorised use, duplication or distribution is prohibited. Because we are
constantly improving our products, Axiome Alpha SA reserves the right to
modify technical features without warning.
axc 474 user manual
Chapter 1 :
Precautions and safety regulations................................................. 4
Chapter 2 :
General information ......................................................................... 5
2.1. General technical information: ..............................................................................................5
2.2. Electronic characteristics......................................................................................................5
2.3. Mechanical characteristics: ..................................................................................................6
2.4. MTBF 6
2.4.1. Feeding:
2.4.2. Transport:
2.4.3. Electronic:
6
6
7
2.5. Dimensions and weight of the machine...............................................................................7
2.6. Optical characteristics...........................................................................................................8
2.6.1. Optical switch
8
2.7. Barcode head.........................................................................................................................8
2.8. Barcode on the axc474b / bb. ............................................................................................10
2.9. HP decoder card..................................................................................................................11
2.9.1. TB2-3 head
2.9.2. Decoders
2.9.3. Syntax
2.9.4. Configuration for HP decoder
11
12
12
13
2.10. Programming Software.....................................................................................................14
Chapter 3 :
Installation....................................................................................... 15
3.1. Choice of position................................................................................................................15
3.2. List of the contents of the package ....................................................................................15
Chapter 4 :
Presentation of the axc 474 .......................................................... 16
4.1. Disposition of the main parts..............................................................................................16
4.2. Disposition of the plug connections ...................................................................................17
4.3. Disposition of the optical switch.........................................................................................17
Chapter 5 :
Opening .......................................................................................... 19
5.1. To open the cover ................................................................................................................19
Chapter 6 :
Connections of the axc 474 .......................................................... 20
6.1. Connecting the axc 474.......................................................................................................20
6.2. Disconnecting the reader....................................................................................................20
6.3. Standard RS232 interface (connecting diagram) ............................................................20
6.4. RS232 connection cable .....................................................................................................21
Chapter 7 :
Using the reader for the first time ................................................. 22
7.1. Control switch & LED ..........................................................................................................22
7.1.1. Starting in read mode
7.1.2. Starting in test mode
7.1.3. Starting in bootstrap loader mode
7.1.4. Switching off
22
22
22
22
7.2. Installing " Firmload " ...........................................................................................................23
7.3. Loading firmware .................................................................................................................23
Page 2
axc 474 user manual
7.3.1. Setting the reader in bootstrap loader mode
7.3.2. Download firmware
23
24
7.4. Insertion of documents.........................................................................................................25
7.5. Adjusting the document separation....................................................................................26
Chapter 8 :
Test mode ...................................................................................... 27
8.1. Configuration list ..................................................................................................................29
8.1.1. Configuration error detected
30
8.2. Motor test ..............................................................................................................................30
8.2.1. Motor forward
30
8.3. Panel test ..............................................................................................................................30
8.3.1. LED test
8.3.2. Key test
31
31
8.4. Sensor test............................................................................................................................32
8.4.1. Optical switch test
8.4.2. Thickness switch test
32
33
8.5. Solenoid test.........................................................................................................................34
8.6. Read test...............................................................................................................................34
8.6.1. External mode
8.6.2. Transport mode
35
35
8.7. Reader set-up.......................................................................................................................35
8.7.1. Initialise Ext1
8.7.2. Disable Ext1
8.7.3. Initialize Ext2
8.7.4. Disable Ext2
8.7.5. User parameter
Chapter 9 :
36
37
37
37
37
Preventive maintenance ................................................................ 38
9.1. Cleaning the Separation Surface.......................................................................................38
Chapter 10 : Error list .......................................................................................... 39
Chapter 11 : Parts list.......................................................................................... 40
Page 3
axc 474 user manual
Chapter 1 :
Precautions and safety regulations
The axc 474 has been designed in compliance with the European EC safety and electrical
regulations for data processing devices and in compliance with the safety regulations for terminals in
the office equipment environment.
This machine can be used in permanent operation in the ambient conditions of an office.
The following guidelines must be applied when installing and manipulating the reader.
• The reader is equipped with a power cable which must be connected to an earthed wall
socket.
• When installing the machine, make sure that the wall socket for the power supply is always
within the user's reach.
• Do not connect or disconnect the cables during a thunderstorm.
!!! WARNING !!!
The axc 474 must always be dismantled by first-level maintenance staff and only after the power
cable has been disconnected.
• AXIOME Alpha SA will refuse any warranty or application of maintenance clauses if it is
established that the axc 474 has been damaged by intervention by an unauthorised person.
• For transportation, the machine must be packed in its original packaging to prevent any
shock to the mechanical parts.
Page 4
axc 474 user manual
Chapter 2 :
General information
2.1. General technical information:
• Operating temperature:
10 to 35 oC (50 - 95 oF).
• Relative operating humidity:
20 to 80% without condensation.
• Storage temperature:
0 to 40 oC (32 - 105 oF).
• Relative storage humidity:
40 to 80% without condensation.
• Power supply :
Input 115V / 230V AC 50 / 60 Hz (auto-switch).
Output 24 V DC.
• Power consumption under 24V DC: Running mode: 1.6 A max.
Standby:
2.4 mA.
2.2. Electronic characteristics
• Microprocessor:
AM188ES.
• Flash memory :
256 K bytes divided into 5 blocks.
Block 1 : 16 Kbytes boot.
Block 2 : 8 Kbytes user parameters.
Block 3 : 8 Kbytes set-up parameters.
Block 4 : 96 Kbytes calibration parameters.
Block 5 : 128 Kbytes firmware.
• Main motor:
Stepping motor.
• Interface:
Serial V24 / RS232C.
Page 5
axc 474 user manual
2.3. Mechanical characteristics:
• Feeding:
Automatic.
• Capacity of the input tray:
100 documents (for documents of 90 gr/m 2).
• Capacity of the output trays:
Refused =100 documents.
Accepted = 100 documents
(for documents of 90 gr/m 2)
• Document transport speed:
0.5 m/s.
• Weight of paper:
80 to 160 g/m².
• Minimum document format:
113 x 38 mm (4.4" x 1.5").
• Maximum document format:
210 x 140 mm (8,26" x 5.5").
• Paper quality:
Optical reading quality (non chemical).
• Document alignment:
Automatic.
• Tray management :
Controlled by the program
2.4. MTBF
2.4.1. Feeding:
• First transport wheel :
1'000'000 documents (*)
• Separation wheel :
1'000'000 documents (*)
(*) average depending on paper quality.
2.4.2. Transport:
• Transport wheel :
5'000'000 documents (*)
• Mini-pitch belt :
20'000'000 documents
• O-ring belt:
5'000'000 documents
• Step motor :
100'000 hours
(*) average depending on paper quality.
Page 6
axc 474 user manual
2.4.3. Electronic:
• Electronic boards :
50'000 hours
• Light barrier :
Automatic adjustment to compensate the ageing
process.
2.5. Dimensions and weight of the machine
• Length without tray :
357 mm
• Length with tray open:
575 mm
• Width:
220 mm
• Max. depth:
215 mm
• Weight:
6.7 kg
Page 7
axc 474 user manual
2.6. Optical characteristics
2.6.1. Optical switch
The cells for document detection are red light beams that the document must cut in order to be
detected (refer to Figure 3, page 18).
• Document detection cells :
3 cells
2.7. Barcode head
The barcode reading device comprises a special reading head connected by fibre optics to its
decoding card.
• Barcode decoder :
1 or 2
• Type of read codes :
Codabar, Code 39, 2/5 interlaced, EAN 13,
EAN 8, Code 128, Code UPC E,
Code UPC, others on request.
• Type selection :
Automatic discrimination by the
reader.
• Resolution of barcode head :
0.15 mm
• Max. no. of barcodes per column :
20 barcodes
250 charact. for one read
100 charact. per barcode
Min. space between two barcodes :
Larger than twice the widest white space of the barcodes.
Page 8
axc 474 user manual
2.8. Adjustment of the Barcode reading head
•
Open the head cover ( refer to To open the cover, page 19 ).
•
Measure the distance between the reference margin and
•
Position the centre of the reading head at the centre of the Barcode line on your document.
Moving the OCR read head.
Page 9
axc 474 user manual
2.8.1. Barcode on the axc474b / bb.
AXIOME
AXIOME
The minimal spacing between two bar-codes must be greater than 4 time the biggest white space
inside both codes.
Maximum number of barcodes on one track :
20 Barcodes
250 Character for one reading
100 Characters for one barcode
Max. number of barcode heads on the axc474b/bb:
1 / 2 heads.
The axc474b/bb can decode the following barcodes :
•
•
•
•
•
2 of 5 interleaved
EAN 8
Code 39
Code AXIOME
Code UPC E
The head resolution is :
•
•
•
•
Codabar
EAN 13
Code 128
Code UPC A
0,15 mm
Page 10
axc 474 user manual
2.9. HP decoder card
2.9.1. TB2-3 head
The resolution of the TB2-3 head is 0.15 mm with a field depth between 0 and 1 mm from the glass.
If you read codes which are not very dense or show some homogeneity defects when you print the
black bars, you can improve the reading reliability in moving the head about 2 - 3 mm away from the
document.
The width of the glass 0.5 mm enables to hide through integration, the small printing mistakes
without penalising the codes which are not perfectly perpendicular (for example sticked labels).
You can read the code despite the printing mistakes.
You can read the code despite its angle
The length of the lighting wave 660 mm (red), also allows the reading of the codes printed with the
"ink jet" method and on thermal paper.
Page 11
axc 474 user manual
2.9.2. Decoders
A character indicating the type of code read always precedes the value of the barcode.
I
A
C
E
G
TA
TE
TFF
TE
=
=
=
=
=
=
=
=
=
Code 2/5 interleaved
Code Codabar
Code 128
Code 39
Code AXIOME
Code UPC A
Code UPC E
Code EAN 8
Code EAN 13
forward + backward
forward + backward
forward + backward
forward + backward
forward + backward
forward + backward
forward + backward
forward + backward
forward + backward
The Axiome decoder read up to 20 bar-codes (250 characters) following one another on a document.
2.9.3. Syntax
The barcode syntax transmitted through the reader is the following :
"[Zxxxxx]yyy...yyyy"
Code value.
Distance between
the barcode and the
bottom Edge.
Type of barcode
read
Remark :
The distance between the barcode and the bottom edge of the document being not very precise, it
cannot be converted into a unit of measure. This value depends on the type and speed of the OMR
reader, but is representative of the order in which the codes are read.
Page 12
axc 474 user manual
2.9.4. Configuration for HP decoder
The configuration is directly done with a Terminal program on the OMR reader running in test mode
(For the test mode, please refer to the corresponding chapter).
This method allows to activate or inactivate some codes. The discrimination of the diverse codes is
automatic, nevertheless to improve the decoding speed as well as the reliability, we advise you to
activate only the decoders of the used barcodes.
To change the displayed configuration, press ENTER, then activate or deactivate the types of
barcode as desired by pressing the respective keys (see below).
Remarks: Attention, these functions are case sensitive.
Page 13
axc 474 user manual
2.10. Programming Software
AXIOME has developed a series of programs enabling optimal use of the readers. The conception of
the program series provides several levels of performance and flexibility and provides at each level
an extension of the inferior levels.
Each reader is delivered with the basic standard interpreter software MAX and a default
configuration file.
Page 14
axc 474 user manual
Chapter 3 :
Installation
3.1. Choice of position
• Place the reader on a stable, flat and horizontal supporting surface.
• Protect the reader from any source of heat such as:
− direct sunlight
− heating radiator, etc.
• Also protect the machine from vibrations and humidity.
• Never use the axc 474 in rooms where the atmosphere is contaminated by dust or oil in the
gaseous state.
!!! WARNING !!!
The power cable of the axc 474 must never be connected to the same electrical socket as:
• large motors
• refrigerators
• in general: machines generating powerful inductive loads
Never leave the power cable plugged into a power supply when the cable is not connected to the
OMR reader.
3.2. List of the contents of the package
Check that the elements mentioned on the list below correspond to the contents of your package. If
the equipment has been damaged during transport or some elements are missing, contact your
dealer or Axiome Alpha SA Switzerland (see address at the end of the manual).
List of contents
• One axc474 reader.
• One primary output tray.
• One cable for the serial connection DB9 /DB25.
• One external power supply.
• One power cable.
• One user manual.
• One MAX programming manual.
• One CD axc474 containing the firmware and software.
Page 15
axc 474 user manual
Chapter 4 :
Presentation of the axc 474
The optical mark reader axc 474 is an automatic device. Its conception provides easy use and
access to the documents and requires little maintenance. Its high transportation speed and the
unique feeding system make it a particularly secure and efficient device. Its programming
possibilities make it flexible, user-friendly and easy to integrate into any data system.
4.1. Disposition of the main parts
1.
Command button.
2.
Contrôle LED
3.
The reference face (edge) assists guidance of the document.
4.
Document insertion tray .
5.
Removable head cover.
6.
The document separation block prevents a document from joining the previous one.
This separation block contains a little wheel allowing you to adjust the separation
depending on the thickness of the document.
7.
Secondary output tray.
8.
Removable primary output tray.
9.
Adjustable stop allowing adaptation of the primary output tray to all document formats.
Figure 1
Page 16
axc 474 user manual
4.2. Disposition of the plug connections
1.
Power supply.
2.
Serial connection plug (25 poles type V24)
Figure 2
Remark:
To unplug the power supply cable, pull the connector and not the cable.
4.3. Disposition of the optical switch
The axc 474 contains three optical switch allowing :
• Control of the document transport.
• Detection of the paper.
• Detection of the secondary output tray.
Each optical switch is defined as follows (see position on Figure 3):
OS1
Controls if there are documents in the input tray for automatic feeding.
OS2
Detects a document before it passes under the read head.
OS3
Controls the document transport and detects if the secondary output tray is full.
Page 17
axc 474 user manual
Disposition of the optical switches on the reader
Figure 3
Page 18
axc 474 user manual
Chapter 5 :
Opening
5.1. To open the cover
It is necessary to open the cover that gives access to the barcode or OCR read head if you will
adjust there position.
To open the cover:
1) remove the separation block
2) unscrew the cross screw placed behind the separation block
3) pull as indicated by the arrow
Figure 4
!!! WARNING !!!
It is not recommended to operate the axc 474 with an open cover.
Page 19
axc 474 user manual
Chapter 6 :
Connections of the axc 474
6.1. Connecting the axc 474
When installing the axc 474 and its peripherals, the cables must be connected in the following order:
• Connect the cable for serial data transfer to the reader's first, then to the PC.
• Connect the external power supply cables first to the reader, then to an earthen wall socket.
• Once these steps have been taken, a pressure on the control switch will switch on the axc
474 and its peripherals.
On the axc 474 the connection plugs are located at the bottom of the machine (refer to chapter 4.2
Disposition of the plug connections, page 17).
6.2. Disconnecting the reader
Never try to disconnect a cable by pulling on the electrical lead. Instead, pull on the mechanical part
of the plug.
• Remove the power cable.
• Disconnect the external power cable.
• Disconnect the data transfer cable.
6.3. Standard RS232 interface (connecting diagram)
2
3
4
5
7
20
<=>
<=>
<=>
<=>
<=>
<=>
TXD
RXD
RTS
CTS
GND
DTR
Page 20
axc 474 user manual
6.4. RS232 connection cable
The following diagram corresponds to the RS232 / V24 serial connection between a PC and a reader
(null modem). One cable of this type is delivered with the machine. However, such cables are also to
be found at local dealer’s under the designation "DB9 Female / DB25 male.
PC
Reader
9 Pin
25 Pin
DCD
1
4
RXD
2
2
TXD
TXD
3
3
RXD
DTR
4
5
CTS
6
DSR
7
GND
DCD
RTS
GND
5
DSR
6
RTS
7
8
DCD
8
20 DTR
The equivalent DB25 female / male cable can also be obtained in the commerce.
PC
Reader
25 Pin
25 Pin
Prot GND
1
1
Prot GND
TXD
2
2
TXD
RXD
3
3
RXD
RTS
4
4
RTS
CTS
5
5
CTS
DSR
6
6
DSR
GND
7
7
GND
DCD
8
8
DCD
DTR 20
20 DTR
Page 21
axc 474 user manual
Chapter 7 :
Using the reader for the first time
7.1. Control switch & LED
The control switch presents 4 distinct functions with corresponding LED coloring.
7.1.1. Starting in read mode
Press the control switch until the LED turns green, then release. An auto-test is carried out. If it is
unsuccessful the LED flashes red/green. If the problem persists, switch to test mode (see below). If
the auto-test was successful, the reader is now in read mode and is ready to be piloted by the
communication software.
7.1.2. Starting in test mode
Press the control switch until the LED turns red (approx. 2,5 secs.), then release. The reader is now
in test mode, ready for various functional tests on the machine. For further information regarding this
mode, please refer to Chapter 7.4 Insertion of documents, page 25.
7.1.3. Starting in bootstrap loader mode
Press the control switch until the LED turns orange (approx. 5 secs.), then release. The reader is
now in bootstrap loader mode, ready for loading of new firmware. For further information on this
mode, please refer to Chapter 7.3 Loading firmware, page 23.
7.1.4. Switching off
Whatever mode the reader is in, press the control switch until the LED turns off (approx. 3 secs.),
then release.
In read mode, the reader switches off automatically after 5 minutes on standby (no command sent to
the reader and no button pressed).
In test mode, the reader switches off automatically after 1 hour on standby.
In bootstrap loader mode, the reader does not switch off automatically.
Remark :
Never unplug the reader without having previously switched the reader off manually,
so as not to lose auto-adaptable parameters.
Page 22
axc 474 user manual
7.2. Installing " Firmload "
Amongst the accessories packed with the axc 474 is a CD containing the firmware as well as a preconfigured Hyper Terminal file (474.ht) with the 19200,N,8,1 communication parameters used to load
the firmware into the OMR reader.
To install, just copy the Firmload axc474 directory from the CD into a directory on your hard disk.
Figure 5
7.3. Loading firmware
When first installing the axc 474, the firmware, the MAX interpreter and the default configuration
parameters have to be loaded into the reader memory.
7.3.1. Setting the reader in bootstrap loader mode
Press the control button (approx. 5 secs.) until the LED turns orange, and release. The reader is now
in bootstrap loader mode ready to receive controls. In this mode the communication parameters are
still 19200,N,8,1.
If no erase or write controls are sent to the reader, the contain of the flash memory remains
unmodified and it is possible to leave this mode by pressing the control button on the panel for 3
seconds. The LED goes out and, as soon as the button is released, the power cut off.
Page 23
axc 474 user manual
Remarks:
The bootstrap and the loader are located in a protected block of the flash memory.
Due to this fact they cannot be modified or destroyed by human error or by an
accidental shutdown. However, the application program may be deleted or partially
destroyed by LOADER misuse. In this last case, the reader will be unusable and the
loading process must be restarted.
The bootstrap may not automatically detect a corrupt application. Especially when an
invalid program is loaded on top of a previous valid program.
There is no power off timeout in the bootstrap loader sequence.
7.3.2. Download firmware
1. Run the Loader2.exe file located under directory Firmload axc474. The default communication
port is COM1. If you wish to change it, select . Connect the cable, place the reader in BootStrap
mode.
Remark:
if communication is established, the reader will respond by giving its name and
its release version.
2. Click Load and select the firmware (hex) file to download. During the transfer process, the LED of
the control panel flashes orange. The download of the firmware (hex) file takes approximately 50
seconds.
Remark:
As soon as the download is finished, the reader is switched off.
Page 24
axc 474 user manual
7.4. Insertion of documents
The output tray must be adjusted to the format of the document.
The documents must be placed in the input tray with the barcode marks on the front.
Place the pile of documents on the reference's side and push it in the direction shown by the arrow.
Don't go beyond the fold in the sheet metal behind the documents.
In proceeding the same way, it is possible to insert only one document.
Insertion of documents
Figure 6
Page 25
axc 474 user manual
7.5. Adjusting the document separation
In the most cases it is not necessary to adjust the document separation, however, if the reader send
a bad feeding or double feeding message, you must readjust it. To do so, follow the procedure below.
• Active the reading process using an application program or select the read test mode (refer to
chapter 8.6.2 Transport mode, page 35).
• Put a document stack in the input tray.
• Adjust the grooved screw until documents are fed through without being stopped by the
separation block. If two documents are simultaneously transported the grooved screw must
be turned in the arrow direction.
Figure 7
Page 26
axc 474 user manual
Chapter 8 :
Test mode
In test mode, it is possible to verify and set-up configuration of various reader functionalities.
However, a serial connection with a computer and a HyperTerminal type communication program or
equivalent is indispensable. The communication parameters must be configured at 19200,N,8,1.
To do this, please follow the procedure below :
1. Run Hyper Terminal, select FILE , then PROPRIETES
2. Select the communication port to which the reader is connected
Page 27
axc 474 user manual
3. Configure the communication parameter to 19200,N,8,1.
When the reader is switched to test mode (red LED), the following menu is automatically displayed
on the PC monitor screen. If the reader is already in test mode, press escape on the computer
keyboard to display the menu.
Page 28
axc 474 user manual
On the main menu the following indications are found :
•
•
•
CPU Version (Axm/Axc.xxx)
API Version (API release x.xx)
Firmware Version (Appl : MAX xxx)
Remark :
To go to the next menu of your choice, press the corresponding key.
To return to the previous menu, press the ESC button on your keyboard.
8.1. Configuration list
This list gives the reader configuration, indicating which elements are present or absent. The list only
provides status of peripherals, and does not allow correction of errors. To set up peripherals, please
use the SET-UP menu (see chapter 8.7 Reader set-up, page 35)
Page 29
axc 474 user manual
8.1.1. Configuration error detected
In case of an error, the list indicates the type and number of the detected error.
8.2. Motor test
The forward / backward function of the document transport motor can be verified using motor test.
8.2.1. Motor forward
When the 1 key is pressed the motor runs in forward mode and the status is displayed on the
screen.
8.3. Panel test
The LED color function and the control switch can be verified in (front) panel menu.
Page 30
axc 474 user manual
8.3.1. LED test
By pressing keys 1, 2 or 3, the LED (see position 2 of Figure 1, page 16) turns green, red, or orange
respectively and status is displayed on the screen.
8.3.2. Key test
The status of the reader’s control switch (see position 1 of Figure 1, page 16) is displayed on the
screen and indicates whether switch is pressed (KEY ON) or released (KEY OFF).
Page 31
axc 474 user manual
8.4. Sensor test
Optical switch functionalities and thickness detector may be verified in sensor menu.
8.4.1. Optical switch test
The method to test the optical switch is digitally. The functions described further on correspond to the
light switches as given below :
1 input switch
2 separation switch
3 output switch
4 reserve switch
:
:
:
:
OSW 1
OSW 2
OSW 3
not used
Please refer to Figure 3, page 18 for the positioning of the optical switches.
By pressing key 1, 2, 3 or 4, the digital status of the corresponding optical switch can be obtained (+
= open / - = closed)
Page 32
axc 474 user manual
8.4.2. Thickness switch test
To test the thickness switch, documents of around 1/10 mm in thickness should be used. This is
usually the case with 80g/m2 paper. The thickness of the document is measured and the result
(represented by the letters A, B, C or D) is displayed on the screen.
Thickness measured
D = too thick
C = Thickness control OK
B = Thickness control OK
A = too fine
Page 33
axc 474 user manual
8.5. Solenoid test
The electro-magnet of the document feeding tray can be verified in the solenoid menu. By pressing
key 1, the solenoid is fed and should push the paper towards the separating wheel.
8.6. Read test
Paper transport mechanism, barcode/OCR read heads can be verified in the Read menu.
Page 34
axc 474 user manual
8.6.1. External mode
For this test, at least one barcode or OCR head should be present, along with respective decoders.
The functioning and positioning of the barcode/OCR head is verified in this mode. The type of code
and its value will be displayed on the screen. In this mode, the thickness detector is deactivated.
8.6.2. Transport mode
With the transport test, the transport function can be verified by ejecting 1 document out of 4 into the
secondary tray. In this mode, all read heads (barcode, OCR) are disabled, but the thickness detector
remains enabled.
8.7. Reader set-up
The reader set-up menu allows configuration of peripherals (barcode and/or OCR).
Page 35
axc 474 user manual
8.7.1. Initialise Ext1
This menu allows activation and configuration of the decoder connected to external interface 1.
With a barcode decoder, this menu allows to select the different types of barcode to be read.
To change the displayed configuration, press ENTER, then activate or deactivate the types of
barcode as desired by pressing the respective keys (see below).
Remarks:
Attention, these functions are case sensitive.
Page 36
axc 474 user manual
8.7.2. Disable Ext1
In this menu, the decoder connected to external interface 1 can be disabled. This becomes effective
immediately after leaving the menu.
8.7.3. Initialize Ext2
In this menu the decoder connected to external interface 2 can be activated and configured. Please
refer to chapter 8.7.1 Initialise Ext1, page 36 for the settings
8.7.4. Disable Ext2
In this menu, the decoder connected to external interface 2 can be disabled. This becomes effective
immediately after leaving the menu.
8.7.5. User parameter
To be used to visualize and erase data contained in the flash memory (block 1).
Erasing user parameters leaves the reader with default parameters. Especially the baud rate setting
of the reader is set back to 19200,N,8,1.
Page 37
axc 474 user manual
Chapter 9 :
Preventive maintenance
9.1. Cleaning the Separation Surface
• Take off the document separation block by pulling first horizontally 1 the grooved screw and
after up 2 (see figure below).
• Clean the separation pad 3 (rubber) using a cloth moistened with methyl spirit.
• Put back the separation block.
Figure 8
Page 38
axc 474 user manual
Chapter 10 : Error list
Below is a list of errors that may be returned by the reader in reading mode.
No
Description
000
001
002
003
004
005
006
007
008
009
010
011
012
013
014
015
016
017
018
019
020
021
022
023
024
025
026
027
028
DATA BUFFER EMPTY
BAD FEEDING
JAM BEFORE HEAD
JAM UNDER HEAD
JAM AFTER HEAD
JAM IN SORTING
NO SHEET ON LIFT
SHEET TOO SHORT
SHEET TOO THIN
SHEET TOO THICK
SHEET TOO LONG
INCORRECT SHEET
NO SHEET TO SORT
PATH NOT FREE
HEAD INIT ERROR
NO DECODER
FAILED Ch x
-
Page 39
axc 474 user manual
Chapter 11 : Parts list
The replacement parts for the axc 474 can be ordered from AXIOME Alpha SA or from your retailer.
Description
EALI024
Part number
Units per
machine
power supply 24V/50W connector mini din 12mm axc 474
1
EFUE034
Fuse 2 AT FST (for 230V)
1
EFUE037
Fuse 4 AT FST (for 115V)
1
EMAG125
solenoid stc 1253 dc-12v
1
FCOC132
Mini-pitch belt 80 132 x 1/4"
1
FORE139
O-ring 55.25 x 2.62
1
FORE148
O-ring 69.52 x 2.62
1
M985504
Transport wheel
4
M985506
Separation Wheel
1
SBARHP1
barcode decoder hp
1 or 2
SBATF950
Barcode head TB2-3
1 or 2
S474801
board CPU474-2
1
S478804
thickness controler
1
S478813
light switch board axc 474
3
S950803
Control panel axc 474/axm 950
1
Page 40
axc 474 user manual
Identification et saisie de données
Identification and data capture
AXIOME ALPHA SA
1, rue du Chasselas
CH-2034 Peseux, Switzerland
Tel.
Fax.
+41 (0)32 732 18 18
+41 (0)32 732 18 00
Web site:
e-mail:
http://www.axiome.ch
[email protected]
Peseux
Basel
Zurich
Bern
Geneva
Ref. LI47USE100
Page 41