1
Advanced Role Swap Utility
Use r G uide
December, 2008
Advanced Role Swap Utility User Guide
Copyright Vision Solutions® , Inc. 2003–2008
All rights reserved.
The information in this document is subject to change without notice and is furnished under a license agreement. This document
is proprietary to Vision Solutions, Inc., and may be used only as authorized in our license agreement. No portion of this manual
may be copied or otherwise reproduced without the express written consent of Vision Solutions, Inc.
Vision Solutions provides no expressed or implied warranty with this manual.
The following are trademarks or registered trademarks of their respective organizations or companies:
•
Vision Solutions is a registered trademark and ORION Solutions, Integrator, Director, Data Manager, Vision Suite,
ECS/400, OMS/400, ODS/400, SAM/400, Replicate1, EchoCluster, EchoStream, and iTERA HA are trademarks of Vision
Solutions, Inc.
•
DB2, IBM, i5/OS, iSeries, System i, System i5, AIX5L, Informix, System p, System x, and System z, and WebSphere—
International Business Machines Corporation.
•
Adobe and Acrobat Reader—Adobe Systems, Inc.
•
Double-Take, GeoCluster, and NSI—NSI Software, Inc.
•
HP-UX—Hewlett-Packard Company.
•
Teradata—Teradata Corporation.
•
Intel—Intel Corporation.
•
Java, all Java-based trademarks, and Solaris—Sun Microsystems, Inc.
•
Linux—Linus Torvalds.
•
Microsoft and Windows—Microsoft Corporation.
•
Mozilla and Firefox—Mozilla Foundation.
•
Netscape—Netscape Communications Corporation.
•
Oracle—Oracle Corporation.
•
Red Hat—Red Hat, Inc.
•
Sybase—Sybase, Inc.
•
Symantec and NetBackup—Symantec Corporation.
•
UNIX and UNIXWare—the Open Group.
All other brands and product names are trademarks or registered trademarks of their respective owners.
If you need assistance, please contact Vision Solutions’ SCP Certified CustomerCare team at:
CustomerCare
Vision Solutions, Inc.
Telephone: 1.800.337.8214 or 1.949.724.5465
Email: [email protected]
Web Site: www.visionsolutions.com/Support/Contact-CustomerCare.aspx
Contents
What’s New or Changed in This Release vii
Compatibility . . . . . . . . . . . . . . . . . . . . . . . . . . . . . . . . . . . . . . . . . . . . . . vii
Function Key Update . . . . . . . . . . . . . . . . . . . . . . . . . . . . . . . . . . . . . . . . viii
Chapter 1: Overview . . . . . . . . . . . . . . . . . . . . . . . . . . . . . . . . . . . . . . 1
Role Swaps . . . . . . . . . . . . . . . . . . . . . . . . . . . . . . . . . . . . . . . . . . . . . . . . 1
Planned Role Swaps . . . . . . . . . . . . . . . . . . . . . . . . . . . . . . . . . . . . . . 1
Unplanned Role Swaps . . . . . . . . . . . . . . . . . . . . . . . . . . . . . . . . . . . . 2
Planning a Role Swap . . . . . . . . . . . . . . . . . . . . . . . . . . . . . . . . . . . . . . . . 3
Chapter 2: Getting Started . . . . . . . . . . . . . . . . . . . . . . . . . . . . . . . . . 5
System Requirements . . . . . . . . . . . . . . . . . . . . . . . . . . . . . . . . . . . . . . . . 5
Loading and Mirroring the VSIARS Library . . . . . . . . . . . . . . . . . . . . . . . . 5
Loading from CD . . . . . . . . . . . . . . . . . . . . . . . . . . . . . . . . . . . . . . . . . 6
Loading from the CustomerCare Website. . . . . . . . . . . . . . . . . . . . . . 7
Installing the Save File . . . . . . . . . . . . . . . . . . . . . . . . . . . . . . . . . . . . 10
Upgrading to VSIARS . . . . . . . . . . . . . . . . . . . . . . . . . . . . . . . . . . . . 10
Adding the VSIARS Library to the Replication Environment . . . . . . . 11
Configuring an Environment . . . . . . . . . . . . . . . . . . . . . . . . . . . . . . . . . . 12
Adding a New Environment Configuration . . . . . . . . . . . . . . . . . . . . 13
Activating an Environment Configuration . . . . . . . . . . . . . . . . . . . . . 16
Setting up Exit Programs . . . . . . . . . . . . . . . . . . . . . . . . . . . . . . . . . . . . . 16
Verifying System Attributes . . . . . . . . . . . . . . . . . . . . . . . . . . . . . . . . . . . 17
Using the Advanced Role Swap Utility . . . . . . . . . . . . . . . . . . . . . . . . . . 18
Understanding the Role Swap Process. . . . . . . . . . . . . . . . . . . . . . . 18
Vision Solutions, Inc.
- iii -
Advanced Role Swap Utility User Guide
Accessing the Advanced Role Swap Utility Menus . . . . . . . . . . . . . 19
Understanding the Role Swap Status. . . . . . . . . . . . . . . . . . . . . . . . 20
Determining the Version . . . . . . . . . . . . . . . . . . . . . . . . . . . . . . . . . . 24
Chapter 3: Performing a Role Swap . . . . . . . . . . . . . . . . . . . . . . . . . 25
Overview . . . . . . . . . . . . . . . . . . . . . . . . . . . . . . . . . . . . . . . . . . . . . . . . . 25
Reviewing the Role Swap Process . . . . . . . . . . . . . . . . . . . . . . . . . . 26
Performing a Preliminary Pre-Role Swap Check . . . . . . . . . . . . . . . . . . 27
Performing the Pre-Role Swap Check . . . . . . . . . . . . . . . . . . . . . . . 27
Displaying the Pre-Role Swap Reports . . . . . . . . . . . . . . . . . . . . . . 33
Restricting the Mirrored Environment . . . . . . . . . . . . . . . . . . . . . . . . . . . 34
Ending User Applications . . . . . . . . . . . . . . . . . . . . . . . . . . . . . . . . . 35
Verifying System Attributes . . . . . . . . . . . . . . . . . . . . . . . . . . . . . . . 35
Performing the Role Swap . . . . . . . . . . . . . . . . . . . . . . . . . . . . . . . . . . . 36
Performing the Role Swap Check. . . . . . . . . . . . . . . . . . . . . . . . . . . 37
Reviewing the Role Swap Check Reports . . . . . . . . . . . . . . . . . . . . 42
Starting the Role Swap . . . . . . . . . . . . . . . . . . . . . . . . . . . . . . . . . . . 42
Starting Applications on the New Source
. . . . . . . . . . . . . . . . . . . . . . . . . . . . . . . . . . . . . . . . . . . . . . . . . . . . . . . . 44
Starting User Applications . . . . . . . . . . . . . . . . . . . . . . . . . . . . . . . . 44
Verifying System Attributes . . . . . . . . . . . . . . . . . . . . . . . . . . . . . . . 45
Appendix A: Messages . . . . . . . . . . . . . . . . . . . . . . . . . . . . . . . . . . . .47
Appendix B: Resolving Pre-Check Errors. . . . . . . . . . . . . . . . . . . . . .57
Appendix C: Report Samples . . . . . . . . . . . . . . . . . . . . . . . . . . . . . . .59
Checking Link Definitions . . . . . . . . . . . . . . . . . . . . . . . . . . . . . . . . . . . . 59
Checking OMS/400 Open Commits . . . . . . . . . . . . . . . . . . . . . . . . . . . . 60
Verifying Journal Status . . . . . . . . . . . . . . . . . . . . . . . . . . . . . . . . . . . . . 60
Appendix D: Role Swap Commands. . . . . . . . . . . . . . . . . . . . . . . . . .63
Overview . . . . . . . . . . . . . . . . . . . . . . . . . . . . . . . . . . . . . . . . . . . . . . . . . 63
BLDOMSTRG (Build OMS/400 Trigger Definitions) . . . . . . . . . . . . . . . . 64
CFGODSSWP (Configure ODS/400 Role Swap). . . . . . . . . . . . . . . . . . . 65
CHGAPPSTS (Change Application Status) . . . . . . . . . . . . . . . . . . . . . . . 66
CHGEXTCFG (Change Exit Configuration) . . . . . . . . . . . . . . . . . . . . . . . 67
CHKJRNSEQ (Check Journal Sequence Numbers) . . . . . . . . . . . . . . . . 68
CHKLNKDFN (Check Link Definitions) . . . . . . . . . . . . . . . . . . . . . . . . . . 70
CHKLNKSTS (Check Link Status) . . . . . . . . . . . . . . . . . . . . . . . . . . . . . . 72
Advanced Role Swap Utility User Guide
- iv -
Vision Solutions, Inc.
CHKODSOBJ (Check ODS/400 Object Transaction) . . . . . . . . . . . . . . . 73
CHKOMSOBJ (Check OMS/400 Objects) . . . . . . . . . . . . . . . . . . . . . . . 75
CHKOPNCMT (Check OMS/400 Open Commits) . . . . . . . . . . . . . . . . . 77
CHKSYSCMN (Check System Communication) . . . . . . . . . . . . . . . . . . 79
ENDS3 (End S3) . . . . . . . . . . . . . . . . . . . . . . . . . . . . . . . . . . . . . . . . . . . 80
ENDUSRAPPS (End User Applications) . . . . . . . . . . . . . . . . . . . . . . . . . 81
ISJOBACT (Is Job Active) . . . . . . . . . . . . . . . . . . . . . . . . . . . . . . . . . . . . 82
LSTACTJOB (List Active Jobs) . . . . . . . . . . . . . . . . . . . . . . . . . . . . . . . . 83
ROLESWAP (Role Swap) . . . . . . . . . . . . . . . . . . . . . . . . . . . . . . . . . . . . 84
RTVLNKID (Retrieve Link ID). . . . . . . . . . . . . . . . . . . . . . . . . . . . . . . . . . 85
RTVODSINF (Retrieve ODS/400 Information) . . . . . . . . . . . . . . . . . . . . . 86
RTVODSSTS (Retrieve ODS/400 Status) . . . . . . . . . . . . . . . . . . . . . . . . 88
RTVOMSINF (Retrieve OMS/400 Information) . . . . . . . . . . . . . . . . . . . . 90
RTVOMSPWD (Retrieve OMS/400 Password) . . . . . . . . . . . . . . . . . . . . 92
SBMODSSYNC (Submit ODS/400 Synch Check) . . . . . . . . . . . . . . . . . 93
SBMOMSSYNC (Submit OMS/400 Synch Check) . . . . . . . . . . . . . . . . . 94
SBMSYNCHK (Submit Synch Check). . . . . . . . . . . . . . . . . . . . . . . . . . . 95
SETARSLIB (Set ARS Library) . . . . . . . . . . . . . . . . . . . . . . . . . . . . . . . . 96
SNDJRNU70 (Send Journal U70) . . . . . . . . . . . . . . . . . . . . . . . . . . . . . . 97
SNDLNKDFN (Send Link Definitions) . . . . . . . . . . . . . . . . . . . . . . . . . . . 98
SNDODSCFG (Send ODS/400 Configuration) . . . . . . . . . . . . . . . . . . . . 99
SNDPLMCFG (Send PLM Configuration) . . . . . . . . . . . . . . . . . . . . . . . 100
STRMQRCDI (Start MQ Record Object Image) . . . . . . . . . . . . . . . . . . 101
STRUSRAPPS (Start User Applications) . . . . . . . . . . . . . . . . . . . . . . . 102
STRVSICHK (Start VSI Check) . . . . . . . . . . . . . . . . . . . . . . . . . . . . . . . 103
Sample Report . . . . . . . . . . . . . . . . . . . . . . . . . . . . . . . . . . . . . . . . 104
SWAPODS (Swap ODS/400) . . . . . . . . . . . . . . . . . . . . . . . . . . . . . . . . 106
SWAPOMS
(Swap OMS/400). . . . . . . . . . . . . . . . . . . . . . . . . . . . . . . . . . . . . . . . . . 107
VFYENV (Verify Environment) . . . . . . . . . . . . . . . . . . . . . . . . . . . . . . . . 108
VFYENVCFG (Verify Environment Configuration) . . . . . . . . . . . . . . . . . 109
VFYJRNSTS (Verify Journal Status) . . . . . . . . . . . . . . . . . . . . . . . . . . . 110
VFYLNKID (Verify Link ID) . . . . . . . . . . . . . . . . . . . . . . . . . . . . . . . . . . . 111
VFYSYSATR (Verify System Attributes) . . . . . . . . . . . . . . . . . . . . . . . . 112
WRKENVCFG (Work Environment Configuration) . . . . . . . . . . . . . . . . 113
WRKVSIJOB (Work VSI Job) . . . . . . . . . . . . . . . . . . . . . . . . . . . . . . . . 114
Vision Solutions, Inc.
-v-
Advanced Role Swap Utility User Guide
Advanced Role Swap Utility User Guide
- vi -
Vision Solutions, Inc.
What’s New or Changed in This Release
Compatibility
The Advanced Role Swap Utility is compatible for installation with VSEE
8.1/4.1 SR-1 product as follows:
•
SR-1 ASP02 through SR-1 ASP05, and does not require that a patch be
applied
•
SR-1 ASP06 or higher, and requires that a compatibility patch be applied
The Advanced Role Swap Utility is compatible for installation with VSEE
8.2/4.2 product as follows and all of the following require that a compatibility
patch be applied:
•
VSEE 8.2/4.2 GA or GA plus ASP01 through ASP03
•
VSEE 8.2/4.2 SR-1 (with an OS of V5R2 or V5R3)
•
VSEE 8.2/4.2 SR-1 ASP01 (with an OS of V5R2, V5R3, or V5R4)
•
VSEE 8.2/4.2 SR-2 GA or GA plus ASP01 through ASP15
If you have a current installation of the Advanced Role Swap Utility that is not
at a minimum v1.0, you must complete the upgrade procedures in the
Advanced Role Swap Utility User Guide prior to applying any patches.
NOTE
See the current version of Technical Bulletin #TBVSI0030 Advanced
Role Swap Utility Installation/Upgrade Matrix to identify the
appropriate patch to apply.
IMPORTANT
Starting with releases VSEE 8.1/4.1 SR-1 ASP10 and ORION v1.1
SR-1 ASP10, and VSEE 8.2/4.2 SR-2 and ORION v1.2 SR-2, all
Product Announcements will include information regarding
Advanced Role Swap Utility compatibility. The Product
Announcement should be consulted to confirm what patches, if any,
need to be applied.
Vision Solutions, Inc.
- vii -
Advanced Role Swap Utility User Guide
Function Key Update
Function Key
Update
The function keys in the Advanced Role Swap Utility were changed as follows:
Function Key
Description
F18
OMSMSGQ– Displays the OMS/400 message queue.
F19
ODSMSGQ–Displays the ODS/400 message queue.
F20
OMS400–Displays the main OMS/400 screen.
F21
ODS400–Displays the main ODS/400 screen.
F22
About–Displays the current version of the Advanced Role
Swap Utility.
F24
WRKACTJOB–Displays the Work with Active Jobs screen.
Advanced Role Swap Utility User Guide
- viii -
Vision Solutions, Inc.
Overview
1
The Advanced Role Swap Utility was created to develop a standard set of
procedures and programs to execute planned and unplanned role swaps. This
chapter contains the following:
Role Swaps
•
A description of unplanned and planned role swaps (see “Role Swaps” on
page 1)
•
Information on planning a role swap (see “Planning a Role Swap” on
page 3)
Both planned and unplanned role swaps can be broken down into a series of
steps. These steps can serve as a high level guide for performing a planned or
unplanned role swap of a mirrored environment and represent the structure of
the Advanced Role Swap Utility. The steps are not inclusive and may not take
into consideration everything required to role swap your environment. See the
following for more information:
•
See “Planned Role Swaps” on page 1 for information on planned role
swaps.
•
See “Unplanned Role Swaps” on page 2 for information on unplanned role
swaps.
Planned Role Swaps
In a planned role swap, both the source and target systems are available and
functional. This role swap is used when there is a need to take the original
source system and keep the applications running and available to the business
(for example, to upgrade the source system’s hardware or operating system, or if
your standard operating procedures include switching the production
workload between the source and target on a scheduled interval).
Vision Solutions, Inc.
-1-
Advanced Role Swap Utility User Guide
Role Swaps
Chapter 1: Overview
Planned role swaps consist of the following steps:
1. Execute a pre-role swap check of your mirroring environment to determine its readiness for a role swap. The pre-role swap check consists of a
number of checks on both the source and target to identify and resolve
issues that may cause the swap to be aborted or lengthen the time it takes
to complete. This check can be run hours or days prior to the scheduled
role swap and can be run multiple times (see “Performing a Preliminary
Pre-Role Swap Check” on page 27 for more information).
2. End or stop all processes on the source server that change data or objects
being mirrored to the target. This includes ending all applications and
interfaces, as well as users access to the system. In addition, you must end
all applications on the target and users access to the mirrored environment
(see “Restricting the Mirrored Environment” on page 34).
3. Swap or reverse the roles of the source and target system (the source
becomes the target and the target becomes the new source). In addition to
swapping roles, this step also includes moving hardware devices that must
be manually switched between the source and target (see “Performing the
Role Swap” on page 36).
4. Start all applications and subsystems on the new source, and logically
switch the users to point to the new production system so that users can
log in and resume working (see “Starting Applications on the New Source”
on page 44). In addition, start any subsystems or applications that are
required to be running on the target.
Unplanned Role Swaps
In an unplanned role swap, an unexpected outage occurs on the source system
and the production work and users must be switched to the target system to
allow the business to continue.
Unplanned role swaps consist of the following steps:
1. On the target or backup server, end user access to the target and any applications that access the mirrored environment on the target (see “Restricting the Mirrored Environment” on page 34).
2. After the OMS/400router and apply jobs have processed all transactions
on the target, swap or reverse the roles of the source and target system (the
source becomes the target and the target becomes the new source). In
addition to swapping roles, this step also includes moving hardware
devices that must be manually switched between the source and target (see
“Performing the Role Swap” on page 36).
3. Depending on your applications and their resiliency during a failure, your
application programming staff may need to assess the state of the databases
prior to letting users log in to the new source and commence work. This
Advanced Role Swap Utility User Guide
-2-
Vision Solutions, Inc.
Chapter 1: Overview
Planning a Role Swap
process may include running a series of programs over the database to
identify incomplete transactions or identifying production jobs that were
running at the time of failure. The process will vary according to your
applications ability to recover from in-flight transactions and lost or
incomplete batch jobs. Additional steps may be required prior to allowing
users back on the system.
4. Start all applications and subsystems on the new source, and logically
switch the users to point to the new production system so that users can
resume working (see “Starting Applications on the New Source” on
page 44).
5. Once the original source system becomes available, it must be role
swapped to the target system so that mirroring is started between the new
source and target system. All journaled changes from the source are sent
across and applied on the new target. Once the target is current and all
changes have been applied, a planned role swap can be scheduled to return
the systems to their original status.
Planning a Role
Swap
To develop role swap capabilities, you must perform a series of planned role
swap tests. These tests will be spread out over a period of weeks or months,
depending on the availability of downtime on the source and target systems.
The number of tests varies and is based on customer change management
procedures, the availability of resources to perform application testing, and
customer application testing requirements. Although the time and effort may
vary, testing generally conforms to the following steps:
1. Test the role swap procedures and programs. This focuses on the mechanics of the role swap: finding and starting subsystems and applications,
switching users and interfaces to the back up system, and role swapping
the mirrored environment so that it mirrors in the opposite direction. The
Vision Administrator and the Vision Consultant are involved in this test.
2. Role swap to the backup server to do some limited application testing.
This testing may include starting all production applications, signing on to
each system and walking through the key menus or functions, and
querying the databases to compare the source and target data. However, no
data is modified in this step. The Vision Administrator, Vision
Consultant, and operations and application development are involved in
this step.
3. Perform a complete application test, which can include updating or
modifying data, mirroring data back in the reverse directions or comparing
reports run on both systems. The Vision Administrator and operations
perform the role swap and application development verifies the data and
applications on the backup server.
Vision Solutions, Inc.
-3-
Advanced Role Swap Utility User Guide
Planning a Role Swap
Chapter 1: Overview
Vision Solutions recommends that you do periodic role swap tests to keep the
staff skill levels current and to identify any changes to the environment, such as
new applications that are not currently being mirrored. These periodic role
swap tests should be done at least once a year, but we strongly encourage you to
do it more often.
When planning and completing your role swap testing, consider the following:
•
Determine the user profile that will execute the role swap. This user profile
must have security officer authority. We recommend that you create a separate user profile to execute the role swap that includes a job description
that ensures the proper working environment for the user profile. In addition, we recommend that you duplicate the QSECOFR user profile to the
new profile ROLESWAP and use the job description ROLESWAP in the
tools library.
•
Determine how to connect to the source and target system during the role
swap, either by telnet to a static IP address or using the system console. If
using telnet, ensure that your job will be active in a subsystem that does
not end during the role swap. We recommend that you transfer your job or
use a device description that is configured in the QCTL subsystem. This
ensures that the job remains active throughout the role swap process.
•
Review and update the standard operating procedures for your environment (for example, the contact list, mirroring configuration, and other
custom procedures and programs in your environment). It is very important to verify that all required libraries and objects are configured to VSEE
prior to the role swap.
•
When signing off the system after the role swap, execute the command
“SIGNOFF *LIST” to produce a job log. The job log may help identify
issues.
•
Review the target system PTF levels and any other system attributes.
•
Plan to continue save activities after the role swap. For example, move tape
drives or update save logs to continue the save operations for the new
source and target system.
•
Coordinate role swap tasks with the network administrators. For example,
in a LAN environment, the ARP cache for routers may need to be cleared
after a role swap to broadcast the new MAC address to which the user IP is
now associated.
•
Throughout the role swap process, take notes to review after the completion of the role swap. The notes will help identify any required changes.
Advanced Role Swap Utility User Guide
-4-
Vision Solutions, Inc.
Getting Started
2
This chapter covers the basics you need to install and prepare for the Advanced
Role Swap Utility:
System
Requirements
•
“System Requirements” on page 5
•
“Loading and Mirroring the VSIARS Library” on page 5
•
“Configuring an Environment” on page 12
•
“Using the Advanced Role Swap Utility” on page 18
To run the Advanced Role Swap Utility, you must meet the following
requirements:
•
OS/400 V5R1 or higher
•
Both the source and target systems must be at the same version
(VSEE 8.1/4.1 and ORION v. 1.1 or VSEE 8.2/4.2 and ORION v1.2).
•
The Advanced Role Swap Utility can only be used in a one-to-one environment (one source system to one target system).
Note the following:
Loading and
Mirroring the
VSIARS Library
Vision Solutions, Inc.
•
The Advanced Role Swap Utility does not support iASP environments.
•
The Advanced Role Swap Utility link must be in the active environment.
The Advanced Role Swap Utility is stored in the VSIARS library. You may
receive the VSIARS library on a CD or as a zip file downloaded from an FTP
site. See the following for information on how to load the VSIARS library:
•
See “Loading from CD” on page 6 to load the VSIARS library from a CD.
•
See “Loading from the CustomerCare Website” on page 7 to load the
VSIARS library from an FTP site.
-5-
Advanced Role Swap Utility User Guide
Loading and Mirroring the VSIARS Library
Chapter 2: Getting Started
NOTE
The procedures and information in this manual refer to the VSIARS
library. If you place the objects from the VSIARS library in another
library, refer to the library to which you copied the objects in the
VSIARS library whenever the VSIARS library is referenced in this
manual.
Loading from CD
The VSIARS library is contained in a save file named ARSSAVF01 on the
Advanced Role Swap Utility CD.
To load the VSIARS library from CD:
1. Insert the CD into your CDROM drive and copy ARSSAVF01 to the
local drive on your PC.
2. On the source iSeries system, use the following command to create a Save
File using the exact name as the Save Files that you will upload.
CRTSAVF OMS400/ARSSAVF01
3. Create a VSIARS library on the target system.
CRTLIB LIB(VSIARS)
4. On your desktop, select the following:
Start > All Programs > Accessories > Command Prompt
The Command Prompt screen is displayed.
5. At the C:\ prompt, enter the following when prompted. (C:\ is used in the
example, but you can select the directory where you place the save file.
Advanced Role Swap Utility User Guide
-6-
Vision Solutions, Inc.
Chapter 2: Getting Started
Loading and Mirroring the VSIARS Library
Also, the example below assumes that you complete the ftp from C:\ root.)
Login using your iSeries user name and password.
C:\>ftp <systemname>
Connected to systemname
220-QTCP at systemname
220 Connection will close if idle more than 5 minutes.
User <systemname:<none>>: <username>
331 Enter password.
Password:xxxxxx
230 username logged on.
ftp>cd OMS400
250 “OMS400” is current library.
ftp>bin
200 Representation type is binary IMAGE.
Local directory now C:\
ftp>put <ARSSAVF01>
6. When the upload process is completed for the save file, enter quit in the
Command Prompt screen.
7. Close the Command Prompt screen.
8. Using the following commands, verify on the iSeries systems that the save
file you created in step 2 contains content:
DSPSAVF OMS400/ARSSAVF01
9. Now go to “Installing the Save File” on page 10.
Loading from the CustomerCare Website
The VSIARS library is contained in a save file named ARSSAVF01. Within the
save file is the VSIARS distribution library ARSSAVF01. Do the following to
extract and download the library:
1. Log in to Vision Solutions’ CustomerCare website.
2. Click Product Downloads, then OMS/400.
3. Click the version of OMS/400 that is currently installed:
• OMS/400 v8.1 SR-1
• OMS/400 v8.2
• OMS/400 v8.2 SR-1
4. Click Advanced Role Swap Utility.
5. Click arssavf01.zip.
6. In the File Download dialog box, click Save.
Vision Solutions, Inc.
-7-
Advanced Role Swap Utility User Guide
Loading and Mirroring the VSIARS Library
Chapter 2: Getting Started
7. Select the location to which you want the contents saved, then click Save.
8. Double-click ARSSAVF01.zip.
9. Select the Extract icon on the toolbar.
10. Select the location to which you want the contents saved, then click
Extract.
11. Repeat step 8 through step 10 to extract the save file ARSSAVF01 from
ARSSAVF01.zip.
12. On the source iSeries system, use the following command to create a Save
File using the exact name as the Save Files that you will upload.
CRTSAVF OMS400/ARSSAVF01
13. Create a VSIARS library on the target system.
CRTLIB LIB(VSIARS)
Advanced Role Swap Utility User Guide
-8-
Vision Solutions, Inc.
Chapter 2: Getting Started
Loading and Mirroring the VSIARS Library
14. On your desktop, select the following:
Start > All Programs > Accessories > Command Prompt
The Command Prompt screen is displayed.
15. At the C:\ prompt, enter the following when prompted. (C:\ is used in the
example, but you can select the directory where you place the save file.
Also, the example below assumes that you complete the ftp from C:\ root.)
Login using your iSeries user name and password.
C:\>ftp <systemname>
Connected to systemname
220-QTCP at systemname
220 Connection will close if idle more than 5 minutes.
User <systemname:<none>>: <username>
331 Enter password.
Password:xxxxxx
230 username logged on.
ftp>cd OMS400
250 “OMS400” is current library.
ftp>bin
200 Representation type is binary IMAGE.
ftp>put <ARSSAVF01>
16. When the upload process is completed for the save file, enter quit in the
Command Prompt screen.
17. Close the Command Prompt screen.
Vision Solutions, Inc.
-9-
Advanced Role Swap Utility User Guide
Loading and Mirroring the VSIARS Library
Chapter 2: Getting Started
18. Using the following commands, verify on the iSeries systems that the save
file you created in step 2 contains content:
DSPSAVF OMS400/ARSSAVF01
19. Now go to “Installing the Save File” on page 10.
Installing the Save File
Do the following to restore the object contained in the ARSSAVF01 save file to
your source system and mirror the objects to the target system.
1. Sign on as QSECOFR (or equivalent).
2. Load the ARSSAVF01 save file on the iSeries in the library of your choice.
3. Restore ARSSAVF01 to the source system:
• To save it to the VSIARS library:
RSTLIB SAVLIB(VSIARS) DEV(*SAVF)
SAVF(OMS400/ARSSAVF01) MBROPT(*ALL)
ALWOBJDIF(*ALL) OUTPUT(*PRINT)
• To save it to a different library:
RSTLIB SAVLIB(VSIARS) DEV(*SAVF)
SAVF(OMS400/ARSSAVF01) MBROPT(*ALL)
ALWOBJDIF(*ALL) OUTPUT(*PRINT)
TOLIB (YOURLIB)
Upgrading to VSIARS
If you have the VSITOOLS library installed, which is the previous version of
the Advanced Role Swap Utility, you must do the following:
NOTE
If you do not have a previous version of the Advanced Role Swap
Utility installed, go to “Adding the VSIARS Library to the
Replication Environment” on page 11.
1. Determine whether or not the program VSIENDSYS exists.
• If the program VSIENDSYS exists, copy VSIENDSYS to VSIARS,
then change the data area ENDEXTCFG to reference the program
VSIENDSYS in the VSIARS library.
• If the program VSIENDSYS does not exist, copy the exit program
ENDUSREXT and any dependent programs into VSIARS from
VSITOOLS.
Advanced Role Swap Utility User Guide
- 10 -
Vision Solutions, Inc.
Chapter 2: Getting Started
Loading and Mirroring the VSIARS Library
2. Determine whether or not the program VSISTRSYS exists.
• If the program VSISTRSYS exists, copy VSISTRSYS to VSIARS, then
change the data area STREXTCFG to reference the program
VSISTRSYS in the VSITOOLS library.
• If the program VSISTRSYS does not exist, copy the program
STRUSREXT and any dependent programs into VSIARS from
VSITOOLS.
3. If you permanently added an entry to the user or system library lists in a
previous version of the Advanced Role Swap Utility, you must edit, as
necessary, any system values or applications that set library lists to ensure
that the VSIARS library is above any prior entries for ARS. (For example,
if a previous version of the Advanced Role Swap Utility was located in the
VSITOOLS library, VSIARS must be above VSITOOLS in the library list
of any session accessing the Advanced Role Swap Utility).
4. As part of the upgrade, you must configure your roleswap environment,
including link selection, in the new version of the Advanced Role Swap
Utility. Environment configurations from previous Advanced Role Swap
Utility versions are not automatically copied to the new version (see
“Configuring an Environment” on page 12 for more information).
Adding the VSIARS Library to the Replication Environment
Once you know the library in which the Advanced Role Swap Utility will be
stored, you must add this library to both the OMS/400 and ODS/400
environments to mirror all changes to the target so that the source and target
libraries are identical. In addition, the MTTPWD and USRAPPSTS data areas
must be excluded from OMS/400 and omitted from ODS/400 so that End
User Applications and Start User Applications on the target work correctly.
The following procedure explains how to mirror a library. (Skip steps 2, 3, and
6 if you are already mirroring VSIARS and are merging the new VSIARS
library with an existing VSIARS library.)
NOTE
The VSIARS library must be created on the target system with no
objects. Create a new link that mirrors only the VSIARS library.
1. Create the VSIARS library on the target system.
2. On the source system, select an OMS/400 link and add the library name
to the PLM. You must exclude the MTTPWD and USRAPPSTS data
areas.
3. On the source system, set the PLM monitor action for the library to
*SND.
Vision Solutions, Inc.
- 11 -
Advanced Role Swap Utility User Guide
Configuring an Environment
Chapter 2: Getting Started
4. On the source system, run the PLM for the link ID and wait for the job to
complete.
5. On both the source and target systems, verify that the objects were
configured correctly to the OMS/400 link.
6. On the source system, add a select statement to ODS/400 to mirror all
objects in the library. You must omit the MTTPWD and USRAPPSTS
data areas.
7. On the source system, execute an ODS/400 synch-check for the library.
The synch-check process will perform a save/restore of any objects that do
not exist on the target system.
8. On the source system, use the ODSSNDOBJ command to send the
MTTPWD and USRAPPSTS data areas that were omitted in step 6.
9. Install the appropriate compatibility patch (see Technical Bulletin
TBVSI0030 for more information).
Configuring an
Environment
The environment configuration allows you to group OMS/400 link IDs so
that they can be processed together as a single entity or a subset of links.
Grouping the link IDs is useful if you want to role swap a subset of your links
defined to OMS/400 or to identify a set of links on which you want to run a
sample synch check when the applications are down.
NOTE
When grouping link IDs, make the link IDs either all source or all
target.
If you do not configure an environment, the current environment is set to
*NOTCFG. This causes all defined OMS/400 links to be selected.
See the following sections to configure an environment:
•
“Adding a New Environment Configuration” on page 13
•
“Activating an Environment Configuration” on page 16
Advanced Role Swap Utility User Guide
- 12 -
Vision Solutions, Inc.
Chapter 2: Getting Started
Configuring an Environment
Adding a New Environment Configuration
The following procedure explains how to define an environment, select links,
and set the current environment.
NOTE
The maximum number of environments that can be created is 9,999.
Use only WRKENVCFG on the source system and ensure that the
VSIARS library is included in the mirroring configuration and all
objects are in synch. It is very important to ensure that the files
ENVMSTP and ENVCFGP, and the data area CURENV are
mirrored via OMS. The Advanced Role Swap Utility link must be in
the active environment.
1. Ensure that the VSIARS library is in your library list. If not, from a command line, add the VSIARS library, then press Enter.
ADDLIBLE VSIARS
2. At a command prompt, type WRKENVCFG to display the Environment
Configuration screen.
Vision Solutions, Inc.
- 13 -
Advanced Role Swap Utility User Guide
Configuring an Environment
Chapter 2: Getting Started
3. Press F6 (Add Environment) to add an environment.
4. Type in the name and description of the environment to create, then press
Enter to create the environment.
Advanced Role Swap Utility User Guide
- 14 -
Vision Solutions, Inc.
Chapter 2: Getting Started
Configuring an Environment
5. Associate the links with the environment configuration.
a) Type 6 (Link Selection) next to the environment for which you want to
select links, then press Enter to display the OMS/400 Link Selection
screen.
b) Select 1 (Select Link) next to each link ID that you want to add to the
environment.
c) Press Enter to add the selected links to the environment. The value for
the selected links changes from *NO to *YES in the Selected column.
d) Press F3 (Exit) to return to the Environment Configuration screen.
6. Type option 5 (Display), then press Enter to verify the selected link IDs
for the new environment.
7. Go to step 2 in “Activating an Environment Configuration” on page 16 to
set the current environment, or press F3 (Exit) to exit.
Vision Solutions, Inc.
- 15 -
Advanced Role Swap Utility User Guide
Setting up Exit Programs
Chapter 2: Getting Started
Activating an Environment Configuration
Making an environment the current environment enables the role swap process
to execute steps against one or more OMS/400 links defined to the
environment. Once set, the role swap menu or commands retrieve the
environment name stored in the data area CURENV. Only one environment
can be set as the current environment.
NOTE
If you do not want a current environment configured, press F13
(Reset Environment). F13 (Reset Environment) changes the value
in the data area CURENV to *NOTCFG and the current
environment defaults to the value ALL_LINKS (see “Configuring an
Environment” on page 12 for more information).
1. Do one of the following to display the Environment Configuration screen.
• At a command prompt, type WRKENVCFG.
• From the Advanced Role Swap Utility Main menu, press F7
(WRKENVCFG).
2. Position the cursor next to the environment you want to set as the current
environment, then select 1 (Set Environment) and press Enter.
3. Verify that the name of the selected environment displays in the Current
Environment field on the Environment Configuration screen.
Setting up Exit
Programs
The Advanced Role Swap Utility provides exit points that either start or end
the applications and environment being role swapped. These exit points have
been predefined within the role swap process, but still allow a set of steps to be
performed that are customized for your environment. As part of the Advanced
Role Swap Utility, two CL programs, ENDUSREXT and STRUSREXT, have
been provided. These are shell programs. The steps that these programs execute
need to be developed. These programs can be found in the source file
QCLSRC in the library VSIARS.
To access these CL exit programs, you may have to restore the files from the
save file ARSPGMSRC as follows (if not previously done when restoring a
patch):
RSTOBJ OBJ(QCLSRC) SAVLIB(QTEMP) DEV(*SAVF)
SAVF(VSIARS/ARSPGMSRC) FILEMBR(*ALL) MBROPT(*NEW)
ALWOBJDIF(*NONE) RSTLIB(VSIARS)
Advanced Role Swap Utility User Guide
- 16 -
Vision Solutions, Inc.
Chapter 2: Getting Started
Verifying System Attributes
The exit programs executed during the role swap are controlled by two data
areas in VSIARS. The ENDEXTCFG and STREXTCFG data areas contain
the program name and library name that are executed when you select the
option from the Advanced Role Swap Utility menu. You can use the
WRKEXTCFG or the CHGEXTCFG commands in the VSIARS library to
view and change the values of these data areas. If you have already developed
programs that can be used to start or end the appropriate pieces, you can
change the data areas to the value of these programs.
The Advanced Role Swap Utility provides the framework to execute these
programs on both the source or target systems, since you may have users
accessing the target system and they must be stopped in order to switch the
target system to the new source system.
Vision Solutions Professional Services or your Vision Industry Partner can
work with you to implement the Advanced Role Swap Utility. this
implementation includes the development of the Start user Application and
End User Application programs that are called when you select the Start User
Applications or End User Applications menu option (see “Ending User
Applications” on page 35 and “Starting User Applications” on page 44 for
more information on each of the menu options). These exit programs can be
used with both planned and unplanned role swaps.
Verifying
System
Attributes
Vision Solutions, Inc.
You can set up the file LSTSYSATRP to contain a list of commands that are
executed when you select the Verify System Attributes option (see “Verifying
System Attributes” on page 35 for information on verifying attributes before
the role swap and “Verifying System Attributes” on page 45 for information on
verifying attributes after a role swap). The file LSTSYSATRP is found in
VSIARS. The file comes pre-defined with an example of the commands that
can be executed.
- 17 -
Advanced Role Swap Utility User Guide
Using the Advanced Role Swap Utility
Using the
Advanced Role
Swap Utility
Chapter 2: Getting Started
The Advanced Role Swap Utility consists of a series of menu-based options you
can use to execute a role swap. See the following sections for more information:
•
“Understanding the Role Swap Process” on page 18
•
“Accessing the Advanced Role Swap Utility Menus” on page 19
•
“Understanding the User Application Status” on page 22
Understanding the Role Swap Process
This section describes the steps that occur when you perform a role swap. The
role swap process is completed by a series of jobs that are submitted to batch.
These jobs communicate with each other and a role swap is not completed
until all jobs process correctly.
The role swap process is driven by the STRVSISWAP command. Once the
STRVSISWAP command is submitted to the QCTL subsystem, it submits the
CHKVSISWAP, OMSCHGROLE, and ODSCHGROLE jobs, as follows:
1. The role swap starts. STRVSISWAP submits CHKVSISWAP which then
submits the OMSCHGROLE and ODSCHGROLE jobs to the QCTL
subsystem. OMSCHGROLE checks for inactive objects and submits a
job(s) that executes the OMSCHGROLE. The job name for the
OMS/400 change role is the same as the link ID name with _SWP at the
end in the QCTL subsystem.
2. The job STRVSISWAP submits the job CHKVSISWAP to the QCTL
subsystem. CHKVSISWAP checks the new role for OMS/400 and ODS,
submits to remote if specified, calls the role swap exit program, if
configured, and restarts the application. For example, if the current role is
SOURCE, CHKVSISWAP checks for TARGET. The job is delayed in ten
second increments until both OMS/400 and ODS/400 have successfully
swapped to be the new TARGET system. If an environment is being
processed for the role swap, CHKVSISWAP only checks the role of link
IDs configured to the environment.
3. Once the job CHKVSISWAP has identified the new role of the system,
messages are sent to the QSYSOPR message queue indicating that
OMS/400 and ODS/400 are ready to be the new source or target system.
4. If STRVSISWAP was specified to end user applications, STRVSISWAP
submits the job ENDUSRAPPS to retrieve the value from the data area
ENDEXTCFG and call the user exit program to end the application and
communication for the respective role. If the local system is the SOURCE,
STRVSISWAP passes the value SOURCE to the ENDUSRAPPS job.
STRVSISWAP is delayed every ten seconds until ENDUSRAPPS has
completed.
Advanced Role Swap Utility User Guide
- 18 -
Vision Solutions, Inc.
Chapter 2: Getting Started
Using the Advanced Role Swap Utility
5. If configured to call a role swap exit program, the job RSUSREXT is
submitted to the QCTL subsystem. RSUSREXT retrieves the value from
the data area RSEXTCFG to call the user exit program at the completion
of the role swap.
6. If specified to start the user application, the job STRUSRAPPS is
submitted to the QCTL subsystem. STRUSRAPPS retrieves the value
from the data area STREXTCFG to call the user exit program to start the
application and communication for the new respective roles. If the local
system is the new SOURCE system, then CHKVSISWAP passes the value
SOURCE to the exit program to restart the application.
Accessing the Advanced Role Swap Utility Menus
The Advanced Role Swap Utility uses a series of menu-based options to
execute the steps necessary in a role swap. The main menu groups the role swap
into four phases, represented by four menu options. Selecting an option on the
main menu displays the associated sub-menu from which you access the
executable options associated with that phase.
To access the Advanced Role Swap Utility Main Menu:
1. Log in to the source system with a user profile that has *SECOFR authority.
2. From a command line, add the VSIARS library, then press Enter.
ADDLIBLE VSIARS
NOTE
If you copied the objects from the VSIARS library to another library,
add the library to which you copied the objects.
3. From a command line, execute the ROLESWAP command, then press
Enter.
ROLESWAP
Vision Solutions, Inc.
- 19 -
Advanced Role Swap Utility User Guide
Using the Advanced Role Swap Utility
Chapter 2: Getting Started
The Role Swap Main Menu is displayed.
Role Swap Status
Menu options
The Role Swap menus contain the following:
• Role Swap Status displays the current state of mirroring and the
application (see “Understanding the Role Swap Status” on page 20 for
more information).
• Menu options list the available menu options. The main menu groups
the role swap into four phases, represented by four menu options.
Selecting an option on the main menu displays the associated submenu
from which you access the executable options associated with that
phase. To navigate within the Advanced Role Swap Utility menus, type
the number of the menu option that you want to access, then press
Enter.
Understanding the Role Swap Status
The Role Swap status displays the current state of mirroring and the
application in the following fields:
•
System Role displays the current role of the system (see “Understanding
the System Role” on page 21)
•
Application displays the status of the application (see “Understanding the
User Application Status” on page 22)
•
Environment displays the current environment (see “Understanding the
Environment” on page 23)
Advanced Role Swap Utility User Guide
- 20 -
Vision Solutions, Inc.
Chapter 2: Getting Started
Using the Advanced Role Swap Utility
Understanding the System Role
Each menu in the Advanced Role Swap Utility contains the System Role. The
System Role displays the role of the current system. The system role is
determined when a menu is displayed or an option is executed. It can be any of
the following:
•
SOURCE – The source system.
•
TARGET – The target system.
•
INCONSISTENT – If any of the following checks fail or do not match,
the System Role is set to *INCONSISTENT:
NOTE
If a value of INCONSISTENT is returned, you cannot start the
Pre-Role Swap or execute the actual Role Swap.
To determine why a value of INCONSISTENT was returned, use
the RTVOMSINF command to determine the value for each of the
parameters listed above (see page 90 for more information on the
RTVOMSINF command).
Vision Solutions, Inc.
Check
Description
ROLE
The OMS/400 and ODS/400 roles for the system do not match.
STATUS
At least one of the link IDs for the specified status does not
match the status of the other link IDs in the group. The status of
each link ID in the environment must match.
PWD
At least one of the link IDs for the specified password does not
match the password of the other link IDs in the group. The
password for each link ID in the environment must match.
RMTSYS
At least one of the link IDs for the specified remote system does
not match the remote system for the other link IDs in the
environment. The name of the remote OMS/400 system must
match the link IDs in the environment.
SNDTYP
At least one of the link IDs for the specified send type does not
match the send type of the other link IDs in the environment.
The send type must be the same for each link ID in the
environment.
MODE
At least one of the link IDs for the specified mode does not
match the mode of other link IDs in the environment. The mode
of each link ID in the environment must match.
RMTIP
At least one of the link IDs for the specified remote IP address
does not match the remote IP address or DNS name of the other
link IDs in the group. The remote IP address for each link ID in
the group must match.
- 21 -
Advanced Role Swap Utility User Guide
Using the Advanced Role Swap Utility
Chapter 2: Getting Started
Understanding the User Application Status
Each menu in the Advanced Role Swap Utility contains the User Application
Status. The User Application Status displays the current state of the
application, as determined by the USRAPPSTS data area.
When either the ENDUSRAPPS or STRUSRAPPS program is called, the data
area USRAPPSTS is changed, using the CHGAPPSTS command, to reflect
the assumed state of the application, if the system role is SOURCE. For the
target system, the Role Swap menu always assumes the application is
unavailable (*NOTAVAIL).
You can also use the CHGAPPSTS command throughout the role swap
process to change the current status of the application to indicate where the
application is in the role swap process.
NOTE
If you do not use the CHGAPPSTS command or the
ENDUSRAPPS or STRUSRAPPS programs (implemented by
ending or starting applications), the User Application Status is not
updated.
For example, on the source and target system prior to starting the role swap,
the fields on the Advanced Role Swap Utility menu are as follows:
Source System:
Target System:
System Role: SOURCE
System Role: TARGET
Application: *ACTIVE
Application: *NOTAVAIL
Environment ALL_LINKS
Environment: ALL_LINKS
Once the role swap is started, the following occurs:
1. On the source system, the ENDUSRAPPS program is called.
2. The command “CHGAPPSTS *INACTPEND” is executed. This in turn,
changes the data area USRAPPSTS to the value of *INACTPEND.
System Role: SOURCE
Application: *INACTPEND
Environment: ALL_LINKS
3. The user exit program stored in the data area ENDEXTCFG is called to
end the application.
Advanced Role Swap Utility User Guide
- 22 -
Vision Solutions, Inc.
Chapter 2: Getting Started
Using the Advanced Role Swap Utility
4. When the user exit program returns to ENDUSRAPPS, the commands
“CHGAPPSTS *INACTIVE” and CHGAPPSTS *NOTAVAIL” are
executed and the User Application Status is updated.
Source System:
Target System:
System Role: SOURCE
System Role: SOURCE
Application: *INACTIVE
Application: *NOTAVAIL
Environment ALL_LINKS
Environment: ALL_LINKS
5. At this time, the application has been restricted from the users. The
OMS/400 and ODS/400 role swap starts.
6. After the role change on the new source system, program STRUSRAPPS is
called.
7. The command “CHGAPPSTS *ACTPEND” is executed. This changes
the data area USRAPPSTS to the value of *ACTPEND.
System Role: SOURCE
Application: *ACTPEND
Environment: ALL_LINKS
8. The user exit program stored in the data area STREXTCFG is called to
start the application.
9. When the user exit program returns to STRUSRAPPS, the command
“CHGAPPSTS *ACTIVE” is executed.
System Role: SOURCE
Application: *ACTIVE
Environment: ALL_LINKS
Understanding the Environment
Each menu in the Advanced Role Swap Utility displays the Environment. The
environment is a group of link IDs to process during a role swap. An
environment can be created and OMS/400 link IDs can be selected for the
environment (see “Configuring an Environment” on page 12 for more
information). The Environment field can contain either of the following
values:
• ALL_LINKS – All link IDs configured to OMS/400 will be processed for the
role swap
• Current Environment – Link IDs in the current environment will be processed
for the role swap.
Vision Solutions, Inc.
- 23 -
Advanced Role Swap Utility User Guide
Using the Advanced Role Swap Utility
Chapter 2: Getting Started
Determining the Version
To display information about which version of the Advanced Role Swap Utility
is installed, press F22 from the Role Swap Main Menu.
The following information about the version of the Advanced Role Swap
Utility that is installed is displayed:
Value
Description
Version
The version that is installed.
Service Release
The Service Release (SR) that is installed.
Adv. Serv. Pack
The Advanced Service Pack (ASP) that is installed.
Build
The build number that is installed. The build
number corresponds to the current patch level that is
installed.
Advanced Role Swap Utility User Guide
- 24 -
Vision Solutions, Inc.
Performing a Role Swap
3
Overview
NOTE
Before executing a role swap, you must complete the procedures in
Chapter 2, “Getting Started.”
The Advanced Role Swap Utility contains a standard set of procedures and
programs to execute planned and unplanned role swaps. Planned and
unplanned role swaps can be broken down into a series of steps that serve as a
high level guide for performing a role swap of a mirrored environment. The
steps are not comprehensive and may not include everything required to role
swap your environment (see Chapter 1, “Overview” for more information).
The steps in the Advanced Role Swap Utility are accessed from the menu
options on the Advanced Role Swap Utility menu. The main menu groups the
role swap into four phases, represented by four menu options. Selecting an
option on the main menu displays the associated submenu from which you can
access the executable options associated with that phase.
Role Swap Main Menu
Pre-Role
Swap Menu
Vision Solutions, Inc.
End User
Applications
Menu
- 25 -
Start Role
Swap Menu
Start User
Applications
Menu
Advanced Role Swap Utility User Guide
Overview
Chapter 3: Performing a Role Swap
For more information on the individual submenus, see the following:
•
For information on the Pre-Role Swap menu, see “Performing a Preliminary Pre-Role Swap Check” on page 27.
•
For information on the End User Applications menu, see “Restricting the
Mirrored Environment” on page 34.
•
For information on the Start Role Swap menu, see “Performing the Role
Swap” on page 36.
•
For information on the Start User Applications menu, see “Starting Applications on the New Source” on page 44
Do one of the following:
• To complete a planned role swap, do the following in the order shown.
• ‘To perform an unplanned role swap, start with step 3 substep d.
Reviewing the Role Swap Process
1. From the Pre-Role Swap menu, do the following:
a) Perform one or more preliminary pre-role swap checks (see
“Performing a Preliminary Pre-Role Swap Check” on page 27) on the
source system.
b) Display the pre-role swap check reports to identify any issues (see
“Displaying the Pre-Role Swap Reports” on page 33).
2. From the End User Applications Menu, do the following:
a) End the user applications (see “Ending User Applications” on page 35)
on the source and target systems.
b) Verify system attributes (see “Verifying System Attributes” on page 35)
on the source and target systems.
3. From the Start Role Swap menu, do the following:
a) Perform the role swap check (see “Performing the Role Swap Check”
on page 37) on the source system.
b) Review the role swap check reports (see “Reviewing the Role Swap
Check Reports” on page 42) on the source.
c) Start the role swap on the source (see “Starting the Role Swap” on
page 42).
d) Start the role swap on the target (see “Starting the Role Swap” on
page 42).
4. From the Start User Applications menu, do the following:
a) Start user applications (see “Starting User Applications” on page 44) on
the new source and target systems.
b) Verify system attributes (see “Verifying System Attributes” on page 45)
on the new source and target systems.
Advanced Role Swap Utility User Guide
- 26 -
Vision Solutions, Inc.
Chapter 3: Performing a Role Swap
Performing a
Preliminary
Pre-Role Swap
Check
Role Swap Main Menu
1. Pre-Role Swap Menu
Performing a Preliminary Pre-Role Swap Check
The preliminary pre-role swap check consists of the following:
1. Running the pre-role swap check to locate and fix system issues before executing a planned role swap (see “Performing the Pre-Role Swap Check” on
page 27)
2. Viewing the results of the pre-role swap check (see “Displaying the
Pre-Role Swap Reports” on page 33)
Performing the Pre-Role Swap Check
Pre-Role Swap Menu
1. Start Pre-Role Swap
2. Pre-Role Swap Reports
The preliminary pre-role swap check is a series of commands that enable you to
check on the general health of the mirroring environment by notifying and
correcting issues before they become major issues or interfere with the
execution of a role swap. It should be run prior to executing a planned role
swap in order to minimize the possibility of any issues interfering with the role
swap process.
The pre-role swap check is driven by the STRVSICHK command. The
STRVSICHK command triggers a series of individual commands that perform
the pre-role swap check. Each command in the pre-role swap check can also be
run individually from a command line. (All commands are found in the
VSIARS library.) The amount of time it takes to perform the check varies
according to the number of OMS/400 links to be checked.
NOTE
We recommend that you always submit an OMS/400 sample and an
ODS/400 synch check hours in advance of the role swap. The time
required to complete a synch check depends on the number of
objects and file members selected in a link.
Once a synch check has been submitted, do not start the role swap
process until all synch check jobs complete.
For example, you can check ODS/400 for errors processing objects using either
of the following:
• CHKODSOBJ *ERROR checks for objects in *ERROR status.
• CHKODSOBJ *PROCESSING checks for objects in the
*PROCESSING status.
Each of the commands in the pre-role swap check are described in the
following procedure. See Appendix D, “Role Swap Commands” for more
information on the individual commands in the pre-role swap check.
Vision Solutions, Inc.
- 27 -
Advanced Role Swap Utility User Guide
Performing a Preliminary Pre-Role Swap Check
Chapter 3: Performing a Role Swap
NOTE
Executing the pre-role swap check when users and production are
running on the source system can produce inaccurate results on some
reports. For example, when checking link definitions, if the link is
behind, differences between the source and target may exist in the
number of objects defined to the link, as well as the number of
inactive objects.
1. From the Role Swap Main Menu screen, select 1 (Pre-Role Swap Menu),
then press Enter.
2. On the Pre-Role Swap screen, select 1 (Start Pre-Role Swap), then press
Enter.
3. Enter the password for the Pre-Role Swap, then press Enter.
The password is the same as the OMS/400 link IDs. All OMS/400 link
IDs that will be role swapped must have the same password. If the
passwords are not the same, an error displays and you will not be able to
perform the pre-role swap check. To change an OMS/400 link ID
password, refer to the VISION SUITE Enterprise Edition OMS/400 –
Object Mirroring System Product Manual.
Once the password is entered, the Start VSI Check (STRVSICHK) screen
displays.
Advanced Role Swap Utility User Guide
- 28 -
Vision Solutions, Inc.
Chapter 3: Performing a Role Swap
Performing a Preliminary Pre-Role Swap Check
4. Next to each task, type one of the values shown to the right of the task.
Type *YES to execute the task or *NO to skip executing the task for each
of the following and select the Type of OMS/400 Sync Check:
Value
Description
Check System
Communication
(CHKSYSCMN)
Retrieves and compares the following
communication attributes within a link ID: Remote
System, Remote Location, Communication
Protocol, Mode, Remote IP or DNS name.
If any link ID does not match, then the process stops
and the attribute must be corrected before
re-executing the command. Once the attributes have
been verified, the process verifies communication
using a ping request, remote program call to the
LISTENER2 job, and either a test FTP or DDM.
• If the data area VSIUSEFTP is set to Y, then a
test FTP is executed.
• If the data area VSIUSEFTP is set to N, then
a test DDM is executed.
See “CHKSYSCMN (Check System
Communication)” on page 79 for more
information.
Check Link Definitions
(CHKLNKDFN)
Compares the total number of mirrored and inactive
objects for each link ID to be processed. If the total
number of mirrored and inactive objects for each link
ID are not equal, the QSYSPRT spool file is created
to summarize the totals. You can use OMS/400
Object Status to identify issues on both the source
and target systems. If you are unable to resolve the
issues, contact CustomerCare. See “Checking Link
Definitions” on page 59 for more information.
Note: Since unapplied transactions can affect the
total number of mirrored and inactive objects, check
that link status for OMS/400 on the source and
target systems are current.
See “CHKLNKDFN (Check Link Definitions)”
on page 70 for more information.
Vision Solutions, Inc.
- 29 -
Advanced Role Swap Utility User Guide
Performing a Preliminary Pre-Role Swap Check
Chapter 3: Performing a Role Swap
Value
Description
Check Open Commits
(CHKOPNCMT)
Retrieves the number of records from the logical file
MRCCIDLB on the target system for the link library
being processed. The logical file points to records in
MRCCIDP that have a status other than A, which
indicates that OMS/400 has not received the end
commit transaction. Consequently, user spaces are
retained and the time to complete an OMS/400
Change Role is affected because all the user spaces are
being copied to the OMS/400 product library and
searched in order to rollback uncommitted
transactions. If the application is active on the source
system, the open commits may be valid. However, if
the number of user spaces is approaching 10,000
contact CustomerCare so that you can avoid
wrapping the data. If the target system link ID has
open commits, the QSYSPRT spool file is created to
summarize the finding (see “Checking OMS/400
Open Commits” on page 60 for more
information).
See “CHKOPNCMT (Check OMS/400 Open
Commits)” on page 77 for more information.
Verify Journal Status
(VFYJRNSTS)
Submits the journal verification process to the target
system. The journal verification process verifies that
all files are journaled to the correct journal associated
to the link ID being processed. If a file is journaled to
the wrong journal or is not journaled, the job
attempts to start journaling. The job creates the
QPRINT spool file with user data MRR330. Review
this report on the target system to ensure that all files
are journaled. Entries with the word ERROR
indicate an issue while attempting to start journaling.
Check object allocation and re-run the VFYJRNSTS
command on the target system to resolve (see
“Verifying Journal Status” on page 60 and
“VFYJRNSTS (Verify Journal Status)” on page
110 for more information).
Advanced Role Swap Utility User Guide
- 30 -
Vision Solutions, Inc.
Chapter 3: Performing a Role Swap
Performing a Preliminary Pre-Role Swap Check
Value
Description
Build OMS Trigger
Definitions
Rebuilds the trigger maintenance file MRTRGFP.
The trigger maintenance file enables and disables
trigger definitions for mirrored physical files during
the final stages of an OMS/400 role change. It
ensures that all records exist and that all old records
are deleted from the trigger maintenance file prior to
a role swap. The process first deletes all records from
MRTRGFP on the source and target system. Then,
the OMS/400 command OMSVFYTRG scans all
mirrored libraries for trigger definitions. If a
definition is found, OMSVFYTRG adds the record
to MRTRGFP on the source and target system.
(BLDOMSTRG)
See “BLDOMSTRG (Build OMS/400 Trigger
Definitions)” on page 64 for more information.
Type of OMS Sync
Check
Selects the type of OMS/400 synch check to
perform.
SBMOMSSYNC
• *SAMPLE checks every object defined to the
link ID. The job is submitted to the
OMS400 subsystem with the same name as
the link ID.
• *ERROR reads the file MRSERRP (Allocation
Error Log) and if any records configured to
the link ID are being processed, a synch check
is performed. The job is submitted to the
OMS400 subsystem with the name SYNCHKERR.
• *NONE does not perform a synch check.
See “SBMOMSSYNC (Submit OMS/400
Synch Check)” on page 94 for more information.
Submit ODS Sync
Check
Submits the ODS/400 synch check jobs to the
ODS400 subsystem. If specified to submit multiple
jobs, there is an ODS/400 synch check job for each
system or path defined to ODS. The job name is
ODSSYNCHK and the spool file names are
ODP261P2 and ODP261P1. Review the ODS/400
synch check reports to identify issues.
(SBMODSSYNC)
See “SBMODSSYNC (Submit ODS/400 Synch
Check)” on page 93 for more information.
Vision Solutions, Inc.
- 31 -
Advanced Role Swap Utility User Guide
Performing a Preliminary Pre-Role Swap Check
Chapter 3: Performing a Role Swap
Value
Description
Send PLM
Configuration
(SNDPLMCFG)
Copies the PLM configuration files MRLMONP
and MREXCLP to the target system and writes a
control record to MRRCFGP for each link ID
processed. In addition, an OMS/400 product
program is called to read the file MRRCFGP and
copy the files to the target system. FTP or DDM is
used to copy the files.
See “SNDPLMCFG (Send PLM
Configuration)” on page 100 for more
information.
Copies the ODS/400 configuration files ODOBJSP,
ODPMSTP and ODPTIMP to the target system
and writes a control record to ODRCFGP for each
file. An ODS/400 product program is called to read
the file ODRCFGP and to copy the configuration
files to the target system. FTP or DDM is used to
copy the files.
Send ODS
Configuration
(SNDODSCFG)
See “SNDODSCFG (Send ODS/400
Configuration)” on page 99 for more information.
Checks ODS/400 for error (*ERROR) transactions.
If *ERROR transactions are found, the user is
prompted with the ODS/400 Object Status display.
All error transactions must be completed or removed
in order to complete an ODS/400 role swap.
Check ODS Error
Trans
(CHKODSOBJ)
See “CHKODSOBJ (Check ODS/400 Object
Transaction)” on page 73 for more information.
Checks ODS/400 for transactions that are being
processed. If *PENDING, *SEND, or *WAITING
transactions are found, the user is prompted with the
ODS/400 Object Status display. All incomplete
transactions must be completed or removed in order
to complete an ODS/400 role swap.
Check ODS
Processing Trans
(CHKODSOBJ)
See “CHKODSOBJ (Check ODS/400 Object
Transaction)” on page 73 for more information.
Check OMS Inactive
Objects
(CHKOMSOBJ)
Checks OMS/400 for inactive objects. If inactive
objects are found, the user is prompted with the
OMS/400 Object Status display. All inactive objects
must be re-synchronized prior to the OMS/400 role
swap.
See “CHKOMSOBJ (Check OMS/400
Objects)” on page 75 for more information.
5. Once the tasks are configured, press Enter to start the check. Messages
display at the bottom of the screen as each task in the check is executed.
Advanced Role Swap Utility User Guide
- 32 -
Vision Solutions, Inc.
Chapter 3: Performing a Role Swap
Performing a Preliminary Pre-Role Swap Check
NOTE
Depending on the number of OMS/400 links selected, this may take
a few minutes to complete.
When the check is complete, the Display Spooled File screen displays.
The Displayed Spooled File screen displays the final status for each task
selected to be processed. Each task has a keyword name along with a
starting and completed date and time.
• If the user was prompted with a display or a spool file was created as the
result of an individual check, a message indicates that a particular
display or a spool file should be reviewed.
• If an error occurred within the task, a message states “Program Error.
Review Job log.” (see “This section outlines the basic steps for resolving
program errors.” on page 57 for more information).
Displaying the Pre-Role Swap Reports
The Pre-Role Swap reports contain the results of the preliminary pre-role swap.
With this information you can identify and solve issues that may interfere with
the role swap or the health of your mirroring environment.
1. From the Role Swap Main Menu screen, select 1 (Pre-Role Swap Menu),
then press Enter.
2. On the Pre-Role Swap screen, select 2 (Pre-Role Swap Reports), then
press Enter.
The Work With All Spooled Files screen displays. It lists the available
reports.
Vision Solutions, Inc.
- 33 -
Advanced Role Swap Utility User Guide
Restricting the Mirrored Environment
Chapter 3: Performing a Role Swap
3. Do one of the following:
• To display the spool file, locate the spool file with the user data labeled
MTTR16, then select option 5 (Display) and press Enter.
• Press F12 (Cancel) to exit.
Restricting the
Mirrored
Environment
Role Swap Main Menu
2. End User Applications
Menu
End User Applications
Menu
1. End User Applications
2. Verify System Attributes
For planned role swaps, you must end all applications, interfaces, and
subsystems on the source system that can make changes to the production
database files and other objects that are defined to the mirroring environment,
as well as ending user access to the system. By restricting user access to the
source system, no additional journal entries are created and the mirroring
environment becomes current.
Once the applications have ended, you can verify the system attributes for your
environment (see“Verifying System Attributes” on page 35).
To restrict the mirrored environment, do the following:
1. End all applications, interfaces, and subsystems on the source system, as
well as ending user access to the system. In addition, on the target system,
you must end subsystems and applications that access the mirrored environment and end user access to the system. See “Ending User Applications” on page 35 for more information.
2. After the applications have ended, verify the attributes on the system (see
“Verifying System Attributes” on page 35).
Advanced Role Swap Utility User Guide
- 34 -
Vision Solutions, Inc.
Chapter 3: Performing a Role Swap
Restricting the Mirrored Environment
Ending User Applications
You can end user applications interactively or as a batch job, depending upon
the Submit to Batch value. If doing a planned role swap, you should end the
user applications on both the source and target systems.
1. From the Role Swap Main Menu, select option 2 (End User Applications
Menu), then press Enter to display the End User Applications menu.
2. Select option 1 (End User Applications).
3. Enter the password to end the user applications, then press Enter. The
password is the same as the OMS/400 link IDs. All OMS/400 link IDs
that will be role swapped must have the same password. If the passwords
are not the same, an error displays. To change an OMS/400 link ID
password, refer to the VISION SUITE Enterprise Edition OMS/400 –
Object Mirroring System Product Manual.
The End User Applications (ENDUSRAPPS) screen displays.
4. In Submit to Batch, do one of the following:
– Type *YES and press Enter to submit the process as a batch job, then
enter the job queue in which you want the job to be submitted.
– Type *NO then press Enter to run the process interactively.
Verifying System Attributes
After the applications have ended, for a planned role swap, verify the system
attributes for your environment on the source and target systems (see
“Verifying System Attributes” on page 17 to configure which attributes are
displayed). The LSTSYSATRP file should already be set up with the list of
commands that are executed during system attribute verification. The
Advanced Role Swap Utility comes pre-defined with an example of the
commands that could be run to display system information for visual
verification.
Vision Solutions, Inc.
- 35 -
Advanced Role Swap Utility User Guide
Performing the Role Swap
Chapter 3: Performing a Role Swap
1. From the Role Swap Main Menu, select option 2 (End User Applications
Menu), then press Enter to display the End User Applications menu.
2. Select option 2 (Verify System Attributes) to display the Display Network
Attributes screen.
3. Press Enter to view the next screen. The screens that display and the
information contained in the screens vary according to your installation.
However, for each screen that displays, you must verify that the entries on
each screen are correct, then press Enter to display the next screen. (For
example, in the Work with Job Schedule Entries screen, verify that all jobs
are on hold, then press Enter.)
4. When all screens have been verified, press F12 (Cancel) to return to the
Role Swap Menu screen.
Performing the
Role Swap
Role Swap Main Menu
3. Role Swap Menu
Start Role Swap Menu
1. Start Role Swap Check
2. Role Swap Check
Reports
3. Start Role Swap
Once you have completed both the preliminary pre-role swap check on the
source (see “Performing a Preliminary Pre-Role Swap Check” on page 27) and
ended user applications on both the source and target (see“Restricting the
Mirrored Environment” on page 34), you can start the role swap. Do the
following to start the role swap:
1. Now that user applications have been ended, perform a role swap check
(see “Performing the Role Swap Check” on page 37).
2. Review the reports generated by the role swap check (see “Reviewing the
Role Swap Check Reports” on page 42).
3. Start the role swap (see “Starting the Role Swap” on page 42).
Advanced Role Swap Utility User Guide
- 36 -
Vision Solutions, Inc.
Chapter 3: Performing a Role Swap
Performing the Role Swap
Performing the Role Swap Check
This check enables you to check the health of the mirrored environment prior
to a planned role swap. This check uses the STRVSICHK command, which is
also used in the pre-role swap check (see“Performing the Pre-Role Swap
Check” on page 27 for more information). However, since applications have
been ended, additional checks are executed to ensure that no journal
transactions are being generated for the OMS/400 links that are being role
swapped. The amount of time it takes to perform the check varies according to
the number of OMS/400 links to be checked.
1. From the Role Swap Main Menu screen, select 3 (Role Swap Menu), then
press Enter.
2. On the Start Role Swap screen, select 1 (Start Role Swap Check), then
press Enter.
3. Enter the password for the role swap check, then press Enter. The
password is the same as the OMS/400 link IDs. All OMS/400 link IDs
that will be role swapped must have the same password. If the passwords
are not the same, an error displays. To change an OMS/400 link ID
password, refer to the VISION SUITE Enterprise Edition OMS/400 –
Object Mirroring System Product Manual.
Once the password is entered, the Start VSI Check (STRVSICHK) screen
displays.
4. Next to each task, type one of the values shown to the right of the task.
Type *YES to execute the task or *NO to skip executing the task for each
of the following and select the Type of OMS/400 Sync Check:
Vision Solutions, Inc.
- 37 -
Advanced Role Swap Utility User Guide
Performing the Role Swap
Chapter 3: Performing a Role Swap
Value
Description
Check System
Communication
(CHKSYSCMN)
Retrieves and compares the following
communication attributes within a link ID: Remote
System, Remote Location, Communication
Protocol, Mode, Remote IP or DNS name.
If any link ID does not match, then the process stops
and the attribute must be corrected before
re-executing the command. Once the attributes have
been verified, the process verifies communication
using a ping request, remote program call to the
LISTENER2 job, and either a test FTP or DDM.
• If the data area VSIUSEFTP is set to Y, then a
test FTP is executed.
• If the data area VSIUSEFTP is set to N, then
a test DDM is executed.
See “CHKSYSCMN (Check System
Communication)” on page 79 for more
information.
Check Link Definitions
(CHKLNKDFN)
Compares the total number of mirrored and inactive
objects for each link ID to be processed. If the total
number of mirrored and inactive objects for each link
ID are not equal, the QSYSPRT spool file is created
to summarize the totals. You can use OMS/400
Object Status to identify issues on both the source
and target systems. If you are unable to resolve the
issues, contact CustomerCare. See “Checking Link
Definitions” on page 59 for more information.
Note: Since unapplied transactions can affect the
total number of mirrored and inactive objects, check
that link status for OMS/400 on the source and
target systems are current.
Advanced Role Swap Utility User Guide
- 38 -
Vision Solutions, Inc.
Chapter 3: Performing a Role Swap
Performing the Role Swap
Value
Description
Check Open Commits
(CHKOPNCMT)
Retrieves the number of records from the logical file
MRCCIDLB on the target system for the link library
being processed. The logical file points to records in
MRCCIDP that have a status other than A, which
indicates that OMS/400 has not received the end
commit transaction. Consequently, user spaces are
retained and the time to complete an OMS/400
Change Role is affected because all the user spaces are
being copied to the OMS/400 product library and
searched in order to rollback uncommitted
transactions. If the application is active on the source
system, the open commits may be valid. However, if
the number of user spaces is approaching 10,000
contact CustomerCare. If the target system link ID
has open commits, the QSYSPRT spool file is created
to summarize the finding (see “Checking
OMS/400 Open Commits” on page 60 for more
information).
See “CHKOPNCMT (Check OMS/400 Open
Commits)” on page 77 for more information.
End Auto Sync Check
(ENDS3)
Ends the auto synch check on the source system. If
the auto synch check is active, the job ending with
“S3” ends immediately for the link ID being
processed.
See “ENDS3 (End S3)” on page 80 for more
information.
Vision Solutions, Inc.
- 39 -
Advanced Role Swap Utility User Guide
Performing the Role Swap
Chapter 3: Performing a Role Swap
Value
Description
Type of OMS Sync
Check
Selects the type of OMS/400 synch check to
perform.
(SBMOMSSYNC)
• *SAMPLE checks every object defined to the
link ID. The job is submitted to the
OMS400 subsystem with the same name as
the link ID with QSYS appended.
•
reads the file MRSERRP (Allocation Error Log) and if any records configured to the link ID are being processed, a
synch check is performed. The job is submitted to the OMS400 subsystem with the
name SYNCHKERR.
*ERROR
• *NONE does not perform a synch check.
NOTE
In order to execute a role swap in the
shortest amount of time, select
*ERROR as the type of OMS/400
synch check.
See “SBMOMSSYNC (Submit OMS/400
Synch Check)” on page 94 for more information.
Check ODS Error
Trans
(CHKODSOBJ)
Checks ODS/400 for error (*ERROR) transactions.
If *ERROR transactions are found, the user is
prompted with the ODS/400 Object Status display.
All error transactions must be completed or removed
in order to complete an ODS/400 role swap.
See “CHKODSOBJ (Check ODS/400 Object
Transaction)” on page 73 for more information.
Check ODS
Processing Trans
(CHKODSOBJ)
Checks ODS/400 for transactions that are being
processed. If *PENDING, *SEND, or *WAITING
transactions are found, the user is prompted with the
ODS/400 Object Status display. All incomplete
transactions must be completed or removed in order
to complete an ODS/400 role swap.
See “CHKODSOBJ (Check ODS/400 Object
Transaction)” on page 73 for more information.
Advanced Role Swap Utility User Guide
- 40 -
Vision Solutions, Inc.
Chapter 3: Performing a Role Swap
Performing the Role Swap
Value
Description
Check OMS Inactive
Objects
(CHKOMSOBJ)
Checks OMS/400 for inactive objects. If inactive
objects are found, the user is prompted with the
OMS/400 Object Status display. All inactive objects
must be re-synchronized prior to the OMS/400 role
swap.
See “CHKOMSOBJ (Check OMS/400
Objects)” on page 75 for more information.
Send U70 Journal
Entry
(SNDJRNU70)
Sends a U70 journal entry into the journal to
ensure that all transactions are processed.
Check Journal
Sequence Numbers
(CHKJRNSEQ)
Checks the OMS/400 sequence numbers for all
jobs in a link ID to ensure the source and target
are at the same sequence number. If any of the
jobs does not return the journal sequence
number of the local journal, the user is
prompted with the OMS/400 System Status
display. All journal transactions must be sent
and applied prior to a OMS/400 role swap. See
“CHKJRNSEQ (Check Journal Sequence
Numbers)” on page 68 for more information.
See “SNDJRNU70 (Send Journal U70)” on
page 97 for more information.
5. Once the checks are configured, press Enter to start the check. Messages
display at the bottom of the screen as each check is executed.
When the check is complete, the Display Spooled File screen displays.
The Displayed Spooled File screen displays the final status for each task
selected to be processed. Each task has a keyword name along with a
starting and completed date and time. If the user was prompted with a
Vision Solutions, Inc.
- 41 -
Advanced Role Swap Utility User Guide
Performing the Role Swap
Chapter 3: Performing a Role Swap
display or a spool file was created as the result of an individual check, a
message indicates that a particular display or a spool file should be
reviewed. If an error occurred within the task, a message states “Program
Error. Review Job log.” (see “Resolving Pre-Check Errors” on page 57 for
more information).
6. Press Enter or F12 (Cancel) to return to the Role Swap menu.
Reviewing the Role Swap Check Reports
The role swap check report contains the results of the role swap check on the
source system. With this information you can identify and solve issues that
may interfere with the role swap.
1. From the Role Swap Main Menu screen, select 3 (Role Swap Menu), then
press Enter.
2. On the Start Role Swap screen, select 2 (Role Swap Check Reports), then
press Enter.
The Work With All Spooled Files screen displays. It shows the spool files
for the current user.
3. Locate the spool file with the user data labeled MTTR16, then select
option 5 to display the spool file.
4. Once work has been completed with the above screen, press F12 (Cancel).
Starting the Role Swap
Once you are satisfied with the results of the role swap check, you can start the
role swap process.
•
For a planned role swap, run this process on the source and target systems.
•
For an unplanned role swap, run this process on the target only.
Advanced Role Swap Utility User Guide
- 42 -
Vision Solutions, Inc.
Chapter 3: Performing a Role Swap
Performing the Role Swap
For more information on the jobs that are submitted as part of the role swap,
see “Understanding the Role Swap Process” on page 18.
1. From a command line on the source, type ROLESWAP to display the Role
Swap Main menu.
2. Select option 3 (Role Swap Menu), then press Enter to display the Start
Role Swap menu.
3. Select option 3 (Start Role Swap), then press Enter.
4. Enter the password for the role swap, then press Enter. The password is the
same as the OMS/400 link IDs. All OMS/400 link IDs that will be role
swapped must have the same password. If the passwords are not identical,
an error displays. To change an OMS/400 link ID password, see the
VISION SUITE Enterprise Edition OMS/400 – Object Mirroring System
Product Manual.
The Start VSI Role Swap (STRVSISWAP) screen displays.
5. Do one of the following to start the role swap:
• Press Enter to accept the defaults. The default job queue is QCTL
since this subsystem is still active after the user applications have ended.
• Enter a job queue and a library. The job queue determines in which
subsystems the jobs run.
NOTE
If either of the end or start user exit programs cannot be found, the
role swap process will not start, regardless of the parameter settings.
6. To view the progress of the role swap, from the Role Swap menu, use F24
(WRKACTJOB) to view the ODS400, OMS400, and VSIGPL
subsystems as well as the subsystem in which you selected the jobs to run.
Vision Solutions, Inc.
- 43 -
Advanced Role Swap Utility User Guide
Starting Applications on the New Source
Chapter 3: Performing a Role Swap
7. Press F5 (Refresh) to monitor the jobs in the various subsystems. If any
job other than OMSJRNMGR has the status MSGW, you must correct
the issue.
NOTE
The CHKVSISWAP job will not end until the role has been changed
for both OMS/400 and ODS.
8. Once all the submitted jobs have finished, you can determine the status of
the role swap by the system role, visible on any screen in the Advanced
Role Swap Utility. The system role for the source system changes to target
(see “Understanding the System Role” on page 21 for more information).
9. Do step 1 through step 7 on the target to perform the role swap on the
target. When complete, the system role for the target changes to source
(see “Understanding the System Role” on page 21 for more information).
Starting
Applications on
the New Source
Starting the user applications makes the new source system available to the
users (see “Starting User Applications” on page 44). Once the applications are
started on the new source system, verify the system attributes for your
environment (see “Verifying System Attributes” on page 45).
Role Swap Main Menu
4. Start User Applications
Menu
Starting User Applications
Start User Applications
Menu
1. Start User Applications
2. Verify System Attributes
1. From the Role Swap Main menu, select 4 (Start User Applications Menu),
then press Enter to display the Start User Applications Menu screen.
User applications can be started on the new source and target systems once the
role swap is complete.
2. Select 1 (Start User Applications), then press Enter.
3. Enter the password to start the user applications, then press Enter. The
password is the same as the OMS/400 link IDs. All OMS/400 link IDs
that will be role swapped must have the same password. If the passwords
are not the same, an error displays. To change an OMS/400 link ID
password, refer to the VISION SUITE Enterprise Edition OMS/400 –
Object Mirroring System Product Manual.
Advanced Role Swap Utility User Guide
- 44 -
Vision Solutions, Inc.
Chapter 3: Performing a Role Swap
Starting Applications on the New Source
The Start User Applications (STRUSRAPPS) screen displays.
4. In Submit to Batch, do one of the following:
– Type *YES and press Enter to submit the process as a batch job, then
enter the job queue in which you want the job to run.
– Type *NO then press Enter to run the process interactively.
Verifying System Attributes
Once the role change process is complete and the applications have been
restarted on the new source system, verify the system attributes for your
environment on both the source and target systems (see “Verifying System
Attributes” on page 17 to configure which attributes are displayed). The
LSTSYSATRP file should already be set up with the list of commands that are
executed during system attribute verification. The Advanced Role Swap Utility
comes pre-defined with an example of the commands that could be run to
display system information for visual verification.
Vision Solutions, Inc.
- 45 -
Advanced Role Swap Utility User Guide
Starting Applications on the New Source
Chapter 3: Performing a Role Swap
1. From the Role Swap Main Menu screen, select 4 (Start User Applications
Menu), then press Enter.
2. In the Start User Applications Menu screen, select option 2 (Verify System
Attributes), then press Enter to display the Display Network Attributes
screen.
3. Press Enter to view the next screen. The screens that display and the
information contained in the screens vary according to your installation.
However, for each screen that displays, you must verify that the entries on
each screen are correct, then press Enter to display the next screen. (For
example, in the Work with Job Schedule Entries screen, verify that all jobs
are on hold, then press Enter.)
4. When all screens have been verified, press F12 (Cancel) or Enter to return
to the Role Swap Menu screen.
Advanced Role Swap Utility User Guide
- 46 -
Vision Solutions, Inc.
Messages
A
The following is a list of messages and message IDs found within the VSIARS
utilities message file, MTTMSGF. If you have programs that monitor for
messages related to conditions that may trigger an error or informational
message, you can use the following tables to identify the message ID.
Vision Solutions, Inc.
Message ID
Message Text
MTC0001
BLDOMSTRG completed normally.
MTC0002
Journal sequence numbers are current for all link IDs.
MTC0003
CHKLNKDFN completed normally.
MTC0004
There are no *ERROR transactions in ODS.
MTC0005
There are no *SEND, *WAITING, or *PENDING transactions
in ODS
MTC0006
There are no OMS &1 objects.
MTC0007
CHKOPNCMT completed normally.
MTC0008
CHKSYSCMN completed normally.
MTC0009
CHKVSISWAP completed normally.
MTC0010
ENDS3 completed normally.
MTC0011
ODS updated to a &1 &2 system. Role swap capable updated to
&3.
MTC0012
ODS sync check jobs submitted to the ODS400 subsystem.
MTC0013
OMS sync check job submitted to the OMS400 subsystem.
MTC0014
SBMPLM completed normally.
MTC0015
SBMSYNCHK completed normally.
MTC0016
SNDJRNU70 completed normally.
MTC0017
SNDODSCFG completed normally.
- 47 -
Advanced Role Swap Utility User Guide
Appendix A: Messages
MTC0018
SNDPLMCFG completed normally.
MTC0019
STRMQRCDI completed normally.
MTC0020
STRVSICHK completed normally.
MTC0021
STRVSISWAP completed normally.
MTC0022
SWAPMQ completed normally.
MTC0023
Time elapsed for RCVMSG. Monitor ODSCHGROLE on the
remote system
MTC0024
ODSCHGROLE completed successfully on the remote system.
MTC0025
OMSCHGROLE job submitted to jobq &1/&2. Check the
status.
MTC0026
VFYJRNSTS completed normally.
MTC0027
TGTBKUP completed normally on the source system.
MTC0028
ENDUSRAPPS completed on the &1 system.
MTC0029
STRUSRAPPS completed on the &1 system.
MTC0030
ODSCHGROLE job submitted to jobq &1/&2. Check the
status.
MTC0031
User request to end ODSCHGROLE due to pending
transactions. ODS still a &1 &2 system
MTC0032
Data area USRAPPSTS changed to &1.
MTC0033
Data area &1 changed to &2/&3.
MTC0034
CHKIFSDFN completed normally.
MTC0035
CHKOMSOBJ completed normally.
MTC0036
ODS local system has been changed to &1 and the remote system
to &2.
MTC0037
VSI Tools configured to library &1.
MTC0038
The ODS Role Swap Capable flag has been set to &1.
MTC0039
CFGPFMM completed for action &1.
MTC0040
The number of journaled objects for journal &2/&3 is &1.
MTC0041
Review QSYSPRT spool file for objects journaled, but not
mirrored.
MTC0042
Job OMSBLDCSTX submitted to the OMS400 subsystem.
MTC0043
Job OMSJRNMNTX submitted to the OMS400 subsystem.
MTC9898
&1
MTE0001
Error calling remote command. Review job log and the GPS9022
job on the target.
Advanced Role Swap Utility User Guide
- 48 -
Vision Solutions, Inc.
Appendix A: Messages
Vision Solutions, Inc.
MTE0002
*NOTCFG is set for the current environment.
MTE0003
&1 is an invalid environment.
MTE0004
&1 is an invalid link ID.
MTE0005
Link ID roles are *INCONSISTENT.
MTE0006
Only allowed on the Source system.
MTE0007
Communication link ID attributes are *INCONSISTENT.
MTE0008
Unable to communicate with remote system.
MTE0009
Remote program ERROR. Review job log for the GPS9022 on
the target
MTE0010
ENDS3 ended abnormally.
MTE0011
ENDUSRJOB ended abnormally.
MTE0012
Error retrieving data area QGPL/VSILIB.
MTE0013
Error retrieving data area QGPL/ODS400.
MTE0014
Error retrieving data area *LIBL/ARSLIB.
MTE0015
Error changing library list.
MTE0016
Level check for display file.
MTE0017
Error with SNDLNKDFN. Review job log. See second level text.
MTE0018
OMS and ODS roles are *INCONSISTENT.
MTE0019
Program Error. Review Job Log.
MTE0020
Invalid password.
MTE0021
ODS is NOT role swap capable. Correct the ODS configuration
an try your request again.
MTE0022
The ODS configuration must have “ODS400” as a configured
message queue.
MTE0023
Unable to clear the &1 message queue.
MTE0024
Time elapsed for RCVMSG. Monitor ODSCHGROLE. Remote
job NOT submitted.
MTE0025
ODSCHGROLE ended with ERRORS. Review Job Log.
MTE0026
Only allowed to execute TGTBKUP on the SOURCE system.
MTE0027
Unable to communicate via &1.
MTE0028
Exit program &1/&2 to start user application not found.
MTE0029
Exit program &1/&2 to end user application not found.
MTE0030
Exit program data area &1/&2 not configured.
- 49 -
Advanced Role Swap Utility User Guide
Appendix A: Messages
MTE0031
Submit to remote only allowed from the SOURCE system.
MTE0032
User request to end ODSCHGROLE due to errors.
MTE0033
User request to end CHKVSISWAP. STRVSICHK not submitted
to the remote system.
MTE0034
Error calling remote command. Review job log and the GPS9022
job on the target.
MTE0035
Maximum timeout value reached. SNDLNKDFN aborted. See
second-level text.
MTE0036
Exit program &1/&2 not found.
MTE0037
There are OMS &1 inactive objects for link ID &2.
MTE0038
User request to end OMSCHGROLE for link ID &1.
MTE0039
Unable to allocate file &1/ODRSTSP.
MTE0040
There is no message queue configured for link ID &1.
MTE0041
There is no journal configuration for link ID &1.
MTE0042
Value *SAME is not valid when parameter ODRSWP = *YES.
MTE0043
User request to end target backup. TGTBKUP not submitted to
the remote system.
MTE0044
Library &1 does not exist.
MTE0045
*NONE not allowed with &1. Specify a valid link ID.
MTE0046
MQ Queue Manager library &1 does not exist.
MTE0047
There are OMS &1 inactive objects for link ID &2.
MTE9898
&1
MTI0001
OMS role is *INCONSISTENT for link ID &1.
MTI0002
OMS remote system is *INCONSISTENT for link ID &1.
MTI0003
OMS send type in *INCONSISTENT for link ID &1.
MTI0004
OMS remote location is *INCONSISTENT for link ID &1.
MTI0005
OMS mode is *INCONSISTENT for link ID &1.
MTI0006
OMS remote IP is *INCONSISTENT for link ID &1.
MTI0007
OMS password is *INCONSISTENT for link ID &1.
MTI0008
OMS status is *INCONSISTENT for link ID &1.
MTI0009
SWAPODS received the ODSCHGROLE completion message.
MTI0010
STRVSISWAP is waiting for ENDUSRAPPS to complete.
MTI0011
ODSCHGROLE completed successfully on the remote system.
Advanced Role Swap Utility User Guide
- 50 -
Vision Solutions, Inc.
Appendix A: Messages
Vision Solutions, Inc.
MTI0012
Time elapsed for RCVMSG. Monitor ODSCHGROLE.
MTI0013
SWAPODS received the ODSCHGROLE error message.
MTI0014
SWAPODS received the ODSCHGROLE completion message.
MTI0015
TGTBKUPMGR submitted to receive save-while-active message
from TGTBKUP.
MTI0016
&1 received the save-while-active checkpoint message from the
target backup.
MTI0017
Link ID &1 is ready for Target BackUp.
MTI0018
Target BackUp starting link ID &1.
MTI0019
OMS and ODS are not configured for the same role (SOURCE
or TARGET)
MTS0001
Deleting all records for file MRTRGFP on the source system.
MTS0002
Deleting all records for file MRTRGFP on the target system.
MTS0003
Re-building the trigger maintenance file MRTRGFP for link &1.
MTS0004
Checking OMS journal sequence numbers for link ID &1.
MTS0005
Review the journal activity for link ID &1.
MTS0006
Comparing the total number of mirrored & *INACT objects for
link ID &1.
MTS0007
The number of mirrored and/or *INACT objects DO NOT
EQUAL for link ID &1.
MTS0008
The number of mirrored and/or *INACT objects EQUAL for
link ID &1.
MTS0009
Review spool file QSYSPRT for OMS Mirrored Objects.
MTS0010
Checking the status for link ID &1.
MTS0011
Checking ODS for &1 transactions.
MTS0012
Review ODS transactions in *ERROR status.
MTS0013
Review ODS transactions in *SEND, *WAITING, or
*PENDING status.
MTS0014
Checking OMS &1 QSYS objects for link ID &2.
MTS0015
Review OMS &1 QSYS objects for link ID &2.
MTS0016
Checking OMS &1 IFS objects for link ID &2.
MTS0017
Review OMS &1 IFS objects for link ID &2.
MTS0018
Checking OMS open commits for link ID &1.
MTS0019
OPEN COMMITS ARE FOUND for link ID &1.
MTS0020
There are NO open commits for link ID &1.
- 51 -
Advanced Role Swap Utility User Guide
Appendix A: Messages
MTS0021
Review spool file QSYSPRT for OMS Open Commits.
MTS0022
Retrieving link ID communication attributes.
MTS0023
Checking communication with remote system &1.
MTS0024
Communication verified with remote system &1.
MTS0025
OMS is ready to be a &1 system.
MTS0026
ODS is ready to be a &1 system.
MTS0027
Vision Suite is ready to be a &1 system.
MTS0028
Ending the auto sync check job for link ID &1.
MTS0029
Creating a list of ODS paths.
MTS0030
Submitting ODS sync check for path &1.
MTS0031
Initializing file MRSERRP for *SAMPLE sync check.
MTS0032
Updating file MRSERRP for *ERROR sample sync check.
MTS0033
Submitting OMS *SAMPLE sync check for link ID &1.
MTS0034
Submitting OMS sync check *ERROR for link ID &1.
MTS0035
Submitting the PLM for link ID &1.
MTS0036
Sending journal entry U70 for link ID &1.
MTS0037
Ending OMS on the target system for link ID &1.
MTS0038
Waiting for the OMS jobs to end. Delaying job for 10 seconds.
MTS0039
Preparing to send link definition file MRMOBJP for link ID &1.
MTS0040
Unable to send link definition file MRMOBJP for link ID &1.
MTS0041
Starting OMS on the target for link ID &1.
MTS0042
File linklibrary/MRMOBJP for link ID &1 sent to the target
system.
MTS0043
Sending ODS configuration files to the target system.
MTS0044
Sending PLM monitor and exclusion file for link ID &1.
MTS0045
Starting VSIRCDMQM for link &1.
MTS0046
MQ Queue Manager &1 is not active.
MTS0047
Checking system role.
MTS0048
Submitting CHKVSISWAP job. Job will check for new &1
system.
MTS0049
Submitting STRVSISWAP for remote system &1.
MTS0050
Rebuilding MQ queues for link ID &1.
MTS0051
Recording MQ object image for link &1.
Advanced Role Swap Utility User Guide
- 52 -
Vision Solutions, Inc.
Appendix A: Messages
Vision Solutions, Inc.
MTS0052
Submitting ODSCHGROLE for the local system.
MTS0053
Receiving the ODSCHGROLE messages.
MTS0054
Clearing the &1 message queue on the remote system.
MTS0055
Submitting OMSCHGROLE to the local system.
MTS0056
Retrieving the status of the ODSCHGROLE from the remote
system.
MTS0057
Submitting OMSCHGROLE job *BCHIMMED for link ID
&1.
MTS0058
Submitting OMSCHGROLE for link ID &1 to the remote
system.
MTS0059
Starting OMSCHGROLE job *BCHCNTRLD for link ID &1.
MTS0060
Retrieving a list of journal objects for link ID &1.
MTS0061
Starting the journal verification process for link ID &1.
MTS0062
Submitting the TGTBKUP job on the remote system.
MTS0063
Ending ODS.
MTS0064
Adding the save journal entry and end the apply jobs for link ID
&1.
MTS0065
Ending User Applications on the &1 system.
MTS0066
Starting User Applications on the &1 system.
MTS0067
CHKSYSCMN - Starting @ time &1.
MTS0068
CHKSYSCMN - Completed @ time &1.
MTS0069
CHKLNKDFN - Starting @ time &1.
MTS0070
CHKLNKDFN - Completed @ time &1
MTS0071
CHKOPNCMT - Starting @ time &1.
MTS0072
CHKOPNCMT - Completed @ time &1.
MTS0073
VFYJRNSTS - Starting @ time &1.
MTS0074
Submitting job VFYJRNSTS to the target system.
MTS0075
Review the MRR330 report on the target system.
MTS0076
VFYJRNSTS - Completed @ time &1.
MTS0077
BLDOMSTRG - Starting @ time &1.
MTS0078
BLDOMSTRG - Completed @ time &1.
MTS0079
ENDS3 - Starting @ time &1.
MTS0080
ENDS3 - Completed @ time &1.
- 53 -
Advanced Role Swap Utility User Guide
Appendix A: Messages
MTS0081
SYNCHKTYPE *SAMPLE - Starting @ time &1.
MTS0082
SYNCHKTYPE *SAMPLE - Completed @ time &1.
MTS0083
SYNCHKTYPE *ERROR - Starting @ time &1.
MTS0084
SYNCHKTYPE *ERROR - Completed @ time &1.
MTS0085
ODSSYNCHK - Starting @ time &1.
MTS0086
ODSSYNCHK - Completed @ time &1.
MTS0087
STRMQRCDI - Starting @ time &1.
MTS0088
STRMQRCDI - Completed @ time &1.
MTS0089
SNDPLMCFG - Starting @ time &1.
MTS0090
SNDPLMCFG - Completed @ time &1.
MTS0091
SNDODSCFG - Starting @ time &1.
MTS0092
SNDODSCFG - Completed @ time &1.
MTS0093
CHKODSOBJ - Starting @ time &1.
MTS0094
CHKODSOBJ - Completed @ time &1.
MTS0095
CHKODSOBJ - Starting @ time &1.
MTS0096
CHKODSOBJ - Completed @ time &1.
MTS0097
CHKOMSOBJ - Starting @ time &1.
MTS0098
CHKOMSOBJ - Completed @ time &1.
MTS0099
SNDJRNU70 - Starting @ time &1.
MTS0100
SNDJRNU70 - Completed @ time &1.
MTS0101
CHKJRNSEQ - Starting @ time &1.
MTS0102
CHKJRNSEQ - Completed @ time &1.
MTS0103
Submitting STRVSISWAP to job queue &1/&2.
MTS0104
Review the VSI Check Status report.
MTS0105
Checking &1 communication with the remote system.
MTS0106
There are no *INACT &1 objects.
MTS0107
Calling exit program &1/&2.
MTS0108
Check the batch jobs in the OMS400 subsystem.
MTS0109
Submit to remote requested. Checking communication.
MTS0110
Incomplete ODS transactions found. Determine cause. Either
remove, re-send or wait until all transactions have been
User request to continue with ODSCHGROLE after incomplete
transactions were found.
MTS0111
Advanced Role Swap Utility User Guide
- 54 -
Vision Solutions, Inc.
Appendix A: Messages
Vision Solutions, Inc.
MTS0112
Check the batch jobs in the ODS400 subsystem.
MTS0113
Comparing the total number of mirrored IFS for link ID &1.
MTS0114
The number of mirrored IFS DO NOT EQUAL for link ID &1.
MTS0115
Review spool file QSYSPRT for OMS Mirrored IFS.
MTS0116
The number of mirrored IFS EQUAL for link ID &1.
MTS0117
Error submitting the Role Swap User Exit Job.
MTS0118
Checking the status of the sync check error job(s).
MTS0119
Waiting for the sync check error job(s) to end.
MTS0120
Active records found in OMS400SYS/MRSERRP. Check for
object locks.
MTS0121
Printing Sync Check Error report. View spool file MRP261 in the
OMS400 output queue.
MTS0122
Link ID &1 is not a *JRN link. Check configuration file
LSTMQMGRP.
MTS0123
&1 is an invalid link ID for MQ Queue Manager &2.
MTS0124
There is an inactive MQ Queue Manager.
MTS0125
There is an invalid link ID configured for a MQ Queue Manager.
MTS0126
The PLM configuration files linklibrary/MRLMONP and
MREXCLP have copied to the remote system.
MTS0127
The ODS configuration files ODS400/ODOBJSP, ODPTIMP,
and ODPMST have been copied to the remote system.
MTS0128
Ending the TCP/IP interfaces for the &1 system.
MTS0129
Ending line descriptions for the &1 system.
MTS0130
Ending controller descriptions for the &1 system.
MTS0131
Starting the TCP/IP interfaces for the &1 system.
MTS0132
Starting the line descriptions for the &1 system.
MTS0133
Starting controller descriptions for the &1 system.
MTS0134
Submitting the journal verification process for link ID &1.
MTS0135
Submitting &1 to job queue &2/&3.
MTS0136
Check the batch job using WRKACTJOB.
MTS0137
Starting TCP/IP servers for the &1 system.
MTS0138
Starting Host servers for the &1 system.
MTS0139
Ending TCP/IP servers for the &1 system.
MTS0140
Ending Host servers for the &1 system.
- 55 -
Advanced Role Swap Utility User Guide
Appendix A: Messages
MTS0141
Error executing user command for sequence number &1.
MTS0142
Creating a list of all &1.
MTS0143
Processing. Standby...
MTS0144
Unable to start journaling for file &1 in library &2.
MTS0145
Unable to end journaling for file &1 in library &2.
MTS0146
Retrieving a list of journaled objects for journal &1/&2.
MTS0147
Submitting job TGTBKUP to the local system.
MTS0148
Error ending TCP/IP interface &1.
MTS0149
Error changing TCP/IP interface &1.
MTS0150
Error varying off line description &1.
MTS0151
Error varying off controller description &1.
MTS0152
Error ending subsystem &1.
MTS0153
Submitting job SAVSYSATR.
MTS0154
Error starting TCP/IP interface &1.
MTS0155
Error varying on line description &1.
MTS0156
Error varying on controller description &1.
MTS0157
Error starting subsystem &1.
MTS0158
Ending subsystems for the &1 system.
MTS0159
Starting subsystems for the &1 system.
MTS9898
&1
Advanced Role Swap Utility User Guide
- 56 -
Vision Solutions, Inc.
Resolving Pre-Check Errors
B
This section outlines the basic steps for resolving program errors.
1. From the Role Swap Main menu, select 1 (Pre-Role Swap Menu), then
press Enter to display the Pre-Role Swap menu.
2. From the Pre-Role Swap menu, select option 2 (Display Pre-Role Swap
Reports), then press Enter.
3. Locate the most recent QSYSPRT spool file with user data MTTR16,
select option 5 (Display) to display the QSYSPRT spool file, then press
Enter.
Vision Solutions, Inc.
- 57 -
Advanced Role Swap Utility User Guide
Appendix B: Resolving Pre-Check Errors
4. For each task in error, note the task keyword displayed in all caps.
5. Press Enter to return to the Pre-Role Swap menu.
6. Press F10 (View 4) to display the job log, and then determine the error.
7. After diagnosing the error, correct the error, and return to the Pre-Role
Swap menu.
8. Select option 1 (Start Pre-Role Swap), type the password, then press F11
(Keywords) to view the command keywords.
9. Type *YES to execute a task again or *NO to skip running the task again.
You can re-run other tasks that do not pertain to the error.
NOTE
If needed, the pre-role swap can be executed multiple times.
Advanced Role Swap Utility User Guide
- 58 -
Vision Solutions, Inc.
Report Samples
Checking Link
Definitions
C
Using the Check Link Definition option (CHKLNKDFN), you can compare
the total number of mirrored and inactive objects for a link between the source
and test systems. If the total number of mirrored and inactive objects for each
link ID are not equal, the QSYSPRT spool file is created to summarize the
totals. (If the total number of mirrored and inactive objects are equal, no spool
file is created.) Using OMS/400 Object Status to investigate on both the
source and target systems can help identify issues. If you are unable to resolve
the issues, contact Vision Solutions CustomerCare.
Display Spooled File
QSYSPRT
Page/Line
Columns
File . . . . . :
1/1
Control . . . . .
1 - 78
Find . . . . . .
*..+..1..+..2..+..3...+...4...+...5...+...6...+...7...+..
OMS Mirrored Objects
6/19/
Role Link ID Number of Mirrored Objects Number of Inactive Objects
---- ------- -------------------------- ----------------------SOURCE TST001A 0000000018
00000
TARGET TST001A 0000000018
00001
SOURCE TST002A 0000000003
00000
TARGET TST002A 0000000002
00000
Bottom
F3=Exit
F12=Cancel
F19=Left
F20=Right
F24=More keys
For example, in the screenshot above, the report shows that there is a
discrepancy for link ID TST001A and TST002A. Link ID TST001A on the
target system has one more inactive object than the source system. And for link
ID TST002A, the target system has one less mirrored object than the source
system. In each case, you must manually check why the totals do not match.
Use OMS/400 Object Status to help investigate the differences.
Vision Solutions, Inc.
- 59 -
Advanced Role Swap Utility User Guide
Checking OMS/400 Open Commits
Checking
OMS/400 Open
Commits
Appendix C: Report Samples
You can retrieve the number of records from logical file MRCCIDLB on the
target system for the link library being processed using the Check Open
Commits command (CHKOPNCMT). The logical file points to records in
MRCCIDP that have a status of A. A status of A indicates that OMS/400 has
not received the end commit transaction. Therefore, user spaces are retained
and the time to complete an OMS/400 Change Role is affected because all the
user spaces are being copied to the OMS/400 product library and searched in
order to rollback uncommitted transactions. If the application is active on the
source system, the open commits may be valid. If the target system link ID has
open commits, the QSYSPRT spool file is created to summarize the finding. If
no open commits exist, CHKOPNCMT completed normally displays below
the command line.
Display Spooled File
File . . . . . :
QSYSPRT
Page/Line
1/1
Control . . . . .
Columns
1 - 78
Find . . . . . .
*..+...1...+...2...+...3...+...4...+...5...+...6...+...7...+..
Link ID
------TST001A
OMS Open Commits
Target Link Library
Number of User Spaces
---------------------------------------OMSSYS0001
0000000005
F3=Exit
F12=Cancel
F19=Left
F20=Right
6/23/
Bottom
F24=More keys
The sample report above indicates that OMS/400 has yet to receive the close
commit transaction from the source system.
Verifying
Journal Status
The command Verify Journal Status (VFYJRNSTS) is run from the source
system and verifies that all mirrored objects are journaled on the target. Journal
verification verifies that all files are journaled to the correct journal associated
to the link ID being processed. If a file is not journaled to the correct journal or
is not journaled, the job attempts to start journaling. The job creates the
QPRINT spool file in the ROLESWAP out queue with user data MRR330.
Review this report on the target system to ensure that all files are journaled.
Entries with the word ERROR indicate an issue while attempting to start
journaling. If an error is found, you must correct the issue prior to the role
swap. Check object allocation and re-run the VFYJRNSTS command on the
target system. This report is the same report that gets spooled during the actual
change role for an OMS/400 link ID.
Advanced Role Swap Utility User Guide
- 60 -
Vision Solutions, Inc.
Appendix C: Report Samples
Verifying Journal Status
Display Spooled File
File . . . . . :
QPRINT
Page/Line
1/2
Control . . . . .
Columns
1 - 78
Find . . . . . .
*..+...1...+...2...+...3...+...4...+...5...+...6...+...7...+.. MRR330
OBJECT MIRRORING SYSTEM
CURRENT STATUS OF MIRRORED OBJECTS
. . . . .: *YES
. . . . .: AJRNLIB/TST001A
RECEIVED AND APPLIED:
483044
TEXT
TYPE HLD DATE END DATE
Vision Solutions, Inc. Tools
DTAA
Vision Solutions, Inc. Tools
DTAA
Vision Solutions, Inc. Tools
FILE
Vision Solutions, Inc. Tools
FILE
FILE
Vision Solutions, Inc. Tools
FILE
Vision Solutions, Inc. Tools
FILE
Vision Solutions, Inc. Tools
FILE
Vision Solutions, Inc. Tools
FILE
Vision Solutions, Inc. Tools
FILE
More...
F12=Cancel
F19=Left
F20=Right
F24=More keys
LINK ID: TST001A
JOURNALING ON TARGET
TARGET JOURNAL NAME
LAST SEQUENCE NUMBER
LIBRARY
OBJECT
VSIARS
CURENV
ENDEXTCFG
ENVCFGP
ENVMSTP
EVFEVENT
LSTACTJOBP
LSTMRROBJP
LSTOPNCMTP
LSTVSICHKP
MTTCLSRC
F3=Exit
Vision Solutions, Inc.
- 61 -
Advanced Role Swap Utility User Guide
Verifying Journal Status
Advanced Role Swap Utility User Guide
Appendix C: Report Samples
- 62 -
Vision Solutions, Inc.
Role Swap Commands
Overview
D
This appendix includes the syntax and descriptive material for the role swap
commands found in the VSIARS library.
The commands are listed in alphabetical order. Most commands can be
executed from any command line within OMS/400 or can be used in CL
programs. The following commands are only valid in CL programs and cannot
be directly used from a command line:
Vision Solutions, Inc.
•
CHKLNKSTS (see page 72)
•
ISJOBACT (see page 82)
•
RTVLNKID (see page 85)
•
RTVODSINF (see page 86)
•
RTVODSSTS (see page 88)
•
RTVOMSINF (see page 90)
•
RTVOMSPWD (see page 92)
•
RTVOSINF (see page 86)
- 63 -
Advanced Role Swap Utility User Guide
BLDOMSTRG (Build OMS/400 Trigger Definitions)
BLDOMSTRG
(Build OMS/400
Trigger
Definitions)
Appendix D: Role Swap Commands
Rebuilds the OMS/400 trigger maintenance file on both the source and target
systems, based on the physical files that have triggers and are selected for an
OMS/400 link. First, it deletes all records in file MRTRGFP on the source
system. Second, it executes VSIRMTCMD to send a remote command to the
target system to delete all the records in file MRTRGFP on the target system.
Last, for each link defined to OMS, it executes OMSVFYTRG to examine all
physical files to determine what triggers are attached to them. If a trigger
definition is found, then the command OMSVFYTRG adds a record to file
MRTRGFP on the source and target system.
Required Parameters
None
Advanced Role Swap Utility User Guide
- 64 -
Vision Solutions, Inc.
Appendix D: Role Swap Commands
CFGODSSWP
(Configure
ODS/400 Role
Swap)
CFGODSSWP (Configure ODS/400 Role Swap)
Enables you to modify the following value associated with a role swap of ODS:
•
Local system name
•
Remote system name
•
Local system role
•
Local system status
You can also force ODS/400 to be role swap capable with this command.
When this command is run on one system, it should also be run on the other
system in order to complete the relationship between the systems. Contact
Vision Solutions before using this command.
Required Parameters
Parameter
Description
ODRSWP
*YES – Forces ODS/400 to be role swap capable.
*NO – Does not force ODS/400 to be role swap capable.
ODLSYS
Name – The name of the local system.
*SAME – Ignore indicator to the program. Will not perform any
action. Only valid when ODRSWP is *NO.
ODRSYS
Name – The name of the remote system.
*SAME – Ignore indicator to the program. Will not perform any
action. Only valid when ODRSWP is *NO.
ODLROL
SOURCE – The role of the current system to which to change
ODS.
TARGET – The role of the current system to which to change
ODS.
*SAME – Ignore indicator to the program. Will not perform any
action. Only valid when ODRSWP is *NO.
ODLSTS
NORMAL – The status of the current system you wish ODS/400
to be changed to.
REVERSED – The status of the current system you wish
ODS/400 to be changed to.
*SAME – Ignore indicator to the program. Will not perform any
action. Only valid when ODRSWP is *NO.
Vision Solutions, Inc.
- 65 -
Advanced Role Swap Utility User Guide
CHGAPPSTS (Change Application Status)
CHGAPPSTS
(Change
Application
Status)
Appendix D: Role Swap Commands
Indicates the status of the user applications during a role swap. The application
status is displayed on the Role Swap Main menu and can be viewed at any time
during the actual role swap. To change the status, the data area USRAPPSTS,
which is not associated with the application, stores the actual status, which is
then displayed on the Role Swap main menu. You can use the command
multiple times within the exit program to indicate the progress of the
application switching and its status or state. This status can then be used to
determine if the application has actually switched and is available for use.
Required Parameters
Parameter
Description
APPSTS
*ACTIVE – Application is active.
*ACTPEND – The application is starting.
*INACTIVE – Application has been ended.
*INACTPEND – Application is ending.
*NOTAVAIL – Status unknown.
Advanced Role Swap Utility User Guide
- 66 -
Vision Solutions, Inc.
Appendix D: Role Swap Commands
CHGEXTCFG
(Change Exit
Configuration)
CHGEXTCFG (Change Exit Configuration)
Changes the user exit program for STRUSRAPPS, ENDUSRAPPS, or
RSEXTCFG.
Changes the name of the user exit programs stored in the Advanced Role Swap
Utility. Two different data areas store the program name and program library:
STRUSRAPPS and RSEXTCFG. These exit points are supplied with the role
swap process and do not have to be used to start or end user applications.
Required Parameters
Parameter
Description
USREXT
STREXTCFG – Changes the data area STREXTCFG to
update the value for the exit program name and library.
Program STRUSRAPPS will retrieve the value and call the
program.
ENDEXTCFG – Changes the data area ENDEXTCFG to
update the value for the exit program name and library. The
program ENDUSRAPPS retrieves the value and calls the
program.
RSEXTCFG – Changes the data area RSEXTCFG to update
the value for the exit program name and library. The program
CHKVSISWAP retrieves the value and submits the job
RSUSREXT to call the exit program.
Position (1 10) = program name.
Position (11 10) = library name.
EXTPGM
Program Name/Library – The program name and library that
ends or starts your application.
*NONE – Changes the data area to the value *NONE for the
program, library, and user exit parameter.
USREXTPARM
*SAME – User exit parameters are not updated. The current
value in the data area is retained.
User Exit Parameter – A character string up to 1024 bytes to
pass to the exit program.
Position (51 1024) = user exit parameter.
For STREXTCFG, the first position will determine if the IPL
start up program will be called. Value Y or N.
Vision Solutions, Inc.
- 67 -
Advanced Role Swap Utility User Guide
CHKJRNSEQ (Check Journal Sequence Numbers)
CHKJRNSEQ
(Check Journal
Sequence
Numbers)
Appendix D: Role Swap Commands
This command is part of the role swap process. It retrieves the journal sequence
numbers for all jobs configured to an OMS/400 link ID and, if any of the jobs
do not equal the local journal sequence number, the OMS/400 System Activity
screen displays.
NOTE
If the OMS/400 System Activity screen is prompted, the F3, F12, or
the ENTER key displays the next link or the command ends.
Required Parameters
Parameter
Description
TYPE
*LNK – Processes one link or *ALL links configured to OMS/400
and displays the LNKID.
*ENV – Processes all links configured to an environment and
displays the ENV parameter.
LNKID
Link ID-name – The link ID to be processed.
*ALL – All link IDs configured to OMS/400 are processed.
ENV
Environment name – Selects the link IDs to process based on the
specified environment name.
*CURENV – The environment name is retrieved from the
CURENV data area. The environment name is used to select link
IDs to be processed.
CHKJRNSEQ Prompt Screen
If there are in-flight transactions during pre-role swap, the OMS/400 System
Status screen displays.
Advanced Role Swap Utility User Guide
- 68 -
Vision Solutions, Inc.
Appendix D: Role Swap Commands
Date MM/DD/YY
Link: TST002A
Refresh Seconds:
CHKJRNSEQ (Check Journal Sequence Numbers)
System Activity Display
5
Role: SOURCE
Config: NORMAL
SOURCE SYSTEM
Journal
Status
TARGET SYSTEM
Remote Journal
Reader
Inact Objs:
Sequence £
8653
*ACTIVE
*ACTIVE
8653
8652
*ACTIVE
*ACTIVE
8649
8649
Elapsed Time:
Diff/Trans
1
----------
Sending Lag
Router
Apply T1
Time:
12:30:39
System: VISION
4
Date
Time
MM/DD/YY 12:30:39
:00
Trns/Hr
MM/DD/YY 12:30:39
MM/DD/YY 12:28:39
-------:00
MM/DD/YY 12:28:39
MM/DD/YY 12:28:39
F3=Exit F5=Refresh F9=System command F10=Restart F12=Cancel F17=Start OMS
F18=End OMS F19=Automatic Refresh F23=WRKACTJOB
(c) Copyright Vision Solutions 1988,2003 - 810000
Vision Solutions, Inc.
- 69 -
Advanced Role Swap Utility User Guide
CHKLNKDFN (Check Link Definitions)
CHKLNKDFN
(Check Link
Definitions)
Appendix D: Role Swap Commands
Compares the total number of mirrored objects defined to a link and inactive
objects for each link between the source and target systems. If the values for
either category are not equal for a link ID, the spool file QSYSPRT is created
to list the differences. (If no mismatches are found, QSYPRT is not created.) If
the link ID is current and a mismatch still occurs, the user must resolve the
differences. Use OMS/400 Object Status for QSYS and/or IFS on source and
target to help determine the differences.
NOTE
If the link ID is not current, a difference may be present so no action
should be taken until the link ID is current.
Required Parameters
Parameter
Description
TYPE
*LNK – Processes one link or *ALL links configured to OMS/400
and displays the LNKID.
*ENV – Processes all links configured to an environment and
displays the ENV parameter.
LNKID
Link ID-name – The link ID to be processed.
*ALL – All link IDs configured to OMS/400 are processed.
ENV
Environment name – Selects the link IDs to be processed using
the specified environment name.
*CURENV – Retrieves the environment name from the
CURENV data area. The environment name will be used to select
link IDs to be processed.
Sample Report
In the following sample report, the report indicates that link ID TST001A on
the target system has one inactive object. For link ID TST002A, the source
system has three mirrored objects defined to the link ID, whereas the target
system two mirrored objects defined.
In each case, the user must investigate why the totals do not match and take
the appropriate corrective actions. Use OMS/400 Object Status to help
investigate the differences.
Advanced Role Swap Utility User Guide
- 70 -
Vision Solutions, Inc.
Appendix D: Role Swap Commands
CHKLNKDFN (Check Link Definitions)
Display Spooled File
File . . . . . :
QSYSPRT
Page/Line
1/1
Control . . . . .
Columns
1 - 78
Find . . . . . .
*...+....1....+....2....+....3....+....4....+....5....+....6....+....7....+...
OMS Mirrored Objects
6/19/
Role
Link ID Number of Mirrored Objects Number of Inactive Objects
----- ------- -------------------------- -------------------------SOURCE TST001A 0000000018
00000
TARGET TST001A 0000000018
00001
SOURCE TST002A 0000000003
00000
TARGET TST002A 0000000002
00000
Bottom
F3=Exit
Vision Solutions, Inc.
F12=Cancel
F19=Left
F20=Right
- 71 -
F24=More keys
Advanced Role Swap Utility User Guide
CHKLNKSTS (Check Link Status)
CHKLNKSTS
(Check Link
Status)
Appendix D: Role Swap Commands
This command is only for use in a CL program. CHKLNKSTS retrieves the
status of an OMS/400 link ID based on the specified parameters.
For example, if you wish to check for inactive jobs for a link ID on the target
system, specify the following command syntax in a CL program.
CHKLNKSTS LNKID(link ID) LNKSTS(*INACTIVE) SYSTEM(TARGET) YESORNO(&YN)
Required Parameters
Parameter
Description
LNKID
Link ID-name – The link ID on which journal sequence numbers
is checked.
LNKSTS
*INACTIVE – Checks for inactive jobs.
*ACTIVE – Checks for active jobs.
SYSTEM
SOURCE – Checks the link ID on the source system for
*INACTIVE or *ACTIVE jobs.
TARGET – Checks the link ID on the target system for
*INACTIVE or *ACTIVE jobs.
*BOTH – Checks the link ID on the source and target system for
*INACTIVE or *ACTIVE jobs.
Return Values
Check Status
Description
YESORNO
Is the link ID active or inactive.
• *YES – The link ID on the target system is inactive.
• *NO – The link ID on the target system is active.
Advanced Role Swap Utility User Guide
- 72 -
Vision Solutions, Inc.
Appendix D: Role Swap Commands
CHKODSOBJ
(Check
ODS/400 Object
Transaction)
CHKODSOBJ (Check ODS/400 Object Transaction)
Displays ODS/400 transactions that are in *ERROR or *PROCESSING
status. The transactions are located by searching the ODS/400 transaction file
ODOTRNP for records with either status. If errors or processing transactions
with the specified status are found, the ODS/400 Object Status screen
displays. All transactions for the requested status are displayed. This command
can only be run interactively.
NOTE
If the ODS/400 Object Status display is prompted, then the F3,
F12, or ENTER keys end the command.
Required Parameters
Parameter
Description
STATUS
*ERROR – Searches for all transactions that have a status of ‘E’
in the ODOTRNP file.
*PROCESS – Searches for any transaction with a status of “P”,
“S” or “W” in the ODOTRNP file. If transactions are found,
the ODSOBJSTS command displays the following ODS/400
statuses:
• *SEND
• *WAITING
• *PROCESSING
If there are error or processing transactions in ODS, the ODS/400 Object
Status screen appears.
Vision Solutions, Inc.
- 73 -
Advanced Role Swap Utility User Guide
CHKODSOBJ (Check ODS/400 Object Transaction)
Date: MM/DD/YY
Appendix D: Role Swap Commands
Object Status
System Role: SOURCE Status: NORMAL
Position to:
Library/Path.
Object. . . .
Errors. . .
Waiting . .
Processing.
Current . .
Type Options, press Enter.
1=Send Object 4=Remove 5=Display Detail
Opt Object
Q1
JOBD1
AUTL1
P1
Library
VSITEST
VSITEST
QSYS
VSITEST
Type
*OUTQ
*JOBD
*AUTL
*FILE
Time:
14:00:46
System: VISION
Attribute
PF
Rmt Sys
VISIONB
VISIONB
VISIONB
VISIONB
2
1
7
Status
*ERROR
*ERROR
*WAITING
*PENDING
F3=Exit F5=Refresh F6=Print F9=SystemCmd F11=View 2 F12=Cancel
F13=Repeat F15=Spool F17=Subset F23=Work with ODS Jobs
This is a subsetted list; QRPLOBJ objects are suppressed.
Advanced Role Swap Utility User Guide
- 74 -
Vision Solutions, Inc.
Appendix D: Role Swap Commands
CHKOMSOBJ
(Check
OMS/400
Objects)
CHKOMSOBJ (Check OMS/400 Objects)
Displays OMS/400 objects in *INACT status for QSYS and IFS file systems in
the OMS/400 Object Status screen displays for the user. This command can
only be run interactively.
NOTE
If the OMS/400 Object Status screen is prompted, the F3, F12, or
ENTER key displays the next link ID or the command end.
Required Parameters
Parameter
Description
TYPE
*LNK – Processes one link or *ALL links configured to OMS/400
and displays the LNKID.
*ENV – Processes all links configured to an environment and
displays the ENV parameter.
LNKID
Link ID-name – The link ID to be processed.
*ALL – All link IDs configured to OMS/400 will be processed.
ENV
Environment name – Selects the link IDs to process based on the
specified environment name.
*CURENV – Retrieve the environment name from the
CURENV data area. The environment name is used to select link
IDs to process.
STATUS
*INACT – If inactive objects are found, then the OMSOBJSTS
command is used to display the subset of inactive objects.
If inactive objects are found, the OMSOBJSTS command displays
the following statuses:
• *PND
• *HLD
• *END
If there are inactive objects in a OMS/400 link ID, the OMS/400 Object
Status screen displays.
Vision Solutions, Inc.
- 75 -
Advanced Role Swap Utility User Guide
CHKOMSOBJ (Check OMS/400 Objects)
Date: MM/DD/YY
Link: TST002A
Appendix D: Role Swap Commands
Object Status
Time:
13:51:51
System: VISION
Program: OMSOBJSTS
Type options, press Enter.
1=Send object 2=Change 3=End mirroring 4=Remove 5=Detail
7=Start journaling/mirroring 8=Sync-check 9=Override Queue
Opt
Library
VSITEST
VSITEST
VSITEST
Object
P1
P2
P3
Type
*FILE
*FILE
*FILE
6=Reset status
Text
Status
*HLD
*PND
*END
F3=Exit F5=Refresh F6=Add Object F9=System Command F11=Summary
F13=Repeat F17=Subset F18=Change defaults F23=WRKACTJOB
F12=Cancel
This is a subsetted list.
Advanced Role Swap Utility User Guide
- 76 -
Vision Solutions, Inc.
Appendix D: Role Swap Commands
CHKOPNCMT
(Check
OMS/400 Open
Commits)
CHKOPNCMT (Check OMS/400 Open Commits)
Identifies the OMS/400 link IDs on the target system that have open commits.
A record found in the file MRCCIDLB indicates that OMS/400 has not
received the end commit transaction from the application on the source
system.
A report lists the OMS/400 link IDs that have open commits and the number
of user spaces in the link ID library on the target system.
NOTE
We recommend that you run the command when the application
that may have open commits on the source system has been quiesced.
Running the command while the application is active may identify a
large number of user spaces and this may be normal.
Required Parameters
Parameter
Description
TYPE
*LNK – Processes one link or *ALL links configured to OMS/400
and displays the LNKID.
*ENV – Processes all links configured to an environment and
displays the ENV parameter.
LNKID
Link ID-name – The link ID to be processed.
*ALL – All link IDs configured to OMS/400 are processed.
ENV
Environment name – Selects the link IDs to process based on the
specified environment name.
*CURENV – Retrieves the environment name from the
CURENV data area. The environment name selects the link IDs
to process.
Sample Report
In the example below, the report indicates that link ID TST001A on the target
system has yet to receive close commit transaction from the source system.
Therefore, OMS/400 thinks open commits exist and there are five user spaces
in the link library OMSSYS0001.
Vision Solutions, Inc.
- 77 -
Advanced Role Swap Utility User Guide
CHKOPNCMT (Check OMS/400 Open Commits)
Appendix D: Role Swap Commands
Display Spooled File
File . . . . . :
QSYSPRT
Page/Line
1/1
Control . . . . .
Columns
1 - 78
Find . . . . . .
*...+....1....+....2....+....3....+....4....+....5....+....6....+....7....+...
OMS Open Commits
6/23/
Link ID
Target Link Library
Number of User Spaces
---------------------------------------------TST001A
OMSSYS0001
0000000005
Bottom
F3=Exit
F12=Cancel
Advanced Role Swap Utility User Guide
F19=Left
F20=Right
- 78 -
F24=More keys
Vision Solutions, Inc.
Appendix D: Role Swap Commands
CHKSYSCMN
(Check System
Communication)
CHKSYSCMN (Check System Communication)
Verifies that the specified communications are active and that the specified
communication configuration attributes match between the source and target
systems. If multiple link IDs are requested to be checked, all communication
attributes are compared. If one of the link IDs are inconsistent, the command
ends with an error. A link ID is inconsistent if it does not match the role of
other link IDs in the group. The attribute must be corrected and the command
run again.
Communication test: PING, remote program call to the LISTENER2 job, and
FTP or DDM.
Communication attributes that are compared: Remote System, Remote
Location, Communication Protocol, Mode, Remote IP or DNS name.
Required Parameters
Parameter
Description
TYPE
*LNK – Processes one link or *ALL links configured to
OMS/400 and displays the LNKID.
*ENV – Processes all links configured to an environment and
displays the ENV parameter.
LNKID
Link ID-name – The link ID to be processed.
*ALL – All link IDs configured to OMS/400 are processed.
ENV
Environment name – Selects the link IDs to process based on
the specified environment name.
*CURENV – Retrieves the environment name from the
CURENV data area. The environment name selects the link
IDs to be processed.
CHKFTPDDM
*YES – Use VSIRMTCPYF to test FTP or DDM
communication. The data area VSIUSEFTP in the OMS400
library determines whether to use FTP or DDM. The value Y
= FTP. The value N = DDM.
*NO – Do not check FTP or DDM communication.
Vision Solutions, Inc.
- 79 -
Advanced Role Swap Utility User Guide
ENDS3 (End S3)
ENDS3 (End S3)
Appendix D: Role Swap Commands
Ends the Auto Syncheck job associated with an OMS/400 link ID.
Required Parameters
Parameter
Description
TYPE
*LNK – Processes one link or *ALL links configured to OMS/400
and displays the LNKID.
*ENV – Processes all links configured to an environment and
displays the ENV parameter.
LNKID
Link ID-name – The link ID to be processed.
*ALL – All link IDs configured to OMS/400 are processed.
ENV
Environment name – Selects the link IDs to process based on the
specified environment name.
*CURENV – Retrieves the environment name from the
CURENV data area. The environment name selectsthe link IDs
to be processed.
Advanced Role Swap Utility User Guide
- 80 -
Vision Solutions, Inc.
Appendix D: Role Swap Commands
ENDUSRAPPS
(End User
Applications)
ENDUSRAPPS (End User Applications)
Retrieves the user exit programs that end subsystems, jobs, and
communication for the specified role. The exit program name and library are
stored in the ENDEXTCFG data areas. Use the command CHGEXTCFG to
configure the exit program names and libraries.
Required Parameters
Parameter
Description
ROLE
SOURCE – Ends the required subsystems, jobs, and
communication for the current source system.
TARGET – Ends the required subsystems, jobs, and
communication for the current target system.
PASSWORD
The password is the value of the ARSLIB data area.
BATCH
*YES – Submits the job ENDUSRAPPS to the specified job
queue. The parameter JOBQ is displayed for input. This is the
default.
*NO – Executes the program interactively.
JOBQ
*LIBL/QCTL – If the BATCH parameter is *YES, then the
JOBQ parameter is displayed for input.
Job QueueLibrary/Name – The job ENDUSRAPPS will be
active in the subsystem that is associated with job queue
specified.
USREXTPARM
*EXTCFG – The value stored in the ENDEXTCFG in
position 51-1024 is passed to the user exit program.
User Exit Parameter – A character string up to 1024 bytes.
The character string will be passed to the user exit program.
Vision Solutions, Inc.
- 81 -
Advanced Role Swap Utility User Guide
ISJOBACT (Is Job Active)
ISJOBACT (Is
Job Active)
Appendix D: Role Swap Commands
ISJOBACT is only for use in a CL program. It determines if the specified job
name is active or inactive. For example, if you wish to determine if the
LISTENER2 job is active, specify the following command syntax in a CL
program.
ISJOBACT JOBNAME(lisetner2) YESORNO(&YN)
The parameter YESORNO returns the value *YES or *NO. If *YES is
returned, the LISTENER2 job is active. If *NO is returned, the LISTENER2
job is inactive.
Required Parameters
Parameter
Description
JOBNAME
Job name to check for active or inactive.
Return Values
Check Status
Description
YESORNO
Whether the job name active or inactive.
*YES – The job name is active.
*NO – The job name is inactive.
Advanced Role Swap Utility User Guide
- 82 -
Vision Solutions, Inc.
Appendix D: Role Swap Commands
LSTACTJOB
(List Active
Jobs)
LSTACTJOB (List Active Jobs)
Lists the active jobs in a physical file created in QTEMP/LSTACTJOBP. The
file provides the job name/job user/job number.
Required Parameters
Parameter
Description
JOBNAME
Job Name – Active job name to list.
*ALL – All jobs that are active for the specified user profile will list
job name/job user/job number.
JOBUSER
Job User – User profile to list.
*ALL – All user profiles that have an active job will list job
name/job user/job number.
Vision Solutions, Inc.
- 83 -
Advanced Role Swap Utility User Guide
ROLESWAP (Role Swap)
ROLESWAP
(Role Swap)
Appendix D: Role Swap Commands
Provides access to the Role Swap menu system to execute a role swap (see
“Performing a Role Swap” on page 25 for more information on using the role
swap menu system).
Required Parameters
None
Advanced Role Swap Utility User Guide
- 84 -
Vision Solutions, Inc.
Appendix D: Role Swap Commands
RTVLNKID
(Retrieve Link
ID)
RTVLNKID (Retrieve Link ID)
Retrieves an OMS/400 link ID for the specified type *LNK or *ENV. It is only
for use in a CL program. For example, if you wish to retrieve a link ID for an
environment, specify the following command syntax in a CL program.
RTVLNKID TYPE(*ENV) ENV(environment name)
RTNLNKID(&LNKID)
The parameter RTNLNKID returns a valid link ID that is configured for the
environment name specified.
Required Parameters
Parameter
Description
TYPE
*LNK – Returns the first record read in MRMMSTP in the
OMS400 library.
*ENV – Returns the first record read that is configured to the
environment name specified. The ENV parameters displays.
ENV
Environment name – The environment name on which an
OMS/400 link ID is returned.
*CURENV – Returns the environment name stored in the
CURENV data area and an OMS/400 link ID configured to the
current environment.
Return Values
Check Status
Description
RTNLNKID
OMS/400 link ID-name – A valid OMS/400 link ID.
*NOTCFG – If *ENV is specified for the type and a link ID
was not found, *NOTCFG is returned.
Vision Solutions, Inc.
- 85 -
Advanced Role Swap Utility User Guide
RTVODSINF (Retrieve ODS/400 Information)
RTVODSINF
(Retrieve
ODS/400
Information)
Appendix D: Role Swap Commands
Retrieves certain ODS/400 configuration attributes and returns them to the
calling program. This command is only for use in a CL program. For example,
to retrieve the local role of ODS, specify the following command syntax in a
CL program.
RTVODSINF ODLROL(&ODSROLE)
The parameter ODLROL returns SOURCE, TARGET, or *NONE.
Return Values
Parameter
Description
ODRSWP
Y – ODS/400 is role swap capable.
N – ODS/400 is not role swap capable.
ODSPWD
Return the ODS/400 password.
ODQUE1
ODS Message Queue #1 – Return the ODS/400 message queue
#1
*NONE – ODS/400 is not configured for message queue in field
number one.
ODQUE2
ODS Message Queue #2 – Return the ODS/400 message queue
#2
*NONE – ODS/400 is not configured for message queue in field
number two.
ODLSYS
ODS Local System Name – Return the Local System Name
*NONE – ODS/400 local system name is not configured.
ODRSYS
ODS Remote System Name – Return the Remote System Name
*NONE – ODS/400 remote system name is not configured.
ODRLOC
ODS Remote Location Name – Return the Remote Location
Name
*NONE – ODS/400 remote location name is not configured.
ODRMODE
ODS Mode – Return the ODS/400 Mode
*NONE – ODS/400 mode is not configured.
ODRIPAD
ODS Remote IP Address or DNS name – Return the remote IP
address or DNS name.
*NONE – Remote IP address or DNS name is not configured.
ODRCPRT
C – CPIC
O – OptiConnect
I – TCP/IP
*NONE – Communication protocol is not configured.
Advanced Role Swap Utility User Guide
- 86 -
Vision Solutions, Inc.
Appendix D: Role Swap Commands
ODLROL
RTVODSINF (Retrieve ODS/400 Information)
SOURCE – Local system is a source system and is role swap
capable.
TARGET – Local system is a target system and is role swap
capable.
*NONE – Local system is not configured for a role. System is not
role swap capable.
ODLSTS
NORMAL – Local system is in normal status and is role swap
capable.
REVERSED – Local system is in reversed status and is role swap
capable.
*NONE – Local system is not configured for a status. System is not
role swap capable.
Vision Solutions, Inc.
- 87 -
Advanced Role Swap Utility User Guide
RTVODSSTS (Retrieve ODS/400 Status)
RTVODSSTS
(Retrieve
ODS/400
Status)
Appendix D: Role Swap Commands
Retrieves ODS/400 status information and returns it to the calling program.
This command is only for use in a CL program. For example, to retrieve the
job information for the ODS/400 reader job, specify the following command
syntax in a CL program.
RTVODSSTS QAUDJRN(&odsrdr)
Required Parameters
Parameter
Description
QAUDJRN
Job Information:
1-10 – *INACTIVE or ACTIVE
11-20 – Job Name
21-30 – Job User
31-40 – Job Number
ODS_FILTER
Job Information:
1-10 = *INACTIVE or ACTIVE
11-20 = Job Name
21-30 = Job User
31-40 = Job Number
ODS_EXCEPT
Job Information:
1-10 = *INACTIVE or ACTIVE
11-20 = Job Name
21-30 = Job User
31-40 = Job Number
ODS_POLLER
Job Information:
1-10 = *INACTIVE or ACTIVE
11-20 = Job Name
21-30 = Job User
31-40 = Job Number
INT_ODSOMS
Job Information:
1-10 = *INACTIVE or ACTIVE
11-20 = Job Name
21-30 = Job User
31-40 = Job Number
ODS_SEND01
Job Information:
1-10 = *INACTIVE or ACTIVE
11-20 = Job Name
21-30 = Job User
31-40 = Job Number
Advanced Role Swap Utility User Guide
- 88 -
Vision Solutions, Inc.
Appendix D: Role Swap Commands
Vision Solutions, Inc.
RTVODSSTS (Retrieve ODS/400 Status)
ODSTSE
The number of error transactions found in file ODOTRNP
with the status of E.
ODSTSS
The number of sending transactions found in file
ODOTRNP with the status of S.
ODSTSP
The number of pending transactions found in file
ODOTRNP with the status of P.
ODSTSW
The number of waiting transactions found in file
ODOTRNP with the status of W.
- 89 -
Advanced Role Swap Utility User Guide
RTVOMSINF (Retrieve OMS/400 Information)
RTVOMSINF
(Retrieve
OMS/400
Information)
Appendix D: Role Swap Commands
Retrieves the specified OMS/400 configuration attributes, then determines if
the OMS/400 configuration information is consistent for the selected link IDs.
If the compared configuration attributes are consistent, the resulting parameter
name value is returned. If the compared configuration attributes are not
consistent, the resulting parameter is *INCONSISTENT. An inconsistent
attribute means that at least one of the link IDs for the specified parameter does not
match the role to other link IDs in the group.
This command is only for use in a CL program. For example, to retrieve and
compare the OMS/400 role for all the link IDs requested, specify the following
command syntax in a CL program.
RTVOMSINF TYPE(*LNK) LNKID(*ALL) ROLE(&ROLE)
The parameter role returns SOURCE, TARGET, or *INCONSISTENT.
Required Parameters
Parameter
Description
TYPE
*LNK – Processes one link or *ALL links configured to OMS/400
and displays the LNKID.
*ENV – Processes all links configured to an environment and
displays the ENV parameter.
LNKID
Link ID-name – The link ID to be processed.
*ALL – All link IDs configured to OMS/400 will be processed.
ENV
Environment name – Selects the link IDs to process based on the
specified environment name.
*CURENV – Retrieves the environment name from the
CURENV data area. The environment name will be used to select
link IDs to be processed.
Return Values
Parameter
Description
ROLE
SOURCE – All link IDs for the specified role are all configured as
a source system.
TARGET – All link IDs for the specified role are all configured as
a target system.
*INCONSISTENT – At least one of the link IDs for the specified
role does not match the role to other link IDs in the group.
Advanced Role Swap Utility User Guide
- 90 -
Vision Solutions, Inc.
Appendix D: Role Swap Commands
STATUS
RTVOMSINF (Retrieve OMS/400 Information)
”blank value” – All link IDs for the specified status are configured
for the normal status.
R – All link IDs for the specified status are configured for the
reverse status.
*INCONSISTENT – This is a valid status only when the
RTVOMSINF command is run for *ENV (the environment).
This value is returned only when the ARS environment has more
than 1 link and there is an inconsistency between the links in their
status or configuration.
PWD
OMS/400 Password – Returns the OMS/400 password.
*INCONSISTENT – At least one of the link IDs for the specified
password does not match the password to other link IDs in the
group.
RMTSYS
OMS/400 Remote System Name – Returns the OMS/400 remote
system name.
*INCONSISTENT – At least one of the link IDs for the specified
remote system does not match the remote system to other link
IDs in the group.
SNDTYP
C=CPIC
O=OptiConnect
I=TCP/IP
*INCONSISTENT – At least one of the link IDs for the specified
send type does not match the send type to other link IDs in the
group.
RMTLOC
Remote Location – Returns the remote location.
*INCONSISTENT – At least one of the link IDs for the specified
remote location does not match the send type to other link IDs in
the group.
MODE
OMS/400 Mode – Return the OMS/400 mode.
*INCONSISTENT – At least one of the link IDs for the specified
mode does not match the mode to other link IDs in the group.
RMTIP
OMS/400 Remote IP address or DNS name – Returns the
OMS/400 remote IP address or DNS name
*INCONSISTENT – At least one of the link IDs for the specified
remote IP address or DNS name does not match the remote IP
address or DNS name to other link IDs in the group.
Vision Solutions, Inc.
- 91 -
Advanced Role Swap Utility User Guide
RTVOMSPWD (Retrieve OMS/400 Password)
RTVOMSPWD
(Retrieve
OMS/400
Password)
Appendix D: Role Swap Commands
Retrieves the OMS/400 password for the specified link ID. This command is
only for use in a CL program. For example, to retrieve the password for an
OMS/400 link ID, specify the following command syntax in a CL program.
RTVOMSPWD LNKID(link ID name) OMSPWD(&omspwd)
The parameter OMSPWD returns the OMS/400 password for the specified
link ID.
Required Parameters
Parameter
Description
LNKID
The link ID on which an OMS/400 password is returned.
Return Values
Check Status
Description
OMSPWD
OMS/400 link ID password.
Advanced Role Swap Utility User Guide
- 92 -
Vision Solutions, Inc.
Appendix D: Role Swap Commands
SBMODSSYNC
(Submit
ODS/400 Synch
Check)
SBMODSSYNC (Submit ODS/400 Synch Check)
Submits a complete ODS/400 synch check as a single job or submits multiple
ODS/400 synch check jobs for each library or path defined to ODS.
Required Parameters
Parameter
Description
SBMMLTJOB
*YES – Creates a file ODSPATH in QTEMP and executes a SQL
statement to select distinct records in ODOBJSP. Then submit a
ODS/400 synch check for each distinct library and/or IFS path to
the ODS400 subsystem.
Caution: Using this option can submit many ODS/400 synch
check jobs and can affect system performance.
*NO – Submits only one ODS/400 synch check job to the
ODS400 subsystem. All libraries and/or IFS paths defined to
ODS400 will be checked.
Vision Solutions, Inc.
- 93 -
Advanced Role Swap Utility User Guide
SBMOMSSYNC (Submit OMS/400 Synch Check)
SBMOMSSYNC
(Submit
OMS/400 Synch
Check)
Appendix D: Role Swap Commands
Submits an OMS/400 sample synch check for each link ID selected or submits
a synch check error job for all of OMS. This can be done for either the QSYS
or IFS files systems.
Required Parameters
Parameter
Description
TYPE
*LNK – Processes one link or *ALL links configured to
OMS/400 and displays the LNKID.
*ENV – Processes all links configured to an environment and
displays the ENV parameter.
LNKID
Link ID-name – The link ID to be processed.
*ALL – All link IDs configured to OMS/400 will be processed.
ENV
Environment name – Selects the link IDs to process based on
the specified environment name.
*CURENV – Retrieves the environment name from the
CURENV data area. The environment name will be used to
select link IDs to be processed.
SYNCHKTYPE
*SAMPLE – Submits an OMS/400 synch check for each link
ID. The job name will be the same as the link ID plus the
character “QSYS’ or “_IFS” in the OMS400 subsystem.
Parameter OBJTYPE and INZMRSERRP will be displayed.
*ERROR – Submit an OMS/400 synch check error for each
link ID. The job name will be SYNCHKERR in the OMS400
subsystem.
OBJTYPE
QSYS – Physical files, data areas, and data queues will be synch
checked. The job name will be the first six characters of the link
ID plus “QSYS”.
IFS – IFS directories and stream files will be synch checked.
The job name will be the first six characters of the link ID plus
“_IFS”.
*BOTH – A job for QSYS and IFS objects will be submitted.
INZMRSERRP
*YES – Deletes all records in the MRSERRP file. The file
contains the allocation errors for a previous synch check could
not obtain a *SHRNUP lock for the object.
*NO – Does not delete records in the MRSERRP file.
Advanced Role Swap Utility User Guide
- 94 -
Vision Solutions, Inc.
Appendix D: Role Swap Commands
SBMSYNCHK
(Submit Synch
Check)
SBMSYNCHK (Submit Synch Check)
Integrates the running of both the OMS/400 and ODS/400 synch check
processes into a single command. For OMS, this submits either an OMS/400
sample synch check for each selected link ID or a synch error job for all of
OMS/400 for either the QSYS or IFS files systems. For ODS, this submits
either a complete ODS/400 Syncheck as a single job or multiple ODS/400
Syncheck jobs one for each library or path defined to ODS.
Required Parameters
Parameter
Description
TYPE
*LNK – Processes one link or *ALL links configured to
OMS/400 and displays the LNKID.
*ENV – Processes all links configured to an environment and
displays the ENV parameter.
LNKID
Link ID-name – The link ID to be processed.
*ALL – All link IDs configured to OMS/400 will be processed.
ENV
Environment name – Selects the link IDs to process based on
the specified environment name.
*CURENV – Retrieves the environment name from the
CURENV data area. The environment name will be used to
select link IDs to be processed.
ENDS3
*YES – End the auto synch check job.
*NO – Does not end the auto synch check job.
SYNCHKTYPE
*SAMPLE – Submits an OMS/400 synch check for each link
ID. All records in file MRSERRP will be deleted.
*ERROR – Submits an OMS/400 synch check error for each
link ID. The job name will be SYNCHKERR in the OMS400
subsystem.
*NONE – OMS/400 synch check will not be submitted.
ODSSYNCHK
*YES – ODS/400 synch check job will be submitted. The
SBMMLTJOB parameter will be displayed.
*NO – ODS/400 synch check job will not be submitted.
SBMMLTJOB
*YES – Creates a file ODSPATH in QTEMP and executes a
SQL statement to select distinct records in ODOBJSP.
Submit a ODS/400 synch check for each distinct library to the
ODS400 subsystem.
Caution: Using this option can submit many ODS/400 synch
check jobs and could affect system performance.
*NO – Submits only one ODS/400 synch check job to the
ODS400 subsystem. All libraries defined to ODS400 will be
checked.
Vision Solutions, Inc.
- 95 -
Advanced Role Swap Utility User Guide
SETARSLIB (Set ARS Library)
SETARSLIB (Set
ARS Library)
Appendix D: Role Swap Commands
Run this command to set the contents of the QGPL/ARSLIB data area.
Finally, manually create the new library and move all objects to the new library.
Required Parameter
Parameter
Description
ARSLIB
The library name in which to store the objects.
Advanced Role Swap Utility User Guide
- 96 -
Vision Solutions, Inc.
Appendix D: Role Swap Commands
SNDJRNU70
(Send Journal
U70)
SNDJRNU70 (Send Journal U70)
Sends a U70 journal entry to the local journal associated with the link ID. The
U70 is used to mark all the router and apply jobs current if no applications
transactions are deposited into the journal.
Required Parameters
Parameter
Description
TYPE
*LNK – Processes one link or *ALL links configured to OMS/400
and displays the LNKID.
*ENV – Processes all links configured to an environment and
displays the ENV parameter.
LNKID
Link ID-name – The link ID to be processed.
*ALL – All link IDs configured to OMS/400 will be processed.
ENV
Environment name – Selects the link IDs to process based on the
specified environment name.
*CURENV – Retrieves the environment name from the
CURENV data area. The environment name will be used to
select link IDs to be processed.
Vision Solutions, Inc.
- 97 -
Advanced Role Swap Utility User Guide
SNDLNKDFN (Send Link Definitions)
SNDLNKDFN
(Send Link
Definitions)
Appendix D: Role Swap Commands
Uses the OMS400 command OMSOBJINZ to send link definitions. Prior to
executing OMSOBJINZ, OMS/400 on the target system ends for the selected
link ID. The command checks for the inactive status for all OMS/400 jobs on
the target system. Finally, it executes OMSOBJINZ SNDDEF(*YES) and
restart OMS/400 on the target system.
Required Parameter
Parameter
Description
LNKID
Link ID-name – A valid link ID.
Advanced Role Swap Utility User Guide
- 98 -
Vision Solutions, Inc.
Appendix D: Role Swap Commands
SNDODSCFG
(Send ODS/400
Configuration)
SNDODSCFG (Send ODS/400 Configuration)
Sends the ODS/400 configuration files. The program writes a control record
to the file MRRCFGP for each file to be copied. Then the command calls the
same program (ODC820) as the RMTCFGUPD job to send across the
configuration files. The following files are sent to the target system via FTP or
DDM: ODOBJSP, ODPMSTP, and ODPTIMP. If the data area value for
VSIUSEFTP is Y, then FTP. If the value is N, then DDM.
Required Parameters
None
Vision Solutions, Inc.
- 99 -
Advanced Role Swap Utility User Guide
SNDPLMCFG (Send PLM Configuration)
SNDPLMCFG
(Send PLM
Configuration)
Appendix D: Role Swap Commands
Sends the PLM configuration files. The program writes a control record to file
MRRCFGP for each file to be copied. Then the command calls the same
program (MRR484) as the RMTCFGUPD job to send the PLM files to the
target. The following files are sent to the target system via FTP or DDM:
MRLMONP and MREXCLP. If the data area value for VSIUSEFTP is Y, then
FTP. If the value is N, then DDM.
Required Parameters
None
Advanced Role Swap Utility User Guide
- 100 -
Vision Solutions, Inc.
Appendix D: Role Swap Commands
STRMQRCDI
(Start MQ
Record Object
Image)
STRMQRCDI (Start MQ Record Object Image)
Executes the VSIRCDMQM for all *JRN link IDs. For MQ Series message
queues and related objects, the VSIRCDMQM executes a record media image
for all MQ/400 objects.
OMS/400 Journal Manager tracks the receivers that must be retained in order
to recover MQ/400 objects from a media image. No receivers are deleted that
include the recovery media image or that are generated subsequently, until the
command is executed again, which establishes a new recovery checkpoint.
Required Parameters
None
Vision Solutions, Inc.
- 101 -
Advanced Role Swap Utility User Guide
STRUSRAPPS (Start User Applications)
STRUSRAPPS
(Start User
Applications)
Appendix D: Role Swap Commands
Retrieves the user exit program that starts subsystems, jobs, and
communication for the specified role. The exit program name and library is
stored in the STREXTCFG data area. Use the command CHGEXTCFG to
configure the exit program name and library.
Required Parameters
Parameter
Description
ROLE
SOURCE – Starts the required subsystems, jobs, and
communication for the current source system.
TARGET – Starts the required subsystems, jobs, and
communication for the current target system.
PASSWORD
Password Value – The value of the ARSLIB data area.
BATCH
*YES – Submits job STRUSRAPPS to the specified job queue.
The parameter JOBQ is displayed for input. This is the
default.
*NO – Executes the program interactively.
JOBQ
*LIBL/QCTL – If the BATCH parameter is *YES, the JOBQ
parameter is displayed for input.
Job queue Library/Name – The job STRUSRAPPS will be
active in the subsystem that is associated with job queue
specified.
USREXTPARM
*EXTCFG – The value stored in the ENDEXTCFG in
position 51-1024 will be passed to the user exit program.
User Exit Parameter – A character string up to 1024 bytes. The
character string will be passed to the user exit program.
Advanced Role Swap Utility User Guide
- 102 -
Vision Solutions, Inc.
Appendix D: Role Swap Commands
STRVSICHK
(Start VSI
Check)
STRVSICHK (Start VSI Check)
Used for the pre-role swap and role swap check processes. It executes a series of
commands from the STRVSICHK command interface. All of the commands
in this process are documented in this manual. See “Performing a Role Swap”
on page 25 for more information.
Required Parameters
Parameter
Description
TYPE
*LNK – Processes one link or *ALL links configured to
OMS/400 and displays the LNKID.
*ENV – Processes all links configured to an environment and
displays the ENV parameter.
LNKID
Link ID-name – The link ID to be processed.
*ALL – All link IDs configured to OMS/400 will be processed.
ENV
Environment name – Selects the link IDs to process based on
the specified environment name.
*CURENV – Retrieves the environment name from the
CURENV data area. The environment name will be used to
select link IDs to be processed.
CHKSYSCMN
*YES – Executes the CHKSYSMN command.
*NO – Does not execute the command.
See page 79 for more information.
CHKLNKDFN
*YES – Executes the CHKLNKDFN command.
*NO – Does not execute the command.
See page 70 for more information.
CHKOPNCMT
*YES – Executes the CHKOPNCMT command.
*NO – Does not execute the command.
See page 77 for more information.
VFYJRNSTS
*YES – Executes the VFYJRNSTS command on the target
system.
*NO – Does not execute the command.
See page 110 for more information.
BLDOMSTRG
*YES – Executes the BLDOMSTRG command.
*NO – Does not execute the command.
See page 64 for more information.
ENDS3
*YES – Executes the ENDS3 command.
*NO – Does not execute the command.
See page 80 for more information.
Vision Solutions, Inc.
- 103 -
Advanced Role Swap Utility User Guide
STRVSICHK (Start VSI Check)
Appendix D: Role Swap Commands
SYNCHKTYPE
*SAMPLE – Submits OMS/400 sample synch check. Executes
the SBMOMSSYNC command.
*ERROR – Submits OMS/400 synch check error, Execute the
SBMOMSSYNC command.
*NONE: – Does not execute the SBMOMSSYNC command.
SBMODSSYNC
*YES – Executes the SBMODSSYNC command.
*NO – Does not execute the command.
See page 93 for more information.
STRMQRCDI
*YES – Executes the STRMQRCDI command.
*NO – Does not execute the command.
See page 101 for more information.
SNDPLMCFG
*YES – Executes the SNDPLMCFG command.
*NO – Does not execute the command.
See page 100 for more information.
SNDODSCFG
*YES – Executes the SNDODSCFG command.
*NO – Does not execute the command.
See page 99 for more information.
CHKODSERR
*YES – Executes the CHKODSOBJ command and specifies
*ERROR.
*NO – Does not execute the command.
CHKODSPRC
*YES – Executes the CHKODSOBJ command and specifies
*PROCESS.
*NO – Does not execute the command.
CHKOMSOBJ
*YES – Executes the CHKOMSOBJ command.
*NO – Does not execute the command.
See page 75 for more information.
SNDJRNU70
*YES – Executes the SNDJRNU70 command.
*NO – Does not execute the command.
See page 97 for more information.
CHKJRNSEQ
*YES – Executes the CHKJRNSEQ command.
*NO – Does not execute the command.
See page 68 for more information.
Sample Report
The screen below shows the final status for each task that was selected to be
processed. Each task has a keyword name and a Starting and Completed
message. If the user was prompted with a display or a spool file was created, a
message indicates to review the following display or refer to a spool file. If an
Advanced Role Swap Utility User Guide
- 104 -
Vision Solutions, Inc.
Appendix D: Role Swap Commands
STRVSICHK (Start VSI Check)
error occurred within the task, a message states “Program Error. Review Job
log.” In both cases, press ENTER to return to the Pre-Role Swap menu.
Display Spooled File
File . . . . . :
QSYSPRT
Page/Line
1/1
Control . . . . .
Columns
1 - 78
Find . . . . . .
*...+....1....+....2....+....3....+....4....+....5....+....6....+....7....+...
VSI Check Status Report
4/21/
Status
-------------------------CHKSYSCMN - Starting @ time 105526455.
Communication verified with remote system VSI05.
CHKSYSCMN - Completed @ time 105542202.
CHKLNKDFN - Starting @ time 105542225.
The number of mirrored and/or *INACT objects EQUAL for link ID *ENV.
CHKLNKDFN - Completed @ time 105554006
CHKOPNCMT - Starting @ time 105554037.
There are NO open commits for link ID *ENV.
CHKOPNCMT - Completed @ time 105557009.
SNDPLMCFG - Starting @ time 105557050.
SNDPLMCFG - Completed @ time 105603178.
CHKODSOBJ - Starting @ time 105603201.
Review ODS transactions in *ERROR status.
More...
F3=Exit
F12=Cancel
F19=Left
F20=Right
F24=More keys
Vision Solutions, Inc.
- 105 -
Advanced Role Swap Utility User Guide
SWAPODS (Swap ODS/400)
SWAPODS
(Swap ODS/400)
Appendix D: Role Swap Commands
Starts the ODS/400 role swap. This allows the command to be either
submitted to batch via a specified job queue or run interactively.
Required Parameters
Parameter
Description
ROLOPT
*INTERACT – Prompts the user with ODS/400 change role
prompt. The parameters are specified and are not input capable.
*BCHIMMED – Submits the ODS/400 change role job to the
OMS400 subsystem. The job retrieves the information messages
from the change role process.
If the message ODE0420 “Active jobs found…” is received, then
the ODSCHGROLE job is delayed 30 seconds before retrying.
If the message ODE0428 “ODSCHGROLE ended with
Errors…” is received, a user message is sent to retry or cancel.
If the message ODE0429 “ODSCHGROLE completed
successfully…” is received, SWAPODS sends a message to the
ODS400 message queue indicating that “SWAPODS received the
successful completion message from ODSCHGROLE.”
JOBQ
Advanced Role Swap Utility User Guide
*LIBL/QCTL Job queue Library/Name – If parameter ROLOPT
is set to *BCHIMMED, the job ODSCHGROLE is active in the
subsystem that is associated with the job queue specified.
- 106 -
Vision Solutions, Inc.
Appendix D: Role Swap Commands
SWAPOMS
(Swap
OMS/400)
SWAPOMS (Swap OMS/400)
Starts the OMS/400 role swap. This allows the command to be either
submitted to batch via a specified job queue or run interactively.
Required Parameters
Parameter
Description
TYPE
*LNK – Processes one link or *ALL links configured to OMS/400
and displays the LNKID.
*ENV – Processes all links configured to an environment and
displays the ENV parameter.
LNKID
Link ID-name – The link ID to be processed.
*ALL – All link IDs configured to OMS/400 are processed.
ENV
Environment name – Selects the link IDs to process based on the
specified environment name.
*CURENV – Retrieves the environment name from the CURENV
data area. The environment name will be used to select link IDs to
be processed.
ROLOPT
*BCHIMMED – Submits the OMS/400 change role to the
OMS400 subsystem. Job name is the same as the link ID plus the
character string “_SWP”.
If inactive objects are found, then a user message will be sent to
retry, ignore or cancel the OMS/400 change role for the link ID
being processed.
JOBQ
Vision Solutions, Inc.
If the parameter ROLOPT is set to *BCHIMMED, the job
OMSCHGROLE will be active in the subsystem that is associated
with job queue specified.
- 107 -
Advanced Role Swap Utility User Guide
VFYENV (Verify Environment)
VFYENV (Verify
Environment)
Appendix D: Role Swap Commands
Verifies that the specified environment name exists in the file ENVMSTP.
Required Parameters
Parameter
Description
ENV
Verifies the specified environment.
Return Values
Is ENV Configured
Description
YESORNO
*YES – Environment is configured.
*NO – Environment is not configured.
Advanced Role Swap Utility User Guide
- 108 -
Vision Solutions, Inc.
Appendix D: Role Swap Commands
VFYENVCFG
(Verify
Environment
Configuration)
VFYENVCFG (Verify Environment Configuration)
Verifies that the specified environment and link ID name exists in file
ENVCFGP. If a record exists, the link ID is associated with the environment.
Required Parameters
Parameter
Description
ENV
Verifies the environment name specified.
LNKID
Verifies the link ID is associated to the environment name
specified above.
Return Values
Is LNKID config to ENV
Description
YESORNO
*YES – Link ID is configured to the specified
environment.
*NO – Link ID is not configured to the specified
environment.
Vision Solutions, Inc.
- 109 -
Advanced Role Swap Utility User Guide
VFYJRNSTS (Verify Journal Status)
VFYJRNSTS
(Verify Journal
Status)
Appendix D: Role Swap Commands
Submits the VFYJRNSTS job to the OMS400 subsystem. The job calls the
OMS/400 product programs to create a list of journaled objects and identify
the status for each object to the link ID. For the source system, if an object is
not journaled, journaling is started if no allocation issues exist. For the target
system, OMS/400 is ended and the program determines if the object is
journaled to the correct journal. If an object is not journaled, journaling is
started to the correct journal. If the object is journaled to the incorrect journal,
journaling is ended and restarted to the correct journal. Currently, if an error
occurs, a message is sent to the QSYSOPR message queue.
Required Parameters
Parameter
Description
TYPE
*LNK – Processes one link or *ALL links configured to OMS/400
and displays the LNKID.
*ENV – Processes all links configured to an environment and
displays the ENV parameter.
LNKID
Link ID-name – The link ID to be processed.
*ALL – All link IDs configured to OMS/400 will be processed.
ENV
Environment name – Selects the link IDs to process based on the
specified environment name.
*CURENV – Retrieves the environment name from the
CURENV data area. The environment name will be used to
select link IDs to be processed.
Advanced Role Swap Utility User Guide
- 110 -
Vision Solutions, Inc.
Appendix D: Role Swap Commands
VFYLNKID
(Verify Link ID)
VFYLNKID (Verify Link ID)
Verifies that the specified link ID exists in file MRMMSTP.
Required Parameters
Parameter
Description
LNKID
Specifies an OMS/400 link ID.
Return Values
Is LNKID Configured to OMS
Description
YESORNO
*YES – Link ID is configured to OMS.
*NO – Link ID is not configured to
OMS.
Vision Solutions, Inc.
- 111 -
Advanced Role Swap Utility User Guide
VFYSYSATR (Verify System Attributes)
VFYSYSATR
(Verify System
Attributes)
Appendix D: Role Swap Commands
Prompts the user with displays of the current system attributes. Use this
command to display the system attributes stored in the configuration file
LSTSYSATRP. (For example, prompt WRKSBS display, prompt the TCP/IP
Interface display, or prompt the Network Attributes display.) This command
provides quick access to areas of the system changed before and after a role
swap.
Required Parameters
None
Advanced Role Swap Utility User Guide
- 112 -
Vision Solutions, Inc.
Appendix D: Role Swap Commands
WRKENVCFG
(Work
Environment
Configuration)
WRKENVCFG (Work Environment Configuration)
Displays the Environment configuration screen. The environment
configuration provides the option to group OMS/400 link IDs to be processed
during the pre-role swap, the actual role swap, or for general maintenance. This
configuration option is beneficial for mirroring environments that have the
need to process a subset of configured OMS/400 link IDs.
NOTE
The maximum number of environments that can be created is 9,999.
Only use this command on the source system and ensure the objects
are included in the mirroring configuration. It is very important to
ensure the file ENVMSTP, ENVCFGP, and data area CURENV are
mirrored via OMS.
Required Parameters
None
Vision Solutions, Inc.
- 113 -
Advanced Role Swap Utility User Guide
WRKVSIJOB (Work VSI Job)
WRKVSIJOB
(Work VSI Job)
Appendix D: Role Swap Commands
Displays the WRKACTJOB screen with subsystems OMS400, ODS400, and
VSIGPL subsystem and jobs.
Required Parameters
None
Advanced Role Swap Utility User Guide
- 114 -
Vision Solutions, Inc.


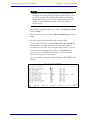
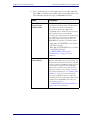


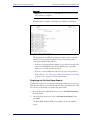
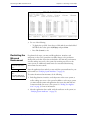
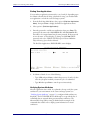
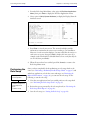
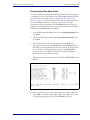


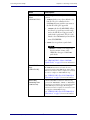
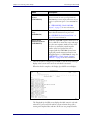
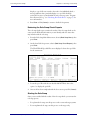

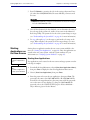
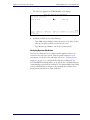
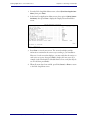
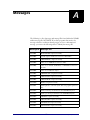
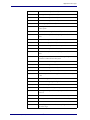
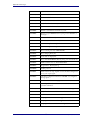
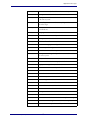

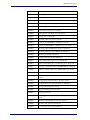

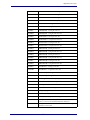


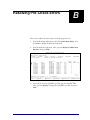
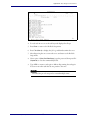
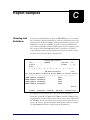

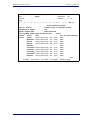


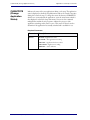
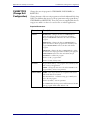
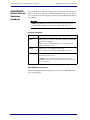
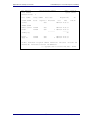
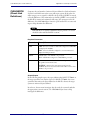
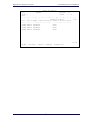


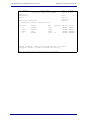
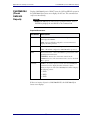


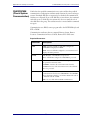
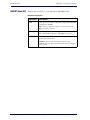
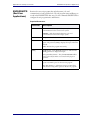
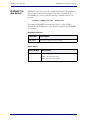
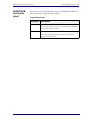


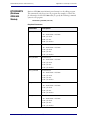

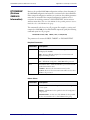
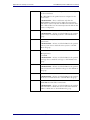
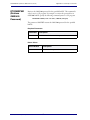


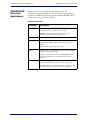
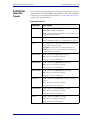
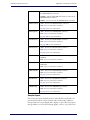

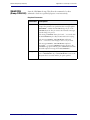


![カタログ一括ダウンロード[18.4MB]](http://vs1.manualzilla.com/store/data/006667448_2-d643a1422aef67f86592a2253273d4ef-150x150.png)