1
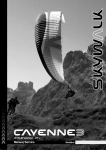
Owner Manuall / Operating Instructions
Seriennr:
Contents
1Congratulations
2Description, technical data, line system
3Acceleration system
4Harness
5Tandem Bar
6Flight techniques and characteristics
7Descent techniques
8Extreme flight manoeuvres
9Materials
Maintenance
10
2-year-check / certification
11
Conclusion
12
Line plans, risers
13
Test protocols
14
02
Page 03
Page 04
Page 08
Page 08
Page 09
Page 10
Page 17
Page 20
Page 24
Page 25
Page 27
Page 28
Page 30
Page 32
1
Congratulations on the purchase of your new paraglider
and thank you for your trust in skywalk.
We have no doubts that you will enjoy every single minute of your flying with your skywalk JOIN’T
To ensure that you feel at home on your new glider, we recommend you thoroughly read the
owners manual/operating instructions. This way you will get to know your skywalk JOIN’T quickly
and easily.
The following instructions will help to maintain your skywalk JOIN’T in excellent condition, to use it
safely and have fun with it for a very long time.
Flying a tandem is double pleasure, because you can bring our sport closer to pedestrians. Flying
a tandem also means taking over responsibility for someone’s life. Therefore flight planning and
the flight itself should be conducted careful and considered.
If you have any questions, remarks or suggestions for improvement, please don't hesitate to
contact us by fax, e-mail or phone. The skywalk-team will be happy to help anytime.
Your skywalk-team
03
2
Description
We set ourselves a high target to reach, with the development of the skywalk JOIN’T. With a
passionate work ethos and attention to detail we selected the best out of many prototypes to
achieve the maximum in performance, safety, stability, handling and the pure fun of flying.
During the testing phase we had the professional tandem pilot in mind – secure and controlled
starts and landings were important defaults for the JOIN’T;
Like the MESCAL and the TEQUILA we have integrated Jet Flaps in the wing, to improve passive
safety of the JOIN’T and to enhance slow flight characteristics. This is especially noticeable during
launches and landings, but even in turbulence the glider remains easy to handle and weak
upwinds are transferred into altitude thanks to the slow flight characteristics.
Comprehensive reinforcements and load equalizers are responsible for permanent profile quality
and extremely durable cloth ensures optimal longevity of highly loaded areas.
Reinforcing webbings relieve the lower sail and several additional flares evenly distribute forces
across the profiles.
The outside wing was designed to carry less load in order to achieve an even and predictable feel
in turns.
Large cross-ports in the ribs create an effective inflation of all cells without reducing the profiles
shape.
Velcro bands are attached to the outer wings to make it easier to empty the sand from the glider.
Scope of delivery
The JOIN’T comes with spreader, carabines as well as shackles for the reserve parachute. All
fittings are stainless steel for best longevity.
Additionally to the rucksack, every JOIN’T owner receives a Biplace Box. This serves to carry the
glider when the rucksack is filled with harnesses and gear for the pilot and the passenger.
04
2
Technical Data
Typ
AR
BI
Number of Cells
44
44
Area [qm]
39,07
42,3
Wingspan [m]
13,78
14,34
Aspect ratio
4,86
4,86
Area projected [qm]
34,41
37,26
Wingspan projected [qm]
11,22
11,68
Aspect ratio projected
3,66
3,66
Line length [cm]
797
830
Line diameter [mm]
1,2/1,5/2,2
1,2/1,5/2,2
Cord max. [cm]
351
366
Cord min. [cm]
73
76
Canopy weight [kg]
9,6
10,4
Cert. Take-off-weight* [kg]
115 - 190
140 - 230
* Pilot + 17 kg equipment
At the time of delivery, this paraglider corresponds to all the regulations of the German Paragliding
and Delta Association (DHV) or the AFNOR (SHV and Aerotest). Further details of the construction
and the measurements are described in the DHV-Luftsportgerätekennblatt, which is part of this
manual. The measurements of the line elements are listed in the Luftsportgerätekennblatt or in the
line plans. They are measured with 5 kg weight. The DHV measures from the line carabiner to the
CAUTION
THE TYPE SHIELD IS PRINTED ONTO THE INSIDE OF THE STABILO. THE
DHV CERTIFICATION STICKER CAN BE FOUND IN A POCKET ON THE
MIDDLE CELL.
DATE AND NAME OF THE PILOT OF THE FIRST FLIGHT HAVE TO BE
ENTERED.
THE DHV CERTIFICATION STICKER HAS TO BE FIXED TO THE PARAGLIDER!
05
2
Line System
The lay-out of the suspension points was made for optimal distribution of load and long life span.
With all considerations and calculations however, our focus always was on safety. The mix of
materials used on the lines of the JOIN´T is and ideal combination of durability, little stretch and
low drag. The main lines of the JOIN´T are made of high-strength Tecnora with polyester
sheathing. Each of these main lines can endure more than 300kg.
But also New Dyneema is used with the JOIN´T because of its excellent resistance to aging.
Also after years of intensive use, a reassuring amount of reserve safety remains in all parts
of the JOIN’T.
The skywalk JOINT has 4 A-, 4 B-, 4 C- as well as 3 D-main lines and
1 stabiliser line.
With the lines one differs between toplines (near the canopy), intermediate-lines (assembling 2 or 3
toplines) and mainlines. These main lines assemble 2 to 4 intermediate-lines and lead to the quick
links at riser (triangle line lock which connects the lines to the riser)
The stabiliser lines connect to the top stabiliser lines with the carabiner.
The brake lines are none carrying and lead from the back of the canopy (=trailing edge) over the
main brake line through the pulley on the D-riser to the brake handle.
There is a mark on the main brake line indicating the position of the handle attachment. This
adjustment must not be altered in order to provide enough brake travel for landing and in extreme
flight situations yet enough slack not to continuously brake the glider in normal flight.
The A-lines, the stabiliser lines and the A-riser are coloured red for better discrimination. The
B-lines, the main brake lines and the brake toplines are yellow and all other lines blue.
The line maillons are triangular and have a rubber grommet to prevent the looped lines from
slipping.
06
The skywalk JOIN´T uses 5 risers on each side. The two inner A-main lines are attached to the
front A-riser, the outer A-main line attaches to the second A-riser.
The B-lines and the stabiliser are attached to the B-riser.
Excepted is the outer B-main, which leads to the C-riser.
The C-main lines lead to the C-riser.
Excepted is the outer C-main, which leads to the D-riser.
The D-main lines lead to the D-riser.
Please see riser drawing on page 30.
IMPORTANT SAFETY WARNING
Flying a paraglider requires maximum caution at all times.
Be aware that flying your paraglider is at your own risk. As a pilot you have to guarantee the flying
capability of your paraglider before every single flight.
Don't use your skywalk JOIN’T:
Outside the certified take-off weight
With any engine, except if you have a license from the BHPA / USHPGA
In rainy, snowy and extremely turbulent weather conditions or high winds
In fog or clouds
With insufficient experience or training
Every tandem-pilot is responsible not just for his own security but also for his passenger and
should take care that his Aircraft (paraglider) has been checked and serviced for its airworthiness
before every flight.
You can only fly your skywalk JOIN’T with a valid flying license and in accordance with local rules
and regulations.
During its production your skywalk JOIN´T has passed thorough quality control checks. More spot
checks were performed before its despatch.
07
3
Acceleration System
The JOIN´T is equipped with trimmers. These trimmers extend the rear risers and therefore
accelerate the glider with a few km/h. In addition the trimmers can be used at starting in zero
wind conditions. Opened half the glider rises even quicker.
CAUTION
THE DHV RATING OF SOME GLIDER SIZES CAN CHANGE DURING THE USE
OF THE ACCELERATION SYSTEM IN FLIGHT. TO DETERMINE WHICH SIZES
ARE AFFECTED PLEASE CHECK THE TYPE SHEET.
One sided opening of the trimmers is to be avoided because arising asymmetry may influence
flying behaviour negatively.
Illustrations of the accelerated risers on page 30.
4
Harness
When flying with passengers a tandem harness should be used at all times.
Be aware that relative brake travel changes with height of the suspension.
CAUTION
Many harnesses are not suitable at all for tandem flying. Big airbags can
obstruct the pilot and cause danger. In case of doubt, please consult an
experienced tandem flight instructor
08
5
Tandem Bar
The tandem bar is part of the glider system. All connecting elements must have a load limit of at
least 9g of the maximum take of weight. (f.e. carabines)
attachment point
maincarabiner
(steelcarabiner)
attachment point
rescue system
(deltacarabiner)
velcro fixing for
rescue connection line
loop in
heavy passengers
loop of
rescue system
pilots
loop in
loop in
light passengers
passangers attachment point
depends also om pilots weight
(light/heavy).
09
6
Flight Techniques and Characteristics
PRE-FLIGHT CHECK AND MAINTENANCE
It is important to check all paragliding equipment thoroughly before every flight, to see if it has any
defects. Also check the paraglider after long flights and after long storage.
Check thoroughly:
All seams of the harness, of the risers and the of the reserve bridle.
That all connecting parts, maillons and carabines are closed
The brake-line knots on both sides and follow the brake-line to the top
All the other lines from riser to canopy
All the line attachment points at the canopy
If the top or bottom of the wing are damaged or perished
The ribs and cross ports from inside.
DO NOT START IF YOU DETECT ANY DEFECTS, EVEN IF THEY ARE MINOR!
If you find any damage or excessive wear and tear please get in touch with your flying school or
skywalk.
Laying out the glider
If you use your paraglider for the first time we recommend that you practise some inflations and try
some simple flights at a training site. This way you are able to get used to your skywalk JOIN’T.
Lay out the canopy so that the leading edge is slightly arched. The middle of the canopy should
form the deepest point of the paraglider. This way the A-lines are tensioned first in the middle
whilst inflating. The paraglider inflates evenly which ensures a stable and straight take off.
Separate A, B, C, D-lines and risers and put in order. Make sure that the brake lines run freely
through the pulleys to the trailing edge of the paraglider. All lines have to run freely without any
knots or twists from the risers to the canopy.
During flight, tied or crossed over lines can often not be released or untangled!
10
The brake-lines are lying directly on the ground, so please pay attention that they can't ensnarl
during launch.
There shouldn’t be any lines beneath the canopy during take-off. Line-overs can have fatal
consequences!
TAKE-OFF
The skywalk JOIN’T is very easy to launch.Hold the two A-risers and the brake handles in your hands.
For a better identification, the A-lines and covers at the A-risers are coloured red. The brake lines
are coloured yellow and the brake handles are black.
Hold your arms slightly sideways and backwards like an extension of the A-risers. Before launching
check the laid out glider. Further check the wind direction and the airspace!
Pull rapidly and the canopy of the skywalk JOIN’T will launch and rise above your head. The
canopy will inflate fast and reliable. Keep the paraglider straight above your head and run forward.
Slow down a little as soon as the upward pull decreases.
You can open any collapsed cells by pumping the affected side.
Changes of directions that are necessary can be carried out now. Look and feel that the wing is
properly inflated.
Don't make your final decision to accelerate or to take-off until you are absolutely sure that the
wing is properly and evenly inflated.
Otherwise, stop the take-off produce immediately!
During reverse launches and in strong winds, it is possible that the paraglider surges forward and
inflates faster than intended. You can counteract this by running towards the glider.
If you reverse launch it is advisable to only use the inside A-risers. This way the paraglider inflates a
little slower and in strong winds you don't have to deal with the full pressure at once.
With a tandem paraglider starts with to strong wind should be omitted out of consideration for the
passenger.
11
The JOIN´T is equipped with the trend-setting Jet-Flap system, just like the
MESCAL and the TEQUILA.
Air is conducted from the bottom sail (pressure area) to the top sail (low-pressure area) and is
blown out there with higher speed. The connection is established through jet shaped channels,
which are located in the rear section of the wing.
When increasing the angle-of-attack the danger of airflow interruption and subsequent stalling is
minimized.
Results: the constant airflow delays the stall even at great angles-of-attack, the flyable minimum
speed is lowered and the pilot has a higher incidence range. This is of great importance, especially
during starting and landing.
Of course, the Jet-Flaps are no reason for uncontrolled braking, but the slow flight characteristics of
the JOIN’T profit immensely.
You don't need any special knowledge to have control of the flap system, the use of a Jet-Flap
paraglider is the same as a conventional glider.
12
TURNING
The skywalk JOIN´T is very manoeuvrable and reacts to steering inputs directly and without delays.
During turning you can control the speed, the curve radius and banking by additional use of the
outer brake. Counter braking or releasing the brake lines can change these parameters most
effectively.
Tight curves and/or wing overs are absolutely inappropriate for biplace flying!
CAUTION
PULLING THE BRAKE LINES TOO FAR AND TOO FAST CAN CAUSE A FULL
STALL!
You will recognise a flat spin through high steering pressure and a slight backwards folding of the
outer wing section. If this happens you have to release the inside brake immediately.
Emergency Steering
In case one or both brake lines break you are able to steer and land the skywalk JOIN’T with the
aid of the D-risers.
Active Flying
Active flying means flying in harmony with your paraglider.
Anticipate the behaviour of your skywalk JOIN’T in flight, especially in turbulent and thermal
conditions and react accordingly. In calm air necessary corrections will be minimal, but turbulence
demands permanent attention and the use of brakes and weight shifting with the harness.
Good pilots have instinctive reactions. It is important that you always have direct contact to the
canopy by slight pressure on the brakes in order to feel the stored energy of the glider. This way
you will recognise a loss of pressure in your canopy and subsequent collapse early and are able to
react in time.
Even if the pilot doesn't react, the skywalk JOIN’T will not collapse immediately. However, with
Active Flying you can increase safety.
13
EXAMPLES
When flying into strong thermals, you have to release the brakes. When flying into falling air
stream, pull the brakes. This way you can avoid extensive changes of the angle of attack.
In turbulent air, you feel the release in pressure on parts of the glider through the feedback from
your brakes. You can balance this by quickly pulling the brake a little more until the pressure
returns. Always apply brakes softly and progressively. Don't slow down your glider too fast as this
can increase the danger of stalling!
By active flying you can avoid almost all deformations of the glider in advance.
Accelerated flying
We remind you to fly only under wind conditions that allow for normal flight with the glider in
untrimmed position.
To accelerate open both trimmers successively. After reaching the desired speed, check that both
trimmers are opened evenly.
On activating the trimmers, pitch angle changes only slightly, because the rear risers are extended.
This means that the JOIN’T is also very resistant to collapses with opened trimmers.
Nevertheless trimmers should be closed in strong turbulences, but certainly under turbulent
conditions on final for landing.
Avoid flying with too short brake lines, otherwise the speed potential cannot
be called upon.
Accelerated collapses tend to be more impulsive and require increased readiness to react.
NEVER LET GO OF THE BRAKE HANDLES!
14
LANDING
The skywalk JOIN’T can be landed easily.
Make a long!final against the wind and let the glider glide at full speed. The passenger should have
been instructed beforehand, to prevent the landing can be performed without stress.
At about 1m above the ground you increase the angle of attack by increasing the pressure on the
brakes and hold the glider. After reaching minimum speed completely flare out the glider by
applying full brake.
In strong head winds, slow down carefully. When you have reached the ground safely, stall the
glider warily.
Especially when flying tandem a decent landing circuit must be performed. Oscillating and curve
changes should not occur, otherwise the landing organisation was bad.
The obviously greater weight of passenger and pilot and the longer lines have to be considered.
This requires exercise and concentration. Occasional tandem flight should only be conducted in
favourable conditions.
WINDENSCHLEPP
The skywalk JOIN´T is suitable for towing.
Make sure you climb from the ground at a flat angle.
The pilot must have a valid towing license.
The used tow winch has to be authorised.
The winch operator must have a towing license, which includes paragliding.
When towing always steer sensitively, do not brake too much because the glider already
flies at an increased angle of attack. In calm conditions the trimmers may be opened to
achieve flatter climbing.
MOTORFLUG
You can inform yourself about the current status of certification of motorised flight at your
dealer, national distributor or directly through us. We will certainly authorise the JOIN’T for
paramotoring. At this time we don't have a license. (January 2005)
15
Carefully packing your paraglider will increase
the longevity of your glider.
Empty the glider from all debris such as leaves, twigs, grass, sand etc.
Sort out your lines and spread them evenly on the glider.
Make sure the glider is dry when storing it for a longer period of time.
Fold the glider starting in the middle and working your way to the outside always folding 2
cells, so that the leading edge is folded cleanly.
This folding method is best done together with a friend, but you should be able to do the same
on your own after some practice.
Fold the cells, starting from the second cell from the middle, so that the reinforced edges of
the cell openings are on top of each other.
Do the same at the lower long-edge of the glider.
Then press the air out of the folded glider starting at the bottom and working your way to the top
Fold the whole row once toward the middle.
Do exactly the same on the other side. Then fold one half onto the other half and make sure
the leading edge is folded cleanly.
Start wrapping up the glider from its lower end. The wraps should be approx. 1ft. wide. The
leading edge can be folded inwards once, but is not necessary. The left over air should be
pressed out of the glider and not through the material (this can increase the porosity of your
glider)
Now attach the compression band around the packed wing, at right angles to the cell
openings, then slide the glider into the light nylon bag. This helps to protect the cloth from
being damaged by sharp edges or zippers from your harness.
Open the rucksack and place your glider on the inside edge. The soft wing on your back will
make transportation much more comfortable.
Place the harness with the seat board facing up on top of your glider and close the zippers.
Put the rest of your equipment (helmet, overall, instruments etc.) under the hood of your Packsack.
The unique Biplace Box which comes with every JOIN’T allows for separate stowage of the glider.
Both harnesses of pilot and passenger, as well as the complete equipment may be carried in the
rucksack and the glider in the Box.
16
7
Descent Techniques
The JOIN’T MANUAL is not a textbook for learning how to paraglide.
According to the local rules and regulations, instruction and training must be carried out in
licensed schools. The following information enables you to get the most out of your skywalk
JOIN’T.
SPIRAL DIVE
You can initiate the spiral dive by carefully increasing the pull on one of the brakes and
simultaneously shifting your weight to the inside of the turn. If the glider doesn't bank up and the
sink rate doesn't increase, then try again. Don't just apply more and more brake without
sensitivity.
The skywalk JOIN’T enters the spiral dive with a high bank angle and makes a fast steep turn. You
control the banking and sink rate by controlled pull or release of the inside brake line. Light outside
brake can counteract the collapse of the inside wing section during a steep spiral dive. The spiral
dive is the fastest way to lose altitude.
CAUTION
THE HIGH SINK RATE CAUSES HIGH PHYSICAL STRAIN DUE TO THE
INCREASING CENTRIFUGAL FORCES AND MAY CAUSE BLACKOUTS!
- Above all, please think of the passenger -
Tensing the stomach muscles during the spiral dive can be helpful. At the first signs of dizziness or
feeling faint exit the spiral dive immediately.
Because of the extreme loss of altitude during a spiral dive always ensure you have enough height
above ground. To avoid a strong surge when exiting the spiral dive, you have to release the inside
brake while applying the outer brake slightly.
The skywalk JOIN’T has no tendency for locking into a spiral dive. In case it keeps on turning under
unfavourable circumstances (e.g. unintended asymmetry of the cross brace harness) you will have
to actively finish the spiral dive. In this case shift your weight to the outside of the turn and
simultaneously apply more outside brake.
Applying both brakes will also take the paraglider out of the spiral dive but the glider can front tuck
and you should dampen the exit with the brakes.
Remember: Compared to regular flight manoeuvres the steering forces in a spiral dive are a lot
higher!
17
Big Ears
In contrast to the spiral dive and B-line stall, Big Ears result in an increase of forward speed in
relation to the gliders sink rate.
Big Ears is used to avoid or exit dangerous areas in a horizontal direction
B-Line Stall
Because of the double B-suspension, performance of a B-line stall limited. The additional
suspension improves the true profile as well as the longevity of your glider.
For rapid descents you should choose between spiralling and making ears, depending on
the situation.
18
BEISPIELE
In strong winds or below a thundercloud at low altitude it is possible that neither B-line stall or
spiral dive will help. Big Ears are the easy way out.
If the pilot is stuck in strong lift and needs to look for sink it is advisable to exit the lift band
with the use of Big Ears..
In order to fold the wing tips you have to pull both outer A-risers simultaneously. This will cause
both wing tips to fold inwards and the skywalk JOIN’T will enter a stable forward flight.
The brake handles remain in your hands together with the outer A-risers. Braking and weight shift
enables you to steer your paraglider.
In order to increase the sink and forward speed you can optimise this manoeuvre by using the
acceleration-system. The risk of canopy destabilisation in turbulent air is clearly reduced when
using Big Ears.
To exit Big Ears release the A-lines. The canopy will unfold automatically. You may brake a little to
support the unfolding. It is advisable to pump out one side at a time to reduce the risk of detaching
airflow.
ALL DESCENT TECHNIQUES SHOULD BE TRAINED IN CALM AIR AND WITH
SUFFICIENT ALTITUDE BEFORE USING THEM IN EMERGENCY SITUATIONS
AND IN TURBULENT AIR.
Any extreme flight manoeuvre and descent technique demands:
Training, either with an instructor in a paragliding school or during a security training course.
Double-checking that before entering a manoeuvre you have sufficient altitude and clear air
space below.
Permanent visual contact with the canopy.
19
8
Extreme Flight Manoeuvres
ASYMMETRIC TUCK
In strong turbulence, the canopy may collapse. The skywalk JOIN’T will re-open automatically even
after bigger collapses within a turn of 180.
The turning towards the collapsed wing section can be minimised by braking on the remaining
open side of the canopy.
In case of a big collapse you will have to use small brake movements in order to avoid a stall.
In case the canopy still doesn't recover you can accelerate the opening process by pumping the
brake on the tucked side.
CRAVAT/LINE OVER
This type of instability never occurred during any of our test flights with the skywalk JOIN’T.
Still, in extremely turbulent air or during exceptional piloting errors it is possible that the folded
wing section might get tangled in the lines. The pilot may then stabilise the paraglider by careful
counter-braking.
Without immediate intervention of the pilot a cravated paraglider will turn into a strong spiral dive.
There are several possibilities to untangle the paraglider:
Pumping on the folded side.
Pulling the stabiliser lines (tip-lines).
In case none of these manoeuvres have any success you can try to unfold the paraglider by
performing a Full Stall. Only experienced pilots, with a lot of flight experience should attempt
this manoeuvre. Make sure you have enough altitude to recover the Full Stall in time.
IF NONE OF THESE MANOEUVRES ARE SUCCESSFULL OR THE PILOT FEELS
OVERWHELMED BY THE SITUATION THE RESERVE PARACHUTE SHOULD BE
DEPLOYED IMMEDIATELY!
The arising forces on the brake lines on a tandem glider are very high and can make excessive
demands of the forces of a pilot. When in doubt always deploy the emergency parachute.
20
FRONT TUCK
The paraglider can be front tucked by a strong pull on the A-risers or when encountering
strong sink.
The leading edge will fold forward along the whole length of the wing. Light braking will reduce the
forward surge and will help to speed up the opening of the canopy.
The skywalk JOIN’T will normally recover from a Front Tuck automatically and without pilot input.
THE PARACHUTAL STALL
The pilot can recover from the Parachutal Stall by slightly pushing the A-risers forward at the
maillons or by using the accelerator.
The skywalk JOINT’T usually exits the Parachutal Stall automatically.
CAUTION
AS SOON AS YOU APPLY THE BRAKES DURING A PARACHUTAL STALL
THE PARAGLIDER WILL IMMEDIATELY ENTER A FULL STALL.
IF STILL IN A PARACHUTAL STALL CLOSE TO THE GROUND DO NOT
ATTEMPT TO RECOVER BUT STRAIGHTEN UP YOUR POSITION IN THE
HARNESS AND PREPARE FOR A PARACHUTE LANDING ROLL.
21
FULLSTALL
In order to Full Stall your paraglider take a wrap on both brake handles and pull strongly and
symmetrically until the airflow breaks away from the canopy.
The glider slows down gradually, until the airflow disconnects completely.
The canopy will drop backwards. Despite this violent reaction keep the brakes fully depressed until
the canopy stabilises above your head.
The skywalk JOIN´T flies backwards but and usually forms a forward facing semi-circle.
This semi-circle can be achieved by a slower entry into the Full Stall
In order to exit a Full Stall the pilot will have to release the brakes slowly and symmetrically.
(Recovery time >= 1 sec). The glider opens and surges forward to pick up speed.
Brake gently to dampen the forward surge of the skywalk JOIN’T and to counteract a possible Front
Tuck. If you fail to brake, the skywalk JOIN’T may surge forward moderately, whereby frontal
collapse is possible.
CAUTION
IN CASE THE FULL STALL IS RELEASED TOO EARLY, TOO FAST OR WITH
THE WRONG TECHNIQUE THE CANOPY MAY SHOOT FORWARDS A VERY
LONG WAY!
22
NEGATIVE SPINS
A paraglider spins backwards if the airflow disconnects over one half of the wing caused by the
inside wing turning in the opposite direction of flight.
There are two reasons for the Negative Spin:
One brake is pulled too far and too hard (e.g. when entering a spiral dive)
One brake is pulled too hard when flying slow (e.g. in thermal flying).
The skywalk JOINT’T usually re-enters normal flight immediately after the brake is released without
any great loss of height.
Simply release the excessively induced brake until the airflow re-connects to the inside wing.
After a long lasting spin it is possible that when releasing the brake the canopy might shoot
forward and collapse.
Cross-braced harnesses that are too narrow increase the tendency to spin on most paragliders.
WINGOVER
Alternating left/right turns lead to an increased banking of the canopy.
The load on the outside wing tip to a minimum (the tip starts to feel light). Further turns and higher
banking is not recommended at this stage as the canopy might collapse on the inside wing
section.
CAUTION
FULL STALL, NEGATIVE SPIN AND WINGOVERS (ABOVE 90°) ARE ILLEGAL
ACROBATIC FLIGHT MANOEUVRES AND ARE NOT PERMITTED IN REGULAR
AIR TRAFFIC.
WRONG OR EXCESSIVE STEERING IN THESE SITUATIONS MAY HAVE FATAL
CONSEQUENCES INDEPENDENT OF THE TYPE OF PARAGLIDER USED!
23
9
Materials
THE SKYWALK JOIN’T IS MANUFACTURED OUT OF HIGHEST-GRADE
MATERIALS.
skywalk has chosen the best possible combination of materials regarding durability, performance
and longevity. We know that durability is a deciding factor for the customers satisfaction.
WINGS AND RIBS
Top Sail
Bottom Sail
Ribs
Leading edge reinforcements
Attachment point reinforcements
Porcher Marine Nylon 6.6
Porcher Marine Nylon 6.6
TSF-SC 84
Dacron
Dacron
The upper sail near the leading edge of the skywalk JOIN’T is made from extremely age resisting
cloth to optimize longevity.
LINES
LIROS has been the world's leading producer of paragliding lines for quite some time.
We have chosen a mix of Tecnora and New Dyneema because of its minimum stretch and high
durability. Even after years of use this line will look and perform "like new".
This new development almost eliminates the common problem of creep on conventional Dyneema
lines and could be raised to a level that is comparable to Technora/Aramid lines.
A
B
C
D
Brake-lines
Main-Brake-line
PPSL 120, PPSL 200; NTSL 350
PPSL 120, PPSL 200; NTSL 350
PPSL 120, PPSL 200; NTSL 350
PPSL 120, PPSL 200; NTSL 200
PPSL 120, PPSL 200
DFL 200
RISER
The risers are manufactured from 25 mm Polyester webbing by Gueth and Wolf.
Stretch values, strength and stability of this material is amongst the leading positions of all webbing
products currently on the market.
24
10
MAINTENANCE
With proper maintenance, your skywalk JOIN’T will be in an airworthy condition for several years. A
well looked after paraglider lasts a lot longer than one which is packed in its bag without care after
use. Always remember: Your life depends on your paraglider!
STORAGE
Store your paraglider in a dry location, protected from light and away from chemicals! Dampness is
a natural enemy for any paraglider. Therefore always make sure your paragliding equipment is dry
before packing it away. Dry if necessary in a heated room.
CLEANING
Rubbing and cleaning leads to faster deterioration of your paraglider.
The PU-coated canopy fabric of the skywalk JOIN’T protects it well from pollution. If you still think
that your paraglider needs to be cleaned, then use a soft and wet towel or sponge. Don't use any
soap or detergents. Never use inflammable products.
REPARATUR
All repairs must be carried out by the manufacturer or by an authorised skywalk-service-centre.
Amateur repairs can cause more harm than good.
WEAR
The skywalk JOIN’T mainly consists of Nylon fabric that loses strength and shows an increase in
porosity under the influence of UV-radiation. Only unfold the paraglider shortly before starting and
pack away immediately after landing to avoid any unnecessary sun exposure
LINE-REPAIRS
The lines of the skywalk JOIN’T consist of a Dyneema or Tecnora core and a polyester-cover. Avoid
heavy loads on single lines, as excessive stretch may be irreversible. Repeated folding or kinking of
lines at the same spot reduces their strength even if it's just a little.
Every visual damage of a line, even if it is only the line coating, requires a replacement. Only
acquire new lines from the manufacturer or from an authorised skywalk-service-centre. Your flying
school or your dealer will assist you to change a defect line.
Check the correct length of the line before replacing it. Compare with its counterpart on the
opposite side of your glider.
After the exchange a line-check will be necessary. The best way to this is by unfolding the glider on
the ground!
25
GENERAL INFORMATION
When unfolding the paraglider, ensure that neither the canopy nor the lines become
too dirty, as dirt particles in the fibres can damage the material and lines.
If the lines get tangled on the ground they may be over-stretched or break during
take-off.
Do not step on the lines and/or canopy.
Make sure that no sand, stones or snow get inside the canopy as the extra weight
collected in the trailing edge may slow down or even stall the glider.
Sharp edges damage the canopy.
Uncontrolled inflation attempts in strong winds may result in the glider impacting
into the ground at high speed. This can cause rips, damage on lines and/or fabric.
Make sure not to land your canopy leading edge first as this may cause permanent
damage to this area of your paraglider.
After landings in trees or on water you should check the length of the lines.
After contact with salt water thoroughly rinse the equipment with fresh water!
26
11
2-YEAR-CHECK / CERTIFICATION
ACCORDING TO DHV REGULATIONS YOUR GLIDER WILL HAVE TO UNDERGO
A MAINTENANCE CHECK AFTER 24 MONTHS OR 200 HOURS OF FLIGHT.
The 2-year check must be conducted by the manufacturer or a skywalk
authorized service center, otherwise any claim for guarantee is void.
For professional use like a flight school or passenger flying a yearly check is mandatory.
The check will have to be confirmed by a DHV-stamp. Missing this deadline or if the check is
carried out by an unauthorised company will lead to immediate loss of your skywalk JOIN’T
DHV-certificate and all warranty and liability claims.
We recommend not to do this check yourself. Without the proper instruments and specific
knowledge the check will be insufficient. The airworthiness of your glider can't be guaranteed.
CHANGES TO THE PARAGLIDER
Your skywalk JOIN’T is manufactured within the regulated parameters of tolerance.
These parameters are very narrow and mustn't be altered under any circumstance. Only this way
the optimum balance between performance, handling and safety can be guaranteed!
UNAUTHORISED CHANGES CAUSE AN IMMEDIATE EXPIRATION OF THE
OPERATING LICENSE!
ANY LIABILITY CLAIM TOWARDS THE MANUFACTURER AND ITS DEALERS
IS EXCLUDED!
CERTIFICATION
The last thing on our ‘To-Do List’ is the certification. There are two sizes in the DHV 1-2,
(accelerated and not accelerated) which are in our requirements specification.
These classifications depend on the ability of the pilot of that category.
The many certification tests are the last hurdle in the development of a skywalk paraglider. The
certifying test flights will only take place when the test-team is completely happy with the glider in
question.
We remark that the certification results will differ during flight in thermally active or turbulent air.
The certification solely informs about a paragliders performance in provoked
extreme-flight-manoeuvres during stable air conditions.
These provoked extreme-flight-manoeuvres during the certification process should thus not be
overrated.
27
12
Conclusion
THE SKYWALK JOIN’T IS AT THE PINNACLE OF
PARAGLIDER DEVELOPMENT.
This glider will provide you with plenty of fun over many years, as long as you treat and maintain it
in a responsible way. Respect for the requirements and potential hazards of our sport are essential
for safe and successful flying.
Even the safest paraglider may crash due to a pilot error or meteorological miscalculations.
Remember that aviation sports are potentially hazardous and that you are responsible for your own
safety.
In the interest of our sport we advise you to fly cautiously and in accordance with air law and local
rules and regulations.
PILOTS FLY AT THEIR OWN RISK!
Join it, too!
GmbH & Co. KG
28
Bahnhofstraße 110
83224 GRASSAU
GERMANY
Fon: +49 (0) 8641 - 69 48 40
Fax: +49 (0) 8641 - 69 48 11
www.skywalk.info
[email protected]
29
13
Riser
D:
350 mm
C:
330 mm
A1 A2 B
30
C
D
310 mm
A1, A2, B:
310 mm
Trimmer closed
Trimmer open
13
Line Plan
The displayed line plan of the
skywalk JOIN’T is only for
demonstration purposes
of the line configuration.
S1 S3 S4
b16
A8
b14
a14
a13
A7
a10
B5
A5
bb9
b9
b8
a8
a7
B3
A3
b5
b4
a3
AIII
AI
bb4
TRAGEGURT
A2 (AIV)
A1
(AI, AII, AIII)
BI
B
(BI,BII,BIII,S)
BRIII
d9
BR4
br6
d7
D4
br5
D3
BRI
br4
d6
c5
MAINBRAKE
d5
CII
c4
br3
d4
c3
CIV
bb2
bb1
D2
CIII
CII
C1
CI
c1
C
(CI,CII,
CIII,BIV)
BR1
br2
d3
C2
c2
b1
br7
d8
BB1
B1
D5
d10
C3
BB2
b2
br8
BIV
BII
a1
c7
C4
bb5
B2
a2
A1
bb7
BR5
BR2
BIII
AII
D6
c6
b3
S
BR8
br9
d11
CIII
c8
bb6
bb3
A2
br10
d12
bb8
b6
a5
a4
c9
BB4
BB3
a6
d13
BR3 BRII
b7
B4
A4
c13
BB5 bb10 c10
b10
C5
a9
br11
C7
D7
d14
bb11 c11
C6
BB6
br12
D8
C8
bb12 c12
b11
B6
d15
c14
BIV
b12
a11
AIV
B7
b13
a12
A6
c15
B8
br13
d16
c16
b15
a15
Plans with individual
measurements and for other
sizes can be aquired
via flight schools,
importers or
BR7
directly from
skywalk.
BR6
br14
c17
b17
a17
a16
S5
D1
DIII
DII
br1
d2
d1
DI
D
(DI,DII,
DIII,CIV)
31
14
Test Protocol 1
Test Protokol
Date:
Customer, Name:
Adress:
Phone:
Glider:
Gütesiegelnr.
Date of the first flight:
Serial number:
Date of last check:
Year of construction:
Accomplished checking
Results: [ +/– ] Description of failure Suggested repairs
–
+
Identification:
Size:
Visual check of canopy:
Upper surface:
:
Lower surface
Profiles:
Line flares:
Leading edge:
Trailing edge:
Crossports:
+
+
+
+
+
+
+
–
–
–
–
–
–
–
Visual check of lines:
Seams:
Abrasions spots:
Core withdrawals:
+
+
+
–
–
–
Vis. check of connectionsparts
Suspension line screw locks:
Risers:
+
+
–
–
Lenght measurement:
Risers:
Lines:
+
+
–
–
Examinations of the canopy:
Firmness of canopy:
32 Porosity:
+
+
–
–
Examinations of the lines:
Firmness of main lines:
Visual check of trimming:
Checkflight necesarry?
Gütesiegel sticker?
Identification plate?
Condition:
Results: [ +/– ]
–
+
–
+
–
+
–
+
daN
Description of failure Suggested repairs
New
Very good condition
Good condition
Well used
Heavily used, but within Gütesiegel standards, frequent checks required
Not longer airworthy, outside of the limit values
Repairs made:
Signature of tester:
Date:
Name of tester:
Firm stamp:
33
Test Protocol 2
Test Protokol
Date:
Customer, Name:
Adress:
Phone:
Glider:
Gütesiegelnr.
Date of the first flight:
Serial number:
Date of last check:
Year of construction:
Accomplished checking
Results: [ +/– ] Description of failure Suggested repairs
–
+
Identification:
Size:
Visual check of canopy:
Upper surface:
:
Lower surface
Profiles:
Line flares:
Leading edge:
Trailing edge:
Crossports:
+
+
+
+
+
+
+
–
–
–
–
–
–
–
Visual check of lines:
Seams:
Abrasions spots:
Core withdrawals:
+
+
+
–
–
–
Vis. check of connectionsparts
Suspension line screw locks:
Risers:
+
+
–
–
Lenght measurement:
Risers:
Lines:
+
+
–
–
Examinations of the canopy:
Firmness of canopy:
34 Porosity:
+
+
–
–
Examinations of the lines:
Firmness of main lines:
Visual check of trimming:
Checkflight necesarry?
Gütesiegel sticker?
Identification plate?
Condition:
Results: [ +/– ]
–
+
–
+
–
+
–
+
daN
Description of failure Suggested repairs
New
Very good condition
Good condition
Well used
Heavily used, but within Gütesiegel standards, frequent checks required
Not longer airworthy, outside of the limit values
Repairs made:
Signature of tester:
Date:
Name of tester:
Firm stamp:
35
36