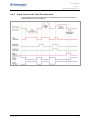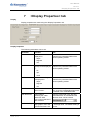
1
User Manual
NanoPro
Control software for
stepper motor controls and
Plug & Drive motors
(valid from version 1.7.0.0)
NANOTEC ELECTRONIC GmbH & Co. KG
Kapellenstraße 6
D-85622 Feldkirchen b. Munich, Germany
Tel.
+49 (0)89-900 686-0
Fax
+49 (0)89-900 686-50
[email protected]
User Manual
NanoPro
Editorial
Editorial
© 2011
Nanotec® Electronic GmbH & Co. KG
Kapellenstraße 6
D-85622 Feldkirchen b. Munich, Germany
Tel.:
Fax:
+49 (0)89-900 686-0
+49 (0)89-900 686-50
Internet: www.nanotec.com
All rights reserved!
MS-Windows 2000/XP/Vista/7 are registered trademarks of the Microsoft Corporation.
Translation of the original operation manual
Version/Change overview
2
Version
Date
Changes
1.0
06/03/2009
New issue C+P
2.0
10/01/2009
Revision of the new software release for
version 1.52.09
2.1
11/05/2010
Revision of the new software release for
version 1.60.0.0
2.2
11/03/2011
Revision of the new software release for
version 1.7.0.0
Issue: V 2.2
User Manual
NanoPro
About this manual
About this manual
Target group
This user manual is aimed at designers and developers who need to configure one of
the Nanotec® SMCI12, SMCI33, SMCI35, SMCI36, SMCI47-S-2, SMCP33 stepper
motor controls or a Plug & Drive motor of the PDx-N series with the aid of the
NanoPro control software without much experience of stepper motor technology.
Important information
This manual only contains a description of the NanoPro control software, version
1.7.0.0 or later.
For the connection and the commissioning of stepper motor controls or Plug & Drive
motors, see the respective technical manuals!
Nanotec® reserves the right to make technical alterations and further develop
hardware and software in the interests of its customers to improve the function of this
product without prior notice.
For criticisms, proposals and suggestions for improvement, please contact the above
address or send an email to: [email protected]
Additional manuals
Please also note the following manuals from Nanotec:
Programming manual
Controller programming
• Command Reference
• NanoJ
• COM interface
NanoCAN User Manual
Configuration of the CAN
communication for CANopencapable controllers with the
NanoCAN software
Nanotec CANopen
reference
Detailed documentation of the
CANopen functions
Technical manuals
Connection and commissioning of
stepper motor controls or
Plug & Drive motors
The manuals are available for download at www.nanotec.com.
Issue: V 2.2
3
User Manual
NanoPro
Contents
Contents
1
Installation ............................................................................................................................ 6
2
Overview of the operating interface................................................................................... 7
2.1
General information................................................................................................................ 7
2.2
Layout of operating interface ................................................................................................. 7
2.2.1
The menu bar......................................................................................................................... 8
2.2.2
Menu window ....................................................................................................................... 10
3
Controller configuration .................................................................................................... 11
4
<Movement Mode> Tab ..................................................................................................... 12
4.1
Overview .............................................................................................................................. 12
4.2
Entering profile parameters.................................................................................................. 14
4.3
Relative/absolute positioning, internal and external reference run...................................... 18
4.3.1
Description ........................................................................................................................... 18
4.3.2
Input and output assignments.............................................................................................. 19
4.3.3
Profile parameters................................................................................................................ 20
4.3.4
Signal curves........................................................................................................................ 23
4.4
Speed mode......................................................................................................................... 24
4.4.1
Description ........................................................................................................................... 24
4.4.2
Input and output assignments.............................................................................................. 25
4.4.3
Profile parameters................................................................................................................ 25
4.4.4
Signal curves in speed mode............................................................................................... 26
4.5
Flag positioning mode .......................................................................................................... 27
4.5.1
Description ........................................................................................................................... 27
4.5.2
Input and output assignments.............................................................................................. 28
4.5.3
Profile parameters................................................................................................................ 28
4.5.4
Signal curves in the Flag positioning mode ......................................................................... 30
4.6
Clock Direction mode Int. Ref. / Ext. Ref. / Left / Right........................................................ 31
4.6.1
Description ........................................................................................................................... 31
4.6.2
Input and output assignments.............................................................................................. 31
4.6.3
Profile parameters................................................................................................................ 32
4.6.4
Signal curves in the Clock Direction mode .......................................................................... 33
4.7
Analog and Joystick mode ................................................................................................... 34
4.7.1
Description ........................................................................................................................... 34
4.7.2
Input and output assignments.............................................................................................. 34
4.7.3
Profile parameters................................................................................................................ 35
4.8
Analog positioning mode...................................................................................................... 36
4.8.1
Description ........................................................................................................................... 36
4.8.2
Input and output assignments.............................................................................................. 36
4.8.3
Profile parameters................................................................................................................ 37
4
Issue: V 2.2
User Manual
NanoPro
Contents
4.9
Torque mode........................................................................................................................ 38
5
<Motor Settings> tab ......................................................................................................... 39
6
<Brake> tab......................................................................................................................... 43
7
<Display Properties> tab................................................................................................... 45
8
<Errorcorrection> tab ........................................................................................................ 46
9
<Input> tab.......................................................................................................................... 49
10
<Output> tab....................................................................................................................... 56
11
<Communication> tab ....................................................................................................... 58
12
<Statusdisplay> tab ........................................................................................................... 60
13
<CL-Parameter> (Closed Loop) tab.................................................................................. 62
13.1.1
Configuring the Closed Loop current control ....................................................................... 62
13.1.2
Velocity Loop........................................................................................................................ 63
13.1.3
Position Loop ....................................................................................................................... 64
14
<Scope> tab........................................................................................................................ 74
15
<Expert> tab ....................................................................................................................... 77
16
Operating Several Motors ................................................................................................. 80
17
Troubleshooting................................................................................................................. 81
17.1
General information.............................................................................................................. 81
17.2
Error messages.................................................................................................................... 82
Index ...................................................................................................................................................... 84
Issue: V 2.2
5
User Manual
NanoPro
Installation
1
Installation
System requirements
• MS-Windows 2000/XP/Vista/Windows 7
• Free COM port on your Windows PC
Procedure
To install the NanoPro control software on your PC, you must first download the
software from the Nanotec website.
To do this, proceed as follows:
Step
6
Action
1
Open the Nanotec website in your browser at http://www.nanotec.com.
2
Go to the "Downloads" area and select the following software:
“Windows Software NanoPro for Plug & Drive & SMCI (NEW) >>”
3
Download the "NanoPro V xxx.zip” file onto your PC.
4
Unpack the zip file on your PC in the required directory.
5
Open the "NanoPro V xxx” folder and start the setup program by doubleclicking on the "Setup_xxx.exe” file.
6
Follow the installation instructions of the setup program.
Issue: V 2.2
User Manual
NanoPro
Overview of the operating interface
2
2.1
Overview of the operating interface
General information
Introduction
The SMCI12, SMCI33, SMCI35, SMCI36, SMCI47-S-2, SMCP33 stepper motor
controls and Plug & Drive motors of the PDx-N series can be configured and
programmed with the NanoPro control software using any standard Windows PC.
Transparent interfaces and simple test functions enable rapid entry into operation and
programming and facilitate commissioning.
Due to the straightforward operating interface, not all functions are described in this
manual. Much of it is self-explanatory. Therefore, only a few essential operational
procedures are explained.
Familiarize yourself with the operating interface of the NanoPro control software
before starting to commission and program the stepper motor controls or Plug & Drive
motors.
2.2
Layout of operating interface
Menu bar and menu window
The operating interface is basically set up with a menu bar (1) and a separate menu
window (2) for each motor.
Issue: V 2.2
7
User Manual
NanoPro
Overview of the operating interface
2.2.1
The menu bar
<File> menu
Standard functions for file editing.
<Language> menu
The operating interface language can be changed here (German/English).
"Motor" selection menu
Selection of the required motor.
In networks, up to 254 motors can be operated on a linked basis and actuated by the
NanoPro control software.
<Motor> menu
The <Motor> menu has the following menu items:
• <Add Motor>
New motors can be added via the <Add Motor> menu item.
An input window for the motor address opens. The address must be between 1
and 254.
• <Remove Motor>
Motors that are no longer required can be removed from the controller in the
<Remove Motor> menu item.
This opens a window with the query "Do you really want to delete this motor?“,
which you can quit with the <Yes> button.
• <Copy Motor to>
You can copy and adopt the current settings for a new motor with this menu item.
An input window for the motor address opens. The address must be between 1
and 254.
• <Refresh all Motorvalues>
All motor settings are transferred to the NanoPro control software.
8
Issue: V 2.2
User Manual
NanoPro
Overview of the operating interface
• <Save all Motorvalues>
All motor settings are saved in the controller.
<System> menu
The <System> menu has the following menu items:
• <Firmware change>
<update to latest firmware>: Update the firmware in the controller to the latest
firmware located in the firmware file for that controller.
– <select firmware>: Select the firmware.
• <Firmwarefile update>
Update of the firmware file (in the NanoPro installation directory) to a new firmware
file from the Nanotec webserver.
–
• <Check for firmware update>
Manually check whether an update for the firmware is available.
• <Firmware check automatic>
When the checkbox is activated, an automatic check is made of whether a
firmware update is available.
• <Show Expert Tab>
When the checkbox is activated, the <Expert> tab is displayed in the tab bar.
• <Supportlog>
When the checkbox is activated, a log file is automatically created for support
purposes.
<Help> menu
The <Help> menu has the following menu items:
• <Content>
Call up the online help for NanoPro.
• <About NanoPro>
Display the version information for the latest installation of NanoPro.
Issue: V 2.2
9
User Manual
NanoPro
Overview of the operating interface
2.2.2
Menu window
Tabs
The menu window contains the following tabs:
Tab
See section
Movement Mode
4 „<Movement Mode>“
Motor Settings
5 „<Motor Settings> tab“
Brake
6 „<Brake> tab“
Display Properties
7 „<Display Properties> tab“
Errorcorrection
8 „<Errorcorrection> tab“
Input
9 „<Input> tab“
Output
10 „<Output> tab“
Communication
11 „<Communication> tab“
Statusdisplay
12 „<Statusdisplay> tab“
CL Parameter
13 „<CL-Parameter> (Closed Loop) tab“
Scope
14 „<Scope> tab“
Expert (display must be activated via 15 „<Expert> tab“
the <System Æ Show Expert Tab>
menu)
Transferring settings to/from controller
The current configuration settings can be saved in the connected controller or read
from the connected controller using the following buttons.
• <Save Configuration to Drive>
The current settings are transferred from the NanoPro to the connected controller.
• <Read Configuration from Drive>
The current settings are transferred from the connected controller to NanoPro.
10
Issue: V 2.2
User Manual
NanoPro
Controller configuration
3
Controller configuration
General information
This Section describes the general procedure for configuring the controller. The
parameters to be configured on the respective tabs are described in detail in sections
4 to 15.
Procedure
To configure the drivers, proceed as follows:
Step
Issue: V 2.2
Action
Note
1
Commission the controller and
establish communication with the
controller.
See technical manual of the
respective controller.
2
Click on the <Read Configuration from See Section 5 “<Motor Settings> tab”
Drive> button.
The connected controller type is
detected and displayed in the <Motor
settings> tab.
The parameters applicable for the
respective controller type are
displayed.
3
If this is not a Plug & Drive motor:
Select the motor type and motor
designation (see motor type plate) in
the <Motor settings> tab.
Motor type and designation are
detected automatically for
Plug & Drive motors.
See Section 5 “<Motor Settings> tab”
4
Enter the required parameters in the
tabs and click, if necessary, on the
<Save Data> button to transfer the
settings of the respective tab to the
controller.
See Section 4.2 „Entering profile
parameters“, for example.
5
Click on the <Save Configuration to
Drive> button, if necessary, to transfer
all settings from NanoPro to the
controller.
11
User Manual
NanoPro
<Movement Mode> Tab
4
4.1
<Movement Mode> Tab
Overview
Introduction
Depending on the travel profile, the motor can be operated using a total of 14 different
operating modes; see also Section 4.2 „Entering profile parameters“. Due to the great
capacity of functions available, it offers designers and developers a rapid and simple
method of resolving numerous drive requirements with less programming effort.
Select the required operating mode for each travel profile and configure the controller
according to your requirements.
Overview of operating modes and their areas of application
Operating mode
Application
Positionmode - Relative
Use this mode if you would like to travel to a specific
position.
The motor travels according to a specified travel profile
from a Position A to a Position B.
Please refer to Section 4.3 "Relative/absolute
positioning, internal and external reference run".
Positionmode - Absolute
12
Internal reference run
During the internal reference run, the motor travels to
an internal reference point at the set minimum speed.
Please refer to Section 4.3 "Relative/absolute
positioning, internal and external reference run".
External reference run
During an external reference run, the motor travels to
a switch connected to the reference input.
Please refer to Section 4.3 "Relative/absolute
positioning, internal and external reference run".
Speed mode
Use this mode when you wish to travel with a specific
speed (e.g. a conveyor belt or pump speed).
In the speed mode, the motor accelerates with a
specified ramp from the starting speed (start frequency
"V Start") to the specified maximum speed (maximum
frequency "V Normal").
With multiple inputs, the rotational speed can be
controlled at various speeds on-the-fly.
Please refer to Section 4.4 "Speed mode".
Flag positioning mode
The flag positioning mode offers a combination of the
speed and positioning modes. The motor is initially
operated in speed mode; when a trigger point is
reached, it changes to the positioning mode and the
specified setpoint position (relative to the trigger
position) is approached.
This operating mode is used for labeling, for example:
the motor first travels with the set ramp to the
synchronous speed of the conveyed goods. When the
labels are detected, the preset distance (position) is
traveled to apply the labels.
Please refer to Section 4.5 "Flag positioning mode".
Issue: V 2.2
User Manual
NanoPro
<Movement Mode> Tab
Operating mode
Application
Use this mode when you wish to operate the motor
with a superordinate controller (e.g. CNC controller).
Clock Direction mode, right
In the clock direction mode, the motor is operated via
Clock direction mode Int. Ref. two inputs with a clock and a direction signal from a
Clock direction mode Ext.
superordinated positioning controller (indexer).
Ref.
Depending on the mode selected (Int. Ref./Ext. Ref.),
the internal and external reference runs are supported.
Please refer to Section 4.6 "Clock Direction mode Int.
Ref. / Ext. Ref.".
Clock Direction mode, left
Analog and Joystick mode
The motor is actuated in this operating mode simply
with a potentiometer or a Joystick (–10 V to +10 V).
Use this mode if you want to use the motor in a simple
application:
• Setting a specific speed, e.g. via an external
potentiometer,
• Traveling synchronously with a superordinate
controller with analog output (–10 V to +10 V).
Please refer to Section 4.7 "Analog and Joystick
mode".
Issue: V 2.2
Analog Positioning mode
Use this mode if you would like to travel to a specific
position.
The voltage level at the analog input is proportionate
to the desired position, thus enabling servo
performance.
Please refer to Section 4.8 "Analog positioning mode".
Torque mode
Use this mode if you would like to have a certain
output torque independent of the rotational speed, as
is typically the case with winding and unwinding
applications. The maximum torque is specified via the
analog input.
Please refer to Section. 4.9 „Torque mode“
13
User Manual
NanoPro
<Movement Mode> Tab
4.2
Entering profile parameters
Introduction
Up to 32 travel profiles can be defined and programmed.
You can assign important profile parameters to a travel profile using the NanoPro
software.
The parameters listed below do not all have to be specified for all travel modes. When
the operation mode is activated or changed, the relevant fields are displayed in the
<Movement Mode> tab.
<Movement Mode> tab
The profile parameters for a specific travel profile are set on the <Movement Mode>
tab.
14
Issue: V 2.2
User Manual
NanoPro
<Movement Mode> Tab
Drive Profile selection list
• This window displays the maximum possible 32 travel profiles.
• After selecting the required travel profile, the corresponding profile parameters are
displayed in the parameter area .
“Operation Type” selection menu
• The required operating type can be selected here.
Profile parameters
• Displays parameters dependent on the selected operating type and travel profile.
• Settings of required parameters for the various profiles (max. 32).
Motor parameters
• Display of the parameters of the connected motor.
• Setting of parameters, see 5 "<Motor Settings> tab".
Issue: V 2.2
15
User Manual
NanoPro
<Movement Mode> Tab
Buttons for communication with the controller
• <Test Record>
Activation of the <Test Record> button transmits the current record to the controller
and starts it. The parameters are not stored by the controller.
• <Stop record>
The currently operating record is stopped.
• <Quick Stop>
The currently operating record is stopped – independent of the travel profile – with
the Quick Stop ramp. For the settings, see Section 5 "<Motor Settings> tab".
• <Save Data>
Pressing the <Save Data> button permanently stores the set travel profile in the
controller.
Transfer can take a few seconds and is visually displayed with a progress bar.
The travel profiles can then be selected and started via the motor inputs.
• <Read from Drive>
All record data stored in the controller is loaded onto your PC.
Display profile graph
• The displayed profile graph can be used to rapidly see the ramp times
(acceleration time) and the overall actuating time for the applicable travel profile.
• The graphic is recalculated after every relevant input.
Buttons for motor position/communication with the optional encoder
• <Query State>
Pressing the <Query State> button queries the actual state of the motor and
displays the state on the screen.
• <Reset counter>
Pressing the <Reset counter> button resets the current counter value to zero.
16
Issue: V 2.2
User Manual
NanoPro
<Movement Mode> Tab
• <Read Counter>
Pressing the <Read Counter> button queries the actual counter value and displays
it on screen.
• <Delivery Status>
Pressing the <Delivery Status> button resets all parameter settings in the controller
to the default condition.
Procedure
The following describes an example of how to enter profile parameters for a travel
profile in the “Relative” operation type. Other parameters must be defined in other
operating modes.
Proceed as follows:
Step
Issue: V 2.2
Action
Note
1
Select the required travel profile in the The parameter values of the selected
<Movement Mode> tab, e.g. “01.
travel profile are displayed.
Relative, 400,-”.
The travel profile is defined by the
positioning mode ("Operation Type"
selection menu) and the distances in
the field "Position Demand".
2
In the "Operation Type" selection
menu, select the "Relative" mode.
The relevant parameter fields are
displayed.
3
Enter the desired parameters.
See Section 4.3.3 "Profile
parameters".
4
If you want to test the entered travel
profile:
Click on the <Test Record> button.
The motor then travels according to
the selected operating mode and
travel profile.
5
Repeat steps 1 to 4 if you want to
enter further travel profiles.
6
If you want to permanently save the
entered settings:
Click on the <Save to Drive> button.
The data are then saved in the
controller.
17
User Manual
NanoPro
<Movement Mode> Tab
4.3
Relative/absolute positioning, internal and external
reference run
4.3.1
Description
Function
Relative and absolute positioning
In the "Relative" and "Absolute" operation types, the motor moves from a position A to
a position B according to a specified travel profile.
They are preferentially used when travel to a specific position is required.
The positions can be defined as absolute or relative values depending on the mode
selected. With relative positioning the travel profile is started from the actual position.
With absolute positioning, the travel profile starts from a specified zero position,
irrespective of the actual position.
Internal and external reference run
In the "Internal reference run" operation type, the motor travels to an internal reference
point at the set minimum speed (index mark of encoder).
In the "External reference run" operation type the motor travels to a switch connected
to the reference input.
After the start of the external reference run, the motor accelerates with the set ramp
from the minimum to the maximum speed. Once the reference switch is reached,
movement is stopped for a break of 100 ms and then, according to the "Limit switch
behavior internal/external" setting (see Section 9 "<Input>", "Behavior for Internal /
External"), travel is recommenced away from the switch at the minimum speed
(start/stop speed).
The reference switch can be an opener or a closer. This must be set with the software
during programming.
See also Section 9 “<Input> tab” and the separate manual for the respective stepper
motor control or for the Plug & Drive motor.
Parameter fields for the "Relative" operation type
18
Issue: V 2.2
User Manual
NanoPro
<Movement Mode> Tab
Parameter fields with the “Absolute” operation type
Parameter fields with the "Reference Run Internal” operation type
Parameter fields with the "Reference Run External” operation type
4.3.2
Input and output assignments
General information
The inputs and outputs are freely configurable, see Section 9 "<Input> tab and Section
10 "<Output> tab".
Possible input configuration
The inputs can be configured with the following functions:
• Start/reset
• Record bit 0 to record bit 4
• External reference switch
Issue: V 2.2
19
User Manual
NanoPro
<Movement Mode> Tab
4.3.3
Profile parameters
Parameter descriptions
The following parameters can be set:
Parameter
Function
Position Demand
• Absolute or relative position for the selected travel profile
(distance).
• The control variable can be input in steps, degrees or mm.
• The units of measurement can be changed in the <Display
Properties> tab.
Direction (not with
Direction of rotation of travel profile
absolute positioning) • Left
• Right
Minimal Speed
"Start speed" (V Start):
• Start speed (start/stop frequency) of the motor in Hz.
• To avoid step losses, it should be selected to be above the
natural resonance of the motor.
• Too high a minimum speed can also lead to step losses.
• The units of measurement can be changed in the <Display
Properties> tab.
Target Speed
"Normal speed" (V Normal):
• Normal travel speed of the motor in Hz.
• To avoid step losses, it should lie outside the resonance
ranges.
• Too high a maximum speed can cause step losses and
motor stalling.
• The units of measurement can be changed in the <Display
Properties> tab.
Ramp / Brake Ramp Ramp gradient:
• Values are entered in Hz/ms.
• The steeper the ramp, the faster the acceleration; however, if
the acceleration is too high, the motor can skip and lose
steps.
• Any possible resonance ranges must be traversed as fast as
possible.
• The maximum value is 3000 Hz/ms.
The set value is output as the next possible speed due to the
coding in the motor (at 3000 Hz/ms e.g. as 2988.3 Hz/ms).
• The minimum value is 0.1 Hz/ms.
• Brake ramp: The value 0 means that the value set in the
"Ramp" field for the acceleration ramp is also applied for the
brake ramp.
Break (only with
relative positioning)
• The idle time of the motor (in ms) when several runs must be
implemented in sequence.
• The minimum duration of the adjustable break is 1 ms.
20
Issue: V 2.2
User Manual
NanoPro
<Movement Mode> Tab
Parameter
Function
Repetitions
(only with relative
positioning)
The "Repetitions" parameter indicates how often the selected
travel profile should be implemented automatically in sequence
without another start command. A value of 0 means that the
selected travel profile is traveled an infinite number of
consecutive times.
Reverse direction
(only with relative
positioning)
• An automatic change of direction can be activated in the
"Reverse Direction" option field.
Next Record
A travel profile can be defined in this selection menu to be
started when the current record is ended.
Ramp Type
The following ramp types can be selected:
• Trapezoid ramp
• In active change of direction, the rotation direction of the
motor is automatically changed when the same record is
called up repeatedly in sequence.
• Sinus ramp
• Jerk Free Ramp
The following additional parameter fields appear if the "Jerk
Free Ramp" has been selected:
Possible values: 1 to 65,536
The "Max. Acceleration Jerk" and "Max. Brake Jerk" parameters
indicate the maximum change of acceleration over time. The
greater the jerk, the faster the acceleration can change. A very
small jerk leads to a sinusoidal acceleration ramp while a large
jerk leads to a trapezoidal ramp, see following figure:
Issue: V 2.2
21
User Manual
NanoPro
<Movement Mode> Tab
Parameter
Ramp Type
(continued)
Function
Speed
Minor
jolt
Max. acceleration
reached
Time
Speed
Major
jolt
Max. acceleration reached
Time
Profile graph display
The displayed profile graph shows the ramp times (acceleration time) and the overall
actuating time for the applicable travel profile.
The graphic is recalculated after every relevant input. This allows you to continually
check and, where necessary, correct the settings made.
22
Issue: V 2.2
User Manual
NanoPro
<Movement Mode> Tab
4.3.4
Signal curves
Example of a signal curve
In this example, travel profile 5, then travel profile 3, followed by travel profile 16
(programmed as reference run) are started.
Issue: V 2.2
23
User Manual
NanoPro
<Movement Mode> Tab
4.4
Speed mode
4.4.1
Description
Function
In the speed mode, the motor accelerates with a specified ramp from the starting
speed (minimal speed/start frequency) to the specified maximum speed (target
speed/maximum frequency).
The speed mode is generally used when a specific travel speed is required (e.g. for a
conveyor belt or a pump).
Parameter fields for “Speed” operation type
Speed changes
Speed changes can be implemented at any time via the inputs or the interface. Unlike
the other operation modes, the state of the inputs is read in during travel and the
associated speed parameters are output. When the speed changes, the motor
accelerates or brakes with the set ramp to the new setpoint speed.
If you start the motor for test purposes via the NanoPro controller software (click on
<Test Record> button), the following buttons change:
• The <Save to Drive> button changes to the <increase frequency> button:
Clicking on the button increases the frequency (speed) of the motor by 100 Hz.
The current frequency value is shown in the window at the top right ("Drive
Speed").
• The <Read from Drive> button changes to the <decrease frequency> button:
Clicking on the button decreases the frequency (speed) of the motor by 100 Hz.
The current frequency value is shown in the window at the top right ("Drive
Speed").
24
Issue: V 2.2
User Manual
NanoPro
<Movement Mode> Tab
4.4.2
Input and output assignments
General information
The inputs and outputs are freely configurable; see Section 9 "<Input>" and Section
10 "<Output>".
Possible input configuration
The inputs can be configured with the following functions:
• Start/reset
• Record bit 0 to record bit 4
• Direction (direction of rotation of motor)
4.4.3
Profile parameters
Parameter descriptions
The following parameters can be set in the speed mode:
Parameter
Function
Direction
Direction of rotation of travel profile:
• Left
• Right
The direction of rotation of the motor is only relevant when the
motor is operated via the programming interface. Otherwise, the
direction of rotation is selected via an input.
Minimal speed
"Starting speed"
• The minimum speed in Hz is the startup speed (start-stop
frequency) of the motor.
• To avoid step losses, it should be selected to be above the
natural resonance of the motor.
• Too high a minimum speed can also lead to step losses.
Target speed
"Normal speed":
• The maximum speed in Hz is the setpoint speed of the
motor.
• To avoid rough operation, it should lie outside resonance
ranges.
• Too high a maximum speed can cause step losses and
motor stalling.
Ramp / Brake Ramp Input of ramp gradient in Hz/ms.
Brake ramp: The value 0 means that the value set in the "Ramp"
field for the acceleration ramp is also applied for the brake ramp.
Ramp Type
The following ramp types can be selected:
• Trapezoid ramp
• Sinus ramp
• Jerk Free Ramp (see Section 4.3.3)
Issue: V 2.2
25
User Manual
NanoPro
<Movement Mode> Tab
Profile graph display
The displayed profile graph shows the ramp times (acceleration time) and the setpoint
speed for the applicable travel profile.
The graphic is recalculated after every relevant input. This allows you to continually
check and, where necessary, correct the settings made.
4.4.4
Signal curves in speed mode
Example of a signal curve
In the example, speeds of travel profile 4, travel profile 7 and, after a change of
direction, the speed of travel profile 13 are used.
26
Issue: V 2.2
User Manual
NanoPro
<Movement Mode> Tab
4.5
Flag positioning mode
4.5.1
Description
Function
The flag positioning mode offers a combination of the speed and positioning modes.
The motor is first operated in speed mode to travel an undefined distance with a
specific speed, for example. When a trigger (trigger point) is reached, e.g. a limit
switch, operation is switched to the relative positioning mode to travel to a defined
setpoint position (relative to the trigger position).
Parameter fields in the “Flag Position” operation type
Issue: V 2.2
27
User Manual
NanoPro
<Movement Mode> Tab
Manually setting the trigger signal
The trigger signal can be set manually at input 5 via the NanoPro controller software.
If you start the motor for test purposes (click on the <Test Record> button), the
following button changes:
• The <Test Record> button changes to the <Trigger on> button: When this button is
clicked, the trigger signal is set and the motor changes from the Speed mode to the
Relative positioning mode.
4.5.2
Input and output assignments
General information
The inputs and outputs are freely configurable, see Section 9 “<Input> tab" and
Section 10 "<Output> tab".
Possible input configuration
The inputs can be configured with the following functions:
• Start/reset (starts the speed mode)
• Record bit 0 to record bit 4
• Trigger (starts the positioning mode)
• External reference switch
4.5.3
Profile parameters
Parameter descriptions
The following parameters can be set in the flag positioning mode:
Parameter
Function
Position Demand
• Distance for the selected travel profile.
• The number of motor steps to be output can be selected up
to 16,777,215 steps.
Direction
Direction of rotation of travel profile:
• Left
• Right
28
Issue: V 2.2
User Manual
NanoPro
<Movement Mode> Tab
Parameter
Function
Minimal Speed
"Starting speed"
• The minimum speed in Hz is the startup speed (start-stop
frequency) of the motor.
• To avoid step losses, it should be selected to be above the
natural resonance of the motor.
• Too high a minimum speed can also lead to step losses.
Target Speed
"Maximum speed 1":
• The maximum speed before the trigger pulse (speed mode)
in Hz.
• To avoid step losses, it should be selected to be above the
natural resonance of the motor.
• Too high a maximum speed can cause step losses and
motor stalling.
V Maximum
"Maximum speed 2":
• The maximum speed after the trigger pulse (positioning
mode) in Hz.
• Default set to 1000 Hz.
• To avoid step losses, it should be selected to be above the
natural resonance of the motor.
• Too high a maximum speed can cause step losses and
motor stalling.
Ramp / Brake Ramp Input of ramp gradient in Hz/ms.
Brake ramp: The value 0 means that the value set in the "Ramp"
field for the acceleration ramp is also applied for the brake ramp.
Break
• The idle time of the motor (in ms) when several runs must be
implemented in sequence.
• The minimum duration of the adjustable break is 1 ms.
Repetitions
The "Repetitions" parameter indicates how often the selected
travel profile should be implemented automatically in sequence
without another start command.
Next Record
A travel profile can be defined in this selection menu to be called
up when the current record is ended.
Ramp Type
The following ramp types can be selected:
• Trapezoid ramp
• Sinus ramp
• Jerk Free Ramp (see Section 4.3.3)
Issue: V 2.2
29
User Manual
NanoPro
<Movement Mode> Tab
Profile graph display
The displayed profile graph shows the ramp times (acceleration time) and the overall
actuating time for the applicable travel profile.
The graphic is recalculated after every relevant input. This allows you to continually
check and, where necessary, correct the settings made.
4.5.4
Signal curves in the Flag positioning mode
In this example, travel profile 4 is started and then a reference run (programmed as
travel profile 8) is started.
30
Issue: V 2.2
User Manual
NanoPro
<Movement Mode> Tab
4.6
Clock Direction mode Int. Ref. / Ext. Ref. / Left / Right
4.6.1
Description
Function
In the Clock Direction modes, the motor is operated via two inputs with a clock and a
direction signal from a superordinated positioning control (indexer).
With the Clock Direction Left/Right modes, the motor can be moved manually into the
selected rotation direction. With every clock signal, the motor moves one step in the
direction set by the direction signal. The motor can be started by clicking on the <Test
Record> button.
In the Clock Direction modes Int. Ref. / Ext. Ref., the internal or, respectively, external
reference runs are supported (see Section 9 "<Input> tab" and the separate manual
for the respective stepper motor control or for the Plug & Drive motor).
Parameter fields in the "Clock Direction Left/Right” operation type
Parameter fields in the "Clock Direction Run Int. Ref. / Ext. Ref.” operation type
4.6.2
Input and output assignments
General information
The inputs and outputs are freely configurable, see Section 9 “<Input> tab" and
Section 10 "<Output> tab".
Possible input configuration
The inputs can be configured with the following functions:
• Start/reset
• Clock Direction mode, mode selection 1
• Clock Direction mode, mode selection 2
• External reference switch
• Direction (direction of rotation of the motor):
A signal change at this input must be completed at least 150 μs before a clock
signal.
• Clock
Issue: V 2.2
31
User Manual
NanoPro
<Movement Mode> Tab
4.6.3
Profile parameters
Parameter descriptions
The following parameters can be set in the clock direction mode:
Parameter
Function
Direction
Direction of rotation of travel profile:
• Left
• Right
Minimal Speed
"Starting speed"
• The minimum speed in Hz is the startup speed (start-stop
frequency) of the motor.
• To avoid step losses, it should be selected to be above the
natural resonance of the motor.
• Too high a minimum speed can also lead to step losses.
Target Speed (only
active if there is no
external frequency)
"Normal speed":
• The maximum speed in Hz is the setpoint speed of the
motor.
• To avoid step losses, it should be selected to be above the
natural resonance of the motor.
• Too high a maximum speed can cause step losses and
motor stalling.
Ramp / Brake Ramp Input of ramp gradient in Hz/ms.
Brake ramp: The value 0 means that the value set in the "Ramp"
field for the acceleration ramp is also applied for the brake ramp.
Note:
For controllers with a dspDrive, when using the clock direction mode in 1/32 or 1/64
step mode, the scaling factors P and I should be set to 0 in the PI parameters of the
dspDrive since resonances may otherwise occur at high speeds.
32
Issue: V 2.2
User Manual
NanoPro
<Movement Mode> Tab
4.6.4
Signal curves in the Clock Direction mode
In this example, the left and right modes are started after one another and then the
external reference run is carried out.
Issue: V 2.2
33
User Manual
NanoPro
<Movement Mode> Tab
4.7
Analog and Joystick mode
Note:
The analog and joystick modes differ only in a few details. Both modes are therefore
described here in one section.
4.7.1
Description
Function
In the analog or joystick mode, a stepper motor is operated in a simple application:
• with a specific speed, e.g. via an external potentiometer,
• or synchronously with a superordinate controller with analog output (–10 V to
+10 V).
The motor is simply actuated either by a potentiometer or an external power supply
and a joystick (maximum –10 V to +10 V).
The motor operates at a speed proportional to the applied voltage. The voltage is
resolved with an accuracy of 10 bits. The smaller the selected voltage range is, the
worse the resolution of the speed will be. To define the voltage range, see Section 9
"<Input> tab".
Parameter fields in the “Analog” operation mode
Parameter fields in the “Joystick” operation mode
4.7.2
Input and output assignments
General information
The inputs and outputs are freely configurable, see Section 9 “<Input> tab" and
Section 10 "<Output> tab".
Possible input configuration
The inputs (digital) can be configured with the following functions, for example:
• Start/reset
• Record bit 0 to record bit 4
• Direction
34
Issue: V 2.2
User Manual
NanoPro
<Movement Mode> Tab
4.7.3
Profile parameters
Parameter descriptions
The following parameters can be set in the analog or joystick mode:
Parameter
Function
Direction (only in
Analogue mode)
Direction of rotation of travel profile:
• Left
• Right
The direction setting is only significant if no input is configured
for direction, since this input would in this case have higher
priority.
Note:
In Joystick mode, the voltage sign determines the direction of
rotation (– means "rotate left", + means "rotate right").
Minimal Speed
"Starting speed"
• The minimum speed in Hz is the startup speed (start-stop
frequency) of the motor.
• To avoid step losses, it should be selected to be above the
natural resonance of the motor.
• Too high a minimum speed can also lead to step losses.
Target Speed
"Normal speed":
• The maximum speed in Hz is the setpoint speed of the
motor.
• To avoid step losses, it should be selected to be above the
natural resonance of the motor.
• Too high a maximum speed can cause step losses and
motor stalling.
Issue: V 2.2
Ramp
Input of ramp gradient in Hz/ms.
In the analog and joystick modes, the ramp determines the
maximum acceleration.
If the voltage changes too fast, e.g. by turning the potentiometer
too rapidly, this ramp is used to accelerate to the maximum
rotational speed.
Brake Ramp
Input of ramp gradient in Hz/ms.
In the analog and joystick modes, the brake ramp determines
the maximum deceleration.
If the voltage changes too fast, e.g. by turning the potentiometer
too rapidly, this ramp is used to decelerate to a standstill.
The value 0 means that the value set for the acceleration ramp
can also be used for the brake ramp.
35
User Manual
NanoPro
<Movement Mode> Tab
4.8
Analog positioning mode
4.8.1
Description
Function
A specific position can be approached in this mode.
The analog input can be actuated with max. –10 V to +10 V. The voltage at the analog
input directly controls the position. To define the voltage range, see Section 9 "<Input>
tab".
Parameter fields
4.8.2
Input and output assignments
General information
The inputs and outputs are freely configurable, see Section 9 “<Input> tab" and
Section 10 "<Output> tab".
Possible input configuration
The inputs (digital) can be configured with the following functions, for example:
• Start/reset
• Record bit 0 to record bit 4
36
Issue: V 2.2
User Manual
NanoPro
<Movement Mode> Tab
4.8.3
Profile parameters
Parameter descriptions
The following parameters can be set in the analog positioning mode:
Parameter
Function
Position Demand
• Distance for the selected travel profile.
• The number of motor steps to be output can be selected up
to 16,777,215 steps.
Minimal Speed
"Starting speed"
• The minimum speed in Hz is the startup speed (start-stop
frequency) of the motor.
• To avoid step losses, it should be selected to be above the
natural resonance of the motor.
• Too high a minimum speed can also lead to step losses.
Target Speed
"Normal speed":
• The maximum speed in Hz is the setpoint speed of the
motor.
• To avoid step losses, it should be selected to be above the
natural resonance of the motor.
• Too high a maximum speed can cause step losses and
motor stalling.
Issue: V 2.2
Ramp
Input of ramp gradient in Hz/ms.
In the analog positioning mode, the ramp determines the
maximum acceleration.
If the voltage changes too fast, e.g. by turning the potentiometer
too rapidly, this ramp is used to accelerate to the maximum
rotational speed.
Brake Ramp
Input of ramp gradient in Hz/ms.
In the analog positioning mode, the brake ramp determines the
maximum deceleration.
If the voltage changes too fast, e.g. by turning the potentiometer
too rapidly, this ramp is used to decelerate to a standstill.
The value 0 means that the value set for the acceleration ramp
can also be used for the brake ramp.
37
User Manual
NanoPro
<Movement Mode> Tab
4.9
Torque mode
Display
Function
The torque mode is used to rotate the motor at a constant torque.
The torque is determined by the analog input (see configuration of analog input in
<Input> tab). The maximum current is limited by the set phase current (see "Phase
current" parameter in the <Motor Settings> tab).
The rotational speed is not fixed in this mode: the greater the load on the motor, the
lower the rotational speed. The speed that is set depends on the type of motor used
and the current setting.
Ramps are not used in the Torque mode. The rate at which the motor accelerates only
depends on the setting for current.
Note:
The Torque mode can only be used when Closed Loop mode is activated.
38
Issue: V 2.2
User Manual
NanoPro
<Motor Settings> tab
5
<Motor Settings> tab
Display
The general motor parameters are set in the <Motor Settings> tab.
Parameter descriptions
The following parameters can be set for the motor:
Parameter
Function
Note
Controller Type
Selection of controller type.
The user interface is modified
to correspond to the selected
controller type.
Motor Design
Selection of the motor design of
the connector motor.
When a BLDC motor is
selected, the input field for the
pole pair number is displayed
instead of the selection field
for the drive step angle in the
motor settings area.
Motor Type
Selection of motor type.
Motor Name
Selection of motor designation
Wiring
Selection of the wiring (serial or
parallel)
hardware
Issue: V 2.2
39
User Manual
NanoPro
<Motor Settings> tab
Parameter
Function
Note
The following step modes can
be selected:
• Full step
The smaller the selected step
size is, the larger the
resolution:
With 1.8° stepper motors, a
half step is therefore 0.9° and
a tenth step 0.18°, for
example.
Adaptive microstep means
that the step angle
automatically increases with
increasing speed.
Example: at 30 rpm, the motor
runs in 64th step mode and at
3000 rpm at full step as a
higher speed is possible here
and in general accuracy plays
a subordinate role.
In the Feed Rate mode, the
number of full steps is defined
by the feed rate.
Motor settings
Step mode
• Half step
• Quarter step
• Fifth step
• Eighth step
• Tenth step
• 16th step
• 32nd step
• 64th step
• Feed rate
• Adaptive microstep
40
Drive Step Angle
(Full Step step
width) (not for
BLDC motors)
Setting of the step angle of the
connected motor.
In general, the motor is a 1.8°
stepper motor (default).
Another step angle can be
selected if necessary in the
selection menu.
Pole pairs
(only for BLDC
motors)
Entry of the pole pair number of
the connected motor.
Only displayed if a BLDC
motor is selected.
Phase Current
The phase current can be set in
steps of 1%.
The corresponding absolute
value is automatically calculated
and displayed in the "Current"
and "Peak Current" display
fields.
The peak current is lower in
the full step mode than in the
other step modes. To provide
the same power as in the full
step mode, the motor requires
a higher peak current at
smaller step modes.
Phase Current
During Idleness
Input of phase current at
standstill in percent.
The corresponding absolute
value is automatically calculated
and displayed in the "Current"
and "Peak Current" display
fields.
It is recommended to select the
highest possible current
reduction for standstill.
This current reduction serves
to minimize the heat
generated by the dissipation
loss of the motor windings
and the output stage of the
controller.
When the full holding torque is
required at a standstill,
however, then the current
reduction should not be
activated and the phase
current should not be
reduced.
BLDC I (max)
Entry of the peak current for
BLDC motors in percent.
The peak current must be at
least as large as the phase
current; otherwise, the phase
current is used.
Issue: V 2.2
User Manual
NanoPro
<Motor Settings> tab
Parameter
Function
Note
BLDC T (I)
Entry of the current time
constants for BLDC motors in
milliseconds.
The time constant defines the
duration for which the set
peak current can flow.
The steps entered here are
Reverse Clearance Entering a number of steps to
compensate for the reverse
added to every change of
clearance of the mechanics, e.g. direction.
for linear axles or gears.
Reverse encoder
Option field for activating the
direction of rotation encoder reversal of direction of
rotation.
In some cases a false
direction of rotation is defined.
This can be seen when the
error message "Position error"
is always displayed when
testing records.
This function can be used to
change the A/B track in the
software.
Send State Byte
If this option field is activated,
Automatically Upon status bytes are automatically
End of Record
sent at the end of a run.
The use of this option is
sensible if just one motor is
actuated and the end of the
run must be evaluated.
Note: This option may not be
used under any
circumstances if a network is
in use, as this could lead to
conflicts and therefore to
transmission errors.
Issue: V 2.2
Rotation Encoder
Resolution
• Resolution of the rotation
encoder (pulses/revolution)
Feed Rate
Numerator
• Entry of the numerator of the
feed rate.
Feed Rate
Denominator
• Entry of the denominator of
the feed rate.
Quick Stop Ramp
Ramp gradient for the Quick
Stop function in Hz/ms.
Value range:
21.84 to 4230.95 Hz/ms
Speedmode
Control
Selection of the control behavior
in CL speed mode.
Please also refer to Section
13 “<CL-Parameter> (Closed
Loop) tab”.
The following resolutions can
be selected:
500, 192, 200, 400, 512,
1000, 1024, 2000, 2048
The feed rate is only used if
numerator and the
denominator are not equal to
• This value defines the
0. Otherwise, the encoder
number of steps per rotation
resolution is used.
of the motor shaft for the feed
Values for the feed rate that
rate step mode.
are not meaningful are not
accepted when entered.
41
User Manual
NanoPro
<Motor Settings> tab
Adjusting the encoder
Note:
Before adjusting the encoder, the motor type or the motor step angle must be correctly
set, see Section 5 "<Motor Settings> tab".
Resolution and direction of rotation of the encoder can be adjusted using the
<Encoder Wizard>.
The motor makes one revolution if the button is pressed. The resolution of the rotation
encoder is automatically matched and displayed in the <Motor Settings> tab.
Depending on the connection, the rotation is also matched if necessary and displayed
in the <Motor Settings> tab ("Reverse Encoder Direction" checkbox is activated).
42
Issue: V 2.2
User Manual
NanoPro
<Brake> tab
6
<Brake> tab
Display
Settings for the brake are adopted using the <Brake> tab.
Parameters for external brake
The following parameters can be set:
• Time ta:
Waiting time between switching on the motor current and switching off (triggering)
the brake in milliseconds.
• Time tb:
Waiting time between switching off (triggering) the brake and activation of
readiness in milliseconds. Travel commands will only be executed after this waiting
time.
• Time tc:
Waiting time between switching on the brake and switching off the motor current in
milliseconds.
The parameters indicate times between 0 and 65,536 milliseconds.
Default values of the controller after a reset: 0 ms.
Issue: V 2.2
43
User Manual
NanoPro
<Brake> tab
Braking response
When switching on the controller, the brake becomes active first and the motor is not
provided with power.
Note:
During current reduction, the brake is not actively connected.
44
Issue: V 2.2
User Manual
NanoPro
<Display Properties> tab
7
<Display Properties> tab
Display
Display properties are made using the <Display Properties> tab.
Display Properties
The following parameters can be set:
Parameter
Function
Note
Distance
The distance can be
displayed in:
• Steps
The units of measure set here are
inserted in the parameter fields of the
various operating modes.
• Degrees
• mm
Speed
The speed (rotational
The units of measure set here are
speed) can be displayed inserted in the parameter fields of the
in:
various operating modes.
• Hz
• rpm
• mm/s
Position
The counter reading can The units of measure set here are
be displayed in:
inserted in the parameter fields of the
various operating modes.
• Steps
• Degrees
• mm
Issue: V 2.2
Feed Rate
Definition of the feed
rate in mm/rev.
If one of the above parameters is set to
"mm", then the corresponding feed must
be entered in the "Feed Rate" field.
Gear Reduction
Option field for
When the option field is set, the field
activating the "Gear
"Gear Reduction" is activated and the
Reduction" field.
reduction value can be entered.
Input of gear reduction if
field activated.
Position Polling
Update interval for the
ramp graph in ms in the
<Movement Mode> tab.
On older computers it can make sense
to set a high value. The default setting is
200 ms.
45
User Manual
NanoPro
<Errorcorrection> tab
8
<Errorcorrection> tab
Display
The settings for speed monitoring and error correction are made on the
<Errorcorrection> tab.
Motor function test
The motor has an integrated encoder signal evaluation for checking motor functions
and to signal step losses. If the motor loses more than 1 half step (0.9° with a 1.8°
stepper motor), output 2 signals an error.
It is possible to compensate for this error at the end of or during the run.
Parameter descriptions
The following parameters can be set for the motor:
Parameter
Function
Note
Rotation
Encoder
Monitoring
The following modes
can be selected:
• Deactivate
"Deactivate" means that the rotation
encoder monitoring has been switched off.
All fields in this area are switched to
inactive. The “Disable” mode must be
selected if no encoder is being used.
The rotation encoder monitoring mode
checks the position of the rotor at the end
of the run (after the swing out time) or
during the run.
As described above, the position of the
rotor can also be checked and corrected, if
necessary, at the end of the run if the
"Automatic Errorcorrection" option field is
activated.
• At end of run
• During run
46
Issue: V 2.2
User Manual
NanoPro
<Errorcorrection> tab
Parameter
Function
Note
Swing Out Time Definition of a swing
out time in 1 ms steps;
the time that the
encoder waits before it
measures the position
of the rotor.
The recommended
standard value is 80
ms.
After a record is completed, the rotor
swings out around the set target position
before it comes to a standstill. This swing
out is taken into account with the definition
of a swing out time, in order to avoid
possible measurement errors.
The swing out time decreases the smaller
the moment of inertia of the rotor, and other
external moments of inertia are, and the
larger the damping, system rigidity and
friction are.
Tolerance
Width
Input of a tolerance
within the encoder
edges.
The recommended
standard value is 2
edges.
The tolerance is the maximum deviation in
(micro)steps. How large a step is depends
on the currently set step mode.
If the encoder resolution is insufficient (step
mode > 1/10 in 1.8° motors, or. >1/5 in 0.9°
motors), additional errors will result from
the conversion of encoder increments into
microsteps.
Automatic
Errorcorrection
Option field for
activating automatic
error correction
At the end of a record, the controller
calculates the lost steps and compensates
for them with a defined correction run. The
parameters must be selected so that the
controller safely implements the correction
without losing any steps.
When the setting is during the run, the
correction will be implemented during the
run itself.
Record for
errorcorrection
Selection menu for
definition of travel
profile used for
"Automatic
Errorcorrection"
(activated option field,
see above).
The ramp and the speed from the selected
travel profile selected here are used for the
correction run.
Starting within the swing out time
The specification of a swing out time before measurement of the rotor position by the
encoder limits the possibility of rapid reversing movements.
In the relative positioning mode, a break between two reversing rotations must also be
set (minimum = 1 ms). If the set break is shorter than the swing out time, the motor
waits until the rotor is in a suitable position and then carries out the next record. This
"favorable position" is determined when the tolerance width is set and avoids step
losses.
The length of the break and swing out time (in ms) after the completion of a record is
determined by the number of encoder edges. It is possible to realize rapid reversing
movements with the specification of a tolerance width (in edges).
Issue: V 2.2
47
User Manual
NanoPro
<Errorcorrection> tab
Encoder edges
The encoder has a 5 to 10 times higher resolution than the motor. The encoders used
operate with 500 pulses/revolution.
This squaring results in a resolution of 2,000 edges.
The 1.8° stepper motors operate with 200 steps/revolution, therefore a full step equals
10 encoder edges (half step = 5 edges).
The recommended tolerance width is 2 edges.
48
Issue: V 2.2
User Manual
NanoPro
<Input> tab
9
<Input> tab
Display
Analog input
The <Input> tab, the following parameters for the analog input can be defined:
Parameter
Function
Lower Limit
and
Upper Limit
These values determine the upper and lower limits of the input
voltage.
The voltage is resolved with an accuracy of 10 bits. The smaller
the selected range is, the worse the resolution of the speed will
be (and vice versa):
• Start speed:
lower limit
• Setpoint speed:
upper limit
• Maximum range: –10 V ... +10 V.
Calculation example
Selected voltage range = 0 V to +5 V
Start speed = 400 Hz = 0 V
Setpoint speed = 1000 Hz = +5 V
Speed adjustable:
10 bit = 1024 = 5 V / 1024 = 0.0048 V corresponds to 2.344 Hz
(400 Hz - 1000 Hz = 600 Hz / 256 = 2.344 Hz).
The divisor "256" in the above equation is derived from the
percentage of the voltage range used:
The voltage range of 5 V out of a possible range of 20 V equals
25%. Based on the 10 bit resolution, this is equal to
25% of 1024 = 256.
Issue: V 2.2
49
User Manual
NanoPro
<Input> tab
Parameter
Function
Play (dead range)
The "Play" setting provides an option to hide the interference or
ripple voltage in the lower limit range.
A play of 10% would limit the control range to 0.5 – 5.0 V with a
lower limit of 0 V and an upper limit of 5 V.
Calculation example for play:
Selected voltage range = 0.5 V to +5 V
Start speed = 400 Hz = 0.5 V
Setpoint speed = 1000 Hz = +5 V
Speed adjustable:
10 bit = 1024 = 4.5 V / 1024 = 0.0044 V corresponds to 2.604 Hz
(400 Hz - 1000 Hz = 600 Hz / 230.4 = 2.604 Hz).
Divisor from the percentage of the voltage range used:
The voltage range of 4.5 V out of a possible range of 20 V equals
22.5 %. Based on the 10 bit resolution, this corresponds to
22.5% of 256 = 230.4.
Filter
50
The analog input samples the input voltage with a frequency of 1
kHz. The input voltage can be smoothed with the help of the
analog input.
A filter value between 0 and 16 results in a simple average value
formation over the given number (a value of 0 or 1 indicated that
averaging has not occurred).
As filtering only takes 16 milliseconds with a sample frequency of
1 kHz over maximum 16 supporting points, it is possible to use a
recursive filter where the determined value depends on the
actually measured value and on the previous "filter value". This
method can be used to average a greater number of supporting
points, even if insufficient memory is available. However, this is
not a real average value, but a signal rounding of the input
voltage (first order low pass or PT1 element).
The recursive filter is used from a value of 17. The first 4 bits of
the value as a power of 2 define the time constant T in ms (time
after which the filter output has approached the filter input to
within 50%) and the last 4 bits of the value define the hysteresis
(maximum change of the value at the filter input toward which the
filter output is insensitive). The two components of the filter
setting can be separately set using the two sliders; the
corresponding total value is automatically entered in the "Filter"
field. The following table shows the values of the time constant
for a hysteresis of 0.
With an input jump from 0 to 1, the filter output follows the
t/T
following rule: Output = 1 – (0.5)
where t is the time along the x axis and T the time constant of the
filter.
5*T after changing the input voltage, the value at the filter output
has thus reached 97% of the input value.
Issue: V 2.2
User Manual
NanoPro
<Input> tab
Parameter
Function
10*T after changing the input voltage, the value at the filter output
will have reached 99.9% of the input value. The deviation
corresponds to one stage of the AD converter when the input
changes cover the entire range, e.g. a jump from -10 V to +10 V.
Value
Time constant T
Time for 99.9%
17
1 ms
10 ms
18
2 ms
20 ms
19
4 ms
40 ms
20
8 ms
80 ms
21
16 ms
160 ms
22
32 ms
320 ms
23
64 ms
640 ms
24
128 ms
1.2 s
25
256 ms
2.6 s
26
512 ms
5.1 s
27
1s
10 s
28
2s
20 s
29
4s
40 s
30
8s
80 s
31
16 s
160 s
Time constant /
hysteresis
Behavior for Internal / External Homing
There are various options for defining behavior at the external and internal limit
switches:
• "Free backwards" (reference run and normal operation)
• "Free forwards" (reference run and normal operation)
• "Stop" (only for normal operation)
• "Disable" (only for normal operation)
Issue: V 2.2
51
User Manual
NanoPro
<Input> tab
"Free backwards"
The motor changes direction on recognition of the limit switch and leaves the limit
switch.
"Free forwards"
The motor continues in the same direction after recognizing the limit switch and leaves
the limit switch.
52
Issue: V 2.2
User Manual
NanoPro
<Input> tab
"Stop"
The motor immediately stops upon recognition of the limit switch. A reference run
must then be implemented as the motor may have lost steps (overflow).
"Disable"
The limit switch has no function.
The following parameters can be set:
Parameter
Function
Type
Selection of the reference switch as an opener or closer
depending on the version.
During Homing
Data on whether the limit switch (external and internal) should
be approached during the reference run free forwards (without
direction change) or backwards (in the opposite direction).
During Normal
Operation
Data on how the motor should behave when recognizing the
limit switch (external and internal) during normal operation (no
reference run).
Procedure
Proceed as follows to set the limit switch behavior:
Step
Issue: V 2.2
Action
1
Select the <Input> tab.
2
Set the parameters according to your
requirements.
3
Click on the <Save Data> button.
Note
The settings are saved.
53
User Manual
NanoPro
<Input> tab
Inputs
The following settings can be made:
Switching behavior
A selection can be made for each input as to whether it switches with rising or falling
edge:
•
= falling edge
•
= rising edge
Input function
• User defined:
The input is “masked”, i.e. it is not directly interpreted by the controller and is
available to the user as a "general purpose" input.
The masking of an input means that its state (high/low) can be evaluated via the
interface.
Further information can be found in the relevant "Command Reference" section of
the programming manual.
• Start/reset:
An impulse at the Start/Reset input starts the selected travel profile. A negative
edge at Start/Reset input can be used to reset an error (speed monitoring).
• Record bit 0 to record bit 4:
The profile numbers are called up using a binary code with the inputs record bit 0
to record bit 3. When the Start/Reset input is activated, the value is read in and the
corresponding profile is loaded and started.
Profile number Record Record Record Record Record
bit 0
bit 1
bit 2
bit 3
bit 4
1
0
0
0
0
0
2
1
0
0
0
0
3
0
1
0
0
0
…
…
…
…
…
…
31
0
1
1
1
1
32
1
1
1
1
1
• External reference switch:
See "End switch behavior, internal/external" and the separate manual for the
respective stepper motor control or for the Plug & Drive motor.
• Trigger:
A pulse at the trigger input starts the positioning mode in the clock direction mode.
• Direction:
The Direction input determines the direction of rotation of the motor.
In the Joystick mode, the direction of the motor depends on the defined voltage
range. The direction is changed in the middle of the voltage range (e.g. at +5 V in a
voltage range of 0 V to +10 V).
• Enable
• Clock (input 6 only):
With every positive edge at the clock input, in the Clock direction mode the motor
carries out a step in the direction set by the direction input. The external clock is
also active for the reference runs.
• Clock direction mode, mode selection 1/2:
The mode is defined with the clock direction mode, mode selection 1/2 inputs. The
setting is accepted when the Start/Reset input is activated. The direction of the
54
Issue: V 2.2
User Manual
NanoPro
<Input> tab
reference runs is specified by the saved parameters. In the clock direction left/right
modes, the motor travels 10 steps with a frequency of approx. 2 Hz and then
accelerates to the programmed maximum frequency.
Mode selection
Operating mode
Clock Direction
mode,
mode selection 1
Clock Direction
mode,
mode selection 2
Clock Direction Left
0
0
Clock Direction Right
1
0
Clock Direction Run Int. Ref.
0
1
Clock Direction Run Ext. Ref.
1
1
State Display
In addition, the state of the inputs present when the tab was opened is displayed
(green = high, red = low).
Input Debounce Time
Sets the time in ms that needs to elapse after a signal change at an input until the
signal has stabilized.
Activate Input Polling
The status display of the inputs is activated if the checkbox is activated.
Issue: V 2.2
55
User Manual
NanoPro
<Output> tab
10
<Output> tab
Display
Note: The number of outputs depends on the controller in use.
Settings
The following settings can be made:
Switching behavior
A selection can be made for each output whether it switches with rising or falling edge:
•
= falling edge
•
= rising edge
Output function
• User defined:
The output is “masked”, i.e. it is not directly interpreted by the controller and is
available to the user as a "general purpose" output.
• Ready
• Running
"Ready" "Running" State
56
0
1
Motor processing last command.
1
0
Motor idle, waiting for new command.
0
0
Error (speed monitoring) or limit switch (normal
operation).
1
1
Reference point (zero position) reached.
Issue: V 2.2
User Manual
NanoPro
<Output> tab
Setting the output
When the checkbox is activated, the corresponding output of the firmware is set
provided it is masked for open use.
State Display
In addition, the state of the outputs present when the tab was opened is displayed
(green = high, red = low).
Activate Output Polling
The status display of the outputs is activated if the checkbox is activated.
Issue: V 2.2
57
User Manual
NanoPro
<Communication> tab
11
<Communication> tab
Display
The settings for interface parameters and the motor address made on the
<Communication> tab:
Interface parameters
The following interface parameters can be set:
Parameter
Function
Port
In the "Port" field, select the COM port to which the motor
is connected.
• The number of the COM port to which the motor is
connected can be found in the device manager of your
Windows PC.
Write/Read Timeout
Maximum timeout in milliseconds when transferring data
to/from the controller.
Baud rate
Data transfer rate in bits per second.
Setting the drive address
To ensure a fault-free connection with the motor, the motor address (module address)
must be set correctly. All motors are delivered with the default address “1”. To operate
more motors in an RS485 network, each motor must be assigned a unique address.
The following functions are available in this menu:
• <Check Drive Address>
Press the button to check whether a motor is connected to the currently configured
motor address.
• <Search Drive Address>
Prerequisite: Only one motor is connected.
The address of the connected motor is adopted.
• <Change Drive Address>
Prerequisite: Only one motor is connected.
The "drive address" configured in the selection menu is assigned to the motor.
• <Choose Drive Address> The address configured in the "Drive Address" selection
menu is transferred to the "Motor" selection menu (menu bar).
58
Issue: V 2.2
User Manual
NanoPro
<Communication> tab
Change Drive Baudrate
Select the required baud rate from the "Drive Baudrate" selection menu and then click
on the <Save Settings> button to transfer the new setting.
Activating the communication check with CRC
Activate the "Check Communication with CRC" checkbox and then click on the <Save
Settings> button to verify communication between the PC and controller using a
checksum.
Search Controller
When the <Search Controller> button is activated, all COM ports and baud rates are
run through until a controller is found.
Issue: V 2.2
59
User Manual
NanoPro
<Statusdisplay> tab
12
<Statusdisplay> tab
Introduction
The <Statusdisplay> tab can display general status messages, stored error entries
and programming settings can also be made.
<Statusdisplay> tab
Display
The <Statusdisplay> tab contains the following displays:
60
Display
Function
Encoder Position
Actual encoder position (if an encoder is connected)
Demand Position
Current setpoint position of the motor
State Display
Actual mode, state and last error entry
Closed Loop
Status
Indicator of whether closed loop mode is active
Error Display
Error memory for the last 32 errors.
Note: After the controller is switched on, the "Undervoltage" error
message appears with the error position 13.
Because the undervoltage occurs with the last switch-off of the
controller, this error message is entirely normal.
Issue: V 2.2
User Manual
NanoPro
<Statusdisplay> tab
Activating the status display
Proceed as follows to activate the motor status:
Step
Action
Note
1
Select the <Statusdisplay> tab.
2
Activate the "Activate Polling" checkbox.
Programming settings
Controllers can be programmed via JAVA (NanoJEasy) or via the COM interface, see
the programming manual.
The following settings can be made in the "Programming Language” area:
Issue: V 2.2
Setting
Function
Autostart
When the checkbox is activated, the loaded program is
automatically executed if the motor is powered.
Activate Com-Polling
If this checkbox is activated, any responses of the executed
program via the COM interface are displayed in the field under
the checkbox.
Start program/Stop
program
Starts/Stops the loaded program.
Read Error
Displays the last entry of the error memory.
NanoJEasy
Open the NanoJEasy editor (if installed).
Transfer program
Transfer the program to the controller.
61
User Manual
NanoPro
<CL-Parameter> (Closed Loop) tab
13
<CL-Parameter> (Closed Loop) tab
13.1.1 Configuring the Closed Loop current control
Function
In the Closed Loop mode, the motor does not behave like a normal stepper motor, but
instead like a servomotor. It is controlled via a PID controller dependent on an
encoder.
The controller includes two controllers and each controller has its own parameter set.
<CL-Parameter> tab
Settings for the Closed Loop current control are made via the <CL-Parameter> tab.
Procedure
Proceed as follows to configure the Closed Loop current control:
Step Action
62
Note
1
Select the <CL-Parameter> tab.
2
In the "Load Defaultsettings" field,
select the motor size (e.g. ST41xx)
3
Run the Closed Loop wizard in the
“CL - Wizard” button.
CAUTION!
Motor makes several revolutions. See
Section “CL - Wizard”.
4
Run the Autotuning Wizard in the
<Autotuning-Wizard> button.
The wizard empirically determines
suitable CL parameters. Alternatively,
you can also enter them manually as
described in Step 4.
5
Enter the desired parameters.
Detailed information on the parameters
can be found the following sections.
6
Click on the <Save Data> button.
The settings are saved.
Issue: V 2.2
User Manual
NanoPro
<CL-Parameter> (Closed Loop) tab
13.1.2 Velocity Loop
Description
The speed controller controls the angle speed of the shaft. The position in this mode is
not controlled and can therefore deviate greatly from the setpoint.
The speed controller is used in the following operation modes:
• Speed mode
• Analog mode
• Joystick mode
• Rotor position measurement
Internal calculation principles and parameters
The controlled variables in the speed controller are always based on the actual speed
in revolutions per minute (rpm). The set parameters are used to convert the system
deviation (deviation of actual speed from setpoint speed) into the control variable
(current value).
The control variable of the speed controller is determined with the following equation:
un = KP * en + In-1 + KI * en + KD * (en-1 - en)
The next integral value is derived from:
In = In-1 + KI * en
un
Control variable
KP
Proportional component derived from the numerator/ 2denominator
KI
Proportional component derived from the numerator/ 2denominator
KD
Proportional component derived from the numerator/ 2denominator
en
Deviation of actual value from setpoint value
en-1
Deviation of previous actual value from previous setpoint value
In-1
Last integral value
Speed error monitoring
The speed controller monitors the set speed. If the actual speed deviates for a specific
time from the setpoint speed, the controller is deactivated and the motor stops.
The speed monitoring can be adjusted as required with the parameters in the
"Following Error Speed Mode" area:
Issue: V 2.2
• "Count”
The maximum amount-based deviation of the actual from the setpoint
position is output in steps (value range: 0 - 2000000000).
• "Time”
Time is output in milliseconds.
63
User Manual
NanoPro
<CL-Parameter> (Closed Loop) tab
13.1.3 Position Loop
Description
The position controller controls the position. It is used in the following modes:
• Relative/Absolute Position Mode
• Flag Position mode
• Clock Direction mode
• Analogue Position mode
• Reference run
Internal calculation principles and parameters
With the position controller, the controlled variables always refer to the actual position
deviation in steps. The set parameters are used to convert the system deviation
(deviation of actual position from setpoint position) into the control variable (current
value). The set parameters are used to convert the system deviation (deviation of
actual position from setpoint position) into the control variable (current value).
The control variable of the position controller is determined with the following equation:
un = KP * en + In-1 + KI * en + KD * (en-1 - en)
The next integral value is derived from:
In = In-1 + KI * en
un
Control variable
KP
Proportional component derived from the numerator/ 2denominator
KI
Proportional component derived from the numerator/ 2denominator
KD
Proportional component derived from the numerator/ 2denominator
en
Deviation of actual value from setpoint value
en-1
Deviation of previous actual value from previous setpoint value
In-1
Last integral value
Reaching the end position
If the position controller is active, the motor will only signal that it is ready after the end
of a run when the measured position remains within a tolerance window for a specific
time.
The tolerance width and the minimum time can be set with the parameters in the
"Position Error" area:
64
• "Count“
The maximum amount-based permissible deviation from the end
position is output in steps.
• "Time"
The minimum time in milliseconds that the motor must stay at the
corresponding position before it signals that it is "ready".
Issue: V 2.2
User Manual
NanoPro
<CL-Parameter> (Closed Loop) tab
Position error monitoring
The position controller monitors the set position at all times (even following errors are
recorded during travel). If the actual position deviates by a specific value from the
setpoint position, the controller is deactivated and the motor stops.
The position monitoring can be adjusted as required with the parameters in the
"Following Error Pos Mode" area:
• "Count”
The maximum amount-based deviation of the actual position from the
setpoint position is output in steps. (Value range: 0 - 2000000000).
• "Time“
Time is output in milliseconds.
Help for setting the control parameters of the position controller
To adjust the parameters, it is necessary to apply the load that the controller later
needs to control to the motor. It does not make sense to set the controller for an
unloaded motor as the behavior will change completely when the load is applied to the
motor.
The following table shows possible problems and countermeasures:
Problem
Countermeasures
Motor oscillates up or too long
afterwards.
• Reduce I-component
• Increase D-component
• Increase P-component
Motor "cracks" during the run.
• Reduce D-component
• Possibly reduce P-component
Motor takes too long to reach the end
position.
• Increase I-component
Motor compensates for static loads too
slowly
• Increase I-component
Motor signals position error.
• Increase permissible following error
("Following Error Pos Mode").
• Increase P-component
• Operate controller more firmly (increase
P-component, increase I-component).
• Decrease maximum speed.
• Increase phase current.
CAUTION!
Note maximum motor current.
A new rotor position initialization may be
necessary.
Motor not accelerating as fast as the set
ramp (possibly combined with a position
error during the acceleration phase).
• Increase phase current.
CAUTION!
Note maximum motor current.
• Set a slower ramp.
• Use a stronger motor (with appropriately
set phase current).
Issue: V 2.2
65
User Manual
NanoPro
<CL-Parameter> (Closed Loop) tab
Cascade controller
The cascade controller consists of two closed loops: an internal closed loop that
controls the speed, and an external closed loop that controls the position. The external
closed loop does not directly control the motor current, but the setpoint value (setpoint
speed) of the internal closed loop.
The autotune wizard can also be used to empirically determine the control parameters
for the cascade controller.
CL - Wizard
Start the closed loop wizard with which the closed loop mode can be set up using the
<CL - Wizard> button.
CAUTION!
Motor makes several revolutions.
• Ensure that a motor is connected.
• Check the interface parameters in the <Communication> tab!
Proceed as follows:
Step
1
66
Action
Click on the <CL - Wizard> button.
The following window appears:
Issue: V 2.2
User Manual
NanoPro
<CL-Parameter> (Closed Loop) tab
Step
Action
2
Click on the <Next> button.
The following window appears:
3
• If a configuration file already exists:
Select the upper option field and then click on the <Next> button. The
"Open" window appears, in which you can select the configuration file.
• If configuration file still does not exist:
Click on the <Next> button. A search is made for connected hardware.
The following window appears if hardware has been found:
Check whether the hardware has been detected correctly and change the
motor design, motor type, wiring and step angle/pole pair number if
necessary.
Issue: V 2.2
67
User Manual
NanoPro
<CL-Parameter> (Closed Loop) tab
Step
4
Action
Click on the <Next> button.
The following window appears:
Specify the phase current in %.
Note:
An excessively high phase current can damage your motor. See the phase
current data in the data sheet of your motor.
5
Click on the <Test drive> button if necessary.
The following window appears:
Click on the <Ok> button: An attempt is made to move the motor by one
rotation using the specified parameters.
Click on the <Cancel> button to abort the motor test.
68
Issue: V 2.2
User Manual
NanoPro
<CL-Parameter> (Closed Loop) tab
Step
6
Action
The following window appears after the motor test:
Check whether the connected motor has made a full revolution. Change the
settings for the step angle or motor current if necessary.
Note:
Depending on the selected motor design, the automatic encoder detection
and calibration run (step 8) can be omitted.
7
Click on the <Next> button.
The following window appears:
Check whether the encoder resolution was detected correctly and change
the value in the upper selection menu if necessary.
In BLDC motors, the encoder resolution cannot be detected automatically
and therefore must be set by the user.
Then select a parameter set in the lower selection menu if necessary.
Issue: V 2.2
69
User Manual
NanoPro
<CL-Parameter> (Closed Loop) tab
Step
8
Action
Click on the <Next> button.
A calibration run is then performed. The following window appears during the
process:
The following window appears after the successful calibration run:
Check the measurement results of the calibration run.
70
Issue: V 2.2
User Manual
NanoPro
<CL-Parameter> (Closed Loop) tab
Step
9
Action
Click on the <Next> button.
The following window appears:
Activate the checkbox if the configuration file should be saved.
10
Click on the <Finish> button to complete the Closed Loop Wizard.
Autotune Wizard
Using the <Autotuning-Wizard> button, start the autotune wizard that can be used to
empirically determine suitable control parameters.
Please ensure that you have fully executed the closed loop wizard before starting the
autotune wizard.
CAUTION!
Motor haltingly makes several revolutions. Possible damage to the system in which
the motor has been installed.
• Ensure that a motor is connected.
• Check the interface parameters in the <Communication> tab!
Issue: V 2.2
71
User Manual
NanoPro
<CL-Parameter> (Closed Loop) tab
Proceed as follows:
Step
Action
1
Click on the <Autotuning - Wizard> button.
The following window appears:
2
Click on the <Next> button.
The following window appears:
3
Adjust the following parameters if necessary:
• Drive direction: direction of rotation in which the autotune run takes place.
• Control loop gradient: proportional factor for sharpness of the controller in
area 0.1 to 10.
Value < 1: controller weaker
Value = 1: controller neutral
Value = >1: controller sharper
• Maximum way: maximum distance that is covered during an autotuning
run.
• Maximum speed: speed to which the motor accelerates during an
autotuning run.
• Phase Current: current that is applied to the motor during the autotuning
run.
72
Issue: V 2.2
User Manual
NanoPro
<CL-Parameter> (Closed Loop) tab
Step
4
Action
Click on the <Next> button.
An autotuning run is performed. The following window appears after the
procedure:
The following window appears after the autotuning run if applicable:
The specified maximum way may have been too short to reach the specified
maximum speed. Try to increase the way or to reduce the speed or current.
Issue: V 2.2
5
Click on the <Finish> button to complete the autotuning wizard.
6
Click on the <Save Data> button to save the determined parameters in the
controller.
73
User Manual
NanoPro
<Scope> tab
14
<Scope> tab
Function
In scope mode, important motor parameters can be displayed and recorded during a
run. This is primarily used to check the set parameters or the commissioning of a
drive.
Display
The scope mode settings are made in the <Scope> tab.
Selectable parameters
“Target position" and "Current position" parameters
The target position is the target value calculated by the ramp generator of the motor.
The current position is the position determined with the help of the motor encoder. In
normal cases, the target and current positions should match. The current position is
the position determined with the help of the motor encoder. In normal cases, the target
and current positions should match. The current position is always 0 in a motor without
encoder. If the target and current position deviate from one another, this may be due
to various reasons: If the target and current position deviate from one another, this
may be due to various reasons:
• Step loss during the run: When the motor does not reach its target position during
open loop operation, step losses have occurred. Possible countermeasures:
–
–
–
74
Select a flatter ramp
Select a lower speed
Increase motor current so that the motor has more strength
Issue: V 2.2
User Manual
NanoPro
<Scope> tab
• Incorrect setting of the encoder: When the curves for setpoint and actual position
are mirrored during a run, the rotation direction of the encoder is inverted (e.g. run
of 400 steps, then setpoint position 400 and actual position -400).
Countermeasure: Reverse the rotation direction of the encoder in the <Motor
Settings> tab.
CAUTION!
To have these settings accepted for closed loop operation, the motor must be
disconnected from the power supply.
When the curves are identical in direction, but differ in gradient, then the resolution
of the encoder is incorrect.
Counter measure: Adjust the encoder resolution in the <Motor Settings> tab.
Other parameters
Parameter
Description
Following error
The following error indicates the difference between the
target and actual position. If the following error exceeds the
set value, the motor will output a position error. For the open
loop mode, the limit value can be set in the <Errorcorrection>
tab. The following error indicates the difference between the
target and actual position. If the following error exceeds the
set value, the motor will output a position error. For the open
loop mode, the limit value can be set in the <Errorcorrection>
tab. For the closed loop mode, there are separate values for
the speed mode and the positioning mode. They can be set
in the <CL - Parameter> tab. They can be set in the <CL Parameter> tab.
Target Current
The "Target Current" value specifies the set phase current in
open loop mode. In closed loop mode, the current calculated
by the motor is displayed.
Actual Voltage
Indicates the voltage applied to the motor.
Temperature
Indicates the temperature measured by the motor.
Analog input
Indicates the voltage at the analog input.
Digital Inputs
Sets the level of all digital inputs of the motor.
Parameters for the Closed Loop mode
Issue: V 2.2
Power
Indicates the power output by the motor.
Efficiency
Indicates the efficiency of the motor.
Current Drain
Indicates the current consumption of the motor.
75
User Manual
NanoPro
<Scope> tab
Display of parameters
Activate/Deactivate
Activating the checkbox displays the progression of the respective parameter in the
Scope mode.
Color
The color with which the parameter is displayed can be changed by clicking on the
colored box.
Scaling
The scaling of the parameter is specified under the <Unit> button and can be changed
with the arrow keys (to the left of the checkboxes).
Clicking on the <Unit> button changes its labeling to <Value>. The current parameter
values are then displayed instead of parameter scaling when the Scope mode is
running.
The horizontal axis can be changed in the ms grid using the <Time> slider.
Adjustment parameters
The following settings can be made for the Scope mode:
Setting
Function
Sample Rate
Setting of the sample rate in milliseconds.
Voltage
Voltage with which the motor is driven.
Start Drive Profile
When the checkbox is activated, the travel profile currently
set in the controller starts at the same time as the scope
mode.
Controlling the Scope mode
76
Reset Counter
Sets the travel profile to the zero position.
Start / Stop
Starts/stops the scope mode (travel profile 32).
Save
Saves recorded parameters.
Open
Opens recorded and saved parameters.
Screenshot
Creates a screenshot of the current display.
Issue: V 2.2
User Manual
NanoPro
<Expert> tab
15
<Expert> tab
Note:
Settings in the <Expert> tab should only be changed by experienced users who are
familiar with working with stepper motors, Nanotec controllers and the NanoPro
software.
Display
Various expert settings can be made in the <Expert> tab.
Issue: V 2.2
77
User Manual
NanoPro
<Expert> tab
Parameter descriptions
The following parameters can be set:
Parameter
Function
Note
Serial interface
Send Command
Clear Log
Direct access to the control via the For commands, see the
console.
programming manual.
Analog Input Correction
Offset
Offset of analog input.
Value range: -32768 to
32767
Default value: 0
The parameter is not
stored in the XML
configuration file and is
only transferred to the
controller by clicking on
the <Save Correction
values> values button, but
not when the <Save Data>
or <Save Configuration to
Drive> button.
Amplitude
Amplification of analog input.
Value range: 0 to 65535
Default value: 32768
The parameter is not
stored in the XML
configuration file and is
only transferred to the
controller by clicking on
the <Save Correction
values> values button, but
not when the <Save Data>
or <Save Configuration to
Drive> button.
Encoder Index
Offset
Specifies the mechanical offset of
the encoder to the rotor.
Value range: -32768 to
32767
Default value: 0
Clockmode
Interpolation
Gradient
Specifies the maximum time in
milliseconds after which an
interpolated support threshold
value is reached if a further clock
signal does not take place before
then.
Value range: 0 to 16383
Default value: 320
CL Node Distance
Distances of the individual load
angles, where the value 8192
corresponds to 1000 rotations per
minute.
Value range: 1 to 65535
Default value:
• Stepper motors: 4096
Frequency above which the
cascade loop is active.
Value range: 0 to
2147483647
Default value: 327680
Miscellaneous
Cascade Loop
Start Frequency
78
• BLDC motors: differ by
motor type.
Issue: V 2.2
User Manual
NanoPro
<Expert> tab
Parameter
Function
Note
Cascade Loop
Stop Frequency
Frequency up to which the
cascade loop is active.
Value range: 0 to
2147483647.
Default value: 512
Loadangle Values
Value 1 to 7
Lead values for the magnetic field. Value range: -32768 to
32767
Default values: differ by
motor type
The value 65536 = 216 for
the load angle value
corresponds to 360°.
PI Parameter DSP-Drive (only with controllers with a dspDrive)
P low
P component of the current
controller at a standstill
Value range: 0 to 1000
Default value: 1
P high
P component of the current
controller during the run.
Value range: 0 to 1000
Default value: 1
P scale
Scaling factor for the speeddependent adjustment of the P
component of the current
controller during the run.
Value range: 0 to 1000
Default value: 58
P component = P run +
speed * P scaling
I low
I component of the current
controller at a standstill.
Value range: 0 to 1000
Default value: 1
I high
I component of the current
controller during the run.
Value range: 0 to 1000
Default value: 1
I scale
Scaling factor for the speeddependent adjustment of the I
component of the current
controller during the run.
Value range: 0 to 1000
Default value: 200
I component = I run +
speed * I scaling
Positions of Hall sensors.
For a detailed explanation,
see Hall Mode Command
in the programming
manual.
Hall mode
Value 1 to 6
Issue: V 2.2
79
User Manual
NanoPro
Operating Several Motors
16
Operating Several Motors
Introduction
Up to 254 motors can be controlled in a network.
The motor address must be assigned in advance for each motor, see Section 11
"<Communication> tab".
New motors can be added in the "Motor" menu by clicking on the <Add Motor> button.
All the motors are displayed in the selection menu.
Unnecessary motors can be removed from the controller by clicking on the <Remove
Motor> button.
"Motor Address" menu
Procedure
Proceed as follows to add new motors:
Step
Action
Note
1
Select the "Add Motor" menu item in the "Motor"
menu.
The "Motor address" menu
opens.
2
Enter a motor address for the motor (number).
Number 1 to 254.
3
Click on the <OK> button.
The settings are saved.
Changing the motor address
The motor address may only be changed if exactly one motor has been connected.
See Section 11 "<Communication> tab".
80
Issue: V 2.2
User Manual
NanoPro
Troubleshooting
17
Troubleshooting
17.1 General information
Error messages
The motor monitors specific functions and outputs an error message if there is a
malfunction.
Error messages are displayed in a pop-up window, e.g.:
Descriptions of possible error messages can be found in Section 17.2 “Error
messages”.
Troubleshooting procedure
Proceed with care during troubleshooting and error rectification to avoid damaging the
motor.
Danger of electrical surges
An operating voltage of > 50 V (for SMCI12 a voltage of > 26 V, for SMCI36 a
voltage of > 72 V) and incorrect connections can destroy the end stage.
Never disconnect the link when operating voltage is applied!
Never disconnect lines when live!
Issue: V 2.2
81
User Manual
NanoPro
Troubleshooting
17.2 Error messages
Communication error
This message appears when data transmission to the controller is not possible:
The following causes may be responsible:
• The wrong COM port is set (see Section 11 "<Communication> tab").
• The communication cable is not connected or interrupted.
• A nonexistent motor number is set.
• The voltage supply to the motor is interrupted.
Controller is not ready
If inadmissible data is sent to the controller during the output of a travel profile, the
following message appears:
Pressing the <Yes> button stops the travel profile and the controller switches back to
the "Ready" state. Pressing the <Yes> button stops the travel profile and the controller
switches back to the "Ready" state. The data can then be resent to the controller.
Pressing the <No> button allows the travel profile to continue.
Position error
If a button is clicked while the motor is in error mode (position error or limit switch in
normal operation), the following message is displayed.
The error can be reset by pressing the <Yes> button.
82
Issue: V 2.2
User Manual
NanoPro
Troubleshooting
Following error
If a button is clicked while the motor is in error mode (following error), the following
message is displayed.
A following error occurs if the motor is in speed mode and either closed loop or error
correction is activated and the actual value differs from the measured value.
The error can be reset by pressing the <Yes> button.
Clock frequency
If an attempt is made to communicate with the controller, while the motor is presently
operated in the Clock Direction mode with a clock frequency of more than 65 kHz,
then the following message appears:
Communication can only take place again if a clock frequency of less than 65 kHz is
set.
Issue: V 2.2
83
User Manual
NanoPro
Index
Index
A
Drive Step Angle ........................................... 40
Absolute positioning mode ............................18
E
Actual Voltage ...............................................75
Efficiency....................................................... 75
Analog input...................................................75
Encoder................................................... 46, 48
Analog mode .................................................34
Encoder direction of rotation......................... 41
Analog Positioning mode...............................36
Encoder position ........................................... 60
Automatic Errorcorrection..............................47
End position tolerance .................................. 64
Autotune Wizard ............................................71
Error correction ............................................. 46
B
Baud rate .......................................................58
Brake .............................................................43
Error Display ................................................. 60
Error messages............................................. 81
External reference run ................ 12, 18, 31, 51
Brake Ramp...................................................20
F
Break .......................................................20, 29
Feed rate....................................................... 45
C
Cascade controller.........................................66
CL - Wizard....................................................62
CL Parameter ................................................62
Clock Direction mode ....................................31
Filter .............................................................. 50
Firmware update ............................................. 9
Flag positioning mode................................... 27
Following error .................................. 63, 65, 75
Frequency
decrease.................................................... 24
Closed-Loop current control ..............10, 41, 62
increase..................................................... 24
Communication..............................................58
Correction run................................................47
G
Counter
Gear reduction .............................................. 45
Read...........................................................17
Reset..........................................................16
Current Drain .................................................75
H
Hysteresis ..................................................... 51
Current position .............................................74
I
D
Input Debounce Time ................................... 55
Delivery condition ..........................................17
Digital Inputs..................................................75
Direction.........................................................20
Inputs ............................................................ 49
Installation....................................................... 6
Internal reference run ................. 12, 18, 31, 51
Display Properties ...................................43, 45
J
Distance.........................................................45
Joystick mode ............................................... 34
Drive
Read from ..................................................16
L
Save to .......................................................16
Limit switch behavior..................................... 51
During Homing .......................................... 53
84
Issue: V 2.2
User Manual
NanoPro
Index
During Normal Operation ...........................53
Torque mode ............................................. 38
Type ...........................................................53
Outputs ......................................................... 56
M
P
Menu
Phase current................................................ 40
File ...............................................................8
Play (dead range) ......................................... 50
Help..............................................................9
Polling ........................................................... 61
Language .....................................................8
Port ............................................................... 58
Motor ......................................................8, 80
Position ......................................................... 45
System .........................................................9
Position Demand........................................... 20
Minimal speed ...............................................20
Position error monitoring............................... 65
Motor
Position loop ................................................. 64
Add.........................................................8, 80
Power............................................................ 75
Change Drive Address...............................58
Profile graph............................................ 16, 22
Check Drive Address .................................58
programming language................................. 61
Choose Drive Address ...............................58
Copy to.........................................................8
Define Address ..........................................80
Q
Quick Stop .................................................... 16
Refresh All Values .......................................8
R
Remove........................................................8
Ramp ............................................................ 20
Save All Values............................................9
Ramp Type ................................................... 22
Search Drive Address ................................58
Read from Drive............................................ 16
Select ...........................................................8
Reference run ............................. 12, 18, 31, 51
Motor settings ................. 10, 11, 15, 16, 39, 42
Relative positioning mode............................. 18
Motor type......................................................39
Repetitions .............................................. 21, 29
N
Reset Positions ............................................. 76
Network..........................................................80
Next record ....................................................21
O
Online help ......................................................9
Operating modes ...........................................12
Absolute positioning mode.........................18
Reverse Clearance ....................................... 41
Reverse direction .......................................... 21
Rotation Encoder Monitoring ........................ 46
Rotation Encoder Resolution ........................ 41
S
Sampling Rate .............................................. 76
Analog mode..............................................34
Save Configuration to Drive/Read
Configuration from Drive ........................... 10
Analog Positioning mode ...........................36
Save to Drive ................................................ 16
Clock Direction mode.................................31
Scope mode.................................................. 74
Flag positioning mode................................27
Screenshot.................................................... 76
Joystick mode ............................................34
Search Controller .......................................... 59
Relative positioning mode..........................18
Send State Byte Automatically Upon End Of
Record....................................................... 41
Speed mode...............................................24
Issue: V 2.2
85
User Manual
NanoPro
Index
Outputs...................................................... 56
Signal curves
Clock Direction mode.................................33
Scope ........................................................ 74
Flag positioning mode................................30
State .......................................................... 12
Relative/Absolute Position Mode ...............23
Statusdisplay ............................................. 60
Speed mode...............................................26
Target Current............................................... 75
Speed ............................................................45
Target position .............................................. 74
Speed mode ..................................................24
Target speed................................................. 20
Start / Stop.....................................................76
Temperature ................................................. 75
Start Travel Profile.........................................76
Test Record .................................................. 16
State ............................................16, 55, 57, 60
Time constant ............................................... 51
Statusdisplay .................................................60
Timeout ......................................................... 58
Step mode .....................................................40
Tolerance Width............................................ 47
Stopping a record ..........................................16
Torque mode................................................. 38
Swing Out Time .............................................47
Travel profiles ......................................... 14, 17
System requirements.......................................6
Trigger on...................................................... 28
T
U
Tabs...............................................................10
Update ............................................................ 9
Brake..........................................................43
User defined inputs ....................................... 54
CL Parameter.............................................62
User defined outputs..................................... 56
Communication ..........................................58
Display Properties................................43, 45
Error correction ..........................................46
Expert.........................................................77
Inputs .........................................................49
Motor settings ......................................39, 43
86
V
V Maximum ................................................... 29
Velocity loop.................................................. 63
Voltage.......................................................... 76
Voltage limit .................................................. 49
Issue: V 2.2