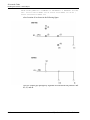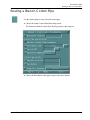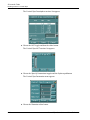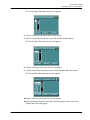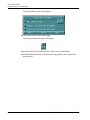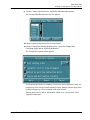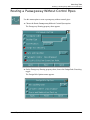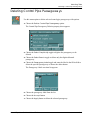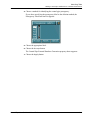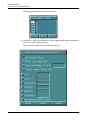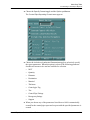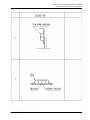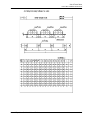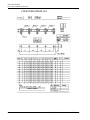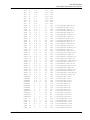
1
Control Pipe
User Guide and Menu Reference
CADDS® 5i Release 10.0
DOC40079-004
Parametric Technology Corporation
Copyright © 2001 Parametric Technology Corporation. All Rights Reserved.
User documentation from Parametric Technology Corporation (PTC) is subject to copyright laws of the United
States and other countries and is provided under a license agreement, which restricts copying, disclosure, and
use of such documentation. PTC hereby grants to the licensed user the right to make copies in printed form of
PTC user documentation provided on software or documentation media, but only for internal, noncommercial use
by the licensed user in accordance with the license agreement under which the applicable software and
documentation are licensed. Any copy made hereunder shall include the Parametric Technology Corporation
copyright notice and any other proprietary notice provided by PTC. User documentation may not be disclosed,
transferred, or modified without the prior written consent of PTC and no authorization is granted to make copies
for such purposes.
Information described in this document is furnished for general information only, is subject to change without
notice, and should not be construed as a warranty or commitment by PTC. PTC assumes no responsibility or
liability for any errors or inaccuracies that may appear in this document.
The software described in this document is provided under written license agreement, contains valuable trade
secrets and proprietary information, and is protected by the copyright laws of the United States and other
countries. UNAUTHORIZED USE OF SOFTWARE OR ITS DOCUMENTATION CAN RESULT IN CIVIL
DAMAGES AND CRIMINAL PROSECUTION.
Registered Trademarks of Parametric Technology Corporation or a Subsidiary
Advanced Surface Design, CADDS, CADDShade, Computervision, Computervision Services,
Electronic Product Definition, EPD, HARNESSDESIGN, Info*Engine, InPart, MEDUSA, Optegra,
Parametric Technology, Parametric Technology Corporation, Pro/ENGINEER, Pro/HELP, Pro/INTRALINK,
Pro/MECHANICA, Pro/TOOLKIT, PTC, PT/Products, Windchill, InPart logo, and PTC logo.
Trademarks of Parametric Technology Corporation or a Subsidiary
3DPAINT, Associative Topology Bus, Behavioral Modeler, BOMBOT, CDRS, CounterPart, CV, CVact, CVaec,
CVdesign, CV-DORS, CVMAC, CVNC, CVToolmaker, DesignSuite, DIMENSION III, DIVISION, DVSAFEWORK,
DVS, e-Series, EDE, e/ENGINEER, Electrical Design Entry, Expert Machinist, Expert Toolmaker,
Flexible Engineering, i-Series, ICEM, Import Data Doctor, Information for Innovation, ISSM, MEDEA,
ModelCHECK, NC Builder, Nitidus, PARTBOT, PartSpeak, Pro/ANIMATE, Pro/ASSEMBLY, Pro/CABLING,
Pro/CASTING, Pro/CDT, Pro/CMM, Pro/COMPOSITE, Pro/CONVERT, Pro/DATA for PDGS, Pro/DESIGNER,
Pro/DESKTOP, Pro/DETAIL, Pro/DIAGRAM, Pro/DIEFACE, Pro/DRAW, Pro/ECAD, Pro/ENGINE, Pro/FEATURE,
Pro/FEM-POST, Pro/FLY-THROUGH, Pro/HARNESS-MFG, Pro/INTERFACE for CADDS 5,
Pro/INTERFACE for CATIA, Pro/LANGUAGE, Pro/LEGACY, Pro/LIBRARYACCESS, Pro/MESH, Pro/Model.View,
Pro/MOLDESIGN, Pro/NC-ADVANCED, Pro/NC-CHECK, Pro/NC-MILL, Pro/NC-SHEETMETAL, Pro/NC-TURN,
Pro/NC-WEDM, Pro/NC-Wire EDM, Pro/NCPOST, Pro/NETWORK ANIMATOR, Pro/NOTEBOOK, Pro/PDM,
Pro/PHOTORENDER, Pro/PHOTORENDER TEXTURE LIBRARY, Pro/PIPING, Pro/PLASTIC ADVISOR,
Pro/PLOT, Pro/POWER DESIGN, Pro/PROCESS, Pro/REPORT, Pro/REVIEW, Pro/SCAN-TOOLS,
Pro/SHEETMETAL, Pro/SURFACE, Pro/VERIFY, Pro/Web.Link, Pro/Web.Publish, Pro/WELDING,
Product Structure Navigator, PTC i-Series, Shaping Innovation, Shrinkwrap, The Product Development Company,
Virtual Design Environment, Windchill e-Series, CV-Computervision logo, DIVISION logo, and ICEM logo.
Third-Party Trademarks
Oracle is a registered trademark of Oracle Corporation. Windows and Windows NT are registered trademarks of
Microsoft Corporation. Java and all Java based marks are trademarks or registered trademarks of Sun
Microsystems, Inc. CATIA is a registered trademark of Dassault Systems. PDGS is a registered trademark of Ford
Motor Company. SAP and R/3 are registered trademarks of SAP AG Germany. FLEXlm is a registered trademark
of GLOBEtrotter Software, Inc. VisTools library is copyrighted software of Visual Kinematics, Inc. (VKI) containing
confidential trade secret information belonging to VKI. HOOPS graphics system is a proprietary software product
of, and copyrighted by, Tech Soft America, Inc. All other brand or product names are trademarks or registered
trademarks of their respective holders.
UNITED STATES GOVERNMENT RESTRICTED RIGHTS LEGEND
This document and the software described herein are Commercial Computer Documentation and Software,
pursuant to FAR 12.212(a)-(b) or DFARS 227.7202-1(a) and 227.7202-3(a), and are provided to the Government
under a limited commercial license only. For procurements predating the above clauses, use, duplication, or
disclosure by the Government is subject to the restrictions set forth in subparagraph (c)(1)(ii) of the Rights in
Technical Data and Computer Software Clause at DFARS 252.227-7013 or Commercial Computer
Software-Restricted Rights at FAR 52.227-19, as applicable.
Parametric Technology Corporation, 140 Kendrick Street, Needham, MA 02494-2714
8 January 2001
Table of Contents
Preface
Related Documents ________________________________________ xiii
Book Conventions __________________________________________ xiv
Window Managers and the User Interface ___________________ xv
Online User Documentation _________________________________ xv
Online Command Help _____________________________________ xvi
Printing Documentation ____________________________________ xvi
Resources and Services ____________________________________ xvii
Documentation Comments ________________________________ xvii
Overview of the Control Pipe
Introduction_____________________________________________________ 1-2
Terms and Definitions ____________________________________________ 1-3
Control Pipe_______________________________________________
Control Pipe Fittings _______________________________________
Control Pipe Label _________________________________________
Control Pipe Tag __________________________________________
MCT ______________________________________________________
Passageway ______________________________________________
Passageway Fittings _______________________________________
Passageway Label ________________________________________
Section Type ______________________________________________
Source ____________________________________________________
Destination ________________________________________________
Control Pipe User Guide and Menu Reference
1-3
1-3
1-3
1-3
1-3
1-3
1-4
1-4
1-4
1-4
1-4
Contents-v
Accessing Control Pipe ___________________________________________ 1-5
Using the Local Data Manager Menu___________________________ 1-5
Accessing Control Pipe Options Without the LDM _______________ 1-6
Control Pipe Environment _________________________________________ 1-7
Environment Access Menu __________________________________
Environment Management Menu ___________________________
Task Set Menu ______________________________________________
Environment Globals 1 Menu ________________________________
1-7
1-8
1-8
1-8
Accessing Control Pipe Setup Options _____________________________ 1-9
Specifying Control Pipe Parameters _____________________________ 1-11
Resetting Control Pipe Parameters (Direct Action)_____________ 1-12
Accessing the Schematic Task Set Options ______________________ 1-13
Accessing the Modeling Task Set Options ________________________ 1-15
Accessing Control Pipe Report Options __________________________ 1-17
Schematic Tasks
Schematic Task Set Options _______________________________________ 2-2
Inserting Nfigures _________________________________________________ 2-5
Changing NFigure Relationships___________________________________ 2-7
Make a Relationship Between Nfigs ____________________________ 2-7
Break a Relationship Between Nfigs ____________________________ 2-7
Make a Relationship Between an Nfig and a Tnode _____________ 2-8
Break a Relationship Between Nfigs ____________________________ 2-8
Routing Schematic Control Pipes__________________________________ 2-9
Example 1 _______________________________________________ 2-12
Example 2 _______________________________________________ 2-14
Routing a Branch Control Pipe __________________________________ 2-17
Routing Schematic Control Pipe Segments ______________________ 2-21
Routing a Passageway Without Control Pipes ____________________ 2-25
Clearing Control Pipe Marking __________________________________ 2-27
Contents-vi
Control Pipe User Guide and Menu Reference
Inserting Control Pipe Fittings____________________________________ 2-28
Inserting an Identical Control Pipe Fitting ________________________ 2-30
Displaying Control Pipes ________________________________________ 2-31
Changing Control Pipe Display Mode Back to
Single Line (Direct Action) ______________________________________ 2-33
Deleting Control Pipe Passageways _____________________________ 2-34
Deleting a Schematic Control Pipe Passageway (Direct Action) __ 2-36
Deleting Selected Control Pipe Fittings (Direct Action)____________ 2-37
Modifying Control Pipes ________________________________________ 2-38
Passageway Selection Method ____________________________ 2-39
Control Pipe Selection Method ____________________________ 2-39
Example 1 __________________________________________________ 2-43
Example 2 __________________________________________________ 2-45
Example 3 __________________________________________________ 2-46
Changing Passageway Layer ________________________________ 2-47
Changing Passageway Label ________________________________ 2-48
Breaking Passageways_______________________________________ 2-49
Joining Passageways ________________________________________ 2-49
Generating Control Pipe Labels _________________________________ 2-50
Writing Control Pipe Attributes to an External Database __________ 2-52
Generating Control Pipe Reports ________________________________ 2-54
Generating Control Pipe Reports _____________________________ 2-55
Generating Control Pipe Segment Reports ____________________ 2-58
Generating Control Pipe Reports _____________________________ 2-59
Generating Control Pipe Default Parameter Listing ____________ 2-59
Modeling Tasks
Modeling Task Set Options _______________________________________ 3-3
Inserting Nfigures ________________________________________________ 3-6
Changing Nfigure Relationships __________________________________ 3-9
Control Pipe User Guide and Menu Reference
Contents-vii
Make a Relationship Between Nfigs ____________________________ 3-9
Break a Relationship Between Nfigs ____________________________ 3-9
Make a Relationship Between an Nfig and a Tnode ___________ 3-10
Break a Relationship Between an Nfig and a Tnode ___________ 3-10
Routing Control Pipes in Modeling Mode ________________________ 3-11
Example 1 _______________________________________________ 3-16
Example 2 _______________________________________________ 3-19
Routing a Branch Control Pipe __________________________________ 3-21
Routing Control Pipe Segments _________________________________ 3-25
Routing a Passageway Without Control Pipes ____________________ 3-29
Clearing Control Pipe Marking __________________________________ 3-31
Inserting Control Pipe and Passageway Fittings __________________ 3-32
Insert Control Pipe Fittings____________________________________ 3-33
Inserting an Identical Control Pipe or
Passageway Fitting (Direct Action) ___________________________ 3-35
Inserting Bend Fitting In a Passageway________________________ 3-36
Inserting Protection Covers In Passageway____________________ 3-37
Inserting a Penetration Piece in a Passageway ________________ 3-39
Inserting a Strap In a Passageway ____________________________ 3-40
Inserting Control Pipe Supports __________________________________ 3-42
Inserting an Identical Control Pipe Support ______________________ 3-44
Deleting Control Pipe Passageways _____________________________ 3-45
Deleting Control Pipe Passageways (Direct Action) ______________ 3-46
Deleting Control Pipe Passageway Fittings _______________________ 3-47
Delete Control Pipe Fittings __________________________________ 3-48
Deleting All Fittings In Passageways __________________________ 3-49
Deleting All Bend Fittings In Passageways _____________________ 3-49
Deleting All Protection Covers In Passageways ________________ 3-49
Deleting All Penetration Pieces In Passageways _______________ 3-50
Deleting All Straps In Passageways ___________________________ 3-50
Deleting Control Pipes and Passageway Fittings (Direct Action ) __ 3-51
Contents-viii
Control Pipe User Guide and Menu Reference
Deleting Control Pipe Supports __________________________________ 3-52
Deleting Control Pipe Supports (Direct Action) ___________________ 3-53
Modifying Control Pipes ________________________________________ 3-54
Example 1 __________________________________________________ 3-58
Example 2 __________________________________________________ 3-60
Example 3 __________________________________________________ 3-60
Changing Passageway Layer ________________________________ 3-62
Changing Passageway Label ________________________________ 3-63
Changing Control Pipe Passageway Parameters ______________ 3-64
Generating Control Pipe Labels _________________________________ 3-65
Generating Cross-section Detail of Control Pipe Arrangement ____ 3-67
Writing Control Pipe Attributes to an External Database __________ 3-68
Generating Drawings of Control Pipe Passageway Fittings ________ 3-70
Generating Control Pipe Reports ________________________________ 3-72
Generating Control Pipe Reports _____________________________ 3-73
Generating Control Pipe Segment Reports ____________________ 3-76
Generating Control Pipe Reports _____________________________ 3-76
Generating Control Pipe Default Parameter Listing ____________ 3-76
Production Drawing Form Part
Creating Production Drawing Form Parts__________________________ A-2
Procedure to Create Production Drawing Form Parts ___________ A-2
Procedure for Penetration and Support Fittings ______________ A-4
Sample Form Parts Available in CADDS
Control Pipe Schematic Drawing ________________________________ B-2
Control Pipe Passageway Section Types _________________________ B-3
Form Part for Control Pipe Protection Cover ______________________ B-9
CPIPE/FORM/COVER-A ____________________________________ B-9
CPIPE/FORM/COVER-B ____________________________________ B-10
CPIPE/FORM/COVER-C ___________________________________ B-11
Control Pipe User Guide and Menu Reference
Contents-ix
CPIPE/FORM/COVER-D ___________________________________ B-12
Form Part for Control Pipe Penetration Piece ____________________ B-13
CPIPE/FORM/PENETRATION ________________________________ B-13
Form Part for Control Pipe Strap and Base Plate _________________ B-14
CPIPE/FORM/STRAP1-1X1__________________________________ B-14
CPIPE/FORM/STRAP1-1X2__________________________________ B-15
List of Form Parts
List of the Available Form Parts ___________________________________ C-2
CPIPE/FORM/STRAP1-1X2 __________________________________
CPIPE/FORM/STRAP1-1X3___________________________________
CPIPE/FORM/STRAP4-1X1___________________________________
CPIPE/FORM/STRAP4-2X1___________________________________
CPIPE/FORM/STRAP4-2X2___________________________________
CPIPE/FORM/STRAP4-2X3___________________________________
CPIPE/FORM/STRAP4-1X4___________________________________
CPIPE/FORM/STRAP4-2X4___________________________________
C-2
C-3
C-4
C-5
C-6
C-7
C-8
C-9
Form Part for Control Pipe Support ______________________________ C-10
CPIPE/FORM/SUPPORT ____________________________________ C-10
CPIPE/FORM/FBSUPPORT __________________________________ C-11
Control Pipe Default Fitting Stockno File _________________________ C-12
CPIPE.DATA.STFILE.FITTING _________________________________ C-12
Control Pipe Default Directories File _____________________________ C-13
CPIPE.DATA.DRFILE _______________________________________ C-13
Control Pipe Default Fitting Auto-selection File ___________________ C-14
CPIPE.DATA.ASFILE.FITTING ________________________________ C-14
Control Pipe Default Parameters File for Fittings __________________ C-17
CPIPE.DATA.PAFILE.PARAMETERS___________________________ C-17
Control Pipe Default Auto-selection file for Cover Fittings _________ C-19
CPIPE.DATA.ASFILE.COVER ________________________________ C-19
Control Pipe Default Auto-selection File for Penetration Fittings ___ C-21
CPIPE.DATA.ASFILE.PENETRATION __________________________ C-21
Contents-x
Control Pipe User Guide and Menu Reference
Control Pipe Default Auto-selection File for Section Types_________ C-22
CPIPE.DATA.ASFILE.SECTION _______________________________ C-22
Control Pipe Default Support Auto-selection File _________________ C-26
CPIPE.DATA.ASFILE.SUPPORT _______________________________ C-26
Control Pipe Default Auto-selection File _________________________ C-27
CPIPE.DATA.ASFILE.CPIPE __________________________________ C-27
Oracle Table Format for Control Pipe Passageway Fittings ________ C-31
Oracle Table Format Sample____________________________________ C-32
Table for CPIPE_FIT_TBL<PROJ> ____________________________ C-32
Table for CPIPE_LABEL_TBL<PROJ> ____________________________ C-33
Table For CPIPE_REL_TBL<PROJ> ______________________________ C-34
Control Pipe User Guide and Menu Reference
Contents-xi
Preface
Control Pipe User Guide and Menu Reference provides a description of the user
interface and instructions for using Control Pipe procedures.
Related Documents
The following documents may be helpful as you use Control Pipe User Guide and
Menu Reference:
• Piping User Guide and Menu Reference
• Piping Specification User Guide
• Visualization/Preparation Reference
• Advance Structural Modeling User Guide and Menu Reference
• Explicit Modeling User Guide and Menu Reference
Control Pipe User Guide and Menu Reference
xiii
Preface
Book Conventions
The following table illustrates and explains conventions used in writing about
CADDS applications.
Convention
Example
Explanation
Menu selections and options List Section option, Specify Layer
field
Indicates a selection you must make from a
menu or property sheet or a text field that you
must fill in.
User-selected graphic
location
X, d1 or P1
Marks a location or entity selection in graphic
examples.
User input in CADDS text
fields and on any command
line
cvaec.hd.data.param
Enter the text in a CADDS text field or on any
command line.
System output
Binary transfer complete. Indicates system responses in the CADDS text
tar -xvf /dev/rst0
window or on any command line.
Variable in user input
tar -cvf /dev/rst0 filename Replace the variable with an appropriate
substitute; for example, replace filename with an
actual file name.
Variable in text
tagname
Indicates a variable that requires an appropriate
substitute when used in a real operation; for
example, replace tagname with an actual tag
name.
CADDS commands and
modifiers
INSERT LINE TANTO
Shows CADDS commands and modifiers as
they appear in the command line interface.
Text string
"SRFGROUPA" or ’SRFGROUPA’
Shows text strings. You must enclose text string
with single or double quotation marks.
Integer
n
Supply an integer for the n.
Real number
x
Supply a real number for the x.
#
# mkdir /cdrom
Indicates the root (superuser) prompt on
command lines.
%
% rlogin remote_system_name
-l root
Indicates the C shell prompt on command lines.
$
$ rlogin remote_system_name -l Indicates the Bourne shell prompt on command
lines.
root
xiv
Control Pipe User Guide and Menu Reference
Preface
Window Managers and the User Interface
According to the window manager that you use, the look and feel of the user
interface in CADDS can change. Refer to the following table:
Look and Feel of User Interface Elements
Common Desktop Environment (CDE) Window Manager Other Than CDE on
User Interface Element on Solaris, HP, DEC, and IBM
Solaris, HP, DEC, IBM, SGI, and NT
Option button
ON — Round, filled in the center
OFF — Round, empty
ON — Diamond, filled
OFF — Diamond, empty
Toggle key
ON — Square with a check mark
OFF — Square, empty
ON — Square, filled
OFF — Square, empty
Online User Documentation
Online documentation for each book is provided in HTML if the documentation
CD-ROM is installed. You can view the online documentation in the following
ways:
• From an HTML browser
• From the Information Access button on the CADDS desktop or the Local Data
Manager (LDM)
Please note: The LDM is valid only for standalone CADDS.
You can also view the online documentation directly from the CD-ROM without
installing it.
From an HTML Browser:
1.
Navigate to the directory where the documents are installed. For example,
/usr/apl/cadds/data/html/htmldoc/ (UNIX)
Drive:\usr\apl\cadds\data\html\htmldoc\ (Windows
NT)
2.
Click mainmenu.html. A list of available CADDS documentation appears.
3.
Click the book title you want to view.
From the Information Access Button on the CADDS Desktop or LDM:
1.
Start CADDS.
2.
Choose Information Access, the i button, in the top-left corner of the CADDS
desktop or the LDM.
3.
Choose DOCUMENTATION. A list of available CADDS documentation appears.
4.
Click the book title you want to view.
Control Pipe User Guide and Menu Reference
xv
Preface
From the Documentation CD-ROM:
1.
Mount the documentation CD-ROM.
2.
Point your browser to:
CDROM_mount_point/htmldoc/mainmenu.html
(UNIX)
CDROM_Drive:\htmldoc\mainmenu.html (Windows
NT)
Online Command Help
You can view the online command help directly from the CADDS desktop in the
following ways:
• From the Information Access button on the CADDS desktop or the LDM
• From the command line
From the Information Access Button on the CADDS Desktop or LDM:
1.
Start CADDS.
2.
Choose Information Access, the i button, in the top-left corner of the CADDS
desktop or the LDM.
3.
Choose COMMAND HELP. The Command Help property sheet opens
displaying a list of verb-noun combinations of commands.
From the Command Line: Type the exclamation mark (!) to display online
documentation before typing the verb-noun combination as follows:
#01#!INSERT LINE
Printing Documentation
A PDF (Portable Document Format) file is included on the CD-ROM for each
online book. See the first page of each online book for the document number
referenced in the PDF file name. Check with your system administrator if you
need more information.
You must have Acrobat Reader installed to view and print PDF files.
The default documentation directories are:
• /usr/apl/cadds/data/html/pdf/doc_number.pdf (UNIX)
• CDROM_Drive:\usr\apl\cadds\data\html\pdf\doc_number.pdf
(Windows NT)
xvi
Control Pipe User Guide and Menu Reference
Preface
Resources and Services
For resources and services to help you with PTC (Parametric Technology
Corporation) software products, see the PTC Customer Service Guide. It includes
instructions for using the World Wide Web or fax transmissions for customer
support.
Documentation Comments
PTC welcomes your suggestions and comments. You can send feedback in the
following ways:
• Send comments electronically to [email protected].
• Fill out and mail the PTC Documentation Survey located in the PTC Customer
Service Guide.
Control Pipe User Guide and Menu Reference
xvii
Chapter 1
Overview of the Control Pipe
This chapter familiarizes you with the Control Pipe graphical interface and tells
you how to use Control Pipe options, which are available from the CADDS
Explicit environment.
• Introduction
• Terms and Definitions
• Accessing Control Pipe
• Control Pipe Environment
• Accessing Control Pipe Setup Options
• Specifying Control Pipe Parameters
• Accessing the Schematic Task Set Options
• Accessing the Modeling Task Set Options
• Accessing Control Pipe Report Options
Control Pipe User Guide and Menu Reference
1-1
Overview of the Control Pipe
Introduction
Introduction
Control Pipe models the small diameter pipes (control pipes) used for the
transmission of hydraulic or pneumatic media in Piping, HVAC, instrumentation,
and machine and valve control systems.
Using Control Pipe you can:
• Specify control pipe schematic design or modeling defaults
• Insert control pipe passageways, fittings, and passageway supports
• Route control pipes
• Modify control pipes
• Delete control pipe passageway supports, passageways, and pipe fittings
• Generate cross sections of passageways
• Change graphical display
• Generate control pipe reports
• Generate control pipe text labels
• Create detailed drawings of passageway items
• Generate external control pipe database
Please note: The Control Pipe features are context-sensitive; that is, they are
available in a specific environment and depend on the active drawings and parts.
1-2
Control Pipe User Guide and Menu Reference
Overview of the Control Pipe
Terms and Definitions
Terms and Definitions
The various terms used in this book are defined below.
Control Pipe
A small diameter pipe or metal tube (usually from 4 mm to 16 mm in diameter)
used to transmit hydraulic or pneumatic media in Piping, HVAC, instrumentation,
and machine and valve control systems. These pipes are commonly found onboard
ships, offshore platforms, and chemical or petrochemical plants.
Control Pipe Fittings
A valve, tee, coupling, or elbow on the control pipe.
Control Pipe Label
A graphical display, in text label form, of information associated with a set of
control pipes routed along the passageway.
Control Pipe Tag
An identifier or mnemonic used to associate a single control pipe or set of control
pipes routed along the passageway. Control Pipe stores the tag as part of the
control pipe information on the passageway. You can input the control pipe tag
while routing the control pipes along the passageway. If you do not specify a tag,
the software generates a unique tag.
Destination
Destination is the termination of a control pipe. It can be either a nodal figure
cnode representing a piece of equipment, or a standalone cnode.
MCT
A group of control pipes, usually contained in a PVC or Metal outer jacket, in
various configurations of multiple cores or control pipes per MCT.
Passageway
A conceptual routing, represented by a single nodal line. The required intelligence
for multiple control pipe or multiple MCT modeling, including reporting, database
generation, and drawing productions is stored on the nodal line.
Control Pipe User Guide and Menu Reference
1-3
Overview of the Control Pipe
Terms and Definitions
In general, passageways are represented by nodal lines and cnodes in both
schematic and modeling modes. If one does not exist, a passageway is
automatically routed using the Route Control Pipe option at the specified
locations.
Passageway Fittings
A penetration, strap, cover, bend, or support on the passageway.
Passageway Label
A label associated with the nodal line that represents the passageway. The
passageway label is used to identify the passageway in various modeling
commands. A passageway label cannot exceed 40 characters.
Section Type
A design parameter input while specifying the supporting structure of the
passageway. Section type indicates the control pipe configuration on the
passageway. There are predefined section types that have assigned names.
Source
Source is the origin of a control pipe. It can be either a nodal figure cnode
representing a piece of equipment, or a standalone cnode.
Destination
Destination is the termination of a control pipe. It can either be a nodal figure
cnode representing a piece of equipment, or a standalone cnode.
1-4
Control Pipe User Guide and Menu Reference
Overview of the Control Pipe
Accessing Control Pipe
Accessing Control Pipe
Access the Control Pipe options from the Explicit environment of CADDS. Enter
the Control Pipe environment either from the Local Data Manager (LDM) menu or
directly from the command prompt without entering CADDS.
Using the Local Data Manager Menu
You can enter the Control Pipe environment from the Local Data Manager in the
following ways:
• Issue the command ENTER CPIPE on the command line,
or
• Click in the Env. Group field in the Activate New Part and Drawing property
sheet. Choose CONTROL PIPE as the environment group from the pull down
menu that appears.
Control Pipe User Guide and Menu Reference
1-5
Overview of the Control Pipe
Accessing Control Pipe
The Env.Group field changes automatically to ENG.PROD and the environment
changes to CONTROL PIPE.
If the part already exists, click on the part and choose CONTROL PIPE as the
environment group. The Env.Group changes automatically to ENG.PROD and the
environment changes to CONTROL PIPE.
Accessing Control Pipe Options Without the LDM
Access the various Control Pipe options without using the Local Data Manager
(LDM)in the following way:
1.
Invoke CADDS directly without the LDM by issuing the following command:
CADDS5 -EXPLICIT
1-6
2.
Activate a new or an existing Control Pipe model.
3.
Access the various Control Pipe options using the following menu areas:
Control Pipe User Guide and Menu Reference
Overview of the Control Pipe
Control Pipe Environment
Control Pipe Environment
The CADDS explicit environment has four menu areas.
• Environment Access menu
• Environment Globals
• Environment Management menu
• Task Set Access menu
You access the CADDS Control Pipe package from the CADDS Environment
Access menu. You can then choose one of the various Control Pipe options from
the:
• Environment Management menu
• Task Set menu
• Environment Globals I menu
Environment Access Menu
Use the Environment Access menu, which provides access to the various CADDS
application environments, to access the CADDS Control Pipe environment.
Control Pipe User Guide and Menu Reference
1-7
Overview of the Control Pipe
Control Pipe Environment
Environment Management Menu
Use the Environment Management menu, which provides access to the various
CADDS application environment management commands, to access the CADDS
Control Pipe Parameter Setup command palette.
Task Set Menu
Use the Task Set menu to access either of the following Control Pipe modeling
options:
• Schematic (default)
• Modeling
The corresponding task set is activated.
Environment Globals 1 Menu
The Environment Globals l menu provides the report option for accessing the
Control Pipe Report command palette.
1-8
Control Pipe User Guide and Menu Reference
Overview of the Control Pipe
Accessing Control Pipe Setup Options
Accessing Control Pipe Setup Options
To access the CADDS Control Pipe Parameter Setup command palette, from the
Environment Management menu:
1.
Choose the Setup option from the top bar of the Environment Management
menu.
The Setup pulldown menu appears.
2.
Choose Control Pipe on the pulldown menu.
Control Pipe User Guide and Menu Reference
1-9
Overview of the Control Pipe
Accessing Control Pipe Setup Options
The Control Pipe Setup command palette appears.
1-10
Control Pipe User Guide and Menu Reference
Overview of the Control Pipe
Specifying Control Pipe Parameters
Specifying Control Pipe Parameters
Use this menu option to choose defaults for various control pipe parameters.
1.
From the Environment Management menu, choose the Setup option.
2.
Choose the Control Pipe option on the pulldown menu.
3.
Choose the Control Pipe Selection Parameters option on the Setup command
palette.
The Control Pipe Parameter Selection property sheet appears.
4.
Choose the Modeling Type option list button.
The Modeling Type option list which appears.
Control Pipe User Guide and Menu Reference
1-11
Overview of the Control Pipe
Specifying Control Pipe Parameters
5.
Choose the Data File Units toggle and press the option list button.
The Data File Units option list appears.
6.
Choose the Axis Locking Order toggle and press option list button.
The Axis Locking Order option list appears.
7.
Choose all control pipes, or multicore tube pipes only.
8.
Choose the number of MCTs.
9.
Enter the appropriate information (source, destination, material, diameter,
thickness, material) in the appropriate fields.
10. Choose
control pipes from the run time list.
11. Choose
the control pipe selection method.
12. Choose
the Apply button.
Resetting Control Pipe Parameters (Direct Action)
Use this menu option to reset the default values of the control pipe parameters.
Choose the Reset Control Pipe Parameters option. The parameters are reset to
the default settings.
1-12
Control Pipe User Guide and Menu Reference
Overview of the Control Pipe
Accessing the Schematic Task Set Options
Accessing the Schematic Task Set Options
To access the CADDS Control Pipe Schematic Task Set options:
1.
Choose the MODELING option from the Task Set Access menu to open the .
Task Set Access pulldown menu.
Control Pipe User Guide and Menu Reference
1-13
Overview of the Control Pipe
Accessing the Schematic Task Set Options
2.
Choose the Schematic option.
The Schematic task set menu appears.
After you have chosen the Schematic task set, you are ready to design schematics
of your schematic control pipes.
1-14
Control Pipe User Guide and Menu Reference
Overview of the Control Pipe
Accessing the Modeling Task Set Options
Accessing the Modeling Task Set Options
To access the CADDS Control Pipe Modeling Task Set options:
1.
Choose the Modeling option from the Task Set Access menu.
The Task Set Access pulldown menu appears.
2.
Choose the Modeling option.
Control Pipe User Guide and Menu Reference
1-15
Overview of the Control Pipe
Accessing the Modeling Task Set Options
The Modeling task set menu appears.
After you have chosen the Modeling task set, you are ready to design your 3D
control pipes.
1-16
Control Pipe User Guide and Menu Reference
Overview of the Control Pipe
Accessing Control Pipe Report Options
Accessing Control Pipe Report Options
To access the CADDS Control Pipe report options from the Environment Global l
menu area:
1.
Choose the Report option from the Environment Global l menu.
The Report pulldown menu appears.
Control Pipe User Guide and Menu Reference
1-17
Overview of the Control Pipe
Accessing Control Pipe Report Options
2.
1-18
Choose the Control Pipe option to bring up the CADDS Control Pipe Reports
command palette.
Control Pipe User Guide and Menu Reference
Overview of the Control Pipe
Accessing Control Pipe Report Options
The Control Pipe Reports command palette appears as shown below.
Control Pipe User Guide and Menu Reference
1-19
Chapter 2
Schematic Tasks
This chapter describes the aspects of control pipe modeling in schematic design.
The Schematic option on the Task Set Access menu displays the Schematic Task
Set.
• Schematic Task Set Options
• Inserting Nfigures
• Changing NFigure Relationships
• Routing Schematic Control Pipes
• Routing a Branch Control Pipe
• Routing Schematic Control Pipe Segments
• Routing a Passageway Without Control Pipes
• Clearing Control Pipe Marking
• Inserting Control Pipe Fittings
• Inserting an Identical Control Pipe Fitting
• Displaying Control Pipes
• Changing Control Pipe Display Mode Back to Single Line (Direct Action)
• Deleting Control Pipe Passageways
• Deleting a Schematic Control Pipe Passageway (Direct Action)
• Deleting Selected Control Pipe Fittings (Direct Action)
• Modifying Control Pipes
• Generating Control Pipe Labels
• Writing Control Pipe Attributes to an External Database
• Generating Control Pipe Reports
Control Pipe User Guide and Menu Reference
2-1
Schematic Tasks
Schematic Task Set Options
Schematic Task Set Options
The 17 icons on the Schematic Task Set display the property sheets you use in
schematic control pipe modeling. For details on accessing the options on the
Schematic task set menu refer to “Accessing the Schematic Task Set Options” on
page 1-13.
Insert Nfigures: Inserts nfigs, sfigs, and pfigs. This icon displays the Insert Nfigure
command palette, which allows you to insert, construct, and create figures.
Change Nfigure Relationships: Makes or breaks relationships between two nfigs,
or between an nfig and a tnode.This icon displays the Change Figure
Relationships command palette.
Route Control Pipes: Routes schematic control pipes.This icon displays the
Schematic Control Pipe Routing property sheet, where you can indicate control
pipe specifications and details.
You can input the quantity, diameter, thickness, material and general description
of the control pipe to be routed through the various options on the property sheet.
A scalar entity is created for each control pipe. The data of the control pipe is
stored in this scalar entity. This data is available for functions such as design and
verification, reporting, control pipe label generation, and drawing production. This
scalar entity should have the STOCKNO property.
Please note: STOCKNO stores the stock number of the control pipe. This
value is got from the field STK# of the control pipe auto-selection file.
Route Control Pipe Branching: Inserts a control pipe branching.This icon displays
the Schematic Branch Control Pipe Routing property sheet.
Route Control Pipe Segments: Routes schematic control pipes. This icon displays
the Schematic Control Pipe Segment Routing property sheet.
2-2
Control Pipe User Guide and Menu Reference
Schematic Tasks
Schematic Task Set Options
Route Passageway without Control Pipes: Routes a passageway without control
pipes. This icon displays Schematic Passageway Routing property sheet
Clear Control Pipe Markings (direct action): Clears the marking of a recently
routed control pipe.
Insert Control Pipe Fittings: Inserts control pipe general fittings in existing control
pipes. This icon displays the Schematic Control Pipe Fitting Insertion property
sheet.
Insert Identical Control Fittings (direct action): Inserts a control pipe fitting
identical to an existing control pipe fitting. The system prompts you to select an
existing control pipe fitting.
Display Control Pipes: Changes the display mode of control pipe
passageways.This icon displays the Display Control Pipes property sheet.
Change Control Pipe Display to Single Line (direct action): Changes the display
mode of a selected control pipe passageway back to a single nodal line
representation from either multiple line or fill display mode.The system prompts
you to select a control pipe.
Delete Control Pipe Passageways (with options): Deletes either an entire control
pipe passageway or branches of a control pipe passageway or individual segments
of a control pipe passageway as per your specification. All control pipes along the
identified passageway will be either deleted or rolled back. This icon displays the
Control Pipe Passageway Deletion property sheet.
Delete Control Pipe Passageways (direct action): Deletes a selected control pipe
passageway. The system prompts you to select the passageway.
Control Pipe User Guide and Menu Reference
2-3
Schematic Tasks
Schematic Task Set Options
Delete Selected Control Pipe Fittings (direct action): Deletes a selected control
pipe fitting. The system prompts you to select the fitting to be deleted.
Modify Control Pipes: Modifies the control pipe parameters and changes
passageway labels and layers. This icon displays the Modify Control Pipe
command palette.
Generate Control Pipe Labels: Generates control pipe labels. This icon displays
the Schematic Control Pipe Label Generation property sheet.
Write Control Pipe Attributes to an External Database: Extracts various control
pipe attributes from the CADDS database and writes them to an external database.
This icon displays the Control Pipe External Database Generation property sheet.
2-4
Control Pipe User Guide and Menu Reference
Schematic Tasks
Inserting Nfigures
Inserting Nfigures
Use this menu option to display a command palette that enables the insertion of
existing Nfigures (nodal figures), Sfigures (sub figures) and Pfigures (part figures)
into an active part. A figure is a copy of an existing part that you can use to
duplicate and standardize information in other parts. Please refer the Figures
chapter in the Nodal Construction User Guide and Menu Reference for more
information about this option.
1.
Choose the Insert Figure option.
The Insert NFigure command palette appears.
2.
To insert or create a single figure, choose one of the direct action icons labeled
in the above figure and enter a figure name.
3.
Choose this option to insert figures with options.
4.
Choose this option to display the property sheet to construct local Nfigures from
selected entities..
Control Pipe User Guide and Menu Reference
2-5
Schematic Tasks
Inserting Nfigures
The Insert Figure property sheet appears.
5.
Choose a figure type.
6.
Enter a figure name in the Name field.
7.
Choose the desired remaining parameters.
8.
Choose the Apply button.
9.
To construct figures with options, choose the Construct Figure with Options
icon.
The Construct Figure property sheet appears.
10. Choose
11. Enter
2-6
a figure type.
a figure name in the Name field.
12. Choose
the desired remaining parameters.
13. Choose
the Apply button.
Control Pipe User Guide and Menu Reference
Schematic Tasks
Changing NFigure Relationships
Changing NFigure Relationships
Use this menu option to change relationships between (relate or unrelate) nfigs and
nfigs and tnodes.
1.
Choose the Change Nfigure Relationships option.
The Change Figure Relationships command palette appears.
Make a Relationship Between Nfigs
Use this menu option to make a relationship between two nfigs.
1.
Choose the Make a Relationship Between Nfigs option.
The system prompts you to select the nfig you want to relate.
2.
Select the nfig you want to relate.
The relationship between nfigs is established.
Break a Relationship Between Nfigs
Use this menu option to dissolve a relationship between two nfigs.
1.
Choose the Dissolve a Relationship Between Nfigs option.
The system prompts you to select the nfigs you want to unrelate.
2.
Select the nfigs you want to relate.
The relationship between nfigs is dissolved.
Control Pipe User Guide and Menu Reference
2-7
Schematic Tasks
Changing NFigure Relationships
Make a Relationship Between an Nfig and a Tnode
Use this menu option to make a relationship between an nfig and a tnode.
1.
Choose the Make a Relationship Between an Nfig and a Tnode option.
The system prompts you to select the nfig and tnode you want to relate.
2.
Select the nfig and tnode you want to relate.
The relationship between the nfig and tnode is established.
Break a Relationship Between Nfigs
Use this menu option to dissolve a relationship between an nfig and a tnode.
1.
Choose the Dissolve a Relationship Between an Nfig and a Tnode option.
The system prompts you to select the nfig and tnode you want to unrelate.
2-8
2.
Select the nfig and tnode you want to relate.
3.
The relationship between the nfig and tnode is dissolved.
Control Pipe User Guide and Menu Reference
Schematic Tasks
Routing Schematic Control Pipes
Routing Schematic Control Pipes
Use this menu option to route schematic control pipes.
1.
Choose the Route Control Pipe option.
The Schematic Control Pipe Routing property sheet appears.
2.
Choose the Description List toggle and press editor button.
The Control Pipe Description run time list appears.
Control Pipe User Guide and Menu Reference
2-9
Schematic Tasks
Routing Schematic Control Pipes
3.
Choose the Specify Parameters toggle and press Options pushbutton.
The Control Pipe Parameters menu appears.
4.
Choose the MCT toggle and press the editor button.
The Control Pipe MCT run time list appears.
5.
Choose the Diameter editor button .
The Control Pipe Diameter run time list appears.
2-10
6.
Choose a diameter and choose the Accept button.
7.
On the Control Pipe Parameters, choose the Thickness editor button.
Control Pipe User Guide and Menu Reference
Schematic Tasks
Routing Schematic Control Pipes
The Control Pipe Thickness run time list appears.
8.
9.
Choose a thickness and choose the Accept button.
On the Control Pipe Parameters, choose the Material editor button.
The Control Pipe Material run time list appears.
10. Choose
11.
a material and choose the Accept button.
On the Schematic Control Pipe Routing property sheet, choose the Design
Rule Checking toggle and press the Options pushbutton.
The Design Rule Options menu appears.
Please note: When the Design Rule Checking toggle is not chosen no check
is made to ensure that the pipes are routed between the source and destination.
Control Pipe User Guide and Menu Reference
2-11
Schematic Tasks
Routing Schematic Control Pipes
12. Choose
the Axis Locking Order toggle and then the Options pushbutton.
The Axis Locking Order option list appears.
13. On
the Control Pipe Parameters menu, choose the Accept button.
14. On
the Schematic Control Pipe Routing property sheet, choose the Apply
button.
Example 1
This example routes a new control pipe passageway between a selected source and
destination, and along a selected path. The passageway will have two control pipes
with diameter of 12mm, a wall thickness of 1.2mm , material CUT, and tag CP1.
The passageway label will be stored as nodal text attached to the passageway nline
as PW1.
Perform the following steps:
1.
Choose the Route Control Pipe option from the Schematic Task Set.
2.
The Route Control Pipe property sheet appears.
.
2-12
Control Pipe User Guide and Menu Reference
Schematic Tasks
Routing Schematic Control Pipes
3.
Enter Pw1 in the Pwlabel field.
4.
Enter 2 in the Quantity field.
5.
Enter 12 in the Diameter field.
6.
Enter 1.2 in the Thickness field.
7.
Enter CUT in the Material field.
8.
Enter CP1 in the Tag field.
9.
Choose the Apply button.
10. In
response to the following prompt on the screen,
ROUTE CPIPE PWLABEL PW1 QUANTITY 2 DIAMETER 12 THICKNESS 1.2
MATERIAL CUT TAG CP1 : Select Source MODEL ent
select location d1, as shown in the figure below.
11. In
response to the following prompt on the screen,
ROUTE CPIPE PWLABEL PW1 QUANTITY 2 DIAMETER 12 THICKNESS 1.2
MATERIAL CUT TAG CP1 : Select Source MODEL ent D1 ; Select
Path MODEL loc
select location d2, as shown in the figure below.
12. In
response to the following prompt on the screen,
ROUTE CPIPE PWLABEL PW1 QUANTITY 2 DIAMETER 12 THICKNESS 1.2
MATERIAL CUT TAG CP1 : Select Source MODEL ent D1 ; Select
Path MODEL loc D2 ; Select Destination MODEL ent
select location d3, as shown in the following figure.
Control Pipe User Guide and Menu Reference
2-13
Schematic Tasks
Routing Schematic Control Pipes
A new control pipe passageway is created between the selected source (d1) and
destination (d3), along the selected path (d2).
Example 2
This example routes a new control pipe passageway between selected points d1
and d2, d3 and d4. Since a passageway between d2 and d3 already exists, no new
passageway is created between these two locations. The passageway between S2
and D2 will have two control pipes with diameter of 12mm, wall thickness of
1.2mm, material CUT and tag CP2.
2-14
Control Pipe User Guide and Menu Reference
Schematic Tasks
Routing Schematic Control Pipes
Perform the following steps:
1.
Choose the Route Control Pipe option from the Schematic Task Set.
The Schematic Control Pipe Routing property sheet appears.
.
2.
In the Route Control Pipe property sheet, enter 2 as the quantity in the Quantity
field.
3.
Enter 12 as the diameter in the Diameter field.
4.
Enter 1.2 as the wall thickness in the Thickness field.
5.
Enter CUT as the material in the Material field.
6.
Enter CP2 as the tag name in the Tag field.
7.
Choose the Apply button.
8.
In response to the following prompt on the screen,
ROUTE CPIPE QUANTITY 2 DIAMETER 12 THICKNESS 1.2 MATERIAL CUT TAG
CP2 : Select Source MODEL ent
select location d1 as shown in the following figure.
9.
In response to the following prompt on the screen,
ROUTE CPIPE QUANTITY 2 DIAMETER 12 THICKNESS 1.2 MATERIAL CUT TAG
CP2 : Select Source MODEL ent d1 Select Path MODEL loc
select locations d2 and d3 as shown in the following figure.
10. In
response to the following prompt on the screen,
Control Pipe User Guide and Menu Reference
2-15
Schematic Tasks
Routing Schematic Control Pipes
ROUTE CPIPE QUANTITY 2 DIAMETER 12 THICKNESS 1.2 MATERIAL CUT TAG
CP2 : Select Source MODEL ent d1 Select Path MODEL loc d2 d3 ;
Select Destination MODEL ent
select location d4 as shown in the following figure.
Two new control pipe passageway segments are routed between points d1 and
d2, d3, and d4.
2-16
Control Pipe User Guide and Menu Reference
Schematic Tasks
Routing a Branch Control Pipe
Routing a Branch Control Pipe
Use this menu option to route a branch control pipe.
1.
Choose the Insert Control Pipe Branching option.
The Schematic Branch Control Pipe Routing property sheet appears.
2.
Choose the Description List toggle and press the editor button.
Control Pipe User Guide and Menu Reference
2-17
Schematic Tasks
Routing a Branch Control Pipe
The Control Pipe Description run time list appears.
3.
Choose the MCT toggle and then the editor button.
The Control Pipe MCT run time list appears.
4.
Choose the Specify Parameters toggle and the Options pushbutton
The Control Pipe Parameter menu appears.
5.
2-18
Choose the Diameter editor button.
Control Pipe User Guide and Menu Reference
Schematic Tasks
Routing a Branch Control Pipe
The Control Pipe Diameter run time list appears.
6.
Choose a diameter and choose the Accept button.
7.
On the Control Pipe Parameters, choose the Thickness editor button.
The Control Pipe Thickness run time list appears.
8.
9.
Choose a thickness and choose the Accept button.
On the Control Pipe Parameters menu, choose the Material editor button.
The Control Pipe Material run time list appears.
10. Choose
a material and choose the Accept button.
11. On
the Schematic Branch Control Pipe Routing property sheet, choose the
Design Rule Checking toggle.
Control Pipe User Guide and Menu Reference
2-19
Schematic Tasks
Routing a Branch Control Pipe
The Design Rule Options menu appears.
12. Choose
the Axis Locking Order toggle.
The Axis Locking Order option list appears.
13. On
the Control Pipe Parameters menu, choose the Accept button.
14. On
the Schematic Branch Control Pipe Routing property sheet, choose the
Apply button.
2-20
Control Pipe User Guide and Menu Reference
Schematic Tasks
Routing Schematic Control Pipe Segments
Routing Schematic Control Pipe Segments
Use this menu option to route control pipes along a selected passageway segment.
1.
Choose the Route Control Pipe Segment option.
The Schematic Control Pipe Segment Routing property sheet appears.
2.
Choose the Description List toggle and the editor button.
The Control Pipe Description run time list appears.
3.
Choose the Specify Parameters toggle and press Options pushbutton.
Control Pipe User Guide and Menu Reference
2-21
Schematic Tasks
Routing Schematic Control Pipe Segments
The Control Pipe Parameters menu appears.
4.
Choose the MCT toggle and press the editor button.
The Control Pipe MCT run time list appears.
5.
On the Control Pipe Parameters menu, choose the Diameter editor button.
The Control Pipe Diameter run time list appears.
2-22
6.
Choose a diameter and choose the Accept button.
7.
On the Changing Control Pipe Parameters, choose the Thickness editor button.
Control Pipe User Guide and Menu Reference
Schematic Tasks
Routing Schematic Control Pipe Segments
The Control Pipe Thickness run time list appears.
8.
9.
Choose a thickness and choose the Accept button.
On the Changing Control Pipe Parameters, choose the Material editor button.
The Control Pipe Material run time list appears.
10. Choose
a material and choose the Accept button.
11. On
the Schematic Control Pipe Segment Routing property sheet, choose the
Design Rule Checking toggle and press the Options pushbutton.
The Design Rule Options menu appears.
12. Choose
the Axis Locking Order toggle and then the Options pushbutton.
Control Pipe User Guide and Menu Reference
2-23
Schematic Tasks
Routing Schematic Control Pipe Segments
The Axis Locking Order option list appears.
13. On
the Control Pipe Parameters menu, choose the Accept button.
14. On
the Schematic Control Pipe Segment Routing property sheet, choose the
Apply button.
2-24
Control Pipe User Guide and Menu Reference
Schematic Tasks
Routing a Passageway Without Control Pipes
Routing a Passageway Without Control Pipes
Use this menu option to route a passageway without control pipes.
1.
Choose the Route Passageway Without a Control Pipe option.
The Schematic Passageway Routing property sheet appears.
2.
On the Schematic Passageway Routing property sheet, choose the Design Rule
Checking toggle.
The Design Rule Options menu appears.
3.
Choose the Axis Locking Order toggle.
Control Pipe User Guide and Menu Reference
2-25
Schematic Tasks
Routing a Passageway Without Control Pipes
The Axis Locking Order option list appears.
2-26
4.
On the Control Pipe Parameters menu, choose the Accept button.
5.
On the Schematic Passageway Routing property sheet, choose the Apply
button.
Control Pipe User Guide and Menu Reference
Schematic Tasks
Clearing Control Pipe Marking
Clearing Control Pipe Marking
Use this menu option to directly clear the passageway markings created while
routing or reporting the control pipes.
1.
Choose the Clear Highlighting option.
The highlighting is removed from all highlighted entities.
Control Pipe User Guide and Menu Reference
2-27
Schematic Tasks
Inserting Control Pipe Fittings
Inserting Control Pipe Fittings
Use this menu option to insert control pipe fittings in existing control pipes.
1.
Choose the Insert Control Pipe Fitting option.
The Schematic Control Pipe Fitting Insertion property sheet appears.
2.
Choose the Fitting Name editor button.
The Control Pipe Fittings run-time list appears.
Please note: The fittings are listed from the stock number file, specified by
the Stock Number File field in Control Pipe Parameters Selection property sheet.
2-28
Control Pipe User Guide and Menu Reference
Schematic Tasks
Inserting Control Pipe Fittings
3.
Choose the Stem Orientation toggle and the Option list button.
The Stem Orientation option list appears.
4.
Choose the Fitting Justification toggle and the Option list button.
The Fitting Justification option list appears.
5.
On the Schematic Control Pipe Fitting Insertion property sheet, choose the
Apply button to insert the fitting.
Please note: The following options are not available for selection, when you
select the Run To Branch or Branch To Run toggles.
• Stem Orientation
• Fitting Justification
• Rotation Angle
• Trim Elbow Fitting
Control Pipe User Guide and Menu Reference
2-29
Schematic Tasks
Inserting an Identical Control Pipe Fitting
Inserting an Identical Control Pipe Fitting
Use this menu option to directly insert a control pipe fitting identical to an existing
control pipe fitting.
1.
Choose the Insert Identical Control Pipe Fitting option.
The systems prompts you to select an existing control pipe fitting.
A new control pipe fitting with parameters the same as those of the selected
control pipe fitting is inserted at the selected location.
2-30
Control Pipe User Guide and Menu Reference
Schematic Tasks
Displaying Control Pipes
Displaying Control Pipes
This menu option invokes the property sheet where you change the control pipe
display mode.
1.
Choose the Change Control Pipe Display Mode option.
The Displaying Control Pipes property sheet appears.
2.
Select Specify Label toggle and press the editor button.
Control Pipe User Guide and Menu Reference
2-31
Schematic Tasks
Displaying Control Pipes
The Passageway Labels run-time list appears.
3.
Select the Fill toggle and then select the Justification toggle.
4.
Choose the Option list button.
The Fill Justification option list appears.
5.
2-32
Choose the Apply button.
Control Pipe User Guide and Menu Reference
Schematic Tasks
Changing Control Pipe Display Mode Back to Single Line (Direct Action)
Changing Control Pipe Display Mode Back to
Single Line (Direct Action)
Use this menu option to directly change the display mode of the selected control
pipe passageways back to a single nodal line representation from either multiple
line or fill display mode.
1.
Choose the Change Control Pipe Display Mode direct action option.
The system prompts you to select the control pipe.
2.
Select the desired control pipe.
The display mode of the selected control pipe changes back to a single nodal
line representation.
Control Pipe User Guide and Menu Reference
2-33
Schematic Tasks
Deleting Control Pipe Passageways
Deleting Control Pipe Passageways
Use this menu option to delete selected control pipe passageways with options
You can delete an entire control pipe passageway or branches of a control pipe
passageway or individual segments of a control pipe passageway. The passageway
can be identified by either specifying the passageway label or by digitizing.
1.
Choose the Delete Control Pipe Passageway option.
The Control Pipe Passageway Deletion property sheet appears.
2-34
2.
Choose the Select Graphically toggle to digitize the passageways to be
deleted.
3.
Choose the Digitized Segment Only toggle to delete the digitized passageway
segment and roll back all of the control pipes routed through this segment, from
their destinations upto their end points. If the source of any control pipe label is
the same as the segment end points, then the control pipe label will be deleted.
4.
Choose the Select Branch toggle to delete only the digitized branch
passageway and all the control pipes associated with the selected branch.
5.
Choose the Passageway Label toggle and enter the label in the fill-in field to
delete the specified passageway or press the editor button.
Control Pipe User Guide and Menu Reference
Schematic Tasks
Deleting Control Pipe Passageways
The Passageway Labels run-time list appears.
Please note: The Digitized Segment Only, Select Branch, and Passageway
Label toggles are mutually exclusive.
6.
Choose the passageway label from the list.
7.
Choose the Accept button.
8.
Choose the Apply button to delete the selected passageway.
Control Pipe User Guide and Menu Reference
2-35
Schematic Tasks
Deleting a Schematic Control Pipe Passageway (Direct Action)
Deleting a Schematic Control Pipe Passageway
(Direct Action)
Use this menu option to directly delete a selected control pipe passageway.
1.
Choose the Delete a Passageway option.
The system prompts you to select the passageway.
2.
Select the passageways to be deleted on the drawing.
The selected passageways are deleted as well as all the control pipes running in
those passageways.
2-36
Control Pipe User Guide and Menu Reference
Schematic Tasks
Deleting Selected Control Pipe Fittings (Direct Action)
Deleting Selected Control Pipe Fittings (Direct
Action)
Use this menu option to directly delete a selected control pipe fitting.
1.
Choose the Delete a Control Pipe Fitting option.
2.
Select the fitting to be deleted on the drawing.
The selected fitting is deleted.
Control Pipe User Guide and Menu Reference
2-37
Schematic Tasks
Modifying Control Pipes
Modifying Control Pipes
Use this menu option to modify control pipe parameters, change passageway
labels and layers, or delete a set of control pipes along a control pipe passageway.
1.
Choose the Modify Control Pipe option.
The Modify Control Pipes command palette appears.
2.
Choose the Modify Control Pipes option to modify various control pipe
parameters.
The Control Pipe Modification property sheet appears.
2-38
Control Pipe User Guide and Menu Reference
Schematic Tasks
Modifying Control Pipes
Passageway Selection Method
You can select a passageway either by digitizing or by specifying the passageway
label.
1.
On the Control Pipe Modification property sheet, choose Specify Label toggle
and press the editor button.
The Passageway Labels run time list appears.
Control Pipe Selection Method
Since control pipes are not visible entities in a model, you select them by selecting
a passageway or by specifying various control pipe parameters.
1.
On the Control Pipe Modification property sheet, choose the Control Pipe
Selection toggle and the Options pushbutton.
2.
To choose a passageway by specifying a passageway label, choose the Specify
Label toggle and enter the label name.
The Control Pipe Selection Parameters menu appears.
3.
To choose a passageway graphically, choose the Select Graphically toggle.
The following prompt appears.
Digitize Passageway: Model ent d1
4.
Digitized the passageway.
Please note: All control pipes from the passageway are listed in the Select
Control Pipes scroll list on menu.
The Control Pipe Selection Parameters menu appears.
Control Pipe User Guide and Menu Reference
2-39
Schematic Tasks
Modifying Control Pipes
5.
Choose the required control pipes by scrolling through the Select Control
Pipes scroll list.
The selected control pipes tag appears in Control Pipe Tags fill-in field.
2-40
6.
Choose the Specified Number of MCTs toggle to filter the control pipe
description labels listed under the Select Control Pipes scroll list.
7.
Choose the Source toggle and enter a source name.
8.
Choose the Quantity toggle and enter a quantity.
9.
Choose the Thickness editor button.
Control Pipe User Guide and Menu Reference
Schematic Tasks
Modifying Control Pipes
The Control Pipe Thickness run time list appears.
10. On
the Control Pipe Selection Parameters property sheet, choose a thickness
and choose the Accept button.
11. Choose
the Destination toggle and enter a destination name.
12. On
the Control Pipe Selection Parameters property sheet, choose the Diameter
editor button.
The Control Pipe Diameter run time list appears.
13. Choose
14.
a diameter and choose the Accept button.
On the Control Pipe Selection Parameters property sheet, choose the Material
editor button.
The Control Pipe Material run time list appears.
15. Choose
a material and choose the Accept button.
Control Pipe User Guide and Menu Reference
2-41
Schematic Tasks
Modifying Control Pipes
16. To
choose control pipes based on the filtering parameters, choose the Select
All Control Pipes Based On Filters toggle.
Please note: Choosing in the manner saves you from having to select control
pipes one by one from a long list.
17. To
change the control pipe parameters, select the Change Parameters toggle
from the Control Pipe Modification menu and press the Options pushbutton.
The Changing Control Pipe Parameters property sheet appears.
18. Choose
2-42
the Change Connections toggle and the Options pushbutton.
Control Pipe User Guide and Menu Reference
Schematic Tasks
Modifying Control Pipes
The Changing Control Pipe Connections property sheet appears.
19. To
change the source, choose the New Source toggle and enter a source name.
20. To
change the destination, choose the New Destination toggle and enter a
source name.
21. To select new connections by digitizing, choose the Interactive Path Selection
toggle and digitize the source and destination when prompted.
22. Choose
the Accept button.
Example 1
This example selects a set of control pipes identified by the tag name CP1 in the
selected passageway and modifies the diameter, material, and thickness according
to the specified values.
Perform the following steps:
1.
Choose the Control Pipe option on the Environment Access menu.
2.
Choose the Schematic option on the Task Set Access menu.
3.
Choose the Modify Control Pipe option from the Schematic Task Set.
The Control Pipe Modification command palette appears
.
Control Pipe User Guide and Menu Reference
2-43
Schematic Tasks
Modifying Control Pipes
4.
In the Modify Control Pipe property sheet, Choose the Control pipe Selection
push button to bring up the sub menu.
Digitize Passageway : Model ent d1
Digitize the passageway as shown in the figure in the following page.
a.
Select the control pipe CP1 from scroll list, or enter CP1 in Control Pipe
fill-in field.
Tags
b.
5.
Click Accept button.
Choose Change Parameters toggle and press the push button to bring up the
sub menu.
a.
Enter 6 as the diameter in the Diameter field.
b.
Enter CUT as the material in the Material field.
c.
Enter 1.4 as the thickness in the Thickness field.
d.
Click the Accept button.
6.
Click the Apply button to carry out the modification.
7.
In response to the following prompt on the screen,
MODIFY CPIPE PWLABEL PW1 SELECT TAG CP1 CHANGE
DIAMETER 6 MATERIAL CUT THICKNESS 1.4 <CR>
All the control pipes identified by the tag name CP1 in the selected passageway
are selected and the diameter, material, and thickness are modified, as shown in
Table AFTER.
2-44
Control Pipe User Guide and Menu Reference
Schematic Tasks
Modifying Control Pipes
Table 2-1
LABEL
FROM
TO
PW1
S1
PW1
S1
BEFORE
QTY
DIA
THK
MATL
TAG
D1
6
10
1.2
SS316
CP1
D1
6
16
1.2
SS316
CP2
QTY
DIA
THK
MATL
TAG
Table 2-2
MCT
AFTER
LABEL
FROM
TO
MCT
PW1
S1
D1
6
6
1.4
CUT
CP1
PW1
S1
D1
6
16
1.2
SS316
CP2
Example 2
This example selects all the control pipes with diameter of 4 and material as CUT
in the identified passageway PW1 and deletes them.
1.
Choose Control Pipe on the Environment Access menu.
2.
Choose Schematic on the Task Set Access menu.
3.
Choose the Modify Control Pipe option from the Schematic Task Set.
The Modify Control Pipes window appears.
4.
In the Modify Control Pipe property sheet, Choose the Control pipe Selection
push button to bring up the sub menu.
Digitize Passageway : Model ent d1
Digitize the passageway as shown in the figure in the following page.
•
Select the control pipe PW1 from scroll list, or enter PW1 in Control Pipe
Tags fill-in field.
5.
Choose Change, Diameter, and Material toggle and press the push button to
bring up the sub menu.
6.
Enter 4 as the diameter in the Diameter field.
7.
Enter CUT as the material in the Material field.
•
Choose Accept button.
Control Pipe User Guide and Menu Reference
2-45
Schematic Tasks
Modifying Control Pipes
8.
Choose the Apply button to carry out the modification.
9.
In response to the following prompt appears on the screen.
MODIFY CPIPE SELECT PWLABEL PW1 DIAMETER 4 MATERIAL CUT DELETE
All the control pipes with diameter as 4 and material as CUT in the identified
passageway PW1 are deleted.
Example 3
This example selects all the control pipes with CP2 as the tag name in the
identified passageway and connects them to the source SRC1 in the passageway.
1.
Choose the Control Pipe option on the Environment Access menu.
2.
Choose thee Schematic option on the Task Set Access menu.
3.
Choose the Modify Control Pipe option from the Schematic Task Set.
The Modify Control Pipe command palette appears
.
4.
In the Modify Control Pipe property sheet, Choose the Control pipe Selection
push button to bring up the sub menu.
Digitize Passageway : Model ent d1
Digitize the passageway as shown in the figure in the following page.
a.
Select the control pipe CP2 from scroll list, or enter CP2 in Control Pipe
fill-in field.
Tags
b.
5.
Click Accept button.
Choose Source toggle and press the push button to bring up the sub menu.
a.
Enter SRC1 as the source in the Source field.
b.
Choose the Accept button.
6.
Choose the Apply button to carry out the modification.
7.
In response to the following prompt on the screen,
MODIFY CPIPE SELECT TAG CP2 CONNECT SOURCE SRC1 : Select
Passageway MODEL ent
select the model location on the screen.
2-46
Control Pipe User Guide and Menu Reference
Schematic Tasks
Modifying Control Pipes
All the control pipes with CP2 as the tag name in the identified passageway are
connected to the source SRC1 in the passageway.
Changing Passageway Layer
Use this menu option to change a passageway layer.
1.
Choose the Change Passageway Layer option.
The Changing Passageway Layer property sheet appears.
The Passageway Labels run-time list appears.
2.
Choose the passageway on which you want to change layers.
3.
Choose the Apply button.
Control Pipe User Guide and Menu Reference
2-47
Schematic Tasks
Modifying Control Pipes
Changing Passageway Label
Use this menu option to change a passageway label.
1.
Choose the Change Passageway Label option.
The Changing Passageway Label property sheet appears.
2.
Choose the passageway graphically or by specifying the label to be modified.
The Passageway Labels run-time list appears.
2-48
3.
Choose the label you want to modify.
4.
Choose the Apply button.
Control Pipe User Guide and Menu Reference
Schematic Tasks
Modifying Control Pipes
Breaking Passageways
Use this menu option to split control pipes at specified locations.
1.
Choose the Break Passageway option.
The following prompt appears.
Digitize Passageway: Model ent
The passageway splits where digitized.
Joining Passageways
Use this menu option to join selected passageways.
1.
Choose the Join Passageway option.
The following prompt appears.
Digitize Passageway: Model ent d1 d2
The digitized passageways are joined and the connect node is deleted.
Control Pipe User Guide and Menu Reference
2-49
Schematic Tasks
Generating Control Pipe Labels
Generating Control Pipe Labels
Use this menu option to generate control pipe labels.
1.
Choose the Generate Control Pipe Text Labels option.
The Schematic Control Pipe Label Generation property sheet appears.
2.
3.
Choose the Include only selected Parameters toggle.
Choose the Material editor button.
The Control Pipe Material run time list appears.
4.
2-50
Choose a material and choose the Accept button.
Control Pipe User Guide and Menu Reference
Schematic Tasks
Generating Control Pipe Labels
5.
Choose the Thickness editor button.
The Control Pipe Thickness run time list appears.
6.
Choose a thickness and choose the Accept button.
7.
Choose the Diameter editor button.
The Control Pipe Diameter run time list appears.
8.
Choose a diameter and choose the Accept button.
9.
Choose the Apply button.
Control Pipe User Guide and Menu Reference
2-51
Schematic Tasks
Writing Control Pipe Attributes to an External Database
Writing Control Pipe Attributes to an External
Database
Use this menu option to extract various control pipe attributes from the CADDS
graphical database to an external database.
1.
Choose the Generate Control Pipe External Database option.
The Control Pipe External Database Generation property sheet appears.
2-52
2.
Enter your username and password.
3.
Enter the project name.
Control Pipe User Guide and Menu Reference
Schematic Tasks
Writing Control Pipe Attributes to an External Database
4.
Choose a method for identifying the control pipe passageway.
If you chose specifying the passageway label as the selection method, the
Passageway Labels run-time list appears.
5.
Choose the appropriate label.
The Control Pipe External Database Generation property sheet reappears.
6.
Choose the Overwrite Control Pipe External Database toggle.
This option overwrites an existing external database with the current
information.
7.
Choose the Apply button.
Control Pipe User Guide and Menu Reference
2-53
Schematic Tasks
Generating Control Pipe Reports
Generating Control Pipe Reports
Use this menu option to generate control pipe reports
1.
Choose the Generate Control Pipe Reports option. (See “Accessing Control
Pipe Report Options” on page 1-17.)
The Control Pipe Reports command palette appears as shown below.
2-54
Control Pipe User Guide and Menu Reference
Schematic Tasks
Generating Control Pipe Reports
Generating Control Pipe Reports
Use this menu option to report on control pipes and control pipe fittings.
1.
Choose the Generate Control Pipe Reports option.
The Control Pipe Report property sheet appears.
Control Pipe User Guide and Menu Reference
2-55
Schematic Tasks
Generating Control Pipe Reports
2.
Select Specify Label toggle and press the editor button.
The Passageway Labels run-time list appears.
3.
Choose the Control Pipe Selection Criteria toggle and press the Option
pushbutton.
The Control Pipe Selection Criteria menu appears.
2-56
Control Pipe User Guide and Menu Reference
Schematic Tasks
Generating Control Pipe Reports
4.
Choose the Specify Format toggle and press the Option pushbutton.
The Control Pipe Reporting Format menu appears.
5.
Choose the Include only selected Parameters toggle.
6.
Choose the Diameter editor button.
The Control Pipe Diameter run time list appears.
7.
Choose a diameter and choose the Accept button.
Control Pipe User Guide and Menu Reference
2-57
Schematic Tasks
Generating Control Pipe Reports
8.
Choose the Thickness editor button.
The Control Pipe Thickness run time list appears.
9.
10.
Choose a thickness and choose the Accept button.
Choose the Material editor button.
The Control Pipe Material run time list appears.
11. Choose
a material and choose the Accept button.
12. Choose
the Accept button.
13. On
the Control Pipe Report property sheet, choose the Apply button.
Generating Control Pipe Segment Reports
Use this menu option to directly create reports on control pipes routed in the
digitized passage way segment only.
1.
Choose the Generate Control Pipe Segment Reports direct action option.
The system asks you to select a segment.
2.
Select the desired segment.
A report of all the control pipes in the selected passageway segments is
displayed.
2-58
Control Pipe User Guide and Menu Reference
Schematic Tasks
Generating Control Pipe Reports
Generating Control Pipe Reports
Use this menu option to directly generate reports on all control pipes in the
selected passageways.
1.
Choose the Generate Control Pipe Reports direct action option.
The system asks you to select a passageway.
2.
Select the desired passageway.
A report of all the control pipes in the selected passageway is displayed.
Generating Control Pipe Default Parameter Listing
Use this menu option to list the currently selected default values of various control
pipe parameters.
1.
Choose the Generate Control Pipe Default Parameter Listing direct action
option.
A listing of current values of all the control pipe parameters is displayed.
Control Pipe User Guide and Menu Reference
2-59
Chapter 3
Modeling Tasks
This chapter describes the aspects of control pipe modeling. The Modeling option
on the Task Set Access menu displays the Modeling Task Set.
• Modeling Task Set Options
• Inserting Nfigures
• Changing Nfigure Relationships
• Routing Control Pipes in Modeling Mode
• Routing a Branch Control Pipe
• Routing Control Pipe Segments
• Routing a Passageway Without Control Pipes
• Clearing Control Pipe Marking
• Inserting Control Pipe and Passageway Fittings
• Inserting Control Pipe Supports
• Inserting an Identical Control Pipe Support
• Deleting Control Pipe Passageways
• Deleting Control Pipe Passageways (Direct Action)
• Deleting Control Pipe Passageway Fittings
• Deleting Control Pipes and Passageway Fittings (Direct Action )
• Deleting Control Pipe Supports
• Deleting Control Pipe Supports (Direct Action)
• Modifying Control Pipes
• Generating Control Pipe Labels
• Generating Cross-section Detail of Control Pipe Arrangement
• Writing Control Pipe Attributes to an External Database
Control Pipe User Guide and Menu Reference
3-1
Modeling Tasks
• Generating Drawings of Control Pipe Passageway Fittings
• Generating Control Pipe Reports
3-2
Control Pipe User Guide and Menu Reference
Modeling Tasks
Modeling Task Set Options
Modeling Task Set Options
The 21 icons on the Modeling Task Set display the property sheets you use in
control pipe modeling. For details on accessing the options on the Modeling task
set menu refer to “Accessing the Modeling Task Set Options” on page 1-15.
Insert Nfigures: Inserts nfigs, sfigs, and pfigs. This icon displays the Insert Figure
command palette, which allows you to insert, construct, and create figures.
Change Nfigure Relationships: Makes or breaks relationships between two nfigs,
or between an nfig and a tnode.This icon displays the Change Figure Relationships
command palette.
.
Route Control Pipes: Routes control pipes.This icon displays the Control Pipe
Routing property sheet, where you can indicate control pipe specifications and
details.
Route Control Pipe Branching: Inserts a control pipe branching.This icon displays
the Branch Control Pipe Routing property sheet
Route Control Pipe Segments: Routes control pipes. This icon displays the Control
Pipe Segment Routing property sheet.
Route Passageway without Control Pipes: Routes a passageway without control
pipes. This icon displays Passageway Routing property sheet
Clear Control Pipe Marking (direct action): Clears marking of a recently routed
control pipe.
Insert Control Pipe and Passageway Fittings: Inserts control pipe passageway
general fittings in existing control pipes or passageways. This icon displays the
Control Pipe Fitting Insertion property sheet.
Control Pipe User Guide and Menu Reference
3-3
Modeling Tasks
Modeling Task Set Options
Insert Control Pipe Supports: Inserts a control pipe support.
Insert Identical Control Pipe Support (direct action): Inserts a control pipe support
identical to an existing control pipe support. The system prompts you to select an
existing control pipe support.
Delete Control Pipe Passageways: Deletes selected control pipe passageways.
This icon displays the Control Pipe Passageway Deletion property sheet.
Delete Control Pipe Passageways (direct action): Deletes selected control pipe
passageway.
Delete Control Pipe And Passageway Fittings (with options): Deletes selected
control pipe passageway fitting or control pipe fitting. This icon displays the
Control Pipe Fitting Deletion property sheet.
Delete Control Pipe And Passageways Fittings (direct action): Deletes a selected
control pipe passageway fitting or control pipe fitting. The system prompts you to
select the passageway fitting or control pipe fitting.
Delete Control Pipe Supports: Deletes a selected control pipe support. The system
prompts you to select the support.
Delete Control Pipe Supports (direct action): Deletes a selected control pipe
support. The system prompts you to select the support.
Modify Control Pipes: Modifies the control pipe parameters and changes
passageway labels and layers. You can use this option to balance a passageway by
connecting control pipes to a selected source and/or destination. You can also
select the passageway interactively. This icon displays the Modify Control Pipe
command palette.
3-4
Control Pipe User Guide and Menu Reference
Modeling Tasks
Modeling Task Set Options
Generate Control Pipe Labels: Generates control pipe labels. This icon displays the
Control Pipe Label Generation property sheet.
Generate Cross-section Detail Of Control Pipe Arrangement: Generates a
cross-section detail representation of a control pipe arrangement.
Write Control Pipe Attributes To An External Database: Extracts various control
pipe attributes from the CADDS graphical database and writes them to an external
database. This icon displays the Control Pipe External Database Generation
property sheet.
Generate Drawings Of Control Pipe Passageway Fittings: Extracts various control
pipe attributes from the CADDS graphical database and writes them to an external
database. This icon displays the Control Pipe External Database Generation
property sheet.
Control Pipe User Guide and Menu Reference
3-5
Modeling Tasks
Inserting Nfigures
Inserting Nfigures
Use this menu option to display a command palette that enables the insertion of
existing Nfigures (nodal figures), Sfigures (sub figures) and Pfigures (part figures)
into an active part. A figure is a copy of an existing part that you can use to
duplicate and standardize information in other parts. Please refer the Figures
chapter in the Nodal Construction User Guide and Menu Reference for more
information about this option.
1.
Choose the Insert Figure option.
The Insert Figure command palette appears.
2.
To insert or create a single figure, choose one of the direct action icons labeled
in the above figure and enter the figure name.
Choose this option to insert figures with options.
Choose this option to construct local Nfigures from selected entities..
3-6
Control Pipe User Guide and Menu Reference
Modeling Tasks
Inserting Nfigures
The Insert Figure property sheet appears.
3.
Choose a figure type.
4.
Enter a figure name in the Name field.
5.
Choose the desired remaining parameters.
6.
Choose the Apply button.
Control Pipe User Guide and Menu Reference
3-7
Modeling Tasks
Inserting Nfigures
7.
To construct figures with options, choose the Construct Figure with Options
icon.
The Construct Figure property sheet appears.
3-8
8.
Choose a figure type.
9.
Enter a figure name in the Name field.
10. Choose
the desired remaining parameters.
11. Choose
the Apply button.
Control Pipe User Guide and Menu Reference
Modeling Tasks
Changing Nfigure Relationships
Changing Nfigure Relationships
Use this menu option to make or break relationships between nfigs and nfigs and
tnodes.
1.
Choose the Change Nfigure Relationships option.
The Change Figure Relationships command palette appears.
Make a Relationship Between Nfigs
Use this menu option to make a relationship between two nfigs.
1.
Choose the Make a Relationship Between Nfigs option.
The system prompts you to select the nfigs you want to relate.
2.
Select the nfigs you want to relate.
3.
The relationship between nfigs is established.
Break a Relationship Between Nfigs
Use this menu option to dissolve a relationship between two nfigs.
1.
Choose the Dissolve a Relationship Between Nfigs option.
The system prompts you to select the nfigs you want to unrelate.
2.
Select the nfigs you want to relate.
3.
The relationship between nfigs is dissolved.
Control Pipe User Guide and Menu Reference
3-9
Modeling Tasks
Changing Nfigure Relationships
Make a Relationship Between an Nfig and a Tnode
Use this menu option to make a relationship between an nfig and a tnode.
1.
Choose the Make a Relationship Between an Nfig and a Tnode option.
The system prompts you to select the nfig and tnode you want to relate.
2.
Select the nfig and tnode you want to relate.
3.
The relationship between the nfig and tnode is established.
Break a Relationship Between an Nfig and a Tnode
Use this menu option to dissolve a relationship between an nfig and a tnode.
1.
Choose the Dissolve a Relationship Between an Nfig and a Tnode option.
The system prompts you to select the nfig and tnode you want to unrelate.
3-10
2.
Select the nfig and tnode you want to relate.
3.
The relationship between the nfig and tnode is dissolved.
Control Pipe User Guide and Menu Reference
Modeling Tasks
Routing Control Pipes in Modeling Mode
Routing Control Pipes in Modeling Mode
The Route Control Pipe option will allow you to route control pipes, automatically
create passageways as required.
The quantity, diameter, thickness, material and general description of the control
pipe to be routed can be specified through the various options available on the
Control Pipe Routing property sheet. A scalar entity is created for each control
pipe to store the data of that control pipe. This data will be available for
performing functions such as design and verification, reporting, control pipe label
generation, and drawing production etc. This scalar entity should have the
STOCKNO property.
Please note: STOCKNO stores the stock number of this control pipe which is
got from the field STK# of the control pipe auto-selection file.
Control Pipe User Guide and Menu Reference
3-11
Modeling Tasks
Routing Control Pipes in Modeling Mode
.
Use this menu option to route control pipes in modeling model.
1.
Choose the Route Control Pipe option.
The Control Pipe Routing property sheet appears.
3-12
Control Pipe User Guide and Menu Reference
Modeling Tasks
Routing Control Pipes in Modeling Mode
2.
Choose the Description List toggle and the editor button.
The Control Pipe Description run time list appears.
Please note:
If you do not specify control pipe information in either of the
Control Pipe Specification options, the passageway, with no information, is
routed between the specified locations.
3.
Choose the Specify Parameters toggle and the Options pushbutton.
The Control Pipe Parameters menu appears.
Control Pipe User Guide and Menu Reference
3-13
Modeling Tasks
Routing Control Pipes in Modeling Mode
4.
Choose the MCT toggle and the editor button.
The Control Pipe MCT run time list appears.
5.
Choose the Diameter editor button .
The Control Pipe Diameter run time list appears.
6.
Choose a diameter and choose the Accept button.
7.
On the Control Pipe Parameters, choose the Thickness editor button.
The Control Pipe Thickness run time list appears.
8.
3-14
Choose a thickness and choose the Accept button.
Control Pipe User Guide and Menu Reference
Modeling Tasks
Routing Control Pipes in Modeling Mode
9.
On the Control Pipe Parameters, choose the Material editor button.
The Control Pipe Material run time list appears.
10. Choose
11.
a material and choose the Accept button.
On the Control Pipe Routing property sheet, choose the Design Rule
Checking toggle and the Options pushbutton.
The Design Rule Options menu appears.
If you choose the Attach to existing Connection Point, and there is only one
passageway at the selected cnode starting location, then the control pipes in the
existing passageway will be extended to the new location.
Routing from sources and /or destinations which are in viewed parts, is not
supported at this time.
Control Pipe User Guide and Menu Reference
3-15
Modeling Tasks
Routing Control Pipes in Modeling Mode
12. Choose
the Axis Locking Order toggle and then the Options pushbutton.
The Axis Locking Order option list appears.
13. On
the Control Pipe Parameters menu, choose the Accept button.
14. On
the Control Pipe Routing property sheet, choose the Apply button.
Example 1
This example routes a new control pipe passageway between a selected source and
destination, and along a selected path. The passageway will have two control pipes
with diameter of 12mm, a wall thickness of 1.2mm , material CUT, and tag CP1.
The passageway label will be stored as nodal text attached to the passageway nline
as PW1.
3-16
Control Pipe User Guide and Menu Reference
Modeling Tasks
Routing Control Pipes in Modeling Mode
Perform the following steps:
1.
Choose the Route Control Pipe option from the Modeling Task Set.
2.
The Control Pipe Routing property sheet appears.
3.
Enter Pw1 in the Pwlabel field.
4.
Enter 2 in the Quantity field.
5.
Enter 12 in the Diameter field.
Control Pipe User Guide and Menu Reference
3-17
Modeling Tasks
Routing Control Pipes in Modeling Mode
6.
Enter 1.2 in the Thickness field.
7.
Enter CUT in the Material field.
8.
Enter CP1 in the Tag field.
9.
Choose the Apply button.
10. In
response to the following prompt on the screen,
ROUTE CPIPE PWLABEL PW1 QUANTITY 2 DIAMETER 12 THICKNESS 1.2
MATERIAL CUT TAG CP1 : Select Source MODEL ent
select location d1, as shown in the figure below.
11. In
response to the following prompt on the screen,
ROUTE CPIPE PWLABEL PW1 QUANTITY 2 DIAMETER 12 THICKNESS 1.2
MATERIAL CUT TAG CP1 : Select Source MODEL ent D1 ; Select
Path MODEL loc
select location d2, as shown in the figure below.
12. In
response to the following prompt on the screen,
ROUTE CPIPE PWLABEL PW1 QUANTITY 2 DIAMETER 12 THICKNESS 1.2
MATERIAL CUT TAG CP1 : Select Source MODEL ent D1 ; Select
Path MODEL loc D2 ; Select Destination MODEL ent
select location d3, as shown in the following figure.
3-18
Control Pipe User Guide and Menu Reference
Modeling Tasks
Routing Control Pipes in Modeling Mode
A new control pipe passageway is created between the selected source (d1) and
destination (d3), along the selected path (d2).
Example 2
This example routes a new control pipe passageway between selected points d1
and d2, d3 and d4. Since a passageway between d2 and d3 already exists, no new
passageway is created between these two locations. The passageway between S2
and D2 will have two control pipes with diameter of 12mm, wall thickness of
1.2mm, material CUT and tag CP2.
Perform the following steps:
1.
Choose the Route Control Pipe option from the Modeling Task Set.
The Control Pipe Routing property sheet appears.
2.
In the Route Control Pipe property sheet, enter 2 as the quantity in the Quantity
field.
3.
Enter 12 as the diameter in the Diameter field.
4.
Enter 1.2 as the wall thickness in the Thickness field.
5.
Enter CUT as the material in the Material field.
6.
Enter CP2 as the tag name in the Tag field.
7.
Choose the Apply button.
8.
In response to the following prompt on the screen,
ROUTE CPIPE QUANTITY 2 DIAMETER 12 THICKNESS 1.2 MATERIAL CUT TAG
CP2 : Select Source MODEL ent
select location d1 as shown in the following figure.
Control Pipe User Guide and Menu Reference
3-19
Modeling Tasks
Routing Control Pipes in Modeling Mode
9.
In response to the following prompt on the screen,
ROUTE CPIPE QUANTITY 2 DIAMETER 12 THICKNESS 1.2 MATERIAL CUT TAG
CP2 : Select Source MODEL ent d1 Select Path MODEL loc
select locations d2 and d3 as shown in the following figure.
10. In
response to the following prompt on the screen,
ROUTE CPIPE QUANTITY 2 DIAMETER 12 THICKNESS 1.2 MATERIAL CUT TAG
CP2 : Select Source MODEL ent d1 Select Path MODEL loc d2 d3 ;
Select Destination MODEL ent
select location d4 as shown in the following figure.
Two new control pipe passageway segments are routed between points d1 and
d2, d3, and d4.
3-20
Control Pipe User Guide and Menu Reference
Modeling Tasks
Routing a Branch Control Pipe
Routing a Branch Control Pipe
Use this menu option to route a branch control pipe.
1.
Choose the Route Control Pipe Branching option.
The Branch Control Pipe Routing property sheet appears.
Control Pipe User Guide and Menu Reference
3-21
Modeling Tasks
Routing a Branch Control Pipe
2.
Choose the Description List toggle and the editor button.
The Control Pipe Description run time list appears.
3.
Choose the MCT toggle and then the editor button.
The Control Pipe MCT run time list appears.
3-22
Control Pipe User Guide and Menu Reference
Modeling Tasks
Routing a Branch Control Pipe
4.
Choose the Specify Parameters toggle and the Options pushbutton
The Control Pipe Parameter menu appears.
5.
Choose the Diameter editor button.
The Control Pipe Diameter run time list appears.
6.
Choose a diameter and choose the Accept button.
7.
On the Control Pipe Parameters, choose the Thickness editor button.
The Control Pipe Thickness run time list appears.
8.
Choose a thickness and choose the Accept button.
Control Pipe User Guide and Menu Reference
3-23
Modeling Tasks
Routing a Branch Control Pipe
9.
On the Control Pipe Parameters menu, choose the Material editor button.
The Control Pipe Material run time list appears.
10. Choose
a material and choose the Accept button.
11. On
the Branch Control Pipe Routing property sheet, choose the Design Rule
Checking toggle.
The Design Rule Options menu appears.
12. Choose
the Axis Locking Order toggle.
The Axis Locking Order option list appears.
3-24
13. On
the Control Pipe Parameters menu, choose the Accept button.
14. On
the Branch Control Pipe Routing property sheet, choose the Apply button.
Control Pipe User Guide and Menu Reference
Modeling Tasks
Routing Control Pipe Segments
Routing Control Pipe Segments
Use this menu option to route control pipe segments along a passageway.
1.
Choose the Route Control Pipe Segment option.
The Control Pipe Segment Routing property sheet appears.
2.
Choose the Description List toggle and the editor button.
The Control Pipe Description run time list appears.
Control Pipe User Guide and Menu Reference
3-25
Modeling Tasks
Routing Control Pipe Segments
3.
Choose the Specify Parameters toggle and the Options pushbutton.
The Control Pipe Parameters menu appears.
4.
Choose the MCT toggle and the editor button.
The Control Pipe MCT run time list appears.
5.
On the Control Pipe Parameters menu, choose the Diameter editor button.
The Control Pipe Diameter run time list appears.
6.
3-26
Choose a diameter and choose the Accept button.
Control Pipe User Guide and Menu Reference
Modeling Tasks
Routing Control Pipe Segments
7.
On the Changing Control Pipe Parameters, choose the Thickness editor button.
The Control Pipe Thickness run time list appears.
8.
9.
Choose a thickness and choose the Accept button.
On the Changing Control Pipe Parameters, choose the Material editor button.
The Control Pipe Material run time list appears.
10. Choose
a material and choose the Accept button.
11. On
the Control Pipe Segment Routing property sheet, choose the Design Rule
Checking toggle and the Options pushbutton.
The Design Rule Options menu appears.
Control Pipe User Guide and Menu Reference
3-27
Modeling Tasks
Routing Control Pipe Segments
12. Choose
the Axis Locking Order toggle and then the Options pushbutton.
The Axis Locking Order option list appears.
3-28
13. On
the Control Pipe Parameters menu, choose the Accept button.
14. On
the Control Pipe Segment Routing property sheet, choose the Apply button.
Control Pipe User Guide and Menu Reference
Modeling Tasks
Routing a Passageway Without Control Pipes
Routing a Passageway Without Control Pipes
Use this menu option to route a passageway without control pipes.
1.
Choose the Route Passageway Without Control Pipes option.
The Passageway Routing property sheet appears.
2.
On the Passageway Routing property sheet, choose the Design Rule Checking
toggle.
The Design Rule Options menu appears.
Control Pipe User Guide and Menu Reference
3-29
Modeling Tasks
Routing a Passageway Without Control Pipes
3.
Choose the Axis Locking Order toggle.
The Axis Locking Order option list appears.
3-30
4.
On the Control Pipe Parameters menu, choose the Accept button.
5.
On the Passageway Routing property sheet, choose the Apply button.
Control Pipe User Guide and Menu Reference
Modeling Tasks
Clearing Control Pipe Marking
Clearing Control Pipe Marking
Use this menu option to directly clear the passageway markings created while
routing or reporting the control pipes.
Choose the Clear Highlighting option. The highlighting is removed from all
highlighted entities.
Control Pipe User Guide and Menu Reference
3-31
Modeling Tasks
Inserting Control Pipe and Passageway Fittings
Inserting Control Pipe and Passageway Fittings
Use this menu option to insert control pipe and passageway fittings in existing
control pipes or passageways.
1.
Choose the Insert Control Pipe Fitting option.
The Fitting Insertion command palette appears.
3-32
Control Pipe User Guide and Menu Reference
Modeling Tasks
Inserting Control Pipe and Passageway Fittings
Insert Control Pipe Fittings
Use this menu option to insert control pipe fittings with options.
1.
Choose the Insert Control Pipe Fitting option.
The Control Pipe General Fitting Insertion property sheet appears.
Control Pipe User Guide and Menu Reference
3-33
Modeling Tasks
Inserting Control Pipe and Passageway Fittings
2.
Choose the Fitting Name button.
The Fitting Name run time list appears
3.
Choose the Stem Orientation toggle and the Option list button.
The Stem Orientation option list appears.
4.
Choose the Fitting Justification toggle and the Option list button.
The Fitting Justification option list appears.
Please note: The following options are not available for selection when you
choose the Run To Branch or Branch To Run toggles.
• Stem Orientation
• Fitting Justification
• Rotation Angle
5.
Click the Control Pipe Tag option to specify a tag for the fitting
Please note: You can also insert control pipe fittings on a passageway that
already contains more than one control pipe.
3-34
Control Pipe User Guide and Menu Reference
Modeling Tasks
Inserting Control Pipe and Passageway Fittings
Inserting an Identical Control Pipe or Passageway
Fitting (Direct Action)
Use this menu option to directly insert a control pipe or passageway fitting same to
an existing control pipe or passageway fitting.
1.
Choose the Insert the Same Fitting option.
The system prompts you to select the fitting you want to duplicate and a control
pipe or passageway in which to put it.
2.
Select the desired fitting and control pipe or passageway.
The chosen fitting is duplicated and inserted in the selected control pipe or
passageway.
Control Pipe User Guide and Menu Reference
3-35
Modeling Tasks
Inserting Control Pipe and Passageway Fittings
Inserting Bend Fitting In a Passageway
Use this menu option to insert a bend fitting in the selected passageway.
1.
Choose the Insert Bend Fitting in a Passageway icon.
The Passageway Bend Fitting Insertion property sheet appears.
2.
Choose either of the Bend Radius Option
Choose the Bend Radius option to specify the Radius of the bend to be
inserted.
Choose the Radius to Width Ratio option to specify the ratio of bend radius to
the passageway width
3-36
3.
Enter the layer on which to create the bend fitting.
4.
Click the Insert Bends at All Vertexes option, to insert bends at all the vertices
of the selected control pipe automatically.
5.
Choose the Apply button.
Control Pipe User Guide and Menu Reference
Modeling Tasks
Inserting Control Pipe and Passageway Fittings
Inserting Protection Covers In Passageway
Use this menu option to insert protection covers in a passageway.
1.
Choose the Insert Protection Covers in Passageway option.
The Passageway Protection Cover Insertion property sheet appears
2.
Choose the Cover Selection Name button and then the Options button.
The Cover Fitting Types run time list appears.
3.
Choose a name from the list box.
4.
Choose the Cover Length button and enter a cover length.
Control Pipe User Guide and Menu Reference
3-37
Modeling Tasks
Inserting Control Pipe and Passageway Fittings
3-38
5.
Choose the Identification Mark button and enter an identification mark.
6.
Choose the Creation Layer button and enter a layer number.
7.
Choose the Apply button.
Control Pipe User Guide and Menu Reference
Modeling Tasks
Inserting Control Pipe and Passageway Fittings
Inserting a Penetration Piece in a Passageway
Use this menu option to insert a penetration piece in a passageway.
1.
Choose the Insert Penetration Piece in Passageway option.
The Passageway Penetration Piece Insertion property sheet appears.
2.
If desired, choose the Choose Parameters from Auto-selection File button.
The Penetration Types run time list appears.
Control Pipe User Guide and Menu Reference
3-39
Modeling Tasks
Inserting Control Pipe and Passageway Fittings
Please note: This property sheet has a unique behavior. When you deselect
the Select Parameters from Autoselection File toggle, the property sheet
appearance changes
3.
If you want to specify parameters, choose the desired parameters and enter the
appropriate values for them.
4.
Choose the Apply button.
Inserting a Strap In a Passageway
Use this menu option to insert straps into a passageway.
1.
Choose the Insert Strap in Passageway option.
The Passageway Strap Insertion property sheet appears.
3-40
Control Pipe User Guide and Menu Reference
Modeling Tasks
Inserting Control Pipe and Passageway Fittings
2.
Choose the desired parameters and enter the appropriate values for them.
3.
Choose the Apply button.
Control Pipe User Guide and Menu Reference
3-41
Modeling Tasks
Inserting Control Pipe Supports
Inserting Control Pipe Supports
Use this menu option to insert passageway supports at the selected locations on
control pipe passageways.
1.
Choose the Insert Control Pipe Supports option.
The Passageway Support Insertion property sheet appears.
2.
Choose the Support Name editor button.
The Control Pipe Supports option list appears.
3-42
Control Pipe User Guide and Menu Reference
Modeling Tasks
Inserting Control Pipe Supports
Please note: The supports are read from the auto-selection file, specified by
the keyword SUPPORT in the directory file.
3.
Choose the Support Orientation toggle and the Option list button.
The Support Orientation option list appears.
4.
Choose the Number of Supports toggle to specify the number of supports that
must be inserted. This option must be used with the Space Between Supports
option.
5.
Choose the Space Between Supports toggle to specify the distance between
supports. If you do not specify a spacing value, the default spacing of 20mm
will be considered.
6.
Choose the Rotation Angle toggle and click on the calculator to specify the
rotation angle value.
7.
Choose Creation Layer toggle to specify a layer number.
8.
Choose Flat Bar Support Leg Span to specify the distance between the flat bar
support legs.
9.
Choose Flat Bar Support Leg Length to specify the length of the flat bar
support legs.
10. Choose
the Apply button.
Control Pipe User Guide and Menu Reference
3-43
Modeling Tasks
Inserting an Identical Control Pipe Support
Inserting an Identical Control Pipe Support
Use this menu option to directly insert a control pipe fitting identical to an existing
control pipe fitting.
1.
Choose the Insert Identical Control Pipe Fitting option.
The systems prompts you to select an existing control pipe fitting.
A new control pipe fitting with parameters the same as those of the selected
control pipe fitting is inserted at the selected location.
3-44
Control Pipe User Guide and Menu Reference
Modeling Tasks
Deleting Control Pipe Passageways
Deleting Control Pipe Passageways
Use this menu option to delete selected control pipe passageways with options.
1.
Choose the Delete Control Pipe Passageway option.
The Control Pipe Passageway Deletion property sheet appears.
2.
Choose the Select Graphically toggle to digitize the passageways to be
deleted.
3.
Choose the Select Branch toggle to delete only the digitized branch
passageway.
4.
Choose the Passageway Label toggle and enter the label in the fill-in field to
delete the specified passageway or choose the editor button.
The Passageway Labels run-time list appears.
5.
Choose the passageway label from the list.
6.
Choose the Accept button.
7.
Choose the Apply button to delete the selected passageway.
Control Pipe User Guide and Menu Reference
3-45
Modeling Tasks
Deleting Control Pipe Passageways (Direct Action)
Deleting Control Pipe Passageways (Direct
Action)
Use this menu option to directly delete a selected control pipe passageway.
Use this menu option to directly delete a selected control pipe passageway.
1.
Choose the Delete a Passageway option.
The system prompts you to select the passageway.
2.
Select the passageways to be deleted on the drawing.
The selected passageways are deleted as well as all the control pipes running in
those passageways.
3-46
Control Pipe User Guide and Menu Reference
Modeling Tasks
Deleting Control Pipe Passageway Fittings
Deleting Control Pipe Passageway Fittings
Use this menu option to delete the selected control pipe fittings from passageways.
1.
Choose the Delete Control Pipe Fittings option.
The Fitting Deletion command palette appears.
Control Pipe User Guide and Menu Reference
3-47
Modeling Tasks
Deleting Control Pipe Passageway Fittings
Delete Control Pipe Fittings
Use this menu option to delete control pipe fittings with options.
1.
Choose the Delete Control Pipe Fittings option.
The Control Pipe Fitting Deletion property sheet appears.
2.
Choose a method for identifying the fittings you want to delete.
If you chose to specify the passageways by labels, the Passageway Labels
run-time list appears.
3.
3-48
Choose the labels of the fittings you want to delete.
Control Pipe User Guide and Menu Reference
Modeling Tasks
Deleting Control Pipe Passageway Fittings
4.
Choose the fitting types you want to delete.
5.
Choose the Apply button.
Deleting All Fittings In Passageways
Use this menu option to directly delete all fittings in the selected passageways.
1.
Select a passageway.
2.
Choose the Delete All Fittings in Passageways direct action option.
All the fittings in the selected passageway are deleted.
Deleting All Bend Fittings In Passageways
Use this menu option to directly delete all bend fittings in the selected
passageways.
1.
Select a passageway.
2.
Choose the Delete All Bend Fittings in Passageways direct action option.
All the bend fittings in the selected passageway are deleted.
Deleting All Protection Covers In Passageways
Use this menu option to delete all protection covers attached to the selected
passageways.
1.
Select a passageway.
2.
Choose the Delete All Protection Covers in Passageways direct action
option.
All the protection covers in the selected passageway are deleted.
Control Pipe User Guide and Menu Reference
3-49
Modeling Tasks
Deleting Control Pipe Passageway Fittings
Deleting All Penetration Pieces In Passageways
Use this menu option to directly delete all penetration pieces attached to the
selected passageways.
1.
Select a passageway.
2.
Choose the Delete All Penetration Pieces in Passageways direct action
option.
All the penetration pieces in the selected passageway are deleted.
Deleting All Straps In Passageways
Use this menu option to delete all control pipe straps attached to the selected
passageways.
1.
Select a passageway.
2.
Choose the Delete All Straps in Passageways direct action option.
All the strap fittings in the selected passageway are deleted.
3-50
Control Pipe User Guide and Menu Reference
Modeling Tasks
Deleting Control Pipes and Passageway Fittings (Direct Action )
Deleting Control Pipes and Passageway Fittings
(Direct Action )
Use this menu option to directly delete selected control pipes and passageway
fittings.
1.
Choose the Delete Control Pipes and Passageway Fittings option.
2.
Select the control pipes and passageway fittings to be deleted on the drawing.
The selected control pipes and passageway fittings are deleted.
Control Pipe User Guide and Menu Reference
3-51
Modeling Tasks
Deleting Control Pipe Supports
Deleting Control Pipe Supports
Use this menu option to delete control pipe supports.
1.
Choose the Delete Control Pipe Supports option.
The Control Pipe Support Deletion property sheet appears.
2.
Choose method of selecting the supports to be deleted.
If you chose specifying the passageway label as the deletion method, the
Passageway Labels run-time list appears.
3-52
3.
Choose the passageway labels for the supports you want to delete.
4.
Choose the Accept button.
Control Pipe User Guide and Menu Reference
Modeling Tasks
Deleting Control Pipe Supports (Direct Action)
Deleting Control Pipe Supports (Direct Action)
Use this menu option to directly delete selected control pipe supports.
1.
Choose the Delete Control Pipe Support direct action option.
The system prompts you to select the supports to be deleted.
2.
Select the supports to delete.
The supports you selected are deleted.
Control Pipe User Guide and Menu Reference
3-53
Modeling Tasks
Modifying Control Pipes
Modifying Control Pipes
This menu option displays the command palette you use to modifying control pipe
parameters and change passageway labels and layers.
1.
Choose the Modify Control Pipe option.
The Modify Control Pipes command palette appears.
2.
Choose the Modify Control Pipes option to modify various control pipe
parameters.
The Control Pipe Modification property sheet appears.
3-54
Control Pipe User Guide and Menu Reference
Modeling Tasks
Modifying Control Pipes
3.
To choose the passageway to be modified graphically, choose the Select
Graphically toggle and choose the Control Pipe Tags button.
The following prompt appears. Select the passageway containing the control
pipes to be modified.
Digitize Passageway : Model ent d1
Alternatively, you can choose the passageway by specifying its label.
4.
To choose the passageway to modify by specifying a label, choose the Label
toggle.
The Passageway Labels run-time list appears.
5.
Choose the desired label name from the list.
6.
Choose the Accept button.
Control Pipe User Guide and Menu Reference
3-55
Modeling Tasks
Modifying Control Pipes
The Control Pipe Selection Parameters property sheet appears.
The description label of all the control pipes in the selected passageway is listed
under Select Control Pipes scroll list, as in the above property sheet above.
7.
Choose the required control pipes by scrolling through the Select Control
Pipes scroll list.
8.
Choose the Accept button.
The selected control pipe tags are automatically filled in the Control Pipe Tags
fill-in field in the main menu.
9.
To filter the control pipe description labels listed under the Select Control
Pipes scroll list, specify the filtering parameters in MCT Selection Radioset,
Source, Destination, Quantity, Thickness fill-in fields as shown above.
10. Choose
3-56
the Run Time List Update button.
Control Pipe User Guide and Menu Reference
Modeling Tasks
Modifying Control Pipes
11. To
redisplay the list of all the control pipes in the Select Control Pipes scroll
list, choose the Update button.
12. To change the control pipe parameters, choose Change Parameters toggle and
choose the Options button.
The Changing Control Pipe Parameters property sheet appears.
13. To
change control pipe source (or destination), choose the Change
Connections toggle and choose the Options button from the Control Pipe
Modification property sheet.
The Changing Control Pipe Connections property sheet appears.
14. Enter
the new source (or destination) name. You can also specify the path
interactively by clicking on the Interactive Path Selection option
Control Pipe User Guide and Menu Reference
3-57
Modeling Tasks
Modifying Control Pipes
15. Choose
the Accept button.
Example 1
This example selects a set of control pipes identified by the tag name CP1 in the
selected passageway and modifies the diameter, material, and thickness according
to the specified values.
Perform the following steps:
1.
Choose the Control Pipe option on the Environment Access menu.
2.
Choose the Modeling option on the Task Set Access menu.
3.
Choose the Modify Control Pipe option from the Modeling Task Set.
The Control Pipe Routing property sheet appears.
.
3-58
Control Pipe User Guide and Menu Reference
Modeling Tasks
Modifying Control Pipes
4.
In the Modify Control Pipe property sheet, Choose the Select option and then
choose Tag.
5.
Enter CP1 as the tag name in the Tag field.
6.
Choose Change and choose Diameter, Material, and Thickness.
7.
Enter 6 as the diameter in the Diameter field.
8.
Enter CUT as the material in the Material field.
9.
Enter 1.4 as the thickness in the Thickness field.
10. Choose
11. In
the Apply button.
response to the following prompt on the screen,
MODIFY CPIPE SELECT TAG CP1 CHANGE DIAMETER 6 MATERIAL CUT
THICKNESS 1.4 : Select Passageway MODEL ent
select location d1, as shown in the figure below.
All the control pipes identified by the tag name CP1 in the selected passageway are
selected and the diameter, material, and thickness are modified, as shown in
Table 3-2 AFTER.
Control Pipe User Guide and Menu Reference
3-59
Modeling Tasks
Modifying Control Pipes
Table 3-1
LABEL
FROM
TO
PW1
S1
PW1
S1
BEFORE
QTY
DIA
THK
MATL
TAG
D1
6
10
1.2
SS316
CP1
D1
6
16
1.2
SS316
CP2
QTY
DIA
THK
MATL
TAG
Table 3-2
MCT
AFTER
LABEL
FROM
TO
MCT
PW1
S1
D1
6
6
1.4
CUT
CP1
PW1
S1
D1
6
16
1.2
SS316
CP2
Example 2
This example selects all the control pipes with diameter of 4 and material as CUT
in the identified passageway PW1 and deletes them.
1.
Choose Control Pipe on the Environment Access menu.
2.
Choose Modeling on the Task Set Access menu.
3.
Choose the Modify Control Pipe option from the Modeling Task Set.
The Control Pipe Routing property sheet appears.
4.
In the Modify Control Pipe property sheet, Choose Select and then choose
Pwlabel.
5.
Enter PW1 as the passageway label in the Pwlabel field.
6.
Choose Change, Diameter, and Material.
7.
Enter 4 as the diameter in the Diameter field.
8.
Enter CUT as the material in the Material field.
9.
Choose the Apply button. The following prompt appears on the screen.
MODIFY CPIPE SELECT PWLABEL PW1 DIAMETER 4 MATERIAL CUT DELETE
All the control pipes with diameter as 4 and material as CUT in the identified
passageway PW1 are deleted.
Example 3
This example selects all the control pipes with CP2 as the tag name in the
identified passageway and connects them to the source SRC1 in the passageway.
3-60
1.
Choose the Control Pipe option on the Environment Access menu.
2.
Choose thee Modeling option on the Task Set Access menu.
Control Pipe User Guide and Menu Reference
Modeling Tasks
Modifying Control Pipes
3.
Choose the Modify Control Pipe option from the Modeling Task Set.
The Modify Control Pipe command palette appears.
4.
In the Modify Control Pipe property sheet, choose the Select Label option.
5.
Enter CP2 as the tag name in the Tag field.
6.
Choose Source.
7.
Enter SRC1 as the source in the Source field.
8.
Choose the Apply button.
9.
In response to the following prompt on the screen,
MODIFY CPIPE SELECT TAG CP2 CONNECT SOURCE SRC1 : Select Passageway
MODEL ent
select the model location on the screen.
All the control pipes with CP2 as the tag name in the identified passageway are
connected to the source SRC1 in the passageway.
Control Pipe User Guide and Menu Reference
3-61
Modeling Tasks
Modifying Control Pipes
Changing Passageway Layer
Use this menu option to change a passageway layer.
1.
Choose the Change Passageway Layer option.
The Changing Passageway Layer property sheet appears.
The Passageway Labels run-time list appears.
3-62
2.
Choose the passageway on which you want to change layers.
3.
Choose the Apply button.
Control Pipe User Guide and Menu Reference
Modeling Tasks
Modifying Control Pipes
Changing Passageway Label
Use this menu option to change a passageway label.
1.
Choose the Change Passageway Label option.
The Changing Passageway Label property sheet appears.
2.
Choose the passageway graphically or by specifying the label to be modified.
The Changing Passageway Label Passageway Labels run-time list appears.
3.
Choose the label you want to modify.
4.
Choose the Apply button.
Control Pipe User Guide and Menu Reference
3-63
Modeling Tasks
Modifying Control Pipes
Changing Control Pipe Passageway Parameters
Use this menu option to modify control pipe passageway parameters, such as
section type and justifications.
1.
Choose the Change Passageway Parameters option.
The Passageway Modification property sheet appears.
Choose the Specify Label toggle and the editor button.
The Passageway Labels run time list appears.
3-64
2.
Choose a passageway label and the Accept button.
3.
Choose the Passageway Justification toggle.
4.
Choose the Apply button.
Control Pipe User Guide and Menu Reference
Modeling Tasks
Generating Control Pipe Labels
Generating Control Pipe Labels
Use this menu option to generate control pipe labels.
1.
Choose the Generate Control Pipe Labels option.
The Control Pipe Label Generation property sheet appears.
2.
Choose the Include only selected Parameters toggle to selectively specify
the label parameters. When this option is selected, the following parameter
checkboxes become active and are available for selection.
•
Destination
•
Material
•
Passageway Label
•
Source
•
Tier
•
Diameter
•
MCT
•
Quantity
Control Pipe User Guide and Menu Reference
3-65
Modeling Tasks
Generating Control Pipe Labels
3.
•
Control pipe Tag
•
Thickness
When you choose any of the parameters listed above a field is automatically be
created for the control pipe label and a label with a specified parameters is
created.
You can select the fields and a label of only the selected fields is displayed. The
control pipe label display format is fixed as shown below.
MCT-QUANTITY-DIAMETER-THICKNESS-MATERIAL-TAG-SOURCE-DESTI
NATION-TIER-PASSAGEWAYLABEL.
For example if the Diameter, Material and Source are selected then the label
will be displayed as DIAMETER-MATERIAL-SOURCE.
4.
3-66
Choose the Apply button to create the label.
Control Pipe User Guide and Menu Reference
Modeling Tasks
Generating Cross-section Detail of Control Pipe Arrangement
Generating Cross-section Detail of Control Pipe
Arrangement
Use this menu option to generate cross-section detail representation of a control
pipe arrangement.
1.
Choose the Generate Cross-Section Detail of Control Pipe Arrangement
option.
The Passageway Section Generation property sheet appears.
2.
Choose the Section Detail Identification Mark button and enter an
identification mark.
3.
Choose the Model to Drawing Scale button and enter the desired value.
4.
Choose the Apply button.
Control Pipe User Guide and Menu Reference
3-67
Modeling Tasks
Writing Control Pipe Attributes to an External Database
Writing Control Pipe Attributes to an External
Database
Use this menu option to extract various control pipe attributes from the CADDS
graphical database to an external database.
1.
Choose the Generate Control Pipe External Database option.
The Control Pipe External Database Generation property sheet appears.
3-68
2.
Enter your username and password.
3.
Enter the project name.
Control Pipe User Guide and Menu Reference
Modeling Tasks
Writing Control Pipe Attributes to an External Database
4.
Choose a method for identifying the control pipe passageway.
If you chose specifying the passageway label as the deletion method, the
Passageway Labels run-time list appears.
5.
Choose the appropriate label.
6.
Choose the Accept button.
The Control Pipe External Database Generation property sheet reappears.
7.
Choose the Apply button.
Control Pipe User Guide and Menu Reference
3-69
Modeling Tasks
Generating Drawings of Control Pipe Passageway Fittings
Generating Drawings of Control Pipe
Passageway Fittings
Use this menu option to generate drawings of control pipe passageway fittings by
reading the external database.
1.
Choose the Generate Drawings of Control Pipe Passageway Fittings option.
The Control Pipe Drawing Generation property sheet appears.
3-70
2.
Enter a user name and password to access the database.
3.
Enter a project and drawing name.
Control Pipe User Guide and Menu Reference
Modeling Tasks
Generating Drawings of Control Pipe Passageway Fittings
4.
Choose the Passageway Label button and enter a label name.
5.
Enter the desired fitting category options.
6.
Enter the desired output destination options.
7.
If desired, select the Process Drawings in Batch Mode button.
8.
Choose the Apply button.
Control Pipe User Guide and Menu Reference
3-71
Modeling Tasks
Generating Control Pipe Reports
Generating Control Pipe Reports
Use this menu option to generate control pipe reports.
1.
Choose the Generate Control Pipe Reports option. (See “Accessing Control
Pipe Report Options” on page 1-17.)
The Control Pipe Reports command palette appears as shown below.
3-72
Control Pipe User Guide and Menu Reference
Modeling Tasks
Generating Control Pipe Reports
Generating Control Pipe Reports
Use this menu option to report on control pipes and control pipe fittings.
1.
Choose the Generate Control Pipe Reports option.
The Control Pipe Report property sheet appears.
2.
Choose the Specify Label toggle and the editor button.
Control Pipe User Guide and Menu Reference
3-73
Modeling Tasks
Generating Control Pipe Reports
The Passageway Labels run-time list appears.
3.
Choose the Control Pipe Selection Criteria toggle and the Option push button
from the Control Pipe Report menu.
The Control Pipe Selection Criteria menu appears.
3-74
Control Pipe User Guide and Menu Reference
Modeling Tasks
Generating Control Pipe Reports
4.
Choose the Specify Format toggle and the Option pushbutton.
The Control Pipe Reporting Format menu appears.
5.
6.
Choose the Include only selected Parameters toggle to selectively specify
the report parameters. When this option is selected, the following parameter
checkboxes become active and are available for selection.
•
MCT
•
Quantity
•
Diameter
•
Destination
•
Material
•
Thickness
•
Control pipe Tag
•
Tier
•
Control Pipe Fittings
•
Passageway fittings
•
Support
When you choose any of the parameters listed above a field is automatically
created for the control pipe report and a report with the specified parameters is
created.
Control Pipe User Guide and Menu Reference
3-75
Modeling Tasks
Generating Control Pipe Reports
7.
On the Control Pipe Report property sheet, choose the Apply button.
Generating Control Pipe Segment Reports
Use this menu option to directly create reports on control pipes routed in the
digitized passage way segment only.
1.
Choose the Generate Control Pipe Segment Reports direct action option.
The system asks you to select a segment.
2.
Select the desired segment.
A report of all the control pipes in the selected passageway segments is
displayed.
Generating Control Pipe Reports
Use this menu option to directly generate reports on all control pipes in the
selected passageways.
1.
Choose the Generate Control Pipe Reports direct action option.
The system asks you to select a passageway.
2.
Select the desired passageway.
A report of all the control pipes in the selected passageway is displayed.
Generating Control Pipe Default Parameter Listing
Use this menu option to list the currently selected default values of various control
pipe parameters.
1.
Choose the Generate Control Pipe Default Parameter Listing direct action
option.
A listing of current values of all the control pipe parameters is displayed.
3-76
Control Pipe User Guide and Menu Reference
Appendix A
Production Drawing Form Part
The production drawing form part is fitting specific and is made up generally of the
graphics and the data table section.
• Creating Production Drawing Form Parts
Control Pipe User Guide and Menu Reference
A-1
Production Drawing Form Part
Creating Production Drawing Form Parts
Creating Production Drawing Form Parts
Given below is a sample Production Drawing Form Part.
The Graphics section details the fitting graphics and displays the various fitting
attributes.
The Data table section lists the values for the fitting attributes shown in the
graphics section.
Procedure to Create Production Drawing Form Parts
You can create Production drawing form parts for various control pipe fittings
using the following procedure:
A-2
1.
Activate a new part and create a new drawing.
2.
Create the desired form boundary using draw mode entities.
Control Pipe User Guide and Menu Reference
Production Drawing Form Part
Creating Production Drawing Form Parts
3.
Create the fitting graphics using draw mode entities. Use the same fitting
attributes shown in the sample form part. However, the attribute names can be
changed to suit your requirements. The sample form parts for various control
pipe fittings are available in CADDS under directory CPIPE/FORM and are
also listed in Appendix B.
4.
Before creating a data table the following rules should be noted:
•
A form part can have only one data table. The data table can be located
anywhere on the form part drawing.
•
The data table of a form part for a control pipe fitting should have the same
number of attribute columns as that in the sample form part for the fitting.
However, the attribute column names can be changed to suit your
requirements.
•
The width of a fitting attribute column in a data table should be selected
based upon the expected range of values for the attribute.
•
The number of rows in a data table is limited only by the drawing extents.
5.
Create the data table using draw mode entities.
6.
To make the data table more comprehensive, follow the steps given below:
a.
Place tnodes in each fitting attribute field of every row. It is important that
the all the tnodes in a row are inserted in sequence. Use the command
INSERT TNODE SEQUENCE and start inserting the tnodes in a row.
b.
A tnode can be placed to the extreme left, center or extreme right of fitting
attribute field depending on how the nodal text is desired to be justified in
the field.
c.
The first tnode of every row is called the head tnode and should correspond
with the fitting attribute field MARK of the row.
d.
The head tnode together with other tnodes (members) of a row constitutes a
group.
e.
The head tnode of each group should have a property called TITLETNOD
property. This property takes two integer values. The first value is the tnode
group order number in the data table and the second value is count of
member tnodes in the group (including the head tnode).
f.
To insert a property on a tnode, use the command INSERT PROPERTY
TITLETNOD <tnode group order number> <space><count of member
tnodes> and specify the tnode by clicking on it.
7.
If you want a fitting attribute column to be positioned differently in the table,
then you can transform the tnodes in all the rows of that column to the desired
location.
8.
You can create a vertical table layout by swapping the word ”rows” with
”columns” and vice versa and following steps (4) and (5) above.
Control Pipe User Guide and Menu Reference
A-3
Production Drawing Form Part
Creating Production Drawing Form Parts
9.
Save the created form part drawing using command EXIT PART FILE NFIG
DRAW <draw name>. The tnodes may optionally be blanked out before saving
the form part.
Procedure for Penetration and Support Fittings
The procedure for the penetration and support fittings is as follows:
A-4
1.
Activate a new part and create a new drawing.
2.
Create the desired form boundary using draw mode entities.
3.
Define a view inside the form boundary. The penetration fitting graphics will be
generated by the command DRAW CPIPE inside this view. A form part
drawing can have only one view. The view location and extents are limited only
by the extents of the form part drawing.
4.
You can create any other graphics as required on the form part using the draw
mode entities. These graphics should be located outside the view extents.
5.
A data table for the general attributes of the penetration/support has to be
created following the steps outlined above in “Procedure to Create Production
Drawing Form Parts” on page A-2 . The sample form parts for various control
pipe fittings are available in CADDS under directory CPIPE/FORM and are
also listed in Appendix B.
6.
Save the created form part drawing using command EXIT PART FILE NFIG
DRAW <draw name>. The tnodes may optionally be blanked out before saving
the form part.
Control Pipe User Guide and Menu Reference
Appendix B
Sample Form Parts Available in
CADDS
This chapter gives the samples of form parts for various control pipe fittings
available in CADDS.
• Control Pipe Schematic Drawing
• Control Pipe Passageway Section Types
• Form Part for Control Pipe Protection Cover
• Form Part for Control Pipe Penetration Piece
• Form Part for Control Pipe Strap and Base Plate
Control Pipe User Guide and Menu Reference
B-1
Sample Form Parts Available in CADDS
Control Pipe Schematic Drawing
Control Pipe Schematic Drawing
B-2
Control Pipe User Guide and Menu Reference
Sample Form Parts Available in CADDS
Control Pipe Passageway Section Types
Control Pipe Passageway Section Types
Control Pipe User Guide and Menu Reference
B-3
Sample Form Parts Available in CADDS
Control Pipe Passageway Section Types
B-4
Control Pipe User Guide and Menu Reference
Sample Form Parts Available in CADDS
Control Pipe Passageway Section Types
Control Pipe User Guide and Menu Reference
B-5
Sample Form Parts Available in CADDS
Control Pipe Passageway Section Types
B-6
Control Pipe User Guide and Menu Reference
Sample Form Parts Available in CADDS
Control Pipe Passageway Section Types
Control Pipe User Guide and Menu Reference
B-7
Sample Form Parts Available in CADDS
Control Pipe Passageway Section Types
B-8
Control Pipe User Guide and Menu Reference
Sample Form Parts Available in CADDS
Form Part for Control Pipe Protection Cover
Form Part for Control Pipe Protection Cover
CPIPE/FORM/COVER-A
Control Pipe User Guide and Menu Reference
B-9
Sample Form Parts Available in CADDS
Form Part for Control Pipe Protection Cover
CPIPE/FORM/COVER-B
B-10
Control Pipe User Guide and Menu Reference
Sample Form Parts Available in CADDS
Form Part for Control Pipe Protection Cover
CPIPE/FORM/COVER-C
Control Pipe User Guide and Menu Reference
B-11
Sample Form Parts Available in CADDS
Form Part for Control Pipe Protection Cover
CPIPE/FORM/COVER-D
B-12
Control Pipe User Guide and Menu Reference
Sample Form Parts Available in CADDS
Form Part for Control Pipe Penetration Piece
Form Part for Control Pipe Penetration Piece
CPIPE/FORM/PENETRATION
Control Pipe User Guide and Menu Reference
B-13
Sample Form Parts Available in CADDS
Form Part for Control Pipe Strap and Base Plate
Form Part for Control Pipe Strap and Base Plate
CPIPE/FORM/STRAP1-1X1
B-14
Control Pipe User Guide and Menu Reference
Sample Form Parts Available in CADDS
Form Part for Control Pipe Strap and Base Plate
CPIPE/FORM/STRAP1-1X2
Control Pipe User Guide and Menu Reference
B-15
Appendix C
List of Form Parts
This chapter gives a list of form parts used by DRAW CPIPE to generate
production drawings for various control pipe fittings and supports. All the form
parts shown in this appendix are provided to you with the software. They can be
used as templates to create your own form parts. A form part is created by using
basic CADDS commands before it can be used by DRAW CPIPE. Appendix A,
“Production Drawing Form Part” gives step by step instructions on how to create
those form parts.
• List of the Available Form Parts
• Form Part for Control Pipe Support
• Control Pipe Default Fitting Stockno File
• Control Pipe Default Directories File
• Control Pipe Default Fitting Auto-selection File
• Control Pipe Default Parameters File for Fittings
• Control Pipe Default Auto-selection file for Cover Fittings
• Control Pipe Default Auto-selection File for Penetration Fittings
• Control Pipe Default Auto-selection File for Section Types
• Control Pipe Default Support Auto-selection File
• Control Pipe Default Auto-selection File
• Oracle Table Format for Control Pipe Passageway Fittings
• Oracle Table Format Sample
Control Pipe User Guide and Menu Reference
C-1
List of Form Parts
List of the Available Form Parts
List of the Available Form Parts
CPIPE/FORM/STRAP1-1X2
C-2
Control Pipe User Guide and Menu Reference
List of Form Parts
List of the Available Form Parts
CPIPE/FORM/STRAP1-1X3
Control Pipe User Guide and Menu Reference
C-3
List of Form Parts
List of the Available Form Parts
CPIPE/FORM/STRAP4-1X1
C-4
Control Pipe User Guide and Menu Reference
List of Form Parts
List of the Available Form Parts
CPIPE/FORM/STRAP4-2X1
Control Pipe User Guide and Menu Reference
C-5
List of Form Parts
List of the Available Form Parts
CPIPE/FORM/STRAP4-2X2
C-6
Control Pipe User Guide and Menu Reference
List of Form Parts
List of the Available Form Parts
CPIPE/FORM/STRAP4-2X3
Control Pipe User Guide and Menu Reference
C-7
List of Form Parts
List of the Available Form Parts
CPIPE/FORM/STRAP4-1X4
C-8
Control Pipe User Guide and Menu Reference
List of Form Parts
List of the Available Form Parts
CPIPE/FORM/STRAP4-2X4
Control Pipe User Guide and Menu Reference
C-9
List of Form Parts
Form Part for Control Pipe Support
Form Part for Control Pipe Support
CPIPE/FORM/SUPPORT
C-10
Control Pipe User Guide and Menu Reference
List of Form Parts
Form Part for Control Pipe Support
CPIPE/FORM/FBSUPPORT
Control Pipe User Guide and Menu Reference
C-11
List of Form Parts
Control Pipe Default Fitting Stockno File
Control Pipe Default Fitting Stockno File
CPIPE.DATA.STFILE.FITTING
UNITS=MM
STK# SCLX SCLY SCLZ NAME
&
* 09-May-96 dongxf; Created
*
----------------------------------------------------------------*
* FILENAME
:
CPIPE.DATA.STFILE*
* PURPOSE
:
Stockno file for fitting
*
* KEY WORD
:
UNITS - Specifies the units used in this file.
It must
*
be the first line of this file.
*
STK# - Stock Number of the fitting
*
SCLX - Scale x of the fitting
*
SCLY - Scale y of the fitting
*
SCLZ - Scale z of the fitting
*
NAME - Name of the fitting nfigure
*
*
----------------------------------------------------------------*
STK# SCLX SCLY SCLZ
NAME
&
BRAN 10
5
CPIPE.S.STEE
CONI 10
5
CPIPE.S.CONI
CONK 10
5
CPIPE.S.CONK
C-12
Control Pipe User Guide and Menu Reference
List of Form Parts
Control Pipe Default Directories File
Control Pipe Default Directories File
CPIPE.DATA.DRFILE
INFO
DIRY
&
*
* 02-Apr-96 dongxf; Created
*
-------------------------------------------------------------------*
* FILENAME
:
CPIPE.DATA.DRFILE
*
* PURPOSE
:
Directories files for CONTROL PIPE
*
*
-----------------------------------------------------------------*
COVER
CPIPE.DATA.ASFILE.COVER
CPIPE
CPIPE.DATA.ASFILE.CPIPE
FITTING
CPIPE.DATA.ASFILE.FITTING
PENETRATION CPIPE.DATA.ASFILE.PENETRATION
SECTION
CPIPE.DATA.ASFILE.SECTION
SUPPORT
CPIPE.DATA.ASFILE.SUPPORT
Control Pipe User Guide and Menu Reference
C-13
List of Form Parts
Control Pipe Default Fitting Auto-selection File
Control Pipe Default Fitting Auto-selection File
CPIPE.DATA.ASFILE.FITTING
UNITS=MM
TYPE SPEC SIZE NSIZ BSIZ ENDT SCLX SCLY SCLZ IFC#NAME
STK#
&
*
* 20-Jun-96 mkeerthi; Added more data from client supplied
standards
* 02-Apr-96 dongxf;
Created
*
----------------------------------------------------------------------------------------*
* FILENAME
:
CPIPE.DATA.ASFILE.FITTING
*
* PURPOSE
:
Autoselection file for fitting
*
* KEY WORD
:
UNITS - Specifies the units used in this file.
It must
*
be the first line of this file.
*
TYPE - Type of the fitting
*
SIZE - Nominal size of the control pipe
*
NSIZ - New size of the fitting
*
BSIZ - Branch size of the fitting
*
SCLX - Scale x of the fitting
*
SCLY - Scale y of the fitting
*
SCLZ - Scale z of the fitting
*
IFC# - Insert fitting code
*
NAME - Name of the fitting nfigure
*
STK# - Stock Number of the fitting
*
*
* TYPE Description :
*
BRNS - Branch Socket Weld end type
*
BRNB - Branch bite end type
*
BRNR - Branch ring end type
*
BRGS - Branch gradual reducing Socket Weld end type
*
* ENDT Description :
*
BT
- Bite type
*
SB
- Socket Bracing type
*
SR
- Silver Ring type
*
----------------------------------------------------------------------------------------BRGS COPPER10
6
CPIPE.F.RTEERGTE10X6-SB-COPPER
BRGS COPPER15
10
CPIPE.F.RTEERGTE15X10-SB-COPPER
C-14
13
17
T
15
15
T
Control Pipe User Guide and Menu Reference
List of Form Parts
Control Pipe Default Fitting Auto-selection File
BRGS COPPER15
RGTE15X6-SB-COPPER
BRNB COPPER10
STEE10-BT-COPPER
BRNB COPPER15
STEE15-BT-COPPER
BRNB COPPER4
STEE4-BT-COPPER
BRNB COPPER5
STEE5-BT-COPPER
BRNB COPPER6
STEE6-BT-COPPER
BRNB COPPER8
STEE8-BT-COPPER
BRNB STEEL 10
STEE10-BT-STEEL
BRNB STEEL 15
STEE15-BT-STEEL
BRNB STEEL 6
STEE6-BT-STEEL
BRNB STEEL 8
STEE8-BT-STEEL
BRNR CUNI 15
STEE15-SR-CUNI
BRNS COPPER10
STEE10-SB-COPPER
BRNS COPPER10
RTEE10X6-SB-COPPER
BRNS COPPER15
STEE15-SB-COPPER
BRNS COPPER15
RTEE15X10-SB-COPPER
BRNS COPPER15
RTEE15X6-SB-COPPER
BRNS COPPER6
STEE6-SB-COPPER
BRNS STEEL 10
STEE10-SB-STEEL
BRNS STEEL 16
STEE16-SB-STEEL
CONI ALBS 10
CONN10-I-ALBS
CONI ALBS 15
CONN15-I-ALBS
CONI ALBS 6
CONN6-I-ALBS
CONI ALBS 8
CONN8-I-ALBS
CONI COPPER10
CONN10-I-COPPER
CONI COPPER15
CONN15-I-COPPER
CONI COPPER6
CONN6-I-COPPER
Control Pipe User Guide and Menu Reference
6
15
20
T
CPIPE.F.RTEE
21.5
21.5
T
CPIPE.F.STEE
25
25
T
CPIPE.F.STEE
13
13
T
CPIPE.F.STEE
15
15T
T
CPIPE.F.STEE
16
16
T
CPIPE.F.STEE
17
17
T
CPIPE.F.STEE
25
25
T
CPIPE.F.STEE
26
26
T
CPIPE.F.STEE
16
16
T
CPIPE.F.STEE
20.5
20.5
T
CPIPE.F.STEE
16
18
T
CPIPE.F.STEE
13
13
T
CPIPE.F.STEE
12
14
T
CPIPE.F.RTEE
15
15
T
CPIPE.F.STEE
10
13
16
T
CPIPE.F.RTEE
6
11
16
T
CPIPE.F.RTEE
10
10
T
CPIPE.F.STEE
13.5
13.5
T
CPIPE.F.STEE
15.9
15.9
T
CPIPE.F.STEE
100
38
CPIPE.F.CONI
100
44
CPIPE.F.CONI
100
34
CPIPE.F.CONI
100
36
CPIPE.F.CONI
100
38
CPIPE.F.CONI
100
44
CPIPE.F.CONI
100
34
CPIPE.F.CONI
6
C-15
List of Form Parts
Control Pipe Default Fitting Auto-selection File
CONI COPPER8
CPIPE.F.CONICONN8-I-COPPER
CONK ALBS 10
CPIPE.F.CONKCONN10-K-ALBS
CONK ALBS 15
CPIPE.F.CONKCONN15-K-ALBS
CONK ALBS 4
CPIPE.F.CONKCONN4-K-ALBS
CONK ALBS 5
CPIPE.F.CONKCONN5-K-ALBS
CONK ALBS 6
CPIPE.F.CONKCONN6-K-ALBS
CONK ALBS 8
CPIPE.F.CONKCONN8-K-ALBS
CONK COPPER10
CPIPE.F.CONKCONN10-K-COPPER
CONK COPPER15
CPIPE.F.CONKCONN15-K-COPPER
CONK COPPER4
CPIPE.F.CONKCONN4-K-COPPER
CONK COPPER5
CPIPE.F.CONKCONN5-K-COPPER
CONK COPPER6
CPIPE.F.CONKCONN6-K-COPPER
CONK COPPER8
CPIPE.F.CONKCONN8-K-COPPER
CONK STEEL 10
CPIPE.F.CONKCONN10-K-STEEL
CONK STEEL 15
CPIPE.F.CONKCONN15-K-STEEL
CONK STEEL 6
CPIPE.F.CONKCONN6-K-STEEL
CONK STEEL 8
CPIPE.F.CONKCONN8-K-STEEL
CONK SUS
10
CPIPE.F.CONKCONN10-K-SUS
CONK SUS
15
CPIPE.F.CONKCONN15-K-SUS
CONK SUS
6
CPIPE.F.CONKCONN6-K-SUS
CONK SUS
8
CPIPE.F.CONKCONN8-K-SUS
C-16
100
36
100
25
100
32
100
16
100
16
100
22
100
22
100
25
100
32
100
16
100
16
100
22
100
22
100
25
100
32
100
22
100
26
100
25
100
32
100
22
100
22
Control Pipe User Guide and Menu Reference
List of Form Parts
Control Pipe Default Parameters File for Fittings
Control Pipe Default Parameters File for Fittings
CPIPE.DATA.PAFILE.PARAMETERS
UNITS=MM
STK#
PARM
& &
*
* 18-Jun-96 mkeerthi; Created
*
--------------------------------------------------------------------*
* FILENAME
:
CPIPE.DATA.PAFILE.PARAMETERS
*
* PURPOSE
:
Parameter file for detailing and clearance
checking
*
* KEY WORD
:
*
STK# - Stock Number of the fitting
*
PARM - Parameter for detailing and clearance
checking
*
*
* ENDT Description :
*
BT
- Bite type
*
SB
- Socket Bracing type
*
SR
- Silver Ring type
*
*
--------------------------------------------------------------------CONN10-I-ALBS100,38
CONN10-I-COPPER100,38
CONN10-K-ALBS100,25
CONN10-K-COPPER100,25
CONN10-K-STEEL100,28
CONN10-K-SUS100,28
CONN15-I-ALBS100,44
CONN15-I-COPPER100,44
CONN15-K-ALBS100,32
CONN15-K-COPPER100,32
CONN15-K-STEEL100,32
CONN15-K-SUS100,32
CONN4-K-ALBS100,16
CONN4-K-COPPER100,16
CONN5-K-ALBS100,16
CONN5-K-COPPER100,16
CONN6-I-ALBS100,34
CONN6-I-COPPER100,34
CONN6-K-ALBS100,22
CONN6-K-COPPER100,22
CONN6-K-STEEL100,22
Control Pipe User Guide and Menu Reference
C-17
List of Form Parts
Control Pipe Default Parameters File for Fittings
CONN6-K-SUS 100,22
CONN8-I-ALBS100,36
CONN8-I-COPPER100,36
CONN8-K-ALBS100,22
CONN8-K-COPPER100,22
CONN8-K-STEEL100,25
CONN8-K-SUS 100,26
RGTE10X6-SB-COPPER25, 27, 17.9, 12.9
RGTE15X10-SB-COPPER29, 27, 23.3, 17.9
RGTE15X6-SB-COPPER29, 30, 23.3, 12.9
RTEE10X6-SB-COPPER24, 24, 17.9, 12.9
RTEE15X10-SB-COPPER27, 28, 23.3, 18.3
RTEE15X6-SB-COPPER25, 26, 23.3, 13.3
STEE10-BT-COPPER41.5, 41.5, 26
STEE10-BT-STEEL45.5, 45.5, 32
STEE10-SB-COPPER25, 25, 17.9
STEE10-SR-STEEL26.5, 26.5, 27
STEE15-BT-COPPER45.5, 45.5, 35
STEE15-BT-STEEL47.5, 47.5, 35
STEE15-SB-COPPER29, 29, 23.2
STEE15-SR-CUNI28, 28, 23.2
STEE16-SR-STEEL28.9, 28.9, 33
STEE4-BT-COPPER29.5, 29.5, 14
STEE5-BT-COPPER33, 33, 17
STEE6-BT-COPPER35.5, 35.5, 19
STEE6-BT-STEEL34.5, 34.5, 19
STEE6-SB-COPPER20, 20, 12.5
STEE8-BT-COPPER36.5, 36.5, 21
STEE8-BT-STEEL40, 40, 26
C-18
Control Pipe User Guide and Menu Reference
List of Form Parts
Control Pipe Default Auto-selection file for Cover Fittings
Control Pipe Default Auto-selection file for Cover
Fittings
CPIPE.DATA.ASFILE.COVER
UNITS=MM
TYPE LENG LEGL CWDT THIK EDG1 EDG2 WELD SUPP WGHTMATLDENS
JUST NAME FORM
&
*
* 02-Apr-96 dongxf; Created
*
------------------------------------------------------------------*
* FILENAME
:
CPIPE.DATA.ASFILE.COVER
*
* PURPOSE
:
Autoselection file for cover
*
* KEY WORD
:
UNITS - Specifies the units used in this file.
It must be the first line of
*
this file.
*
DESC - Description of the cover
*
LENG - Length of the cover along control pipe
passageway
*
LEGL
- Cover support leg length
*
CWDT - Width of the cover head
*
EDG1 - Distance between the bottom edge and the
bottom bolt hole of the cover
*
EDG2 - Distance between the top edge and the top
bolt hole of the cover
*
WELD - Rate(%) between welding length and cover
width when welding support
*
with the cover
*
SUPP - Support material specification
*
WGHT - Support material unit length weight
*
MATL - Material of the cover
*
DENS - Density of the cover material. Its units
is per cubic asfile-units.
*
NAME - Name of the cover nfigure
*
FORM - Name of the cover drawing form part
*-------------------------------------------------------------------*
A
2400 50
60
4.5
15
20
.67
40X5 1.5SS41
.0000078LJT CPIPE.F.COVER-LCPIPE.FORM.COVER-A
A
2400 50
60
4.5
15
20
.67
40X5 1.5SS41
.0000078RJT CPIPE.F.COVER-RCPIPE.FORM.COVER-A
A
500
50
60
4.5
15
20
.67
40X5 1.5SS41
.0000078LJT CPIPE.F.COVER-LCPIPE.FORM.COVER-A
B
2400 50
60
4.5
15
20
.67
40X40X52.97SS41
.0000078LJT CPIPE.F.COVER-LCPIPE.FORM.COVER-B
Control Pipe User Guide and Menu Reference
C-19
List of Form Parts
Control Pipe Default Auto-selection file for Cover Fittings
B
2400
.0000078RJT
C
2400
.0000078LJT
D
2400
.0000078LJT
D
500
.0000078LJT
C-20
50
60
4.5
15
20
.67
CPIPE.F.COVER-RCPIPE.FORM.COVER-B
50
60
4.5
15
20
.67
CPIPE.F.COVER-LCPIPE.FORM.COVER-C
50
60
4.5
15
20
.67
CPIPE.F.COVER-LCPIPE.FORM.COVER-D
50
60
4.5
15
20
.67
CPIPE.F.COVER-LCPIPE.FORM.COVER-D
40X40X52.97SS41
40X5
1.5SS41
40X40X52.97SS41
40X40X52.97SS41
Control Pipe User Guide and Menu Reference
List of Form Parts
Control Pipe Default Auto-selection File for Penetration Fittings
Control Pipe Default Auto-selection File for
Penetration Fittings
CPIPE.DATA.ASFILE.PENETRATION
UNITS=MM
TYPE MATL CTYP WDTH HGHT THIK FRAD DENS NAME FORM
&
*
* 02-Apr-96 dongxf; created
*----------------------------------------------------------------*
* FILENAME: CPIPE.DATA.ASFILE.PENETRATION
*
* PURPOSE: Autoselection file for penetration
*
* KEY WORD: UNITS - Specifies the units used in this file. It must
be the first
*
line of this file.
*
TYPE - Name of the penetration
*
MATL - Material of the penetration
*
CTYP - Connection type of the penetration
*
WDTH - Width of the penetration
*
HGHT - Height of the penetration
*
THIK - Thickness of the penetration
*
FRAD - Fillet redius of the penetration
*
DENS - Density of the penetration material
*
NAME - name of the penetraiton nfigure
*
FORM - name of the form part for the penetration
*
*
-----------------------------------------------------------------RPEN COPPERBU
1300 1200 20
150
0.0000084CPIPE.F.RPEN
CPIPE.FORM.PENETRATION
RPEN STEEL BU
1300 1200 20
150
0.0000078CPIPE.F.RPEN
CPIPE.FORM.PENETRATION
RPEN COPPERBU
600
600
20
150
0.0000084CPIPE.F.RPEN
CPIPE.FORM.PENETRATION
ZPEN COPPERBU
1300 1200 20
150
0.0000084CPIPE.F.ZPEN
CPIPE.FORM.PENETRATION
RPEN COPPERBU
300
300
20
150
0.0000084CPIPE.F.RPEN
CPIPE.FORM.PENETRATION
ZPEN STEEL BU
1300 1200 20
150
0.0000078CPIPE.F.ZPEN
CPIPE.FORM.PENETRATION
ZPEN COPPERBU
600
600
20
150
0.0000084CPIPE.F.ZPEN
CPIPE.FORM.PENETRATION
Control Pipe User Guide and Menu Reference
C-21
List of Form Parts
Control Pipe Default Auto-selection File for Section Types
Control Pipe Default Auto-selection File for
Section Types
CPIPE.DATA.ASFILE.SECTION
UNITS=MM
TYPE ODIA MATP TIER GROP WDTH THIK EDG1 EDG2 GWDTMATS
BOLT NAME
FORM
&
*
* 02-Apr-96 dongxf; created
*
----------------------------------------------------------------*
* FILENAME: CPIPE.DATA.ASFILE.SECTION
*
* PURPOSE: Autoselection file for section
*
* KEY WORD: UNITS - Specifies the units used in this file. It must
be the first line of
*
this file.
*
TYPE - Description of the section( section name )
*
ODIA - control pipe outer diameter in this section. If
more than one diameter
*
group exist in this section, the biggest outer
diameter should be used.
*
MATP - material of the control pipes in this section
*
TIER - number of tier in this section
*
GROP - number of group control pipe in one tier
*
EDG1 - distance between bolt hole center to the strap
edge
*
EDG2 - distance between bolt hole center to the
outside of control pipe
*
GWDT - group maximum width
*
WDTH - width of the strap
*
THIK - thickness of the strap
*
MATS - material of the strap
*
BOLT - bolts to be used with the strap
*
NAME - name of the strap nfigure
*
FORM - name of the form part for this strap
*
*-------------------------------------------------------------------*
A
10
STEEL 1
1
STEELM8X10
CPIPE.F.UBOLT
A
15
ALBS 1
1
STEELM8X10
CPIPE.F.UBOLT
B
10
STEEL 1
1
STEELM16X30
CPIPE.F.FBAND
C-22
Control Pipe User Guide and Menu Reference
List of Form Parts
Control Pipe Default Auto-selection File for Section Types
C
10
ALBS 1
1
CPIPE.F.TAPE
C
15
ALBS 1
1
CPIPE.F.TAPE
C
15
ALBS 2
1
CPIPE.F.TAPE
D
20
CUNI 1
1
CPIPE.F.TAPE
D
10
ALBS 2
1
CPIPE.F.TAPE
D
20
CUNI 2
1
CPIPE.F.TAPE
E
10
ALBS 1
1
25
2
10
M8X10 CPIPE.F.STRAP2-1X1CPIPE.FORM.STRAP2-1X1
F
15
ALBS 1
1
25
2
10
M8X10 CPIPE.F.STRAP1-1X1CPIPE.FORM.STRAP1-1X1
G
15
ALBS 1
1
25
2
10
M8X10 CPIPE.F.STRAP4-1X1CPIPE.FORM.STRAP4-1X1
G
15
ALBS 2
1
25
2
10
M8X10 CPIPE.F.STRAP4-2X1CPIPE.FORM.STRAP4-2X4
G
15
ALBS 2
2
25
2
10
M8X10 CPIPE.F.STRAP4-2X2CPIPE.FORM.STRAP4-2X4
G
15
STEEL 1
1
25
2
10
M8X10 CPIPE.F.STRAP4-1X1CPIPE.FORM.STRAP4-1X1
G
15
SUS
2
1
25
2
10
M8X10 CPIPE.F.STRAP4-2X1CPIPE.FORM.STRAP4-2X1
G
12
NON
2
2
25
2
10
M8X10 CPIPE.F.STRAP4-2X2CPIPE.FORM.STRAP4-2X2
G
15
COPPER2
2
25
2
10
M8X10 CPIPE.F.STRAP4-2X2CPIPE.FORM.STRAP4-2X2
H
15
ALBS 1
1
25
2
10
CPIPE.F.STRAP3CPIPE.FORM.STRAP3
I
15
COPPER1
1
25
2
10
M8X10 CPIPE.F.STRAP1-1X1CPIPE.FORM.STRAP1-1X1
I
20
COPPER1
1
25
2
10
M8X10 CPIPE.F.STRAP1-1X1CPIPE.FORM.STRAP1-1X1
I
21
COPPER1
1
25
2
10
M8X10 CPIPE.F.STRAP1-1X1CPIPE.FORM.STRAP1-1X1
I
10
CUNI 1
1
25
2
10
M8X10 CPIPE.F.STRAP1-1X1CPIPE.FORM.STRAP1-1X1
I
11
CUNI 1
1
25
2
10
M8X10 CPIPE.F.STRAP1-1X1CPIPE.FORM.STRAP1-1X1
I
12
CUNI 1
1
25
2
10
M8X10 CPIPE.F.STRAP1-1X1CPIPE.FORM.STRAP1-1X1
I
13
CUNI 1
1
25
2
10
M8X10 CPIPE.F.STRAP1-1X1CPIPE.FORM.STRAP1-1X1
I
15
CUNI 1
1
25
2
10
M8X10 CPIPE.F.STRAP1-1X1CPIPE.FORM.STRAP1-1X1
I
20
CUNI 1
1
25
2
10
M8X10 CPIPE.F.STRAP1-1X1CPIPE.FORM.STRAP1-1X1
I
24
CUNI 1
1
25
2
10
M8X10 CPIPE.F.STRAP1-1X1CPIPE.FORM.STRAP1-1X1
I
28
CUNI 1
1
25
2
10
M8X10 CPIPE.F.STRAP1-1X1CPIPE.FORM.STRAP1-1X1
Control Pipe User Guide and Menu Reference
100
100
100
100
100
100
12
125STEEL
12
125STEEL
9
100STEEL
9
100STEEL
9
100STEEL
9
100STEEL
9
100SUS304
9
100BRASS
9
100BRASS
12
STEELM8X10
12
125STEEL
12
125STEEL
12
125STEEL
12
125STEEL
12
125STEEL
12
125STEEL
12
125STEEL
12
125STEEL
12
125STEEL
12
125STEEL
12
125STEEL
C-23
List of Form Parts
Control Pipe Default Auto-selection File for Section Types
I
29
CUNI 1
1
25
2
10
M8X10 CPIPE.F.STRAP1-1X1CPIPE.FORM.STRAP1-1X1
I
33
CUNI 1
1
25
2
10
M8X10 CPIPE.F.STRAP1-1X1CPIPE.FORM.STRAP1-1X1
I
36
CUNI 1
1
25
2
10
M8X10 CPIPE.F.STRAP1-1X1CPIPE.FORM.STRAP1-1X1
I
41
CUNI 1
1
25
2
10
M8X10 CPIPE.F.STRAP1-1X1CPIPE.FORM.STRAP1-1X1
I
41
CUNI 1
2
25
2
10
M8X10 CPIPE.F.STRAP1-1X2CPIPE.FORM.STRAP1-1X2
I
15
ALBS 1
1
25
2
10
M8X10 CPIPE.F.STRAP1-1X1CPIPE.FORM.STRAP1-1X1
I
15
ALBS 1
1
30
2
10
M8X10 CPIPE.F.STRAP1-1X1CPIPE.FORM.STRAP1-1X1
I
15
ALBS 1
1
30
4
10
M8X10 CPIPE.F.STRAP1-1X1CPIPE.FORM.STRAP1-1X1
I
20
ALBS 1
1
25
2
10
M8X10 CPIPE.F.STRAP1-1X1CPIPE.FORM.STRAP1-1X1
I
12
ALBS 1
1
25
2
10
M8X10 CPIPE.F.STRAP1-1X1CPIPE.FORM.STRAP1-1X1
I
41
ALBS 1
1
25
2
10
M8X10 CPIPE.F.STRAP1-1X1CPIPE.FORM.STRAP1-1X1
I
15
ALBS 1
2
25
2
10
M8X10 CPIPE.F.STRAP1-1X2CPIPE.FORM.STRAP1-1X2
I
20
ALBS 1
2
25
2
10
M8X10 CPIPE.F.STRAP1-1X2CPIPE.FORM.STRAP1-1X2
I
15
ALBS 1
3
25
2
10
M8X10 CPIPE.F.STRAP1-1X3CPIPE.FORM.STRAP1-1X3
I
20
ALBS 1
3
25
2
10
M8X10 CPIPE.F.STRAP1-1X3CPIPE.FORM.STRAP1-1X3
I
9
S304 1
1
25
2
10
M8X10 CPIPE.F.STRAP1-1X1CPIPE.FORM.STRAP1-1X1
I
10
S316 1
1
25
2
10
M8X10 CPIPE.F.STRAP1-1X1CPIPE.FORM.STRAP1-1X1
I
29
S316 1
1
25
2
10
M8X10 CPIPE.F.STRAP1-1X1CPIPE.FORM.STRAP1-1X1
I
28
S316L 1
1
25
2
10
M8X10 CPIPE.F.STRAP1-1X1CPIPE.FORM.STRAP1-1X1
I
36
S316L 1
1
25
2
10
M8X10 CPIPE.F.STRAP1-1X1CPIPE.FORM.STRAP1-1X1
I
41
S316L 1
1
25
2
10
M8X10 CPIPE.F.STRAP1-1X1CPIPE.FORM.STRAP1-1X1
J
41
CN
1
1
25
2
10
CPIPE.F.STRAP5
K
10
ALBS 1
1
CPIPE.F.TAPE
L
6
ALBS 1
25
2
10
M8X10 CPIPE.F.STRAP1-1X1CPIPE.FORM.STRAP1-1X1
L
15
CUNI1 1
25
2
10
M8X10 CPIPE.F.STRAP1-1X1CPIPE.FORM.STRAP1-1X1
L
15
CUT
1
2
25
2
10
M8X10 CPIPE.F.STRAP1-1X2CPIPE.FORM.STRAP1-1X2
L
15
STEEL 1
2
25
2
10
M8X10 CPIPE.F.STRAP1-1X2CPIPE.FORM.STRAP1-1X2
C-24
12
125STEEL
12
125STEEL
12
125STEEL
12
125STEEL
12
125STEEL
12
125STEEL
12
125STEEL
12
125STEEL
12
125STEEL
12
125STEEL
12
125STEEL
12
125STEEL
12
125STEEL
12
125STEEL
12
125STEEL
12
125STEEL
12
125STEEL
12
125STEEL
12
125STEEL
12
125STEEL
12
125STEEL
12
STEELM8X10
100
12
125STEEL
12
125STEEL
12
125STEEL
12
125STEEL
Control Pipe User Guide and Menu Reference
List of Form Parts
Control Pipe Default Auto-selection File for Section Types
L
15
CUNI 1
3
25
2
10
12
125STEEL
M8X10 CPIPE.F.STRAP1-1X3CPIPE.FORM.STRAP1-1X3
Following section fittings are supported by this version.
FITTYPE
NFIGURE
DESCRIPTION
231
CPIPE.F.UBOLTU-bolt with double nuts
232
CPIPE.F.FBANDFixed band
233
CPIPE.F.TAPE1Binding tape with single tier
233
CPIPE.F.TAPE2Binding tape with double tier
235
CPIPE.F.STRAP1-1X1Strap with single group and single tier
235
CPIPE.F.STRAP1-1X2Strap with two groups and single tier
235
CPIPE.F.STRAP1-1X3Strap with three groups and single tier
235
CPIPE.F.STRAP2-1X1Strap without guide plate with single
group and single tier
235
CPIPE.F.STRAP2-1X2Strap without guide plate with two group
and single tier
235
CPIPE.F.STRAP2-1X3Strap without guide plate with three group
and single tier
235
CPIPE.F.STRAP3Strap with single group, single tier and
clearance gap
235
CPIPE.F.STRAP4-1x1Strap with single diameter, single group
and single tier
235
CPIPE.F.STRAP4-2x1Strap with single diameter, single group
and two tier
235
CPIPE.F.STRAP4-2x2Strap with single diameter, two group and
two tier
235
CPIPE.F.STRAP4-2x3Strap with single diameter, three group
and two tier
236
CPIPE.F.STRAP4-2X4Strap with single diameter, four group and
two tier
237
CPIPE.F.STRAP5Fixed band strap
Control Pipe User Guide and Menu Reference
C-25
List of Form Parts
Control Pipe Default Support Auto-selection File
Control Pipe Default Support Auto-selection File
CPIPE.DATA.ASFILE.SUPPORT
UNITS=MM
TYPE WDTH HGTH LENG THIK MATL IFC# NAME FORM STK#
&
*
* 02-Apr-96 dongxf; Created
*-------------------------------------------------------------------*
* FILENAME: CPIPE.DATA.ASFILE.SUPPORT
*
* PURPOSE: Autoselection file for support
*
* KEY WORD: UNITS - Specifies the units used in this file. It must
*
be the first line of this file.
*
WDTH - Scale y of the support
*
HGTH - Scale z of the support
*
LENG - Scale x of the support
*
IFC# - Insert fitting code
*
MATL - Material of the support
*
NAME - Name of the support nfigure
*
FORM - Form part name for drawing
*
STK# - Stock Number of the support
*
*--------------------------------------------------------------------*
SUPA 805
210
STEEL A
CPIPE.F.SUPA
CPIPE.FORM.SUPPORTSUPPORT-A
SUPS 200
200
50
STEEL
CPIPE.F.SUPSSUPPORT-S
FBSP 50
500
2000
STEEL
CPIPE.F.FBSPSUPPORT-FB
TR62 62
10
1800 1.6
SS41
CPIPE.F.TRAY
CPIPE.FORM.TRAYSUPPORT-TRAY
TR90 90
10
1800 1.6
SS41
CPIPE.F.TRAY
CPIPE.FORM.TRAYSUPPORT-TRAY
T118 118
10
1800 1.6
SS41
CPIPE.F.TRAY
CPIPE.FORM.TRAYSUPPORT-TRAY
T146 46
10
1800 1.6
SS41
CPIPE.F.TRAY
CPIPE.FORM.TRAYSUPPORT-TRAY
T174 174
10
1800 1.6
SS41
CPIPE.F.TRAY
CPIPE.FORM.TRAYSUPPORT-TRAY
T230 230
10
1800 1.6
SS41
CPIPE.F.TRAY
CPIPE.FORM.TRAYSUPPORT-TRAY
T258 258
10
1800 1.6
SS41
CPIPE.F.TRAY
CPIPE.FORM.TRAYSUPPORT-TRAY
T370 370
10
1800 1.6
SS41
CPIPE.F.TRAY
CPIPE.FORM.TRAYSUPPORT-TRAY
C-26
Control Pipe User Guide and Menu Reference
List of Form Parts
Control Pipe Default Auto-selection File
Control Pipe Default Auto-selection File
CPIPE.DATA.ASFILE.CPIPE
UNITS=MM
MATL DIAM THIK MCTQ ODIA SCHE WGHT STK#
&
*
* 02-Apr-96 dongxf; created
* ------------------------------------------------------------*
* FILENAME
:
CPIPE.DATA.ASFILE.CPIPE
*
* PURPOSE
:
Autoselection file for control pipe
*
* KEY WORD
:
UNITS - Specifies the units used in this
*
file. It must be the first line of
*
this file.
*
MATL - Material of the control pipe
*
DIAM - Nominal diameter of the control pipe
*
MCTQ - MCT core quantity
*
SCHE - Schedule of the control pipe
*
THIK - thickness of the control pipe wall
*
ODIA - outer diameter of MCT/control pipe
*
WGHT - unit length weight of MCT/control pipe
*
* ------------------------------------------------------------*
ALBS 4
1.0
6
10K
0.132
ALBS 5
1.0
8
10K
0.185
ALBS 6
1.0
10
10K
0.237
ALBS 8
1.2
12
10K
0.341
ALBS 10
1.2
15
10K
0.435
ALBS 15
1.2
20
10K
0.595
ALBS 4
1.2
6
40K
0.162
ALBS 5
1.2
8
40K
0.215
ALBS 6
1.2
10
40K
0.279
ALBS 8
1.5
12
40K
0.416
ALBS 10
1.5
15
40K
0.534
ALBS 15
1.5
20
40K
0.732
ALBS 4
1.2
6
70K
0.152
ALBS 5
1.4
8
70K
0.244
ALBS 6
1.6
10
70K
0.365
ALBS 8
1.6
12
70K
0.439
ALBS 10
1.8
15
70K
0.627
ALBS 15
2.0
20
70K
0.95
ALBS 4
1.5
6
140K 0.178
ALBS 5
1.8
8
140K 0.295
ALBS 6
2.0
10
140K 0.422
ALBS 8
2.2
12
140K 0.569
ALBS 10
2.5
15
140K 0.825
ALBS 15
3.0
20
140K 1.346
CUNU 4
1.0
6
10K
0.14
Control Pipe User Guide and Menu Reference
C-27
List of Form Parts
Control Pipe Default Auto-selection File
CUNU 5
CUNU 6
CUNU 8
CUNU 10
CUNU 15
CUNU 4
CUNU 5
CUNU 6
CUNU 8
CUNU 10
CUNU 15
CUNU 4
CUNU 5
CUNU 6
CUNU 8
CUNU 10
CUNU 15
CUNU 4
CUNU 5
CUNU 6
CUNU 8
CUNU 10
CUNU 15
COPPER4
COPPER5
COPPER6
COPPER8
COPPER10
COPPER15
COPPER4
COPPER5
COPPER6
COPPER8
COPPER10
COPPER15
COPPER4
COPPER5
COPPER6
COPPER8
COPPER10
COPPER15
COPPER4
COPPER5
COPPER6
COPPER8
COPPER10
COPPER15
STEEL 10
STEEL 16
STEEL 10
STEEL 16
STEEL 10
STEEL 16
STEEL 16
C-28
1.0
1.0
1.2
1.2
1.2
1.2
1.2
1.2
1.5
1.5
1.5
1.2
1.4
1.6
1.6
1.8
2.0
1.5
1.8
2.0
2.2
2.5
3.0
1.2
1.2
1.2
1.2
1.4
1.6
1.4
1.4
1.6
1.8
1.8
2.2
1.6
1.8
2.0
2.3
2.5
3.0
2.0
2.5
3.0
3.5
4.0
5.0
2.35
2.65
2.3
2.8
3.2
3.7
4.7
8
10
12
15
20
6
8
10
12
15
20
6
8
10
12
15
20
6
8
10
12
15
20
6
8
10
12
15
20
6
8
10
12
15
20
6
8
10
12
15
20
6
8
10
12
15
20
17.3
21.7
17.3
21.7
17.3
21.7
21.7
10K
10K
10K
10K
10K
40K
40K
40K
40K
40K
40K
70K
70K
70K
70K
70K
70K
140K
140K
140K
140K
140K
140K
10K
10K
10K
10K
10K
10K
40K
40K
40K
40K
40K
40K
70K
70K
70K
70K
70K
70K
140K
140K
140K
140K
140K
140K
SPP
SPP
40
40
80
80
160
0.196
0.251
0.361
0.462
0.631
0.162
0.228
0.295
0.441
0.566
0.776
0.161
0.258
0.376
0.465
0.664
1.007
0.189
0.312
0.447
0.603
0.874
1.426
0.161
0.228
0.295
0.362
0.532
0.822
0.18
0.258
0.376
0.513
0.664
1.095
0.197
0.312
0.447
0.623
0.874
1.424
0.224
0.384
0.587
0.832
1.203
2.096
Control Pipe User Guide and Menu Reference
List of Form Parts
Control Pipe Default Auto-selection File
SUS
6
SUS
8
SUS
6
SUS
8
SUS
6
SUS
8
SUS
6
SUS
8
S304 6
S304 8
S304 8
S304 10
S304 10
S304 12
S304 12
S316 6
S316 8
S316 8
S316 10
S316 10
S316 12
S316 12
S316L 6
S316L 8
S316L 8
S316L 10
S316L 10
S316L 12
S316L 12
S316L 6
S316L 8
S316L 8
S316L 10
S316L 10
S316L 12
S316L 12
COPPER6
COPPER6
COPPER6
COPPER6
COPPER8
COPPER8
COPPER8
COPPER8
COPPER10
COPPER10
COPPER10
COPPER10
CUNU 8
CUNU 8
CUNU 8
CUNU 8
CUNU 10
CUNU 10
1.2
1.65
1.5
2.0
1.7
2.2
2.4
3.0
0.5
0.5
1.0
0.8
1.0
0.8
1.0
0.5
0.5
1.0
0.8
1.0
0.8
1.0
0.5
0.5
1.0
0.8
1.0
0.8
1.0
0.5
0.5
1.0
0.8
1.0
0.8
1.0
0.8
0.8
0.8
0.8
1
1
1
1
1
1
1
1
0.7
0.7
0.7
0.7
1
1
1
1
1
1
1
1
1
2
2
2
2
2
2
2
4
4
4
4
4
4
4
6
6
6
6
6
6
6
1
2
4
6
1
2
4
6
1
2
4
6
1
2
4
6
1
2
Control Pipe User Guide and Menu Reference
10.5
13.8
10.5
13.8
10.5
13.8
10.5
13.8
9
11
11
13
13
15
15
21
24
24
29
29
36
36
25
28
28
36
36
41
41
25
28
28
36
36
41
41
9
21
25
30
11
24
28
33
13
29
36
41
11
24
28
33
13
29
10S
10S
20S
20S
40S
40S
80S
80S
160
120
240
160
200
130
160
200
150
300
190
240
160
200
200
150
300
190
240
160
200
200
150
300
190
240
160
200
160
160
160
160
116
116
116
116
90
90
90
90
170
170
170
170
135
135
0.00015DS304-6X0.5T-1C
0.0002DS304-8X0.5T-1C
0.00028DS304-8X1T-1C
0.0003DS304-10X0.8T-1C
0.00034DS304-10X1T-1C
0.00036DS304-12X0.8T-1C
0.00041DS304-12X1T-1C
0.0006DS316-6X0.5T-2C
0.00073DS316-8X0.5T-2C
0.00089DS316-8X1T-2C
0.0011DS316-10X0.8T-2C
0.00118DS316-10X1T-2C
0.00138DS316-12X0.8T-2C
0.0015DS316-12X1T-2C
0.0006DS316L-6X0.5T-4C
0.00073DS316L-8X0.5T-4C
0.00089DS316L-8X1T-4C
0.0011DS316L-10X0.8T-4C
0.00118DS316L-10X1T-4C
0.00138DS316L-12X0.8T-4C
0.00237DS316L-12X1T-4C
0.0006DS316L-6X0.5T-4C
0.00073DS316L-8X0.5T-4C
0.00089DS316L-8X1T-4C
0.0011DS316L-10X0.8T-4C
0.00118DS316L-10X1T-4C
0.00138DS316L-12X0.8T-4C
0.00237DS316L-12X1T-4C
0.0002DC-6X0.8T-1C
0.0007DC-6X0.8T-2C
0.0011DC-6X0.8T-4C
0.00134DC-6X0.8T-6C
0.00031DC-8X1T-1C
0.00094DC-8X1T-2C
0.00143DC-8X1T-4C
0.00215DC-8X1T-6C
0.00037DC-10X1T-1C
0.00124DC-10X1T-2C
0.00209DC-10X1T-4C
0.00257DC-10X1T-6C
0.00025DCN-8X.7T-1C
0.00083DCN-8X.7T-2C
0.0012DCN-8X.7T-4C
0.00192DCN-8X.7T-6C
0.00037DCN-10X1T-1C
0.00124DCN-10X1T-2C
C-29
List of Form Parts
Control Pipe Default Auto-selection File
CUNU
CUNU
C-30
10
10
1
1
4
6
36
41
135
135
0.00209DCN-10X1T-4C
0.00257DCN-10X1T-6C
Control Pipe User Guide and Menu Reference
List of Form Parts
Oracle Table Format for Control Pipe Passageway Fittings
Oracle Table Format for Control Pipe
Passageway Fittings
The GENERATE CPDATABASE command reads the various parameters and
attributes of the existing passageway fittings and supports along the control pipe
passageway in the active CADDS parts and write them to the external RDBMS
database outside CADDS. The read and write access to the RDBMS is done
through the existing SQL HLI interface. Once the attributes of a passageway fitting
is written to RDBMS database, the User should use the report generation tools
available in the RDBMS to prepare the reports or bill of material outside CADDS.
DRAW CPIPE command will use this external RDBMS data to automatically
generate drawings for the control pipe passageway fittings and supports. The
relational database format of the control pipe passageway fittings and supports in
the external RDBMS database is described below. In this version of CADDS,
Oracle is the supported RDBMS.
Two scripts are provided to help the User to set up their own Oracle tables.
1.
cpipe/scripts/enroll_cpipe_users
will allow the system administrator to create account and grant rights on the
related Oracle tables.
2.
cpipe/scripts/create_cpipe_tables
will allow the user to create their own Oracle tables.
Control Pipe User Guide and Menu Reference
C-31
List of Form Parts
Oracle Table Format Sample
Oracle Table Format Sample
Table for CPIPE_FIT_TBL<PROJ>
Field name and size
Datatype
Description
fit_uid
number
fitting ID
fit_pid
number
fitting Part ID(currently not in use)
comp_name
varchar[50]
component name
fittype
number
fitting type number
comp_miptr
number
fitting miptr number
mark
varchar[50]
fitting identification mark
loc_x
number
fitting insertion location x value
loc_y
number
fitting insertion location y value
loc_z
number
fitting insertion location z value
pwlabel
varchar[50]
fitting passageway label value
stage
varchar[50]
fitting stage value
block
varchar[50]
fitting block value(currently not in use)
unit
varchar[50]
fitting units value
form
varchar[50]
fitting form part name
draw
varchar[50]
fitting drawing name(currently not in use)
rel_fit_mark
varchar[50]
relative fitting identification mark
length
number
fitting length
width
number
fitting width
height
number
fitting height
thickness
number
fitting thickness
material
varchar[50]
fitting material
density
number
fitting material density
bend_radius
number
fitting bend radius
bend_ratio
varchar[50]
fitting bend ratio
column_count
number
penetration fitting column count value
row_count
number
penetration fitting row count value
pen_hole_dia
number
penetration fitting hole diameter value
pen_fillet_radius
number
penetration fitting fillet radius value
pen_conn_type
varchar[50]
penetration fitting connection type value
column_gap
number
penetration fitting column gap value
row_gap
number
penetration fitting row gap value
group_count
number
fitting group count value
tier_count
number
fitting tier value
weld_length
number
fitting weld length value
C-32
Control Pipe User Guide and Menu Reference
List of Form Parts
Oracle Table Format Sample
Field name and size
Datatype
Description
edge1
number
strap - distance between fitting edge to bolt centre line
edge2
number
strap - distance between bolt centre line to
fitting inner edge
cover - distance between bolt centre line
to fitting edge
sp_desc
varchar[50]
support description
sp_cen_coor
varchar[400]
support centre line coordinates value
sp_orient_mat
varchar[400]
support orientation matrix
sp_length
number
support leg length
sp_unit_wt
number
support material unit weight
sp_l1
number
distance between cover edge and the first strap center line
sp_l2
number
distance between strap center lines
bolt_desc
varchar[50]
bolt description
ring_desc
varchar[50]
ring description(currently not in use)
Table for CPIPE_LABEL_TBL<PROJ>
Field name and size
Datatype
Description
pwlabel
varchar[50]
control pipe passageway label
source
varchar[50]
control pipe source
destination
varchar[50]
control pipe destination
quantity
number
control pipe quantity
diameter
number
control pipe nominal diameter
odia
number
control pipe outer diameter
thickness
number
control pipe thickness
material
varchar[50]
control pipe material
tag
varchar[50]
control pipe identification tag
length
number
control pipe length
tier
number
control pipe tier
mct
number
control pipe mct value
Control Pipe User Guide and Menu Reference
C-33
List of Form Parts
Oracle Table Format Sample
Table For CPIPE_REL_TBL<PROJ>
Field name and size
Datatype
Description
pwlabel
varchar[50]
control pipe passageway label
fit_mark
varchar[50]
fitting identifiation mark
tag
varchar[50]
control pipe identification tag
C-34
Control Pipe User Guide and Menu Reference
Index
A
Attributes
writing to an extenal database 2-52, 3-5
writing to an external database 3-68
Axis Locking Order
option list 3-16
B
Bend fittings
deleting, all 3-49
icon 3-49
inserting in a passageway 3-36
Branching
routing 2-25
C
Changing
connections 2-43
property sheet 2-43, 3-57
control pipe display mode
icon 2-33
display to single line 2-33
nfigure relationships
command palette 3-9
parameters
property sheet 3-57
passageway
label 2-48, 3-63
icon 3-63
Control Pipe User Guide and Menu Reference
property sheet 3-63
layer 2-47, 3-62
icon 2-47, 3-62
property sheet 3-62
parameters
icon 3-64
passageway label
run-time list 3-63
Clearing
control pipe marking 2-27
icon 2-27, 3-31
Command
ENTER CPIPE 1-5
Command palettes
Change Figure Relationships 2-7
Change Nfigure Relationships 3-9
Control Pipe Reports 1-19, 2-54, 3-72
Control Pipe Setup 1-10
Fitting Deletion 3-47
Fitting Insertion 3-32
Insert Figure 2-5
Insert Nfigure 3-6
Modify Control Pipes 2-38, 3-54
Connections
changing 2-43
Constructing
figures
property sheet 3-8
Control pipe
accessing 1-7
from Environment Access Menu 1-7
arrangement 3-67
generatiing cross-section of 3-67
attributes
Index-1
Index
writing ro an external database 3-68
writing to an external database 2-52
definition 1-2, 1-3
displaying 2-33
evironment 1-7
menus 1-7
inserting identical 2-30
modifying 3-54
command palette 2-38
icon 2-38
property sheet 2-38
overview 1-1
routing 2-9, 3-11
icon 2-9
property sheet 2-9
Control pipe marking
clearing 2-27
Control Pipe Selection Parameters
property sheet 3-56
D
Definitions
control pipe 1-3
destination 1-3
fittings 1-3
label 1-3
MCT 1-3
passageway 1-3
passageway fittings 1-4
passageway label 1-4
section type 1-4
source 1-4
tag 1-3
Deleting
bend fittings, all 3-49
control pipes and passageway fittings
icon 3-51
fittings 2-37
command palette 3-47
icon 2-37, 3-47, 3-48
property sheet 3-48
fittings, all 3-49
icon 3-49
passageway 2-34, 2-36, 3-45, 3-46
icon 2-34, 2-36, 3-45, 3-46
property sheet 2-34, 3-45
Index-2
passageway fittings 3-47
penetration pieces, all 3-50
protection covers, all
3-49
icon 3-49
straps, all 3-50
icon 3-50
support
icon 3-53
supports 3-52
icon 3-52
property sheet 3-52
Design Rule Options
menu 3-15
Destination
definition 1-3
Display
property sheet 2-31
Displaying
control pipe 2-33
Documentation, printing from Portable
Document Format (PDF) file xvi
Drawings
generating 3-70
E
Environment Access
menu 1-7
Environment Globals
menu 1-7
Environment Management
menu 1-7
Examples
modifying control pipe 3-58
modifying control pipes 2-43
routing control pipes 2-12, 3-16
External Database
writing attributes to 3-68
F
Features
context-sensitive 1-2
Figure relationships
changing
command palette 2-7
Control Pipe User Guide and Menu Reference
Index
dissolving between nfig and tnode 2-8, 3-10
icon 2-8
dissolving between nfigs 2-7, 3-9
icon 2-7
making between nfig and tnode 2-8, 3-10
icon 2-8
making between nfigs 2-7
icon 2-7
Figures
constructing
property sheet 2-6
inserting
command palette 2-5
Fittings
definition 1-3
deleting 2-37
inserting 3-32
G
Generating
cross-section of
icon 3-67
property sheet 3-67
cross-section of control pipe arrangement 3-67
default parameter listing 2-59, 3-76
drawings of fittings 3-70
property sheet 3-70
external database
icon 2-52, 3-68
property sheet 2-52, 3-68
labels 2-50, 3-65
icon 2-50, 3-65
property sheet 2-50, 3-65
parameter listing
icon (direct action) 2-59, 3-76
reports 2-54, 3-72
icon (direct action) 2-58, 2-59, 3-76
icon (with options) 2-55
property sheet 2-55, 3-73
I
Icons
Break Passageway 2-49
Control Pipe User Guide and Menu Reference
Change Control Pipe Display Mode 2-33
Change Passageway Label 2-48, 3-63
Change Passageway Layer 2-47, 3-62
Change Passageway Parameters 3-64
Changing Nfigure Relationships 2-7
Clear Control Pipe Marking 2-27, 3-31
Delete a Control Pipe Fitting 2-37
Delete a Passageway 2-36, 3-46
Delete All Bend Fittings in Passageway 3-49
Delete All Fittings 3-49
Delete All Penetration Pieces in
Passageway 3-50
Delete All Protection Covers in
Passageway 3-49
Delete All Straps in Passageway 3-50
Delete Control Pipe Fittings 3-47, 3-48
Delete Control Pipe Passageway 2-34, 3-45
Delete Control Pipe Support 3-53
Delete Control Pipe Supports 3-52
Dissolve a Relationship Between an Nfig and a
Tnode 3-10
Dissolve a Relationship Between Nfig and
Tnode 2-8
Dissolve a Relationship Between Nfigs 2-7
Generate Control Pipe Default Parameter
Listing (direct action) 2-59, 3-76
Generate Control Pipe External Database 2-52,
3-68
Generate Control Pipe Labels 2-50, 3-65
Generate Control Pipe Reports (direct
action) 2-58, 2-59, 3-76
Generate Control Pipe Reports (with
options) 2-55
Generate Cross-Section Detail of Control Pipe
Arrangement 3-67
Insert Bend Fitting in a Passageway 3-36
Insert Control Pipe Branching 2-17, 3-21
Insert Control Pipe Fitting 2-28
Insert Control Pipe Fitting (with options) 3-33
Insert Control Pipe Fittings 3-32
Insert Control Pipe Supports 3-42
Insert Identical Control Pipe 2-30
Insert Identical Control Pipe Support 3-44
Insert Nfigure 2-5
Insert Penetration Piece in Passageway 3-39
Insert Protection Covers in a Passageway 3-37
Insert Strap in Passageway 3-40
Join Passageway 2-49
Make a Relationship Between an Nfig and a
Tnode 2-8
Index-3
Index
Make a Relationship Between Nfigs 2-7, 3-9
Modify Control Pipe 2-38, 3-54
Modify Control Pipes 2-38
Modify Control Pipes (with options) 3-54
Route Control Pipe 2-9, 3-12
Route Control Pipe Segment 3-25
Route Passageway Without a Control Pipe 2-25
Route Passageway Without Control Pipes 3-29
Inserting
bend fitting in a passageway 3-36
bend fittings in passageway
icon 3-36
property sheet 3-36
branching
icon 2-17, 3-21
figures
property sheet 2-6, 3-7
fittings 3-32
command palette 3-32
icon 2-28, 3-32
icon (with options) 3-33
property sheet 2-28
general fitting
property sheet 3-33
identical control pipe 2-30
identical control pipe support 3-44
identical fitting in a passageway 3-35
nfigures 3-6
command palette 3-6
passageway fittings 2-28, 3-32
penetration piece in a passageway 3-39
icon 3-39
property sheet 3-39
protection covers in passageway
icon 3-37
property sheet 3-37
strap in a passageway
icon 3-40
property sheet 3-40
supports 3-42
icon 3-42
property sheet 3-42
L
Labels
definition 1-3
Index-4
generating 2-50, 3-65
M
MCT
defintion 1-3
Menus
Design Rule Options 3-15
Environment Access 1-7
Environment Globals 1-7
Environment Managment 1-7
Modeling Task Set 1-15
NCBuilder Task Set 2-2, 2-5, 3-3, 3-6
Report 1-17
Schematic Task Set 1-14, 2-1
Task Set Access 1-7
Modeling
task set menu 1-15, 3-1
tasks 1-16, 3-1
Modeling option
accessing 1-8, 1-15
Modifying
control pipe 3-54
command palette 3-54
examples 3-58
icon 3-54
icon (with options) 3-54
property sheet 3-54
control pipes
examples 2-43
N
Nfigure relationships
changing
icon 2-7
making relationship
icon 2-7
Nfigures
inserting 3-6
icon 2-5
O
Option Lists
Control Pipe User Guide and Menu Reference
Index
Axis Locking Order 3-16
P
Parameters
list
generating 2-59, 3-76
resetting 1-12
Passageway
break
icon 2-49
definition 1-3
deleting 2-34, 2-36, 3-45, 3-46
fittings
definition 1-4
deleting 3-47
inserting 2-28
inserting identical fitting in 3-35
join
icon 2-49
label
changing 2-48, 3-63
definition 1-4
icon 2-48
property sheet 2-48
labels
property sheet 3-48
layer
changing 2-47
property sheet 2-47
routing
property sheet 3-29
routing without control pipes 2-25
Passageway layer
changing 3-62
Passagway
fittings
inserting 3-32
Penetration pieces
deleting, all 3-50
inserting in a passageway 3-39
Printing documentation from Portable
Document Format (PDF) file xvi
Property Sheets
Branch Control Pipe Routing 3-21
Changing Control Pipe Connections 2-43, 3-57
Control Pipe User Guide and Menu Reference
Changing Control Pipe Parameters 3-57
Changing Passageway Label 2-48, 3-63
Changing Passageway Layer 2-47, 3-62
Construct Figure 2-6, 3-8
Control Pipe Drawing Generation 3-70
Control Pipe External Database
Generation 2-52, 3-68
Control Pipe Fitting Deletion 3-48
Control Pipe General Fitting 3-33
Control Pipe Label Generation 3-65
Control Pipe Modification 2-38, 3-54
Control Pipe Passageway Deletion 2-34, 3-45
Control Pipe Report 2-55, 3-73
Control Pipe Routing 3-12
Control Pipe Segment Routing 3-25
Control Pipe Selection Parameters 1-11, 3-56
control pipe selection parameters 3-56
Control Pipe Support Deletion 3-52
Delete Control Pipes and Passageway
Fittings 3-51
Display Control Pipes 2-31
Insert Figure 2-6, 3-7
Passageway Bend Fitting Insertion 3-36
Passageway Labels 3-48
Passageway Penetration Piece Insertion 3-39
Passageway Protection Cover Insertion 3-37
Passageway Routing 3-29
Passageway Section Generation 3-67
Passageway Strap Insertion 3-40
Passageway Support Insertion 3-42
Schematic Branch Control Pipe Routing 2-17
Schematic Control Pipe Fitting Insertion 2-28
Schematic Control Pipe Label Generation 2-50
Schematic Control Pipe Routing 2-9
Schematic Control Pipe Segment Routing 2-21,
2-23, 2-24
Schematic Passageway Routing 2-25
Protection covers
deleting, all 3-49
icon 3-50
inserting in a passageway 3-37
R
Report
menu 1-17
Reports
accessing 1-8, 1-17
Index-5
Index
command palette 2-54, 3-72
command palettes 1-19
generating 2-54, 3-72
Routing
branching 2-25
property sheet 2-17
control pipe
icon 3-12
property sheet 3-12
control pipes 2-9
examples 2-12, 3-16
control pipes (modeling) 3-11
passageway
property sheet 2-25
passageway without control pipes 2-25, 3-32
icon 2-25, 3-29
segment 3-25
icon 3-25
property sheet 3-25
segments 2-21
Run-Time List
Changing Passageway Label 3-63
deleting, all 3-50
Supports
deleting 3-52
inserting 3-42
inserting identical 3-44
T
Tag
definition 1-3
Task set
modeling 3-1
Task Set Access
menu 1-7
Tasks
modeling option 3-1
schematic 2-1
S
Schematic
task set menu 1-14, 2-1
tasks 1-14, 2-1
Schematic option
accessing 1-8, 1-13
Section type
definition 1-4
Segments
routing 2-21, 3-25
property sheet 2-21, 2-23, 2-24
Selecting
parameters
property sheet 3-56
Selection
parameters
property sheet 1-11
Setup
accessing options 1-9
command palette 1-10
Source
definition 1-3
Straps
Index-6
Control Pipe User Guide and Menu Reference