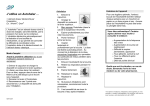
Download USER GUIDE herborizer XL
Transcript
Herborizer® XL
Users guide
Pack contents:
•
•
•
•
•
•
1- Injector
2- Bowl with stainless steel screen
3- Temperature regulator
4- Power supply adaptor
5- Power cord
6- Stirring rod
Assembly :
We advise careful manipulation of all glass components and to ensure a permanent location
for the installation of you Herborizer ; prefer a site against a wall to a coffee table, for
example,in order to avoid tripping over the power supply cord after a successful vaporization
session.
The conical glass joints are extremely precise, to disassemble twist to release before pulling
apart.
Put a little cold water in the body of the Herborizer (fill just above the holes), the water filters
plant particles present in the vapour whilst at the same time cooling it.
With the model "Tube" it is also possible to use crushed ice or ice cubes, alternatively place
the water filled body in a refrigerator.
For the model "Sphere" install the inhaler nozzle or the flexible (optional extra).
Place the bowl (containing the screen) on the body, introduce your finely ground dried herbs
in the bowl with a grinder (optional extra), completely cover the screen.
Then place the injector over the bowl.
The "Sphere" models also have an inhaler tube or flexible (optional extra).
Connect the injector to the variator and the variator to the mains adaptor (or the cigarette
lighter). Be careful to ensure good connections,failure to do so may result in serious damage
to the connectors.
Never connect the injector directly to the power supply adaptor,the injector temperature
would be too important and may burn the herbs.
Set the temperature regulator at the desired temperature ; ideal temperature for resinous herbs
is 180/190°C, 5/6 on the regulator scale.
Leave for approximately 10 minutes to preheat before using.
Once a sufficient temperature is reached the Herborizer can be left on for several hours,which
permits regular usage without preheating.
Instructions for use :
WARNING : to avoid damage to the injector NEVER BLOW into the Herborizer !
For maximum efficiency inhale gently and slowly,the vapour will appear after 2/3 inhalations.
If you do not inhale the herbs will not be consumed,the heat being evacuated at the top of the
injector.
The amount of vapour given off depends upon the quality of herbs and resin content. A very
resinous herb needs a lower vaporization temperature than a herb with less resin.
After several inhalations, remove the injector and stir the herbs with the stirring rod or
spoon,in order to ensure a complete vaporization of the herb.
If you wish to use essential oils and resin, first place on a bed of dried herbs.
The end of a vaporization session is reached when when the green herb colour yellows,the
taste is unpleasant and there is no more vapour.
To change the herbs, remove the hot injector and place on its stand (optional extra) or on a
wooden or glass board, avoid all other materials, which may burn
or melt or damage the injector.
Empty the bowl after each session, it is easier when warm,the spoon can be used to remove
the stainless steel screen ; To avoid blocking clean regularly
with a small brush.
Cleaning :
Clean the Herborizer completely and regularly (approximately every 10 sessions) using BIO
Limpuro cleaning solution, perfectly suited,it allows cleaning
without brushing. Leave to act with hot water for half an hour, rinse.
If you do not have Limpuro cleaner, use a solvent or alcohol for the bowl and body, rinse
abundantly with clean water.
Do not use washing up liquid with hot water, ineffective on resin deposits.
Graduations / Temperatures:
1 – 90°c
2 – 110°c
3 – 130°c
4 – 150°c
5 – 180°c
6 – 190°c
7 – 200°c
8 – 210°c
9 – 220°c
10 –230°c


