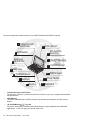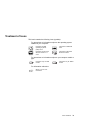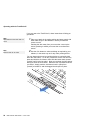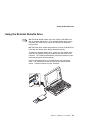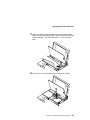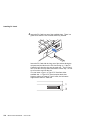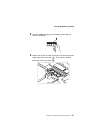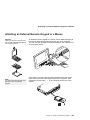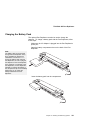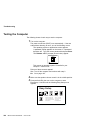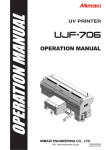
1
IBM ThinkPad 365X/365XD
User's Guide
S76H-7579-00
IBM ThinkPad 365X/365XD
IBM
User's Guide
S76H-7579-00
Note
Before using this information and the product it supports, be sure to read the general information in Appendix E,
Product Warranties and Notices. You should also read the safety guidelines on page xii.
First Edition, April 1996
The following paragraph does not apply to the United Kingdom or any country where such provisions are
inconsistent with local law: INTERNATIONAL BUSINESS MACHINES CORPORATION PROVIDES THIS
PUBLICATION “AS IS” WITHOUT ANY WARRANTY OF ANY KIND, EITHER EXPRESS OR IMPLIED, INCLUDING,
BUT NOT LIMITED TO, THE LIMITED WARRANTIES OF MERCHANTABILITY OR FITNESS FOR A PARTICULAR
PURPOSE. Some states do not allow disclaimer, or express or implied warranties in certain transactions; therefore,
this statement may not apply to you.
This publication could include technical inaccuracies or typographical errors. Changes are periodically made to the
information herein; these changes will be incorporated in new editions of the publication. IBM may make
improvements or changes in the products or the programs described in this publication at any time.
It is possible that this publication may contain reference to, or information about, IBM products (machines and
programs), programming, or services that are not announced in your country. Such references or information must not
be construed to mean that IBM intends to announce such IBM products, programming, or services in your country.
Requests for technical information about IBM products should be made to your IBM Authorized Dealer or your IBM
Marketing Representative.
IBM may have patents or pending patent applications covering the subject matter in this document. The furnishing of
this document does not give you any license to these patents. You can send license inquiries, in writing, to the IBM
Director of Licensing, IBM Corporation, 500 Columbus Avenue, Thornwood, NY 10594, USA.
Copyright International Business Machines Corporation 1996. All rights reserved.
Note to U.S. Government Users – Documentation related to restricted rights – Use, duplication or disclosure is subject
to restrictions set forth in GSA ADP Schedule Contract with IBM Corp.
Thank You for Selecting
an IBM ThinkPad 365X or 365XD Computer
The IBM ThinkPad 365X/365XD computer
is one of the most advanced notebook computers available today.
You will find many uses for its powerful features:
fast processing power, a built-in quad-speed CD-ROM,
a brilliant, colorful DSTN or TFT LCD display,
audio capabilities, and infrared communication.
We are happy to offer the IBM ThinkPad 365X/365XD
to help meet all your mobile computing needs.
iii
Here are the distinctive system features of your IBM ThinkPad 365X/365XD computer:
1
2
3
Pentium Processor
and PCI Bus
8
SVGA Color LCD
EDO Memory
9
Quad-Speed
CD-ROM Drive
10
11
4
Config
ESS AudioDrive
Sound Chip
Infrared Communication
Power Management
Easy-Setup
Restart
5
12
ThinkPad Features
6
HelpWare
7
Security
13
14
PCMCIA Support
Fn Key Function
TrackPoint III
1
Pentium Processor and PCI Bus.
The fast Intel** Pentium** processor and PCI bus combine to give your computer optimal speed
and performance.
2
EDO Memory.
The built-in extended data out (EDO) memory chip enhances performance with fast memory
access.
3
4X CD-ROM Drive:
Page 58.
The built-in quad-speed CD-ROM model affords access to large databases and multimedia
applications. It can even play your favorite music CDs.
iv
IBM ThinkPad 365X/365XD:
User's Guide
4
Easy-Setup:
Page 37.
The built-in system programs in Easy-Setup let you set the basic configuration of your computer.
5
ThinkPad Features Program:
Page 33.
The ThinkPad Features program allows you to set various parameters by using a graphical user
interface or commands.
6
HelpWare:
Page 216.
Comprehensive service and support packages for your IBM ThinkPad 365X/365XD computer are
available in most countries.
7
Security Features:
Page 39.
The computer provides security passwords for the computer. Locking capability is provided for
internal devices. Personalization is also provided to make it easy to identify your computer.
8
SVGA Color LCD
Page 48.
The DSTN (dual-scan super-twisted nematic) display models offer 256 colors at 800-by-600
SVGA resolution.
The thin-film transistor (TFT) display models offer 65,536 colors at 800-by-600 resolution.
9
Audio Features:
Page 56.
The system-integrated ESS** AudioDrive** Sound Chip provides stereo business audio (8 bit to 16
bit) with Sound Blaster** Pro compatibility.
1
Infrared Communication:
Page 54.
Wireless serial communication with one infrared port is supplied with your computer.
11
Power Management:
Page 70.
Power Management sets the computer to different modes to save battery power when you are not
using the full power of your computer. It also provides a resume function, which quickly returns
you to where you left off.
12
PCMCIA** Support:
Page 49.
The computer provides two Personal Computer Memory Card International Association (PCMCIA)
slots. PCMCIA software also is provided so that you can use PC Cards more easily and
conveniently.
13
Fn Key Functions:
Page 26.
The combination of this Fn key with a function key is used to control display modes and battery
power-saving modes.
14
TrackPoint III:
Page 23.
Pointing, selecting, and dragging all become part of a single process with no need to lift your
hands from the keyboard with the TrackPoint III.
v
vi
IBM ThinkPad 365X/365XD:
User's Guide
About This Book
This book contains information that will help you operate the IBM
ThinkPad 365X/365XD computer.
Chapter 1, “Getting Started,” provides information about unpacking
your IBM ThinkPad 365X/365XD and describes how to set up your
computer.
Chapter 2, “Getting Familiar with Your Computer,” acquaints you
with the features of your computer.
Chapter 3, “Operating Your Computer,” provides information on
using your computer with its different features.
Chapter 4, “Using Battery Power,” provides battery information
and describes how to operate your computer with the battery pack.
Chapter 5, “Protecting Your Computer,” provides information for
protecting your computer and internal devices against unauthorized
use.
Chapter 6, “Installing and Removing Options,” describes how to
install or remove IBM options. For optional memory module (DIMM)
installation instructions, see page 119.
Chapter 7, “Installing Software,” provides procedures for installing
operating systems and device drivers in your computer.
Chapter 8, “Solving Computer Problems,” describes what to do
when you have a computer problem.
Appendix A, “Avoiding Hardware Conflicts,” describes what to do
to avoid device address setting problems.
Appendix B, “Advanced Information for PC Cards,” provides
additional information when using PC Cards.
Appendix C, “Using PS2 Commands,” describes PS/2 commands
that you can use to alter computer settings.
Appendix D, “Features and Specifications,” describes the
features and specifications associated with your computer.
Appendix E, “Product Warranties and Notices,” contains the
warranty statements for your computer and notices for this book.
See the Glossary for the meaning of terms and acronyms used in
this book.
An Index is also included.
Copyright IBM Corp. 1996
vii
Viewing the Online Book
Note:
The online book is not available in
all countries.
You can view this book online to retrieve information about the
computer. The online book provides an easy way to get needed
information when you are traveling.
To start the online book, click on the Online Book icon in OS/2
Warp, Microsoft Windows Version 3.11, or Microsoft Windows 95.
Information Notices
This book contains notices that relate to specific information or text.
Caution
Note
Usild Lke Sejk
Provides important hints, tips,
guidance, or advice.
Using Easy-Setup
Note:
LKjef osijdf lke.
LIej tlkje sfoi efp sl
lkjdf toie sfekjt.
Ltke fsoie ltij erlkjs efoitj sdf. The skfeoig
lksjdf otie sfldkj tekjs fdi zdif lkt elskfd.
Pdfk setk sdfk shtke fdij thesdfkl sekj soit
oit skdf 3 lskdti shd gkejt wse. Tkj eoisdjf
tlkjsd.
Attention
Warning:
Caution:
Ljsdkf thkejr fosidj tlkje afshei ldfkue.
Toisdjf sldj ohd flskajt shdf, foiasj.
LKj tlke fsoiej glkje f
lskjdf oiret e. SKjt
slkfj eoit sf.
Indicates situations that are
potentially hazardous to you.
It appears in text before the
instruction or situation that
could be hazardous.
Danger:
Lskjdt oidsfa thie rsldkj etskdjf xo.
Oijds kj dtah fia glisdjf klasdjt sadf.
Attention
1 LKdkfsa oif lkaj oisdt lskef.
Indicates possible damage to
programs, devices, system, or
data. It appears next to the
related instruction or situation
in which possible damage could
occur.
viii
IBM ThinkPad 365X/365XD:
User's Guide
Danger
Chapter 2. YoekfBlksd Lekjf
109
Indicates situations that are
potentially lethal or extremely
hazardous to you. It is indicated
by the symbol
and appears
in text before the instruction or
situation that could be dangerous.
Treatment of Icons
This book contains the following icons (symbols):
For procedures or information unique to the operating system
installed in your computer:
O S / 2
WIN
Information for IBM
Operating System/2
(OS/2) users.
Information for Microsoft
Windows Version 3.11
users.
DOS
Information for IBM DOS
users.
WIN
Information for Microsoft
Windows 95 users.
For procedures or information unique to your computer model or
type:
365X
Information only for 365X
models.
365XD CD
Information only for 365XD
models.
For information referred to:
Where to go for more
information.
About This Book
ix
Ergonomics Information
Notebook computers have made the virtual office a reality. The fact
that you can use your ThinkPad virtually anywhere is a big plus in
today's business world. Read this important information before using
your ThinkPad computer in the virtual office.
Working in the virtual office may mean adapting to frequent changes
in your environment. Following some simple “rules of the road” will
make things easier and bring you the maximum benefits of your
ThinkPad computer. Keeping in mind such basics as good lighting
and proper seating, for example, can go a long way in helping you
enhance your performance and achieve greater comfort wherever
you are.
4 Head
5 View
1 Chair
6 Display
2 Arms
3 Thighs
Note: The example shown here is of someone in a traditional office
setting. Even when not in such a setting, you can follow many of these
tips. Develop good habits and they will serve you well.
x
IBM ThinkPad 365X/365XD:
User's Guide
1 Chair
Use a chair that gives you good
back support.
2 Arms
Keep your forearms, wrists, and
hands in a relaxed and neutral
position. Don't pound the keys;
type with a soft touch.
3 Thighs
Keep your thighs parallel to the
floor and your feet flat on the
floor or on a footrest.
4 Head
Keep your head in a
comfortable and vertical
position.
5 View
Maintain a comfortable viewing
distance of 20–30 inches.
6 Display
Position the display to avoid
glare or reflections from
overhead lighting or outside
sources of light.
Keep the display screen clean
and set the contrast and
brightness to levels that allow
you to see the screen clearly.
What if I am traveling?
It may not be possible to observe the best ergonomic practices when
you are using the ThinkPad computer while on the move or in a
“casual” setting, such as the seashore or on a mountaintop.
Sometimes, your lap may be the only “desk” around. Regardless of
the setting, try to observe as many of the tips for proper usage as
possible. Sitting properly and using adequate lighting, for example,
will help you maintain desirable comfort and performance levels.
Questions about vision?
IBM's visual display screens are designed to meet the highest
standards and to provide you with clear, crisp images and large,
bright displays that are easy to see, yet easy on the eyes. Of
course, any concentrated and sustained visual activity can be tiring.
If you have questions on eye fatigue or visual discomfort, consult a
vision care specialist for advice.
About This Book
xi
Safety Notice
DANGER
Do not disassemble, incinerate, or short-circuit the
rechargeable battery pack. Do not put it in trash that is
disposed of in landfills. Dispose of it as required by
local ordinances or regulations. In the United States,
call IBM at 1-800-IBM-4333 for information on disposal.
CAUTION:
The nickel metal hydride rechargeable battery can only be
replaced by your dealer or an IBM service representative. Do
not disassemble, incinerate, or short-circuit it. The battery can
cause burns or release toxic chemicals. Do not put it in trash
that is disposed of in landfills. Dispose of it as required by
local ordinances and regulations.
CAUTION:
The fluorescent lamp in the liquid crystal display (LCD) contains
mercury. Do not put it in trash that is disposed of in landfills.
Dispose of it as required by local ordinances or regulations.
The LCD is made of glass, and rough handling or dropping the
computer can cause the LCD to break. If the LCD breaks and
the internal fluid gets into your eyes or on your hands,
immediately wash the affected areas with water for at least 15
minutes; then get medical care if any symptoms are present
after washing.
xii
IBM ThinkPad 365X/365XD:
User's Guide
Laser Compliance Statement
The CD-ROM drive in the 365XD models of the IBM ThinkPad
365X/365XD is a laser product. The CD-ROM drive's classification
label (shown below) is located on the top of the drive.
CLASS 1 LASER PRODUCT
LASER KLASSE 1
LUOKAN 1 LASERLAITE
APPAREIL A LASER DE CLASSE 1
KLASS 1 LASER APPARAT
The CD-ROM drive is certified in the U.S. to conform to the
requirements of the Department of Health and Human Services 21
Code of Federal Regulations (DHHS 21 CFR) Subchapter J for
Class I laser products.
In other countries, the drive is certified to conform to the
requirements of EN60825.
Caution:
Do not open the drive; no user adjustments or serviceable parts
are inside.
Use of controls, adjustments or the performance of procedures
other than those specified may result in hazardous radiation
exposure.
Class I (1) laser products are not considered to be hazardous. The
CD-ROM drive has an internal, Class I (1), 0.5-milliwatt, aluminum
gallium-arsenide laser that operates at a wavelength of 760 to 810
nanometers. The design of the laser system and the CD-ROM drive
ensures that there is no exposure to laser radiation above a Class I
(1) level during normal operation, user maintenance, or servicing
conditions.
About This Book
xiii
xiv
IBM ThinkPad 365X/365XD:
User's Guide
Contents
Copyright IBM Corp. 1996
About This Book . . . . .
Viewing the Online Book
.
Information Notices . . . . .
Treatment of Icons . . . . .
Ergonomics Information . .
Safety Notice . . . . . . . .
Laser Compliance Statement
.
.
.
.
.
.
.
.
.
.
.
.
.
.
.
.
.
.
.
.
.
.
.
.
.
.
.
.
.
.
.
.
.
.
.
.
.
.
.
.
.
.
.
.
.
.
.
.
.
.
.
.
.
.
.
.
.
.
.
.
.
.
.
.
.
.
.
.
.
.
.
.
.
.
.
.
.
.
.
.
.
.
.
.
.
.
.
.
.
.
.
.
.
.
.
.
.
.
.
.
.
.
.
.
.
.
.
.
.
.
.
.
.
.
.
.
.
.
.
.
.
.
.
.
.
.
.
.
.
.
.
.
Chapter 1. Getting Started
Overall Setup Procedures .
Checking Your Items . . . .
Setting Up Your Computer
. . .
. . . .
. . . .
. . . .
.
.
.
.
.
.
.
.
.
.
.
.
.
.
.
.
.
.
.
.
.
.
.
.
.
.
.
.
.
.
.
.
.
.
.
.
.
.
.
.
.
.
.
.
.
.
.
.
.
.
.
.
.
.
.
.
.
.
.
.
.
.
.
.
.
.
.
.
Chapter 2. Getting Familiar with Your Computer
. . . . . . . . . . . . . . . . . . . . . . . .
Locations
System Status Indicators . . . . . . . . . . . . . . .
Providing Power
. . . . . . . . . . . . . . . . . . . .
Operating with the TrackPoint III . . . . . . . . . . .
Cleaning the Cap . . . . . . . . . . . . . . . . . .
Using the Fn Key Function . . . . . . . . . . . . . .
Operating the Numeric Keypad . . . . . . . . . . . .
Keeping the Computer from Being Damaged . . . .
Carrying the Computer . . . . . . . . . . . . . . . . .
.
.
.
.
.
.
.
.
.
.
.
.
.
.
.
.
.
.
.
.
.
.
.
.
.
.
.
.
.
.
.
.
.
.
.
.
.
.
.
.
.
.
.
.
.
.
.
.
.
.
.
.
.
.
.
.
.
.
.
.
.
.
.
.
.
.
.
.
.
13
14
19
21
23
25
26
28
29
30
Chapter 3. Operating Your Computer . . . . . . . . . . . . .
What Happens When Power Is Turned On? . . . . . . . . . . .
Using the ThinkPad Features Program . . . . . . . . . . . . . .
. . . . . . . . . . .
Starting the ThinkPad Features Program
Using Easy-Setup
. . . . . . . . . . . . . . . . . . . . . . . . . .
Starting Easy-Setup . . . . . . . . . . . . . . . . . . . . . . . .
Using the Selectable Drive-Startup Sequence . . . . . . . . .
Using the Computer LCD or the External Monitor . . . . . . . .
Display Output Type . . . . . . . . . . . . . . . . . . . . . . .
Points to Consider When Using the DOS Screen on the LCD
Attaching a Monitor . . . . . . . . . . . . . . . . . . . . . . . .
. . . . . . . . . . . . . . . . . . . .
Using SVGA Video Mode
Using PC Cards
. . . . . . . . . . . . . . . . . . . . . . . . . . .
PC Card Limitations under Suspend Mode . . . . . . . . . .
Using the PC Card Director Program . . . . . . . . . . . . . .
Starting PC Card Director for OS/2 or Windows
. . . . . . .
Starting PC Card Director for DOS . . . . . . . . . . . . . . .
Using the Infrared Communication Feature . . . . . . . . . . . .
Points to Consider for Infrared Communication . . . . . . . .
Audio Features . . . . . . . . . . . . . . . . . . . . . . . . . . . .
Using the External Diskette Drive
. . . . . . . . . . . . . . . . .
Using the CD-ROM Drive . . . . . . . . . . . . . . . . . . . . . .
31
32
33
34
37
37
41
43
43
44
45
48
49
49
50
51
53
54
54
56
57
58
.
.
.
.
.
.
.
.
.
.
.
.
.
.
.
.
.
.
.
.
.
.
vii
viii
viii
ix
x
xii
xiii
1
2
4
6
xv
Handling Compact Discs
xvi
IBM ThinkPad 365X/365XD:
. . . . . . . . . . . . . . . . . . . .
59
Chapter 4. Using Battery Power . . . . . . . . .
Charging the Battery Pack
. . . . . . . . . . . . .
Charging with the AC Adapter . . . . . . . . . .
Battery Pack Maintenance . . . . . . . . . . . .
Replacing the Battery Pack . . . . . . . . . . . . .
Monitoring the Battery-Power Status . . . . . . . .
Using the Battery-Power Status Indicator . . .
Using the Fuel-Gauge Program . . . . . . . . .
Preserving Battery-Pack Life . . . . . . . . . . . .
Maximizing Battery-Powered Operation . . . . . .
Using Advanced Power Management
. . . . .
Decreasing LCD Brightness . . . . . . . . . . .
Using the Battery Power-Management Function
.
.
.
.
.
.
.
.
.
.
.
.
.
.
.
.
.
.
.
.
.
.
.
.
.
.
.
.
.
.
.
.
.
.
.
.
.
.
.
.
.
.
.
.
.
.
.
.
.
.
.
.
.
.
.
.
.
.
.
.
.
.
.
.
.
.
.
.
.
.
.
.
.
.
.
.
.
.
.
.
.
.
.
.
.
.
.
.
.
.
.
.
.
.
.
.
.
.
.
.
.
.
.
61
62
62
64
65
67
67
68
70
70
70
73
73
Chapter 5. Protecting Your Computer
Using Passwords . . . . . . . . . . . . .
Power-On Password . . . . . . . . .
Hard Disk Password . . . . . . . . .
Supervisor Password . . . . . . . . .
Using the Personalization Feature . . .
Entering the Personal Information . .
Deleting a Personalized Screen . . .
Using Locks . . . . . . . . . . . . . . . .
Using Locking Devices . . . . . . . .
Affixing a Nameplate . . . . . . . . . . .
.
.
.
.
.
.
.
.
.
.
.
.
.
.
.
.
.
.
.
.
.
.
.
.
.
.
.
.
.
.
.
.
.
.
.
.
.
.
.
.
.
.
.
.
.
.
.
.
.
.
.
.
.
.
.
.
.
.
.
.
.
.
.
.
.
.
.
.
.
.
.
.
.
.
.
.
.
.
.
.
.
.
.
.
.
.
.
.
83
84
84
89
94
98
99
101
102
102
103
Chapter 6. Installing and Removing Options . . . . . . . .
Upgrading the Hard Disk Drive . . . . . . . . . . . . . . . . . .
Upgrading a ThinkPad 365XD with an Internal CD-ROM
Drive . . . . . . . . . . . . . . . . . . . . . . . . . . . . . . .
Upgrading a ThinkPad 365X with an Internal Diskette Drive
Installing PC Cards . . . . . . . . . . . . . . . . . . . . . . . . .
Removing PC Cards . . . . . . . . . . . . . . . . . . . . . . . .
Increasing Memory Capacity . . . . . . . . . . . . . . . . . . .
Installing a DIMM . . . . . . . . . . . . . . . . . . . . . . . .
Removing a DIMM
. . . . . . . . . . . . . . . . . . . . . . .
Attaching an External Numeric Keypad or a Mouse . . . . . .
Using the Mouse and Other Pointing Devices . . . . . . . .
Attaching an External Keyboard . . . . . . . . . . . . . . . . .
Attaching a Printer . . . . . . . . . . . . . . . . . . . . . . . . .
IBM ThinkPad 365 Port Replicator . . . . . . . . . . . . . . . .
Installing the Port Replicator (Option A) . . . . . . . . . . .
Charging the Battery Pack . . . . . . . . . . . . . . . . . . .
Removing the Port Replicator . . . . . . . . . . . . . . . . .
.
.
105
106
.
106
111
115
118
119
119
123
125
126
127
128
129
130
131
132
User's Guide
.
.
.
.
.
.
.
.
.
.
.
.
.
.
.
.
.
.
.
.
.
.
.
.
.
.
.
.
.
.
.
.
.
.
.
.
.
.
.
.
.
.
.
.
.
.
.
.
.
.
.
.
.
.
.
.
.
.
.
.
.
.
.
.
.
.
.
.
.
.
.
.
.
.
.
.
.
.
Installing the Port Replicator (Option B) . . .
Inserting or Changing a CD or Floppy Diskette
Removing the ThinkPad . . . . . . . . . . . .
. . . . . . . . .
. . . . . . . .
. . . . . . . . .
133
135
136
Chapter 7. Installing Software . . . . . . . . . . . . . . . . . .
What You Need for Your Computer . . . . . . . . . . . . . . . .
Installing the Operating System and Device Drivers . . . . . . .
Installing Software for OS/2 Warp . . . . . . . . . . . . . . . . .
Installing IBM OS/2 Warp Version 3 . . . . . . . . . . . . . .
Installing the CD-ROM Device Driver for OS/2 Warp (for the
365XD Only) . . . . . . . . . . . . . . . . . . . . . . . . . . .
Installing the ThinkPad Features Program for OS/2 Warp . .
Installing the PCI-IDE Bus Master Driver for OS/2 Warp
. .
Installing the PC Card Director for OS/2 Warp . . . . . . . .
Installing the ESS AudioDrive Support Software for OS/2
Warp . . . . . . . . . . . . . . . . . . . . . . . . . . . . . . . .
Installing the Infrared Device Driver for OS/2 Warp
. . . . .
Installing the ThinkPad Display Device Driver for OS/2 Warp
Installing Software for DOS . . . . . . . . . . . . . . . . . . . . .
Installing IBM PC DOS Version 7.0 . . . . . . . . . . . . . . .
Installing the CD-ROM Device Driver for DOS (for the 365XD
Only) . . . . . . . . . . . . . . . . . . . . . . . . . . . . . . . .
Installing the ThinkPad Features Program for DOS
. . . . .
Installing the PC Card Director for DOS . . . . . . . . . . . .
Installing Software for Microsoft Windows 3.11 . . . . . . . . . .
Installing Windows 3.11
. . . . . . . . . . . . . . . . . . . . .
Installing the ThinkPad Features Program for Windows 3.11
. . . . . .
Installing the PC Card Director for Windows 3.11
Installing the AudioDrive Support Software for Windows 3.11
Installing the Infrared Device Driver for Windows 3.11 . . . .
. .
Installing the ThinkPad Display Driver for Windows 3.11
Installing Software for Microsoft Windows 95 . . . . . . . . . . .
Installing Windows 95 . . . . . . . . . . . . . . . . . . . . . . .
Installing the ThinkPad Display Driver for Windows 95
. . .
Installing the ThinkPad Features Program for Windows 95 .
Installing the PCI-IDE Bus Master Driver for Windows 95 . .
Installing the PC Card Director for Windows 95 . . . . . . . .
Installing the AudioDrive Support Software for Windows 95 .
Installing the Infrared Device Driver for Windows 95 . . . . .
Points to Consider When Using Windows 95 . . . . . . . . .
137
138
139
140
141
Chapter 8. Solving Computer Problems . . . . .
Common Problems and Frequently Asked Questions
Common Problems and Actions . . . . . . . . . .
Frequently Asked Questions and Answers . . . .
Testing the Computer . . . . . . . . . . . . . . . . .
. .
.
. .
. .
. .
.
.
.
.
.
.
.
.
.
.
.
.
.
.
.
.
.
.
.
.
Contents
.
.
.
.
.
147
149
150
151
152
153
155
156
157
158
161
162
163
165
169
170
171
172
173
174
175
177
178
179
180
184
186
187
189
190
190
192
193
xvii
xviii
IBM ThinkPad 365X/365XD:
Troubleshooting Charts . . . . . . . . . . . . . . . . . . . . .
Error Codes . . . . . . . . . . . . . . . . . . . . . . . . . .
LCD Blank or Power-On Problems . . . . . . . . . . . . .
Screen Messages . . . . . . . . . . . . . . . . . . . . . . .
Other General Problems . . . . . . . . . . . . . . . . . . .
What If Testing Cannot Find the Problem? . . . . . . . . . .
Battery Power Problems . . . . . . . . . . . . . . . . . . .
CD-ROM Drive Problems
. . . . . . . . . . . . . . . . . .
Diskette Drive Problems . . . . . . . . . . . . . . . . . . .
Port Replicator Problems . . . . . . . . . . . . . . . . . . .
External Monitor Problems . . . . . . . . . . . . . . . . . .
Hibernation Problems . . . . . . . . . . . . . . . . . . . . .
Infrared Communication Problems . . . . . . . . . . . . .
Keyboard, External Numeric Keypad, and Pointing Device
Problems . . . . . . . . . . . . . . . . . . . . . . . . . . .
Option Problems . . . . . . . . . . . . . . . . . . . . . . . .
PC Card Problems . . . . . . . . . . . . . . . . . . . . . .
Printer Problems . . . . . . . . . . . . . . . . . . . . . . . .
Software Problems . . . . . . . . . . . . . . . . . . . . . .
Getting Service . . . . . . . . . . . . . . . . . . . . . . . . . .
Listing Installed Options . . . . . . . . . . . . . . . . . . .
Recording Identification Numbers . . . . . . . . . . . . . .
Getting Help, Service, and Information . . . . . . . . . . . .
Using the HelpWare Support Family . . . . . . . . . . . .
Purchasing Additional HelpWare Services . . . . . . . . .
Custom Services
. . . . . . . . . . . . . . . . . . . . . . .
Obtaining IBM Operating System Updates . . . . . . . . .
About Your Warranty . . . . . . . . . . . . . . . . . . . . .
Service outside North America
. . . . . . . . . . . . . . .
.
.
.
.
.
.
.
.
.
.
.
.
.
.
.
.
.
.
.
.
.
.
.
.
.
.
195
195
198
200
201
203
203
204
205
205
206
207
207
.
.
.
.
.
.
.
.
.
.
.
.
.
.
.
.
.
.
.
.
.
.
.
.
.
.
.
.
.
.
208
209
210
211
212
213
213
214
215
216
220
222
223
223
224
Appendix A. Avoiding Hardware Conflicts
Avoiding System Resource Conflicts . . . . .
Avoiding Conflicts When Using PC Cards
List of System Resources . . . . . . . . . . .
.
.
.
.
.
.
.
.
231
231
232
236
Appendix B. Advanced Information for PC Cards . . . . . .
Auto Configurator for PC Card Director . . . . . . . . . . . . . .
Starting the Auto Configurator Utility for OS/2 or Windows .
Adding to the CONFIG.SYS File . . . . . . . . . . . . . . . . . .
Registered Drivers and Standard Rules for OS/2 . . . . . . .
Registered Drivers and Standard Rules for DOS and
Windows . . . . . . . . . . . . . . . . . . . . . . . . . . . . .
Storage Card Device Driver . . . . . . . . . . . . . . . . . . . . .
PCMCIA Storage Card Device Driver for OS/2 . . . . . . . .
PCMCIA Storage Card Device Driver for DOS and Windows
Before Using PCMCIA Storage Cards . . . . . . . . . . . . .
239
239
239
243
243
User's Guide
. . .
. . . .
. . . .
. . . .
.
.
.
.
.
.
.
.
.
.
.
.
.
.
.
.
.
.
.
.
246
248
248
248
248
Using PCMCIA ATA Cards with Multiple Partitions . . . . .
Parameters for the OS/2 PCMCIA ATA Card Device Driver
Parameters for DOS PCMCIA Storage Card Device Drivers
. . . . .
PCMCIA Storage Card Device Manager for OS/2
OS/2 PCMCIA Storage API Device Driver . . . . . . . . . .
Flash Card Memory Technology Driver
. . . . . . . . . . .
Checking the Allocated Resources for the PC Card . . . . . .
Avoiding PC Card Resource Conflicts . . . . . . . . . . . . . .
Virtual Card Services for OS/2 . . . . . . . . . . . . . . . . . .
Appendix C. Using PS2 Commands
.
.
.
.
.
.
249
249
250
251
252
252
253
255
256
. . . . . . . . . . . . . .
257
.
.
.
.
.
.
.
.
.
.
.
.
.
.
.
.
.
.
.
.
.
.
.
.
263
265
266
267
. . .
. . . .
. . . .
. . . .
.
.
.
.
.
.
.
.
.
.
.
.
.
.
.
.
.
.
.
.
269
272
272
273
. . . . . . . . . . . . . . . . . . . . . . . . . . . . . . .
275
. . . . . . . . . . . . . . . . . . . . . . . . . . . . . . . . . .
279
Appendix D. Features and Specifications
Specifications . . . . . . . . . . . . . . . . . .
Diskette Standards . . . . . . . . . . . . . . .
IBM Power Cords . . . . . . . . . . . . . . . .
.
.
.
.
.
.
.
.
Appendix E. Product Warranties and Notices
Notices . . . . . . . . . . . . . . . . . . . . . . . .
Trademarks
. . . . . . . . . . . . . . . . . . .
Electronic Emission Notices . . . . . . . . . .
Glossary
Index
.
.
.
.
.
.
.
.
.
.
.
.
.
.
Contents
xix
xx
IBM ThinkPad 365X/365XD:
User's Guide
Chapter 1. Getting Started
Welcome to the world of ThinkPad computers!
The IBM ThinkPad 365X/365XD computer is designed to meet many
multimedia and mobile computing needs. Its various features,
unique to IBM products, can help your everyday work go easily and
smoothly. You can use your IBM ThinkPad 365X/365XD computer in
the office or at home as a desktop computer by attaching an external
keyboard, display, or other external devices. And, of course, your
computer can be easily carried wherever you need a computer “on
the go.”
This chapter provides step-by-step instructions to help you set up
your new computer.
Overall Setup Procedures
Checking Your Items . . .
Setting Up Your Computer
Copyright IBM Corp. 1996
. . . . . . . . . . . . . . . . . . . . . . .
. . . . . . . . . . . . . . . . . . . . . . .
. . . . . . . . . . . . . . . . . . . . . .
2
4
6
1
Getting Started
Overall Setup Procedures
Before using the computer for the first time, review these overall setup procedures:
Set Up the Computer
First, check whether you have all the necessary items
with your computer.
See page 4.
Then, install the battery pack in the computer. Now
you are ready to turn on the computer.
See page 6.
Install Options
If you have any options, such as memory cards,
install them now.
See page 105.
3
Customize Your Computer
Easy-Setup
1 2 3
Config
Date/Time
Password
Start Up
Test
You can use Easy-Setup, a built-in system function,
to set passwords to prevent your computer from
unauthorized use, or use the ThinkPad Features
program to customize your computer.
For Easy-Setup, see page 37.
Restart
For the ThinkPad Features program, see page
33.
ThinkPad Features
2
IBM ThinkPad 365X/365XD:
User's Guide
Getting Started
4
Make a Backup of Your System
Some computers come with the necessary software
already installed for you to use the computer right out
of the box. Or, you may have installed the operating
system and software yourself. Whichever is the case
for you, remember to make a backup copy of your
hard disk drive software.
On some computers, the Diskette Factory program is
installed so you can create backup diskettes. On
other computers, you will find utility and device driver
diskettes packed in the box with the computer.
If your computer did not come with the utility and
device driver diskettes, make a backup copy of all
necessary files using the Diskette Factory program.
This way, if you ever need to reinstall the operating
system, you will have all the necessary software you
need to restore your computer to the way it was at
the time of purchase.
Do you need more hard disk space?
If your computer did not come with the utility and device driver diskettes, and you have already
made a backup copy of all necessary software using the Diskette Factory program, you can delete
any preinstalled software you do not want to use to have more free hard disk space.
Click on the Diskette Factory icon; then follow the instructions on the screen.
You can also delete the demonstration program.
You are ready to use your computer.
If you are reinstalling the operating system...
If you have any application programs to install,
follow the instructions in the documentation that
came with those programs.
If you are reinstalling the operating system to
customize your computer, follow the instructions
in Chapter 7, “Installing Software” on page 137.
If you have any problems after you have customized your computer, refer to Chapter 8,
“Solving Computer Problems” on page 189 for troubleshooting help.
Chapter 1. Getting Started
3
Getting Started
Checking Your Items
Remove everything from the shipping box and check that all
necessary items were shipped with your computer.
1 Match the items, one by one, with the following figures.
If any item is missing or damaged, contact your place of
purchase.
Computer
Battery Pack
Power Cord
AC Adapter
4
IBM ThinkPad 365X/365XD:
User's Guide
Getting Started
Diskette Drive
Miscellaneous Items
Envelope
365X The internal diskette drive is
installed in the computer.
This envelope contains:
Spare caps for TrackPoint III
365XD CD
To use the external diskette
drive and the CD-ROM drive at the
same time, use the external diskette
drive connector to connect the
external diskette drive. You can
also use the IBM Port Replicator to
attach an external diskette drive.
Utility Diskettes
Driver Diskettes
These diskettes contain various
system programs and device
drivers.
Other items
Note: In some countries, backup
diskettes should be created
using the Diskette Factory
program when the computer
power is turned on for the
first time.
2 Turn the computer upside down and record the identification
numbers 1 on page 214.
The machine type has a prefix of Type.
The serial number has a prefix of S/N.
Chapter 1. Getting Started
5
Getting Started
Setting Up Your Computer
You are now ready to assemble and start your computer. The steps
on the next few pages guide you through the process. The following
conventions are used in the steps and illustrations that appear in this
book.
1
Indicates a main sequence of actions. This refers to the same
number in the figure.
1 Indicates a sequence of actions within a main action. An arrow
accompanying a circled number shows the direction of
movement.
Note
Battery packs shipped from the factory are in an almostdischarged state, so you must charge them fully before use.
To install the battery pack:
1 Slide the latches on the sides of the computer halfway toward
the front, and open the liquid crystal display (LCD).
(Do 1 and 2 .)
2 Slide the same two latches forward again all the way toward
the front; then raise the keyboard.
(Do 1 and 2 .)
Some pressure might be needed to slide these latches if they
are tight.
6
IBM ThinkPad 365X/365XD:
User's Guide
Getting Started
2
1
1
1
Right Side View
2
2
Chapter 1. Getting Started
7
Getting Started
3
DANGER
The battery pack provided with your computer
contains a small amount of harmful substances.
To avoid possible injury:
Keep the battery pack away from fire.
Do not expose the battery pack to water or
rain.
Do not attempt to disassemble the battery
pack.
Avoid mechanical shocks to the battery.
Always use battery packs recommended by
IBM.
Keep the battery pack away from children.
When disposing of the battery, comply with local
ordinances or regulations or your company's
safety standards.
Install the battery pack with the strap-side up and press it
firmly into the connector.
(Do 1 and 2 .)
4 Close the keyboard by sliding the latches to the front and
lowering the keyboard into place.
(Do 1 and 2 .)
8
IBM ThinkPad 365X/365XD:
User's Guide
Getting Started
Chapter 1. Getting Started
9
Getting Started
5 Slide the brightness control (
)( 1 ) to its upper position as
shown; then set the speaker volume control to
mid-position( 2 ). (If your ThinkPad 365 model has a contrast
3 as well.)
control, adjust this control
(Do 1 , 2 , and, if appropriate, 3 .)
6 Connect the AC Adapter as shown.
(Do 1 , 2 , and 3 .)
7 Push and release the power switch to turn on the computer.
The power switch automatically returns to its original position
after you push and release it.
8 After a single beep, one of the following screens appears,
confirming that the system is operating correctly.
1995 .12.31
Month
Year
Day
23:59:59
F 1
Hour
F 2
F 3
F 4
F 5
F 6
F 7
F 8
F 9
Month
Second
F1 0 F 1 1 F 1 2
OK
Cancel
Diskette and F1 prompts.
This screen appears when no
operating system is installed.
Date and Time menu.
This screen instructs you to set
the date and time.
See page 137 to install all software
necessary for your computer.
See page 38 to set the date and
time.
Operating System Screen.
This screen appears when you have
purchased a computer with an
operating system installed.
(The screen shown is an example
of an operating system screen. The
actual screen may differ according
to your operating system.)
On some computers, a
demonstration program might start
running.
If any other screen appears, a problem might have occurred in the
computer. See Chapter 8, “Solving Computer Problems” on
page 189.
10
IBM ThinkPad 365X/365XD:
User's Guide
Getting Started
5
3
6
3
7
Chapter 1. Getting Started
11
Getting Started
Congratulations! You have successfully completed the basic setup of your computer.
Important
It is recommended that you make a backup
copy of the files on the hard disk drive, in case
you accidentally erase preinstalled software or
intentionally modify the hard disk drive. You
can use the backup copy to restore your
computer to the way it was at the time when
you made the backup copy.
In some countries, you can create the device
driver diskettes you need to install all necessary
software, using the Diskette Factory program.
For more information on Diskette Factory, refer
to Chapter 7, “Installing Software” on page 137.
12
IBM ThinkPad 365X/365XD:
User's Guide
Chapter 2. Getting Familiar with Your Computer
This chapter provides general information for getting acquainted with
your computer.
Locations
. . . . . . . . . . . . . . . . . . . .
System Status Indicators . . . . . . . . . . .
Providing Power
. . . . . . . . . . . . . . . .
Operating with the TrackPoint III . . . . . . .
Cleaning the Cap . . . . . . . . . . . . . .
Using the Fn Key Function . . . . . . . . . .
Operating the Numeric Keypad . . . . . . . .
Keeping the Computer from Being Damaged
Carrying the Computer . . . . . . . . . . . . .
Copyright IBM Corp. 1996
.
.
.
.
.
.
.
.
.
.
.
.
.
.
.
.
.
.
.
.
.
.
.
.
.
.
.
.
.
.
.
.
.
.
.
.
.
.
.
.
.
.
.
.
.
.
.
.
.
.
.
.
.
.
.
.
.
.
.
.
.
.
.
.
.
.
.
.
.
.
.
.
.
.
.
.
.
.
.
.
.
.
.
.
.
.
.
.
.
.
.
.
.
.
.
.
.
.
.
14
19
21
23
25
26
28
29
30
13
Locations
Locations
8 To install PC Cards:
This section describes additional features of your computer.
Page 115.
Front View
9 To use the hardware lock:
Page 102.
12 To use the TrackPoint III:
Page 23.
15 To use Fn functions:
Page 26.
14
IBM ThinkPad 365X/365XD:
User's Guide
Locations
1
2
The color LCD screen,
uses either thin-film
transistor (TFT) or
dual-scan super-twisted
nematic crystal (DSTN)
technology (depending on
the model) to display
computer output in
800-by-600 resolution.
High-resolution display
modes can be used on the
LCD or with an attached
external display (see page
43).
The contrast control
(available on some
models) moves up or down
to adjust the display
contrast level.
3
The brightness control
moves up or down to
adjust the brightness of the
display.
4
The indicator panel
consists of the system
status indicators and their
related symbols. These
indicators show the current
status of the computer.
5
The built-in microphone
provides audio capturing
capability when it is used
with an application
program capable of
handling an audio function.
6
The LCD suspend switch
sets the computer to enter
suspend mode when the
LCD is closed. Do not
manually press this
switch at any time; the
switch is automatically
pressed when you close
the LCD.
7
The PC Card eject
buttons eject the PC Card
from the upper or lower
PCMCIA slots.
8
PC Card slots
See “Checking Your Items”
on page 4.
9
The locking device
keyhole is used when
securing the ThinkPad with
a Kensington**
MicroSaver** Security
System (hereafter called
the Kensington lock) or
compatible lock. See page
102.
1
The release latches
release the LCD screen or
keyboard so they can be
opened.
11
Personalization
nameplate See page 103.
12
The TrackPoint III is a
built-in pointing device that
is as easy to use as a
mouse without adding
external devices to the
system.
13
The click buttons are
used with the TrackPoint
III.
14
The CD-ROM drive or
diskette drive. See
“Checking Your Items” on
page 4.
15
The Fn key is used with a
function key to activate
certain functions. See
page 26.
16
The function keys can be
used with or without the Fn
key to activate various
functions.
17
The speaker volume
control adjusts the
speaker volume from no
sound to maximum
volume.
18
The speaker provides
sound for your application
programs.
Chapter 2. Getting Familiar with Your Computer
15
Locations
Inside View
1 Using CD-ROMs:
Page 58.
4 To replace the battery:
Page 65.
5 To install an optional memory
module (DIMM):
Page 119.
6 To secure your computer:
Page 102.
1
A CD-ROM drive that reads
data from a 5.25-inch
CD-ROM or a diskette
drive that reads data from
3.5-inch diskettes.
2
The CD-ROM eject button
releases the CD-ROM tray
for inserting, removing, or
replacing a compact disc.
16
IBM ThinkPad 365X/365XD:
3
4
User's Guide
The mechanical CD-ROM
eject allows removal of a
CD in the event of a power
failure, which could disable
the electronic eject button.
To open the CD-ROM tray,
insert a pin into this hole
and push.
The battery pack allows
you to operate the computer
when ac power is not
available.
5
The optional dual-inline
memory module (DIMM)
increases system memory
capacity.
6
The keyboard lock
prevents the keyboard from
opening.
7
The insulator sheet covers
the internal devices to
protect the devices from
harm.
Locations
Bottom View
1
The legs are used to adjust the
keyboard angle.
Chapter 2. Getting Familiar with Your Computer
17
Locations
Rear View
4 To attach an external keyboard,
mouse, or numeric keypad:
11
12
13
Page 125.
5
To attach a display:
Page 45.
7 To attach a printer:
1
Page 128.
8 To attach an external
diskette drive:
3
Page 57.
9 To connect the AC Adapter:
Page 21.
2
4
5
6
7
8
9
1
The rear door covers the
connectors on the rear of
the computer.
5
External display
connector
See page 45.
9
2
The expansion connector
allows connection of the
Port Replicator.
6
Serial connector
See “Checking Your Items”
on page 4.
1
Line-out/headphone jack
11
Line-in jack
Infrared (IR) port
See page 54.
7
12
Microphone-in jack
The external input-device
connector is where a
mouse, an external numeric
keypad, or the
keyboard/mouse connector
is plugged in. An external
keyboard can also be
connected through the
keyboard/mouse connector.
8
3
4
18
IBM ThinkPad 365X/365XD:
User's Guide
Parallel connector
See page 128.
External diskette drive
connector
See page 57.
13
The power jack is where
the AC Adapter cable is
connected.
The power switch turns
the computer on and off.
System Status Indicators
System Status Indicators
The system status indicators show the current status of your
computer by their on or off states or colors (green and amber). Each
indicator is identified with a symbol.
The following shows the location of each symbol and the meaning of
each indicator.
1 2
3 4
5 6 7
8 9
10
Symbol
1 Battery Power Status
Color
Meaning
Green
Indicates that sufficient power remains for operation.
The battery power status cannot be determined when
the battery is not installed in the computer.
Indicates that the battery pack needs charging.
When the indicator starts blinking amber, the
computer beeps three times.
Indicates that the battery pack is charging. When the
indicator turns off, the battery pack is fully charged.
Indicates that the battery pack is charged (if the AC
Adapter is attached).
Turns on when data is written to or read from the
internal diskette drive.
Blinking Amber
2 Battery Charging
Green
Off
3 Diskette Drive In Use
Amber
4 Hard Disk In-Use
Amber
Turns on when data is read from or written to the
hard disk or internal CD-ROM. Do not enter suspend
mode or turn off the computer when this indicator is
on.
5 Numeric Lock
Green
When on, indicates the numeric keypad on the
keyboard is enabled. You enable and disable the
keypad by pressing and holding the Shift key. Then
press the NumLk key. For more information about
the numeric keypad, see page 28.
Chapter 2. Getting Familiar with Your Computer
19
System Status Indicators
Symbol
Color
Meaning
6 Caps Lock
Green
7 Scroll Lock
Green
8 Suspend Mode
Green
When on, indicates the Caps Lock mode is enabled.
All alphabetic characters (A–Z) are entered in capital
letters without pressing the Shift key. You enable
and disable Caps Lock mode by pressing the Caps
Lock key.
Alternately turns on and off each time the Scroll
Lock key is pressed.
While this indicator is on, the Arrow keys are used as
screen-scroll function keys. In this state, the cursor
cannot be moved with the Arrow keys. Not all
application programs support this function.
When on, indicates the computer is in suspend
mode. For more information about suspend mode,
see page 73.
Indicates that the computer is entering suspend
mode or hibernation mode, or the computer is
resuming normal operation.
Shows that the computer is operational. This
indicator turns on when the computer is turned on
and the computer is not in suspend mode.
Blinking Green
9 Power On
1
CD-ROM Drive/Diskette
Drive In Use
Green
Amber
365XD CD
Amber
365X
20
IBM ThinkPad 365X/365XD:
User's Guide
Turns on when data is read from a CD in the
CD-ROM drive. Do not enter suspend mode or eject
the CD when this indicator is on.
Turns on when data is read from or written to a
diskette in the internal diskette drive. Do not enter
suspend mode or eject the diskette when this
indicator is on.
Providing Power
Providing Power
You can use your computer almost anywhere: at home, in the office,
or on the road. Different power sources can be used for different
conditions: the AC Adapter, battery pack, or the Port Replicator.
When you have access to an electrical outlet, you can use the AC
Adapter for continuous power. Otherwise, you can use the battery
pack.
AC Adapter
The AC Adapter is an alternating current (ac) to direct current (dc)
converter that supplies power for the computer. The AC Adapter
also charges the battery pack when it is installed in the computer.
Attention:
Always use the AC Adapter certified
by IBM in the country where you will
be using the computer. Operating
the computer with an incorrect AC
Adapter can cause damage to the
battery pack and to the computer.
The AC Adapter is permanently
sealed and cannot be repaired.
The input voltage is 100–240 V ac, 50/60 Hz. Refer to the label on
your AC Adapter for the input voltage, and make sure you use the
AC Adapter with the stated input voltage.
Chapter 2. Getting Familiar with Your Computer
21
Providing Power
Battery Pack
Note:
The optional Port Replicator can
also be used to charge the
batteries. When the computer is
connected to the Port Replicator,
the Port Replicator recharges the
batteries as long as it is powered.
For details, see page 131.
The battery pack is an internal power source for the computer when
no electrical outlets are available. The battery pack can be
recharged with the AC Adapter.
The approximate operating time of the computer with a fully charged
battery pack depends on the applications used, whether power
management is used, the frequency of keystrokes, and the
configuration of the system.
To ensure the longest possible battery life, in terms of both length of
use per charge and number of charge and discharge cycles before
wearing out, please observe these guidelines:
Battery packs shipped from the factory are in an
almost-discharged state, so you must charge them fully before
use.
When charging, always charge the battery pack fully. Even if
you only need to run on battery power for a fraction of the
battery's capacity, you should not try to give the battery a partial
charge.
Normal charging causes the battery pack to heat up slightly.
Let it cool for 15 minutes before you use it.
Do not recharge a partially drained battery; always drain the
battery pack completely before recharging.
Immediately after the battery pack has been drained of power, it
may be warm to the touch. This is normal. However it should
be set aside to cool for 15 minutes before recharging.
22
IBM ThinkPad 365X/365XD:
User's Guide
Operating with the TrackPoint III
Operating with the TrackPoint III
Note:
No other software is required for the
TrackPoint III; it works with the PS/2
mouse driver.
The keyboard contains a unique cursor-pointing device called the
TrackPoint III. Pointing, selecting, and dragging all become part of
a single process, so you need not move your fingers from their
normal typing position.
The TrackPoint III consists of a stick 1 on the keyboard and a pair
of click buttons 2 in front of the keyboard. The motion of the
cursor is controlled by pressure applied to the stick in any direction
within the plane of the keyboard; the stick does not move. The
speed at which the cursor moves corresponds to the amount of
pressure on the stick. The click buttons are similar in function to
those on other pointing devices; what they do depends on the
software that is used.
Chapter 2. Getting Familiar with Your Computer
23
Operating with the TrackPoint III
If you are new to the TrackPoint III, these instructions will help you
get started.
Note:
Remember that the stick does not
move.
1 Place your hands in the typing position and press gently with
either index finger in the direction in which you want the
cursor to move.
Pressing the stick away from you moves the cursor up the
screen; pressing it toward you moves the cursor down the
screen.
Note:
Either thumb can be used.
2 Use the click buttons to select and drag as required by your
software, in the same way as for any other pointing device.
You can drag and drop an item without having to continually hold
down the click button. To do this, position the cursor over the item,
press and hold the click button, then slide the button back (toward
yourself) until it locks into place. Now you can drag the item without
having to touch the click button. When the item is positioned where
you want it, simply push the click button back in (away from
yourself) to release it, and the dragged item drops into place.
24
IBM ThinkPad 365X/365XD:
User's Guide
Operating with the TrackPoint III
Cleaning the Cap
The cap on the end of the TrackPoint III is removable. You can
replace it with one of the spares shipped with your computer when
the cap is worn out.
To maintain a smooth pointing operation, occasionally clean the cap
with a soft cloth moistened with a nonalkaline detergent.
Chapter 2. Getting Familiar with Your Computer
25
Using the Fn Key Function
Using the Fn Key Function
The Fn key function allows you to change operational features
instantly. When you use the following functions, press and hold the
Fn key 1 ; then press the appropriate function key 2 (F1 to F12;
some function keys are reserved for future use.)
2
1
Note:
To use the Fn Key Lock function,
select the TrackPoint III (
) icon
in the ThinkPad Features program
window, or type
PS2 FNS E at the command prompt.
Key
Combination
Fn
+ F1
Fn
+
F2
Hints and Tips
Using the Fn Key Lock Function: You only need to press Fn
once to get the same effect as when you press and hold the Fn
key. After you press a function key in the top row, Fn returns to
its normal state.
Feature
Meaning
Reserved
—
Fuel-Gauge
display on or off
The Fuel-Gauge program must be activated before you can use this
key combination.
When this key combination is pressed:
Fn
Fn
26
+
+
F3
F4
Standby mode
Suspend mode
IBM ThinkPad 365X/365XD:
User's Guide
For OS/2 or Windows users: The window for the battery power
status appears or disappears. Parameters for power status can
be set.
Places the computer in standby mode. For more information about
this mode, see page 75.
Places the computer in suspend mode. For more information about
this mode, see page 75.
Using the Fn Key Function
Key
Combination
Fn
+
F5
Fn
+ F6
Fn
+
F7
Feature
Meaning
Reserved
—
Reserved
—
LCD/external
monitor switching
Displays the computer output in the following order when an
external monitor is attached.
External
Display
Both
LCD
Fn
+
F8
Fn
+ F9
Fn
+ F10
Fn
+
F11
Reserved
—
Reserved
—
Reserved
—
Power mode
switching
When this key combination is pressed during battery-power
operation, the power-management (power-saving) mode changes as
follows.
High
Auto
Customize
Fn
+ F12
Fn
+
Fn
+
P g Up
PgDn
Hibernation mode
AC mode is used when the AC Adapter is attached. The
Fuel-Gauge program displays the current power option. See
page 68.
Places the computer in hibernation mode. See “Hibernation Mode”
on page 79 for more information.
Reserved
—
Reserved
—
Chapter 2. Getting Familiar with Your Computer
27
Operating the Numeric Keypad
Operating the Numeric Keypad
The keyboard has some keys that, when enabled, work as a 10-key
numeric keypad.
To enable the numeric keypad, press and hold Shift and NumLk.
7
8
5
4
/
9
6
3
2
1
*
.
0
+
While in this mode, press and hold Shift to temporarily use the
cursor and screen control keys.
Up
To disable the numeric keypad, press and hold Shift; then press
NumLk again.
28
IBM ThinkPad 365X/365XD:
User's Guide
Keeping the Computer from Being Damaged
Keeping the Computer from Being Damaged
Your computer is a delicate device that requires careful handling. To
keep it from being damaged, keep these precautions in mind:
Do not place anything heavy on your computer.
Do not scratch, twist, hit, or press the surface of the LCD.
Keep the computer at least 130 mm (5 in.) away from any
electrical appliance that generates a strong magnetic field (for
example, magnets, motors, TVs, refrigerators, or large audio
speakers).
Use your computer when the temperature is from 10°C to 35°C
(50°F to 95°F).
Remove the battery pack and keep it in a cool place if you do
not plan to use the computer for a long period of time.
Do not disassemble the computer.
Do not leave any objects (especially metal objects) in the
computer.
Do not pour liquids into the computer.
Do not drop or apply shock to your computer.
The hard disk drive, CD-ROM drive, and diskette drive are very
delicate devices that need careful handling. To avoid damage, do
not press on, drop, or apply any shock to them.
Do not press on the middle part of the CD-ROM drive or the
diskette drive at any time.
Do not touch the lens on the CD-ROM tray.
Do not use benzene, thinners, or other cleaners to clean the lens
on the CD-ROM tray. Use a CD-ROM cleaner kit.
Do not place more than one diskette label on a diskette. Two or
more labels can cause a label to tear apart inside the drive and
cause damage to the diskette drive.
Insert a diskette straight into the diskette drive. Inserting it at an
angle can damage the front of the diskette drive.
Occasionally clean your computer as follows:
Use a soft cloth moistened with a nonalkaline detergent to wipe
the exterior of the computer.
Gently wipe the LCD with a dry, soft cloth. Avoid using alcohol
or detergent to clean the LCD.
Chapter 2. Getting Familiar with Your Computer
29
Carrying the Computer
Carrying the Computer
When carrying your computer, follow these instructions to prevent
possible damage to your computer and data.
1 Remove any CD-ROM from the CD-ROM drive or any diskette
from the diskette drive.
2 Turn off all attached devices.
3 Turn off the computer and close the LCD.
4 Unplug all external cables and cords connected to the
computer.
5 Make sure all computer doors and covers are closed.
For Your Information
1. You should occasionally back up data from the hard disk to
diskettes or tapes.
2. To use the AC Adapter outside your home country, you need
an ac power cord that is certified for the country you are
visiting. You can purchase one through IBM or an IBM
authorized dealer in that country. For more information about
power cords, see page 267.
3. A carrying case is available from IBM or an IBM authorized
dealer.
30
IBM ThinkPad 365X/365XD:
User's Guide
Chapter 3. Operating Your Computer
This section provides information about using your computer.
What Happens When Power Is Turned On? . . . . . . . . . . .
Using the ThinkPad Features Program . . . . . . . . . . . . . .
Starting the ThinkPad Features Program
. . . . . . . . . . .
Starting the Program for OS/2 and Windows . . . . . . . .
Starting the Program in DOS . . . . . . . . . . . . . . . . .
Using Easy-Setup
. . . . . . . . . . . . . . . . . . . . . . . . . .
Starting Easy-Setup . . . . . . . . . . . . . . . . . . . . . . . .
Using the Selectable Drive-Startup Sequence . . . . . . . . .
Changing the Startup Sequence . . . . . . . . . . . . . . .
Selecting the Network RPL Speed . . . . . . . . . . . . . .
Using the Computer LCD or the External Monitor . . . . . . . .
Display Output Type . . . . . . . . . . . . . . . . . . . . . . .
Points to Consider When Using the DOS Screen on the LCD
Attaching a Monitor . . . . . . . . . . . . . . . . . . . . . . . .
Setting the Monitor Type and the Display Driver . . . . . .
Connecting an External Monitor to the Computer . . . . .
. . . . . . . . . . . . . . . . . . . .
Using SVGA Video Mode
Using PC Cards
. . . . . . . . . . . . . . . . . . . . . . . . . . .
PC Card Limitations under Suspend Mode . . . . . . . . . .
Using the PC Card Director Program . . . . . . . . . . . . . .
. . . . . . .
Starting PC Card Director for OS/2 or Windows
Starting PC Card Director for DOS . . . . . . . . . . . . . . .
Using the Infrared Communication Feature . . . . . . . . . . . .
Points to Consider for Infrared Communication . . . . . . . .
Audio Features . . . . . . . . . . . . . . . . . . . . . . . . . . . .
Using the External Diskette Drive
. . . . . . . . . . . . . . . . .
Using the CD-ROM Drive . . . . . . . . . . . . . . . . . . . . . .
Handling Compact Discs
. . . . . . . . . . . . . . . . . . . .
Copyright IBM Corp. 1996
32
33
34
34
36
37
37
41
42
42
43
43
44
45
46
47
48
49
49
50
51
53
54
54
56
57
58
59
31
What Happens after Power-On?
What Happens When Power Is Turned On?
You see one of the following prompts when the computer is turned on:
An operating system screen appears when the computer is operating
correctly. The screen you see may differ depending on your operating
system.
An operating system screen
F1
F2
F10
1996 .12.31
Month
Year
This screen appears when an operating system is not found. It instructs you
to insert a self-starting diskette into the diskette drive and press F1 to start
the diskette. The order in which the computer checks the drives for an
operating system is set in the drive-startup sequence. See “Using the
Selectable Drive-Startup Sequence” on page 41 for more information.
This screen instructs you to set the date and time for the first time. Enter the
date and time (see page 38); then press Enter.
Day
23:59:59
Hour
Month
Second
This screen indicates that a failure occurred during the power-on self-test
(POST). See page 201 for the necessary actions.
ERROR
OK
Cancel
This icon appears when a power-on password is set. To start the computer,
enter the correct password.
This icon appears when a hard disk password is set. To unlock the hard disk
drive, enter the correct password.
32
IBM ThinkPad 365X/365XD:
User's Guide
Using the ThinkPad Features Program
Using the ThinkPad Features Program
Note:
When installing an operating
system, you must also install the
ThinkPad Features program.
ThinkPad Features is a control program that allows you to
configure your computer. Using the ThinkPad Features program,
you can easily set up and customize the built-in devices, such as
the parallel port or infrared port.
To install the ThinkPad Features
program:
It also provides the Device Configuration Management System that
automatically detects a system resource (such as IRQ, DMA, I/O
address, or memory) conflict, so that you can easily set up your
computer configuration for the new device or software. For more
detail about each device's resource, see Appendix A, “Avoiding
Hardware Conflicts” on page 231.
Chapter 7.
ThinkPad Features also provides various features for your computer
such as:
Power management detail settings
Screen resolution and color depth for both LCD and external
monitor
Fuel-Gauge program:
Page 68.
Personalization Editor program:
Page 98.
Fuel-Gauge program
– Remaining power percentage
– Current power mode
– Discharge options
Personalization Editor
Alarm
Chapter 3. Operating Your Computer
33
Using the ThinkPad Features Program
Starting the ThinkPad Features Program
The way you start the ThinkPad Features program depends on the
operating system.
If you are using OS/2 or Windows, you can use the ThinkPad
Features program with a user-friendly graphical user interface. You
can select or change any option in the ThinkPad Features program
by simply clicking on the buttons on the screen with a pointing
device. You can also specify features by entering the appropriate
PS2 commands at the command prompt (see page 257).
O S / 2
WIN
WIN
Starting the Program for OS/2 and Windows
To start the ThinkPad Features program, double-click on the
ThinkPad Features icon.
In the ThinkPad Features window, you can:
Customize the settings for the one-touch setup buttons.
View or set the configuration for the built-in devices. This allows
you to detect or resolve system resource conflicts.
For your information
A Help button is available on the screen. For additional
information on each menu item, click on the help button.
Note:
Any buttons on the screen that
appear in gray are options that
cannot be set.
2
3
ThinkPad Features
1
4
7
5
Default
6
34
IBM ThinkPad 365X/365XD:
User's Guide
Cancel
Using the ThinkPad Features Program
1
One-touch setup buttons. Click on one of the buttons to set
the system configuration automatically to fit your office (
or your home (
2
), or to customize it (
).
Power mode buttons for battery operation. Click on one of
the buttons to set the power mode for battery operation to high
performance mode (
mode (
3
),
), automatic mode (
), or customized
).
Display device buttons. Click on one of the buttons to set the
display output type to the LCD (
both (
), external monitor (
), or
).
When making a presentation, you can click on the presentation
button (
) to disable any system timers, such as turning the
LCD off or entering a power-saving mode.
4
Help or save button. Click on the left button for help. Click on
the right button to save the changes made and to exit the
ThinkPad Features window.
5
View angle buttons. Click on the buttons representing the
front, rear, or Port Replicator view to display the devices and
connectors from that computer view.
6
Status bar. When you place the cursor on a device button, the
device name and its status appear in this status bar.
7
Device buttons. Click on the button of your choice from the
screen; then set the options for that device in the window that
appears.
When the device is enabled, the red indicator next to the icon is
lit. Otherwise, the device is disabled.
Click on the Cancel button to exit ThinkPad Features without saving
the changes. Click on the Default button to set the default values
for each option and cancel the changes you have made.
When you press the minimize button in the top-right corner ( ), the
following Tool Bar view is displayed.
ThinkPad Features
Chapter 3. Operating Your Computer
35
Using the ThinkPad Features Program
D O S
Notes:
1. You can use the PS2
commands from the command
prompt in OS/2.
2. This menu screen might look
different on your system.
Starting the Program in DOS
The ThinkPad Features program for DOS is a command line
interface, so you can specify features by entering appropriate
commands. Type PS2 ? at the DOS prompt to display the ThinkPad
Features online help.
C:\>PS2 ?
(C) Copyright IBM Corp. 1993,1995. All rights reserved.
US Government Users Restricted Rights - Use, duplication
or disclosure restricted by GSA ADP Schedule Contract
with IBM Corp.
Command Syntax:
PS2
[Parameter1] [Parameter2] [Parameter3]
Following are available [Parameter1].
For the complete command syntax, type ‘PS2 ? [Parameter]’.
1. Power Management related
You can select an item from the menu and follow the instructions on
the screen to set any of the features. For details on the commands,
see page 257.
You can create a batch file to set your unique operating
environment quickly and easily.
Note:
Refer to the manuals supplied with
the operating system for more
information on batch files.
The following example batch file allows you to set up an operational
environment that is suitable for traveling and can result in longer
battery operation time.
@Echo Off
Rem
Rem
36
IBM ThinkPad 365X/365XD:
User's Guide
SAMPLE: Set the parameters to provide maximum power utilization.
================================================================
PS2 PMode Auto
> Nul
PS2 LCd 3
> Nul
PS2 DISK 3
> Nul
PS2 POwer 5
> Nul
PS2 SPeed Fixed MIN
> Nul
PS2 STandby 3
> Nul
PS2 IR OFf
> Nul
PS2 CARD OFf
> Nul
PS2 SErial OFf
> Nul
Using Easy-Setup
Using Easy-Setup
The computer has a built-in system setup function called Easy-Setup.
Easy-Setup allows you to set the date and time, passwords, and the
startup sequence of the drives. It also shows hardware
configurations. Easy-Setup also runs the diagnostics.
Starting Easy-Setup
To start Easy-Setup:
Note:
You can change the screen color of
the Easy-Setup menu with the key
combinations of Ctrl+PgUp or
Ctrl+PgDn. Use Ctrl+Home to
restore the original screen color.
1 Turn off the computer.
2 Remove any diskette from the diskette drive.
3 Press and hold F1; then turn on the computer.
Hold F1 until
the Easy-Setup menu appears.
Easy-Setup
Config
Restart
Date/Time Password
BIOS part number,..Date
System-unit serial number
System board serial number
Microprocessor
Start up
Test
nnnnnnn 12/31/96
nnnnnnnnnnnnnnnn
nnnnnnnnnnn
Pentium( )Process
**
To select an item from the Easy-Setup menu, move the pointer with
a pointing device to the item and click on the item or use the
keyboard as follows:
Arrow keys (↑↓←→
): Highlight the item from the menu.
Spacebar: Selects the item.
Enter key: Enters the next menu, or saves the changes and exits
the menu.
Esc key: Returns to the previous menu, or cancels the changes.
Chapter 3. Operating Your Computer
37
Using Easy-Setup
Config contains the following:
Config
Memory
SystemBoard
Initialize
Exit
Memory shows the amount of installed memory and available
memory.
Memory
SystemBoard provides information about the installed system
board.
System
Board
Initialize sets all items that have been changed back to their default
values.
Initialize
After verifying your selections, click on OK or press Enter. To
cancel the selections, press Esc.
Date/Time is used to set the current date and time.
1996 .12.31
Date/Time
23:59:59
Select any field (Year, Month, Date, Hour, Minute, or Second) with
the Arrow keys or pointing device; then type or click on the
or
icon to change the setting. Clicking on the
or
icon
changes the setting more quickly.
38
IBM ThinkPad 365X/365XD:
User's Guide
Using Easy-Setup
After verifying the selection, click on OK or press Enter. To cancel
the setting, click on Cancel or press Esc.
Password is used to set the:
Password
Power-on password
Hard disk password
Supervisor password
Attention:
When you set the hard disk
password, do not forget your hard
disk password.
If you forget it, there is no way to
reset your password or recover
data from the hard disk. Neither
an IBM authorized reseller nor IBM
marketing representative can make
the hard disk drive usable.
Power-On
HDD
OK
Supervisor
Cancel
For more information about passwords, see Chapter 5.
Start up is used to change the startup sequence of your computer.
1
2
3
Start
1
2
3
4
Reset
FDD-1 HDD Network FDD-2
PCMCIA
For more information about the startup sequence, see “Using the
Selectable Drive-Startup Sequence” on page 41.
Chapter 3. Operating Your Computer
39
Using Easy-Setup
Select Test to test the computer hardware.
Test
Start
Restart
1
Note:
The FDD-1 icon represents the
diskette drive in the computer. The
FDD-2 icon represents the
externally attached diskette drive.
SystemBoard Memory Display
HDD FDD-1 PCMCIA
Parallel
2
Serial CDROM
Infrared
Audio
FDD-2
Exit
For more information, see “Testing the Computer” on page 193.
Click on Restart to restart the computer after you have made your
selections. Then press Enter or click on OK.
Restart
40
IBM ThinkPad 365X/365XD:
User's Guide
Using Easy-Setup
Using the Selectable Drive-Startup Sequence
Attention:
If you change your startup
sequence, you must be extremely
careful when you do write
operations (such as copying, saving,
or formatting). Your data or
programs can be overwritten if you
select the wrong drive.
Selectable drive startup (selectable boot) allows you to control the
startup sequence of the drives in your computer. The order in
which the computer searches the drives for your operating system is
the drive-startup sequence. If you are working with multiple
operating systems, you might want to change the drive-startup
sequence to load an operating system from the hard disk or a PC
Card without checking the diskette drive, or to do a remote program
load (RPL).
1
2
3
4
Reset
FDD-1 HDD Network FDD-2
PCMCIA
FDD-1 represents the first diskette drive found during system
startup. When no diskette drive is installed in the system, and if an
external diskette drive is attached, the external diskette drive will be
FDD-1.
Chapter 3. Operating Your Computer
41
Using Easy-Setup
Changing the Startup Sequence
To change the startup sequence:
To start Easy-Setup:
Page 37.
1 Start Easy-Setup and select the Start up icon.
2 Move the cursor to the Reset icon; then press the Spacebar.
The sequence is reset, and all available device icons appear
at the bottom of the screen. For the meaning of the icons,
see page 39.
Note:
You cannot set a hard disk drive
before a PCMCIA card in the
startup sequence.
3 Move the cursor to the icon for the first device in the startup
sequence; then press the Spacebar.
Repeat this step to set the other devices for the startup
sequence. You can set up to four devices.
4 To save the change, click on OK or press Enter.
Selecting the Network RPL Speed
When you use a remote program load through a token-ring card or
other network card, you can select the RPL speed.
1 Start Easy-Setup and select the Start up icon.
2 Move the cursor to the Network icon; then press the
Spacebar.
The window to select the token-ring RPL speed appears.
3 Move the cursor to the 4 icon or the 16 icon; then press the
Spacebar and press Enter.
If you are using another card, such as an Ethernet card, press
Esc to exit this window.
42
IBM ThinkPad 365X/365XD:
User's Guide
Using the Computer LCD or the External Monitor
Using the Computer LCD or the External Monitor
This section provides information about using the computer display
and an external monitor. It also provides tips to consider when using
DOS applications.
The LCD in your computer displays computer output with SVGA
(800-by-600 resolution). On some models, thin-film transistor (TFT)
technology is used, providing up to 65,536 colors. On some models,
dual-scan super twisted nematic (DSTN) technology is used,
providing up to 256 colors.
Display Output Type
To attach an external monitor:
Page 45.
When you attach an external monitor that supports higher resolution
than VGA mode, you can get a maximum of 1024-by-768 video
resolution.
To display your computer output on an external monitor, you need
to set the appropriate display output type (where to display the
computer output). You can select one of the following display
output types:
LCD (
): The computer output is displayed only on the
LCD of the computer.
CRT (
): The computer output is displayed only on the
attached external monitor.
If no external monitor is attached to the computer and the
display output type is set to CRT, the output is displayed on the
LCD.
Both (
): The computer output is displayed on both the
LCD and the external monitor.
You can select where to display computer output among the LCD,
the external monitor, or both by using the following commands:
Using the Fn key function: Press and hold the Fn key; then
press the F7 key. The output is displayed sequentially as
follows:
External
Display
Both
LCD
Chapter 3. Operating Your Computer
43
Using the Computer LCD or the External Monitor
O S/2
WIN
Using the ThinkPad Features program:
WIN
1. Start the ThinkPad Features program.
2. Click on the following icons from the tools bar:
– The CRT (
) icon to display information on the
external monitor.
– The LCD (
) icon to display information on the LCD.
– The Both (
) icon to display information on both the
LCD and external monitor.
Entering a PS2 command from the command prompt:
D O
S
– Enter PS2 SC BOTH to display information on both the LCD
and external monitor.
– Enter PS2 SC CRT to display information on the external
monitor.
– Enter PS2 SC LCD to display information on the LCD.
Points to Consider When Using the DOS Screen on the LCD
When you use a DOS application that supports only VGA mode
(640-by-480 resolution) with your computer, the screen image might
look slightly distorted or might appear smaller than the display size,
as shown:
640 x 480
This is to maintain compatibility with DOS applications.
44
IBM ThinkPad 365X/365XD:
User's Guide
Attaching a Monitor
PS2 command for screen
expansion:
To expand the screen image to the same size as the actual screen,
you can use the screen expansion function. The screen expansion
Page 260.
can be selected when you click on the Display button (
) in the
ThinkPad Features program. However, the image may look slightly
distorted.
ThinkPad Features program:
Page 33.
Note:
For the standard video model, when
display is set to 640-by-480
resolution and 65,536 colors, screen
expansion is not available.
Attaching a Monitor
Note:
When installing an operating
system, you must install the display
driver before you can use an
external monitor.
Your computer supports the following color depth and resolution on
an attached SVGA monitor:
Color
256 colors
Note:
To use 16,777,216 colors, set the
display output type to
CRT (
).
65,536 colors
16,777,216 colors
(See note.)
Resolution
640 by 480
800 by 600
1024 by 768
640 by 480
800 by 600
640 by 480
To install the display driver:
Chapter 7.
Chapter 3. Operating Your Computer
45
Attaching a Monitor
Attention:
When you select Both, do not
attach an external monitor that
supports only VGA mode
(640-by-480 resolution). Otherwise,
the external monitor screen will be
scrambled and the output will not be
displayed, or the screen might be
damaged.
To attach an external monitor:
1 Change the display output type to CRT (
Both (
) or
). (See “Display Output Type” on page 43.)
2 Set your monitor type and display device driver.
(See “Setting the Monitor Type and the Display Driver” on
page 46.)
3 Attach the external monitor to the computer.
(See
“Connecting an External Monitor to the Computer” on
page 47.)
Setting the Monitor Type and the Display Driver
Before attaching the external monitor to your computer, set the
appropriate monitor type and device driver type as follows:
O S / 2
W IN
WIN
Note:
Refer to the specifications for your
external monitor to determine its
supported resolutions and refresh
rates.
1 Start the ThinkPad Features program.
2 Click on the Display ( or
) icon.
3 Click on the Advanced... button.
You can select your display type from the monitor list, or click
on a new resolution or refresh rate.
4 Restart the computer to make the changes effective.
Important
When you are using OS/2 Warp, do not use System in the
System Setup folder to change the resolution or color depth. Use
the ThinkPad Features program to configure the display.
Hints and Tips
When you are using OS/2 or Windows, the virtual screen function
is available with the ThinkPad Features program. It is used to
display a part of the high-resolution screen image that is
produced by the computer. Other parts can be seen by moving
the screen with the TrackPoint III or other pointing device.
46
IBM ThinkPad 365X/365XD:
User's Guide
Attaching a Monitor
Connecting an External Monitor to the Computer
Attention:
Do not disconnect the external
monitor while the computer is in
suspend mode or hibernation mode.
If no external monitor is attached
when the computer resumes, the
LCD will remain blank and the
output will not be displayed. This
does not depend on the resolution
value.
To attach an external monitor to the computer:
1 Turn off the computer.
2 Attach the external monitor to the external monitor connector
(
) and then to the electrical outlet.
3 Turn on the external monitor and the computer.
Chapter 3. Operating Your Computer
47
Using SVGA Video Mode
Using SVGA Video Mode
Some IBM ThinkPad 365X/365XD models have an LCD screen that
supports an SVGA video mode with 800x600 resolution. You can
also display information in higher resolutions by attaching an external
monitor to your computer that supports higher resolutions.
When installing an operating system, you must install the display
driver supplied with the computer to use SVGA mode.
When using the high-resolution mode, select CRT in the Display
Menu of the Display Driver Control program.
The table shows the various display modes available with your
computer.
TFT
DSTN
(1 MB)
(1 MB)
Resolution and Color Depth (LCD only)
640x480 (full screen)
65,536
256
800x600 (full screen)
65,536
256
800x600 (virtual screen)
65,536
256
1024x768 (virtual
256
256
screen)
External Resolution and Color Depth (CRT only)
640x480
16,777,216
16,777,216
800x600
65,536
65,536
1024x768
256
256
Simultaneous Display (LCD / CRT)
640x480
65,536 (LCD) /
256 (LCD) / 256 (CRT)
65,536 (CRT)
800x600
65,536 / 65,536
256 / 256
1024x768
256 / 256
256 / 256
Display Modes
48
IBM ThinkPad 365X/365XD:
User's Guide
Using PC Cards
Using PC Cards
To insert a PC Card:
Page 115.
PC Card Standard:
Page 239.
Your computer has two slots that allow you to install 68-pin, 85.6
mm × 54.0 mm (credit-card-size) PC Cards. With a PC Card, you
can send and receive faxes, communicate via a network, or store
data.
The PC Card slots of the computer conform to the PCMCIA
Standard Release 2.1 that is defined as the hardware layer of the
PC Card standard. Your computer also comes with the following
basic set of drivers:
Socket Services
Card Services
PC Card Director and common enablers
PC Card Director:
Page 50.
The PC Card slots operate at 5V and support the following:
Type I, Type II, and Type III PC Cards.
16-bit PC Card (PCMCIA 2.0,2.1/ JEIDA 4.1,4.2)
Note that the PC Card slots do not support 8-bit or 16-bit slave
DMA PC Cards. Ask IBM or an IBM authorized dealer for more
information about the different types of PC Cards.
For more information about PC Cards, see Appendix B.
PC Card Limitations under Suspend Mode
Although some PC Cards can be inserted or removed without turning
off the computer (refer to the instructions that came with the PC
Card), you cannot remove or install PC Cards during suspend mode.
Chapter 3. Operating Your Computer
49
Using the PC Card Director Program
Using the PC Card Director Program
Note:
When installing an operating
system, install the PCMCIA device
driver with the PCMCIA Features
Diskette to use PC Card Director.
Your computer comes with an advanced IBM program for PCMCIA
called PC Card Director that makes using PC Cards with your
computer easier by:
Turning on and setting up a PC Card when you insert it in a PC
Card slot (common enablers).
To install the PCMCIA device driver:
Showing what type of PC Card is in your computer.
Notifying you with a message, sound, and icons whenever a
card is inserted or removed.
Chapter 7.
Allowing you to register an application program for a particular
PC Card and starting the program automatically when the card
is inserted.
Note:
The PCMCIA.CRD file does not
always list the latest PC Cards. If
your PC Card is not listed, try using
it with PC Card Director anyway.
Some PC Cards come with their own device driver that will set them
up just like PC Card Director does. However, if these cards are
supported by PC Card Director, you will not need their device
drivers. The PC Cards that PC Card Director supports are listed in
the PCMCIA.CRD file.
The Supported PC Cards icon:
To see the PCMCIA.CRD file, click on the Supported PC Cards
icon in the PC Card Director window. (The PCMCIA.CRD file can
be accessed from OS/2 Warp and Windows 3.11.)
Page 52.
If your PC Card is not supported by PC Card Director, you must
install the driver that came with your card. The card driver must be
compatible with the PCMCIA Card Services Standard Release 2.1.
Follow the instructions in your PC Card manual to install the driver.
50
IBM ThinkPad 365X/365XD:
User's Guide
Using the PC Card Director Program
O S/2
WIN
W IN
Starting PC Card Director for OS/2 or
Windows
To start PC Card Director, select the PC Card Director folder or
window; then select the PC Card Director icon.
Note:
The screens shown here might look
different depending on your
operating system.
For OS/2:
PC Card Director - Icon View
PC Card Director Mount Utility
Auto Configurator Utility Supported PC Cards
For Windows 3.11:
PC Card Director
PC Card
Director
Driver’s
Selector
ATA Mount
Utility
PC Card
Director
Launcher
Auto
Configurator
Utility
Supported PC
Cards
For Windows 95:
PC Card Director
PC Card Director
Chapter 3. Operating Your Computer
51
Using the PC Card Director Program
Note:
Supported icons and functions by
PC Card Director are different
depending on each operating
system.
The PC Card Director program includes the following:
PC Card Director
The main program in the PC Card Director folder or window.
PC Card Director
Mount Utility
This program controls the partitions in ATA PC Cards.
Mount Utility
Auto Configurator
Auto Configurator
Note:
Refer to the PCMCIA.CRD file for a
list of PC Cards that Auto
Configurator can enable.
The Auto Configurator has prepared a script file for configuring
each PC Card. These script files contain steps for enabling the
PC Card and the resource information for its I/O interrupt level
or memory. The Auto Configurator Utility is a utility that edits
these script files, transforms them into binary data, and records
them in Auto Configurator. Then Auto Configurator enables
each PC Card, based on the data in the card's script file.
For more information on how to use the Auto Configurator, see
Appendix B.
Supported PC Cards
Supported
PC Cards
This shows the PCMCIA.CRD file that lists all PC Cards
supported by PC Card Director.
Drivers Selector
Drivers Selector
This program lets you modify the CONFIG.SYS file when you
add or remove some PC Cards device drivers.
PC Card Director Launcher
PC Card Director
Launcher
52
IBM ThinkPad 365X/365XD:
You can register applications in this launcher (15 programs
maximum).
User's Guide
Using the PC Card Director Program
D O S
Starting PC Card Director for DOS
To start PC Card Director for DOS:
1 Go to the DOS command prompt.
C:\>
Note:
C:\THINKPAD is the directory where
PC Card Director is installed. If you
have installed it in a different
directory, type that directory name
instead.
2 Type C:\THINKPAD\EZPLAY at the command prompt; then press
Enter.
Chapter 3. Operating Your Computer
53
Communicating with the Infrared Port
Using the Infrared Communication Feature
To install the infrared device driver:
For OS/2: page 153.
Your computer is equipped with an infrared (IR) communication
feature that allows point-to-point communication with other ThinkPad
computers or systems equipped with an infrared port. The
computer has an infrared port on the rear of the computer.
For Windows: page 172.
The infrared feature is designed to be compatible with IrDA** 1.0
mode at a data transfer speed of up to 115 Kbps (Kilobits per
second). Your computer can communicate with a device that has a
compatible infrared port, such as another ThinkPad, a
Hewlett-Packard** 100LX**, 200LX**, or Omnibook** computer, or
other IrDA-compliant systems.
To enable or disable the infrared port, use the ThinkPad Features
program:
If you are using OS/2 or Windows, click on the
Infrared (
PS2 commands:
) icon in the ThinkPad Features window.
If you are using DOS, type PS2 ? IR at the command prompt;
then press Enter for more information.
Page 36.
Points to Consider for Infrared Communication
Consider the following points when communicating with the infrared
port:
When using the infrared port to communicate with the infrared
port of another computer, the two infrared ports must face each
other directly at a distance that allows for clear infrared
communication (less than 1 meter apart for IrDA-compliant
devices).
[Side view]
You need to run the same communication application on both
computers to communicate between your computer and another
54
IBM ThinkPad 365X/365XD:
User's Guide
Communicating with the Infrared Port
computer device. Refer to the application manuals for more
information.
Run only one communication application at a time that uses the
infrared port.
The communicating distance might need to be closer if:
– The other system is not the same model as your computer.
– There is interference from ambient light. It is recommended
that you do not use infrared communication in bright
sunshine. Light from some fluorescent lamps can also
interfere with infrared communication.
– The infrared port is not directly facing the other infrared port.
Cordless headphones that use infrared communication may
interfere with infrared communication. When listening through
the headphones and also operating the infrared port, you might
hear interference or noise. Also, the headphones might cause
the computer to lose communication with other devices.
Chapter 3. Operating Your Computer
55
Audio Features
Audio Features
Some models of the IBM ThinkPad 365X/365XD computer have
built-in audio features that let you record and playback sound from
various sources.
These features include:
A built-in ESS AudioDrive Sound Chip on the system board,
providing 16-bit stereo audio that supports OS/2 Warp, Microsoft
Windows 3.1, Windows 95, Microsoft Sound System, and most
programs that use the Sound Blaster/Sound Blaster Pro
standard.
The ability to perform real-time recording.
Scalable sampling rate (from 4 to 44.1 kHz) and compression
ratio that give complete control of record time to required storage
ratio.
Digitally controlled volume with muting.
Microphone line-in jack, line-in jack, and line-out/headphone jack
for maximum flexibility.
Built-in microphone and speaker to enhance portability.
To adjust the volume of your internal speaker, speakers attached to
the line-out port on the computer, or speakers attached to the
line-out port on the Port Replicator, use the volume control at the
lower-left corner of the LCD screen.
56
IBM ThinkPad 365X/365XD:
User's Guide
Using the Diskette Drive
Using the External Diskette Drive
365XD CD
IBM ThinkPad 365XD models come with a built-in CD-ROM drive
and an external diskette drive. This external diskette drive can be
connected and used with or without the optional Port Replicator
being present.
IBM ThinkPad 365X models (those without a built-in CD-ROM drive)
come with the diskette drive already installed internally.
To install the external diskette drive, simply plug the diskette drive
cable into the diskette drive port, located on the rear panel of the
computer. The ThinkPad automatically senses the presence of the
drive and configures itself accordingly.
Power to the diskette drive is provided through this connecting
cable. The diskette drive does not have its own internal power
source. It draws its power from the ThinkPad.
Chapter 3. Operating Your Computer
57
Using the CD-ROM Drive
Using the CD-ROM Drive
365XD CD
IBM ThinkPad 365XD models come with a built-in CD-ROM drive,
so you can use compact discs (CDs).
The following CDs are supported by the computer:
Attention:
Hold the CD by the edges. Do not
touch the surface of the CD.
Music CDs
Photo CDs
CD-ROM or CD-ROM XA discs
To use the CD-ROM drive, do the following:
1 Turn on the computer.
2 Push the CD-ROM eject button on the front of the computer;
then pull out the CD-ROM tray.
3 Carefully insert your CD-ROM onto the CD-ROM tray; then
push the tray into the computer until it fully closes.
4 The way you access the data on the CD-ROM depends on
what type of CD it is:
– Music CDs can be played using the CD Player application
program.
– Data CDs can be read just like normal disks.
– Photo CDs require specific application software.
58
IBM ThinkPad 365X/365XD:
User's Guide
Using the CD-ROM Drive
Handling Compact Discs
Compact discs are high-density media that must be handled with
care and kept clean to ensure that they remain readable. Keep in
mind the following to maintain reliability:
Attention:
Wiping the compact disc in a
circular direction can cause loss of
data.
1 Hold the compact disc by the edges.
Do not touch the
surface of the compact disc.
2 To remove dust or fingerprints, wipe the compact disc from
the center to the outside of the disc.
3 Do not write on the surface.
4 Do not store or place the compact disc in direct sunlight.
5 Do not use benzene, thinners, or other cleaners to clean the
compact disc. Use a CD-ROM cleaner kit.
6 Do not flex or bend the compact disc.
Chapter 3. Operating Your Computer
59
Using the CD-ROM Drive
60
IBM ThinkPad 365X/365XD:
User's Guide
Chapter 4. Using Battery Power
This section describes the battery-pack operations.
Charging the Battery Pack
. . . . . . . . . . . . . . . .
Charging with the AC Adapter . . . . . . . . . . . . .
Battery Pack Maintenance . . . . . . . . . . . . . . .
Replacing the Battery Pack . . . . . . . . . . . . . . . .
Monitoring the Battery-Power Status . . . . . . . . . . .
Using the Battery-Power Status Indicator . . . . . .
Low-Battery Condition . . . . . . . . . . . . . . . .
Using the Fuel-Gauge Program . . . . . . . . . . . .
Fuel-Gauge Program for OS/2 or Windows . . . .
Preserving Battery-Pack Life . . . . . . . . . . . . . . .
Maximizing Battery-Powered Operation . . . . . . . . .
. . . . . . . .
Using Advanced Power Management
Decreasing LCD Brightness . . . . . . . . . . . . . .
Using the Battery Power-Management Function . .
Standby Mode . . . . . . . . . . . . . . . . . . . .
Suspend Modes . . . . . . . . . . . . . . . . . . .
Points to Consider for Suspend Mode . . . . . . .
Hibernation Mode
. . . . . . . . . . . . . . . . . .
Creating the Hibernation File . . . . . . . . . . . .
Points to Consider When Using Hibernation Mode
Copyright IBM Corp. 1996
.
.
.
.
.
.
.
.
.
.
.
.
.
.
.
.
.
.
.
.
.
.
.
.
.
.
.
.
.
.
.
.
.
.
.
.
.
.
.
.
.
.
.
.
.
.
.
.
.
.
.
.
.
.
.
.
.
.
.
.
.
.
.
.
.
.
.
.
.
.
.
.
.
.
.
.
.
.
.
.
.
.
.
.
.
.
.
.
.
.
.
.
.
.
.
.
.
.
.
62
62
64
65
67
67
68
68
68
70
70
70
73
73
75
75
77
79
79
81
61
Charging the Battery Pack
Charging the Battery Pack
Note:
For more information on maintaining
your battery packs, see page 64.
The battery pack can be charged with the AC Adapter. You must
charge the battery pack in any of the following situations:
A new battery pack was purchased.
The battery status indicator (amber) is blinking, and the
computer beeps three times.
The battery status indicator (amber) blinks for less than 1
minute; and then the suspend mode indicator turns on.
Charging with the AC Adapter
Note:
Battery packs shipped from the
factory are in an almost-discharged
state, so you must charge them fully
before use.
The following table shows the approximate charging times for the
battery pack:
Conditions
Charging Time
Operational charging
1.5 hours
Power-off charging
1.2 hours
Suspend-mode charging
1.2 hours
If the battery pack is new or has not been used for a long period of
time, it does not reach full charge with only one charging. This is
normal. When used regularly (at least once per week) and properly
(as described on page 64), the battery pack will work its way back
up to full capacity within five or six charge and discharge cycles.
62
IBM ThinkPad 365X/365XD:
User's Guide
Charging the Battery Pack
The following procedure describes how to recharge the battery pack
with the AC Adapter when the computer is turned off.
1 Turn off the computer and open the keyboard.
2 Install the new or discharged battery pack into the computer.
3 Close the keyboard.
4 Connect the AC Adapter to the computer.
The system status indicators show the following:
Color
Meaning
On (green)
The battery pack is being charged.
Off
The battery pack is fully charged.
Chapter 4. Using Battery Power
63
Charging the Battery Pack
Battery Pack Maintenance
Many users are familiar with the phenomenon known as battery
memory, where after repeated partial charging and discharging the
battery pack appears to lose some or all of its original capacity. The
nickel/metal-hydride (NiMH) battery packs used by the ThinkPad are
less susceptible to memory development than are the more common
nickel/cadmium (NiCd) batteries. However, to ensure the longest
possible battery life, in terms of both length of use per charge and
number of charge and discharge cycles before wearing out, please
observe the following guidelines:
Battery packs shipped from the factory are in an almost
discharged state, so you must charge them fully before use.
When charging, always charge the battery pack fully. Even if
you only need to run on battery power for a fraction of the
battery's capacity, you should not try to give the battery a partial
charge.
Normal charging causes the battery pack to heat up slightly. Let
it cool for 15 minutes before you use it.
Do not recharge a partially drained battery; always use up the
battery pack completely before recharging.
Immediately after the battery pack has been drained of power, it
may be warm to the touch. This is normal. However, for longer
battery life, it should be set aside to cool for 15 minutes before
recharging.
64
IBM ThinkPad 365X/365XD:
User's Guide
Replacing the Battery Pack
Replacing the Battery Pack
When the AC Adapter is connected, you can replace the battery
pack whenever it is low in power. Without the AC Adapter, the
battery pack can be replaced when the computer power is off, or
when the computer is in hibernation mode. To replace the battery
pack during hibernation mode and without turning off the computer,
follow these instructions.
To create the hibernation file:
Page 79.
Important
If you are using PC Cards, either connect the AC Adapter or
stop the PC Card application and remove the PC Card
before doing the following.
Make sure you have created the hibernation file before
doing the following steps. Otherwise, you cannot enter
hibernation mode. (See page 79.)
1 Enter hibernation mode by pressing the Fn+F12 key
combination.
Make sure the power-on indicator is off before you open the
keyboard.
2 Open the LCD; then open the keyboard.
3 Locate the flexible tab at the rear end (nearest the LCD) of the
battery; pull the tab to raise the battery out of its slot.
Chapter 4. Using Battery Power
65
Replacing the Battery Pack
4 Lift the battery out of its slot and set it aside.
5 Place the fully charged battery into the slot with its forward end
(away from the pull-tab) pointed down at an angle. Then press
the rear end of the battery into place. The forward end of the
battery should fit under, and be held in place by, a ridge on the
inside of the ThinkPad case.
6 Close the keyboard.
7 Press the power switch.
The computer resumes normal operation from hibernation
mode.
66
IBM ThinkPad 365X/365XD:
User's Guide
Monitoring the Battery-Power Status
Monitoring the Battery-Power Status
The battery condition can be determined through the battery-power
status indicator and the Fuel-Gauge program.
Using the Battery-Power Status Indicator
The battery-power status indicator shows the current status of the
battery pack.
Observe the battery-power status indicator and compare it with the
following status list to determine the battery condition:
Status
Condition
Action Required
Green
Fully charged or partially
discharged.
Approximately 5 minutes of
power left. The amber
indicator blinks until power
fails or this low-battery
condition is remedied.
Continue your work.
Blinking
Amber
Off
The battery pack is not
installed, the computer is
turned off, or the computer
is in suspend mode.
Take either of the following
actions within 1 minute:
Connect the AC
Adapter to the
computer.
Replace the battery
pack with a fully
charged spare.
If suspend mode is caused
by a low-battery condition,
data in memory can be lost.
Do either of the following
immediately.
To continue your work
with the AC Adapter:
connect the AC Adapter
to the computer and
press the Fn key.
To continue your work
with a fully charged
battery pack: connect
the AC Adapter to the
computer, replace the
battery pack with a fully
charged one. Then
disconnect the AC
Adapter from the
computer.
Chapter 4. Using Battery Power
67
Using the Fuel-Gauge Program
Low-Battery Condition
Attention:
Do not leave the computer in this
condition for an extended period of
time. Data in memory will be lost.
For necessary actions:
When the battery pack is low in power, the battery-power status
indicator turns amber and begins to blink. At this point, you should
complete all disk access operations before the battery runs out of
power.
The battery pack needs to be charged immediately. If corrective
actions are not taken within 1 minute, the computer enters Suspend
mode.
Page 67.
Using the Fuel-Gauge Program
Note:
When installing an operating
system, install the ThinkPad
Features program by using the
Utility Diskette. Then access the
Fuel-Gauge program through the
ThinkPad Features program.
The Fuel-Gauge program is another way you can monitor the
battery-pack condition.
The Fuel-Gauge program appears on the screen with the following
information about the battery pack:
Power mode
Battery status
Suspend or hibernation options (for OS/2 and Windows)
To install the ThinkPad Features
program:
Refer to the Fuel-Gauge program instructions appropriate for your
operating system.
Page 33.
O S/2
WIN
WIN
Fuel-Gauge Program for OS/2 or Windows
When you click on the Fuel icon in the ThinkPad Features program,
the Fuel-Gauge program appears. You will see:
The icon for the currently used power mode.
A gauge showing the remaining battery capacity.
The suspend button to enter suspend mode.
The hibernation button to enter hibernation mode.
68
IBM ThinkPad 365X/365XD:
User's Guide
Using the Fuel-Gauge Program
The following shows how the Fuel-Gauge program appears with
different power sources and when it is minimized to an icon.
Maximized Fuel-Gauge program:
AC Adapter Connected
Charge-In-Progress
Battery Operation
Suspend Button
Fuel
Fuel
Hibernation Button
Current Power
Mode (AC/High)
Gauge
Minimized (to an icon) Fuel-Gauge program:
The power source (AC Adapter or battery) and power mode
alternately appear:
Power Source
Power Mode
AC AC Adapter
BT Battery
HI High Performance
AU Automatic
CU Customized
AC Adapter Connected
Battery Operation
Chapter 4. Using Battery Power
69
Maximizing Battery-Powered Operation
Preserving Battery-Pack Life
To preserve the life of the battery pack:
Attention:
Make sure the battery pack power is
completely used before you
recharge it. Recharging a battery
pack that is not completely
discharged can shorten battery life.
Do not charge the battery pack until all of its power is used.
Once you have started charging the battery pack, do not use it
until it is fully charged.
Discharge the battery pack occasionally by using the
Fuel-Gauge program.
Turn off the computer whenever it is not in use.
Maximizing Battery-Powered Operation
To save battery power:
Use Advanced Power Management (APM)
Decrease the LCD brightness
Use the Battery Power-Management function
Using Advanced Power Management
Note:
If you have purchased this computer
with a preinstalled operating system,
APM is already installed correctly.
The computer has power-management functions built in. No special
power-management drivers have to be installed before you use the
computer. However, the computer is able to conserve more power
when Advanced Power Management (APM) is used.
APM allows you to reduce power consumption when your
applications and devices are idle. Each operating system comes
with its own APM.
O
70
IBM ThinkPad 365X/365XD:
S / 2
If you are using OS/2, APM is automatically installed when the
installation program detects that the power-management function is
installed on your computer.
User's Guide
Maximizing Battery-Powered Operation
D O S
If you are using DOS, APM is automatically installed when the
installation program detects that the power-management function is
installed on your computer. To verify that the computer has APM
installed correctly, type power at the command prompt and press
Enter. If a screen similar to the following appears, APM is
successfully installed.
Power Management Status
----------------------Setting = ADV: REG
CPU: idle 32% of time.
AC Line Status : OFFLINE
Battery status : High
If not, add the following line to your CONFIG.SYS file, using a text
editor such as the DOS Editor.
DEVICE=C:\DOS\POWER.EXE
W
I N
If you are using Windows, follow these instructions to check and
install APM for Windows:
1. Start the system. Make sure that the current directory is
Windows (usually C:\WINDOWS>).
2. Type SETUP at the command prompt and press Enter. The
following screen appears.
Windows Setup
===============
If your computer or network appears on the Hardware Compatibility List
with an asterisk next to it, press F1 before continuing.
System Information
Computer:
MS-DOS
System
Display:
Cyber932
8 ×6
256 small font
Mouse:
Microsoft, or IBM PS/2
Chapter 4. Using Battery Power
71
Maximizing Battery-Powered Operation
Note:
If “MS-DOS System with APM”
appears for the item “Computer:”,
APM is already installed. Press F3
to exit the setup.
3. Using the Arrow keys (↑ , ↓ ), position the highlighted cursor on
MS-DOS System and press Enter.
4. Position the highlighted cursor over MS-DOS System with APM
and press Enter.
5. Verify that the item Computer has changed to
MS-DOS System with APM on the screen. If not, return to
step 3 on page 72.
Windows Setup
===============
If your computer or network appears on the Hardware Compatibility List
with an asterisk next to it, press F1 before continuing.
System Information
Computer:
MS-DOS System with APM
Display:
Cyber932 8 ×6
256 small font
Mouse:
Microsoft, or IBM PS/2
6. Press Enter to install APM.
7. Restart the system to make APM effective.
72
IBM ThinkPad 365X/365XD:
User's Guide
Using Power Management
Decreasing LCD Brightness
Adjust the brightness control on the LCD to the lowest level possible
that allows you to comfortably view the screen. This is an effective
way of conserving battery power.
Using the Battery Power-Management Function
Note:
When you install an operating
system, you must install the
ThinkPad Features program using
the Utility Diskette.
To install the ThinkPad Features
program:
Chapter 7.
Your computer has the following built-in battery power-saving
functions to save power when you use the battery pack or AC
Adapter:
Operation modes. The operation modes control the processor
speed or set timers for saving power. For more information
about the operation modes, see 2 on page 35.
Power-saving modes. The power-saving modes stop all tasks
when the computer is not used for a specified time.
When resuming normal operation from one of the modes, use
the resume function to return to where you were when you
entered that mode. Because the operating system is already
loaded, the resume function is faster than turning on the power.
The following are the three power-saving modes:
Standby mode
You can enter standby mode for short idle times,
such as when you are taking a short break from
work.
Suspend mode You can enter suspend mode for somewhat longer
times when you are away from your computer.
Hibernation mode
You can enter hibernation mode when you leave
your office for the day.
It takes more time to return to normal operation from suspend mode
than to return from standby mode, but the computer does not use as
much power.
Chapter 4. Using Battery Power
73
Using Power Management
The following figure shows the operations required when the
computer moves from a power-off condition to operation mode, and
vice versa. The battery shows the amount of battery power used in
each stage.
Operation Mode
Fn+F11
High Performance
Automatic
Customized
Fn+F3
Timer*
Power
Shutdown
Switch
Power Switch
External Keyboard
Ring Indicator*
Fn key
Timer*
Open LCD
Close Keyboard
Any key
Standby Mode
Fn+F4
Timer*
Low Battery*
Power
Switch
Fn+F12
Low Battery*
Timer*
Power Switch*
Open Keyboard
Fn+F4
Timer*
Low Battery*
Close LCD
Close LCD
Suspend Mode
Quick Suspend
RediSafe Suspend
Timer*
Hibernation Mode
Power-off
*
These options are set using the ThinkPad Features program.
74
IBM ThinkPad 365X/365XD:
User's Guide
Fn+F12
Low Battery*
Timer*
Open Keyboard
0%
Using Power Management
Standby Mode
In standby mode, the hard disk drive stops and the LCD turns off.
The computer immediately resumes normal operation when you
press any key or use any pointing device. Also, if a power-saving
monitor (Energy Star monitor) is in use when the computer enters
standby mode, the computer activates the monitor's low-power
mode.
Suspend Modes
The computer provides the following two types of suspend modes for
you to save power:
Suspend mode
RediSafe suspend mode
The following indicator lamps (visible when the LCD is closed)
change status when using suspend mode or RediSafe suspend
mode:
Indicator Lamps
Current Status
Suspend Mode
In suspend mode
Entering or resuming
suspend
Normal operation
Power-On
Green
Blinking green
Off
Off
Off
Green
Suspend mode. In suspend mode, all tasks are stopped and
stored in memory to save power. When the computer resumes
normal operation, the tasks are automatically restored.
RediSafe suspend mode. In this mode, all tasks are stopped, and
memory data and the status of the computer are stored on the hard
disk drive. This prevents accidental loss of data during suspend
mode. Resuming normal operation is faster in RediSafe suspend
mode than it is in hibernation mode; the computer resumes normal
operation when you press the Fn key while in RediSafe suspend
mode.
If all battery power is used and the computer turns off during
RediSafe suspend mode, install a fully charged battery pack or
connect the AC Adapter; then press the power switch to resume
operation. All tasks are restored. Create the hibernation file before
using this mode. (See “Creating the Hibernation File” on page 79.)
Chapter 4. Using Battery Power
75
Using Power Management
To enable RediSafe suspend mode, do the following:
O S / 2
WIN
WIN
If you are using OS/2 or Windows:
1. Start the ThinkPad Features program.
2. Click on the Battery (
) icon; then click on the
Suspend/Hibernation/Resume options (
Note:
You can create a hibernation file on
the hard disk drive in the main hard
disk drive bay.
) icon.
3. If a hibernation file has not been created, click on Enable
hibernation and create the file on the hard disk drive.
4. Click on the check box next to RediSafe suspend. (A mark
appears in the check box when RediSafe suspend is selected.)
5. Click on the OK button.
D O S
Note:
You can create a hibernation file on
the hard disk drive in the main hard
disk drive bay.
76
IBM ThinkPad 365X/365XD:
If you are using DOS:
1. Type PS2 HFILE C at the command prompt; then press Enter to
create the hibernation file on drive C (type the drive letter of
your choice).
2. Type PS2 SA E at the command prompt; then press Enter to
enable suspend mode.
User's Guide
Using Power Management
Points to Consider for Suspend Mode
Consider the following before using suspend mode:
The computer can enter suspend mode when used with the
following operating systems:
–
–
–
–
DOS Version 7.0
OS/2 Warp Version 3
Microsoft Windows 3.11 with DOS Version 7.0
Microsoft Windows 95
Important
When you use Windows Version 3.11, ensure that Advanced
Power Management (APM) is installed according to the
instructions in “Installing Windows 3.11” on page 165.
Attached devices, such as a printer or serial device, stop running
when the computer enters suspend mode. When you resume
normal operation, the output might differ from what you expect,
because the device might be reset or lose its configuration
settings.
Sometimes you might want to use the computer with the LCD
closed—for example, when an external monitor and keyboard are
used. In such a case, turn on the computer with the LCD closed
or set the computer to not enter suspend mode when the LCD is
closed using the ThinkPad Features program.
When a power-on password is set and the computer resumes
normal operation by the ThinkPad Features timer or an incoming
call, only a blank screen is displayed. To display a power-on
password prompt, press any key or move your pointing device.
Standby mode:
Page 75.
When the computer is powered with ac power and is using one
of the following IBM PC Cards, it enters standby mode:
–
–
–
–
IBM
IBM
IBM
IBM
3270 Emulation Credit Card Adapter
Token-Ring 16/4 Credit Card Adapter
Credit Card Adapter for Ethernet
5250 Emulation Credit Card Adapter
When other PC Cards are used and the computer enters
suspend mode, all application programs stop. Communication
also stops for communication PC Cards not listed above. For
some PC Cards, power to the PC Cards might also turn off.
Chapter 4. Using Battery Power
77
Using Power Management
When the computer is powered with battery power, the
computer turns power off to the PC Card, and communication
stops for communication PC Cards, so the duration of suspend
mode is longer.
If communication for a PC Card is not reestablished after
resuming normal operation, remove and then reinstall the PC
Card before restarting the system or application program. For
other kinds of PC Cards, if the PC Card or computer does not
operate, restart the application or computer.
Note:
You must set the Resume on
incoming call option in the
ThinkPad Features program so the
computer automatically resumes
normal operation.
When the computer is using one of the following IBM modem
cards and detects an incoming call while in suspend mode, the
computer automatically resumes normal operation:
–
–
–
–
–
–
–
–
For OS/2 or Windows:
1. Click on the
Battery (
) icon.
2. Click on the
Suspend/Hibernation/Resume
option (
) icon; then
select the Resume on
incoming call option.
For DOS: Enter PS2 RI E
IBM
IBM
IBM
IBM
IBM
IBM
IBM
IBM
28.8/14.4 Data/FAX Modem
PCMCIA Data/FAX Modem
High Speed PCMCIA Data/FAX Modem
Microelectronics 2.4/9.6 Data/FAX Modem
Microelectronics 14.4/14.4 Data/FAX Modem
Wireless Modem for ARDIS
Wireless Modem for Mobitex
Wireless Modem for Cellular/CDPD
While a communication link is active, the computer does not
enter suspend mode.
365XD CD When you use Windows 95, the Windows 95 generic
CD-ROM driver accesses the internal CD-ROM drive every 3
seconds to see if a disc is inserted in the CD-ROM drive. This
prevents a ThinkPad 365XD from entering suspend mode by
the timer suspend function even if there is no actual system
activity for a certain period.
To stop this auto-detect function and enable the timer suspend
function, do the following:
1.
2.
3.
4.
5.
6.
7.
Open My Computer.
Open Control Panel; then open System.
Click on the Device Manager tab.
Click on the + mark of CD-ROM.
Double-click on TEAC** CD-40E.
Click on the Setting tab.
Remove the check mark from Auto insertion notification.
Windows 95 will no longer detect CD-ROM insertion
automatically.
78
IBM ThinkPad 365X/365XD:
User's Guide
Using Power Management
Notes:
1. Before using hibernation mode,
you must create a hibernation
file.
2. Using an expansion unit or a
particular PC Card can disable
the hibernation mode.
3. With a base memory of 8MB, it
takes approximately 10 seconds
to enter hibernation mode and
18 seconds to resume normal
operation. (The time to enter or
exit hibernation mode depends
on the computer memory size.)
Hibernation Mode
In hibernation mode, all tasks are stopped and memory data and
the current status of the computer are stored on the hard disk drive;
then power is turned off. No battery power is used. When power is
turned on again, the computer automatically restores the tasks and
resumes normal operation. When the computer enters hibernation
mode, you hear one short beep. A graphical message appears and
the suspend mode indicator lamp blinks; then a short beep sounds
again to inform you that the computer has entered hibernation
mode.
Creating the Hibernation File
Attention:
The hibernation file must not be
created in a compressed data area
of the hard disk.
Note:
You can create a hibernation file on
the hard disk drive in the main hard
disk drive bay.
When installing an operating system or installing additional
computer memory, you must create a hibernation file on the hard
disk drive to use the hibernation mode. (You only need to create
the hibernation file once after installing an operating system or
additional memory.)
The size of the hibernation file will be greater than total memory.
For example, if base memory is 8MB and you have installed an
optional 8MB memory module (DIMM), the hibernation file is 17MB:
(8MB + 8MB) + 1MB = 17MB
The following describes how to create a hibernation file for your
operating system.
Chapter 4. Using Battery Power
79
Using Power Management
O S/2
WIN
WIN
If you are using OS/2 or Windows:
1 Turn on the computer and start the ThinkPad Features
program.
2 Click on the Battery ( ) icon.
3 Click on the Suspend/Hibernation/Resume options (
icon.
4 Click on the Enable Hibernation button in the menu.
5 Make sure the hard disk drive in the computer is selected;
then press the OK button to create the hibernation file.
The computer can now enter hibernation mode.
D O S
If you are using DOS:
Type PS2 HFILE C at the command prompt; then press Enter.
The hibernation file is created on drive C.
80
IBM ThinkPad 365X/365XD:
User's Guide
)
Using Power Management
Points to Consider When Using Hibernation Mode
Consider the following before using hibernation mode:
Do not run any tasks while the hibernation file is being created.
Note:
You can create a hibernation file on
the hard disk drive in the main hard
disk drive bay.
Create the hibernation file only on the hard disk drive installed
in the computer. The hibernation file is hidden and cannot be
accessed.
The computer uses battery power to enter hibernation mode.
Therefore, it reserves some battery power when it is set to enter
hibernation mode when a low-battery condition occurs. This
can cause the battery operating time to be reduced.
365XD CD When you enter hibernation mode while playing music
CDs or multisession photo CDs, you will not return to where you
left off after resuming normal operation.
Note:
If the communication links are still
not reestablished, remove and then
reinstall the PC Card before
restarting the system or application
program.
When the computer is powered with battery power, the
computer turns power off to the PC Card when entering
hibernation mode. When resuming normal operation, if the PC
Card or computer does not operate, restart the application or
computer.
When the computer is powered with ac power and is using one
of the following IBM PC Cards, it does not enter hibernation
mode:
–
–
–
–
–
–
–
–
–
–
–
–
IBM
IBM
IBM
IBM
IBM
IBM
IBM
IBM
IBM
IBM
IBM
IBM
28.8/14.4 Data/FAX Modem
PCMCIA Data/FAX Modem
High Speed PCMCIA Data/FAX Modem
3270 Emulation Credit Card Adapter
Token-Ring 16/4 Credit Card Adapter
Credit Card Adapter for Ethernet
5250 Emulation Credit Card Adapter
Microelectronics 2.4/9.6 Data/FAX Modem
Microelectronics 14.4/14.4 Data/FAX Modem
Wireless Modem for ARDIS
Wireless Modem for Mobitex
Wireless Modem for Cellular/CDPD
This prevents possible problems from occurring with
communication application programs after the computer returns
to normal operation.
Chapter 4. Using Battery Power
81
Using Power Management
The figure shows approximately how much power is normally
required for each computer feature, and how much is required when
the feature is controlled by the battery power-management function.
Legend:
100%
Required Power in
No Power-Saving Mode
Power Saved
Amount of Required Power
LCD Off
Processor
Maximum
Brightness at Minimum
Medium
Slow
Minimum
External Serial Off
Power-Saving Mode
ESS AudioDrive
Off
Suspend Mode
Standby Mode
82
IBM ThinkPad 365X/365XD:
User's Guide
Hard Disk Off
Infrared Off
Chapter 5. Protecting Your Computer
This chapter provides information about how to protect your
computer and its internal devices.
Using Passwords . . . . . . . . . . . . .
Power-On Password . . . . . . . . .
Setting a Power-On Password . .
Entering a Power-On Password .
Changing a Power-On Password
Removing a Power-On Password
Hard Disk Password . . . . . . . . .
Setting a Hard Disk Password . .
Entering a Hard Disk Password .
Changing a Hard Disk Password
Removing a Hard Disk Password
Supervisor Password . . . . . . . . .
Setting a Supervisor Password . .
Entering a Supervisor Password .
Changing a Supervisor Password
Removing a Supervisor Password
Using the Personalization Feature . . .
Entering the Personal Information . .
Deleting a Personalized Screen . . .
Using Locks . . . . . . . . . . . . . . . .
Using Locking Devices . . . . . . . .
Affixing a Nameplate . . . . . . . . . . .
Copyright IBM Corp. 1996
.
.
.
.
.
.
.
.
.
.
.
.
.
.
.
.
.
.
.
.
.
.
.
.
.
.
.
.
.
.
.
.
.
.
.
.
.
.
.
.
.
.
.
.
.
.
.
.
.
.
.
.
.
.
.
.
.
.
.
.
.
.
.
.
.
.
.
.
.
.
.
.
.
.
.
.
.
.
.
.
.
.
.
.
.
.
.
.
.
.
.
.
.
.
.
.
.
.
.
.
.
.
.
.
.
.
.
.
.
.
.
.
.
.
.
.
.
.
.
.
.
.
.
.
.
.
.
.
.
.
.
.
.
.
.
.
.
.
.
.
.
.
.
.
.
.
.
.
.
.
.
.
.
.
.
.
.
.
.
.
.
.
.
.
.
.
.
.
.
.
.
.
.
.
.
.
.
.
.
.
.
.
.
.
.
.
.
.
.
.
.
.
.
.
.
.
.
.
.
.
.
.
.
.
.
.
.
.
.
.
.
.
.
.
.
.
.
.
.
.
.
.
.
.
.
.
.
.
.
.
.
.
.
.
.
.
.
.
.
.
.
.
.
.
.
.
.
.
.
.
.
.
.
.
.
.
.
.
.
.
.
.
.
.
.
.
.
.
.
.
.
.
.
.
.
.
.
.
.
.
.
.
.
.
.
.
.
.
.
.
.
.
.
.
.
.
.
.
.
.
.
.
.
.
.
.
.
.
84
84
85
86
87
88
89
90
91
92
93
94
94
95
96
97
98
99
101
102
102
103
83
Using Passwords
Using Passwords
There are three types of passwords you can use to protect your
computer and the removable hard disk drive:
The power-on password protects your computer from being used
by unauthorized persons.
The hard disk password protects the data on your removable
hard disk drive from being accessed by unauthorized persons.
The supervisor password protects the system information in
Easy-Setup from being modified and your removable hard disk
drive from being used by unauthorized persons.
Hints and Tips
You can display your personal information, such as your name or
address, on the password prompt screen. For details, see page
98.
Power-On Password
The power-on password helps protect your computer from being
used by unauthorized persons. If a power-on password is set, the
password prompt ( ) appears on the screen whenever you turn on
the computer and reminds you to enter the password.
84
IBM ThinkPad 365X/365XD:
User's Guide
Using Passwords
Setting a Power-On Password
To set a power-on password:
Note:
If Initialize in the Config menu,
Password, or Start up cannot be
selected when using Easy-Setup, a
supervisor password is set. You
must enter the supervisor password
instead of the power-on password to
use all Easy-Setup functions.
1 Start Easy-Setup and select the Password icon.
Note:
When you type a wrong key, use
the Backspace key to erase it and
then type the correct key.
3 Type your desired power-on password; then press Enter.
To start Easy-Setup, press and hold F1 and turn on the
computer.
2 Select the Power-On icon (
).
You can use any combination of up to 7 characters. Use a
combination of any letters or numbers (A to Z, 0 to 9) in
uppercase (A) or lowercase (a). Uppercase and lowercase
letters (for example, A and a) are treated the same.
4 Type your power-on password again to verify it; then press
Enter.
Do Not Forget Your Power-On Password!
If you forget your power-on password, you cannot reset it. You
have to take the computer to an IBM authorized reseller or IBM
marketing representative to have the password canceled. Proof
of purchase is required, and an additional charge might be
required for the service.
Once you set the password, you cannot change or remove it in
Easy-Setup; you must change or remove a password at the
password prompt screen that appears when you turn on the
computer. See “Changing a Power-On Password” on page 87 or
“Removing a Power-On Password” on page 88.
Chapter 5. Protecting Your Computer
85
Using Passwords
Entering a Power-On Password
Notes:
If the return to normal operation
is caused by a preset timer or
an incoming call through the
modem, the password prompt
does not appear. To display a
power-on password prompt,
press any key or move your
pointing device.
To resume from standby mode
when the computer is attached
to the Dock I or Dock II, you
might need to enter the
power-on password.
If a power-on password is set, the password prompt reminds you to
enter the password when:
Turning on the computer.
Returning to normal operation from suspend mode.
When the password prompt appears at the top left corner on the
screen, do the following:
1 Type your power-on password.
Each time you press a key, the symbol
appears.
When typing your password, release each key quickly. If
you hold a key down too long, the same letter can be
entered repeatedly.
2 Press the Enter key.
When the password is entered correctly, OK appears and
the computer starts normal operation.
When you enter the password incorrectly, X appears.
Enter the correct password.
If you fail to enter the correct password after three tries,
you must turn the computer off, wait at least 5 seconds,
and turn it on to try again.
86
IBM ThinkPad 365X/365XD:
User's Guide
Using Passwords
Changing a Power-On Password
You must change your power-on password at the password prompt
screen that appears when you turn on the computer. You cannot
change it after normal operation is resumed. To change a power-on
password:
Important
Do not press Enter until you have finished all the steps to
change the power-on password.
1 Turn off the computer and wait at least 5 seconds; then turn it
on.
2 When the password prompt (
) appears, type your current
power-on password; then press the Spacebar.
3 Type the new password; then press the Spacebar.
Use no more than 7 characters.
4 Type the new password again to verify it; then press Enter.
All the steps can be summarized as follows:
Current(space)New(space)New(Enter)
The new password will be available when you turn on the computer
the next time.
Do Not Forget Your Power-On Password!
If you forget your power-on password, you cannot reset it. You
have to take the computer to an IBM authorized reseller or IBM
marketing representative to have the password canceled. Proof
of purchase is required, and an additional charge might be
required for the service.
Chapter 5. Protecting Your Computer
87
Using Passwords
Removing a Power-On Password
You must remove your power-on password at the password prompt
that appears when you turn on the computer. You cannot remove it
after normal operation is resumed. To remove a power-on
password:
1 Turn off the computer and wait at least 5 seconds; then turn it
on.
2 When the password prompt (
) appears, type your current
password; then press the Spacebar.
3 Press Enter.
The power-on password is removed.
All the steps can be summarized as follows:
Current(space)(Enter)
88
IBM ThinkPad 365X/365XD:
User's Guide
Using Passwords
Hard Disk Password
The hard disk password helps you protect the information stored on
your removable hard disk drive. Even if your hard disk was
removed from the computer, the information stored in your hard disk
cannot be accessed without the hard disk password.
Note:
The hard disk password is stored on
the hard disk drive when you set the
hard disk password, and the
power-on password is stored in the
nonvolatile memory of the computer.
When you turn on the computer, the hard disk password prompt
appears on the screen and reminds you to enter your password.
When a hard disk password is set, a preset timeout or an incoming
call will not activate the resume function.
To use the resume function with a hard disk password, set the
same password for both the power-on password and the hard disk
password.
Note
Using a Hard Disk Password with a Power-On Password:
You can use the hard disk password with the power-on
password at the same time. When you turn on the computer,
the power-on password prompt appears first, and then the hard
disk password prompt appears on the screen. Enter the correct
passwords.
When you set the same hard disk password as the power-on
password, only the power-on password prompt appears on the
screen. Enter the correct password. The hard disk password
screen does not appear.
Chapter 5. Protecting Your Computer
89
Using Passwords
Setting a Hard Disk Password
Note:
If Initialize in the Config menu,
Password, or Start up functions
cannot be selected when using
Easy-Setup, the supervisor
password is set. You must enter
the supervisor password instead of
the power-on password to use all
Easy-Setup functions.
Note:
When you type a wrong key, use
the Backspace key to erase it, and
then type the correct key.
To set a hard disk password:
1 Start Easy-Setup; then select the Password icon.
To start Easy-Setup, press and hold F1 and turn on the
computer.
2 Select HDD (
).
3 Type your desired hard disk password; then press Enter.
You can use any combination of up to 7 characters. Use a
combination of any letters or numbers (A to Z, 0 to 9) in
uppercase (A) or lowercase (a). Uppercase and lowercase
letters (for example, A and a) are treated the same.
4 Type your hard disk password again to verify it; then press
Enter.
Do Not Forget Your Hard Disk Password!
Note the password and keep it in a safe place.
If you forget your hard disk password, there is no way to reset
your password or recover data from the hard disk. Neither
an IBM authorized reseller nor IBM marketing representative can
make the hard disk drive usable.
Once you set the password, you cannot change or remove it in
Easy-Setup; you must change or remove a password at the
password prompt screen that appears when you turn on the
computer. See “Changing a Hard Disk Password” on page 92 or
“Removing a Hard Disk Password” on page 93.
90
IBM ThinkPad 365X/365XD:
User's Guide
Using Passwords
Entering a Hard Disk Password
If a hard disk password is set, the hard disk password prompt
appears when:
You turn on the computer.
When the computer returns to normal operation from suspend or
hibernation mode.
When the password prompt appears at the top left corner on the
screen:
Note:
Do not press the Spacebar after
you enter the password; this action
removes the password.
1 Type the hard disk password.
Each time you press a key, the symbol
appears.
When typing your password, release each key quickly. If
you hold a key down too long, the same letter can be
entered repeatedly.
2 Press Enter.
When the password is entered correctly, OK appears and
the computer starts normal operation.
When you enter the password incorrectly, X appears.
Enter the correct password.
If you fail to enter the correct password after three tries,
you must turn the computer off, wait at least 5 seconds,
and turn it on to try again.
Chapter 5. Protecting Your Computer
91
Using Passwords
Changing a Hard Disk Password
The procedure to change a hard disk password depends on whether
it is set to the same password as the power-on password.
When the hard disk password is set the same as the power-on
password:
1 Remove the passwords by following the steps in “Removing a
Power-On Password” on page 88.
This operation removes both the hard disk password and the
power-on password.
2 In Easy-Setup, set a new hard disk password.
See the steps
on page 90.
3 If you need a power-on password, set it in Easy-Setup.
When the hard disk password and the power-on password are
different, or the power-on password has not been set:
1 Turn off the computer and wait at least 5 seconds; then turn it
on.
2 If you have set a power-on password, type it; then press
Enter.
3 When the hard disk password prompt (
) appears, type your
current hard disk password; then press the Spacebar.
4 Type the new password; then press the Spacebar.
Use no more than 7 characters.
5 Type the new password again to verify it; then press Enter.
All the steps can be summarized as follows:
Current(space)New(space)New(Enter)
92
IBM ThinkPad 365X/365XD:
User's Guide
Using Passwords
Do Not Forget Your Hard Disk Password!
Note the password and keep it in a safe place.
If you forget your hard disk password, there is no way to reset
your password or recover data in the hard disk drive.
Neither an IBM authorized reseller nor IBM marketing
representative can make the hard disk drive usable.
Removing a Hard Disk Password
The procedure to remove a hard disk password depends on whether
or not it is set to the same password as the power-on password.
When the hard disk password is set the same as the power-on
password:
1 Remove the password by following the steps in “Removing a
Power-On Password” on page 88.
This operation removes both the hard disk password and the
power-on password.
2 If you need a power-on password, reset it in Easy-Setup.
When the hard disk password and the power-on password are
different, or a power-on password has not been set:
1 Turn off the computer and wait at least 5 seconds; then turn it
on.
2 If you have set the power-on password, type it; then press
Enter.
3 When the hard disk password prompt (
) appears, type your
current password; then press the Spacebar.
4 Press Enter.
These steps can be summarized as follows:
Current(space)(Enter)
Chapter 5. Protecting Your Computer
93
Using Passwords
Supervisor Password
The supervisor password helps you protect classified information. A
supervisor password:
Secures the system information stored in Easy-Setup.
Prohibits modification to the hardware.
Stops the computer after a POST error to restrict access to the
system information.
Note:
The supervisor password has
priority over the power-on password.
You can start the computer with the
supervisor password even if you do
not know the power-on password.
Overrides the power-on password. (The supervisor password
has priority over the power-on password.)
If a supervisor password is set, you are prompted with a power-on
icon ( ) to enter the supervisor password when entering the
Easy-Setup program and when a POST error occurs. You can start
all normal operations for the computer except Easy-Setup without
the supervisor password.
Using Both Supervisor and Hard Disk Passwords
When a supervisor password is set, the same password is
automatically set for the hard disk password.
When you change or remove the supervisor password, the hard
disk password also is changed or removed.
Setting a Supervisor Password
To set a supervisor password:
1 Start Easy-Setup; then select the Password icon.
To start Easy-Setup, press and hold F1 and turn on the
computer.
2 Select the Supervisor icon ( ).
3 Type your desired supervisor password; then press Enter.
You can use any combination of up to 7 characters. Use a
combination of any letters or numbers (A to Z, 0 to 9) in
uppercase (A) or lowercase (a). Uppercase and lowercase
letters (for example, A and a) are treated the same.
94
IBM ThinkPad 365X/365XD:
User's Guide
Using Passwords
4 Type your supervisor password again to verify it; then press
Enter.
Do Not Forget Your Supervisor Password!
Note the password and keep it in a safe place.
If you forget your supervisor password, there is no way to reset
your password or recover data from the hard disk. You have
to take the computer to an IBM authorized reseller or IBM
marketing representative to have the system board replaced.
Proof of purchase is required, and an additional charge might be
required for the service. Neither an IBM authorized reseller nor
IBM marketing representative can make the hard disk drive
usable.
Entering a Supervisor Password
To enter your supervisor password:
1 Type your supervisor password.
Each time you press a key, the symbol
appears.
When typing your password, release each key quickly. If
you hold a key down too long, the same letter can be
entered repeatedly.
2 Press Enter.
When the password is entered correctly, OK appears.
When you enter the password incorrectly, X appears.
Enter the correct password.
If you fail to enter the correct password after three tries,
you must turn the computer off, wait at least 5 seconds,
and turn it on to try again.
Chapter 5. Protecting Your Computer
95
Using Passwords
Changing a Supervisor Password
To change your supervisor password:
1 Turn off the computer and wait at least 5 seconds; then turn it
on.
2 Start Easy-Setup.
To start Easy-Setup, press and hold F1 and turn on the
computer.
3 Type your current supervisor password at the power-on
prompt (
); then press Enter.
4 Select the Password icon from the Easy-Setup menu.
5 Select the Supervisor icon; then type your current supervisor
password and press the Spacebar.
A window appears so you can enter a new password.
6 Type the new password; then press Enter.
7 Type the new password again for verification; then press
Enter.
Do Not Forget Your Supervisor Password!
Note the password and keep it in a safe place.
If you forget your supervisor password, you have to take the
computer to an IBM authorized reseller or IBM marketing
representative to have the system board replaced. Proof of
purchase is required, and an additional charge might be required
for the service.
If you forget your supervisor password, there is no way to reset
your password or recover data from the hard disk. Neither
an IBM authorized reseller nor IBM marketing representative can
make the hard disk drive usable.
96
IBM ThinkPad 365X/365XD:
User's Guide
Using Passwords
Removing a Supervisor Password
To remove the supervisor password:
1 Turn off the computer and wait at least 5 seconds; then turn it
on.
2 Start Easy-Setup.
To start Easy-Setup, press and hold F1 and turn on the
computer.
3 When the power-on prompt (
) appears, type your current
supervisor password; then press Enter.
4 Select the Password icon from the Easy-Setup menu.
5 Select the Supervisor icon; then type your current password
and press the Spacebar.
6 Press Enter at the blank box.
7 Press Enter again at the verification screen.
When the supervisor password is removed, the lock in the
Supervisor icon is unlocked (
) and you can select the HDD icon.
Chapter 5. Protecting Your Computer
97
Using the Personalization Feature
Using the Personalization Feature
OS/2
WIN
To set the password:
Page 84.
You can display personal information, such as your name or
address, every time the computer is turned on and a power-on or
hard disk password is set. This can help you when you misplace
your computer. Because the password is set, your data is secured
and cannot be accessed, but your personal information is displayed
and identifies the owner of the computer.
The personalization feature includes a personalization editor
program to create your own image to be displayed with the text
information you create, and a personalization update utility to store
your personal data in the nonvolatile memory of your system.
Note:
For details about bitmap graphics,
see page 275.
The personalized password screen consists of two parts: the
personal data area and the background bitmap area.
The personal data area 1 is the box in the center of the
screen that has a black-and-white bitmap.
The background bitmap area 2 surrounds the personal data
area.
d
Pad
kPa
in
Th
k
hin
d
kPa
Pad
k
hin
John Smith
IBM Corporation
123-456-789
1234-56 Big Road, New York
in
Th
d
kPa
d
If you find this computer,
please contact the above address.
kPa
in
Th
T
d
kPa
in
Th
d
kPa
in
Th
T
in
Th
d
kPa
in
Th
d
d
kPa
in
Th
kPa
in
Th
d
kPa
in
Th
Once you have created and saved this screen, it appears each time
the computer is turned on. You must then enter your password.
98
IBM ThinkPad 365X/365XD:
User's Guide
Using the Personalization Feature
Entering the Personal Information
To enter personal information for the password screen:
OS/2
WIN
1 Turn on the computer and start OS/2 or Windows.
2 Make a backup copy of Utility Diskette 2 using your operating
system's diskcopy command.
3 Insert the backup copy of the Utility Diskette 2 into the
diskette drive.
4 Start the ThinkPad Features program by double-clicking the
ThinkPad icon on the screen.
5 Click on the Personalization Editor (
XX XXXXX
X XX XXX
) icon.
The personalization editor window appears.
Personalization Editor
Personal Data
Help
Exit
Notes:
Use the TAB key to move the
cursor to the next field.
You can change the color of the
text background from black to
white using the Black
background option.
Background
Preview
6 Select Personal Data.
7 Fill in each field with your own information at the Personal
Data Entry window.
8 Select OK.
Next, create the background bitmap as follows:
9 Select Background in the Personalization Editor window.
Windows Paintbrush automatically opens.
Chapter 5. Protecting Your Computer
99
Using the Personalization Feature
Note:
A sample bitmap file (BACKSAMP.BMP)
is available on Utility Diskette 2.
10 Draw an image or color the background.
Your bitmap size must be 160 by 100 pels. To set the size,
select Options and then Image Attributes. Specify a Width
of 160, a Height of 100, and set the Units to pels.
11 Select File and Save As to save your drawing as a 16-color
bitmap file on the backup copy of Utility Diskette 2. Give your
file a name when you save it.
12 Close Paintbrush.
13 When the opening file window appears, enter the name of
your bitmap file that you saved on Utility Diskette 2.
14 Select Preview to preview the actual full-screen size of the
personal information screen.
To return to the previous screen, press Enter.
To save your personalized screen in the nonvolatile memory in the
computer:
15 Close all applications; then turn off the computer.
16 Insert the backup copy of the Utility Diskette 2 into the
diskette drive; then turn on the computer.
17 Select Update personalization data at the menu screen;
then follow the instructions on the screen.
Your data will be copied from Utility Diskette 2 and stored in
the nonvolatile memory in the computer.
To set the password:
18 After the data is stored, turn off the computer.
19 Set your password if you have not yet set it.
Page 84.
You have created your own personalized password screen. It will
appear each time the computer is turned on.
100
IBM ThinkPad 365X/365XD:
User's Guide
Using the Personalization Feature
Deleting a Personalized Screen
To delete a personalized screen from the password screen:
1 Close all applications; then turn off the computer.
2 Insert the backup copy of the Utility Diskette 2 into the
diskette drive; then turn on the computer.
3 Select Delete personalization data from the menu; then
follow the instructions on the screen.
4 After the data is updated, turn off the computer.
Your data has been deleted from the nonvolatile memory in
the computer.
Chapter 5. Protecting Your Computer
101
Using Locks
Using Locks
Note:
You are responsible for the
evaluation, selection, and
implementation for the locking
devices and security features. IBM
makes no comments, judgments, or
warranties about the functions,
quality, or performance regarding
locking devices and security
features.
You can protect your computer by attaching locks or a chain, so it
cannot be removed without your permission. You can use a lock,
such as a Kensington lock, to protect your computer from being
removed and also protect the internal devices under the keyboard
by locking the keyboard to prevent it from being opened.
Using Locking Devices
To protect the internal devices under the keyboard and prevent the
removal of your computer, you can purchase a Kensington lock or a
compatible lock. Attach the lock to the keyhole on the side of the
computer; then secure the chain on the lock to a stationary object.
This also prevents the removal of:
Internal devices under the keyboard
Any memory module (DIMM) in the memory slot inside the
computer.
102
IBM ThinkPad 365X/365XD:
User's Guide
Affixing a Nameplate
Affixing a Nameplate
On the front of the ThinkPad, space is provided for a metal
nameplate that can be custom engraved with any name, initials, or
company name up to 20 characters in length. Among the various
materials packaged with your computer, you will find a nameplate
brochure card. To receive your nameplate, simply fill out this card
and send it in. In a few weeks, the engraved nameplate will be
delivered to you.
To affix the nameplate to your ThinkPad, peel off the paper backing
to expose the adhesive layer, and press the nameplate firmly into
place on the ThinkPad's front panel.
Chapter 5. Protecting Your Computer
103
Affixing a Nameplate
104
IBM ThinkPad 365X/365XD:
User's Guide
Chapter 6. Installing and Removing Options
This chapter provides information on how to install or remove
external or internal devices and IBM options.
Note
For instructions on installing and removing the battery pack, see
page 65.
Upgrading the Hard Disk Drive . . . . . . . . . . . . . . . . . .
Upgrading a ThinkPad 365XD with an Internal CD-ROM
Drive . . . . . . . . . . . . . . . . . . . . . . . . . . . . . . .
Upgrading a ThinkPad 365X with an Internal Diskette Drive
Installing PC Cards . . . . . . . . . . . . . . . . . . . . . . . . .
Removing PC Cards . . . . . . . . . . . . . . . . . . . . . . . .
Increasing Memory Capacity . . . . . . . . . . . . . . . . . . .
Installing a DIMM . . . . . . . . . . . . . . . . . . . . . . . .
Removing a DIMM
. . . . . . . . . . . . . . . . . . . . . . .
Attaching an External Numeric Keypad or a Mouse . . . . . .
Using the Mouse and Other Pointing Devices . . . . . . . .
Attaching an External Keyboard . . . . . . . . . . . . . . . . .
Attaching a Printer . . . . . . . . . . . . . . . . . . . . . . . . .
IBM ThinkPad 365 Port Replicator . . . . . . . . . . . . . . . .
Installing the Port Replicator (Option A) . . . . . . . . . . .
Charging the Battery Pack . . . . . . . . . . . . . . . . . . .
Removing the Port Replicator . . . . . . . . . . . . . . . . .
Installing the Port Replicator (Option B) . . . . . . . . . . .
Inserting or Changing a CD or Floppy Diskette . . . . . . .
Removing the ThinkPad . . . . . . . . . . . . . . . . . . . .
Copyright IBM Corp. 1996
.
106
.
106
111
115
118
119
119
123
125
126
127
128
129
130
131
132
133
135
136
.
.
.
.
.
.
.
.
.
.
.
.
.
.
.
.
105
Upgrading the Hard Disk Drive
Upgrading the Hard Disk Drive
The ThinkPad 365 offers you the option to upgrade your existing
hard disk drive to a larger capacity drive. This section contains
detailed instructions for removing and installing the hard disk drive.
Upgrading a ThinkPad 365XD with an Internal CD-ROM Drive
To remove the existing hard disk drive from your computer, do the
following:
1 Turn on the computer.
2 Press the CD-ROM eject button to open the CD-ROM tray.
3 Turn off the computer.
4 Raise the keyboard. Then remove the battery pack.
106
IBM ThinkPad 365X/365XD:
User's Guide
Upgrading the Hard Disk Drive
5 Slide your fingers under the right edge of the black insulator
sheet, and lift up the adhesive tab. Remove the black insulator
sheet completely. (Put the sheet aside. You will reinstall it
later.)
6 Remove the screw that holds the hard disk drive in place.
Chapter 6. Installing and Removing Options
107
Upgrading the Hard Disk Drive
7 Pull the hard disk drive toward the front of the computer, using
the top tab 1 , until the drive is removed from its connector.
8 Lift the drive out of its housing using the right tab
108
IBM ThinkPad 365X/365XD:
User's Guide
2 .
Upgrading the Hard Disk Drive
To install the new hard disk drive, do the following:
1 Slide the new drive into position from the right side, under the
CD-ROM.
2 Push the drive onto the drive connector, while pressing it with
your thumb through the opening on the right end of the
CD-ROM tray.
3 Reinstall the screw that holds down the hard disk drive.
4 Reinstall the black insulator sheet.
5 Reinstall the battery pack.
6 Lower the keyboard.
7 Close the CD-ROM tray.
8 Turn on the computer.
Chapter 6. Installing and Removing Options
109
Upgrading the Hard Disk Drive
Important!
If the following message appears after you have installed a new
hard disk drive, the drive you installed is an unformatted drive.
xxxxx KB OK
I999 3 2
(xxxxx is the amount of memory installed in your system.)
Refer to the manual that came with the drive and your operating
system manuals to format your drive and install the operating
system.
110
IBM ThinkPad 365X/365XD:
User's Guide
Upgrading the Hard Disk Drive
Upgrading a ThinkPad 365X with an Internal Diskette Drive
To remove the existing hard disk drive from your computer, do the
following:
1 Turn off the computer.
2 Raise the keyboard. Then remove the battery pack.
Chapter 6. Installing and Removing Options
111
Upgrading the Hard Disk Drive
3 Slide your fingers under the right edge of the black insulator
sheet, and lift up the adhesive tab. Remove the black insulator
sheet completely. (Put the sheet aside. You will reinstall it
later.)
4 Remove the screw that holds the hard disk drive in place.
112
IBM ThinkPad 365X/365XD:
User's Guide
Upgrading the Hard Disk Drive
5 Pull the hard disk drive toward the front of the computer, using
the top tab 1 , until the drive is removed from its connector.
6 Lift the drive out of its housing using the right tab
2 .
Chapter 6. Installing and Removing Options
113
Upgrading the Hard Disk Drive
To install the new hard disk drive, do the following:
1 Slide the new drive into position from the right side.
2 Push the drive onto the drive connector.
3 Reinstall the screw that holds down the hard disk drive.
4 Reinstall the black insulator sheet.
5 Reinstall the battery pack.
6 Lower the keyboard.
7 Turn on the computer.
114
IBM ThinkPad 365X/365XD:
User's Guide
Installing PC Cards
Installing PC Cards
Your computer has two slots that allow you to plug in credit-card-size
PCMCIA cards (called PC cards) that support PCMCIA Standard
release 2.01 or later.
There are different types of PC Cards. Your ThinkPad 365 supports
Type I, Type II, and Type III cards. The PCMCIA slots can be used
for the following combinations:
One
One
One
One
or two Type I
or two Type II
Type I and one Type II
Type III
Before Installing PC Cards
Be sure to read “Using PC Cards” on page 49.
For information about the type of PC Cards to install, see
Appendix E, “Product Warranties and Notices” on page 269.
To install a PC Card in your computer, follow these steps:
1 Open the PCMCIA cover.
The cover opens from the top down,
like a door. Once opened, the door can then slide into the
ThinkPad case where it will be out of the way.
Chapter 6. Installing and Removing Options
115
Installing PC Cards
2 Insert the PC Card into one of the available slots.
There is a
gentle click when the PC Card has been fully inserted.
Insert the PC Card with the long row of pin sockets facing the
computer and the label on the PC Card facing up. If the PC
Card will not fit into the slot, turn the card over. The PC Card
can fit into the slot only when inserted the correct way. Do not
try to force the card into the slot.
You can insert a Type I or Type II PC Card into either
available slot. A Type III PC Card occupies both slots.
However, when you insert a Type III card, aim its bottom
ridges at the lower PC Card slot.
116
IBM ThinkPad 365X/365XD:
User's Guide
Installing PC Cards
3 The PCMCIA slot cover can be slid inside the ThinkPad case
where it will be out of the way.
4 You can now attach the appropriate devices and cables to your
installed PC Card.
To insert an additional Type I or Type II card when one is already
installed, follow the same direction, placing the new card into the
available slot.
Once you have installed the PC Card, PC Card Director recognizes
that a card has been installed and beeps or displays the PC Card
Director window on your screen. From the PC Card Director
window, you can configure your PC Card by choosing various
settings to be used each time you insert any PC Card or use this
particular PC Card. For more information about configuring your PC
Card, see “Using PC Cards” on page 49.
Chapter 6. Installing and Removing Options
117
Removing PC Cards
Removing PC Cards
To remove a PC Card from your computer, follow these steps:
1 Detach any devices that are connected to your PC Card. If
there are no attached devices and the cover is closed, follow
these steps:
a
Open the cover of the PC Card slot and slide it into the
case.
b
Pull out the PC Card release button (if it has been folded
into its recessed niche). When it is sticking out straight
from the case, press it in gently.
2 Carefully slide the PC Card out of the slot.
3 Close the cover of the PC Card slots.
After you remove the PC Card, PC Card Director will recognize that
the PC Card has been removed and will update the system
information accordingly.
D O S
If you have installed device drivers in your system, you may want to
remove those drivers and update your configuration file
(CONFIG.SYS) if you will not be using the same PC Card again.
For more information on altering the CONFIG.SYS file for PC Cards,
see “Adding to the CONFIG.SYS File” on page 243.
118
IBM ThinkPad 365X/365XD:
User's Guide
Increasing Memory Capacity
Increasing Memory Capacity
Attention:
To avoid damaging the DIMM, do
not touch the contact edge of the
DIMM.
Increasing memory capacity is an effective way to make programs
run faster. You can increase the amount of memory in your
computer by installing a memory option, called a dual inline memory
module or DIMM, to increase your computer's memory.
Important!
Changing memory while your computer is in suspend mode or
hibernation mode may cause permanent damage to the
equipment.
Installing a DIMM
To install the new DIMM, do the following:
1 Save any files you are working with.
2 Turn the power off.
3 Disconnect all cables and other devices, including the AC
adapter.
4 Open the keyboard. (For instructions, see page 6.)
5 Take out the battery pack, if it is installed.
Chapter 6. Installing and Removing Options
119
Increasing Memory Capacity
120
IBM ThinkPad 365X/365XD:
6
Slide your fingers under the right edge of the black insulator
sheet, and lift up the adhesive tab. Remove the black insulator
sheet completely. (Put the sheet aside. You will reinstall it
later.)
7
Locate the DIMM socket 1 .
User's Guide
Increasing Memory Capacity
8
Hold the DIMM as shown in the illustration, and locate the
notch on the DIMM ( 1 ).
9
Position the card at an angle, and push it into the socket firmly,
aligning the notch in the slot ( 1 ). Then push the module
down until it locks into place ( 2 ).
1
2
Chapter 6. Installing and Removing Options
121
Increasing Memory Capacity
The DIMM should fit into the slot at a slight angle.
10
11
12
122
IBM ThinkPad 365X/365XD:
User's Guide
Replace the black insulator sheet.
Reinstall the battery pack.
Close the keyboard.
Increasing Memory Capacity
Removing a DIMM
To remove a DIMM, do the following:
1 Save any files you are working with.
2 Turn the power off.
3 Disconnect all cables and other devices, including the AC
adapter.
4 Open the keyboard. (For instructions, see page 6.)
5 Take out the battery pack, if it is installed.
6 Slide your fingers under the right edge of the black insulator
sheet, and lift up the adhesive tab. Remove the black insulator
sheet completely. (Put the sheet aside. You will reinstall it
later.)
Chapter 6. Installing and Removing Options
123
Increasing Memory Capacity
7 Locate the latches on either end of the DIMM, and pull them
gently apart.
8 Lift the DIMM out of its socket.
9 Replace the black insulator sheet.
10 Reinstall the battery pack.
11 Close the keyboard.
124
IBM ThinkPad 365X/365XD:
User's Guide
Attaching an External Numeric Keypad or a Mouse
Attaching an External Numeric Keypad or a Mouse
Attention:
When you connect a mouse other
than an IBM PS/2 Miniature Mouse,
turn off the computer.
Note:
You can remove the keypad cover
and use it as a stand for the
keypad.
An external numeric keypad or a mouse can be attached directly to
the external input-device connector at the rear of the computer.
You can use both the IBM PS/2 Miniature Mouse and TrackPoint III
as the pointing device.
If you want to use the external numeric keypad and mouse at the
same time, first connect the keypad cable to the computer; then
connect the mouse cable 1 to the connector at the rear of the
keypad.
1
Chapter 6. Installing and Removing Options
125
Attaching an External Numeric Keypad or a Mouse
Using the Mouse and Other Pointing Devices
Note:
The appropriate software must
already be installed.
O S/2
WIN
A serial mouse connected to the serial port or a device that is not
compatible with the IBM PS/2 Miniature Mouse can be connected to
the external input-device connector. Some mouse types require the
TrackPoint III to be disabled before you can use them. To disable
the TrackPoint III:
WIN
With OS/2 or Windows:
1 Start the ThinkPad Features program.
2 Click on the Keyboard/Pointing-Device (
3 Click on Disable for the TrackPoint.
) icon.
These changes become effective when computer power is
turned off and then on again.
Using the IBM ThinkPad Space Saver Keyboard
When using the IBM ThinkPad Space Saver Keyboard, do not
install the device driver supplied with the Space Saver Keyboard.
When the Space Saver Keyboard is used, the device driver on
the computer's Utility Diskette automatically enables or disables
the TrackPoint III on the computer when power is turned on.
126
IBM ThinkPad 365X/365XD:
User's Guide
Attaching an External Keyboard
Attaching an External Keyboard
You can connect an external keyboard to your computer through the
keyboard/mouse connector 1 (available separately as an option).
Note:
The computer enters suspend mode
when the LCD is closed. If you
want to use the computer with the
LCD closed, set the suspend option
in the ThinkPad Features program
so the computer does not enter
suspend mode when the LCD is
closed.
The external keyboard must be connected through the
keyboard/mouse connector. It will not work if it is connected directly
to the computer.
ThinkPad Features program:
You should use the numeric keypad on the external keyboard.
Page 33.
When the external keyboard is attached, the following keys are not
available:
Numeric keypad on the system keyboard
External numeric keypad
When you attach the external keyboard, turn off the computer and
then attach the keyboard/mouse connector and the external
keyboard. (Do 1 and 2 .)
2
1
1
Chapter 6. Installing and Removing Options
127
Attaching a Printer
Attaching a Printer
Any parallel printer with the standard Centronics** interface can be
attached to the 25-pin, parallel connector at the rear of the
computer.
1 Turn off the computer and attach the printer as shown.
Note:
If EPP or ECP is needed, it should
also be enabled in the ThinkPad
Features program.
128
IBM ThinkPad 365X/365XD:
2 Turn on the computer and the printer.
3 Start the ThinkPad Features program, and click on the Printer
User's Guide
icon. Make sure the parallel port is enabled and the address
setting (LPT1 or other port) is correct.
ThinkPad 365 Port Replicator
IBM ThinkPad 365 Port Replicator
The Port Replicator allows quick and easy access to all of your
nonportable peripherals. If you commonly use an external monitor, a
printer, a sound system, or some other devices when you are at your
desk, you can leave them all connected to the Port Replicator when
you are away. When you come back, you only need to install the
ThinkPad into the Port Replicator to have immediate access to all of
these devices.
1
External Monitor Connector
2
Serial Connector
3
Parallel Connector
4
MIDI/Joystick Connector
5
Power Jack
6
Rear view
1
8
External Diskette Drive
Connector
7
Line-in Jack
8
Line-out/Headphone Jack
9
Expansion Connector
1
Mouse Connector
11
Keyboard Connector
7
2
6
4
5
3
Front view
11
9
10
Chapter 6. Installing and Removing Options
129
ThinkPad 365 Port Replicator
Installing the Port Replicator (Option A)
Before Installing the Port Replicator:
Shut down any applications you are using.
Snap the legs back into the base of the computer, if they are
extended.
Turn off the computer and close the display (LCD).
Disconnect the AC Adapter from the electrical outlet first, then
from the computer.
Note where each cable of any attached external devices are
connected to the computer.
Attach all cables to the connectors on the Port Replicator,
including the AC Adapter.
To install the Port Replicator only (without the Desktop Base):
1 Remove the Port Replicator Connector cover.
2 Place the ThinkPad on a flat surface, such as a desk or table,
and place the Port Replicator directly behind it. Align the two,
so that the two guide pins on the Port Replicator connectors
match up.
3 Gently but firmly slide the two together as far as they will go.
The Port Replicator is now installed!
130
IBM ThinkPad 365X/365XD:
User's Guide
ThinkPad 365 Port Replicator
Charging the Battery Pack
The optional Port Replicator can also be used to charge the
batteries. To charge a battery pack with the Port Replicator, follow
these steps:
Make sure the AC Adapter is plugged into the Port Replicator's
power port.
Open the battery compartment door on the back of the Port
Replicator.
Note:
The battery pack can be charged
through the Port Replicator at any
time, regardless of whether the
ThinkPad is connected to it. To
charge the battery pack using the
Port Replicator, be sure to plug the
AC Adapter into the Port Replicator.
If the computer is connected to the
Port Replicator, the Port Replicator
attempts to recharge the battery in
the computer first (if one is installed)
before going on to charge the
battery inserted into the Port
Replicator.
Insert the battery pack into the compartment.
Chapter 6. Installing and Removing Options
131
ThinkPad 365 Port Replicator
Removing the Port Replicator
To remove the Port Replicator, locate the two release levers on
either end of the replicator. Lift the two levers together, while
pressing down with your thumbs on the replicator itself (to keep it
from moving). As the levers come up, they will gently and evenly
separate the ThinkPad from the replicator.
132
IBM ThinkPad 365X/365XD:
User's Guide
ThinkPad 365 Port Replicator
Installing the Port Replicator (Option B)
The Port Replicator's Desktop Base adds an extra level of ease and
comfort to your computing. It provides a firm platform on which to
work, a palmrest for easier typing, and a cable cover to keep all of
your peripheral cables neat and free from dust.
To install the ThinkPad onto the Port Replicator or Desktop Base,
follow these steps:
1 Slide the palmrest out (away from the Port Replicator), as
shown on the next page (
1 ).
2 Press the Port Replicator down onto the Desktop Base, making
sure that the tabs on the Base line up correctly with the slots in
the bottom of the Replicator ( 2 ).
3 Place the ThinkPad on the Desktop Base, making sure the
guide pins on the Port Replicator line up with the
corresponding holes in the ThinkPad ( 3 ).
Locate the two notches on either side of the Desktop Base,
just in front of the palmrest, and grip the base by these
notches as you press the ThinkPad into place with your
thumbs.
4 Finally, push the palmrest back into place ( 4 ).
Chapter 6. Installing and Removing Options
133
ThinkPad 365 Port Replicator
3
2
1
4
134
IBM ThinkPad 365X/365XD:
User's Guide
ThinkPad 365 Port Replicator
Inserting or Changing a CD or Floppy Diskette
To insert or change a CD or floppy diskette while the ThinkPad is
installed in the Desktop Base, pull the palmrest away from the
ThinkPad, and lift up the cover as shown.
With the CD-ROM drive now exposed, you can insert or change CDs
as you would normally. When finished, simply close the palmrest
cover and slide the palmrest back into place.
Chapter 6. Installing and Removing Options
135
ThinkPad 365 Port Replicator
Removing the ThinkPad
To remove the ThinkPad from the Desktop Base, follow these steps:
Note:
If you purchased a ThinkPad 365X
model with an internal diskette drive
drive, you can use these same
instructions for inserting or changing
a floppy diskette.
1 Slide the palmrest out (away from the ThinkPad).
2 Locate the two release levers on either end of the replicator.
Lift the two levers together, directly behind the ThinkPad,
while pressing down with your thumbs on the replicator itself
(to keep it from moving). As the levers come up, they will
gently and evenly separate the ThinkPad from the replicator.
3 Lift the ThinkPad away from the Desktop Base and set it
aside.
4 Push the palmrest back into place.
136
IBM ThinkPad 365X/365XD:
User's Guide
Chapter 7. Installing Software
This chapter provides information about the software installed in your
computer and the procedures for installing the necessary device
drivers when reinstalling an operating system.
What You Need for Your Computer . . . . . . . . . . . . . . . .
Installing the Operating System and Device Drivers . . . . . . .
Installing Software for OS/2 Warp . . . . . . . . . . . . . . . . .
Installing IBM OS/2 Warp Version 3 . . . . . . . . . . . . . .
Avoiding Video Problems When Installing OS/2 Warp . .
Installing the CD-ROM Device Driver for OS/2 Warp (for the
365XD Only) . . . . . . . . . . . . . . . . . . . . . . . . . . .
Installing the ThinkPad Features Program for OS/2 Warp . .
Installing the PCI-IDE Bus Master Driver for OS/2 Warp
. .
Installing the PC Card Director for OS/2 Warp . . . . . . . .
Installing the ESS AudioDrive Support Software for OS/2
Warp . . . . . . . . . . . . . . . . . . . . . . . . . . . . . . . .
Installing the AudioDrive Support Software for OS/2 . . .
. . . . .
Installing the Infrared Device Driver for OS/2 Warp
Installing the ThinkPad Display Device Driver for OS/2 Warp
Installing Software for DOS . . . . . . . . . . . . . . . . . . . . .
Installing IBM PC DOS Version 7.0 . . . . . . . . . . . . . . .
Installing the CD-ROM Device Driver for DOS (for the 365XD
Only) . . . . . . . . . . . . . . . . . . . . . . . . . . . . . . . .
Installing the ThinkPad Features Program for DOS
. . . . .
Installing the PC Card Director for DOS . . . . . . . . . . . .
Installing Software for Microsoft Windows 3.11 . . . . . . . . . .
. . . . . . . . . . . . . . . . . . . . .
Installing Windows 3.11
Installing the ThinkPad Features Program for Windows 3.11
Installing the PC Card Director for Windows 3.11
. . . . . .
Installing the AudioDrive Support Software for Windows 3.11
Installing the Infrared Device Driver for Windows 3.11 . . . .
Installing the ThinkPad Display Driver for Windows 3.11
. .
Installing Software for Microsoft Windows 95 . . . . . . . . . . .
Installing Windows 95 . . . . . . . . . . . . . . . . . . . . . . .
. . .
Installing the ThinkPad Display Driver for Windows 95
Installing the ThinkPad Features Program for Windows 95 .
Installing the PCI-IDE Bus Master Driver for Windows 95 . .
Installing the PC Card Director for Windows 95 . . . . . . . .
Installing the AudioDrive Support Software for Windows 95 .
Installing the Infrared Device Driver for Windows 95 . . . . .
Points to Consider When Using Windows 95 . . . . . . . . .
Copyright IBM Corp. 1996
138
139
140
141
145
147
149
150
151
152
152
153
155
156
157
158
161
162
163
165
169
170
171
172
173
174
175
177
178
179
180
184
186
187
137
What You Need for Your Computer
What You Need for Your Computer
Your computer comes with the following software already installed:
Operating system
ESS AudioDrive support software
Infrared device driver
PC Card Director program
ThinkPad Features program
ThinkPad display driver
365XD CD CD-ROM device driver
Online book
Note:
Before reinstalling the operating
system and device drivers, you
need to create all installation
diskettes using the Diskette Factory
(diskette backup program) that is
preinstalled on your computer.
When reinstalling an operating system, you must install an operating
system and the software listed above for your computer to operate
as it did at the time of purchase. The online book, however, is
available only at the time of purchase, and no diskettes are
available for reinstallation. You should make a backup copy of the
online book before beginning the reinstallation process.
The PC Card client device driver is not part of the preinstalled
software. Refer to the manual that came with the PC Card to install
the device driver.
Note
365XD CD
Some software is shipped on a CD-ROM along with a
diskette and might require that the CD-ROM drive and diskette
drive be attached to the computer at the same time. If this is the
case, use the external-diskette-drive connector to connect the
external diskette drive. You can also use the IBM Port Replicator
to attach a diskette drive externally. Otherwise, you need to
obtain the diskette-only version of your software.
138
IBM ThinkPad 365X/365XD:
User's Guide
Installing Software
Installing the Operating System and Device Drivers
The operating systems supported by your computer are:
IBM Operating System/2 (OS/2) Warp Version 3
IBM PC DOS Version 7.0
Microsoft Windows 3.11
Microsoft Windows 95
Important
If you will be installing Windows 3.11, you must first do the
following for Windows to operate correctly:
Install the ThinkPad display driver instead of the default
device drivers that came with Windows.
When the Windows Setup program asks you to select either
Express Setup or Custom Setup, select C for Custom
Setup.
Refer to the appropriate section to install your operating system and
its device drivers:
O S / 2
D O S
W
I N
WIN
If you are installing OS/2: go to “Installing Software for OS/2
Warp” on page 140.
If you are installing DOS: go to “Installing Software for DOS”
on page 156.
If you are installing Windows 3.11: go to “Installing Software
for Microsoft Windows 3.11” on page 163.
If you are installing Windows 95: go to “Installing Software for
Microsoft Windows 95” on page 174.
Chapter 7. Installing Software
139
Installing OS/2 Software
Installing Software for OS/2 Warp
O
S / 2
This section describes how to install OS/2 Warp in your computer
with DOS and Windows. You also need to install the device drivers
for OS/2 Warp in your computer.
Important
Before reinstalling the operating system and device drivers, you
need to create installation diskettes using the Diskette Factory
program (diskette backup program) that is preinstalled on your
computer.
Especially, you must create the Video Graphics Adapter Fix
Diskette for OS/2 Warp to avoid video problems you encounter
during installation of OS/2 Warp.
The software shown in the following figure is already installed at the
time of purchase. When reinstalling OS/2 Warp Version 3, install
this software for your computer to work as it did:
OS/2 Warp Version 3
OS/2 Warp
1 Install
365XD
Page numbers:
1
Page 141.
2
Page 149.
3
Page 150.
4
Page 151.
5
Page 152.
6
Page 153.
7
Page 155.
CD
with CD-ROM device driver
Install ThinkPad
Features program
5
Install ESS
AudioDrive
support software
3 Install PCI-IDE Bus
6
Install Infrared
device driver
4 Install PC Card
7
Install ThinkPad
display driver
2
Master driver
Director
Start Computer Operation
140
IBM ThinkPad 365X/365XD:
User's Guide
Installing IBM OS/2 Warp
Installing IBM OS/2 Warp Version 3
Your installation of OS/2 Warp will differ, depending on whether you
use the Dual Boot or the Boot Manager for switching between OS/2
Warp and DOS/Windows.
Which type are you going to use?
Dual Boot
Go to “Installing OS/2 Warp with Dual Boot” on
page 142.
Boot Manager
Go to “Installing OS/2 Warp with the Boot
Manager” on page 143.
Avoiding Video Problems for OS/2 Warp
If you have a video problem when installing OS/2 Warp, go to
“Avoiding Video Problems When Installing OS/2 Warp” on
page 145 to solve the problem.
Chapter 7. Installing Software
141
Installing IBM OS/2 Warp
Installing OS/2 Warp with Dual Boot
To install the DOS ThinkPad
Features program:
If DOS and Windows are not installed in the computer, install DOS
and Windows, and then install the ThinkPad Features program for
both DOS and Windows.
Page 161.
After that, install OS/2 Warp:
To install the Windows ThinkPad
Features program:
Page 169.
Note:
If you have the OS/2 Warp FixPak
10 (XR0010) or later, install it after
you complete the installation of
OS/2 Warp. Follow the instructions
in the README.1ST file in diskette
1 of that FixPak.
To install the diskette version of OS/2 Warp, refer to the
documentation. During installation, be sure to pay attention
to the following:
– Select VGA as the Primary Display in the System
Configuration screen.
– Do not select the PCMCIA Feature in the System
Configuration screen. Leave it as No Support
Installed.
If you want to continue to install all device drivers, continue
with “Installing the ThinkPad Features Program for OS/2
Warp” on page 149.
365XD CD
– If you are using a 365XD and installing the CD-ROM
version of OS/2 Warp using the built-in CD-ROM drive,
go to “Installing OS/2 Warp Using an External Diskette
Drive” on page 144.
– If you are using a 365XD and installing the CD-ROM
version of OS/2 Warp using the optional Port Replicator,
go to “IBM ThinkPad 365 Port Replicator” on page 129.
Important
You need at least 90MB of free space on the hard
disk drive.
142
IBM ThinkPad 365X/365XD:
User's Guide
Installing IBM OS/2 Warp
Installing OS/2 Warp with the Boot Manager
When you install OS/2 Warp with the Boot Manager:
1 Install the Boot Manager, referring to the OS/2 Warp
documentation.
To install the DOS ThinkPad
Features program:
Page 161.
To install the Windows ThinkPad
Features program:
Page 169.
Note:
If you have the OS/2 Warp FixPak
10 (XR0010) or later, install it after
you complete the installation of
OS/2 Warp. Follow the instructions
in the README.1ST file in diskette
1 of that FixPak.
2 Install DOS and Windows, and the ThinkPad Features
programs for both DOS and Windows.
3 Install OS/2 Warp:
If you are installing the diskette version of OS/2 Warp,
refer to the documentation. During installation, pay
attention to the following:
– Select VGA as the Primary Display at the System
Configuration screen.
– Do not select the PCMCIA Feature at the System
Configuration screen. Leave it as No Support
Installed.
–
365XD CD Select Non-Listed IDE CD-ROM for the
CD-ROM at the System Configuration screen.
After OS/2 has been successfully installed, make sure you
restart the computer.
365XD CD
– If you are using a 365XD and installing the CD-ROM
version of OS/2 Warp using the built-in CD-ROM
drive, go to “Installing OS/2 Warp Using an External
Diskette Drive” on page 144.
– If you are using a 365XD and installing the CD-ROM
version of OS/2 Warp using the optional Port
Replicator, go to “IBM ThinkPad 365 Port Replicator”
on page 129.
Important
You need at least 90MB of free space on the hard
disk drive.
Chapter 7. Installing Software
143
Installing IBM OS/2 Warp
Installing OS/2 Warp Using an External Diskette Drive
1 Ensure that DOS and Windows are installed in the computer.
2 Insert the OS/2 Warp CD-ROM into the CD-ROM drive.
3 Open the DOS command prompt and change to the drive for
the CD-ROM drive.
4 Type CDINST and press Enter.
Make copies of the OS/2 Warp diskettes labeled “OS/2
Installation Diskette” and “OS/2 Diskette 1.”
5 Shut down the system and turn off the computer.
6 Insert the OS/2 Installation Diskette into the external diskette
drive and turn on the computer.
7 When you are prompted to insert OS/2 Diskette 1, insert it
into the external diskette drive and insert the OS/2 Warp
CD-ROM into the CD-ROM drive.
8 Follow the instructions on the screen until the installation is
complete.
Note:
If you have the OS/2 Warp FixPak
10 (XR0010) or later, install it after
you complete the installation of
OS/2 Warp. Follow the instructions
in the README.1ST file in diskette
1 of that FixPak.
Be sure to pay attention to the following during installation:
Select VGA as the Primary Display at the System
Configuration screen.
Do not select the PCMCIA Feature at the System
Configuration screen. Leave it as No Support Installed.
Select Non-Listed IDE CD-ROM for the CD-ROM at the
System Configuration screen.
9 Shut down OS/2 and restart the system.
If you want to continue to install all device drivers,
365X
Continue with “Installing the ThinkPad Features Program
for OS/2 Warp” on page 149.
365XD CD Continue with “Installing the CD-ROM Device Driver for
OS/2 Warp (for the 365XD Only)” on page 147.
144
IBM ThinkPad 365X/365XD:
User's Guide
Installing IBM OS/2 Warp
Avoiding Video Problems When Installing OS/2 Warp
If you have a video problem when installing OS/2 Warp, do the
following:
Important
Make sure you create the Video Graphics Adapter Fix Diskette
for OS/2 Warp using the Diskette Factory program before
reinstalling OS/2 Warp. Have the diskette ready when doing the
procedures below.
1 Make sure you have created the OS/2 Warp Video Fix
Diskette using the Diskette Factory program.
2 Start installing OS/2 Warp.
3 When prompted to remove Diskette 1 and restart the
computer, instead insert the OS/2 Installation Diskette and
restart the computer.
4 Continue the installation, following the instructions on the
screen, until the “Welcome” screen appears.
5 Press F3 and go to the command prompt.
6 Insert the OS/2 Warp Video Fix Diskette into the diskette
drive.
7 Type the following command at the command prompt:
a:\repvga c
where c is the drive where OS/2 Warp is installed. The video
driver files will be replaced.
8 Remove any diskettes from the diskette drive; then restart the
computer.
The second half of the Warp installation continues.
9 When selecting a video driver, select a VGA display driver.
10 When prompted to remove any diskettes and restart the
computer, instead insert the OS/2 Installation Diskette and
restart the computer.
Chapter 7. Installing Software
145
Installing IBM OS/2 Warp
11 Continue the installation, following the instructions on the
screen, until the “Welcome” screen appears.
12 Press F3 and go to the command prompt.
13 Insert the OS/2 Warp Video Fix Diskette into the diskette
drive.
14 Type the following command at the command prompt:
a:\repvga c
where c is the drive where OS/2 Warp is installed. The video
driver files will be replaced.
15 Remove any diskettes from the diskette drive; then restart the
computer.
To install the video driver:
16 Install the SVGA (800×600 or more with 256 colors or more)
Page 155.
video mode driver using the ThinkPad 760 Video Driver
Diskette for OS/2.
Note
When you open System Configuration in Selective Install
after the video driver installation, Video Graphics Array
[VGA] is shown as the Primary Display (representing the
LCD). However, the video driver is correctly installed if
you have followed the foregoing procedure.
You have completed the installation of OS/2 Warp and the correct
VGA video driver.
146
IBM ThinkPad 365X/365XD:
User's Guide
Installing the CD-ROM Device Driver for OS/2 Warp
Installing the CD-ROM Device Driver for OS/2 Warp (for the 365XD
Only)
365XD CD This section describes the installation of the CD-ROM device
driver for OS/2.
Important
If you installed a CD-ROM device driver (Non-listed IDE
CD-ROM on the System Configuration screen) when installing
OS/2 Warp, you need not reinstall the CD-ROM device driver.
Continue with “Installing the ThinkPad Features Program for OS/2
Warp” on page 149.
Have the diskettes that came with the OS/2 system ready; then
install the CD-ROM device driver for OS/2:
1 Start OS/2.
2 Open OS/2 System, System Setup, and Selective Install.
3 Select the CD-ROM Device Support icon.
4 Select Non-listed IDE CD-ROM and click on OK.
5 Click on OK at the System Configuration screen.
6 At the OS/2 Setup and Configuration screen, select Install.
7 Follow the instructions on the screen.
You have completed the installation of the CD-ROM device driver. If
you want to continue to install all device drivers, continue with
“Installing the ThinkPad Features Program for OS/2 Warp” on
page 149.
Chapter 7. Installing Software
147
Installing the CD-ROM Device Driver for OS/2 Warp
Software Parameters in the CONFIG.SYS File
Note:
When the CD-ROM device driver is
installed in your computer, OS/2
automatically modifies the
CONFIG.SYS file.
This section explains the parameters in the CONFIG.SYS file for the
OS/2 CD-ROM device drivers:
DEVICE=OS2CDROM.DMD [options]
This is the CD-ROM device class driver, where options can be:
[/V]
Displays messages on the LCD during the installation.
[/Q]
Does not display messages on the LCD during the
installation.
BASEDEV=IBMIDECD.FLT [options]
This is the IDE adapter device driver for ATA Packet Interface
devices where options can be:
[/V]
Displays messages on the LCD during the installation.
IFS=[drive]:[path]CDFS.IFS [options]
This is the ISO9660/HSG file system for OS/2. All CD data
discs are recorded with this file format. Options can be:
148
IBM ThinkPad 365X/365XD:
[/C:n]
Indicates how many 64KB segments to use for the
sector cache. The default is n=2, two 64KB segments.
[/M:n]
Indicates the maximum number of file sectors to be
read at a time. The default is n=8, 8 sectors.
[/V]
Displays messages on the LCD during the installation.
[/Q]
Does not display messages on the LCD during the
installation.
User's Guide
Installing the ThinkPad Features Program for OS/2 Warp
Installing the ThinkPad Features Program for OS/2 Warp
Note:
When installing an operating
system, you need to install the
ThinkPad Features program.
To install the ThinkPad Features program:
1 Start OS/2.
2 Insert Utility Diskette 2 into the diskette drive.
3 Install the ThinkPad System Management device driver:
a) Open OS/2 System and then System Setup.
b) Select Device Driver Install.
c) Click on the Install... button.
d) Click on ThinkPad System Management Device Driver;
then click on OK.
4 Open the OS/2 screen command prompt.
5 Remove Utility Diskette 2 from the diskette drive, and insert
Utility Diskette 1.
6 Go to the A: prompt and type
INSTALL2; then press Enter.
Follow the instructions on the screen.
7 Install the Windows ThinkPad Features program for the
WIN-OS/2 session:
a) Exit the OS/2 screen; then open the WIN-OS/2 full screen.
b) Follow the instructions in “Installing the ThinkPad Features
Program for Windows 3.11” on page 169.
8 Install the DOS ThinkPad Features program to use the PS2
commands.
a) Exit the WIN-OS/2 full screen; then open the DOS full
screen.
b) Follow the instructions on page 161.
You have completed the installation of the ThinkPad Features
program.
If you want to continue to install all device drivers, continue with
“Installing the PCI-IDE Bus Master Driver for OS/2 Warp” on
page 150.
Chapter 7. Installing Software
149
Installing the PCI-IDE Bus Master Driver for OS/2 Warp
Installing the PCI-IDE Bus Master Driver for OS/2 Warp
Note:
When installing an operating
system, you need to install the
PCI-IDE Bus Master driver to
improve the performance of hard
disk drive in the computer.
To install the PCI-IDE Bus Master driver:
1 Start OS/2.
2 Insert the Utility Diskette 2 into the diskette drive.
3 Open the OS/2 command prompt.
4 Type A:INSTPX; then press Enter.
5 After the installation is complete, remove any diskette from the
diskette drive; then restart OS/2.
You have completed the installation of the PCI-IDE Bus Master
driver for OS/2.
If you want to continue to install all device drivers, continue with
“Installing the PC Card Director for OS/2 Warp” on page 151.
150
IBM ThinkPad 365X/365XD:
User's Guide
Installing the PC Card Director for OS/2 Warp
Installing the PC Card Director for OS/2 Warp
PC Card Director:
Page 50.
When installing an operating system, you need to install the
following device drivers and software associated with PCMCIA
before you can use the PC Cards:
PC Card device drivers:
–
–
–
–
Card Services device driver
Socket Services device driver
PC Card Power Management device driver
PC Card Director utility
PC Card client device drivers (only when PC Card Director does
not support the PC Card)
To install the PC Card Director:
1 Turn on the computer and start the operating system.
2 Insert the diskette labeled “PCMCIA Installation Diskette for
OS/2, Windows 95” into the diskette drive.
3 Open the OS/2 full screen command prompt.
4 Type A:\PCMINST2 at the OS/2 command prompt; then press
Enter.
5 Follow the instructions on the screen.
6 Click on OK when you have completed the installation.
7 After the installation is complete, close all applications, remove
the diskette from the diskette drive, and restart the system.
Note:
Whenever you update the
CONFIG.SYS file, refer to “Adding
to the CONFIG.SYS File” on
page 243.
You have completed the installation of the PC Card Director for
OS/2.
If you want to continue to install all device drivers, continue with
“Installing the ESS AudioDrive Support Software for OS/2 Warp” on
page 152.
Chapter 7. Installing Software
151
Installing the ESS AudioDrive Support Software for OS/2 Warp
Installing the ESS AudioDrive Support Software for OS/2 Warp
Installing the AudioDrive Support Software for OS/2:
O S / 2
The AudioDrive support software for OS/2 is supplied on the
AudioDrive Features Diskette or in the hard disk drive of your
computer.
When the software is supplied on the hard disk drive
If the AudioDrive Features Diskette was not supplied with your
computer, the support software is contained on the hard disk
drive. Create the AudioDrive Features Diskette using the
diskette backup program (Diskette Factory) that is preinstalled
on your computer.
Have ready the AudioDrive Features Diskette; then install the
AudioDrive support software as follows:
Note:
To open the OS/2 full screen:
1. Select OS/2 System.
2. Select Command Prompts;
then select OS/2 Full Screen.
1 Turn on the computer and start OS/2.
2 Open the OS/2 full screen command prompt.
3 Insert the AudioDrive Features Diskette for OS/2 into the
diskette drive of your computer.
4 Type A:ESUNINST at the command prompt; then press Enter.
Necessary backups are created.
5 Type A:MINSTALL at the command prompt; then press Enter.
6 Select AudioDrive ES1688 from the list.
Make sure the source drive is A:.
If you have Win-OS/2 installed on your computer, also select
ES1688 WinOS2/Windows Audio.
7 Click on Install; then follow the instructions on the screen.
8 When you have completed the installation, shut down OS/2;
then restart the computer.
You have completed the installation of the AudioDrive support
software for OS/2.
If you want to continue to install all device drivers, continue with
“Installing the Infrared Device Driver for OS/2 Warp” on page 153.
152
IBM ThinkPad 365X/365XD:
User's Guide
Installing the Infrared Device Driver for OS/2 Warp
Installing the Infrared Device Driver for OS/2 Warp
Note:
When installing an operating
system, you need to install the
infrared device driver.
To install the infrared device driver:
1 Turn on the computer and start OS/2.
2 If you have not installed DOS and WIN-OS/2 support for
OS/2, install it by referring to your operating system manual.
3 Go to the DOS command prompt.
4 Insert the Infrared Features diskette into the diskette drive.
5 Type A:UINSTALL and press Enter.
The following screen appears:
Installation Options
Installation Source Drive
Type the SOURCE drive letter (A-Z). When you install a program, the
SOURCE drive letter is the location you are installing FROM.
Source Drive ...
Enter F1=Help F3=Exit
6 Press Enter; then follow the instructions on the screen.
Select Install Win-OS2 ThinkPad InfraRed Driver when you
are asked.
You have completed the installation of the infrared device driver.
Chapter 7. Installing Software
153
Installing the Infrared Device Driver for OS/2 Warp
Starting TranXit or Other Infrared Applications
If you are going to start TranXit or any other infrared applications
that use the ThinkPad infrared device driver from:
The Program Manager window, do the following:
1. Click on the Program Manager object in the Windows
Programs folder or the WIN-OS2 (full screen or window)
object in the Command Prompts folder with the right
mouse button.
2. Select Settings, Session, and then WIN-OS/2 Settings.
3. Modify the following setting as shown:
COM_DIRECT_ACCESS
ON
A separate object that you have created for the infrared
application, do the following:
1. Click on the object with the right mouse button.
2. Select Settings, Session, and then check Separate
Session.
3. Select WIN-OS/2 Settings and modify the following
setting as shown:
COM_DIRECT_ACCESS
ON
If you want to continue to install all device drivers, continue with
“Installing the ThinkPad Display Device Driver for OS/2 Warp” on
page 155.
154
IBM ThinkPad 365X/365XD:
User's Guide
Installing the ThinkPad Display Device Driver for OS/2 Warp
Installing the ThinkPad Display Device Driver for OS/2 Warp
Note:
When installing an operating
system, you need to install the
ThinkPad display device driver.
ThinkPad Features:
Page 33.
The display driver enables you to use various screen resolutions
and colors for the LCD and external monitor. (See page 45 for
possible combinations of resolution and color.) The display driver
also takes advantage of the computer's video capability.
Before Installation
Before you begin installing the display driver, set the display
device mode to LCD: open the ThinkPad Features program and
select the LCD (
) icon, or at the command prompt, type PS2
SC LCD and press Enter.
To install the ThinkPad display device driver:
1 Start OS/2.
2 Insert the ThinkPad Video Features Diskette for OS/2 into the
diskette drive.
3 Open the OS/2 full screen or OS/2 window.
4 Go to the A: prompt; then type INSTALL and press Enter.
5 Follow the instructions on the screen.
6 After the installation is complete, remove the diskette, shut
down OS/2, and restart the system.
You have completed the installation of the display driver for OS/2.
Chapter 7. Installing Software
155
Installing DOS Software
Installing Software for DOS
D O S
This section describes the installation procedures for DOS Version
7.0 and its device drivers for your ThinkPad.
Important
Before reinstalling the operating system and device drivers, you
need to create all installation diskettes using the Diskette
Factory program (diskette backup program) that is preinstalled
on your computer.
The software shown in the following figure is already installed at the
time of purchase. When reinstalling DOS Version 7.0, install this
software for your computer to work as it did:
PC DOS Version 7.0
Page numbers:
1
Install DOS
1 Page 157.
2 Page 158.
2
3 Page 161.
4 Page 162.
365XD CD
Install CD-ROM device driver
3 Install ThinkPad Features program
4 Install PC Card Director
5
Start Computer Operation
156
IBM ThinkPad 365X/365XD:
User's Guide
Installing IBM PC DOS
Installing IBM PC DOS Version 7.0
Follow the instructions in the operating-system documentation. If you
also are installing Microsoft Windows 3.11, go to “Installing Windows
3.11” on page 165. Otherwise, if you want to continue to install all
device drivers, continue with either of the following:
365X “Installing the ThinkPad Features Program for DOS” on
page 161.
365XD CD
“Installing the CD-ROM Device Driver for DOS (for the
365XD Only)” on page 158.
Chapter 7. Installing Software
157
Installing the CD-ROM Device Driver for DOS
Installing the CD-ROM Device Driver for DOS (for the 365XD Only)
Note:
When installing an operating
system, you need to install the
CD-ROM device driver.
Note:
The default subdirectory is
C:\CDROM\.
365XD CD
To install the CD-ROM device driver:
1 Start DOS.
2 Insert the CD-ROM Diskette into the diskette drive.
3 Type A:UINSTALL and press Enter.
4 Select Install IBM ThinkPad CD-ROM Driver for
DOS/Windows at the Installation Options screen; then follow
the instructions on the screen.
5 After the installation is complete, remove any diskette from the
diskette drive and restart the computer.
You have completed the installation of the CD-ROM device driver. If
you want to continue to install all device drivers, continue with
“Installing the ThinkPad Features Program for DOS” on page 161.
158
IBM ThinkPad 365X/365XD:
User's Guide
Installing the CD-ROM Device Driver for DOS
Software Parameters in the CONFIG.SYS and
AUTOEXEC.EXE
When the CD-ROM device driver is installed in your computer, the
installation program (UINSTALL.EXE) automatically modifies the
CONFIG.SYS file and AUTOEXEC.BAT file. The following are the
parameters for the CD-ROM device driver:
CD-ROM device driver parameters for the CONFIG.SYS
DEVICE=[drive:][path]IBMTPCD.SYS /R [/C] [/S]
This is the CD-ROM device driver (IBMTPCD.SYS). Make sure
this line is inserted after the EMM386 statement.
/R
Enables the resident type device driver. Even when the
CD-ROM drive is not installed at power-on, the device
driver can be loaded in the memory.
[/C]
Sets the cache size in the XMS memory. When this
parameter is set, the cache size in the XMS memory is
512 sectors. When it is not set, the default is 0.
[/S]
Sets the power-saving mode to OFF. When using DOS
with another operating system (for example, when using
it with OS/2 in dual boot), set the power-saving mode to
OFF using this parameter.
Chapter 7. Installing Software
159
Installing the CD-ROM Device Driver for DOS
CD-ROM device driver parameters for the AUTOEXEC.BAT
– [drive:][path]MSCDEX.EXE /D:TPCD
[/M:n][/E][/V][/L:x]
1
The Microsoft CD-ROM Extensions (MSCDEX.EXE) program
is an executable program for MS-DOS Version 7.0 that
works in conjunction with the device driver (IBMTPCD.SYS)
to allow your computer to access the CD-ROM drive, where
the options can be:
/D
Specifies the name of the CD-ROM drive,
TPCD001.
[/M:n]
Specifies the number of sector buffers to temporarily
store the most recent disc data.
[/E]
Specifies that the computer will use expanded
memory, if available.
[/V]
Displays on the LCD a summary of RAM allocation
and expanded memory usage at power-on.
[/L:drive letter]
Specifies the drive letter for the CD-ROM drive. Be
sure not to assign a drive letter already used by
another drive; otherwise, the computer cannot
access the CD-ROM drive.
– SMARTDRV cache for photo CDs
If you are using DOS SMARTDRV caches and planning to
use a photo CD or multisession discs, you have to add the
/U parameter to the SMARTDRV line in the AUTOEXEC.BAT
file. This is because photo CDs or multisession discs are not
compatible with the SMARTDRV caches.
– To be able to play CD-I movies in Windows 3.11, do not
cache the CD-ROM drive by the SMARTDRV Version 5.0 or
5.1, which is supplied with PC DOS Version 7.0.
160
IBM ThinkPad 365X/365XD:
User's Guide
Installing the ThinkPad Features Program for DOS
Installing the ThinkPad Features Program for DOS
Note:
When installing an operating
system, you need to install the
ThinkPad Features program.
To install the ThinkPad Features program:
1 Start DOS.
2 Insert the Utility Diskette 1 into the diskette drive.
3 Type A:UINSTALL at the DOS prompt and press Enter.
The following screen appears:
Installation Options
Installation Source Drive
Type the SOURCE drive letter (A-Z). When you install a program, the
SOURCE drive letter is the location you are installing FROM.
Source Drive ...
Enter F1=Help F3=Exit
4 Press Enter.
5 Select Install DOS ThinkPad Features at the Installation
Options screen; then follow the instructions on the screen.
You have completed the installation of the ThinkPad Features
program.
If you want to continue to install all device drivers, continue with the
PC Card Director.
Chapter 7. Installing Software
161
Installing the PC Card Director for DOS
Installing the PC Card Director for DOS
Note:
Do not install the Phoenix**
PCMCIA support in IBM PC DOS
7.0.
When installing DOS, you need to install the following software to
use the PC Cards:
PC Card device drivers:
–
–
–
–
–
PC Card Director:
Page 50.
Note:
The PC Card client device driver is
not part of the preinstalled software.
Refer to the manual that came with
the PC Card to install the device
driver.
Card Services device driver
Socket Services device driver
Resource Map Utility device driver
PC Card Power Management device driver
PC Card Director utility
PC Card client device drivers (only when PC Card Director does
not support the PC Card)
To install the PC Card Director:
1 Start DOS.
2 Insert the PCMCIA Installation Diskette for DOS/Windows into
the diskette drive.
3 Type A: at the DOS command prompt and press Enter to go
to the A: prompt.
4 Type PCMINSTD; then press Enter.
5 Follow the instructions on the screen.
Default choices are already highlighted at the Selector
screens.
Note:
Whenever you update the
CONFIG.SYS file, see page 243.
6 After the installation is complete, remove any diskette from the
diskette drive and restart the computer.
You have completed the installation of the PC Card Director for
DOS.
162
IBM ThinkPad 365X/365XD:
User's Guide
Installing Windows 3.11 Software
Installing Software for Microsoft Windows 3.11
W IN
This section describes the installation procedures for Microsoft
Windows 3.11 and its device drivers for your ThinkPad.
Important
Before reinstalling the operating system and device drivers, you
need to create all installation diskettes using the Diskette
Factory program (diskette backup program) that is preinstalled
on your computer.
The software shown in the following figure is already installed at the
time of purchase. When reinstalling Windows 3.11, install this
software for your computer to work as it did:
Microsoft Windows Version 3.11
Page numbers:
1 Pages 157, 158, and 161.
1
Install DOS
365XD Install CD-ROM device driver for DOS
Install ThinkPad Features for DOS
CD
1
2 Pages 165 and 173.
3 Page 169.
4 Page 170.
2
Install Microsoft
Windows
with Advanced
Power Management
with ThinkPad
display driver
5 Page 171.
6 Page 172.
3
Install ThinkPad
Features program
for Windows
4
Install PC Card
Director
5
Install ESS
AudioDrive
support software
6
Install Infrared
device driver
Start Computer Operation
Chapter 7. Installing Software
163
Installing Windows 3.11 Software
Important
If you will be installing Windows 3.11, you must first do the
following for Windows 3.11 to operate correctly:
When the Windows Setup program asks you to select either
Express Setup or Custom Setup, select C for Custom
Setup.
Install the ThinkPad display driver instead of the default
device drivers that came with Windows.
164
IBM ThinkPad 365X/365XD:
User's Guide
Installing Windows 3.11
Installing Windows 3.11
Windows 3.11 operates in a DOS environment. Install the following
before installing Windows:
DOS Version 7.0 (see your DOS manuals)
365XD CD
CD-ROM Device Driver for DOS (see page 158)
ThinkPad Features program for DOS (see page 161)
Important
Before you install Windows 3.11, you must do the following for
Windows to operate correctly:
When the Windows Setup program asks you to select either
Express Setup or Custom Setup, select C for Custom
Setup.
Install the ThinkPad display driver instead of the default
device drivers that came with Windows.
Do the following to install Windows 3.11 with Advanced Power
Management (APM) and the ThinkPad display driver:
1 Turn on the computer.
2 Install Windows 3.11 with the APM option:
Important
When the Windows Setup program asks you to select
Express Setup or Custom Setup, type C for Custom
Setup.
a) Start the installation as specified in the Windows manual.
Chapter 7. Installing Software
165
Installing Windows 3.11
Note:
If you have installed OS/2, the path
to install Windows may have
changed to:
C:\OS2\MDOS\WINOS2
(C is the drive on which you
installed OS/2). If so, change the
path to:
C:\WINDOWS
b) When the Windows Setup program asks you to select
Express Setup or Custom Setup, type C for Custom
Setup.
c) Continue installing Windows 3.11 until the following
screen appears:
Windows Setup
===============
Setup has determined that your system includes the following hardware
and software components. If your computer or network appears on the
Hardware Compatibility List with an asterisk, press F1 for Help.
Computer:
Display:
Mouse:
MS-DOS System
VGA
Microsoft, or IBM PS/2
d) Using the Up Arrow (↑ ), highlight MS-DOS System and
press Enter.
e) Select MS-DOS System with APM from the list and press
Enter.
Verify that Computer has changed to MS-DOS System
with APM. If the item has not changed, return to
step 2d.
166
IBM ThinkPad 365X/365XD:
User's Guide
Installing Windows 3.11
Note:
After installing Windows, you should
check the creation date of the
following drivers in the DOS
subdirectory and the Windows
subdirectory:
EMM386.EXE (loaded by
CONFIG.SYS)
HIMEM.SYS (loaded by
CONFIG.SYS)
SMARTDRV.EXE (loaded by
AUTOEXEC.BAT)
365XD CD
MSCDEX.EXE (loaded
by AUTOEXEC.BAT)
Then use whichever program is
newest (either the one for DOS or
the one for Windows) when
selecting each driver.
3 When you have completed the installation of Windows, edit
the AUTOEXEC.BAT file so that the computer will use the
correct mouse driver.
When Windows 3.11 is installed, the computer is automatically
configured to use the MOUSE.COM driver provided by
Windows 3.11. However, for correct operation, your computer
must use the MOUSE.COM driver that came with DOS.
a) At the DOS command prompt (usually C:\>), type
E \AUTOEXEC.BAT and press Enter.
b) Find the line: C:\WINDOWS\MOUSE.COM /Y
c) Change it to: C:\DOS\MOUSE.COM /Y
d) Find the line that includes SHARE.EXE and delete that line.
e) Save the file and restart the computer.
You can easily access the newer
one by changing the subdirectory
name in the CONFIG.SYS or
AUTOEXEC.BAT as follows:
C:\DOS\SMARTDRV.EXE
↓
C:\WINDOWS\SMARTDRV.EXE
Note:
You can change the display
resolution by using the ThinkPad
Features program after completing
the installation of the ThinkPad
Features program for Windows.
4 Select your display resolution:
a) Start DOS and go to the WINDOWS subdirectory.
b) Type SETUP to start Windows setup program.
c) Using the Up Arrow (↑ ), highlight Display and press
Enter.
d) Select Other (Requires disk...) from the list.
e) Insert the Video Features Diskette for Windows 3.1 into
the diskette drive; then type A: and press Enter.
f) Select your desired resolution from the menu and press
Enter.
Verify that Display has changed to your desired resolution
(an example is shown in the following screen). If the item
has not changed, return to step 4c.
Chapter 7. Installing Software
167
Installing Windows 3.11
Windows Setup
===============
Setup has determined that your system includes the following hardware
and software components. If your computer or network appears on the
Hardware Compatibility List with an asterisk, press F1 for Help.
Computer:
Display:
Mouse:
MS-DOS System with APM
Cyber932 8 ×6
256 small font
Microsoft or IBM PS/2
g) Press Enter to continue the installation.
h) After the installation is complete, remove any diskette
from the diskette drive and restart the computer.
When you start Windows from the DOS prompt, do not close the
LCD while the program is loading; if you do, the computer will stop
running.
If you want to continue to install all device drivers, continue with
“Installing the ThinkPad Features Program for Windows 3.11” on
page 169.
168
IBM ThinkPad 365X/365XD:
User's Guide
Installing the ThinkPad Features Program for Windows 3.11
Installing the ThinkPad Features Program for Windows 3.11
Note:
When installing an operating
system, you need to install the
ThinkPad Features program.
If you are going to use Windows, install the ThinkPad Features
program for DOS first (see page 161); then do the following to
install the ThinkPad Features program for Windows 3.11:
1 Turn on the computer and start Windows.
2 Select File from the Program Manager window; then select
Run... from the pull-down menu.
Program Manager
File
O pt ion s
Win dows
Help
New...
Open
E nte r
Move...
F7
Copy...
F8
Delete...
Del
Prope rti es. ..
Alt+Enter
R u n. . .
Exit Windows...
3 Insert the Utility Diskette 1 into the diskette drive.
4 Type A:\INSTALLW and press Enter.
5 Follow the instructions on the screen.
Default choices are already highlighted at the Installation
Options screen.
You have completed the installation of the ThinkPad Features
program.
If you want to continue to install all device drivers, continue with
“Installing the PC Card Director for Windows 3.11” on page 170.
Chapter 7. Installing Software
169
Installing the PC Card Director for Windows 3.11
Installing the PC Card Director for Windows 3.11
Note:
The PC Card Director for Windows
3.11 must be installed with Windows
3.11 or a later version with
enhanced mode. Otherwise, it
cannot be installed.
To use PC Card Director:
Page 50.
When installing an operating system, you need to install the PC
Card Director. You must install the following device drivers and
software associated with PCMCIA before you can use the PC
Cards:
Card Services device driver
Socket Services device driver
Resource Map Utility device driver
PC Card Power Management device driver
PC Card Director Utility
PC Card client device drivers (only when PC Card Director does
not support the PC Card)
To install the PC Card Director:
1 Turn on the computer and start Windows.
2 Select File from the Program Manager window; then select
Run... from the pull-down menu.
3 Insert the PCMCIA Installation Diskette for DOS/Windows into
the diskette drive.
4 Type A:PCMINSTW and press Enter.
5 Follow the instructions on the screen to complete the
installation.
Default choices are already highlighted at the choice screens.
6 After the installation is complete, remove any diskette from the
diskette drive and restart the computer.
You have completed the installation of the PCMCIA device driver for
Windows 3.11.
If you want to continue to install all device drivers, continue with
“Installing the AudioDrive Support Software for Windows 3.11” on
page 171.
170
IBM ThinkPad 365X/365XD:
User's Guide
Installing the AudioDrive Support Software for Windows 3.11
Installing the AudioDrive Support Software for Windows 3.11
1 Turn on the computer and start Windows.
2 Select File... from the Program Manager window; then select
Run... from the pull-down menu.
File
Options
New...
Open
Move...
Copy...
Delete...
Properties...
Windows
Program Manager
Help
Enter
F7
F8
Del
Alt+Enter
Run...
Exit Windows...
3 Insert the AudioDrive Features Diskette for Windows into the
diskette drive of your computer.
4 Type A:\SETUP; then press Enter.
5 Follow the instructions on the screen to complete the
installation.
If you want to continue to install all device drivers, continue with
“Installing the Infrared Device Driver for Windows 3.11” on page 172.
Chapter 7. Installing Software
171
Installing the Infrared Device Driver for Windows 3.11
Installing the Infrared Device Driver for Windows 3.11
Note:
When installing an operating
system, you need to install the
Infrared device driver.
1 Turn on the computer; then go to the DOS command prompt.
2 Insert the Infrared Features Diskette into the diskette drive.
3 Type A:UINSTALL and press Enter.
The following screen appears:
Installation Options
Installation Source Drive
Type the SOURCE drive letter (A-Z). When you install a program, the
SOURCE drive letter is the location you are installing FROM.
Source Drive ...
Enter F1=Help F3=Exit
4 Press Enter; then follow the instructions on the screen.
Select Install Windows ThinkPad InfraRed Driver when you
are asked.
You have completed the installation of the Infrared device driver for
Windows 3.11.
For the standard video model, you have completed all the device
drivers for Windows 3.11.
If you want to continue to install all device drivers, continue with
“Installing the ThinkPad Display Driver for Windows 3.11” on
page 173.
172
IBM ThinkPad 365X/365XD:
User's Guide
Installing the ThinkPad Display Driver for Windows 3.11
Installing the ThinkPad Display Driver for Windows 3.11
If you did not install the display driver when Windows was installed
(by following the procedures on page 165), you must install the
ThinkPad display device driver. The display driver enables you to
use various screen resolutions and colors for the LCD and external
monitor. (See page 45 for possible combinations of resolution and
color.)
The display driver also takes advantage of the computer's video
capability.
To install the ThinkPad device driver:
1 Turn on the computer.
2 If Windows is running on your computer, exit Windows and
switch to the DOS prompt.
3 Go to the Windows subdirectory and type SETUP; then press
Enter.
4 Select Display from the Windows Setup menu; then select
Other (Requires disk...).
5 Insert the Video Features Diskette for Windows 3.1 into the
diskette drive; then type A:\ and press Enter.
6 Select your desired resolution from the menu and press
Enter. Follow the instructions on the screen.
You have completed the installation of the display driver for
Windows 3.11.
Chapter 7. Installing Software
173
Installing Windows 95 Software
Installing Software for Microsoft Windows 95
WIN
This section describes the installation procedures for Windows 95
and its device drivers for your ThinkPad.
Important
Before reinstalling the operating system and device drivers, you
need to create all installation diskettes using the Diskette
Factory program (diskette backup program), which is preinstalled
on your computer.
The software shown in the following figure is already installed at the
time of purchase. When reinstalling Windows 95, install this
software for your computer to work as it did:
Microsoft Windows 95
Page numbers:
1
Install
Windows 95
2
Install ThinkPad
display driver
3
Install ThinkPad
Features program
4
Install PC Card
Director
1 Page 175.
2 Page 177.
3 Pages 178 and 179.
5
Install ESS
AudioDrive
support software
6
Install Infrared
support software
4 Page 180.
5 Page 184.
6 Page 186.
with PCI-IDE Bus
Master driver
Start Computer Operation
174
IBM ThinkPad 365X/365XD:
User's Guide
Installing Windows 95
Installing Windows 95
Install Windows 95 as described in its documentation.
While Installing Windows 95
During the installation of Windows 95, make sure of the
following:
On the Setup Options screen of the Windows 95 Setup
Wizard, select Custom; then click on the Next> button.
On the Analyzing Your Computer screen of the Windows 95
Setup Wizard:
1. Select No, I want to modify the hardware list; then
click on the Next> button.
2. Select and highlight Display in the “Hardware types” list
box.
3. Remove the check mark ( ) from “S3
801/805/928/864/964 Display Adapter” and “S3 Display
Adapter” in the Manufacturer and model list box.
4. Click on the Next> button.
Follow the instructions on the screen to complete the
installation for Windows 95.
For more details, refer to the Windows 95 documentation.
Chapter 7. Installing Software
175
Installing Windows 95
Encounter a problem??
If you did not follow the instructions in the previous While
Installing... box, your computer screen might black out
during the Windows 95 installation. If this is the case, do
the following to recover from the problem:
1. When your computer blacks out, wait until the hard disk
activity stops; then restart the computer.
2. Start the Windows 95 setup from the beginning.
3. On the Safe Recovery screen of the Windows 95 Setup
Wizard, select Use Safe Recovery (recommended);
then click on the Next> button.
4. On the Setup Options screen of the Windows 95 Setup
Wizard, select Custom; then click on the Next> button.
5. On the Analyzing Your Computer screen of the Windows
95 Setup Wizard, select Yes, redetect now; then click
on the Next> button.
6. Follow the instructions to complete the installation of
Windows 95.
You may encounter Unknown Hardware Found messages
when you install Windows 95. In these cases, select Do not
install a driver (Windows will not prompt you again).
176
IBM ThinkPad 365X/365XD:
User's Guide
Installing the ThinkPad Display Driver for Windows 95
Installing the ThinkPad Display Driver for Windows 95
To install the ThinkPad display driver for Windows 95, do the
following:
1 Make sure that Windows 95 has been installed in your
computer.
2 Start Windows 95.
3 Open My Computer.
4 Open Control Panel and open Display; then click on the
Settings tab.
5 Click on the Change Display Type... button.
6 Make sure that Trident** SuperVGA is set to “Adapter Type”
(as a default value); then click on Change....
7 Insert the ThinkPad Video Feature Diskette for Windows 95
into the diskette drive.
8 Click on Have disk... and click on OK.
9 Make sure that IBM ThinkPad (Cyber9320) is selected.
Then click on OK.
Note:
If you do not know what to choose,
try the following: 256 Colors for the
Color palette, 800 x 600 pixels for
the Desktop area, and Small Fonts
for the Font size.
10 Click on Close.
11 Select your screen parameters from the Color palette,
Desktop area, and Font size; then click on OK.
12 Click on Close; then click on Close again.
13 Follow the instructions on the screen.
Windows 95 prompts you to restart the computer to make the
display driver change effective.
You have completed the installation of the ThinkPad display driver.
Chapter 7. Installing Software
177
Installing the ThinkPad Features Program for Windows 95
Installing the ThinkPad Features Program for Windows 95
The ThinkPad Features program for Windows works on Windows 95.
If you installed Windows 95 on a computer in which
DOS/Windows and its ThinkPad Features program were already
installed, the ThinkPad Features program is migrated into the
“Start Menu” of Windows 95 automatically.
To start the ThinkPad Features program:
1 Click on Start.
2 Select Programs; then select ThinkPad.
3 Select ThinkPad Features.
If you installed Windows 95 on a blank hard disk or if you have
not installed the ThinkPad Features program:
Install the ThinkPad Features program using the Utility Diskette
supplied with the computer:
1 Insert the ThinkPad Utility Diskette 1 into the diskette drive.
2 Click on Start.
3 Click on Run....
4 Type a:INSTALLW; then click on OK.
5 Follow the instructions on the screen.
You have completed the installation of the ThinkPad Features
program.
If you want to continue to install all the device drivers, go to
“Installing the PCI-IDE Bus Master Driver for Windows 95” on
page 179.
178
IBM ThinkPad 365X/365XD:
User's Guide
Installing the PCI-IDE Bus Master Driver for Windows 95
Installing the PCI-IDE Bus Master Driver for Windows 95
Note:
When installing an operating
system, you need to install the
PCI-IDE Bus Master driver to
improve the performance of the
hard disk drive in the computer.
To install the PCI-IDE Bus Master driver:
1 Start Windows 95
2 Select My Computer, Control Panel, and then System.
3 Click on the Device Manager tab.
4 Click on the + mark for hard disk controllers.
5 Click on Standard IDE/ESDI Hard Disk Controller, and click
on the Remove button.
Press OK when prompted to remove this controller.
6 Select Yes when prompted to restart Windows 95.
Windows 95 restarts.
7 At the New Hardware Found screen, select Driver from disk
provided by hardware manufacturer.
8 Insert Utility Diskette 2 into the diskette drive.
9 Click on OK.
10 Select Yes when prompted to restart Windows 95.
You have completed the installation of the PCI-IDE Bus Master driver
for Windows 95.
If you want to continue to install all device drivers, continue with
“Installing the PC Card Director for Windows 95” on page 180.
Chapter 7. Installing Software
179
Installing the PC Card Director for Windows 95
Installing the PC Card Director for Windows 95
Note:
The ThinkPad computer has three
different sets of PCMCIA Feature
software: one for DOS/Windows,
one for OS/2 Warp, and one for
Windows 95.
To use the PCMCIA features in the Windows 95 environment, you
need to do the following. Each step will be explained in detail
following this summarized procedure.
1. If you have already installed the PC Card Director for DOS and
Windows, disable it (enable the Windows 95 Integrated PCMCIA
support software).
2. Install the Socket Services device driver.
3. Install the PC Card Director for Windows 95.
Disabling the PC Card Director for DOS and Windows
If the PC Card Director for DOS and Windows has been already
installed on your computer, you must remove the PC Card Director
for DOS and Windows before installing the PCMCIA support software
for Windows 95. This is because the Windows 95 installation
program does not automatically remove the PC Card Director for
DOS and Windows.
To remove the PC Card Director for DOS and Windows, do the
following (this procedure also enables the Windows 95 Integrated
PCMCIA support software):
1 Start Windows 95.
2 Select My Computer, Control Panel, and PC Card.
3 Select No for the question “Are you using a PC card to install
Windows?” and click on Next.
4 Select No for the question “Do you want to review your system
files and select real-mode PC card drivers so Windows can
disable them?”
5 Click on Finish to complete the Windows 95 PCMCIA support
setup.
6 Restart your computer.
You have removed the PC Card Director for DOS and Windows. To
install the ThinkPad PC Card Director for Windows 95, continue to
the following section.
180
IBM ThinkPad 365X/365XD:
User's Guide
Installing the PC Card Director for Windows 95
Installing the Socket Services Device Driver: Prepare your
Windows 95 product diskettes or CD-ROM, if you do not already
have the Windows 95 integrated PCMCIA support software installed
on your computer.
To install the ThinkPad Socket Services device driver for Windows
95:
1 Start Windows 95.
2 Select My Computer, Control Panel, and System.
3 Click on the Device Manager tab.
4 Click on the + mark for PCMCIA socket.
5 Double-click on PCIC or compatible PCMCIA controller.
6 Click on the Driver tab to see the Driver files: list.
7 Click on the Change Driver... button.
8 Click on the Have Disk... button.
9 Insert the PCMCIA Installation Diskette for OS/2, Windows 95
into the diskette drive.
Chapter 7. Installing Software
181
Installing the PC Card Director for Windows 95
10 Click on the OK button; then you will see the “PCIC or
compatible PCMCIA controller on IBM system” item in the
“Models:” list.
11 Click on the OK button.
IBMCSS01.VXD and IBMPCDIF.VXD will be listed in the
“Driver files:” list.
12 Click on the OK button.
Windows 95 now starts copying files. The “Insert Disk” panel
asks for one of the Windows 95 installation diskettes or the
CD-ROM.
13 Change the source for “Copying files from:” to A:\ when
Windows 95 tries to copy IBMCSS01.VXD or IBMPCDIF.VXD.
14 Insert the diskette labeled PCMCIA Installation Diskette for
OS/2, Windows 95 into the diskette drive.
15 Click on OK.
IBMCSS01.VXD and IBMPCDIF.VXD are copied from the
diskette.
Note:
These files were copied when you
installed the Windows 95 integrated
PCMCIA support software.
16 Click on the OK button at the “Insert Disk” panel.
17 Click on the Skip File button at the “Copying Files...” panel
when Windows 95 tries to copy the following files:
CARDDRV.EXE
CSMAPPER.SYS
FLS1MTD.VXD
FLS2MTD.VXD
PCCARD.VXD
SRAMMTD.VXD
18 Restart the computer.
You have completed the installation of the ThinkPad Socket
Services device driver. Continue with “Installing the PC Card
Director for Windows 95” on page 183.
182
IBM ThinkPad 365X/365XD:
User's Guide
Installing the PC Card Director for Windows 95
Installing the PC Card Director for Windows 95: To install the
PC Card Director for Windows 95, do the following:
1 Start Windows 95.
2 Open My Computer.
3 Open Control Panel.
4 Open Add/Remove Programs.
5 Click on the Install... button.
6 Insert the PCMCIA Installation Diskette for OS/2, Windows 95
into the diskette drive.
7 Click on the Next> button.
8 Click on the Finish button when you see the
“A:\INSTALLP.EXE” on the screen.
9 Click on the Continue button when the opening panel of the
installation program appears on the screen.
10 Follow the instructions on the screen.
11 Remove the diskette from the diskette drive.
You have completed the installation of the PC Card Director for
Windows 95.
If you want to continue to install all the device drivers, go to
“Installing the AudioDrive Support Software for Windows 95” on
page 184.
Chapter 7. Installing Software
183
Installing the AudioDrive Support Software for Windows 95
Installing the AudioDrive Support Software for Windows 95
When installing Windows 95, the software might detect the
AudioDrive chip installed in your computer, and automatically install
the required software in your hard disk drive.
However, the version of the AudioDrive support software supplied
with Windows 95 might be a version earlier than the one needed for
your computer.
You should reinstall the AudioDrive support software as follows:
1 Turn on the computer and start Windows 95.
2 Open My Computer.
3 Open Control Panel and open System to open the System
Properties window.
4 Click on the Device Manager tab; then double-click on Sound,
video, and game controllers from the list.
5 Double-click on ESS AudioDrive.
6 Click on the Driver tab.
7 Click on the Change Driver button.
8 Click on the Have Disk... button.
9 Insert the Audio Features Diskette for Windows 95 into the
diskette drive, and click on OK.
10 Click on OK until you see the following error message:
Insert Disk
Please insert the disk labeled ’Install Disk 1’, and then click OK.
OK
184
IBM ThinkPad 365X/365XD:
User's Guide
Installing the AudioDrive Support Software for Windows 95
11 Make sure the Audio Features Diskette for Windows is inserted
in the diskette drive; then click on OK.
12 Type A:\ at the Copy Files From window; then click on OK.
The installation begins.
13 After the installation is complete, click on the Close button.
You have completed the installation of the AudioDrive Support
Software for Windows 95.
If you want to continue to install all the device drivers, go to
“Installing the Infrared Device Driver for Windows 95” on page 186.
Chapter 7. Installing Software
185
Installing the Infrared Device Driver for Windows 95
Installing the Infrared Device Driver for Windows 95
To install the Infrared device driver for Windows 95, do the following:
1 Start Windows 95; then go to the MS-DOS command prompt.
2 Insert the Infrared Features Diskette into the diskette drive.
3 Type A:UINSTALL and press Enter.
4 At the “Installation Options” screen, press Enter to accept the
default source drive.
5 Follow the instructions on the screen.
6 Select Install Windows ThinkPad Infrared Driver when you
are asked.
Make sure you specify the directory where you have installed
Windows 95 when asked.
You have completed the installation of the Infrared device driver.
Continue with “Points to Consider When Using Windows 95” on
page 187.
186
IBM ThinkPad 365X/365XD:
User's Guide
When Using Windows 95
Points to Consider When Using Windows 95
Consider the following when you use Windows 95 with your
computer:
Disabling the Docking Control Utility:
Note:
For example, type EDIT
NODRIVER.INF and press Enter to
open the file.
All the docking functions, once provided by the ThinkPad
Docking Control Utility program for Windows, are now supported
by the ThinkPad Plug-and-Play BIOS and Windows 95.
If you have installed Windows 95 on a computer in which the
Docking Control Utility for Windows had already been installed,
stop this utility program from working as follows:
1 Open the WIN.INI file using your editor.
2 Remove the following statement:
[windows]
:
load=C:\THINKPAD\DOCKWIN.EXE
:
←
Remove this statement
3 Save and close the file.
4 Open the SYSTEM.INI file using your editor.
5 Remove this statement:
[386Enh]
:
device=IBMPNP.386
←
Remove this statement
6 Save and close the file.
7 Restart Windows to make the changes effective.
Chapter 7. Installing Software
187
When Using Windows 95
188
IBM ThinkPad 365X/365XD:
User's Guide
Chapter 8. Solving Computer Problems
Computer problems can be caused by software, hardware, or both.
You can diagnose and solve many problems with the assistance of
the self-tests and system programs contained in Easy-Setup. If a
hardware problem is detected by the self-tests, an error message is
displayed.
The system programs can identify a problem or provide information
for the service representative. Make a note of all error codes, and
give them to the service representative when you call for service. If
the system programs cannot be loaded, the troubleshooting charts
and other information will help you determine what corrective action
to take.
Important
Use this chapter to test only IBM products. Non-IBM products
can cause misleading error information or incorrect computer
responses. When testing non-IBM products, refer to the
instructions supplied with those products.
Common Problems and Frequently Asked Questions . . . .
Common Problems and Actions . . . . . . . . . . . . . . .
Frequently Asked Questions and Answers . . . . . . . . .
Testing the Computer . . . . . . . . . . . . . . . . . . . . . .
Troubleshooting Charts . . . . . . . . . . . . . . . . . . . . .
Error Codes . . . . . . . . . . . . . . . . . . . . . . . . . .
LCD Blank or Power-On Problems . . . . . . . . . . . . .
Screen Messages . . . . . . . . . . . . . . . . . . . . . . .
Other General Problems . . . . . . . . . . . . . . . . . . .
What If Testing Cannot Find the Problem? . . . . . . . . . .
Battery Power Problems . . . . . . . . . . . . . . . . . . .
CD-ROM Drive Problems
. . . . . . . . . . . . . . . . . .
Diskette Drive Problems . . . . . . . . . . . . . . . . . . .
Port Replicator Problems . . . . . . . . . . . . . . . . . . .
External Monitor Problems . . . . . . . . . . . . . . . . . .
Hibernation Problems . . . . . . . . . . . . . . . . . . . . .
Infrared Communication Problems . . . . . . . . . . . . .
Keyboard, External Numeric Keypad, and Pointing Device
Problems . . . . . . . . . . . . . . . . . . . . . . . . . . .
Option Problems . . . . . . . . . . . . . . . . . . . . . . . .
PC Card Problems . . . . . . . . . . . . . . . . . . . . . .
Printer Problems . . . . . . . . . . . . . . . . . . . . . . . .
Software Problems . . . . . . . . . . . . . . . . . . . . . .
Getting Service . . . . . . . . . . . . . . . . . . . . . . . . . .
Listing Installed Options . . . . . . . . . . . . . . . . . . .
Copyright IBM Corp. 1996
.
.
.
.
.
.
.
.
.
.
.
.
.
.
.
.
.
.
.
.
.
.
.
.
.
.
.
.
.
.
.
.
.
.
190
190
192
193
195
195
198
200
201
203
203
204
205
205
206
207
207
.
.
.
.
.
.
.
.
.
.
.
.
.
.
208
209
210
211
212
213
213
189
Troubleshooting
Recording Identification Numbers . . . . .
Getting Help, Service, and Information . . .
Solving Problems . . . . . . . . . . . . .
Using the HelpWare Support Family . . .
Purchasing Additional HelpWare Services
Custom Services
. . . . . . . . . . . . . .
Obtaining IBM Operating System Updates
About Your Warranty . . . . . . . . . . . .
Service outside North America
. . . . . .
190
IBM ThinkPad 365X/365XD:
User's Guide
.
.
.
.
.
.
.
.
.
.
.
.
.
.
.
.
.
.
.
.
.
.
.
.
.
.
.
.
.
.
.
.
.
.
.
.
.
.
.
.
.
.
.
.
.
.
.
.
.
.
.
.
.
.
.
.
.
.
.
.
.
.
.
.
.
.
.
.
.
.
.
.
.
.
.
.
.
.
.
.
.
.
.
.
.
.
.
.
.
.
.
.
.
.
.
.
.
.
.
214
215
215
216
220
222
223
223
224
Troubleshooting
Common Problems and Frequently Asked Questions
This section provides:
Common problems and their corresponding actions.
Frequently asked questions and their answers.
Common Problems and Actions
Problems
My modem application does not
work with the PC Card modem.
Actions
If the PC Card Director shows the PC Card modem status “Ready,” add
the following option switch in the CONFIG.SYS file:
For DOS:
DEVICE=C:\THINKPAD\IBMDSS 1.SYS /IO =x (or /IO1=x)
For OS/2:
DEVICE=C:\THINKPAD\IBM2SS 1.SYS /IO =x (or /IO1=x)
I cannot use PC Cards other than
IBM ones in the OS/2 Warp
environment.
My computer does not show as
good performance as I expected.
Error 2XX appears (memory error).
Note: x shows the PC Card slot number (1 for the upper slot, 2 for
the lower slot, or 12 for both slots) on the computer and /IO1= shows
the slot number for an expansion unit or port replicator that is attached
to the computer.
If you do not have the PC Card device driver for OS/2 but you have one
for DOS, your PC Card may run in the VDM (virtual DOS machine)
environment. Refer to “Virtual Card Services for OS/2” on page 256 for
setting the VDM and the sample configuration files on the PCMCIA
Installation Diskette for OS/2, Windows 95. (If the PCMCIA Installation
Diskette for OS/2, Windows 95 did not come with the computer, create it
using the Diskette Factory program.)
Performance varies depending on your hardware and software
configurations such as memory size, swapper file size, or smart drive
settings.
Make sure your memory card is correctly installed. (See page 119.)
Chapter 8. Solving Computer Problems
191
Troubleshooting
Problems
A memory shortage or memory
error occurs.
Actions
When you are using DOS, you should use the DOS command MEM /C
to review your DOS memory usage occasionally. And then:
– Unload any unnecessary drivers from the CONFIG.SYS file. (For
example, unload printer drivers if you do not use a printer.)
– Reconfigure the UMB (upper memory block) using the DEVICEHIGH
statement.
– Use the multiple configuration setup for DOS (refer to the
documents supplied with DOS).
When you are using Windows:
– Try the same actions as described for DOS.
– Unload any unnecessary programs from the WIN.INI file (for
example, FUELWIN for AC operations, LRGPTR for large pointer,
and so on).
Do the following:
The external monitor screen is
blank.
Make sure the display output type parameter of the ThinkPad Features
program is set to CRT (
The computer does not resume
from suspend mode, or the
suspend indicator stays on and the
computer does not work.
The computer does not enter
suspend or hibernation mode.
IBM ThinkPad 365X/365XD:
).
In the ThinkPad Features program, set the computer not to enter
suspend mode when the LCD is closed.
The computer automatically enters suspend or hibernation mode when the
battery pack is empty. Do one of the following:
Replace the battery pack with a fully charged one and then press Fn.
Connect the AC Adapter to the computer.
Verify that:
If the computer is attached to a Port Replicator, suspend mode is
disabled.
When using Windows, the pointer
does not move after normal
operation is resumed from one of
the power-saving modes.
192
) or Both (
If you are using the AC Adapter and the computer is communicating,
suspend and hibernation modes are disabled. (See page 77.)
Make sure you have installed Windows with the APM option by following
the procedures on page 165.
User's Guide
Troubleshooting
Frequently Asked Questions and Answers
Questions
How can I expand my hard disk
space?
How can I expand my memory?
How can I get diskettes for
operating systems or device
drivers?
Answers
Most of the preloaded applications provide a way to be uninstalled and
free hard disk space. Check whether or not the application you want to
delete has its own delete icon.
See answers to memory questions on page 191.
You can create the operating systems diskettes or device driver diskettes
by using the Diskette Factory program or any other backup programs. If
you cannot use the Diskette Factory program, do the following:
In the U.S., access the IBM PC Company BBS to get the latest
versions of device driver diskettes.
How can I resolve any resource
conflicts (for IRQ, COM port, and
other settings) that have occurred
after installing a new option or a
new application?
Purchase the operating system diskettes or device driver diskettes.
Contact your IBM dealer or IBM marketing representative. (See page
216 for IBM HelpWare information.)
See Appendix A, Avoiding Hardware Conflicts to get information about any
hardware resources already used by devices in the computer.
Chapter 8. Solving Computer Problems
193
Troubleshooting
Testing the Computer
The following shows a basic way to test the computer:
1 Turn on the computer.
The power-on self-test (POST) runs automatically. If the test
ends without detecting an error, one of the following occurs:
The operating system or application screen appears.
A password prompt appears on the screen, if a password
has been set. Type the correct password and press Enter.
The Diskette and F1 prompts (shown below) appear.
F1
F2
F10
This means no operating system is installed in your
computer. Install it now.
Did one of these screens appear?
Yes Turn off the computer and continue with step 2.
No
Go to page 195.
2 Make sure the speaker volume control is in the middle position.
3 Press and hold F1; then turn on the computer to start
Easy-Setup. Hold F1 until the following Easy-Setup menu
appears.
Easy-Setup
Config
Restart
194
IBM ThinkPad 365X/365XD:
User's Guide
Date/Time Password
BIOS part number,..Date
System-unit serial number
System board serial number
Microprocessor
Start up
Test
nnnnnnn 12/31/96
nnnnnnnnnnnnnnnn
nnnnnnnnnnn
Pentium( )Process
**
Troubleshooting
4 Did the Easy-Setup menu appear on the screen?
Yes
The computer has successfully completed the POST
(internal tests), and the system programs have been
loaded. To start the test programs, select the Test
icon; then select the Start icon or press Enter.
Start
Restart
1
SystemBoard Memory Display
HDD FDD-1 PCMCIA
Parallel
2
Serial CDROM
Infrared
Audio
FDD-2
Exit
If the computer did not beep, the speaker is not
working correctly. Check that the speaker volume
control (see page 15 for the location) is in its
middle position. If you are not sure about the
beep, turn off the computer; then turn it on again
and repeat step 3 on page 193. If a problem still
exists, have the computer serviced.
If you cannot go beyond the first screen, have the
computer serviced.
If an error is detected, the character X appears at
the left of the affected device, and an error code
appears below it. Record the error code and have
the computer serviced.
If the test does not find a problem but one still
exists, find the problem in “Troubleshooting
Charts.”
No
Return to step 3 on page 193 and start Easy-Setup
again. If you still cannot start Easy-Setup, find the
problem in “Troubleshooting Charts.”
Chapter 8. Solving Computer Problems
195
Troubleshooting
Troubleshooting Charts
In the charts, x can be any character.
Error Codes
Screen Message and Its
Meaning
I9990301
I9990302
I9990305
(Incorrect connection of
the hard disk drive can
cause these error codes
to appear.)
Action
The computer cannot find the startup drive. Do the following:
1. Turn off the computer.
2. Press and hold F1; then turn on the computer to start Easy-Setup. Hold F1
until the Easy-Setup menu appears.
3. Select the Start up icon. If you are unable to set the startup sequence,
have the computer serviced.
4. Check the list of devices on the startup sequence box. Is the default drive
listed in the startup sequence box?
Yes Exit this screen, and turn off the computer.
No Select the Reset icon.
5. Is an operating system installed?
Yes Go to step 7.
No Install operating system in your computer.
6. After the operating system is installed, turn off the computer.
7. Turn on the computer.
I99xxxxx
(Except the preceding
I999030x errors)
111
(Expansion unit error)
158
(Supervisor password
error)
If the same screen message appears, have the computer serviced.
Have the computer serviced.
If you are using a port replicator or an expansion unit, disconnect it; then
reconnect it.
If there is still a problem, have the computer serviced.
A hard disk drive without a hard disk password is installed when a supervisor
password is set.
To solve the problem, do the following:
1. Type your supervisor password at the power-on password prompt.
If a 00158 error screen appears, press Enter to proceed to the Easy-Setup
password screen.
2. Select the Supervisor icon; then press Enter.
The same password as the supervisor password is set for the hard disk
password on the hard disk drive.
3. Turn off the computer.
196
IBM ThinkPad 365X/365XD:
User's Guide
Troubleshooting
Screen Message and Its
Meaning
159
(Supervisor password
error)
Action
The hard disk password differs from the supervisor password.
To solve the problem, do the following:
1. Turn off the computer; then turn it on again.
16x or 17x
2. Change the hard disk password to the supervisor password at the hard disk
password prompt.
Follow the instructions on the screen.
(Undefined date or
configuration error)
174
There is a device configuration error.
(Device configuration
error)
184
(Invalid password error)
190
(Critical low-battery error)
195
(Hibernation error)
Check that the hard disk drive and the other devices are installed firmly in their
connectors.
The entered password is invalid. Turn off the computer and wait at least 5
seconds; then turn it on again and type the correct password.
The computer has turned off because of a critical low-battery condition.
Connect the AC Adapter to the computer and charge the battery pack, or
replace the battery pack with the fully charged one.
The system configuration before and after hibernation mode differs, and the
computer cannot resume normal operation.
Change the system configuration to what it was before the computer entered
hibernation mode.
196
If the memory size is changed, re-create the hibernation file (see page 79).
The computer cannot read the hibernation file.
(Hibernation error)
2xx
Have the computer serviced.
Verify that the DIMM option is correctly installed.
(Memory error)
Chapter 8. Solving Computer Problems
197
Troubleshooting
Screen Message and Its
Meaning
30x
(Keyboard error)
Action
Verify that nothing is pressing on the system keyboard or the external keyboard.
Turn off the computer and all attached devices. Turn on the computer first; then
turn on the attached devices.
If there is still a problem, do the following:
If the computer has an external keyboard connected, do the following:
– Turn off the computer and disconnect the external keyboard; then turn
on the computer. If no error occurred, your external keyboard might be
damaged. Have the external keyboard serviced.
– Verify that the external keyboard is connected to the correct side of the
external input-device connector (see page 18).
– Verify that the external input-device connector is correctly connected to
the computer.
If the preceding items are correct, disconnect the external input-device
connector from the computer and verify that the operation of the system
keyboard is correct. If the system keyboard works correctly, have the
external input-device connector or the external keyboard serviced.
Test the computer by selecting the Start icon in the Test menu of
Easy-Setup.
– If the computer stops during testing and does not continue, have the
computer serviced.
198
IBM ThinkPad 365X/365XD:
User's Guide
Troubleshooting
LCD Blank or Power-On Problems
Problem
The screen is blank and
there are no beeps.
Note: If you are not sure
about the beeps, turn the
computer off; then turn it
on again, and listen to the
beeps.
The screen is blank and
there is one beep.
Note: If you are using an
external monitor, go to
“External Monitor
Problems” on page 206.
The screen is blank and
there is a continuous
beep, or two or more
beeps.
Only the cursor appears.
xxxxx KB OK appears
and the computer halts.
The screen is unreadable
or distorted.
Incorrect characters
appear on the screen.
The screen stays on
although the power switch
is turned off.
The computer goes into
suspend mode
immediately after the
POST. (The suspend
lamp turns on.)
Action
Verify that:
The battery pack is correctly installed.
The AC Adapter is connected to the computer and the power cord is
plugged into a working electrical outlet.
The computer power switch is turned on.
If the preceding items are correct and the screen remains blank, have the
computer serviced.
If a power-on password is set, press any key to display a power-on password
prompt and then type the correct password and press Enter (see page 85).
If a power-on password is not set, verify that the brightness control on the
computer is correctly adjusted. If the preceding items are correct and the
screen remains blank, have the computer serviced.
Have the computer serviced.
Reinstall your operating system and turn on the computer.
If there is still a problem, have the computer serviced.
Have the computer serviced.
Verify that:
The ThinkPad display driver is installed correctly (refer to the Chapter 7 for
installation instructions).
The refresh rate settings in the ThinkPad Features program's display setup
screen (under the Advanced... button) are set to your display resolution and
color type.
Verify that operating systems and application programs have been installed and
configured correctly.
If so, have the computer serviced.
Press the Power Shutdown switch on the rear of the computer with the tip of a
pen to turn off the computer; then turn the computer on again.
Verify that:
The battery pack is charged.
The keyboard is firmly closed.
The environmental temperature is within the acceptable range. Refer to
Appendix D, Features and Specifications.
If the preceding items are correct, have the computer serviced.
Chapter 8. Solving Computer Problems
199
Troubleshooting
Problem
Error 190 appears and the
computer immediately
turns off.
Missing, discolored, or
bright dots appear on the
screen at all times (TFT
color display model only).
200
IBM ThinkPad 365X/365XD:
Action
The battery pack is low in power. Connect the AC Adapter to the computer, or
replace the battery pack with a fully charged one.
The computer LCD contains more than 1,440,000 thin-film transistors (TFTs). A
small number of missing, discolored, or bright dots on the screen is an intrinsic
characteristic of TFT LCD technology and is not an LCD defect.
User's Guide
Troubleshooting
Screen Messages
Message
Diskette and F1 prompts.
Action
Verify that the hard disk drive is correctly installed. Or, verify that the
self-starting diskette is inserted correctly (with the label up and metal-shutter end
first) in the diskette drive.
If so, press F1. If both prompts remain, have the computer serviced.
F1
F2
F10
Error 163 appears with
the date and time screen.
Set the date and time by typing or clicking on the
then click on the OK button.
1996 .12.31
Month
Year
The date and time screen appears when neither the date nor the time is set in
the computer.
Day
or
to set the numbers;
23:59:59
Hour
Month
Second
Power-on password
prompt.
A power-on or supervisor password was set. To use the computer, type the
correct password and press Enter (see page 85).
If the power-on password is not accepted, a supervisor password might have
been set. Type the supervisor password and press Enter.
If there is still a problem, have the computer serviced.
Hard disk password
prompt.
A hard disk password was set. To use the computer, type the correct password
and press Enter (see page 85).
If there is still a problem, have the computer serviced.
Test menu.
Select the Start icon and follow the instructions to test your system.
Start
Restart
1
SystemBoard Memory Display
HDD FDD-1 PCMCIA
2
Serial CDROM
Exit
Infrared
Audio
FDD-2
Parallel
If you cannot go beyond the Test screen, have the computer serviced.
If the computer stops during testing and does not continue, have the
computer serviced.
If testing does not find a problem but one still exists, find the problem in
“What If Testing Cannot Find the Problem?” on page 203.
If the test ends with an error, make a note of the error code and have the
computer serviced.
Chapter 8. Solving Computer Problems
201
Troubleshooting
Message
POST error prompt.
ERROR
OK
Action
An error was found during the POST. Press Enter; then select Start from the
test menu to run the test.
If the test ends with an error, make a note of the error code and have the
computer serviced.
Cancel
Error prompt.
Turn off the computer and start Easy-Setup; then select Test to test the
computer.
If the test ends with an error, make a note of the error code and have the
computer serviced.
You can start the operating system by pressing F1 instead and ignore the error.
A screen or message that
is not listed.
Turn off the computer and start Easy-Setup; then select Test to test the
computer.
If the test ends with an error, make a note of the error code and have the
computer serviced.
If you cannot start Easy-Setup, have the computer serviced.
Other General Problems
Problem
The computer locks up or
does not accept any input.
Cause or Action
365XD CD
When you turn on the computer with OS/2 Warp installed, make
sure no compact disc (CD) is in the CD-ROM drive.
Some CDs cause the computer to lock up and accept no input when the
computer is turned on with the CD installed. If the computer locks up with
the CD installed in the CD-ROM drive, remove the CD, turn off the
computer, and turn the computer on again.
The computer enters
suspend mode
automatically.
The computer
performance is getting
worse in an environment
where the temperature is
higher than the product
specifications. (See
Appendix D, Features and
Specifications.)
202
IBM ThinkPad 365X/365XD:
To turn the computer off, press the Power Shutdown switch on the rear of
the computer with the tip of a pen to turn off the computer; then turn the
computer on again.
The computer enters suspend mode automatically when the processor
temperature is higher than a certain degree. This is not a defect.
Processor speed may decrease if the computer is used in a high-temperature
environment. This is not a defect.
User's Guide
Troubleshooting
Problem
The computer has
problems such as a
broken keylock or a
defective indicator lamp.
The computer does not
turn off with the power
switch.
The computer does not
start from a diskette.
The keyboard cannot be
opened.
Cause or Action
Have the computer serviced.
If the suspend lamp is turned on, connect the AC Adapter or install a fully
charged battery pack in the computer; then resume operation.
Check that the startup sequence in Easy-Setup is set to start the computer from
the diskette drive (see page 41).
Check that a Kensington lock or compatible lock is not in use. See page 102.
Note: Slide the keyboard latches toward the front to open the keyboard.
Chapter 8. Solving Computer Problems
203
Troubleshooting
What If Testing Cannot Find the Problem?
If the test programs do not find the problem, use these troubleshooting charts:
Battery Power Problems
Problem
When you are using OS/2
or Windows, the message,
“Please discharge battery”
appears on the screen.
The battery status
indicator has turned off
although a battery pack is
installed in the computer.
The battery pack cannot
be fully charged in 3
hours by the power-off
charging method.
Action
Discharge the battery pack; then recharge it using the Fuel-Gauge program (see
page 68).
The over-current protection device inside the battery pack has been activated.
Wait for several hours and try to use it again. If there is still a problem, replace
the battery pack or have the computer serviced.
The battery pack might be overdischarged.
1. Turn off the computer.
2. Make sure that the overdischarged battery pack is in the computer.
3. Connect the AC Adapter to the computer and let it charge.
If the battery pack cannot be fully charged in 24 hours, use a new battery pack.
The battery operating time
indicated by the
Fuel-Gauge program or
the battery status indicator
is much longer or shorter
than the actual operating
time.
The operating time for a
fully charged battery pack
becomes shorter.
The computer does not
operate with a fully
charged battery pack
installed.
204
IBM ThinkPad 365X/365XD:
If a Quick Charger (available as an option) is available, use it to charge the
overdischarged battery pack.
Repeat discharging and charging of the battery pack at least three times.
Repeat discharging and charging of the battery pack three to six times. If there
is still a problem, use a new battery pack.
The over-current protective function in the battery pack might be activated. Turn
off the computer for 1 minute to reset the over-current protective function, and
then turn it back on again.
User's Guide
Troubleshooting
CD-ROM Drive Problems
Problem
The CD-ROM will not
operate.
Action
Verify that:
The computer power is turned on and a compact disc is set in the CD-ROM
tray.
The CD-ROM drive connector is firmly attached to the computer.
The CD-ROM drive tray is firmly closed.
The device drivers have been installed correctly (see page 147 for OS/2 or
page 158 for DOS.)
When using Windows and DOS, the device driver and support software
have been copied to the correct directory on the hard disk. (See page 158.)
When using DOS, the CONFIG.SYS and AUTOEXEC.BAT files have the
correct statements (see page 159).
The compact disc cannot
be read.
When using DOS, refer to your DOS documentation and check the
LASTDRIVE statement in your CONFIG.SYS file. (It is recommended to set
the LASTDRIVE to Z.)
Verify that:
The
The
The
The
compact
compact
compact
compact
disc
disc
disc
disc
is
is
is
is
not dirty. Clean it with a CD-ROM cleaner kit.
not defective. Try another compact disc.
placed in the tray with the label side up.
a compatible format, as described on page 58.
Chapter 8. Solving Computer Problems
205
Troubleshooting
Diskette Drive Problems
Problem
The diskette drive in use
icon stays on.
Action
If there is a diskette in the drive, verify that:
– The internal or externally attached diskette drive connector is firmly
attached to the computer.
– The diskette contains the necessary files to start the system.
– There is nothing wrong with your application program.
– There is nothing wrong with the diskette. Try a backup copy if you have
one.
– The diskette is inserted correctly (label up and metal-shutter end first) in
the diskette drive.
If the preceding items are correct, have the computer serviced.
If there is no diskette in the drive, have the computer serviced.
Port Replicator Problems
Problem
The devices attached
through the Port
Replicator do not work.
206
IBM ThinkPad 365X/365XD:
Action
Verify that the devices are installed and connected correctly. (Refer to the
User's Guide for the Port Replicator.)
If the problem remains, remove each device from the Port Replicator and attach
each device directly to the computer one at a time. If the device still does not
work, have the device serviced. If the device works correctly when attached to
the computer, have the Port Replicator serviced.
User's Guide
Troubleshooting
External Monitor Problems
Problem
The screen is blank.
Action
Verify that:
The power cord for the external monitor is plugged into a working electrical
outlet and into the external monitor.
The external monitor is turned on and the brightness and contrast controls
are adjusted.
The signal cable for the external monitor is plugged into the external-monitor
connector on the computer. Some signal cables might not fit into the
external-monitor connector because of the connector type.
The external monitor (CRT
or Both
) is selected as the display
device using the Fn key function (see page 26) or the ThinkPad Features
program (see page 33).
After verifying the preceding items, turn off the computer; then turn it on.
The screen is unreadable
or distorted.
If the external monitor remains blank, run the display tests described in the
instructions supplied with the external monitor. If the tests show the external
display is OK, have the computer serviced.
Verify that:
The ThinkPad display driver is installed correctly (see Chapter 7).
The device setup parameters in the display setting screen (click on the
Display (
) icon in the ThinkPad Features program) are set to your
display resolution and color type (see page 46).
To change or set up the external monitor, see “Attaching a Monitor” on page 45.
Wrong characters appear
on the screen.
If these are correct, run the tests described in the instructions supplied with the
external monitor. If the tests show the external display is OK, have the
computer serviced.
Verify that the operating systems and application programs have been installed
and configured correctly.
If so, have the computer serviced.
Chapter 8. Solving Computer Problems
207
Troubleshooting
Hibernation Problems
Problem
The computer does not
enter hibernation mode
with the Fn+F12 key
combination.
Action
Did you create the hibernation file?
You must create the hibernation file before entering hibernation mode (see
page 79).
Are you using PC Cards?
If you are using one of the IBM communication PC Cards listed in the
“Points to Consider When Using Hibernation Mode” on page 81, the
computer cannot enter hibernation mode.
To enter hibernation mode, stop the communication program, and then
remove the PC Card or turn off the power to the PC Card slot using the PC
Card Director.
Infrared Communication Problems
Problem
The computer cannot
communicate with other
devices using the infrared
port on the computer.
Action
Verify that:
Power is supplied to the infrared port by the ThinkPad Features program
(click on the Infrared (
) icon).
The infrared function is enabled and other choices are set correctly in
ThinkPad Features program (click on the Infrared (
) icon).
The communicating device is using an equivalent communication speed
(see page 54).
The infrared port is clean and does not have any spots.
No cable or electrical device is between the computer and the
communicating device.
Incorrect data is sent
between the computer
and the device.
The distance and angle between the computer and the communicating
device are correct.
Verify that:
The distance and angle between the devices are correct.
The communicating device is using an equivalent communication speed.
There is no device radiating infrared rays, such as remote-controlled devices
or wireless headphones, near the computer or device.
Direct sunlight or fluorescent lamps are not near the computer or device.
208
IBM ThinkPad 365X/365XD:
User's Guide
Troubleshooting
Keyboard, External Numeric Keypad, and Pointing Device Problems
Problem
All or some keys on the
system keyboard do not
work.
Action
If the problem occurs immediately after the computer returns to normal
operation from suspend mode, enter the power-on password. If a power-on
password is set, you must enter the password.
If the external keyboard is connected, the numeric keypad on the system
keyboard will not work.
If the external numeric keypad or the mouse is connected:
1. Turn off the computer.
2. Remove the external numeric keypad or the mouse.
3. Turn on the computer and try using the keyboard again.
The pointer drifts when
the computer is turned on
or after resuming normal
operation.
—or—
During computer
operation, the pointer
drifts when not using the
TrackPoint III.
The mouse or pointing
device does not work.
If the keyboard problem is resolved, check the connection of the external
numeric keypad, external keyboard, or the mouse. If there is still a problem,
have the computer serviced.
Drifting is a characteristic of the TrackPoint III and is not a defect. The drifting
occurs for several seconds under the following conditions:
When
When
When
When
the computer is turned on.
resuming normal operation.
the TrackPoint III is pressed for a long period of time.
the environmental temperature changes.
Verify that the mouse or pointing-device cable is securely connected to the
computer.
Try using the TrackPoint III. If the TrackPoint III works, suspect the
externally attached pointing device.
If you are using Windows 3.11, make sure Computer is set as MS-DOS
System with APM. See page 165.
If you are using a mouse that is not compatible with the IBM PS/2 Miniature
Mouse, disable the TrackPoint III using the ThinkPad Features program.
1. For OS/2 and Windows, see page 261 to disable the TrackPoint III.
All or some keys on the
external numeric keypad
do not work.
2. For DOS, see page 36 or page 261.
Verify that the external numeric keypad is correctly connected to the computer.
Chapter 8. Solving Computer Problems
209
Troubleshooting
Problem
All or some keys on the
external keyboard do not
work.
Action
To use an external keyboard, you need to attach the external input-device
connector to the computer. Verify that:
The external input-device connector is correctly connected to the computer.
The keyboard connector is connected to the correct side of the external
input-device connector.
A number appears when
you type an alphabetic
character.
If the preceding items are correct, disconnect the external input-device
connector from the computer and verify that the operation of the system
keyboard is correct. If the system keyboard works, have the external
input-device connector or the external keyboard serviced.
The numeric lock function is on. To disable it, press and hold Shift; then press
NumLk.
Option Problems
Problem
An IBM option that was
just installed does not
work.
Action
Verify that:
The option is designed for the IBM ThinkPad 365X/365XD computers.
The option has been installed correctly by following the instructions supplied
with the option or this book.
Other installed options or cables are not loose.
No I/O address or interrupt level (IRQ) conflict has occurred. To see the
system resource status, start the ThinkPad Features program and click on
the device icon. (The Advanced... button is available on some devices.)
An IBM option that used
to work no longer works.
If the test programs for the option did not find the problem, have the computer
and option serviced, or see Appendix A.
Verify that:
All the option hardware and cable connections are securely connected.
If the option came with its own test instructions, use those instructions to
test the option.
System resource conflicts do not occur (see Appendix A).
The serial port does not
work.
210
IBM ThinkPad 365X/365XD:
If the preceding items are correct and the test programs did not find the
problem, have the computer and option serviced.
Ensure that serial port is enabled and set to COM1, COM2, COM3, or COM4 in
the ThinkPad Features program (click on the Serial Port
User's Guide
icon).
Troubleshooting
PC Card Problems
Problem
PC Card Director does not
recognize your PC Card.
Action
Verify that:
If you are using the EMS driver under DOS:
– You have set the correct value for the /MA=mmmm-nnnn parameter in the
Resource Map Utility. In the EMS driver, check the UMB area used for
PCMCIA under the X=mmmm-nnnn parameter; then use that range to set
the /MA parameter in the Resource Map Utility.
Your PC Card supports the PCMCIA Release 2.0 and 2.01. Refer to the
manual that came with your PC Card.
If your PC Card does not support the PCMCIA Release 2.0 and 2.01, you
cannot use PC Card Director. Contact your PC Card supplier.
The PC Card is
recognized by PC Card
Director, but the “Not
Ready” message is
shown.
Your PC Card is working by following the diagnostic instructions for your PC
Card, if any.
Verify that:
The PC Card enabler is installed.
Refer to the manuals supplied with your PC Card.
If you are using the EMS driver under DOS:
You have set the correct value for the /MA=mmmm-nnnn parameter in the
Resource Map Utility. In the EMS driver, check the UMB area used for
PCMCIA under the X=mmmm-nnnn parameter; then use that range to set the
/MA parameter in the Resource Map Utility. If you are using Windows, also
set the value for the EMMEXCLUDE= parameter in the SYSTEM.INI file.
The resources for the PC Card are correctly reserved.
Refer to “Checking the Allocated Resources for the PC Card” on page 253.
Chapter 8. Solving Computer Problems
211
Troubleshooting
Problem
The PC Card is shown as
“Ready,” but it does not
work correctly.
Action
Verify that:
The resources reserved for the PC Card do not conflict with those for other
system devices.
Refer to “Avoiding Conflicts When Using PC Cards” on page 232, or open
the ThinkPad Features program to resolve a conflict.
The resources reserved for the PC Card match the settings in the
application program.
If you are using a modem card, check the COM number, I/O port address,
and IRQ level. If you are using a network card, check the I/O port address,
IRQ level, and memory window address. To check the resources assigned
to the PC Card, click on the Status button in the PC Card Director program.
If you are using an I/O PC Card, it might work if you add the following in the
CONFIG.SYS file:
DEVICE=C:\THINKPAD\IBMDSS 1.SYS /IO =x (or /IO1=x)
System resource conflicts
occurred when using PC
Cards.
Note: x shows the PC Card slot number (1 for the upper slot, 2 for the
lower slot, or 12 for both slots) on the computer and /IO1= shows the slot
number for a Port Replicator that is attached to the computer.
See “Avoiding Conflicts When Using PC Cards” on page 232.
Printer Problems
Problem
The printer does not work.
Action
Verify that:
The parallel port is enabled. (Click on the Parallel Port (
) icon.
The printer is turned on and ready to print.
The printer signal cable is connected to the correct connector on the
computer. (For the location of the printer connector, see “parallel connector”
on page 128.)
If the preceding items are correct and the printer still does not work, run the
tests described in the printer manual. If the tests show that the printer is OK,
have the computer serviced.
212
IBM ThinkPad 365X/365XD:
User's Guide
Getting Service
Software Problems
Problem
An application program
does not work correctly.
Action
To determine if a problem is caused by the software, verify that:
Your computer has the minimum memory required to use the software.
Refer to the manuals supplied with the software.
The software is designed to operate with your computer and your operating
system.
Other software works correctly with your computer.
Necessary device drivers are installed (see Chapter 7).
The software you are using works correctly with another computer.
If you have received any error messages when using the application program,
refer to the manuals supplied with the software for a description of the
messages and a solution to the problem.
If the preceding items are correct and there is still a problem, contact your IBM
authorized reseller or IBM marketing representative for help.
Chapter 8. Solving Computer Problems
213
Getting Service
Getting Service
If you need further assistance, call your IBM authorized reseller or
IBM marketing representative.
When requesting service, describe the error message or problem to
the service representative. Error messages can help identify what
service action is required and help the service representative provide
quick and efficient service.
Important
During the warranty period, you may be responsible for repair
costs if the product damage was due to misuse, accident,
modification, unsuitable physical or operating environment, or
improper maintenance by you.
For your convenience, write the service phone numbers here.
Listing Installed Options
When requesting repair service, you might need to know which
options you have in your system. Check or write the names of your
options below.
DIMM
(8MB or 16MB)
______MB Hard Disk Drive
Internal CD-ROM Drive
or Diskette Drive
214
IBM ThinkPad 365X/365XD:
User's Guide
Battery Pack
Port Replicator
PC Cards
Getting Help, Service, and Information
Recording Identification Numbers
The following information is needed when requesting repair services:
IBM Product Name
IBM ThinkPad 365X
IBM ThinkPad 365XD
Machine Type
Serial Number
The machine type and serial number 1 are located on the bottom
of the computer.
The machine type has a prefix of Type.
The serial number has a prefix of S/N.
Chapter 8. Solving Computer Problems
215
Getting Help, Service, and Information
Getting Help, Service, and Information
If you need help, service, technical assistance, or just want more
information about IBM products, you will find a wide variety of
sources available from IBM to assist you. This section provides
information about those sources. Services available and telephone
numbers listed are subject to change without notice.
Solving Problems
Many computer problems can be solved without outside assistance,
by using the online help or by looking in the online or printed
documentation that comes with your computer or software. Also, be
sure to read the information in any README files that come with
your software.
Most computers, operating systems, and application programs come
with documentation that contains troubleshooting procedures and
explanations of error messages. The documentation that comes with
your computer also contains information about the diagnostic tests
you can perform.
If you suspect a hardware problem, run the diagnostic tests and
make a note of any error messages you receive. Then look up the
message in the documentation and take the appropriate action.
If you suspect a software problem, consult the documentation
(including README files) for the operating system or application
program.
216
IBM ThinkPad 365X/365XD:
User's Guide
Getting Help, Service, and Information
Using the HelpWare Support Family
IBM HelpWare is the full-service solution for IBM PC service and
support, wherever IBM products are sold and serviced. Purchasing
an IBM PC hardware product entitles you to standard, no-fee help
and support during the warranty period. If you need additional
support and services, HelpWare provides a wide variety of extended
solutions that address almost any need.
Getting Help by Telephone
During the warranty period, you can get help and information by
telephone, at no additional charge, through the IBM HelpWare PC
Support Line. Expert technical-support representatives are available
to assist you with questions you might have on the following::
Setting up your computer and IBM display
Installing and setting up IBM options purchased from IBM or an
IBM reseller
Using the 60-day support for the preinstalled operating system
Arranging for service
Please have the following information ready when you call:
Serial numbers of your computer, display, and other components
or your proof of purchase
Description of the problem
Exact wording of any error messages
Hardware and software configuration information for your system
If possible, be at your computer when you call.
In the U.S. and Puerto Rico, call 1-800-772-2227.
In Canada, call 1-800-565-3344.
In all other countries, contact your IBM reseller or IBM marketing
representative. See page 224.
These services are available 24 hours a day, 7 days a week
(excluding some holidays).
Chapter 8. Solving Computer Problems
217
Getting Help, Service, and Information
Your HelpWare representative can also fax or mail additional
technical or product information to you, such as:
Sales information
Product brochures
Locations of IBM resellers
Services available through IBM
ThinkPad EasyServ
ThinkPad EasyServ is a courier repair service for IBM Mobile
products in which your ThinkPad computer will be picked up, sent to
IBM for repair, and then returned to the location of your choice. This
service is available at no additional charge during the warranty
period. Most repairs should be made the same day the system is
received at the IBM repair location.
This service will be arranged by calling the PC Support Line for
service. Telephone problem determination will be performed in the
event the issue may be resolved over the telephone. If the problem
is not able to be resolved over the telephone, a support
representative will arrange for ThinkPad EasyServ.
You should keep your original ThinkPad shipping materials to send
the computer to the repair location. If the original shipping carton is
not available, the courier will deliver a shipping carton and return to
pick up the system for delivery to IBM. This service is available only
in the U.S. and Canada.
Getting Help Around the World
If you travel with your computer or need to move it to another
country, you can register for International Warranty Service. When
you register with the International Warranty Service Office, you will
receive an International Warranty Service Certificate that is honored
worldwide, wherever IBM or IBM resellers sell and service IBM PC
products.
For more information or to register for International Warranty Service
in the U.S. or Canada, call 1-800-497-7426.
218
IBM ThinkPad 365X/365XD:
User's Guide
Getting Help, Service, and Information
Online Housecall
Online Housecall is a remote communication tool, available in the
U.S. and Canada only, that allows an IBM HelpWare
technical-support representative to access your PC by modem.
Many problems can be diagnosed remotely and corrected quickly
and easily. To use this tool, a modem and a remote access
application program are required.
For more information about configuring your PC for Online Housecall:
In the U.S., call 1-800-772-2227.
In Canada, call 1-800-565-3344.
Getting Information by Fax
If you have a touch-tone telephone and access to a fax machine, in
the U.S. and Canada you can receive by fax free marketing and
technical information on many topics, including hardware, operating
systems, and local area networks (LANs). You can call the IBM PC
Company Automated Fax System 24 hours a day, 7 days a week.
Follow the recorded instructions, and the requested information will
be sent to your fax machine.
To access the IBM PC Company Automated Fax System, do the
following:
In the U.S., call 1-800-426-3395.
In Canada, call 1-800-465-3299.
Using Electronic Support Services
If you have a modem, you can access public electronic bulletin
boards and public messaging areas, electronic conferences, and
searchable databases available in several of the most popular online
information services.
Chapter 8. Solving Computer Problems
219
Getting Help, Service, and Information
Bulletin boards and online services contain information on many
topics, such as:
PC user groups
PC questions and answers
OS/2 topics
Solving problems
Technical information
Hardware and software configurations
Networking
The IBM PC Company Bulletin Board System (BBS) can be reached
24 hours a day, 7 days a week. Modem speeds of up to 14,400
baud are supported. Long distance telephone charges might apply.
To access the PC Company BBS:
In the U.S., call 1-919-517-0001.
In Canada, call the center closest to you:
– Markham: call 905-316-4255.
– Montreal: call 514-938-3022.
– Toronto: call 416-492-1823.
– Vancouver: call 604-664-6466.
Commercial online services that contain information about IBM
products include:
CompuServe**
Use the following GO word: ThinkPad.
PRODIGY**
Use the Jump command; type IBM and select PC Product
Support.
America Online**
Use the Go to keyword IBM.
220
IBM ThinkPad 365X/365XD:
User's Guide
Getting Help, Service, and Information
Purchasing Additional HelpWare Services
During and after the warranty period, you can purchase additional
HelpWare services, such as support for IBM and non-IBM hardware,
operating systems, and application programs; network setup and
configuration; upgraded or extended hardware repair services; and
custom installations. Service availability and name might vary by
country.
Enhanced PC Support Line: Enhanced PC Support is available
for desktop and mobile IBM computers that are not connected to a
network. Technical support is provided for IBM computers and IBM
or non-IBM options, operating systems, and application programs on
the Supported Products list.
This service includes technical support for:
Installing and configuring your out-of-warranty IBM computer
Installing and configuring non-IBM options in IBM computers
Using the operating system or application programs
Tuning performance
Installing device drivers remotely
Setting up and using multimedia devices
Identifying system problems
Interpreting documentation
You can purchase this service for a single incident, for multiple
incidents, or through a 900 number (billing will be by the telephone
company). For more information about purchasing Enhanced PC
Support, see “Ordering Support Line Services.”
Network and Server Support Line: Network and Server Support
is available for simple or complex networks made up of IBM
workstations and servers using major network operating systems. In
addition, many popular non-IBM adapters and network interface
cards are supported.
This service includes technical support for:
Installing and configuring client workstations and servers
Identifying system problems and correcting problems on the
client or the server
Using IBM and non-IBM network operating systems
Interpreting documentation
Chapter 8. Solving Computer Problems
221
Getting Help, Service, and Information
You can purchase this service for a single incident or for multiple
incidents. For more information about purchasing Network and
Server Support, see “Ordering Support Line Services.”
PC Software Assistance Support Line: This service is an
individual year-long subscription for assistance with desktop
application programs installed in IBM and IBM-compatible computers.
In Canada, this service is called PC Professional. Product experts
will provide telephone assistance, 24 hours a day, 7 days a week, for
application programs on the Supported Products list.
For more information about purchasing this service, see “Ordering
Support Line Services” on page 221.
Ordering Support Line Services: Enhanced PC Support Line,
Network and Server Support Line, and PC Software Assistance
Support Line services are available for products on the Supported
Products list. To receive a Supported Products list:
In the U.S.,
– Call 1-800-772-2227.
– Select the automated fax system option.
– Select the service for which you would like a Supported
Products list:
- For Enhanced PC Support Line, select document 11682.
- For Network and Server Support Line, select document
11683.
- For PC Software Assistance Support Line, select
document 11684.
In Canada, contact IBM Direct at 1-800-465-7999, or:
– Call 1-800-465-3299.
– Select the HelpWare catalog.
In all other countries, contact your IBM reseller or IBM marketing
representative.
For more information or to purchase these services:
In the U.S., call 1-800-772-2227.
In Canada, call 1-800-465-7999.
In all other countries, contact your IBM reseller or IBM marketing
representative.
222
IBM ThinkPad 365X/365XD:
User's Guide
About Your Warranty
Warranty and Repair Services: You can upgrade your ThinkPad
EasyServ/Customer Carry-in warranty service or extend the service
beyond the warranty period.
Warranty upgrades in the U.S. include:
Overnight service option
Your warranty provides ThinkPad EasyServ/Carry-in repair
service.
You can also extend your warranty. HelpWare Warranty and Repair
Services offers a ThinkPad EasyServ Maintenance Agreement.
For more information about warranty upgrades and extensions:
In the U.S., call 1-800-426-7697.
In Canada, call 1-800-465-7999.
In all other countries, contact your IBM reseller or IBM marketing
representative.
Consulting: If you want to better understand and more effectively
use IBM PC Servers and other Personal Computer products, in the
U.S. you can purchase HelpWare Consult Line support. This service
offers telephone access to experts for consultation on agreed-to
topics. The experts provide recommendations and corrective
actions, as appropriate.
For more information about the HelpWare Consult Line, call
1-800-772-2227.
Custom Services
If you are setting up a network and need help installing the network
or the application programs, in the U.S. you can purchase assistance
from HelpWare Custom Services.
The following services are available:
LAN Startup Services
This service provides assistance with setting up and customizing
your network, including:
–
–
–
–
Unpacking equipment
Setting up and testing the hardware
Connecting systems to LAN cabling
Customizing the network operating system
Chapter 8. Solving Computer Problems
223
Service outside North America
– Customizing the network printer server
Connectivity Services
This service provides hardware installation and connection to
support a server and five or more workstations, using token-ring
or 10BaseT Ethernet cabling.
For more information about LAN Startup and Connectivity Services,
call 1-800-772-2227.
Obtaining IBM Operating System Updates
IBM provides update diskettes, called ServicePaks or corrective
service diskettes (CSDs), to customers who report a DOS or OS/2
problem for which there is or will be a corrective program.
You can obtain update diskettes from the following sources:
IBM PC Company BBS.
IBM Software Solutions Center. In the U.S. or Canada, call
1-800-992-4777.
IBM authorized reseller or IBM marketing representative.
Ordering Publications: Additional publications are available for
purchase from IBM. For a list of publications available in your
country:
In the U.S. and Puerto Rico, call IBM PC Books at
1-800-426-7282.
In Canada, call 1-800-465-1234.
In other countries, contact your IBM authorized reseller or IBM
marketing representative.
About Your Warranty
During the warranty period, you may be responsible for repair costs if
the product damage was due to misuse, accident, modification,
unsuitable physical or operating environment, or improper
maintenance.
For complete details about the product warranty, see Appendix E,
“Product Warranties and Notices.”
224
IBM ThinkPad 365X/365XD:
User's Guide
Service outside North America
Service outside North America
Notes:
The number in parentheses ( )
is the country code.
Toll-free numbers do not work
outside the appropriate country.
Caribbean:
Bahamas
(1)-323-7350
Barbados
(1)-426-0670
Jamaica
(1)-926-3170
Netherlands-Antilles (Curacao)
(599)-77-000
Trinidad
(1)-624-5111
North America:
Canada
Toll-Free 800-565-3344
416-443-1681
Mexico (Mexico City-5)
(52)-557-8588
USA
Toll-Free 800-772-2227
919-517-2477
Central and South America
Argentina (Buenos Aires-1)
(54)-1-313-0014
Chile (Santiago-2)
(56)-2-334-400
Colombia (Bogota-1)
(57)-1-236-1672
Costa Rica
(506)-236-222
Ecuador (Quito-2)
(593)-2-565-100
Panama
(507)-693-977
Peru (Lima-14)
(51)-14-836-1263
Venezuela (Caracas-2)
(58)-2-908-8738
Africa
Angola
(244)-337-591
Sociedade Informatica
(Luanda-2)
(244)-337-598
Botswana
(267)-312-425
Business Computer Ltd
Burundi
(257)-2-25-005
Centre National DeL'Inf
Chapter 8. Solving Computer Problems
225
Service outside North America
Burundi
(257)-2-22-813
Computel S.A.R.L SOFT Informatica
Djibouti
(253)-353-444
Dankal Centre Pharma (253)-354-347
Egypt (Cairo-2)
(20)-349-2533
Ethiopia (Addis Ababa-1)
(251)-518-444 AFCOR Ethiopia
Gambia
(22)-27577 Techn. & Office Equipm.
Ghana (Accra-21)
(233)-777-703 Masai Developers Ltd
(233)-772-762
(233)-666-201
(233)-666-204
Kenya
(254)-2-230-261/2 Trans Business
Mach
(254)-2-556-913 Modern Business
Mach
(254)-2-742-574/5 Genop (BCS
Division)
(254)-2-742-400/4
(254)-2-750-475
Liberia
(231)-223-648 Liberia Business Mach.
Malawi
(265)-671-755 Comp. Sales & Services
Malta
(356)-234-175 Computer Solutions
(356)-234-176
(356)-234-177
(356)-233-121
Mozambique
(258)-424-036 Systems &
Computadores
Nigeria (Lagos-1)
(234)-1-633-194
(234)-1-634-473
(234)-1-634-453
(234)-1-630-371
(234)-1-632-739
Rwanda
226
IBM ThinkPad 365X/365XD:
User's Guide
(250)-72-931 Compulec Rwanda
Service outside North America
Sierra Leone
(232)-22-224-275 Continental Comm.
& Service
(232)-22-223-833
South Africa
(27)-011-331-8111
Toll-Free 0800-110756
Sudan
(249)-40-296 Computer Ltd
(249)-42-277
Tanzania
(255)-51-37-183 Intern. Comm. Syst.
(Dar Es Salaam-51)
(255)-51-32-810
Uganda (Kampala-41)
(256)-41-230-823 Business Systems
Ltd
Zaire
(243)-12-24-029 Zaire Business Mach.
(Kinshasa-12)
(243)-12-23-359
Zambia (Lusaka-1)
(260)-1-229-323 Woodgate Computer
Sys.
(260)-1-229-325
(260)-1-221-182
Zimbabwe (Harare-4)
(263)-4-794-631 Infotech Ltd
Europe and Middle East
Abu Dhabi
971-2-337-173 Alpha Data Proc. Ser.
Austria
(43)-222-21145-7500
Bahrain
973-2-531-585 Mohammed Jalal &
Sons
Belgium
(32)-2-718 4333
Bosnia-Herzegovina
(38)-71-219388
Bulgaria
(359)-2-730235
Croatia
(30)-41-624500
Czech Republic
(42)-2-7106111
Denmark
(45)-43-43-43-43
Dubai
971-4-521-000 Al-Abbas Trad. Co.
Finland
(358)-0-9800 4260
France
(33)-1-4039-9798
Germany
(49)-(0)-130-4567
(Hannover)
(49)-(0)-511-5164567
Chapter 8. Solving Computer Problems
227
Service outside North America
Greece
(30)-1-995-3403
Hungary
(36)-1-1654422
Iceland
Toll-Free 354-1-996977
Iran
982-1-893-251 Data Processing Iran
982-1-680-644 Data Proc. Field Eng.
982-1-850-504 Daya Systems Co.
982-1-858-947 Taradis Iran Comp.
982-1-651-319 Iran Microsyste
Ireland
(353)-1-515-811
Israel (Tel Aviv-3)
(972)-3-618-681
Italy
(39)-2-28100327
(39)-2-28100370
Jordan
962-6-603-879 General Comp. & Elec.
962-6-605-365
962-6-664-221 Special Systems Co.
Kuwait
965-2-451-915 Al Khorafi
Lebanon
961-1-324-122 Commercial & Tech.
Sup.
961-1-336-719
961-1-372-860/1 El-Haceb S.A.L.
961-1-389-814
228
IBM ThinkPad 365X/365XD:
Macedonia
(38)-91-117022
Netherlands
(31)-20-513-4275
Norway (Oslo)
(47)-66 99 93 00
Oman
968-793-741 Suhail & Saud Bahwan
Pakistan
(92)-21-525-181
Poland (Warsaw)
(48)-2-6582991
Portugal (Lisbon-1)
(351)-1-795-5546
Qatar
974-435-395 Almana Company
Romania
(40)-1-6158267
Russia
(7)-095-2356602
Saudi Arabia
(966)-2-660-0007 Saudi Business
Mach.
User's Guide
Service outside North America
(966)-2-669-4605 S.B.M. Inf. Products
(966)-2-761-7285 Tayseer Al Sheikh
(966)-2-665-3470 Saudi Soft
Serbia
(38)-11-34622211
Slovak Republic
(42)-7-330175
Slovenia
(38)-61-15215
Spain (Madrid-1)
(34)-1-397-6503
Sweden
(46)-8-793 30 00
Switzerland
(41)-155-46-46
Syria
963-11-249-911 Attar Brothers Trad.
Turkey (Istanbul-1)
(90)-1-800-900
United Kingdom
(44)-81-940-6001
Yemen
967-2-272-401 Khirbash & Majid Trad.
Middle East
973-2-10880 Gulf Business Mach.
Abu Djabi Dubai Kuwait Oman
(Bahrain)
Bahrain Jordan Lebanon Qatar
Asia and Pacific Countries
Australia (Sydney-2)
(61)-2-951-9716
Bangladesh
(880)-2-863532
Brunei
(673)-3-35204
Burma
See Myanmar
Hong Kong
(852)-825-6345
India
(91)-812-562645
Indonesia
(62)-21-571-1455
(62)-21-571-1485
(62)-21-571-1555
(62)-21-571-1575
(62)-21-520-9500
Japan
Toll-Free 0120-20-5550
03-3450-7744 (fax)
(Tokyo)
Korea
(81)-3-3586-1111
Toll-Free 080-023-5050
Chapter 8. Solving Computer Problems
229
Service outside North America
(82)-2-781-7367
Malaysia
(60)-3-735-5727
(60)-3-735-5728
Myanmar (Burma)
(95)-01-78354
(95)-01-73951
New Zealand
Toll-Free 0800-733-222
(64)-4-576-5555
Philippines
(63)-2-819-3679
(63)-2-819-3774
(63)-2-816-3578
Singapore
(65)-289-8973
(65)-289-8975
(65)-289-2101 (fax)
Sri Lanka
(94)-1-448442
(94)-1-440810-203
Taiwan
Toll-Free 080-21-1212
(886)-02-776-7676
Thailand
(66)-2-2734069-70
(66)-2-27344010
For other countries, contact your local IBM office for service
information.
230
IBM ThinkPad 365X/365XD:
User's Guide
Appendix A. Avoiding Hardware Conflicts
This appendix describes how to avoid system resource conflicts by
listing the default and optional hardware settings. It also describes
how to do a network remote program load and how to start the
computer from an ATA PC Card.
For PC Card resource conflicts, see “Avoiding PC Card Resource
Conflicts” on page 255.
Avoiding System Resource Conflicts
When a new option such as an adapter card is installed, the
computer might not operate correctly because of conflicting settings
for IRQ (interrupt) levels, I/O addresses, DMA channels, and
memory addresses.
To avoid these resource conflicts, you must know the hardware
requirements, such as IRQ level and I/O addresses, for each option
and program as shown in their manuals.
ThinkPad Features program:
Page 33.
Then you must check the current resource allocations for the
computer and your expansion unit, and select the available resource
values by using the ThinkPad Features program.
Example:
When you want to install a new Ethernet PC Card in the computer,
you need to assign an IRQ for the PC Card. An Ethernet PC Card
generally requires IRQ5 as a default interrupt level; however, IRQ5
has already been occupied by the ESS AudioDrive function in the
computer.
You need to disable the ESS AudioDrive function when you use the
Ethernet PC Card as follows:
1 Install the Ethernet PC Card in the PC Card slot.
2 Open the ThinkPad Features program and click on the
PC Card (
) icon.
3 Click on the Auto Config button.
Copyright IBM Corp. 1996
231
Avoiding Hardware Conflicts
The ESS AudioDrive function is automatically disabled by the
ThinkPad Features program, and the Ethernet PC Card is now
ready to use.
When you want to disable the Ethernet PC Card and enable the
ESS AudioDrive function, open the ThinkPad Features program,
click on the Audio (
or
) icon; then click on the Advanced
button. You can enable ESS AudioDrive at the Audio/Alarm
Advanced Setup screen.
Avoiding Conflicts When Using PC Cards
When you do a network remote program load (RPL) or start the
computer from a PC Card, you must make sure that the system
resources used by the PC Card do not conflict with the resources
used by other devices.
O S/2
W IN
Using the ThinkPad Features Program: When PC Card
resources conflict with a built-in device, you can resolve the conflict
using the ThinkPad Features program:
1 Insert the PC Card into the PC Card slot.
2 Start Windows or OS/2.
3 Start the ThinkPad Features program.
4 Click on the PC Card ( ) icon.
5 Click on the Auto Config button.
6 Exit the ThinkPad Features program and restart your
computer.
The built-in device in conflict may have been disabled to resolve the
resource conflict.
232
IBM ThinkPad 365X/365XD:
User's Guide
Avoiding Hardware Conflicts
If you are using Windows, you can set the memory area used by
the PC Card as follows:
1 Start the PC Card Director.
2 Select Set Memory Area... from the Actions pull-down menu.
Setup Upper Memory Block
Total Memory Size for PC cards
Unspecified
PC cards
Used
OK
Cancel
Help
3 Plan carefully which memory area to use for the PC Card and
Card Services from the displayed information.
4 Using the mouse pointer, click on the desired memory area
for the PC Card.
5 Click on the OK button.
6 Restart the computer.
Appendix A. Avoiding Hardware Conflicts
233
Avoiding Hardware Conflicts
Doing a Network Remote Program Load
To do a network remote program load (RPL):
1 Using the PS2 command or ThinkPad Features program,
check that there is no conflict between the system resources
used by the PC Card and by other devices.
The following are the resources for a token-ring PC Card and
an Ethernet PC Card:
Token-Ring PC Card
IRQ
9
I/O Address (Hex)
0A20–0A23
Memory Address (Hex) D6000–D7FFF, D8000–DBFFF
Ethernet PC Card
IRQ
5
I/O Address (Hex)
0300–031F
Memory Address (Hex) D2000–D3FFF, D4000–D7FFF
IRQ5 is the default setting used by the Sound Blaster
emulation. To do an Ethernet PC Card RPL, change the
IRQ for the Sound Blaster emulation, or disable it with the
ThinkPad Features program or the SB PS2 command (see
page 261).
2 Start Easy-Setup and select the Start Up icon.
3 Select the Network icon.
A window appears at the bottom of the screen for you to select
the RPL speed.
4 If you are using a token-ring card, select 4 (4Mbps) or 16
(16Mbps) for the RPL speed.
5 Click on OK or press Enter; then restart the computer.
234
IBM ThinkPad 365X/365XD:
User's Guide
Avoiding Hardware Conflicts
Starting the Computer from an ATA PC Card
To start the computer from an ATA PC Card:
1 Using the PS2 command or ThinkPad Features program,
check that there is no conflict between the system resources
used by the PC Card and by other devices.
The following are the resources for an ATA PC Card:
IRQ
I/O Address (Hex)
15
0170–0177
Note
If you install the IDE hard disk or CD-ROM drive in the Port
Replicator, IRQ15 is the default setting used by the IDE
hard disk or CD-ROM drive. Remove the IDE hard disk or
CD-ROM drive to use an ATA PC Card.
2 Start Easy-Setup and select the Start Up icon.
3 Select the PCMCIA icon.
The PC Card (PCMCIA icon) should not be set to follow the
computer hard disk drive (HDD-1 icon) in the list. If the HDD-1
icon is already in the drive-startup sequence, click on the
Reset icon; then set the sequence so that the PC Card icon is
before the HDD-1 icon.
4 Click on OK or press Enter; then restart the computer.
Appendix A. Avoiding Hardware Conflicts
235
Avoiding Hardware Conflicts
List of System Resources
The following table summarizes the available system resources for the computer and expansion units.
Values in parentheses are alternative values that are selectable in the ThinkPad Features program or
application programs. The default values are highlighted.
System Resources
Timer
Keyboard
Serial Port
Parallel Port
IRQ
0
1
Disabled
4
3
4
3
7
7
5
Infrared Port
Disabled
4, 3, or
disabled
Diskette Controller
Video Controller
6
None
ESS AudioDrive
Device (Sound
Blaster)
ESS AudioDrive
Device (FM
Synthesizer)
MIDI Port
(on Port Replicator)
Joystick Port
(on Port Replicator)
5, 7, 10, 11,
or disabled
236
I/O Address (Hex)
0040–0043
0060 and 0064
Disabled
03F8–03FF
02F8–02FF
03E8–03EF
02E8–02EF
03BC–03BE (and
07BC–07BE )
0378–037F (and
0778–077A )
0278–027F (and
0678–067A )
Disabled
03F8–03FF, 02F8–02FF,
02E8–02EF, or
03E8–03EF
03F0–03F7
03BA, 03B4–03B5,
03C0–03CF, 03D4–03D5,
03D8–03D9, 03DA,
2100–21FF, 43C6–43C9,
46E8, and 83C6–83C9
0220–022F or 0240–024F
Memory Address
(Hex)
None
None
None
DMA
Channel
None
None
None
None
0, 1, 3, or
disabled
None
0 and 3 or
disabled
None
A0000–BFFFF and
C0000–C7FFF
2
None
None
1 or 0
None
0388–038B
None
None
5, 7, 10, 11,
or disabled
None
0330–0332 or 0300–0302
None
None
0201
None
None
IBM ThinkPad 365X/365XD:
User's Guide
Avoiding Hardware Conflicts
System Resources
Hard Disk Drive or
CD-ROM Drive (for
the 365XD)
PCMCIA Controller
PC Card
Real Time Clock
TrackPoint III or
Mouse
Math Coprocessor
Exception
Notes:
Memory Address
(Hex)
None
DMA
Channel
None
03E0–03E1
(Depends on the type of
PC Card)
None
(Depends on the
type of PC Card)
None
None
0070–0071
0060 and 0064
None
None
None
None
None
None
None
IRQ
14
I/O Address (Hex)
01F0–01F7 and
03F6–03F7
None
(Depends on
the type of PC
Card)
8
12
13
1. ESS AudioDrive, Sound Blaster, and the MIDI connector (on the Port Replicator) share the same IRQ.
2. Addresses in the parentheses are also used when ECP is enabled by the ThinkPad Features program as
the printer operating mode.
3. When you enable ECP as the printer operating mode by ThinkPad Features program, one of the choices
(including “disabled”) must be selected.
Appendix A. Avoiding Hardware Conflicts
237
Avoiding Hardware Conflicts
238
IBM ThinkPad 365X/365XD:
User's Guide
Appendix B. Advanced Information for PC Cards
This appendix describes advanced information related to using PC
Cards.
Auto Configurator for PC Card Director
Note:
When installing an operating
system, install the PCMCIA device
driver that is on the PCMCIA
Features Diskette to use the Auto
Configurator.
To install the PCMCIA device driver:
The 365X and 365XD computers provide the Auto Configurator, a
program for some PC Cards, so that you do not have to install the
device driver supplied with the card to use it.
The resource and configuration information for the PC Cards are
written in the script files. Once the information is written, you can
use the Auto Configurator Utility to edit these script files.
When Auto Configurator is installed, the following line is added to
the CONFIG.SYS file according to your operating system:
Chapter 7.
For OS/2:
BASEDEV=AUTODRV2.SYS
For DOS and Windows:
DEVICE=[drive:] [directory] AUTODRV.SYS
O S/2
W IN
Starting the Auto Configurator Utility for
OS/2 or Windows
This section describes the Auto Configurator Utility for OS/2 or
Windows.
To start Auto Configurator Utility for OS/2 or Windows, select the
Auto Configurator Utility icon from the PC Card Director window.
The operation for OS/2 and for Windows is the same.
Copyright IBM Corp. 1996
239
Advanced Information for PC Cards
Registering a PC Card in Auto Configurator
1 Select a card from the Available Cards list in the Auto
Configurator Utility main panel.
Select the card for which you want to assign the resources
first. For example, to assign COM3 to a modem card, and not
COM2, select the setting for COM3 first.
2 Click on the Add>> button.
3 Click on the Save button.
The names in the left list box (Available Cards) are the cards
that can be registered. Those in the right list box (Selected
Cards) are already registered in Auto Configurator. When a
PC Card is installed, Auto Configurator starts from the top of
the list to assign the resources to the card.
Deleting a Registered Card
1 Select the PC Card you want to delete from Selected Cards in
the Auto Configurator Utility main panel.
2 Click on the Delete button.
3 Click on the Save button.
240
IBM ThinkPad 365X/365XD:
User's Guide
Advanced Information for PC Cards
Changing the Registered Order for PC Cards
To change the order of the registered PC Cards, do the following:
1 Click on the Order... button in the Auto Configurator Utility
main panel.
The operation for OS/2 and for Windows is the same.
2 Refer to the following to change the order of the PC Cards in
the list:
Moving a card toward the bottom:
a) Select the PC Card you want to move.
b) Click on the Down button. Every time you click on the
Down button, the PC Card is moved toward the bottom
of the list.
Moving a card toward the top:
a) Select the PC Card you want to move.
b) Click on the Up button. Every time you click on the Up
button, the PC Card is moved toward the top of the list.
3 Click on the OK button to save the changes.
The changes are
saved. To cancel the changes, click on the Cancel button.
Appendix B. Advanced Information for PC Cards
241
Advanced Information for PC Cards
Changing the Resource Information for the PC Card
1 Select the PC Card you want to change from the left list box
in the Auto Configurator Utility main panel.
2 Click on the Edit... button.
The following screen is displayed:
Note:
The current resource information is
set as the default and appears in
the input field of each item. The
number that can be set is displayed
in the pull-down list box.
Auto Configurator Utility - Edit
Title
Modem Card [2F8]
Card ID
MODEM,MD24XC,116E2,118C2,FC2400,2460MC
I/O port 1
I/O Port 2
IRQ level
Description:
Interrupt [IRQ] Level
COM No.
Memory window 1
Base address
Size
Card offset
Memory window 2
Base address
Size
Card offset
Ok
Cancel
Help
3 You can change the following registered information for the
PC Card.
The items that can be changed differ among PC Cards.
Card ID
I/O port address
IRQ level
COM number of the serial port
Memory window address
Memory window size
Card offset address
4 Click on the OK button, and save the changes.
To cancel the changes, click on the Cancel button.
242
IBM ThinkPad 365X/365XD:
User's Guide
Advanced Information for PC Cards
Adding to the CONFIG.SYS File
For PC Card Director to work correctly, the PC Card device drivers
(which make up the structured file of PC Card Director) must be
registered in the CONFIG.SYS file. These drivers are automatically
registered in the CONFIG.SYS file when you install PC Card Director
following the instructions in Chapter 7. The following shows each
driver registered in the CONFIG.SYS file and the standard rules.
O
S / 2
Registered Drivers and Standard Rules for
OS/2
The following is a sample of the CONFIG.SYS file for OS/2:
:
BASEDEV=PCMCIA.SYS
← Card Services
BASEDEV=ICRMU 1.SYS
← Resource Map Utility
BASEDEV=IBM2SS 1.SYS
← Socket Services
BASEDEV=AUTODRV2.SYS
← Auto Configurator
DEVICE=C:\THINKPAD\VPCMCIA.SYS
← Virtual Card Services
:
DEVICE=C:\THINKPAD\xxxxxxx.SYS
:
↑ Storage card device driver
REM PC_Card_Client_Device_Driver
:
DEVICE=C:\THINKPAD\$ICPMOS2.SYS
↑ Power Management Support driver
Rule 1
Card Services, Resource Map Utility, and Socket Services
must be listed before any other PCMCIA drivers.
Rule 2
The Resource Map Utility is necessary only for OS/2
Version 2.1x.
Rule 3
The PCMCIA Power Management Support driver must be
listed after all drivers, at the end of the CONFIG.SYS file.
Rule 4
When using storage cards, the device drivers must be
installed according to the card type:
Appendix B. Advanced Information for PC Cards
243
Advanced Information for PC Cards
Using only an ATA card:
:
BASEDEV=PCM2ATA.ADD /!DM ←
ATA card device driver
DEVICE=C:\THINKPAD\PCMSSDIF.SYS
:
↑
Storage API device driver
BASEDEV=OS2PCARD.DMD ←
Storage Card Device Manager
Using an ATA card and an SRAM card:
:
BASEDEV=PCM2ATA.ADD /!DM
←
ATA card device driver
DEVICE=C:\THINKPAD\PCMSSDIF.SYS
↑
Storage API device driver
DEVICE=C:\THINKPAD\PCM2SRAM.SYS
:
↑
SRAM card device driver
BASEDEV=OS2PCARD.DMD
←
Storage Card Device Manager
Using an ATA card and a Flash card:
:
BASEDEV=PCM2ATA.ADD /!DM ←
ATA card device driver
DEVICE=C:\THINKPAD\FLSH2MTD.SYS
↑
Flash Card Memory
Technology driver
DEVICE=C:\THINKPAD\PCMSSDIF.SYS
↑
Storage API device driver
DEVICE=C:\THINKPAD\PCM2FLSH.SYS
:
↑
Flash card device driver
BASEDEV=OS2PCARD.DMD ←
Storage Card Device Manager
Using an ATA card, an SRAM card, and a Flash card:
:
BASEDEV=PCM2ATA.ADD /!DM ←
ATA card device driver
DEVICE=C:\THINKPAD\FLSH2MTD.SYS
↑
Flash Card Memory
Technology driver
DEVICE=C:\THINKPAD\PCMSSDIF.SYS
↑
Storage API device driver
DEVICE=C:\THINKPAD\PCM2SRAM.SYS
↑
SRAM card device driver
DEVICE=C:\THINKPAD\PCM2FLSH.SYS
:
↑
Flash card device driver
BASEDEV=OS2PCARD.DMD ←
Storage Card Device Manager
244
IBM ThinkPad 365X/365XD:
User's Guide
Advanced Information for PC Cards
Rule 5
The Storage Card Device Manager (OS2PCARD.DMD)
must be added after the Power Management Support
driver ($ICPMOS2.SYS) in the CONFIG.SYS file. If you
don't have the Power Management Support driver, the
Storage Card Device Manager must be added at the end
of the CONFIG.SYS file.
Appendix B. Advanced Information for PC Cards
245
Advanced Information for PC Cards
W IN
D O S
Registered Drivers and Standard Rules for
DOS and Windows
The following is a sample of the CONFIG.SYS file for DOS and
Windows:
:
DEVICE=C:\DOS\EMM386.EXE FRAME=D
X=C8 -CFFF
:
DEVICEHIGH=C:\THINKPAD\IBMDSS 1.SYS
←
Socket Services
DEVICEHIGH=C:\THINKPAD\IBMDOSCS.SYS
←
Card Services
DEVICEHIGH=C:\THINKPAD\DICRMU 1.SYS /MA=C8 -CFFF
↑ Resource Map Utility
DEVICEHIGH=C:\THINKPAD\$ICPMDOS.EXE
↑ Power Management Support driver
:
REM PC_Card_Client_Device_Driver
:
DEVICEHIGH=C:\THINKPAD\xxxxxxx.SYS
↑
Storage card device driver
DEVICEHIGH=C:\THINKPAD\AUTODRV.SYS
← Auto Configurator
:
Rule 1
When using the PCMCIA drivers with the Software EMS
driver (EMM386.EXE), you must specify the X=
parameter for EMM386.EXE. This is to avoid conflict in
the memory area used by the PCMCIA drivers and the
Software EMS driver.
Rule 2
Socket Services, Card Services, and Resource Map
Utility must be listed in this order.
Rule 3
The Power Management Support driver must be listed
after the Resource Map Utility.
Rule 4
The PC Card Client device driver must be listed before
the Auto Configurator.
Rule 5
When using storage cards, you must install the device
driver according to the card type, as listed below.
Using only an ATA card:
DEVICEHIGH=C:\THINKPAD\PAWATA.SYS
Using an ATA card and an SRAM card:
DEVICEHIGH=C:\THINKPAD\PAWATAS.SYS
246
IBM ThinkPad 365X/365XD:
User's Guide
Advanced Information for PC Cards
Using an ATA card, an SRAM card, and a Flash
card:
DEVICEHIGH=C:\THINKPAD\FLSHDMTD.SYS
↑
Flash card
Memory Technology driver
DEVICEHIGH=C:\THINKPAD\PAWATASF.SYS
↑
ATA SRAM
Flash card driver
Note: When the total storage of the Flash cards used at the same
time exceeds 10 MB, you must do one of the following:
Assign the /TSIZE:n parameter in the PAWATASF.SYS file.
For example:
1. If the maximum total storage is 20MB, specify:
DEVICE=PAWATASF.SYS /TSIZE:6
2. If the maximum total storage is 40MB, specify:
DEVICE=PAWATASF.SYS /TSIZE:1
See the /TSIZE parameter on page 251.
This increases the memory-resident area for PAWATASF.SYS.
Assign the /EMS parameter in the PAWATASF.SYS file, and the
/NE parameter in the IBMDOSCS.SYS file. This sets
IBMDOSCS.SYS not to use the EMS page frame and allows
PAWATASF.SYS to use it instead. (The EMS memory must be
enabled.)
For example:
DEVICE=IBMDOSCS.SYS /NE /FLASH
:
DEVICE=PAWATASF.SYS /EMS
Appendix B. Advanced Information for PC Cards
247
Advanced Information for PC Cards
Storage Card Device Driver
ATA cards, SRAM cards, and Flash cards are PCMCIA storage
cards. The following section describes the device drivers for these
storage cards, available in PC Card Director.
PCMCIA Storage Card Device Driver for OS/2
O S / 2
Note:
Install PCM2ATA.ADD for all
storage cards, even when you are
using SRAM or Flash cards.
PCM2ATA.ADD supports ATA cards, PCM2SRAM.SYS supports
SRAM cards, and PCM2FLSH.SYS supports Flash cards.
Any PC Card installed in the slot is recognized by its device driver,
so regardless of its type, you can access the card by the drive
name assigned to the slot.
When using the PCMCIA ATA Card Mount Utility, install the
PCMCIA Storage API device driver (PCMSSDIF.SYS) for OS/2.
W IN
D O S
PCMCIA Storage Card Device Driver for DOS
and Windows
PAWATA.SYS supports ATA cards, PAWATAS.SYS supports ATA
cards and SRAM cards, and PAWATASF.SYS supports ATA cards,
SRAM cards, and Flash cards.
These device drivers assign a drive letter for each usable PC Card
slot. These drive letters are displayed when the device drivers are
initialized, and then you can use the drive letter to access the
installed PCMCIA storage card. When you run FORMAT.COM
against the drive letter, the SRAM card is formatted as a diskette
and the ATA or Flash card is formatted as a nonremovable disk. In
the File Manager under Windows, the drive letters are represented
and treated as a diskette drive, regardless of the storage card type.
Before Using PCMCIA Storage Cards
Format new PCMCIA storage cards before use. For Flash cards, run
the Flash Format Utility (FFORMAT.EXE/FFORMAT2.EXE); then
format the Flash card. For ATA cards and SRAM cards, there is no
need to run any programs before formatting the card. Format using
the FORMAT.COM program, by displaying the File Manager (for
Windows), or by choosing the drive icon (for OS/2).
248
IBM ThinkPad 365X/365XD:
User's Guide
Advanced Information for PC Cards
Using PCMCIA ATA Cards with Multiple Partitions
The device driver assigns a drive letter only to the active (bootable)
partition of the ATA card if it holds multiple partitions. For other
primary partitions or logical drives in an extended partition, use the
PCMCIA ATA Card Mount utility to assign the drive letter to it.
O
S / 2
Parameters for the OS/2 PCMCIA ATA Card
Device Driver
The following are the parameters in the OS/2 PCMCIA ATA card
device driver and their explanations:
BASEDEV=PCM2ATA.ADD [/S:n] [/P:hhhh] [/EXIRQ:n]
[/NOBEEP] [/B] [/STBTIME:n] [/MDRV:n] [/!DM]
/S:n
Specifies the number of PC Card slots. /S:1 shows
that there is only one PC Card slot. When this
parameter is not set, the number of PC Card slots is
set to 2.
/P:hhhh
Specifies the lower limit for the I/O address of the
ATA card. The device driver assigns the next usable
I/O address from this lower limit to the card. When
this parameter is not set, the device driver looks for a
usable address and assigns it to the card.
/EXIRQ:n
Specifies the IRQ level that is not assigned to the
card. You can set more than one IRQ level.
/NOBEEP
Specifies not to beep when a storage card is
installed. When this parameter is not set, you will
hear a beep every time a storage card is installed
into the PC Card slot.
/B
Specifies that OS/2 has started from an ATA card.
When this parameter is set, there will be no
redundancy in assigning the logical drive to the slot
where OS/2 was booted. It depends on the ATA
card whether you can start OS/2 from it.
/STBTIME:n
Specifies the time (from 1 to 21 minutes) until
entering standby mode. When the ATA card is not
accessed for the time specified by this parameter, the
ATA card enters standby mode (only when your ATA
card supports standby mode). When this parameter
is not specified, standby mode for the ATA card is
disabled.
Appendix B. Advanced Information for PC Cards
249
Advanced Information for PC Cards
D O S
/MDRV:n
Specifies the number of extra drives that can be used
in addition to the number of PC Card slots available
for the PCMCIA storage devices. When this
parameter is not specified, no extra drive is given to
the device driver. The extra drives can be activated
by the PCMCIA ATA Card Mount utility.
/!DM
Specifies not to use OS2DASD.DMD as the device
manager. When this parameter is set,
OS2PCARD.DMD is used instead.
Parameters for DOS PCMCIA Storage Card
Device Drivers
The following are the parameters in the DOS PCMCIA storage card
device driver and their explanations:
DEVICE=[drive:] [directory]
[/STBTIME:n] [/MDRV:n]
DEVICE=[drive:] [directory]
[/STBTIME:n] [/MDRV:n]
DEVICE=[drive:] [directory]
[/NOBEEP] [/STBTIME:n]
250
IBM ThinkPad 365X/365XD:
PAWATA.SYS [/P:hhhh] [/NOBEEP]
PAWATAS.SYS [/P:hhhh] [/NOBEEP]
PAWATASF.SYS [/P:hhhh]
[/MDRV:n] [/EMS] [/TSIZE:n]
/P:hhhh
Specifies the lower limit for the I/O address of the
ATA card. The device driver assigns the next usable
I/O address from this lower limit to the card. When
this parameter is not set, the device driver looks for a
usable address and assigns that address to the card.
/NOBEEP
Specifies not to beep when a storage card is
installed. When this parameter is not set, you will
hear a beep every time a storage card is installed
into the PC Card slot.
/STBTIME:n
Specifies the time (from 1 to 21 minutes) until
entering standby mode. When the ATA card is not
accessed for the time specified by this parameter, the
ATA card enters standby mode (only when your ATA
card supports standby mode). When this parameter
is not specified, standby mode for the ATA card is
disabled.
/MDRV:n
Specifies the number of extra drives that can be used
in addition to the number of PC Card slots available
for the PCMCIA storage devices. When this
parameter is not specified, no extra drive is given to
User's Guide
Advanced Information for PC Cards
the device driver. The extra drives can be activated
by the PCMCIA ATA Card Mount Utility.
/EMS
When this parameter is specified, the device driver
uses the EMS resources if they are usable. When
this parameter is not specified, the device driver does
not use the EMS resources.
/TSIZE:n
You can specify the size of the table for the device
driver data in the resident memory area. When the
EMS resources are not usable, the data tables are
created in the resident memory area. When the EMS
resources are usable, this parameter is ignored. The
table size depends on the variable n and is
calculated as follows:
table size = n × 1024 bytes
Specify n in a decimal number. When this parameter
is not specified, the device driver creates the table
with n=4. Select the variable n depending on the
total capacity of the Flash card. The following is an
example of the relationship between the variable n
and the total capacity of the Flash card:
Up to 10MB: n=4
Up to 20MB: n=6
Up to 40MB: n=10
O S / 2
PCMCIA Storage Card Device Manager for
OS/2
OS2PCARD.DMD is the device manager for the PCMCIA storage
card. Specify the /!DM parameter in the PCM2ATA.ADD line, so
OS2PCARD.DMD is used instead of OS2DASD.DMD. If you do not
specify /!DM, PCM2ATA.ADD uses the OS/2 standard Storage Card
Device Manager (OS2DASD.DMD); however, under some
conditions the format is not correct when you use OS2DASD.DMD.
The following is a line from the CONFIG.SYS file that describes the
Storage Card Device Manager:
BASEDEV=OS2PCARD.DMD
Appendix B. Advanced Information for PC Cards
251
Advanced Information for PC Cards
O S / 2
OS/2 PCMCIA Storage API Device Driver
This device driver provides a communication function between PC
Card Director or the mount utility and the OS/2 PCMCIA ATA card
device driver. As a result, a utility in the upper layer can get the
drive letter or partition information for the PCMCIA storage card.
The following is a line from the CONFIG.SYS file that describes the
Storage API device driver:
DEVICE =[drive:][directory]PCMSSDIF.SYS
Flash Card Memory Technology Driver
This driver is used to read and write to a Flash card. It is used by
the DOS storage card device driver (PAWATASF.SYS) and OS2
Flash card driver (PCM2FLSH.SYS).
The following is a line from the CONFIG.SYS file that describes the
Flash Card Memory Technology driver, according to the operating
system:
For OS/2:
DEVICE =[drive:] [directory] FLSH2MTD.SYS
↑ Memory Technology driver
DEVICE =[drive:] [directory] PCM2FLSH.SYS
↑
Storage card device driver
For DOS and Windows:
DEVICE=[drive:] [directory] IBMDOSCS.SYS /FLASH
↑ Card Services driver
DEVICE=[drive:] [directory] FLSHDMTD.SYS
↑ Memory Technology driver
DEVICE=[drive:] [directory] PAWATASF.SYS
↑ ATA SRAM Flash card
device driver
252
IBM ThinkPad 365X/365XD:
User's Guide
Advanced Information for PC Cards
Checking the Allocated Resources for the PC Card
If the resources for the PC Cards are not correctly allocated, you will
see error messages. You can check which resources for the PC
Card were not correctly allocated by using PC Card Director. To
check the resources that could not be allocated, click on the Status
button in the PC Card Director program.
The following are some reasons why the resources could not be
correctly allocated, and corresponding actions you should take to
solve the problem.
The resource was already reserved by another device.
Resource Map Utility or other configuration files were not set up
correctly.
To change the resource settings for the PC Card or other devices,
you can do one of the following:
Refer to the system manual or utility program and check which
device is using the resources that you want to use for the PC
Card. Then, change the settings for the device by using, for
example, the setup programs. For more information, refer to the
manuals supplied with your computer.
If your PC Card is enabled by a PC Card enabler, you can
change the resources assigned to the PC Card by changing the
parameters in the PC Card enabler, or you can change the
settings in the configuration file of the PC Card. For more
information, refer to the manuals supplied with your PC Card.
Appendix B. Advanced Information for PC Cards
253
Advanced Information for PC Cards
If you are using Auto Configurator to enable your PC Card, you
can change the resources assigned to the PC Card by using the
Auto Configurator. Make sure the resource is not used by other
devices and can be used by the PC Card and its application
program. For more information, see “Starting the Auto
Configurator Utility for OS/2 or Windows” on page 239.
If you are using modem cards, some modem cards use serial
port COM1 or COM2 and do not have the setup information for
COM3 and COM4. These modem cards cannot be enabled
when other devices are using COM1 and COM2. Error
messages are displayed to tell you that the I/O port address 3F8
or 2F8, or IRQ level 3 or 4, were not allocated.
If this is the case, use the ThinkPad Setup Utility in the ThinkPad
Features program to:
– For OS/2, disable the devices using COM1 or COM2; then
restart the system.
– For DOS or Windows, reserve COM2 for the PC Card, and
use COM1 for other integrated communication devices.
254
IBM ThinkPad 365X/365XD:
User's Guide
Advanced Information for PC Cards
Avoiding PC Card Resource Conflicts
PC Card Director checks the resources for most devices used by the
system to avoid resource conflicts, but it does not recognize all
option devices used. Especially when you are using the expansion
unit, there is a possibility that the I/O port address or IRQ level may
conflict with the PC Card.
Check the status of the PC Card by using PC Card Director. When
the PC Card is set to “Ready,” the resources used for that PC Card
are displayed. Refer to the manuals supplied with the system or
option adapters to check that the resources for the devices in the
system or for the option adapters are not conflicting with the
resources for the IRQ level, I/O port address, or memory window of
the PC Card. If you are using OS/2 Warp Version 3, you can check
the assigned system resources using RMVIEW.EXE.
If there is a conflict:
Use the Resource Map Utility, so that those resources are not
assigned to the PC Card. (Change the value for the /MA=
parameter, or add the /MX=, /PX=, or /IX= parameter.)
If you are using OS/2 Warp Version 3, use RESERVE.SYS to
register those resources in OS/2.
To set RESERVE.SYS, refer to the manuals or online help for
OS/2 Warp, or refer to the READ.ME file of PC Card Director.
If you are using Auto Configurator, change the enabling order or
resource information using the Auto Configurator Utility.
See “Starting the Auto Configurator Utility for OS/2 or Windows”
on page 239.
Change the parameter for the PC Card enabler. Refer to the
manuals supplied with the PC Card.
If you are using network cards, change the resource information
for the PC Card stated in the PROTOCOL.INI or NET.CFG file.
To change the configuration file for the network cards, refer to
the manuals or READ.ME files of the PC Cards or network
drivers.
Appendix B. Advanced Information for PC Cards
255
Advanced Information for PC Cards
Virtual Card Services for OS/2
O S / 2
Note:
A DOS Object includes any DOS
program, Windows program, DOS
full-screen, DOS window, WIN-OS/2
full-screen, and WIN-OS/2 window
objects.
When you use a DOS object in the OS/2 environment, OS/2 Virtual
Card Services provides a Card Services interface so that you can
use the DOS PC Card device driver for the DOS object.
To use Virtual Card Services in a DOS object, do the following:
1 Move the mouse pointer to the DOS object icon; then click on
the right mouse button.
2 Select Settings.
3 Select Session.
4 Select DOS (WIN-OS/2) Settings.
5 Select All DOS (DOS and WIN-OS/2) Settings.
6 Set PCMCIA_CARD_SERVICES as On.
7 Set PCMCIA_RELEASE_LEVEL as 2.1.
8 Set MEM_EXCLUDE_REGIONS as C8000–CFFFF.
9 Specify the PC Card device driver name to the DOS_DEVICE.
Even when a PC Card is enabled in a DOS object, the device driver
or the application program may not work or their performance may
not be what you expect.
256
IBM ThinkPad 365X/365XD:
User's Guide
Appendix C. Using PS2 Commands
Please note that PS2 commands are subject to change without
notice. If you enter a command written in this section and receive an
error, type PS2 ? and refer to the online help menu.
You can enter the following PS2 commands from the DOS and OS/2
command prompts to set the features for your computer. When
entering a command, enter it in the following syntax:
PS2 [Parameter1] [Parameter2] [Parameter3]
Syntax Rules
Refer to these notes when you enter a command.
Syntax
|
Rule
Select one of the options on either side of the vertical
bar ( | ).
Highlighted
Enter the exact highlighted letters in either uppercase
or lowercase.
UPPERCASE
Enter any value for the following:
XX: 0–20
MM: 0–59
HH: 0–23
SS: 0–59
The MM (minutes) and SS (seconds) are optional. The
default values are 0.
lowercase
Copyright IBM Corp. 1996
Command elements in lowercase are optional. For
example, entering PS2 SE OF and PS2 SErial OFf
gives the same results.
257
Using PS2 Commands
The following is a list of commonly used PS2 commands. It is
organized as follows:
Description of the command
Parameter1
Parameter2
Parameter3
Power Management Commands
Set whether to enter suspend mode when the LCD is closed:
Cover
Enable | Disable
—
Note:
This command is effective on the
current power mode set by the PM
command.
Set POwer, LCd, DISK, SPeed, and STandby to their original values:
Note:
This command is effective on the
current power mode set by the PM
commands.
Set the hard disk drive power-saving timer for the specified number of
minutes (xx):
DEFAULT
—
—
xx
DISK
—
Set the features for the infrared port (IR):
IR
Enable | Disable
ADDress
—
1|2|3|4
Note:
Use this command before using
other hibernation commands.
Create the hibernation file:
Note:
Create the hibernation file using the
HFILE command before using this
command.
Enter hibernation mode when the power switch is pressed:
HFILE
HSWITCH
C – Z | DELete
—
Enable | Disable
Set the timer to enter hibernation mode after the specified number of
minutes (xx):
HTimer
Note:
Create the hibernation file using the
HFILE command before using the
LB H command.
IBM ThinkPad 365X/365XD:
[AC | DC]
Set the power management mode to enter when a low-battery condition
occurs:
AC: Specifies battery mode when the AC Adapter is connected.
DC: Specifies ac mode when using battery power:
LBattery
258
xx
User's Guide
Suspend | Hibernation
—
Using PS2 Commands
Note:
This command is effective on the
current power mode set by the PM
command.
Set the LCD off when there is no computer operation after the specified
number of minutes (xx):
Note:
yyyy can be set from 1995 to 2093.
Set the resume timer:
xx
LCd
ON at
—
[yyyy/MM/DD] HH:MM:SS
| Clear
—
Set the power mode:
PMode
Note:
When the AC or DC option is not
specified, this command is effective
on the current power mode set by
the PM command.
Page 75.
[AC | DC]
Set the timer to enter suspend mode after the specified number of minutes
(xx):
AC: Specifies battery mode when the AC Adapter is connected.
DC: Specifies ac mode when using battery power.
POwer
RediSafe suspend mode:
High | Auto | Custom
xx
[AC | DC]
Resume normal operation when detecting an incoming call:
RI
Enable | Disable
—
Enter the RediSafe suspend mode:
SAfe
Enable | Disable
—
Set power on or off for the serial device attached to the serial port:
SErial
Note:
When the AC or DC option is not
specified, this command is effective
on the current power mode set by
the PM commands.
ON | OFf
—
Set the processor speed:
AC: Specifies battery mode when the AC Adapter is connected.
DC: Specifies ac mode when using battery power.
Parameter1
SPeed
Parameter2
Fixed | Auto
Parameter3
MAX | Medium |
Slow | MIN
Parameter4
[AC | DC]
Set the timer to enter hibernation mode from suspend mode after the
specified number of minutes:
Parameter1
S2H
Parameter2
30 | 60 | 90 | Disable
Parameter3
—
Appendix C. Using PS2 Commands
259
Using PS2 Commands
Set the timer to enter standby mode after the specified number of minutes
(xx):
AC: Specifies battery mode when the AC Adapter is connected.
DC: Specifies ac mode when using battery power.
xx
STandby
Note:
Create the hibernation file using the
HFILE command before using the TI
H command.
[AC | DC]
Set the power management mode to enter by the automatic power-saving
timer:
TImer
Suspend | Hibernation
—
ON | OFf
—
Display Commands
Set the screen expansion:
HVEXPansion
Set where to display information:
SCreen
LCD | CRT | BOTH
—
Set the frequency for the external monitor:
VSYNC
640×480
800×600
1024×768
60 | 72 | 75 | 85
56 | 60 | 75 | 85 | Disable
43I | 60 | 75 | Disable
Alarm (Sound) Commands
Set the computer to beep in certain conditions:
BEEP
ON | OFf
Alarm | System
| Warn
System Setup Commands
Display the DMA channel assignments:
? DMA
—
—
Set the Fn key lock function:
FNSticky
260
IBM ThinkPad 365X/365XD:
User's Guide
Enable | Disable
—
Using PS2 Commands
Set the HVEXPansion command to on or off with the Fn+F8 key
combination:
F8
Enable | Disable
—
Display the interrupt level assignments:
? IRQ
—
—
365XD CD
Set the timer for the CD-ROM drive to sleep after the specified
number of minutes (MM):
CDTimer
MM | Default
—
Set the keyboard typematic speed:
KRate
Normal | Fast
—
Set the features for the parallel port:
PARallel
Enable | Disable
ADDress
MOde
DMA
—
LPT1 | LPT2 | LPT3
Uni | Bi | EPP | ECP
0 | 1 | 3 | Disable
Set the features for the serial port:
SERA
Enable | Disable
ADDress
—
1|2|3|4
Disable the screen off, standby, and suspend timers for presentations:
PRESENtation
Enable | Disable
—
Set the features for the ESS AudioDrive (Sound Blaster) emulation:
Audio
Enable | Disable
ADDress
IRQ
DMA
—
220 | 240
5 | 7 | 10 | 11
0|1
Set the startup screen when the computer power is turned on:
STARTup
Enable | Disable
—
Enable | Disable
—
Set the TrackPoint III:
TPOint
Appendix C. Using PS2 Commands
261
Using PS2 Commands
Other Commands
Display the help menu:
? | Help
—
—
Set the A: drive to the internal or external diskette drive:
FDD
Note:
Create the hibernation file using the
HFILE command before using this
command.
Internal | External
—
Enter hibernation mode:
HIBernation
—
—
—
—
Enter suspend mode:
OFF | SUSpend
Turn off the computer:
TURN
262
IBM ThinkPad 365X/365XD:
User's Guide
OFF
—
Appendix D. Features and Specifications
This appendix describes the features and specifications for the IBM
ThinkPad 365X/365XD superslim notebook computer.
Microprocessor
Intel Pentium processor
Memory
Built-in: A minimum of 8 MB RAM
Optional:
– 8 MB, 16 MB DIMM (70ns, 144-pin EDO)
Storage devices
2.5-inch hard disk drive (upgradable)
3.5-inch diskette drive
3.5-inch external diskette drive (for CD-ROM models)
5.25-inch 4X CD-ROM (available on some models)
Display
The SVGA color LCD display uses either TFT or DSTN technology
(depending on the model) and supports:
DSTN color LCD
–
–
–
–
Up to 256 colors
Up to 800-by-600 resolution on the LCD and external monitor
Brightness control and contrast control
1 MB built-in VRAM
TFT color LCD
–
–
–
–
–
Up to 65,536 colors
Up to 800-by-600 resolution on the LCD
Up to 1024-by-768 resolution on the external monitor
Brightness control
1 MB built-in VRAM
Keyboard
84-key, 85-key, or 89-key
TrackPoint III
Fn key functions
Embedded numeric keypad
Audio
Compatible with Sound Blaster Pro
Copyright IBM Corp. 1996
263
Features and Specifications
External interface (standard for all models)
DC-In jack for ac power supply
Infrared port
Serial connector (EIA-RS232D)
Parallel connector (Centronics)
External input-device connector
External monitor connector
Two PCMCIA slots (accept two Type I or Type II PC Cards, or
one Type III PC Card)
Port Replicator port
External interface (available on some models)
Audio line-in jack
Audio line-out/headphone jack
Microphone jack
External diskette drive port
264
IBM ThinkPad 365X/365XD:
User's Guide
Features and Specifications
Specifications
Note:
Actual specifications may vary
based on features, vendor
components, or manufacturer
processes.
Size
Width:
297 mm (11.72 in.)
Depth:
210 mm (8.3 in.)
Height:
49.5 mm (1.95 in.)
Weight
Total system weight varies, depending on the LCD and hard disk
drive installed.
For models with a built-in CD-ROM:
– 2.76 kg to 2.85 kg (6.1 lb to 6.3 lb)
For models with an internal diskette drive:
– 2.63 kg to 2.69 kg (5.8 lb to 5.9 lb)
Environment
Temperature
– Operating: 10°C to 35°C (50°F to 95°F)1
– Non-operating: −20°C to 60°C (−4°F to 140°F)
Relative Humidity:
– Operating 8% to 80% (noncondensing)
Altitude: −61 m (−200 ft) to 3048 m (10,000 ft)2
1
2
With diskette in drive
In unpressurized conditions
Appendix D. Features and Specifications
265
Diskette Standards
Heat output
Approximately 119.4 British Thermal Units (BTUs) per hour (35.0
watts)
Electrical (AC Adapter)
Sine-wave input, at 50 to 60 Hz, is required
100–240 V ac
Battery pack (NiMH)
Output voltage: 9.6 V dc
Capacity: 2800 mAh
Diskette Standards
To get the best performance from your diskette drives, use
high-quality diskettes (such as IBM diskettes) that meet or exceed
the following standards:
1 MB, 3.5-inch, unformatted diskette:
ANSI (American National Standard Institute) X3. 137
ISO (International Standards Organization) 8860
ECMA (European Computer Manufacturers' Association) 100
2 MB, 3.5-inch, unformatted diskette:
ANSI X3. 171
ISO 9529
ECMA 125
266
IBM ThinkPad 365X/365XD:
User's Guide
IBM Power Cords
IBM Power Cords
IBM power cords for a specific country are usually available only in
that country. For 3-pin power cords:
Note
The grounded adapter is required for full MPRII compliance.
IBM Power
Cord
Part Number
25H2205
25H2207
25H2219
25H2209
25H2211
25H2213
25H2215
25H2221
25H2223
25H2225
85G6665
Used in These Countries
Argentina, Australia, New Guinea, New Zealand,
Papua, Paraguay, Uruguay
Bahamas, Barbados, Bermuda, Bolivia, Canada,
Cayman Islands, Colombia, Costa Rica, Dominican
Republic, Ecuador, El Salvador, Guatemala, Guyana,
Haiti, Honduras, Jamaica, Korea (South), Mexico,
Netherlands Antilles, Nicaragua, Panama, Peru,
Philippines, Saudi Arabia, Suriname, Taiwan, Trinidad
(West Indies), United States of America, Venezuela
Thailand
Austria, Belgium, Bulgaria, Czech Republic, Egypt,
Finland, France, Germany, Greece, Hungary, Iceland,
Indonesia, Netherlands, Norway, Poland, Portugal,
Romania, Slovakia, Spain, Sweden, Turkey, former
Yugoslavia
Denmark
Bangladesh, Pakistan, South Africa, Sri Lanka
Abu Dhabi, Albania, Antigua, Bahrain, Brunei, Dubai,
Fiji, Hong Kong, India, Ireland, Kenya, Kuwait,
Macao, Malaysia, Nigeria, Oman, People's Republic
of China, Qatar, Singapore, United Kingdom
Switzerland
Chile, Italy
Israel
Japan (2-pin)
Appendix D. Features and Specifications
267
IBM Power Cords
Attention:
If a 3-pin power cord came with
your computer, you must follow the
following safety notice.
DANGER
Electrical current from power, telephone, and communication cable
is hazardous. To avoid shock hazard, connect and disconnect
cables as shown below when installing, moving, or opening the
covers of this product or attached devices. The 3-pin power cord
must be used with a properly grounded outlet.
To Connect
To Disconnect
Turn everything OFF.
Turn everything OFF.
First, attach all cables to devices.
First, remove the power cord from
the outlet.
Remove signal cables from
receptacles.
Attach the signal cables to
receptacles.
Remove all cables from devices.
Attach the power cord to an outlet.
Turn the device ON.
Note: In the U.K., by law:
The telephone line cable must be connected after the power cord.
The power cord must be disconnected after the telephone line cable.
268
IBM ThinkPad 365X/365XD:
User's Guide
Appendix E. Product Warranties and Notices
International Business Machines Corporation
Armonk, New York 10504
Statement of Limited Warranty
The warranties provided by IBM in this Statement of Limited Warranty apply only to
Machines you originally purchase for your use, and not for resale, from IBM or an IBM
authorized reseller. The term “Machine” means an IBM machine, its features,
conversions, upgrades, elements, or accessories, or any combination of them.
Machines are subject to these terms only if purchased in the United States or Puerto
Rico, or Canada, and located in the country of purchase. If you have any questions,
contact IBM or your reseller.
Machine: IBM ThinkPad 365X or 365XD
Warranty Period*: One Year
*Elements and accessories are warranted for three months. Contact your place
of purchase for warranty service information.
Production Status
Each Machine is manufactured from new parts, or new and serviceable used parts
(which perform like new parts). In some cases, the Machine may not be new and may
have been previously installed. Regardless of the Machine's production status, IBM's
warranty terms apply.
The IBM Warranty
IBM warrants that each Machine 1) is free from defects in materials and workmanship
and 2) conforms to IBM's Official Published Specifications. BM calculates the
expiration of the warranty period from the Machine's Date of Installation. The date on
your receipt is the Date of Installation, unless IBM or your reseller informs you
otherwise.
During the warranty period, IBM or your reseller will provide warranty service under
the type of service designated for the Machine and will manage and install engineering
changes that apply to the Machine. IBM or your reseller will specify the type of
service.
For a feature, conversion, or upgrade, IBM or your reseller may require that the
Machine on which it is installed be 1) the designated, serial-numbered Machine and 2)
at an engineering-change level compatible with the feature, conversion, or upgrade.
Some of these transactions (called “Net-Priced” transactions) may include additional
parts and associated replacement parts that are provided on an exchange basis. All
removed parts become the property of IBM and must be returned to IBM.
Replacement parts assume the remaining warranty of the parts they replace.
If a Machine does not function as warranted during the warranty period, IBM or your
reseller will repair or replace it (with a Machine that is at least functionally equivalent)
without charge. If IBM or your reseller is unable to do so, you may return it to your
place of purchase and your money will be refunded.
If you transfer a Machine to another user, warranty service is available to that user for
the remainder of the warranty period. You should give your proof of purchase and this
Statement to that user.
Copyright IBM Corp. 1996
269
Product Warranties
Warranty Service
To obtain warranty service for the Machine, you should contact your reseller or call
IBM. In the United States, call IBM at 1-800-772-2227. In Canada, call IBM at
1-800-565-3344. You may be required to present proof of purchase.
Depending on the Machine, the service may be 1) a “Repair” service at your location
(called “On-site”) or at one of IBM's or a reseller's service locations (called “Carry-in”)
or 2) an “Exchange” service, either On-site or Carry-in.
When a type of service involves the exchange of a Machine or part, the item IBM or
your reseller replaces becomes its property and the replacement becomes yours. The
replacement may not be new, but will be in good working order and at least
functionally equivalent to the item replaced.
It is your responsibility to:
1. obtain authorization from the owner (for example, your lessor) to have IBM or your
reseller service a Machine that you do not own;
2. where applicable, before service is provided —
a) follow the problem determination, problem analysis, and service request
procedures that IBM or your reseller provide,
b) secure all programs, data, and funds contained in a Machine,
c) inform IBM or your reseller of changes in a Machine's location, and
d) for a Machine with exchange service, remove all features, parts, options,
alterations, and attachments not under warranty service. Also, the Machine
must be free of any legal obligations or restrictions that prevent its exchange;
and
3. be responsible for loss of, or damage to, a Machine in transit when you are
responsible for the transportation charges.
Extent of Warranty
IBM does not warrant uninterrupted or error-free operation of a Machine.
Misuse, accident, modification, unsuitable physical or operating environment, improper
maintenance by you, or failure caused by a product for which IBM is not responsible
may void the warranties.
THESE WARRANTIES REPLACE ALL OTHER WARRANTIES, EXPRESS
OR IMPLIED, INCLUDING, BUT NOT LIMITED TO, THE IMPLIED
WARRANTIES OF MERCHANTABILITY AND FITNESS FOR A
PARTICULAR PURPOSE. HOWEVER, SOME LAWS DO NOT ALLOW
THE EXCLUSION OF IMPLIED WARRANTIES. IF THESE LAWS APPLY,
THEN ALL EXPRESS AND IMPLIED WARRANTIES ARE LIMITED IN
DURATION TO THE WARRANTY PERIOD. NO WARRANTIES APPLY
AFTER THAT PERIOD.
In Canada, warranties include both warranties and conditions.
Some jurisdictions do not allow limitations on how long an implied warranty lasts, so
the above limitation may not apply to you.
270
IBM ThinkPad 365X/365XD:
User's Guide
Product Warranties
Limitation of Liability
Circumstances may arise where, because of a default on IBM's part (including
fundamental breach) or other liability (including negligence and misrepresentation),
you are entitled to recover damages from IBM. In each such instance, regardless of
the basis on which you are entitled to claim damages, IBM is liable only for:
1. bodily injury (including death), and damage to real property and tangible personal
property; and
2. the amount of any other actual loss or damage, up to the greater of $100,000 or
the charge for the Machine that is the subject of the claim.
Under no circumstances is IBM liable for any of the following:
1. third-party claims against you for losses or damages (other than those under the
first item listed above);
2. loss of, or damage to, your records or data; or
3. economic consequential damages (including lost profits or savings) or incidental
damages, even if IBM is informed of their possibility.
Some jurisdictions do not allow the exclusion or limitation of incidental or
consequential damages, so the above limitation or exclusion may not apply to you.
This warranty gives you specific legal rights and you may also have other rights which
vary from jurisdiction to jurisdiction.
Appendix E. Product Warranties and Notices
271
Notices
Notices
References in this publication to IBM products, programs, or services
do not imply that IBM intends to make these available in all countries
in which IBM operates. Any reference to an IBM product, program,
or service is not intended to state or imply that only IBM’s product,
program, or service may be used. Any functionally equivalent
product, program, or service that does not infringe any of IBM’s
intellectual property rights may be used instead of the IBM product,
program, or service. Evaluation and verification of operation in
conjunction with other products, except those expressly designated
by IBM, are the user’s responsibility.
IBM may have patents or pending patent applications covering
subject matter in this document. The furnishing of this document
does not give you any license to these patents. You can send
license inquiries, in writing, to:
IBM Director of Licensing
IBM Corporation
500 Columbus Avenue
Thornwood, NY 10594
USA
Trademarks
The following terms are trademarks of the IBM Corporation in the
United States or other countries or both:
AT
HelpClub
HelpWare
IBM
Operating System/2
OS/2
PC Card Director
PS/2
RediSafe
ThinkPad
TrackPoint III
WIN-OS2
Windows is a trademark of Microsoft Corporation.
Other company, product, and service names, which may be denoted
by a double asterisk (**), may be trademarks or service marks of
others.
272
IBM ThinkPad 365X/365XD:
User's Guide
Electronic Emission Notices
Electronic Emission Notices
Federal Communications Commission (FCC) Statement
Note: This equipment has been tested and found to comply with the
limits for a Class B digital device, pursuant to Part 15 of the FCC
Rules. These limits are designed to provide reasonable protection
against harmful interference in a residential installation. This
equipment generates, uses, and can radiate radio frequency energy
and, if not installed and used in accordance with the instructions,
may cause harmful interference to radio communications. However,
there is no guarantee that interference will not occur in a particular
installation. If this equipment does cause harmful interference to
radio or television reception, which can be determined by turning the
equipment off and on, the user is encouraged to try to correct the
interference by one or more of the following measures:
Reorient or relocate the receiving antenna.
Increase the separation between the equipment and receiver.
Connect the equipment into an outlet on a circuit different from
that to which the receiver is connected.
Consult an IBM authorized dealer or service representative for
help
Properly shielded and grounded cables and connectors must be
used in order to meet FCC emission limits. Proper cables and
connectors are available from IBM authorized dealers. IBM is not
responsible for any radio or television interference caused by using
other than recommended cables and connectors or by unauthorized
changes or modifications to this equipment.
Unauthorized changes or modifications could void the user's
authority to operate the equipment. This device complies with Part
15 of the FCC Rules. Operation is subject to the following two
conditions: (1) this device may not cause harmful interference, and
(2) this device must accept any interference received, including
interference that may cause undesired operation.
Appendix E. Product Warranties and Notices
273
Electronic Emission Notices
Canadian Department of Communications Compliance
Statement
This equipment does not exceed Class B limits per radio noise
emissions for digital apparatus, set out in the Radio Interference
Regulation of the Canadian Department of Communications.
Avis de conformité aux normes du ministère des
Communications du Canada
Cet équipement ne dépasse pas les limites de Classe B d'émission
de bruits radioélectriques pour les appareils numériques, telles que
prescrites par le Règlement sur le brouillage radioélectrique établi
par le ministère des Communications du Canada.
European Community Directive Conformance Statement
This product is in conformity with the protection requirements of EC
Council Directive 89/336/EEC on the approximation of the laws of the
Member States relating to electromagnetic compatibility.
A declaration of Conformity with the requirements of the Directive
has been signed by IBM United Kingdom Limited, PO Box 30,
Spango Valley, Greenock, Scotland PA160AH.
This product satisfies the Class B limits of EN 55022.
274
IBM ThinkPad 365X/365XD:
User's Guide
Glossary
This glossary includes terms and
definitions from the IBM Dictionary of
Computing (New York: McGraw-Hill,
1994).
ac (AC). Alternating current.
ac power. Power that is supplied to the
computer through an electrical outlet.
Advanced Power Management (APM).
A facility consisting of one or more layers
of software that support power
management in computers with power
manageable hardware. The APM
software interface allows applications,
operating systems, device drivers, and
the APM BIOS to work together to
reduce power consumption, without
reducing system performance.
ANSI. American National Standards
Institute.
application program. A program that
performs specific tasks on your
computer, such as word processing or
creating spreadsheets.
APM. Advanced Power Management.
ASCII. American National Standard
Code for Information Interchange.
ATA PC Card. A PC Card with an AT
attachment hard disk drive interface such
as a storage device PC Card.
AUTOEXEC.BAT. A file that contains a
startup procedure of DOS. Each time
you start your system, DOS performs the
commands that are stored in this file.
backup copy. A copy, usually of a file
or group of files, that is kept in case the
original file or files are unintentionally
changed or destroyed.
batch. A process method in which a
program or programs records with little or
no operator action.
BIOS (Basic Input/Output System).
Microcode that contains such basic
hardware operations as interactions with
diskette drives, hard disk drives, and the
keyboard.
Copyright IBM Corp. 1996
bitmap graphics. (1) A form of graphics
in which all points on the display are
directly addressable. (2) In multimedia
applications, a form of graphics in an
area of computer memory or storage that
can be displayed as an image.
boot. To prepare a computer system for
operation by loading an operating
system.
bus. A facility for transferring data
between several devices located between
two end points, only one device being
able to transmit at a given moment.
cache memory. A special memory,
smaller and faster than main memory,
that is used to hold a copy of instructions
and data in main memory that are likely
to be needed next by the processor, and
that have been obtained automatically
from main memory.
CD. Compact disc.
CD-I. Compact disc-interactive.
CD-ROM. Compact disc read-only
memory.
combination keys. Keys that have
specific functions when you hold them
down at the same time.
CONFIG.SYS. A file that contains a
group of commands to load installable
device drivers and reserve space in
system memory for information
processing. This file is referred to by
DOS during system startup.
configuration. (1) The manner in which
the hardware and software of an
information processing system are
organized and interconnected. (2) The
physical and logical arrangement of
devices and programs that make up a
data processing system. (3) The devices
and programs that make up a system,
subsystem, or network.
CRT. Cathode ray tube display.
device driver. A file that contains the
code needed to attach and use a device.
The operating system loads device
drivers for screens, keyboards, printers,
diskette drives, hard disk drives, and
275
auxiliary devices. The user can replace
these or add other devices by coding and
loading a device driver.
fuel gauge. An indicator on the screen
that constantly shows the current power
status of the battery pack.
DIMM. Dual inline memory module.
HDD. Hard disk drive.
directory. A type of file containing the
names and controlling information for
other files or other directories.
HHR. Half-horizontal resolution.
DMA. Direct memory access. The
transfer of data between memory and
input/output units without processor
intervention.
double-click. To press and release a
mouse button twice within a time frame
defined by the user, without moving the
pointer off the choice.
DRAM. Dynamic random access
memory.
DSTN. Dual-scan, super-twisted
nematic.
EDO. Enhanced Data Output or
Extended Data Out. A type of DRAM
that offers faster access to data in
memory.
EGA. Enhanced graphics adapter.
EIA. Electronics Industries Association.
EIA-232D. An EIA interface standard
that defines the physical, electronic, and
functional characteristics of an interface
line that connects a communication
device and associated workstation. It
uses a 25-pin connector and an
unbalanced line voltage.
hibernation mode. One of the
power-saving methods that stores data
and applications running in the
computer's memory on the hard disk.
During hibernation, the computer is
automatically turned off to save power.
When power is turned on again, the
computer immediately restores the same
data and applications as when
hibernation started, without restarting the
operating system.
high-performance mode. A method of
increasing the access time of video
memories for DSTN LCDs, to produce
high-quality video on an external monitor
(CRT).
high-resolution mode. Video
resolutions that are greater than 640 x
480 pels.
icon. A graphic symbol, displayed on a
screen, that a user can point to with a
pointing device such as a mouse to
select a particular function or software
application.
IR. Infrared.
IRQ. Interrupt request.
ISA. Industry standard architecture.
EMS. Expanded memory specification.
ISO. International Organization for
Standardization.
fax. Facsimile machine or transmitted
document.
JEIDA. Japan Electronics Industry
Development Association.
FDD. Floppy disk drive.
kilobyte (KB). 1024 (210) bytes.
fixed disk. In personal computing, fixed
disk is synonymous with hard disk.
LAN. Local area network.
LCD. Liquid crystal display.
flash memory. A rewritable storage that
is used to contain BIOS instructions and
POST routines.
folder. A file used to store and organize
documents.
276
IBM ThinkPad 365X/365XD:
User's Guide
LPT1 or LPT2. The name you can
assign a parallel port to specify its
address. See also parallel port.
mAh. Milliampere hours.
megabyte (MB). 1024 kilobytes. About
1 million (1,048,576 or 220) bytes.
memory. Often referred to as
random-access memory (RAM),
measured in kilobytes (KB) or megabytes
(MB) of information.
MHz. Megahertz.
microcode. One or more
microinstructions used in a product as an
alternative to hard-wired circuitry to
implement functions of a processor or
other system component.
MIDI. Musical Instrument Digital
Interface.
modem. A device that connects your
computer to a telephone line, allowing it
to communicate with another computer at
another location.
parallel port. A port used to attach
such devices as dot-matrix printers and
input/output units; it transmits data 1 byte
at a time.
parity check. A redundancy check by
which a recalculated parity bit is
compared with the pregiven parity bit.
partial suspend mode. A kind of
suspend mode where only a part of the
system components use power.
password. A series of letters or
numbers that you designate to restrict
access to your computer.
POST. Power-on self-test.
pop-up menu. On the display screen, a
menu that emerges in an upward
direction from a particular point or line on
a display screen.
prompt. A visual or audible message
sent by a program to request the user's
response.
pull-down menu. On the display
screen, a menu that emerges in a
downward direction from a point or line at
or near the top of the screen.
reboot. Restart all operations of the
computer as if the power were just turned
on.
resume. To begin computer operations
again from suspend mode.
serial port. A port used to attach such
devices as display devices, letter-quality
printers, modems, plotters, and such
pointing devices as light pens and mice;
it transmits data 1 bit at a time.
suspend mode. A power-saving mode
in which all computer operations are
stopped in order to reduce power drain
and restrict access to the files.
SVGA. Super video graphics adapter, a
video mode that produces up to
1024-by-768 resolution.
STN. Super-twisted nematic.
TFT. See thin-film transistor.
PC Card. A card that is based on the
PCMCIA standard.
PCMCIA. Personal Computer Memory
Card International Association.
pel. Picture element.
picture element. In computer graphics,
the smallest element of a display surface
that can be independently assigned color
and intensity.
pixel. Picture element.
pointing device. An instrument, such
as a mouse, TrackPoint III, or joystick,
that is used to move a pointer on the
screen.
thin-film transistor (TFT). A type of
material that is used to create some LCD
computer screens.
TSRs. Terminate-and-stay-resident
programs. Memory-resident programs
that are loaded into memory and stay
there so you can conveniently access
them whenever you need to.
vertical expansion. A video display
technique in character-display mode to fit
video images on the whole LCD screen
by adjusting the number of character dots
vertically.
Glossary
277
VESA. Video Electronics Standards
Association.
XMS. Extended memory specification.
1KR or 2KR. 1K or 2K refresh rate.
VGA. Video graphics adapter, a video
mode that produces up to 640-by-480
resolution.
278
IBM ThinkPad 365X/365XD:
User's Guide
Index
A
AC Adapter
input rating 21
power source 21
using 21
America Online service 220
API device driver, OS/2 PCMCIA storage
card 252
APM (advanced power
management) 70
Windows, installing 165
assistance 216
ATA PC Card 249
audio
features 56
support software 184
Auto Configurator 239
B
battery
maintenance 64
memory 64
battery pack 62, 63, 64
charging 62, 63, 64
fuel-gauge program, using 68
maximizing battery-powered
operation 70
monitoring battery power
fuel-gauge program, using 68
preserving battery-pack life 70
problems 204
boot manager, OS/2 143
boot, selectable 41
broken keylock 202
bulletin boards 219
C
card in-use 19
card services 49
CardBus card 49
carrying the computer 30
CD-ROM drive 16
device drivers
handling CDs 59
problems 205
using 58, 59
charging, battery indicator 19
charging, battery pack 62, 63, 64
cleaning the computer 29
cleaning the TrackPoint cap 25
Copyright IBM Corp. 1996
CompuServe 220
configuration menu, Easy-Setup 38
Connectivity Services network 224
consulting services 223
corrective service diskette (CSD) 224
custom services 223
D
damage to computer, preventing 29
date and time
Easy-Setup, setting 38
prompt 32
dealer locations 217
device driver
device drivers
for DOS, installing 158
for OS/2, installing 147
display driver
for OS/2, installing 155
for Windows 3.11, installing 173
for Windows 95, installing 177
infrared device driver
for OS/2, installing 153
for Windows 3.11, installing 172
for Windows 95, installing 186
PC Card Director
for DOS, installing 162
for OS/2, installing 151
for Windows 3.11, installing 170
for Windows 95, installing 180
PCI-IDE bus master driver
for OS/2, installing 150
for Windows 95, installing 179
ThinkPad features
for DOS, installing 161
for OS/2, installing 149
for Windows 3.11, installing 169
for Windows 95, installing 178
diagnostic diskette 224
DIMM adapter 119—124
DIMM installation 119
diskette drive 19
in-use, indicator 19
installing an external 57
problems 206
Diskette Factory 3
diskette standards 266
display
output type 43
problems 43, 199
switching, using Fn key 27
279
display (continued)
using 43
display driver
for OS/2, installing 155
for Windows 3.11, installing 165,
173
for Windows 95, installing 177
DMA channel, system resource 236
DOS Version 7.0 157
drive-startup sequence 41
Drivers Selector, PC Card Director 52
dual boot, OS/2 142
E
Easy-Setup
configuration menu 38
date and time menu 38
password menu 39
restart menu 40
start-up menu 39
test menu 40
time and date menu 38
using 37
EDO memory 263, 276
electronic support 219
ergonomics information x
error codes 196
ESS AudioDrive software
for Windows 95, installing 184
installing for OS/2 Warp 152
installing for Windows 3.11 171
Ethernet RPL speed 42
external diskette drive 5
external keyboard
attaching 127
external monitor
attaching 45
display driver
for OS/2, installing 155
for Windows 3.11, installing 173
for Windows 95, installing 177
setting 46
problems 43, 207
SVGA modes, using 48
using 43
external numeric keypad
attaching 125
problems 209
external printer 128
attaching 128
ezplay command, for DOS 53
280
IBM ThinkPad 365X/365XD:
User's Guide
F
FAQ 191—193
fee services 221
Flash card memory technology
driver 252
Fn key
function 26
lock 26
fuel-gauge program
Fn key function, using 26
monitoring battery status 68
using 68
H
handling precautions 29
hard disk drive
securing, with password
upgrading 106
hard disk password
changing 92
prompt 32
removing 93
using 89
wrong password 91
hardware conflicts 236
help 216
HelpWare 217
hibernation
file, creating 79
using 79
hibernation mode
defined 276
Fn key function 27
points to consider 81
problems 208
PS2 command 262
I
89
I/O address, system resource 236
I99xxxxx
See error codes
identification numbers, recording 215
information notices viii
Caution notices viii
infrared device driver
for OS/2, installing 153
for Windows 3.11, installing 172
for Windows 95, installing 186
infrared port
infrared port (continued)
problems 208
using 54
initialization, Easy-Setup 38
installing
external keypad 127
external numeric keypad 125
mouse 125
PC Card (PCMCIA card) 115
PCMCIA Card (PC Card) 116, 117
software 138
IR
See infrared port
IRQ, system resource 236
K
keyboard
external, attaching 127
problems 209
keyboard/mouse connector 127
M
L
LAN startup services 223
LCD
problems 44, 199
using 43
locations 14
battery pack 16
bottom view 17
brightness control 15
CD-ROM drive 15, 16
CD-ROM eject 16
click buttons 15
contrast control 15
diskette drive 15
external diskette drive 18
external input-device connector
Fn key 15
function keys 15
indicator panel 15
infrared port 18
insulator sheet 16
keyboard lock 16
LCD screen 15
LCD suspend switch 15
legs 17
line-in jack 18
line-out/headphone jack 18
locking device keyhole 15
microphone-in jack 18
locations (continued)
microphone, built-in 15
nameplate 15
optional memory (DIMM) 16
parallel connector 18
PC Card eject buttons 15
PC Card slots 15
Port Replicator connector 18
power jack 18
power switch 18
rear door 18
rear view 18
release latches 15
serial connector 18
speaker volume control 15
speakers 15
TrackPoint III 15
locking devices 102
low-battery condition 68
18
memory 119, 123, 124
address, system resource 236
area 233
Easy-Setup 38
increasing capacity 119, 123, 124
messages on screen 201
miscellaneous items envelope 5
modem
PC Card 115, 116, 117
monitor
See external monitor
Mount Utility, PC Card Director 52
mouse
attaching 125
space saver keyboard, using
with 126
using with
TrackPoint III 125
N
network and server support services
fee 221
network RPL (remote program load) 42,
234
network, Connectivity Services
fee 224
numeric keypad, operating 28
numeric lock indicator 19
Index
281
O
online book viii
Online Housecall 219
online information services 219
operating systems
installing 139
IBM PC DOS Version 7.0 156
OS/2 Warp Version 3 140
Windows 3.11 163
Windows 95 174
updates 224
options 129—136
CardBus card 49
expansion unit 129—136
external keyboard 127
external monitor 45
external numeric keypad 125
mouse 125
PC Card, using
problems 210
OS/2 Warp Version 3 141
P
password 39
Easy-Setup 39
hard disk password
using 89
wrong, entering 91
personalization feature, using
with 98
power-on password
using 84
wrong, entering 86
supervisor password
using 94
wrong, entering 95
PC Card
advanced use 239
API device driver 252
ATA PC Card 249
Auto Configurator 239
CardBus card 49
Flash card memory technology
driver 252
installing 115, 116, 117
problems 211, 232
registering 240
remote program load 232
resource conflicts, avoiding 255
resources, checking 253
282
IBM ThinkPad 365X/365XD:
User's Guide
PC Card (continued)
suspend mode, using with 77
system boot up 232
using 49
virtual card services 256
PC Card Director
installing, for DOS 162
installing, for OS/2 151
installing, for Windows 3.11 170
installing, for Windows 95 180
using 50
PC Card Director Launcher 52
PC DOS Version 7.0 157
PCI-IDE bus master driver
installing, for OS/2 150
installing, for Windows 95 179
PCMCIA card
See PC Card
PCMCIA device driver
See PC Card Director
PCMCIA.CRD, file 50
personalization editor 98
pointing device
attaching 125
problems 209
Port Replicator, problems
POST error prompt 201
power command 70
power cords 267
power management
using 73
power mode
switching, using Fn key 27
power saving 73
power-on indicator 20
power-on password
changing 87
prompt 32
removing 88
using 84
wrong power-on password,
entering 86
power, providing 21, 22
printer 128
problems 212
problems
battery pack 204
CD-ROM drive 205
diskette drive 206
display 43
error codes 196
external monitor 207
external numeric keypad 209
problems (continued)
FAQ 191—193
general 202
hibernation 208
infrared communication 208
IRQ 231
keyboard 209
LCD 44, 199
messages on screen 201
options 210
PC Card 211, 255
pointing device 209
Port Replicator 206
printer 212
resource conflict 231
serial port 210
software 213
testing the computer 194
TrackPoint III 209
troubleshooting charts 196—213
Prodigy online service 220
PS2 commands 257
A drive, setting 262
address of DSP 260
automatic power-saving timer 259
hibernation 260
suspend 260
beep on/off 260
default 258
display device 260
DMA information 260
expansion, horizontal/vertical 260
frequency, monitor 260
hard disk drive, power saving 258
help menu 262
HFILE 258
hibernate from suspend 259
hibernation, entering 262
HTIMER 258
HVEXP by Fn+F8 261
interrupt level information 261
IR 258
keyboard typematic speed 261
LCD power-off 259
low battery
hibernation, entering 258
suspend, entering 258
parallel port, enabling 261
power mode 259
power switch, hibernate 258
power to serial port 261
presentation 261
processor speed rate 259
PS2 commands (continued)
RediSafe 259
resume date and time 259
resuming by the incoming call 259
serial port 259
sleep timer for the CD-ROM
drive 261
Sound Blaster 261
standby mode, timer 260
startup screen 261
suspend mode, entering 258, 262
TrackPoint III 261
turning off, the computer 262
publications, ordering 224
R
record of identification numbers 215
RediSafe, suspend 75
remote technical support 219
removing the battery pack 65
repair services 224
getting service 214, 224
identification numbers 215
resource map utility 243
restart menu, Easy-Setup 40
resume function 73
RPL (remote program load) 41, 234
S
safety notice xii
sales information 216, 217
screen expansion 44
screen messages
date and time prompt 32
F1 and diskette prompts 32
hard disk password prompt 32
power-on password prompt 32
power-on self-test (POST) error 32
scroll lock, indicator 20
security 102
locks 102
password
hard disk password 89
power-on password 84
supervisor password 94
personalization feature 98
security locks 102
serial number 215
serial port, problems 210
service 224—230
Index
283
service (continued)
how to get 214, 224
IBM Helpware 225, 230
ServicePak 224
services, fee 221
shipped items 4
socket services 49
software
needed 138
problems 213
solving problems yourself 216
space saver keyboard 126
standards, diskette 266
standby mode
command 260
Fn key function, using 26
using 75
start-up menu, Easy-Setup 39
startup, changing 42
storage card device driver 248
supervisor password
changing 96
removing 97
using 94
wrong, entering 95
support line services
ordering 222
suspend mode
defined 277
Fn key function, using 26
points to consider 77
PS2 command 262
using 75
SVGA monitor 43
system resource list 236
system status indicators 19
battery power status 19
diskette drive in-use 19
locations 19
numeric lock 19
power on 20
scroll lock 20
suspend mode 19
SystemBoard, Easy-Setup 38
T
technical support 217
fee 221
remote 219
telephone assistance 217
test menu, Easy-Setup 40
testing the computer 194
284
IBM ThinkPad 365X/365XD:
User's Guide
ThinkPad Features
fuel-gauge program 33
installing 149, 161
DOS Version 7.0 161
OS/2 Warp Version 3 149
Windows 3.11 169
Windows 95 178
personalization editor 33
PS2 commands
list 257
using 36
starting
for DOS 36
for OS/2 and Windows 34
tool bar 35
using 33
ThinkPad system management device
driver 149
time and date, setting 38
token-ring RPL speed 42
TrackPoint III 263
problems 209
using 23
troubleshooting charts 196
U
updates
operating system 224
upgrading the hard disk drive
Utility Diskettes 5
106
V
video driver
See display driver
virtual card services 256
W
warranty 224
extensions and upgrades 223
product 269
service, international 218
Windows 3.11, installing 165
Windows 95, installing 175
IBM
Part Number: 76H7579
76H7579
Printed in U.S.A.
S76H-7579-