1
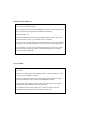
JEM AF-1 DMX FAN – Operating Instructions
CONTENTS OF BOX
1 x Jem AF-1 DMX Fan (with fitted hanging bracket and mains cable)
1 x Jem AF-1 Hand-held auto-timer controller
1 x Operating Instruction Leaflet
SAFETY
Never place any object or part of your body into the path of the fan blade as
Nthis will result in serious injury and may cause permanent damage to the fan.
Always check the voltage is correct for use with this product. The
recommended voltage is printed on the grey serial number label with is fixed
to the case of the fan.
Do not remove the cover or either of the grills either during operation or for
repair or while the fan is still connected to the mains supply Always contact an
authorized Jem dealer in the event of a fault.
When installing the Jem AF-1, ensure that a suitable means of fixing is used.
Please note that the slight vibration of the fan during operation may cause
weak fixings to loosen. This product should only be installed by qualified
personnel.
Do not use the fan if the mains lead or plug is damaged as you may risk
electric shock.
MAINS LEAD WIRING INSTRUCTIONS
INSTRUCTIONS FOR USE
With the correct plug fitted to the mains lead (correct standard for country of
use), connect to the mains supply.
For none DMX control connect the Hand-held auto-timer remote to the fan using
the 3 pin XLR connector and the socket labelled “Remote In”.
Press “Stand-By” On.
Select the desired fan speed on the control knob labelled “Speed”. This can be
selected between 1 and 9. (1 is minimum and 9 is maximum).
Press “Fan On”. The Fan will now start to rotate at the pre-selected speed. Please
note that the fan takes approximately 7seconds to accelerate to maximum speed.
To stop the fan, press the “Fan On” button again and the fan will come to a halt.
Please note that it will take the blades of the fan approximately 15 seconds to
come to a complete stand still.
AUTO TIMER
The Fan can bet set to operate for timed intervals by following the following
procedure.
Decide on an operating period by setting the “Run” control knob between 1 and
9. (This is note calibrated in seconds).
Decide on a delay period between each operating period by setting the “Delay”
control knob between 1 and 9. (This is not calibrated in seconds).
To engage the time settings, press the “Timer On” button. Please note that the
“Stand-by on” button must also be in the on position.
To extend these timer settings further, press “Timer X8” button. This will
multiply the settings on the “Delay” and “Run” controls by 8.