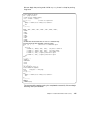
1
AIX Logical Volume Manager from A to Z: Troubleshooting and Commands Laurent Vanel, Ronald van der Knaap, Dugald Foreman, Keigo Matsubara, Antony Steel International Technical Support Organization www.redbooks.ibm.com SG24-5433-00 SG24-5433-00 International Technical Support Organization AIX Logical Volume Manager from A to Z: Troubleshooting and Commands March 2000 Take Note! Before using this information and the product it supports, be sure to read the general information in Appendix F, “Special notices” on page 401. First Edition (March 2000) This edition applies to AIX Version 4.3, Program Number 5765-C34. This document created or updated on March 20, 2000. Comments may be addressed to: IBM Corporation, International Technical Support Organization Dept. JN9B Building 003 Internal Zip 2834 11400 Burnet Road Austin, Texas 78758-3493 When you send information to IBM, you grant IBM a non-exclusive right to use or distribute the information in any way it believes appropriate without incurring any obligation to you. © Copyright International Business Machines Corporation 2000. All rights reserved. Note to U.S Government Users – Documentation related to restricted rights – Use, duplication or disclosure is subject to restrictions set forth in GSA ADP Schedule Contract with IBM Corp. Contents Preface . . . . . . . . . . . . . . . . . . . . . . . . . . . . . . . . . . . . . . . . . . . . . . . . . . . .ix The team that wrote this redbook . . . . . . . . . . . . . . . . . . . . . . . . . . . . . . . . . . . . ix Comments welcome . . . . . . . . . . . . . . . . . . . . . . . . . . . . . . . . . . . . . . . . . . . . . . x Chapter 1. LVM commands . . . . . . . . . . . . . . . . . . . . . . . . . . . . . . . . 1.1 Volume group related commands . . . . . . . . . . . . . . . . . . . . . . . . . . 1.1.1 Add a volume group . . . . . . . . . . . . . . . . . . . . . . . . . . . . . . . . 1.1.2 Activate a volume group . . . . . . . . . . . . . . . . . . . . . . . . . . . . . 1.1.3 Deactivate a volume group . . . . . . . . . . . . . . . . . . . . . . . . . . . 1.1.4 Remove a physical volume from a volume group . . . . . . . . . . 1.1.5 Remove a volume group. . . . . . . . . . . . . . . . . . . . . . . . . . . . . 1.1.6 Bring a volume group into the system . . . . . . . . . . . . . . . . . . . 1.1.7 Add physical volume to an existing volume group . . . . . . . . . . 1.1.8 Change name of volume group . . . . . . . . . . . . . . . . . . . . . . . . 1.1.9 Reorganize a volume group . . . . . . . . . . . . . . . . . . . . . . . . . . 1.1.10 Listing the volume groups on the system . . . . . . . . . . . . . . . 1.1.11 Listing the configuration of a volume group. . . . . . . . . . . . . . 1.1.12 List contents of a volume group . . . . . . . . . . . . . . . . . . . . . . 1.2 Logical volume related commands . . . . . . . . . . . . . . . . . . . . . . . . . 1.2.1 Add a logical volume . . . . . . . . . . . . . . . . . . . . . . . . . . . . . . . 1.2.2 Copy a logical volume to a new logical volume . . . . . . . . . . . . 1.2.3 Copy a logical volume to same sized or bigger logical volume 1.2.4 Copy a logical volume to a smaller logical volume . . . . . . . . . 1.2.5 Add a mirrored copy to a logical volume . . . . . . . . . . . . . . . . . 1.2.6 Set allocation policy for a logical volume . . . . . . . . . . . . . . . . 1.2.7 Set strictness for a logical volume . . . . . . . . . . . . . . . . . . . . . 1.2.8 Set write verify for a logical volume . . . . . . . . . . . . . . . . . . . . 1.2.9 Set schedule policy . . . . . . . . . . . . . . . . . . . . . . . . . . . . . . . . 1.2.10 Increase the maximum size of a logical volume . . . . . . . . . . 1.2.11 Increase the size of a logical volume . . . . . . . . . . . . . . . . . . 1.2.12 List the configuration of a logical volume . . . . . . . . . . . . . . . 1.2.13 List a logical volumes detailed mapping . . . . . . . . . . . . . . . . 1.3 Physical volume related commands . . . . . . . . . . . . . . . . . . . . . . . . 1.3.1 List all physical volumes in system . . . . . . . . . . . . . . . . . . . . . 1.3.2 List configuration of a physical volume . . . . . . . . . . . . . . . . . . 1.3.3 List contents of a physical volume . . . . . . . . . . . . . . . . . . . . . 1.3.4 Move data from a physical volume . . . . . . . . . . . . . . . . . . . . . 1.4 Journaled file system related commands . . . . . . . . . . . . . . . . . . . . 1.4.1 Add a JFS to a previously defined logical volume menu . . . . . 1.4.2 Change/show details of a file system . . . . . . . . . . . . . . . . . . . 1.4.3 Defrag a file system . . . . . . . . . . . . . . . . . . . . . . . . . . . . . . . . © Copyright IBM Corp. 2000 . . . . . . . . . . . . . . . . . . . . . . . . . . . . . . . . . . . . . . .1 . .2 . .3 . .5 . .6 . .8 . .9 . 10 . 12 . 13 . 14 . 16 . 18 . 21 . 22 . 23 . 26 . 27 . 28 . 29 . 30 . 32 . 33 . 34 . 35 . 37 . 38 . 41 . 43 . 44 . 45 . 47 . 49 . 50 . 51 . 52 . 54 iii 1.4.4 Mount a file system. . . . . . . . . . . . . . . . . . . . . . . . . . . . . . . . . . . 55 1.4.5 Unmount a file system . . . . . . . . . . . . . . . . . . . . . . . . . . . . . . . . 57 iv Chapter 2. Problem determination and recovery . . . . . . . . . . . . . . . 2.1 A methodology for problem determination. . . . . . . . . . . . . . . . . . . . 2.1.1 Breaking up high-level commands . . . . . . . . . . . . . . . . . . . . . 2.2 Producing debug output for LVM Scripts . . . . . . . . . . . . . . . . . . . . 2.3 Corruption example 1: Simple ODM corruption . . . . . . . . . . . . . . . . 2.4 Gathering information about the problem . . . . . . . . . . . . . . . . . . . . 2.5 Corruption example 2: PVID corruption . . . . . . . . . . . . . . . . . . . . . 2.6 Inspection commands. . . . . . . . . . . . . . . . . . . . . . . . . . . . . . . . . . . 2.6.1 Checking the errorlog . . . . . . . . . . . . . . . . . . . . . . . . . . . . . . . 2.6.2 Checking for free file system space . . . . . . . . . . . . . . . . . . . . 2.6.3 The high-level commands. . . . . . . . . . . . . . . . . . . . . . . . . . . . 2.6.4 Checking fileset levels . . . . . . . . . . . . . . . . . . . . . . . . . . . . . . 2.6.5 Checking device availability . . . . . . . . . . . . . . . . . . . . . . . . . . 2.6.6 Checking the ODM . . . . . . . . . . . . . . . . . . . . . . . . . . . . . . . . . 2.6.7 The low-level commands . . . . . . . . . . . . . . . . . . . . . . . . . . . . 2.6.8 korn shell debug . . . . . . . . . . . . . . . . . . . . . . . . . . . . . . . . . . . 2.6.9 Examining raw data on physical volumes and logical volumes 2.6.10 Watching system calls . . . . . . . . . . . . . . . . . . . . . . . . . . . . . 2.6.11 Examining internal kernel memory structures with crash . . . . 2.7 Rebuilding and repair . . . . . . . . . . . . . . . . . . . . . . . . . . . . . . . . . . . 2.7.1 ODM corruption . . . . . . . . . . . . . . . . . . . . . . . . . . . . . . . . . . . 2.7.2 LVM control data corruption . . . . . . . . . . . . . . . . . . . . . . . . . . 2.7.3 JFS problems . . . . . . . . . . . . . . . . . . . . . . . . . . . . . . . . . . . . . 2.7.4 Hardware failures . . . . . . . . . . . . . . . . . . . . . . . . . . . . . . . . . . 2.7.5 Setting up notification of LVM_MISSPVADDED errors . . . . . . 2.8 Special considerations for rootvg . . . . . . . . . . . . . . . . . . . . . . . . . . 2.8.1 rootvg problem determination in maintenance mode . . . . . . . . 2.8.2 Reducing the size of hd6 . . . . . . . . . . . . . . . . . . . . . . . . . . . . . . 59 . . 60 . . 60 . . 62 . . 66 . . 75 . . 75 . . 87 . . 88 . . 93 . . 96 . . 98 . . 98 . . 98 . 107 . 109 . 121 . 127 . 127 . 128 . 129 . 146 . 179 . 181 . 185 . 187 . 187 . 187 Chapter 3. Replacing a drive in a mirrored configuration 3.1 Replace a failed physical volume . . . . . . . . . . . . . . . . . . 3.1.1 Step 1. . . . . . . . . . . . . . . . . . . . . . . . . . . . . . . . . . . 3.1.2 Step 2. . . . . . . . . . . . . . . . . . . . . . . . . . . . . . . . . . . 3.1.3 Step 3. . . . . . . . . . . . . . . . . . . . . . . . . . . . . . . . . . . 3.1.4 Step 4. . . . . . . . . . . . . . . . . . . . . . . . . . . . . . . . . . . 3.1.5 Step 5. . . . . . . . . . . . . . . . . . . . . . . . . . . . . . . . . . . 3.1.6 Step 6. . . . . . . . . . . . . . . . . . . . . . . . . . . . . . . . . . . 3.1.7 Step 7. . . . . . . . . . . . . . . . . . . . . . . . . . . . . . . . . . . 3.1.8 Step 8. . . . . . . . . . . . . . . . . . . . . . . . . . . . . . . . . . . 3.1.9 Step 9. . . . . . . . . . . . . . . . . . . . . . . . . . . . . . . . . . . . 189 . 189 . 189 . 190 . 191 . 191 . 191 . 192 . 192 . 193 . 193 AIX Logical Volume Manager from A to Z: Troubleshooting and Commands . . . . . . . . . . . . . . . . . . . . . . . . . . . . . . . . . . . . . . . . . . . . . . . . . . . . . . . . . . . . . . . . . . . . . . . . . . . . . . . . . . . . . . . . 3.2 Using the replacepv command . . . . . . . . . . . . . . . . . . . . . . . . . . . . . 193 3.2.1 Description of the test environment . . . . . . . . . . . . . . . . . . . . . 193 Appendix A. High-level LVM commands. . . . . . . . . . . . . . . . . . . . . . . . . 199 A.1 The chlv command . . . . . . . . . . . . . . . . . . . . . . . . . . . . . . . . . . . . . . . . . 199 A.2 The chpv command . . . . . . . . . . . . . . . . . . . . . . . . . . . . . . . . . . . . . . . . 203 A.3 The chvg command . . . . . . . . . . . . . . . . . . . . . . . . . . . . . . . . . . . . . . . . 204 A.4 The cplv command . . . . . . . . . . . . . . . . . . . . . . . . . . . . . . . . . . . . . . . . . 209 A.5 The exportvg command . . . . . . . . . . . . . . . . . . . . . . . . . . . . . . . . . . . . . 211 A.6 The extendlv command. . . . . . . . . . . . . . . . . . . . . . . . . . . . . . . . . . . . . . 212 A.7 The extendvg command . . . . . . . . . . . . . . . . . . . . . . . . . . . . . . . . . . . . . 215 A.8 The importvg command . . . . . . . . . . . . . . . . . . . . . . . . . . . . . . . . . . . . . 216 A.9 The lslv command. . . . . . . . . . . . . . . . . . . . . . . . . . . . . . . . . . . . . . . . . . 219 A.10 The lspv command . . . . . . . . . . . . . . . . . . . . . . . . . . . . . . . . . . . . . . . . 224 A.11 The lsvg command . . . . . . . . . . . . . . . . . . . . . . . . . . . . . . . . . . . . . . . . 229 A.12 The lsvgfs command . . . . . . . . . . . . . . . . . . . . . . . . . . . . . . . . . . . . . . . 233 A.13 The lvedit command . . . . . . . . . . . . . . . . . . . . . . . . . . . . . . . . . . . . . . . 234 A.14 The migratepv command . . . . . . . . . . . . . . . . . . . . . . . . . . . . . . . . . . . 235 A.15 The mirrorvg command . . . . . . . . . . . . . . . . . . . . . . . . . . . . . . . . . . . . . 236 A.16 The mkcd command . . . . . . . . . . . . . . . . . . . . . . . . . . . . . . . . . . . . . . . 238 A.17 The mklv command. . . . . . . . . . . . . . . . . . . . . . . . . . . . . . . . . . . . . . . . 243 A.18 The mklvcopy command . . . . . . . . . . . . . . . . . . . . . . . . . . . . . . . . . . . . 250 A.19 The mksysb command . . . . . . . . . . . . . . . . . . . . . . . . . . . . . . . . . . . . . 254 A.20 The mkszfile command . . . . . . . . . . . . . . . . . . . . . . . . . . . . . . . . . . . . . 257 A.21 The mkvg command . . . . . . . . . . . . . . . . . . . . . . . . . . . . . . . . . . . . . . . 259 A.22 The mkvgdata command . . . . . . . . . . . . . . . . . . . . . . . . . . . . . . . . . . . 261 A.23 The readlvcopy command. . . . . . . . . . . . . . . . . . . . . . . . . . . . . . . . . . . 262 A.24 The redefinevg command . . . . . . . . . . . . . . . . . . . . . . . . . . . . . . . . . . . 263 A.25 The reducevg command . . . . . . . . . . . . . . . . . . . . . . . . . . . . . . . . . . . . 263 A.26 The reorgvg command . . . . . . . . . . . . . . . . . . . . . . . . . . . . . . . . . . . . . 265 A.27 The replacepv command . . . . . . . . . . . . . . . . . . . . . . . . . . . . . . . . . . . 266 A.28 The rmlv command . . . . . . . . . . . . . . . . . . . . . . . . . . . . . . . . . . . . . . . . 267 A.29 The rmlvcopy command . . . . . . . . . . . . . . . . . . . . . . . . . . . . . . . . . . . . 268 A.30 The restvg command . . . . . . . . . . . . . . . . . . . . . . . . . . . . . . . . . . . . . . 268 A.31 The savevg command. . . . . . . . . . . . . . . . . . . . . . . . . . . . . . . . . . . . . . 270 A.32 The splitlvcopy command . . . . . . . . . . . . . . . . . . . . . . . . . . . . . . . . . . . 274 A.33 The synclvodm command . . . . . . . . . . . . . . . . . . . . . . . . . . . . . . . . . . . 276 A.34 The syncvg command . . . . . . . . . . . . . . . . . . . . . . . . . . . . . . . . . . . . . . 277 A.35 The unmirrorvg command . . . . . . . . . . . . . . . . . . . . . . . . . . . . . . . . . . . 277 A.36 The updatelv command . . . . . . . . . . . . . . . . . . . . . . . . . . . . . . . . . . . . 279 A.37 The updatevg command . . . . . . . . . . . . . . . . . . . . . . . . . . . . . . . . . . . . 279 A.38 The varyoffvg command . . . . . . . . . . . . . . . . . . . . . . . . . . . . . . . . . . . . 280 A.39 The varyonvg command . . . . . . . . . . . . . . . . . . . . . . . . . . . . . . . . . . . . 280 v Appendix B. Intermediate-level commands . . . . . . . . . . . . . . . . . . . . . . 285 B.1 The allocp command. . . . . . . . . . . . . . . . . . . . . . . . . . . . . . . . . . . . . . . . 285 B.2 The cfgvg command . . . . . . . . . . . . . . . . . . . . . . . . . . . . . . . . . . . . . . . . 287 B.3 The chlvcopy command . . . . . . . . . . . . . . . . . . . . . . . . . . . . . . . . . . . . . 287 B.4 The copyrawlv command . . . . . . . . . . . . . . . . . . . . . . . . . . . . . . . . . . . . 289 B.5 The getlvcb command. . . . . . . . . . . . . . . . . . . . . . . . . . . . . . . . . . . . . . . 289 B.6 The getlvname command . . . . . . . . . . . . . . . . . . . . . . . . . . . . . . . . . . . . 290 B.7 The getlvodm command . . . . . . . . . . . . . . . . . . . . . . . . . . . . . . . . . . . . . 291 B.8 The getvgname command . . . . . . . . . . . . . . . . . . . . . . . . . . . . . . . . . . . 293 B.9 The lchangelv command. . . . . . . . . . . . . . . . . . . . . . . . . . . . . . . . . . . . . 293 B.10 The lchlvcopy command . . . . . . . . . . . . . . . . . . . . . . . . . . . . . . . . . . . . 294 B.11 The lchangepv command . . . . . . . . . . . . . . . . . . . . . . . . . . . . . . . . . . . 295 B.12 The lcreatelv command. . . . . . . . . . . . . . . . . . . . . . . . . . . . . . . . . . . . . 296 B.13 The lcreatevg command . . . . . . . . . . . . . . . . . . . . . . . . . . . . . . . . . . . . 297 B.14 The ldeletelv command . . . . . . . . . . . . . . . . . . . . . . . . . . . . . . . . . . . . . 297 B.15 The ldeletepv command . . . . . . . . . . . . . . . . . . . . . . . . . . . . . . . . . . . . 298 B.16 The lextendlv command . . . . . . . . . . . . . . . . . . . . . . . . . . . . . . . . . . . . 298 B.17 The linstallpv command . . . . . . . . . . . . . . . . . . . . . . . . . . . . . . . . . . . . 299 B.18 The lmigratelv command. . . . . . . . . . . . . . . . . . . . . . . . . . . . . . . . . . . . 299 B.19 The lmigratepp command . . . . . . . . . . . . . . . . . . . . . . . . . . . . . . . . . . . 300 B.20 The lquerylv command . . . . . . . . . . . . . . . . . . . . . . . . . . . . . . . . . . . . . 300 B.21 The lquerypv command . . . . . . . . . . . . . . . . . . . . . . . . . . . . . . . . . . . . 302 B.22 The lqueryvg command . . . . . . . . . . . . . . . . . . . . . . . . . . . . . . . . . . . . 302 B.23 The lqueryvgs command. . . . . . . . . . . . . . . . . . . . . . . . . . . . . . . . . . . . 303 B.24 The lreducelv command . . . . . . . . . . . . . . . . . . . . . . . . . . . . . . . . . . . . 304 B.25 The lresynclp command . . . . . . . . . . . . . . . . . . . . . . . . . . . . . . . . . . . . 305 B.26 The lresynclv command . . . . . . . . . . . . . . . . . . . . . . . . . . . . . . . . . . . . 305 B.27 The lresyncpv command . . . . . . . . . . . . . . . . . . . . . . . . . . . . . . . . . . . . 305 B.28 The lvaryonvg command. . . . . . . . . . . . . . . . . . . . . . . . . . . . . . . . . . . . 306 B.29 The lvaryoffvg command. . . . . . . . . . . . . . . . . . . . . . . . . . . . . . . . . . . . 307 B.30 The lvgenmajor command . . . . . . . . . . . . . . . . . . . . . . . . . . . . . . . . . . 307 B.31 The lvgenminor command . . . . . . . . . . . . . . . . . . . . . . . . . . . . . . . . . . 308 B.32 The lvchkmajor command . . . . . . . . . . . . . . . . . . . . . . . . . . . . . . . . . . . 308 B.33 The lvlstmajor command . . . . . . . . . . . . . . . . . . . . . . . . . . . . . . . . . . . . 308 B.34 The lvmmsg command . . . . . . . . . . . . . . . . . . . . . . . . . . . . . . . . . . . . . 309 B.35 The lvrelmajor command . . . . . . . . . . . . . . . . . . . . . . . . . . . . . . . . . . . 309 B.36 The lvrelminor command . . . . . . . . . . . . . . . . . . . . . . . . . . . . . . . . . . . 309 B.37 The migfix command. . . . . . . . . . . . . . . . . . . . . . . . . . . . . . . . . . . . . . . 309 B.38 The putlvcb command. . . . . . . . . . . . . . . . . . . . . . . . . . . . . . . . . . . . . . 310 B.39 The putlvodm command . . . . . . . . . . . . . . . . . . . . . . . . . . . . . . . . . . . . 311 Appendix C. ODM commands . . . . . . . . . . . . . . . . . . . . . . . . . . . . . . . . . 315 C.1 The odmadd command . . . . . . . . . . . . . . . . . . . . . . . . . . . . . . . . . . . . . . 315 vi AIX Logical Volume Manager from A to Z: Troubleshooting and Commands C.2 C.3 C.4 C.5 C.6 C.7 The odmchange command . . . . . . . . . . . . . . . . . . . . . . . . . . . . . . . . . . . 315 The odmcreate command . . . . . . . . . . . . . . . . . . . . . . . . . . . . . . . . . . . . 316 The odmdelete command . . . . . . . . . . . . . . . . . . . . . . . . . . . . . . . . . . . . 318 The odmdrop command . . . . . . . . . . . . . . . . . . . . . . . . . . . . . . . . . . . . . 318 The odmget command . . . . . . . . . . . . . . . . . . . . . . . . . . . . . . . . . . . . . . 318 The odmshow command . . . . . . . . . . . . . . . . . . . . . . . . . . . . . . . . . . . . 319 Appendix D. Other related commands . . . . . . . . . . . . . . . . . . . . . . . . . . 321 D.1 The backup command . . . . . . . . . . . . . . . . . . . . . . . . . . . . . . . . . . . . . . 321 D.2 The chfs command . . . . . . . . . . . . . . . . . . . . . . . . . . . . . . . . . . . . . . . . . 327 D.3 The chps command . . . . . . . . . . . . . . . . . . . . . . . . . . . . . . . . . . . . . . . . 330 D.4 The cpio command . . . . . . . . . . . . . . . . . . . . . . . . . . . . . . . . . . . . . . . . . 331 D.5 The crfs command . . . . . . . . . . . . . . . . . . . . . . . . . . . . . . . . . . . . . . . . . 335 D.6 The defragfs command . . . . . . . . . . . . . . . . . . . . . . . . . . . . . . . . . . . . . . 338 D.7 The df command . . . . . . . . . . . . . . . . . . . . . . . . . . . . . . . . . . . . . . . . . . . 339 D.8 The dfsck command . . . . . . . . . . . . . . . . . . . . . . . . . . . . . . . . . . . . . . . . 341 D.9 The dumpfs command . . . . . . . . . . . . . . . . . . . . . . . . . . . . . . . . . . . . . . 343 D.10 The ff command . . . . . . . . . . . . . . . . . . . . . . . . . . . . . . . . . . . . . . . . . . 344 D.11 The file command . . . . . . . . . . . . . . . . . . . . . . . . . . . . . . . . . . . . . . . . . 345 D.12 The fileplace command. . . . . . . . . . . . . . . . . . . . . . . . . . . . . . . . . . . . . 346 D.13 The fsck command . . . . . . . . . . . . . . . . . . . . . . . . . . . . . . . . . . . . . . . . 348 D.14 The fsdb command . . . . . . . . . . . . . . . . . . . . . . . . . . . . . . . . . . . . . . . . 354 D.15 The imfs command . . . . . . . . . . . . . . . . . . . . . . . . . . . . . . . . . . . . . . . . 354 D.16 The ipl_varyon command . . . . . . . . . . . . . . . . . . . . . . . . . . . . . . . . . . . 355 D.17 The istat command . . . . . . . . . . . . . . . . . . . . . . . . . . . . . . . . . . . . . . . . 355 D.18 The logform command . . . . . . . . . . . . . . . . . . . . . . . . . . . . . . . . . . . . . 356 D.19 The logredo command . . . . . . . . . . . . . . . . . . . . . . . . . . . . . . . . . . . . . 357 D.20 The lsfs command . . . . . . . . . . . . . . . . . . . . . . . . . . . . . . . . . . . . . . . . 357 D.21 The lsps command . . . . . . . . . . . . . . . . . . . . . . . . . . . . . . . . . . . . . . . . 358 D.22 The mkfs command . . . . . . . . . . . . . . . . . . . . . . . . . . . . . . . . . . . . . . . 360 D.23 The mount command . . . . . . . . . . . . . . . . . . . . . . . . . . . . . . . . . . . . . . 362 D.24 The ncheck command . . . . . . . . . . . . . . . . . . . . . . . . . . . . . . . . . . . . . 365 D.25 The restore command. . . . . . . . . . . . . . . . . . . . . . . . . . . . . . . . . . . . . . 365 D.26 The rmfs command . . . . . . . . . . . . . . . . . . . . . . . . . . . . . . . . . . . . . . . . 376 D.27 The savebase command . . . . . . . . . . . . . . . . . . . . . . . . . . . . . . . . . . . 376 D.28 The snap command . . . . . . . . . . . . . . . . . . . . . . . . . . . . . . . . . . . . . . . 377 D.29 The sync command . . . . . . . . . . . . . . . . . . . . . . . . . . . . . . . . . . . . . . . 380 D.30 The sysdumpdev command . . . . . . . . . . . . . . . . . . . . . . . . . . . . . . . . . 381 D.31 The tar command . . . . . . . . . . . . . . . . . . . . . . . . . . . . . . . . . . . . . . . . . 384 D.32 The umount command . . . . . . . . . . . . . . . . . . . . . . . . . . . . . . . . . . . . . 391 Appendix E. Scripts used during this residency . . . . . . . . . . . . . . . . . 393 E.1 trclvm . . . . . . . . . . . . . . . . . . . . . . . . . . . . . . . . . . . . . . . . . . . . . . . . . . . 393 vii E.2 E.3 E.4 E.5 E.6 E.7 E.8 dspmsg_index. . . . . . . . . . . . . . . . . . . . . . . . . . . . . . . . . . . . . . . . . . . . . 395 chpvid . . . . . . . . . . . . . . . . . . . . . . . . . . . . . . . . . . . . . . . . . . . . . . . . . . . 395 gather_maps . . . . . . . . . . . . . . . . . . . . . . . . . . . . . . . . . . . . . . . . . . . . . . 396 findlvm. . . . . . . . . . . . . . . . . . . . . . . . . . . . . . . . . . . . . . . . . . . . . . . . . . . 397 maker . . . . . . . . . . . . . . . . . . . . . . . . . . . . . . . . . . . . . . . . . . . . . . . . . . . 397 pvsinvg . . . . . . . . . . . . . . . . . . . . . . . . . . . . . . . . . . . . . . . . . . . . . . . . . . 398 scraper . . . . . . . . . . . . . . . . . . . . . . . . . . . . . . . . . . . . . . . . . . . . . . . . . . 398 Appendix F. Special notices . . . . . . . . . . . . . . . . . . . . . . . . . . . . . . . . . . . 401 Appendix G. Related publications. . . . . . . . . . . . . . . . . . . . . . . . . . . . . . 405 G.1 IBM Redbooks . . . . . . . . . . . . . . . . . . . . . . . . . . . . . . . . . . . . . . . . . . . . 405 G.2 IBM Redbooks collections . . . . . . . . . . . . . . . . . . . . . . . . . . . . . . . . . . . 405 G.3 Other resources . . . . . . . . . . . . . . . . . . . . . . . . . . . . . . . . . . . . . . . . . . . 406 G.4 Referenced Web sites . . . . . . . . . . . . . . . . . . . . . . . . . . . . . . . . . . . . . . 406 How to get IBM Redbooks . . . . . . . . . . . . . . . . . . . . . . . . . . . . . . . . . . 407 IBM Redbooks fax order form . . . . . . . . . . . . . . . . . . . . . . . . . . . . . . . . . . . . 408 Glossary . . . . . . . . . . . . . . . . . . . . . . . . . . . . . . . . . . . . . . . . . . . . . . . . 409 Index . . . . . . . . . . . . . . . . . . . . . . . . . . . . . . . . . . . . . . . . . . . . . . . . . . . 411 IBM Redbooks review . . . . . . . . . . . . . . . . . . . . . . . . . . . . . . . . . . . . . . 415 viii AIX Logical Volume Manager from A to Z: Troubleshooting and Commands Preface LVM: Logical Volume Manager. What is its role in the AIX operating System? How does it perform this function? Its role is to control disk resources by mapping data between a more simple and flexible logical view of storage space and the actual physical disks. How it performs this function is a topic vast enough to fill two books. The first volume, AIX Logical Volume Manager from A to Z: Introduction and Concepts, SG24-5432, describes the basic components and defines physical volumes, volume groups, and logical volumes. This second volume focuses on the practical aspects of the Logical Volume Manager and describes, in detail, the commands, including some undocumented commands and options. The last section of this volume is on troubleshooting and provides hints on how to handle certain problems, how to investigate them, and what commands are needed to run and solve these problems. Most importantly, this volume discusses what commands not to run in order to avoid ruining your entire system. This book is aimed at every IT specialist who wants to know more about the core element of AIX, which is the Logical Volume Manager. The team that wrote this redbook This redbook was produced by a team of specialists from around the world working at the International Technical Support Organization, Austin Center. Laurent Vanel is an AIX and RS/6000 specialist at the International Technical Support Organization, Austin Center. Before joining the ITSO three years ago, Laurent worked in the french Risc System/6000 Technical Center in Paris, where he conducted benchmarks and presentations for the AIX and RS/6000 solutions. Ronald van der Knaap is a Senior I/T Specialist in the Netherlands. He has 11 years of experience in the Unix/AIX field. His areas of expertise include a wide range of system and network management products, AIX related products, HACMP, performance and tuning, and RS/6000 SP systems. He has written extensively on LVM performance and journaled file systems. Dugald Foreman is an AIX support specialist in England. He has two years of experience in AIX, both spent working for IBM. His areas of expertise © Copyright IBM Corp. 2000 ix include problem determination in software development and the AIX base operating system. He has written extensively on LVM recovery procedures. Keigo Matsubara is an Advisory I/T Specialist in Japan. He has seven years of experience in the AIX filed. His areas of expertise include a wide range of AIX related products, particularly RS/6000 SP, and high-end storage systems. He has written extensively on mirroring, striping, and concurrent access volume groups. This is his second redbook. Antony Steel is an Advisory IT Specialist in Australia. He has eight years of experience in the field of Unix. He holds a degree in Theoretical Chemistry from the University of Sydney. His areas of expertise include system performance and customization, scripting, and high availability. Thanks to the following people for their invaluable contributions to this project: Gerald McBrearty LVM developer Ram Pandiri LVM developer Johnny Shieh LVM developer Mathew Accapadi AIX performance engineer Mike Wortman AIX file system developer Comments welcome Your comments are important to us! We want our Redbooks to be as helpful as possible. Please send us your comments about this or other Redbooks in one of the following ways: • Fax the evaluation form found in “IBM Redbooks review” on page 415 to the fax number shown on the form. • Use the online evaluation form found at http://www.redbooks.ibm.com/ • Send your comments in an Internet note to [email protected] x AIX Logical Volume Manager from A to Z: Troubleshooting and Commands Chapter 1. LVM commands This chapter covers common tasks used in administering volume groups and the commands that are used. This chapter will cover areas, such as how to create, list, and modify volume groups, logical volumes, and file systems. To use the commands effectively requires an understanding of the concepts covered in the redbook AIX Logical Volume Manager from A to Z, Introduction and Concepts, SG24-5432. The details of the command line options are contained in Appendix A, “High-level LVM commands” on page 199. Most of the commands can be accessed from the command line or the SMIT panels. These panel are located under the System Storage Management tree as shown in the following screen: System Management Move cursor to desired item and press Enter. Software Installation and Maintenance Software License Management Devices System Storage Management (Physical & Logical Storage) Security & Users Communications Applications and Services Print Spooling Problem Determination Performance & Resource Scheduling System Environments Processes & Subsystems Applications Using SMIT (information only) F1=Help F9=Shell F2=Refresh F10=Exit F3=Cancel Enter=Do F8=Image Figure 1 on page 2 shows the layout of the system storage management SMIT panels. © Copyright IBM Corp. 2000 1 . SMIT - System Storage Management Logical Volume Manager File Systems Removable Disk Management Files & Directories System Backup Manager File Systems Removable Disk Management List All File Systems List All Mounted File Systems Add / Change / Show / Delete File Systems Mount a File System Mount a Group of File Systems Unmount a File System Unmount a Group of File Systems Verify a File System Backup a File System Restore a File System List Contents of a Backup List All Mounted File Systems on a Disk Unmount File Systems on a Disk Remove a Disk form the Operating System Remove a Disk Open Door System Backup Manager Backup Up the System List Files in a System Image Restore Files in a System Image Files & Directories Logical Volume Manager Volume Groups Logical Volumes Physical Volumes Paging Space Backup a File or Directory Restore a File or Directory List Contents of a Backup Figure 1. SMIT system storage management menu 1.1 Volume group related commands The commands in this section relate to creating and modifying volume groups. These commands can be run from the command line or from the SMIT System Storage management -> Logical Volume Manager -> Volume Groups menu (See Figure 2). 2 AIX Logical Volume Manager from A to Z: Troubleshooting and Commands Volume Groups List All Volume Groups Add a Volume Group Set Characteristics of a Volume Group List Contents of a Volume Group Remove a Volume Group Activate a Volume Group Deactivate a Volume Group Import a Volume Group Export a Volume Group Mirror a Volume Group Unmirror a Volume Group Synchronize LVM Mirrors Back Up a Volume Group Remake a Volume Group List Files in a Volume Group Backup Restore Files in a Volume Group Backup Change a Volume Group Add a Physical Volume to a Volume Group Remove a Physical Volume from a Volume Group Reorganize a Volume Group Figure 2. SMIT volume group options 1.1.1 Add a volume group A volume group is created by using the mkvg command. The mkvg command creates a new volume group using the physical volume names supplied. Since AIX Version 4.1, this command also varies on the volume group using the varyonvg command. The exception to this is when the volume group is created as concurrent capable. By default this command creates a volume group that is capable of handling up to 255 logical volumes on 32 physical volumes. These limits can be extended to 512 logical volumes and 128 disks, and the design allows space for 1024 physical volumes. The mkvg script checks each physical volume to verify that it is not already part of another volume group. If a physical volume is part of a varied on volume group, then mkvg exits. If it is part of a non-varied on volume group, the user is warned that data will be lost and is given a chance to back out. The script also checks that the selected partition size will not violate the 1016 partition limit. In this case, either the partition factor can be set, or the partition size increased. For the command line options, see mkvg in Appendix A.21, “The mkvg command” on page 259, or use the SMIT fastpath: smit mkvg Chapter 1. LVM commands 3 SMIT provides the following fields: Volume group name A system-wide unique 1-15 character name that will be assigned to the volume group. Physical Partition size The physical partition size for the volume group from 1 to 1024 (in powers of 2). Physical volume names The name(s) of the physical volume(s) that will make up the volume group. These physical volumes cannot be part of another volume group. Other physical volumes can be added at a later date. Activate volume group automatically at system restart Some administrators may not want to automatically start some volume groups (particularly in HACMP setups). Volume Group major number The system will assign the next available major number if left blank. Concurrent Capable/Concurrent Mode Used only for concurrent volume groups and requires further software installed. (See the concurrent access volume group description in AIX Logical Volume Manager from A to Z Introduction and Concepts, SG24-5432). 4 AIX Logical Volume Manager from A to Z: Troubleshooting and Commands SMIT mkvg Add a Volume Group Type or select values in entry fields. Press Enter AFTER making all desired changes. [Entry Fields] [keovg] 16 [hdisk11] yes VOLUME GROUP name Physical partition SIZE in megabytes * PHYSICAL VOLUME names Activate volume group AUTOMATICALLY at system restart? Volume Group MAJOR NUMBER Create VG Concurrent Capable? Auto-varyon in Concurrent Mode? F1=Help Esc+5=Reset Esc+9=Shell F2=Refresh Esc+6=Command Esc+0=Exit [] no no F3=Cancel Esc+7=Edit Enter=Do F4=List Esc+8=Image 1.1.2 Activate a volume group The varyonvg command activates the volume group (specified by the VolumeGroup parameter) and all associated logical volumes. A volume group that is activated is available for use. When a volume group is activated, physical partitions are synchronized if they are not current. A list of all physical volumes with their status is displayed to standard output whenever there is a discrepancy between the Device Configuration Database and the information stored in the Logical Volume Manager. As a result, the volume group may or may not be varied on. The list must be examined and proper action taken to preserve the system integrity. With quorum on, and if the volume group cannot be varied on due to a loss of the majority of physical volumes, a list of all physical volumes with their status is displayed. This is also true if quorum is off and not all physical volumes are available. For the command line options, see varyonvg in Appendix A.39, “The varyonvg command” on page 280, or use the SMIT fastpath: smit varyonvg SMIT provides the following fields: Volume group name The name of volume group to be activated ([F4] for list). Chapter 1. LVM commands 5 Resynchronize stale partitions The resynchronization of any stale mirror copies can be done during the vary on process. Activate into system management mode Logical volumes can be operated on, but not opened, for input/output. Force activation This will force the vary on process even if some physical volumes are missing. Warning: Data integrity is not guaranteed. Vary on VG in Concurrent Mode Used for concurrent access. smit varyonvg Activate a Volume Group Type or select values in entry fields. Press Enter AFTER making all desired changes. * VOLUME GROUP name RESYNCHRONIZE stale physical partitions? Activate volume group in SYSTEM MANAGEMENT mode? FORCE activation of the volume group? Warning--this may cause loss of data integrity. Varyon VG in Concurrent Mode? F1=Help Esc+5=Reset F9=Shell F2=Refresh F6=Command F10=Exit F3=Cancel F7=Edit Enter=Do [Entry Fields] [] yes no no no F4=List F8=Image 1.1.3 Deactivate a volume group The varyoffvg command deactivates the volume group specified by the VolumeGroup parameter along with its associated logical volumes. The logical volumes must first be closed. For example, if the logical volume contains a file system, it must be unmounted. 6 AIX Logical Volume Manager from A to Z: Troubleshooting and Commands Note A volume group that has a paging space volume on it cannot be varied off while the paging space is active. Before de-activating a volume group with an active paging space volume, ensure that the paging space is not activated automatically at system initialization and then reboot the system. For the command line options, see varyoffvg in Appendix A.38, “The varyoffvg command” on page 280, or use the SMIT fastpath: smit varyoffvg SMIT provides the following fields: Volume group name The name of the volume group to be de-activated ([F4] for list). Put volume group into system management mode This will allow logical volume to be operated on but not opened for input/output. smit varyoffvg Deactivate a Volume Group Type or select values in entry fields. Press Enter AFTER making all desired changes. [Entry Fields] [] no * VOLUME GROUP name Put volume group in SYSTEM MANAGEMENT mode? F1=Help Esc+5=Reset F9=Shell F2=Refresh F6=Command F10=Exit F3=Cancel F7=Edit Enter=Do F4=List F8=Image Chapter 1. LVM commands 7 1.1.4 Remove a physical volume from a volume group The reducevg command removes one or more physical volumes from the volume group. When you remove all physical volumes in a volume group, the volume group is also removed. The volume group must be varied on (that is, active) before it can be reduced. All logical volumes residing on the physical volumes being removed must have been removed before starting the reducevg command. For the command line options, see reducevg in Appendix A.25, “The reducevg command” on page 263, or use the SMIT fastpath: smit reducevg SMIT provides the following fields: Physical volume names The names of the physical volumes to be removed from the volume group ([F4] for list). Force deallocation of all partitions This will force the de-allocation of any logical partitions on this physical volume. This will destroy those logical volumes, and the user will be asked to confirm. 8 AIX Logical Volume Manager from A to Z: Troubleshooting and Commands smit reducevg - After entering volume group name. Remove a Physical Volume from a Volume Group Type or select values in entry fields. Press Enter AFTER making all desired changes. * VOLUME GROUP name * PHYSICAL VOLUME names FORCE deallocation of all partitions on this physical volume? F1=Help Esc+5=Reset F9=Shell F2=Refresh F6=Command F10=Exit F3=Cancel F7=Edit Enter=Do [Entry Field park_vg [] no F4=List F8=Image 1.1.5 Remove a volume group A volume group can be removed from the system by removing all physical volumes from the volume group and then deleting it. The reducevg command executed with each physical volume will remove all logical volume information from each physical volume, then remove the physical volume from the volume group. When the last physical volume is removed For the command line options, see reducevg in Appendix A.25, “The reducevg command” on page 263, or use the SMIT fastpath: smit reducevg2 SMIT provides the following fields: Volume group name The name of the volume group to be removed ([F4] for list). Chapter 1. LVM commands 9 smit reducevg2 Remove a Volume Group Type or select a value for the entry field. Press Enter AFTER making all desired changes. [Entry Fields] [park_vg] * VOLUME GROUP name F1=Help Esc+5=Reset F9=Shell F2=Refresh F6=Command F10=Exit F3=Cancel F7=Edit Enter=Do F4=List F8=Image 1.1.6 Bring a volume group into the system The importvg command makes the previously exported volume group known to the system. Only one physical volume is needed to identify the volume group; any remaining physical volumes (those belonging to the same volume group) are found by the importvg command and are included in the import. An imported volume group is automatically varied on unless the volume group is Concurrent Capable. You must use the varyonvg command to activate Concurrent Capable volume groups before you access them. When a volume group with file systems is imported, the /etc/filesystems file is updated with values for the new logical volumes and mount points. After importing the volume group and activating it with the varyonvg command, you must run the fsck command before the file systems can be mounted. The importvg command changes the name of a logical volume if the name already exists in the system. It prints a message and the new name to standard error and updates the /etc/filesystems file to include the new logical volume name. 10 AIX Logical Volume Manager from A to Z: Troubleshooting and Commands Note You may import an AIX Version 3.2 created volume group into an AIX Version 4 system, and you may import an AIX Version 4 volume group into an AIX Version 3.2 system, provided striping has not been applied. Once striping is put onto a disk, its importation into version 3.2 is prevented. When you issue the importvg command to a previously defined volume group, the QUORUM and AUTO ON values will be reset to volume group default values. You should verify the parameters of the newly imported volume group with the lsvg command and change any values with the chvg command. A volume group with a mirrored striped logical volume cannot be back ported into a version of AIX older than 4.3.3. For the command line options, see importvg in Appendix A.8, “The importvg command” on page 216, or use the SMIT fastpath: smit importvg SMIT provides the following fields: Volume group name The system-wide unique name to be assigned to the volume group when imported into the system. Physical volume name The name (hdiskn) of any of the physical volumes in the volume group. The remaining physical volumes will be accessed using the VGDA information on the given physical volume. Volume group major number The next available will be allocated, or one can be chosen. Concurrent options Only used if the volume group is concurrent and the appropriate software installed. Chapter 1. LVM commands 11 smit importvg Import a Volume Group Type or select values in entry fields. Press Enter AFTER making all desired changes. [Entry Fields] [] [] [] no no VOLUME GROUP name * PHYSICAL VOLUME name Volume Group MAJOR NUMBER Make this VG Concurrent Capable? Make default varyon of VG Concurrent? F1=Help Esc+5=Reset F9=Shell F2=Refresh F6=Command F10=Exit F3=Cancel F7=Edit Enter=Do F4=List F8=Image 1.1.7 Add physical volume to an existing volume group The physical volume is checked to verify that it is not already in another volume group. If the system believes the physical volume belongs to a volume group that is varied on, it exits. But, if the system detects a description area from a volume group that is not varied on, it prompts the user for confirmation in continuing with the command. The previous contents of the physical volume will be lost; so, the user must be cautious when using the override function. For the command line options, see extendvg in Appendix A.7, “The extendvg command” on page 215, or use the SMIT fastpath: smit extendvg SMIT provides the following fields: Volume group name The unique name of the volume group to be extended ([F4] for list). Physical volume name(s) The name(s) of the physical volume(s) to be added to the volume group ([F4] for list). 12 AIX Logical Volume Manager from A to Z: Troubleshooting and Commands smit extendvg Add a Physical Volume to a Volume Group Type or select values in entry fields. Press Enter AFTER making all desired changes. [Entry Fields] * VOLUME GROUP name * PHYSICAL VOLUME names F1=Help Esc+5=Reset F9=Shell F2=Refresh F6=Command F10=Exit [] [] F3=Cancel F7=Edit Enter=Do F4=List F8=Image 1.1.8 Change name of volume group To change the name of a volume group, more than one step is required, and familiarity with some of the commands used previously is needed. To change the name of a volume group, the volume group must first have all its logical volumes closed (that is, if they contain file systems, then they must be unmounted). The volume group must then be de-activated, then exported. The volume group is then imported with the new name, reactivated, and any file systems remounted. The only command not dealt with above is the command to export the volume group: exportvg For the command line options, see exportvg in Appendix A.5, “The exportvg command” on page 211, or use the SMIT fastpath: smit exportvg SMIT provides the following fields: Volume group name The unique name of the volume group to be exported ([F4] for list). Chapter 1. LVM commands 13 smit exportvg Export a Volume Group Type or select values in entry fields. Press Enter AFTER making all desired changes. [Entry Fields] * VOLUME GROUP name F1=Help Esc+5=Reset F9=Shell [] F2=Refresh F6=Command F10=Exit F3=Cancel F7=Edit Enter=Do F4=List F8=Image 1.1.9 Reorganize a volume group The reorgvg command reorganizes the placement of allocated physical partitions within the volume group according to the allocation characteristics of each logical volume. Specific logical volumes can also be reorganized within the volume group. In the reorganization, the order of priority goes in the order to the logical volumes listed by lsvg -l Volume_Group. If a list of logical volumes is provided, the highest priority goes to the first logical volume in the list down to the last logical volume with the lowest priority. The volume group must be varied on and must have free partitions before use of the reorgvg command. The relocatable flag of each logical volume must be set to y with the chlv -r command (or smit chlv) for the reorganization to take effect; otherwise, the logical volume is ignored. 14 AIX Logical Volume Manager from A to Z: Troubleshooting and Commands Note The reorgvg command does not reorganize the placement of allocated physical partitions for any striped logical volumes. At least one free physical partition must exist on the specified volume group for the reorgvg command to run successfully. In AIX Version 4.2 or later, if you enter the reorgvg command with the volume group name and no other arguments, the entire volume group is reorganized. For lower levels of AIX, if you enter the reorgvg command with the volume group name and no other arguments, it will only reorganize the first logical volume in the volume group. The first logical volume is the one listed by the lsvg -l VolumeName command. This command is not allowed if the volume group is varied on in concurrent mode. For the command line options, see reorgvg in Appendix A.26, “The reorgvg command” on page 265, or use the SMIT fastpath: smit reorgvg SMIT provides the following fields: Volume group name Name of the volume group to be reorganized ([F4] for list). Logical volume names The names of the logical volumes to be included if only these ones are to be reorganized. The order of priority will be in the order in which they are listed ([F4] for list). Chapter 1. LVM commands 15 smit reorgvg Reorganize a Volume Group Type or select values in entry fields. Press Enter AFTER making all desired changes. [Entry Fields] park_vg [] * VOLUME GROUP name LOGICAL VOLUME names F1=Help Esc+5=Reset F9=Shell F2=Refresh F6=Command F10=Exit F3=Cancel F7=Edit Enter=Do F4=List F8=Image 1.1.10 Listing the volume groups on the system The lsvg command displays information about volume groups. If you use no parameters, a list of the names of all defined volume groups is displayed. For the command line options, see lsvg in Appendix A.11, “The lsvg command” on page 229, or use the SMIT fastpath: smit lsvg 16 AIX Logical Volume Manager from A to Z: Troubleshooting and Commands smit lsvg List Volume Groups Move cursor to desired item and press Enter. List All Volume Groups List Contents of a Volume Group List All Logical Volumes by Volume Group F1=Help F9=Shell F2=Refresh F10=Exit F3=Cancel Enter=Do F8=Image SMIT provides the following field: List only the active volume groups. The default is to list all volume groups. smit lsvg output COMMAND STATUS Command: OK stdout: yes stderr: no Before command completion, additional instructions may appear below. rootvg asgard_vg software F1=Help F8=Image n=Find Next F2=Refresh F9=Shell F3=Cancel F10=Exit F6=Command /=Find Chapter 1. LVM commands 17 1.1.11 Listing the configuration of a volume group The lsvg command also displays more detailed information about volume groups. When information from the Device Configuration Database is unavailable, some of the fields will contain a question mark (?) in place of the missing data. The lsvg command attempts to obtain as much information as possible from the description area when the command is given a logical volume identifier. For the command line options, see lsvg in Appendix A.11, “The lsvg command” on page 229, or use the SMIT fastpath: smit lsvg SMIT provides the following field: List option status - volume group configuration logical volumes - logical volume details physical volumes - physical volume usage smit lsvg - List contents of a volume group List Contents of a Volume Group Type or select values in entry fields. Press Enter AFTER making all desired changes. [Entry Fields] [park_vg] status * VOLUME GROUP name List OPTION F1=Help Esc+5=Reset F9=Shell 18 F2=Refresh F6=Command F10=Exit F3=Cancel F7=Edit Enter=Do AIX Logical Volume Manager from A to Z: Troubleshooting and Commands F4=List F8=Image smit lsvg - Volume group configuration COMMAND STATUS Command: OK stdout: yes stderr: no Before command completion, additional instructions may appear below. VOLUME GROUP: asgard_vg VG VG STATE: active VG PERMISSION: read/write MAX LVs: 256 LVs: 5 OPEN LVs: 0 TOTAL PVs: 3 STALE PVs: 0 ACTIVE PVs: 3 MAX PPs per PV: 1016 F1=Help F8=Image n=Find Next IDENTIFIER: 00017d378edf7c9d PP SIZE: 4 megabyte(s) TOTAL PPs: 1611 (6444 megabytes) FREE PPs: 1546 (6184 megabytes) USED PPs: 65 (260 megabytes) QUORUM: 2 VG DESCRIPTORS: 3 STALE PPs: 0 AUTO ON: yes MAX PVs: 32 F2=Refresh F9=Shell F3=Cancel F10=Exit F6=Command /=Find Explanation of the fields displayed: Volume group Name of the volume group. Volume group state State of the volume group. If the volume group is activated with the varyonvg command, the state is either active/complete (indicating all physical volumes are active) or active/partial (indicating some physical volumes are not active). If the volume group is not activated with the varyonvg command, the state is inactive. Permission Access permission: read-only or read-write. Max LVs Maximum number of logical volumes allowed in the volume group. LVs Number of logical volumes currently in the volume group. Open LVs Number of logical volumes within the volume group that are currently open. Total PVs Total number of physical volumes within the volume group. Chapter 1. LVM commands 19 Active PVs Number of physical volumes that are currently active. VG identifier The volume group identifier. PP size Size of each physical partition. Total PPs Total number of physical partitions within the volume group. Free PPs Total number of physical partitions not allocated. Alloc PPs Number of physical partitions currently allocated to logical volumes. Quorum Number of physical volumes needed for a majority. VGDS Number of volume group descriptor areas within the volume group. Auto-on Automatic activation at IPL (yes or no). Concurrent1 States whether or not the volume group is Concurrent Capable or Non-Concurrent Capable. Applies to AIX Version 4.2 or later. Auto-Concurrent 1 States whether you should autovary the Concurrent Capable volume group in concurrent or non-concurrent mode. For volume groups that are Non-Concurrent Capable, this value defaults to Disabled. Applies to AIX Version 4.2 or later. VG Mode1 The vary on mode of the volume group: Concurrent or Non-Concurrent. Applies to AIX Version 4.2 or later. Node ID 1 Node ID of this node if volume group is varied on in concurrent node. Active Nodes 1 Node IDs of other concurrent nodes that have this volume group varied on. Max PPs Per PV Maximum number of physical partitions per physical volume allowed for this volume group. Max PVs Maximum number of physical volumes allowed in this volume group. 1 Only displayed if volume group is concurrent capable 20 AIX Logical Volume Manager from A to Z: Troubleshooting and Commands 1.1.12 List contents of a volume group The lsvg command will also display information about the logical volumes or physical volumes in the volume group. As seen in the previous section, either logical volume or physical volume information can be specified in the list option. smit lsvg - Logical volume list option COMMAND STATUS Command: OK stdout: yes stderr: no Before command completion, additional instructions may appear below. asgard_vg: LV NAME odin_lv thor_lv loglv00 loki_lv F1=Help F8=Image n=Find Next TYPE jfs jfs jfslog jfs LPs 12 12 1 10 F2=Refresh F9=Shell PPs 12 12 1 20 PVs 1 1 1 1 LV STATE closed/syncd closed/syncd closed/syncd closed/syncd F3=Cancel F10=Exit MOUNT POINT /home/odin /home/thor N/A N/A F6=Command /=Find Explanation of the fields displayed: LV Name Name of the logical volume. Type The logical volume type, for example, jfs (journaled file system), jfslog (jfs log), boot, paging, or dump. LPs The number of logical partitions currently in the logical volume. PPs The number of physical partitions currently in the logical volume. PVs The number of physical volumes that the logical volume is spread over. LV State The logical volume state. open - active closed - inactive syncd - mirror copies synchronized stale - mirror copies not in sync Chapter 1. LVM commands 21 Mount point The mount point of the associated file system. smit lsvg - Physical volume list option COMMAND STATUS Command: OK stdout: yes stderr: no Before command completion, additional instructions may appear below. asgard_vg: PV_NAME hdisk11 hdisk9 hdisk10 PV STATE active active active F1=Help F8=Image n=Find Next TOTAL PPs 537 537 537 F2=Refresh F9=Shell FREE PPs 492 517 537 FREE DISTRIBUTION 108..62..107..107..108 108..87..107..107..108 108..107..107..107..108 F3=Cancel F10=Exit F6=Command /=Find Explanation of the fields displayed: PV Name Name of the physical volume. PV State The physical volume state. active - in use missing - physical volume missing removed - for a removable physical volume varied off - volume group varied off Total PPs The total number of physical partitions on the physical volume. Free PPs The number of physical partitions currently not allocated to a logical volume. Free distribution The number of physical partitions in each region. Regions are shown from right to left as outer edge, outer-middle, center, inner-middle, and inner edge. 1.2 Logical volume related commands The commands in this section relate to creating and modifying logical volumes. These commands can be run from the command line or from the SMIT System Storage management -> Logical Volume Manager ->Logical Volumes menu (See Figure 3). 22 AIX Logical Volume Manager from A to Z: Troubleshooting and Commands Logical Volumes List All Logical Volumes by Volume Group Add a Logical Volume Set Characteristic of a Logical Volume Show Characteristics of a Logical Volume Remove a Logical Volume Copy a Logical Volume Change a Logical Volume Rename a Logical Volume Increase the Size of a Logical Volume Add a Copy to a Logical Volume Remove a Copy from a Logical Volume Figure 3. SMIT logical volume options 1.2.1 Add a logical volume The mklv command creates a new logical volume within the given volume group. Physical partitions can be allocated to the logical volume from one physical volume or many. Allocation policies can also be used to determine which physical partitions should be used to make up the logical volume (if there are enough free partitions in the volume group to allow choice). When the logical volume is created, it can be created with extra copies as a mirrored logical volume, or additional copies can be added later on. Note AIX Version 4.3.3 supports logical volumes that are both striped and mirrored. These logical volumes cannot be used on systems with lower versions of AIX. For the command line options, see mklv in Appendix A.17, “The mklv command” on page 243, or use the SMIT fastpath: smit mklv SMIT provides the following fields: Logical volume name A system wide unique one to 15 character name. Chapter 1. LVM commands 23 Number of logical partitions The number of logical partitions to allocate to the logical volume. Physical volume names The physical volumes to use to allocate physical partitions. If none are specified, AIX will use physical volumes that best meet the specified allocation policies. Logical volume type The type of logical volume jfs - journaled file system jfslog - log logical volume for a jfs boot - contains AIX boot image paging - system paging logical volume Position on physical volume Specifies the intra-physical volume allocation policy. SMIT uses the different terms to describe the regions on physical volume. Range of physical volumes Specifies the inter-physical volume allocation policy minimum - tries to use minimum number of disks (depending on number of mirror copies.) maximum - will spread the logical volume over the available physical volumes. Max number of physical volumes used Sets the number of physical volumes to be used in allocation. Must be between one and the number of physical volumes in the volume group. Number of copies Specifies the number of physical partitions to be allocated for each logical partition. Must be between one (no mirroring) and three. Mirror write consistency Whether mirror write consistency is turned on. Allocate each logical partition copy on a separate physical volume Sets the strictness policy. For availability, one usually wants to allocate each copy of a logical volume on different physical volumes. 24 AIX Logical Volume Manager from A to Z: Troubleshooting and Commands Relocate the logical volume during reorganization Sets whether a reorganization of the volume group will affect this logical volume. Logical volume label A one to 127 character label for the logical volume. If a jfs is using this logical volume, then the mount point will be stored here. Max number of partitions Sets the maximum number of logical partitions that can be allocated to this logical volume. The default is 512. Note the logical volume may never have this many logical partitions. Enable bad block relocation Specifies whether the logical volume manager bad block relocation will be used for this logical volume. Scheduling policy Sets how mirror reads/writes are done: parallel - writes to logical volume copies performed at once, reads from the most accessible copy. sequential - writes to logical volume copies performed sequentially and waits for completion before proceeding to the next. Reads are from the primary copy. Enable write verify Sets if each write is verified by a read. File containing allocation map Specifies the name of the file that contains the allocation map for the logical volume. Stripe size The stripe width (4,16,32,64,128 KB, or none) Chapter 1. LVM commands 25 smit mklv Add a Logical Volume Type or select values in entry fields. Press Enter AFTER making all desired changes. [TOP] Logical volume NAME * VOLUME GROUP name * Number of LOGICAL PARTITIONS PHYSICAL VOLUME names Logical volume TYPE POSITION on physical volume RANGE of physical volumes MAXIMUM NUMBER of PHYSICAL VOLUMES to use for allocation Number of COPIES of each logical partition Mirror Write Consistency? Allocate each logical partition copy on a SEPARATE physical volume? RELOCATE the logical volume during reorganization? Logical volume LABEL MAXIMUM NUMBER of LOGICAL PARTITIONS Enable BAD BLOCK relocation? SCHEDULING POLICY for reading/writing logical partition copies Enable WRITE VERIFY? File containing ALLOCATION MAP Stripe Size? [BOTTOM] F1=Help Esc+5=Reset F9=Shell F2=Refresh F6=Command F10=Exit [Entry Fields] [] asgard_vg [] [] [] middle minimum [] 1 yes yes yes [] [512] yes parallel no [] [Not Striped] F3=Cancel F7=Edit Enter=Do F4=List F8=Image 1.2.2 Copy a logical volume to a new logical volume A new logical volume will be created with the same attributes as the source logical volume. The user can chose to define the name for the new logical volume, or let the system assign the name, with the user just specifying the prefix. 26 AIX Logical Volume Manager from A to Z: Troubleshooting and Commands Note If you are copying a striped logical volume and the destination logical volume does not exist, an identical copy, including the striped block size and striping width of the source logical volume, is created, and then the data is copied For the command line options, see cplv in Appendix A.4, “The cplv command” on page 209, or use the SMIT fastpath: smit cplv SMIT provides the following fields: Source logical volume name The name or logical volume ID of the source logical volume ([F4] for list). Destination logical volume The name of the new logical volume. Destination volume group The name of the volume group in which the destination logical volume will reside. smit cplv - Copy to a user created logical volume Copy to a user created logical volume Type or select values in entry fields. Press Enter AFTER making all desired changes. [Entry Fields] * SOURCE logical volume name * DESTINATION logical volume to create * Destination VOLUME GROUP name F1=Help Esc+5=Reset F9=Shell F2=Refresh F6=Command F10=Exit [] [] [] F3=Cancel F7=Edit Enter=Do F4=List F8=Image 1.2.3 Copy a logical volume to same sized or bigger logical volume This example is similar to the previous example, except that the logical volume will be copied to an already existing logical volume. The type field in the destination logical volume must be set to copy before this command will work. Chapter 1. LVM commands 27 Note The destination logical volume must be the same size or larger than the source logical volume, as not all file system data will be copied. This will lead to corruption of the destination file system. For the command line options, see cplv in Appendix A.4, “The cplv command” on page 209, or use the SMIT fastpath: smit cplv SMIT provides the following fields: Source logical volume name The name of the logical volume to be copied ([F4] for list). Destination logical volume The name of an existing logical volume, to which the source logical volume will be copied. smit cplv - Copy over an existing logical volume Copy over an existing logical volume Type or select values in entry fields. Press Enter AFTER making all desired changes. [Entry Fields] * SOURCE logical volume name * DESTINATION logical volume F1=Help Esc+5=Reset F9=Shell F2=Refresh F6=Command F10=Exit [] [] F3=Cancel F7=Edit Enter=Do F4=List F8=Image 1.2.4 Copy a logical volume to a smaller logical volume This cannot be performed by simply copying the logical volume. The smit cplv command will allow this, but will result in a corrupted file system. To do this properly, the user must create the new logical volume at the required size, create a file system on the logical volume, and mount it. The information can then be copied using cp -r or cpio -p (for details on the cpio command see Appendix D.4, “The cpio command” on page 331). 28 AIX Logical Volume Manager from A to Z: Troubleshooting and Commands 1.2.5 Add a mirrored copy to a logical volume The mklvcopy command increases the number of copies of each logical partition in the logical volume. This is accomplished by increasing the total number of physical partitions for each logical partition to the number represented by Copies. You can request that the physical partitions for the new copies be allocated on specific physical volumes (within the volume group); otherwise, all the physical volumes within the volume group are available for allocation. The logical volume modified with this command uses the copies parameter as its new copy characteristic. The data in the new copies will not be synchronized until one of the following occurs: • The -k option is used. • The volume group is activated by the varyonvg command. • The volume group or logical volume is synchronized explicitly by the syncvg command. Individual logical partitions are always updated as they are written to. Note To create a copy of a striped logical volume, all systems that access the volume group must be at least at AIX Version 4.3.3. For the command line options, see mklvcopy in Appendix A.18, “The mklvcopy command” on page 250, or use the SMIT fastpath: smit mklvcopy SMIT provides the following fields: Logical volume name The name of the logical volume to add the copy to ([F4] for list). New total number of logical partition copies The new total number of copies for each logical partition after this copy has been added. Physical volume names The names of the physical volumes that will be used to create the new copies. If not specified, physical volumes in the volume group will be used that best meet the allocation policies of the logical volume ([F4] for list). Chapter 1. LVM commands 29 Position on physical volumes Set the intra-physical volume allocation policy for this copy/copies. Range of physical volumes Set the inter-physical volume allocation policy for this copy/copies. Allocate each copy on a separate physical volume Set the strictness policy for this copy/copies. File containing the allocation map Use a map file for allocating the new logical partitions. Synchronize the data in the new logical partition copies This will force the synchronization of the data between the existing logical partitions and the new logical partitions. smit mklvcopy Add Copies to a Logical Volume Type or select values in entry fields. Press Enter AFTER making all desired changes. [Entry Fields] loki_lv 1 * LOGICAL VOLUME name * NEW TOTAL number of logical partition copies PHYSICAL VOLUME names POSITION on physical volume RANGE of physical volumes MAXIMUM NUMBER of PHYSICAL VOLUMES to use for allocation Allocate each logical partition copy on a SEPARATE physical volume? File containing ALLOCATION MAP SYNCHRONIZE the data in the new logical partition copies? F1=Help Esc+5=Reset F9=Shell F2=Refresh F6=Command F10=Exit [] middle minimum [32] yes [] no F3=Cancel F7=Edit Enter=Do F4=List F8=Image 1.2.6 Set allocation policy for a logical volume The allocation policy can be changed for a logical volume, but it will not affect the allocation of existing physical partitions. It will only affect the allocation of 30 AIX Logical Volume Manager from A to Z: Troubleshooting and Commands new partitions, or if the logical volume is reorganized, using the reorgvg command. For the command line options, see chlv in Appendix A.1, “The chlv command” on page 199, or use the SMIT fastpath: smit chlv SMIT provides the following fields: Logical volume name The name of the logical volume that will have its allocation policy changed ([F4] for list). Position on physical volume Sets the intra-physical volume allocation policy. Range of physical volumes Sets the inter-physical volume allocation policy. smit chlv Change a Logical Volume Type or select values in entry fields. Press Enter AFTER making all desired changes. [TOP] * Logical volume NAME Logical volume TYPE POSITION on physical volume RANGE of physical volumes MAXIMUM NUMBER of PHYSICAL VOLUMES to use for allocation Allocate each logical partition copy on a SEPARATE physical volume? RELOCATE the logical volume during reorganization? Logical volume LABEL MAXIMUM NUMBER of LOGICAL PARTITIONS SCHEDULING POLICY for reading/writing logical partition copies PERMISSIONS Enable BAD BLOCK relocation? Enable WRITE VERIFY? Mirror Write Consistency? [BOTTOM] F1=Help Esc+5=Reset F9=Shell F2=Refresh F6=Command F10=Exit [Entry Fields] odin_lv [jfs] middle minimum [32] yes yes [/home/odin] [512] parallel read/write yes no yes F3=Cancel F7=Edit Enter=Do F4=List F8=Image Chapter 1. LVM commands 31 1.2.7 Set strictness for a logical volume The strictness policy can be changed for a logical volume, but it will not affect the existing physical partitions. It will only affect the allocation of new partitions, or if the logical volume is reorganized, using the reorgvg command. For the command line options, see chlv in Appendix A.1, “The chlv command” on page 199, or use the SMIT fastpath: smit chlv SMIT provides the following fields: Logical volume name The name of the logical volume that will have its strictness changed ([F4] for list). Maximum number of physical volumes to use for allocation This physical volume upper bound is used with super strictness to determine how many physical volumes each mirror will span. Allocate each logical partition copy on a separate physical volume Sets the strictness for the logical volume to yes - Sets a strict allocation policy so that copies of a logical partition cannot share the same physical volume (default). no - Does not set a strict allocation policy. 32 AIX Logical Volume Manager from A to Z: Troubleshooting and Commands smit chlv Change a Logical Volume Type or select values in entry fields. Press Enter AFTER making all desired changes. [TOP] * Logical volume NAME Logical volume TYPE POSITION on physical volume RANGE of physical volumes MAXIMUM NUMBER of PHYSICAL VOLUMES to use for allocation Allocate each logical partition copy on a SEPARATE physical volume? RELOCATE the logical volume during reorganization? Logical volume LABEL MAXIMUM NUMBER of LOGICAL PARTITIONS SCHEDULING POLICY for reading/writing logical partition copies PERMISSIONS Enable BAD BLOCK relocation? Enable WRITE VERIFY? Mirror Write Consistency? [BOTTOM] F1=Help Esc+5=Reset F9=Shell F2=Refresh F6=Command F10=Exit [Entry Fields] odin_lv [jfs] middle minimum [32] yes yes [/home/odin] [512] parallel read/write yes no yes F3=Cancel F7=Edit Enter=Do F4=List F8=Image 1.2.8 Set write verify for a logical volume The write verify can be changed for a logical volume, and it will take effect immediately. Setting the write verify for a logical volume will mean that each write will be followed by a read to verify the data written. This obviously has performance implications. For the command line options, see chlv in Appendix A.1, “The chlv command” on page 199, or use the SMIT fastpath: smit chlv SMIT provides the following fields: Logical volume name The name of the logical volume that will have its write verify flag changed ([F4] for list). Enable write verify Set write verify on or off for the logical volume. Chapter 1. LVM commands 33 smit chlv Change a Logical Volume Type or select values in entry fields. Press Enter AFTER making all desired changes. [TOP] * Logical volume NAME Logical volume TYPE POSITION on physical volume RANGE of physical volumes MAXIMUM NUMBER of PHYSICAL VOLUMES to use for allocation Allocate each logical partition copy on a SEPARATE physical volume? RELOCATE the logical volume during reorganization? Logical volume LABEL MAXIMUM NUMBER of LOGICAL PARTITIONS SCHEDULING POLICY for reading/writing logical partition copies PERMISSIONS Enable BAD BLOCK relocation? Enable WRITE VERIFY? Mirror Write Consistency? [BOTTOM] F1=Help Esc+5=Reset F9=Shell F2=Refresh F6=Command F10=Exit [Entry Fields] odin_lv [jfs] middle minimum [32] yes yes [/home/odin] [512] parallel read/write yes no yes F3=Cancel F7=Edit Enter=Do F4=List F8=Image 1.2.9 Set schedule policy The scheduling policy can be changed for a logical volume and will take effect immediately. For the command line options, see chlv in Appendix A.1, “The chlv command” on page 199, or use the SMIT fastpath: smit chlv SMIT provides the following fields: Logical volume name The name of the logical volume that will have its scheduling policy changed ([F4] for list). Scheduling policy for reading/writing logical partition copies There are two options for the scheduling policy: Parallel - Writes to logical volume copies 34 AIX Logical Volume Manager from A to Z: Troubleshooting and Commands performed at once, reads from the most accessible copy. Sequential - Writes to logical volume copies performed sequentially and wait for completion before proceeding to the next. Reads are from the primary copy. smit chlv Change a Logical Volume Type or select values in entry fields. Press Enter AFTER making all desired changes. [TOP] * Logical volume NAME Logical volume TYPE POSITION on physical volume RANGE of physical volumes MAXIMUM NUMBER of PHYSICAL VOLUMES to use for allocation Allocate each logical partition copy on a SEPARATE physical volume? RELOCATE the logical volume during reorganization? Logical volume LABEL MAXIMUM NUMBER of LOGICAL PARTITIONS SCHEDULING POLICY for reading/writing logical partition copies PERMISSIONS Enable BAD BLOCK relocation? Enable WRITE VERIFY? Mirror Write Consistency? [BOTTOM] F1=Help Esc+5=Reset F9=Shell F2=Refresh F6=Command F10=Exit [Entry Fields] odin_lv [jfs] middle minimum [32] yes yes [/home/odin] [512] parallel read/write yes no yes F3=Cancel F7=Edit Enter=Do F4=List F8=Image 1.2.10 Increase the maximum size of a logical volume The maximum size stops users increasing the size of logical volumes beyond a pre-determined size. While users can still increase the size of logical volumes by first changing the maximum size, it serves as a warning. The maximum size may be set as: Chapter 1. LVM commands 35 • Performance of the logical volume would deteriorate if allocation went beyond a given size. • Other parts of an organization may need to be aware if logical volumes are increased. For the command line options, see chlv in Appendix A.1, “The chlv command” on page 199, or use the SMIT fastpath: smit chlv SMIT provides the following fields: Logical volume name The name of the logical volume that will have its maximum size changed ([F4] for list). Maximum number of logical partitions This sets the maximum size (in logical partitions) that a logical volume can be. The default is 512. smit chlv Change a Logical Volume Type or select values in entry fields. Press Enter AFTER making all desired changes. [TOP] * Logical volume NAME Logical volume TYPE POSITION on physical volume RANGE of physical volumes MAXIMUM NUMBER of PHYSICAL VOLUMES to use for allocation Allocate each logical partition copy on a SEPARATE physical volume? RELOCATE the logical volume during reorganization? Logical volume LABEL MAXIMUM NUMBER of LOGICAL PARTITIONS SCHEDULING POLICY for reading/writing logical partition copies PERMISSIONS Enable BAD BLOCK relocation? Enable WRITE VERIFY? Mirror Write Consistency? [BOTTOM] F1=Help Esc+5=Reset F9=Shell 36 F2=Refresh F6=Command F10=Exit [Entry Fields] odin_lv [jfs] middle minimum [32] yes yes [/home/odin] [512] parallel read/write yes no yes F3=Cancel F7=Edit Enter=Do AIX Logical Volume Manager from A to Z: Troubleshooting and Commands F4=List F8=Image 1.2.11 Increase the size of a logical volume The extendlv command increases the number of logical partitions allocated to the logical volume by allocating an additional number of logical partitions. This can be limited to specific physical volumes, or all physical volumes can be considered to be available. Note The -e, -m, -s, and -u flags are not valid with a striped logical volume. By default, the logical volume is expanded using the existing characteristics. These can be temporarily overridden by specifying different allocation policies. However, the characteristics of the logical volume do not change. For the command line options, see extendlv in Appendix A.6, “The extendlv command” on page 212, or use the SMIT fastpath: smit extendlv SMIT provides the following fields: Logical volume name The name of the logical volume to be extended ([F4] for list). Number of additional logical partitions The number of logical partitions to add to the logical volume. Physical volume names This is used to specify which physical volumes will be used, else all physical volumes will be considered to be available. Position on physical volume Sets the intra-physical volume allocation policy for this allocation alone. The policy of the logical volume is not changed. Range of physical volumes Sets the inter-physical volume allocation policy for this allocation alone. Again, the policy of the logical volume is not changed. Maximum number of physical volumes to use for the allocation Sets the upper bound for this allocation. Allocate each logical partition on a separate physical volume Sets the strictness policy for this allocation. Chapter 1. LVM commands 37 File containing the allocation map A map file can be used to specify which physical partitions are to be used. smit extendlv Increase the Size of a Logical Volume Type or select values in entry fields. Press Enter AFTER making all desired changes. * LOGICAL VOLUME name * Number of ADDITIONAL logical partitions PHYSICAL VOLUME names POSITION on physical volume RANGE of physical volumes MAXIMUM NUMBER of PHYSICAL VOLUMES to use for allocation Allocate each logical partition copy on a SEPARATE physical volume? File containing ALLOCATION MAP F1=Help Esc+5=Reset F9=Shell F2=Refresh F6=Command F10=Exit F3=Cancel F7=Edit Enter=Do [Entry Fields] grom_lv [] [] middle minimum [32] yes [] F4=List F8=Image 1.2.12 List the configuration of a logical volume The lslv command displays information about the logical volume. Used without any arguments, it returns the configuration of the logical volume. Other flags can return information about the physical partition usage or logical partition mapping. For the command line options, see lsvg in Appendix A.11, “The lsvg command” on page 229, or use the SMIT fastpath: smit lslv SMIT provides the following fields: 38 Logical volume name The name of the logical volume to report ([F4] for list). List options Status - The configuration of the logical volume. Physical volume map - Usage of physical partitions by physical volume and region. AIX Logical Volume Manager from A to Z: Troubleshooting and Commands Logical partition map - The physical partition to logical partition mapping. smit lslv - Show the characteristics of a logical volume Show Characteristics of a Logical Volume Type or select values in entry fields. Press Enter AFTER making all desired changes. [Entry Fields] [odin_lv] status * LOGICAL VOLUME name List OPTION F1=Help Esc+5=Reset F9=Shell F2=Refresh F6=Command F10=Exit F3=Cancel F7=Edit Enter=Do F4=List F8=Image smit lslv can also be used to list the configuration of a logical volume. COMMAND STATUS Command: OK stdout: yes stderr: no Before command completion, additional instructions may appear below. LOGICAL VOLUME: odin_lv LV IDENTIFIER: 00017d378edf7c9d.1 VG STATE: active/complete TYPE: jfs MAX LPs: 512 COPIES: 1 LPs: 12 STALE PPs: 0 INTER-POLICY: minimum INTRA-POLICY: middle MOUNT POINT: /home/odin MIRROR WRITE CONSISTENCY: on EACH LP COPY ON A SEPARATE PV ?: yes STRIPE WIDTH 3 STRIPE SIZE 8K F1=Help F8=Image n=Find Next F2=Refresh F9=Shell VOLUME GROUP: PERMISSION: LV STATE: WRITE VERIFY: PP SIZE: SCHED POLICY: PPs: BB POLICY: RELOCATABLE: UPPER BOUND: LABEL: F3=Cancel F10=Exit asgard_vg read/write closed/syncd off 4 megabyte(s) parallel 12 relocatable yes 32 /home/odin F6=Command /=Find Chapter 1. LVM commands 39 Explanation of the fields displayed: 40 Logical volume Name of the logical volume. Volume group Name of the volume group. Logical volume identifier Identifier of the logical volume. Permission Access permission, read-only or read-write. Volume group state State of the volume group. If the volume group is activated with the varyonvg command, the state is either active/complete (indicating all physical volumes are active) or active/partial (indicating all physical volumes are not active). If the volume group is not activated with the varyonvg command, the state is inactive. Logical volume state State of the logical volume. The Opened/stale status indicates the logical volume is open but contains physical partitions that are not current. Opened/syncd indicates the logical volume is open and synchronized. Closed indicates the logical volume has not been opened. Type Logical volume type. Write verify Write verify state (on or off). Mirror write consistency Mirror write consistency state (yes or no). Max LPs Maximum number of logical partitions the logical volume can hold. PP size Size of each physical partition. Copies Number of physical partitions created for each logical partition when allocating. Schedule policy Sequential or parallel scheduling policy. LPs Number of logical partitions currently in the logical volume. PPs Number of physical partitions currently in the logical volume. AIX Logical Volume Manager from A to Z: Troubleshooting and Commands Stale partitions Number of physical partitions in the logical volume that are not current. BB policy Bad block relocation policy. Inter-policy Inter-physical allocation policy. Relocatable Indicates whether the partitions can be relocated if a reorganization of partition allocation takes place. Intra-policy Intra-physical allocation policy. Upper bound If the logical volume is super strict, upper bound is the maximum number of disks in a mirror copy. Mount point File system mount point for the logical volume, if applicable. Label Specifies the label field for the logical volume. Each LP copy on separate PV Current state of allocation, strict, nonstrict, or superstrict. Striping width1 The number of physical volumes being striped across. Strip size1 The number of bytes per stripe. 1 Only displayed if the logical volume is striped. 1.2.13 List a logical volumes detailed mapping The lslv command will also display information about the logical volume’s physical partition usage by region and physical volume or the actual logical to physical partition mapping. As seen in the previous section, the physical volume map or the logical partition map can be selected. Chapter 1. LVM commands 41 smit lslv - Showing the physical volume map COMMAND STATUS Command: OK stdout: yes stderr: no Before command completion, additional instructions may appear below. grom_lv:/home/odin PV COPIES hdisk11 012:000:000 F1=Help F8=Image n=Find Next IN BAND 100% F2=Refresh F9=Shell DISTRIBUTION 000:012:000:000:000 F3=Cancel F10=Exit F6=Command /=Find Explanation of the fields displayed: 42 PV The physical volume name. Copies The number of physical partitions used for each mirrored copy. Shows if a logical volume is mirrored on the same physical volume. In band The percentage of physical partitions on the physical volume belonging to the logical volume that have met their intra-physical volume allocation policy. Distribution The number of physical partitions laying in each region on the physical volume (shown from outer edge to inner edge). AIX Logical Volume Manager from A to Z: Troubleshooting and Commands smit lslv - Showing the logical partition map COMMAND STATUS Command: OK stdout: yes stderr: no Before command completion, additional instructions may appear below. [TOP] grom_lv:/home/odin LP PP1 PV1 0001 0109 hdisk11 0002 0110 hdisk11 0003 0111 hdisk11 0004 0112 hdisk11 0005 0113 hdisk11 0006 0114 hdisk11 0007 0115 hdisk11 0008 0116 hdisk11 0009 0117 hdisk11 0010 0118 hdisk11 0011 0119 hdisk11 0012 0120 hdisk11 PP2 PV2 PP3 PV3 [BOTTOM] F1=Help F8=Image n=Find Next F2=Refresh F9=Shell F3=Cancel F10=Exit F6=Command /=Find Explanation of the fields displayed: LP The logical partition number. PP1-3 Physical partition number for copy 1 to 3. PV1-3 Physical volume that the physical partition resides on for copy 1through 3. 1.3 Physical volume related commands The commands in this section relate to creating and modifying physical volumes. These commands can be run from the command line or from the SMIT System Storage management -> Logical Volume Manager -> Physical Volumes menu (See Figure 4). Chapter 1. LVM commands 43 P h ys ic a l V o lu m e s Lis t A ll P h ys ic a l V o lum e s in S ys te m A d d a D is k C h a ng e C h ara c te ris tic s o f a P h ys ica l V o lum e Lis t C o n te n ts o f a P h ys ic a l V o lum e M o v e C o n te nts o f a P h ys ica l V o lum e Figure 4. SMIT physical volume options 1.3.1 List all physical volumes in system The getlvodm -C command will list all the configured physical volumes in the system. For the command line options, see getlvodm in Appendix B.7, “The getlvodm command” on page 291, or use the SMIT fastpath: smit pv smit pv - List all physical volumes in system COMMAND STATUS Command: OK stdout: yes stderr: no Before command completion, additional instructions may appear below. hdisk0 hdisk1 hdisk2 hdisk3 hdisk5 hdisk4 hdisk6 hdisk9 hdisk10 hdisk11 hdisk7 F1=Help F8=Image n=Find Next 44 F2=Refresh F9=Shell F3=Cancel F10=Exit AIX Logical Volume Manager from A to Z: Troubleshooting and Commands F6=Command /=Find 1.3.2 List configuration of a physical volume The lspv command displays information about the physical volume. Used without any arguments, it returns the configuration of the physical volume. Other flags can return information about the logical volumes and physical partitions. For the command line options, see lspv in Appendix A.10, “The lspv command” on page 224, or use the SMIT fastpath: smit lspv SMIT provides the following fields: Physical volume name The name of the physical volume to report ([F4] to list). List option Status - The configuration of the physical volume Logical volumes - List the logical volumes on the physical volume, their size, and distribution. Physical partitions - The physical partition usage by logical volume. smit lspv - List contents of a physical volume List Contents of a Physical Volume Type or select values in entry fields. Press Enter AFTER making all desired changes. [Entry Fields] [hdisk9] status * PHYSICAL VOLUME name List OPTION F1=Help Esc+5=Reset F9=Shell F2=Refresh F6=Command F10=Exit F3=Cancel F7=Edit Enter=Do F4=List F8=Image smit lspv can also be used to show the configuration of a physical volume. Chapter 1. LVM commands 45 COMMAND STATUS Command: OK stdout: yes stderr: no Before command completion, additional instructions may appear below. PHYSICAL VOLUME: PV IDENTIFIER: PV STATE: STALE PARTITIONS: PP SIZE: TOTAL PPs: FREE PPs: USED PPs: FREE DISTRIBUTION: USED DISTRIBUTION: hdisk9 00017d37628265fc active 6 4 megabyte(s) 537 (2148 megabytes) 459 (1836 megabytes) 78 (312 megabytes) 108..29..107..107..108 00..78..00..00..00 F1=Help F8=Image n=Find Next F2=Refresh F9=Shell VOLUME GROUP: VG IDENTIFIER park_vg 00017d378edf7c9d ALLOCATABLE: yes LOGICAL VOLUMES: 5 VG DESCRIPTORS: 1 F3=Cancel F10=Exit F6=Command /=Find Explanation of the fields displayed: 46 Physical volume Name of the physical volume. Volume group Name of volume group. PV Identifier The physical volume identifier for this physical disk. VG Identifier The volume group identifier of the volume group that this physical disk is a member. PVstate State of the physical volume. If the volume group that contains the physical volume is varied on with the varyonvg command, the state is active, missing, or removed. If the physical volume is varied off with the varyoffvg command, the state is varied off. Stale Partitions Number of physical partitions on the physical volume that are not current. PP size Size of physical partitions on the volume. Total PPs Total number of physical partitions on the physical volume. AIX Logical Volume Manager from A to Z: Troubleshooting and Commands Free PPs Number of free physical partitions on the physical volume. Used PPs Number of used physical partitions on the physical volume. Free distribution Number of free partitions available in each intra-physical volume section. Used distribution Number of used partitions in each intra-physical volume section. Allocatable Allocation permission for this physical volume. Logical volumes Number of logical volumes using the physical volume. VG descriptors Number of volume group descriptors on the physical volume. 1.3.3 List contents of a physical volume The lspv command will also display information about the logical volumes on the physical volume and the physical partition usage by region and logical volume. As seen in the previous section, the logical volumes or physical partitions can be selected. Explanation of the fields displayed: LV Name The logical volume name. LPs The number of logical partitions used by the logical volume. PPs The number of physical partitions used by the logical volume. Distribution The number of physical partitions laying in each region on the physical volume (shown from outer edge to inner edge). Mount point The mount point of the file system (if appropriate). Chapter 1. LVM commands 47 smit lspv - Show logical volumes on the physical volume COMMAND STATUS Command: OK stdout: yes stderr: no Before command completion, additional instructions may appear below. hdisk9: LV NAME loki_lv odin_lv thor_lv F1=Help F8=Image n=Find Next LPs 4 12 15 PPs 4 12 30 DISTRIBUTION 00..04..00..00..00 00..12..00..00..00 00..30..00..00..00 F2=Refresh F9=Shell F3=Cancel F10=Exit MOUNT POINT /home/loki N/A /home/thor F6=Command /=Find Explanation of the fields displayed: 48 PP range The physical volume name. State The current state of the physical partitions: free, used, stale, or VGDA. If a volume group is converted to a big VG format, it may be necessary to use some data partitions for the volume group descriptor area. These partitions will be marked as VGDA. Region The intra-physical volume region in which the partitions are located. LV ID The name of the logical volume to which the physical partitions are allocated. Type The type of the logical volume to which the partitions are allocated. Mount point The mount point of the file system (if appropriate). AIX Logical Volume Manager from A to Z: Troubleshooting and Commands smit lspv - Show physical partition usage for the physical volume COMMAND STATUS Command: OK stdout: yes stderr: no Before command completion, additional instructions may appear below. hdisk9: PP RANGE STATE 1-108 free REGION outer edge LV ID TYPE MOUNT POINT 129-132 133-144 145-174 175-180 181-186 187-215 216-322 323-429 430-537 outer middle outer middle outer middle outer middle outer middle outer middle center inner middle inner edge loki_lv odin_lv thor_lv mirror_lv mirror_lv jfs jfs jfs jfs jfs /home/loki N/A /home/thor N/A N/A used used used used stale free free free free F1=Help F8=Image n=Find Next F2=Refresh F9=Shell F3=Cancel F10=Exit F6=Command /=Find 1.3.4 Move data from a physical volume The data in allocated physical partitions can be moved from one physical volume to one or more physical volumes as long as they are in the same volume group. This process can be limited to the physical partitions belonging to one logical volume; otherwise, all physical partitions will be moved. For the command line options, see migratepv in Appendix A.14, “The migratepv command” on page 235, or use the SMIT fastpath: smit migratepv SMIT provides the following fields: Source physical volume The name of the physical volume from which to move the data. Destination physical volumes The destination physical volume or volumes. Move only data belonging to this logical volume If a logical volume is specified, only physical partitions used by this logical Chapter 1. LVM commands 49 volume will be moved, else all physical partitions will be moved. smit migratepv Move Contents of a Physical Volume Type or select values in entry fields. Press Enter AFTER making all desired changes. [Entry Fields] hdisk9 [] [] * SOURCE physical volume name * DESTINATION physical volumes Move only data belonging to this LOGICAL VOLUME? F1=Help Esc+5=Reset F9=Shell F2=Refresh F6=Command F10=Exit F3=Cancel F7=Edit Enter=Do F4=List F8=Image 1.4 Journaled file system related commands The commands in this section relate to creating and modifying journaled file systems. These commands can be run from the command line or from the SMIT System Storage Management -> File Systems menu (See Figure 5). File Systems File Systems List All File Systems List All Mounted File Systems Add / Change / Show / Delete File Systems Mount a File System Mount a Group of File Systems Unmount a File System Unmount a Group of File Systems Verify a File System Backup a File System Restore a File System List Contents of a Backup Journaled File Systems CDROM File Systems Network File Systems (NFS) Cache FS Add a Journaled File System Add a Journaled File System on a Previously Defined Logical Volume Change/ Show Characteristics of a Journaled File System Defragment a Journaled File System Figure 5. SMIT file systems options 50 AIX Logical Volume Manager from A to Z: Troubleshooting and Commands 1.4.1 Add a JFS to a previously defined logical volume menu The crfs command is used to create a file system on an already created logical volume, or a new one can be created using the -d flag. The file system will not be mounted once it is created. The file system can be: Standard Standard journaled file system. Compressed All data is compressed using the Lempev Zed compression algorithm Large file enabled Provides support for files greater than 2 GB For the command line options, see crfs in Appendix D.5, “The crfs command” on page 335, or use the SMIT fastpath: smit crfs SMIT provides the following fields: Logical Volume Name Name of the logical volume to use. Mount Point The mount point for the file system (will become the logical volume label). Mount Automatically at system restart Mount the file system automatically when system starts. Permissions Set the permissions for the file system read/write or read only. Mount Options Set the security related mount options nosuid - prevents setuid and setgid from programs in this file system nodev - no open system calls of devices from this mount. Start disk accounting Turn on accounting for this file system Fragment size Fragment size can be 512, 1024, 2048, and 4096. Sizes below 4096 allow partial blocks to be written Number of bytes per inode Specifies the ration of the file system size to the number of inodes. Allocation group size Determines the range of allowable nbpi (number of bytes per i-node). Chapter 1. LVM commands 51 smit crfs Add a Standard Journaled File System Type or select values in entry fields. Press Enter AFTER making all desired changes. [Entry Fields] * LOGICAL VOLUME name * MOUNT POINT Mount AUTOMATICALLY at system restart? PERMISSIONS Mount OPTIONS Start Disk Accounting? Fragment Size (bytes) Number of bytes per inode Allocation Group Size (MBytes) F1=Help Esc+5=Reset F9=Shell F2=Refresh F6=Command F10=Exit F3=Cancel F7=Edit Enter=Do [] no read/write [] no 4096 4096 8 F4=List F8=Image More information about fragment size, nbpi, and allocation group size can be found in the redbook AIX Logical Volume Manager from A to Z, Introduction and Concepts, SG24-5432. 1.4.2 Change/show details of a file system The chfs command is used to change the attributes of a file system. The new mount point, automatic mounts, permissions, and file system size can be set or changed. Some file system attributes are set at the time the file system is created and cannot be changed. For the journaled file system these attributes include the fragment size, block size, number of bytes per i-node, compression, and the minimum file system size. For the command line options, see chfs in Appendix D.2, “The chfs command” on page 327, or use the SMIT fastpath: smit chjfs SMIT provides the following fields: 52 File system name The current mount point of the file system. New mount point The new mount point for the file system. AIX Logical Volume Manager from A to Z: Troubleshooting and Commands Size of file system in 512-byte blocks The new size of the file system. It will be rounded up to the nearest physical partition. Mount Group File system can be the member of a mount group - File systems that can be mounted as a group. Mount automatically at system restart Change the automount option. Permissions Set permissions (read/write or read only). Mount Options Set the mount options (nosuid or nodev). Start Disk Accounting Turn on or off accounting for this file system. Note The other fields cannot be changed and are just for information. smit chjfs Change / Show Characteristics of a Journaled File System Type or select values in entry fields. Press Enter AFTER making all desired changes. File system name NEW mount point SIZE of file system (in 512-byte blocks) Mount GROUP Mount AUTOMATICALLY at system restart? PERMISSIONS Mount OPTIONS Start Disk Accounting? Fragment Size (bytes) Number of bytes per inode Compression algorithm Large File Enabled Allocation Group Size (MBytes) F1=Help Esc+5=Reset F9=Shell F2=Refresh F6=Command F10=Exit F3=Cancel F7=Edit Enter=Do [Entry Fields] /usr [/usr] [933888] [bootfs] yes read/write [] no 4096 4096 no false 8 F4=List F8=Image Chapter 1. LVM commands 53 1.4.3 Defrag a file system The amount of contiguous free space in a file system can be increased by reorganizing allocations to be contiguous rather than scattered across the disk. For the command line options, see defragfs in Appendix D.6, “The defragfs command” on page 338, or use the SMIT fastpath: smit dejfs SMIT provides the following fields: File system name Mount point of the file system to defrag. Perform, Query, or report Select the option Perform - Run the defragmentation of the file system. Query - Report the current fragmentation state of the file system. Report - Produce a report as if the defrag had been run. smit dejfs Defragment a Journaled File System Type or select values in entry fields. Press Enter AFTER making all desired changes. [Entry Fields] / perform File System Name Perform, Query, or Report ? F1=Help Esc+5=Reset F9=Shell F2=Refresh F6=Command F10=Exit F3=Cancel F7=Edit Enter=Do The smit dejfs can be used to obtain a report. 54 AIX Logical Volume Manager from A to Z: Troubleshooting and Commands F4=List F8=Image COMMAND STATUS Command: OK stdout: yes stderr: no Before command completion, additional instructions may appear below. [TOP] statistics before running defragfs: number of free fragments 364911 number of allocated fragments 11921 number of free spaces shorter than a block 0 number of free fragments in short free spaces 0 statistics after running defragfs: number of free spaces shorter than a block 0 number of free fragments in short free spaces 0 other statistics: number of fragments moved 0 number of logical blocks moved 0 number of allocation attempts 0 number of exact matches 0 [BOTTOM] F1=Help F8=Image n=Find Next F2=Refresh F9=Shell F3=Cancel F10=Exit F6=Command /=Find 1.4.4 Mount a file system Mounting a file system makes the file system available for use at its defined mount point. The mount point becomes the root directory of the newly mounted file system. For the command line options, see mount in Appendix D.23, “The mount command” on page 362, or use the SMIT fastpath: smit mountfs SMIT provides the following fields: File system name The current defined mount point. Directory over which to mount If you wish to mount the file system over another directory. Type of file system Can be cdrfs, jfs, nfs, sfs, nfs3, cachefs, or autofs. Chapter 1. LVM commands 55 Force the mount Requests a forced mount during system initialization to enable mounting over the root file system. Remote node containing the file system to mount If the file system exists on a remote system. Mount as a removable file system Treat the file system as a removable file system. While files are open, it will be treated the same as a normal file system; however, once all files are closed, the system will not return errors if it is removed. Mount as read-only Set permissions to read-only, not read/write Disallow device access via this mount Set the nodev security option. Disallow execution of setuid and setgid programmes in this system Set the nosuid security option. smit mountfs Mount a File System Type or select values in entry fields. Press Enter AFTER making all desired changes. [Entry Fields] FILE SYSTEM name DIRECTORY over which to mount TYPE of file system FORCE the mount? REMOTE NODE containing the file system to mount Mount as a REMOVABLE file system? Mount as a READ-ONLY system? Disallow DEVICE access via this mount? Disallow execution of SUID and sgid programs in this file system? F1=Help Esc+5=Reset F9=Shell 56 F2=Refresh F6=Command F10=Exit F3=Cancel F7=Edit Enter=Do AIX Logical Volume Manager from A to Z: Troubleshooting and Commands [] [] no [] no no no no F4=List F8=Image 1.4.5 Unmount a file system Unmounting a file system makes it unavailable for use. There can be no files open. This will cause the unmount to fail unless the force option is used. For the command line options, see umount in Appendix D.32, “The umount command” on page 391, or use the SMIT fastpath: smit umountfs SMIT provides the following fields: Unmount all mounted file systems Choosing ’yes’ will unmount all local file systems except /, /tmp, and /usr. Unmount all remotely mounted file systems Choosing ’yes’ will unmount all remote file systems. Name of file system to unmount Specify the device, directory, or file system to be unmounted. Remote node containing the file system(s) to unmount Choose the node that is holding the file system to be unmounted. smit umountfs Unmount a File System Type or select values in entry fields. Press Enter AFTER making all desired changes. Unmount ALL mounted file systems? (except /, /tmp, /usr) -ORUnmount all REMOTELY mounted file systems? NAME of file system to unmount REMOTE NODE containing the file system(s) to unmount F1=Help Esc+5=Reset F9=Shell F2=Refresh F6=Command F10=Exit F3=Cancel F7=Edit Enter=Do [Entry Fields] no no [] [] F4=List F8=Image Chapter 1. LVM commands 57 58 AIX Logical Volume Manager from A to Z: Troubleshooting and Commands Chapter 2. Problem determination and recovery This chapter sets out techniques for Logical Volume Manager problem determination and discusses some internal details of the high-level commands. After setting out an underlying methodology for problem determination, It will also present some common issues encountered and appropriate solutions or recommendations for these situations. There will be considerable reference to the contents of LVM scripts, not only to highlight specific details of the scripts’ operation, but also to promote an overall awareness of the structure of LVM. It is strongly recommended that the reader work through this chapter as a whole: Performing recovery techniques on LVM without understanding what you are doing may well lead to further corruption of LVM control data. It is also recommended that the reader works through the examples given on a test system. Some LVM recovery situations require a good feel for LVM. Unless otherwise stated, all the tests in this chapter were performed on non-bigVG volume groups, as these are weaker than the newer bigVG structures in some recovery situations. The reader should be advised that, in some situations, recovery is simply not possible or not possible as a customer procedure. User data may either be gone, one may lack sufficient control information to perform reconstruction, or one may be in a deadlock situation where all approaches to repair are damaged. It must also be stressed that once recovery is started, if a recovery attempt fails, the LVM control structures may be left in a worse state than before. Reasons for this are shown in this chapter. It is recommended, therefore, that as much control information as possible should be backed up beforehand. At the least the ODM should be backed up, and, possibly, backup copies of the VGDAs should be made using dd as well. Note This chapter assumes the reader is comfortable with the LVM concepts. Competency in korn shell scripting is required to make full use of the material in this chapter although it is not a pre-requisite. It would also be helpful for the reader to be familiar with the format of C language header files. © Copyright IBM Corp. 2000 59 2.1 A methodology for problem determination. Identifying the source of a problem, in LVM or otherwise, is often a circular process. Initial investigation is performed. An hypothesis is made based on the facts discovered. Action is then taken to test the validity of the hypothesis. Further data to test the theory is gathered, or an attempt to fix the problem is made. If either of these are unsuccessful, more investigation is performed, or another hypothesis is drawn. Once a cause is found, it can then be repaired or rebuilt. It is vital that the reader realize that merely fixing a problem, for example, the object database manager (ODM) corruption, only addresses a symptom. The LVM may be back up, but the reason for its failure should also be considered, or it may simply reoccur. Problem determination is not complete until the cause has been determined as far as is possible (bearing in mind there are often practical limits to how much problem determination may be performed after repairs have been made and a system is back online). As an introduction to looking inside the LVM, consider that most high level LVM commands exist as user-readable korn shell scripts. This allows the troubleshooter to identify each command’s affect on the LVM structures of the volume group descriptor area (VGDA), the volume group status area (VGSA, and so on, as well as on the AIX’s ODM database. 2.1.1 Breaking up high-level commands For example, the mkvg command may be broken down (an initial simplification) as shown in Figure 6. 60 AIX Logical Volume Manager from A to Z: Troubleshooting and Commands Parsing Checking lcreatevg extendvg Figure 6. Flow of execution for mkvg Here, we can see that mkvg first parses its command line arguments. It then passes these on to the low level command lcreatevg to build a VGDA containing the first physical volume. It then invokes the extendvg command to bring additional physical volumes into the volume group (once per physical volume). It is apparent, from inspection of the script, that a number of other actions are also performed. These include: • Checking if the target physical volume devices are available or if they already participate in pre-existing volume groups • Generation of major and minor numbers for the volume group’s entry in the /dev directory and the ODM’s CuDvDr Chapter 2. Problem determination and recovery 61 [ -z "$VFLAG" ] then # Get major number. MAJOR=`lvgenmajor $VGNAME` test_return $? GOTMAJOR=1 else # Check major number. MAJOR=`lvchkmajor $VVAL $VGNAME` test_return $? GOTMAJOR=1 fi # Get minor number ( should be zero ) MINOR=`lvgenminor $MAJOR $VGNAME` test_return $? GOTMINOR=1 • Updating the ODM to contain information for the new volume group # Add new volume group to odm. putlvodm $CFLAG $C_VAL $XFLAG $X_VAL -v $VGNAME -o $AUTO_ON -q 0 $VGID if [ $? != 0 ] #If putlvodm failed, output warning and continue. then dspmsg -s 1 cmdlvm.cat 1024 "`lvmmsg 1024`\n" mkvg >& 2 ; fi It is not the intention here to set out every action performed by the mkvg script. Rather, the reader should be aware that it is possible to locate the areas within the scripts where these actions occur. Note The use of portions of LVM scripts in this document does not imply that the contents of LVM scripts is fixed. The LVM scripts are subject to modification at different levels of AIX or even of PTF. 2.2 Producing debug output for LVM Scripts Since we are dealing with standard shell scripts here, it is possible to trace these scripts in the normal fashion for korn shell scripts. We may sh -xv importvg -y prod_datavg hdisk2 from a shell prompt (-v will display each line as the shell reads it, therefore, displaying comments, functions definitions, and so on. The - x flag will display each line as it actually executes. This will give the input values of variables passed in to the script line followed by its 62 AIX Logical Volume Manager from A to Z: Troubleshooting and Commands evaluation). This allows tracking the execution of the target script but will not descend into sub-shells created when other scripts are started from within the script. The behavior of korn shell debug output is also such that it will not produce this output for functions within a script. It is necessary to insert set -xv into the body of the function to produce this output. set -xv could also be used to display debugging information for sub-shells of other high-level commands. However, it is generally sufficient to run sh -xv on each high-level command to produce the required output. Since editing the high-level commands is an undesirable method of problem determination or LVM investigation, this book provides the unsupported trclvm script (Appendix E.1, “trclvm” on page 393), which makes a copy of a high level command, instruments it with set -xv lines, and runs it. The script command can be used to capture the large amounts of data that are generated when running high-level commands in debug mode to a log file for later examination. By default, this will produce a typescript file containing input and output (standard and error) to the terminal running the command. The embedded control-M’s in the typescript file displayed by vi may be removed with the vi command %s/^M// (use control-V, control-M to produce ^M in vi command mode). We can look at debug output for the code fragment shown above to add a new volume group to the ODM by running sh -xv mkvg -y testvg hdisk9 and capturing the output with script. The relevant portion of the typescript file is shown below. # Add new volume group to odm. putlvodm $CFLAG $C_VAL $XFLAG $X_VAL -v $VGNAME -o $AUTO_ON -q 0 $VGID + putlvodm -v testvg -o y -q 0 00017d3700bfbf5c if [ $? != 0 ] #If putlvodm failed, output warning and continue. then dspmsg -s 1 cmdlvm.cat 1024 "`1024`\n" mkvg >& 2 ; fi + [ 0 != 0 ] Here putlvodm runs and places the volume group identifier (VGID) ( 00017d3700bfbf5c) into the ODM. We can see this operation has succeeded with the following test of $?. Frequent error checking is a feature of the high-level commands. If the putlvodm had failed, dspmsg would have been run. This will attempt to get an Chapter 2. Problem determination and recovery 63 appropriate NLS message for the situation, but if one is not available in the message catalogues, it will fall back onto the default set of English language messages generated by lvmmsg. If for some reason the putlvodm had failed, the following message would have been printed: 0516-624 mkvg: Warning, cannot update device configuration database for volume group. Execute redefinevg to synchronize the database. This is not considered a fatal error; so, we continue execution. LVM commands will sometimes output more than one error message when failure occurs. Some LVM high-level commands call an errhandler function (or a similar function serving this purpose). For example, if we have a 9.1 GB disk with physical partition size of 4 MB, there are 2275 physical partitions. Running chvg -t2 -c testvg will ask for 2032 physical partitions. Since this is insufficient: 0516-1158 chvg: The t flag parameter value 2 is too small to accommodate the largest disk in the volume group testvg. Specify a value between 3 and 16 OR do not specify any value for default minimum value. (lvmmsg 1158) 0516-732 chvg: Unable to change volume group testvg. (lvmmsg 732) will be displayed. This is generated by the following code: convert1016() { ... # if tVAL is specified, it should be large enough to fit MAX_TOTPPS if [ -n "$tVAL" ]; then if [ $tVAL -lt $MINTVAL ]; then dspmsg -s 1 cmdlvm.cat 1158 "`lvmmsg 1158`\n" chvg \ $tVAL $name $MINTVAL >& 2 errhandler return fi else ... } ... errhandler() { dspmsg -s 1 cmdlvm.cat 732 "`lvmmsg 732`\n" chvg $name >& 2 EXIT_CODE=2 } 64 AIX Logical Volume Manager from A to Z: Troubleshooting and Commands If we look at the code where convert1016 was called, we can see that this was not in fact fatal. EXIT_CODE of 2 is often used by the high-level scripts to report a partial success. chvg will continue, attempting to fulfill whatever other requests were made of it, in this case the -c flag, to make the volume group concurrent capable. After a high-level script has run through its tasks, it will typically reset the $EXIT_CODE to zero to indicate success, if appropriate, and run exit. Since the scripts initially set a korn shell trap, with a line such as trap 'cleanup' 0 1 2 15, shortly after the script begins the execution of its main function (not explicitly defined as a main() in korn shell, instead indicated by a comment line), cleanup will now be executed. Note Since we are trapping signals 0 (dummy), 1 (SIGHUP), 2 (SIGINT), and 15 (SIGTERM), it is best to terminate an LVM command by sending it a SIGTERM ( kill -15 process-ID) if it cannot be run through to completion. It is certainly undesirable to send a SIGKILL ( kill -9) to interrupt any LVM command. This opens a window to ODM or LVM database corruption. Again, looking at chvg, traced with trclvm, we see: exit #trap will handle cleanup. + exit + cleanup + getlvodm -R + [ 0 -eq 0 ] + savebase + rm -f /tmp/pvmap.00091974d81ff431.18298 + exit 2 A couple of useful observations can be made here: • The cleanup() routine tidies up various files that are generated by high level command scripts in the /tmp directory. Since these scripts are created by high-level commands using the syntax filename$$, they all end in the process ID of the creator script. The importance of this is that if we modify the scripts so temporary files are not removed, they are available for later examination and are easily identifiable by process ID. This facility is part of the example trclvm script when run with the -t flag. • As part of cleanup(), a savebase may be run to synchronize the mini-ODM within the boot logical volume with the runtime ODM database ( getlvodm -R checks for the presence of the runtime attribute within PdAt). It is often the Chapter 2. Problem determination and recovery 65 case that after LVM problems have been fixed manually, that is by working at a lower level than the high-level command scripts do, running savebase is neglected. This may lead to a reoccurrence of the problem that has been fixed the next time the machine is rebooted. 2.3 Corruption example 1: Simple ODM corruption A very simple example will illustrate some initial problem determination. Note A number of recovery examples are presented in this chapter. These are not recipes to be followed blindly. Many LVM problems are unique. The aim is to develop strategies and techniques for solving LVM problems. Suppose we have a system comprising rootvg and datavg. However, when lsvg is run: # lsvg rootvg datavg badvg # we seem to have acquired an extra volume group, badvg. We could try an exportvg badvg: # exportvg badvg 0516-306 getlvodm: Unable to find badvg in the Device Configuration Database. 0516-772 exportvg: Unable to export volume group badvg # Matters have not improved, as a second lsvg would confirm. We think exportvg only references the ODM. We also think lsvg only references the ODM. In fact, both of these are true (at least for lsvg run without any flags). However, faced with a situation like this, we may feel some doubt as to what is actually going on, particularly when faced with the more complex scripts, such as mirrorvg. At this point, some people might try a synclvodm, often used as a general way of fixing LVM problems. For the record, in this situation it would fail: # synclvodm -v badvg 66 AIX Logical Volume Manager from A to Z: Troubleshooting and Commands 0516-306 synclvodm: Unable to find volume group badvg in the Device Configuration Database. 0516-502 synclvodm: Unable to access volume group badvg. Later on, the reasons for the failure will become clear. It is a bad idea to simply throw commands at LVM problems. Reasons for this are also made clear later on. We run a quick sh -xv exportvg badvg to see what is going on. sh -xv will actually display the contents of all functions as the shell reads them into memory before they are run. Like all the other high-level LVM scripts, there is also a preamble setting out the command name, a brief description of its purpose, return codes, and requisite external programs. To keep this document brief, these initial sections are omitted here. As an aside, there are often considerable numbers of comment lines spread throughout the LVM scripts that improve their readability. However, the reader should always bear in mind that the code of the scripts itself is the best documentation. Chapter 2. Problem determination and recovery 67 PATH=/usr/bin:/etc:/usr/sbin:/usr/ucb:/usr/bin/X11:/sbin:$PATH + PATH=/usr/bin:/etc:/usr/sbin:/usr/ucb:/usr/bin/X11:/sbin:/usr/bin:/etc:/usr/sb in:/usr/ucb:/usr/bin/X11:/sbin:/home/dugald:.:/home/dugald:.:/home/dugald:.:/hom e/dugald:/home/dugald/scripts:. EXIT_CODE=1 + EXIT_CODE=1 #Initialize exit code. This will be reset to 0 before #exiting only if exportvg completes successfully. # # Trap on exit/interrupt/break to clean up # trap 'cleanup' 0 1 2 15 + trap cleanup 0 1 2 15 PROGNAME=`basename $0` + + basename exportvg PROGNAME=exportvg ODMDIR=/etc/objrepos + ODMDIR=/etc/objrepos export ODMDIR + export ODMDIR # # Parse command line arguments # set -- `getopt - $*` + getopt - badvg + set -- -- badvg if [ $? != 0 ] # Determine if there is a syntax error. then dspmsg -s 1 cmdlvm.cat 606 "`lvmmsg 606`\n" exportvg >& 2 dspmsg -s 1 cmdlvm.cat 760 "`lvmmsg 760`\n" $PROGNAME >&2 exit fi + [ 0 != 0 ] shift + shift Here, we see the script set up its environment (the traps and other miscellaneous shell variables). The command line arguments are also parsed with getopt. In the case of exportvg, this is trivial, but, as will be seen, a far more elaborate process occurs with the other high-level commands. Following this, a process of validation begins for the input parameters and gathering and testing the various LVM and ODM structures required for the script’s operation. 68 AIX Logical Volume Manager from A to Z: Troubleshooting and Commands if [ -n "$1" ] #if vgname argument on command line then VGNAME=$1 # Determine the major number of the root device file. ls -l /dev/IPL_rootvg |sed 's/,/ /g' > /tmp/rootdevice$$ read skipfld skipfld skipfld skipfld ROOTMAJOR skipfld < /tmp/rootdevic e$$ VGID=`getlvodm -v $VGNAME` test_return $? # check for error return # Determine the major number of the volume group entered VGMAJOR=`getlvodm -d $VGNAME` 2>/dev/null if [ "$VGMAJOR" -eq "$ROOTMAJOR" ] then dspmsg -s 1 cmdlvm.cat 762 "`lvmmsg 762`\n" $PROGNAME $VGNAME >&2 exit fi else dspmsg -s 1 cmdlvm.cat 606 "`lvmmsg 606`\n" $PROGNAME >&2 dspmsg -s 1 cmdlvm.cat 760 "`lvmmsg 760`\n" $PROGNAME >&2 exit fi + [ -n badvg ] + VGNAME=badvg + sed s/,/ /g + ls -l /dev/IPL_rootvg + 1> /tmp/rootdevice17818 + read skipfld skipfld skipfld skipfld ROOTMAJOR skipfld + 0< /tmp/rootdevice17818 + + getlvodm -v badvg 0516-306 getlvodm: Unable to find badvg in the Device Configuration Database. VGID= + test_return 3 0516-772 exportvg: Unable to export volume group badvg + cleanup # Here, we clearly see the getlvodm -v badvg fail. getlvodm will only read from the logical volume control blocks (LVCB) and the ODM. The -v flag obtains the VGID from the ODM; so, we can rule out problems with the LVCBs. Therefore, there must be some kind of problem with information stored in the ODM. Trying an odmget -q "name=badvg AND attribute=vgserial_id" CuAt returns nothing. A general test for any relevant information is a command of the form odmget CuAt | grep -ip badvg. This still returns nothing. So, we try the other Chapter 2. Problem determination and recovery 69 parts of the customized database. However, odmget CuDvDr | grep -ip badvg and odmget CuDv | grep -ip badvg both also give us nothing. There are two choices at this point. In the context of an AIX-Support line call, support personnel would typically ask for full odmget CuAt, odmget CuDv and odmget CuDvDr output (and possibly also the predefined database) at this point. It would then be a more efficient use of the customer’s time for support to browse these off-line (after all, we are not in a data availability situation here). Alternatively, we may tackle this problem from another angle. Review the types of information contained within the ODM specific to volume groups (as opposed to information for logical volumes and physical devices). CuAt: name = "rootvg" attribute = "vgserial_id" value = "00017d37e1762ac7" type = "R" generic = "D" rep = "n" nls_index = 637 CuAt: name = "rootvg" attribute = "timestamp" value = "37cec3d704a471db" type = "R" generic = "DU" rep = "s" nls_index = 0 CuDv: name = "rootvg" status = 0 chgstatus = 1 ddins = "" location = "" parent = "" connwhere = "" PdDvLn = "logical_volume/vgsubclass/vgtype" CuDvDr: resource value1 = value2 = value3 = = "ddins" "rootvg" "10" ";" resource value1 = value2 = value3 = = "devno" "10" "0" "rootvg" CuDvDr: 70 AIX Logical Volume Manager from A to Z: Troubleshooting and Commands CuAt: name = "rootvg" attribute = "vgserial_id" value = "00017d37e1762ac7" type = "R" generic = "D" rep = "n" nls_index = 637 CuAt: name = "rootvg" attribute = "timestamp" value = "37cec3d704a471db" type = "R" generic = "DU" rep = "s" nls_index = 0 CuDv: name = "rootvg" status = 0 chgstatus = 1 ddins = "" location = "" parent = "" connwhere = "" PdDvLn = "logical_volume/vgsubclass/vgtype" CuDvDr: resource value1 = value2 = value3 = = "ddins" "rootvg" "10" ";" resource value1 = value2 = value3 = = "devno" "10" "0" "rootvg" CuDvDr: Figure 7. Review of volume group specific information in the ODM We can target these categories. Chapter 2. Problem determination and recovery 71 # odmget -q ‘attribute=vgserial_id’ CUAt CuAt: name = "rootvg" attribute = "vgserial_id" value = "00017d37e1762ac7" type = "R" generic = "D" rep = "n" nls_index = 637 CuAt: name = "datavg" attribute = "vgserial_id" value = "00017d371e38f579" type = "R" generic = "D" rep = "n" nls_index = 637 # There is nothing unexpected here; so, we look in CuDv. # odmget -q 'PdDvLn = logical_volume/vgsubclass/vgtype' CuDv CuDv: name = "rootvg" status = 0 chgstatus = 1 ddins = "" location = "" parent = "" connwhere = "" PdDvLn = "logical_volume/vgsubclass/vgtype" CuDv: name = "badvg" status = 0 chgstatus = 1 ddins = "" location = "" parent = "" connwhere = "" PdDvLn = "logical_volume/vgsubclass/vgtype" CuDv: name = "datavg" status = 1 chgstatus = 1 ddins = "" location = "" parent = "" connwhere = "" PdDvLn = "logical_volume/vgsubclass/vgtype" 72 AIX Logical Volume Manager from A to Z: Troubleshooting and Commands We have found something, but it is probably a good idea to go on checking in case something else is wrong. We check CuDvDr next. # ls -l /dev/*bad* # (if we had found anything with the last command we might try using the major and minor numbers to narrow down our search of CuDvDr) # odmget -q ‘resource=devno’ CuDvDr (many entries of the form CuDvDr: resource = "devno" value1 = "11" value2 = "0" value3 = "pci1" (but nothing relevant) ... # odmget -q ‘resource=ddins’ CuDvDr (again many entries but nothing is particularly unusual) CuDvDr: resource = "ddins" value1 = "sysram" value2 = "0" value3 = ";" # Note that we also looked for entries in the /dev directory. It seems that we have some corruption in CuDv. We try odmdelete -o CuAt -q 'name = badvg'. However, this returns: 0518-307 odmdelete: 0 objects deleted. There is some strangeness here: We re-run the odmget, redirecting the output to a file odmget -q 'PdDvLn = logical_volume/vgsubclass/vgtype' CuDv| > PdDvLn.CuDv and now edit the file with vi. Scrolling down to the entry for badvg, Chapter 2. Problem determination and recovery 73 ddins = "" location = "" parent = "" connwhere = "" PdDvLn = "logical_volume/vgsubclass/vgtype" CuDv: name = "bad1^Hvg" status = 0 chgstatus = 1 ddins = "" location = "" parent = "" connwhere = "" PdDvLn = "logical_volume/vgsubclass/vgtype" the source of the corruption is immediately apparent. We have an embedded control character in the ODM. This ODM object is named bad1^Hvg. Note that looking at this file with pg would not have shown us the problem. pg does not display control-characters like this. There are alternative ways to check for this type of corruption. odmget output may be piped through commands, such as od, followed by a grep to check for backslashes to check for control characters. Alternatively odmget -q ‘name LIKE ba*’ CuDv would have pulled out the corrupt entry; however, this is clearly not as reliable as the detailed procedure above. So, to delete the above entry, we can run: # odmget -q 'name LIKE ba*' CuDv CuDv: name = "badvg" status = 0 chgstatus = 1 ddins = "" location = "" parent = "" connwhere = "" PdDvLn = "logical_volume/vgsubclass/vgtype" # (that was to check we would only delete this one entry) # odmdelete -o CuDv -q 'name LIKE ba*' 0518-307 odmdelete: 1 objects deleted. # lsvg rootvg datavg # 74 AIX Logical Volume Manager from A to Z: Troubleshooting and Commands lsvg now runs clean. savebase should now be run in case the mini-ODM is also corrupt. It would also be a good idea to check that we don’t have any corrupted file names in the /dev directory. The above procedure may seem somewhat long-winded, and certainly with experience, could be performed more quickly. Note When tackling an LVM problem, as much data as possible should always be gathered about the nature of the problem. Only then should attempts to fix the problem be made. In fact, the LVM scripts have code to detect and prevent this problem being caused by the high-level commands themselves. For example, you cannot mkvg a volume group with non-alphanumeric characters in its name. However, that does not mean that this situation could never occur, whether through malicious user intervention or unpredictable circumstance. 2.4 Gathering information about the problem As discussed in “A methodology for problem determination.”on page 60, problem determination involves a information gathering process of forming deeper and deeper hypotheses. For LVM, this generally means starting with the high level commands and working down deeper towards the contents of the ODM and the low level LVM structures: The VGDAs, VGSAs, and LVCBs. Once again, it is important to understand the problem before the attempt to fix it is made. Some people just throw synclvodm, exportvg, and importvg at a problem, making the common assumption that “the ODM must be corrupt” and leaving the scripts to sort out the damage. Of course, sometimes this is possible, but when you are dealing with VGDA corruption, these tactics can make things worse. This is detailed in the following example (another even stronger case of the need to be methodical about tackling LVM problems is presented in “Corruption example 3: Low-level VGDA corruption”on page 146). 2.5 Corruption example 2: PVID corruption The following example shows techniques for recreating VGDAs and rebuilding logical volumes from maps. Chapter 2. Problem determination and recovery 75 For an example of what not to do with the exportvg command, we will make a volume group workvg consisting of two disks, hdisk5 and hdisk6. #mkvg -ft2 -y workvg hdisk5 hdisk6 workvg #lsvg workvg VOLUME GROUP: workvg VG IDENTIFIER: 00017d372f40c3f5 VG STATE: active PP SIZE: 4 megabyte(s) VG PERMISSION: read/write TOTAL PPs: 2150 (8600 megabytes) MAX LVs: 256 FREE PPs: 2145 (8580 megabytes) LVs: 2 USED PPs: 5 (20 megabytes) OPEN LVs: 2 QUORUM: 2 TOTAL PVs: 2 VG DESCRIPTORS: 3 STALE PVs: 0 STALE PPs: 0 ACTIVE PVs: 2 AUTO ON: yes MAX PPs per PV: 2032 MAX PVs: 16 # #crfs -v jfs -a size=32768 -m /workfs -g workvg Based on the parameters chosen, the new /workfs JFS file system is limited to a maximum size of 134217728 (512 byte blocks) New File System size is 32768 #mount /workfs #cd /workfs #echo "data" > fs_ok #ls fs_ok lost+found/ # We have also created a reference file system, /workfs, containing some sample data to recover. Let us assume we experience PVID corruption. We can simulate this by running: dd if=/dev/zero of=/dev/hdisk6 count=1 Note that in this example only the PVID is corrupted . If there is any suspicion that VGDAs are corrupt there are some very important additional considerations. This is discussed “Corruption example 3: Low-level VGDA corruption”on page 146. We will still be able to access our data until something happens that requires accessing the affected VGDA, such as bringing the volume group back up after a reboot (or a varyoffvg/varyonvg combination). Note that running shutdown will not perform an exportvg. 76 AIX Logical Volume Manager from A to Z: Troubleshooting and Commands #ls -l /workfs total 16 -rw-r--r-- 1 root drwxrwx--- 2 root #umount /workfs #varyoffvg workvg #varyonvg workvg PV Status: hdisk5 hdisk6 sys system 5 Sep 11 20:03 fs_ok 512 Sep 11 20:03 lost+found/ 00017d372f1de834 0000000000000000 00017d372f67da78 varyonvg: Volume group workvg is varied on. # PVACTIVE INVPVID NAMIDMTCH We can still vary on the volume group; however, when we try to mount the file system to access our data, we get: # mount /workfs Unable to read superblock (TERMINATED) Unable to read superblock (TERMINATED) mount: 0506-318 /jfs is not a known vfs type for object /dev/lv02. # This kind of JFS error can indicate a problem either with the jfslog or with the file system itself. We display the logical partition maps for each of the disks in our volume group. With some kinds of corruption this will not be possible. It is recommended that regular snapshots are made of these maps to assist in potential recovery situations (this is discussed in “lslv”on page 97). # lspv -M hdisk5 hdisk5:1-215 hdisk5:216 loglv00:1 hdisk5:217-1075 # lspv -M hdisk6 hdisk6:1-215 hdisk6:216 lv02:1 hdisk6:217 lv02:2 hdisk6:218 lv02:3 hdisk6:219 lv02:4 hdisk6:220-1075 # This shows we can see that the problem is accessing the file system itself on lv02. We know hdisk6 is the one with the problem since it is returning INVPVID at the time of the vary-on shown above. We can confirm lv02 is inaccessible by running od -cx /dev/lv02:. This command will return 0000000. Chapter 2. Problem determination and recovery 77 /* * * * * * * */ PV status values which can be returned from lvm_varyonvg (in addition to the state values of LVM_PVMISSING, LVM_PVREMOVED, LVM_PVACTIVE) in the varyonvg output structure. These are returned only if a quorum is obtained, or, if a request has been made to override the no quorum error, they may be returned if any volume group descriptor area copy has been obtained. #define LVM_INVPVID 5 #define LVM_DUPPVID 6 #define LVM_LVMRECNMTCH 7 #define LVM_NONAME 8 #define LVM_NAMIDNMTCH 9 /* /* /* /* /* /* /* /* /* /* /* physical volume is not a member of the volume group this PV id previously appeared in the list of input PVs VGDA indicates this PV is a member of the VG, but VG id in the PV's LVM record does not match this VG name not given for physical volume id which is a member of the VG the PV id was passed in but it was not the id of the named disk */ */ */ */ */ */ */ */ */ */ */ /* * PV status values which may be returned from lvm_varyonvg in the * varyonvg output structure if a quorum is not obtained. (Error return * of LVM_NOQUORUM or LVM_NOVGDAS). */ #define LVM_PVNOTFND 10 #define LVM_PVNOTINVG 11 #define LVM_PVINVG 12 /* /* /* /* /* /* /* physical volume could not be opened or its IPL record or LVM record could not be read the PV's LVM record indicates it is not a member of the specified VG the PV's LVM record indicates it is a member of the specified VG */ */ */ */ */ */ */ Figure 8. Return values from varyonvg Figure 8 shows the other potential return codes for varyonvg. These are taken from /usr/include/lvm.h. This file serves as a useful reference in LVM problem determination. At this point, assume that the exportvg/ importvg combination is wrongly executed (perhaps because the investigator knows that the ODM contains PVIDs, but not that they shadow the values owned by LVM on disk). Note that before we do this, an entry is present in /etc/filesystems for /workfs. 78 AIX Logical Volume Manager from A to Z: Troubleshooting and Commands #grep -p workfs /etc/filesystems /workfs: dev = /dev/lv02 vfs = jfs log = /dev/loglv00 mount = false account = false # Now, we run the importvg/exportvg combination: # varyoffvg workvg # exportvg workvg # importvg workvg # importvg -y workvg hdisk5 PV Status: hdisk5 00017d372f1de834 PVACTIVE hdisk6 0000000000000000 INVPVID 00017d372f67da78 NAMIDMTCH varyonvg: Volume group workvg is varied on. workvg PV Status: hdisk5 00017d372f1de834 PVACTIVE hdisk6 0000000000000000 INVPVID 00017d372f67da78 NAMIDMTCH varyonvg: Volume group workvg is varied on. # mount /workfs mount: 0506-334 /workfs is not a known file system. # grep -p workfs /etc/filesystems # We are now in an even worse position than before: AIX no longer even knows a file system called /workfs should exist. The mount information, log device, and so forth, have been removed from /etc/filesystems. In this case, we have only lost one file system entry. However, if our volume group had contained many small file systems (let’s say we are using a database product that doesn’t use raw logical volumes), the impact of manually re-adding them would be more severe. Now that the point is made, the question becomes: How to recover from this situation? We begin the information gathering process again. First, we check the state of our VGDAs with lqueryvg:. Chapter 2. Problem determination and recovery 79 #lqueryvg #(to check syntax) 0516-162 lqueryvg: VG identifier or PV name not entered. Usage: lqueryvg [-g VGid | -p PVname] [-NsFncDaLPAvt] #lqueryvg -g `getlvodm -v workvg` -At -p hdisk5 Max LVs: 256 PP Size: 22 Free PPs: 2145 LV count: 2 PV count: 2 Total VGDAs: 3 Conc Allowed 0 MAX PPs per 2032 MAX PVs: 16 Conc Autovar 0 Varied on Co 0 Logical: 00017d37383736ec.1 loglv00 1 00017d37383736ec.2 lv02 1 Physical: 00017d372f1de834 2 0 00017d372f67da78 1 0 Total PPs: 2150 #lqueryvg -g `getlvodm -v workvg` -At -p hdisk6 Max LVs: 256 PP Size: 22 Free PPs: 2145 LV count: 2 PV count: 2 Total VGDAs: 3 Conc Allowed 0 MAX PPs per 2032 MAX PVs: 16 Conc Autovar 0 Varied on Co 0 Logical: 00017d37383736ec.1 loglv00 1 00017d37383736ec.2 lv02 1 Physical: 00017d372f1de834 2 0 00017d372f67da78 1 0 Total PPs: 2150 # This confirms that the VGDAs themselves are intact. In fact, all the dd command did was erase the first 512 bytes of the disk (512 is the default blocksize for dd), thus destroying hdisk6’s PVID. Because we have some intact copies of the VGDA, we can pull out the LP maps for each physical volume with lspv -M in the present case. This is not always possible after the corruption event. We now create a mapfile for lv02 (the unusable logical volume) based upon these maps in the format used by mklv. 80 AIX Logical Volume Manager from A to Z: Troubleshooting and Commands #lspv -M hdisk5 hdisk5:1-215 hdisk5:216 loglv00:1 hdisk5:217-1075 #lspv -M hdisk6 hdisk6:1-215 hdisk6:216 lv02:1 hdisk6:217 lv02:2 hdisk6:218 lv02:3 hdisk6:219 lv02:4 hdisk6:220-1075 #echo "hdisk6:216-219" > map_lv02 # Since the PVID information in the first block of the disk has become corrupted, we will remove the physical volume from the volume group then re-add it, thus giving the high-level LVM commands the opportunity to rebuild the damaged control data. In the following commands, we are removing the LVM’s control data. It must be understood that the following commands will not touch the user data held within the logical partitions. #reducevg workvg hdisk6 0516-016 ldeletepv: Cannot delete physical volume with allocated partitions. Use either migratepv to move the partitions or reducevg with the -d option to delete the partitions. 0516-884 reducevg: Unable to remove physical volume hdisk6. # Note that this first attempt at reducing the volume group has failed. LVM is still aware that there is data on this physical volume but cannot understand that a considered recovery effort is underway. We may force the removal with the -d flag. Although we are warned that all data on the volume group will be destroyed, in fact, for our purposes, this is better read as all data contained on logical volume lv02 will be made inaccessible. In normal LVM operations, the original message, of course, makes a lot of sense. Chapter 2. Problem determination and recovery 81 #reducevg -d workvg hdisk6 0516-914 rmlv: Warning, all data belonging to logical volume lv02 on physical volume hdisk6 will be destroyed. rmlv: Do you wish to continue? y(es) n(o)? y /usr/sbin/rmlv[458]: test: 0403-004 Specify a parameter with this command. rmlv: Logical volume lv02 is removed. # Alternatively, we may first rmlv the logical volumes, then run the reducevg cleanly. #rmlv lv02 Warning, all data contained on logical volume lv02 will be destroyed. rmlv: Do you wish to continue? y(es) n(o)? y /usr/sbin/rmlv[458]: test: 0403-004 Specify a parameter with this command. rmlv: Logical volume lv02 is removed. #reducevg workvg hdisk6 # In both cases, we can ignore the 0403-004 error message. Now that the physical volume is removed, we can bring it back into the volume group and, therefore, create new, good control data on this disk. Running extendvg workvg hdisk6 gives us: # lspv | grep hdisk6 hdisk6 00017d372f67da78 None # extendvg workvg hdisk6 0516-796 extendvg: Making hdisk6 a physical volume. Please wait. # lspv | grep workvg hdisk5 00017d372f1de834 workvg hdisk6 00017d3738adc5d4 workvg # Note that hdisk6 has aquired a new PVID (the extendvg doesn’t ask for confirmation because there was no PVID on this disk). We can vary-on and vary-off the volume group without difficulties, but lv02 is still unavailable (in fact, it disappeared) and, hence, so is our data: # varyonvg workvg # lsvg -l workvg workvg: LV NAME loglv00 # 82 TYPE jfslog LPs 1 PPs 1 PVs LV STATE MOUNT POINT 1 closed/syncd N/A AIX Logical Volume Manager from A to Z: Troubleshooting and Commands This is where the mapfile we created earlier becomes of use. We re-create lv02 on hdisk6 using the mapfile so that the logical volume resides on exactly the same partitions as before. Note that we have to specify the size of our logical volume (the number of logical partitions) even though this is implied by the mapfile. #mklv -y lv02 -m map_lv02 workvg 4 lv02 #lsvg -l workvg workvg: LV NAME TYPE LPs loglv00 jfslog 1 lv02 jfs 4 # PPs 1 4 PVs LV STATE MOUNT POINT 1 closed/syncd N/A 1 closed/syncd N/A We cannot mount the file system just yet. Remember that the original entry in /etc/filesystems was destroyed when the exportvg was run. We need to re-add this entry with vi to /etc/filesystems. /workfs: dev vfs log account mount = = = = = /dev/lv02 jfs /loglv00 false false Figure 9. Example /etc/filesystems entry This should be sufficient to get our data back online. However, as a matter of best practice, we should run fsck -y on the file systems before mounting it. File system corruption is a cause of system crashes, and since mount will access the file system, we expose ourselves here. It is a good idea to guarantee integrity in any case when there may have been a corruption window when access to the file system broke down. Chapter 2. Problem determination and recovery 83 #fsck -y /workfs ** Checking /dev/rlv02 (/workf) ** Phase 0 - Check Log log redo processing for /dev/rlv02 ** Phase 1 - Check Blocks and Sizes ** Phase 2 - Check Pathnames ** Phase 3 - Check Connectivity ** Phase 4 - Check Reference Counts ** Phase 5 - Check Inode Map ** Phase 6 - Check Block Map 9 files 1120 blocks 31648 free # mount /workfs # ls /workfs fs_ok lost+found # We have now regained access to our data. It is important that we do not stop here. Although the file system is back up, the system is not in the state it was before corruption occurs. If we compare the LVCBs of a known good file system, for example, /home on hd1, and the repaired file system, we see: 84 AIX Logical Volume Manager from A to Z: Troubleshooting and Commands # getlvcb -AT lv02 AIX LVCB intrapolicy = m copies = 1 interpolicy = m lvid = 00017d37389db50b.2 lvname = lv02 label = None machine id = 17D374C00 number lps = 4 relocatable = y strict = y stripe width = 0 stripe size in exponent = 0 type = jfs upperbound = 32 fs = time created = Tue Sep 14 08:52:18 1999 time modified = Tue Sep 14 08:52:18 1999 # getlvcb -AT hd1 AIX LVCB intrapolicy = c copies = 1 interpolicy = m lvid = 00017d37e1762ac7.8 lvname = hd1 label = /home machine id = 17D374C00 number lps = 4 relocatable = y strict = y stripe width = 0 stripe size in exponent = 0 type = jfs upperbound = 32 fs = log=/dev/hd8:mount=true:check=true:vol=/home:free=false time created = Fri Aug 27 21:49:20 1999 time modified = Sun Sep 12 13:00:37 1999 # Note that the fs field in the LVCB has been erased for lv02. While the check and free entries are not mandatory, problems will occur if the log field is blank. We must also rebuild the label field, as it contains mount point information. Clearly, these will not be a concern for non-JFS file systems or raw logical volumes. Not fixing these will cause problems, most painfully in highly-available environments. We can remake these with chfs: Chapter 2. Problem determination and recovery 85 # chfs -a log=/dev/loglv00 /workfs # getlvcb -AT lv02 AIX LVCB intrapolicy = m copies = 1 interpolicy = m lvid = 00017d37389db50b.2 lvname = lv02 label = /workfs machine id = 17D374C00 number lps = 4 relocatable = y strict = y stripe width = 0 stripe size in exponent = 0 type = jfs upperbound = 32 fs = log=/dev/loglv00:account=false time created = Tue Sep 14 08:52:18 1999 time modified = Tue Sep 14 10:06:26 1999 # Note that the chfs also re-created the following ODM entry: # odmget CuAt | grep workfs CuAt: name = "lv02" attribute = "label" value = "/workfs" type = "R" generic = "DU" rep = "s" nls_index = 640 # We have now restored our data and also fixed the relevant LVM and ODM control data. Although we could have done this by running putlvcb -f and performing an odmadd, it is safest to stick to as high a level of command as possible. Low-level commands are designed to be called by high-level commands, and a large amount of checking is performed by the high-level code that will not be called if low-level commands are used. For completeness, note that in this example, only the PVID was corrupt: We did not, in fact , need to re-create the VGDA and rebuild the maps. The above procedure was introduced here as a valuable technique in LVM problem determination that should be understood as quickly as possible. Appendix E.1, “trclvm” on page 393 gives a script that we can used to simply adjust the original PVID back on to disk. Note that this is a highly 86 AIX Logical Volume Manager from A to Z: Troubleshooting and Commands unsupported technique and is presented for explanatory purposes only: Again, use high-level commands wherever possible. Going back to the start of the rebuild process, from the point where the varyonvg fails, we see: # varyonvg workvg PV Status: hdisk5 00017d372f1de834 hdisk6 0000000000000000 00017d372f67da78 varyonvg: Volume group workvg is varied on. # chpvid 00017d372f67da78 hdisk6 # varyoffvg workvg # varyonvg workvg # (repair any damage if exportvg was run) # mount /workfs $ ls /workfs fs_ok lost+found # PVACTIVE INVPVID NAMIDMTCH We now return to working through the methodological approach to LVM problem determination. 2.6 Inspection commands As previously stated, the general procedure in restoring LVM is to inspect and then repair. In the previous example situations, we have already seen a variety of inspection commands: odmget, the high-level commands, the lowlevel query commands, and so on. In fact, the toolbox of inspection commands for LVM recovery and problem determination is very large, including (in an approximate attempt to order the commands by depth of enquiry into the internal structures of AIX): • Checking the errorlog: errpt • Checking free file system space: df • The high-level commands: lspv, lslv, lsvg • Checking fileset levels: lslpp • Checking device availability: lsdev, lsattr • Checking the ODM: odmget • korn shell debug: sh -xv, trclvm • The low-level commands: getlvcb, lqueryvg, lquerypv, lquerylv • Examining raw physical volumes, VGDAs, and logical volumes: dd • Examining in-kernel memory structures: crash, kdb Chapter 2. Problem determination and recovery 87 In addition, we have already seen that we can identify the point of failure in the high-level commands by shelling out high level commands and tools, such as trclvm. There are often several ways to obtain a particular piece of information within AIX. This list is not meant to be exhaustive. The value of many of the tools should be clear; however, a discussion of the utility of these tools is of value. 2.6.1 Checking the errorlog The error report should indicate both hardware and software LVM errors, and identifying if there is a hardware or software problem is a vital initial step in problem determination (precisely speaking, although this chapter refers loosely to problem determination, problem determination is the distinction between hardware and software problems, and problem source identification is the isolation of a problem to a particular hardware or software component). The errorlog’s contents can be displayed by running errpt -a. On the hardware side, it alerts system administrators events ranging from complete disk failures, bus problems, such as SCSI and SSA errors and high levels of bad block relocation. Such events may be accompanied by sense data, which can be analyzed by hardware support. Some sites may wish to replace disks once it is judged that an unacceptable level of bad block relocation has been reached. It is not unknown to see system crashes accompanied by large amounts of bad block relocation when a disk is dying. On the software side, as well as seeing JFS errors for conditions, such as full file systems, we can benefit from LVM’s own error logging. The relevant error template names are shown as follows. 88 AIX Logical Volume Manager from A to Z: Troubleshooting and Commands # errpt -t | grep LVM 03913B94 LVM_HWREL 26120107 LVM_MISSPVADDED 320B8ED9 LVM_BBEPOOL 33604AEF LVM_BBDIR90 41BF2110 LVM_MWCWFAIL 41E36337 LVM_SA_FRESHPP 438E027E LVM_BBDIRERR 4523CAA9 CMDLVM 52715FA5 LVM_SA_WRTERR 56116BF9 LVM_MWCENTRY_NOT_FO 613E5F38 LVM_IO_FAIL 688B4101 LVM_BBDIRFUL 80D3764C LVM_BBFAIL 88453987 LVM_BBDIRBAD 9811EB50 LVM_HWFAIL AF6582A7 LVM_MISSPVRET CAD234BE LVM_SA_QUORCLOSE D8CF8401 LVM_SWREL DAFEE4D6 LVM_BBRELMAX EAA3D429 LVM_SA_STALEPP F7DDA124 LVM_SA_PVMISS # UNKN UNKN UNKN UNKN UNKN UNKN UNKN PERF UNKN TEMP PERM UNKN UNKN UNKN UNKN UNKN UNKN UNKN UNKN UNKN UNKN H S H H H S H H H O H H H H H S H H H S H HARDWARE DISK BLOCK RELOCATION ACHIEVED PHYSICAL VOLUME DEFINED AS MISSING PV NO LONGER RELOCATING NEW BAD BLOCKS BAD BLOCK DIRECTORY OVER 90% FULL MIRROR WRITE CACHE WRITE FAILED PHYSICAL PARTITION MARKED ACTIVE PV NO LONGER RELOCATING NEW BAD BLOCKS DISK OPERATION ERROR FAILED TO WRITE VOLUME GROUP STATUS AREA MWC ENTRY NOT FOUND I/O ERROR DETECTED BY LVM BAD BLOCK RELOCATION FAILURE PV NO LONGER RELOCATING NEW BAD BLOCKS PV NO LONGER RELOCATING NEW BAD BLOCKS HARDWARE DISK BLOCK RELOCATION FAILED PHYSICAL VOLUME IS NOW ACTIVE QUORUM LOST, VOLUME GROUP CLOSING SOFTWARE DISK BLOCK RELOCATION ACHIEVED PV NO LONGER RELOCATING NEW BAD BLOCKS PHYSICAL PARTITION MARKED STALE PHYSICAL VOLUME DECLARED MISSING In the following example, we fake a disk failure. A volume group is created with quorum set to off: # mkvg -ft2 -y workvg hdisk6 hdisk9 workvg # chvg -Qn workvg # lspv|grep workvg hdisk6 00091974de731316 workvg hdisk9 00017d37297a96c8 workvg # lsvg workvg VOLUME GROUP: workvg VG IDENTIFIER: VG STATE: active PP SIZE: VG PERMISSION: read/write TOTAL PPs: MAX LVs: 256 FREE PPs: LVs: 0 USED PPs: OPEN LVs: 0 QUORUM: TOTAL PVs: 2 VG DESCRIPTORS: STALE PVs: 0 STALE PPs: ACTIVE PVs: 2 AUTO ON: MAX PPs per PV: 2032 MAX PVs: # 00017d3729050708 4 megabyte(s) 1612 (6448 megabytes) 1612 (6448 megabytes) 0 (0 megabytes) 1 3 0 yes 16 We now create a file system on a new logical volume and check the partition maps on each hdisk with lspv -M. Chapter 2. Problem determination and recovery 89 # crfs -v jfs -a size=16384 -g workvg -m /workfs Based on the parameters chosen, the new /workfs JFS file system is limited to a maximum size of 134217728 (512 byte blocks) New File System size is 16384 # mount /workfs # cd /workfs #echo data > fs_ok # ls fs_ok lost+found # # lspv -M hdisk6 hdisk6:1-215 hdisk6:216 loglv00:1 hdisk6:217 lv02:1 hdisk6:218 lv02:2 hdisk6:219-1075 # lspv -M hdisk9 hdisk9:1-537 # Note that, in this case, there is nothing on hdisk9. Partitions 1 through 537 are empty. Let’s now suppose that hdisk9 dies. This with leave us in a situation where all of our data is still intact. However, we have lost at least one of our VGDAs. Actually, in this situation, we have lost only one VGDA, since when the volume group was created by mklv, hdisk6 would have been used first and, therefore, has two VGDAs. hdisk9 was brought in next by extendvg and, therefore, has only one VGDA. Not only is our data intact, it is also still available. This would be the case whether we had quorum set or not,since two out of three VGDAs are still around. However, if the machine is rebooted (or other actions happen to vary off and then attempt to vary on the volume group), our data will no longer be available. On reboot, initial investigation in response to user complaints about missing data shows: 90 AIX Logical Volume Manager from A to Z: Troubleshooting and Commands # mount /workfs mount: 0506-324 Cannot mount /dev/lv02 on /workfs: There is a request to a device or address that does not exist. # lsvg rootvg workvg software # lsvg -o software rootvg # Checking the error report will show an LVM_MISSPVADDED error (missing physical volume) before the reboot, therefore, allowing us to fix this situation before it becomes a problem. We may also have had OPMSG errors if we had error log analysis running. Assuming these are SSA disks, we would also have seen SSA_LINK_OPEN. The green SSA status lights will also be flashing on either side of the pulled disk. hdisk9’s own lights will, of course, be dead. After the reboot , we will see the LVM_MISSPVADDED error again (link open errors appear again for SSA since the error logging thresholds were reset). Chapter 2. Problem determination and recovery 91 errpt -a |more --------------------------------------------------------------------------LABEL: LVM_MISSPVADDED IDENTIFIER: 26120107 Date/Time: Sequence Number: Machine Id: Node Id: Class: Type: Resource Name: Sat Sep 11 17:09:46 50 00017D374C00 itsosrv1 S UNKN LIBLVM Description PHYSICAL VOLUME DEFINED AS MISSING Probable Causes POWER, DRIVE, ADAPTER, OR CABLE FAILURE Detail Data MAJOR/MINOR DEVICE NUMBER 001E 2008 SENSE DATA 0000 0000 0000 0000 0000 0000 0000 0000 --------------------------------------------------------------------------LABEL: SSA_LINK_OPEN IDENTIFIER: 625E6B9A ... --------------------------------------------------------------------------LABEL: REBOOT_ID IDENTIFIER: 2BFA76F6 ... We can identify the disk associated with the LVM_MISPVADDED by taking the major and minor numbers from the errpt output and converting from hexadecimal to decimal. # bc ib=16 1E 30 2008 8200 quit # ls -l /dev| grep 8200 brw------- 1 root system # 30,8200 Sep 23 16:16 This gives us a major number 30 and minor number 8200, hdisk9. We can check if a disk is actually available with the lsdev command, as discussed in “Checking device availability”on page 98. 92 AIX Logical Volume Manager from A to Z: Troubleshooting and Commands Now that we understand the situation, we can regain access to our data with a forced varyonvg. An unforced varyonvg will fail since we have quorum turned off. The fact that we have a majority of VGDAs will not be considered. # varyonvg workvg # varyonvg workvg PV Status: hdisk6 00091974de731316 PVACTIVE hdisk9 00017d37297a96c8 PVMISSING 0516-056 varyonvg: The volume group is not varied on because a physical volume is marked missing. Run diagnostics. # varyonvg -f workvg # In such a situation, we can regain access to our data by running varyonvg -f. Once the volume group is back online we can reducevg away the failed disks and extendvg new disks back in as required. 2.6.2 Checking for free file system space The LVM commands can hit problems if we are running out of space in rootvg. There are particular problems associated with full /tmp or the root file system subdirectories /etc and /dev. 2.6.2.1 /tmp Most high-level LVM commands require having free space in /tmp. This is used for storing various temporary files (which can be saved for later viewing with trclvm -t). If this space is exhausted commands will begin to malfunction in various ways as shown in the following: # mkvg -y fullvg hdisk9 0516-014 lcreatevg: The physical volume appears to belong to another volume group. 00017d3743cf2892 0516-631 mkvg: Warning, all data belonging to physical volume hdisk9 will be destroyed. mkvg: Do you wish to continue? y(es) n(o)? y 0516-029 lcreatevg: The Physical Volume is a member of a currently varied on Volume Group and this cannot be overridden. 00017d3743cf2892 0516-862 mkvg: Unable to create volume group. # df /tmp Filesystem 512-blocks Free %Used Iused %Iused Mounted on /dev/hd3 81920 0 100% 105 2% /tmp # Chapter 2. Problem determination and recovery 93 Here is another example that shows the incorrect running of exportvg on a volume group that is still varied on when /tmp is full. # exportvg fullvg sed: There is not enough space in the file system. # lsvg rootvg # lsvg -o rootvg fullvg # Here we see the exportvg command was partially successful. It removed the volume group from the ODM but did not vary it off. You may also experience other forms of corruption. In another test of this we saw the following: # lsvg -o 0516-304 : Unable to find device id 00017d374c013e1f in the Device Configuration Database. vgid=00017d374c013e1f rootvg # This second symptom is actually more common. The point is that behavior may be undefined in this kind of situation. To recover from the first situation it is sufficient to vary off the volume group manually (we still have to fix the full /tmp condition as well, of course). This will rebuild the ODM so that we can then run exportvg. To recover from the second situation, we have to think about what we are seeing. Since we cannot pass a VGID to varyoffvg:, we have a stale entry in the entry in the kernel tables for this VGID. Since this is what we are seeing, we can attack it with lvaryoffvg -g 00017d374c013e1f. We will not need to run exportvg in this second case since the ODM entries were not recreated by the low-level lvaryoffvg. An alternative method to resolve this second situation is importvg -y fullvg hdisk9. 94 AIX Logical Volume Manager from A to Z: Troubleshooting and Commands # lsvg -o 0516-304 : Unable to find device id 00017d374c013e1fin the Device Configuration Database. vgid=00017d374c013e1f rootvg # lsvg rootvg # importvg -y fullvg hdisk9 fullvg # lsvg -o rootvg fullvg # However, this assumes we know which lost volume group is giving the phantom entry. This could be obtained by searching disks, which are not imported for the phantom VGID, using low-level commands, for instance lqueryvg -g 00017d374c013e1f (these are discussed in “The low-level commands”on page 107). Using importvg is preferable since it gives the benefit of checking that it is built into the high level scripts. 2.6.2.2 /etc Some commands also have a dependency on free file system space in the / file system, as volume group lock files are created in /etc/vg. At these levels the absence of /etc/vg also gave rise to 0516-028 internal mapfile errors. If /etc is full, we may also experience problems adding or removing ODM objects in /etc/objrepos. An example of this is as follows: # varyoffvg fullvg 0516-362 putlvodm: Unknown Object Data Manager error: 0. 0516-942 varyoffvg: Unable to vary off volume group fullvg. # It is prudent system management to keep some space free in all rootvg system file systems. 2.6.2.3 /dev A typical symptom of full /dev is the inability to create new LVM objects, such as logical volumes. These may fail with errors, such as the following: Chapter 2. Problem determination and recovery 95 # mklv -y nospacelv11 devvg 1 0516-576 getlvname: Unable to update device configuration database. 0516-362 getlvname: Unknown Object Data Manager error: 0. 0516-822 mklv: Unable to create logical volume. This kind of problem can be simulated by artificially filling /dev, then repeatedly running mklv : mklv will not fail immediately; failure will only occur when the directory file for /dev itself needs to be expanded. Remember this is contained within the file system, and we are creating special files here. Interestingly, when testing this, mklv would occasionally fail and take an ODM lock. Procedures for clearing this are discussed in “Checking the ODM”on page 98. A useful test for finding out what is stealing space in a file system when space is taken as a file system is expanded is to run find /file system -xdev -exec ls -ld {} \; > file1, then increase the size of the file system and run find /filesystem -xdev -exec ls -ld {} \; > file2. Any changes to file sizes can be seen with diff file1 file2. Note that this method will not show files that are still open by applications but have been deleted. 2.6.3 The high-level commands The high-level commands are good for getting an initial feel for a problem and for checking if limits are being exceeded, such as: • Breaking the factor size PP limit • Running out of free space • Hitting the current maximum LPs for a logical volume 2.6.3.1 lspv We have already seen lspv -M used in pulling out maps for physical volumes. lspv is also very useful for obtaining the current state of a physical volume as of the last varyonvg (active, missing, or removed). It will go to the physical volume with the VGDA containing the latest timestamp. lspv -n (descriptor physical volume) (physical volume) will tell us about the standard lspv information from the point of view of the VGDA on a particular physical volume. This is useful if we suspect our VGDAs have become out of sync. This kind of problem can occur in twin-tailed configurations. It is also a way to determine if a physical volume or associated VGDA has been lost if logical volumes start showing up as open/stale in mirrored configurations. As a further example of the use of the -n flag, consider that whenever the high-level commands cannot extract information for a field, this will be 96 AIX Logical Volume Manager from A to Z: Troubleshooting and Commands indicated with question marks. For example, if hdisk1 and hdisk2 are not in the same volume group: # lsvg -p software software: PV_NAME PV STATE TOTAL PPs FREE PPs FREE DISTRIBUTION hdisk1 active 268 38 23..00..00..00..15 hdisk2 active 542 0 00..00..00..00..00 hdisk3 active 542 0 00..00..00..00..00 root@itsosrv1:/home/dug/scripts [449] # lspv -n hdisk1 hdisk4 0516-022 lspv: Illegal parameter or structure value. PHYSICAL VOLUME: hdisk4 VOLUME GROUP: rootvg PV IDENTIFIER: 00091974d381d097 VG IDENTIFIER 00017d37e1762ac7 PV STATE: ??????? STALE PARTITIONS: ??????? ALLOCATABLE: ??????? PP SIZE: ??????? LOGICAL VOLUMES: ??????? TOTAL PPs: ??????? VG DESCRIPTORS: ??????? FREE PPs: ??????? USED PPs: ??????? FREE DISTRIBUTION: ??????? USED DISTRIBUTION: ??????? # We see this because the VGDA on hdisk1 does not know anything about hdisk4. This can be a useful test for corruption. If it is suspected that the VGID in the ODM has become out of sync, the -v flag allows us to try using other VGID values to look at the VGDA on the disk. 2.6.3.2 lsvg lsvg will show if the ODM knows about a volume group; lsvg -o will tell us which volume groups have been varied on. lsvg also has the -n flag to target a specific descriptor area. lsvg -M can be used to dump the complete set of maps for a volume group. -L can be used for investigation without explicitly breaking the ODM lock. 2.6.3.3 lslv Again, -L ignores an ODM lock. lslv -m will show us the map files for a particular logical volume. Chapter 2. Problem determination and recovery 97 Note It is often useful in recovery situations to have the map files for the logical volumes on the disks. Sometimes it is not possible to determine the maps after corruption has occurred (for example, if a one disk volume group has both copies of the VGDA accidently wiped). It is prudent to save the map files for logical volumes regularly (and particularly after a change is made, such as extending a logical volume or running reorgvg). This may be done manually or via cron (in which case, care should be taken that the map copies are kept up to date). A sample script to gather copies of all the maps is given in Appendix E.4, “gather_maps” on page 396. Again, lslv has a -n flag, which allows us to target a specific descriptor area. 2.6.4 Checking fileset levels When strange or inexplicable behavior is encountered, it may be worthwhile to check that the latest levels of AIX filesets are installed. These can be downloaded from the IBM support Web site at: http://www.rs6000.ibm.com/support The most important fileset is bos.rte.lvm. Its level can be checked with the lslpp command. 2.6.5 Checking device availability lsdev -Cc disk or lsdev -Cc pdisk provides a quick way to see if an hdisk or SSA pdisk is known and usable to the system. If a disk cannot be seen with the lsdev command, the problem exists below the LVM layer. lsattr -El <disk> will check the pvid held in the ODM for a specific physical volume. If more disks than expected appear within the ODM SCSI, termination should be checked for the relevant bus. A missing, incorrect, or loose terminator may allow signals to bounce up and down the bus when cfgmgr starts methods to probe the bus. All necessary terminators for the configuration should be in place. 2.6.6 Checking the ODM ODM data can be interrogated with odmget <class file>. Specific objects, or groups of objects, may be obtained by using the -q flag. This is followed by 98 AIX Logical Volume Manager from A to Z: Troubleshooting and Commands criteria, which may include wild-card searches using the little-known LIKE comparison operator. This is documented in the AIX base documentation. A quick-and-dirty alternative to specifying criteria is to use grep -p to pull stanzas out of the odmget output. The investigator should check that the basic requirements for physical volumes, volume groups, and logical volumes are met within the ODM. The ODM’s relationship with the LVM is described in the first volume of this redbook, AIX Logical Volume Manager, from A to Z Introduction and Concepts, SG24-5432. From a problem determination perspective, we can distinguish certain basic objects (ODM stanzas) that are required for normal functioning of LVM. The following section lists the basic objects that will be created as part of the configuration or creation of a: • Physical volume (brought in with cfgmgr) • Volume group ( mkvg -ft2 -y odmvg hdisk6 hdisk7 hdisk8 hdisk9) • Simple logical volume ( mklv -y simplelv odmvg 1) • Mirrored logical volume ( mklv -y mirrorlv -c 2 odmvg 1) • Striped logical volume ( mklv -y stripelv -S64k -u2 odmvg 2) • Mirrored and striped logical volume (a sample may be created for examination with mklv -y mirrorstripelv -S64K -u2 -c2 odmvg 2) This section is intended as a checklist of the ODM objects required for the dependent LVM objects to function correctly. If these are missing or corrupt, it may be necessary to repair them with high- or low-level LVM commands, or as a last resort, with the low-level ODM commands. 2.6.6.1 Physical volumes Some objects present in the ODM for a particular volume are dependent on the particular kind of disk being used, for example, SCSI or SSA. Since these attributes are not LVM specific, they are not shown here. If such values are required, they should be obtained by comparison with a known, good disk of the same kind. Chapter 2. Problem determination and recovery 99 Physical volume ODM classes: Physical volume ODM object CuAt: name = "hdisk11" attribute = "size_in_mb" value = "2255" type = "R" generic = "D" rep = "nr" nls_index = 60 CuAt: name = "hdisk11" attribute = "pvid" value = "00017d37e671fe4b0000000000000000" type = "R" generic = "D" rep = "s" nls_index = 15 CuDvDr: resource value1 = value2 = value3 = = "devno" "30" "8199" "hdisk11" Note that PVIDs stored in ODM should be 32 characters long with the last 16 characters set to zero. 2.6.6.2 Volume groups Volume group ODM objects are shown below. Note that there should be one entry for each physical volume incorporated in the volume group. Volume group ODM classes: Volume group ODM objects CuAt: name = "odmvg" attribute = "pv" value = "00017d375243d4020000000000000000" type = "R" generic = "" rep = "sl" nls_index = 0 100 AIX Logical Volume Manager from A to Z: Troubleshooting and Commands Volume group ODM objects CuAt: name = "odmvg" attribute = "vgserial_id" value = "00017d375251870e" type = "R" generic = "D" rep = "n" nls_index = 637 CuAt: name = "odmvg" attribute = "timestamp" value = "37e3ebf429732e31" type = "R" generic = "DU" rep = "s" nls_index = 0 CuDv: name = "odmvg" status = 1 chgstatus = 1 ddins = "" location = "" parent = "" connwhere = "" PdDvLn = "logical_volume/vgsubclass/vgtype" CuDvDr: resource value1 = value2 = value3 = = "ddins" "odmvg" "41" "" resource value1 = value2 = value3 = = "devno" "41" "0" "odmvg" CuDvDr: The ODM tracks the timestamp of the most recent VGDA for the volume group with an object having attribute=timestamp. This is set by the high-level commands and is typically the last action performed by a high-level script before completion and cleanup(). If a high=level command fails, it will not be changed and should, thus, hold a timestamp we can compare with the VGDAs on disk to see if they were altered by the failing command. Chapter 2. Problem determination and recovery 101 The code used to change the ODM timestamp is of the form (from replacepv): # Update the timestamp in odm for VG disk_timestamp=` -g $VGID -T` if [ $? -eq 0 ] then putlvodm -T $disk_timestamp $VGID fi 2.6.6.3 Logical volumes (simple) This is the base set of classes required for a logical volume. Mirroring or striping result in the generation of additional objects. Simple logical volume ODM classes: Simple logical volume ODM classes name = "simplelv" attribute = "lvserial_id" value = "00017d375251870e.1" type = "R" generic = "D" rep = "n" nls_index = 648 CuAt: name = "simplelv" attribute = "stripe_width" value = "0" type = "R" generic = "DU" rep = "r" nls_index = 1100 CuDv: name = "simplelv" status = 1 chgstatus = 1 ddins = "" location = "" parent = "odmvg" connwhere = "" PdDvLn = "logical_volume/lvsubclass/lvtype" CuDep: name = "odmvg" dependency = "simplelv" 102 AIX Logical Volume Manager from A to Z: Troubleshooting and Commands Simple logical volume ODM classes CuDvDr: resource value1 = value2 = value3 = = "devno" "41" "1" "simplelv" 2.6.6.4 Logical volumes (mirrored) Mirrored logical volume ODM objects: Mirrored logical volume ODM objects CuAt: name = "mirrorlv" attribute = "lvserial_id" value = "00017d375251870e.3" type = "R" generic = "D" rep = "n" nls_index = 648 CuAt: name = "mirrorlv" attribute = "copies" value = "2" type = "R" generic = "DU" rep = "r" nls_index = 642 CuAt: name = "mirrorlv" attribute = "stripe_width" value = "0" type = "R" generic = "DU" rep = "r" nls_index = 1100 CuDv: name = "mirrorlv" status = 1 chgstatus = 1 ddins = "" location = "" parent = "odmvg" connwhere = "" PdDvLn = "logical_volume/lvsubclass/lvtype" Chapter 2. Problem determination and recovery 103 Mirrored logical volume ODM objects CuDep: name = "odmvg" dependency = "mirrorlv" CuDvDr: resource value1 = value2 = value3 = = "devno" "41" "3" "mirrorlv" 2.6.6.5 Logical volumes (striped) Striped logical volume ODM objects: Striped logical volume ODM objects CuAt: name = "stripelv" attribute = "lvserial_id" value = "00017d375251870e.2" type = "R" generic = "D" rep = "n" nls_index = 648 CuAt: name = "stripelv" attribute = "inter" value = "x" type = "R" generic = "DU" rep = "l" nls_index = 643 CuAt: name = "stripelv" attribute = "relocatable" value = "n" type = "R" generic = "DU" rep = "l" nls_index = 644 104 AIX Logical Volume Manager from A to Z: Troubleshooting and Commands Striped logical volume ODM objects CuAt: name = "stripelv" attribute = "stripe_width" value = "2" type = "R" generic = "DU" rep = "r" nls_index = 1100 CuAt: name = "stripelv" attribute = "strictness" value = "s" type = "R" generic = "DU" rep = "l" nls_index = 645 CuAt: name = "stripelv" attribute = "stripe_size" value = "64k" type = "R" generic = "DU" rep = "r" nls_index = 1101 CuAt: name = "stripelv" attribute = "upperbound" value = "2" type = "R" generic = "DU" rep = "r" nls_index = 646 CuAt: name = "stripelv" attribute = "size" value = "2" type = "R" generic = "DU" rep = "r" nls_index = 647 Chapter 2. Problem determination and recovery 105 Striped logical volume ODM objects CuDv: name = "stripelv" status = 1 chgstatus = 1 ddins = "" location = "" parent = "odmvg" connwhere = "" PdDvLn = "logical_volume/lvsubclass/lvtype" CuDep: name = "odmvg" dependency = "stripelv" CuDvDr: resource value1 = value2 = value3 = = "devno" "41" "2" "stripelv" 2.6.6.6 Logical volumes (mirrored and striped) Mirrored and striped logical volumes possesses the objects of both the mirrored logical volume and the striped logical volume. This is not shown here for reasons of space. The ODM should also be inspected for any strangeness as seen in “Corruption example 1: Simple ODM corruption”on page 66. The ODM lock is worthy of special consideration. This is used as a serialization lock for a particular volume group (one lock stanza for each lock that is held). It will only be present if a lock is taken. There is no entry if the lock is free. If the lock is taken, commands requiring the lock will hang until it is released. # lsvg mirrvg 0516-1201 lsvg: Warning: Volume group mirrvg is locked. This command will continue retries until lock is free. If lock is inadvertent and needs to be removed, execute 'chvg -u mirrvg'. ^C# # mklv -y locklv mirrvg 1 0516-1201 putlvodm: Warning: Volume group mirrvg is locked. This command will continue retries until lock is free. If lock is inadvertent and needs to be removed, execute 'chvg -u mirrvg'. ^# This lock appears in the ODM as a stanza similar to the following: 106 AIX Logical Volume Manager from A to Z: Troubleshooting and Commands CuAt: name = "mirrvg" attribute = "lock" value = "14428" type = "R" generic = "" rep = "l" nls_index = 0 The value field holds the process identifier of the process that owns the lock. The lock should be broken with chvg -u <vgname>. A couple of other techniques exist to break the lock, putlvodm -k `getlvodm -v <vgname>` and odmdelete -o CuAt -q “name=<vgname> and attribute=lock”. However it is recommended that high-level commands are used whenever possible. varyonvg will also break an ODM lock; however, if the /etc/vg relevant map file is in use, the vary on will fail: # varyonvg lostmirrvg 0516-004 varyonvg: The mapped file is currently being used by another process. # The ODM lock should not be manually destroyed unless it is a stale lock left over by a process that has died. If it is removed merely to run multiple commands simultaneously, LVM corruption is likely to occur. 2.6.7 The low-level commands Strictly speaking, these commands are not intended for customer use. As already stated, significant error checking is provided above this layer in the high-level scripts, and the high-level commands also have the intelligence to drive the low-level commands in such a way as to avoid their occasional peculiarities. That said, the low-level commands provide a useful way to target, with certainty, a specific VGDA or ODM object when it cannot be established where high-level commands are obtaining their information from. They can often provide more information than the corresponding high-level commands as well. They can also be used to replicate the actions of a high-level script and, therefore, walk through it until a point of failure with opportunities to check the state of the LVM while problem re-creation is taking place. This must be done with caution. Chapter 2. Problem determination and recovery 107 Focussing on the low level inquiry commands, we will discuss getlvcb, getlvodm, lquerylv, lquerypv and lqueryvg. •getlvcb This command allows checking for LVCB corruption. We have seen it used in “Corruption example 2: PVID corruption”on page 75 where it was noted that corrupt LVCBs may cause loss of mount points and log device information for file systems. The implications of a corrupt LVCB are discussed further in “LVCBs”on page 178. •getlvodm This command allows target ing the ODM to find lists of free physical volumes, known volume groups, and so on, stored in the ODM. It may be useful as an alternative to odmget and is very useful in passing parameters into the lquery commands with constructs of the form lquerylv -L `getlvodm -l mirrorstripelv` -p hdisk9 -At: # lquerylv -L `getlvodm -l mirrorstripelv` -p hdisk9 -At LVname: mirrorstripelv VGid: 17d375251870e MaxLP: 512 MPolicy: 5 MWrtConsist: 1 LVstate: 1 Csize: 2 PPsize: 22 Permissions: 1 Relocation: 1 WrVerify: 2 open_close: 2 stripe_exp: 16 striping_wid 2 NumCopies: 2 BkMirrorCopy 0 LVMAP: 00091974e4f3d56e:218 1 ODMtype 00017d375251870e.4 LVMAP: 00017d37e671f51b:109 1 ODMtype 00017d375251870e.4 # 1 2 00017d375243d402:219 00017d374dd8c762:109 It may also be useful in situations where extensive damage has occurred to large numbers of LVM objects, and time and availability considerations make it desirable to script a solution rather than work through repair commands by hand. A full list of its capabilities is documented in Appendix C., “ODM commands” on page 315. 108 AIX Logical Volume Manager from A to Z: Troubleshooting and Commands Note Essentially, the low-level commands prefixed with l simply act as parsers and front-ends onto the LVM API calls. To gain a good understanding of these commands’ capabilities, one may look up the relevant API call, for example, lvm_queryvgs for lqueryvgs. These calls are listed in the AIX Version 4.3 Technical Reference: Kernel and Subsystems Technical Reference, Volume 1, SC23-4163. Recall, however, that BigVG functionality will not be documented by IBM. • lquerylv, lquerypv, lqueryvg The low-level VGDA interrogation commands are often the only way, short of examination of the raw data on disk, to detect subtle corruption of the VGDA structures. It is recommended that the reader become very familiar with these commands. They are of use in recovering maps, checking VGDAs for consistency between disks, examining VGDA timestamps, and so forth. As with high-level commands, these commands can be run against specific physical volumes as shown in the example above for getlvodm. 2.6.8 korn shell debug Before running any LVM command, its effects should be understood. As was already stated, the reader should be comfortable with the material presented in the first volume of this redbook AIX Logical Volume Manager, from A to Z Introduction and Concepts, SG24-5432. As we have seen, it is sometimes useful to go lower and look at the script of a particular high level with sh -xv or trclvm. Examining scripts at this level of detail is also very useful to build an understanding of LVM. In “Rebuilding and repair”on page 128, we will break down a couple of the high-level commands used in the recovery situation. As preparation for this, a commentary for exportvg follows (we saw this may do things that might not be appropriate in some situations in “Corruption example 2: PVID corruption”on page 75). The aim is to acquaint the reader with some stylistic features of the LVM scripts, which will aid in problem determination. In this example, we have a simple volume group, victimvg, made up of one physical volume, hdisk10, containing logical volume victimlv on which is created a file system named /victimfs. The volume group is varied off, and the exportvg will succeed. Chapter 2. Problem determination and recovery 109 To get inside the functions, we use trclvm. The following section may be clearer if the script itself is viewed at the same time with an editor or pager so that it can be searched to follow the flow of execution. The small awk script in Appendix E.2, “dspmsg_index” on page 395 can be used to display the text of a high-level command with the lvmmsg lines expanded to show English text. Some people may find this makes the scripts more readable. /home/dug# trclvm -t exportvg #! /usr/bin/ksh # IBM_PROLOG_BEGIN_TAG # This is an automatically generated prolog. ... (introductory comments are parsed by the shell. These are omitted here.) ... # # hash functions into system table hash getlvodm lqueryvgs putlvodm lvrelminor \ lvrelmajor dspmsg + alias -t - getlvodm lqueryvgs putlvodm lvrelminor lvrelmajor dspmsg The above code resolves and saves the paths of the low level commands the script calls; so, the shell doesn't have to resolve the path of each command every time it is run. The shell now loads the script's korn shell functions. These will be displayed on the screen but are not actually executed at these point. They will then be available for the main body of the script to execute. 110 AIX Logical Volume Manager from A to Z: Troubleshooting and Commands ########################### test_return ####################################### # # NAME: test_return() # # DESCRIPTION: Tests function return code. Will exit and output error message # if bad. .. (This section is omitted as we are concentrating on lines as they are executed. When a line actually runs it is preceded by a +, the shell's default $PS4 variable. If a line is not preceded by a plus it is merely being read by the shell - it is however useful to see these lines as they allow us to see the names of the variables the shell is using.) .. ############################ cleanup ########################################### # # NAME: cleanup() # # DESCRIPTION: Called from trap command to clean up environment and exit. ... (This is the cleanup() function that all the high level commands have. It deletes temporary files, resets locks and runs savebase.) .. # cleanup() { set -xv (This set -xv was added by trclvm.) trap '' 0 1 2 15 ... # delete temporary files # rm -f /tmp/pvid_names$$ # rm -f /tmp/rootdevice$$ # rm -f /tmp/lvinfo$$ # rm -f /tmp/pvinfo$$ # rm -f /tmp/vginfo$$ (These lines were commented out by trclvm's -t flag.) exit $EXIT_CODE } ############################## main ############################################ # Export volume group # Input: # Command line options and arguments: # exportvg vgname # Output: # Error Messages (Standard error) # PATH=/usr/bin:/etc:/usr/sbin:/usr/ucb:/usr/bin/X11:/sbin:$PATH + PATH=/usr/bin:/etc:/usr/sbin:/usr/ucb:/usr/bin/X11:/sbin:/usr/bin:/etc:/usr/sbin:/usr/ucb: /home/dug/bin:/usr/bin/X11:/sbin EXIT_CODE=1 + EXIT_CODE=1 #Initialize exit code. This will be reset to 0 before #exiting only if exportvg completes successfully. Chapter 2. Problem determination and recovery 111 We have just begun running commands. We set up the $PATH and initialize the $EXIT_CODE. This $EXIT_CODE logic is common to many of the high level commands. # # Trap on exit/interrupt/break to clean up # trap 'cleanup' 0 1 2 15 + trap cleanup 0 1 2 15 PROGNAME=`basename $0` + + basename /tmp/lvmtrace18118/exportvg PROGNAME=exportvg ODMDIR=/etc/objrepos + ODMDIR=/etc/objrepos export ODMDIR + export ODMDIR Note that $ODMDIR is hard-coded into the LVM scripts. We now begin the parsing process. This procedure is present in all of the scripts. First, any flags used are parsed, and then the command line arguments are parsed. In exportvg, the parsing of flags is somewhat trivial since, unusually among the high-level commands, exportvg has no possible flags. Thus, there is no actual code to parse for flags. For purposes of explanation, a quick diversion is made into the importvg script. Flag parsing is a loop where internal variables of the form $(letter)FLAG are set up based on the flags with which the high-level command was called. An associated $(letter)VAL may also be set if a value was passed with the flag. These flags may come from the user input, or even from another high-level command script , since high-level commands frequently run other high-level commands (some high-level commands even export variables in sub-shells running other high level commands). The importvg flag parsing loop is shown as follows. 112 AIX Logical Volume Manager from A to Z: Troubleshooting and Commands # Parse command line options set -- `getopt y:V:fcxL:FnR $*` if [ $? != 0 ] # if there is a syntax error. then dspmsg -s 1 cmdlvm.cat 1205 "`lvmmsg 1205`\n" $PROG >& 2 exit fi yFLAG= ; yVAL= ; vFLAG= ; vVAL= ; fFLAG= ; cFLAG= ; xFLAG= ; LFLAG= ; lVAL= ; FFLAG= ; nFLAG= ; L_DEVICE= ; RFLAG= while [ $1 != -- ] # While there is a command line option do case $1 in -y) yFLAG='-n'; yVAL=$2; shift; shift;; #vgname -V) vFLAG='-V'; vVAL=$2; shift; shift;; #major number -L) LFLAG='-L'; lVAL=$2; shift; shift;; #learn option -f) fFLAG='-f'; shift;; #force varyon -c) cFLAG='-c'; shift;; #import a concurrent vg -x) xFLAG='-x'; shift;; #auto-on conc vg -F) FFLAG='-F'; shift;; #fast import -n) nFLAG='-n'; shift;; #no auto-on after import -R) RFLAG='-R'; shift;; #Restore uid/gid/perms of lvs #and auto_on and quorum esac done It is a good idea to become familiar with the $FLAG variables’ uses within a particular script before attempting to tackle the rest of the script. These may include undocumented flags, as some flags should never be passed in by the user, only by other high-level commands. There is a high level of similarity between the flag variable names and corresponding roles among the scripts. For instance, $BFLAG requests big VG conversion or creation, and $WFLAG specifies to mirror write consistency. However, the reader cannot rely on a flag having a constant meaning across all scripts - $CFLAG refers variously to concurrent capability, number of mirrors, clear boot record, and exit in a case of name conflict. Returning to exportvg, we have still to parse the command line arguments. Chapter 2. Problem determination and recovery 113 # # Parse command line arguments # set -- `getopt - $*` + getopt + set -- -if [ $? != 0 ] # Determine if there is a syntax error. then dspmsg -s 1 cmdlvm.cat 606 "`lvmmsg 606`\n" exportvg >& 2 dspmsg -s 1 cmdlvm.cat 760 "`lvmmsg 760`\n" $PROGNAME >&2 exit fi + [ 0 != 0 ] shift + shift The only real parsing check to be made is if the script has been passed the name of the volume group to be exported. This will be the case if the shell $1 parameter variable is non-null. if [ -n "$1" ] #if vgname argument on command line then VGNAME=$1 # Determine the major number of the root device file. ls -l /dev/IPL_rootvg |sed 's/,/ /g' > /tmp/rootdevice$$ read skipfld skipfld skipfld skipfld ROOTMAJOR skipfld < /tmp/rootdevice$$ VGID=`getlvodm -v $VGNAME` test_return $? # check for error return # Determine the major number of the volume group entered VGMAJOR=`getlvodm -d $VGNAME` 2>/dev/null if [ "$VGMAJOR" -eq "$ROOTMAJOR" ] then dspmsg -s 1 cmdlvm.cat 762 "`lvmmsg 762`\n" $PROGNAME $VGNAME >&2 exit fi else dspmsg -s 1 cmdlvm.cat 606 "`lvmmsg 606`\n" $PROGNAME >&2 dspmsg -s 1 cmdlvm.cat 760 "`lvmmsg 760`\n" $PROGNAME >&2 exit fi The above code sets up variables for the script's use and also performs sanity checking. Now that the code block has been read by the shell, we trace through the execution of the individual lines of code to see how this works. 114 AIX Logical Volume Manager from A to Z: Troubleshooting and Commands + [ -n victimvg ] (Here is the parsing check for a non-null $VGNAME. If this had failed we would have fallen through to the lvmmsg 606 (volume group name not entered) and lvmmsg 760 (the usage statement for exportvg) shown just above.) + VGNAME=victimvg (The next three lines copy the ls -l output for the IPL device into a temporary file. The order in which they are displayed may seem a little strange - this is due to shell pipelining of the original ls -l /dev/IPL_rootvg |sed 's/,/ /g' > /tmp/rootdevice$$ command) + sed s/,/ /g + ls -l /dev/IPL_rootvg + 1> /tmp/rootdevice17482 (We now pull rootvg's major number out of this temporary file.) + read skipfld skipfld skipfld skipfld ROOTMAJOR skipfld + 0< /tmp/rootdevice17482 (The next line obtains the VGID of our target volume group. This is placed in the VGID variable for exportvg's use. Running this command also allows us to to take a quick sanity check for a valid $VGNAME, one that is present in the ODM. If the $VGNAME is bad then the following call of the test_return function will fail: we know that something is wrong.) + + getlvodm -v victimvg VGID=00017d376b7ee896 + test_return 0 + [ 0 != 0 ] (We are inside test_return function called by the line above: we have passed the test.) + + getlvodm -d victimvg (We now get our target volume group's major number from the ODM. We check we aren't trying to export rootvg since this is never permissible.) VGMAJOR=43 + 2> /dev/null + [ 43 -eq 10 ] Now, the latest test is passed, the next section of code tries to get the volume group lock and makes a further sanity check. We cannot export volume groups that are varied on. Chapter 2. Problem determination and recovery 115 # # Get volume group information from object data manager # if [ -n "$VGID" ] then putlvodm -k $VGID 2>/dev/null # lock the volume group so only we change it now test_return $? # check for error return LOCKED=y # Determine if the volume group is varied on. # If the volume group is varied on then output an error message # since a volume group that is varied off can only be exported. lqueryvgs > /tmp/vginfo$$ 2> /dev/null if [ $? = 0 ] then while read VGID_ON MAJOR_NUM do if [ $VGID_ON = $VGID ] then dspmsg -s 1 cmdlvm.cat 764 "`lvmmsg 764`\n" $PROGNAME >&2 exit fi done < /tmp/vginfo$$ fi fi + [ -n 00017d376b7ee896 ] + putlvodm -k 00017d376b7ee896 + 2> /dev/null + test_return 0 + [ 0 != 0 ] We have successfully taken the volume group lock. Next, shown below, we set the $LOCKED variable. This will be used by the cleanup routine to decide whether or not to unlock the volume group. We wouldn't want to always run a putlvodm -K to unlock in cleanup() since we might not have reached the section of code where we took the lock. To always release the lock could result in accidental deletion of a lock taken by another process running another high level command. If another high-level command was running, this could result in multiple, critical sections of LVM code running simultaneously. If this was allowed, it could cause corruption. + + + + + 116 LOCKED=y lqueryvgs 1> /tmp/vginfo17482 2> /dev/null [ 0 = 0 ] 0< /tmp/vginfo17482 AIX Logical Volume Manager from A to Z: Troubleshooting and Commands We make a list of every varied on volume group on the system into a temporary file. exportvg then loops through this file reading a VGID and a major number each time and tests to see if our $VGID is in this list. If it is, we must fail since you cannot export a volume group that is varied on. + + + + + + + + + + + read VGID_ON MAJOR_NUM [ 4 = 00017d376b7ee896 ] read VGID_ON MAJOR_NUM [ 00017d376c135837 = 00017d376b7ee896 read VGID_ON MAJOR_NUM [ 00017d375251870e = 00017d376b7ee896 read VGID_ON MAJOR_NUM [ 00017d373eb17718 = 00017d376b7ee896 read VGID_ON MAJOR_NUM [ 00017d37e1762ac7 = 00017d376b7ee896 read VGID_ON MAJOR_NUM ] ] ] ] We have passed that test. We now come to the core functionality of the script. We are seeing the standard pattern for LVM high-level scripts: First parse and check the requested action is possible, then gather required data and perform actions with that data. This was seen for mkvg back in Figure 6 on page 61. The following section gathers up all the relevant logical volume ODM information for this volume group. # Get all the of the logical volume id numbers # Remove all evidence of their existence from object data manager. getlvodm -L $VGNAME > /tmp/lvinfo$$ 2>/dev/null + getlvodm -L victimvg + 1> /tmp/lvinfo17482 2> /dev/null if [ ! -s "/tmp/lvinfo$$" ] then odmget -q name=$VGNAME CuDep | grep dependency | cut -d"\"" -f2 >/tmp/lvinfo$$ LVID= fi + [ ! -s /tmp/lvinfo17482 ] This has been created with a temporary file, /tmp/lvinfo17482, containing the following two lines: victimlv 00017d376b7ee896.2 victimlog 00017d376b7ee896.1 The script continues information gathering: Chapter 2. Problem determination and recovery 117 #Is tcb turned on ? TCB_OFF=`odmget -q "attribute=TCB_STATE and deflt=tcb_disabled" PdAt` + + odmget -q attribute=TCB_STATE and deflt=tcb_disabled PdAt TCB_OFF= PdAt: uniquetype = "" attribute = "TCB_STATE" deflt = "tcb_disabled" values = "" width = "" type = "" generic = "" rep = "" nls_index = 0 LVM code has to work with the trusted computing base if it’s turned on. We check for this in PdAt. At this point , we have all the data we need. We loop through each logical volume in /tmp/lvinfo17482 and perform the relevant actions for it. while read LVNAME LVID do #remove entries from TCB database if TCB is On if [ -z "$TCB_OFF" -a -x /usr/bin/tcbck ] then tcbck -d /dev/$LVNAME /dev/r$LVNAME > /dev/null 2>&1 fi imfs -lx $LVNAME done < /tmp/lvinfo$$ + 0< /tmp/lvinfo17482 + read LVNAME LVID + [ -z PdAt: uniquetype = "" attribute = "TCB_STATE" deflt = "tcb_disabled" values = "" width = "" type = "" generic = "" rep = "" nls_index = 0 -a -x /usr/bin/tcbck ] + imfs -lx victimlv Calling imfs like this deletes any relevant entries from /etc/filesystems for the LV. This line is why exportvg should not be used as the ultimate solution for every LVM problem. 118 AIX Logical Volume Manager from A to Z: Troubleshooting and Commands + read LVNAME LVID + [ -z PdAt: uniquetype = "" attribute = "TCB_STATE" deflt = "tcb_disabled" values = "" width = "" type = "" generic = "" rep = "" nls_index = 0 -a -x /usr/bin/tcbck ] (we do nothing here as tcb is turned off) + imfs -lx victimlog (victimlog is a jfs log not a jfs file system so this does nothing.) + read LVNAME LVID LOCKED= + LOCKED= At this point, we have the logical volume and volume group information still remaining in the ODM. We also have the entries in /dev for the volume group and the logical volume devices. Removing these is essentially what exportvg does. This is accomplished simply by the putlvodm -G in the following code. Removing a volume group also handles the dependent logical volumes and all the associated devices. It is not uncommon for so much functionality to be concentrated in a single line of the high-level commands. These scripts act as drivers to the powerful low-level commands. Once you have identified these key low-level sections in the high-level scripts, the scripts become much easier to understand and debug. One can look at the surrounding checking code and by identifying what check is not being passed, find the problem area to recover. #remove all the logical volume information and the VGNAME from the ODM putlvodm -G $VGNAME >/dev/null 2>&1 + putlvodm -G victimvg + 1> /dev/null 2>& 1 #If putlvodm failed, output warning and continue. if [ $? -ne 0 ] then dspmsg -s 1 cmdlvm.cat 894 "`lvmmsg 894`\n" exportvg $VGNAME >& 2 fi + [ 0 -ne 0 ] We run the above check to offer a warning message as, if something has gone wrong, the putlvodm may still have partially succeeded, and we don't Chapter 2. Problem determination and recovery 119 want to roll back from this situation. An error at this stage is better investigated manually rather than via scripting. Displaying a message of the form Warning, cannot remove volume group %2$s from device configuration database alerts the administrator to investigate and perform problem determination. If the putlvodm succeeded, nothing really remains of the volume group from AIX’s point of view at this moment. We know there can't have been a reference to it in the kernel, as we couldn't have varied it off (a pre-requisite for exportvg that we saw above if there had been). Now, all that remains is to tidy up the trusted computing base and remove the map file in /etc/vg. #remove VG entry from TCB database if TCB is On if [ -z "$TCB_OFF" -a -x /usr/bin/tcbck ] then tcbck -d /dev/$VGNAME > /dev/null 2>&1 fi + [ -z PdAt: uniquetype = "" attribute = "TCB_STATE" deflt = "tcb_disabled" values = "" width = "" type = "" generic = "" rep = "" nls_index = 0 -a -x /usr/bin/tcbck ] # remove mapped file /bin/rm -f /etc/vg/vg`echo $VGID | tr "[a-z]" "[A-Z]"` > /dev/null 2>&1 + tr [a-z] [A-Z] + echo 00017d376b7ee896 + /bin/rm -f /etc/vg/vg00017D376B7EE896 + 1> /dev/null 2>& 1 EXIT_CODE=0 #branch to cleanup with success + EXIT_CODE=0 (We reset $EXIT_CODE so no spurious errors appear when cleanup is run.) + cleanup (Now we are inside cleanup we reset the signal trapping and run a savebase so that the mini-ODM in the boot logical volume is consistent with the run-time ODM. Unlike some of the other high level commands this savebase is always run whether we are in run-time or not: there is no test with getlvodm -R here.) + trap 0 1 2 15 + [ -n ] + savebase + exit 0 120 AIX Logical Volume Manager from A to Z: Troubleshooting and Commands 2.6.9 Examining raw data on physical volumes and logical volumes Unfortunately, an examination of the low-level structures comprising the VGDA and VGSA is beyond the scope of this book. By this point in the investigation, it is to be hoped that a service call has been raised with AIX-support (this applies for watching system calls with trace and examining internal memory structures as well). However, we can use od as a simple test for corruption by examining what the raw structures laid out on a disk for the LVM should look like. This section will briefly examine the structures mentioned in /usr/include/sys/hd_psn.h (hard disk physical sector numbers). #define PSN_IPL_REC 0 /* PSN of the IPL record #define PSN_CFG_REC 1 /* PSN of the configuration record /* * The Mirror Write Consistency(MWC) records must stay contiguous. The * MWC cache is written to each alternately by the LVDD. */ #define PSN_MWC_REC0 2 /* PSN of the first MWC cache record #define PSN_MWC_REC1 3 /* PSN of the second MWC cache record #define PSN_LVM_REC 7 /* PSN of LVM information record #define PSN_BB_DIR 8 /* beginning PSN of bad block directory #define LEN_BB_DIR 22 /* length in sectors of bad block dir #define PSN_CFG_BAK 64 /* PSN of the backup config record #define PSN_LVM_BAK 70 /* PSN of backup LVM information record #define PSN_BB_BAK 71 /* PSN of backup bad block directory #define PSN_CFG_TMP 120 /* PSN of concurrent config work record #define PSN_NONRSRVD 128 /* PSN of first non-reserved sector */ */ */ */ */ */ */ */ */ */ */ */ Figure 10. /usr/include/sys/hd_psn.h Since a physical sector is 512 bytes, each of them begins at offset of the Physical Sector Number (PSN) * 512 bytes. We can look at these sectors by running od -cx /dev/hdisk9 (note that od displays offsets in octal, and 512 is octal 1000). Note that not every block in this region is used, and some blocks are reserved for other code than LVM. Chapter 2. Problem determination and recovery 121 # od -cx /dev/hdisk9 0000000 É Â Ô Á \0 \0 \0 \0 \0 \0 \0 \0 \0 \0 \0 \0 c9c2 d4c1 0000 0000 0000 0000 0000 0000 0000020 \0 \0 \0 \0 \0 \0 \0 \0 \0 \0 \0 \0 \0 \0 \0 \0 0000 0000 0000 0000 0000 0000 0000 0000 * 0000200 \0 001 } 7 M Ø Ç b \0 \0 \0 \0 \0 \0 \0 \0 0001 7d37 4dd8 c762 0000 0000 0000 0000 0000220 \0 \0 \0 \0 \0 \0 \0 \0 \0 \0 \0 \0 \0 \0 \0 \0 0000 0000 0000 0000 0000 0000 0000 0000 * PVID Figure 11. Contents of the first physical sectors on an hdisk: Blocks 1: The IPL record Note that the LVM maintains two mirror write consistency cache (MWCC) areas on each hdisk. We can see the first one is running from bytes 02000 to 02767, that is, decimal 512 to 1527. The alternate MWCC area immediately follows this. 0002000 7 ä 027 233 * \f Å H \0 \0 \0 \0 \0 \0 \0 \0 37e4 179b 0002020 \0 \0 \0 0000 2a0c c548 0000 0000 0000 0000 \0 \0 \0 \0 \0 \0 \0 \0 \0 \0 \0 \0 \0 0000 0000 0000 0000 0000 0000 0000 * 0002760 \0 \0 \0 \0 \0 \0 \0 \0 7 ä 027 233 * \f Å H 0000 0000 0003000 \0 \0 \0 \0 0000 0000 0000 0000 37e4 179b \0 \0 \0 \0 \0 \0 \0 0000 0000 0000 \0 0000 2a0c c548 \0 \0 \0 \0 0000 0000 * MWCC Area 1 Figure 12. Contents of the first physical sectors on an hdisk: Blocks 2 and 3: The MWCC We now see the extremely important LVM information record. This area should contain pointers to our VGDAs and VGSAs as well other key volume group information, such as our VGID, PP size, LVM version level, and so forth. These items are documented in /usr/include/sys/lvmrec.h. 122 AIX Logical Volume Manager from A to Z: Troubleshooting and Commands LVM_LVID lvmarea_len vgda_len vg_id vgda_psn[0] 0007000 _ L V M \0 001 } 7 R Q 207 016 \0 \0 \0 \0 5f4c 564d 0007020 \0 \0 \0 \0 0000 0000 0007040 \0 \0 \b  0000 08c2 0007060 \0 \0 \0 \b 0000 0008 0007100 \0 \0 \0 \0 0000 0000 * vgda_psn[1] vgsa_len 7d37 5251 \0 \0 020 t 0000 1074 \0 C 3 210 0043 3388 \0 \0 \0 200 0000 0080 \0 \0 \0 \0 0000 0000 0001 \0 \0 0000 \0 \0 0000 \0 \0 0000 \0 \0 0000 reloc_psn vgsa_psn[0] reloc_len 870e 0000 0000 \b 2 \0 \0 \0 210 0832 0000 0088 001 \0 \0 004 \0 026 0100 0004 0016 \b º \0 006 \0 \0 08ba 0006 0000 \0 \0 \0 \0 \0 \0 0000 0000 0000 pv_num vgsa_psn[1] pp_size version Figure 13. Contents of the first physical sectors on an hdisk: Block 7: The LVM information record There is a backup of this sector in sector 70. As you can see, vgda_len is 0x832 equal to 2098; so, we have a small, as opposed to big, VG here. vgda_psn[0] and vgda_psn[1] are pointers to the primary and secondary VGDAs. If this disk only has one VGDA, the secondary will be used for bad block relocation. vgsa_psn[0] and vgsa_psn[1] serve the same purpose for bad block relocation. The version field, indicating LVM version level, may serve to explain the cause when a cross-system importvg fails. Chapter 2. Problem determination and recovery 123 0010000 0010020 D E 4445 F E 4645 C T \0 \0 \0 \0 4354 0000 0000 \0 \0 \0 \0 0000 0000 \0 \0 0000 \0 \0 \0 \0 0000 0000 \0 \0 \0 \0 \0 \0 0000 0000 0000 \0 \0 \0 \0 0000 0000 \0 \0 0000 * Figure 14. Contents of the first physical sectors on an hdisk: Blocks 8 to 29: The LVM bad block directory The bad block directory structure is described by /usr/include/sys/bbdir.h. This is also backed up in sectors 71 to 92. 0106000 _ L 5f4c V M 564d \0 001 0001 } 7 7d37 R Q 207 016 \0 \0 5251 870e 0000 \0 \0 0000 0106020 \0 \0 \0 \0 0000 0000 \0 \0 020 t \0 \0 0000 1074 0000 0106040 \0 \0 \b  0000 08c2 \0 C 0043 0106060 \0 \0 \0 \b 0000 0008 \0 \0 \0 200 \0 \0 0000 0080 0000 \b º \0 006 08ba 0006 \0 \0 0000 0106100 \0 \0 \0 \0 0000 0000 \0 \0 \0 \0 \0 \0 0000 0000 0000 \0 \0 \0 \0 0000 0000 \0 \0 0000 F E 4645 C T \0 \0 \0 \0 4354 0000 0000 \0 \0 \0 \0 0000 0000 \0 \0 0000 \0 \0 \0 \0 0000 0000 \0 \0 \0 \0 \0 \0 0000 0000 0000 \0 \0 \0 \0 0000 0000 \0 \0 0000 * 0107000 0107020 D E 4445 \b 2 \0 \0 0832 0000 \0 210 0088 3 210 \0 \0 001 \0 \0 004 3388 0000 0100 0004 \0 026 0016 * Figure 15. Contents of the first physical sectors on an hdisk: Block 70 and blocks 71-92: Backup copies of the LVM information record and the LVM bad block directory As can be seen in Figure 15, backup copies of the LVM information record and the bad block directory are stored on the physical volume in blocks 70-92. Since this backup exists, there is a last resort method to restore the LVM information block. Check the size of the LVM information block (using a command of the form echo "ib=16\n`dd if=/dev/hdiskn skip=7 count=1|od -x|grep 0000020|awk '{print $5}'`"|bc). Divide this by 512 and round up to get the number of sectors.You can run a command of the form dd if=/dev/hdiskn skip=70 of=/dev/hdiskn seek=7 count=NumSectors to restore the 124 AIX Logical Volume Manager from A to Z: Troubleshooting and Commands original LVM information record and reattempt the vary on. Note that whenever such an unsupported technique as this is attempted, the volume group may be left in an unstable state. At this point, we should backup user data and re-creation of the volume group should be done. Since we have vgda_psn[0] and vgda_psn[1] we can see our VGDAs. Looking at vgda_psn[0], we have 0x88 or sector 136 decimal. If we look at the start of this area by running dd if=/dev/hdisk6 skip=136 count=1 2>/dev/null|od -cx, #dd if=/dev/hdisk6 skip=136 count=1 2>/dev/null|od -cx 0000000 7 å 37e5 0000020 \0 \0 0000 0000040 \0 003 0003 0000060 \0 \0 0000 * 0001000 # & 206 026 © 2686 16a9 \0 \0 \0 \0 0000 0000 \b 2 \0 \0 0832 0000 \0 \0 \0 \0 0000 0000 R 210 5288 \0 \0 0000 \0 001 0001 \0 \0 0000 \0 001 } 7 0001 7d37 \0 004 001 \0 0004 0100 \0 001 \0 \0 0001 0000 \0 \0 \0 \0 0000 0000 R Q 207 016 5251 870e \0 026 \0 003 0016 0003 \0 \0 \0 \0 0000 0000 \0 \0 \0 \0 0000 0000 we see that the first eight bytes run 37e5 2686 16a9 5288. Consider that the VGDA begins with a 64 bit timestamp. If we run lqueryvg on this physical volume, we can see first that we have found the VGDA since we match the lqueryvg timestamp for hdisk9. If we then run lqueryvg , targeting the VGID, we can see that this VGDA is up-to-date since it matches the latest timestamp for the volume group. # lqueryvg -p hdisk9 -Tt Time Stamp: 37e5268616a95288 # lqueryvg -g `getlvodm -v odmvg` -Tt Time Stamp: 37e5268616a95288 # We have also confirmed that at least this part of our LVM information record is good as well. This is as far as can be done in this document in describing the VGDA and VGSA. If there is a problem requiring knowledge of the finer details of the VGDAs and VGSAs, AIX-support should be contacted, as these structures Chapter 2. Problem determination and recovery 125 are really not customer serviceable. It should be clear that a lot of damage can be done by attempting to manipulate them manually. Actions to perform in dealing with corrupt VGDA problems and common situations are discussed in “LVM control data corruption”on page 146. We now complete our examination of the low-level control structures by looking at the LVCB. The start of an LV is shown here for reference. Running od -a on the logical volume device is a quick sanity check for LVCB corruption. # od -c /dev/hd1 0000000 A I 0000020 \0 \0 0000040 \0 \0 0000060 3 7 0000100 \0 \0 0000120 \0 \0 * 0000200 \0 \0 0000220 : 4 0000240 \0 S 0000260 0 : 0000300 7 D 0000320 \0 004 0000340 \0 \0 * 0000520 \0 \0 0000540 : m 0000560 k = 0000600 : f 0000620 \0 \0 * ... snipped ... X L V \0 \0 \0 \0 \0 \0 \0 \0 e 1 7 6 \0 h d 1 \0 \0 \0 \0 C \0 \0 2 \0 \0 B \0 \0 a \0 \0 \0 \0 \0 c \0 \0 \0 j f s \0 \0 \0 \0 \0 0 0 0 7 . 8 \0 \0 \0 \0 \0 \0 \0 \0 \0 \0 F r i A u g 9 : 2 0 1 9 9 9 u n S e p 1 2 3 7 1 9 9 9 \n \0 3 7 4 C 0 0 \0 y m \0 001 / h o m e \0 \0 \0 \0 \0 \0 \0 \0 \0 \0 \0 2 7 \n \0 1 \0 \0 c \0 \0 \0 \0 \0 \0 \0 1 \0 \0 \0 \0 \0 7 \0 \0 \0 \0 \0 d \0 \0 \0 \0 3 \0 y \0 \0 2 1 \0 \0 : 0 \0 1 \0 \0 \0 \0 \0 \0 \0 l o g = / d e v / h d 8 o u n t = t r u e : c h e c t r u e : v o l = / h o m e r e e = f a l s e \0 \0 \0 \0 \0 \0 \0 \0 \0 \0 \0 \0 \0 \0 \0 \0 \0 \0 \0 The text, AIX LVCB, should be at the start of the logical volume. Note that when this is information is corrupt, it is not apparent for big VGs since the remaining fields are taken from the VGDA itself. Note that, in this case, the functioning of LVM itself will be unimpaired, as LVM works off the LVCBs in the VGDA. However some other parts of AIX code, particularly IPL and RAS code, still expect to find valid information in the on-LV LVCB. This should be remembered when debugging strange LVM/RAS and LVM/IPL problems. Some applications may also expect to find intact LVCBs at the start of the LV as well. 126 AIX Logical Volume Manager from A to Z: Troubleshooting and Commands 2.6.10 Watching system calls Commands, such as trace, may occasionally be useful in LVM problem determination and particularly for investigating performance problems. However, it is not within the scope of this document to discuss the trace command. LVM does have its own trace hooks, 105 and 10B. These are described in /usr/include/sys/trchkid.h. JFS trace hook IDs are also listed there. /usr/sys/include/lvm.h can also be useful since it documents the errno return codes for the various LVM library functions. 2.6.11 Examining internal kernel memory structures with crash In the event of deep LVM failures, either the system may crash, or it may be necessary to force a dump. In both cases, AIX-support should be contacted, as such dumps are really not customer serviceable. An example script using kdb to examine the in-kernel memory structures for LVM is given in Appendix E.7, “pvsinvg” on page 398 for those interested. More information on LVM kernel internals may be found in the AIX Version 4.3 Kernel Extensions and Device Support Programming Concepts, SC23-4125, in Chapter 10, and LVM and information on investigating these structures is found in Chapter 17, “Debugging Tools” of the same document. 2.6.11.1 Journaled file system enhancements Before the file system enhancements of AIX 4.3.3, it was sometimes necessary to use crash to isolate file system corruption. These enhancements are available for lower levels of AIX with the following APARs: AIX level APAR 4.1.5 IX83878, IX87162 4.2.1 IX82819, IX84402, IX89392 4.3.2 IX86362, IX89598 When the file system enhancements are in place, an entry will be generated in the error log when file system corruption is detected. This entry will be of the form: Chapter 2. Problem determination and recovery 127 Label: JFS_FSCK_REQUIRED Class: OTHER Type: INFO Description FILE SYSTEM RECOVERY REQUIRED Recommended Actions PERFORM FULL FILE SYSTEM RECOVERY USING FSCK UTILITY Detail Data MAJOR/MINOR DEVICE NUMBER FILE SYSTEM DEVICE AND MOUNT POINT This informational entry will usually be paired with a diagnostic entry, such as KERNHEAP LOW, LOG WRITE ERR, META CORRUPTION, META EXCEPTION, or META WRITE ERR. As a final note on inspection commands, the investigator should take care to focus on the problem and not become confused about problems that are not there. An investigation into why a logical volume has gone stale will not get far if strenuous efforts are not made to determine why an lsdev on the logical volume device shows it as defined (in fact, this is normal behavior). 2.7 Rebuilding and repair We have already seen some examples of rebuilding problem situations. The following section expands on this by introducing a range of typical problems. The reader must be aware that sometimes situations simply are not recoverable. The data just may not be around any more. No amount of recovery procedures are a substitute for a single good backup. One should not overestimate the power of recovery procedures. There is also the case where a disk is failing, and recovery procedures may be performed to get data back on line easily so that it can be copied to a good media. There is the further case where a logical volume may be brought back online but LVM control data integrity can no longer be guaranteed. This may be a case of salvaging as much as possible and then re-creating the logical volume or volume group. Hopefully, the previous sections will have given us some idea of what the failing component is in the recovery situation. Depending on what is damaged, the reader should refer to the following sections, which cover: • ODM corruption 128 AIX Logical Volume Manager from A to Z: Troubleshooting and Commands • LVM control data corruption - VGDA - VGSA - LVCB • JFS problems • Hardware failures • Special considerations for rootvg • RAID and SSA issues • Escalating a call to AIX-support The following sections attempt to tackle LVM issues in detail. The sections dealing with other subsystems are briefer. 2.7.1 ODM corruption The most common form of ODM corruption is the ODM , and the LVM control information becoming out of sync. In this situation, generally it is the control information, the VGDAs, and VGSAs on the disk surfaces that are correct while the ODM becomes incorrect (but we should not assume this is always the case). The two commands to correct this situation are redefinevg and synclvodm. redefinevg will rebuild volume group and physical volume information in the ODM and should give enough information to vary-on. It will also restore some knowledge of logical volumes to the system. synclvodm will restore the remaining logical volume information from the VGDA and LVCBs so as to allow access to the logical volume groups in the volume group. For an example of the distinction between these two commands, we will create a volume group targetvg containing logical volumes targetlv and targetlog with a JFS file system /targetfs. Chapter 2. Problem determination and recovery 129 # mkvg -ft2 -y targetvg hdisk6 targetvg # crfs -l 2 -m /targetfs -a size=8192 -g targetvg -v jfs Based on the parameters chosen, the new /targetfs JFS file system is limited to a maximum size of 134217728 (512 byte blocks) New File System size is 8192 # lsvg -l targetvg targetvg: LV NAME TYPE LPs PPs PVs LV STATE loglv00 jfslog 2 2 1 closed/syncd lv02 jfs 1 1 1 closed/syncd # chlv -n targetlog loglv00 0516-712 chlv: The chlv succeeded, however chfs must now be run on every filesystem which references the old log # chlv -n targetlv lv02 # chfs -a log=/dev/targetlog /targetfs # lsvg -l targetvg targetvg: LV NAME TYPE LPs PPs PVs LV STATE targetlog jfslog 2 2 1 closed/syncd targetlv jfs 1 1 1 closed/syncd # mount /targetfs # echo "data" > /targetfs/data # MOUNT POINT N/A /targetfs# name loglv00. MOUNT POINT N/A /targetfs Let’s assume all the ODM information required for this volume group has been destroyed. We can replicate this kind of situation by carefully running odmdelete (always check what you are going to delete by running an odmget on the criteria first). # odmdelete -o CuAt -q "name LIKE target*" 0518-307 odmdelete: 10 objects deleted. # odmdelete -o CuDvDr -q "value3 LIKE target*" 0518-307 odmdelete: 3 objects deleted. # odmdelete -o CuDvDr -q "value1=targetvg" 0518-307 odmdelete: 1 objects deleted. # odmdelete -o CuDv -q "name LIKE target*" 0518-307 odmdelete: 3 objects deleted. # odmdelete -o CuDep -q "name=targetvg" 0518-307 odmdelete: 2 objects deleted. Now, we look to see what we have done. 130 AIX Logical Volume Manager from A to Z: Troubleshooting and Commands # lsvg rootvg # lsvg -o 0516-304 : Unable to find device id 00017d3770963601 in the Device Configuration Database. vgid=00017d3770963601 rootvg # lspv -M hdisk6 0516-320 : Physical volume hdisk6 is not assigned to a volume group. # lslv -m targetlv 0516-306 lslv: Unable to find targetlv in the Device Configuration Database. # The high-level inquiry commands that reference the LVM are unable to find any information for this volume group or its dependent logical volumes. # ls /targetfs data lost+found # umount /targetfs # mount /targetfs # ls /targetfs data lost+found # Note, however, that even though LVM is confused, our data is still available. We can even unmount and remount the file system. Some people might try exporting or performing a vary on. Exporting would never work since we can see by our data that we are already varied on (seen as the missing device id 00017d3770963601 in the lsvg -o output). # exportvg targetvg 0516-306 getlvodm: Unable to find targetvg in the Device Configuration Database. 0516-772 exportvg: Unable to export volume group targetvg # # varyonvg targetvg 0516-310 varyonvg: Unable to find attribute lock in the Device Configuration Database. Execute synclvodm to attempt to correct the database. # The recommended repair action, synclvodm targetvg, will fail since it depends on having a minimal amount of information in the ODM (we already said LVM was confused). Chapter 2. Problem determination and recovery 131 # synclvodm targetvg 0516-306 synclvodm: Unable to find volume group targetvg in the Device Configuration Database. 0516-502 synclvodm: Unable to access volume group targetvg. # Performing problem determination logically, we check the ODM. The short script in Appendix E.5, “findlvm” on page 397 checks the ODM classes for a particular string. Running findlvm target at this point returns nothing. We know that no references to our volume group or its dependent logical volumes exist in the LVM. To regain this basic ODM information, we need to run redefinevg. We can pass redefinevg the volume group name (which, of course, we already know) and either a VGID or a physical volume name. It is a good idea to confirm what volume group we are running the redefinevg on beforehand. We can do this by looking at the key VGID for the volume group with lqueryvg. # lqueryvg -g 00017d3770963601 -At Max LVs: 256 PP Size: 22 Free PPs: 1072 LV count: 2 PV count: 1 Total VGDAs: 2 Conc Allowed 0 MAX PPs per 2032 MAX PVs: 16 Conc Autovar 0 Varied on Co 0 Logical: 00017d3770963601.1 00017d3770963601.2 Physical: 00017d375243d402 2 Total PPs: 1075 # targetlog 1 targetlv 1 1 We may now run the redefinevg. # redefinevg -i 00017d375243d402 targetvg # Alternatively, in a telephone support situation, people occasionally have trouble typing long strings of numbers when they are afraid that they have lost 132 AIX Logical Volume Manager from A to Z: Troubleshooting and Commands their company’s data. Therefore, we could also have run redefinevg -d hdisk6 targetvg. # redefinevg -d hdisk6 targetvg # We check the state of our volume groups and logical volumes. # lsvg rootvg targetvg # lsvg -o rootvg targetvg # lsvg -l targetvg targetvg: LV NAME TYPE targetlog ??? targetlv ??? # LPs 2 1 PPs 2 1 PVs LV STATE 1 open/syncd 1 open/syncd MOUNT POINT N/A /targetfs The damage is not completely repaired. It is advised to review the current state of the ODM. Chapter 2. Problem determination and recovery 133 CuAt: name = "targetvg" attribute = "vgserial_id" value = "00017d3770963601" type = "R" generic = "D" rep = "n" nls_index = 637 CuAt: name = "targetvg" attribute = "pv" value = "00017d375243d4020000000000000000" type = "R" generic = "" rep = "sl" nls_index = 0 CuDv: name = "targetvg" status = 1 chgstatus = 1 ddins = "" location = "" parent = "" connwhere = "" PdDvLn = "logical_volume/vgsubclass/vgtype" CuDvDr: resource value1 = value2 = value3 = = "ddins" "targetvg" "41" "" resource value1 = value2 = value3 = = "devno" "41" "0" "targetvg" CuDvDr: We have re-created the entries for the VGID, PVID objects for physical volumes contained within the volume group, the volume group back-reference to the PdDv database, and the ddins and devno driver entries. We have not yet pulled in the information from the LVCBs. This is why we still see question marks in the lsvg -l type fields. At this stage, commands, such as extendlv, will fail. We do not have any policy information in the ODM. # extendlv targetlv 1 0516-306 getlvodm: Unable to find targetlv in the Device Configuration Database. 0516-788 extendlv: Unable to extend logical volume. # 134 AIX Logical Volume Manager from A to Z: Troubleshooting and Commands To complete the repair, run synclvodm. This will restore the LVCB control information to the ODM (the command can also perform other tidying-up, such as removing stale ODM information and running imfs -x for logical volumes that are not in the VGDA and, thus, must have been deleted). At this point , all ODM information is restored. # synclvodm targetvg # lsvg -l targetvg targetvg: LV NAME TYPE targetlog jfslog targetlv jfs # savebase # LPs 2 1 PPs 2 1 PVs LV STATE 1 open/syncd 1 open/syncd MOUNT POINT N/A /targetfs Note that we run savebase at this point. It is useful to look at the commands the redefinevg actually ran when it succeeded. Hopefully, this will prepare the reader for cases when it fails. The trclvm output for redefinevg -d hdisk6 targetvg follows. Chapter 2. Problem determination and recovery 135 #! /bin/ksh ... (Again we skip the prologue and initial comments - there is also a cleanup function which in addition to the steps we saw in exportvg resets the umask and runs savebase if we are in run-time as opposed to maintenance mode. The main body starts in the same way exportvg did.) ... # PATH=/usr/bin:/etc:/usr/sbin:/usr/ucb:/usr/bin/X11:/sbin:$PATH + PATH=/usr/bin:/etc:/usr/sbin:/usr/ucb:/usr/bin/X11:/sbin:/usr/bin:/etc:/usr/sbin:/usr/ucb:/home/dug/bin:/ usr/bin/X11:/sbin:.: /home/dug:/home/dug/scripts:. VGEXISTED= + VGEXISTED= (this is a variable used by the cleanup routine in the same manner as exportvg's locked variable.) EXIT_CODE=1 + EXIT_CODE=1 OLD_UMASK=`umask` + + umask OLD_UMASK=022 umask 117 + umask 117 # save old umask value # set umask for rw-rw---- ODMDIR=/etc/objrepos + ODMDIR=/etc/objrepos export ODMDIR + export ODMDIR TCB_OFF=`odmget -q "attribute=TCB_STATE and deflt=tcb_disabled" PdAt` + + odmget -q attribute=TCB_STATE and deflt=tcb_disabled PdAt TCB_OFF= PdAt: uniquetype = "" attribute = "TCB_STATE" deflt = "tcb_disabled" values = "" width = "" type = "" generic = "" rep = "" nls_index = 0 # Trap on exit/interrupt/break to clean up trap 'cleanup' 0 1 2 15 + trap cleanup 0 1 2 15 PROG=`basename $0` # just get the basename of the command + + basename /tmp/lvmtrace14910/redefinevg PROG=redefinevg 136 AIX Logical Volume Manager from A to Z: Troubleshooting and Commands We now begin the parsing code. Unlike exportvg, there is a loop for parsing flags here. # Parse command line options set -- `getopt d:i:V:LF $*` + getopt d:i:V:LF -d hdisk6 targetvg + set -- -d hdisk6 -- targetvg if [ $? != 0 ] # if there is a syntax error. then dspmsg -s 1 cmdlvm.cat 560 "`lvmmsg 560`\n" $PROG >& 2 exit fi + [ 0 != 0 ] dFLAG= ; dVAL= ; iFLAG= ; iVAL= ; vFLAG= ; vVAL= ; LFLAG= ; FFLAG= ; + dFLAG= + dVAL= + iFLAG= + iVAL= + vFLAG= + vVAL= + LFLAG= + FFLAG= (all FLAG values and associated values are reset so no extraneous flags are pulled in from the shell environment outside the script.) while [ $1 != -- ] # While there is a command line option do case $1 in -d) dFLAG='-d'; dVAL=$2; shift; shift;; # key device to define VG -i) iFLAG='-i'; iVAL=$2; shift; shift;; # id of VG to define -V) vFLAG='-V'; vVAL=$2; shift; shift;; # major number of VG -L) LFLAG='-L'; shift;; # importvg called with -L option -F) FFLAG='-F'; shift;; # importvg called with -F option esac done + [ -d != -- ] + dFLAG=-d + dVAL=hdisk6 + shift + shift + [ -- != -- ] (The only FLAG set is the -d.) # Parse command line arguments shift # skip past "--" from getopt + shift if [ $# != 1 ] then dspmsg -s 1 cmdlvm.cat 560 "`lvmmsg 560`\n" $PROG >& 2 exit fi + [ 1 != 1 ] VGNAME=$1 + VGNAME=targetvg The command line option parsing has completed successfully. We now begin checking and input validation. Chapter 2. Problem determination and recovery 137 # Read the VGID from the key devices descriptor area. if [ -n "$dFLAG" ] then KEY_VGID=`lqueryvg -p $dVAL -v` #key device defines the VG if [ $? != 0 ] then dspmsg -s 1 cmdlvm.cat 562 "`lvmmsg 562`\n" $PROG $dVAL >& 2 exit fi elif [ -n "$iFLAG" ] then KEY_VGID=$iVAL else dspmsg -s 1 cmdlvm.cat 560 "`lvmmsg 560`\n" $PROG >& 2 exit fi + [ -n -d ] + + lqueryvg -p hdisk6 -v KEY_VGID=00017d3770963601 + [ 0 != 0 ] At this point in the code, we will be in the same state whether we ran with -d or -i: $KEY_VGID is set to 00017d3770963601. With parsing and checking of input arguments done, we begin to gather data for the reconstruction process. # Get the list of all configured physical volumes in the database PVS=`getlvodm -C` + + getlvodm -C PVS=hdisk0 hdisk1 ... (snipped) ... hdisk11 if test -z "$PVS" # couldn't find any configured PVs then dspmsg -s 1 cmdlvm.cat 566 "`lvmmsg 566`\n" $PROG >& 2 exit fi + test -z hdisk0 hdisk1 ... (snipped) ... hdisk11 This has just given us a list of all available physical volumes in $PVS. A sanity check has also been taken. 138 AIX Logical Volume Manager from A to Z: Troubleshooting and Commands if [ -n "$LFLAG" -o -n "$FFLAG" ] then ... (the shell reads in a long section of code here which will not actually be executed because we are not running with the undocumented -L or -F flags. Neither of these will normally be supplied from a user command line - generally they are used when redefinevg is driven by the importvg script. Accordingly this section is omitted here.) ... else # From list of all configured PVs, build list containing PVNAMEs # and PVIDs for all PVs which appear to belong to the volume group. # If a PV's descriptor area has the key VGID, then the PV is # considered in the volume group. for name in $PVS do VGID=`lqueryvg -p $name -v 2>/dev/null` if [ $? -eq 0 -a "$VGID" = "$KEY_VGID" ] then PVID=`getlvodm -p $name` if [ $? -eq 0 -a -n "$PVID" ] then echo $PVID $name >> /tmp/pvlist$$ fi fi done fi + [ -n -o -n ] + + lqueryvg -p hdisk0 -v + 2> /dev/null VGID=00017d37e1762ac7 + [ 0 -eq 0 -a 00017d37e1762ac7 = 00017d3770963601 ] ... (various other unsuccessful tests for physical volumes belonging to target volume group snipped) ... + + lqueryvg -p hdisk6 -v + 2> /dev/null VGID=00017d3770963601 + [ 0 -eq 0 -a 00017d3770963601 = 00017d3770963601 ] + + getlvodm -p hdisk6 PVID=00017d375243d402 + [ 0 -eq 0 -a -n 00017d375243d402 ] + echo 00017d375243d402 hdisk6 + 1>> /tmp/pvlist22794 (hdisk6 is a member of the target volume group) ... (other unsuccessful tests snipped) ... if [ ! -s /tmp/pvlist$$ ] # zero length file then dspmsg -s 1 cmdlvm.cat 567 "`lvmmsg 567`\n" $PROG >& 2 exit fi + [ ! -s /tmp/pvlist22794 ] We now have a file, /tmp/pvlist22794, containing all the physical volumes that belong to our target volume group. Next, we have a thought provoking piece of commentary: Chapter 2. Problem determination and recovery 139 # NOTE: In importvg we already checked to insure that VGNAME is not already # in use -- if used then print error message and exit, redefinevg would # not be called at all. # We decided to have the checking here also because redefinevg is # a separated command and in the future it might be used in other # places or used by itself. When we know for sure that we do not # need the ckecking here anymore then we will delete it. Another valid solution to the problem of a loss of all ODM entries is simply to run an importvg -y targetvg hdisk6. This will produce the output: # importvg -y targetvg hdisk6 targetvg 0516-012 lvaryoffvg: Logical volume must be closed. If the logical volume contains a filesystem, the umount command will close the LV device. 0516-942 varyoffvg: Unable to vary off volume group targetvg. # Despite the above error message, caused because the /victimfs file system is still mounted, running an lsvg -l would confirm that all ODM objects have been re-created. Some may prefer to use this one high-level command rather than the two intermediate-level commands redefinevg and synclvodm. On the other hand, the intermediate command combination will finish quicker than an importvg. Sometimes there's more than one way to tackle an LVM problem. Continuing with the trace of redefinevg, the script checks for ODM corruption, making sure $KEY_VGID is not already known to the ODM by another name. 140 AIX Logical Volume Manager from A to Z: Troubleshooting and Commands # if vgname is already in database but used for another VG then # fatal error # else # if vgname is in database, save the VG's auto_on value, else set default # remove any existing VG entry from database in order to build fresh one # store all VG info in database (including all the associated PV info) if [ -z "$LFLAG" ] then EXISTING_VGID=`getlvodm -v $VGNAME 2>/dev/null` rc=$? if [ $rc -eq 3 ] # VGNAME not found in database then EXISTING_VGNAME=`getlvodm -t $KEY_VGID 2>/dev/null` # is VGID in database? if [ $? -eq 0 ] # with a different VGNAME then dspmsg -s 1 cmdlvm.cat 572 "`lvmmsg 572`\n" $PROG $EXISTING_VGNAME >& 2 exit fi elif [ $rc -eq 0 -a "$EXISTING_VGID" != "$KEY_VGID" ] then dspmsg -s 1 cmdlvm.cat 574 "`lvmmsg 574`\n" $PROG $VGNAME >& 2 if [ -z "$EXISTING_VGID" ] then # need a new msg saying that odm is # inconsistent, exportvg then importvg dspmsg -s 1 cmdlvm.cat 621 "`lvmmsg 621`\n" $PROG $VGNAME >& 2 fi exit fi fi + [ -z ] + + getlvodm -v targetvg + 2> /dev/null EXISTING_VGID= + rc=3 + [ 3 -eq 3 ] + + getlvodm -t 00017d3770963601 + 2> /dev/null EXISTING_VGNAME= + [ 3 -eq 0 ] This done, further checks are made. Chapter 2. Problem determination and recovery 141 # check to see whether if [ -r /dev/"$VGNAME" then VGEXISTED=1 else VGEXISTED=0 fi + [ -r /dev/targetvg ] + VGEXISTED=1 /dev entry for the volume group already existed ] # node was there # node was not there if [ -n "$LFLAG" ] then ... (some code for learning mode to protect the volume group’s permissions has been ommitted here.) ... fi + [ -n ] # use user-supplied major number or system-supplied major number. if [ -z "$vFLAG" ] then MAJOR=`lvgenmajor $VGNAME` else MAJOR=`lvchkmajor $vVAL $VGNAME` fi + [ -z ] + + lvgenmajor targetvg MAJOR=41 if [ $? -eq 1 ] then dspmsg -s 1 cmdlvm.cat 568 "`lvmmsg 568`\n" $PROG >& 2 exit fi + [ 0 -eq 1 ] (We are using the system supplied major number.) # release the minor number before trying to get it back lvrelminor $VGNAME >/dev/null 2>&1 + lvrelminor targetvg + 1> /dev/null 2>& 1 MINOR=`lvgenminor -p 0 $MAJOR $VGNAME` + + lvgenminor -p 0 41 targetvg MINOR=0 if [ $? != 0 ] then dspmsg -s 1 cmdlvm.cat 570 "`lvmmsg 570`\n" $PROG >& 2 exit fi + [ 0 != 0 ] (We save the minor number in $MINOR and sanity check.) The next , and final, piece of information gathering sets the $AUTO_ON and $QUORUM variables. 142 AIX Logical Volume Manager from A to Z: Troubleshooting and Commands # Retreive the quorum and auto_on value from VGDA if bigvg # else get them from ODM AUTO_ON=y + AUTO_ON=y QUORUM=y + QUORUM=y if [ -n "$dVAL" ]; then NqV=`lqueryvg -NqVp $dVAL` if [ -n "$NqV" ]; then set $NqV if [ $1 -gt 256 ]; then # BIGVG if [ $2 -eq 0 ];then QUORUM=n fi if [ $3 -eq 0 ];then AUTO_ON=n fi else # from ODM for small VGs AUTO_ON=`getlvodm -u $VGNAME 2> /dev/null` if [ $? != 0 ] then AUTO_ON=y # default value for new entry fi QUORUM=`getlvodm -Q $VGNAME 2> /dev/null` if [ $? != 0 ] then QUORUM=y # default value for new entry fi fi fi fi + [ -n hdisk6 ] + + lqueryvg -NqVp hdisk6 NqV=256 + [ -n 256 ] + set 256 + [ 256 -gt 256 ] + + getlvodm -u targetvg + 2> /dev/null AUTO_ON= + [ 3 != 0 ] + AUTO_ON=y + + getlvodm -Q targetvg + 2> /dev/null QUORUM=y + [ 0 != 0 ] redefinevg now acts, manipulating the ODM. Chapter 2. Problem determination and recovery 143 # VG in database or not putlvodm -V $KEY_VGID 2> /dev/null + putlvodm -V 00017d3770963601 + 2> /dev/null # delete old entry putlvodm -v $VGNAME -o $AUTO_ON -Q $QUORUM $KEY_VGID # add the new VG + putlvodm -v targetvg -o y -Q y 00017d3770963601 The code shown above deletes any stale VGID information in the ODM. It then rebuilds the VGID object. Next, redefinevg walks through the logical volumes for this volume group deleting stale logical volume information and rebuilding. It is worth noting the use of putlvodm -V and -p in the last and the next piece of code. These may be used in the recovery situation to tweak the ODM without having to build stanzas for odmadd. if test -s /tmp/pvlist$$ then while read PVID PVNAME do putlvodm -P $PVID 2>/dev/null # delete old entry putlvodm -p $KEY_VGID $PVID # add new entry if [ $? != 0 ] then dspmsg -s 1 cmdlvm.cat 576 "`lvmmsg 576`\n" $PROG >& 2 fi done < /tmp/pvlist$$ else dspmsg -s 1 cmdlvm.cat 567 "`lvmmsg 567`\n" $PROG >& 2 exit fi + test -s /tmp/pvlist22794 + 0< /tmp/pvlist22794 + read PVID PVNAME Finally, we rebuild the entries in /dev and work with the trusted computing base if necessary. 144 AIX Logical Volume Manager from A to Z: Troubleshooting and Commands #Remove any existing node for the VG, recreate fresh one to insure correctness rm -f /dev/$VGNAME 2>/dev/null # Note: lvrelminor is being bypassed + rm -f /dev/targetvg + 2> /dev/null mknod /dev/$VGNAME c $MAJOR 0 + mknod /dev/targetvg c 41 0 if [ -n "$LFLAG" ] then chown $L_OWNER.$L_GROUP /dev/$VGNAME 2>/dev/null chmod $L_PERMS /dev/$VGNAME 2>/dev/null fi + [ -n ] # Add/modify the dev entry to TCB if ON. if [ -z "$TCB_OFF" -a -x /usr/bin/tcbck ] then tcbck -l /dev/$VGNAME fi + [ -z PdAt: uniquetype = "" attribute = "TCB_STATE" deflt = "tcb_disabled" values = "" width = "" type = "" generic = "" rep = "" nls_index = 0 -a -x /usr/bin/tcbck ] As usual, we finish by resetting the $EXIT_CODE and calling cleanup(). EXIT_CODE=0 + EXIT_CODE=0 exit $EXIT_CODE + exit 0 + cleanup + trap 0 1 2 15 + test 0 -eq 1 + getlvodm -R + [ 0 -eq 0 ] + savebase + 1> /dev/null + umask 022 + exit 0 A final piece of ODM manipulation to consider is that you may rmdev -dl hdisks and then run mkdev to bring in specific physical volumes to adjust your hdisk numbering. This is particularly useful when making both sides of a Chapter 2. Problem determination and recovery 145 twin-tailed configuration appear the same or when working with EMC hardware mirrored disks. 2.7.2 LVM control data corruption This section first presents an example of low-level VGDA corruption. Other VGDA problems are then discussed. Corruption example 3: Low-level VGDA corruption Fortunately, VGDA corruption is very rare. Generally, you can tell that corruption is present when LVM commands start to dump core (an alternative possibility is that you have hit a defect in LVM code). Sometimes, corruption may have occurred on the VGDA but only becomes apparent when the VGDA is restructured, for example chvg -B is run or the factor size changed with -t. In the following example, we will deliberately corrupt and then repair a VGDA. In a production environment, this procedure must be performed extremely carefully; otherwise, you could propagate the corruption to all your other VGDAs. It is extremely difficult to recover from such a situation. It is suggested you work through this example before attempting the procedure. If you are in any way unsure of what you are doing, do not try this, call AIX-support instead. In this example, we create the volume group lowvg and associated logical volumes and file systems using the script supplied in Appendix E.6, “maker” on page 397. This will create volume group lowvg and logical volumes lowlv1 and lowlv2 containing file systems /lowfs1 and /lowfs2, respectively. lowlv1 is a simple logical volume containing three logical partitions, and lowlv2 contains two logical partitions mirrored across two disks. In our case, we are using hdisk6 and hdisk7. This example should be read very carefully. It first shows what not to do. A very bad outcome of problem determination is presented from which there really is no recovery (apart from the theoretical possibility of using dd to adjust the raw bytes in a VGDA, after that, the maker script will be re-run, and the recovery performed correctly. To begin the example, the maker script is run. The LVM is now in the following state: 146 AIX Logical Volume Manager from A to Z: Troubleshooting and Commands # lsvg rootvg lowvg # lsvg -o lowvg rootvg # lsvg -l lowvg lowvg: LV NAME lowlv1 lowlv2 lowlog # lsvg -p lowvg lowvg: PV_NAME hdisk6 hdisk7 # TYPE jfs jfs jfslog PV STATE active active LPs 3 2 1 PPs 3 4 1 TOTAL PPs 1075 1075 PVs 1 2 1 LV STATE open/syncd open/syncd open/syncd FREE PPs 1070 1072 MOUNT POINT /lowfs1 /lowfs2 N/A FREE DISTRIBUTION 215..210..215..215..215 215..212..215..215..215 We will corrupt the VGDA with dd. Since lowvg is on hdisk6, we run: echo "?\c" |dd bs=1 seek=`echo "ib=8\n200000+11000"|bc` of=/dev/hdisk6 LVM commands will now begin to dump core. # lsvg -M lowvg Segmentation fault(coredump) # varyonvg lowvg # /usr/sbin/syncvg[16]: 16184 Segmentation fault(coredump) /usr/sbin/syncvg[18]: 16186 Segmentation fault(coredump) 0516-932 /usr/sbin/syncvg: Unable to synchronize volume group lowvg. Note that at this stage, our data is still available. # ls -l /lowfs1 total 16 -rw-r--r-- 1 root drwxrwx--- 2 root # ls -l /lowfs2 total 16 -rw-r--r-- 1 root drwxrwx--- 2 root # sys system 8 Sep 27 12:56 data1 512 Sep 27 12:56 lost+found sys system 8 Sep 27 12:56 data2 512 Sep 27 12:56 lost+found Let us now approach this as a support call. We begin with problem determination. Chapter 2. Problem determination and recovery 147 Note if the following steps get us nowhere, we may need debug versions of the LVM libraries or commands to produce a core that contains the current state of LVM to be analyzed by AIX-support. This would be the case where we suspect a defect. Since LVM commands are dumping core, we suspect VGDA corruption. We can use lsvg -n to target the different VGDAs in the volume group to find which are damaged and which are intact. # lsvg -n hdisk6 Segmentation fault(coredump) # lsvg -n hdisk7 VOLUME GROUP: lowvg VG STATE: active VG PERMISSION: read/write MAX LVs: 256 LVs: 3 OPEN LVs: 0 TOTAL PVs: 2 STALE PVs: 0 ACTIVE PVs: 0 MAX PPs per PV: 2032 # VG IDENTIFIER: PP SIZE: TOTAL PPs: FREE PPs: USED PPs: QUORUM: VG DESCRIPTORS: STALE PPs: AUTO ON: MAX PVs: 00017d3780467f5b 4 megabyte(s) 2150 (8600 megabytes) 2142 (8568 megabytes) 8 (32 megabytes) 2 3 0 yes 16 We have identified the VGDA(s) on hdisk6 as corrupt, and the one on hdisk7 as good. Our first priority is to get maps for our logical volumes out of the good VGDA. # lspv -M -n hdisk7 hdisk6 hdisk6:1-215 hdisk6:216 lowlv1:1 hdisk6:217 lowlv1:2 hdisk6:218 lowlv1:3 hdisk6:219 lowlv2:1:2 hdisk6:220 lowlv2:2:2 hdisk6:221-1075 We can turn these into maps suitable for mklv -m with the following commands: 148 AIX Logical Volume Manager from A to Z: Troubleshooting and Commands # lspv -M -n hdisk7 hdisk6|grep lowlv1|awk '{print $1}' > lowlv1.map # lspv -M -n hdisk7 hdisk6|grep lowlv2|awk '{print $1}' > lowlv2.map # cat lowlv1.map hdisk6:216 hdisk6:217 hdisk6:218 # cat lowlv2.map hdisk6:219 hdisk6:220 # We could aim to reduce and re-create the VGDA as we did in “Corruption example 2: PVID corruption”on page 75. Note that from this point on, we are on the wrong track. # reducevg lowvg hdisk6 /usr/sbin/reducevg[227]: 21524 Segmentation fault(coredump) 0516-882 reducevg: Unable to reduce volume group. # We might try ldeletepv. Since we have started working with low level commands, we put the VGID into $VGID to save typing. # lspv|grep hdisk6 hdisk6 00017d377c3abace lowvg # VGID=00017d3780467f5b # ldeletepv -g $VGID -p 00017d377c3abace 0516-016 ldeletepv: Cannot delete physical volume with allocated partitions. Use either migratepv to move the partitions or reducevg with the -d option to delete the partitions. # This should be simple enough. We remember we cannot ldeletepv a logical volume with allocated partitions. We set out to create maps in a format ldeletepv will understand. This is done with lquerylv -L <lvid> -r. Chapter 2. Problem determination and recovery 149 # lquerylv -L $VGID.1 -r 00017d377c3abace 216 1 00017d377c3abace 217 2 00017d377c3abace 218 3 # lquerylv -L $VGID.2 -r 00017d377b71d55c 216 1 00017d377c3abace 219 1 00017d377b71d55c 217 2 00017d377c3abace 220 2 # lquerylv -L $VGID.1 -r > lowlv1.map.raw # lquerylv -L $VGID.2 -r > lowlv2.map.raw.bothdisks # We should edit lowlv2.map.raw.bothdisks since it currently contains all the logical partitions for both mirrors of the logical volume. It should only contain the copies on hdisk6. We create lowlv2.map.raw, which only contains the logical partitions for hdisk6. # grep 00017d377c3abace lowlv2.map.raw.bothdisks > lowlv2.map.raw # cat lowlv2.map.raw 00017d377c3abace 219 1 00017d377c3abace 220 2 # We now have maps to pass into lreducelv. We get the number of partitions in each map with wc -l and run the lreducelv. We will see shortly that this was a bad idea at this point in the recovery procedure. # lreducelv -l $VGID.1 -s 3 lowlv1.map.raw # lreducelv -l $VGID.2 -s 2 lowlv2.map.raw # ldeletepv -g $VGID -p 00017d377c3abace # lspv -M -n hdisk7 hdisk6 0516-022 lspv: Illegal parameter or structure value. # The lspv -M result may be unexpected. We attempt to reducevg the bad VGDA on hdisk6 away. # reducevg lowvg hdisk6 /usr/sbin/reducevg[227]: 15864 Segmentation fault(coredump) 0516-882 reducevg: Unable to reduce volume group. # 150 AIX Logical Volume Manager from A to Z: Troubleshooting and Commands The above procedure doesn’t seem to have helped at all. In fact, we cannot even get the maps out any more with lspv -M -n. The other high-level commands will also dump core. Here, we might try varying off. # varyonvg lowvg # /usr/sbin/syncvg[16]: 18586 Segmentation fault(coredump) /usr/sbin/syncvg[18]: 18588 Segmentation fault(coredump) 0516-932 /usr/sbin/syncvg: Unable to synchronize volume group lowvg. # umount /lowfs1 # umount /lowfs2 # varyoffvg othervg 0516-306 getlvodm: Unable to find othervg in the Device Configuration Database. 0516-942 varyoffvg: Unable to vary off volume group othervg. # varyoffvg lowvg # varyonvg lowvg PV Status: hdisk6 00017d377c3abace INVPVID hdisk7 00017d377b71d55c PVACTIVE varyonvg: Volume group lowvg is varied on. # /usr/sbin/syncvg[16]: 18604 Segmentation fault(coredump) /usr/sbin/syncvg[18]: 18606 Segmentation fault(coredump) Now, we no longer have access to our data, and when we try to pull maps out, we just get core dumps. If we look at the VGDAs with od , we can see the following: # dd skip=128 0011000 ? # dd skip=128 0011000 ? # if=/dev/hdisk6 \0 \0 \0 \0 if=/dev/hdisk7 \0 \0 \0 \0 count=10 \0 002 count=10 \0 002 2>/dev/null|od \0 001 \0 \0 2>/dev/null|od \0 001 \0 \0 -cx|grep 002 \0 -cx|grep 002 \0 11000 \0 \0 \0 11000 \0 \0 \0 The corruption (the first question mark character in each line) has propagated across from the VGDA on hdisk6 to hdisk7. All the VGDAs are now corrupt, and we are in a deadlock situation. This propagation occurred as soon as we ran the first lreducelv. The VGDA wheel, the mechanism for keeping all the VGDAs in sync, was spun, and the corruption spread across all the disks. Once this has happened, our only option would be to completely destroy the volume group and remake it and its logical volumes from maps. This is unlikely to happen when working with high level commands, as the error checking sections should core dump before a low-level modification command is run. However, if you choose to operate at the low-level, it is assumed that you know what you are doing. Remember that the low level commands are unsupported when used directly by customers. Chapter 2. Problem determination and recovery 151 We now resume before we run the lreducelv. To get back to this situation, we can rerun maker and retrace our steps. # maker hdisk6 hdisk7 (output skipped) # echo "?\c" |dd bs=1 seek=`echo "ib=8\n200000+11000"|bc` of=/dev/hdisk6 1+0 records in. 1+0 records out. # lsvg -n hdisk7|grep ID VOLUME GROUP: lowvg VG IDENTIFIER: 00017d378099d25d # VGID=00017d378099d25d # lspv -M -n hdisk7 hdisk6|grep lowlv1|awk '{print $1}' > lowlv1.map # lspv -M -n hdisk7 hdisk6|grep lowlv2|awk '{print $1}' > lowlv2.map (If you are using the same disks as before you will find that there is a certain predictability to the way allocp lays out partitions on a disk. The LV maps should actually be the same as before.) # lquerylv -L $VGID.1 -r > lowlv1.map.raw # lquerylv -L $VGID.2 -r | grep 00017d377c3abace > lowlv2.map.raw # The key point in this procedure is that we must remove hdisk6 from the wheel before it is spun. We can do this by removing /dev/hdisk6. If the LVM device driver cannot read from the disk, it cannot propagate it to any other devices on the wheel. Since we have to vary off the volume group before we can run the rmdev, at this point, we will have to take our data off-line. Note Whenever repair of VGDA corruption is performed with low-level modification commands, and we have a mix of good and bad VGDAs, all devices containing bad copies of the VGDA should be removed before repair is attempted. This should be done so that the corruption does not propagate across the VGDAs. We then run the commands shown below. Note that before we do the vary-off, as far as the logical volume device driver is concerned, lowvg contains both hdisk6 and hdisk7. After we vary-on again, only hdisk7 is in the volume group from the drivers point of view since hdisk6 has been removed. If you want to follow the driver’s view of which physical volumes are in a volume group, you can use a script, such as pvsinvg, provided in Appendix E.7, “pvsinvg” on page 398 (we can’t use lsvg -p or lqueryvg -g until we have fixed the core dump problem). Note that this script only displays physical volumes that have an open logical volume; so, it will not work when volume groups are varied on in maintenance mode. 152 AIX Logical Volume Manager from A to Z: Troubleshooting and Commands # umount /lowfs1 # umount /lowfs2 # varyoffvg lowvg # rmdev -dl hdisk6 hdisk6 deleted # varyonvg -f lowvg PV Status: 00017d377c3abace hdisk7 00017d377b71d55c varyonvg: Volume group lowvg is varied on. # PVREMOVED PVACTIVE Note that the forced vary-on since we no longer have quorum. We also use the -s flag to vary-on in maintenance mode since we do not want the file systems to be mounted (someone might start using them, and we are going to have to take the volume group off-line again soon). We can safely run the low-level commands now. # lreducelv -l $VGID.1 -s 3 lowlv1.map.raw # lreducelv -l $VGID.2 -s 2 lowlv2.map.raw # ldeletepv -g $VGID -p 00017d377c3abace # We have removed the reference to hdisk6 from hdisk7’s VGDA. We must still be extremely careful. If we bring hdisk6 back online with cfgmgr (or more quickly cfgmgr -l ssar if we are using SSA disks), we still cannot run extendvg yet. # cfgmgr -l ssar # extendvg lowvg hdisk6 0516-696 extendvg: Physical Volume hdisk6 belongs to another volume group. # lspv | grep lowvg hdisk7 00017d377b71d55c lowvg hdisk6 00017d377c3abace lowvg # reducevg lowvg hdisk6 0516-022 ldeletepv: Illegal parameter or structure value. 0516-884 reducevg: Unable to remove physical volume hdisk6. # The issue here is that, as far as the ODM is concerned, the volume group still contains both disks. Chapter 2. Problem determination and recovery 153 # odmget -q "name=lowvg and attribute=pv" CuAt|grep value value = "00017d377c3abace0000000000000000" value = "00017d377b71d55c0000000000000000" # If we now vary off, export, and re-import (to clear the ODM corruption), we will spin the refresh wheel again and propagate the VGDA corruption (we ran cfgmgr too early). # varyoffvg lowvg # exportvg lowvg # importvg -y lowvg hdisk7 /usr/sbin/redefinevg[215]: 14446 Segmentation fault(coredump) lowvg # After running the ldeletepv, the correct procedure is: # varyoffvg lowvg # cp /etc/filesystems /tmp/filesystems.bak # exportvg lowvg # importvg -y lowvg hdisk7 lowvg # cfgmgr -l ssar # extendvg lowvg hdisk6 # Note that we also make a copy of /etc/filesystems before we run an exportvg since we will lose the entries for /lowfs1 and /lowfs2, and we do not have any copies of lowlv1’s logical control block on hdisk7 (this is not a bigVG). As a brief aside, if you tried to script the above commands, you may see a strange, albeit harmless, error when you run the exportvg after the ldeletepv and varyoffvg. + ldeletepv -g 00017d3785f9cc2d -p 00017d377c3abace varyoffvg lowvg + varyoffvg lowvg exportvg lowvg + exportvg lowvg 0516-008 lqueryvg: LVM system call returned an unknown error code (-97). 0516-932 /usr/sbin/syncvg: Unable to synchronize volume group lowvg. importvg -y lowvg hdisk7 154 AIX Logical Volume Manager from A to Z: Troubleshooting and Commands Note that LVM sometimes does perform control actions asynchronously. This is not a problem in normal LVM operation. However, it is a good reason not to script using low-level commands. Now, after the extendvg is run, the LVM is in the following state: # lsvg -p lowvg lowvg: PV_NAME hdisk6 hdisk7 # lsvg -l lowvg lowvg: LV NAME lowlv1 lowlv2 lowlog # PV STATE active active TOTAL PPs 1075 1075 TYPE jfs jfslog LPs 0 2 1 PPs 0 2 1 FREE PPs 1075 1072 PVs 0 1 1 FREE DISTRIBUTION 215..215..215..215..215 215..212..215..215..215 LV STATE closed/syncd closed/syncd closed/syncd MOUNT POINT N/A /lowfs2 N/A We can now safely rebuild the logical volumes from maps. At this point, we may choose to make our data in /lowfs2 available. Alternatively, we may prefer to remount the file systems after LVM manipulation is complete. Recall that early in this procedure, we created lowlv1.map and lowlv2.map. To repair the unmirrored lowlv1, we first remove the remnant zero-size lowlv1 seen in the lsvg -l with rmlv. We can run mklv as we did in the final repair stage for “Corruption example 2: PVID corruption”on page 75. # rmlv lowlv1 Warning, all data contained on rmlv: Do you wish to continue? rmlv: Logical volume lowlv1 is # mklv -y lowlv1 -m lowlv1.map lowlv1 # logical volume lowlv1 will be destroyed. y(es) n(o)? y removed. lowvg 3 An unfortunate side effect of the mklv is that the LVCB on lowlv1 has been wiped. We have to rebuild the entry for lowfs1 in /etc/filesystems from the /tmp/filesystems.bak that was made earlier. We then run chfs -a log=/dev/lowlog /lowfs1 to update the LVCB. The /lowfs1 file system will then mount successfully. Any lost logical volume policy settings will have to be re-created manually. Chapter 2. Problem determination and recovery 155 The /lowfs2 file system is easier to fix since all we have to do is re-create the mirror. The safest way to do this is by running mklvcopy. Although this costs disk I/O, we then have a known good mirror. These final repair commands are shown as follows: # chfs -a log=/dev/lowlog /lowfs1 # mount /lowfs1 # ls -l /lowfs1 # ls /lowfs1 data1 lost+found mount /lowfs2 # ls /lowfs2 data2 lost+found # mklvcopy -k -m lowlv2.map lowlv2 2 # lsvg -M lowvg lowvg hdisk6:1-215 hdisk6:216 hdisk6:217 hdisk6:218 hdisk6:219 hdisk6:220 hdisk6:221-1075 hdisk7:1-215 hdisk7:216 hdisk7:217 hdisk7:218 hdisk7:219-1075 # lowlv1:1 lowlv1:2 lowlv1:3 lowlv2:1:2 lowlv2:2:2 lowlv2:1:1 lowlv2:2:1 lowlog:1 The delicate procedure of VGDA repair is now complete. VGDA corruption with two VGDAs on one disk For the case of a unique physical volume in a volume group, one might think that a command, such as echo "?\c" |dd bs=1 seek=`echo "ib=8\n 211000 "|bc` of=/dev/hdisk6, would bring corruption. However, LVM is very resilient in such a case, and lquerylv can still be used to pull the maps out of the first VGDA. All the following examples assume a starting point of volume group corrvg on hdisk6 containing logical volume corrlv. 156 AIX Logical Volume Manager from A to Z: Troubleshooting and Commands # echo "?\c" |dd bs=1 seek=`echo "ib=8\n200000+11000"|bc` of=/dev/hdisk6 # lsvg -M corr Segmentation fault(coredump) # lquerylv -L $VGID.1 -r 00017d3787995016 216 1 00017d3787995016 217 2 00017d3787995016 218 3 # lquerylv -L $VGID.1 -r|awk '{print "hdisk6:" $2}' hdisk6:216 hdisk6:217 hdisk6:218 # Even if the first VGDA is completely removed, and the second VGDA is corrupted, lquerylv will still work, and LVM will go to the second VGDA. # dd if=/dev/zero seek=128 count=2106 of=/dev/hdisk6 2106+0 records in. 2106+0 records out. # lsvg -M corrvg corrvg hdisk6:1-215 hdisk6:216 corrlv:1 hdisk6:217 corrlv:2 hdisk6:218 corrlv:3 hdisk6:219-1075 # However, if you have a second VGDA that is good and a first VGDA that is bad, LVM will go the first VGDA and return incorrect information. In the following example, we corrupt the partition maps on the VGDA. This can be resolved by removing the first VGDA (after taking a backup copy). LVM will then acquire maps from the second VGDA. This procedure is very dangerous. You should work with an IBM AIX-support center before doing this since you need to know that the second VGDA is good. The numbers used in all these examples were for a non-big VG on a specific level of AIX. There is no guarantee they will stay the same. Chapter 2. Problem determination and recovery 157 # dd if=/dev/hd1 bs=256 seek=306 count=127 of=/dev/hdisk6 # lsvg -M corrvg corrvg 0516-304 lsvg: Unable to find device id 0000000000000000 in the Device Configuration Database. 0516-022 lsvg: Illegal parameter or structure value. # lsvg -l corr corr: LV NAME TYPE LPs PPs PVs LV STATE MOUNT POINT 0516-1147 lsvg: Warning - logical volume corrlv may be partially mirrored. corrlv jfs 3 0 1 closed/syncd N/A # lsvg -p corr 0516-022 lsvg: Illegal parameter or structure value. 0516-304 lsvg: Unable to find device id 0000000000000000 in the Device Configuration Database. corr: PV ID PV STATE TOTAL PPs FREE PPs FREE DISTRIBUTION 0000000000000000 ??????? ??????? ??????? ??????? # lslv -l corrlv 0516-022 lslv: Illegal parameter or structure value. 0516-304 lslv: Unable to find device id 0000000000000000 in the Device Configuration Database. corrlv:N/A PVID COPIES IN BAND DISTRIBUTION 0000000000000000 003:000:000 ? ? # # dd if=/dev/zero seek=128 count=2106 of=/dev/hdisk6 2106+0 records in. 2106+0 records out. # lsvg -M corrvg corrvg hdisk6:1-215 hdisk6:216 corrlv:1 hdisk6:217 corrlv:2 hdisk6:218 corrlv:3 hdisk6:219-1075 # Another possible symptom of partition map corruption is nonsensical map output: # lsvg -M corrvg corrvg hdisk6:1-4 hdisk6:5 RESERVED:1919492161 stale 0516-304 lsvg: Unable to find device id 00017d378ac4e080.83 in the Device Configuration Database. # This is shown here for recognition purposes. 158 AIX Logical Volume Manager from A to Z: Troubleshooting and Commands The 0516-304 error message seen previously can also occur if we have a partial mirror or a false mirror. This is discussed next. Sixteen zeros errors and other corrupt PVIDs in the VGDA As we saw in the “VGDA corruption with two VGDAs on one disk”on page 156 a corrupted, non-mirrored logical volume may give 0516-304 errors in response to inspection commands. In the partition map corruption shown previously, is not the only reason this error number may be reported. As the error message states, the LVM is looking in the ODM for a PVID having the nonsense value 0000000000000000. This message will be returned any time there is a 0000000000000000 value taken from the VGDA and referenced against the ODM. Such a value can occur due either to corruption within the logical volume partition map, or if a PVID of 0000000000000000 is present as a physical volume definition at the start of a partition map. You can check for a PVID of 0000000000000000 being present in the partition map by running lqueryvg -Ptp. In contrast, lquerpv -h /dev/hdisk6 80 10 will give the real PVID on the hdisk. This is shown below: # lsvg -M corrvg corrvg 0516-304 lsvg: Unable to find device id 0000000000000000 in the Device Configuration Database. 0000000000000000:1-215 0000000000000000:216 corrlv:1 0000000000000000:217 corrlv:2 0000000000000000:218 corrlv:3 0000000000000000:219-1075 # lqueryvg -Ptp hdisk6 Physical: 0000000000000000 2 0 # lquerypv -h /dev/hdisk6 80 10 00000080 00017D37 8BB9F828 00000000 00000000 |..}7...(........| # If the 16 zeros are actually present in the VGDA, but no partitions are mapped in, they can be removed by specifying -p 0000000000000000 to ldeletepv at all levels of AIX. The alternative is to try reducevg, which allows you to specify a pvid specifically to handle this kind of corruption situation. 16 zeroes may be seen as a special case of any nonsensical PVID value existing on a disk. Note that if any copies of logical volumes are in partition maps associated with this PVID, and a reducevg (or ldeletepv) is run, those maps will be lost. You would probably want to map the volume group, export it, and remake it in such a situation. Chapter 2. Problem determination and recovery 159 Apart from the dd corruption shown in the last section, this could also be caused by a false or partial mirror at AIX 4.2.1. This is shown as follows. 421 # lslv -m corrlv corrlv:N/A LP PP1 PV1 PP2 PV2 PP3 PV3 0001 0155 hdisk1 0490 hdisk0 0002 0156 hdisk1 0003 0157 hdisk1 421 # lsvg -l rootvg rootvg: LV NAME TYPE LPs PPs PVs LV STATE MOUNT POINT hd6 paging 32 32 1 open/syncd N/A hd5 boot 1 1 1 closed/syncd N/A hd8 jfslog 1 1 1 open/syncd N/A hd4 jfs 16 16 1 open/syncd / hd2 jfs 424 424 1 open/syncd /usr hd9var jfs 7 7 1 open/syncd /var hd3 jfs 44 44 1 open/syncd /tmp hd1 jfs 37 37 1 open/syncd /home 0516-022 lsvg: Illegal parameter or structure value. 0516-304 lsvg: Unable to find device id 0000000000000000 in the Device Configuration Database. corrlv jfs 3 6 3 closed/stale N/A 421 # This could occur if migratepv or reorgvg commands fail and create a false mirror. Note the error message occurs before the problem logical volume. For AIX 4.3, however, ordinarily the error message is the more explicit: 0516-1147 lsvg: Warning - logical volume corrlv may be partially mirrored In fact, any situation where a lextendlv command either ran partially, or was given a map that does not cover the entire physical volume, could create a false mirror and give this error: # lslv -m corrlv corrlv:N/A LP PP1 PV1 PP2 PV2 PP3 PV3 0001 0216 hdisk6 0216 hdisk7 0002 0217 hdisk6 0217 hdisk7 0003 0218 hdisk6 # lsvg -l corrvg corrvg: LV NAME TYPE LPs PPs PVs LV STATE MOUNT POINT 0516-1147 lsvg: Warning - logical volume corrlv may be partially mirrored. corrlv jfs 3 5 3 closed/stale N/A # This can occur if a mirrored logical volume is increased, but not enough partitions are available to accommodate all mirrors. However, allocp should prevent this at AIX 4.3.3. All of these partial or false mirrored conditions can 160 AIX Logical Volume Manager from A to Z: Troubleshooting and Commands be fixed by simply running a rmlvcopy against the appropriate disk (unless the inadvisable practice of having both mirrors on the same disk is used, in which case, a simple rmlvcopy should be run). The 0516-304 error may also be caused by passing an incomplete map to reducevg -df. Another cause is rmlvcopy removing some partitions from one drive, and then discovering the remaining partitions for a logical volume are off-line when no drive was specified. These can both be fixed simply by removing the remaining partitions. In the past, some LVM defects have also caused the 16 zeros symptom. Two disks having the same PVID There have been occasions when people have used dd as an unsupported method to back up a disk. This is not recommended. Sometimes this has led to people running two disks with the same PVID on a machine. This can obviously confuse the LVM. As an example, we create a volume group ddvg and then back it up with dd (no logical volumes in the volume group). We now run rmdev, cfgmgr, and lspv. # mkvg -ft2 -y ddvg hdisk6 ddvg # lspv | grep ddvg hdisk6 00017d378bb9f828 ddvg # dd if=/dev/hdisk6 bs=32768 of=/dev/hdisk7 # rmdev -dl hdisk7 hdisk7 deleted # cfgmgr -l ssar # lspv | grep ddvg hdisk7 00017d378bb9f828 hdisk6 00017d378bb9f828 # # mklv -y ddlv ddvg 1 ddlv ddvg ddvg # varyoffvg ddvg # exportvg ddvg Assume the original hdisk, hdisk6, goes off-line, and we import the volume group using the VGDA on hdisk7. We have now lost touch with our control data. If any data had been stored in ddlv it would also not be on this disk. In these kind of situations, the copy hdisk should be taken off-line, and the original hdisk should be imported. The copy hdisk’s PVID can be reset with chdev -a pv=clear hdisk6. Chapter 2. Problem determination and recovery 161 allocp and ghost maps In this section, and the section on “VGSAs”on page 170, techniques for recovering from the worst-case scenario of lost or corrupt copies of all VGDAs are shown. In this situation, we have no good copies of the partition maps to work with. The intermediate command, allocp, has predictable behavior in the sense that when it is run with a certain set of values for the following set of items, a certain logical to physical partition map will be returned: • Allocation policy and level of strictness. • Map of used/free partitions for a volume group made up of certain number of hdisks each having a certain number of physical partitions distributed among any pre-existing logical volumes in a certain manner. • Number of partitions requested for a given logical volume. For example, assume the new volume group, allocpvg, made up of one hdisk, hdisk6. This hdisk has 1075 physical partitions. When mklv asks allocp to provide it with a map for a new logical volume with the default (outer) middle allocation policy, when it requests 10 partitions, the following map should be returned: # mklv -y allocplv allocpvg 10 allocplv # lslv -m allocplv allocplv:N/A LP PP1 PV1 PP2 PV2 0001 0216 hdisk6 0002 0217 hdisk6 0003 0218 hdisk6 0004 0219 hdisk6 0005 0220 hdisk6 0006 0221 hdisk6 0007 0222 hdisk6 0008 0223 hdisk6 0009 0224 hdisk6 0010 0225 hdisk6 # PP3 PV3 If we have a record of the precise commands used and the order in which they were run since the volume group was first created, we may be able to re-create the so-called ghost maps of the logical volumes. In practice, this generally means having complete copies of the smit.script or smit.log from the time of volume group creation to the time the corruption occurs. This is not an easy procedure, and there can be no guarantees of success here. 162 AIX Logical Volume Manager from A to Z: Troubleshooting and Commands Also, note that the behavior of the allocp algorithm changed with AIX 4.2, and its behavior is not guaranteed to be identical across different levels or PTF of LVM. In a more complex example we now create a new volume group, allocpvg, using SMIT containing hdisk6 (4296 MB) and hdisk7 (4296 MB). Since these disks are large we use a PP size of 8. We then use SMIT to create allocplv1 (default allocation policy, and so on) containing 10 logical partitions. We go on to create allocplv2 with 15 logical partitions (again using all the SMIT specified defaults). Now we create allocplv3 (five partitions in size and with maximum inter-policy set.) Finally, we remove allocplv1 and create allocplv4 (standard SMIT settings and seven logical partitions in size). After these manipulations, our maps will look as follows: Chapter 2. Problem determination and recovery 163 # lsvg -M allocpvg|more allocpvg hdisk6:1-108 hdisk6:109 hdisk6:110 hdisk6:111 hdisk6:112 hdisk6:113 hdisk6:114 hdisk6:115 hdisk6:116-118 hdisk6:119 hdisk6:120 hdisk6:121 hdisk6:122-537 hdisk7:1-108 hdisk7:109 hdisk7:110 hdisk7:111 hdisk7:112 hdisk7:113 hdisk7:114 hdisk7:115 hdisk7:116 hdisk7:117 hdisk7:118 hdisk7:119 hdisk7:120 hdisk7:121 hdisk7:122 hdisk7:123 hdisk7:124 hdisk7:125 hdisk7:126-537 # allocplv4:1 allocplv4:2 allocplv4:3 allocplv4:4 allocplv4:5 allocplv4:6 allocplv4:7 allocplv3:1 allocplv3:3 allocplv3:5 allocplv2:1 allocplv2:2 allocplv2:3 allocplv2:4 allocplv2:5 allocplv2:6 allocplv2:7 allocplv2:8 allocplv2:9 allocplv2:10 allocplv2:11 allocplv2:12 allocplv2:13 allocplv2:14 allocplv2:15 allocplv3:2 allocplv3:4 We place some dummy data into our logical volumes to recover: # echo "allocplv2_data" | dd seek=1 of=/dev/allocplv2 0+1 records in. 0+1 records out. # echo "allocplv3_data" | dd seek=1 of=/dev/allocplv3 0+1 records in. 0+1 records out. # echo "allocplv4_data" | dd seek=1 of=/dev/allocplv4 0+1 records in. 0+1 records out. # We now assume our VGDAs are now destroyed. 164 AIX Logical Volume Manager from A to Z: Troubleshooting and Commands # dd if=/dev/zero count=4399 of=/dev/hdisk6 # dd if=/dev/zero count=4399 of=/dev/hdisk7 # lsvg -M allocpvg 0516-066 : Physical volume is not a volume group member. Check the physical volume name specified. # Once problem determination has been performed, and we can confirm there are indeed no good copies of the VGDA we turn, as a last resort, to the SMIT logs. # cat smit.script # # [Sep 30 1999, 16:19:33] # mkvg -f -y'allocpvg' -s'8' hdisk6 hdisk7 # # [Sep 30 1999, 16:20:20] # mklv -y'allocplv1' allocpvg 10 # # [Sep 30 1999, 16:20:42] # mklv -y'allocplv2' allocpvg 15 # # [Sep 30 1999, 16:21:13] # mklv -y'allocplv3' -e'x' allocpvg 5 # In a real-life situation, the SMIT logs will probably not be this neat and may need to be pre-processed either by hand or with a UNIX text processing tool. In this case, however, we can simply clean up the stale ODM entries for allocpvg, then chmod the smit.script so that it is executable and then run it. # varyoffvg allocpvg # exportvg allocpvg # chmod +x smit.script # ./smit.script allocpvg allocplv1 allocplv2 allocplv3 rmlv: Logical volume allocplv1 is removed. allocplv4 # Chapter 2. Problem determination and recovery 165 In this case, we can verify that our test data is recovered. # dd skip=1 if=/dev/allocplv2 | head -1 allocplv2_data # dd skip=1 if=/dev/allocplv3 | head -1 allocplv3_data # dd skip=1 if=/dev/allocplv4 | head -1 allocplv4_data # In some situations, it may be desirable to examine the internal tables allocp uses to generate its maps. This may be done by exporting the environment variable _DBGCMD_ALLOCP=1. This will produce debug output in the file /tmp/DEBUGCMD. Scraping If we cannot resurrect the ghost maps, an alternative is to scrape the surface of the disks, od -cx /dev/hdiskn, looking for LVCBs with. This can be used to indicate the byte offset of the first logical partition from the beginning of the disk. However, this is, in fact, a very inefficient way to do the search and doesn’t really give us enough information to begin finding an LP:PP map. As an alternative, consider that the offset for the first physical partition in sectors is contained within the VGDA. For a small VGDA, this will be at block 4352. For a BigVG, this is located at block 17408. This value will also change for different -d values specified with the mkvg used to create the volume group. Without discussing where we can find this by following pointers within the VGDA structure (this information is proprietary), the following alternative test can be used to check the PP1 offset for a particular number of disks in a volume group. Note This test should not be done on the actual disk being recovered, as it will place an LVCB down on the physical volume if PP1 contains data that will be corrupted. Use a spare disk and create a volume group with similar characteristics to the lost volume group. 166 AIX Logical Volume Manager from A to Z: Troubleshooting and Commands # mkvg -ft2 -y pp1vg hdisk6 pp1vg # cat map hdisk6:1 # mklv -m map -y pp1lv pp1vg 1 pp1lv # od -tc /dev/hdisk6 | sed "s/ //g" |grep AIXLVCB 10400000AIXLVCB\0\0jfs\0\0\0 ^C# bc ib=8 10400000 2228224 10400000/1000 4352 Converting octal 10400000 bytes to decimal 512 byte (octal 1000) sectors gives us 4352. For a bigVG, we can see PP1 is located in sector 17408: # mkvg -B -ft2 -y pp1bigvg hdisk8 pp1bigvg # cat bigmap hdisk8:1 # mklv -m bigmap -y pp1biglv pp1bigvg 1 pp1biglv # od -tc /dev/hdisk8 | sed "s/ //g" |grep AIXLVCB 42000000AIXLVCB\0Äjfs\0_ñ ^C# bc ib=8 42000000/1000 17408 quit # Now that we know the offset PP1 for a given size of VGDA, we can grep along the disk in PPSIZE chunks and find where our logical volumes started. We can also obtain the logical size from the LVCB (a four byte integer at offset 208 within the LVCB). If we make the assumption that we are using (the default) minimum inter-policy, and our LV is contiguous (less likely, but this is another reason, apart from performance, that you should run reorgvg), we can assume a map and lay down a contiguous logical volume. Obviously, this will not work every time. Again, we are in a last resort situation. We are also in trouble if our logical volume spans multiple disks and also if an LVM level bad block relocation had occurred. The script in Appendix E.8, “scraper” on page 398 performs this simple laying down of maps. Chapter 2. Problem determination and recovery 167 # mklv -y scrapelv scrapevg 5 scrapelv # mklv -t jfslog -y scrapelog scrapevg 1 scrapelog # crfs -d /dev/scrapelv -a logname=/dev/scrapelog -m /scrapefs -v jfs Based on the parameters chosen, the new /scrapefs JFS file system is limited to a maximum size of 134217728 (512 byte blocks) New File System size is 40960 # echo "y"|logform /dev/scrapelog # mount /scrapefs # echo data > /scrapefs/data # ls -l /scrapefs total 16 -rw-r--r-- 1 root sys 5 Oct 01 13:58 data drwxrwx--- 2 root system 512 Oct 01 13:56 lost+found # umount /scrapefs # rmlv -f scrapelog scrapelv rmlv: Logical volume scrapelog is removed. rmlv: Logical volume scrapelv is removed. # Here, rmlv is used, but the procedure would be the same if we had destroyed the whole VGDA (we would also have to fix /etc/filesystems). 168 AIX Logical Volume Manager from A to Z: Troubleshooting and Commands # scraper hdisk6 scrapevg AIX LVCB found at PP1 (offset 4352) Type jfs LVname pp1lv NUMLPS 1 Attempt restore (y to do) ?n AIX LVCB found at PP200 (offset 1634560) Type jfslog LVname toastlog NUMLPS 1 Attempt restore (y to do) ?n AIX LVCB found at PP210 (offset 1716480) Type jfs LVname toast NUMLPS 7 Attempt restore (y to do) ?n AIX LVCB found at PP216 (offset 1765632) Type jfs LVname scrapelv NUMLPS 5 Attempt restore (y to do) ?y scrapelv AIX LVCB found at PP221 (offset 1806592) Type jfslog LVname scrapelog NUMLPS 1 Attempt restore (y to do) ?y scrapelog # Note that we see the remnant LVCBs of other logical volumes we are not interested in. Since the script has no real error checking, it may also ask if you wish to restore logical volumes that already exist (although a mklv on these logical volumes will, of course, fail). # mount /scrapefs # ls -l /scrapefs total 16 -rw-r--r-- 1 root drwxrwx--- 2 root # sys system 5 Oct 01 13:58 data 512 Oct 01 13:56 lost+found Laying down contiguous logical volumes is not the last word in data recovery when only the raw data on disks is available. Depending on how well we understand our data, it may be possible to start with the first logical partition and then consider remaining logical partitions as candidate logical partitions. Each candidate logical partition may be joined onto the logical volume with a mapped extendlv and data integrity checks performed. If more data blocks are checked successfully, we know we have a good candidate and permanently Chapter 2. Problem determination and recovery 169 extend the logical volume. Otherwise, we back out our extendvg with lreducelv and try another candidate partition. Once we have confirmed the candidate is correct, we begin searching the remaining physical partitions for a candidate for the next logical partition position. Again, this depends on understanding data well enough to perform the integrity checks, and this technique is not possible for some types of data organization. In the case of JFS, this cannot be accomplished with fsck since fsck treats the file system as atomic. All partitions must be present before integrity checks are performed. Thus, we cannot tell how many allocation groups or inodes a fsck has advanced or failed to advance for each candidate. The data organization issue we face here is standard to BSD file system implementations. JFS does, however, allow mounting a file system containing one LP. While many files will not be accessible, you may be able to recover at least some data. A final suggestion is that if a disk has been in a volume group in the past, and then reducevg was run, a stale copy of the VGDA will still be on that disk, as reducevg only clears the LVM information record (and MWCC areas). However, given the complexity of rewalking techniques, it is strongly recommended that backups are used instead. This will provide much faster availability of data and also guarantees integrity when the backup is good. 2.7.2.1 VGSAs The main problem area with mirrored logical volumes (whether mirrored explicitly by the user or internally by LVM commands such as migratepv which are only noticeable when they fail) is the case of false or partial mirrors. These were discussed in “Sixteen zeros errors and other corrupt PVIDs in the VGDA”on page 159. hdisks with greater than 1016 physical partitions and factor size 1 The other problem worth mentioning is that of physical volumes containing more than 1016 physical partitions (or the equivalent multiple if factor size is used), as the default VGSA on each disk can only track 1016 physical partitions. Since AIX Version 4.2, the LVM commands were changed to prevent the creation of volume groups with hdisks exceeding this limit. This will only be a problem if the system is running below this level, or there is a volume group that was created at an earlier level of AIX. If you have a volume group in this state (since the VGSA is used to track the staleness of mirrors), there may be a false and nonsensical report that a 170 AIX Logical Volume Manager from A to Z: Troubleshooting and Commands non-mirrored logical volume is stale. Alternatively, there may be a false indication that a mirror copy has gone stale. As well as providing a confusing view of the state of the LVM from the high-level commands, this symptom may cause some commands to fail. migratepv may fail because migratepv briefly uses a form of mirroring to move a logical volume from one disk to another. If the target logical partition is incorrectly considered stale, then migratepv cannot remove the source logical partition; so, the command will fail in the middle of migration. Another command that performs this temporary mirroring is reorgvg; hence, it may also be affected (you can see this check in the get_stales() function). If a disk is in this state, it can be converted to a working state by running chvg -t followed by an appropriate factor size for the largest physical volume in the volume group. Stale partition errors As the reader should know by now, situations such as: # lsvg -M stalevg stalevg hdisk8:1-108 hdisk8:109 hdisk8:110 hdisk8:111 hdisk8:112-537 hdisk9:1-108 hdisk9:109 hdisk9:110 hdisk9:111 hdisk9:112-537 # stalelv:1:1 stalelv:2:1 stalelv:3:1 stalelv:1:2 stalelv:2:2 stalelv:3:2 stale stale stale where the mirror on hdisk9 of stalelv is reported as stale may not be true corruption problems. All that is indicated is that no synchronization action has been performed yet (for instance, a mklvcopy has been run without the -k flag). To synchronize the partitions, all that is necessary is to run a syncvg. While the remedy is simple, it is useful to consider what is happening under the covers when syncvg runs. To this end, a trclvm syncvg is run. Chapter 2. Problem determination and recovery 171 # trclvm -l stalelv #! /bin/ksh # IBM_PROLOG_BEGIN_TAG # This is an automatically generated prolog. ... The reader will be pleased to know that this command turns out to be a very simple script. Once again, we omit the prolog and description, details of external functions called, and so forth. syncvg may be run in three ways: Targeting a volume group, a logical volume, or a physical volume depending on whether the -v, -l, or -p flags are used. Each of these will call a different internal korn shell function to do the work - syncvolgrp(), synclogvol(), or syncphyvol(). These functions are passed to $namelist, a list of LVM objects to synchronize which is then process either lresyncpv or lresynclv respectively. We omit the first pass of the shell reading the functions in and proceed directly to main(). Since we are running with -l, we will only see synclogvol() executing. There is also a cleanup() function read in here. ... ############################## main ############################################ # Synchronizes all stale partitions within either a volume group 'vgname', # logical volume 'lvdescript', or physical volume 'pvname'. # Input: # Command line options and arguments: # syncvg [-i] [-f] -v | -l | -p Name... # Output: # Error Messages (Standard error) # PATH=/usr/bin:/etc:/usr/sbin:/usr/ucb:/usr/bin/X11:/sbin:$PATH + PATH=/usr/bin:/etc:/usr/sbin:/usr/ucb:/usr/bin/X11:/sbin:/usr/bin:/etc:/usr/sbin:/usr/ucb:/ home/dug/bin:/u sr/bin/X11:/sbin:.:/home/dug:/home/dug/scripts:. hash getlvodm lqueryvg lresynclv lresyncpv cat + alias -t - getlvodm lqueryvg lresynclv lresyncpv cat EXIT_CODE=1 #Initialize exit code. This will be reset to 0 before + EXIT_CODE=1 #exiting only if syncvg completes successfully. # # Trap on exit/interrupt/break to clean up # trap 'cleanup' 0 1 2 15 + trap cleanup 0 1 2 15 We have seen the above startup code before. This is standard. We now perform the usual parsing of flags and of command line input. 172 AIX Logical Volume Manager from A to Z: Troubleshooting and Commands # # Parse command line options # PROG=$0 #set up program name for error messages + PROG=/tmp/lvmtrace16090/syncvg set -- `getopt P:Hfivlp $*` + getopt P:Hfivlp -l stalelv + set -- -l -- stalelv if [ $? != 0 ] # Determine if there is a syntax error. then dspmsg -s 1 cmdlvm.cat 1145 "`lvmmsg 1145`\n" $PROG >& 2 exit fi + [ 0 != 0 ] FFLAG= ;IFLAG= ; VFLAG= ; LFLAG= ; PFLAG= ; CASE= ; PFLAG= ; HFLAG= + FFLAG= + IFLAG= + VFLAG= + LFLAG= + PFLAG= + CASE= + PFLAG= + HFLAG= All flags are reset. We now fill the flag variables. Chapter 2. Problem determination and recovery 173 while [ $1 != -- ] # While there is a command line option do case $1 in #specifies the names are read from standard in -i) IFLAG='-i'; shift;; #synchronizes even the non-stale partitions -f) FFLAG='-f'; shift;; #synchronizes the indicated volume group -v) VFLAG='-v'; shift; CASE=y;; #synchronizes the indicated logical volume -l) LFLAG='-l'; shift; CASE=y;; #synchronizes the indicated physical volume -p) PFLAG='-p'; shift; CASE=y;; # NUMBER of -P) if [ "$2" -lt 1 -o "$2" -gt 32 ] then dspmsg -s 1 cmdlvm.cat 1148 "`lvmmsg 1148`\n" $PROG >& 2 dspmsg -s 1 cmdlvm.cat 1145 "`lvmmsg 1145`\n" $PROG >& 2 exit fi PARALLELFLAG="-P $2"; shift; shift;; # HOLD passive node writes -H) HFLAG="-H"; shift;; esac done #end - while there is a command line option + [ -l != -- ] + LFLAG=-l + shift + CASE=y + [ -- != -- ] We have come through flag parsing and now check for incompatibilities among the different flags we have set. This checking is also a major component of other scripts, such as mklv. 174 AIX Logical Volume Manager from A to Z: Troubleshooting and Commands if [ -z "$CASE" ] then dspmsg -s 1 cmdlvm.cat 938 "`lvmmsg 938`\n" $PROG >& 2 dspmsg -s 1 cmdlvm.cat 1145 "`lvmmsg 1145`\n" $PROG >& 2 exit fi + [ -z y ] if [ -n "$VFLAG" -a \( -n then dspmsg -s 1 cmdlvm.cat dspmsg -s 1 cmdlvm.cat exit fi + [ -n -a ( -n -l -o -n if [ -n "$LFLAG" -a \( -n then dspmsg -s 1 cmdlvm.cat dspmsg -s 1 cmdlvm.cat exit fi + [ -n -l -a ( -n -o -n if [ -n "$PFLAG" -a \( -n then dspmsg -s 1 cmdlvm.cat dspmsg -s 1 cmdlvm.cat exit fi + [ -n -a ( -n -l -o -n "$LFLAG" -o -n "$PFLAG" \) ] 937 "`lvmmsg 937`\n" $PROG >& 2 1145 "`lvmmsg 1145`\n" $PROG >& 2 ) ] "$VFLAG" -o -n "$PFLAG" \) ] 937 "`lvmmsg 937`\n" $PROG >& 2 1145 "`lvmmsg 1145`\n" $PROG >& 2 ) ] "$LFLAG" -o -n "$VFLAG" \) ] 937 "`lvmmsg 937`\n" $PROG >& 2 1145 "`lvmmsg 1145`\n" $PROG >& 2 ) ] if [ \( -n "$HFLAG" -o -n "$PARALLELFLAG" \) -a -n "$PFLAG" ] then dspmsg -s 1 cmdlvm.cat 1149 "`lvmmsg 1149`\n" $PROG >& 2 fi + [ ( -n -o -n ) -a -n ] All the flags were compatible. Here we only had -l; so, we now parse the command line arguments. # # Parse command line arguments # #if -i option then read values in from standard in and save in name list if [ -n "$IFLAG" ] then while read LINE do namelist="$namelist $LINE " done Chapter 2. Problem determination and recovery 175 This allows us to pipe in arguments to syncvg with traditional UNIX semantics. We are now building the $namelist, mentioned at the start of this commentary, on the script. #else get arguments from command line and save in namelist else shift # skip past "--" from getopt if [ -n "$1" ] then namelist=$* else dspmsg -s 1 cmdlvm.cat 618 "`lvmmsg 618`\n" $PROG >& 2 dspmsg -s 1 cmdlvm.cat 1145 "`lvmmsg 1145`\n" $PROG >& 2 exit fi fi + [ -n ] + shift + [ -n stalelv ] + namelist=stalelv We have build our $namelist containing the single argument stalelv. The next section is a switch to the appropriate synchronization function for the type of LVM object we are targeting. if [ -n "$VFLAG" ] then syncvolgrp #if sycronizing volume group(s) elif [ -n "$LFLAG" ] then synclogvol #if syncronizing logical volume(s) #syncronize the volume group(s) #syncronize the logical volume(s) else syncphyvol #then sycronize the physical volume(s) fi + [ -n ] + [ -n -l ] + synclogvol We switch to the synclogvol() function. The next few lines gather the information to pass to the low level action command. $CONC_STATE and $CONC_SYNC_LOCK are used to manage concurrent volume groups. We also see them as checkpoints in cleanup(). 176 AIX Logical Volume Manager from A to Z: Troubleshooting and Commands + CONC_SYNC_LOCK=0 + + getlvodm -l stalelv LVID=00017d379f0b1047.1 + [ 0 != 0 ] + + getlvodm -b 00017d379f0b1047.1 TMP_VGNAME=stalevg + + getlvodm -v stalevg VGID=00017d379f0b1047 + + lqueryvg -g 00017d379f0b1047 -C CONC_STATE=0 + [ 0 -eq 1 ] Now that information is gathered (here, we really just wanted an LVID), we call the low level lresynclv to act. We then check for success and perform tidying-up as we saw before in exportvg and redefinevg. + lresynclv -l 00017d379f0b1047.1 + [ 0 != 0 ] + [ 0 -eq 1 -a 0 -eq 1 ] #check exit_code to see if any unsuccessful attempts were made and if not #set exit_code to successful if [ "$EXIT_CODE" != 2 ] then EXIT_CODE=0 #Reset exit code to indicate successful completion of syncvg fi + [ 1 != 2 ] + EXIT_CODE=0 exit #trap will handle cleanup. + exit + cleanup + trap 0 1 2 15 + rm -f /tmp/pvids17582 /tmp/pvinfo17582 + [ 0 -eq 1 -a 0 -eq 1 ] + exit 0 # The syncvg is now complete. Problems removing a mirrored copy The final issue with mirroring discussed here is that attempts to remove mirrored copies of a logical volume may sometimes fail with the error message number 0516-912, particularly if a systems crash occurred while a first attempt was being made. We have already seen a procedure to target specific areas of a logical volume with lquerylv -r, then lreducelv, followed by ldeletelv. This is relevant here: Chapter 2. Problem determination and recovery 177 # LVID=`lqueryvg -Lp hdisk8 | grep stalelv | cut -c 1-18` # lquerylv -L $LVID -r | grep `getlvodm -p hdisk8` > stalemap # lreducelv -l $LVID -s `wc -l stalemap` ./stalemap # 2.7.2.2 LVCBs We have already seen an example of rebuilding LVCBs with chfs and putlvcb in 2.5, “Corruption example 2: PVID corruption” on page 75. Remember that whenever we run a mklv when restoring from maps, the LVM will repopulate the LVCB with the default values. Historically, the main cause of LVCB corruption has generally been databases which are writing to raw logical volume, being unaware that the first 512 bytes are reserved for the logical volume control block. Obviously, if a database has done this, it is very unwise to simply overwrite a good LVCB into the beginning of the logical volume. It is very likely this will cause the database to become corrupt. This issue should be taken up with the database vendor. Fortunately, none of the latest versions of the popular databases have this problem anymore. Other non-AIX code can also do this when working with raw logical volumes if its programmers are unaware of this issue. Since the LVCB holds information, such as the creation date of the logical volume, information about mirrored copies, and possible mount points in a journaled file system, if its overwritten, these values become undefined. This will not be the case if we are using a bigVG since we run off the LVCBs in VGDA. The following discussion mainly applies to non-big VGs. Certain LVM commands are required to update the LVCB as part of completeness of algorithms in LVM. The old LVCB area is first read and analyzed to see if it is a valid LVCB. If the information is verified as valid LVCB information, then LVM writes an updated LVCB. If the information is not valid, then LVM does not perform an update (due to the user data corruption possibility). Instead, LVM displays a warning, such as: 0516-622 synclvodm: Warning, cannot write lv control block data. It is important to realize that loss of an LVCB does not prevent manipulation of a logical volume. Once an LVCB is lost, it is still possible to perform the following actions on the logical volume: •extendlv •mklvcopy •rmlv 178 AIX Logical Volume Manager from A to Z: Troubleshooting and Commands • crfs -d (note this will destroy any information within the LVCB) The problem with logical volumes with corrupted LVCBs is that they cannot be completely and reliably imported. We saw in 2.3, “Corruption example 1: Simple ODM corruption” on page 66, that file system log devices and mount points were lost when we exported, imported, and ran a mklv. The mklv caused us to lose our LVCB information, and when an LVCB is corrupt, we are in the same situation. If the LVCB is deleted, importvg will still define the logical volume to the system that is accessing this volume group, and the user can still access the raw logical volume. However, any JFS information is lost until the LVCB is re-created. We may also need to create a mount point manually if we are running importvg on a new system. On some old versions of LVM, if the LVCB was damaged, and the volume group was taken to a new system and imported, LVM could become confused about the number of copies existing, and it was necessary to rmlvcopy and mklvcopy to re-synchronize the ODM. This is not the case with the current implementation, as the code is smart enough to realize the number of copies from the partition maps inside the VGDA. A corrupted LVCB will not cause problems for syncvg. If the integrity of the data that has overwritten the LVCB is not an issue, the following commands will rebuild the LVCB from the ODM: echo "AIX LVCB\0" | dd of=/dev/hd# bs=1 count=9 updatelv lv_name vg_name The updatelv gets information from the ODM to re-create the LVCB. This is inadvisable unless you have identified what data is in the LVCB and taken the appropriate steps to ensure you have another copy of it somewhere (these steps will depend on what caused the corruption). 2.7.3 JFS problems Some problems experienced with JFS are mentioned in the following. 2.7.3.1 Super block corruption Attempting to mount or fsck file systems with a corrupt superblock may generate messages, as such: fsck: Not an AIX3 file system fsck: Not an AIXV3 file system fsck: Not an AIX4 file system Chapter 2. Problem determination and recovery 179 fsck: Not an AIXV4 file system fsck: Not a recognized file system type mount: invalid argument If this occurs, sometimes we can recover the superblock from a secondary backup copy stored further on down the file system. To copy the backup superblock over the primary superblock, run fsck -p /dev/lv00. On versions of AIX before version 4 this is done by running dd count=1 bs=4k skip=31 seek=1 if=/dev/lv00 of=/dev/lv00. Rechecking the file system is then done with fsck /dev/lv00. If this procedure fails, the file system will have to be re-created and user data restored from backup. 2.7.3.2 File system corruption If the file system itself is corrupt, this can sometimes be fixed by running fsck -y. Note that you cannot reliably fsck a mounted file system. To run fsck on the AIX system file systems in rootvg will, therefore, require booting into maintenance mode and importing the root volume group without mounting file systems from the maintenance menus. 2.7.3.3 Corrupt log device We have already seen the use of the logform command, for example, in 2.5, “Corruption example 2: PVID corruption” on page 75. This command should only be run when the log device is known to be corrupt, and the file system cannot be mounted. If it is run on the log of a mounted file system, undefined behavior may result. 2.7.3.4 File system cannot be unmounted When a file system cannot be unmounted, it indicates that some process is using the file system. The fuser -cx command can be used to detect this. The -x flag is an enhancement that shows executable and loadable objects in addition to the standard fuser output. For this functionality to be present in pre-AIX4.3.3, the following APARs should be installed: 180 AIX Level APAR 4.3.2 IX78523 AIX Logical Volume Manager from A to Z: Troubleshooting and Commands AIX Level APAR 4.2.1 IX78941 4.1.5 IX78943 2.7.4 Hardware failures Hardware failures are a common cause of LVM problems. In the case of a disk failing completely obviously the data on it cannot be recovered. The question becomes how to clean up references to the disk from the ODM and the remaining VGDAs. The alternative situation is when a disk is failing but not yet dead, and the issue is what are the correct sequence of steps to perform to replace the failing disk. These procedures are considered in the AIX Version 4.3 System Management Guide: Operating System and Devices, SC23-4126, in the section titled “Recovering from Disk Drive Problems”. They are also discussed in Chapter 1, “LVM commands” on page 1. From the point of view of software problem determination, the investigator is usually faced with the problem of how to clear up the ODM and possibly the VGDAs after these procedures have been incorrectly performed. This can be treated as a normal VGDA or ODM corruption situation. The hardware issue that deserves special attention because of its tendency to generate long and hard to debug problems is when a disk has had a “stroke”: The disk still gives the appearance of working, but recurrent LVM problems or data corruption occur. This a comparatively rare situation but it is worth mentioning. If a disk does not certify when diagnostics are run. then this should be suspected. and hardware support should become involved. The procedure to run diagnostics on a disk is as follows (the diagnostic menus are entered with the diag command): Chapter 2. Problem determination and recovery 181 FUNCTION SELECTION 801002 Move cursor to selection, then press Enter. Diagnostic Routines This selection will test the machine hardware. Wrap plugs and other advanced functions will not be used. Advanced Diagnostics Routines This selection will test the machine hardware. Wrap plugs and other advanced functions will be used. Task Selection(Diagnostics, Advanced Diagnostics, Service Aids, etc.) This selection will list the tasks supported by these procedures. Once a task is selected, a resource menu may be presented showing all resources supported by the task. Resource Selection This selection will list the resources in the system that are supported by these procedures. Once a resource is selected, a task menu will be presented showing all tasks that can be run on the resource(s). F1=Help Esc+0=Exit F3=Previous Menu Move the cursor to the boxed area, Task Selection, and press return. TASKS SELECTION LIST 801004 From the list below, select a task by moving the cursor to the task and pressing 'Enter'. To list the resources for the task highlighted, press 'List'. [TOP] Run Diagnostics Run Error Log Analysis Run Exercisers Display or Change Diagnostic Run Time Options Add Resource to Resource List Backup and Restore Media Certify Media Change Hardware Vital Product Data Configure ISA Adapter Configure Reboot Policy Configure Remote Maintenance Policy [MORE...30] F1=Help 182 F4=List AIX Logical Volume Manager from A to Z: Troubleshooting and Commands Esc+0=Exit Select certify media (SSA disk certification is performed from the SSA service aids further down this menu). RESOURCE SELECTION LIST 801006 From the list below, select any number of resources by moving the cursor to the resource and pressing 'Enter'. To cancel the selection, press 'Enter' again. To list the supported tasks for the resource highlighted, press 'List'. Once all selections have been made, press 'Commit'. To exit without selecting a resource, press the 'Exit' key. All Resources This selection will select all the resources currently displayed. hdisk3 30-58-00-8,0 16 Bit SCSI Disk Drive (9100 MB) hdisk4 30-58-00-9,0 16 Bit LVD SCSI Disk Drive (4500 MB) hdisk5 30-58-00-10,0 16 Bit LVD SCSI Disk Drive (4500 MB) fd0 01-D1-00-00 Diskette Drive hdisk0 10-60-00-8,0 16 Bit SCSI Disk Drive (9100 MB) hdisk1 10-60-00-9,0 16 Bit LVD SCSI Disk Drive (4500 MB) hdisk2 10-60-00-10,0 16 Bit LVD SCSI Disk Drive (4500 MB) F1=Help F4=List F7=Commit Select the disk(s) to certify by moving the cursor to them and pressing return. They will be marked with a + sign. When all disks are selected, press F7 (or escape-7 if the terminal does not support function keys). You cannot certify a disk that is in use, and a disk will be in PVMISSING status while certification is being run. Chapter 2. Problem determination and recovery 183 CERTIFY MEDIA TASK 802584 Device: hdisk4 in location 30-58-00-9,0 The certify operation is in progress. Please stand by. 8% completed. Disk Drive Capacity................... Data Errors Recovered................. Data Errors Not Recovered............. Equipment Check Errors Recovered...... Equipment Check Errors Not Recovered.. F3=Cancel 4512 MB 0 0 0 0 Esc+0=Exit If the disk certifies correctly, you will see the following: CERTIFY MEDIA TASK 802548 hdisk4 in location 30-58-00-9,0. The certify operation has completed successfully. Disk Drive Capacity................... Data Errors Recovered................. Data Errors Not Recovered............. Equipment Check Errors Recovered...... Equipment Check Errors Not Recovered.. 4512 MB 0 0 0 0 To continue, press Enter. F3=Cancel 184 Esc+0=Exit AIX Logical Volume Manager from A to Z: Troubleshooting and Commands Enter If the certify fails, hardware problem determination should now be performed. Sometimes people get confused about the difference between certify and format. Certify will check the disk; format will erase all information from the disk. This is only way to be certain that confidential information is erased from a disk. You cannot dd over the raw disk because some information may still be on the disk as relocated-over bad blocks. Note that if you format over the disk, this also means you will lose the bad block relocation tables. It is also important to realize that certify is an attempt to fail the disk. This attempt may not succeed. You can only use this to prove that a disk is bad, not that a disk is good. If more extensive testing of a disk is required, a /usr/lib/ras/rdwrtest/rdwrtest should be run. Note this will permanently erase any information in the logical volume being tested. The accompanying file README.rdwrtest should be read carefully before using this tool. This tool first shipped with AIX4.3.2. Below AIX4.3.2, the following APARs should be installed: AIX Level APAR 4.2.1 IX71128 4.1.5 IX70680 Another indication of this situation is if many DISK_ERR or SCSI_ERR are logged in the error report. An example of using the error report was considered in 2.6.1, “Checking the errorlog” on page 88. 2.7.5 Setting up notification of LVM_MISSPVADDED errors It is possible to configure the error logging subsystem to automatically notify the system administrator of LVM_MISSPVADDED conditions. To do this, we first back up the errnotify ODM class: cp /etc/objrepos/errnotify /etc/objrepos/errnotify.bak Next, we create a file, /tmp/pvmiss.add, containing the following ODM object stanza: Chapter 2. Problem determination and recovery 185 errnotify: en_pid = 0 en_name = "LVM_MISSPVADDED" en_persistenceflg = 1 en_label = "LVM_MISSPVADDED" en_crcid = 0 en_class = "S" en_type = "UNKN" en_alertflg = "" en_resource = "LIBLVM" en_rtype = "NONE" en_rclass = "NONE" en_method = "/usr/lib/ras/pvmiss.notify $1 $2 $3 $4 $5 $6 $7 $8 $9" The parameters of en_method will be filled in by the error notification daemon. A script to be run when the error occurs is also needed: /usr/lib/ras/pvmiss.notify: #!/bin/ksh exec 3>/dev/console print -u3 "\007" print -u3 - "-------------------------------------------------------------" print -u3 "WARNING! WARNING! WARNING! WARNING! WARNING! WARNING! WARNING!" print -u3 "" print -u3 "Desc: PHYSICAL VOLUME DECLARED MISSING. PLEASE SEE ERRPT." print -u3 "" print -u3 "Error Label: $9" print -u3 "Sequence number: $1" print -u3 "Error ID: $2" print -u3 "Error Class: $3" print -u3 "Error Type: $4" print -u3 "Resource Name: $6" print -u3 "Resource Type: $7" print -u3 "Resource Class: $8" print -u3 - "-------------------------------------------------------------" print -u3 "\007" mail -s "PHYSICAL VOLUME DECLARED MISSING" root <<-EOF ----------------------------------------------------------------------WARNING! WARNING! WARNING! WARNING! WARNING! WARNING! WARNING! WARNING! Desc: PHYSICAL VOLUME DECLARED MISSING. PLEASE SEE ERRPT. Error Label: $9 Sequence number: $1 Error ID: $2 Error Class: $3 Error Type: $4 Resource Name: $6 Resource Type: $7 Resource Class: $8 ----------------------------------------------------------------------EOF 186 AIX Logical Volume Manager from A to Z: Troubleshooting and Commands The following commands should be run to activate the error notification: chmod 755 /usr/lib/ras/pvmiss.notify odmadd /tmp/pvmiss.add Note that SSA provides its own tools, such as ssa_ela and ssa_healthcheck, to notify the administrator of problems. 2.8 Special considerations for rootvg The following section discusses special considerations involved when working on a rootvg volume group. 2.8.1 rootvg problem determination in maintenance mode If a machine will not boot, and an LVM problem is suspected, the machine can be booted into maintenance mood, and normal problem determination techniques, as described throughout this chapter, can be pursued. The procedure for booting a machine into maintenance is found in the relevant hardware documentation for that model type. However, if file systems are not mounted when a maintenance shell is started, some LVM commands will not be available unless the /dev/hd2 logical volume is mounted under /mnt, and the required commands copied into /usr/sbin. This boot into maintenance is also required if a task that cannot be performed on an open logical volume is desired, and that logical volume is a system logical volume in rootvg. For instance, changing the MWCC value of a logical volume is not possible while that logical volume is mounted. Once the system is booted into maintenance mode, lchangelv is not available in the maintenance mode /dev/ram0 file system. /dev/hd2 must be mounted, and the lchangelv binary copied over to /usr/sbin. We can obtain the appropriate LVID by running lqueryvg (this is in /dev/ram0 anyway) and then run lchangelv -l <LVID> -w <value>. In this command, value is 1 to turn MWCC on, or 2 to turn MWCC off. 2.8.2 Reducing the size of hd6 A common problem with rootvg is how to reduce the size of the paging space of hd6. The following procedure is also interesting for its manipulation of the Chapter 2. Problem determination and recovery 187 system dump device. This should not be done with a /usr client, diskless client, or dataless client. First, we check which existing paging spaces are in rootvg: This can be done by running lsvg -p rootvg. If hd6 is the only paging space in rootvg, then it will be necessary to create an alternate paging space with mkps -s <number> -a rootvg, where number is an appropriate value for paging space size for this system. lsps -p rootvg is then run again to get the name of the new paging space. hd6 is now deactivated for the next reboot with chps -n hd6. It is now very important to change the default paging space used by the /sbin/rc.boot script. To do this, we carefully alter the line swapon /dev/hd6 to swapon /dev/pagingnn, where the new paging space is either the new paging space created with mkps or another pre-existing paging space. This will allow the last phase of the boot process to complete. To make sure the earlier phases of boot run successfully as well, we need to re-create the boot logical volume with the new copy of rc.boot. We check which hdisk the boot logical volume is on with lslv -m hd5 and run bosboot -ad /dev/hdiskn. A reboot is necessary to deactivate hd6. After doing this, if either the primary or secondary dump device point to hd6 (this can be checked with sysdumpdev -l), then that pointer should be reset by running sysdumpdev -P -p /dev/sysdumpnull. It is now possible to delete and re-create hd6 (it is advisable to re-create a boot logical volume of the same name, as many parts of AIX have this hardcoded). We can simply run rmlv hd6 followed by mklv -y hd6 -t paging rootvg <desired size in LPs>. We should now change the swapon line in /sbin/rc.boot back to swapon /dev/hd6. We should then check if hd6 will be automatically swapped on at boot time with lsps -a. If there is a n in the auto column, we must run chps -a y hd6. Next, we rerun the bosboot. If we created a temporary paging space, it should now be turned off with chps -n and rebooted. It can then be deleted with rmlv. The final piece of tidying-up is to reset the dump device pointer with sysdumpdev -P -p /dev/hd6 (assuming we altered the primary dump device). 188 AIX Logical Volume Manager from A to Z: Troubleshooting and Commands Chapter 3. Replacing a drive in a mirrored configuration This chapter describes how to replace a failing hard drive in a mirrored configuration. Mirroring is used to increase the data availability, but you should always have a backup ready just in case something really wrong happens. In a non-mirrored configuration, if a hard drive dies, your only solution is pretty much the backup. In a mirrored configuration, this failure should be transparent to users, and you should be able to replace the disk without loosing any data. Based on your version of AIX, this procedure can be quite simple with AIX Version 4.3.3 and the replacepv command, or more complex with a sequence of commands in earlier versions of AIX. 3.1 Replace a failed physical volume This first section describes how to replace a failing disk in AIX Version 4.3.2 and lower. Assume that we have a system, with one physical volume (hdiskn), which is part of a volume group (asgard_vg) and contains mirrored copies of logical volumes as well as parts of un-mirrored logical volumes. 3.1.1 Step 1 We will remove any copies of logical volumes that reside on the failed physical volume. For example, we have a logical volume called mirrorlv, which had two copies, one on hdiskn and one on hdiskm. Therefore, the new maximum number of logical partition copies is one: rmlvcopy mirrorlv 1 hdiskn or use the following: © Copyright IBM Corp. 2000 189 smit rmlvcopy Remove Copies from a Logical Volume Type or select values in entry fields. Press Enter AFTER making all desired changes. * LOGICAL VOLUME name * NEW maximum number of logical partition copies PHYSICAL VOLUME names F1=Help Esc+5=Reset F9=Shell F2=Refresh F6=Command F10=Exit F3=Cancel F7=Edit Enter=Do [Entry Fields] mirrorlv 1 [hdiskn] F4=List F8=Image Repeat step 1 for every logical volume that had copies on hdiskn. 3.1.2 Step 2 We will now remove any (un-mirrored) logical volumes that used partitions from the failed disk (if any existed). For example, we will assume that we have a logical volume dudlv that was not mirrored and used partitions on hdiskn. rmlv -f dudlv or smit rmlv Remove a Logical Volume Type or select values in entry fields. Press Enter AFTER making all desired changes. [Entry Fields] [dudlv] LOGICAL VOLUME name F1=Help Esc+5=Reset F9=Shell F2=Refresh F6=Command F10=Exit F3=Cancel F7=Edit Enter=Do Repeat step 2 for each non-mirrored logical volume. 190 AIX Logical Volume Manager from A to Z: Troubleshooting and Commands F4=List F8=Image 3.1.3 Step 3 We can remove the failed disk from the volume group. reducevg asgard_vg hdiskn or refer to: 1.1.4, “Remove a physical volume from a volume group” on page 8 3.1.4 Step 4 Now remove the definition of the failed physical volume from the ODM. rmdev -l hdiskn -d or refer to: smit rmvdsk1 Remove a Disk Type or select values in entry fields. Press Enter AFTER making all desired changes. [Entry Fields] hdiskn no DISK Name KEEP definition in database? F1=Help Esc+5=Reset F9=Shell F2=Refresh F6=Command F10=Exit F3=Cancel F7=Edit Enter=Do F4=List F8=Image 3.1.5 Step 5 Shut down the system, remove the failed physical volume, and add the new disk in the same location. After the physical volume has been replaced, reboot the machine. If the failed physical volume is "hot swappable", the system doesn’t need to be shut down. If the failed physical volume is part of a SSA system, then there are special commands to handle the SSA disk. If the physical volume was "hot swappable", run: cfgmgr Chapter 3. Replacing a drive in a mirrored configuration 191 to bring the new disk into the configuration database, and then: lspv to confirm that there is a new hdiskn. Because we deleted the old hdiskn from the configuration database, the name hdiskn is now available, and it will be reassigned to the new disk. If another disk with a lower hdisk number had been previously removed, then this number will be assigned to the new disk. This can be got around by creating a dummy disk on the lower number. For example: mkdev -d -c disk -s ssar -p ssar -t hdisk -w 11111111 will create a dummy disk to fill the vacant hdisk number. 3.1.6 Step 6 Now, add the new hdisk2 to the volume group (asgard_vg) extendvg asgard_vg hdiskn or refer to: 1.1.7, “Add physical volume to an existing volume group” on page 12 3.1.7 Step 7 Add the mirror copies back for each logical volume that originally used physical partitions on the failed physical volume. For example, we had logical volume mirrorlv, which used to have two copies, one was on hdiskn mklvcopy mirrorlv 2 hdiskn or refer to: 1.2.5, “Add a mirrored copy to a logical volume” on page 29 Repeat step 7 for each mirrored logical volume. Note To retain the original placement, use map files when creating the new mirror or add the logical volumes onto the replacement physical volume in the order in which they were originally created. This way the allocp logic will ensure that the same physical partitions are used. 192 AIX Logical Volume Manager from A to Z: Troubleshooting and Commands 3.1.8 Step 8 Re-create any unmirrored logical volumes and restore the data from backup. 3.1.9 Step 9 Re-synchronize the mirror copies: syncvg -p hdiskn If you are running AIX Version 4.3.3 or above, you may want to take advantage of the syncvg -P NumP option, where NumP is the number of physical partitions to synchronize in parallel. 3.2 Using the replacepv command Using the replacepv command is a much simpler option. The original definition of the failed disk is left, and the physical volume itself is replaced. 3.2.1 Description of the test environment In our test environment, we have used an F50 machine with five disks. Here is the position and the name of these disks: $ lspv hdisk0 0004163128f3de5a hdisk1 000416314bd724bc hdisk2 0004163192b1d7f5 hdisk3 000416314bd749f8 hdisk4 000416314bdada38 $ lsdev -Ccdisk hdisk0 Available 10-60-00-8,0 16 hdisk1 Available 10-60-00-9,0 16 hdisk2 Available 10-60-00-10,0 16 hdisk3 Available 30-58-00-8,0 16 hdisk4 Available 30-58-00-9,0 16 rootvg None None None None Bit Bit Bit Bit Bit SCSI Disk Drive LVD SCSI Disk Drive LVD SCSI Disk Drive SCSI Disk Drive LVD SCSI Disk Drive We then create a volume group spanning on three 4.5 GB disks. Chapter 3. Replacing a drive in a mirrored configuration 193 $ lspv hdisk0 0004163128f3de5a hdisk1 000416314bd724bc hdisk2 0004163192b1d7f5 hdisk3 000416314bd749f8 hdisk4 000416314bdada38 $ lsvg testvg VOLUME GROUP: testvg VG STATE: active VG PERMISSION: read/write MAX LVs: 256 LVs: 0 OPEN LVs: 0 TOTAL PVs: 3 STALE PVs: 0 ACTIVE PVs: 3 MAX PPs per PV: 1016 rootvg testvg testvg None testvg VG IDENTIFIER: PP SIZE: TOTAL PPs: FREE PPs: USED PPs: QUORUM: VG DESCRIPTORS: STALE PPs: AUTO ON: MAX PVs: 00041631d7475818 8 megabyte(s) 1611 (12888 megabytes) 1611 (12888 megabytes) 0 (0 megabytes) 2 3 0 yes 32 The next step is to create a mirrored and striped logical volume in this volume group. Our logical volume, testlv, has a stripe width of 3 and has two copies. The following screen shows the characteristics and position of testlv. 194 AIX Logical Volume Manager from A to Z: Troubleshooting and Commands $ lslv testlv LOGICAL VOLUME: testlv LV IDENTIFIER: 00041631d7475818.1 VG STATE: active/complete TYPE: jfs MAX LPs: 512 COPIES: 2 LPs: 20 STALE PPs: 0 INTER-POLICY: minimum INTRA-POLICY: middle MOUNT POINT: N/A MIRROR WRITE CONSISTENCY: on EACH LP COPY ON A SEPARATE PV ?: yes $ lslv testlv LOGICAL VOLUME: testlv LV IDENTIFIER: 00041631d7475818.1 VG STATE: active/complete TYPE: jfs MAX LPs: 512 COPIES: 1 LPs: 21 STALE PPs: 0 INTER-POLICY: maximum INTRA-POLICY: middle MOUNT POINT: /home/mirror MIRROR WRITE CONSISTENCY: on EACH LP COPY ON A SEPARATE PV ?: yes STRIPE WIDTH: 3 STRIPE SIZE: 128K $ lslv -m testlv testlv:N/A LP PP1 PV1 PP2 PV2 0001 0056 hdisk3 0028 hdisk2 0002 0028 hdisk1 0028 hdisk4 0003 0057 hdisk3 0029 hdisk2 0004 0029 hdisk1 0029 hdisk4 0005 0058 hdisk3 0030 hdisk2 0006 0030 hdisk1 0030 hdisk4 0007 0059 hdisk3 0031 hdisk2 0008 0031 hdisk1 0031 hdisk4 0009 0060 hdisk3 0032 hdisk2 0010 0032 hdisk1 0032 hdisk4 0011 0061 hdisk3 0033 hdisk2 0012 0033 hdisk1 0033 hdisk4 0013 0062 hdisk3 0034 hdisk2 0014 0034 hdisk1 0034 hdisk4 0015 0063 hdisk3 0035 hdisk2 0016 0035 hdisk1 0035 hdisk4 0017 0064 hdisk3 0036 hdisk2 0018 0036 hdisk1 0036 hdisk4 0019 0065 hdisk3 0037 hdisk2 0020 0037 hdisk1 0037 hdisk4 VOLUME GROUP: PERMISSION: LV STATE: WRITE VERIFY: PP SIZE: SCHED POLICY: PPs: BB POLICY: RELOCATABLE: UPPER BOUND: LABEL: testvg read/write closed/syncd off 8 megabyte(s) parallel 60 relocatable yes 32 None VOLUME GROUP: PERMISSION: LV STATE: WRITE VERIFY: PP SIZE: SCHED POLICY: PPs: BB POLICY: RELOCATABLE: UPPER BOUND: LABEL: testvg read/write closed/syncd off 8 megabyte(s) striped 21 relocatable no 3 None PP3 PV3 Chapter 3. Replacing a drive in a mirrored configuration 195 We simulate the failing drive by removing hdisk2 from the system and reboot. This screen shows the resulting state on the system. As you can see, the status of the disk is now defined, but it is always present in the logical volume map. $ lspv hdisk0 0004163128f3de5a hdisk1 000416314bd724bc hdisk3 000416314bd749f8 hdisk4 000416314bdada38 $ lsdev -Ccdisk hdisk0 Available 10-60-00-8,0 16 hdisk1 Available 10-60-00-9,0 16 hdisk2 Defined 10-60-00-10,0 16 hdisk3 Available 30-58-00-8,0 16 hdisk4 Available 30-58-00-9,0 16 $ lslv -m testlv testlv:/home/mirror LP PP1 PV1 PP2 0001 0056 hdisk3 0028 0002 0028 hdisk1 0028 0003 0057 hdisk3 0029 0004 0029 hdisk1 0029 0005 0058 hdisk3 0030 0006 0030 hdisk1 0030 <<lines removed>> 0017 0064 hdisk3 0036 0018 0036 hdisk1 0036 0019 0065 hdisk3 0037 rootvg testvg testvg testvg Bit Bit Bit Bit Bit SCSI Disk Drive LVD SCSI Disk Drive LVD SCSI Disk Drive SCSI Disk Drive LVD SCSI Disk Drive PV2 hdisk2 hdisk4 hdisk2 hdisk4 hdisk2 hdisk4 PP3 PV3 hdisk2 hdisk4 hdisk2 We add a new disk to the system. We even try to confuse the system by inserting the new disk at the same position than the previous one, but that didn’t trick the system at all. The new disk is named hdisk5, and the status of hdisk2 is always defined. 196 AIX Logical Volume Manager from A to Z: Troubleshooting and Commands $ lsdev -Ccdisk hdisk0 Available 10-60-00-8,0 16 hdisk1 Available 10-60-00-9,0 16 hdisk2 Defined 10-60-00-10,0 16 hdisk3 Available 30-58-00-8,0 16 hdisk4 Available 30-58-00-9,0 16 hdisk5 Available 10-60-00-10,0 16 $ lspv hdisk0 0004163128f3de5a hdisk1 000416314bd724bc hdisk3 000416314bd749f8 hdisk4 000416314bdada38 hdisk5 0004163192b1d297 Bit Bit Bit Bit Bit Bit SCSI Disk Drive LVD SCSI Disk Drive LVD SCSI Disk Drive SCSI Disk Drive LVD SCSI Disk Drive LVD SCSI Disk Drive rootvg testvg testvg testvg None hidsk5 is not part of any volume group yet. It is time to use the magic command replacepv. replacepv hdisk2 hdisk5 After issuing this simple command, the results are as follows: Chapter 3. Replacing a drive in a mirrored configuration 197 lspv hdisk0 0004163128f3de5a hdisk1 000416314bd724bc hdisk3 000416314bd749f8 hdisk4 000416314bdada38 hdisk5 0004163192b1d297 lslv -m testlv testlv:/home/mirror LP PP1 PV1 PP2 0001 0056 hdisk3 0028 0002 0028 hdisk1 0028 0003 0057 hdisk3 0029 0004 0029 hdisk1 0029 0005 0058 hdisk3 0030 0006 0030 hdisk1 0030 0007 0059 hdisk3 0031 0008 0031 hdisk1 0031 0009 0060 hdisk3 0032 0010 0032 hdisk1 0032 0011 0061 hdisk3 0033 0012 0033 hdisk1 0033 0013 0062 hdisk3 0034 0014 0034 hdisk1 0034 0015 0063 hdisk3 0035 0016 0035 hdisk1 0035 0017 0064 hdisk3 0036 0018 0036 hdisk1 0036 0019 0065 hdisk3 0037 0020 0037 hdisk1 0037 rootvg testvg testvg testvg testvg PV2 hdisk5 hdisk4 hdisk5 hdisk4 hdisk5 hdisk4 hdisk5 hdisk4 hdisk5 hdisk4 hdisk5 hdisk4 hdisk5 hdisk4 hdisk5 hdisk4 hdisk5 hdisk4 hdisk5 hdisk4 PP3 PV3 hdisk5 has completely replaced hdisk2. The failed disk can then be removed from the system. rmdev -d -l hdisk2 It should be noted that this method doesn’t keep the same hdisk number. Note Any logical volumes on the failed physical volume that were not mirrored will not be re-created on the new physical volume. Therefore, they must be re-created manually and restored from backup. 198 AIX Logical Volume Manager from A to Z: Troubleshooting and Commands Appendix A. High-level LVM commands The high level commands are the ones aimed at administrators and users. They check the validity of the arguments that are passed and prevent non-valid values from destroying the system. Wise users should stay with these commands as much as possible. This appendix provides the options for these commands. A.1 The chlv command The following summarizes the options for the chlv command. chlv - This script changes the name of a logical volume in a volume group. Usage: chlv [-n NewLVName] LogicalVolume -n Changes the name of the logical volume to that specified by the NewLVName variable. Logical volume names must be unique system wide and can range from 1 to 15 characters. If the logical volume that you change the name for is a log, then each file system that uses that log must be pointed to the new name. This option is not allowed if the volume group is varied on in concurrent mode. chlv - This script changes the characteristics of the logical volume[s] in the list (logical volume IDs can also be used). Usage: chlv [-a Position] [-b BadBlocks] [-d Schedule] [-e Range] [-G Groupid] [-L label] [-P Modes] [-p Permission] [-r Relocate] [-s Strict] [-t Type] [-U Userid] [-u Upperbound] [-v Verify] [-w MirrorWriteConsistency] [-x Maximum] LogicalVolume[s] © Copyright IBM Corp. 2000 199 -a Position -b BadBlocks -d Schedule -e Range 200 Sets the intraphysical volume allocation policy (the position of the logical partitions on the physical volume). The Position variable is one of the following: m Allocates logical partitions in the outer-middle section of each physical volume. This is the default position. c Allocates logical partitions in the center section of each physical volume. e Allocates logical partitions in the outer edge section of each physical volume. ie Allocates logical partitions in the inner edge section of each physical volume. im Allocates logical partitions in the inner-middle section of each physical volume. Sets the bad block relocation policy. The BadBlocks variable is one of the following: y Allows bad block relocation to occur (default). n Prevents bad block relocation from occurring. Sets the scheduling policy when more than one logical partition is written. The scheduling policy must be either parallel or sequential as follows: p Establishes a parallel scheduling policy (default). s Establishes a sequential scheduling policy. Sets the interphysical volume allocation policy (the number of physical volumes to extend across using the volumes that provide the best allocation). The value of the Range variable is limited by the Upperbound variable, set with the -u flag, and is one of the following: x Allocates logical partitions across the maximum number of physical volumes. m Allocates logical partitions across the minimum number of physical volumes. AIX Logical Volume Manager from A to Z: Troubleshooting and Commands -G Groupid Specifies group ID for the logical volume special file. -L Label Sets the logical volume label. The maximum size of the Label variable is 127 characters. -p Permission Sets the access permission to read-write or read-only. The Permission variable is represented by one of the following: w Sets the access permission to read-write (default). r Sets the access permission to read-only. -P Modes Specifies permissions (file modes) for the logical volume special file. -r Relocate Sets the reorganization flag to allow or prevent the relocation of the logical volume during reorganization. The Relocate variable is one of the following: -s Strict y Allows the logical volume to be relocated during reorganization. If the logical volume is striped, the chlv command will not let you change the relocation flag to y (default). n Prevents the logical volume from being relocated during reorganization. Determines the strict allocation policy. Copies of a logical partition can be allocated to share or not to share the same physical volume. The Strict variable is one of the following: y Sets a strict allocation policy so that copies of a logical partition cannot share the same physical volume (default). n Does not set a strict allocation policy so that copies of a logical partition can share the same physical volume. s Sets a super strict allocation policy so that the partitions allocated for one mirror cannot share a physical volume with other partitions from another mirror Note: When changing a non-superstrict logical volume to a superstrict logical volume, you must use the -u flag. Appendix A. High-level LVM commands 201 -t Type Sets the logical volume type ( jfs, boot, jfslog, or paging). The maximum size is 31 characters. If the logical volume is striped, you cannot change type to boot. -U Userid Specifies user ID for the logical volume special file. -u Upperbound Sets the maximum number of physical volumes for new allocation. The value of the Upperbound variable should be between one and the total number of physical volumes. When using striped logical volumes or super strictness, the upper bound is the maximum number of physical volumes allowed for each mirror copy. -v Verify Sets the write verify state for the logical volume. Sets whether all writes to the logical volume should be verified with a follow-up read or not. The Verify variable is one of the following: -w MWCFlag -x Maximum Commands called y All writes to the logical volume are to be verified with a follow-up read. n All writes to the logical volume are not to be verified with a follow-up read (default). Mirror write consistency ensures data consistency among mirrored copies of a logical volume during normal I/O processing. The MWC flag sets mirror write consistency to on or off: y Turns on mirror write consistency (default). n No mirror write consistency. See the -f flag of the syncvg command. Sets the maximum number of logical partitions that can be allocated to the logical volume. The maximum number of logical partitions per logical volume is 32,512. getlvodm, lchangelv, lquerylv, mv, and putlvodm The flags to change the position of the logical partitions, the interphysical volume allocation policy, the strictness, or the upperbound will only take effect when new partitions are added or removed. The other flags take effect immediately. If any of the flags are used that change the permissions of the special file, and a big VGDA is used for the volume group, then these permissions will be maintained during an importvg if the -R flag is used. 202 AIX Logical Volume Manager from A to Z: Troubleshooting and Commands Changes made to the logical volume are not reflected in the file system. They must be done separately. A.2 The chpv command The following summarizes the options for the chpv command. chpv - Changes the characteristics of a physical volume in a volume group Usage: chpv [-a Allocation] [-v Availability] [-c] PhysicalVolume(s) -a Allocation -c Sets the allocation permission for additional physical partitions on the physical volume specified by the PhysicalVolume parameter. Either allows (yes) the allocation of additional physical partitions on the physical volume or prohibits (no) the allocation of additional physical partitions on the physical volume. The Allocation variable can be either: y Allows the allocation of additional physical partitions on the physical volume. n Prohibits the allocation of additional physical partitions on the physical volume. The logical volumes that reside on the physical volume can still be accessed. Clears the boot record of the given physical volume. Appendix A. High-level LVM commands 203 -v Availability Sets the availability of the physical volume. If you set the availability to closed, logical input and output to the physical volume are stopped. You should close a physical volume when the physical volume is removed from operation. Access to physical volume data by the file system or the virtual memory manager is stopped, but you can continue to use the system management commands. The Availability variable can be either: a Makes a physical volume available for logical input and output. r Makes a physical volume unavailable (removed) for logical input and output. If the physical volume is required in order to maintain a volume group quorum, an error occurs, and the physical volume remains open. getlvodm and lchangepv Commands called Note This command is not allowed if the volume group is varied on in concurrent mode. The chpv command changes the state of the physical volume in a volume group by setting allocation permission to either allow or not allow allocation and by setting the availability to either available or removed. This command can also be used to clear the boot record for the given physical volume. Characteristics for a physical volume remain in effect unless explicitly changed with the corresponding flag. A.3 The chvg command The following summarizes the options for the chvg command. chvg - A script that sets the characteristics of a volume group Usage: chvg [-a AutoOn {n|y}] [-c|-l] [-Q {n|y}] [-u] [-x {-n|y} ] [-t [factor] ] [-B] VolumeGroup 204 AIX Logical Volume Manager from A to Z: Troubleshooting and Commands -a AutoOn Determines if the volume group is automatically activated during system startup. The AutoOn variable can be either of the following: n The volume group is not automatically activated during system startup. y The volume group is automatically activated during system startup. Appendix A. High-level LVM commands 205 -B Changes the volume group to big VG format. This can accommodate up to 128 physical volumes and 512 logical volumes. Notes: 1. The -B flag cannot be used if there are any stale physical partitions or there are any open logical volumes in the volume group. 2. Once the volume group is converted, it cannot be imported into AIX Version 4.3.1 or lower versions. 3. The -B flag cannot be used if the volume group is varied on in concurrent mode. 4. There must be enough free partitions available on each physical volume for the VGDA expansion for this operation to be successful. 5. Since the VGDA resides on the edge of the disk, and it requires contiguous space for expansion, the free partitions are required on the edge of the disk. If those partitions are allocated for user usage, they will be migrated to other free partitions on the same disk. The rest of the physical partitions will be renumbered to reflect the loss of the partitions for VGDA usage. This will change the mappings of the logical to physical partitions in all the PVs of this VG. If you have saved the mappings of the LVs for a potential recovery operation, you should generate the maps again after the completion of the conversion operation. Also, if the backup of the VG is taken with the map option, and you plan to restore using those maps, the restore operation may fail since the partition number may no longer exist (due to reduction). It is recommended that backup is taken before the conversion, and right after the conversion, if the map option is utilized. Since the VGDA space has been increased substantially, every VGDA update operation (creating an LV, changing an LV, adding a PV, and so forth) may have a considerably longer duration. -c 206 Changes the volume group into a Concurrent Capable volume group. However, the volume group must be varied on in non-concurrent mode for this command to take effect. This flag only applies to AIX Version 4.2 or later. AIX Logical Volume Manager from A to Z: Troubleshooting and Commands -l Changes the volume group into a Non-Concurrent Capable volume group. The volume group must be varied on in non-concurrent mode for this command to take effect. This flag only applies to AIX Version 4.3 or later. -Q Determines if the volume group is automatically varied off after losing its quorum of physical volumes. The default value is yes. The change becomes effective the next time the volume group is activated. n The volume group stays active until it loses all of its physical volumes. y The volume group is automatically varied off after losing its quorum of physical volumes. Note: Run the bosboot or savebase command after the chvg -Q n or chvg -Q y command to update the boot image. Appendix A. High-level LVM commands 207 -t [factor] Changes the limit of the number of physical partitions per physical volume, specified by factor. factor should be between 1 and 16 for 32 disk volume groups and 1 and 64 for 128 disk volume groups. If factor is not supplied, it is set to the lowest value such that the number of physical partitions of the largest disk in volume group is less than factor x 1016. If factor is specified, the maximum number of physical partitions per physical volume for this volume group changes to factor x 1016. Notes: 1. If the volume group is created in AIX 3.2/4.1.2 in violation of 1016 physical partitions per physical volume limit, this flag can be used to convert the volume group to a supported state. This will ensure proper stale/fresh marking of partitions. 2. factor cannot be changed if there are any stale physical partitions in the volume group. 3. Once volume group is converted, it cannot be imported into AIX Version 4.3 or lower versions. 4. This flag cannot be used if the volume group is varied on in concurrent mode. 5. The maximum number of physical volumes that can be included in this volume group will be reduced to (MAXPVS/factor). 6. Change of the volume group may require the modification of the LVM meta data. In this situation, the volume group will be varied off in management mode to ensure the integrity of the Volume group, needing the closure of all open logical volumes in this volume group. Since logical volumes in rootvg cannot be closed, rootvg cannot be converted if it needs modification of the meta-data as part of the chvg -t operation. -u 208 Unlocks the volume group. This option is provided if the volume group is left in a locked state by abnormal termination of another LVM operation (such as the command core dumping, or the system crashing). Note: Before using the -u flag, make sure that the volume group is not being used by another LVM command. AIX Logical Volume Manager from A to Z: Troubleshooting and Commands -x Changes the mode that the Concurrent Capable volume group is varied on. The volume group must be varied on in non-concurrent mode for this command to take effect. This flag only applies to AIX Version 4.2 or later. y auto-varyon the volume group in concurrent mode. n auto-varyon the volume group in non-concurrent mode. Note: If the volume group is not created Concurrent Capable, this command has no effect on the volume group. In order for this auto-varyon into concurrency of the volume group to take effect, you must enter the following line into the /etc/inittab file: rc_clvmv:2:wait:/usr/sbin/clvm_cfg 2>&1 Attention: This entry must be added after the entry used to initiate srcmstr. Commands called getlvodm, lchangelv, lquerylv, mv, and putlvodm If there is a volume group that is infrequently used, you may not want it activated at system startup because it uses kernel resources (memory). The chvg command has options, such as increasing the size of the VGDA and changing the physical partition factor, that are not supported by SMIT. A.4 The cplv command The following summarizes the options for the cplv command. cplv - Copies the contents of a logical volume to a new logical volume. Usage: cplv [-v VolumeGroup] [-y NewLogicalVolume | -Y Prefix] SourceLogicalVolume cplv - copies the contents of a logical volume to an existing logical volume. Usage: cplv -e DestinationLogicalVolume [-f] SourceLogicalVolume Appendix A. High-level LVM commands 209 -e Specifies that the DestinationLogicalVolume exists and that a new logical volume should not be created. If the DestinationLogicalVolume is smaller than the SourceLogicalVolume, the extra logical partitions are not copied. When you use this flag, any data already in the DestinationLogicalVolume is destroyed. For this reason, user confirmation is required unless the -f flag is added. The Type characteristic of the DestinationLogicalVolume must be copied to prevent inadvertently overwriting data. To change the Type characteristic, use the chlv command. -f Copies to an existing logical volume without requesting user confirmation. -v VolumeGroup Specifies the volume group where the new logical volume resides. If this is not specified, the new logical volume resides in the same volume group as the SourceLogicalVolume. -y NewLogicalVolume Specifies the name to use, in place of a system-generated name, for the new logical volume. Logical volume names must be unique system wide names and can range from 1 to 15 characters. -Y Prefix Specifies a prefix to use in building a system-generated name for the new logical volume. The prefix must be less than, or equal to, 13 characters. A name cannot begin with a prefix already defined in the PdDv class in the Device Configuration Database for other devices or a name already used by another device. copyrawlv, getlvodm, lquerylv, lqueryvg, mklv, putlvodm, and rmlv Commands called Note Do not copy from a larger logical volume containing data to a smaller one. Doing so results in a corrupted file system because some data (including the superblock) is not copied. It should be noted that this command will fail if cplv creates a new logical volume and the volume group is varied on in concurrent mode.The cplv command copies the contents of SourceLogicalVolume to a new or existing DestinationLogicalVolume. The SourceLogicalVolume parameter can be a 210 AIX Logical Volume Manager from A to Z: Troubleshooting and Commands logical volume name or a logical volume ID. The cplv command creates a new logical volume with a system-generated name by using the default syntax. The system-generated name is displayed. Note 1. If you are copying a striped logical volume, and the destination logical volume does not exist, an identical copy, including the striped block size and striping width of the source logical volume, is created, and then the data is copied. 2. If you are copying a striped logical volume, and you have created the destination logical volume with the mklv command using a different stripe block size and striping width, or the destination is not a striped logical volume, the new characteristics are maintained, and the data is copied from the source logical volume. A.5 The exportvg command The following summarizes the options for the exportvg command. exportvg - Exports the definition of a volume group from a set of physical volumes. exportvg VolumeGroup Commands called getlvodm, lvaryonvg, lqueryvgs, lvaryoffvg, putlvodm, lvrelminor, and lvrelmajor The exportvg command removes the definition of the volume group specified by the VolumeGroup parameter from the system. Since all system knowledge of the volume group and its contents are removed, an exported volume group can no longer be accessed. The exportvg command does not modify any user data in the volume group. A volume group is a non-shared resource within the system. It should not be accessed by another processor until it has been explicitly exported from its current processor and imported on another. The primary use of the exportvg command, coupled with the importvg command, is to allow portable volumes to be exchanged between processors. Only a complete volume group can be exported, not individual physical volumes. Appendix A. High-level LVM commands 211 Using the exportvg command and the importvg command, you can also switch ownership of data on physical volumes shared between two processors. Note 1. A volume group that has a paging space volume on it cannot be exported while the paging space is active. Before exporting a volume group with an active paging space volume, ensure that the paging space is not activated automatically at system initialization, and then reboot the system. 2. The mount point information of a logical volume would be missing from the LVCB (logical volume control block) if it is longer than 128 characters. Please make a note of the mount points that are longer than 128 characters, as you will need to edit the /etc/filesystems file manually upon executing importvg command to import this volume group completely. A.6 The extendlv command The following summarizes the options for the extendlv command. extendlv - Increases the size of a logical volume by adding unallocated physical partitions from within the volume group. Usage: extendlv [-a Position] [-e Range] [-u Upperbound] [-s Strict] LPartitions [PhysicalVolume(s)] Usage: extendlv [-mMapFile] LPartitions 212 AIX Logical Volume Manager from A to Z: Troubleshooting and Commands -a Position -e Range -m MapFile Sets the intra-physical volume allocation policy (the position of the logical partitions on the physical volume). The Position variable is one of the following: m Allocates logical partitions in the outer-middle section of each physical volume. This is the default position. c Allocates logical partitions in the center section of each physical volume. e Allocates logical partitions in the outer edge section of each physical volume. ie Allocates logical partitions in the inner edge section of each physical volume. im Allocates logical partitions in the inner-middle section of each physical volume. Sets the inter-physical volume allocation policy (the number of physical volumes to extend across using the volumes that provide the best allocation). The value of the Range variable is limited by the Upperbound variable, set with the -u flag, and is one of the following: x Allocates logical partitions across the maximum number of physical volumes. m Allocates logical partitions across the minimum number of physical volumes. Specifies the exact physical partitions to allocate. Partitions are used in the order given in the MapFile parameter. Used partitions in the MapFile parameter are skipped. All physical partitions belonging to a copy are allocated before allocating for the next copy of the logical volume. The MapFile parameter format is: PVname:PPnum1[-PPnum2]. In this example, PVname is a physical volume name (for example, hdisk0). It is one record per physical partition or a range of consecutive physical partitions. PPnum is the physical partition number. Appendix A. High-level LVM commands 213 -s Strict Determines the strict allocation policy. Copies of a logical partition can be allocated to share or not to share the same physical volume. The Strict variable is one of the following: y Sets a strict allocation policy so that copies of a logical partition cannot share the same physical volume (default). n Does not set a strict allocation policy so that copies of a logical partition can share the same physical volume. s Sets a super strict allocation policy so that the partitions allocated for one mirror cannot share a physical volume with other partitions from another mirror Note: When changing a non-superstrict logical volume to a superstrict logical volume, you must use the -u flag. -u Upperbound Sets the maximum number of physical volumes for new allocation. The value of the Upperbound variable should be between one and the total number of physical volumes. When using striped logical volumes or super strictness, the upper bound is the maximum number of physical volumes allowed for each mirror copy. PhysicalVolume(s) The physical volumes to be used in allocating additional partitions to the logical volume can be restricted to those named. If no physical volumes are named, then all will be available, depending on which best meet the allocation policies. LPartitions The number of logical partitions to add to the logical volume. allocp, getlvodm, lextendlv, lquerylv, lquerypv, lqueryvg, putlvodm, and resynclv Commands called Note The -e, -m, -s, and -u flags are not valid with a striped logical volume. The extendlv command increases the number of logical partitions allocated to the LogicalVolume by allocating the number of additional logical partitions represented by the LPartitions parameter. The LogicalVolume parameter can 214 AIX Logical Volume Manager from A to Z: Troubleshooting and Commands be a logical volume name or a logical volume ID. To limit the allocation to specific physical volumes, use the names of one or more physical volumes in the PhysicalVolume parameter; otherwise, all the physical volumes in a volume group are available for allocating new physical partitions. By default, the logical volume is expanded using the existing characteristics that are displayed when you use the lslv command. To temporarily override these existing characteristics for the new partitions only, choose different values for these characteristics by using the flags. The characteristics of the logical volume do not change. The default maximum number of partitions for a logical volume is 512. Before extending a logical volume more than 512 logical partitions, use the chlv command to increase the default value. The default allocation policy is to use a minimum number of physical volumes per logical volume copy to place the physical partitions belonging to a copy as contiguously as possible and then to place the physical partitions in the desired region specified by the -a flag. Also, by default, each copy of a logical partition is placed on a separate physical volume. Note 1. When extending a striped logical volume, the number of partitions must be in an even multiple of the striping width. 2. When extending a striped logical volume, only the striping width (disks striped across) is used. If there is not enough partitions on the physical volumes used for this striped logical volume, the extend of the logical volume fails. 3. It is recommended that a logical volume using a large number of partitions (more than 800 MB) be extended gradually in sections. 4. Changes made to the logical volume are not reflected in the file systems. To change file system characteristics, use the chfs command. A.7 The extendvg command The following summarizes the options for the extendvg command. extendvg - Adds physical volumes to a volume group. Appendix A. High-level LVM commands 215 Usage: extendvg [-f] VolumeGroup PhysicalVolume(s) -f Forces the physical volume to be added to the specified volume group unless it is a member of another volume group in the Device Configuration Database or of a volume group that is active. Commands called getlvodm, linstallpv, and putlvodm The physical volume is checked to verify that it is not already in another volume group. If the system believes the physical volume belongs to a volume group that is varied on, it exits. But, if the system detects a description area from a volume group that is not varied on, it prompts the user for confirmation in continuing with the command. The previous contents of the physical volume are lost; so, the user must be cautious when using the override function. A.8 The importvg command The following summarizes the options for the importvg command. importvg - Imports a new volume group definition from a set of physical volumes. Usage: importvg [-V MajorNumber] [-y VolumeGroup] [-f] [-c] [-x] | [-L VolumeGroup] [-n] [-F] [-R]PhysicalVolume 216 -c Imports the volume group and creates it as a Concurrent Capable volume group. Only use the -c flag with the HACMP. It has no effect on volume groups and systems not using the HACMP product. This flag only applies to AIX Version 4.2 or later. -f Forces the volume group to be varied online. AIX Logical Volume Manager from A to Z: Troubleshooting and Commands -LVolumeGroup Takes a volume group and learns about possible changes performed to that volume group. Any new logical volumes created as a result of this command emulate the ownership, group identification, and permissions of the /dev special file for the volume group listed in the -y flag. The -L flag performs the functional equivalent of the -F and -n flags during execution. Restrictions: 1. The volume group must not be in an active state on the system executing the -L flag. 2. The volume group's disks must be unlocked on all systems that have the volume group varied on and operational. Volume groups and their disks may be unlocked, remain active, and used via the varyonvg -b -u command. 3. The physical volume name provided must be of a good and known state. The disk named may not be in the missing or removed state. 4. If an active node has both added AND deleted logical volumes on the volume group, the -L flag may produce inconsistent results. The -L flag should be used after each addition or deletion, rather than being deferred until after a sequence of changes. 5. If a logical volume name clash is detected, the command will fail. Unlike the basic importvg actions, clashing logical volume names will not be renamed. -F Provides a fast version of importvg that checks the Volume Group Descriptor Areas of only the disks that are members of the same volume group. As a result, if a user exercises this flag, they must ensure that all physical volumes in the volume group are in a good and known state. If this flag is used on a volume group where a disk may be in missing or removed state, the command may fail, or the results may be inconsistent. -n Causes the volume not to be varied at the completion of the volume group import into the system. Appendix A. High-level LVM commands 217 -R Restores the ownership, group ID, and permissions of the logical volume special device files. These values will be restored only if they were set using the U, G, and P flags of mklv and chlv commands. This flag is applicable only for big VG format volume groups only. -V MajorNumber Specifies the major number of the imported volume group. -x When used with the -c flag, sets the Concurrent Capable volume group to be autovaried on in concurrent mode. When used without the -c flag, it does nothing. Only use the -c flag with HACMP. It has no effect on volume groups and systems not using the HACMP product. This flag only applies to AIX Version 4.2 or later. In order for this auto-varyon into concurrency of the volume group to take effect, you must enter the following line into the /etc/inittab file: rc_clvmv:2:wait:/usr/sbin/clvm_cfg 2>&1 Attention: This entry must be added after the entry used to initiate srcmstr. -y The volume group name can only contain the following characters: A through Z, a through z, 0 through 9, or _ (the underscore), - (the minus sign), or . (the period). All other characters are considered invalid. Commands called getlvodm, getvgname, redefinevg, varyonvg, synclvodm, and varyoffvg You may import an AIX Version 3.2 created volume group into an AIX Version 4 system, and you may import an AIX Version 4 volume group into an AIX Version 3.2 system, provided striping has not been applied. Once striping is put onto a disk, its importation into version 3.2 is prevented. When you issue the importvg command to a previously defined volume group, the QUORUM and AUTO ON values will be reset to volume group default values. You should verify the parameters of the newly imported volume group with the lsvg command and change any values with the chvg command. The importvg command makes the previously exported volume group known to the system. The PhysicalVolume parameter specifies only one physical volume to identify the volume group; any remaining physical volumes (those belonging to the same volume group) are found by the importvg command and 218 AIX Logical Volume Manager from A to Z: Troubleshooting and Commands included in the import. An imported volume group is automatically varied unless the volume group is Concurrent Capable. You must use the varyonvg command to activate Concurrent Capable volume groups before you access them. When a volume group with file systems is imported, the /etc/filesystems file is updated with values for the new logical volumes and mount points. After importing the volume group and activating it with the varyonvg command, you must run the fsck command before the file systems can be mounted. However, the mount point information would be missing from the LVCB (logical volume control block) if it is longer than 128 characters. In this case, the importvg command will not be able to update the /etc/filesystems file with the stanza for the newly imported logical volume. You should manually edit the /etc/filesystems file to add a new stanza for this logical volume. The importvg command changes the name of a logical volume if the name already exists in the system. It prints a message and the new name to standard error and updates the /etc/filesystems file to include the new logical volume name. Note 1. AIX Version 4 changed the behavior of importvg so that, as part of the importvg process, the volume group is automatically varied on by the system after it is imported. However, if the volume group is Concurrent Capable or was imported with the -c flag, then the importvg command prompts you to varyonvg the imported volume group manually. 2. A volume group with a mirrored striped logical volume cannot be back ported into a version of AIX older than 4.3.3 A.9 The lslv command The following summarizes the options for the lslv command. lslv- Displays information about a logical volume. Usage: lslv [-L] [-l|-m] [-n PhysicalVolume] LogicalVolume lslv- Displays information about a logical volume allocation map. Appendix A. High-level LVM commands 219 Usage: lslv [-L] [-n PhysicalVolume] -p PhysicalVolume [LogicalVolume] -L Specifies no waiting to obtain a lock on the Volume group. Note : If the volume group is being changed, using the -L flag gives unreliable date. -l Lists the following fields for each physical volume in the logical volume: PV Physical volume name. Copies The following three fields: • The number of logical partitions containing at least one physical partition (no copies) on the physical volume. • The number of logical partitions containing at least two physical partitions (one copy) on the physical volume. • The number of logical partitions containing three physical partitions (two copies) on the physical volume. In band The percentage of physical partitions on the physical volume that belong to the logical volume and were allocated within the physical volume region specified by Intra-physical allocation policy. DistributionThe number of physical partitions allocated within each section of the physical volume: Outer edge, outermiddle, center, inner-middle, and inner edge of the physical volume. 220 AIX Logical Volume Manager from A to Z: Troubleshooting and Commands -m -n PhysicalVolume Lists the following fields for each logical partition: LPs Logical partition number. PV1 Physical volume name where the logical partition's first physical partition is located. PP1 First physical partition number allocated to the logical partition. PV2 Physical volume name where the logical partition's second physical partition (first copy) is located. PP2 Second physical partition number allocated to the logical partition. PV3 Physical volume name where the logical partition's third physical partition (second copy) is located. PP3 Third physical partition number allocated to the logical partition. Accesses information from the specific descriptor area of PhysicalVolume variable. The information may not be current since the information accessed with the -n flag has not been validated for the logical volumes. If you do not use the -n flag, the descriptor area from the physical volume that holds the validated information is accessed; therefore, the information that is displayed is current. The volume group need not be active when you use this flag. Appendix A. High-level LVM commands 221 -p PhysicalVolume Displays the logical volume allocation map for the PhysicalVolume variable. If you use the LogicalVolume parameter, any partition allocated to that logical volume is listed by logical partition number. Otherwise, the state of the partition is listed as one of the following: used Indicates that the partition is allocated to another logical volume. free Indicates that the specified partition is not being used on the system. stale Indicates that the specified partition is no longer consistent with other partitions. The computer lists the logical partitions number with a question mark if the partition is stale. The lslv command displays the characteristics and status of the LogicalVolume or lists the logical volume allocation map for the physical partitions on the PhysicalVolume. The logical volume can be a name or identifier. Note If the lslv command cannot find information for a field in the Device Configuration Database, it will insert a question mark (?) in the value field. As an example, if there is no information for the LABEL field, the following is displayed: LABEL: ? The command attempts to obtain as much information as possible from the description area when it is given a logical volume identifier. When no flags are used, the following characteristics of the specified logical volume are displayed: 222 Logical volume Name of the logical volume. Logical volume names must be unique systemwide and can range from 1 to 15 characters. Volume group Name of the volume group. Volume group names must be unique system wide and can range from 1 to 15 characters. Logical volume identifier Identifier of the logical volume. AIX Logical Volume Manager from A to Z: Troubleshooting and Commands Permission Access permission, read-only or read-write. Volume group state State of the volume group. If the volume group is activated with the varyonvg command, the state is either active/complete (indicating all physical volumes are active) or active/partial (indicating all physical volumes are not active). If the volume group is not activated with the varyonvg command, the state is inactive. Logical volume state State of the logical volume. The Opened/stale status indicates the logical volume is open but contains physical partitions that are not current. Opened/syncd indicates the logical volume is open and synchronized. Closed indicates the logical volume has not been opened. Type Logical volume type. Write verify Write verify state of On or Off. Mirror write consistency Mirror write consistency state of Yes or No. Max LPs Maximum number of logical partitions the logical volume can hold. PP size Size of each physical partition. Copies Number of physical partitions created for each logical partition when allocating. Schedule policy Sequential or parallel scheduling policy. LPs Number of logical partitions currently in the logical volume. PPs Number of physical partitions currently in the logical volume. Stale partitions Number of physical partitions in the logical volume that are not current. BB Policy Bad block relocation policy. Inter-policy Inter-physical allocation policy. Appendix A. High-level LVM commands 223 Relocatable Indicates whether the partitions can be relocated if a reorganization of partition allocation takes place. Intra-policy Intra-physical allocation policy. Upper bound If the logical volume is super-strict, upper bound is the maximum number of disks in a mirror copy. Mount point File system mount point for the logical volume, if applicable. Label Specifies the label field for the logical volume. Each LP copy on a separate PV Current state of allocation, strict, non-strict, or super-strict. A strict allocation states that no copies for a logical partition are allocated on the same physical volume. If the allocation does not follow the strict criteria, is called non-strict. A non-strict allocation states that at least one occurrence of two physical partitions belong to the same logical partition. A super-strict allocation states that no partition from one mirror copy may reside the same disk as another mirror copy. PV distribution The distribution of the logical volume within the volume group. The physical volumes used, the number of logical partitions on each physical volume, and the number of physical partitions on each physical volume are shown. Stripe width The number of physical volumes being striped across. Stripe size The number of bytes per stripe. A.10 The lspv command The following summarizes the options for the lspv command. 224 AIX Logical Volume Manager from A to Z: Troubleshooting and Commands lspv - Displays information about a physical volume within a volume group. Usage: lspv [-L] [-l|-p|-M] [-n DescriptorPhysicalVolume] [-v VGID] PhysicalVolume -L Specifies no waiting to obtain a lock on the Volume group. Note: If the volume group is being changed, using the -L flag gives an unreliable date. -l Lists the following fields for each logical volume on the physical volume: LVname Name of the logical volume to which the physical partitions are allocated. LPs The number of logical partitions within the logical volume that are contained on this physical volume. PPs The number of physical partitions within the logical volume that are contained on this physical volume. Distribution The number of physical partitions, belonging to the logical volume that are allocated within each of the following sections of the physical volume: Outer edge, outer-middle, center, inner-middle, and inner edge of the physical volume. Mount Point File system mount point for the logical volume, if applicable. Appendix A. High-level LVM commands 225 -M -n 226 Lists the following fields for each logical volume on the physical volume: PVname:PPnum [LVname: LPnum [:Copynum] [PPstate]] Where: PVname Name of the physical volume as specified by the system. PPnum Physical partition number. LVname Name of the logical volume to which the physical partitions are allocated. Logical volume names must be system-wide unique names and can range from one to 64 characters. LPnum Logical partition number. Logical partition numbers can range from one to 64,000. Copynum Mirror number. PPstate Only the physical partitions on the physical volume that are not current are shown as stale. Accesses information from the variable descriptor area specified by the DescriptorPhysicalVolume variable. The information may not be current since the information accessed with the -n flag has not been validated for the logical volumes. If you do not use the -n flag, the descriptor area from the physical volume that holds the validated information is accessed; therefore, the information displayed is current. The volume group need not be active when using this flag. AIX Logical Volume Manager from A to Z: Troubleshooting and Commands -p Lists the following fields for each physical partition on the physical volume: Range A range of consecutive physical partitions contained on a single region of the physical volume. State The current state of the physical partitions: free, used, stale, or vgda. Note: If a volume group is converted to a big VG format, it may be necessary to use some data partitions for volume group descriptor area. These partitions will be marked vgda. Region The intra-physical volume region in which the partitions are located. LVname The name of the logical volume to which the physical partitions are allocated. Type The type of the logical volume to which the partitions are allocated. Mount point File system mount point for the logical volume, if applicable. -v Accesses information based on the VGID variable. This flag is needed only when the lspv command does not function due to incorrect information in the Device Configuration Database. The VolumeGroupID variable is the hexadecimal representation of the volume group identifier, which is generated by the mkvg command. The lspv command displays information about the physical volume if the specific physical volume name is specified. If you do not add flags to the lspv command, the default is to print every known physical volume in the system along with its physical disk name, physical volume identifiers (PVIDs), and which volume group (if any) it belongs to. Appendix A. High-level LVM commands 227 Note If the lspv command cannot find information for a field in the Device Configuration Database, it will insert a question mark (?) in the value field. As an example, if there is no information for the PP RANGE field, the following might be displayed: PP RANGE: ? The lspv command attempts to obtain as much information as possible from the description area when it is given a logical volume identifier. When no flags are used, the following characteristics of the specified physical volume are displayed: 228 Physical volume Name of the physical volume. Volume group Name of volume group. Volume group names must be unique system-wide names and can be from one to 15 characters long. PV Identifier The physical volume identifier for this physical disk. VG Identifier The volume group identifier of which this physical disk is a member. PVstate State of the physical volume. If the volume group that contains the physical volume is varied on with the varyonvg command, the state is active, missing, or removed. If the physical volume is varied off with the varyoffvg command, the state is varied off. Allocatable Allocation permission for this physical volume. Logical volumes Number of logical volumes using the physical volume. Stale PPs Number of physical partitions on the physical volume that are not current. VG descriptors Number of volume group descriptors on the physical volume. PP size Size of physical partitions on the volume. Total PPs Total number of physical partitions on the physical volume. AIX Logical Volume Manager from A to Z: Troubleshooting and Commands Free PPs Number of free physical partitions on the physical volume. Used PPs Number of used physical partitions on the physical volume. Free distribution Number of free partitions available in each intra-physical volume section. Used distribution Number of used partitions in each intra-physical volume section. A.11 The lsvg command The following summarizes the options for the lsvg command. lsvg - Displays information about volume groups. Usage: lsvg [-L] [-o] | [-n DescriptorPhysicalVolume] | [-i] [-l | -M | -p] VolumeGroup(s) -L Specifies no waiting to obtain a lock on the Volume group. Note : If the volume group is being changed, using the -L flag gives unreliable date. -p Lists the following information for each physical volume within the group specified by the VolumeGroup parameter. Physical volumeA physical volume within the group. PVstate State of the physical volume. Total PPs Total number of physical partitions on the physical volume. Free PPs Number of free physical partitions on the physical volume. Distribution The number of physical partitions allocated within each section of the physical volume: Outer edge, outermiddle, center, inner-middle, and inner edge of the physical volume. Appendix A. High-level LVM commands 229 -l Lists the following information for each logical volume within the group specified by the VolumeGroup parameter: LV A logical volume within the volume group. Type Logical volume type. LPs Number of logical partitions in the logical volume. PPs Number of physical partitions used by the logical volume. PVs Number of physical volumes used by the logical volume. Logical volume State of the logical volume. Opened/stale indicates the logical volume is open but contains partitions that are not current. Opened/syncd indicates the logical volume is open and synchronized. Closed indicates the logical volume has not been opened. Mount point -i 230 File system mount point for the logical volume, if applicable. Reads volume group names from standard input. AIX Logical Volume Manager from A to Z: Troubleshooting and Commands -M Lists the following fields for each logical volume on the physical volume: PVname:PPnum [LVname: LPnum [:Copynum] [PPstate]] PVname Name of the physical volume as specified by the system. PPnum Physical partition number. Physical partition numbers can range from 1 to 1016. LVname Name of the logical volume to which the physical partitions are allocated. Logical volume names must be system-wide unique names, and can range from one to 64 characters. LPnum Logical partition number. Logical partition numbers can range from 1 to 64,000. Copynum Mirror number. PPstate Only the physical partitions on the physical volume that are not current are shown as stale. -n Accesses information from the descriptor area specified by the DescriptorPhysicalVolume variable. The information may not be current since the information accessed with the -n flag has not been validated for the logical volumes. If you do not use the -n flag, the descriptor area from the physical volume that holds the most validated information is accessed; therefore, the information displayed is current. The volume group need not be active when you use this flag. -o Lists only the active volume groups (those that are varied on). An active volume group is one that is available for use. The lsvg command displays information about volume groups. If you use the VolumeGroup parameter, only the information for that volume group is displayed. If you do not use the VolumeGroup parameter, a list of the names of all defined volume groups is displayed. When information from the Device Configuration database is unavailable, some of the fields will contain a question mark (?) in place of the missing data. The lsvg command attempts to obtain as much information as possible Appendix A. High-level LVM commands 231 from the description area when the command is given a logical volume identifier. Note that to determine a volume group's major number, use the ls -al /dev/VGName command. This command lists the special device file that represents the volume group. The volume group major number is the same as the major device number of the special device file. For example, for a volume group named ha1vg, enter the following command: ls -al /dev/ha1vg This command returns the following: crw-rw---- 1 root system 52, 0 Aug 27 19:57 /dev/ha1vg In this example, the volume group major number is 52. When no flags are used, the following characteristics of the specified volume group are displayed: Information displayed if you do not specify any flags: Volume group Name of the volume group. Volume group names must be unique system-wide and can range from one to 15 characters. Volume group state State of the volume group. If the volume group is activated with the varyonvg command, the state is either active/complete (indicating all physical volumes are active) or active/partial (indicating some physical volumes are not active). If the volume group is not activated with the varyonvg command, the state is inactive. 232 Permission Access permission: read-only or read-write. Max LVs Maximum number of logical volumes allowed in the volume group. LVs Number of logical volumes currently in the volume group. Open LVs Number of logical volumes within the volume group that are currently open. Total PVs Total number of physical volumes within the volume group. Active PVs Number of physical volumes that are currently active. AIX Logical Volume Manager from A to Z: Troubleshooting and Commands VG identifier The volume group identifier. PP size Size of each physical partition. Total PPs Total number of physical partitions within the volume group. Free PPs Number of physical partitions not allocated. Alloc PPs Number of physical partitions currently allocated to logical volumes. Quorum Number of physical volumes needed for a majority. VGDS Number of volume group descriptor areas within the volume group. Auto-on Automatic activation at IPL (yes or no). Concurrent 1 States whether or not the volume group is Concurrent Capable or Non-Concurrent Capable. Applies to AIX Version 4.2 or later. Auto-Concurrent1 States whether you should auto-vary the Concurrent Capable volume group in concurrent or non-concurrent mode. For volume groups that are Non-Concurrent Capable, this value defaults to Disabled. Applies to AIX Version 4.2 or later. VG Mode1 The vary on mode of the volume group: Concurrent or Non-Concurrent. Applies to AIX Version 4.2 or later. Node ID 1 Node ID of this node if volume group is varied on in concurrent node. Active Nodes 1 Node IDs of other concurrent nodes that have this volume group varied on. Max PPs Per PV Maximum number of physical partitions per physical volume allowed for this volume group. Max PVs Maximum number of physical volumes allowed in this volume group. 1 Only displayed if volume group is concurrent capable. A.12 The lsvgfs command The following summarizes the options for the lsvgfs command. Appendix A. High-level LVM commands 233 lsvgfs - This is an object file command that lists the file systems that are in the specified volume group. Usage: lsvgfs VolumeGroup A.13 The lvedit command The following summarizes the options for the lvedit command. lvedit - The logical volume editor is used for interactive definition and placement of logical volumes within a volume group. This command does not apply to AIX Version 4.2 or later. Usage: lvedit VolumeGroup The lvedit command invokes the logical volume editor in the context of a particular volume group (VolumeGroup). From within the editor, a user can inspect the current state of logical and physical volumes in the volume group and can make changes to this state interactively. A user can make the same changes that are possible using the mklv, chlv, extendlv, and rmlv commands but can have much more precise control over the placement of logical volumes on physical volumes (mapping of logical partitions to physical partitions). When a user changes a logical volume from within the editor, the editor checks that the modification is permissible in the context of the current editor state. If the change is allowed, the editor state is modified to reflect it, so that the user can preview the results from within the editor. However, the actual system logical and physical volumes are not altered until the user elects to commit the changes upon exiting the editor. The logical volume editor permits both precise allocation of physical volumes to logical volumes within a volume group as well as the definition of logical volume attributes. However, this editor does not currently support the creation and modification of higher-level abstractions built on these logical volumes, such as file systems and paging spaces. After arranging the logical volumes within a volume group, a user must still create or modify file systems, paging spaces, and journaling logs, for example. This can be done from within SMIT or by using commands, such as mkfs, chfs, swapon, and chps. The editor also 234 AIX Logical Volume Manager from A to Z: Troubleshooting and Commands does not support creation or extension of volume groups, which must be defined prior to entering the editor. Most editing operations (other than extension) are not permitted on logical volumes that are in active use. These consist of logical volumes with mounted file systems, active paging spaces, and journaling logs that are in current use. In general, before these logical volumes can be edited, they must be unmounted or deactivated. Furthermore, in the case of mounted file systems, any valuable data they contain should be archived (for example, to tape) prior to unmounting and editing. Note The lvedit command cannot be used to reduce the size of an existing logical volume. However, the reduce command of the logical volume editor can be used to reduce the size of a logical volume that has been extended but not yet committed. A.14 The migratepv command The following summarizes the options for the migratepv command. migratepv - Moves allocated physical partitions from one physical volume to one or more other physical volumes. Usage: migratepv [-i] [-l LogicalVolume] SrcPhysicalVolume DestnPV(s) -i Reads the DestinationPhysicalVolume parameter from standard input. -l LogicalVolume Moves only the physical partitions allocated to the specified logical volume and located on the specified source physical volume. Commands called lmigratelv, getlvodm, dspmsg, lquerylv, lquerypv, lqueryvg, sort, grep, and awk The migratepv command moves allocated physical partitions and the data they contain from the SourcePhysicalVolume to one or more other physical volumes. To limit the transfer to specific physical volumes, use the names of one or more physical volumes in the DestinationPhysicalVolume parameter; otherwise, all the physical volumes in the volume group are available for the Appendix A. High-level LVM commands 235 transfer. All physical volumes must be within the same volume group. The specified source physical volume cannot be included in the list of DestnPV parameters. This command is not allowed if the volume group is varied on in concurrent mode. The allocation of the new physical partitions follows the policies defined for the logical volumes that contain the physical partitions being moved. The migratepv command (only when the source and target physical volumes are specified) fails when a boot logical volume is found on the source physical volume. When you migrate a physical volume, the boot logical volume must remain intact. Two contiguous physical partitions and the new boot image must be built on the new boot logical volume. If you specify a logical volume that contains the boot image, the migratepv -l command attempts to find enough contiguous partitions on one of the target physical volumes. If the migration is successful, the migratepv command prints a message that recommends the user run the bosboot command to indicate a change in the boot device. The attempted migration fails if the migratepv -l command is unable to find enough contiguous space to satisfy the request. Note All Logical Volume Manager migrate functions work by creating a mirror of the logical volumes involved and then resynchronizing the logical volumes. The original logical volume is then removed. Therefore, the migratepv command alone should not be used to move a logical volume containing the primary dump device. The command will execute, but any subsequent system dump will fail. In addition, the physical volume cannot be removed from the volume group. You must first reassign the dump device using the sysdumpdev command. A.15 The mirrorvg command The following summarizes the options for the mirrorvg command. mirrorvg - mirrors all the logical volumes that exist on a given volume group. Usage: mirrorvg [-S | -s] [-Q] [-c Copies] [-m] VolumeGroup [PhysicalVolume(s)] 236 AIX Logical Volume Manager from A to Z: Troubleshooting and Commands -c Copies Specifies the minimum number of copies that each logical volume must have after the mirrorvg command has finished executing. It may be possible, through the independent use of mklvcopy, that some logical volumes may have more than the minimum number specified after the mirrorvg command has executed. Minimum value is 2 and 3 is the maximum value. A value of 1 is ignored. -m Allows mirroring of logical volumes in the exact physical partition order that the original copy is ordered. This option requires you to specify a PhysicalVolume(s) where the exact map copy should be placed. If the space is insufficient for an exact mapping, then the command will fail. You should add new drives or pick a different set of drives that will satisfy an exact logical volume mapping of the entire volume group. The designated disks must be equal to or exceed the size of the drives, which are to be exactly mirrored, regardless if the entire disk is used. Also, if any logical volume to be mirrored is already mirrored, this command will fail. -Q By default, in mirrorvg, when a volume group's contents becomes mirrored, volume group quorum is disabled. If the user wishes to keep the volume group quorum requirement after mirroring is complete, this option should be used in the command. For later quorum changes, refer to the chvg command. -S Returns the mirrorvg command immediately and starts a background syncvg of the volume group. With this option, it is not obvious when the mirrors have completely finished their synchronization. However, as portions of the mirrors become synchronized, they are immediately used by the operating system in mirror usage. -s Returns the mirrorvg command immediately without performing any type of mirror synchronization. If this option is used, the mirror may exist for a logical volume but is not used by the operating system until it has been synchronized with the syncvg command. Commands called lquerylv, lqueryvg, lquerypv, and lslv The mirrorvg command takes all the logical volumes on a given volume group and mirrors those logical volumes. This same functionality may also be Appendix A. High-level LVM commands 237 accomplished manually if you execute the mklvcopy command for each individual logical volume in a volume group. As with mklvcopy, the target physical drives to be mirrored with data must already be members of the volume group. To add disks to a volume group, run the extendvg command. By default, mirrorvg attempts to mirror the logical volumes onto any of the disks in a volume group. If you wish to control which drives are used for mirroring, you must include the list of disks in the input parameters, PhysicalVolume. Mirror strictness is enforced. Additionally, mirrorvg mirrors the logical volumes using the default settings of the logical volume being mirrored. If you wish to violate mirror strictness or affect the policy by which the mirror is created, you must execute the mirroring of all logical volumes manually with the mklvcopy command. When mirrorvg is executed, the default behavior of the command requires that the synchronization of the mirrors must complete before the command returns to the user. If you wish to avoid the delay, use the -S or -s option. Additionally, the default value of two copies is always used. To specify a value other than 2, use the -c option. Note The mirrorvg command may take a significant amount of time before completing because of complex error checking, the amount of logical volumes to mirror in a volume group, and the time is takes to synchronize the new mirrored logical volumes. A.16 The mkcd command The following summarizes the options for the mkcd command. mkcd - Creates a multi-volume CD (or CDs) from a mksysb or savevg backup image. Usage: mkcd -d cd_device | -S [-m mksysb_image| -M mksysb_target | -s savevg_image | -v savevg_vol_group] [-Ccd_fs_dir] [-I cd_image_dir] [-V cdfs_vol_group] [-G] [-B] [-p pkg_source_dir] [-R | -S] [-i image.data] [-u bosinst.data] [-e] [-P] [-l package_list] [-b bundle_file] [-z custom_file] [-D] 238 AIX Logical Volume Manager from A to Z: Troubleshooting and Commands -B Prevents mkcd from adding boot images (non-bootable CD) to the CD. Use this flag if creating a mksysb CD that you will not boot. Before installing the non-bootable mksysb CD you must boot a same level (V.R.M.) product CD. The mkcd command defaults to creating a bootable CD for the machine type of the source system. See the Notes section. -b bundle_file Gives the full pathname of the file containing a list of filesets to be installed after the mksysb is restored. This file is copied to ./usr/sys/inst.data/user_bundles/bundle_file in the CD file system and also copied to RAM in case the CD is unmounted. The file would be listed as BUNDLES=/../usr/sys/inst.data/user_bundles/bundle_file in the bosinst.data file. -C cd_fs_dir Specifies the file system used to create the CD file system structure, which must have at least 640 MB of available disk space. If you do not specify the -C flag and the /mkcd/cd_fs directory exists, mkcd uses that directory. If you do not give the -C flag, and the /mkcd/cd_fs directory does not exist, mkcd creates the file system /mkcd/cd_fs and removes it when the command finishes executing. The command creates the file system in the volume group indicated with the -V flag, or rootvg if that flag is not used. Each time you invoke the mkcd command, a unique subdirectory (using the process ID) is created under the /mkcd/cd_fs directory, or in the directory specified with the -C flag. -D Turns on the debug output information feature. The default is no debug output. -d cd_device Indicates the CD-R device (/dev/cd1, for instance). This flag is required unless you use the -S flag. -e Excludes the files and/or directories from the backup image listed in the /etc/exclude.volume_group file. You cannot use this flag with the -m or -s flags. -G Generates a generic bootable mksysb CD. The CD contains all three RS/6000 platform (chrp, rs6k, rspc) boot images. In conjunction with the -G flag, you must specify the -m and -p flags. Appendix A. High-level LVM commands 239 240 -I cd_image_dir Specifies the directory or file system where the final CD images are stored before writing to the CD-R device. If this flag is not used, mkcd uses the /mkcd/cd_images directory if it already exists. If not, the command creates the /mkcd/cd_images file system in the volume group given with the -V flag, or in rootvg if that flag is not used. If mkcd creates the file system, it is removed upon command completion unless either the -R or -S flag is used. If the -R or -S flag is used, consideration must be made for adequate file system, directory, or disk space, especially when creating multi-volume CDs. -i image.data Specifies the user-supplied image.data file. This data file takes precedence over the image.data file in the mksysb image. If you do not give the -i flag, then mkcd restores the image.data from the given mksysb image, or generates a new image.data file during the creation of mksysb. Note: The -i flag cannot be used to specify a user-supplied vgname.data file for use with a savevg image. -l package_list Specifies the file containing a list of additional packages you want copied to the ./usr/lpp/inst.images directory of the CD file system. The images are copied from the location named with the -p flag. If you use the -l flag, you must also use the -p flag. -M mksysb_target States the directory or file system where the mksysb or savevg image is stored if a previously created backup is not given with the -m or -s flags. If the -M flag is not used and a mksysb or savevg image is not provided, mkcd verifies that /mkcd/mksysb_image exists. If the directory does not exist, then mkcd creates a separate file system, /mkcd/mksysb_image, where the mksysb or savevg images are temporarily stored. The command creates the file system in the volume group given with the -V flag, or in rootvg if that flag is not used. -m mksysb_image Specifies a previously created mksysb image. If you do not give the -m flag, mkcd calls mksysb. (See the -M flag for more information about where the mksysb image is placed.) AIX Logical Volume Manager from A to Z: Troubleshooting and Commands -P Creates physical partition mapping during the mksysb or savevg creation. You cannot use this flag with the -m or -s flags. The -P flag is not recommended for generic backup CDs. -p pkg_source_dir Names the directory or device that contains device and kernel package images. The device can only be a CD device (for example, /dev/cd0). If you use the same CD-R device that you gave with the -d flag, the product CD media must be inserted into the CD-R drive first. mkcd then prompts you to insert the writable CD before the actual CD creation. You must use the -p flag if using the -G flag. -R Prevents mkcd from removing the final CD images. mkcd defaults by removing everything that it creates when it finishes executing. The -R flag allows multiple CD image sets to be stored, or for CD creation (burn) to occur on another system. If multiple volumes are needed, the final images are uniquely named using the process ID and volume suffixes. -S Stops mkcd before writing to the CD-R, without removing the final CD images. The -S flag allows multiple CD sets to be created, or for CDs to be created on another system. The images remain in the directory marked by the -I flag, or in the /mkcd/cd_images directory if the -I flag is not used. If multiple volumes are required, the final images are uniquely named using the process ID and volume suffixes. -s savevg_image Indicates a previously created savevg image. See the Notes section. -u bosinst.data Specifies the user-supplied bosinst.data file. This data file takes precedence over the bosinst.data file in the mksysb image. If you do not give the -u flag, then mkcd restores bosinst.data from the given mksysb image, or generates a new bosinst.data file during the creation of mksysb. Appendix A. High-level LVM commands 241 -V cdfs_vol_group -v savevg_vol_group Indicates the volume group used when creating the file systems needed for the mkcd command. If the -V flag is not given, and a file system is needed but not there (because it was not supplied with other flags), then rootvg is the default volume group for creating the file systems. If mkcd creates the file systems in the backup volume group, those file systems are not included as part of the backup image. mkcd-created file systems are removed upon the command's completion. Denotes the volume group to be backed up using the savevg command. See the Notes section. (See the -M flag for more information about where the savevg image is placed.) -z custom_file States the full pathname of the file to be copied to the root directory of the CD file system. This file could be a customization script specified in the bosinst.data file, such as CUSTOMIZATION_FILE=filename. For example: If the file my_script is in /tmp on the machine where mkcd is running, then enter -z/tmp/my_script and specify CUSTOMIZATION_FILE=my_script. The code copies the script to the root directory of the RAM file system before it executes. Note 1. If you are creating a non-bootable CD (using the -B flag), you cannot use the -p or -l flags. 2. If you are creating a non-bootable CD with a savevg image (using the -s or -v flags), you cannot use the -p, -l, -u, -i, -z, or -b flags. The mckd command creates a system backup image ( mksysb) to CD-Recordable (CD-R) from the system rootvg or from a previously created mksysb image. It also creates a volume group backup image ( savevg) to CD-R from a user-specified volume group or from a previously created savevg image. With mkcd, you can create three types of CDs: Personal system backup, "generic" backup, and a non-bootable volume group backup. 242 AIX Logical Volume Manager from A to Z: Troubleshooting and Commands Personal system backup CDs can only boot and install a specific machine and are similar to using mksysb on tape. Generic backup CDs can boot and install any RS/6000 platform (rspc, rs6k, or chrp). This backup requires all the necessary device support, including the MP kernel, to create the boot images for all three platforms. This type of backup also requires a user-supplied, and previously created, mksysb image. The non-bootable volume group backup contains only the CD image of a volume group. If this backup contains rootvg backup, then you must boot from a product CD before restoring the mksysb image, or use alt_disk_install to install it. If the backup volume group is a non-rootvg volume group, then use restvg to restore the image. Note The functionality required to create Rock Ridge format CD images and to write the CD image to the CD-R device is not part of the mkcd command. You must supply additional code to mkcd to do these tasks. The code will be called via shell scripts and then linked to /usr/sbin/mkrr_fs (for creating the Rock Ridge format image) and /usr/sbin/burn_cd (for writing to the CD-R device). Both links are called from the mkcd command. Some sample shell scripts are included for different vendor-specific routines. You can find these scripts in /usr/samples/oem_cdwriters. If you do not give any file systems or directories as command parameters, mkcd creates the necessary file systems and removes them when the command finishes executing. File systems you supply are checked for adequate space and write access. If mkcd creates file systems in the backup volume group, they are excluded from the backup. If you need to create multi-volume CDs because the volume group image does not fit on one CD, mkcd gives instructions for CD replacement and removal until all the volumes have been created. A.17 The mklv command The following summarizes the options for the mklv command. Appendix A. High-level LVM commands 243 mklv - Creates a logical volume. Usage: mklv [-a Position] [-b BadBlocks] [-c Copies] [-d Schedule] [-e Range] [-i] [-L Label] [-m MapFile] [-r Relocate] [-s Strict] [-t Type] [-u UpperBound] [-v Verify] [-w MirrorWriteConsistency] [-x Maximum] [-y NewLogicalVolume | -Y Prefix] [-S StripeSize] [-U Userid] [-G Groupid] [-P Modes] VolumeGroup NumLP [PhysicalVolume(s)] -a Position -b BadBlocks 244 Sets the intra-physical volume allocation policy (the position of the logical partitions on the physical volume). The Position variable can be one of the following: m Allocates logical partitions in the outer middle section of each physical volume. This is the default position. c Allocates logical partitions in the center section of each physical volume. e Allocates logical partitions in the outer edge section of each physical volume. ie Allocates logical partitions in the inner edge section of each physical volume. im Allocates logical partitions in the inner middle section of each physical volume. Sets the bad block relocation policy. The Relocation variable can be one of the following: y Causes bad block relocation to occur. This is the default. n Prevents bad block relocation from occurring. -c Copies Sets the number of physical partitions allocated for each logical partition. The Copies variable can be set to a value from 1 to 3; the default is 1. -d Schedule Sets the scheduling policy when more than one logical partition is written. The Schedule variable can be one of the following: p Establishes a parallel scheduling policy. This is the default for scheduling policy. s Establishes a sequential scheduling policy. AIX Logical Volume Manager from A to Z: Troubleshooting and Commands -e Range Sets the inter-physical volume allocation policy (the number of physical volumes to extend across, using the volumes that provide the best allocation). The Range value is limited by the UpperBound variable (set with the -u flag) and can be one of the following: x Allocates across the maximum number of physical volumes. m Allocates logical partitions across the minimum number of physical volumes. This is the default range. -G Groupid Specifies group ID for the logical volume special file. -i Reads the PhysicalVolume parameter from standard input. Use the -i flag only when PhysicalVolume is entered through standard input. -L Sets the logical volume label. The default label is None. The maximum size of the label file is 127 characters. Note: If the logical volume is going to be used as a journaled file system (JFS), then the JFS will use this field to store the mount point of the file system on that logical volume for future reference. -m MapFile Specifies the exact physical partitions to allocate. Partitions are used in the order given in the MapFile parameter. Used partitions in the MapFile parameter are not legal since the new logical volume cannot occupy the same physical space as a previously allocated logical volume. All physical partitions belonging to a copy are allocated before allocating for the next copy of the logical volume. The MapFile parameter format is: PVname:PPnum1[-PPnum2].In this example, PVname is a physical volume name (for example, hdisk0) as specified by the system. It is one record per physical partition or a range of consecutive physical partitions. PPnum is the physical partition number. -P Modes PVname Name of the physical volume as specified by the system. PPnum Physical partition number. Specifies permissions (file modes) for the logical volume special file. Appendix A. High-level LVM commands 245 -r Relocate -s Strict -S StripeSize 246 Sets the reorganization relocation flag. For striped logical volumes, the Relocate parameter must be set to n (the default for striped logical volumes). The Relocate parameter can be one of the following: y Allows the logical volume to be relocated during reorganization. This is the default for relocation. n Prevents the logical volume from being relocated during reorganization. Determines the strict allocation policy. Copies of a logical partition can be allocated to share or not to share the same physical volume. The Strict parameter is represented by one of the following: y Sets a strict allocation policy so that copies for a logical partition cannot share the same physical volume. This is the default for allocation policy. n Does not set a strict allocation policy so that copies for a logical partition can share the same physical volume. s Sets a super strict allocation policy so that the partitions allocated for one mirror cannot share a physical volume with the partitions from another mirror. Specifies the number of bytes per striped. Must be a power of two, between 4 K and 128 K, for example 4 K, 8 K, 16 K, 32 K, 64 K, or 128 K. Note: The -d, -e, -m, and -s flags are not valid when creating a striped logical volume using the -S flag. AIX Logical Volume Manager from A to Z: Troubleshooting and Commands -t Type Sets the logical volume type. The standard types are jfs (file systems), jfslog (journal file system logs), and paging (paging spaces), but a user can define other logical volume types with this flag. You cannot create a striped logical volume of type boot. The default is jfs. If a log is manually created for a file system, the user must run the logform command to clean out the new jfslog before the log can be used. For example, to format the logical volume logdev, enter: logform /dev/logdev where /dev/logdev is the absolute path to the logical volume. -U Userid Specifies user ID for logical volume special file. -u UpperBound Sets the maximum number of physical volumes for new allocation. The value of the Upperbound variable should be between one and the total number of physical volumes. When using striped logical volumes or super strictness the upper bound indicates the maximum number of physical volumes allowed for each mirror copy. Note: When creating a superstrict logical volume, you must specify physical volumes or use the -u flag. -v Verify Sets the write verify state for the logical volume. Causes (y) all writes to the logical volume to either be verified with a follow-up read, or prevents (n) the verification of all writes to the logical volume. The Verify parameter is represented by one of the following: n Prevents the verification of all write operations to the logical volume. This is the default for the -v flag. y Causes the verification of all write operations to the logical volume. Appendix A. High-level LVM commands 247 -w MWCflag Mirror write consistency flag can be one of the following: y Turns on mirror write consistency, which insures data consistency among mirrored copies of a logical volume during normal I/O processing. n No mirror write consistency. See the -f flag of the syncvg command. -x Maximum Sets the maximum number of logical partitions that can be allocated to the logical volume. The default value is 512. The number represented by the Number parameter must be equal to or less than the number represented by the Maximum variable. The maximum number of logical partitions per logical volume is 32,512. -y NewLogicalVolume Specifies the logical volume name to use instead of using a system-generated name. Logical volume names must be unique system wide name and can range from one to 15 characters. If the volume group is varied on in concurrent mode, the new name should be unique across all the concurrent nodes the volume group is varied on. The name cannot begin with a prefix already defined in the PdDv class in the Device Configuration Database for other devices. -Y Prefix Specifies the Prefix to use instead of the prefix in a system-generated name for the new logical volume. The prefix must be less than, or equal to, 13 characters. The name cannot begin with a prefix already defined in the PdDv class in the Device Configuration Database for other devices, nor be a name already used by another device. VolumeGroup Volume group in which to create the logical volume. NumLP Number of logical partitions to allocate to the logical volume. Commands called allocp, getlvname, getlvodm, lcreatelv, lextendlv, lquerypv, lqueryvg, putlvcb, putlvodm, and rmlv The mklv command creates a new logical volume within the VolumeGroup. For example, all file systems must be on separate logical volumes. The mklv command allocates the number of logical partitions to the new logical volume. If you specify one or more physical volumes with the PhysicalVolume 248 AIX Logical Volume Manager from A to Z: Troubleshooting and Commands parameter, only those physical volumes are available for allocating physical partitions; otherwise, all the physical volumes within the volume group are available. The default settings provide the most commonly used characteristics, but use flags to tailor the logical volume to the requirements of your system. Once a logical volume is created, its characteristics can be changed with the chlv command. The default allocation policy is to use a minimum number of physical volumes per logical volume copy, to place the physical partitions belonging to a copy as contiguously as possible, and then to place the physical partitions in the desired region specified by the -a flag. Also, by default, each copy of a logical partition is placed on a separate physical volume. The -m flag specifies exact physical partitions to be used when creating the logical volume. If the volume group in which the logical volume is being created is in big VG format, U, G, and P flags can be used to set the ownership, group, and permissions, respectively, of the special device files. Only root user will be able to set these values. If the volume group is exported, these values can be restored upon import if R flag is specified with the importvg command. Physical partitions are numbered starting at the outermost edge with number one. Appendix A. High-level LVM commands 249 Note 1. Changes made to the logical volume are not reflected in the file systems. To change file system characteristics, use the chfs command. 2. Each logical volume has a control block. This logical volume control block is the first few hundred bytes within the logical volume. Care has to be taken when reading and writing directly to the logical volume to allow for the control block. Logical volume data begins on the second 512-byte block. 3. A mirrored, or copied, logical volume is not supported as the active dump device. System dump error messages will not be displayed, and any subsequent dumps to a mirrored logical volume will fail. 4. When creating a striped logical volume using the -S flag, you must specify two or more physical volumes or use the -u flag. 5. When creating a striped logical volume, the number of partitions must be an even multiple of the striping width. 6. To create a striped logical volume with more than one copy, all active nodes should be at least AIX Version 4.3.3 or later when the volume group is in the concurrent mode. Note There is an undocumented option -f to the mklv command that suppresses the display of the warning when you try to create a mirrored and striped logical volume. Use this command if you want to automate the creation of mirrored and striped logical volumes without having to acknowledge the fact that you will not be able to import this logical volume in earlier versions of AIX A.18 The mklvcopy command The following summarizes the options for the mklvcopy command. mklvcopy - Provides copies of data with the logical volume. Usage: mklvcopy [-a Position] [-e Range] [-k] [-m MapFile] [-s Strict] [-u UpperBound] LogicalVolume Copies [PhysicalVolume(s)] 250 AIX Logical Volume Manager from A to Z: Troubleshooting and Commands -a Position -e Range -k Sets the intra-physical volume allocation policy (the position of the logical partitions on the physical volume). The Position variable can be one of the following: m Allocates logical partitions in the outer-middle section of each physical volume. This is the default position. c Allocates logical partitions in the center section of each physical volume. e Allocates logical partitions in the outer edge section of each physical volume. ie Allocates logical partitions in the inner edge section of each physical volume. im Allocates logical partitions in the inner-middle section of each physical volume. Sets the inter-physical volume allocation policy (the number of physical volumes to extend across, using the volumes that provide the best allocation). The Range value is limited by the UpperBound variable (set with the -u flag) and can be one of the following: x Allocates across the maximum number of physical volumes. m Allocates logical partitions across the minimum number of physical volumes. This is the default range. Synchronizes data in the new partitions. Appendix A. High-level LVM commands 251 -m MapFile -s Strict 252 Specifies the exact physical partitions to allocate. Partitions are used in the order given in the MapFile parameter. Used partitions in the MapFile parameter are not legal since the new logical volume cannot occupy the same physical space as a previously allocated logical volume. All physical partitions belonging to a copy are allocated before allocating for the next copy of the logical volume. The MapFile parameter format is: PVname:PPnum1[-PPnum2].In this example, PVname is a physical volume name (for example, hdisk0) as specified by the system. It is one record per physical partition or a range of consecutive physical partitions. PPnum is the physical partition number. PVname Name of the physical volume as specified by the system. PPnum Physical partition number. Determines the strict allocation policy. Copies of a logical partition can be allocated to share or not to share the same physical volume. The Strict parameter is represented by one of the following: y Sets a strict allocation policy so that copies for a logical partition cannot share the same physical volume. This is the default for allocation policy. n Does not set a strict allocation policy so that copies for a logical partition can share the same physical volume. s Sets a super strict allocation policy so that the partitions allocated for one mirror cannot share a physical volume with the partitions from another mirror. AIX Logical Volume Manager from A to Z: Troubleshooting and Commands -u UpperBoundl Sets the maximum number of physical volumes for new allocation. The value of the Upperbound variable should be between one and the total number of physical volumes. When using striped logical volumes or super strictness the upper bound indicates the maximum number of physical volumes allowed for each mirror copy. Note: When creating a superstrict logical volume, you must specify physical volumes or use the -u flag. allocp, getlvodm, lextendlv, lquerylv, lquerypv, lqueryvg, putlvodm, and lresyclv Commands called Note The -e, -m, -s, and -u flags are not valid with a striped logical volume. The mklvcopy command increases the number of copies of each logical partition in LogicalVolume. This is accomplished by increasing the total number of physical partitions for each logical partition to the number represented by Copies. The LogicalVolume parameter can be a logical volume name or logical volume ID. You can request that the physical partitions for the new copies be allocated on specific physical volumes (within the volume group) with the PhysicalVolume parameter; otherwise, all the physical volumes within the volume group are available for allocation. The logical volume modified with this command uses the Copies parameter as its new copy characteristic. The data in the new copies are not synchronized until one of the following occurs: The -k option is used, the volume group is activated by the varyonvg command, or the volume group, or logical volume is synchronized explicitly by the syncvg command. Individual logical partitions are always updated as they are written to. The default allocation policy is to use minimum numbering of physical volumes per logical volume copy to place the physical partitions belong to a copy as contiguously as possible, and then to place the physical partitions in the desired region specified by the -a flag. Also, by default, each copy of a logical partition is placed on a separate physical volume. Appendix A. High-level LVM commands 253 Note To create a copy of a striped logical volume, all active nodes using the volume group must be at least AIX Version 4.3.3 or later. Older versions of AIX will not be able to use the volume group after a mirror copy has been added to the striped logical volume. Note There is an undocumented option -f to the mklvcopy command that suppresses the display of the warning when you try to add a copy to a striped logical volume. Use this command if you want to automate the creation of copies for striped logical volumes without having to acknowledge the fact that you will not be able to import this logical volume in earlier versions of AIX A.19 The mksysb command The following summarizes the options for the mksysb command. mksysb - Creates an installable image of the root volume group either in a file or onto a bootable tape. Usage: mksysb [-b Number] [-e] [-p] [-v] [-X] [-i | -m] Device | File -b Number 254 Specifies the number of 512-byte blocks to write in a single output operation. When the backup command writes to tape devices, the default is 100 for backups by name. The write size is the number of blocks multiplied by the block size. The default write size for the backup command writing to tape devices is 51200 (100 * 512) for backups by name. The write size must be an even multiple of the tape's physical block size. AIX Logical Volume Manager from A to Z: Troubleshooting and Commands -e Excludes files listed in the /etc/exclude.rootvg file from being backed up. The rules for exclusion follow the pattern matching rules of the grep command. Note: If you want to exclude certain files from the backup, create the /etc/exclude.rootvg file, with an ASCII editor, and enter the patterns of file names that you do not want included in your system backup image. The patterns in this file are input to the pattern matching conventions of the grep command to determine which files will be excluded from the backup. If you want to exclude files listed in the /etc/exclude.rootvg file, select the Exclude Files field and press the Tab key once to change the default value to yes. For example, to exclude all the contents of the directory called scratch, edit the exclude file to read as follows: /scratch/ For example, to exclude the contents of the directory called /tmp, and avoid excluding any other directories that have /tmp in the path name, edit the exclude file to read as follows: ^./tmp/ All files are backed up relative to . (current working directory). To exclude any file or directory for which it is important to have the search match the string at the beginning of the line, use ^ (caret character) as the first character in the search string, followed by . (dot character) followed by the filename or directory to be excluded. If the filename or directory being excluded is a substring of another filename or directory, use ^. (caret character followed by dot character) to indicate that the search should begin at the beginning of the line and/or use $ (dollar sign character) to indicate that the search should end at the end of the line. Appendix A. High-level LVM commands 255 Calls the mkszfile command, which generates the /image.data file. The /image.data file contains information on volume groups, logical volumes, file systems, paging space, and physical volumes. This information is included in the backup for future use by the installation process. Note: Before running the mkszfile command, ensure that enough space is available in the /tmp file to store a boot image. This space is needed during both backup and installation. To determine the amount of space needed in the /tmp file, issue the following command: -i bosboot -q -a -d device If you use the -X flag with the mksysb command, you do not need to run the bosboot command to determine the amount of space needed in the /tmp file. -m Calls the mkszfile command, with the -m flag, to generate map files. -p Disables software packing of the files as they are backed up. Some tape drives use their own packing or compression algorithms. This flag only applies to AIX Version 4.2 or later. -v Verbose mode. Lists files as they are backed up. This flag only applies to AIX Version 4.2 or later. -X Specifies to automatically expand the /tmp file system if necessary. The /tmp file system may need to be extended to make room for the boot image when creating a bootable backup to tape. This flag only applies to AIX Version 4.2 or later. Commands called bosboot, mkinstape, mkszfile, and backup. The mksysb command creates a backup of the operating system (that is, the root volume group). You can use this backup to reinstall a system to its original state after it has been corrupted. If you create the backup on tape, the tape is bootable and includes the installation programs needed to install from the backup. The file system image is in backup file format. The tape format includes a boot image, a bosinstall image, and an empty table of contents followed by the system backup (root volume group) image. The root volume group image 256 AIX Logical Volume Manager from A to Z: Troubleshooting and Commands is in backup-file format starting with the data files and then any optional map files. One of the data files mksysb uses is the /bosinst.data file. If a /bosinst.data file doesn't exist, /var/adm/ras/bosinst.data is copied to / (root). In AIX Version 4.3.3 and later versions, mksysb always updates the target_disk_data stanzas in bosinst.data to match the disks currently in the root volume group of the system where the mksysb command is running. If you are using a customized /bosinst.data file and do not want the target_disk_data stanzas updated, you must create the file /save_bosinst.data_file. The mksysb command does not update /bosinst.data if the /save_bosinst.data_file exists. Note 1. The image the mksysb command creates does not include data on raw devices or in user-defined paging spaces. 2. If you are using a system with a remote-mounted /usr file system, you cannot reinstall your system from a backup image. 3. The mksysb command may not restore all device configurations for special features, such as /dev/netbios and some device drivers not shipped with the product. 4. Some rspc systems do not support booting from tape. When you make a bootable mksysb image on an rspc system that does not support booting from tape, the mksysb command issues a warning indicating that the tape will not be bootable. You can install a mksysb image from a system that does not support booting from tape by booting from a CD and entering maintenance mode. In maintenance mode, you will be able to install the system backup from tape. A.20 The mkszfile command The following summarizes the options for the mkszfile command. mkszfile - Creates a file containing information about the rootvg volume group for use by the mksysb command. Usage: mkszfile [-X] [-m] Appendix A. High-level LVM commands 257 -m Creates map files that specify the mapping of the logical-to-physical partitions for each logical volume in the volume group. This mapping can be used to allocate the same logical-to-physical mapping when the image is restored. The map file locations are stored in the MAPFILE field in the /image.data file for each logical volume. Sufficient space would exist in the /tmp file system for map creation because the installation routines place the maps in the /tmp file system before issuing the mklv command. For example, for the hd7 logical volume, the location of the map file is /tmp/vgdata/rootvg/hd7.map. The MAPFILE field in the /image.data file for the hd7 logical volume is under the entry: MAPFILE=/tmp/vgdta/rootvg/hd7.map. The map files in the backup image are copied after the /bosinst.data and /image.data files. -X Expands /tmp if needed. Commands called lsvg, lslv, lsjfs, df, bootinf, and bosboot The mkszfile command overwrites an existing /image.data file with new information. The mkszfile command saves the system state for reinstallation on the current system or on another system. The information saved includes the following: • System installation information • Logical volume information for the root volume group • File system information The saved information allows the bosinstall routine to re-create the logical volume information as it existed before the backup. The mkszfile command creates the /image.data file. The contents of this file are defined by the system in which the image was created. The user can edit the /image.data file before calling the mksysb command. The mksysb command, in turn, only backs up the file systems specified in the /image.data file, which reflects the requirements of the rootvg file system. All the saved information is obtained using AIX list commands. The commands are listed in the /image.data file as comments for the user's reference when editing this file. 258 AIX Logical Volume Manager from A to Z: Troubleshooting and Commands Files on tape cannot be changed. However, in order to override the data files on the tape, the user can create a diskette with the desired files. The mkszfile command checks to be sure there is at least 8 MB of free space available in the /tmp file system for the boot image. Note Before running the mkszfile command, ensure that enough space is available in the /tmp file to store a boot image. This space is needed during both backup and installation. To determine the amount of space needed in the /tmp file, issue the following command: bosboot -qad /dev/hdiskn where hdiskn is the physical volume that contains hd5 (use lslv -l hd5 or bootinfo -b). A.21 The mkvg command The following summarizes the options for the mkvg command. mkvg - Creates a volume group. Usage: mkvg [-d MaximumPhysicalVolumes] [-B] [-G] [-f] [-i] [-c] [-x] [-m MaxPvSize] [-n] [-s Size] [-t factor] [-V MajorNumber] [-y VolumeGroup] Physical_Volume[s] -B Creates a big VGDA volume group. This can consist of up to 128 physical volumes and 512 logical volumes and is not supported on AIX 4.3.1 or below -c Creates a concurrent capable volume group. Can only be used with HACMP and has no effect if HACMP is not being used. Not supported prior to AIX Version 4.2 -d Max PVs The maximum number of physical volumes in the volume group (default is 32 or 128 for a big VGDA volume group). This can be used to minimize the space occupied by the VGSA/VGDA; so, the value must be 32 (or 128 for a big VGDA). Appendix A. High-level LVM commands 259 -f Forces the volume group to be created on the specified physical volume unless the physical volume is part of an active volume group or a volume group defined in the configuration database. -G Similar to -B flag, except that space is reserved in the VGSA/VGDA for up to 1024 physical volumes. Should be used if the volume group is likely to be expanded to include more than 128 physical volumes -i Reads the PhysicalVolume parameter from standard input -m MaxPvSize Specifies the maximum size of the physical volume[s]. When this flag is used, the calculation of the number of physical partitions are based on the size of the physical volume. If this flag is not specified (and the -t flag not used), then 1016 physical partitions are assumed. -n Specifies that the volume group is not automatically varied on at system startup. -s Size Sets the physical partition size for the volume group, where the size is in megabytes and must be a power of 2 from 1 to 1024; the default is 4. -t factor Changes the limit of the number of physical partitions per physical volume, where the number of physical volumes is the factor times 1016. The range is from 1 to 16 for normal VGDA systems, and 1 to 64 for big VGDA systems. Increasing this factor will reduce the number of physical volumes allowed to make up the volume group (see Chapter 1on components in AIX Logical Volume Manager from A to Z, Introduction and Concepts, SG24-5432). -V MajorNumber Specifies the major number that will be used by the volume group -x Specifies that the volume group will be automatically varied on at system start. Similar to -c, this flag has no affect if HACMP clvm is not running. -y VolumeGroup Specifies the volume group name, which must be unique system-wide and can be from one to 15 characters. Can only contain "A-Z", "a-z", "0-9", "_", "-" or ".". Commands called 260 getlvodm, getvgname, lcreatevg, linstallpv, putlvodm, lvgenminor, lvgenmajor, and varyonvg AIX Logical Volume Manager from A to Z: Troubleshooting and Commands A.22 The mkvgdata command The following summarizes the options for the mkvgdata command. mkvgdata - Creates a file containing information about a volume group for use by the savevg and restvg commands. This file is a symbolic link to the mkszfile script. Usage: mkvgdata [-X] [-m] VGName -m Creates map files that specify the mapping of the logical-to-physical partitions for each logical volume in the volume group. This mapping can be used to allocate the same logical-to-physical mapping when the image is restored. The map file locations are stored in the MAPFILE field in the /image.data file for each logical volume. Sufficient space should exist in the /tmp file system for map creation because the installation routines place the maps in the /tmp file system before issuing the mklv command. For example, for the hd7 logical volume, the location of the map file is /tmp/vgdata/rootvg/hd7.map. The MAPFILE field in the /image.data file for the hd7 logical volume is under the entry: MAPFILE=/tmp/vgdta/rootvg/hd7.map. The map files in the backup image are copied after the /bosinst.data and /image.data files. -X Expands /tmp if needed. Commands used lsvg, lslv, lsjfs, df, bootinf, and bosboot The mkvgdata command creates a file containing information about a volume group for use by the savevg and restvg commands. The information includes the list of logical volumes, file systems and their sizes, and the volume group name. One of the following files is created depending on the type of volume group: image.data Created for information about the root volume group (rootvg). The savevg command uses this file to create a backup image that can be used by the bosinstall routine to reinstall the volume group to the current system or to a new system. The mkvgdata command overwrites this file if it already exists. The /image.data file is located in the / directory. Appendix A. High-level LVM commands 261 vgname.data Created for information about a user volume group. The vgname variable reflects the name of the volume group. The savevg command uses this file to create a backup image that can be used by the restvg command to reinstall the user volume group. The mkvgdata command overwrites this file if it already exists. The vgname.data file is located in the /tmp/vgdata/vgname directory, where vgname is the volume group name. The information in either of these files can be edited by the user before issuing the savevg command. A.23 The readlvcopy command The following summarizes the options for the readlvcopy command. readlvcopy - Reads a specific mirror copy of a logical volume. Usage: readlvcopy -d device [-c copy | -C copy | -b] [-n number_of_blocks] [-o outfile] [-s skip] [-S seek] 262 -d device Logical volume special device file to be read from. -c copy Requested mirror copy to read from. Valid values are 1, 2, or 3 for the first, second, or third copy of the data. Data is read even if the logical partition has been marked stale. The default is the first copy of the data. -C copy Requested mirror copy to read from. Valid values are 1, 2, or 3 for the first, second, or third copy of the data. Stale logical partitions are not read. -b Read mirror copy marked as online backup. -n number_of_blocks Number of 128 K blocks to read. -o outfile Destination file. The default is stdout. -s skip Number of 128 K blocks to skip into device. -S seek Number of 128 K blocks to seek into outfile. AIX Logical Volume Manager from A to Z: Troubleshooting and Commands A.24 The redefinevg command The following summarizes the options for the redefinevg command. redefinevg - Redefines the set of physical volumes of the given volume group in the device configuration database. Usage: redefinevg {-d Device | -i Vgid} VolumeGroup -d Device The volume group ID, Vgid, is read from the specified physical volume device. You can specify the Vgid of any physical volume belonging to the volume group that you are redefining. -i Vgid The volume group identification number of the volume group to be redefined. Commands called odmget, lqueryvg, lvgenmajor, lvgenminor, getlvodm, putlvodm, and mknod During normal operations, the device configuration database remains consistent with the Logical Volume Manager (LVM) information in the reserved area on the physical volumes. If inconsistencies occur between the device configuration database and the LVM, the redefinevg command determines which physical volumes belong to the specified volume group and re-enters this information in the device configuration database. The redefinevg command checks for inconsistencies by reading the reserved areas of all the configured physical volumes attached to the system. A.25 The reducevg command The following summarizes the options for the reducevg command. reducevg - Removes physical volumes from a volume group. Usage: reducevg [-d] [-f] VolumeGroup PhysicalVolume(s) Appendix A. High-level LVM commands 263 -d Deallocates the existing logical volume partitions and then deletes resultant, empty logical volumes from the specified physical volumes. User confirmation is required unless the -f flag is added. Attention: -f The reducevg command with the -d flag automatically deletes all logical volume data on the physical volume before removing the physical volume from the volume group. If a logical volume spans multiple physical volumes, the removal of any of those physical volumes may jeopardize the integrity of the entire logical volume. Removes the requirement for user confirmation when the -d flag is used. getlvodm, ldeletepv, lquerylv, lquerypv, lreducelv, putlvodm, and rmlv Commands called Note You can use the reducevg command while the volume group is in concurrent mode. However, if you run this command while the volume group is in concurrent mode, and the end result is the deletion of the volume group, then the reducevg command will fail. The reducevg command removes one or more physical volumes represented by the PhysicalVolume parameter from the VolumeGroup. When you remove all physical volumes in a volume group, the volume group is also removed. The volume group must be varied on before it can be reduced. All logical volumes residing on the physical volumes represented by the PhysicalVolume parameter must be removed with the rmlv command or the -d flag before starting the reducevg command. 264 AIX Logical Volume Manager from A to Z: Troubleshooting and Commands Note Sometimes a disk is removed from the system without first running reducevg VolumeGroup PhysicalVolume. The VGDA still has this removed disk in its memory, but the PhysicalVolume name no longer exists or has been reassigned. To remove references to this missing disk, you can still use reducevg, but with the Physical Volume ID (PVID) instead of the disk name: reducevg VolumeGroup PVID A.26 The reorgvg command The following summarizes the options for the reorgvg command. reorgvg - Reorganizes the physical partition allocation for a volume group. Usage: reorgvg [-i] VolumeGroup [LogicalVolume(s)] -i Specifies physical volume names read from standard input. Only the partitions on these physical volumes are organized. allocp, getlvodm, lmigratepp, lquerylv, lquerypv, lqueryvg, and putlvodm, Commands called Note This command is not allowed if the volume group is varied on in concurrent mode. The reorgvg command reorganizes the placement of allocated physical partitions within the VolumeGroup according to the allocation characteristics of each logical volume. Use the LogicalVolume parameter to reorganize specific logical volumes. In the reorganization, the order of priority goes in the order the logical volumes are listed by lsvg -l Volume_Group. If a list of logical volumes is provided, the highest priority goes to the first logical volume in the list, down to the last logical volume with the lowest. The volume group must be varied on and must have free partitions before you can use the reorgvg command. Appendix A. High-level LVM commands 265 The relocatable flag of each logical volume must be set to y with the chlv -r command for the reorganization to take effect; otherwise, the logical volume is ignored. Note 1. The reorgvg command does not reorganize the placement of allocated physical partitions for any striped logical volumes. 2. At least one free physical partition must exist on the specified volume group for the reorgvg command to run successfully. 3. In AIX Version 4.2 or later, if you enter the reorgvg command with the volume group name and no other arguments, the entire volume group is reorganized. In earlier versions of AIX, if you enter the reorgvg command with the volume group name and no other arguments, it will only reorganize the first logical volume in the volume group. The first logical volume is the one listed by the lsvg -l VolumeName command. A.27 The replacepv command The following summarizes the options for the replacepv command. replacepv - Replaces a physical volume in a volume group with another physical volume. Usage: replacepv [-f] {SourcePV | SourcePVID} DestinationPV Usage: replacepv [-R] dir_name [DestinationPV] -f Forces the replacement of the DestinationPV by the SourcePV unless the DestinationPV is part of another volume group in the Device Configuration Database or a volume group that is active. -R dir_name Recovers replacepv if it is interrupted by <ctrl-c>, a system crash, or a loss of quorum. When using the -R flag, you must specify the directory name given during the initial run of replacepv. This flag also allows you to change the DestinationPV. The replacepv command replaces allocated physical partitions and the data they contain from the SourcePV to DestinationPV. The specified SourcePV cannot be the same as DestinationPV. 266 AIX Logical Volume Manager from A to Z: Troubleshooting and Commands Note 1. The DestinationPV size must be at least the size of the SourcePV. 2. The replacepv command cannot replace a SourcePV with a stale logical volume unless this logical volume has a non-stale mirror. The allocation of the new physical partitions follows the policies defined for the logical volumes that contain the physical partitions being replaced. A.28 The rmlv command The following summarizes the options for the rmlv command. rmlv - Removes logical volumes from a volume group. Usage: rmlv [-B] [-f] [-p Physical Volume] LogicalVolume(s) -B Issues a chlvcopy -B -s for the parent logical volume if the logical volume was created using the -l flag. If it is a regular logical volume, then the -B flag is ignored. -f Removes the logical volumes without requesting confirmation. -p PhysicalVolume Removes only the logical partition on the PhysicalVolume. The logical volume is not removed unless there are no other physical partitions allocated. getlvodm, ldeletelv, lquerylv, lreducelv, putlvodm, and lvrelminor Commands called Note This command destroys all data in the specified logical volumes. The rmlv command removes a logical volume. The LogicalVolume parameter can be a logical volume name or logical volume ID. The logical volume first must be closed. If the volume group is varied on in concurrent mode, the logical volume must be closed on all the concurrent nodes on which volume group is varied on. For example, if the logical volume contains a file system, it must be unmounted. However, removing the logical volume does not notify Appendix A. High-level LVM commands 267 the operating system that the file system residing on it has been destroyed. The rmfs command updates the /etc/filesystems file. A.29 The rmlvcopy command The following summarizes the options for the rmlvcopy command. rmlvcopy - Removes copies from a logical volume. Usage: rmlvcopy LogicalVolume Copies [PhysicalVolume(s)] LogicalVolume The LogicalVolume parameter can be the logical volume name or logical volume ID. Copies The copies parameter determines the maximum number of physical partitions that remain. PhysicalVolume The PhysicalVolume parameter can be the physical volume name or the physical volume ID. Commands called getlvodm, putlvodm, putlvcb, lquerylv allocp, and lreducelv The rmlvcopy command removes copies from each logical partition in the LogicalVolume. Copies are the physical partitions, which, in addition to the original physical partition, make up a logical partition. You can have up to two copies in a logical volume. If the PhysicalVolume parameter is used, then only copies from that physical volume will be removed. A.30 The restvg command The following summarizes the options for the restvg command. restvg - Restores the user volume group and all its containers and files. Usage: restvg [-b Blocks] [-f Device] [-q] [-s] [-n] [-p PPsize] [PhysicalVolume(s)] -b Blocks 268 Specifies the number of 512-byte blocks to read in a single input operation. If this parameter is not specified, the default of 100 is used by the restore command. Larger values result in larger physical transfers to tape devices. AIX Logical Volume Manager from A to Z: Troubleshooting and Commands -f Device Specifies the device name of the backup media. The default is /dev/rmt0. -n Specifies that the existing MAP files are ignored. The -n flag overrides the value of the EXACT_FIT field in the logical_volume_policy stanza of the vgname.data file. -p PPsize Specifies the number of megabytes in each physical partition. If not specified, restvg uses the best value for the PPsize, dependent upon the largest disk being restored to. If this is not the same as the size specified in the vgname.data file, the number of partitions in each logical volume will be appropriately altered with respect to the new PPsize. If a PPsize is specified that is smaller than appropriate for the disk sizes, the larger PPsize will be used. If a PPsize is specified that is larger than appropriate for the disk sizes, the specified larger PPsize will be used. -q Specifies that the usual prompt not be displayed before the restoration of the volume group image. If this flag is not specified, the prompt displays the volume group name and the target disk-device names. -s Specifies that the logical volumes be created at the minimum size possible to accommodate the file systems. This size is specified by the value of LV_MIN_LPS field of the lv_data stanza of the vgname.data file (where vgname is the name of the volume group). The -s flag overrides the values of the SHRINK and EXACT_FIT fields in the logical_volume_policy stanza of the vgname.data file. The -s flag causes the same effect as values of SHRINK=yes and EXACT_FIT=no would cause. PhysicalVolme(s) Specifies the names of physical volumes to be used instead of the physical volumes listed in the vgname.data file. Target physical volumes must be defined as empty; that is, they must contain a physical volume identifier and must not belong to a volume group. If the target physical volumes are new, they must be added to the system using the mkdev command. If the target physical volumes belong to a volume group, they must be removed from the volume group using the reducevg command. Appendix A. High-level LVM commands 269 mkvg, mklv, and mkfs Commands called The restvg command restores the user volume group and all its containers and files as specified in the /tmp/vgdata/vgname/vgname.data file (where vgname is the name of the volume group) contained within the backup image created by the savevg command. The restvg command restores a user volume group. The bosinstall routine reinstalls the root volume group (rootvg). If the restvg command encounters a rootvg volume group in the backup image, the restvg command exits with an error. If a yes value has been specified in the EXACT_FIT field of the logical_volume_policy stanza of the /tmp/vgdata/vgname/vgname.data file, the restvg command uses the map files to preserve the placement of the physical partitions for each logical volume. The target disks must be of the same size or larger then the source disks specified in the source_disk_data stanzas of the vgname.data file. Note To view the files in the backup image or to restore individual files from the backup image, the user must use the restore command with the -T or -x flag, respectively. (Refer to the restore command for more information.) A.31 The savevg command The following summarizes the options for the savevg command. savevg - Finds and backs up all file belonging to a specified volume group. The file is a symbolic link to the mksysb script. Usage: savevg [-b Blocks] [-e] [-f Device] [-i | -m] [-p] [-v] [-X] VGName 270 AIX Logical Volume Manager from A to Z: Troubleshooting and Commands -b Number Specifies the number of 512-byte blocks to write in a single output operation. When the backup command writes to tape devices, the default is 100 for backups by name. The write size is the number of blocks multiplied by the block size. The default write size for the backup command writing to tape devices is 51200 (100 * 512) for backups by name. The write size must be an even multiple of the tape's physical block size. Appendix A. High-level LVM commands 271 272 -e Excludes files listed in the /etc/exclude.rootvg file from being backed up. The rules for exclusion follow the pattern matching rules of the grep command. Note: If you want to exclude certain files from the backup, create the /etc/exclude.rootvg file, with an ASCII editor and enter the patterns of file names that you do not want included in your system backup image. The patterns in this file are input to the pattern matching conventions of the grep command to determine which files will be excluded from the backup. If you want to exclude files listed in the /etc/exclude.rootvg file, select the Exclude Files field and press the Tab key once to change the default value to yes. For example, to exclude all the contents of the directory called scratch, edit the exclude file to read as follows: /scratch/ For example, to exclude the contents of the directory called /tmp, and avoid excluding any other directories that have /tmp in the pathname, edit the exclude file to read as follows: ^./tmp/ All files are backed up relative to . (current working directory). To exclude any file or directory for which it is important to have the search match the string at the beginning of the line, use ^ (caret character) as the first character in the search string, followed by . (dot character) followed by the filename or directory to be excluded. If the filename or directory being excluded is a substring of another filename or directory, use ^. (caret character followed by dot character) to indicate that the search should begin at the beginning of the line and/or use $ (dollar sign character) to indicate that the search should end at the end of the line. -f Device Specifies the device or file name on which the image is to be stored. The default is the /dev/rmt0 device. AIX Logical Volume Manager from A to Z: Troubleshooting and Commands -i Calls the mkvgdata command, which generates the /vgname.data file. The /vgname.data file contains information on logical volumes, file systems and physical volumes. This information is included in the backup for future use by the installation process. -m Calls the mkvgdata command with the -m flag to generate map files. -p Disables software packing of the files as they are backed up. Some tape drives use their own packing or compression algorithms. This flag only applies to AIX Version 4.2 or later. -v Verbose mode. Lists files as they are backed up. This flag only applies to AIX Version 4.2 or later. -X Specifies to automatically expand the /tmp file system if necessary. This flag only applies to AIX Version 4.2 or later. bosboot, mkinstape, mkszfile, and backup Commands called Note The savevg command will not generate a bootable tape if the volume group is the root volume group. Although the tape is not bootable, the first three images on the tape are dummy replacements for the images normally found on a bootable tape. The actual system backup is the fourth image. For more information about images on bootable tapes, please see “Troubleshooting an Installation from a System Backup, General Information Regarding mksysb System Backups” in the AIX Version 4.3 Installation Guide, SC23-4112. The savevg command finds and backs up all files belonging to a specified volume group. A volume group must be varied-on, and the file systems must be mounted. The savevg command uses the data file created by the mkvgdata command. This file can be one of the following: /image.data Contains information about the root volume group (rootvg). The savevg command uses this file to create a backup image that can be used by Network Installation Management (NIM) Appendix A. High-level LVM commands 273 to reinstall the volume group to the current system or to a new system. /tmp/vgdata/vgname/ vgname.data Contains information about a user volume group. The vgname variable reflects the name of the volume group. The savevg command uses this file to create a backup image that can be used by the restvg command to remake the user volume group. To create a backup of the operating system to CD, please refer to the mkcd command. A.32 The splitlvcopy command The following summarizes the options for the splitlvcopy command. splitlvcopy - Splits copies from one logical volume and creates a new logical volume from them. Usage: splitlvcopy [-f] [-y NewLVName] [-Y Prefix] LVCopies [PhysicalVolume(s)] 274 -f Specifies to split open logical volumes without requesting confirmation. By default, splitlvcopy requests confirmation before splitting an open logical volume. This includes open raw logical volumes and logical volumes containing mounted file systems. Copies Specifies the maximum number of physical partitions that remain in LogicalVolume after the split. LogicalVolume Specifies the logical volume name or logical volume ID to split. PhysicalVolume Specifies the physical volume name or the physical volume ID to remove copies from. -y NewLVName Specifies the name of the new logical volume to move copies to from LogicalVolume. AIX Logical Volume Manager from A to Z: Troubleshooting and Commands -Y Prefix Specifies the Prefix to use instead of the prefix in a system-generated name for the new logical volume. The prefix must be less than, or equal to, 13 characters. A name cannot begin with a prefix already defined in the PdDv class in the Device Configuration Database for other devices or be a name already used by another device. allocp, getlvcb, getlvname, getlvodm, lcreatelv, lquerylv, lquerypv, lqueryvg, lreducelv, lvgenminor, putlvcb, lvrelminor, rmlv, lspv, and putlvodm Commands called Note Although the splitlvcopy command can split logical volumes that are open, including logical volumes containing mounted file systems, this is not recommended. You may lose consistency between LogicalVolume and NewLogicalVolume if the logical volume is accessed by multiple processes simultaneously. When splitting an open logical volume, you implicitly accept the risk of potential data loss and data corruption associated with this action. To avoid the potential corruption window, close logical volumes before splitting, and unmount file systems before splitting The splitlvcopy command removes copies from each logical partition in LogicalVolume and uses them to create NewLogicalVolume. The Copies parameter determines the maximum number of physical partitions that remain in LogicalVolume after the split. Therefore, if LogicalVolume has three copies before the split, and the Copies parameter is 2, LogicalVolume will have two copies after the split, and NewLogicalVolume will have one copy. You can not split a logical volume so that the total number of copies in LogicalVolume and NewLogicalVolume after the split is greater than the number of copies in LogicalVolume before the split. The NewLogicalVolume will have all the same logical volume characteristics as LogicalVolume. If LogicalVolume does not have a logical volume control block, the command will succeed with a warning message and create NewLogicalVolume without a logical volume control block. There are additional considerations to take when splitting a logical volume containing a file system. After the split, there will be two logical volumes, but there will only be one entry in the /etc/filesystems file that refers to LogicalVolume. To access NewLogicalVolume as a file system, you must create an additional entry in /etc/filesystems with a different mount point that refers to NewLogicalVolume. If the mount point does not already exist, you Appendix A. High-level LVM commands 275 have to create it before the new file system can be mounted. In addition, if NewLogicalVolume was created while LogicalVolume was open, you have to run the command: fsck /dev/NewLogicalVolume before the new file system can be mounted. You can not use the System Management Interface Tool (SMIT) to run this command. Message catalogs are not supported for this command; therefore, the error messages are provided in English only with no message catalog numbers. A.33 The synclvodm command The following summarizes the options for the synclvodm command. synclvodm - Synchronizes or rebuilds the logical volume control block, the device configuration database, and the volume group descriptor areas on the physical volumes. Usage: synclvodm [ -v ] VolumeGroup [ LogicalVolume(s)] -v verbose getlvodm, lqueryvg, updatevg, and updatelv Commands called During normal operations, the device configuration database remains consistent with the logical volume manager information in the logical volume control blocks and the volume group descriptor areas on the physical volumes. If for some reason the device configuration database is not consistent with Logical Volume Manager information, the synclvodm command can be used to resynchronize the database. The volume group must be active for the resynchronization to occur (see varyonvg). If logical volume names are specified, only the information related to those logical volumes is updated. Note Do not remove the /dev entries for volume groups or logical volumes. Do not change the device configuration database entries for volume groups or logical volumes using the object data manager. 276 AIX Logical Volume Manager from A to Z: Troubleshooting and Commands A.34 The syncvg command The following summarizes the options for the syncvg command. syncvg - Synchronizes logical volume copies that are not current. Usage: syncvg [-f] [-i] [-H] [-P NumParallelLPs] { -l LVName(s) | -p PVName(s) | -v VGname(s) } -f Specifies a good physical copy is chosen and propagated to all other copies of the logical partition, whether or not they are stale. -H Postpones writes for this volume group on other active concurrent cluster nodes until this sync operation is complete. When using the -H flag, the -P flag does not require that all the nodes on the cluster support the -P flag. This flag is ignored if the volume group is not varied on in concurrent mode. -i Reads the names from standard input. -l LVName(s) The logical volume device name(s) to resynchronize -P NumParallelLps Numbers of logical partitions to by synchronized in parallel. The valid range for NumParallelLps is 1 to 32. NumParallelLps must be tailored to the machine, disks in the volume group, system resources, and volume group mode. -p PVName(s) The physical volume device name(s) to resynchronize. -v VGName(s) The volume group device name(s) to resynchronize. Commands called getlvodm, lqueryvg, lresyncpv, and lresynclv A.35 The unmirrorvg command The following summarizes the options for the unmirrorvg command. unmirrorvg - Removes the mirrors that exist on volume groups or specified disks. Appendix A. High-level LVM commands 277 Usage: unmirrorvg [ -c Copies] VolumeGroup [ PhysicalVolume(s) ] -c Copies Commands called Specifies the minimum number of copies that each logical volume must have after the unmirrorvg command has finished executing. If you do not want all logical volumes to have the same number of copies, then reduce the mirrors manually with the rmlvcopy command. If this option is not used, the copies will default to 1. allocp, getlvname, getlvodm, lcreatelv, lextendlv, lquerylv, lquerypv, lqueryvg, putlvcb, putlvodm, and rmlv The unmirrorvg command unmirrors all the logical volumes detected on a given volume group. This same functionality may also be accomplished manually if you execute the rmlvcopy command for each individual logical volume in a volume group. By default, unmirrorvg will pick the set of mirrors to remove from a mirrored volume group. If you wish to control which drives no longer are to contain mirrors, you must include the list of disks in the input parameters, PhysicalVolume. When the PhysicalVolume parameter is listed in the command, this indicates that only the mirrors that exist on this disk should be unmirrored. Mirrors that exist on other drives in the volume group, but not listed in a user-provided disk list, are left alone and remain mirrored. Note that if a logical volume copy spans more than one disk, the portion of the logical volume copy that resides on a disk not listed by the user is also removed. When unmirrorvg is executed, the default COPIES value for each logical volume becomes 1. If you wish to convert your volume group from triply mirrored to doubly mirrored, use the -c option. Note that to use this command, you must either have root user authority or be a member of the system group. The unmirrorvg command may take a significant amount of time to complete because of complex error checking and the number of logical volumes to unmirror in a volume group. 278 AIX Logical Volume Manager from A to Z: Troubleshooting and Commands A.36 The updatelv command The following summarizes the options for the updatelv command. updatelv - Updates the logical control block and the ODM. It is an undocumented command. Usage: updatelv [-c] [-D] [-L] [-P] [-R] LVname VGname -c Exit script if there is a name conflict -D This flag keeps the existing entries in /dev -L Do a learning importvg. -P Preserve permissions and ownership of special files. -R Restore permissions from the VGDA Commands called getlvname, getlvodm, lvgenminor, lvrelminor, lquerylv, lchangelv, putlvodm, putlvcb, getlvcb, and mknod The volume group must be varied on when this command is executed. A.37 The updatevg command The following summarizes the options for the updatevg command. updatevg - synchronizes volume group information in the ODM if the ODM has at least a valid volume group identifier. It is an undocumented command usage: updatevg VGname Commands called getlvodm, getlvcb, lqueryvg, putlvcb, and putlvodm The LVM information and the logical volume control block are both used to do the resynchromization. The volume group must be varied when this command is executed. Appendix A. High-level LVM commands 279 A.38 The varyoffvg command The following summarizes the options for the varyoffvg command. varyoffvg - Deactivates a volume group. Usage: varyoffvg [-s] VolumeGroup -s Puts the volume group into System Management mode so that only logical volume commands can be used on the volume group. In this mode, no logical volume can be opened or accessed by users. getlvodm, lvaryoffvg, and putlvodm Commands called The varyoffvg command deactivates the volume group specified by the VolumeGroup parameter along with its associated logical volumes. The logical volumes first must be closed. For example, if the logical volume contains a file system, it must be unmounted. To activate the volume group, use the varyonvg command. Note 1. To use this command, you must either have root user authority or be a member of the system group. 2. A volume group that has a paging space volume on it cannot be varied off while the paging space is active. Before deactivating a volume group with an active paging space volume, ensure that the paging space is not activated automatically at system initialization, and then reboot the system. A.39 The varyonvg command The following summarizes the options for the varyonvg command. varyonvg - Activates a volume group. Usage: varyonvg [-b] [-c] [-f] [-n] [-p] [-s] [-u] VolumeGroup 280 AIX Logical Volume Manager from A to Z: Troubleshooting and Commands -b Breaks disk reservations on disks locked as a result of a normal varyonvg command. Use this flag on a volume group that is already varied on. This flag only applies to AIX Version 4.2 or later. Note: This flag unlocks all disks in a given volume group. -c Varies the volume group on in concurrent mode. This is only possible if the volume group is Concurrent Capable and the system has the HACMP product loaded and available. If neither is true, the volume group will fail the vary on. This flag only applies to AIX Version 4.2 or later. If the vary on process detects that there is a new logical volume in the volume group whose name is already being used for one of the existing logical volumes, then the vary on will fail. You will need to rename the existing logical volume before attempting the vary on again. -f Allows a volume group to be made active that does not currently have a quorum of available disks. All disk that cannot be brought to an active state will be put in a removed state. At least one disk must be available for use in the volume group. -n Disables the synchronization of the stale physical partitions within the VolumeGroup. -p All physical volumes must be available to use the varyonvg command. -s Makes the volume group available in System Management mode only. Logical volume commands can operate on the volume group, but no logical volumes can be opened for input or output. Note: Logical volume commands also cannot read or write to or from logical volumes in a volume group varied on with the -s flag. Logical volumes that attempt to write to a logical volume in a volume group varied on with the -s flag (such as chvg or mklvcopy) may display error messages indicating that they were unable to write to and/or read from the logical volume. Appendix A. High-level LVM commands 281 -u Varies on a volume group, but leaves the disks that make up the volume group in an unlocked state. Use this flag as part of the initial varyon of a dormant volume group. This flag only applies to AIX Version 4.2 or later. Note AIX Version 4.2 or later provides the flags -b and -u for developers who use n-tailed DASD systems. The base design of LVM assumes that only one initiator can access a volume group. The HACMP product does work with LVM in order to synchronize multi-node accesses of a shared volume group. However, multi-initiator nodes can easily access a volume group with the -b and -u flags without the use of HACMP. Your must be aware that volume group status information may be compromised or inexplicably altered as a result of disk protect (locking) being bypassed with these two flags. If you use the -b and -u flags, data and status output cannot be guaranteed to be consistent. The varyonvg command activates the volume group specified by the VolumeGroup parameter and all associated logical volumes. A volume group that is activated is available for use. When a volume group is activated, physical partitions are synchronized if they are not current. A list of all physical volumes with their status is displayed to standard output whenever there is some discrepancy between the Device Configuration Database and the information stored in the Logical Volume Manager. The volume group may or may not be varied on. You must carefully examine the list and take proper action depending on each reported status to preserve your system’s integrity. A list of every status and its meanings can be found in the lvm_varyonvg subroutine. While varying on in concurrent mode, if the vary on process detects that there are logical volumes which are not previously known to the system, their definitions are imported. The permissions and ownership of the new device special files are duplicated to those of the volume group special file. If you have changed the permissions and/or ownership of the device special files of the logical volume on the node it was created, you will need to perform the same changes on this node. If the volume group cannot be varied on due to a loss of the majority of physical volumes, a list of all physical volumes with their status is displayed. To vary on the volume group in this situation, you will need to use the force option. 282 AIX Logical Volume Manager from A to Z: Troubleshooting and Commands The varyonvg command will fail to vary on the volume group if a majority of the physical volumes are not accessible (no Quorum). This condition is true even if the quorum checking is disabled. Disabling the quorum checking will only ensure that the volume group stays varied on even in the case of loss of quorum. The volume group will not vary on if there are any physical volumes in PV_MISSING state and the quorum checking is disabled. This condition is true even if there are a quorum of disks available. To vary on in this situation, either use the force option or set an environment variable MISSINGPV_VARYON to TRUE (set this value in /etc/environment if the volume group needs to be varied with missing disks at the boot time). In the above cases (using the force varyon option and using MISSINGPV_VARYON variable), you take full responsibility for the volume group integrity. Appendix A. High-level LVM commands 283 284 AIX Logical Volume Manager from A to Z: Troubleshooting and Commands Appendix B. Intermediate-level commands These commands are usually called by the high level commands and are not aimed to the end user. A careful system administrator can still use these commands. Be aware that not all arguments and options are checked here and that you may end up destroying your system using these commands. This appendix lists and explains the options for this set of commands. B.1 The allocp command The following summarizes the options for the allocp command. allocp - An object file command that is used to generate an allocation map that is required when a logical volume is created, extended, reduced, or removed. Usage: allocp [-a Position] [-c Copies] [-e Range] [-i LVID] [-K] [-k Strict] [-S StripSize] [-s Size] [-t] [-u] VolumeGroup -a Position -c Copies © Copyright IBM Corp. 2000 Sets the intraphysical volume allocation policy (the position of the logical partitions on the physical volume). The Position variable is one of the following: m Allocates logical partitions in the outer middle section of each physical volume. This is the default position. c Allocates logical partitions in the center section of each physical volume. e Allocates logical partitions in the outer edge section of each physical volume. ie Allocates logical partitions in the inner edge section of each physical volume. im Allocates logical partitions in the inner middle section of each physical volume. 1,2, or 3 285 -e Range Sets the interphysical volume allocation policy (the number of physical volumes to extend across using the volumes that provide the best allocation). The value of the Range variable is limited by the Upperbound variable, set with the -u flag, and is one of the following: x Allocates logical partitions across the maximum number of physical volumes. m Allocates logical partitions across the minimum number of physical volumes. -i LVid -K 2 -k Strict Determines the strict allocation policy. Copies of a logical partition can be allocated to share or not to share the same physical volume. The Strict variable is one of the following: y Sets a strict allocation policy so that copies of a logical partition cannot share the same physical volume (default). n Does not set a strict allocation policy so that copies of a logical partition can share the same physical volume. s Sets a super-strict allocation policy so that the partitions allocated for one mirror cannot share a physical volume with other partitions from another mirror Note: When changing a non super-strict logical volume to a superstrict logical volume you must use the -u flag. 286 -S StripeSize Specifies the number of bytes per striped. Must be a power of two, between 4 K and 128 K, for example 4 K, 8 K, 16 K, 32 K, 64 K, or 128 K. Note: The -d, -e, -m, and -s flags are not valid when creating a striped logical volume using the -S flag. -s Size Number of logical partitions. -t Type The logical volume type (jfs, jfslog, and so on). AIX Logical Volume Manager from A to Z: Troubleshooting and Commands -u UpperBound Sets the maximum number of physical volumes for new allocation. The value must be between one and the total number of physical volumes. The default is the total number of physical volumes in the volume group There is a known problem with allocp, which causes this error (0516-423 allocp: Not enough entries in mapfile to fulfill allocation). allocp is picky about the way the map file is organized. The partitions must be in order from lower to higher and, if multiple drives, the drives must appear in the same order from bottom to top. B.2 The cfgvg command The following summarizes the options for the cfgvg command. cfgvg - Is a Bourne shell script command that is called by /etc/rc to vary on volume groups that have the auto-varyon flag set. This undocumented script requires no flags. Usage:cfgvg B.3 The chlvcopy command The following summarizes the options for the chlvcopy command. chlvcopy - Marks or unmarks mirror copy as read-only backup. Usage: chlvcopy [-f] {-B [-s] } | {-b [-c copy] [-f] [-P] [-l newlvname] [-w] } LV name -b Marks a mirror copy as a split mirror copy. -c copy Mirror copy to mark as split mirror copy. The allowed values of copy are 1, 2, or 3. If this option is not specified, the default for copy is the last mirror copy of the logical volume. -B Unmarks a mirror as split mirror copy. It will also attempt to remove the child backup logical volume if one was created with the -l option. Appendix B. Intermediate-level commands 287 -f Forces split mirror copy even if there are stale partitions. If used with the -B option, the child backup logical volume, if one was created with the -l option, will be removed with the force option. -l newlvname New name of the backup logical volume. Specifying the -l flag also sets the persistence option, allowing applications to access split mirror copy via newlvname. -P Maintains information about the existence of an online split mirror copy across a reboot and also allows other nodes (in a concurrent mode environment) to be aware of the existence of the online split mirror copy. -s Starts a background syncvg for the logical volume. -w Allows split mirror copy to be writable (default is to create the split mirror copy as READ ONLY). LVName Allows split mirror copy to be writable (default is to create the split mirror copy as READ ONLY). Note 1. If persistence is used either by using the -P flag or by creating a child backup logical volume device by using the -l flag, it will cause the volume group to be usable only on 4.3.2.0 or later versions of AIX. This is true even after removal of split mirror copy designation of the parent logical volume and the child backup logical volumes. 2. For chvlcopy to be successful in a concurrent volume group environment, all the concurrent nodes must be at AIX Version 4.3.2 or later. All partitions of a logical volume must be refreshed before chvlcopy can mark a mirror copy as a split mirror. Only one copy may be designated as an online split mirror copy. Although the chlvcopy command can mark online split mirror copies on logical volumes that are open (including logical volumes containing mounted file systems), this is not recommended unless the application is at a known state at the time the copy is marked as a split mirror. The split mirror copy is internally consistent at the time the chlvcopy command is run, but consistency is lost between the logical volume and the split mirror copy if the logical 288 AIX Logical Volume Manager from A to Z: Troubleshooting and Commands volume is accessed by multiple processes simultaneously and the application is not at a known state. When marking an open logical volume, data may be lost or corrupted. Logical volumes should be closed before marking online split mirror copies in order to avoid a potential corruption window. If the persistence flag is not set to prevent the loss of backup data, the volume group should be set to not automatically vary on, and the -n flag should be used with varyonvg to prevent stale partitions from being resynced. If the persistence flag ( -P) is set, the following applies: In the event of a crash while an online split mirror copy exists (or multiples exist), the existence of copies is retained when the system is rebooted. B.4 The copyrawlv command The following summarizes the options for the copyrawlv command. copyrawlv - Is an object file command that is used by cplv to do the actual copying on the physical volume. Usage: copyrawlv LVNamefrom LVNameto Size LVNamefrom Source logical volume device name. LVNameto Destination logical volume device name. Size Size of the copy (that is the smaller logical volume). B.5 The getlvcb command The following summarizes the options for the getlvcb command. getlvcb - This undocumented command queries the lvcb. Usage: getlvcb [-A] [-a] [-c] [-f] [-L] [-r] [-P] [-S] [-s] [-t] [-u] LVName -A Display contents of lvcb. -a Intra physical volume allocation policy. -c copies Appendix B. Intermediate-level commands 289 -f File system name -L Label -r Inter-physical volume allocation policy. -P Stripe expn -S Striping width -s Strictness -t Display type of file system. -u Upper limit. LVName Logical Volume Name. B.6 The getlvname command The following summarizes the options for the getlvname command. getlvname - Is an object file command that generates or checks a logical volume name. This command is undocumented. Usage: getlvname [-Y Prefix] [-n LVName] [Type] -n LVName Logical volume name to check. -Y Prefix Prefix for new logical volume name. Type Type of logical volume. The getlvname command generates a logical volume name for the logical volume block device. If the type argument is contained in the Configuration Database (PdAt), then the corresponding name prefix is taken from the PdAt class and used to build the logical volume name. If the type is not contained in the PdAt class, then the default prefix (lv) is used to build the logical volume name. If the prefix is given, then a two integer sequence number is generated. Names are formed by concatenating the name prefix with a sequence number. 290 AIX Logical Volume Manager from A to Z: Troubleshooting and Commands If the -n flag is used, the CuDv class is checked to ensure the name does not already exist. B.7 The getlvodm command The following summarizes the options for the getlvodm command. getlvodm - Is an object file command that volume group and logical volume gets information from the ODM. This command is undocumented. Usage: getlvodm [-a LVDescriptor] [-B LVDescriptor] [--b LVID] [-C] [-c LVID] [-d VGID] [-e LVID} [-F] [-G LVID] [-g PVID] [-h] [-j PVID] [-L VGDescriptor] [-l LVDescriptor] [-m LVID] [-N LVID] [-P] [-p PVDescriptor] [-Q VGDescriptor] [-R] [-r LVID] [-S] [-s VGDescriptor] [-T VGDescriptor] [-t VGID] [-u VGDescriptor] [-v VGDescriptor] [-w VGDescriptor] [-y LVID] [-X VGDescriptor] [-x VGDescriptor] -a LVDescriptor Return the logical volume name, given the LVDescriptor, which can be a logical volume name or LVID. -B LVDescriptor Return the label for this logical volume descriptor. -b LVID Return the volume group name for this LVID. -C Return all the configured physical volumes. -c LVID Return the logical volume allocation characteristics for this LVID. The order is as follows: logical volume type intra-allocation policy flag inter-allocation policy flag upperbound flag strictness flag number of copies relocation flag -d VGID Return the major number for this VGID. -e LVID Return the logical volume name for this LVID. -F Return the free configured physical volumes. -G LVID Return the strip size for this LVID. -g PVID Return the physical volume name for this PVID. Appendix B. Intermediate-level commands 291 292 -h Return all volume group names. -j PVID Return the VGID for this PVID. -L VGDescriptor Returns the logical volumes and the LVIDs for this volume group Name or VGID. -l LVDescriptor Returns the LVID for this Logical volume name or LVID. -m LVID Returns the mount point for this LVID. -N LVID Return the stripe width for this LVID. -p PVDescriptor Return the PVID for the physical volume name or PVID. -P Return the physical volume names, PVIDs, and volume groups of all the configured physical volumes. -Q VGID Returns the quorum attribute for this VGID. -R Returns the runtime attribute from the PdAt class. -r LVID Returns the relocatable flag for this LVID. -S Returns a list of all read/write optical devices. -s VGDescriptor Returns the volume group state for this volume group name or VGID. The value returned is as follows: 0 - Varied off 1 - Varied on with all PVs 2 - Varied on with missing PVs -T VGDescriptor Returns the timestamp for this volume group name or VGID. -t VGID Returns the volume group name for this VGID. -u VGDescriptor Returns the auto-on value for this volume group name or VGID. The value returned is as follows: y - Auto-vary on set n - Auto-vary on disabled -v VGDescriptor Returns the VGID for this volume group name or VGID. -w VGDescriptor Returns the physical volume names and PVIDs for this volume group name or VGID. -y LVID Returns the logical volume type for this LVID. AIX Logical Volume Manager from A to Z: Troubleshooting and Commands -X VGDescriptor Returns the concurrent capable flag for the volume group name or VGID. -x VGDescriptor Returns the auto-on concurrent flag for the volume group name or VGID. The getlvodm command gets logical volume data from the Configuration Database and writes it to standard out (stdout). The command line option specifies what information will be retrieved. The LVDescriptor, PVDescriptor, or VGDescriptor can be either an ID or a name. B.8 The getvgname command The following summarizes the options for the getvgname command. getvgname - An object file command that returns a new, unused volume group name. This command is undocumented. Usage: getvgname [-n] [-Y Prefix] VGName -n Returns whether this volume group name is in use or not. -Y Prefix The getvgname command returns a volume group name. The name is written to standard out (stdout). The name is formed by concatenating the volume group prefix (vg) to the next two integer sequence number available from the CuDv class. If the -n option is used, then the CuDv class will be checked to make sure the name does not already exist. B.9 The lchangelv command The following summarizes the options for the lchangelv command. lchangelv - An object file command that changes the attributes of a logical volume. Usage: lchangelv -l LVID [-s MaxLVsize] [-n LVname] [-M MirrorPolicy] [-p Permissions] [-r Relocation] [-v WriteVerify] [-w MWConsistency] Appendix B. Intermediate-level commands 293 -l LVID The LVID of the logical volume to change. -s MaxLVsize New maximum size of logical volume. -n NewLVname New logical volume name. The size of the string is between 1 and 64 characters. -M MirrorPolicy New mirror policy. The value is as follows: 1 - Sequential mirroring 2 - Parallel mirroring -p Permission Set whether the logical volume is read-write or read-only. The value is as follows: 1 - Read-write 2 - Read-only -r Relocation Sets whether there will be bad block reallocation. The value is as follows: 1 - Bad block reallocation 2 - No bad block reallocation -v WriteVerify Sets the write verify flag. The value is as follows: 1 - Write verify on 2 - Write verify off -w MWConsistency Sets the mirror write consistency flag. The value is as follows: 1 - Mirror write consistency is on 2 - Mirror write consistency is off B.10 The lchlvcopy command The following summarizes the options for the lchlvcopy command. lchlvcopy - An object file that changes the logical volume in question for online backup. Usage: lchlvcopy -l LVID -c Copy [-f] [-P] [-n new_minor_num] [-m child_minor_num] 294 -l LVID The logical volume ID. -c Copy Mirror copy to mark as split mirror copy. The allowed values of copy are 1, 2, or 3. If this option is not specified, the default for copy is the last mirror copy of the logical volume. AIX Logical Volume Manager from A to Z: Troubleshooting and Commands -f Forces split mirror copy even if there are stale partitions. If used with the -B option, the child backup logical volume, if one was created with the -l option, will be removed with the force option. -P Maintains information about the existence of an online split mirror copy across a reboot and also allows other nodes (in a concurrent mode environment) to be aware of the existence of the online split mirror copy. -n new_minor_num -m child_minor_num The minor number of the new logical volume. B.11 The lchangepv command The following summarizes the options for the lchangepv command. lchangepv - An object files that changes the attributes of a physical volume. Usage: lchangepv -g VGID -p PVID [-r PVState] [-a AllocState] -g VGID The volume group ID. -p PVID The physical volume ID. -r PVState The remove or return state of the physical volume. The values are as follows: 1 - PV temporarily REMOVED from VG. 2 - PV RETURNED to VG. Note that returning a PV to the VG requires execution of lvaryonvg to perform recovery and, thereby, activate the returned Physical Volume. -a AllocState The Allocate / Noallocate state of the Physical Volume. The values are as follows: 4 - Partitions in PV cannot be allocated for LV (NOALLOCPV). 8 - Partitions in PV can be allocated for LV (ALLOCPV). Appendix B. Intermediate-level commands 295 B.12 The lcreatelv command The following summarizes the options for the lcreatelv command. lcreatelv - An object file command that creates an empty logical volume that belongs to a specified volume group. Usage: lcreatelv -N LVname -g VGID -n MinorNum [-M MirrorPolicy] [-s MaxLPts] [-p Permissions] [-r Relocation] [-v WriteVerify] [-w MWConsistency] 296 -N LVname The logical volume name. -g VGID The volume group ID. -n MinorNum The minor number assigned to the logical volume. -s MaxLPts The maximum number of logical partitions allowed for this logical volume (an integer between 1 and LVM_MAXLPS (65535)). Note, this is not the number of logical partitions allocated. -M MirrorPolicy The mirror policy. The value is as follows: 1 - Sequential mirroring 2 - Parallel mirroring -p Permission Set whether the logical volume is read-write or read-only. The value is as follows: 1 - Read-write 2 - Read-only -r Relocation Sets whether there will be bad block reallocation. The value is as follows: 1 - Bad block reallocation 2 - No bad block reallocation -v WriteVerify Sets the write verify flag. The value is as follows: 1 - Write verify on 2 - Write verify off -w MWConsistency Sets the mirror write consistency flag. The value is as follows: 1 - Mirror write consistency is on 2 - Mirror write consistency is off AIX Logical Volume Manager from A to Z: Troubleshooting and Commands B.13 The lcreatevg command The following summarizes the options for the lcreatevg command. lcreatevg - An object file command that creates a new volume group and installs the first physical volume in the volume group. Usage: lcreatevg -a VGname -V VGmajor -N PVname -n MaxLV -D VGDASize -s SizePP [-ft] -a VGname The volume group name for the new volume group (VGname is the name of the /dev entry). -V VGmajor The major number to be assigned to the new volume group. -N PVname The name of the first physical volume to install in the volume group. -n MaxLV The maximum number of logical volumes in the volume group (an integer between 0 and LVM_MAXLVS (256)). -D VGDASize The size of the VGDA. An integer between 32 and 8192, where n is the number of blocks (512 bytes) to be reserved for one copy of the Volume Group Descriptor Area. -s SizePP The size of the physical partitions in this volume group. This size is expressed as an integer n between 20 and 30. The partition size is 2 n bytes. -f Use the force flag to create a volume group on a physical volume when the physical volume appears to be a member of another volume group that is not varied on. Caution -- All data on the physical volume is destroyed. -t Include VGID in the output. B.14 The ldeletelv command The following summarizes the options for the ldeletelv command. Appendix B. Intermediate-level commands 297 ldeletelv - An object file command that deletes a logical volume from its parent volume group. Usage: ldeletelv -l LVID -l LVID The logical volume ID. B.15 The ldeletepv command The following summarizes the options for the ldeletepv command. ldeletepv - An object file command that deletes a physical volume from its parent volume group. Usage: ldeletepv -g VGID -p PVID -g VGID The volume group ID. -p PVID The physical volume ID. B.16 The lextendlv command The following summarizes the options for the lextendlv command. lextendlv - An object file command that extends or allocates additional partitions to a logical volume. Usage: lextendlv -l LVID [-s ExtendSize] filename 298 -l LVID The logical volume ID of the logical volume to extend. -s ExtendSize The number of logical partitions to allocate for extending the logical volume. Note the ExtendSize + the CurrentSize of the logical volume should not exceed LVM_MAXLPS (65535). In the current implementation of the LVM, a logical volume cannot go beyond 2 gigabytes. AIX Logical Volume Manager from A to Z: Troubleshooting and Commands filename The name of the file that contains the map. This map comprises of a set of triplets - one for each partition to be allocated. Each triplet contains the physical volume ID, the physical partition number, and the logical partition number, respectively, thus specifying the exact location of each physical partition. B.17 The linstallpv command The following summarizes the options for the linstallpv command. linstallpv - An object file command that adds a physical volume to a volume group and adds a VGDA. Usage: installpv -N PVName -g VGID -f -N PVName The name of the physical volume to add -g VGID The volume group ID of the volume group to which the physical volume will be added. -f Forces the physical volume to be added to the specified volume group unless it is a member of another volume group in the Device Configuration Database or of a volume group that is active. B.18 The lmigratelv command The following summarizes the options for the lmigratelv command. lmigratelv - An object file command that moves the partitions for a particular logical volume following the specifications in the mapfile. Usage: lmigratelv -l LVID -s Size Mapfile -l LVID The LVID of the logical volume to be moved. -s Size The size in logical partitions of the logical volume. Appendix B. Intermediate-level commands 299 Mapfile The mapfile describing the migration moves and has the following records on each line: Src_PVID Src_LPNum Dest_PVID Dest_LPNum B.19 The lmigratepp command The following summarizes the options for the lmigratepp command. lmigratepp - An object file command that moves a physical partition to a specified physical volume. Usage: lmigratepp -g VGID -p old_PVID -n old_PPNum -P new_PVID -N new_PNum -g VGID The VGID of the volume group that contains both the origin and destination physical volumes. -p old_PVID The PVID of the physical volume that contains the physical partition that is to be moved. -n old_PPNum The physical partition number of the partition that is to be moved. -P new_PVID The PVID of the physical volume to which the physical partition should be moved. -N new_PPNum The destination physical partition number. B.20 The lquerylv command The following summarizes the options for the lqureylv command. lquerylv - An object file command that queries the attributes of a logical volume. Usage: lquerylv -L LVID [-p PVName] [-N] [-G] [-n] [-M] [-S] [-c] [-s] [-P] [-R] [-v] [-o] [-w] [-a] [-d] [-l] [-A] [-r] [-t] 300 -L LVID The LVID of the logical volume that is to be queried. -p PVName The name of the physical volume containing the VGDA. -N Returns the logical volume name. AIX Logical Volume Manager from A to Z: Troubleshooting and Commands -G Returns the VGID. -n Returns the maximum number of logical partitions. -M Returns the Logical Volume mirror write policy: 1 -Sequential mirroring 2 - Parallel mirroring -S Returns the current state of the logical volume. -c Returns the current size in logical partitions. -s Returns the physical partition size. -P Returns the logical volume permission attribute: 1 - Read-write 2 - Read-only -R Returns the bad block reallocation attribute: 1 - Bad block reallocation 2 - No bad block reallocation -v Returns the write verify state: 1 - Write verify is on 2 - Write verify is off -o Returns the open/closed state: 1 - Open 2 - Closed -w Returns the mirror write consistency state: 1 - Mirror write consistency is on 2 - Mirror write consistency is off -a Returns all the static attributes of the logical volume (LVName, VGID, MaxLP, MirrorPolicy, MWConsistency, LVState, LVSize, PPSize, PermissionFlag, ReallocateFlag, WriteVerify, OpenClose, StripeExp, StripeWidth, NumCopies, BkMirrorCopy) without headings. -d Returns the dynamic attribute of the logical volume - The logical partition map. -l Returns each copies of the mirror in the partition map on separate lines when used with the -d flag. -A Returns all static attributes and the partition map. Appendix B. Intermediate-level commands 301 -r Returns the partition map in lreducelv format. -t Includes the appropriate tags in the output. B.21 The lquerypv command The following summarizes the options for the lquerypv command. lquerypv - An object file command that queries the attributes of a physical volume. Usage: lquerypv -p PVID { -g VGID | -N PVName} [-s] [-c] [-P] [-n] [-a] [-D] [-d] [-A] [-t] -p PVID The PVID of the physical volume to query. -g VGID The VGID of the volume group that contains the physical volume to query. -N PVName The physical volume name. If both the physical name and VGID are provided, the VGID is ignored. -s Returns the physical volume partition size. -c Returns the current state of the physical volume: 1 - Active 2 - Missing -P Returns the total number of physical partitions. -n Returns the number of allocated physical partitions. -a Returns all static attributes of the physical volume (PPSize, PPState, TotalPPs, AllocPPs, VGDAs). -D Returns the number of VGDAs on the physical volume. -d Returns the physical partition map of the physical volume. -A Returns all attributes of the physical volume, that is, the static attributes and the physical partition map. -t Adds a short description when use with the above options. B.22 The lqueryvg command The following summarizes the options for the lqueryvg command. 302 AIX Logical Volume Manager from A to Z: Troubleshooting and Commands lqueryvg - An object file command that queries the attributes of a volume group. Usage: lqueryvg [-g VGID] [-p PVname] [-N] [-s] [-F] [-n] [-c] [-D] [-a] [-l] [-P] [-A] [-v] [-t] -g VGID The VGID of the volume group to query. -p PVname The name of the physical volume that contains the VGID. -N Returns the maximum number of logical volumes allowed in the volume group. -s Returns the physical partition size. -F Returns the number of free physical partitions in the volume group. -n Returns the current number of logical volumes in the volume group. -c Returns the current number of physical volumes in the volume group. -D Returns the total number of VGDAs for the volume group. -a Returns all the static attributes for the volume group ( ). -l Returns each LVID, logical volume name and state for each logical volume in the volume group. -P Returns each PVID, number of VGDAs and state for each physical volume in the volume group. -A Returns all attributes for the volume group (static attributes, logical volume details and physical volume details). -v Used only with the -p PVName flag to return the VGID from that physical volume. -t Includes the tags with the output for the above options. B.23 The lqueryvgs command The following summarizes the options for the lqueryvgs command. Appendix B. Intermediate-level commands 303 lqueryvgs - An object file command that queries the IDs of all volume groups in the system. It is assumed that there is only one system in the environment. Usage: lqueryvgs [-m ModuleID] [-N] [-G] [-A] [-t] -m ModuleID Kernel Module ID of the logical volume device drive. This is returned when the LVDD is loaded. -N Returns the number of volume groups created so far in the system. -G Returns the VGIDs and major numbers of the volume groups in the system. -A Returns the number of volume groups and each VGID and major number. -t Includes tags in the output of the above options. B.24 The lreducelv command The following summarizes the options for the lreducelv command. lreducelv - An object file command that reduces the number of allocated logical partitions in a logical volume. Usage: lreducelv -l LVID -s Size filename 304 -l LVID The LVID of the logical volume that will be reduced. -s Size The number of logical partitions to deallocate from the logical volume. Must be less than the current number of logical partitions in the logical volume. filename The file that contains the map of the partitions that will be deallocated. The file has an entry for each of the partitions, which is a triplet containing: Physical Volume ID Physical Partition Number Logical Partition Number AIX Logical Volume Manager from A to Z: Troubleshooting and Commands B.25 The lresynclp command The following summarizes the options for the lresynclp command. lresynclp - An object file command that synchronizes all physical partitions that belonging to a particular logical partition. Usage: lresynclp -l LVID -n LPNum -l LVID The LVID of the logical volume that is to be synchronized. -n LPNum The partition number of the physical partition that is to be synchronized. B.26 The lresynclv command The following summarizes the options for the lresynclv command. lresynclv - An object file command that synchronizes all the mirrored logical partition(s) in the logical volume. Usage: lresynclv -l LVID -l LVID The LVID of the logical volume to resynchronize. B.27 The lresyncpv command The following summarizes the options for the lresyncpv command. lresyncpv - An object file command that synchronizes all mirrored partitions on a physical volume. Usage: lresyncpv -g VGID -p PVID -g VGID The VGID of the volume group that contains the physical volume to be synchronized. -p PVID The PVID of the physical volume to be synchronized. Appendix B. Intermediate-level commands 305 B.28 The lvaryonvg command The following summarizes the options for the lvaryonvg command. lvaryonvg - An object file that Varies a Volume Group online. Usage: lvaryonvg -a VGname [-V VGmajor] -g VGID [-o] [-r] [-n] [-p] [-f] [-t] filename 306 -a VGname The volume group name of the volume group to be varied on. -V VGmajor The major number of the volume group to be varied on. -g VGID The VGID of the volume group to be varied on. -o Selects if logical volumes in the volume group will be opened. If this flag is used, then access to the logical volumes in the Volume Group is permitted. If omitted, then access to the logical volumes is not permitted, but queries and other system management functions can be performed on the volume group. -r If selected, automatic resynchronization of logical and physical Volumes in the Volume Group containing stale partitions will be performed. -n If selected, the volume group will be varied on if a quorum is available even though the names of one or more physical volumes are missing from the input list. -p If selected, the volume group will be varied on if a quorum is available even though one or more physical volumes in the volume group is missing or removed. -f If selected, the volume group will be varied on even if quorum is not present. Caution- data consistency may be lost if normal operations are attempted without a quorum. -t Include tags in the output. filename The name of the file that contains the list of physical volumes in the volume group to be varied on. This file contains one name per line, or the names can be fed via standard input. AIX Logical Volume Manager from A to Z: Troubleshooting and Commands After varying a Volume Group on-line, the user gets permission to do the following: 1. If the -o flag is not invoked, queries and other system management functions can be performed on the Volume Group, but opens to the Logical Volumes in the Volume Group is not permitted 2. If the -o is invoked, opens, and, thereby, access to the Logical Volumes in the Volume Group is permitted. The IDs of Physical Volumes comprising the Volume Group are output from this command. This output is produced only when the supplied Physical Volume names did not match in number and identity of the Volume Group's Physical Volume(s) stored in the VGDA. B.29 The lvaryoffvg command The following summarizes the options for the lvaryoffvg command. lvaryoffvg - An object file command that varies off the volume group. Usage: lvaryoffvg -g VGID [-f] -g VGID The VGID of the volume group to be varied off. -f Vary the volume group off into system management mode. B.30 The lvgenmajor command The following summarizes the options for the lvgenmajor command. lvgenmajor - An object file command that gets the next available device major number for a volume group. Usage: lvgenmajor VGName VGName The name of the volume group for which the major number should be generated. If a major number already exists for the volume group, then it is returned; otherwise, a new number is returned. Appendix B. Intermediate-level commands 307 B.31 The lvgenminor command The following summarizes the options for the lvgenminor command. lvgenminor - An object file command that gets the next available device minor number. Usage: lvgenminor [-p PreferredMinNum] MajorNum NewDeviceName -p PreferredMinNum Used to provide the preferred minor number. If this number is not available, then an error is returned. MajorNum Device major number. NewDeviceName Name of device. B.32 The lvchkmajor command The following summarizes the options for the lvchkmajor command. lvchkmajor - An object file command that checks if the major number is valid for the given volume group. Usage lvchkmajor MajorNum VGName MajorNum The major number for the volume group to check. VGName The volume group name. If the provided major number is valid for the volume group, then it is returned; otherwise, -1 is returned. B.33 The lvlstmajor command The following summarizes the options for the lvlstmajor command. lvlstmajor - An object file command that returns a list of unused major numbers. Usage: lvlstmajor 308 AIX Logical Volume Manager from A to Z: Troubleshooting and Commands B.34 The lvmmsg command The following summarizes the options for the lvmmsg command. lvmmsg - This is an object file command that is used by other lvm commands to generate error messages. Usage: lvmmsg MessageNum MessageNum The LVM message number. B.35 The lvrelmajor command The following summarizes the options for the lvrelmajor command. lvrelmajor - An object file command that releases a volume group's major number. Usage: lvrelmajor VGName VGName The name of the volume group for which the major number will be released from the CuDvDr class. B.36 The lvrelminor command The following summarizes the options for the lvrelminor command. lvrelminor - An object file command that releases a logical volume's minor number. Usage: lvrelminor DeviceName DeviceName The device for which the minor number will be released. All entries in /dev associated with this minor number will also be deleted. B.37 The migfix command The following summarizes the options for the migfix command. Appendix B. Intermediate-level commands 309 migfix - migfix is an object file command that is used by the reorgvg command to help determine the proper order of physical partition moves. It builds a set of migration moves that will move all the source physical partitions to their destinations without over-writing any physical partitions. Usage: migfix FreePPList MigratePPList MigrateMoves FreePPList The list of free physical partitions to use in the migration. MigratePPList The list of migrations in source destination format. MigrateMoves The list of legal moves to accomplish the migration. B.38 The putlvcb command The following summarizes the options for the putlvcb command. putlvcb - An object file command that writes the logical volume control block. Usage: putlvcb [-a IntraPolicy] [-c Copies] [-e InterPolicy] [-f FSLabel] [-L Label] [-i Identifier] [-n NumLPs] [-r Reloc] [-s Strict] [-t Type] [-u UpperBound] [-N] [-v VGName] [-x VGAutoOn] LVName 310 -a IntraPolicy Writes the intra-physical volume allocation policy to the logical volume LVName's control block. -c Copies Writes the copy allocation values to the logical volume LVName's control block. -e InterPolicy Writes the inter-physical volume allocation policy to the logical volume LVName's control block. -f FSLabel Writes the file system label field to the logical volume LVName's control block. -L Label Writes the logical volume label field to the logical volume LVName's control block. -i Identifier Writes the logical volume identifier to the logical volume LVName's control block. -n NumLPs Writes the number of logical partitions for lvname to the logical volume LVName's control block. AIX Logical Volume Manager from A to Z: Troubleshooting and Commands -r Reloc Writes the relocation policy to the logical volume LVName's control block. -s Strict Writes the strictness allocation policy to the logical volume LVName's control block. -t Type Writes the logical volume type to the logical volume LVName's control block. -u UpperBound Writes the upperbound allocation policy to the logical volume LVName's control block. -N This option indicates a new logical volume control block is being written. If this flag is not set then a control block must already exist on the logical volume to be updated. -v VGName Writes the volume group name to logical volume LVName's control block. -x VGAutoOn Writes the volume group auto_on value to the logical volumes LVName's control block. LVName The name of the logical volume for which the control block will be updated/created. The putlvcb command writes the control block information into block 0 of the logical volume lvname. Only the fields specified are written. putlvcb can be used to write a new control block or update an existing one. B.39 The putlvodm command The following summarizes the options for the putlvodm command. putlvodm - An object file command that puts logical volume data values into the Configuration Database. Usage: putlvodm [-a IntraPolicy] [-B Label] [-c Copies] [-e InterPolicy] [-l LVName] [-n NewLVName] [-r Relocatable] [-s StrictState] [-t Type] [-u UpperBound] [-y CopyFlag] [-z Size] LVID Appendix B. Intermediate-level commands 311 -a IntraPolicy Sets the intra-physical volume allocation policy (the position of the logical partitions on the physical volume). The Position variable is one of the following: m Allocates logical partitions in the outer-middle section of each physical volume. This is the default position. c Allocates logical partitions in the center section of each physical volume. e Allocates logical partitions in the outer edge section of each physical volume. ie Allocates logical partitions in the inner edge section of each physical volume. im Allocates logical partitions in the inner-middle section of each physical volume. -B Label Set the label field for the logical volume. -c Copies Set the number of copies for the logical volume. -e InterPolicy Sets the inter-physical volume allocation policy (the number of physical volumes to extend across using the volumes that provide the best allocation). The value of the Range variable is limited by the Upperbound variable, set with the -u flag, and is one of the following: x Allocates logical partitions across the maximum number of physical volumes. mAllocates logical partitions across the minimum number of physical volumes. 312 -l LVName Sets the logical volume name. -n NewLVName Set a new logical volume name for the logical volume ID. -r Relocatable Sets the bad block relocation policy. The BadBlocks variable is one of the following: y Allows bad block relocation to occur (default). n Prevents bad block relocation from occurring. AIX Logical Volume Manager from A to Z: Troubleshooting and Commands -s StrictState Determines the strict allocation policy. Copies of a logical partition can be allocated to share or not to share the same physical volume. The Strict variable is one of the following: y Sets a strict allocation policy so that copies of a logical partition cannot share the same physical volume (default). n Does not set a strict allocation policy so that copies of a logical partition can share the same physical volume. s Sets a super strict allocation policy so that the partitions allocated for one mirror cannot share a physical volume with other partitions from another mirror. -t Type Sets the logical volume type ( jfs, boot, jfslog, or paging). -u UpperBound Set the upperbound (between 1 and 32). -y CopyFlag Sets the copy flag. -z Size Sets the number of partitions. LVID The logical volume ID. putlvodm - An object file command that puts volume group values into the Configuration Database. Usage: [-o AutoOn] [-k] [-K] [-q State] [-v VGName] VGID -K For volume group VGID, unlock the volume group. -k For volume group VGID, lock the volume group. -o AutoOn For volume group VGID, set the AutoOn flag (y or n). -q State For volume group vgid, set the State: 0 - Varied off 1 - Varied on with all PVs 2 - Varied on with missing PVs -v VGName Add a new volume group VGID. VGID The volume groups VGID. putlvodm - An object file command that puts physical volume values into the Configuration Database. Appendix B. Intermediate-level commands 313 Usage: putlvodm [-p VGID] PVID -p VGID The volume group ID for which the physical volume should be added. PVID The physical volume ID to add. putlvodm - An object file command that removes a volume group from the Configuration Database. Usage: putlvodm [-V VGID] -V VGID The volume group ID for which the volume group information is to be removed. putlvodm - An object file command that removes logical volume values from the Configuration Database. Usage: putlvodm [-L LVID] -L LVID The LVID of the logical volume for which logical volume data is to be removed. putlvodm - An object file command that removes physical volume values from the Configuration Database. Usage: putlvodm [-P PVID] -P VGID 314 The PVID of the physical volume for which physical volume data is to be removed. AIX Logical Volume Manager from A to Z: Troubleshooting and Commands Appendix C. ODM commands A large part of the information that the Logical Volume Manager relies on is included in the ODM. This appendix lists the commands that allow you to work with the ODM (adding, removing, or modifying items). C.1 The odmadd command The following summarizes the options for the odmadd command. odmadd - An object file command that adds an object to a created object class. Usage: odmadd [InputFile(s)] The odmadd command takes, as input, one or more InputFile files and adds objects to object classes with data found in the stanza files. Each InputFile file is an ASCII file containing the data that describes the objects to be added to object classes. If no file is specified, input is taken from stdin (standard input). The classes to be added to are specified in the ASCII input file. The file is in the following general format: class1name: descriptor1name = descriptor1value descriptor2name = descriptor2value descriptor3name = descriptor3value class2name: descriptor4name = descriptor4value descriptor5name = descriptor5value C.2 The odmchange command The following summarizes the options for the odmchange command. © Copyright IBM Corp. 2000 315 odmchange - An object file command that changes the contents of a selected object in the specified object class. Usage: odmchange -o ObjectClass [-q Criteria] [InputFile] -o ObjectClass Specifies the object class to modify. -q Criteria Specifies the criteria used to select objects from the object class. Pattern matching can be done using comparison operators (for example "=") or pattern matches (for example "like"). More information on qualifying criteria, see "Understanding ODM Object Searches" in AIX Version 4.3 General Programming Concepts: Writing and Debugging Programs, SC23-4128. If no criteria are specified, all object entries in the object class are changed. InputFile The InputFile file has the same format as the InputFile file for the odmadd command. C.3 The odmcreate command The following summarizes the options for the odmcreate command. odmcreate - An object file command that produces the .c (source) and .h (include) files necessary for ODM application development and creates empty object classes. Usage: odmcreate [-p] [-c | -h] ClassDescriptionFile -c Creates empty object classes only; it does not generate the C language .h and .c files. -h Generates the .c and .h files only; it does not create empty classes. -p Runs the C language preprocessor on the ClassDescriptionFile file. ClassDescriptionFile The ClassDescriptionFile parameter specifies an ASCII file that contains descriptions of one or more object classes. The odmcreate command is the ODM class compiler. The command takes, as input, an ASCII file that describes the objects a user wishes to use in a 316 AIX Logical Volume Manager from A to Z: Troubleshooting and Commands specific application. The odmcreate command can create empty object classes as part of its execution. The output of the odmcreate command is an .h file (an include file) that contains the C language definitions for the object classes defined in the ASCII ClassDescriptionFile file. The resulting include file is used by the application for accessing objects stored in ODM. The odmcreate command also produces an .c file that must be compiled and bound in with the application. The .c file contains structures and definitions that are used internally by ODM at run time. The ClassDescriptionFile parameter specifies an ASCII file that contains descriptions of one or more object classes. The general syntax for the ClassDescriptionFile parameter is as follows: file : classes classes : class | classes class class : head body tail head : struct ClassName { tail :} body : elements elements : elements | elements element element :char DescriptorName [ DescriptorSize ]; vchar DescriptorName [ DescriptorSize ]; binary DescriptorName [ DescriptorSize ]; short DescriptorName ; long DescriptorName ; long64 or int64 or ODM_LONG_LONG DescriptorName ; method DescriptorName ; link StdClassName StdClassName ColName DescriptorName ; The default suffix for a ClassDescriptionFile file is .cre. If no suffix is specified on the odmcreate command, then an .cre suffix is appended. The file can have C language comments if run with the -p flag, and can include #define and #include lines that can be preprocessed if the -p flag is used to run the C language preprocessor on the file. Appendix C. ODM commands 317 Note ODM data bases are 32-bit data bases. The long type, when used in the class description file is a 32-bit data item. The long64 or int64 type, when used in the class description file, is a 64-bit data item. The generated files will function the same for both 32- and 64-bit applications. C.4 The odmdelete command The following summarizes the options for the odmdelete command. odmdelete - An object file command that deletes selected objects from a specified object class. Usage: odmdelete -o ObjectClass [-q Criteria] -o ObjectClass Specifies the object class to delete data from. -q Criteria Specifies the criteria used to select objects from the object class. C.5 The odmdrop command The following summarizes the options for the odmdrop command. odmdrop - An object file command that removes an object class. Usage: odmdrop -o ClassName -o ClassName Specifies the object class to remove. The odmdrop command removes an entire object class and all of its objects. No checking is done to see if other object classes are linked to this one. C.6 The odmget command The following summarizes the options for the odmget command. 318 AIX Logical Volume Manager from A to Z: Troubleshooting and Commands odmget - An object file command that retrieves objects from the specified object classes into an odmadd input file. Usage: odmget [-q Criteria] ObjectClass(s) -q Criteria Specifies the search criteria used to select objects from the object class or classes. C.7 The odmshow command The following summarizes the options for the odmshow command. odmshow - An object file command that displays an object class definition on the screen. Usage: odmshow ObjectClass The odmshow command takes as input an object class name (ObjectClass) and displays the class description on the screen. The class description is in the format taken as input to the odmcreate command. Appendix C. ODM commands 319 320 AIX Logical Volume Manager from A to Z: Troubleshooting and Commands Appendix D. Other related commands This appendix summarizes the options for commands that are not as closely related to the Logical Volume Manager. You will find here the commands to back up your data, and to manipulate the journaled file systems or the paging space. D.1 The backup command The following summarizes the options for the backup command. backup - Backs up files and file systems by name. Usage: backup -i [-b Number] [-p [-e RegularExpression] ] [-f Device] [-l Number] [-o] [-q] [-v] backup - Backs up files and file systems by i-node. Usage: backup [[-Level] [-b Number] [-c] [-f Device] [-L Length] [-u]] [FileSystem] | [-w | -W] -b Number For backups by name, specifies the number of 512-byte blocks; for backups by i-node, specifies the number of 1024-byte blocks to write in a single output operation. When the backup command writes to tape devices, the default is 100 for backups by name and 32 for backups by i-node. The write size is the number of blocks multiplied by the block size. The default write size for the backup command writing to tape devices is 51200 (100 * 512) for backups by name and 32768 (32 * 1024) for backups by i-node. The write size must be an even multiple of the tape's physical block size. The value of the -b flag is always ignored when the backup command writes to diskette. In this case, the command always writes in clusters that occupy a complete track. -c Specifies that the tape is a cartridge, not a nine-track. © Copyright IBM Corp. 2000 321 322 -e RegularExpression Specifies that the files with names matching the regular expression are not to be packed. A regular expression is a set of characters, meta characters, and operators that define a string or group of strings in a search pattern. It can also be a string containing wildcard characters and operations that define a set of one or more possible strings. The -e flag is applied only when the -p flag is specified. -f Device Specifies the output device. To send output to a named device, specify the Device variable as a path name (such as /dev/rmt0). To send output to the standard output device, specify a - (minus sign). The - (minus) feature enables you to pipe the output of the backup command to the dd command. You can also specify a range of archive devices. The range specification must be in the following format: /dev/deviceXXX-YYY where XXX and YYY are whole numbers, and XXX must always be less than YYY, for example, /dev/rfd0-3. All devices in the specified range must be of the same type. For example, you can use a set of 8 mm, 2.3 GB tapes, or a set of 1.44 MB diskettes. All tape devices must be set to the same physical tape block size. If the Device variable specifies a range, the backup command automatically goes from one device in the range to the next. After exhausting all of the specified devices, the backup command halts and requests that new volumes be mounted on the range of devices. -i Specifies that files be read from standard input and archived by file name. If relative path names are used, files are restored (with the restore command) relative to the current directory at restore time. If full path names are used, files are restored to those same names. AIX Logical Volume Manager from A to Z: Troubleshooting and Commands -L Length Specifies the length of the tape in bytes. This flag overrides the -c, -d, and -s flags. You can specify the size with a suffix of b, k, m, or g to represent Blocks (512 bytes), Kilo (1024 bytes), Mega (1024 Kilobytes), or Giga (1024 Megabytes), respectively. To represent a tape length of 2 Gigabytes, enter -L 2g. This flag only applies to AIX Version 4.2 and above. Note: Use the -L flag for i-node backups only. -l Limits the total number of blocks to use on the diskette device. The value specified must be a non-zero multiple of the number of sectors per diskette track. This option applies to by-name backups only. See the format command for information on sectors per diskette track. -o Creates a Version 2-compatible backup by name. This flag is required for compatibility with Version 2 systems because backups by name that are created by a version higher than 2 cannot be restored on Version 2 systems. To create a Version 2-compatible backup by name, use the -o flag along with other flags required for backups by name. Files with attributes and values, such as user IDs and group IDs, that are too large for Version 2 systems will not be backed up. A message is displayed for each such file and each value that is too large. -p Specifies that the files be packed, or compressed, before they are archived. Only files of less than 2 GB are packed. Note: This option should only be used when backing up files from an inactive file system. Modifying a file when a backup is in progress may result in corruption of the backup and an inability to recover the data. When backing up to a tape device, which performs compression, this option can be omitted. -q Indicates that the removable medium is ready to use. When you specify the -q flag, the backup command proceeds without prompting you to prepare the backup medium and press the Enter key to continue. This option applies only to the first volume; you are prompted for subsequent volumes. The -q flag applies only to backups by name. Appendix D. Other related commands 323 -u Updates the /etc/dumpdates file with the raw device name of the file system and the time, date, and level of the backup. You must specify the -u flag if you are making incremental backups. The -u flag applies only to backups by i-node. -v Causes the backup command to display additional information about the backup. When using the -v flag, the size of the file, as it exists on the archive, is displayed in bytes. Additionally, a total of these file sizes is displayed when all files have been processed. Directories are listed with a size of 0. Symbolic links are listed with the size of the symbolic link. Hard links are listed with the size of the file, which is how hard links are archived. Block and character devices, if they were backed up, are listed with a size of 0. When the -v flag is not specified, the backup command displays only the names of the files being archived. This option is used only when backing up by file name. -w Currently disabled. If the -w flag is specified, no other flags are applied. -W Displays, for each file system in the /etc/dumpdates file, the most recent backup date and level. If the -W option is specified, no other flags are applied. -Level Specifies the backup level (0 to 9). The default level is 9. The backup command creates copies of your files on a backup medium, such as a magnetic tape or diskette. The copies are in one of the two backup formats: • Specific files backed up by name using the -i flag. • Entire file system backed up by i-node using the Level and FileSystem parameters. If you issue the backup command without any parameters, it defaults to a level 9 i-node backup of the root file system to the /dev/rfd0 device. The default syntax is: -9uf/dev/rfd0 /dev/rhd4 324 AIX Logical Volume Manager from A to Z: Troubleshooting and Commands The default backup device is /dev/rfd0. If flags are specified that are not appropriate for the specified backup device, the backup command displays an error message and continues with the backup. A single backup can span multiple volumes. Note 1. Running the backup command results in the loss of all material previously stored on the selected output medium. 2. Data integrity of the archive may be compromised if a file is modified during system backup. Keep system activity at a minimum during the system backup procedure. 3. If a backup is made to a tape device with the device block size set to 0, it might be difficult to restore data from the tape unless the default write size was used with the backup command. The default write size for the backup command can be read by the restore command when the tape device block size is 0. In other words, the -b flag should not be specified when the tape device block size is 0. If the -b flag of the backup command is specified and is different from the default size, the same size must be specified with the -b flag of the restore command when the archived files are restored from the tape. Backing up files by name To back up by name, use the -i flag. The backup command reads standard input for the names of the files to be backed up. File types can be special files, regular files, or directories. When the file type is a directory, only the directory is backed up. The files under the directory are not backed up unless they are explicitly specified. Appendix D. Other related commands 325 Note 1. Files are restored using the same path names as the archived files. Therefore, to create a backup that can be restored from any path, use full path names for the files that you want to back up. 2. When backing up files that require multiple volumes, do not enter the list of file names from the keyboard. Instead, pipe or redirect the list from a file to the backup command. When you enter the file names from the keyboard, and the backup process needs a new tape or diskette, the command "loses" any file names already entered but not yet backed up. To avoid this problem, enter each file name only after the archived message for the previous file has been displayed. The archived message consists of the character a followed by the file name. 3. If you specify the -p flag, only files of less than 2 GB are packed. Backing up file systems by i-node To back up a file system by i-node, specify the -Level and FileSystem parameters. When used in conjunction with the -u flag, the -Level parameter provides a method of maintaining a hierarchy of incremental backups for each file system. Specify the -u flag and set the -Level parameter to n to back up only those files that have been modified since the n-1 level backup. Information regarding the date, time, and level of each incremental backup is written to the /etc/dumpdates file. The possible backup levels are 0 to 9. A level 0 backup archives all files in the file system. If the /etc/dumpdates file contains no backup information for a particular file system, specifying any level causes all files in that file system to be archived. The FileSystem parameter can specify either the physical device name (block or raw name) or the name of the directory on which the file system is mounted. The default file system is the root (/) file system. Users must have read access to the file system device (such as /dev/hd4) or have Backup authorization in order to perform backups by i_node. 326 AIX Logical Volume Manager from A to Z: Troubleshooting and Commands Note 1. You must first unmount a file system before backing it up by i-node. If you attempt to back up a mounted file system, a warning message is displayed. The backup command continues, but the created backup may contain inconsistencies because of changes that may have occurred in the file system during the backup operation. 2. Backing up file systems by i-node truncates the uid or gid of files having a uid or gid greater than 65535. When restored, these files may have different values for the uid and gid attributes. To retain the values correctly, always back up by name files having a uid or gid greater than 65535. 3. You can archive only JFS (Journaled File System) file systems when backing up by i-node. Back up any non-JFS file systems by file name or by using other archive commands, such as the pax, tar, or cpio command. D.2 The chfs command The following summarizes the options for the chfs command. chfs - Changes attributes of a file system. Usage: chfs [-n NodeName] [-m NewMountPoint] [-u MountGroup] [-A {yes | no}] [-p{ro | rw}] [-t {yes | no} ] [-a Attribute=Value] [-d Attribute] FileSystem -a Attribute=Value Specifies a virtual file system-dependent attribute/value pair. To specify more than one attribute/value pair, provide multiple -a Attribute=Value parameters. The following attribute/value pairs are specific to the Journaled File System (JFS). -a ag={8 | 16 | 32 | 64} Specifies the allocation group size in megabytes. An allocation group is a grouping of inodes and disk blocks similar to BSD cylinder groups. The default ag value is 8. This attribute only applies to AIX Version 4.2 or later. Appendix D. Other related commands 327 -a bf={true | false} Specifies a large file enabled file system. If you do not need a large file enabled file system, set this option to false; this is the default. Specifying bf=true requires a fragment size of 4096 and compress=no. This attribute only applies to AIX Version 4.2 or later. -a compress={no | LZ} Specifies data compression. If you do not want data to be compressed, set this option to no. The default compress value is no. Selecting compression requires a fragment size of 2048 or less. -a frag={512 | 1024 | 2048 | 4096} Specifies the JFS fragment size in bytes. A file system fragment is the smallest unit of disk storage that can be allocated to a file. The default fragment size is 4096 bytes. -a logname=LVName Specifies the log logical volume name. The specified logical volume will be the logging device for the new JFS. The LVName logical volume must already exist. The default action is to use an existing logging device in the target volume group. -a nbpi={ 512 | 1024 | 2048 | 4096 | 8192 | 16384 | 32768 | 65536 | 131072 } Specifies the number of bytes per i-node (nbpi). The nbpi affects the total number of i-nodes on the file system. The nbpi value is inversely proportional to the number of i-nodes on the file system. The default nbpi value is 4096 bytes. The values 32768, 65536, and 131072 only apply to AIX Version 4.2 or later. -a size=Value Specifies the size of the JFS in 512-byte blocks. If the specified size is not evenly divisible by the physical partition size, it is rounded up to the closest number that is evenly divisible. This attribute is required when creating a JFS file system. The maximum size of a JFS file system is a function of its fragment size and the nbpi value. These values yield the size restrictions shown in Table 1 on page 330 328 AIX Logical Volume Manager from A to Z: Troubleshooting and Commands -A Specifies the attributes for auto-mount. yes - File system is automatically mounted at system start. no - File system is not automatically mounted at system start. -d Attribute Deletes the specified attribute from the /etc/filesystems file for the specified file system. -m NewMountPoint Specifies the new mount point. -n NodeName Specifies a node name for the specified file system. The node name attribute in the /etc/filesystems file is updated with the new name. The node name attribute is specific to certain remote virtual file system types, such as the NFS (Network File System) virtual file system type. -p Sets the permissions for the file system. ro - Specifies read-only permissions. rw - Specifies read-write permissions. -t Sets the accounting attribute for the specified file system: yes - File system accounting is to be processed by the accounting subsystem. no - File system accounting is not to be processed by the accounting subsystem; this is the default. -u MountGroup Specifies the mount group. Mount groups are used to group related mounts so that they can be mounted as one instead of mounting each individually. For example, if several scratch file systems always need to be mounted together when performing certain tests, they can each be placed in the test mount group. They can then all be mounted with a single command, such as the mount -t test command. The chfs command changes the attributes of a file system. The new mount point, automatic mounts, permissions, and file system size can be set or changed. The FileSystem parameter specifies the name of the file system expressed as a mount point. Some file system attributes are set at the time the file system is created and cannot be changed. For the Journaled File System (JFS), such attributes Appendix D. Other related commands 329 include the fragment size, block size, number of bytes per i-node, compression, and the minimum file system size. Table 1. Fragment size and nbpi restrictions nbpi Fragment size in bytes Maximum size in 512-byte blocks 512 512, 1024, 2048, 4096 16777216 1024 512, 1024, 2048, 4096 33554432 2048 512, 1024, 2048, 4096 67108864 8192 512, 1024, 2048, 4096 134217728 16384 512 268435456 16384 1024, 2048, 4096 536870912 32768 512 268435456 32768 1024 536870912 32768 2048, 4096 1073741824 65536, 131072 512 268435456 65536, 131072 1024 536870912 65536, 131072 2048 1073741824 65536, 131072 4096 2147483648 AIX Version 4.1 is limited to NBPI values from 512 to 16384. In AIX Version 4.3, you can have NBPI values from 512 to 128 K, with corresponding maximum file system sizes. D.3 The chps command The following summarizes the options for the chps command. chps - Changes attributes of a paging space. Usage: chps [-s LogicalPartitions] [-a { y | n }] PagingSpace 330 AIX Logical Volume Manager from A to Z: Troubleshooting and Commands -a Specifies to use a paging space at the next system restart. y - Specifies that the paging space is active at subsequent system restarts. n - Specifies that the paging space is inactive at subsequent system restarts. -s LogicalPartitions Specifies the number of logical partitions to add. The chps command changes attributes of a specific paging space. The PagingSpace parameter specifies the name of the paging space to be changed. If the paging space is increased in size, the additional partitions will be available for use immediately, even though they may not be used straight away. To change the size of a Network File System (NFS) paging space, the size of the file that resides on the server must first be changed, and then the swapon command used to notify the client of the change in size of the paging space. Note The primary paging space is hardcoded in the boot record. Therefore, the primary paging space will always be activated when the system is restarted. The chps command is unable to deactivate the primary paging space. D.4 The cpio command The following summarizes the options for the cpio command. cpio - Copies files into and out of archive storage and directories. Usage: cpio -o [a] [c] [v] [B | C Value] <FileName >Output Usage: cpio -i [b] [c] [d] [f] [m] [M] [r] [s] [t] [u] [v] [S] [6] [B | C Value] [Pattern...] <Input Usage: cpio -p [a] [d] [l] [m] [M] [u] [v] Directory <FileName Directory Specifies the directory. <Filename Specifies a list of file names for the cpio command to use as input. Appendix D. Other related commands 331 332 >Output Specifies the output device, such as a diskette or file. For more information on using tape devices, see the rmt special file. <Input Specifies the input device (where Input is the Output file created by the cpio -o command). For more information on using tape devices, see the rmt special file. Pattern Specifies the pattern (as described in the ksh command) to be used with the command. The default for the Pattern parameter is an * (asterisk), selecting all the files in the Input. a Resets the access times of the source files to their previous times. b Swaps both bytes and halfwords. Note: If there is an odd number of bytes or halfwords in the file being processed, data can be lost. B Performs block input and output using 512 bytes to a record. Note: When using the B or C options to extract or create a tape archive, the blocking factor must be a multiple of the physical block size for that tape device. When using the B or C options to extract an archive from tape, the blocking factor should not be larger than the size of the archive as it exists on the tape. The B flag and the C flag are mutually exclusive. If you list both, the cpio command uses the last one it encounters in the flag list. c Reads and writes header information in ASCII character form. If a cpio archive was created using the c flag, it must be extracted with the c flag. C Value Performs block input and output using the Value parameter times 512 bytes to a record. For instance, a -C2 flag changes the block input and output sizes to 1024 bytes to a record. d Creates directories as needed. f Copies all files except those matching the Pattern parameter. AIX Logical Volume Manager from A to Z: Troubleshooting and Commands l Links files rather than copying them, whenever possible. This flag can only be used with the cpio -p command. m Retains previous file modification time. This flag does not work when copying directories. M Retains previous file modification time even when directories are copied. r Renames files interactively. If you do not want to change the file name, enter a single period or press the Enter key. In the latter case, the cpio command does not copy the file. s Swaps bytes. This flag is used only with the cpio -i command. Note: If there is an odd number of bytes in the file being processed, data can be lost. S Swaps halfwords. This flag is usable only with the cpio -i command. Note: If there is an odd number of halfwords in the file being processed, data can be lost. t Creates a table of contents. This operation does not copy any files. u Copies unconditionally. An older file now replaces a newer file with the same name. v Lists file names. If you use this with the t flag, the output looks similar to that of the ls -l command. 6 Processes an old file (for example, one written in UNIX Sixth Edition format). This flag is usable only with the cpio -i command. Appendix D. Other related commands 333 Note 1. If you redirect the output from the cpio command to a special file (device), you should redirect it to the raw device and not the block device. Because writing to a block device is done asynchronously, there is no way to know if the end of the device is reached. 2. The cpio command is not enabled for files greater than 2 Gig in size due to limitations imposed by XPG/4 and POSIX.2 standards. 3. cpio does not preserve the sparse nature of any file that is sparsely allocated. Any file that was originally sparse before the restoration will have all space allocated within the file system for the size of the file. 4. You can copy special files only if you have root user authority. 5. All the flags must be listed together without blanks between them. The cpio -o command The cpio -o command reads file path names from standard input and copies these files to standard output along with path names and status information. Avoid giving the cpio command path names made up of many uniquely linked files, as it may not have enough memory to keep track of them and would lose linking information. The cpio -i command The cpio -i command reads from standard input an archive file created by the cpio -o command and copies from it the files with names that match the Pattern parameter. These files are copied into the current directory tree. You can list more than one Pattern parameter by using the file name notation described in the ksh command. Note that in this application the special characters * (asterisk), ? (question mark), and [...] (brackets and ellipses) match the / (slash) in path names in addition to their use as described in the ksh command. The default for the Pattern parameter is an * (asterisk), selecting all files in the Input. In an expression, such as [a-z], the minus sign means through according to the current collating sequence. A collating sequence can define equivalence classes for use in character ranges. The cpio -p command The cpio -p command reads file path names from standard input and copies these files into the directory named by the Directory parameter. The specified directory must already exist. If these path names include directory names that 334 AIX Logical Volume Manager from A to Z: Troubleshooting and Commands do not already exist, you must use the d flag to cause the specified directory to be created D.5 The crfs command The following summarizes the options for the crfs command. crfs - Adds a file system. Usage: crfs -v VfsType {-g VolumeGroup | -d Device} [-l LogPartitions] -m MountPoint [-n NodeName] [-uMountGroup] [-A {yes | no}] [-p {ro | rw}] [-a Attribute= Value ...] [-t {yes | no}] -a Attribute=Value Specifies a virtual file system-dependent attribute/value pair. To specify more than one attribute/value pair, provide multiple -a Attribute=Value parameters. The following attribute/value pairs are specific to the Journaled File System (JFS): -a ag={8 | 16 | 32 | 64} Specifies the allocation group size in megabytes. An allocation group is a grouping of inodes and disk blocks similar to BSD cylinder groups. The default ag value is 8. This attribute only applies to AIX Version 4.2 or later. -a bf={true | false} Specifies a large file enabled file system. See "Understanding Large File Enabled File Systems" for more information. If you do not need a large file enabled file system, set this option to false; this is the default. Specifying bf=true requires a fragment size of 4096 and compress=no. This attribute only applies to AIX Version 4.2 or later. -a compress={no | LZ} Specifies data compression. If you do not want data to be compressed, set this option to no. The default compress value is no. Selecting compression requires a fragment size of 2048 or less. Appendix D. Other related commands 335 -a frag={512 | 1024 | 2048 | 4096} Specifies the JFS fragment size in bytes. A file system fragment is the smallest unit of disk storage that can be allocated to a file. The default fragment size is 4096 bytes. -a logname=LVName Specifies the log logical volume name. The specified logical volume will be the logging device for the new JFS. The LVName logical volume must already exist. The default action is to use an existing logging device in the target volume group. -a nbpi={ 512 | 1024 | 2048 | 4096 | 8192 | 16384 | 32768 | 65536 | 131072 } Specifies the number of bytes per i-node (nbpi). The nbpi affects the total number of i-nodes on the file system. The nbpi value is inversely proportional to the number of i-nodes on the file system. The default nbpi value is 4096 bytes. The values 32768, 65536, and 131072 only apply to AIX Version 4.2 or later. -a size=Value Specifies the size of the JFS in 512-byte blocks. If the specified size is not evenly divisible by the physical partition size, it is rounded up to the closest number that is evenly divisible. This attribute is required when creating a JFS file system. See "Understanding JFS Size Limitations" for more information. The maximum size of a JFS file system is a function of its fragment size and the nbpi value. These values yield the size restrictions shown in Table 1 on page 330. 336 -A Specifies the attributes for auto-mount. yes - File system is automatically mounted at system start. no - File system is not automatically mounted at system start. -d Device Specifies the device name of a device or logical volume on which to make the file system. This is used to create a file system on an already existing logical volume. -g VolumeGroup Specifies an existing volume group on which to make the file system. A volume group is a collection of one or more physical volumes. AIX Logical Volume Manager from A to Z: Troubleshooting and Commands -l LogPartitions Specifies the size of the log logical volume, expressed as a number of logical partitions. This flag applies only to JFS file systems that do not already have a log device. -m NewMountPoint Specifies the mount point, which is the directory where the file system will be made available. Note: If you specify a relative path name, it is converted to an absolute path name before being inserted into the /etc/filesystems file. -n NodeName Specifies the remote host name where the file system resides. This flag is only valid with remote virtual file systems, such as the Network File System (NFS). -p Sets the permissions for the file system. ro - Specifies read-only permissions. rw - Specifies read-write permissions. -t Sets the accounting attribute for the specified file system: yes - File system accounting is to be processed by the accounting subsystem. no - File system accounting is not to be processed by the accounting subsystem; this is the default. -u MountGroup Specifies the mount group. Mount groups are used to group related mounts so that they can be mounted as one instead of mounting each individually. For example, if several scratch file systems always need to be mounted together when performing certain tests, they can each be placed in the test mount group. They can then all be mounted with a single command, such as the mount -t test command. -v VfsType Specifies the virtual file system type. The crfs command creates a file system on a logical volume within a previously created volume group. A new logical volume is created for the file system unless the name of an existing logical volume is specified using the -d flag. An entry for the file system is put into the /etc/filesystems file. Appendix D. Other related commands 337 Note 1. The file system is created with the setgid (set group ID) bit enabled. This determines the default group permissions. All directories created under the new file system will have the same default group permissions. 2. The volume group in which the file system resides defines a maximum logical volume size and also limits the file system size. 3. Only journaled file systems created with the default ag, bf, compress, frag, and nbpi values, and a size of less than 2 gigabytes, are recognized on an AIX Version 3.2 system. Furthermore, file systems created with an ag value greater than 8 are not recognized on an AIX Version 4.1 system much less an AIX Version 3.2 system. 4. The ag, bf, compress, frag, and nbpi attributes are set at file system creation and cannot be changed after the file system is successfully created. The size attribute defines the minimum file system size, and you cannot decrease it once the file system is created. 5. The root file system ( / ) cannot be compressed. 6. Some nbpi values and allocation group sizes are mutually exclusive. 7. If the bs flag is specified by itself and no conversions other than sync, noerror, or notrunc are specified, then the data from each input block will be written as a separate output block if the read returns less than a full block and sync is not specified, then the resulting output block will be the same size as the input block. If the bs flag is not specified, or a conversion other than sync, noerror, or notrunc is specified, then the input will be processed and collected into full sized output blocks until the end of input is reached. D.6 The defragfs command The following summarizes the options for the defragfs command. defragfs - Increases a file system's contiguous free space. Usage: defragfs [-q | -r] {Device | FileSystem} -q 338 Reports the current state of the file system. AIX Logical Volume Manager from A to Z: Troubleshooting and Commands -r Reports the current state of the file system and the state that would result if the defragfs command is run without either -q or -r flag. The defragfs command increases a file system's contiguous free space by reorganizing allocations to be contiguous rather than scattered across the disk. You can specify the file system to be defragmented with the Device variable, the path name of the logical volume (for example, /dev/hd4). You can also specify it with the FileSystem variable, which is the mount point in the /etc/filesystems file. The defragfs command is intended for fragmented and compressed file systems. However, you can use the defragfs command to increase contiguous free space in non fragmented file systems. You must mount the file system read-write for this command to run successfully. Using the -q flag or the -r flag generates a fragmentation report. These flags do not alter the file system. D.7 The df command The following summarizes the options for the df command. df - Reports information about space on file systems. Usage: df [ [-P] | [-I | -M | -i | -t | -v] ] [-k] [-s] [FileSystem(s) | File(s) ] -i Displays the number of free and used i-nodes for the file system; this output is the default when the specified file system is mounted. -I Displays information on the total number of blocks, the used space, the free space, the percentage of used space, and the mount point for the file system. -k Displays statistics in units of 1024-byte blocks. -M Displays the mount point information for the file system in the second column. Appendix D. Other related commands 339 -P Displays information on the file system in POSIX portable format. When the -P flag is specified, the header line appears similar to: Filesystem 512-blocks Used Available Capacity Mounted on\n If the -k flag is specified in addition to the -P flag, the column heading 512-blocks is replaced by the heading 1024-blocks. File system statistics are displayed on one line in the following order: FileSystem, TotalSpace, UsedSpace, FreeSpace, UsedPercentage, MountPoint -s Gets file system statistics from the VFS specific file system helper instead of the statfs system call. Any arguments given when using the -s flag must be a journaled file system mount point or device. The file system must also be listed in /etc/filesystem. -t Includes figures for total allocated space in the output. -v Displays all information for the specified file system. The df command displays information about total space and available space on a file system. The FileSystem parameter specifies the name of the device on which the file system resides, the directory on which the file system is mounted, or the relative path name of a file system. The File parameter specifies a file or a directory that is not a mount point. If the File parameter is specified, the df command displays information for the file system on which the file or directory resides. If you do not specify the FileSystem or File parameter, the df command displays information for all currently mounted file systems. File system statistics are displayed in units of 512-byte blocks by default. The df command gets file system space statistics from the statfs system call. However, specifying the -s flag gets the statistics from the virtual file system (VFS) specific file system helper. If you do not specify arguments with the -s flag, and the helper fails to get the statistics, the statfs system call statistics are used. Under certain exceptional conditions, such as when a file system is being modified while the df command is running, the statistics displayed by the df command might not be accurate. 340 AIX Logical Volume Manager from A to Z: Troubleshooting and Commands Note Some remote file systems, such as the Network File System (NFS), do not provide all the information that the df command needs. The df command prints blanks for statistics that the server does not provide. D.8 The dfsck command The following summarizes the options for the dfsck command. dfsck - Checks and repairs two file systems simultaneously on different drives. Usage: dfsck [FlagList1] FileSystem1 [FlagList2] FileSystem2 Where FlagList = [-d BlockNumber] [-f] [-i InodeNumber] [-n] [-o Options] [-p] [-t File] [-V VFSName] [-y] -d BlockNumber Searches for references to a specified disk block. Whenever the fsck command encounters a file that contains a specified block, it displays the i-node number and all path names that refer to it. -f Performs a fast check. Under normal circumstances, the only file systems likely to be affected by halting the system without shutting down properly are those that are mounted when the system stops. The -f flag prompts the fsck command not to check file systems that were unmounted successfully. The fsck command determines this by inspecting the s_fmod flag in the file system superblock. This flag is set whenever a file system is mounted and cleared when it is unmounted successfully. If a file system is unmounted successfully, it is unlikely to have any problems. Because most file systems are unmounted successfully, not checking those file systems can reduce the checking time. -i InodeNumber Searches for references to a specified i-node. Whenever the fsck command encounters a directory reference to a specified i-node, it displays the full path name of the reference. Appendix D. Other related commands 341 -n Assumes a no response to all questions asked by the fsck command and does not open the specified file system for writing. -o Options Passes comma-separated options to the fsck command. These options are assumed to be file system implementation-specific, except that the following are currently supported for all file systems: mountable Causes the fsck command to exit with success, returning a value of 0 if the file system in question is mountable (clean). If the file system is not mountable, the fsck command exits returning with a value of 8. mytype 342 Causes the fsck command to exit with success (0) if the file system in question is of the same type as either specified in the /etc/filesystems file or by the -V flag on the command line. Otherwise, 8 is returned. For example, fsck -o mytype -V jfs / exits with a value of 0 if / (the root file system) is a journaled file system. -p Does not display messages about minor problems but fixes them automatically. This flag does not grant the wholesale license that the -y flag does and is useful for performing automatic checks when the system is started normally. You should use this flag as part of the system startup procedures whenever the system is being run automatically. Also allows parallel checks by group. -t File Specifies a File parameter as a scratch file on a file system other than the one being checked if the fsck command cannot obtain enough memory to keep its tables. If you do not specify the -t flag, and the fsck command needs a scratch file, it prompts you for the name of the scratch file. However, if you have specified the -p flag, the fsck command is unsuccessful. If the scratch file is not a special file, it is removed when the fsck command ends. AIX Logical Volume Manager from A to Z: Troubleshooting and Commands -V VFSName Uses the description of the virtual file system specified by the VFSName variable for the file system instead of using the /etc/filesystems file to determine the description. If the -V VfsName flag is not specified on the command line, the /etc/filesystems file is checked, and the vfs=Attribute of the matching stanza is assumed to be the correct file system type. -y Assumes a yes response to all questions asked by the fsck command. This flag lets the fsck command take any action it considers necessary. Use this flag only on severely damaged file systems. The dfsck command lets you simultaneously check two file systems on two different drives. Use the FlagList1 and FlagList2 parameters to pass flags and parameters for the two sets of file systems. For a list of valid flags for FlagList1 and FlagList2, see the above table. Use a - (minus sign) to separate the file system groups if you specify flags as part of the arguments. The dfsck command permits you to interact with two fsck commands at once. To aid in this, the dfsck command displays the file system name with each message. When responding to a question from the dfsck command, prefix your response with a 1 or a 2 to indicate whether the answer refers to the first or second file system group. Note Do not use the dfsck command to check the root file system. D.9 The dumpfs command The following summarizes the options for the dumpfs command. dumpfs - Dumps file system information. Usage: dumpfs {FileSystem | Device} The dumpfs command prints out the superblock, i-node map, and disk map information for the file system or special device specified. This listing is used to find out file system information. Primarily, the dumpfs command is for debugging purposes. Appendix D. Other related commands 343 D.10 The ff command The following summarizes the options for the ff command . ff - Lists the file names and statistics for a file system. Usage: ff [-a Number] [-c Number] [-I] [-l] [-m Number] [-n File] [-o Option] [-p Prefix] [-s] [-u] [-V VFSName] [-i I-Number [,I-Number(s)] ] [FileSystem] -a Number Displays the file if it has been accessed within the number of days specified by the Number parameter. -c Number Displays the file if its i-node has been changed within the number of days specified by the Number parameter. -i I-Number Displays the files corresponding to the i-node numbers specified by the I-Number parameter. The i-node numbers listed must be separated by a comma. -I Does not display the i-node after each path name. -l Additionally displays a list of pathnames for files with more than one link. -m Number Displays the file if it has been modified within the number of days specified by the Number parameter. -n File Displays the file if it has been modified more recently than the file specified by the File parameter. -o Options Specifies file system implementation-specific options. -p Prefix Adds the prefix specified by the Prefix parameter to each path name. The default prefix is . (dot). -s Writes the file size, in bytes, after each path name. -u Writes the owner's login name after each path name. -V VFSName Instructs the ff command to assume the file system is of type VFSName, thus overriding the value in the /etc/filesystems file. The ff command reads the i-nodes in the file system specified by the FileSystem parameter and then writes information about them to standard 344 AIX Logical Volume Manager from A to Z: Troubleshooting and Commands output. It assumes the FileSystem is a file system, which is referenced in the /etc/filesystems file, and saves i-node data for files specified by flags. The output from the ff command consists of the path name for each requested i-node number in addition to other file information that you can request using the flags. The output is listed in order by i-node number with tabs between all fields. The default line produced by the ff command includes the path name and i-node number fields. With all flags enabled, the output fields include path name, i-node number, size, and UID (user ID). The Number parameter is a decimal number that specifies a number of days. It is prefixed by a + or - (plus or minus sign). Therefore, +3 means more than 3 days, -3 means less than 3 days, and 3 means 3 days, where a day is defined as a 24-hour period. The ff command lists only a single path name out of many possible ones for an i-node with more than one link unless you specify the -l flag. With the -l flag, the ff command lists all links. D.11 The file command The following summarizes the options for the file command. file - To classify the file type. Usage: file [-m MagicFile] [-f FileList] [File...] file - To Check the Magic File for format errors. Usage: file-c [-m MagicFile] -c Checks the specified Magic File (the /etc/magic file, by default) for format errors. This validation is not normally done. File typing is not done under this flag. -f FileList Reads the specified file list. The file must list one file per line and must not contain leading or trailing spaces. -m MagicFile Specifies the file name of the Magic File (the /etc/magic file, by default). The file command reads the files specified by the File parameter or the FileList variable, performs a series of tests on each file, and attempts to Appendix D. Other related commands 345 classify them by type. The command then writes the file types to standard output. If a file appears to be in ASCII format, the file command examines the first 1024 bytes and determines the file type. If a file does not appear to be in ASCII format, the file command further attempts to distinguish a binary data file from a text file that contains extended characters. If the File parameter specifies an executable or object module file, and the version number is greater than 0, the file command displays the version stamp. The ld command explains the use of a.out files. The file command uses the /etc/magic file to identify files that have some sort of a magic number, that is, any file containing a numeric or string constant that indicates type. D.12 The fileplace command The following summarizes the options for the fileplace command. fileplace - Displays the placement of file blocks within logical or physical volumes. Usage: fileplace [{-l | -p} [-i] [-v] ] File 346 -i Displays the indirect blocks for the file, if any. The indirect blocks are displayed in terms of either their logical or physical volume block addresses, depending on whether the -l or -p flag is specified. -l Displays file placement in terms of logical volume fragments for the logical volume containing the file. The -l and -p flags are mutually exclusive. Note: If neither the -l flag nor the-p flag is specified, the -l flag is implied by default. If both flags are specified, the -p flag is used. -p Displays file placement in terms of underlying physical volume for the physical volumes that contain the file. If the logical volume containing the file is mirrored, the physical placement is displayed for each mirror copy. The -l and -p flags are mutually exclusive. AIX Logical Volume Manager from A to Z: Troubleshooting and Commands -v Displays more information about the file and its placement, including statistics on how widely the file is spread across the volume and the degree of fragmentation in the volume. The statistics are expressed in terms of either the logical or physical volume fragment numbers, depending on whether the -l or -p flag is specified. File space efficiency is calculated as the number of non-null fragments (N) divided by the range of fragments (R) assigned to the file and multiplied by 100, or (N /R) x 100. Range is calculated as the highest assigned address minus the lowest assigned address plus 1, or MaxBlk-MinBlk+1. For example, the logical blocks written for the file are 01550 through 01557, so N equals 8. The range, R, (01557 - 01550 +1) also equals 8. Space efficiency for this file is 100% or 8/8 x 100. The -v flag message prints the results of the (N/R)+100 equation. According to this method of calculating efficiency, files greater than 32 KB are never 100 percent efficient because of their use of the indirect block. Sequential efficiency is defined as 1 minus the number of gaps (nG) divided by number of possible gaps (nPG) or 1 (nG/nPG). The number of possible gaps equals N minus 1 ( nPG=N - 1). If the file is written to 9 blocks (greater than 32 KB), and the logical fragment column shows: 01550-01557 01600 the file is stored in two fragments out of a possible nine fragments. The sequential efficiency calculation for this file is: nG=1 nPG=9-1=8 (1-1/8) x 100=87.5% The fileplace command displays the placement of a specified file within the logical or physical volumes containing the file. By default, the fileplace command lists to standard output the ranges of logical volume fragments allocated to the specified file. The order in which the logical volume fragments are listed corresponds directly to their order in the file. A short header indicates the file size (in bytes), the name of the logical volume in which the file lies, the block size (in bytes) for that volume, the fragment size in bytes, and the compression indicating if the file system is compressed or not. Appendix D. Other related commands 347 Occasionally, portions of a file may not be mapped to any fragments in the volume. These areas, whose size is an integral number of fragments, are implicitly zero-filled by the file system. The fileplace command indicates which areas in a file have no allocated fragments. Optionally, the fileplace command also displays: • Statistics indicating the degree to which the file is spread within the volume. • The indirect block addresses for the file. • The file's placement on physical (as opposed to logical) volume, for each of the physical copies of the file. Note 1. The fileplace command is not able to display the placement of remote Network File System (NFS) files. If a remote file is specified, the fileplace command returns an error message. However, the placement of the remote file can be displayed if the fileplace command is run directly on the file server. 2. The fileplace command reads the file's list of blocks directly from the logical volume on disk. If the file is newly created, extended, or truncated, the file system information may not yet be on the disk when the fileplace command is run. Use the sync command to flush the file information to the logical volume. D.13 The fsck command The following summarizes the options for the fsck command. fsck - Checks file system consistency and interactively repairs the file system. Usage: fsck [-n] [-p] [-y] [-dBlockNumber] [-f] [-ii-NodeNumber] [-o Options] [-tFile] [-V VFSName] [FileSystem1 - FileSystem(s)] -dBlockNumber 348 Searches for references to a specified disk block. Whenever the fsck command encounters a file that contains a specified block, it displays the i-node number and all path names that refer to it. AIX Logical Volume Manager from A to Z: Troubleshooting and Commands -f Performs a fast check. Under normal circumstances, the only file systems likely to be affected by halting the system without shutting down properly are those that are mounted when the system stops. The -f flag prompts the fsck command not to check file systems that were unmounted successfully. The fsck command determines this by inspecting the s_fmod flag in the file system superblock. This flag is set whenever a file system is mounted and cleared when it is unmounted successfully. If a file system is unmounted successfully, it is unlikely to have any problems. Because most file systems are unmounted successfully, not checking those file systems can reduce the checking time. -i i-Node-Number Searches for references to a specified i-node. Whenever the fsck command encounters a directory reference to a specified i-node, it displays the full path name of the reference. -n Assumes no response to all questions asked by the fsck command. It does not open the specified file system for writing. -o Options Passes comma-separated options to the fsck command. These options are assumed to be file system implementation-specific, except that the following are currently supported for all file systems: mountable Causes the fsck command to exit with success, returning a value of 0, if the file system in question is mountable (clean). If the file system is not mountable, the fsck command exits returning with a value of 8. mytype Causes the fsck command to exit with success (0) if the file system in question is of the same type as either specified in the /etc/filesystems file or by the -V flag on the command line. Otherwise, 8 is returned. For example, fsck -o mytype -V jfs / exits with a value of 0 if / (the root file system) is a journaled file system. Appendix D. Other related commands 349 -p Does not display messages about minor problems but fixes them automatically. This flag does not grant the wholesale license that the -y flag does and is useful for performing automatic checks when the system is started normally. You should use this flag as part of the system startup procedures, whenever the system is being run automatically. It also allows parallel checks by group. If the primary superblock is corrupt, the secondary superblock is verified and copied to the primary superblock. -t File Specifies a File parameter as a scratch file on a file system other than the one being checked if the fsck command cannot obtain enough memory to keep its tables. If you do not specify the -t flag, and the fsck command needs a scratch file, it prompts you for the name of the scratch file. However, if you have specified the -p flag, the fsck command is unsuccessful. If the scratch file is not a special file, it is removed when the fsck command ends. -V VFSName Uses the description of the virtual file system specified by the VFSName variable for the file system instead of using the /etc/filesystems file to determine the description. If the -V VfsName flag is not specified on the command line, the /etc/filesystems file is checked, and the vfs=Attribute of the matching stanza is assumed to be the correct file system type. -y Assumes a yes response to all questions asked by the fsck command. This flag lets the fsck command take any action it considers necessary. Use this flag only on severely damaged file systems. Note Always run the fsck command on file systems after a system malfunction. Corrective actions may result in some loss of data. The default action for each consistency correction is to wait for the operator to enter yes or no. If you do not have write permission for an affected file system, the fsck command defaults to a no response in spite of your actual response. 350 AIX Logical Volume Manager from A to Z: Troubleshooting and Commands Note 1. The fsck command does not make corrections to a mounted file system. 2. The fsck command can be run on a mounted file system for reasons other than repairs. However, inaccurate error messages may be returned when the file system is mounted. The fsck command checks and interactively repairs inconsistent file systems. You should run this command before mounting any file system. You must be able to read the device file on which the file system resides (for example, the /dev/hd0 device). Normally, the file system is consistent, and the fsck command merely reports on the number of files, used blocks, and free blocks in the file system. If the file system is inconsistent, the fsck command displays information about the inconsistencies found and prompts you for permission to repair them. The fsck command is conservative in its repair efforts and tries to avoid actions that might result in the loss of valid data. In certain cases, however, the fsck command recommends the destruction of a damaged file. If you do not allow the fsck command to perform the necessary repairs, an inconsistent file system may result. Mounting an inconsistent file system may result in a system crash. If you do not specify a file system with the FileSystem parameter, the fsck command checks all file systems listed in the /etc/filesystems file for which the check attribute is set to true. You can enable this type of checking by adding a line in the stanza as follows: check=true The fsck command can perform simultaneous checks on multiple file systems. This procedure can reduce the time required to check a large number of file systems. Use a - (minus sign) to separate the file systems when specified as part of the argument. You can also perform simultaneous checks on multiple file systems by grouping the file systems in the /etc/filesystems file. To do so, change the check attribute in the /etc/filesystems file as follows: check=Number The Number parameter tells the fsck command which group contains a particular file system. File systems that use a common log device should be placed in the same group. Each group is checked in a separate parallel Appendix D. Other related commands 351 process. File systems are checked, one at a time, in the order that they are listed in the /etc/filesystems file. All check=true file systems are in group 1. The fsck command attempts to check the root file system before any other file system, regardless of the order specified on the command line or in the /etc/filesystems file. The fsck command checks for the following inconsistencies: • Blocks or fragments allocated to multiple files. • i-nodes containing block or fragment numbers that overlap. • i-nodes containing block or fragment numbers out of range. • Discrepancies between the number of directory references to a file and the link count of the file. • Illegally allocated blocks or fragments. • i-nodes containing block or fragment numbers that are marked free in the disk map. • i-nodes containing corrupt block or fragment numbers. • A fragment that is not the last disk address in an i-node. This check does not apply to compressed file systems. • Files larger than 32 KB containing a fragment. This check does not apply to compressed file systems. • Size checks: • Incorrect number of blocks. • Directory size not a multiple of 512 bytes. (These checks do not apply to compressed file systems) • Directory checks: • Directory entry containing an i-node number marked free in the i-node map. • i-node number out of range. • Dot (.) link missing or not pointing to itself. • Dot dot (..) link missing or not pointing to the parent directory. • Files that are not referenced or directories that are not reachable. • Inconsistent disk map. • Inconsistent i-node map. 352 AIX Logical Volume Manager from A to Z: Troubleshooting and Commands Orphaned files and directories (those that cannot be reached) are, if you allow it, reconnected by placing them in the lost+found subdirectory in the root directory of the file system. The name assigned is the i-node number. If you do not allow the fsck command to reattach an orphaned file, it requests permission to destroy the file. In addition to its messages, the fsck command records the outcome of its checks and repairs through its exit value. This exit value can be any sum of the following conditions: 0 All checked file systems are now okay. 2 The fsck command was interrupted before it could complete checks or repairs. 4 The fsck command changed the file system; the user must restart the system immediately. 8 The file system contains unrepaired damage. When the system is booted from a disk, the boot process explicitly runs the fsck command, specified with the -f and -p flags, on the /, /usr, /var, and /tmp file systems. If the fsck command is unsuccessful on any of these file systems, the system does not boot. Booting from removable media and performing maintenance work will then be required before such a system will boot. If the fsck command successfully runs on /, /usr, /var, and /tmp, normal system initialization continues. During normal system initialization, the fsck command specified with the -f and -p flags runs from the /etc/rc file. This command sequence checks all file systems in which the check attribute is set to true (check=true). If the fsck command executed from the /etc/rc file is unable to guarantee the consistency of any file system, system initialization continues. However, the mount of any inconsistent file systems may fail. A mount failure may cause incomplete system initialization. Note that, by default, the /, /usr, /var, and /tmp file systems have the check attribute set to false (check=false) in their /etc/filesystem stanzas. The attribute is set to false for the following reasons: 1. The boot process explicitly runs the fsck command on the /, /usr, /var, and /tmp file systems. 2. The /, /usr, /var, and /tmp file systems are mounted when the /etc/rc file is executed. The fsck command will not modify a mounted file system. Furthermore, the fsck command run on a mounted file system produces unreliable results. Appendix D. Other related commands 353 D.14 The fsdb command The following summarizes the options for the fsdb command. fsdb - Debugs file systems. Usage: fsdb FileSystem [-] - Disables the error checking routines used to verify i-nodes and block addresses. The O subcommand switches these routines on and off. When these routines are running, the fsdb command reads critical file system data from the superblock. The obtained information allows the fsdb command to access the various file system objects successfully and to perform various error checks. The fsdb command enables you to examine, alter, and debug a file system specified by the FileSystem parameter. The command provides access to file system objects, such as blocks, i-nodes, or directories. You can use the fsdb command to examine and patch damaged file systems. Key components of a file system can be referenced symbolically. This feature simplifies the procedures for correcting control-block entries and for descending the file system tree. To examine a file system, specify it by a block device name, a raw device name, or a mounted file system name. In the last case, the fsdb command determines the associated file system name by reading the /etc/filesystems file. Mounted file systems cannot be modified. The subcommands for the fsbd command allow you to access, view, or change the information in a file system. Any number you enter in the sub-command is considered decimal by default unless you prefix it with either 0, to indicate an octal number, or 0x to indicate a hexadecimal number. All addresses are printed in hexadecimal. Because the fsdb command reads and writes one block at a time, it works with raw, as well as block I/O. D.15 The imfs command The following summarizes the options for the imfs command. 354 AIX Logical Volume Manager from A to Z: Troubleshooting and Commands imfs - Removes file system data from /etc/filesystems. Usage: imfs [-x] {PVName | VGName | -l LVName} -x Remove the stanzas from /etc/filesystems that contain information pertaining to the specified object -l The object is a logical volume. D.16 The ipl_varyon command The following summarizes the options for the ipl_varyon command. ipl_varyon - An object file command that is used to vary on the root volume group during system boot processing. Usage: ipl_varyon [-d IPLDevice] [-i] [-v] -d IPLDevice The name of the device from which to perform the ipl. -i Inquiry mode - skips ipl device processing. -v Set verbose output. D.17 The istat command The following summarizes the options for the istat command. istat - Examines i-node numbers. Usage: istat {FileName | i-nodeNumber Device} The istat command displays the i-node information for a particular file. You can specify the file either by providing a file or directory name with the FileName parameter or by providing an i-node number with the i-nodeNumber parameter and a device name with the Device parameter. You can specify the Device parameter as either a device name or as a mounted file system name. Appendix D. Other related commands 355 If you specify the FileName parameter, the istat command writes the following information about the file: • Device where the file resides • i-node number of the file on that device • File type, such as normal, directory, and block device • File access permissions • Name and identification number of the owner and group Note: The owner and group names for remote files are taken from the local /etc/passwd file. • Number of links to the file • If the i-node is for a normal file, length of the file • If the i-node is for a device, major and minor device designations • Date of the last i-node update • Date of the last file modification • Date of the last reference to the file If you specify the i-nodeNumber and Device parameters, the istat command also displays, in hexadecimal values, the block numbers recorded in the i-node. Note The Device parameter cannot refer to a remote device. D.18 The logform command The following summarizes the options for the logform command. logform - Initializes a logical volume for use as a journal file system (JFS) log. Usage: logform LogName LogName 356 The name of the device file in /dev, for example /dev/jfslog1. AIX Logical Volume Manager from A to Z: Troubleshooting and Commands Note Executing the logform command on any journaled file system (JFS) log device can result in data loss and file system corruption for all JFS file systems logged by the log device. The logform command initializes a logical volume for use as a JFS log device. The logform command destroys all log records on existing log devices, which may result in file system data loss. The Logname parameter specifies the absolute path to the logical volume to be initialized (for example, /dev/jfslog1). Note The only intended use for the logform command is to initialize a JFS log logical volume as a JFS log device. The SMIT interface for creating a JFS, and the crfs command, allow only one JFS log device per volume group. D.19 The logredo command The following summarizes the options for the logredo command. logredo - An object file command that uses the jfs log to re-establish consistency in the specified file system. Usage: logredo [-b] [-n] filename -b Replay the log file to a backup copy. -n Set debug mode. The logredo algorithm reads the log backwards from logend to the value specified by the first log syncpt record encountered. D.20 The lsfs command The following summarizes the options for the lsfs command. Appendix D. Other related commands 357 lsfs - Displays the characteristics of file systems. Usage: lsfs [-q] [-c | -l] [-a | -v VFSType | -u MountGroup | [FileSystem(s)]] -a Lists all file systems (default). -c Specifies that the output should be in colon format. -l Specifies that the output should be in list format. -q Queries the logical volume manager (LVM) for the logical volume size (in 512-byte blocks) and queries the JFS superblock for the file system size, the fragment size, the compression algorithm (if any), and the number of bytes per i-node (nbpi). This information is not reported for other virtual file system types. It is displayed in addition to other file system characteristics reported by the lsfs command. -u MountGroup Reports on all file systems of a specified mount group. -v VFSType Reports on all file systems of a specified type. The lsfs command displays characteristics of file systems, such as mount points, automatic mounts, permissions, and file system size. The FileSystem parameter reports on a specific file system. The following subsets can be queried for a listing of characteristics: • All file systems • All file systems of a certain mount group • All file systems of a certain virtual file system type • One or more individual file systems The lsfs command displays additional journaled file system (JFS) characteristics if the -q flag is specified. D.21 The lsps command The following summarizes the options for the lsps command. lsps - Displays the characteristics of paging spaces. 358 AIX Logical Volume Manager from A to Z: Troubleshooting and Commands Usage: lsps {-s | [-c | -l] {-a | -t {lv | nfs} | PagingSpace}} -a Specifies that the characteristics of all paging spaces are to be given. The size is given in megabytes. -c Specifies that the output should be in colon format. The colon format gives the paging space size in physical partitions. -l Specifies that the output should be in list format. -s Specifies that the summary characteristics of all paging spaces are to be given. This information consists of the total paging space in megabytes and the percentage of paging space currently assigned (used). If the -s flag is specified, all other flags are ignored. Note: Setting the environment variable PSALLOC=early causes the use of early paging space algorithm. In this case, the value the -s flag specifies is different from the value returned for a single paging space or when using the -a flag for all the paging spaces. The value the -s flag displays is the percentage of paging space allocated (reserved), whether the paging space has been assigned (used) or not. Therefore, the percentage reported by the -s flag is usually larger than that reported by the -a flag when PSALLOC is set to early. -t Specifies the characteristics of the paging space. One of the following variables is required: lv Specifies that the characteristics of only logical volume paging spaces are to be given. nfs Specifies that the characteristics of only NFS paging spaces are to be given. The heading of the output will be changed to display the host name of the NFS server and the path name of the file that resides on the server that is being used for NFS paging. The lsps command displays the characteristics of paging spaces, such as the paging-space name, physical-volume name, volume-group name, size, percentage of the paging space used, whether the space is active or inactive, and whether the paging space is set to automatic. The PagingSpace parameter specifies the paging space whose characteristics are to be shown. Appendix D. Other related commands 359 For NFS paging spaces, the physical-volume name, and volume-group name will be replaced by the host name of the NFS server and the path name of the file that is used for paging. D.22 The mkfs command The following summarizes the options for the mkfs command. mkfs - Makes a file system. Usage: mkfs [-b Boot] [-l Label] [-i i-Nodes] [-o Options] [-p Prototype] [-s Size] [-v VolumeLabel] [-V VFSName] -b Boot Names the program to be installed in block 0 of the new file system. -i i-Nodes Specifies the initial number of i-nodes on the file system. This flag is ignored when creating a journaled file system. -l Label Specifies the file system label for the new file system. -o Options Specifies a comma-separated list of virtual file system implementation-specific options. -o ag={ 8 | 16 | 32 | 64 } Specifies the allocation group size in megabytes. An allocation group is a grouping of inodes and disk blocks similar to BSD cylinder groups. The default ag value is 8. This option only applies to AIX Version 4.2 or later. -o bf={ true | false } Specifies a large file enabled file system. If you do not need a large file enabled file system, set this option to false; this is the default. Specifying bf=true requires a fragment size of 4096, and compress=no. This option only applies to AIX Version 4.2 or later. -o frag={ 512 | 1024 | 2048 | 4096 } Specifies the JFS fragment size in bytes. A file system fragment is the smallest unit of disk storage that can be allocated to a file. The default fragment size is 4096 bytes. 360 AIX Logical Volume Manager from A to Z: Troubleshooting and Commands -o frag={ 512 | 1024 | 2048 | 4096 } Specifies the JFS fragment size in bytes. A file system fragment is the smallest unit of disk storage that can be allocated to a file. The default fragment size is 4096 bytes. -o compress={ no | LZ } specifies data compression. If you do not want data to be compressed, set this option to no. Selecting compression requires a fragment size of 2048 or less. -o nbpi={ 512 | 1024 | 2048 | 4096 | 8192 | 16384 | 32768 | 65536 | 131072 } Specifies the number of bytes per i-node (nbpi). The nbpi is the ratio of file system size in bytes to the total number of i-nodes. The default nbpi value is 4096 bytes. The values 32768, 65536, and 131072 only apply to AIX Version 4.2 or later. -p Prototype Specifies the name of the prototype file. Options specified on the command line override attributes in the prototype file. -s Size Specifies the size of the file system in 512-byte blocks. The mkfs command makes a new file system on a specified device. The mkfs command initializes the volume label, file system label, and startup block. The Device parameter specifies a block device name, raw device name, or file system name. If the parameter specifies a file system name, the mkfs command uses this name to obtain the following parameters from the applicable stanza in the /etc/filesystems file unless these parameters are entered with the mkfs command: dev Device name vol Volume ID size File system size boot Program to be installed in the startup block vfs Definition of the virtual file system options File-system implementation-specific options of the form Keyword, Keyword=Value Appendix D. Other related commands 361 Note 1. The file system is created with the setgid (set group ID) bit enabled. The setgid bit determines the default group permissions. All directories created under the new file system have the same default group permissions. 2. The mkfs command does not alter anything in a mounted file system, including the file system label. The file system label changes when you change the mount point unless the file system is mounted. Prototype files The mkfs command requires an extended prototype file to create a journaled file system (JFS). A prototype file is a formatted listing of the contents and structure of a file system. A prototype file describes the file system by a series of tokens separated by spaces and new lines. The main body of a prototype file defines the objects of the file system. A JFS prototype file consists of the main body, which can be created by the proto command, preceded by five special tokens. D.23 The mount command The following summarizes the options for the mount command. mount - Makes a file system available for use. Usage: mount [-f] [-n Node] [-o Options] [-p] [-r] [-v VFSName] [-t Type | [Device | Node:Directory] Directory | all | -a [-V [generic_options] special_mount_points] 362 -a Mounts all file systems in the /etc/filesystems file with stanzas that contain the true mount attribute. all Same as the -a flag. -f Requests a forced mount during system initialization to enable mounting over the root file system. -n Node Specifies the remote node that holds the directory to be mounted. AIX Logical Volume Manager from A to Z: Troubleshooting and Commands -o Options Specifies options. Options you enter on the command line should be separated only by a comma, not a comma and a space. The following file system-specific options apply to JFS: bsy Prevents the mount operation if the directory to be mounted over is the current working directory of a process. log=LVName Specifies the full path name of the file system logging logical volume name where the following file-system operations are logged. nodev Specifies that you cannot open devices from this mount. This option returns a value of ENXIO if a failure occurs. nosuid Specifies that execution of setuid and setgid programs by way of this mount is not allowed. This option returns a value of EPERM if a failure occurs. ro Specifies that the mounted file is read-only. The default value is rw. rw Specifies that the mounted file is read/write accessible. The default value is rw. The mount command instructs the operating system to make a file system available for use at a specified location (the mount point). In addition, you can use the mount command to build other file trees made up of directory and file mounts. The mount command mounts a file system expressed as a device using the Device or Node:Directory parameter on the directory specified by the Directory parameter. After the mount command has finished, the directory specified becomes the root directory of the newly mounted file system. Only users with root authority, or members of the system group and have write access to the mount point, can issue file or directory mounts. The file or directory may be a symbolic link. The mount command uses the real user ID, not the effective user ID, to determine if the user has appropriate access. System group members can issue device mounts, provided they have write access to the mount point and those mounts specified in the /etc/filesystems file. Users with root user authority can issue any mount command. Users can mount a device provided they belong to the system group and have appropriate access. When mounting a device, the mount command uses the Appendix D. Other related commands 363 Device parameter as the name of the block device and the Directory parameter as the directory on which to mount the file system. If you enter the mount command without flags, the command displays the following information for the mounted file systems: • The node (if the mount is remote) • The object mounted • The mount point • The virtual-file-system type • The time mounted • Any mount options If you specify only the Directory parameter, the mount command takes it to be the name of the directory or file on which a file system, directory, or file is usually mounted (as defined in the /etc/filesystems file). The mount command looks up the associated device, directory, or file and mounts it. This is the most convenient way of using the mount command because it does not require you to remember what is normally mounted on a directory or file. You can also specify only the device. In this case, the command obtains the mount point from the /etc/filesystems file. The /etc/filesystems file should include a stanza for each mountable file system, directory, or file. This stanza should specify at least the name of the file system and either the device on which it resides or the directory name. If the stanza includes a mount attribute, the mount command uses the associated values. It recognizes five values for the mount attributes: automatic, true, false, removable, and read-only. The mount all command causes all file systems with the mount=true attribute to be mounted in their normal places. This command is typically used during system initialization, and the corresponding mounts are referred to as automatic mounts. CacheFS mount specific The CacheFS-specific version of the mount command mounts a cached file system. If necessary, it NFS-mounts its back file system. It also provides a number of CacheFS-specific options for controlling the caching process. 364 AIX Logical Volume Manager from A to Z: Troubleshooting and Commands Note If the mount command encounters a journaled file system that was not unmounted before reboot, a replay of any JFS log records is attempted. In order to move a compatible journaled file system to a system running an earlier release of the AIX operating system, the file system must always be unmounted cleanly prior to its movement. Failure to unmount first may result in an incompatible JFS log device. If the movement results in an unknown log device, the file system should be returned to the system running the latter operating system release, and fsck should be run on the file system. D.24 The ncheck command The following summarizes the options for the ncheck command. ncheck - Generates path names from i-node numbers. Usage: ncheck [ [ [-a] [-i InNumber(s)]] | [-s] ] [FileSystem] -a Lists the . (dot) and .. (dot dot) file names. -i InNumber Lists only the file or files specified by the InNumber parameter. -s Lists only special files and files with set-user-ID mode. The ncheck command displays the i-node number and path names for file system files. It uses question marks (??) displayed in the path to indicate a component that could not be found. Path names displayed with ... (ellipses) at the beginning indicate either a loop or a path name of greater than 10 entries. The ncheck command uses a simple hashing algorithm to reconstruct the path names that it displays. Because of this, it is restricted to file systems with less than 50,000 directory entries. D.25 The restore command The following summarizes the options for the restore command. Appendix D. Other related commands 365 restore - To restore files archived by file name. Usage: restore -x [d M v q] [-b Number] [-f Device] [-s SeekBackup] [-X VolumeNumber] [File(s)] restore - To list files archived by file name. Usage: restore -T [q v] [-b Number] [-f Device] [-s SeekBackup] restore - To restore files archived by file system. Usage: restore -r [B q v y] [-b Number] [-f Device] [-s SeekBackup] restore - To restore files archived by file system (multi-volume). Usage: restore -R [B v y] [-b Number] [-f Device] [-s SeekBackup] restore - To interactively restore files archived by file system. Usage: restore -i [h m q v y] [-b Number] [-f Device] [-s SeekBackup] restore - To individually restore files archived by file system. Usage: restore -x [B h m q v y] [-b Number] [-f Device] [-s SeekBackup] [File(s)] restore - To list files archived by file system. Usage: -t | -T [B h q v y] [-b Number] [-f Device] [-s SeekBackup] [File(s)] -B 366 Specifies that the archive should be read from standard input. Normally, the restore command examines the actual medium to determine the backup format. When using a | (pipe), this examination cannot occur. As a result, the archive is assumed to be in file-system format, and the device is assumed to be standard input (-f -). AIX Logical Volume Manager from A to Z: Troubleshooting and Commands -b Number For backups done by name, specifies the number of 512-byte blocks; for backups done by i-node, specifies the number of 1024-byte blocks to read in a single output operation. When the restore command reads from tape devices, the default is 100 for backups by name, and 32 for backups by i-node. The read size is the number of blocks multiplied by the block size. The default read size for the restore command reading from tape devices is 51200 (100 * 512) for backups by name, and 32768 (32 * 1024) for backups by i-node. The read size must be an even multiple of the tape's physical block size. If the read size is not an even multiple of the tape's physical block size, and it is in fixed block mode (nonzero), the restore command tries to determine a valid value for Number. If successful, the restore command changes Number to the new value, writes a message about the change to standard output, and continues. If unsuccessful in finding a valid value for Number, the restore command writes an error message to standard error and exits with a non-zero return code. Larger values for the Number parameter result in larger physical transfers from the tape device. The value of the -b flag is always ignored when the restore command reads from diskette. In this case, the command always reads in clusters that occupy a complete track. -d Indicates that, if the File parameter is a directory, all files in that directory should be restored. This flag can only be used when the archive is in file-name format. Appendix D. Other related commands 367 368 -f Device Specifies the input device. To receive input from a named device, specify the Device variable as a path name (such as /dev/rmt0). To receive input from the standard output device, specify a - (minus sign). The - (minus) feature enables you to pipe the input of the restore command from the dd command. You can also specify a range of archive devices. The range specification must be in the following format: /dev/deviceXXX-YYY where XXX and YYY are whole numbers, and XXX must always be less than YYY; for example, /dev/rfd0-3. All devices in the specified range must be of the same type. For example, you can use a set of 8 mm, 2.3 GB tapes, or a set of 1.44 MB diskettes. All tape devices must be set to the same physical tape block size. If the Device variable specifies a range, the restore command automatically goes from one device in the range to the next. After exhausting all of the specified devices, the restore command halts and requests that new volumes be mounted on the range of devices. -h Restores only the actual directory, not the files contained in it. This flag can only be used when the archive is in file-system format. This flag is ignored when used with the -r or -R flags. AIX Logical Volume Manager from A to Z: Troubleshooting and Commands -i Allows you to interactively restore selected files from a file-system archive. The subcommands for the -i flag are: cd Directory Changes the current directory to the specified directory. add [File] Specifies that the File parameter is added to the list of files to extract. If File is a directory, that directory and all the files contained in it are added to the extraction list (unless the -h flag is used). If File is not specified, the current directory is added to the extraction list. delete [File] Specifies that the File parameter is to be removed from the list of files to be extracted. If File is a directory, that directory, and all the files contained in it, is removed from the extraction list (unless the -h flag is used). ls [Directory] Displays the directories and files contained within the Directory parameter. Directory names are displayed with a / (slash) after the name. Files and directories, within the specified directory, that are on the extraction list are displayed with an * (asterisk) before the name. If verbose mode is on, the i-node number of the files and directories is also displayed. If the Directory parameter is not specified, the current directory is used. extract Restores all the directories and files on the extraction list. pwd Displays the full path name of the current directory. verbose Causes the ls subcommand to display the i-node number of files and directories. Additional information about each file is also displayed as it is extracted from the archive. setmodes Sets the owner, mode, and time for all directories added to the extraction list. quit Causes restore to exit immediately. Any files on the extraction list are not restored. help Displays a summary of the subcommands. Appendix D. Other related commands 369 370 -M Sets the access and modification times of restored files to the time of restoration. If a restored file is an archive created by the ar command, the modification times in all the member headers are also set to the time of restoration. You can specify the -M flag only when you are restoring individually named files and only if the -x or -X flags are also specified. When the -M flag is not specified, the restore command maintains the access and modification times as they appear on the backup medium. The -M flag is used when the data is in the AIX Version 2 backup by-i-node or by-name format. -m Renames restored files to the file's i-node number as it exists on the archive. This is useful if a few files are being restored, and you want these files restored under a different file name. Since any restored archive members are renamed to their i-node numbers, directory hierarchies and links are not preserved. Directories and hard links are restored as regular files. The -m flag is used when the archive is in file-system format. -q Specifies that the first volume is ready to use and that the restore command should not prompt you to mount the volume and hit Enter. If the archive spans multiple volumes, the restore command prompts you for the subsequent volumes. -R Requests a specific volume of a multiple-volume, file-system archive. The -R flag allows a previously interrupted restore to be restarted. The File parameter is ignored when using the -R flag. Once restarted, the restore command behavior is the same as with the -r flag. -r Restores all files in a file-system archive. The -r flag is only used to restore complete level 0 backups or to restore incremental backups after a level 0 backup is restored. The restoresymtable file is used by restore to pass information between incremental restores. This file should be removed once the last incremental backup is restored. The File parameter is ignored when using the -r flag. AIX Logical Volume Manager from A to Z: Troubleshooting and Commands -s SeekBackup Specifies the backup to seek and restore on a multiple-backup tape archive. The -s flag is only applicable when the archive is written to a tape device. To use the -s flag properly, a no-rewind-on-close and no-retension-on-open tape device, such as /dev/rmt0.1 or /dev/rmt0.5, must be specified. If the -s flag is specified with a rewind tape device, the restore command displays an error message and exits with a non-zero return code. If a no-rewind tape device is used, and the -s flag is not specified, a default value of -s 1 is used. The value of the SeekBackup parameter must be in the range of 1 to 100, inclusive. It is necessary to use a no-rewind-on-close, no-retension-on-open tape device because of the behavior of the -s flag. The value specified with -s is relative to the position of the tape's read/write head and not to an archive's position on the tape. For example, to restore the first, second, and fourth backups from a multiple-backup tape archive, the respective values for the -s flag would be -s 1, -s 1, and -s 2. -T Displays information about the backup archive. If the archive is in file-name format, the information contained in the volume header, and a list of files found on the archive, are written to standard output. The File parameter is ignored for file-name archives. If the archive is in file-system format, the behavior is identical to the -t flag. -t Displays information about the backup archive. If the archive is in file-system format, a list of files found on the archive is written to standard output. The name of each file is preceded by the i-node number of the file as it exists on the archive. The file names displayed are relative to the root (/) directory of the file system that was backed up. If the File parameter is not specified, all the files on the archive are listed. If the File parameter is used, then just that file is listed. If the File parameter refers to a directory, all the files contained in that directory are listed. If the archive is in file-name format, information contained in the volume header is written to standard output. This flag can be used to determine if the archive is in file-name or file-system format. Appendix D. Other related commands 371 372 -v Displays additional information when restoring. If the archive is in file-name format, and either the -x or -T flag is specified, the size of the file as it exists on the archive is displayed in bytes. Directory, block, or character device files are archived with a size of 0. Symbolic links are listed with the size of the symbolic link. Hard links are listed with the size of the file, which is how they are archived. Once the archive is read, a total of these sizes is displayed. If the archive is in file-system format, directory and non-directory archive members are distinguished. -X VolumeNumber Begins restoring from the specified volume of a multiple-volume, file-name backup. Once started, the restore command behavior is the same as with the -x flag. The -X flag applies to file-name archives only. AIX Logical Volume Manager from A to Z: Troubleshooting and Commands -x Restores individually named files specified by the File parameter. If the File parameter is not specified, all the archive members are restored. If the File parameter is a directory, and the archive is in file-name format, only the directory is restored. If the File parameter is a directory, and the archive is in file-system format, all the files contained in the directory are restored. The file names specified by the File parameter must be the same as the names shown by the restore -T command. Files are restored with the same name they were archived with. If the file name was archived using a relative path name (./filename), the file is restored relative to the current directory. If the archive is in file-system format, files are restored relative to the current directory. The restore command automatically creates any needed directories. When using this flag to restore file-system backups, you are prompted to enter the beginning volume number. The restore command allows for shell-style pattern matching metacharacters to be used when specifying files for archive extraction. The rules for matching metacharacters are the same as those used in shell pathname "globbing," namely: * (asterisk) Matches zero or more characters, but not a '.' (period) or '/' (slash). ? (question mark)Matches any single character, but not a '.' (period) or '/' (slash). [ ] (brackets) Matches any one of the characters enclosed within the brackets. If a pair of characters separated by a dash are contained within the brackets, the pattern matches any character that lexically falls between the two characters in the current local. Additionally, a '.' (period) or a '/' (slash) within the brackets will not match a a '.' (period) or a '/' (slash) in a file name. \ (backslash) Matches the immediately following character, preventing its possible interpretation as a metacharacter. Appendix D. Other related commands 373 -y Continues restoring when tape errors are encountered. Normally, the restore command asks you whether or not to continue. In either case, all data in the read buffer is replaced with zeroes. The -y flag applies only when the archive is in file-system format. -? Displays a usage message. The restore command reads archives created by the backup command and extracts the files stored on them. These archives can be in either file-name or file-system format. An archive can be stored on disk, diskette, or tape. Files must be restored using the same method by which they were archived. This requires that you know the format of the archive. The archive format can be determined by examining the archive volume header information that is displayed when using the -T flag. When using the -x, -r, -T, or -t flags, the restore command automatically determines the archive format. Note The restore command actively sparses files that are being restored. If a file has block aligned, and sized areas that are NULL populated, then restore does not cause physical space for those file system blocks to be allocated. The size in bytes of the file remain the same, but the actual space taken within the file system is only for the non-NULL areas. Individual files can be restored from either file-name or file-system archives by using the -x flag and specifying the file name. The file name must be specified as it exists on the archive. Files can be restored interactively from file-system archives using the -i flag. The names of the files on an archive can be written to standard output using the -T flag. Users must have write access to the file system device or have Restore authorization in order to extract the contents of the archive. The diskette device, /dev/rfd0, is the default media for the restore command. To restore from standard input, specify a - (dash) with the -f flag. You can also specify a range of devices, such as /dev/rmt0-2. 374 AIX Logical Volume Manager from A to Z: Troubleshooting and Commands Note 1. If you are restoring from a multiple-volume archive, the restore command reads the volume mounted, prompts you for the next volume, and waits for your response. After inserting the next volume, press the Enter key to continue restoring files. 2. If an archive, created using the backup command, is made to a tape device with the device block size set to 0, it may be necessary for you to have explicit knowledge of the block size that was used when the tape was created in order to restore from the tape. 3. Multiple archives can exist on a single tape. When restoring multiple archives from tape, the restore command expects the input device to be a no-retension-on-open, no-rewind-on-close tape device. Do not use a no-rewind tape device for restoring unless the -B, -s, or -X flag is specified. For more information on using tape devices, see the rmt special file. File-system archives File-system archives are also known as i-node archives due to the method used to archive the files. A file-system name is specified with the backup command, and the files within that file system are archived based on their structure and layout within the file system. The restore command restores the files on a file-system archive without any special understanding of the underlying structure of the file system. When restoring file-system archives, the restore command creates and uses a file named restoresymtable. This file is created in the current directory. The file is necessary for the restore command to do incremental file-system restores. Note Do not remove the restoresymtable file if you perform incremental file-system backups and restores. The File parameter is ignored when using either the -r or the -R flag. File-name archives File-name archives are created by specifying a list of file names to archive to the backup command. The restore command restores the files from a file-name archive without any special understanding of the underlying Appendix D. Other related commands 375 structure of the file system. The restore command allows for metacharacters to be used when specifying files for archive extraction. This provides the capability to extract files from an archive based on pattern matching. A pattern file name should be enclosed in single quotations, and patterns should be enclosed in brackets (...). D.26 The rmfs command The following summarizes the options for the rmfs command. rmfs - Removes a file system. Usage: rmfs [-r] FileSystem -r Removes the mount point of the file system. The rmfs command removes a file system. If the file system is a journaled file system (JFS), the rmfs command removes both the logical volume on which the file system resides and the associated stanza in the /etc/filesystems file. If the file system is not a JFS file system, the command removes only the associated stanza in the /etc/filesystems file. The FileSystem parameter specifies the file system to be removed. You can use the Web-Based System Manager File Systems application ( wsm f s fast path) to run this command. You can also use the System Management Interface Tool (SMIT), smit rmfs fast path, to run this command. D.27 The savebase command The following summarizes the options for the savebase command. savebase - Saves information about base-customized devices in the Device Configuration database onto the boot device. Usage: savebase [-o Path] [-d File] [-v] -d File 376 Specifies the destination file or device to which the base information will be written. AIX Logical Volume Manager from A to Z: Troubleshooting and Commands -o Path Specifies a directory containing the Device Configuration database. -v Causes verbose output to be written to standard input. The savebase command stores customized information for base devices for use during phase 1 of a system boot. By default, the savebase command retrieves this information from the /etc/objrepos directory. However, you can override this action by using the -o flag to specify an ODM directory. By default, the savebase command writes the information it retrieves to the boot disk. Alternatively, you can use the -d flag to specify a destination file or a device, such as the /dev/hdisk0 device file. The savebase command determines what device information to save using the PdDv.base field corresponding to each entry in the CuDv object class. Specifically, the PdDv.base field is a bit mask that represents the type of boot for which this device is a base device. The savebase command determines the current type of boot by accessing the boot_mask attribute in the CuAt object class. The value of this attribute is the bit mask to apply to the PdDv.base field to determine which devices are base. Note: Base devices are those devices that get configured during phase 1 boot; they may vary depending on the type of boot (mask). For example, if the mask is NETWORK_BOOT, network devices are considered base. For DISK_BOOT, disk devices are considered base. The type-of-boot masks are defined in the /usr/include/sys/cfgdb.h file. D.28 The snap command The following summarizes the options for the snap command. snap - Gathers system configuration information. Usage: snap [-a] [-A] [-b] [-c] [-D] [-f] [-g] [-G] [-i] [-k] [-l] [-L] [-n] [-N] [-p] [-r] [-s] [-S] [-t] [-o OutputDevice] [-d Dir] [-v Component] -A Gathers asynchronous (TTY) information. -a Gathers all system configuration information. This option requires approximately 8 MB of temporary disk space. -b Gathers SSA information. Appendix D. Other related commands 377 378 -c Creates a compressed tar image (snap.tar.Z file) of all files in the /tmp/ibmsupt directory tree or other named output directory. Note: Information not gathered with this option should be copied to the snap directory tree before using the -c flag. If a test case is needed to demonstrate the system problem, copy the test case to the /tmp/ibmsupt/testcase directory before compressing the tar file. -D Gathers dump and /unix information. The primary dump device is used. Attention: If bosboot -k was used to specify the running kernel to be other than /unix, the incorrect kernel will be gathered. Make sure that /unix is, or is linked to, the kernel in use when the dump was taken. Gathers dump and /unix information. The primary dump device is used. -d Dir Identifies the optional snap command output directory (/tmp/ibmsupt is the default). -f Gathers file system information. -G Includes predefined Object Data Manager (ODM) files in general information collected with the -g flag. -g Gathers the output of the lslpp -hBc command, which is required to re-create exact operating system environments. Writes output to the /tmp/ibmsupt/general/lslpp.hBc file. Also collects general system information and writes the output to the /tmp/ibmsupt/general/general.snap file. -i Gathers installation debug vital product data (VPD) information. -k Gathers kernel information -L Gathers LVM information. -l Gathers programming language information. -N Suppresses the check for free space. -n Gathers Network File System (NFS) information. -o OutputDevice Copies the compressed image onto diskette or tape. AIX Logical Volume Manager from A to Z: Troubleshooting and Commands -p Gathers printer information. -r Removes snap command output from the /tmp/ibmsupt directory. -S Includes security files in general information collected with the -g flag. -s Gathers Systems Network Architecture (SNA) information. -t Gathers Transmission Control Protocol/Internet Protocol (TCP/IP) information. -v Component Displays the output of the commands executed by the snap command. Use this flag to view the specified name or group of files. The snap command gathers system configuration information and compresses the information into a tar file. The file can then be downloaded to disk or tape or be transmitted to a remote system. The information gathered with the snap command may be required to identify and resolve system problems. Use the snap -o /dev/rfd0 command to copy the compressed image to diskette. Use the snap -o /dev/rmt0 command to copy the image to tape. Approximately 8 MB of temporary disk space is required to collect all system information, including contents of the error log. If you do not gather all system information with the snap -a command, less disk space may be required (depending on the options selected). Note that if you intend to use a tape to send a snap image to IBM for software support, the tape must be one of the following formats: • 8 mm, 2.3 Gb capacity • 8 mm, 5.0 Gb capacity • 4 mm, 4.0 Gb capacity Using other formats prevents or delays IBM software support from being able to examine the contents. The snap -g command gathers general system information, including the following: • Error report • Copy of the customized Object Data Manager (ODM) database Appendix D. Other related commands 379 • Trace file • User environment • Amount of physical memory and paging space • Device and attribute information • Security user information The output of the snap -g command is written to the /tmp/ibmsupt/general/general.snap file. The snap command checks for available space in the /tmp/ibmsupt directory, the default directory for snap command output. You can write the output to another directory by using the -d flag. If there is not enough space to hold the snap command output, you must expand the file system. Each execution of the snap command appends information to previously created files. Use the -r flag to remove previously gathered and saved information. Note Press the Ctrl-C key sequence to interrupt the snap command. A prompt will return with the following options: Press the Enter key to return to current operation; press the S key to stop the current operation; press the Q key to quit the snap command completely. D.29 The sync command The following summarizes the options for the sync command. sync - Updates the i-node table and writes buffered files to the hard disk. Usage: sync The sync command runs the sync subroutine. If the system must be stopped, run the sync command to ensure file system integrity. The sync command writes all unwritten system buffers to disk including modified i-nodes, delayed block I/O, and read-write mapped files. 380 AIX Logical Volume Manager from A to Z: Troubleshooting and Commands Note The writing, although scheduled, is not necessarily complete upon return from the sync subroutine. D.30 The sysdumpdev command The following summarizes the options for the sysdumpdev command. sysdumpdev - Changes the primary or secondary dump device designation in a running system. Usage: sysdumpdev [-c | -C] -P {-p Device | -s Device} [-q] Usage: sysdumpdev [-c | -C] [-p Device | -s Device] [-q] Usage: [-c | -C] [-d Directory | -D Directory | -e | [-k | -K] | -l | -L | -p Device | -q | -r Host: Path | -s Device | -z] -C Specifies that all future dumps will be compressed before they are written to the dump device. The -C flag applies to only AIX Version 4.3.2 and later versions. -c Specifies that dumps will not be compressed. The -c flag applies to only AIX Version 4.3.2 and later versions. -D Directory Specifies the Directory the dump is copied to at system boot. If the copy fails at boot time, using the -D flag allows you to copy the dump to an external media. Note: When using the -d Directory or -D Directory flags, the following error conditions are detected: • Directory does not exist. • Directory is not in the local journaled file system. • Directory is not in the rootvg volume group. -d Directory Specifies the Directory the dump is copied to at system boot. If the copy fails at boot time, the -d flag ignores the system dump. -e Estimates the size of the dump (in bytes) for the current running system. If the dump will be compressed, then the size shown is the estimate of the size after compression. Appendix D. Other related commands 381 -K The reset button or the dump key sequences will force a dump with the key in the normal position or on a machine without a key mode switch. Note: On a machine without a key mode switch, a dump can not be forced with the reset button or the key switch without this value set. -k Requires the key mode switch to be in the service position before a dump can be forced with the reset button or the dump key sequences. This is the default setting. -L Displays statistical information about the most recent system dump. This includes date and time of last dump, number of bytes written, and completion status. If the dump was compressed, then this flag shows both the original uncompressed size and the compressed size of the dump. The compressed size is the size of what was actually written to the dump device. -l Lists the current value of the primary and secondary dump devices, copy directory, and forcecopy attribute. -P Makes permanent the dump device specified by the -p or -s flags. The -P flag can only be used with the -p or -s flags. 382 -p Device Temporarily changes the primary dump device to the specified device. The device can be a logical volume or a tape device. For a network dump, the device can be a host name and a path name. -q Suppresses all messages to standard output. If this flag is used with the -l, -r, -z or -L flag, the -q command will be ignored. -r Host:Path Frees space used by the remote dump file on server Host. The location of the dump file is specified by the Path. -s Device Temporarily changes the secondary dump device to the specified device. The device can be a logical volume or a tape device. For a network dump, the device can be a host name and a path name. AIX Logical Volume Manager from A to Z: Troubleshooting and Commands -z Determines if a new system dump is present. If one is present, a string containing the size of the dump in bytes and the name of the dump device will be written to standard output. If a new system dump does not exist, nothing is returned. After the sysdumpdev -z command is run on an existing system dump, the dump will no longer be considered recent. If no flags are used with the sysdumpdev command, the default dump devices are used. The sysdumpdev command changes the primary or secondary dump device designation in a system that is running. The primary and secondary dump devices are designated in a system configuration object. The new device designations are in effect until the sysdumpdev command is run again, or the system is restarted. If no flags are used with the sysdumpdev command, the dump devices defined in the SWservAt ODM object class are used. The default primary dump device is /dev/hd6. The default secondary dump device is /dev/sysdumpnull. Note 1. A mirrored paging space may be used as a dump device. 2. Do not use a diskette drive as your dump device. 3. If you use a paging device, only use hd6, the primary paging device. AIX Version 4.2.1 or later supports using any paging device in the root volume group (rootvg) as the secondary dump device. You can also use the sysdumpdev command to specify whether or not dumps should be compressed before writing them to the dump device. Compressing dumps reduces the size needed for dump devices but may cause the dump process to take longer. Note 1. The savecore command should be used to copy a compressed dump from the dump device to a file. 2. The dump compression feature only applies to AIX Version 4.3.2 and later versions. Running sysdumpdev in non-rootvg volume groups Appendix D. Other related commands 383 You can use a dump logical volume outside the root volume group if it is not a permanent dump device. For example, if the -P flag is not specified. However, if you choose a paging space, you cannot copy the dump device unless it is in rootvg. During the time, you must copy the dump device. Only rootvg is active before paging is started. The primary dump devices must always be in the root volume group for permanent dump devices. The secondary device may be outside the root volume group unless it is a paging space. Configuring remote dump devices with sysdumpdev The sysdumpdev command can also be used to configure remote dump devices. The following conditions must be met before a remote dump device can be configured: • The local and the remote host must have Transmission Control Protocol/Internet Protocol (TCP/IP) installed and configured. • The local host must have Network File System (NFS) installed. • The remote host must support NFS. • The remote host must be operational and on the network. This condition can be tested by issuing the ping command. • The remote host must have an NFS exported directory defined such that the local host has read and write permissions as well as root access to the dump file on the remote host. • The remote host cannot be the same as the local host. The network device driver must support remote dump. D.31 The tar command The following summarizes the options for the tar command. tar - Manipulates archives Usage: tar {-c | -r | -t | -u | -x} [-b Blocks] [-B] [-d] [-F] [-h] [-i] [-L InputList] [-l] [-m] [-N Blocks] [-o] [-p] [-s] [-v] [-w] [-Number] [-f Archive] [-S Blocksb | -S Feet | -S Feet@Density] [File(s) | Directory(s) | -C Directory(s)] 384 AIX Logical Volume Manager from A to Z: Troubleshooting and Commands -B Forces input and output blocking to 20 blocks per record. With this option, the tar command can work across communications channels where blocking may not be maintained. -b Blocks Specifies the number of 512 bytes blocks per record. Both the default and the maximum is 20, which is appropriate for tape records. Due to the size of inter record gaps, tapes written with large blocking factors can hold much more data than tapes with only one block per record. The block size is determined automatically when tapes are read (the -x or -t function flags). When archives are updated with the -u and -r functions, the existing record size is used. The tar command writes archives using the specified value of the Blocks parameter only when creating new archives with the -c flag. For output to ordinary files with the -f flag, you can save disk space by using a blocking factor that matches the size of disk blocks (for example, the -b4 flag for 2048-byte disk blocks). -C Directory Causes the tar command to perform a chdir subroutine to the directory specified by the Directory variable. Using the -C flag allows multiple directories not related by a close common parent to be archived using short relative path names. For example, to archive files from the /usr/include and /etc directories, you might use the following command: tar c -C /usr/include File1 File2 -C /etc File3 File4 The -CDirectory flag must appear after all other flags and can appear in the list of file names given. -c Creates a new archive and writes the files specified by one or more File parameters to the beginning of the archive. -d Makes separate entries for block files, special character files, and first-in-first-out (FIFO) piped processes. Normally, the tar command will not archive these special files. When writing to an archive with the -d flag, the tar command makes it possible to restore empty directories, special files, and first-in-first-out (FIFO) piped processes with the -x flag. Note: Although anyone can archive special files, only a user with root user authority can extract them from an archive. Appendix D. Other related commands 385 386 -F Checks the file type before archiving. Source Code Control Systems (SCCS), Revision Control Systems (RCS), files named core, errs, a.out, and files ending in .o (dot o) are not archived. -f Archive Uses the Archive variable as the archive to be read or written. When this flag is not specified, the tar command uses a system-dependent default file name of the form /dev/rmt0. If the Archive variable specified is - (minus sign), the tar command writes to standard output or reads from standard input. If you write to standard output, the -c flag must be used. -h Forces the tar command to follow symbolic links as if they were normal files or directories. Normally, the tar command does not follow symbolic links. -i Ignores header checksum errors. The tar command writes a file header containing a checksum for each file in the archive. When this flag is not specified, the system verifies the contents of the header blocks by recomputing the checksum and stops with a directory checksum error when a mismatch occurs. When this flag is specified, the tar command logs the error and then scans forward until it finds a valid header block. This permits restoring files from later volumes of a multi-volume archive without reading earlier volumes. -L InputList Writes the files and directories listed in the InputList variable to the archive. Directories from the InputList variable are not treated recursively. For directories contained in the InputList variable, the tar command writes only the directory to the archive, not the files and subdirectories rooted in the directory. If additional files and directories follow the InputList variable on the command line, the contents of the InputList variable are archived after these files and directories. These additional files or directories are archived with their default behavior, which is to treat them recursively. AIX Logical Volume Manager from A to Z: Troubleshooting and Commands -l Writes an error message to standard output for each file with a link count greater than 1 whose corresponding links were not also archived. For example, if file1 and file2 are hard-linked together, and only file1 is placed on the archive, then the -l flag will issue an error message. Error messages are not displayed if the -l flag is not specified. -m Uses the time of extraction as the modification time. The default is to preserve the modification time of the files. -N Blocks Allows the tar command to use very large clusters of blocks when it deals with streaming tape archives. Note, however, that on input, the tar command cannot automatically determine the block size of tapes with very long block sizes created with this flag. In the absence of a -N Blocks flag, the largest block size that the tar command can automatically determine is 20 blocks. -o Provides backwards compatibility with older versions (non-AIX) of the tar command. When this flag is used for reading, it causes the extracted file to take on the User and Group ID (UID and GID) of the user running the program rather than those on the archive. This is the default behavior for the ordinary user. -p Says to restore fields to their original modes, ignoring the present umask. The setuid, setgid, and tacky bit permissions are also restored to the user with root user authority. -r Writes the files specified by one or more File parameters to the end of the archive. This flag is not valid for any tape devices because such devices do not support the addition of information at the end of a tape. Appendix D. Other related commands 387 -SBlocksb -S Feet, -S Feet@Density Specifies the number of 512 KB blocks per volume (first format) independent of the tape blocking factor. You can also specify the size of the tape in feet by using the second form; in which case, the tar command assumes a default Density variable. The third form allows you to specify both tape length and density. Feet are assumed to be 11 inches long to be conservative. This flag lets you deal more easily with multivolume tape archives, where the tar command must be able to determine how many blocks fit on each volume. Notes: 1. Tape drives vary in density capabilities. The Density variable calculates the amount of data a system can fit on a tape. 2. When using 1/4-inch tape devices, be sure to take into account the number of tracks on the tape device when specifying the value for the Feet variable. For example, a 4-track,1/4-inch tape drive with a 600-foot tape and a density of 8000 bpi can be specified using the -S Feet@Density flag as follows: -S 2400@8000 where 600 feet multiplied by 4 tracks equals 2400 feet. 388 -s Tries to create a symbolic link if the tar command is unsuccessful in its attempt to link (regular link) two files with the -s flag. -t Lists the files in the order in which they appear in the archive. Files can be listed more than once. -u Adds the files specified by one or more File parameters to the end of the archive only if the files are not in the archive already, or if they have been modified since being written to the archive. The -u flag is not valid for any tape devices because such devices do not support the addition of information at the end of a tape. AIX Logical Volume Manager from A to Z: Troubleshooting and Commands -v Lists the name of each file as it is processed. With the -t flag, -v gives more information about the tape entries, including file sizes, times of last modification, User Number (UID), Group Number (GID), and permissions. -w Displays the action to be taken, followed by the file name, and then waits for user confirmation. If the response is affirmative, the action is performed. If the response is not affirmative, the file is ignored. -x Extracts the files specified by one or more File parameters from the archive. If the File parameter refers to a directory, the tar command recursively extracts that directory from the archive. If you do not specify the File parameter, the tar command extracts all of the files from the archive. When an archive contains multiple copies of the same file, the last copy extracted overwrites all previously extracted copies. If the file being extracted does not already exist on the system, the file is created. If you have the proper permissions, the tar command restores all files and directories with the same owner and group IDs as they have on the tape. If you do not have the proper permissions, the files and directories are restored with your owner and group IDs. It is not possible to ask for any occurrence of a file other than the last. - Number Uses the /dev/rmtNumber file instead of the default. For example, the -2 flag is the same as the -f/dev/rmt2 file. Note Because of limitations on header block space in the tar command, user numbers (UIDs), and group identification numbers (GIDs) larger than 65,535, will be corrupted when restored to certain systems. The size constraint affects only the ownership and permissions causing no damage to the data. Corruption of the ownership occurs on the following systems: • Those that do not use uname and gname fields to check ownership. • Those that do not have the same user and group IDs as the archiving system. Appendix D. Other related commands 389 Note 1. The tar command is not enabled for files greater than 2 GB in size due to limitations imposed by XPG/4 and POSIX.2 standards. 2. tar does not preserve the sparse nature of any file that is sparsely allocated. Any file that was originally sparse before the restoration will have all space allocated within the file system for the size of the file. The tar command manipulates archives by writing files to, or retrieving files from, an archive storage medium. The files used by the tar command are represented by the File parameter. If the File parameter refers to a directory, then that directory and, recursively, all files and directories within it are referenced as well. The tar command looks for archives on the default device (usually tape), unless you specify another device with the -f Archive flag. When specifying path names that are greater than 100 characters for the United States Tape Archiver (USTAR) format, remember that the path name is composed of a prefix buffer, a / (slash), and a name buffer. The prefix buffer can be a maximum of 155 bytes and the name buffer can hold a maximum of 100 bytes. If the path name cannot be split into these two parts by a slash, it cannot be archived. This limitation is due to the structure of the tar archive headers and must be maintained for compliance with standards and backwards compatibility. In addition, the length of a destination for a hard or symbolic link (the 'link name') cannot exceed 100 bytes. When writing to an archive, the tar command uses a temporary file (the /tmp/tar* file) and maintains, in memory, a table of files with several links. You receive an error message if the tar command cannot create the temporary file, or if there is not enough memory available to hold the link tables. Two groups of flags exist for the tar command: The required flags and the optional flags. The required flags control the actions of the tar command and include the -c, -r, -t, -u, and -x flags. At least one required flag must be selected for the tar command to function. Having selected a required flag, you can select an optional flag, but none are necessary to control the tar command. 390 AIX Logical Volume Manager from A to Z: Troubleshooting and Commands Note 1. When the storage device is an ordinary file or a block special file, the -u and -r flags backspace. However, raw magnetic tape devices do not support backspacing. So, when the storage device is a raw magnetic tape, the -u and -r flags rewind the tape, open it, and then read it again. 2. Records are one block long on block magnetic tape, but they are typically less than half as dense on raw magnetic tape. As a result, although a blocked raw tape must be read twice, the total amount of tape motion is less than when reading one-block records from a block magnetic tape once. 3. The structure of a streaming tape device does not support the addition of information at the end of a tape. Consequently, when the storage device is a streaming tape, the -u and -r flags are not valid options. An attempt to use these flags results in the following error message: tar: Update and Replace options not valid for a streaming tape drive. No recovery exists from tape errors The performance of the tar command to the IBM 9348 Magnetic Tape Unit Model 12 can be improved by changing the default block size. To change the block size, enter the following at the command line: chdev -1 <device_name> -a block_size=32k D.32 The umount command The following summarizes the options for the umount command. umount - Unmounts a previously mounted file system, directory, or file. Usage: {unmount | umount} [-f] [-a] | [all | allr | Device | Directory | File | FileSystem | -n Node | -t Type] -a Unmounts all mounted file systems. all Unmounts all mounted file systems. Appendix D. Other related commands 391 allr Unmounts all remotely mounted file systems. Note: For remote mounts, specify the device, directory, file, or file system parameters. If you specify the allr flag, the umount command unmounts all remote mounts. -f Forces an unmount in a remote environment. Use to free a client when the server is down, and server path names cannot be resolved. The -f flag is not supported for journaled file systems. Note: This forced unmount works only when there is no hold on the directory, that is, when the directory is not some user's working directory, and there is no process started and still running there. -n Node Specifies the node holding the mounted directory you want to unmount. The umount -n Node command unmounts all remote mounts made from the Node parameter. -t Type Unmounts all stanzas in the /etc/filesystems file that contain the type=Type flag and are mounted. The Type parameter is a string value, such as the remote value that specifies the name of the group. Note You cannot use the umount command on a device in use. A device is in use if any file is open for any reason or if a user's current directory is on that device. 392 AIX Logical Volume Manager from A to Z: Troubleshooting and Commands Appendix E. Scripts used during this residency This appendix provides a list of the scripts referred to in Chapter 2., “Problem determination and recovery” on page 59. All these scripts are intended as examples only and have minimal or no error checking. . Note The following scripts were produced during this residency as aides to problem determination and for understanding the structure and internals of LVM. Please note that they are supplied on an “as is” basis and have not been submitted to any formal IBM testing procedure. IBM can take no responsibility for the effects of the scripts in a customer environment. E.1 trclvm trclvm makes a temporary copy of an lvm high-level command and instruments it with set -xv lines so that all functions within the script produce debug output. Syntax: trclvm -l <logfile> -t <command> <parameters> Flags: -t do not delete temporary files -l logfile log to file For example, trclvm unmirrorvg rootvg will produce shell debug output that can be captured by the script command. © Copyright IBM Corp. 2000 393 #!/usr/bin/ksh set -- `getopt tl: $*` if [ $? != 0 ] then echo Usage: trclvm -t -l logfile command options exit fi tFLAG= while [ $1 != -- ] do case $1 in -t) tFLAG='-t'; shift;; -l) lFLAG='-l'; lFILE=$2; shift; shift;; esac done shift file=$1 shift parms=$* mkdir /tmp/lvmtrace$$/ cp `whence $file` /tmp/lvmtrace$$/${file}_orig awk -v tFLAG=$tFLAG '{ if ( tFLAG == "-t" ) { if ( $1 ~ /[Cc]leanup()/ ) { cFLAG = "-c" } if ( cFLAG && (($1=="rm")||(multi=="y")) ) { printf ("#") slash=substr($0, length($0)) if (slash == "\\") { multi = "y" } else { multi = "" } } if ( $1 == "}" ) { cFLAG = "" } } print $0; if ( LP=="\(\)" && $0 == "\{" ) {print "set -xv"} LP=substr($0,length($0)-1) }' /tmp/lvmtrace$$/${file}_orig > /tmp/lvmtrace$$/$file # we have entered cleanup # comment out rms, handle # extended lines # we have left cleanup # add debug line if [ -n "$lFLAG" ] then exec > $lFILE 2>&1 fi sh -xv /tmp/lvmtrace$$/$file $parms rc=$? rm -rf /tmp/lvmtrace$$ return $rc 394 AIX Logical Volume Manager from A to Z: Troubleshooting and Commands E.2 dspmsg_index This script adds a line after each dspmsg in a high-level command giving the associated string literal, for example, %1$s: Volume Group deleted since it contains no physical volumes., and displays the script to stdout. Some people may find this makes LVM scripts more readable. This output cannot be used in place of the high-level commands. Syntax: dspmsg <filename> Flags: none #!/usr/bin/ksh awk '{ print $0 if ($0 ~ /dspmsg/) {system ("print -n '[['; print -n `lvmmsg "$5"`; print ']]'")} }' $1 E.3 chpvid chpvid sets the pvid on a disk to a given value. This was useful in building the examples for this book and may be of use as a last resort in recovery situations. Syntax: chpvid <pvid> <hdiskn> Flags: none Note It is most strongly recommended that the chpvid script is not used as a production tool in a production environment, as its effects are undefined. IBM will not be held responsible if you use this tool. Syntax: chpvid (new pvid) (hdisk) Flags: None Appendix E. Scripts used during this residency 395 #!/usr/bin/ksh pvid=$1 disk=$2 set -A a `echo $pvid|\ awk ' { for (f=1; f <= length($0); f=f+2) { print "ibase=16\nobase=8\n"toupper(substr($0,f,2)) } }'|\ bc 2>/dev/null` /usr/bin/echo "\0"${a[0]}"\0"${a[1]}"\0"${a[2]}"\0"${a[3]}"\0"\ ${a[4]}"\0"${a[5]}"\0"${a[6]}"\0"${a[7]}"\0\0\0\0\0\0\0\0\c"|\ dd bs=1 seek=128 of=/dev/$disk E.4 gather_maps gather_maps saves the map files for all available logical volumes in all available volume groups on a system. The administrator should check that all LVs are in a known good state before gathering the maps and should verify the snapshot afterwards for accuracy. Syntax: gather_maps Flags: none #!/usr/bin/ksh rm -r /tmp/lvmaps.old mv /tmp/lvmaps /tmp/lvmaps.old mkdir /tmp/lvmaps cd /tmp/lvmaps for LV in `lsvg|lsvg -il|awk '$1 != "LV" && $1 !~ ":" {print $1}'` do NumCopies=`lslv $LV|awk '/COPIES/ {print $2}'` COPY1="" if [ "$NumCopies" -gt 1 ] then COPY1=".copy1" fi lslv -m $LV |awk 'NR > 2 "" { printf ("%s:%s\n", $3,$2) }' > $LV$COPY1 if [ "$NumCopies" -gt 1 ] then lslv -m $LV |awk 'NR > 2 && $4 != "" { printf ("%s:%s\n", $5,$4) }' > $LV.copy2 if [ "$NumCopies" -gt 2 ] then lslv -m $LV |awk 'NR > 2 && $6 != "" { printf ("%s:%s\n", $7,$6) }' > $LV.copy3 fi fi done 396 AIX Logical Volume Manager from A to Z: Troubleshooting and Commands E.5 findlvm findlvm checks the basic ODM classes relevant to the LVM for a particular string. Syntax: findlvm <string> Flags: none #!/usr/bin/ksh for class in CuAt CuDv CuDep CuDvDr PdAt PdDv do odmget $class | grep -ip $1 done E.6 maker This short script creates the example volume groups, logical volumes, and file systems used for “Corruption example 3: Low-level VGDA corruption” on page 146. Syntax: maker <1st-hdisk> <2nd-hdisk> Flags: none #!/usr/bin/ksh HDISK1=$1 HDISK2=$2 umount /lowfs1 umount /lowfs2 varyoffvg lowvg exportvg lowvg echo maker - ignore non-fatal errors before this point mkvg -ft2 -y lowvg $HDISK1 $HDISK2 mklv -y lowlv1 lowvg 3 mklv -c 2 -y lowlv2 lowvg 2 mklv -t jfslog -y lowlog lowvg 1 crfs -d /dev/lowlv1 -a logname=/dev/lowlog -m /lowfs1 -v jfs crfs -d /dev/lowlv2 -a logname=/dev/lowlog -m /lowfs2 -v jfs echo "y"|logform /dev/lowlog mount /lowfs1 mount /lowfs2 echo mydata1 > /lowfs1/data1 echo mydata2 > /lowfs2/data2 Appendix E. Scripts used during this residency 397 E.7 pvsinvg pvsinvg examines the in-kernel volume group structures to determine which physical volumes the logical volume device driver thinks are associated with a particular volume group. Syntax: pvsinvg <volume-group-name> Flags: none #!/usr/bin/ksh VG=$1 DEVNO=`ls -l /dev/$VG | awk '{print $5}' | cut -d, -f1` MAJOR=0`echo "ob=16\n$DEVNO"| bc` DASDPTR=`echo "devsw $MAJOR"|kdb|tail -1|awk '{print $2}'` for DEVT in `echo "volgrp $DASDPTR"|kdb|grep "pvol@"|awk '{print $6}'|sort -u` do if [ "$DEVT" != "00000000" ] then HEXMAJ=`echo $DEVT|cut -c 1-4` HEXMIN=`echo $DEVT|cut -c 5-` MAJOR=`echo "ib=16\n$HEXMAJ"|bc` MINOR=`echo "ib=16\n$HEXMIN"|bc` odmget -q "value1=$MAJOR and value2=$MINOR" CuDvDr|grep value3|cut -d\" -f 2 fi done | sort -u E.8 scraper This last resort script will search for orphan LVCBs on a disk that has lost its VGDAs. It will then offer the option of re-creating a contiguous logical volume equal in size to the number of logical partitions held in the LVCB. Syntax: scraper <hdisk name> Flags: none 398 AIX Logical Volume Manager from A to Z: Troubleshooting and Commands #!/usr/bin/ksh # Note: this is a very minimal example of a scanner / repairer - it has no understanding of # the user data and only lays down contiguous maps. # change the folowing variables for bigVG or non-4MB PPSIZE let offset=4352 # hard coded for a small VG let delta=8192 # hard coded for 4MB partitions (2048*4 blocks) HDISK=$1 VGID=`getlvodm -j $HDISK` VG=`getlvodm -t $VGID` echo $VG exec 2>/dev/null while : do MAGIC=`dd if=/dev/$HDISK bs=512 skip=$offset count=1 2>/dev/null| head -c 8 ` if [ "$MAGIC" = "AIX LVCB" ] then PP=`echo "( $offset - 4352 ) / 8192 + 1\n"|bc` echo "AIX LVCB found at PP$PP (offset $offset)" TYPE=`dd if=/dev/$HDISK bs=512 skip=$offset count=1 |\ dd bs=1 skip=10 count=31` LVNAME=`dd if=/dev/$HDISK bs=512 skip=$offset count=1 |\ dd bs=1 skip=67 count=31` set `dd if=/dev/$HDISK bs=512 skip=$offset count=1 |\ dd bs=2 skip=104 count=2 |od -d` let NUMLPS=$2 echo Type $TYPE echo LVname $LVNAME NUMLPS $NUMLPS exec 2>/dev/tty read decide?"Attempt restore (y to do) ?" if [ "$decide" = "y" ] then echo $HDISK":"$PP"-"`expr $PP + $NUMLPS` > /tmp/map_restore$$ mklv -y $LVNAME -m /tmp/map_restore$$ $VG $NUMLPS rm /tmp/map_restore$$ fi exec 2>/dev/null echo fi let offset=offset+delta done Appendix E. Scripts used during this residency 399 400 AIX Logical Volume Manager from A to Z: Troubleshooting and Commands Appendix F. Special notices This publication is intended to help customers and systems engineers to better understand the AIX logical volume manager in order to make better proposals or to develop their storage strategy on RS/6000 systems. See the PUBLICATIONS section of the IBM Programming Announcement for AIX Version 4.3.3 for more information about what publications are considered to be product documentation. References in this publication to IBM products, programs or services do not imply that IBM intends to make these available in all countries in which IBM operates. Any reference to an IBM product, program, or service is not intended to state or imply that only IBM's product, program, or service may be used. Any functionally equivalent program that does not infringe any of IBM's intellectual property rights may be used instead of the IBM product, program or service. Information in this book was developed in conjunction with use of the equipment specified, and is limited in application to those specific hardware and software products and levels. IBM may have patents or pending patent applications covering subject matter in this document. The furnishing of this document does not give you any license to these patents. You can send license inquiries, in writing, to the IBM Director of Licensing, IBM Corporation, North Castle Drive, Armonk, NY 10504-1785. Licensees of this program who wish to have information about it for the purpose of enabling: (i) the exchange of information between independently created programs and other programs (including this one) and (ii) the mutual use of the information which has been exchanged, should contact IBM Corporation, Dept. 600A, Mail Drop 1329, Somers, NY 10589 USA. Such information may be available, subject to appropriate terms and conditions, including in some cases, payment of a fee. The information contained in this document has not been submitted to any formal IBM test and is distributed AS IS. The information about non-IBM ("vendor") products in this manual has been supplied by the vendor and IBM assumes no responsibility for its accuracy or completeness. The use of this information or the implementation of any of these techniques is a customer responsibility and depends on the customer's ability to evaluate and integrate them into the customer's operational environment. While each item may have been reviewed by IBM for accuracy in a specific situation, there is no © Copyright IBM Corp. 2000 401 guarantee that the same or similar results will be obtained elsewhere. Customers attempting to adapt these techniques to their own environments do so at their own risk. Any pointers in this publication to external Web sites are provided for convenience only and do not in any manner serve as an endorsement of these Web sites. Any performance data contained in this document was determined in a controlled environment, and therefore, the results that may be obtained in other operating environments may vary significantly. Users of this document should verify the applicable data for their specific environment. This document contains examples of data and reports used in daily business operations. To illustrate them as completely as possible, the examples contain the names of individuals, companies, brands, and products. All of these names are fictitious and any similarity to the names and addresses used by an actual business enterprise is entirely coincidental. Reference to PTF numbers that have not been released through the normal distribution process does not imply general availability. The purpose of including these reference numbers is to alert IBM customers to specific information relative to the implementation of the PTF when it becomes available to each customer according to the normal IBM PTF distribution process. The following terms are trademarks of the International Business Machines Corporation in the United States and/or other countries: AIX CUA IBM NetView System/390 AS/400 DB2 Netfinity RS/6000 400 The following terms are trademarks of other companies: C-bus is a trademark of Corollary, Inc. in the United States and/or other countries. Java and all Java-based trademarks and logos are trademarks or registered trademarks of Sun Microsystems, Inc. in the United States and/or other countries. Microsoft, Windows, Windows NT, and the Windows logo are trademarks of 402 AIX Logical Volume Manager from A to Z: Troubleshooting and Commands Microsoft Corporation in the United States and/or other countries. PC Direct is a trademark of Ziff Communications Company in the United States and/or other countries and is used by IBM Corporation under license. ActionMedia, LANDesk, MMX, Pentium and ProShare are trademarks of Intel Corporation in the United States and/or other countries. UNIX is a registered trademark in the United States and other countries licensed exclusively through The Open Group. SET, SET Secure Electronic Transaction, and the SET Logo are trademarks owned by SET Secure Electronic Transaction LLC. Other company, product, and service names may be trademarks or service marks of others. Appendix F. Special notices 403 404 AIX Logical Volume Manager from A to Z: Troubleshooting and Commands Appendix G. Related publications The publications listed in this section are considered particularly suitable for a more detailed discussion of the topics covered in this redbook. G.1 IBM Redbooks For information on ordering these publications see “How to get IBM Redbooks” on page 407. • AIX Logical Volume Manager from A to Z, Introduction and Concepts, SG24-5432 • Understanding IBM RS/6000 Performance and Sizing, SG24-4810 • RS/6000 SP System Management Guide, SG24-5628 • GPFS: A Parallel File System, SG24-5165 • Getting Started with ADSM: A Practical Implementation Guide, SG24-5416 • Database Performance on AIX in DB2 UDB and Oracle Environments, SG24-5511 G.2 IBM Redbooks collections Redbooks are also available on the following CD-ROMs. Click the CD-ROMs button at http://www.redbooks.ibm.com/ for information about all the CD-ROMs offered, updates and formats. CD-ROM Title System/390 Redbooks Collection Networking and Systems Management Redbooks Collection Transaction Processing and Data Management Redbooks Collection Lotus Redbooks Collection Tivoli Redbooks Collection AS/400 Redbooks Collection Netfinity Hardware and Software Redbooks Collection RS/6000 Redbooks Collection (BkMgr) RS/6000 Redbooks Collection (PDF Format) Application Development Redbooks Collection IBM Enterprise Storage and Systems Management Solutions © Copyright IBM Corp. 2000 Collection Kit Number SK2T-2177 SK2T-6022 SK2T-8038 SK2T-8039 SK2T-8044 SK2T-2849 SK2T-8046 SK2T-8040 SK2T-8043 SK2T-8037 SK3T-3694 405 G.3 Other resources These publications are also relevant as further information sources: • AIX Version 4.3 Technical Reference: Base Operating System and Extensions Volume 2, SC23-4160. • AIX Versions 4.1 and 4.2 Technical Reference, Volume 2: Base Operating System and Extensions, SC23-2615 • AIX Versions 3.2 and 4 Performance and Tuning Guide, SC23-2365 • AIX Version 4.3 Technical Reference: Kernel and Subsystems Technical Reference, Volume 1, SC23-4163. • AIX Version 4.3 Problem Solving Guide and Reference, SC23-4123 • HACMP Version 4.3 AIX: Installation Guide, SC23-4278 • PSSP for AIX Version 3.1 Managing Shared Disks, SA22-7349 • HACMP Version 4.3 AIX: Programming Locking Applications, SC23-4281 • OEM PCI Adapter Placement Guide, SA23-2504 • IBM Recoverable Virtual Shared Disk User’s Guide and Reference, GC23-3849 • AIX Version 4.3 Kernel Extensions and Device Support Programming Concepts, SC23-4125 • AIX Version 4.3 System Management Guide: Operating System and Devices, SC23-4126 • AIX Version 4.3 Installation Guide, SC23-4112 • AIX Version 4.3 General Programming Concepts: Writing and Debugging Programs, SC23-4128 G.4 Referenced Web sites • http://www.rs6000.ibm.com/support 406 AIX Logical Volume Manager from A to Z: Troubleshooting and Commands How to get IBM Redbooks This section explains how both customers and IBM employees can find out about IBM Redbooks, redpieces, and CD-ROMs. A form for ordering books and CD-ROMs by fax or e-mail is also provided. • Redbooks Web Site http://www.redbooks.ibm.com/ Search for, view, download, or order hardcopy/CD-ROM Redbooks from the Redbooks Web site. Also read redpieces and download additional materials (code samples or diskette/CD-ROM images) from this Redbooks site. Redpieces are Redbooks in progress; not all Redbooks become redpieces and sometimes just a few chapters will be published this way. The intent is to get the information out much quicker than the formal publishing process allows. • E-mail Orders Send orders by e-mail including information from the IBM Redbooks fax order form to: In United States Outside North America e-mail address [email protected] Contact information is in the “How to Order” section at this site: http://www.elink.ibmlink.ibm.com/pbl/pbl • Telephone Orders United States (toll free) Canada (toll free) Outside North America 1-800-879-2755 1-800-IBM-4YOU Country coordinator phone number is in the “How to Order” section at this site: http://www.elink.ibmlink.ibm.com/pbl/pbl • Fax Orders United States (toll free) Canada Outside North America 1-800-445-9269 1-403-267-4455 Fax phone number is in the “How to Order” section at this site: http://www.elink.ibmlink.ibm.com/pbl/pbl This information was current at the time of publication, but is continually subject to change. The latest information may be found at the Redbooks Web site. IBM Intranet for Employees IBM employees may register for information on workshops, residencies, and Redbooks by accessing the IBM Intranet Web site at http://w3.itso.ibm.com/ and clicking the ITSO Mailing List button. Look in the Materials repository for workshops, presentations, papers, and Web pages developed and written by the ITSO technical professionals; click the Additional Materials button. Employees may access MyNews at http://w3.ibm.com/ for redbook, residency, and workshop announcements. © Copyright IBM Corp. 2000 407 IBM Redbooks fax order form Please send me the following: Title Order Number First name Quantity Last name Company Address City Postal code Country Telephone number Telefax number VAT number Card issued to Signature Invoice to customer number Credit card number Credit card expiration date We accept American Express, Diners, Eurocard, Master Card, and Visa. Payment by credit card not available in all countries. Signature mandatory for credit card payment. 408 AIX Logical Volume Manager from A to Z: Troubleshooting and Commands Glossary Your glossary term, acronym or abbreviation. Term definition. ODM . Object Database Manager. AIX . Advanced Interactive eXecutive. RAID. Redundant Array of Independent Disks. BSD. Berkeley Software Distribution. C-SPOC. Cluster-Single Point Of Control. RDBMS. Relational Database Management System. CD-ROM . Compact Disc Read Only Memory. RSCT. Risc System Cluster Technology. CLVM . Concurrent Logical Volume Manager. ROS. Read Only Storage. DASD. Direct Access Storage Devices. RVSD. Recoverable Virtual Shared Disk. FC-AL . Channel arbitrated loop. SCSI. Small Computer Systems Interface. GPFS. General Parallel File System. SSA . Serial Storage Architecture. HACMP. High Availability Cluster Multi-Processing. VGDA . Volume Group Descriptor Area. HACMP/CRM . High Availability Cluster Multi-Processing, Concurrent Resource Manager. VGSA . volume group status area. HACMP/ES. High Availability Cluster Multi-Processing, Enhanced Scalability. VSD. Virtual Shared Disk. PVID. Physical Volume Identifier. VGID. Volume Group Identifier. VMM . Virtual Memory Manager. HiPPI . High Performance Parallel Interface Adapter. I/O. Input/Output. IBM . International Business Machines. IPL. Initial Program Load. ITSO. International Technical Support Organization. JFS. Journaled File System. LPSN . Last Physical Sector Number. LTG . Logical Track Group. LVCB. Logical Volume Control Block. LVDD. Logical Volume Device Driver. LVID. Logical Volume Identifier. LVM . Logical Volume Manager. MWC. Mirror Write Consistency. MWCC. Mirror Write Consistency Checking. NBPI. Number of Bytes Per Inode. © Copyright IBM Corp. 2000 409 410 AIX LVM System Management, Volume 2 Index CuDvDr 61 Symbols $ODMDIR 112 /etc/environment 283 /etc/exclude.rootvg 255 /etc/filesystems 10, 78, 83, 154, 337, 345 /etc/magic 346 /image.data 256 /usr/include/lvm.h 78 /usr/include/sys/bbdir.h 124 /usr/include/sys/hd_psn.h 121 /usr/include/sys/lvmrec.h 122 D A E accounting 51 allocation group size 51 allocation map 25, 30 allocation policy 24, 30, 31, 42 inter-physical 41 intra-physical 41 strict 32 allocp 285 errorlog 88 errpt 87, 88 exportvg 13, 66, 83, 118, 211 extendlv 37, 212 extendvg 61, 215 extra volume group 66 B backup 321, 324 bad block relocation 25, 41 boot 21 C C language 59 cfgvg 287 chfs 52, 327 chlv 33, 199 chlvcopy 267, 287 chps 330 chpv 203 chvg 65, 107, 204 concurrent mode 6 copyrawlv 289 cp 28 cpio 28, 331 cplv 27, 209 crash 87 crfs 51, 335 © Copyright IBM Corp. 2000 deallocation 8 defragfs 338 Device Configuration Database 5, 18 df 87, 339 dfsck 341 disk failure 89 dspmsg 63 dump device 21 dumpfs 343 F ff 344 file 345 file system 51 permissions 51 type 51, 55 file system corruption 180 fileplace 346 fragment size 51 fsck 83, 348 fsdb 354 G getlvcb 87, 108, 289 getlvname 290 getlvodm 44, 65, 108, 291 getvgname 293 H hardware failure 181 header files 59 411 I imfs 118, 135, 354 importvg 10, 11, 62, 112, 216 ipl_varyon 355 istat 355 J journaled file system 21 K korn shell 59, 62 L lchangelv 293 lchangepv 295 lchlvcopy 294 lcreatelv 296 lcreatevg 61, 297 ldeletelv 297 ldeletepv 149, 298 lextendlv 298 linstallpv 299 lmigratelv 299 lmigratepp 300 log device corruption 180 logform 356 logical partition mapping 38 logical volume allocation characteristics 14 control block 69 label 25 relocatable flag 14 state 21, 40 type 21, 24 logredo 357 lquerylv 87 lquerypv 87, 302 lqueryvg 79, 87, 125, 132, 302 lqueryvgs 303 lqureylv 300 lreducelv 151, 304 lresynclp 305 lresynclv 305 lresyncpv 305 lsattr 87 lsdev 87 lsfs 357 412 lslpp 87 lslv 38, 41, 219 lsps 358 lspv 45, 47, 80, 87, 96, 224 lsvg 14, 16, 18, 21, 66, 229 lsvgfs 233 lvaryoffvg 307 lvaryonvg 306 LVCB 75 lvchkmajor 308 lvedit 234 lvgenmajor 307 lvgenminor 308 lvlstmajor 308 LVM control data corruption 129 LVM_MISSPVADDED 91, 185 lvmmsg 309 lvrelmajor 309 lvrelminor 309 M migfix 309 migratepv 49, 160, 235 mini-ODM 65, 75 mirror write consistency 24 state 40 mirror write consistency cache 122 mirrorvg 236 MISSINGPV_VARYON 283 mkcd 238 mkfs 360 mklv 23, 243 mklvcopy 29, 250 mksysb 254 mkszfile 256, 257 mkvg 3, 60, 259 mkvgdata 261 mount 83, 362 mount option 51 mount point 22, 41, 51, 55 N NBPI 51 ncheck 365 O od 121 AIX Logical Volume Manager from A to Z: Troubleshooting and Commands ODM 62, 63 ODM corruption 60, 128 ODM lock 107 ODM stanzas 99 odmadd 86, 315 odmchange 315 odmcreate 316, 317 odmdelete 318 odmdrop 318 odmget 69, 87, 318 odmshow 319 P paging space 7, 21 PdAt 65 physical partition 5 size 4 state 48 physical volume 8 name 4, 8, 11 state 22, 46 problem determination 59 putlvcb 86, 310 putlvodm 63, 116, 119, 311 PV_MISSING 283 PVID corruption 75 Q schedule policy 34 scheduling policy 25, 34, 40 parallel 34 sequential 35 SIGHUP 65 SIGINT 65 SIGTERM 65 snap 377 splitlvcopy 274 stale partition 6, 41 strictness policy 24, 30, 32 strip size 41 stripe size 25 striping width 41 super strictness 32 sync 380 synchronization 6, 30 synclvodm 66, 129, 276 syncvg 29, 277 sysdumpdev 381 system management mode 7 T tar 384 timestamp 101 trace 127 trclvm 63 trusted computing base 118, 120 quorum 5, 11, 153, 283 U R readlvcopy 262 recovery techniques 59 redefinevg 129, 263 reducevg 8, 9, 263 reorganization 25 reorgvg 14, 31, 32, 265 replacepv 266 restore 365 restvg 268 rmfs 376 rmlv 82, 267 rmlvcopy 268 S savebase 65, 75, 135, 376 savevg 270 umount 391 unmirrorvg 277 updatelv 279 updatevg 279 V varyoffvg 6, 280 varyonvg 3, 5, 93, 280 VGDA 60, 75, 80, 90 VGDA corruption 146 VGID 117 VGSA 60, 75 volume group 2 changing name 13 concurrent access 4 concurrent capable 10, 20 defined 16 413 exported 10 identifier 20, 63 major number 4 maximum number of logical volumes 19 name 4, 11 number of open logical volumes 19 number of physical volumes 19 permission 19 state 19, 40 total number of physical partitions 20 W write verify 25, 33 414 AIX Logical Volume Manager from A to Z: Troubleshooting and Commands IBM Redbooks review Your feedback is valued by the Redbook authors. In particular we are interested in situations where a Redbook "made the difference" in a task or problem you encountered. Using one of the following methods, please review the Redbook, addressing value, subject matter, structure, depth and quality as appropriate. • Use the online Contact us review redbook form found at http://www.redbooks.ibm.com/ • Fax this form to: USA International Access Code + 1 914 432 8264 • Send your comments in an Internet note to [email protected] Document Number Redbook Title SG24-5433-00 AIX Logical Volume Manager from A to Z: Troubleshooting and Commands Review What other subjects would you like to see IBM Redbooks address? Please rate your overall satisfaction: O Very Good Please identify yourself as belonging to one of the following groups: O Customer O Business Partner O IBM, Lotus or Tivoli Employee O None of the above Your email address: The data you provide here may be used to provide you with information from IBM or our business partners about our products, services or activities. O Please do not use the information collected here for future marketing or promotional contacts or other communications beyond the scope of this transaction. Questions about IBM’s privacy policy? The following link explains how we protect your personal information. http://www.ibm.com/privacy/yourprivacy/ © Copyright IBM Corp. 2000 O Good O Average O Poor O Solution Developer 415 SG24-5433-00 ® AIX Logical Volume Manager from A to Z: Troubleshooting and Commands SG24-5433-00 Printed in the U.S.A.