1
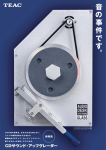
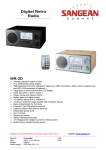
Disc Cleaner
Operating Instructions
Many thanks for your interest and purchase of the disc cleaner. Please take a few
moments to read these short instructions to ensure correct operation of the
apparatus. You will see that the fully automatic and enhancing cleaning of your
valuable CDs is complete in a couple of easy steps: place your CD on the turntable
and close the apparatus‘ lid – all other operations follow fully automatically as soon
as the start button is pressed.
Setting up the apparatus
o Open the pacakaging at the foreseen side and check that the contents are
complete and that no transport damage has occured.
o The delivery package comprises the ready-to-use apparatus together with two
small containers of cleaning concentrate and a measuring beaker.
o The apparatus runs on a 220V, 50Hz system. Please check the compatability of
your electricity source before plugging in the apparatus.
o Before the first usage the Disc Cleaner should be filled with cleaning fluid. Here,
the cleaning concentrate plus water should be filled in the apparatus.
Filling of cleaning fluid
o For your own safety please use a waterproof surface when filling the apparatus.
o Open the apparatus‘ lid and flip it forwards.
o Using the measuring beaker, pour 1 litre of water into the cleaning chamber. A
maximum of 1.5 litres of water is permitted but 1 litre is sufficient. The water
level can be checked via the viewing window at the rear of the apparatus. The
water level should be seen to lie between the two markings.
o Pour the entire contents of one of the containers of cleaning fluid into the
apparatus.
Emptying of cleaning fluid
o The cleaning fluid is in a self-contained circulation system and in general can be
used to clean over 100 CDs.
o The cleaning fluid should be replaced after 2 months or when cleaning results
become inferior.
o Unplug the apparatus and place it on a firm, even surface with a drainage
facility.
o Open the outlet at the rear of the apparatus so that the water can flow out. In
order to do this the hexagonal screw must be completely removed.
o Do not forget to replace the hexagonal screw on completion. Do not use tools
when tightening, hand force is sufficient here.
CD cleaning
o Turn on the main switch to begin the heating process, during this time the
middle LED will blink.
o Open the cleaning chamber and place the CD on the turntable, printed side
facing upwards.
o close the apparatus‘ lid – the CD will be fixed automatically.
o All other operations will follow automatically once the start button is
pressed. The cleaning fluid will be warmed and sprayed at a constant
temperature and light pressure on the underside of the CD. The CD is
rotated at varying speeds and directions.
o Once cleaning is completed an acoustic signal is heard and the green LED
lights up. The apparatus can now be opened and the cleaned CD removed.
Functional elements
o The front plate contains 4 yellow and one green LED in the upper left block,
which display the current status of the cleaning procedure. The meaning of
the display is clearly marked on the front plate.
o The next functional block with 3 red LEDs has a safety control function and
has the following meaning:
x The upper LED lights up when the apparatus‘ lid is open or not properly
closed when switched on. In this case the apparatus cannot function.
x The middle red LED blinks during the warming procedure until the
optimal cleaning temperature is reached. This can take several minutes.
x The lower red LED lights up when either no or too little cleaning fluid is in
the machine. An acoustic signal also warns in this case.
o In the lower area of the front plate a switch for switching the apparatus on
and off is seen. The yellow LED to the left of this is for controlling the
electricity source and lights up when the correct current is running through
the apparatus. The start button next to this allows the cleaning procedure to
begin.
o At the rear of the apparatus is a water outlet, closed by a hexagonal screw.
This screw must be removed when emptying the cleaning fluid. The viewing
window above this can be used to control the level of cleaning fluid via the
min./max. markings.
Safety instructions
o The Disc Cleaner may only be used to clean CDs and similar data
storage discs.
o Place the apparatus on a solid and even surface when the cleaning
process is in progress.
o Under normal circumstances no liquid should leak from the
apparatus. This applies to the apparatus‘ lid and the drill holes at the
rear of the apparatus and below the front plate. Should leakage occur
turn off the apparatus immediately and contact the manufacturer.
o The apparatus should not be opened during cleaning. If opened the
cleaning process will be interrupted.
o Before transporting the apparatus the cleaning fluid should be
emptied. Even with the lid closed a risk of leakage exists.
o Only use the cleaning concentrate supplied. Other cleaning agents may
cause operating faults (excess foaming) and damage to CDs may be
caused.
o Pay attention when cleaning older CDs with paper stickers. Repeated
cleaning may cause these labels to come off and cause damage to the
machine.
o To clean the exterior of the apparatus the use of a damp cloth with
normal household cleaning agents is sufficient. Do not submerge the
apparatus in water.
Technical information
Electricity supply 220 V, 50 Hz
Amount of fluid: 1 to 1.5 Litres
Cleaning temperature: 65°C
Cleaning cycle: 2 min
Weight without fluid: 4 kg
puchase
Heating performance: 1000 W
Water pressure: 2 bar
Warming time: 3 min
Rotation rate: 22 l/min
Garanty: 2 years from date of
Reiner Gläss, Seestraße 1, 89551 Königsbronn, Germany
Tel/Fax ++ 49 (0) 7328-7138, D1 ++ 49 (0) 171-6001363
E-Mail [email protected], homepage www.audiodesksysteme.de