1
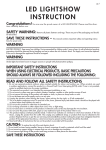
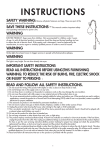
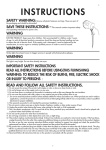
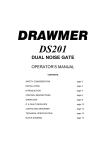
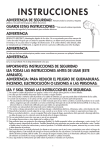
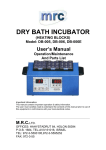
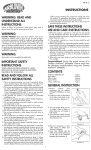
LE D LIG HT S HO W
INST R U CT IO NS
87448 87449-E
Congratulations! You are now the proud owner of a LED LIGHTSHOW. Please read the
directions carefully before use.
SAFETY WARNING: Remove all plastic fasteners and tags. These are part of the packaging and should
be discarded.
SAVE THESE INSTRUCTIONS – This manual contains important safety and operating
instructions for power units.
WARNING
ELECTRIC PRODUCT. Keep away from children. Not recommended for children under 3 years of age. As with all electrical
products, precautions should be observed during handling and use to reduce the risk of electric shock. If the supply cord
is damaged, it must be replaced by the manufacturer, its service agent or similarly qualified persons in order to avoid a
hazard.
WARNING
Strobe lights have been known to trigger seizures in people with photosensitive epilepsy.
IMPORTANT SAFETY INSTRUCTIONS
WHEN USING ELECTRICAL PRODUCTS, BASIC PRECAUTIONS
SHOULD ALWAYS BE FOLLOWED INCLUDING THE FOLLOWING:
READ AND FOLLOW ALL SAFETY INSTRUCTIONS
1. Do not use seasonal products outdoors unless marked suitable for indoor and outdoor use. When products are used
in outdoor applications, connect the product to a Ground Fault Circuit Interrupting (GFCI) outlet. lf one is not provided,
contact a qualified electrician for proper installation.
2. This seasonal use product is not intended for permanent installation or use.
3. Do not mount or place near gas or electric heaters, fireplace, candles or other similar sources of heat.
4. D
o not secure the wiring of the product with staples or nails, or place on sharp hooks or nails.
5. D
o not let lamps rest on the supply cord or on any wire.
6. U
nplug the product when leaving the house, when retiring for the night, or if left unattended.
7. T his is an electric product-not a toy! To avoid risk of fire, burns, personal injury and electric shock it should not be played
with or placed where small children can reach it.
8. Do not use this product for other than its intended use.
9. Do not hang ornaments or other objects from cord, wire, or light string.
10. Do not close doors or windows on the product or extension cords as this may damage the wire insulation.
11. Do not cover the product with cloth, paper or any material not part of the product when in use.
12. This product employs overload protection (fuse). A blown fuse indicates an overload or short-circuit situation. If the fuse
blows, unplug the product from the outlet. Also unplug any additional strings or products that may be attached to the
product. Replace the fuse as per the user servicing instructions(follow product marking for proper fuse rating)and check the
product. lf the replacement fuse blows, a short-circuit may be present and the product should be discarded.
13. Read and follow all instructions that are on the product or provided with the product.
CAUTION: To reduce the risk of fire and electric shock:
1. Do not install on trees.
2. Do not mount on support strings in manner that can cut or damage wire insulation.
3. Do not remove light string off the product and hang on trees or other places for decoration.
SAVE THESE INSTRUCTIONS
1
USE AND CARE INSTRUCTIONS
1. Before using or reusing, inspect product carefully. Discard any products that have cut, damaged, or frayed wire insulation
or cords, cracks in the lampholders or enclosures, loose connections, or exposed copper wire.
2. When storing the product, carefully remove the product from wherever it is placed, to avoid any undue strain or stress on
the product conductors, connections, and wires.
3. When not in use, store neatly in a cool, dry location protected from sunlight.
USER SERVICING INSTRUCTIONS
To replace the fuse:
1. Grasp plug and remove from the receptacle or other outlet device. Do not unplug by pulling on cord.
2. Open fuse cover. Slide open fuse access cover on top of attachment plug towards blades.
3. R
emove fuse carefully. Turn fuseholder over to remove fuse.
4. RISK OF FIRE. Replace fuse only with 3 Amp, 125Volt fuse (provided with product.)
5. Close fuse cover. Slide closed the fuse access cover on top of attachment plug.
6. RISK OF FIRE. Do not replace attachment plug. Contains a safety device (fuse) that should not be removed.
Discard product if the attachment plug is damaged.
OPERATE
THE REMOTE:
1. Remove the remote from its packing box.
2. Remove the battery compartment cover. (Fig.1) Install the included 23A battery.
Ensure the battery is installed correctly with regard to polarity (+ and -).
3. The remote has two buttons (Fig 2).
Fig. 1
Fig. 2
a. ON/OFF – Press to turn the set ON; press again to turn the set OFF.
b. FUNCTION: Light Colors: Change the light color to any on this list by pressing the button on remote until you reach the
desired color.
1.LightShow™
2.Rainbow Wave™
3.Rainbow Morph™
4.Red
5.Green
6.Blue
7.White
8.Pink
9.Yellow
10.Aqua
11.Rainbow Chase™
12.Red, White and Blue
NOTES:
1. When using the remote to turn ON your set there may be up to a 2 seconds delay before the light pattern starts working.
2. To change light patterns it is recommended to wait 2 seconds each time after pressing the Function button until you reach
the desired pattern.
3. If for any reason the signal from the remote (transmitter) to the control box (receiver) hangs up, please turn off and then
restart the power to the set.
4. If a power interruption, the system’s memory keeps the last light pattern displayed.
5. The effective operating distance of the remote is 20’ (6m).
SETTING SAME LIGHT PATTERN ON MULTIPLE SETS
Before installing your sets you will need to preset each string to the same light pattern.
1. Plug one set into a working 120V outlet.
2. Using any remote press the Function button until you have selected the desired lighting effect and note that pattern from
the remote.
3. Unplug the set and then plug in the next set into the same outlet for ease of controlling.
4. With the remote follow Steps 2 and 3 setting the same light pattern (same function ) as the previous set.
2
5. W
hen the strings are all set to the same function, power up all sets using multiple outlets. They will all light displaying the same
pattern as the control module contains a built-in memory function. Once plugged in each set will start through their pattern.
6.To have all sets start together, press OFF on your remote and now press ON.
7. Install your sets. Follow step 6 to get all your sets operating on the same light pattern.
NOTES:
1. With all sets lighted, pressing the Function button will change all sets to the same (next) pattern.
2. These are Radio Frequency controlled devices. ALL sets within the effective range will be affected and controlled using any
one remote.
3. To have different lighting patterns, in Step 2 set each string to a different function.
4. To group sets together to their own function follow the above setting one group to its same function and then the second
to their same yet different function.
5. If used with a mechanical/digital timer, only one timer must control all sets. In this case, do not turn sets off using the remote
or sets will not turn on with timer.
6. Setting the same light pattern works ONLY with lights sets having the same number of LEDs.
7. Due to component tolerances there will be cycle time differences between sets.
BATTERY CAUTION:
• Keep this product’s battery out of the reach of small children or pets. If ingested, contact a physician immediately.
• Always purchase the correct size and grade of battery most suitable for the intended use.
• Replace all battery of a set at the same time.
• Clean the battery contacts and also those of the device prior to battery installation.
• Ensure the battery is installed correctly with regard to polarity (+ and -).
• Remove battery from equipment which is not to be used for an extended period of time.
• Remove used battery promptly.
INSIDE OF COMPARTMENT
OUTSIDE OF COMPARTMENT
BATTERY USAGE:
See illustration. 1. Keep these instructions for future reference because they contain important information. 2. May explode
or leak and cause burn injury if recharged, disposed of in fire, mixed with a different battery type, inserted backwards
or disassembled. 3. Products that contain batteries should not be disposed of in fire. The batteries inside may explode or
leak. 4. Do not mix alkaline, standard (carbon-zinc) or rechargeable (nickel-cadmium) batteries. 5. Do not mix old and new
batteries. Replace all batteries of a set at the same time. 6. Use only batteries of the same or equivalent type as recommended
by the manufacturer. 7. Be sure to insert batteries with correct polarities and always follow manufacturers’ instructions. 8.
Remove exhausted batteries from product promptly. 9. Do not short-circuit supply terminals. 10. Remove batteries before
storage or extended periods of non-usage. 11. Clean the contacts on the batteries and the device prior to battery installation.
Non-rechargeable batteries are not to be recharged. Rechargeable batteries are not recommended for use in this product.
If rechargeable batteries are being used, however, please follow these guidelines. (1).Rechargeable batteries should be
removed from the product before being charged. (2). Rechargeable batteries should only be charged under adult supervision.
CAUTION
This string is rated 24 Watts ( 0.2Amps ), do not overload. Connect other Lighting Strings or decorative outfits end-to-end up
to a maximum of 210 Watts (1.75Amps) total.
If connecting to a lighting string that does not have a wattage (W) rating (found on the tag within 6 inches of the plug),
Calculate The wattage (W) as follows: Multiply the current (0.2A) which is on the flag type tag Within 6 inches of the plug,
by 120.
For example, string is rated 120V, 60Hz, 0.2Amps, 0.2×120=24 Watts.
Add the wattage of each light string together for a total of 210 Watts or less. (Do not exceed 210 Watts)
Total amount of wattage that can be connected 210W-24W=186W.
CAUTION
To reduce the risk of fire or electric shock, do not attempt to replace lamps or modify string.
3
PACKAGE CONTENTS
Color changing lightshow 1 piece
Remote control 1 piece
23A Battery
1 piece
Extra fuse, 3A,125V 2 pieces
Clip24 pieces
THESE INSTRUCTIONS ARE FOR THESE ITEM NUMBERS
87448
87449
NOTE: This item is not a toy and should be used for decorative purposes only.
WARNING
This device complies with Part 15 of the FCC Rules. Operation is subject to the following two conditions: (1) this device
may not cause harmful interference, and (2) this device must accept any interference received, including interference that
may cause undesired operation.
CAUTION: Changes or modifications not expressly approved by the party responsible for compliance could void
the user’s authority to operate the equipment.
NOTE:
This equipment has been tested and found to comply with the limits for a Class B digital device, pursuant
to Part 15 of the FCC Rules. These limits are designed to provide reasonable protection against harmful interference in a
residential installation. This equipment generates, uses, and can radiate radio frequency energy and, if not installed and
used in accordance with the instructions, may cause harmful interference to radio communications. However, there is no
guarantee that interference will not occur in a particular installation. If this equipment does cause harmful interference to radio
or television reception, which can be determined by turning the equipment off and on, the user is encouraged to try to correct
the interference by one or more of the following measures:
• Reorient or relocate the receiving antenna.
• Increase the distance between the equipment and receiver.
• Connect the equipment into an outlet on a circuit different from that to which the receiver is connected.
• Consult the dealer or an experienced radio/TV technician for help.
Visit WWW.GEMMY.COM for more information.
©2014 GEMMY INDUSTRIES CORP.
117 WRANGLER DRIVE. SUITE 100
COPPELL, TX 75019 U.S.A.
1 (877) 250-9032
MADE IN CHINA / PRINTED IN CHINA
4