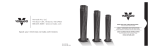
1
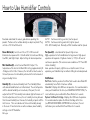
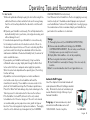
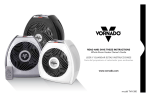
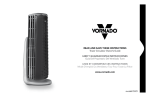
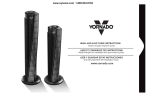
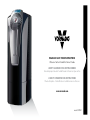
READ AND SAVE THESE INSTRUCTIONS Ultrasonic Vortex Humidifier Owner’s Guide LEER Y GUARDAR ESTAS INSTRUCCIONES Guía del propietario del humidificador ultrasónico tipo vórtice LISEZ ET CONSERVEZ CES INSTRUCTIONS Mode d’emploi – Humidificateur tourbillonnaire à ultrasons www.vornado.com model ULTRA1 Designed, engineered and supported in Andover, Kansas. Pensado, diseñado y respaldado en Andover, Kansas. Conception, mise au point et soutien technique effectués à Andover, au Kansas. Questions or comments? ¿Prequntas o comentarios? Questions ou commentaires? www.vornado.com [email protected] 800.234.0604 2 English Contents Important Instructions........................................................ 4 The Vornado Difference...................................................... 6 Product Information............................................................ 7 Getting Started Filling Water Tank............................................................. 9 How to Use Humidifier Controls......................................... 10 Cleaning and Maintenance Cleaning Instructions....................................................... 11 Mineral Cartridge Replacement...................................... 12 Operating Tips and Recommendations.............................. 13 Automatic Filter Refill Program.......................................... 13 Storage................................................................................ 13 Troubleshooting.................................................................. 14 Unpacking Your Humidifier Remove your Humidifier from carton by lifting from bottom of unit. Lifting by recessed handle on Water Tank, may cause Tank to detach and unit to fall and cause damage. We recommend checking the Base and Water Tank for leaks that may have occurred due to damage caused in shipping. Please note a visual inspection may not reveal hairline fractures. To Check for Leaks: Place Humidifier on a water-resistant surface. Fill Water Tank and Base with water to inspect for leaks (For instructions see FILLING WATER TANK.) Not Leaking? Empty water from Base and install full Water TANK (For instructions see FILLING WATER TANK.) Leaking? In the remote chance your Humidifier has leaks, contact Vornado Consumer Services and we will immediately replace damaged parts. Warranty.............................................................................. 15 Español p. 16 Français p. 29 English 3 IMPORTANT INSTRUCTIONS READ AND SAVE ALL INSTRUCTIONS BEFORE USING THIS HUMIDIFIER. When using electrical appliances, basic precautions should always be followed to reduce the risk of fire, electrical shock and injury to persons, including the following: Read all instructions before using this Humidifier. This Humidifier may not work properly on an uneven surface. Always place this Humidifier on a firm, flat surface. This Humidifier requires periodic cleaning. Refer to the CLEANING instructions provided. Never clean the Humidifier in any manner other than as instructed in this manual. Turn the Humidifier off if the relative humidity exceeds 60%. Humidity levels above 60% may allow moisture to build up indoors and condense on surfaces, where bacteria and fungi can settle and grow. For accurate humidity readings, use a hygrometer which is available at most hardware stores and home centers. Unplug the Humidifier prior to moving, cleaning or refilling. This Humidifier should always be unplugged and emptied when not in operation. This product is equipped with a polarized alternating current line plug (a plug having one blade wider than the other). This plug will fit into the power outlet only one way. This is a SAFETY FEATURE. If you are unable to insert the plug fully into the outlet, try reversing the plug. If the plug still fails to 4 English fit, contact an electrician to replace the obsolete outlet. DO NOT defeat the safety purpose of the polarized plug. DO NOT operate the Humidifier with a damaged cord or plug, after the Humidifier malfunctions, or has been dropped or damaged in any manner. Return to Vornado for examination, electrical or mechanical adjustment or repair. DO NOT run power cord under carpeting. DO NOT cover cord with throw rugs, runners or similar objects. Arrange the power cord away from traffic areas, so it will not become a tripping hazard. DO NOT place the Humidifier near heat sources such as stoves, radiators or heaters. DO NOT run unit without the Mist Outlet in place. The Mist Outlet can be removed for cleaning. Never pour water through the top Outlet Air Grill on the Power Head. If the Humidifier is to be turned off and left for more than 12 hours, the water should be emptied from the unit, as leaving the water will encourage the growth of algae or bacteria. If this happens, thoroughly clean and disinfect the unit. (Refer to the CLEANING instructions.) If you need to move the Humidifier to another location, remove the Water Reservoir first. Use only water and mild detergents to perform daily maintenance on your Humidifier. Do not use undiluted bleach or ammonia, strong detergents, abrasive cleansers, IMPORTANT INSTRUCTIONS READ AND SAVE ALL INSTRUCTIONS BEFORE USING THIS HUMIDIFIER. gasoline, paint thinner or other solvents to clean this Humidifier. The Power Head contains no user serviceable parts. If you experience a problem, please see the warranty for information. DO NOT ATTEMPT TO DISASSEMBLE THE POWER HEAD. DOING SO WILL VOID YOUR WARRANTY AND COULD CAUSE DAMAGE AND/OR PERSONAL INJURY. DO NOT repeatedly remove and replace the Water Reservoir. This will only fill the Base and water will spill out. This device complies with Part 18 of the FCC Rules. This ISM device complies with Canadian ICES-001. SAVE THESE INSTRUCTIONS English 5 Trust. The Vornado Difference It is said that trust isn’t given, but earned. For decades Vornado has been earning the trust of our customers by offering them only the best. Vornado provides the highest level of performance, coupled with the highest level of support available. Complete satisfaction with no exceptions – this is Vornado’s promise to you. If you are not satisfied for any reason, please contact us. Knowledgeable representatives are available at 1-800-234-0604 from 7:00 AM to 6:00 PM CST. A wealth of additional support is also available online at www.vornado.com. On behalf of myself and the entire staff at our Andover, Kansas headquarters – thank you for selecting Vornado. See it in action ULTRA1 HUMIDIFIER Sincerely, Randy Brillhart CEO, Vornado Air Without Adequate Circulation Find our complete product line at www.vornado.com 6 English With Vornado Vortex Action Unlike any other ultrasonic humidifier, Vornado delivers whole room humidification using our exclusive Vortex Action. The Vornado Ultrasonic channels mist into a powerful beam of air and evenly distributes the humidity throughout the living area. Other systems are only designed to push mist out of the unit, once outside, there is no mechanism to deliver the humidity throughout the living space. The mist simply falls, leaving the floor damp. Product Information 1 LCD Display Screen Easily adjust fan speed, humidity level, power and mist condition. 2 Mist Outlet Moist air is dispersed through the Mist Outlet and projected into Vornado’s signature Vortex beam of air - circulating the moist air throughout the entire room. 9 Fill Port Releases water from Water Tank into Base. 10 Ultrasonic Transducer Rapid vibrations break water into a fine mist. 11 Cleaning Brush Used for cleaning the Base in hard to reach areas. Stored in Base. 3 Base Durable, leak-resistant construction. 4 Water Tank Large 2 gallon capacity allows for fewer refills. 5 Mineral Cartridge Removes minerals from the water, thereby softening the water and reducing harmful mineral buildup on the Transducer. 6 Gasket Creates a waterproof seal between Cap and Water Tank. 7 Cap Easy-to-remove Cap for convenient Water Tank refilling. 8 Power Cord Convenient 6 ft. cord. English 7 Product Information 1 4 11 2 9 10 3 5 7 8 8 English 6 Getting Started Filling Water Tank Before initial use, you must soak the Mineral Cartridge in water for 24 hours. You may use a separate container or Water Tank to do so. If Tank is used, empty water and refill with fresh water prior to use. Note: the unit may take several minutes to create mist with the initial use of a new Mineral Cartridge. A This Humidifier has a 2 gallon capacity and 3.5 gallon output in 24 hours (if set to High output, Continuous Humidity setting). To fill Water Tank: 1. Unplug Humidifier. Place on firm and level surface, such as the floor. Note: Spills can occur during cleaning, moving, or refilling Water Tank, so be careful to avoid spills when doing these activities. Do not touch the water inside the Base, as the water temperature can reach 92 degrees F. 2. Remove Water Tank by grasping recessed handle on back (A). Lift and pull outward. 3. Turn Water Tank upside down. 4. Remove Cap (B). Empty any remaining water inside Water Tank. Rinse, wipe clean and dry with clean cloth or paper towel. 5. Place Water Tank in sink with opening at the top. 6. Fill Water Tank with cool tap water (C). 7. Ensure Gasket is properly positioned and secure Cap. 8. Lower Water Tank into Base, positioning Fill Port over raised bump in Base. Once in nested position, the water outlet valve inside Cap will open, releasing water into Base. B C Note: The rate of water dispensing from Water Tank into Base is controlled by the Mineral Cartridge. The unit may take several minutes to fill the Base. English 9 How to Use Humidifier Controls A B C D Read and understand this owners guide before operating this product. Position unit to not blow directly on objects or plants. Plug unit into a 110-120 volt AC outlet. AUTO 1 Continuous misting, cool mist, low fan speed. AUTO 2 Continuous misting, warm mist, high fan speed 40% - 60% Humidity level. Manually set Mist Condition and Fan Speed. Power Button (A) - turns the unit On or Off. LCD Screen will illuminate when powered On. Unit will default to Continuous Misting, Cool Mist, and High Output. Adjust settings for desired operation. Fan Speed (D) - select desired Fan Speed - High or Low . High - operation for fast humidification for larger rooms. High speed operation will evaporate 3.5 gallons of water (+/- 10%) in 24 hours of continuous operation. (This assumes room conditions of 70º F and 30% relative humidity.) Low - operation for quiet, nighttime use or smaller rooms. On Low operation, your Humidifier may run without refilling for extended periods. Mist Condition (B) - select Cool or Warm Mist Output. The temperature of the mist on the Warm Mist setting is approximately 94 -98 degrees at the Outlet. However, the mist will feel much cooler to the touch, because it is immediately entrained in the Vortex beam of air generated by the fan. Humidity (C) - sets desired humidity level. Press Humidity Button until desired humidification level is illuminated. The unit will operate until the desired humidity level is reached, at this point, the mist output will turn Off. The humidity level indicator light will remain on. If the mist output does not turn on, the set humidity level may be lower than the room humidity level. Increase the humidity set point until the mist turns on. This is an indication of the level of humidity already in the room. If moisture forms on walls or windows, lower humidity settings or turn Off Humidifier. 10 English Notifications Refill Tank - Notifies you when the Water Tank needs to be refilled. Will automatically turn off after it has been refilled. Clean Unit - Displays after 400 hours of operation. It is recommended to clean your Humidifier at this time (see CLEANING INSTRUCTIONS). To reset notification, press and hold the Power Button for 3 seconds. Replace the Mineral Cartridge - Displays after 800 hours of operation. It is recommended to replace the Mineral Cartridge at this time (see REPLACING MINERAL CARTRIDGE for instructions). To reset notification, press and hold the Power Button for 3 seconds. Cleaning and Maintenance Cleaning Instructions Proper cleaning of your Ultrasonic Vortex Humidifier is essential to the air quality and performance of your unit. The frequency in which your Humidifier will need to be cleaned will vary, depending on use, water hardness, and outside environmental factors. It is recommended, assuming average use, to thoroughly clean the unit several times throughout the season, or when algae, mineral deposits or other particles begin to form. To clean your Humidifier, follow these instructions: 1. Turn the Humidifier Off and unplug. Do not submerge into water. Remove Mist Outlet by grasping base of Outlet and pulling up (A). A 2. Empty water from Base and Water Tank. (See FILLING WATER TANK for instructions). Place Mist Outlet inside Water Tank to clean both components at the same time. Note: Do not operate the unit during cleaning. 3. Fill Base and Water Tank with a mixture of water and white vinegar - mixed at a ratio of one (1) 8 oz. cup of undiluted white vinegar per 1 gallon of water (B). Do not overfill, discard unused portion. Solution should remain in Base and Water Tank for 20 minutes to dissolve any residue. B 8 oz. White Vinegar + 1 gal. Water 4. Empty after 20 minutes and clean Mist C Outlet and all interior surfaces of Base and Water Tank with soft brush (C). Use Cleaning Brush, stored in Base of unit to clean hard to reach areas. Dampen soft cloth with undiluted white vinegar and wipe down to remove scale. Rinse thoroughly with clean warm water before disinfecting. Note: Do not use gasoline, thinners, solvents or other chemicals for cleaning. 5. Use canned compressed air around the top outlet grill and side inlet grill, follow up using your brush attachment on your household vacuum cleaner to vacuum top outlet grill and side inlet grill. Wipe down the entire surface with a soft cloth. English 11 Cleaning and Maintenance To Disinfect: 1. Place Mist Outlet back into Water Tank. 2. Fill Base and Water Tank with a mixture of water and chlorine bleach - mixed at a ratio of one (1) teaspoon of chlorine bleach per 1 gallon of water (D). Do not overfill, discard unused portion. Solution should remain in Base and Water Tank for 20 minutes to fully disinfect. D 1 tsp. Chlorine Bleach + 1 gal. Water 3. Rinse with water until bleach smell is gone. Dry with clean cloth or paper towel. 4. Reinstall all components. Components must be securely in place for unit to function properly. Mineral Cartridge Replacement The Mineral Cartridge removes minerals from the water thereby softening the water and reducing harmful mineral buildup on the Transducer. When to Replace: Many factors affect the frequency in which the Cartridge will need to be replaced - including amount of use, water hardness, and outside environmental factors. For 12 English heavy use, using the unit continuously, we recommend replacing the Cartridge approximately once a month. For lighter use, using the unit intermittently, we recommend replacing the Cartridge every two months. The Cartridge will need to be replaced earlier if white powder residue accumulates around the device. If the water used in the humidifier has been treated by a decalcification system, the salt from the treatment can show up as white dust also. How to Replace: 1. Remove Water Tank (See FILLING WATER TANK for instructions) 2. Unscrew Cap. 3. Unscrew Mineral Cartridge from Cap (A). Discard Cartridge. MINERAL CARTRIDGE View cartridge replacement tutorial on your mobile device. Note: Before initial use, you must soak the Mineral Cartridge in water for 24 hours. 4. Install new Cartridge onto Cap. 5. If continuing use of Humidifier, fill Water Tank and reinstall Cap. Replace Tank back into unit. Your Humidifier is now ready for use. Note: the unit may take several minutes to create mist with the initial use of a new Mineral Cartridge. 6. If storing unit, empty Water Tank and reinstall Cap. Replace Tank back into unit. See STORAGE for instructions. Operating Tips and Recommendations For best results: 1. Allow for optimum airflow by keeping the mist outlet and grill unobstructed. Ensure curtains and other items are far enough away from the unit to not be pulled into the side inlets or interfere with airflow. 2. Operate your Humidifier continuously. This will help maintain the desired humidity level in your home, cost only pennies a day, and will not damage the unit. It is normal and expected for your Humidifier to run continuously for a few days in order to raise the moisture content of the air to the desired level upon initial use or if the air is extremely dry. When your home and its furnishings have absorbed sufficient moisture and become stabilized at the desired humidity level, the amount of water used will decrease. If you operate your Humidifier continuously, it may need to be refilled with water every day. Simply look through the Water Tank to be certain that there is adequate water supply for operation. When the water level drops below the operating level, the misting function will stop. Any additives such as aroma fragrances or water conditioners must not be used. Any use of such additives will void the manufacturer’s warranty. These additives can cause cracks in the plastic of the Humidifier and may affect Transducer performance. Protect the Water Tank from damage. Any cracks or damage to the Tank may cause it to leak water onto the floor or other surfaces. If the Humidifier is turned Off, with water in the unit, and not turned back on for 12 hours or longer, or if the unit is not cleaned as recommended, you may experience some growth of algae or bacteria. These microorganisms may become airborne. Thoroughly clean the unit to eliminate any microorganisms (See CLEANING AND MAINTENANCE for instructions). Your Ultrasonic Vortex Humidifier is effective at supplying necessary moisture to dry air. It should be used with proper care to prevent over-humidification. To know if the humidity level is too high, gauge the condensation or frost on windows. Adjust your Humidifier to a point where this condition is at a minimum. Storage 1. Thoroughly clean unit (See CLEANING INSTRUCTIONS). 2. Remove and discard Mineral Cartridge (See MINERAL CARTRIDGE REPLACEMENT). Be sure to buy a new Mineral Cartridge now so you are ready for next season! 3. Empty Water Tank and Base. Let unit dry completely. 4. Place in original retail carton if available. 5. Your Humidifier is now ready for Storage. Store in a cool, dry location. Note: It is recommended to clean the unit again before use. Automatic Refill Program Select the shipment interval and Vornado will send replacement Mineral Cartridges automatically. Eliminate the hassle of remembering to reorder. Maintain the high efficiency of your Vornado Humidifier. To sign up, visit www.vornado.com, email [email protected] or call 1-800-234-0604. Cancel at anytime. Part # MD1-0018 English 13 Troubleshooting Problem Unit fails to power on. Possible Cause and Solution Unit is not plugged in. Plug power cord into electrical outlet. Household circuit breaker / ground fault interrupter has tripped or blown a fuse. Reset circuit breaker / ground fault interrupter, or replace fuse. For assistance, contact a licensed electrician. Unit is damaged or in need of repair. Cease usage and unplug. Contact Consumer Service for assistance. Unit makes a bubbling or gurgling sound. This is normal. Water is being dispensed into Base. Unit is not producing desired amount of humidity or mist output has ceased. Water level in Tank is empty or too low. Refill with clean, cool tap water. (See FILLING WATER TANK for instructions.) Unit has reached its set point. When set humidity level is reached, the unit will not produce mist until humidity level in the room drops below humidity set point. Airflow is blocked. Remove obstruction. Unit settings are too low. Set to High Output and Continuous Humidity for maximum humidity output. White dust has accumulated on Mist Outlet or on flooring below. Mineral Cartridge is no longer removing minerals from water. Cartridge needs to be replaced (See MINERAL CARTRIDGE REPLACEMENT for instructions.) Unit and Transducer is in need of cleaning. (See CLEANING AND MAINTENANCE for instructions.) Water is too hard. Use distilled water. 14 English Ultrasonic Vortex Humidifier • 5 Year Limited Warranty Vornado Air LLC (“Vornado”) warrants to the original consumer or purchaser this Vornado® Ultrasonic Vortex Humidifier (“Product”) is free from defects in material or workmanship for a period of five (5) years from the date of purchase, depending on model. If any such defect is discovered within the warranty period, Vornado, at its discretion, will repair or replace the Product at no cost. Repairs not covered by the warranty or outside the warranty period will require a fee to cover the cost of materials, labor, handling and shipping. This warranty does not apply to defects resulting from abuse of the Product, modification, alteration, repair or service of the Product by anyone other than Vornado, mishandling, improper maintenance, commercial use of the Product, damages which occur in shipment or are attributed to acts of God. REPAIR OR REPLACEMENT AS PROVIDED UNDER THIS WARRANTY IS THE EXCLUSIVE REMEDY OF THE CONSUMER. VORNADO SHALL NOT BE LIABLE FOR ANY INCIDENTAL OR CONSEQUENTIAL DAMAGES FOR BREACH OF ANY EXPRESS OR IMPLIED WARRANTY ON THIS PRODUCT. EXCEPT TO THE EXTENT PROHIBITED BY APPLICABLE LAW, ANY IMPLIED WARRANTY OF MERCHANTABILITY OR FITNESS FOR A PARTICULAR PURPOSE ON THIS PRODUCT IS LIMITED IN DURATION TO THE DURATION OF THIS WARRANTY. Some states do not allow the exclusion or limitation of incidental or consequential damages, or allow limitations on how long an implied warranty lasts, so the above limitations or exclusions may not apply to you. This warranty gives you specific legal rights, and you may have other rights that vary from state to state. For warranty or repair service, call 1-800-234-0604 or email consumerservice@vornado. com to obtain a Return Authorization (“RA”) form. Please have or include your Product’s model number and serial number, as well as your name, address, city, state, zip code and phone number when contacting Vornado for warranty service. After receiving the RA form, ship your Product to: Vornado Air LLC Attn: Warranty & Repair 415 East 13th Street Andover, KS 67002 For your convenience, please have your model number and serial number when contacting Vornado with service inquiries. To assure proper handling, packages must be clearly marked with the RA number. Packages not clearly marked with the RA number may be refused at the receiving dock. Please allow 1-2 weeks for repair and return of your Product after the Product is received. For your records: Staple or attach your original sales receipt to this Owner’s Guide. Please also write your products’s serial number below (located on product specs decal). Serial No. ______________________________________ Product registration available online at www.vornado.com © 2014 Vornado Air LLC Andover, KS 67002 Patents Pending. Specifications subject to change without notice. Vornado® is a trademark owned by Vornado Air LLC. Designed and Engineered in the U.S.A. Manufactured in China. www.vornado.com [email protected] 800.234.0604 English 15 Vornado Air, LLC 415 East 13th Street, Andover, Kansas 67002 800.234.0604 | www.vornado.com Speak your mind www.vornado.com/reviews CL3-0158 RC CL7-0158 rC, V01