Transcript
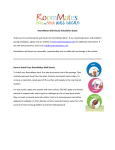
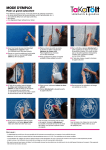
WallPops Use & Installation
WallPops are totally re-usable, removable and repositionable so you can peel and stick
to your heart’s delight. To reposition WallPops, carefully peel them off of the wall,
reposition in a new spot and smooth on. To transport WallPops to an area that is
further away, it is best to stick them back on their original backing. If you forgot to
save the backing, you can also use wax paper or a vinyl shower liner. This will protect
the adhesive and keep the WallPop from creasing during transport.
WallPops work best on smooth, flat surfaces. However, WallPops can still be
successful on textured walls if they are not excessively porous or uneven. They will
stick best to painted surfaces, so if you are trying to stick WallPops to knock-down
texture walls, concrete, or raw wood, you will have more success if the surface has
been painted. In general, WallPops stick great to tiles, mirrors, glass, and wallpaper.
After a fresh coat of paint has been applied, you should wait 3-4 weeks before
applying WallPops. This allows the paint to fully cure, ensuring that the wall decal will
not damage the paint or leave an area of varied color underneath when it is removed.
WallPops are very easy to cut to any shape and size. They are perfect for craft projects
and die-cutting as well as for DIY home décor projects. Cut the WallPops with
scissors, a die-cutting machine or a utility knife while they are still adhered to the
backing, peel and stick! You can trace shapes onto the backing as a guide for more
involved designs.
If you need to clean your WallPops wall art, simply wipe with a damp cloth. No need
for chemical cleaners or abrasives, which could damage the WallPops.