Transcript
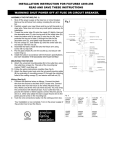
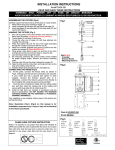
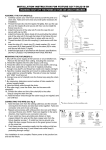
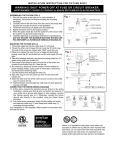
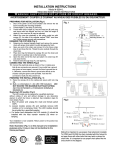
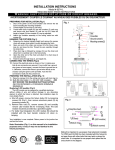
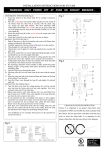
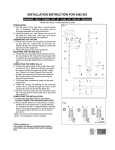
INSTALLATION INSTRUCTION FOR FIXTURE#1625-613, 1629-613
READ AND SAVE THESE INSTRUCTIONS
WARNING! SHUT POWER OFF AT FUSE OR CIRCUIT BREAKER.
8
ASSEMBLY THE FIXTURE (FIG. 1)
1. Shut off the power supply at the fuse box or circuit breaker.
Remove the old fixture from ceiling, including the old cross
bar.
2. Carefully unpack your new fixture and lay out all the parts in a
clear area. Take care not to lose any small parts necessary for
installation.
3. Adjust the arms to its desired position.
4. Thread the nipple (L) into the coupling (O) and secure with
hex nut (N).
5. Put the tube (M), check ring (K), wheel (J) & (I) over the nipple
(L) in order,
6. Assemble the extension rod (G) together using the nipple (H),
then thread the bottom end of the extention rod (G) onto the
nipple(L) tightly.
7. Put the ring (E) over the top end of the extension rod (G) and
secure with loop (F).
(Remark: there is one piece 11” L. chain included in the
hardware bag. You could add the chain on to increase the
fixture height if needed)
8. Put the glass shade(T), spacer ring (S) over the socket (U),
then secure with socket ring (R) using socket ring tool(Q).
9. Install the bulbs in accordance with the fixture’s specifications.
DO NOT EXCEED THE MAXIMUM WATTAGE RATING!
Fig.1
MOUNTING THE FIXTURE
10. Attach the mounting plate (B) to the outlet box using the outlet
box screws (A). The side of the mounting bar marked “GND”
must face out.
11. Follow the wiring instructions carefully (See Fig.2).
12. Attach the fixture main body onto the mounting plate (B) by
attaching the ceiling canopy(D) onto the mounting plate (B)
using the mounting screw (C).
Wiring (See fig.2)
1. Connect the electrical wires as follows. Connect the black
wire from the fixture to the black (HOT) house wire. Connect
the white wire from the fixture to the white (Neutral) house
wire. Make sure all the wire nuts were secured. You may wrap
the connections with electrical tape. If your outlet box has a
ground wire (Green or Bare Copper) connect fixture’s ground
wire to it. Other wise attach the bare copper fixture wire to the
green ground screw on the mounting bar.
2. Tuck the wire connections neatly into the ceiling junction box.
‘
Your installation is now complete. Turn on the power supply of
the junction box to test the fixture.
Notice: It is important to use proper chain pliers (not
included) to OPEN and CLOSE the chain included
with this fixture. Do not open them with other tools
that may twist or stress the chain links. It is important
to use proper chain pliers like the ones shown in the
diagram.