1
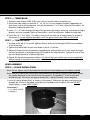
Outdoor Water Solutions
Aeration Windmill
Installation Manual
Outdoor Water Solutions, Inc.
2300 South Old Missouri Road, Springdale, AR 72764 • 1-866-471-1614 (Toll Free) • 1-479-756-1614
www.outdoorwatersolutions.com
Outdoor Water Solutions Accessories
Tower Hinges
A set of Outdoor Water Solutions Tower Hinges are a great way to make raising
and lowering your windmill more safe and easy. Simple to install, they allow the
windmill to pivot on two points, making the base much more stable.
Weighted Air Line
Weighted Air Line can be used in the pond to keep your air line on the bottom.
This allows easier fishing, boating, swimming, etc., and also keeps your air line from
freezing on the surface in climates where ice is a possibility. Available in 50’, 100’,
and 500’ lengths.
Freeze Control System
An Outdoor Water Solutions Freeze Control System keeps your air line from freezing
in the winter due to excess condensation in the line. A Freeze Control System is
HIGHLY RECOMMENDED and will keep your warranty intact if freezing temperatures
are common in the winter months.
2-Way & 3-Way Selector Valves
These high-quality valves allow you to adjust airflow between multiple airstones or
between airstones and water pumps if you are running both with one windmill.
Airstone Housing Bucket
These high-quality buckets are ideal for protecting the airstone from the mud and
debris common in most ponds and lakes.
Airstone Marker – Duck Decoy
The use of a duck decoy allows you to mark the airstone and can also serve as a way
to lift your Airstone Housing Bucket (if needed) to move or service.
OWS Small Pond Accessory Kit
• Includes everything you need to aerate a 1/ 8-acre to 1-acre pond
• Includes pivot hinges, which help raise and lower your tower for maintenance
• Includes 50’ of weighted air line, so your air line sinks to the bottom of your pond
• Includes 1 airstone housing bucket, 1 duck decoy marker, and hose connectors.
OWS Medium Pond Accessory Kit
•
•
•
•
Page 1
Includes everything you need to aerate a 1- to 2-acre pond
Includes pivot hinges, which help raise and lower your tower for maintenance
Includes 150’ of weighted air line, so your air line sinks to the bottom of your pond
Includes 1 extra airstone and foot valve, a 2-way selector valve to regulate oxygen
flow, 2 airstone housing buckets, 2 duck decoys, and hose connectors.
Outdoor Water Solutions, Inc.
Installation Manual 2/12 (Feb. 2012)
The Outdoor Water Solutions 3/5-Year Limited Warranty
This warranty covers all Outdoor Water Solutions, Inc. Windmill products for 3 years from purchase date
against defects in workmanship and 5 years from purchase date against defects in the compressor.
1.Outdoor Water Solutions, Inc. (OWS) will replace or repair any part deemed to be defective
by Outdoor Water Solutions, Inc., due to defects in quality and/or workmanship within a
3-year period from the initial date of purchase. Functional windmill compressors are covered
for 5 years from date of purchase against major defects. Note: Diaphragm and check valve
replacement are considered routine maintenance, if needed.
2.Warranty does not apply to OWS products that are installed incorrectly, subject to an
accident, neglect, or damage due to excess winds.
3.This warranty does not apply to damage caused by severe weather. Private insurance
coverage is recommended.
4.When an OWS Freeze Control System has not been used, warranty coverage may not apply to
damages incurred to an Outdoor Water Solutions Aeration System as a result of a blocked line.
The use of an Outdoor Water Solutions Freeze Control System or an inline Pressure Relief Valve
is HIGHLY RECOMMENDED in geographical areas where freeze may be a concern in order to
keep excess back pressure off of the compressor.
5.Product returned for warranty repair must be returned to the address specified by the
Manufacturer, and any warranty product sent to the customer will be sent freight prepaid.
6.Warranty coverage may be void if parts other than genuine Outdoor Water Solutions parts
are utilized for repair or attached to an Outdoor Water Solutions Aeration System.
7.Proof of purchase date is required for warranty repairs.
8.If you have any warranty concerns, please contact Outdoor Water Solutions, Inc. at
1-866-471-1614 in Canada or the U.S.A. International customers can call 1-866-471-1614 or
1-479-756-1614 with any warranty concerns.
Safety Precautions
1.DO NOT attempt any service or repairs to the windmill in a high-wind situation.
2.Make sure the blades are secured when service or repair is necessary for compressor. We
recommend laying the windmill down while working on it vs. trying to do repairs while it is
standing. A sudden gust of wind can physically turn the rotor head, causing possible injury.
3.DO NOT get near the windmill in high-wind situations or in a thunderstorm.
4.DO NOT allow children to play on or near the windmill.
Return Materials Authorization
• A return materials authorization (RMA) number must be obtained prior to returning any
product for warranty work.
• You can call the Outdoor Water Solutions warranty department at the following numbers:
• Canada and the U.S. – 1-866-471-1614
• International (outside Canada and the U.S.) – 1-866-471-1614 or 1-479-756-1614
Note: Serial Numbers are located inside the compressor.
Outdoor Water Solutions, Inc. recommends that, for future reference, you keep this
Installation Manual in a convenient location.
Serial number: ______________________ Date of Purchase: _______________________
www.outdoorwatersolutions.com
Page 2
TABLE OF CONTENTS
TitleSteps
Page(s)
The Outdoor Water Solutions 3- to 5-Year Limited Warranty
—
2
Tips & Suggestions – Installing Outdoor Water Solutions Aeration Windmill
—
3
Contents of the Aeration Windmill Boxes
—
4–6
Outdoor Water Solutions Windmill Tower Assembly
1 – 8
7 – 11
Blade Assembly
9 – 10
12 – 13
Tail & Pivot Tube Installation
11 – 12
13 – 14
13
15 – 17
Final Set Up
Tips and Suggestions for Installing an Outdoor Water Solutions Aeration Windmill
• WE STRONGLY RECOMMEND THAT YOU READ THROUGH THIS ENTIRE MANUAL BEFORE
BEGINNING ASSEMBLY. IF YOU HAVE ANY QUESTIONS, PLEASE CONTACT US AT (866) 471-1614.
• In order for your windmill to work properly, YOU MUST LOCATE THE AREA WITH THE MOST
WIND EXPOSURE NEAR YOUR POND. The windmill can be positioned up to 1,000 feet away
from the pond.
• Anchoring of the windmill tower is very important. Outdoor Water Solutions, Inc. (OWS)
supplies a BASIC anchoring kit with each unit. We STRONGLY recommend an anchoring system
such as concrete pilings, a concrete pad, or screw-in anchors. High winds or light soil conditions
can cause the windmill to fall over, physically damaging the rotor head and other components.
The customer is responsible to anchor the Windmill adequately or consult the appropriate
people to do so.
• NOTE: DURING THE TOWER ASSEMBLY, DO NOT COMPLETELY TIGHTEN ANY NUTS OR BOLTS
UNTIL THE TOWER IS COMPLETED, UNLESS SPECIFICALLY DIRECTED OTHERWISE.
• NOTE: DO NOT TIGHTEN ANY OF THE BLADES ON THE HUB UNTIL THE BLADE BRACES HAVE
BEEN INSTALLED.
• NOTE: HUB MUST FACE DOWN WHEN THE BLADES AND BLADE BRACES ARE BEING INSTALLED
(FACE DOWN MEANS THE SMALLER BOLT HOLE IN THE FRONT MUST BE FACING DOWN. THE
EXPOSED 1” HOLE FOR THE SHAFT SHOULD FACE UP). THIS ALLOWS THE PROPER BLADE PITCH,
SLIGHTLY FORWARD, WHEN COMPLETE. IT IS ALSO HELPFUL TO SET THE BLACK HUB UP ON
A TIRE, BUCKET, OR BOX WHEN INSTALLING THE BLADES AND BLADE BRACES. THIS ALLOWS
EVERYTHING TO PITCH FORWARD VS. BACKWARDS.
• NOTE: IN COLD CLIMATE AREAS, WHERE FREEZING DOES OCCUR, WE RECOMMEND THE USE
OF AN OWS FREEZE CONTROL SYSTEM TO AID IN KEEPING THE AIR LINE OPEN. CONDENSATION
CAN FORM IN THE AIR LINE AND RESTRICT AIR FLOW, PUTTING UNDUE PRESSURE ON THE
PUMPING MECHANISM AND VOIDING THE WARRANTY.
• We also recommend the use of Outdoor Water Solutions Tower Hinges as an accessory, allowing
ease in lowering and raising the tower.
Page 3
Outdoor Water Solutions, Inc.
Installation Manual 2/12 (Feb. 2012)
Contents of Outdoor Water Solutions Aeration Windmill Boxes
Note: Make sure all components and accessories are accounted for before beginning assembly.
ITEM
CODE
DESCRIPTION
PACKAGED IN
TOTAL QUANTITY IN COMPLETE
(Nut & Bolt Quantities are for a 20’ tower)
(not to scale)
12’
16’
20’
24’
Tower Tower Tower Tower
BLA
Blade
Blade & Tail Box
12
12
12
12
BBR
Blade Brace
Blade & Tail Box
12
12
12
12
HUB
Blade Hub Assembly
Hub & Dome Box
1
1
1
1
DOME
Dome
Hub & Dome Box
1
1
1
1
COMP
Windmill Compressor
Compressor Box
1
1
1
1
GRS
Ground Rod Stakes
8’ Tower Box
3
3
3
3
LTS
Leg Top Section – 14 Holes
8’ Tower Box
3
3
3
3
LEN
Leg Extension – 8 Holes
8’, 12’, 16’, 20’, 24’
6
9
12
15
CM23
22¾” Cross Member
8’ & 20’ Tower Boxes
3
3
6
6
CM41
41” Cross Member
8’, 12’, 16’, 20’, 24’
3
9
15
24
PW
Pivot Tube Washer
Bolt Package
1
1
1
1
www.outdoorwatersolutions.com
DIAGRAM
page 4
Contents of Outdoor Water Solutions Aeration Windmill Boxes
NOTE: Make sure all components and accessories are accounted for before beginning assembly.
ITEM
CODE
DESCRIPTION
PACKAGED IN
TOTAL QUANTITY IN COMPLETE
(Nut & Bolt Quantities are for a 20’ tower)
Pivot Tube
Blade & Tail Box
1
1
1
1
SCBR
Stake Clamp Bracket–Right
Bolt Package
3
3
3
3
SCBL
Stake Clamp Bracket–Left
Bolt Package
3
3
3
3
TA
Tail Arm – with one bent end
Tail Arm Box
2
2
2
2
TF
Tail Fin (2 pieces)
Blade & Tail Box
2
2
2
2
Tower Cone
Compressor Box
1
1
1
1
0
6
6
3
6
0
3
0
0
0
0
0
6
6
3
6
6
3
3
0
3
0
6
6
6
3
9
6
6
3
6
3
0
6
12
6
9
9
6
9
3
9
3
6
Cross Braces
#1
#2
#3
#4
#5
#6
#7
#8
#9
#10
#11
157/ 8” Cross Brace
19” Cross Brace
27¼” Cross Brace
29½” Cross Brace
33¾” Cross Brace
35¼” Cross Brace
38½” Cross Brace
41” Cross Brace
43¾” Cross Brace
45¼” Cross Brace
23½” Cross Brace
(not to scale)
12’
16’
20’
24’
Tower Tower Tower Tower
PVT
CONE
DIAGRAM
Tower Box
20’ Tower Box
8’ & 24’ Tower Box
12’ Tower Box
8’ & 24’ Tower Box
8’, 12’, & 20’ Tower Box
16’ Tower Box
12’, 20’, & 24’ Tower Box
16’ Tower Box
20’ & 24’ Tower Box
16’ Tower Box
24’ Tower Box
Bolt Package Contents
ABK
Page 5
Angle Bracket – Used to
tighten cross braces
Package H & J
6
9
12
15
#10” x ½” Sheet Metal Screw – (4) used to attach dome to hub assembly
Package G
4
4
4
4
Outdoor Water Solutions, Inc.
Installation Manual 2/12 (Feb. 2012)
Contents of Outdoor Water Solutions Aeration Windmill Boxes
Note: Make sure all components and accessories are accounted for before beginning assembly.
ITEM
CODE
DESCRIPTION
PACKAGED IN
TOTAL QUANTITY IN COMPLETE
(Nut & Bolt Quantities are for a 20’ tower)
DIAGRAM
(not to scale)
12’
16’
20’
24’
Tower Tower Tower Tower
⁄16” x ½” Bolts –
5
(18) to connect Cross Braces
(12) attach eye bolts to cross braces
(4) attach tail arms to compressor
(1) to attach hub assembly to shaft
⁄16” Flange Nuts –
Package A & J
18
24
36
54
Package B & J
18
24
36
54
Package C & J
68
80
104
128
Package C & J
92
104
116
131
Package G & J
6
9
12
15
5
Used with 5/16” x ½” bolt (2) used
to tighten U-bolt to pivot tube
¼” x ½” Bolts –
(2) to install elongated hose clamp brackets
(48) join cross members
(24) install blade braces
(24) install cone to leg
(6) to join the two-piece Tail Fin
¼” x ¾” Bolts –
(60) to attach cross members to leg
(18) stake clamp assembly
(36) install blades to hub assembly
(2) to connect tail arms to tail
Eye Bolt –
Used to tighten cross braces & tensioners
¼” Nuts –
Package E & J
172
202
244
298
Package F
108
108
108
108
Package I & J
160
184
220
259
Package G
1
1
1
1
½” x ½” – 90-degree Hose Barb
Package G
1
1
1
1
Elongated Hose Clamp Bracket –
Package H
1
1
1
1
/ ” Allen Wrench –
Package G
1
1
1
1
Used with all ¼” bolts (2) to be used with
each eye bolt
¼” Washers –
(36) for ground stake clamps
(36) for blade to hub assembly
¼” Lock Washers
U-Bolts –
Used to attach pivot tube to compressor
(2 pieces)
5 32
Used to tighten locking collars to shaft
www.outdoorwatersolutions.com
Page 6
Illustration 1
cone
LT1
CM23
#2 - 19”
8’ TOWER BOX
#5 - 33.75”
Brace
#4 - 29.5” Brace
CM41
#3 - 27.25”
Brace
12’ TOWER EXTENSION
LE2
#7 - 38.5”
Brace
#5 - 33.75”
Brace
CM32
#6 - 35.25” Brace
16’ TOWER EXTENSION
(OPTIONAL)
#8 - 41”
Brace
#10 - 45.25”
Brace
CM41
#9 - 43.75” Brace
20’ TOWER EXTENSION
(OPTIONAL)
CM41
#1 - 15.875”
Brace
#7 - 38.5”
#5 - 33.75”
Brace
Brace
CM23
CM41
#4 - 29.5”
Brace
24’ TOWER
EXTENSION
(OPTIONAL)
#4 - 29.5”
Brace
23.5” Brace
23.5” Brace
#2 - 19” Brace
#9 - 43.75” Brace
#7 - 38.5” Brace
3 CM41” Cross Members
Page 7
Outdoor Water Solutions, Inc.
Installation Manual 2/12 (Feb. 2012)
Illustration 2
Inside
Outside
www.outdoorwatersolutions.com
Page 8
TOWER ASSEMBLY:
IMPORTANT TIPS TO EASE TOWER ASSEMBLY:
• We highly recommend that you read through the manual completely before beginning the
assembly process. If you have any questions, please contact us at (866) 471-1614.
• It is extremely important that you do not tighten any nuts or bolts during the tower
assembly process unless specifically told differently in the instruction manual.
READ THROUGH ENTIRE MANUAL BEFORE BEGINNING ASSEMBLY
TOOLS REQUIRED FOR ASSEMBLY:
• (2) ½” Wrenches or socket drivers
• (2) 7/ 16” Wrenches or socket drivers
• 3/ 8” Wrench or socket driver
•Needle-nose vice grip
NOTE: We are now providing a lock washer for every ¼” bolt. This is an optional item, but can help
keep all bolts and nuts tight over time. Install (1) behind each ¼” nut used in the assembly process
for both the tower and windmill head. (They are not needed for the cross-brace tighteners.)
STEP 1 — TOP 4’ SECTION:
1.Using the (24) ¼” x ½” bolts (package D) and (24) ¼” nuts (package E) to attach the three top legs (LTS) to the
cone (cone) as shown in Illustration 1. Tighten the nuts and bolts completely.
2.Using (1) ¼” x ½” bolt and (1) ¼” nut, attach the elongated hose bracket (EHB in package H) to any one
of the three top legs (LTS), using the hole in the top leg (LTS) that is just below the tower top. Tighten
completely. Using another ¼” x ½” bolt and (1) ¼” nut, attach the air line clamp to the elongated hose
bracket. Do not tighten until you place the air line into the bracket during the final stage of assembly (once
head has been attached).
From this point forward, complete tower laying on one side on a level surface. A couple of tables or picnic
tables are helpful. If assembling on a rough surface, use a drop cloth or cardboard to protect the finish
(especially if powder coated).
3.It is important that you only install the ¼” x ¾” bolts only in the top hole, where the 4’ and 8’ section overlap.
Do not install the bottom bolts at this step. You should now install the cross member (CM23): Please refer to
Illustration 1 on page 7.
NOTE: Make sure that the order shown in Illustration 1 is followed. The correct order for each connection is to have
the upper leg section first, lower section leg second, cross brace or angle bracket third, then the cross member.
Install the angle brackets on the same side throughout the tower and ensure that they are turned inward.
4. Repeat for all three sides.
STEP 2 — 4’– 8’ SECTION:
1.Using the ¼” x ¾” bolts at the 4’ leg sections overlap (where LT1 and LE2 come together), install #2 cross
braces between the 4’ leg section and the cross member (CM23). To finish the “X” cross braces, use one 5/ 16” x
½” bolt and one 5⁄16” flange nut for the cross brace connection, attaching the #4 and #5 cross braces to the #2
cross braces.
2.The eye bolt should be installed on the #4 cross brace forming the bottom of the “X”. To install the eye bolt,
insert one 5/16” x ½” bolt through the eye bolt, then through the hole in the end of the #4 cross brace (as
shown in Illustration 1). Secure the eye bolt with one 5/ 16” flange nut.
3. Install one ¼” nut onto each eye bolt and turn it until it reaches the top of the threaded section of the eye bolt.
Page 9
Outdoor Water Solutions, Inc.
Installation Manual 2/12 (Feb. 2012)
Refer to Illustration 1 for direction.
4.Install the short end of the angle bracket (ABK) onto each of the eye bolts, using one ¼”
nut (as shown in Illustration 1). The nut on the bottom of the eye bolt should be installed
just far enough to ensure that it will not fall off.
5.Using the top ¼” x ¾” bolts at the 8’ leg overlap, install the 8’– 12’ section extension legs
(LEN), the #5 cross brace on one side, the angle bracket (ABK) (turned inward) on the opposite
side attached to the #4 cross brace and the cross member (CM41). Refer to Illustration 1 for
direction. Also see Illustration 2 to see how the finished corner should appear.
6.Repeat for all three sides.
STEP 3 — 8’– 12’ SECTION:
1.Using the ¼” x ¾” bolts at the 8’ leg sections overlap (where LE2 and LE2 come together), install
#3 cross braces between the 8’ leg section and the cross member (CM41). To finish the “X” cross
braces, use one 5/ 16” x ½” bolt and one 5/ 16” flange nut for the cross brace connection attaching
the #5 and #7 cross braces to the #3 cross braces. Refer to Illustration 1 for direction.
2.The eye bolt should be installed on the #5 cross brace forming the bottom of the “X”. To install the
eye bolt, insert one 5/ 16” x ½” through the eye of the eye bolt, then through the hole in the end of
the #5 cross brace (as shown in Illustration 1). Secure the eye bolt with one 5/ 16” flange nut.
3.Install one ¼” nut onto each eye bolt and turn until it reaches the top of the threaded
section of the eye bolt. Refer to Illustration 1 for direction.
4.Install the short end of one angle bracket (ABK) onto each of the eye bolts using ¼” nut (as
shown in Illustration 1). The nut on the bottom of the eye bolt should be installed just far
enough to ensure that it will not fall off.
5.For each of the three sides of the tower, assemble the 12’ cross member assembly by
attaching two CM32s together using four ¼” and ½” bolts and tighten completely.
6.If you are assembling a 12’ tower, go to Step 6 for the tower base installation instructions.
7.If you are assembling a 16’ or 20’ tower: using the top ¼” x ¾” bolts at the 12’ leg overlap,
install the 12’–16’ section extension legs (LE2), place the #7 cross brace on one side, the #5
cross with the angle bracket (ABK) (turned inward) on the opposite side, and the CM32
cross assembly assembled in No. 5 above. Refer to Illustration 1 for direction. Also see
Illustration 2 to see how the finished corner should appear.
8.Repeat steps for all three sides.
STEP 4 — 12’– 16’ SECTION:
1.Using the ¼” x ¾” bolts at the 12’ leg sections overlap (where LE2 and LE2 come together),
install #6 cross braces between the 12’ leg section and the cross member (the two CM32
cross members assembled above). To finish the “X” cross braces, use one 5/ 16” x ½” bolt and
one 5/ 16” flange nut for the cross brace connection attaching the #8 and #10 cross braces to
the #6 cross braces. Refer to Illustration 1 for direction.
2.The eye bolt should be installed on the #8 cross brace forming the bottom of the “X”. To
install the eye bolt, insert one 5/ 16” x ½” bolt through the eye of the eye bolt, then through
the hole in the end of the #8 cross brace (as shown in Illustration 1). Secure the eye bolt
with one 5/ 16” flange nut, leaving it loose so that the eye bolt can rotate.
www.outdoorwatersolutions.com
Page 10
3.Install one ¼” nut onto each eye bolt and turn it until it reaches the top of the threaded section
of the eye bolt. Refer to Illustration 1 for direction.
4.Install the short end of one angle bracket (ABK) onto each of the eye bolts using one ¼” nut
(as shown in Illustration 1). The nut on the bottom of the eye bolt should be installed just far
enough to ensure that it will not fall off.
5.For each of the three sides of the tower, assemble the 16’ cross member assembly (CM41, CM41)
using four ¼” and ½” bolts and tighten completely.
6.If you are assembling a 16’ tower: go to Step 6 for the tower base installation instructions.
7.If you are assembling a 20’ windmill: Using the top ¼” x ¾” bolts at the 16’ leg overlap, install
the 16’–20’ section extension legs (LEN), the #10 cross brace on one side, the #8 cross brace with
the angle bracket (ABK) (turned inward) on the opposite side, and the CM41 cross member
assembly in Step 5. Refer to Illustration 1 for direction. Also see Illustration 2 to see how the
finished corner should appear.
8.Repeat steps for all three sides.
STEP 5 — 16’– 20’ SECTION:
1.Using the ¼” x ¾” bolts at the 16’ leg overlap (where LE2 and LE2 come together), install #9
cross braces between the 16’ leg section and the cross member (the two CM41 cross members
assembled above). To finish the “X” cross braces, use one 5/ 16” x ½” bolt and one 5/ 16” flange
nut for the cross brace connection attaching the #1 cross braces to the #9 cross braces. Then
attach #5 and #7 cross braces to the #1 cross braces, using one 5/16” x ½” bolt and one 5/ 16”
flange nut. Refer to Illustration 1 for direction.
2.The eye bolt should be installed on the #5 cross brace forming the bottom of the “X”. To install
the eye bolt, insert one 5/ 16” x ½” bolt through the eye of the eye bolt, then through the hole
in the end of the #5 cross brace (as shown in Illustration 1). Secure the eye bolt with one 5/ 16”
flange nut, leaving it loose so that the eye bolt can rotate.
3.Install one ¼” nut onto each eye bolt and turn it until it reaches the top of the threaded section
of the eye bolt. Refer to Illustration 1 for direction.
4.Install the short end of one angle bracket (ABK) onto each of the eye bolts, using one ¼” nut,
as shown in Illustration 1. The nut on the bottom of the eye bolt should be installed just far
enough to ensure that it will not fall off.
5.For each of the three sides of the tower, assemble the 16’ cross member assembly (CM41, CM41)
using four ¼” x ½” bolts and tighten completely.
6.For each of the three sides of the tower, assemble the 20’ cross member assembly (CM41, CM23,
CM41) using eight ¼” x ½” bolts and tighten completely.
7.Repeat steps for all three sides.
20’– 24’ Section: Repeat the steps above for all other sections using the cross braces and cross
members shown in Illustration 1 for the 24’ Tower Extension.
Page 11
Outdoor Water Solutions, Inc.
Installation Manual 2/12 (Feb. 2012)
STEP 6 — TOWER BASE:
1.Separate stake clamps (SCBR, SCBL) into 3 sets of one left and one right per set.
2.Install one stake clamp set and the 12’, 16’, 20’, or 24’ cross member assembly (depending on
your tower size) to the leg bottom. Use only the bottom ¼” x ¾” bolt. Refer to Illustration 1 for
directions. Repeat for each side.
3.Insert a ¼” x ¾” bolt through the top of the ground stake clamp, tower leg, cross brace or angle
bracket, and cross member. Refer to Illustrations 1 and 2 for directions. Repeat for each side.
4.Install the six ¼” x ¾” bolts, 12 washers, and six nuts on each set of stake clamps (as shown in
Illustration 1). Do not tighten these bolts until the ground rod stakes (GRS) are installed.
STEP 7 — TIGHTEN BOLTS:
1.Starting at the top 4’– 8’ section, tighten all bolts and nuts attaching the CM23 cross members
to the tower legs.
2.Tighten the center bolt of each cross brace in the 4’– 8’ section.
3.Adjust all three cross brace tensioners (angle bracket and eye bolts) until cross braces are tight.
Do not overtighten, as overtightening will straighten the angle bracket. Tighten all nuts so that
the cross brace tensioner is locked into place.
4.Repeat for the remaining tower sections. It is critical that you tighten each section completely
before moving to the next-lower section of the tower. Do not tighten the six ¼” x ¾” bolts in
the stake clamps at this time.
HEAD ASSEMBLY:
STEP 8 — BLADE INSTALLATION:
Note: Do not tighten any of the blades on the hub until the blade braces have been installed.
Note: Hub must face down when blades and blade braces are being installed (‘face down’ means
the smaller bolt hole in the front must be facing down. The exposed 1” hole for the shaft
should face up). This allows the proper blade pitch—slightly forward—when complete.
1.Install all twelve blades (BLA), as shown in Illustration 3. Make sure the bolts and washers go
through the 3 holes in the blade, with the nuts attached on the inside of the hub. DO NOT
finger-tighten — keep VERY LOOSE!
Illustration 3
¼” x ¾” BOLTS & NUTS
(Package C)
www.outdoorwatersolutions.com
Page 12
STEP 9 — BLADE INSTALLATION:
Illustration 4
BBR
¼” x ½ ” BOLTS & NUTS (BTBP)
1.Install all twelve blade braces (BBR), as shown in Illustration 4 above. Keep all nuts very
loose until AFTER the last blade brace has been installed. Again, it will help if the hub is
elevated up on a tire or bucket, allowing the blades to fall downwards, giving us a forward
pitch. MAKE SURE the small hole in the hub is on the bottom and the 1” hole is on top!
2.After ALL of the blades and blade braces have been installed, you can flip the windmill
head over onto the other side (small hole on top). This makes it easier to reach the bolt
heads on the blades for tightening. Completely tighten all bolts on both the blades and
blade braces. A small impact driver or impact wrench with a deep socket placed inside the
hub along with an open ended wrench on the outside can speed tightening of all bolts.
STEP 10 — TAIL PRE-ASSEMBLY:
Illustration 5
¼” x ½” BOLTS &
NUTS (BTBP)
TFN – Overlap each other
1.Pre-assemble tail fins (TFN) for Step 10. Overlap each tail fin by lining up the bolt holes
in the channel of both. Insert ¼” x ½” bolts & nuts (BTBP) in the back six bolt holes and
tighten (see Illustration 5).
2.Attach tail arms to tail fin in the front two bolt holes using ¼” x ¾” bolts and ¼” nuts (as
shown in Illustration 6 on the next page). Tighten when tail arm and tail fin are straight.
Page 13
Outdoor Water Solutions, Inc.
Installation Manual 2/12 (Feb. 2012)
Illustration 6
TAM
TAM
TRN
¼” x ¾” BOLTS
& NUTS (BTBP)
STEP 11 — PIVOT TUBE and TAIL INSTALLATION:
1.Insert the “U” bolt (package G) through the two holes in the back of the compressor and
secure with 5/16” flange nuts (package B). Do not tighten tightly — leave loose until pivot
tube has been installed.
2.Slip the pivot tube (PVT) (hole at the top of the tube) through the compressor bottom,
through the “U” bolt clamp, and through the compressor top plate. Align the hole in the
pivot tube to the compressor air line hose. Tighten the “U” bolt clamp with 5/ 16” nuts from
inside the compressor until the pivot tube is held securely in place (see Illustration 7).
3.Install your pre-assembled tail arms and tail fins onto the compressor. The tail arms and
tail fins are attached to the compressor body using 5/ 16” x ½” bolts (package A) and 5/ 16”
flange nuts (package B). Note: Insert bolts from the outside and use nuts on the inside of
the compressor housing. Tightening these nuts is done from the inside of the compressor,
through the side opening (see Illustration 7). After these are tightened, replace the side
cover plate.
Note: Cover plate will be very snug when sliding behind the tail arms. If too tight, slightly
loosen the two bolts, insert side cover plate, then re-tighten the bolts.
Illustration 7
COMP
PIVOT TUBE
U BOLT
TAM
5/
x ½” BOLTS & NUTS
SIDE COVER PLATE
www.outdoorwatersolutions.com
16”
Page 14
STEP 12 — SETUP OF WINDMILL COMPONENTS:
Setup of Windmill Components
1.Install the blade assembly onto the compressor crankshaft and tighten the Allen screws in
locking collar with supplied 5/ 32” Allen wrench (package A) on the flat sections of the crankshaft
(photo 1). Note: A little lubricant on the crankshaft can help make this step easier. If needed,
place the blade assembly on the ground and gently push down on the compressor to secure it
into the two locking collars. Attach blade hub assembly (HUB) to the crankshaft using 5/ 16” x ½”
bolt (package A) into the end of the shaft (photo 2). Make sure all Allen screws and the front
mounting bolt are tight.
2.Install the dome (DOME) on the outside of the blade hub assembly (HUB). Secure with the four
#10 x ½” sheet-metal screws (package G) to blade hub assembly (HUB).
3.Install the completed rotor head unit onto the tower. Before you do this step, apply a thin
coating of grease to the entire pivot tube and both sides of the pivot tube washer to aid in
allowing the windmill head to turn as needed. With the tower being supported on a saw-horse
or some type of stand, slide the pivot tube washer (PW) over the pivot tube. Then insert the
pivot tube into the first plastic bushing in the top of the cone and continue through bottom
bushing.
4.After the completed rotor head unit has been mounted at the top of the tower, insert the air
line up through the tower (starting at the bottom and going out the top of the pivot tube).
Put a small amount of grease onto each end of the ½” x ½” ninety-degree hose barb. Connect
one end of the ninety-degree hose barb to the line running down the tower and to the pond.
Push the air line back down and insert the ninety-degree hose barb through the 9/ 16” hole in
the pivot tube and into the ½” air line connecting the compressor (see Illustration 8). A longhandled screwdriver or wrench can help leverage the hose barb into the ½” connecting hose.
5.Insert the hose into the elongated hose bracket and air line clamp that was attached to the
tower, just below the cone in the top 4’ section. Tighten to secure the air line in the clamp. This
allows the air line to spin on the hose barb and prevents kinking of the hose when the head
spins.
Page 15
Outdoor Water Solutions, Inc.
Installation Manual 2/12 (Feb. 2012)
6.After the previous procedures are done, stand up the completed unit on the site. Be sure
to have enough people to hold the base of the tower and to help lift up the tower, or have
your optional tower hinges in place. After the windmill has been erected, the ground rods
can be driven into the ground through stake clamp brackets (SCBs), leaving 2”– 3” of the
ground rods above the stake clamp brackets (SCBs). Level the windmill and tighten the
clamps securely. For added high wind security it is STRONGLY recommended that you drill
a 1/4” hole through the completed stake clamp and ground stake to accommodate a 1/4”
bolt with lock washer and nut.
7.Please note: Anchoring of Outside Water Solutions Windmill Towers. Outdoor Water
Solutions, Inc. will not determine soil and wind conditions for any windmill erection.
Therefore, these conditions must be determined by the customer. Anchoring of the
windmill tower is very important. It is the customer’s responsibility to adequately anchor
the tower. Outdoor Water Solutions, Inc. supplies a basic anchoring kit with each unit.
However, we strongly recommend the use of concrete pilings, a concrete pad, or screw-in
anchors. High winds or light soil conditions can cause the windmill to fall over, physically
damaging the rotor head and other components. The customer is responsible for anchoring
the windmill adequately or consulting the appropriate people to do so.
Illustration 8
90-DEGREE ELBOW FITTING
½” CONNECTING HOSE (INCLUDED)
½” HOSE
WMH
PIVOT TUBE WASHER
CONE
www.outdoorwatersolutions.com
Page 16
Instructions for Placing Airstone in Pond
We recommend that you put your airstone into a rubber or plastic bucket to help protect it
from the mud and debris common in the bottom of most ponds. A 3”– 5” layer of small rock,
sand, or even concrete put into the bottom of the bucket can help weigh the bucket down, so
that it sits on the bottom.
We also suggest installing the airstone into the deep part of the pond to ensure complete
circulation of your water. The exception to this would be that, if you want to keep the water
open for watering livestock in the winter, then you can put the stone closer to the shoreline
(or move it there in the fall). You can also place the airstone in a shallow area, if you are in a
northern climate and have trout, walleye, Northern pike, or muskie in the pond or lake and
want the deep parts of the pond to remain colder in the summer months.
The use of OWS Weighted Air Line will help keep the air line submerged and on the bottom of
the pond. In the absence of using weighted air line, we recommend tying rebar, bricks, blocks,
etc. to the non-weighted air line to help keep it submerged.
If you are attaching multiple airstones or a combination of airstones and a water pump, then
using an OWS 2-way or 3-way Selector Valve is needed. These are available in combinations and
are made up of high-quality brass-ball valves that allow you to adjust and regulate the airflow
between multiple accessories.
Note: Air will travel to the point of least resistance or to the shallow airstones first. Adjusting
the airflow, so that it goes to the deeper airstones, is usually required.
CONGRATULATIONS!!!
We hope your new Outdoor Water Solutions Windmill will give you many years of joy!
Page 17
Outdoor Water Solutions, Inc.
Installation Manual 2/12 (Feb. 2012)
All Natural Pond Products
OWS Pond Pack
OWS Lake & Pond Bacteria
A complete kit of all-natural products that
will jump-start your pond and help keep
it clean for the whole season. Each kit is
designed to treat ¼ acre of water and
includes 10 lbs. of a water clarifier; 12 lbs. of
bacteria in a barley-straw medium, packaged
in water-soluble pouches, and 2 lake &
pond dye packs – all of which are safe to
fish! Multiple kits should be used for largersize ponds. Products help break down organic matter, diminish nutrient
overload, and help reduce odor to create a clean, clear pond without having
to use commercial algaecides and chemicals. All products are packed dry for
ease of handling and less risk of spillage. Made in the USA.
Each pack includes 12 lbs. of bacteria
in a barley-straw medium, packaged
in water-soluble pouches. Our
bacteria help break down organic
matter, diminish nutrient overload,
and help reduce odor to help create
a clean, clear pond.
Item # PSP0001 (23 lbs.)
OWS Lake & Pond Muck Pellets
This is a new, highly concentrated product designed
to clean up areas of much around a pond, swimming
area, or dock. Contains sludge-eating bacteria, which
allows you to focus on problem areas with a selfsinking, highly concentrated bacteria blend, designed
to break down the muck and sludge in a specific area.
Item # PSP0153 1 lb.
Trial Size
Item # PSP0150 10 lbs. Pail
Item # PSP0151 25 lbs. Pail (value-priced)
Item # PSP0074 (12 lbs.)
Item # PSP0132 (25 lbs.)
OWS Lake & Pond Dye
A high-quality proprietary blend of
environmentally friendly, non-toxic, watersoluble dyes that are formulated to help
maintain your pond or lake by filtering
sunlight and adding an aesthetically
pleasing blue color. Each packet treats a
¼-acre pond and is packed dry in a watersoluble pouch for ease of handling and less
risk of spillage. Purchase multiple packs for
larger bodies of water.
Item # PSP0002
(.375 lbs.)
Item # PSP0196 Twin Pack
(.75 lbs.)
All-Natural Blue Pond Dye
If you’re looking for a highly concentrated liquid blue dye for your
ponds, we’ve got it! This product is equivalent to other companies’
ONE Gallon containers and is 4X Concentrated! Pond Dye helps
prevent weeds and algae from growing by naturally blocking out
the sun’s harmful UV rays. A “must-have” to naturally keep your
pond weed-free, and also to add an attractive blue color to your
pond. Contains highly concentrated Acid Blue #9, which is safe
for recreational ponds, horses, cattle, birds, fish, wildlife, and the
environment.
Item # PSP0125 (3 lbs.)
OWS Fish & Game Feeder
OWS Fish & Game Feeder
Manage a better pond and grow bigger, healthier fish with the new Outdoor Water Solutions fish
feeder. If you’re looking for accurate feeding, less waste, and larger, healthier fish, then this one is
for you! We’ve designed a system that has everything you need, and at an affordable price.
Features include:
•30-gallon, taper hopper (200-lb. capacity)
•Tripod design with powder-coated legs for long life
•Metal feeder feet included, so you can bolt or stake
your unit down to keep it intact in high wind conditions
•Narrow directional casting of fish food or corn out to 20 ft.
•Programmable digital timer; schedule up to 6
feedings a day
www.outdoorwatersolutions.com
•Customize feed-dispense times between 1 and
20 seconds
•High-quality 6v battery included
•Solar-panel recharger included
•1-year warranty on all parts
Item # FDR0084 (41 lbs.)
Page 18