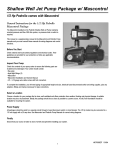
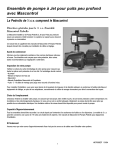
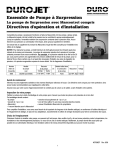
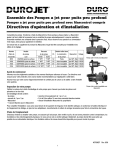
Transcript
Res-Up® Feeder
Installation Instructions
1. Remove top cover, fill the
Res-Up® Feeder (plastic container) to the top with water so
that the wick retaining clip,
tube and wick are wetted,
allow to soak for 15 minutes
or more.
Figure 1
2. Empty water and pull tube
and wick through Feeder until
slack is removed from inside.
The outlet end tube and wick
must be below the bottom
level of the Res-Up® Feeder.
3. Drill two 1/4” holes in brine
tank as shown in Figure 2.
1-3/8
4. Drill a 5/8” hole in the brine
well cap as shown in Figure 3.
Figure 2
5. Clip mounting bracket over
feeder with “hooks” pointed
up. Insert end of tube in the
brine well cap and mounting
bracket with the 1/4” holes in
the brine tank, rotating feeder
downward into position as
shown in Figure 1.
6. Fill Feeder with Res-Up®
Cleaner to “Fill Line” on label.
7/8
(2) 1/4” Dia.
Holes
6-1/16
Hole for Brine
Draw Tube
Figure 3
1-5/8
Riser Pipe Hole
(9/16” Dia.)
Riser Pipe Hole
(9/16” Dia.)
7. Release cover on Feeder and
automatic feeding will occur in
a few hours.
Drill This Hole
(5/8”)
1-5/16
(For 434 & 464 Brine
Valves only)
Drill This Hole
(5/8”)
1-1/4
1
3/8
1/4
4” DIA.
BRINE WELL CAP
WATERGROUP INC.
WATERGROUP COMPANIES INC.
FRIDLEY, MN
REGINA, SK • CAMBRIDGE, ON
1-800-354-7867
1-877-288-9888
www.watergroup.com
3-1/2” DIA.
BRINE WELL CAP
#51568
6/08