1
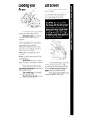
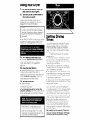
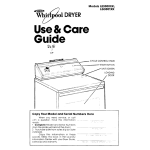
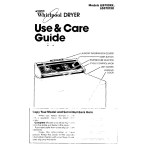
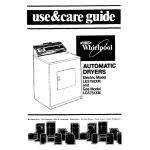
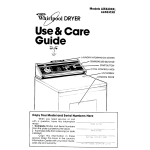
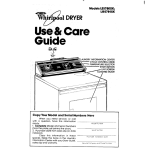
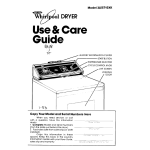
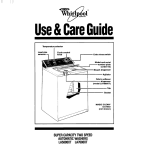
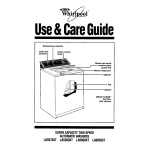
Copy
Your Model
When you
a question,
need
have
and Serial
Numbers
Here
service,
or call
this information
with
ready:
1. Complete
Model and Serial Numbers
(from the plate just behind the door].
2. Purchase date from sales slip [or date
installed).
Copy
this information
in these
spaces. Keep this book in the Laundry
Information
Center with your Dryer Guide,
sales slip and warranty.
Vodel
Yu~ber
Swol
Number
Purchase
Service Compaq
Ir,slOll~f~on
Dale
ona Phone Number
Before using
your Dryer
Please read this booklet to be
sure your dryer is installed and used
properly It will help you get the best
results and longest life your dryer was
designed to give.
You are personally
responsible for maklng sure that Your dryer...
l Is installed
by a qualified installer.
l Is installed
in an area protected from
the weather.
l Is properly
installed and leveled in a
well ventilated room. on a floor that
can support the weight.
l Is located
in an area where the temperature is above 45’F (7.2X).’
l Is connected
to the right kind of outlet,
electric supply and grounding..
l Is properly
connected to fuel and
exhaust systems..
l Is used only for jobs normally
expected of home clothes dryers.
l Is properly
maintalned.
l Is not run where there may be explosive fumes.
l Is not used by children
or anyone
unable to operate it properly.
Remove the Consumer Buy
Guide label before using your dryer. It
will be easier to remove.
Wipe out the drum with a damp
cloth to remove any dust.
FOR YOUR SAFETY
If you smell gas:
1. Open windows
2. Don’t touch
electrical
switches
3. Extinguish any open
flame
4. Immediately
call
your gas supplier
Please read this manual
Follow the Instructions to help
you get the best drying results
Save the manual for future use
SPECIAL INSTRUCTIONS: See the
Dryer Gulde for drying tips, Information about permanent
press and
knits, lnstructlons
for drying special
Items and for thlngs not to be drled In
your dryer.
See the “Installation Instructions” for
complete informatlon.
.See Setting Drying Times, page 4.
I
\
FOR YOUR SAFETY
Do not store or use
gasoline or other
flammable
vapors and
liquids in the vicinity of
this or any other
appliance.
/
2
I
Contents
Before Using Your Dryer
Loading Your Dryer
Lint Screen
Using Your Dryer
Setting Drying Times
Selecting
Cycles and
Temperature
Settings
Using the Automatic
Settings
FLUFF AIR
TUMBLE PRESS” Control
End-of-Cycle
Signal
If You Need Service or
Assistance
I, Before Calling for Assistance
2. If You Need Assistance
3. If You Need Service
,.
4. If You Have a Problem
2
3
3
4
4
5
6
6
6
6
6
7
7
7
7
.8
loading
your
lint Screen
The lint screen ISunder the Ild on
top of the dryer
C/eon
the //nt screen
before
each
iood A screen that’s blocked by lint
can cause longer drying times
For best drying results and energy
savings, sort dryer loads carefully.
Separate
loads according
to
the type of fabric and weight For
example
l
Dry heavy fabrics (denrms. towels,
cottons] separately from light fabrics
(permanent press, synthetics).
l Separate
lent givers (towels, sweatshorts, etc ] from lent takers [synthetics.
blends, permanent press]
l
Keep dark colors and light colors
separate
l
Keep colorfast items away from non
colorfast fabrics
Allow room for items to tumble
freely The load will dry faster with fewer
wrinkles
When drying permanent press,
dry smaller-than-normal
loads for the
best wrinkle removal
Use a mesh bag to hold small
items such as baby socks
Read the Dryer Guide for more
hints on sorting and loading
To remove the screen, open the
Ird door and pull the screen straight
out. Roll the lint off the screen with your
fingers. DO NOT rinse the screen or
wash it. Wet lint IS hard to remove.
When replacing the screen, push
It firmly Into place Close the lid.
Using Your Dryer
I.
Put the sorted load in the dryer
and close the door tightly.
2.
Turn the Cycle Control Knob to
the cycle you want.
l
Use the Automatic Cycles for most
loads Start with the pointer at the
middle of an Automatic Cycle See
page 6 for more rnformation
NOTE: In the Automatic Cycles, the
Cycle Control Knob does not keep
movrng. It starts and stops, dependrng on the heat and the dryness of
Use TIMED DRYING for dryrng a certain
number of minutes, or for damp dvrng,
fluffing, or tumblrng items without ar.
l
3.
Set TEMPERATURE SELECTOR.
Turn the TEMPERATURE SELECTOR to
the drying temperature
needed for the
load See page 5 for suggested
settings.
l
4.
Push the Start Button.
l
Make sure the door ISclosed and the
Cycle Control is set. If the door IS
opened during the cycle, the dryer will
stop. To restart the dryer, close the
door and push the Start Button.
5.
To stop the dryer:
Open the door
l
Or, turn the Cycle Control Knob to one
of the OFF posittons
l
To change
the setting while the
dryer is running, turn the Cycle Control
Knob, either way, so it points to the setl
Setting Drying
Times
Modern dryers are designed with
drying temperatures
needed to safely
handle modern fabrics. Cool-down
times have been added to heat settings You might notice slightly longer
dryrng times
The time It takes to dry a loud
depends on
l
The kind of fabric h weight and the
s/ze of the iood A large load of jeans
will take a lot longer to dry than a small
load of light synthetics.
l
The amount
of moisture
in the ioad
Towels hold a lot of moisture: synthetics
don’t. Synthetics dry faster
l
Temperature
of the rinse water Cold
rinses help save on energy and wrinkles.
but a cold load will take slightly longer
to dry than a worm one
l
Amount of i/n/ on the screen
A full lint
screen slows the air flow and con make
drying time longer
l
Room temperature
The dryer heats
room arr If the room air temperature
ISnot above 45 F (7 2 C), the automatic
cycle will not advance the timer and
shut off the dryer. Use Timed Drying as a
temporary way of drying a load Drying
times WI/I be longer due to the cold air
Removal of wrrnkles may be poor
0 Proper instaiiotion
ond exhaust sys~
terns For the fastest possible drying
IMPORTANT, To help reduce wrinklrng, take the load from the dryer as
soon as tumbling stops This ISvery
important for permanent press, knits
and other synthetic fabrics
time, rnstallrng and exhausting your
dver properly IS important
See installation instructions
Be careful not to overdry. Overdrying can cause shrinkage,
damage
to some fabrics and static cling.
SELECTING CYCLES AND TEMPERATURE SETTINGS
Choose the correct
settings according
to the chart below.
DRYING CYCLE
TYPE OF LOAD
TEMPERATURE
SELECTOR
COTTONS
MAW-
Bedspreads,
mattress pads, quilts
MEDlUMAND l/GHTWE/GHT- Shorts, dresses, sheets,
diapers, towels, work clothes
PERMANENT PRESS
HEAW- Work clothes, jackets, raincoats, etc.
MED/UMWF/GHT-
AUTOMATIC
REGULAR
AUTOMATIC
REGULAR
AUTOMATIC
PERMANENT
PRESS
Shirts, unrforms, dresses, slacks, etc. AUTOMATIC
PERMANENT
PRESS
HEAVY HIGH
HEAVY HIGH
PERM’T PRESSMED
PERM’T PRESSMED
KNITS
PERM’T PRESS- COTTONS, RAYONS, BLENDS- T-shorts. AUTOMATIC
MED
slacks, polo shirts, etc.
PERMANENT
PRESS
KNITS GENTLE iiGHTWE/GHT- SYNTHETIC FIBERS (polyester, acrylic.
tow
etc.) AND BLENDS - Lingerre, blouses, dresses, etc
KNITS GENTLE DELICATELY CONSTRUCTED FABRICS -Sheer Curtains
AUTOMATIC
LOW
(2 or 3 panels)
PERMANENT
PRESS
FOAM RUBBER ARTICLES - Pillows, bras, etc
TIMED DRYING
FLUFF-AIR
HEAT SENSITIVE FABRICS - Olefrn. nylon. etc
TIMED DRYING
FLUFF AIR
To damp dry clothes for rronrng, set control In the TIMED DRYING Cycle for 15 to 25 minutes
MIXED LOADS
If you dry a mixed load of various weights of fabrics, select the cycle for the lrghter weight
fabric. When dryer stops, remove the dry artrcles and reset the control.
HEAWRGHT
Using the
Automatic
Settings
With AUTOMATIC REGULAR and
AUTOMATIC PERMANENT PRESS, you
select how dry you want the load to be.
When the load IS as dry as the settrng
you have selected, the Cycle Control
will advance
toward endrng the cycle.
Use the AUTOMATIC REGULAR
Cycle to dry most family loads During
the last five mrnutes of the dryrng cycle,
the load IStumbled without heat. This
helps make the load easrer to handle
Use the AUTOMATIC PERMANENT
PRESS Cycle to dry permanent press,
knits and other synthetrc fabrrcs The lust
10 mrnutes of the drying cycle are without heat This cool-down time helps
keep wrinkles from setting in.
For the first few loads, set the
Cycle Control Knob to pornt In the mid
dle between VERY DRY and LESS DRY
FLUFF AIR should be used for such
items as plastic shower curtains or
tablecloths,
rubber-backed
rugs, some
pillows, stuffed toys, etc.
l
Turn the TEMPERATURE SELECTOR to
FLUFF AIR.
l
Turn the Cycle Control Knob to the
number of minutes you want in the
TIMED DRYING Cycle
TUMBLE PRESS ’
Control
This setting IS useful for removing
wrinkles from packing In suitcases or
closets TUMBLE PRESS will help put them
bock into their bre-set shabe
Set TEMPERATURE SELECTOR to
PERM’T PRESS MED or HEAVY HIGH
l
Push the Start Button
For best results, TUMBLE PRESS
only a few items at Q ttme; put them on
hangers or fold them as soon OS the
dryer stops.
l
When the dryer stops, feel the
items in the load If they are about how
you like them, keep using this setting
If the Items are drier than you Irke,
use a setting nearer LESS DRY or COOL
DOWN the next time you dry a load like
that.
If the items are not as dry as you
want, use a setting nearer VERY DRY the
next time you dry a loud like that.
After drying a few loads, You WIII
find a favorite setting to use
FLUFF AIR
This temperature
setttng IS useful
for fluffing bedding, pillows and clothIng. or dusting drapes. It IS also best
to use when damp-drying
heat-sensitrve
items.
6
End-of-Cycle
Signal
A signal will let you know that
the dryer has stopped
The signal IS helpful when you are
dryng permanent press, synthetrcs
and other Items that really should be
taken out as soon as the dryer stops
The signal can’t be turned off and
It IS not adjustable
If You Need
Service or
Assistance, We
Suggest You Follow
These Four Steps:
1. Before calling for asslrfance...
Performance problems often
result from little things you can find and
fix yourself without tools of any kind.
DRYER DOES NOT RUN
0 Is electric power
cord plugged
in?
l
Is the dryer door
closed tightly’ Your dryer
has a swatch by the door that
shuts off the dryer If the door is opened.
l
Drd you push the
Start Button?
l
Check circuit breakers
or both fuses In the fuse
box
DRYER RUNS BUT DOES NOT HEAT:
l
Is the Cycle Control Knob set correctly? (The last 5 minutes are cooldown time In AUTOMATIC REGULAR,
the last 10 minutes in AUTOMATIC
PERMANENT PRESS are without heat )
l
Is it a gas dryer? See If the gas is
turned on. If not, turn the Cycle Control Knob to OFF Turn on the gas
and wait five minutes for the automatrc swatch to reset. Then try starting
it again
l
Is It an electrrc dryer? Check the
circuit breakers or fuses In the fuse
box. An electric dryer will have two
fuses. If one IS blown, the dryer may
run, but not heat
DRYING TIME IS LONGER THAN USUAL
l
Check the lint screen. Remove Ilnt.
Keep the screen clean for best
drying results and trmes.
l
Modern dryers are designed to dry
at the cooler temperatures
needed
by modern fabrics They may need
more time than you are used to
l
Room temperature
is cold.
2. If you need
assistance’...
Call the Whirlpool
COOL-LINE ’
service assistance
telephone
number. Dial free from:
Continental
U.S. (800) 253-1301
Michigan..
..
(800) 632-2243
Alaska 81 Hawaii
(800) 253-1121
and talk with one of our trained Consultants. The Consultant can instruct you
in how to obtarn satrsfactory operation
from your appliance
or, if service is necessary, recommend
a qualifted service
company in your area.
3. If you need servlce*...
Whirlpool has a nationwrde network of franchrsed TECH-CARE ’ Service
Companies. TECH-CARE service technicians are trained to fulfill the product
warranty and provide after-warranty
servrce, anywhere in the United States.
To locate TECH-CARE service in your
area, call our COOL-LINE service assistance telephone number (see Step 2) or
look in your telephone directory Yellow
Pages under:
APPLIANCESHOIJSEHOLDMAJOR-SERVICE6
REPAIR
OR
WHIRLPOOLAPPLIANCES
FRANCHISEDTECH CARE
SERVICE
WHIRLPOOLAPPLIANCES
FRANCHISEDTECH-CARE
SERVICE
SERt’lCE(‘OMP;\.X7ES
XYZSERVICECO
123 Maple
999.9999
ELECTRICAL
APPLIANCES-MAJOR
REPAIRING
6 PARTS
SERI’I~‘E
(‘O.Uf’.4 VIES
XYZSERVICECO
999 9999
123 Maple
OR
WASHING MACHINES,
A IRONERS-SERVICING
DRYERS
WtiIRLPOOLAPPLIANCES
FRANCHISEDTECH-CARESERVICE
SERVICE
XYZSERVICECO
123 Maple
CO.UP.4.%IES
999.9999
4. If you have a problem-...
Call our COOL-LINE service assistance telephone number [see Step 2)
and talk with one of our Consultants, or if
ycu prefer, write to:
Mr Guy Turner, Vice President
Whirlpool Corporation
Administrative Center
2000 US-33 North
Benton Harbor, MI 49022
‘If you must call 0T write, please provide:
model number, serial number, date of
purchase, and a complete description of
the problem. This information is needed
in otder to better respond to your request
for assistance.
Benton Harbor. Michigan Aulnmallc Washers, Clothes Dryers.
Freezers. Relrlgeralor-Freezers.
Ice Makers. Dishwashers.
Eu~ll-III Ovens and Surface Units. Ranges. Microwave Ovens.
Compaclors. Room Air Condllloners. Dehumidifiers.
Cenlral
Healing and Air Conditioning Systems.
Part No. 690724
Rev.
E
PrInted
n i! S A